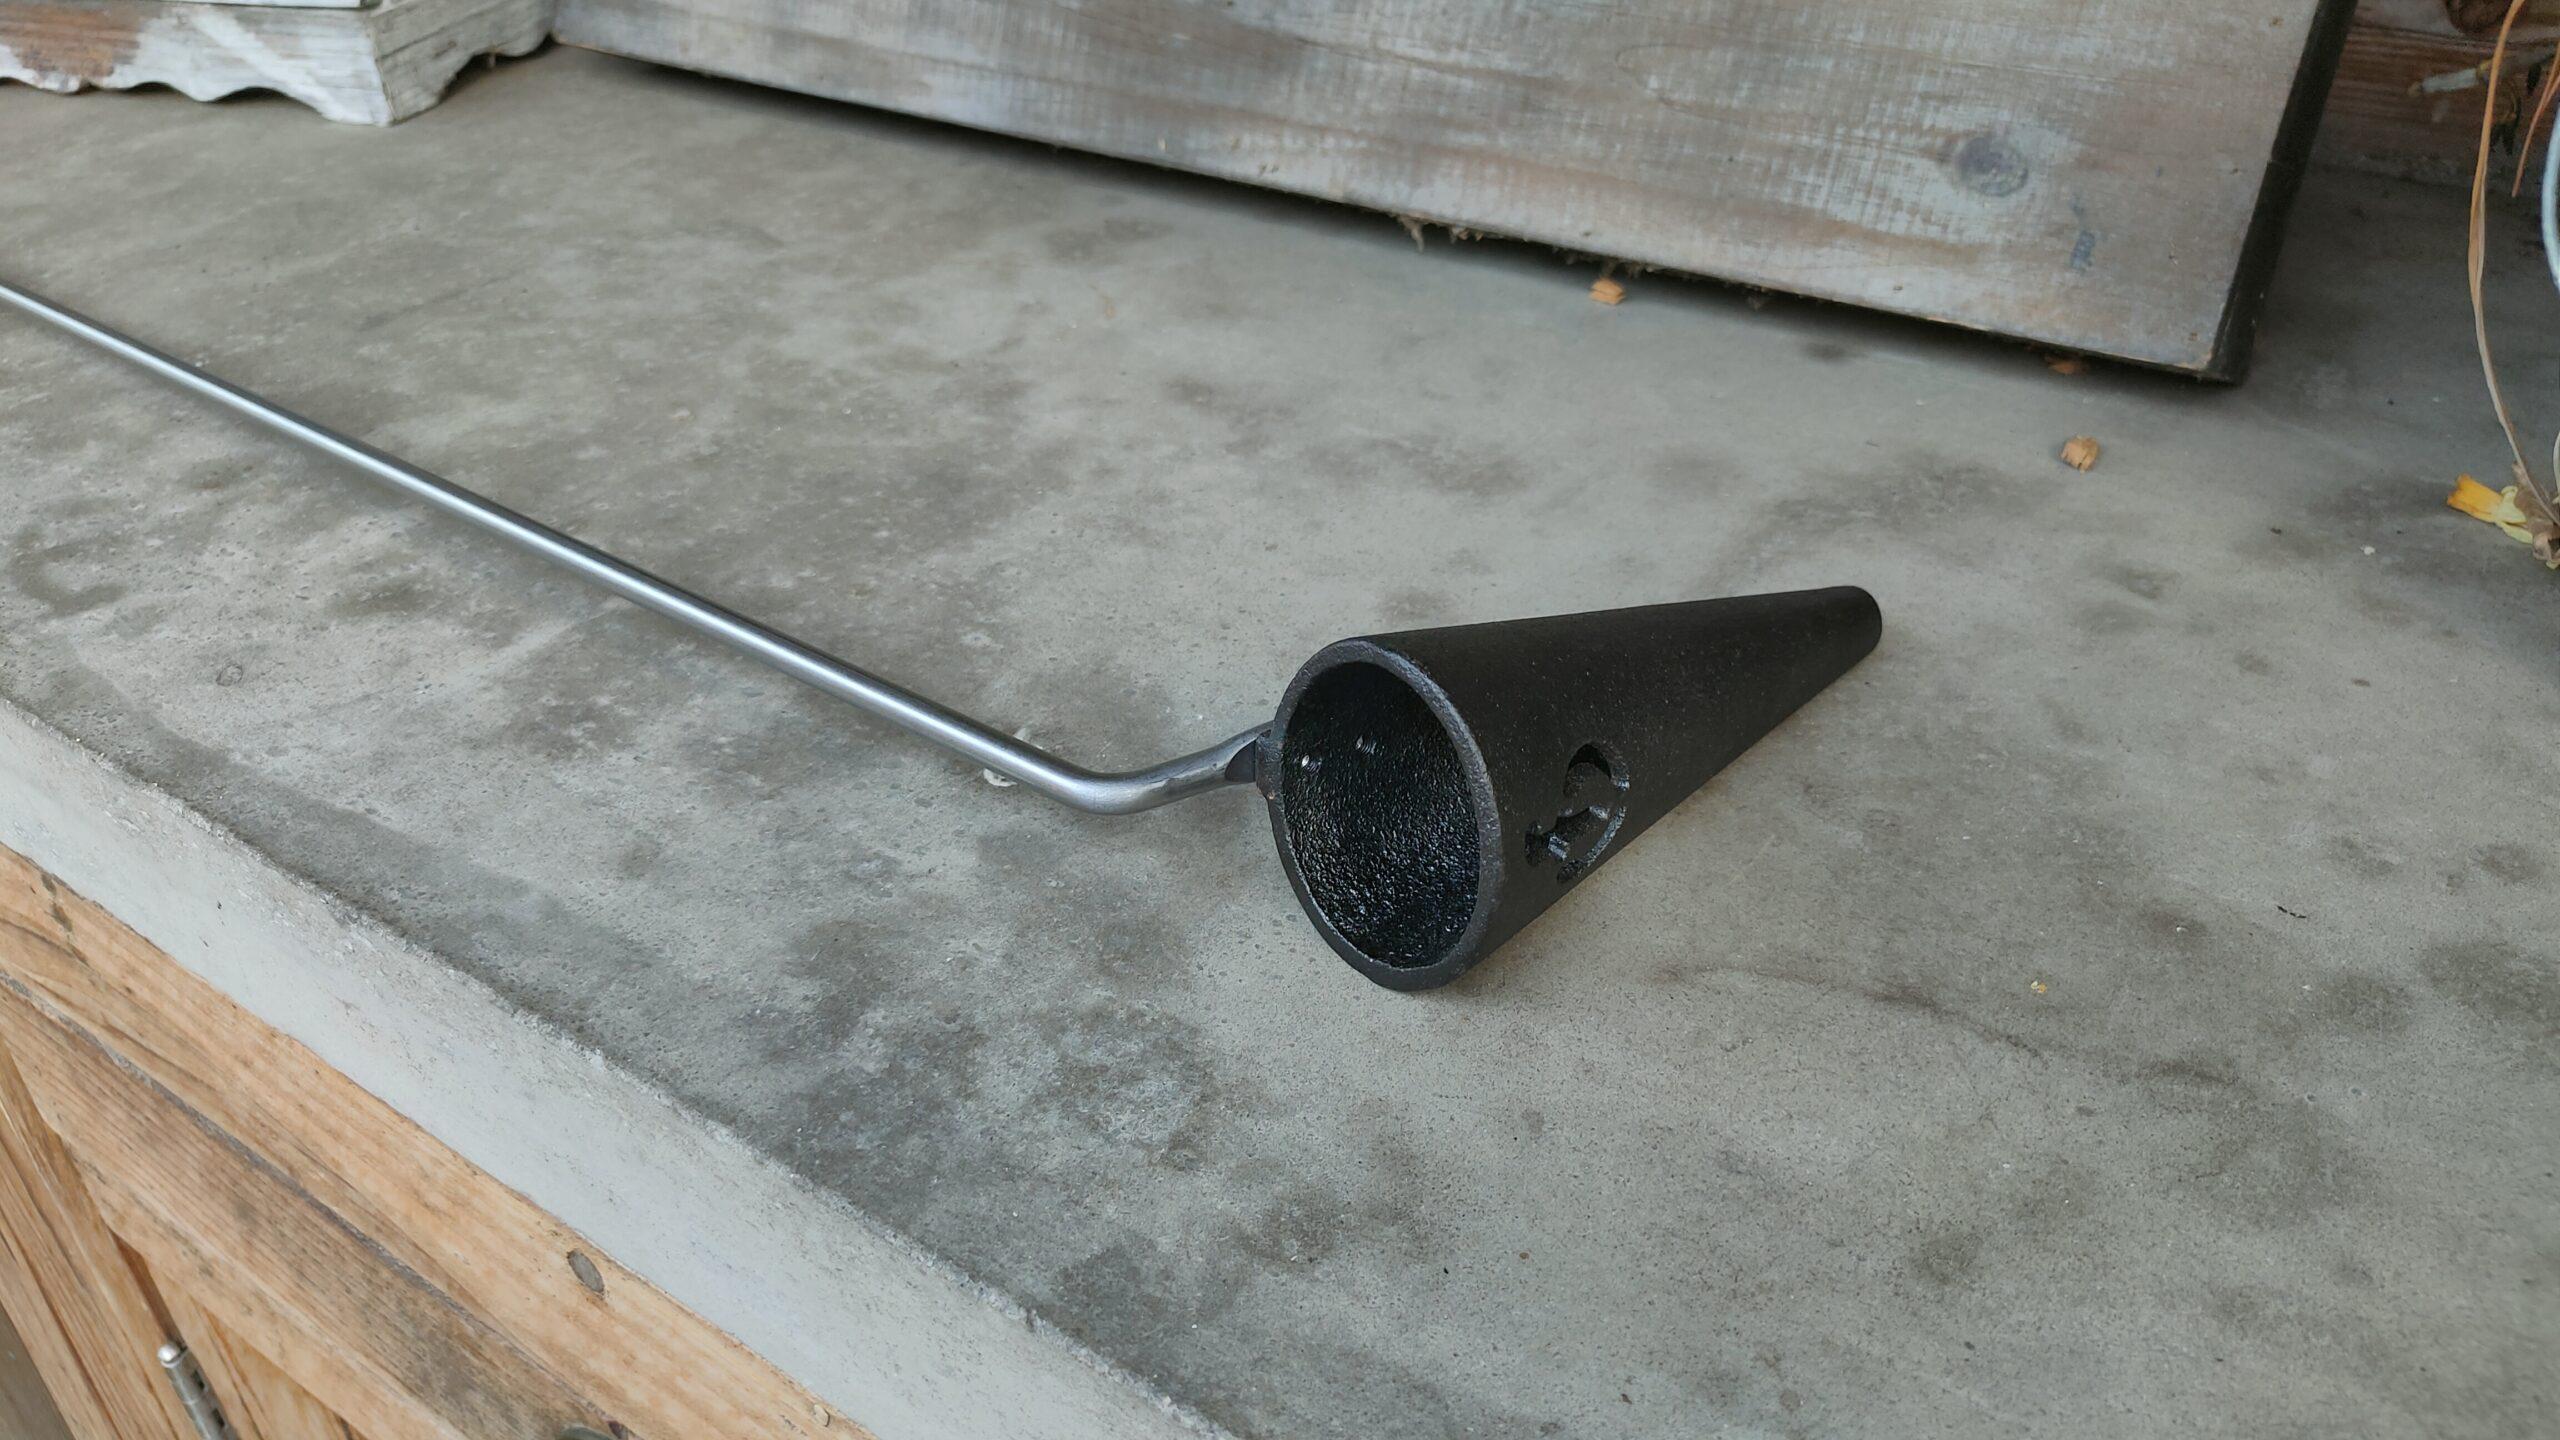
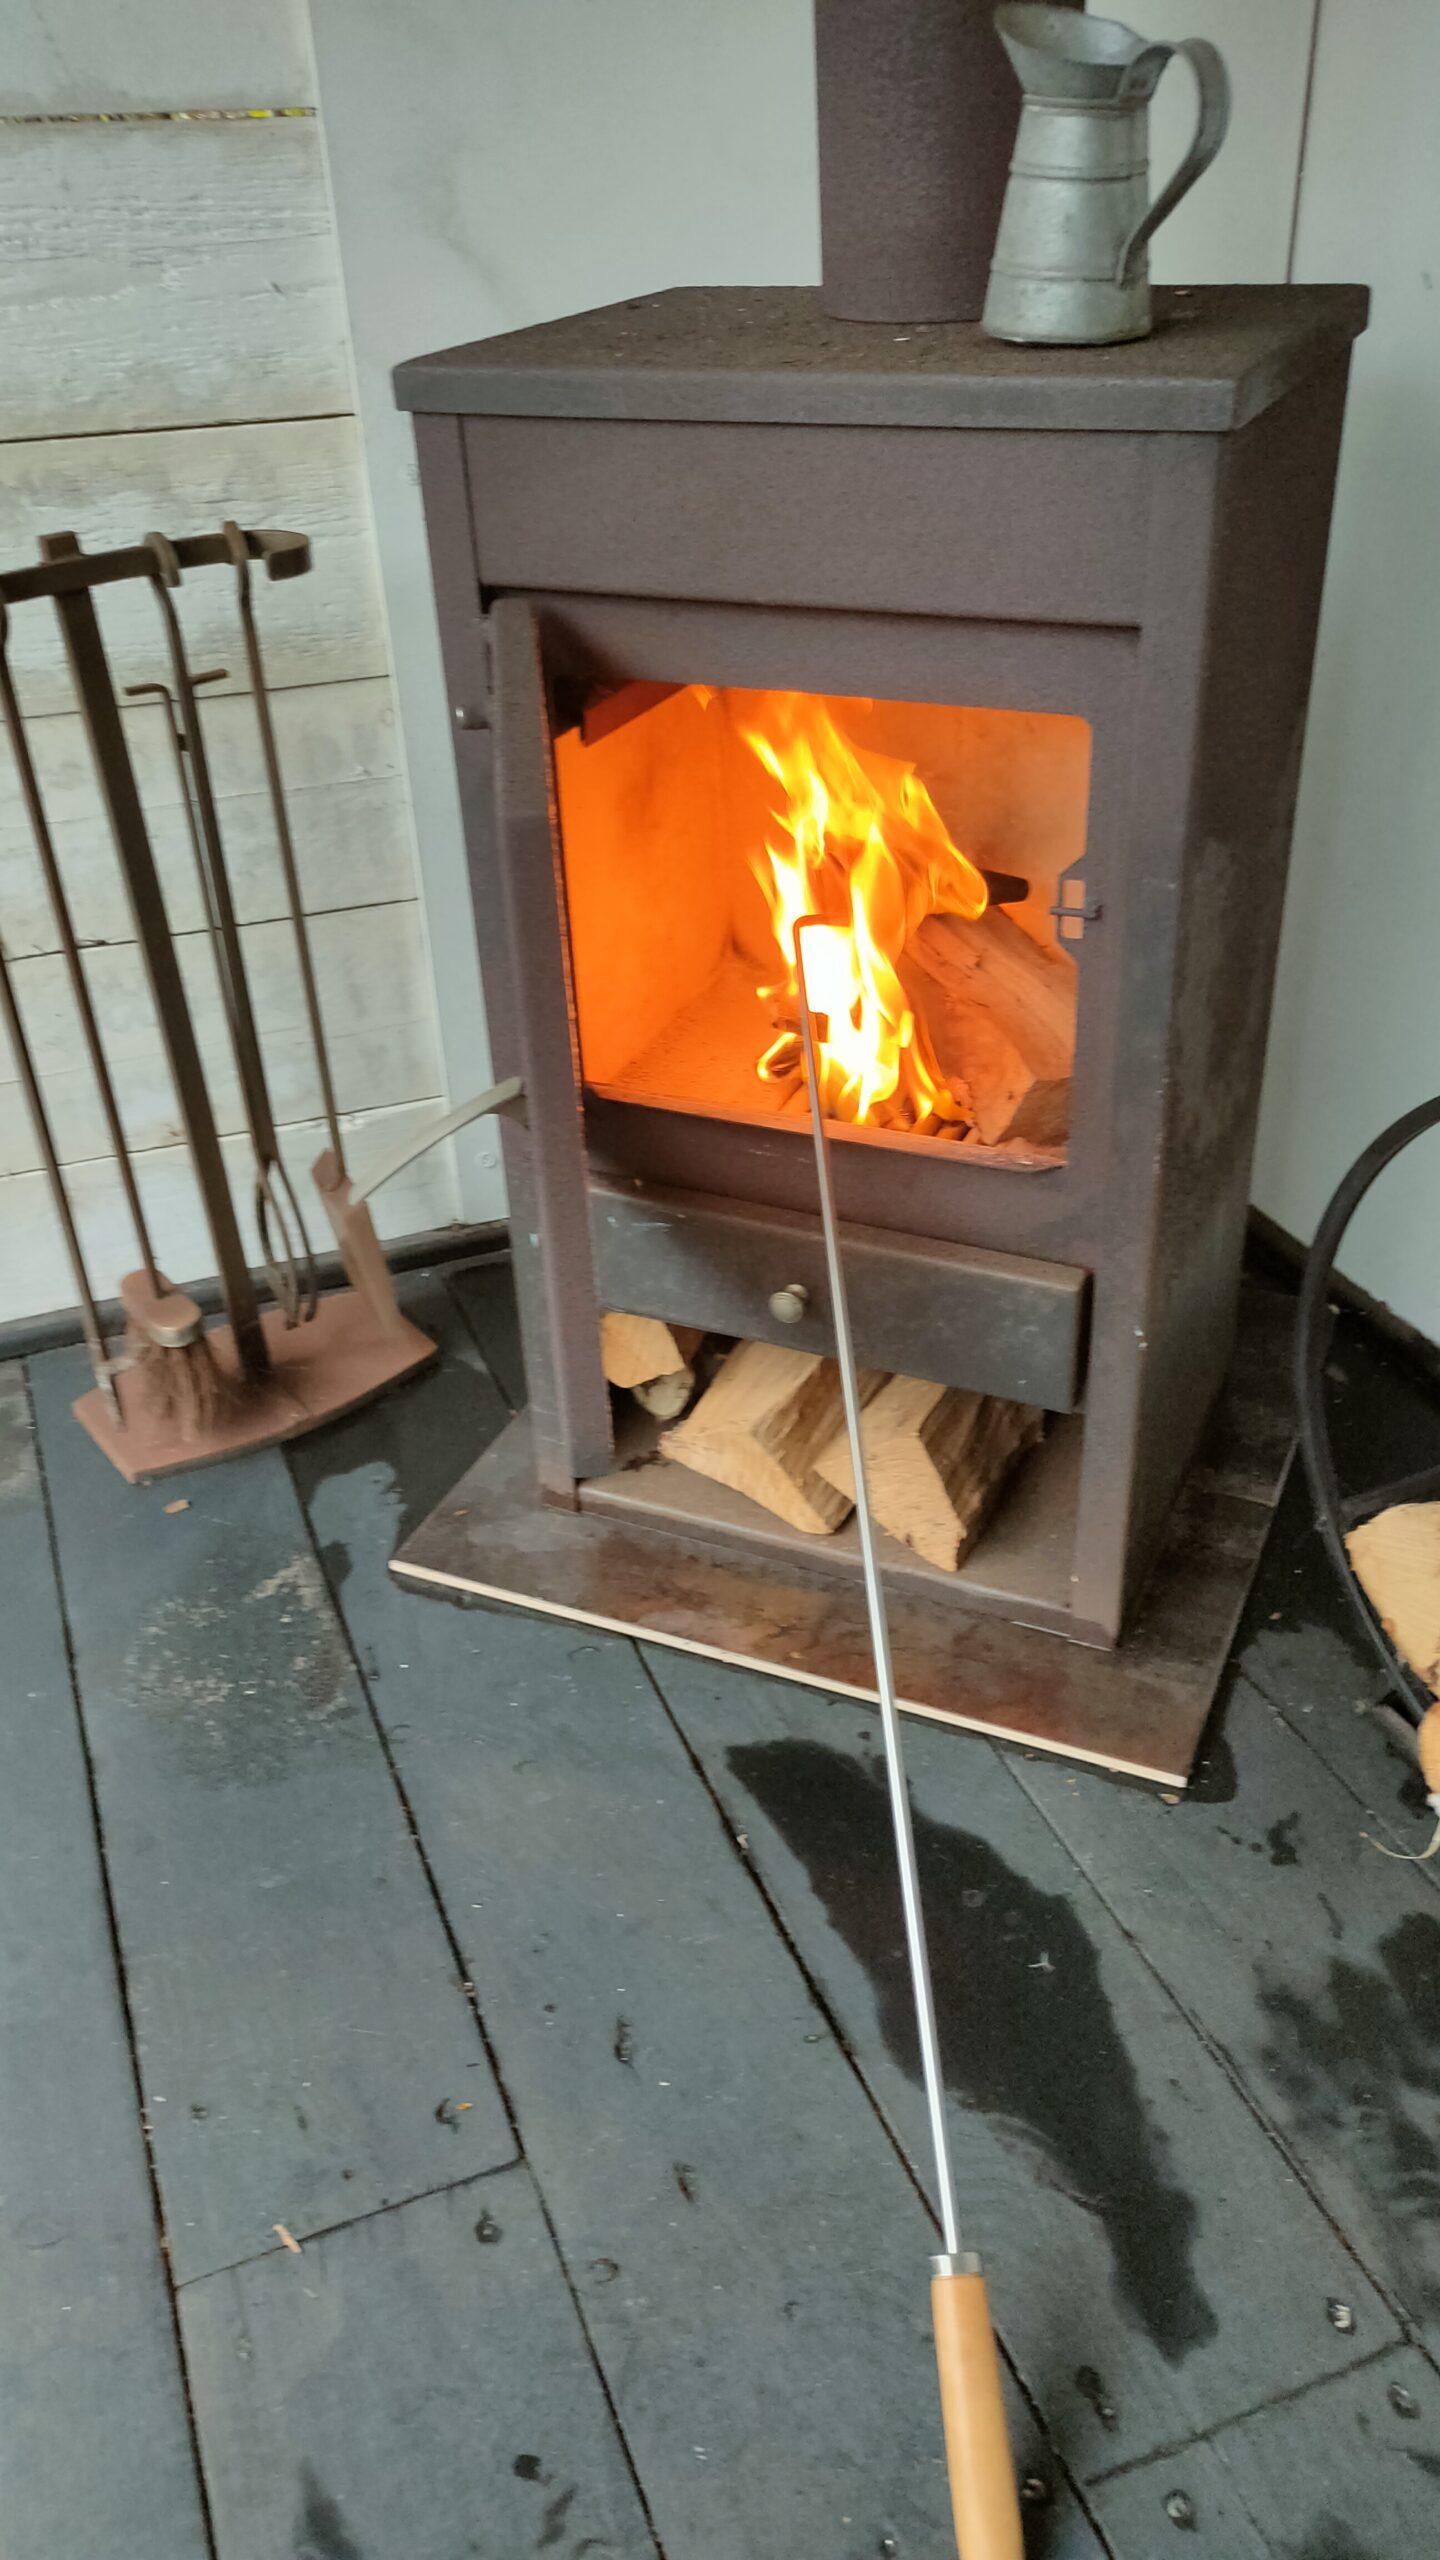
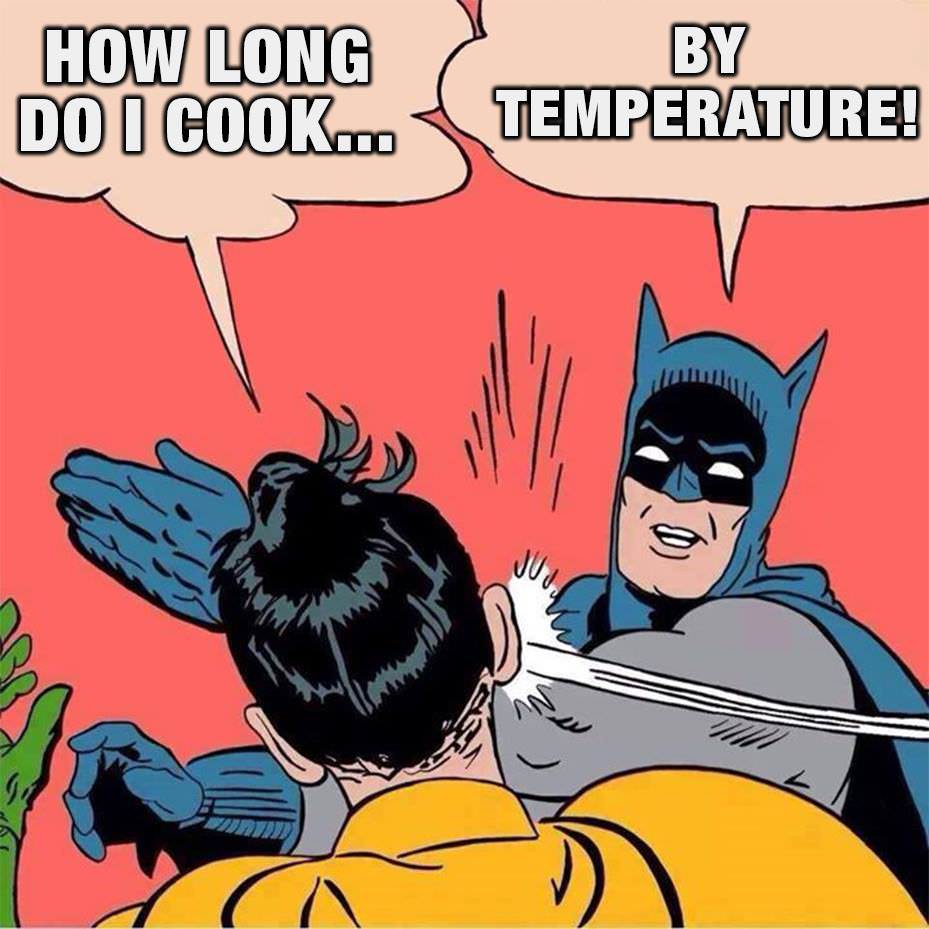
WHAT IS A FLAMBADOU? It’s a cast iron cone with a large opening at the top and a small one at the bottom attached to a long metal handle (generally 1m) designed to heat until red-hot to ignite and melt fat quickly.
Reportedly from the Middle Ages, flambadous were historically used to sear joints of meat, but are comparatively rare now. It’s also a traditional French technique for basting meat with fat as it cooks over the coals.
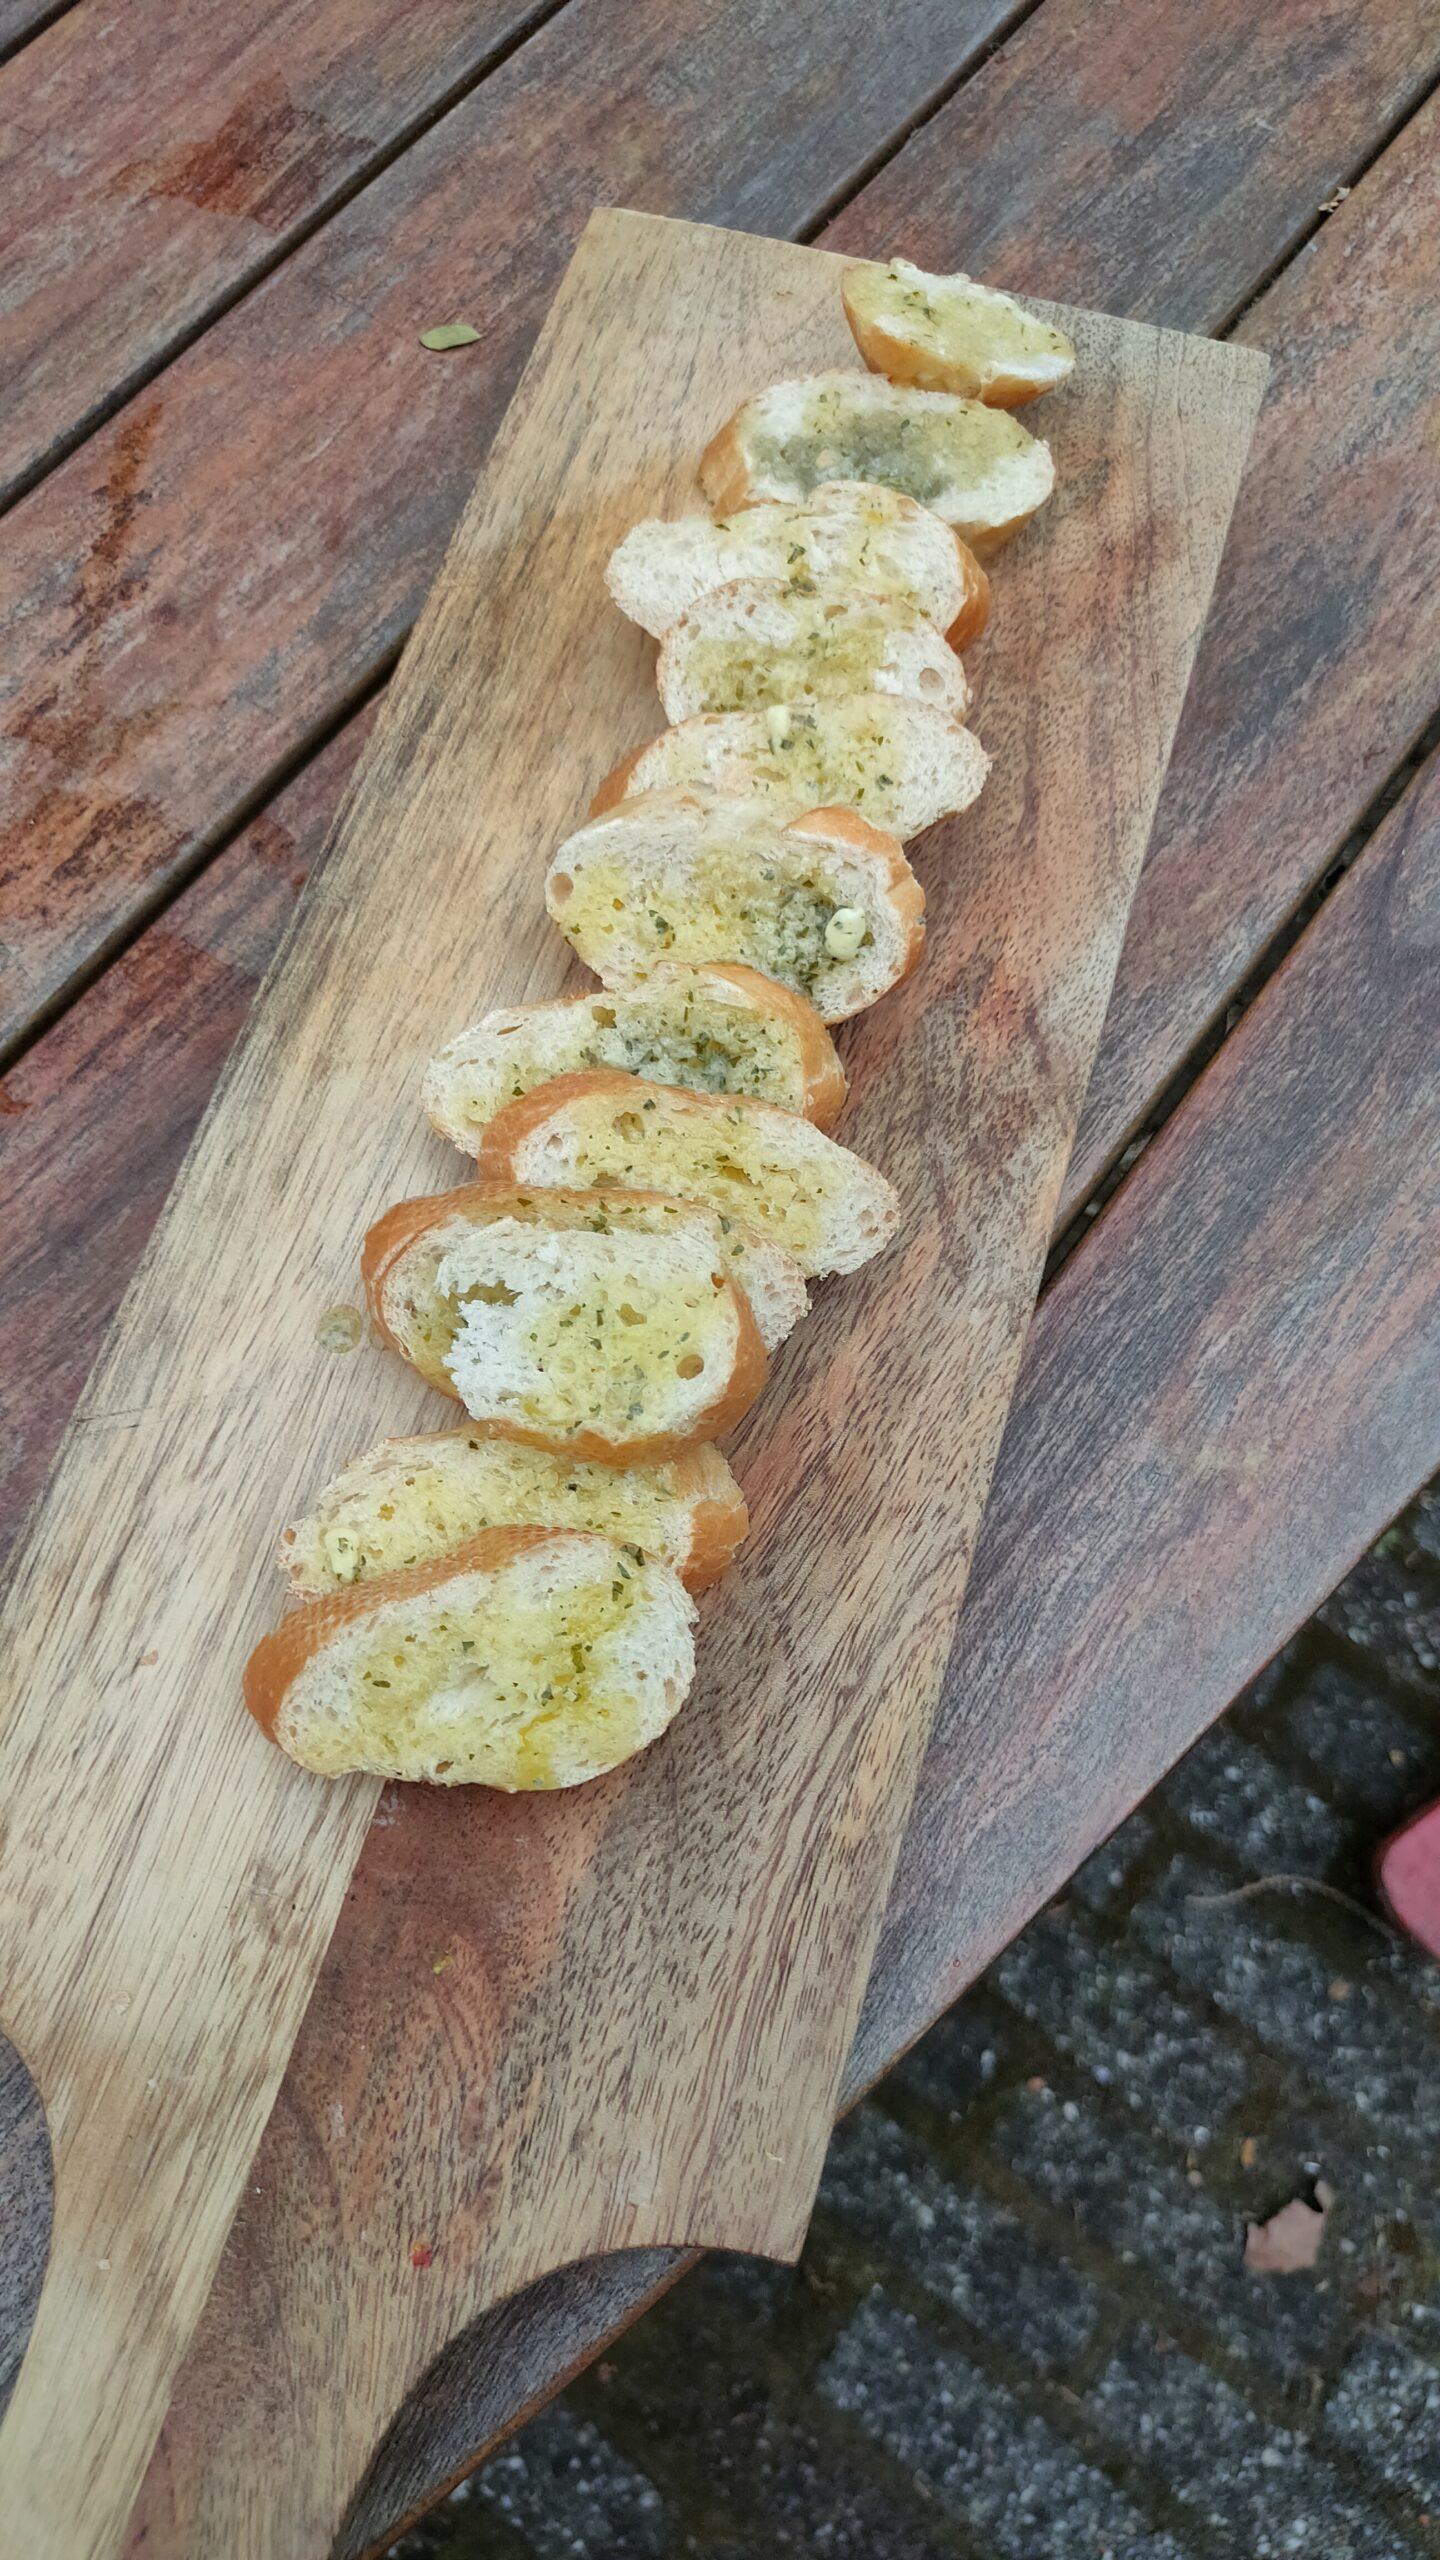
First, a french baguette.
I used Herb butter for the flambadou.
Don’t make the Flambadou as hot as you would do with the fat for the meat.
Recipe own made herb butter.
250 g unsalted butter (at room temperature)
Pinch of coarse salt
A few sprigs of fresh parsley
A few sprigs of chives
2 cloves of garlic
1 tablespoon lemon juice
Mash the butter finely with a fork. Add a pinch of sea salt and a tablespoon of lemon juice. Add finely chopped garlic. Chop the parsley and chives and add at the end and mix everything well. Wrap in cling film.
Let the herb butter harden in the refrigerator. Remove it a few minutes before use. So not frozen but still solid.
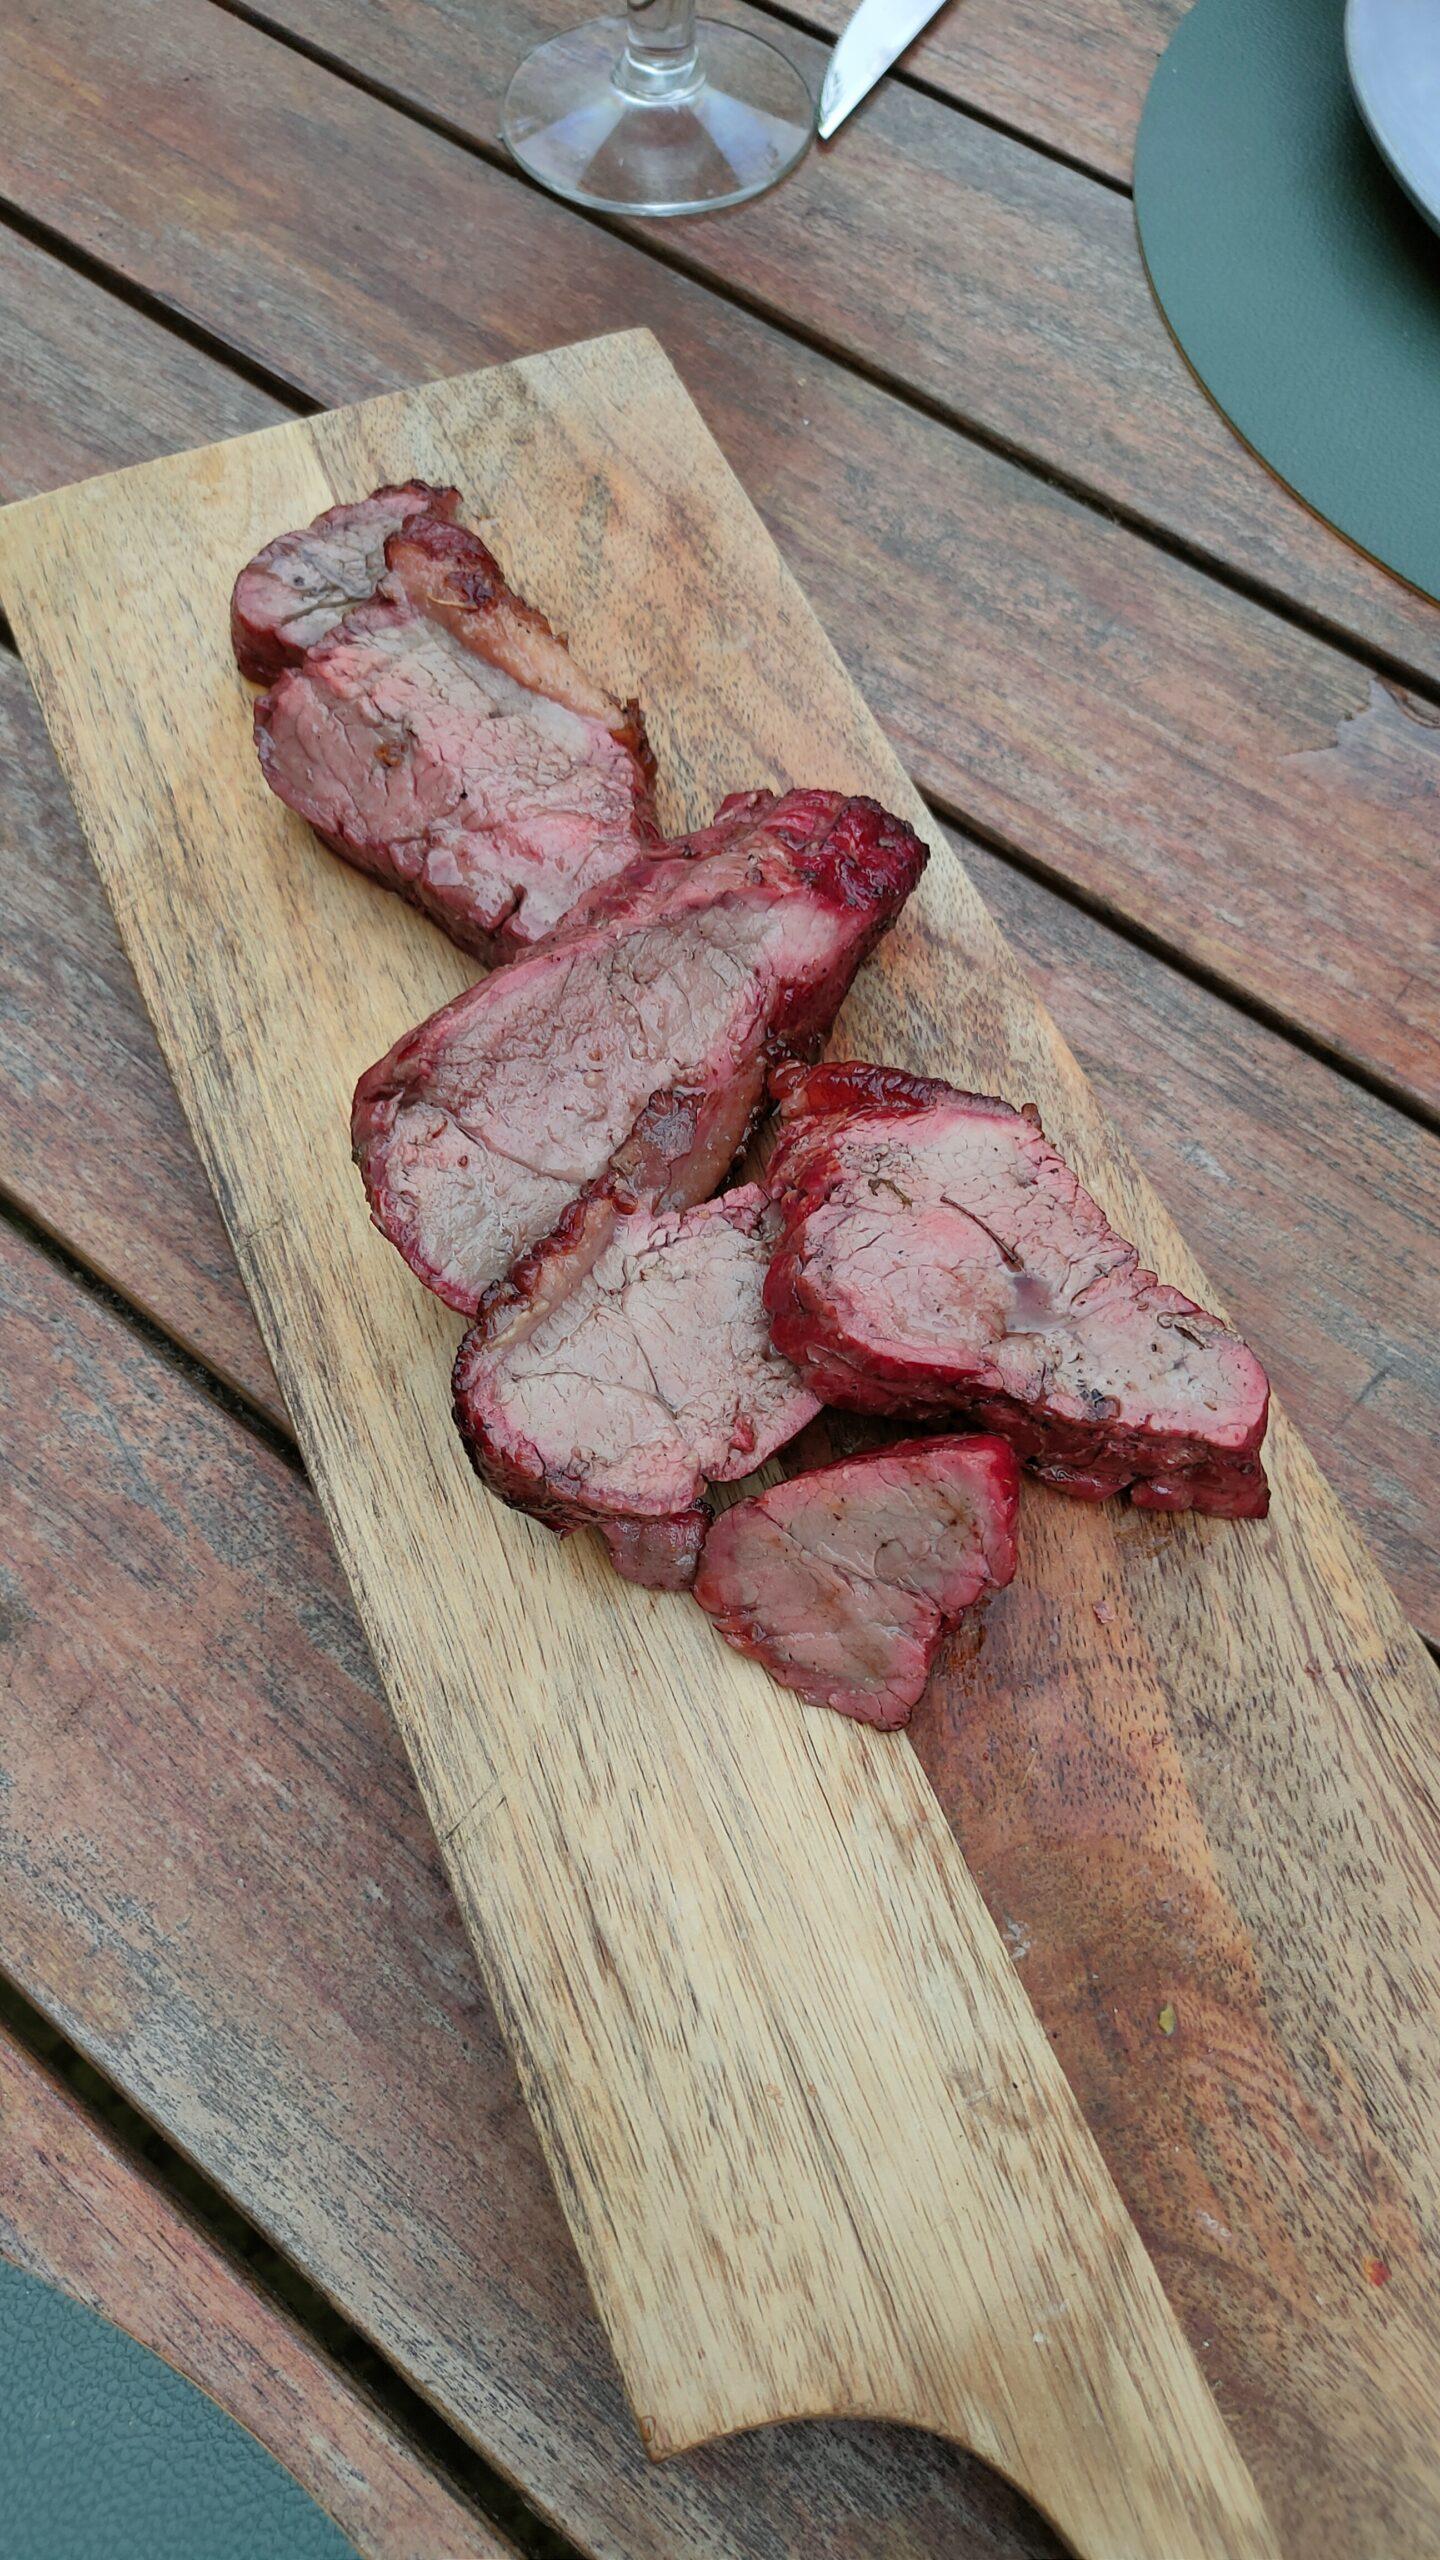
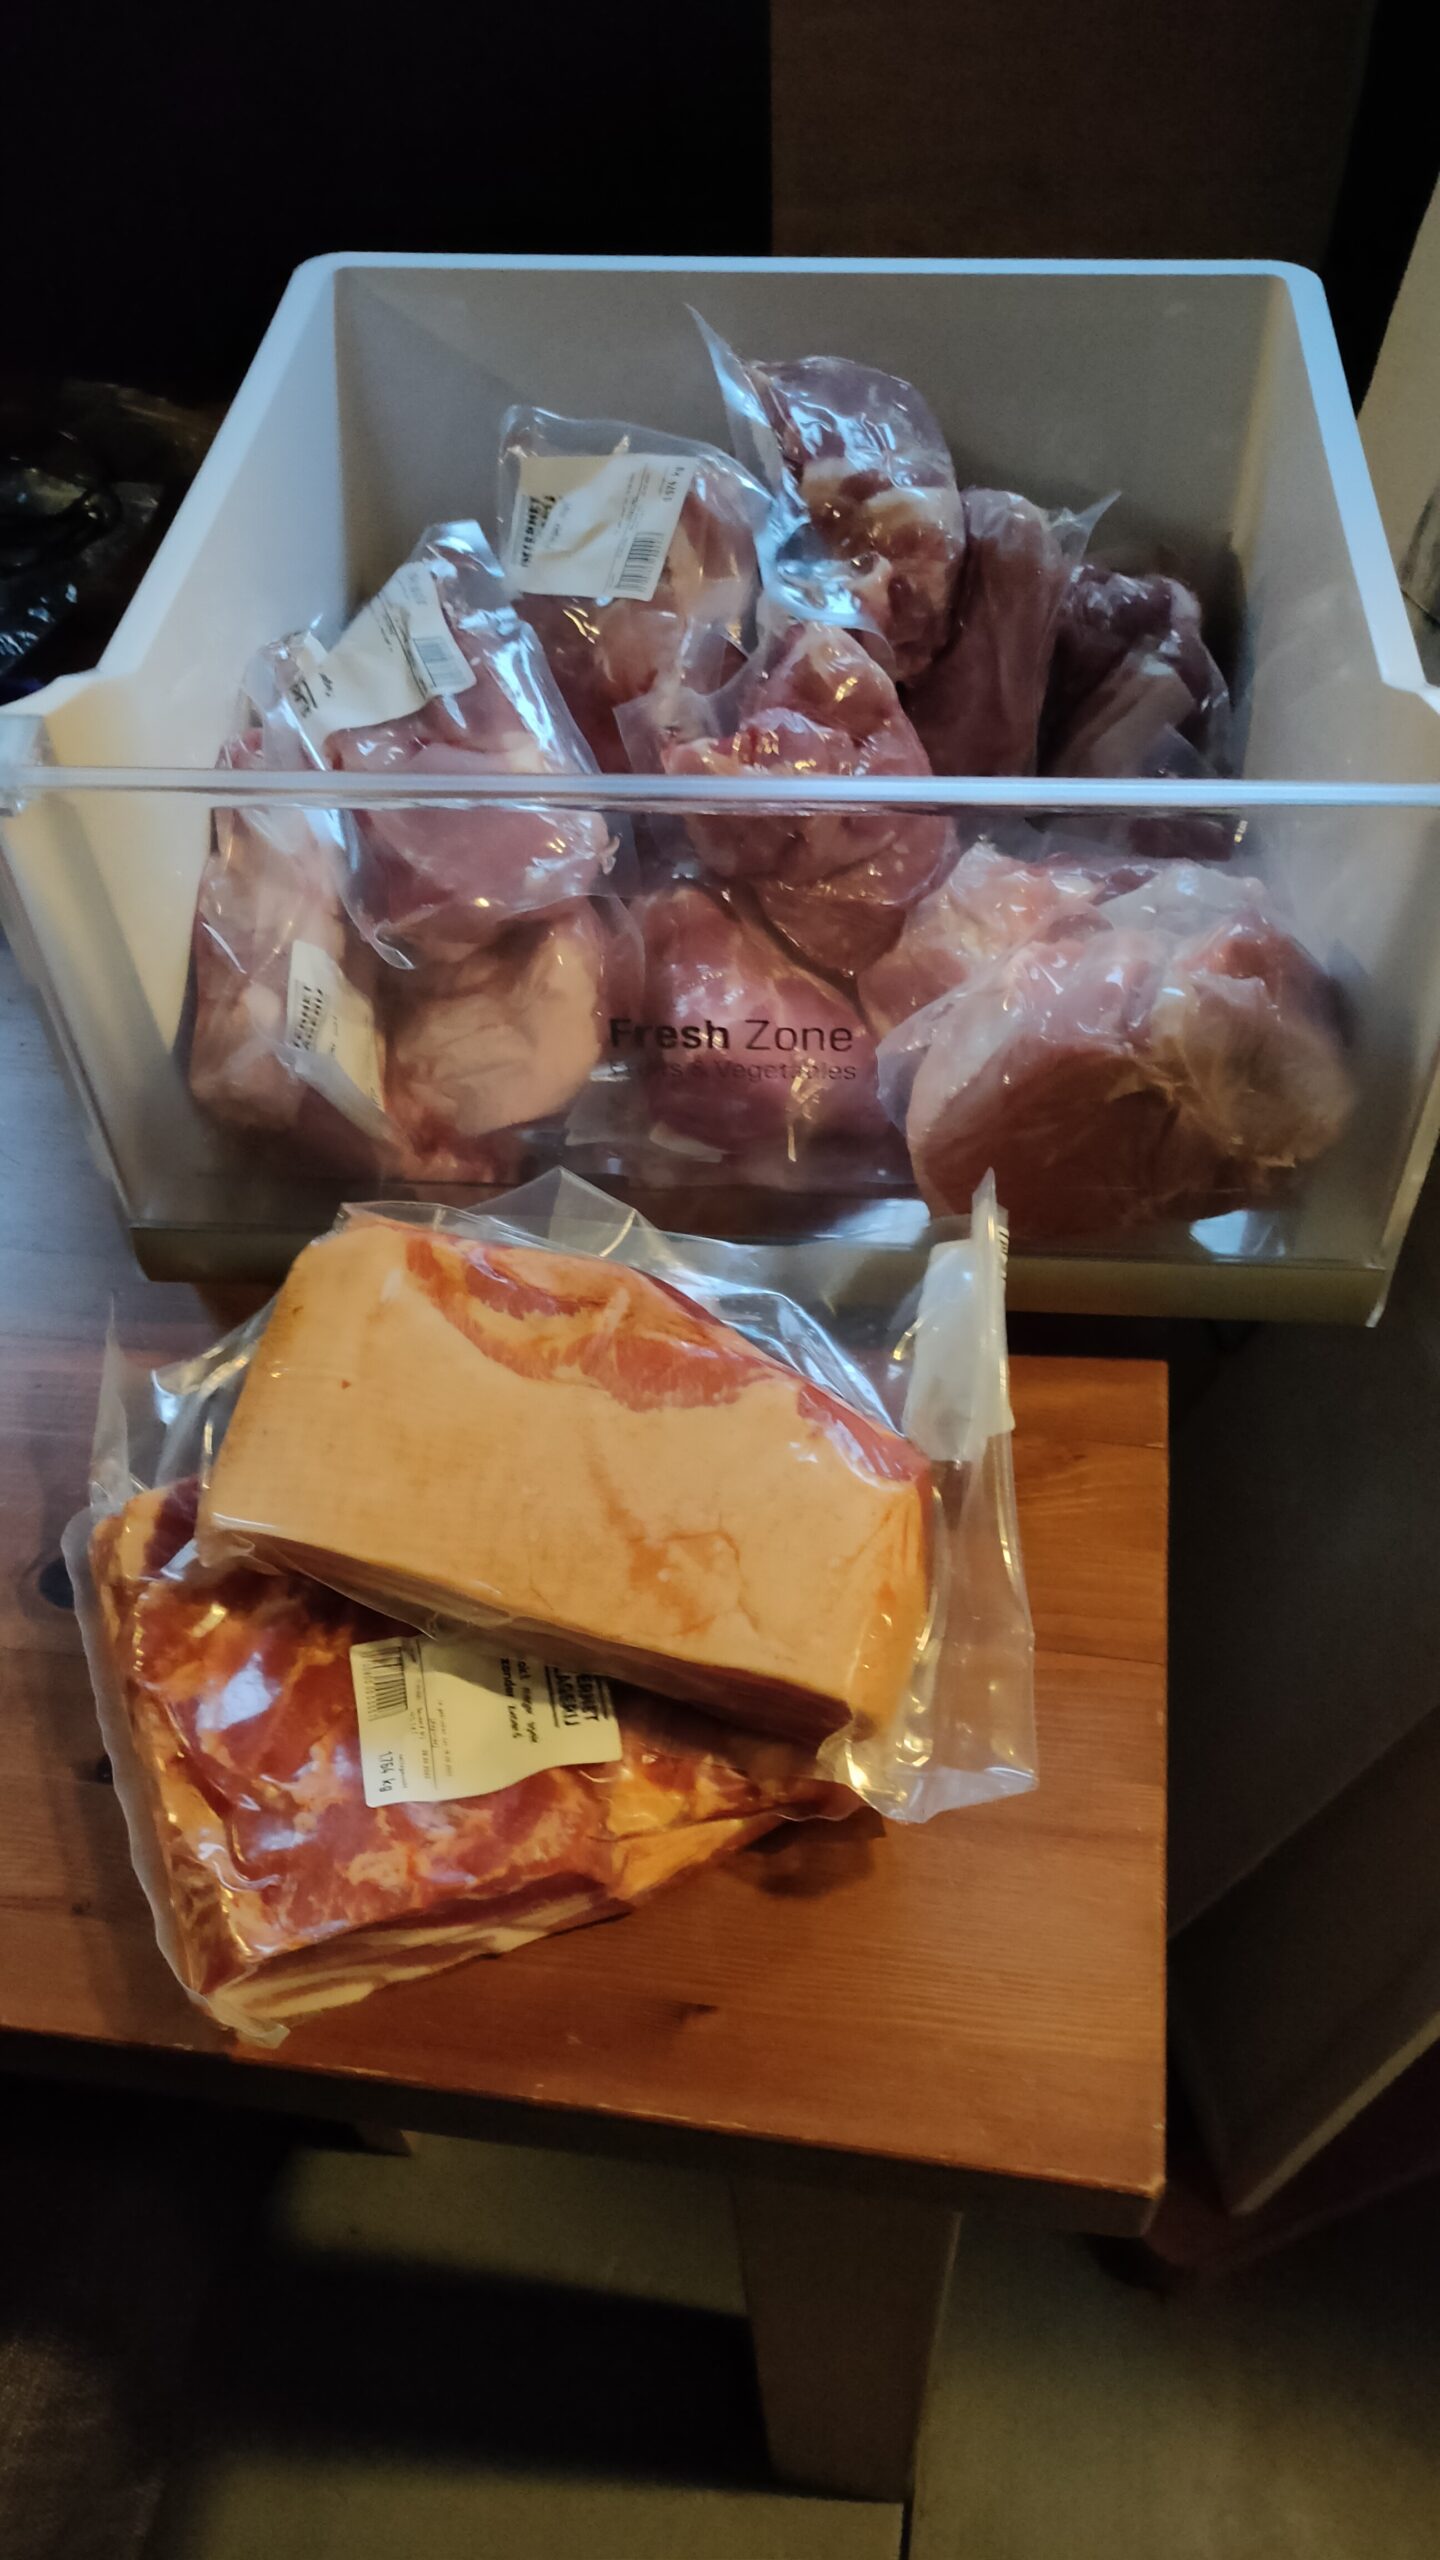
For the meat, I used Picanha and the cubed pieces of fat. Next time I’m going to use Bacon Fat or Geese Fat.
The Flambadou was NOT hot enough for the fat. Ah well, learning every day.
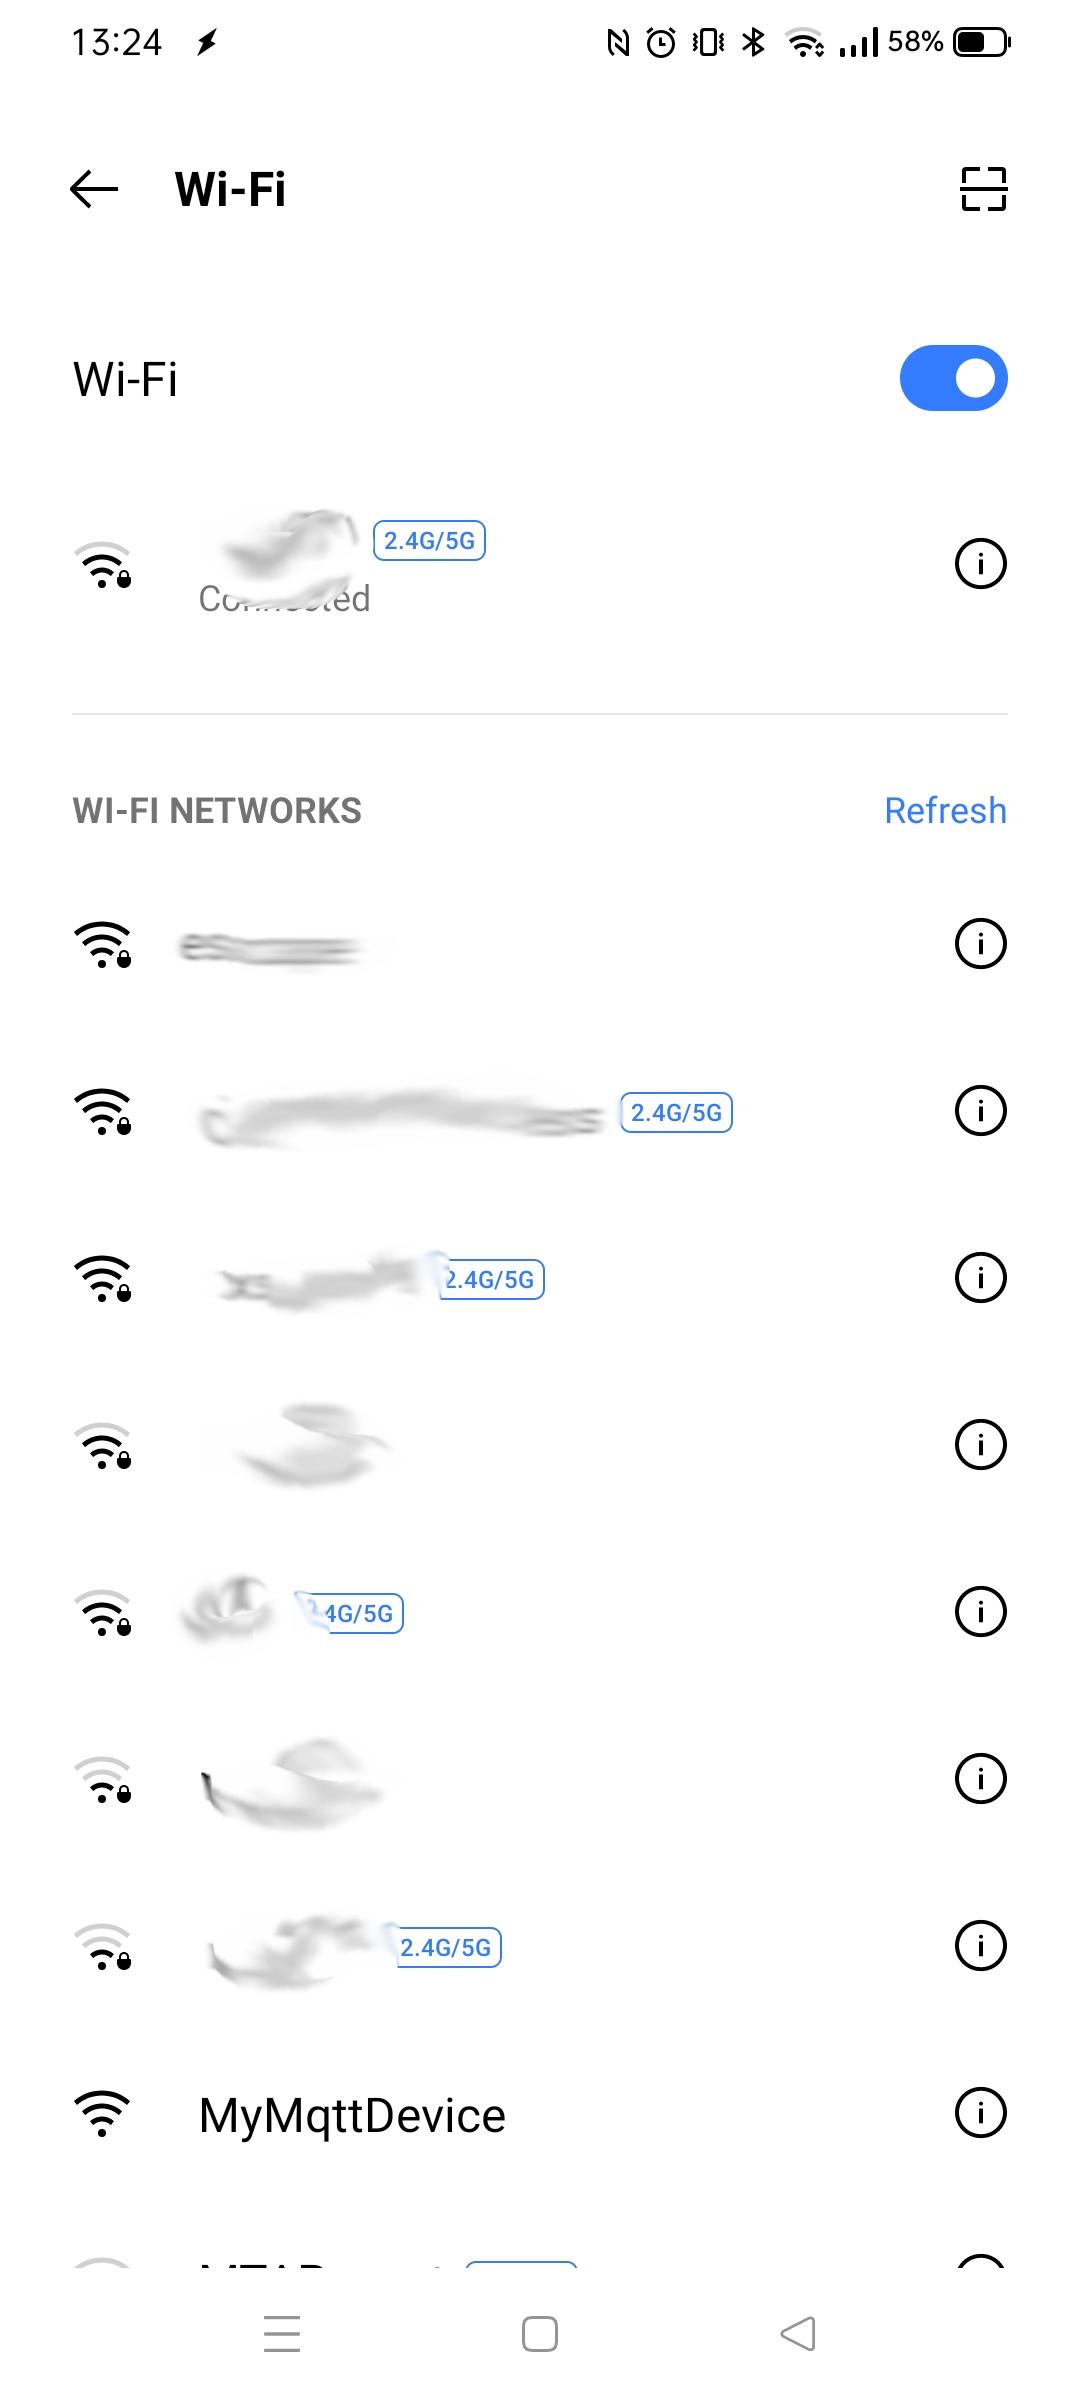
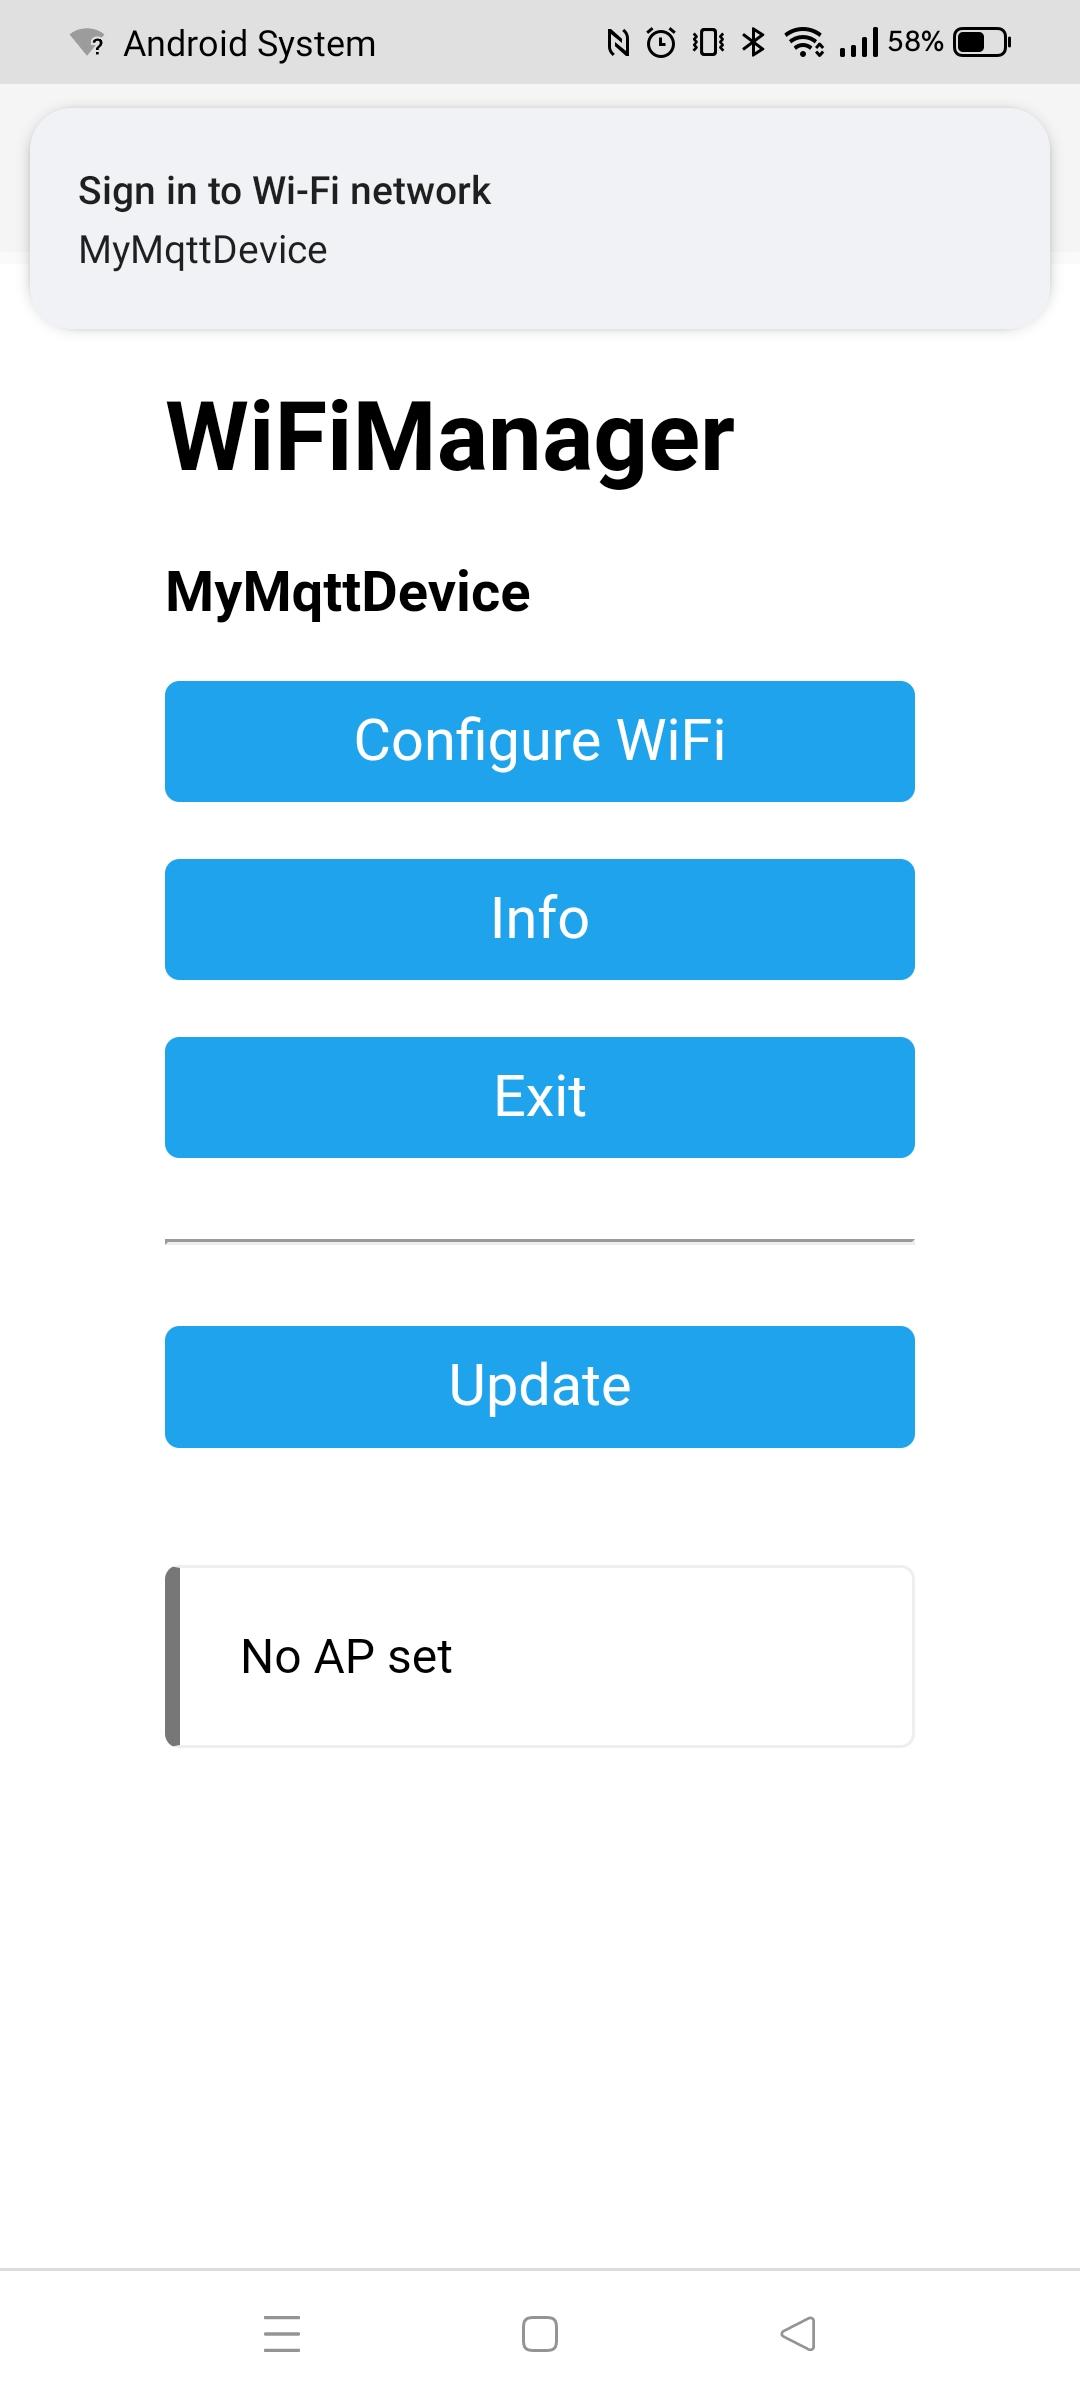
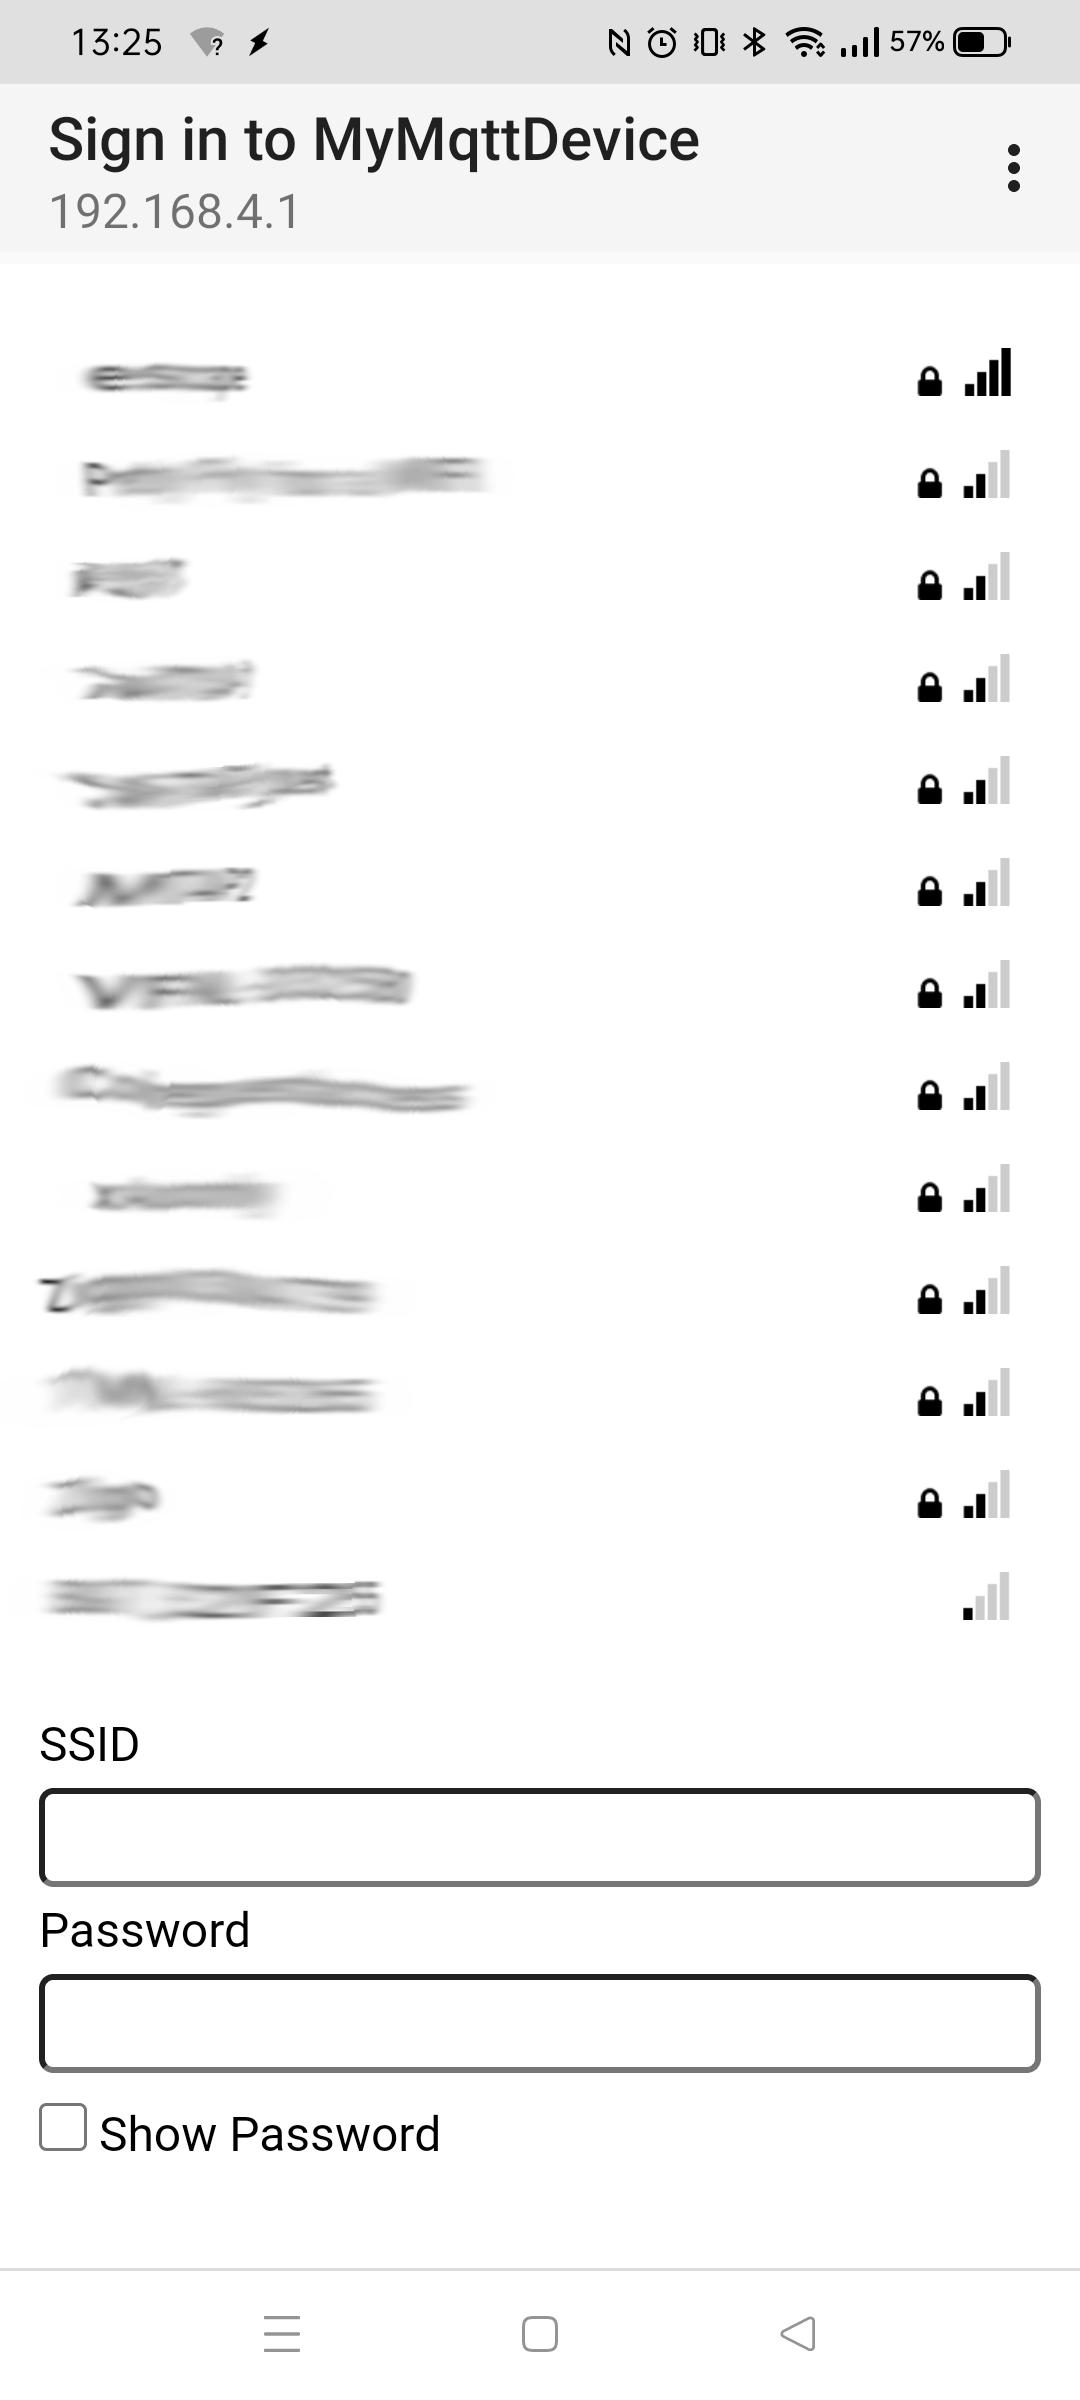
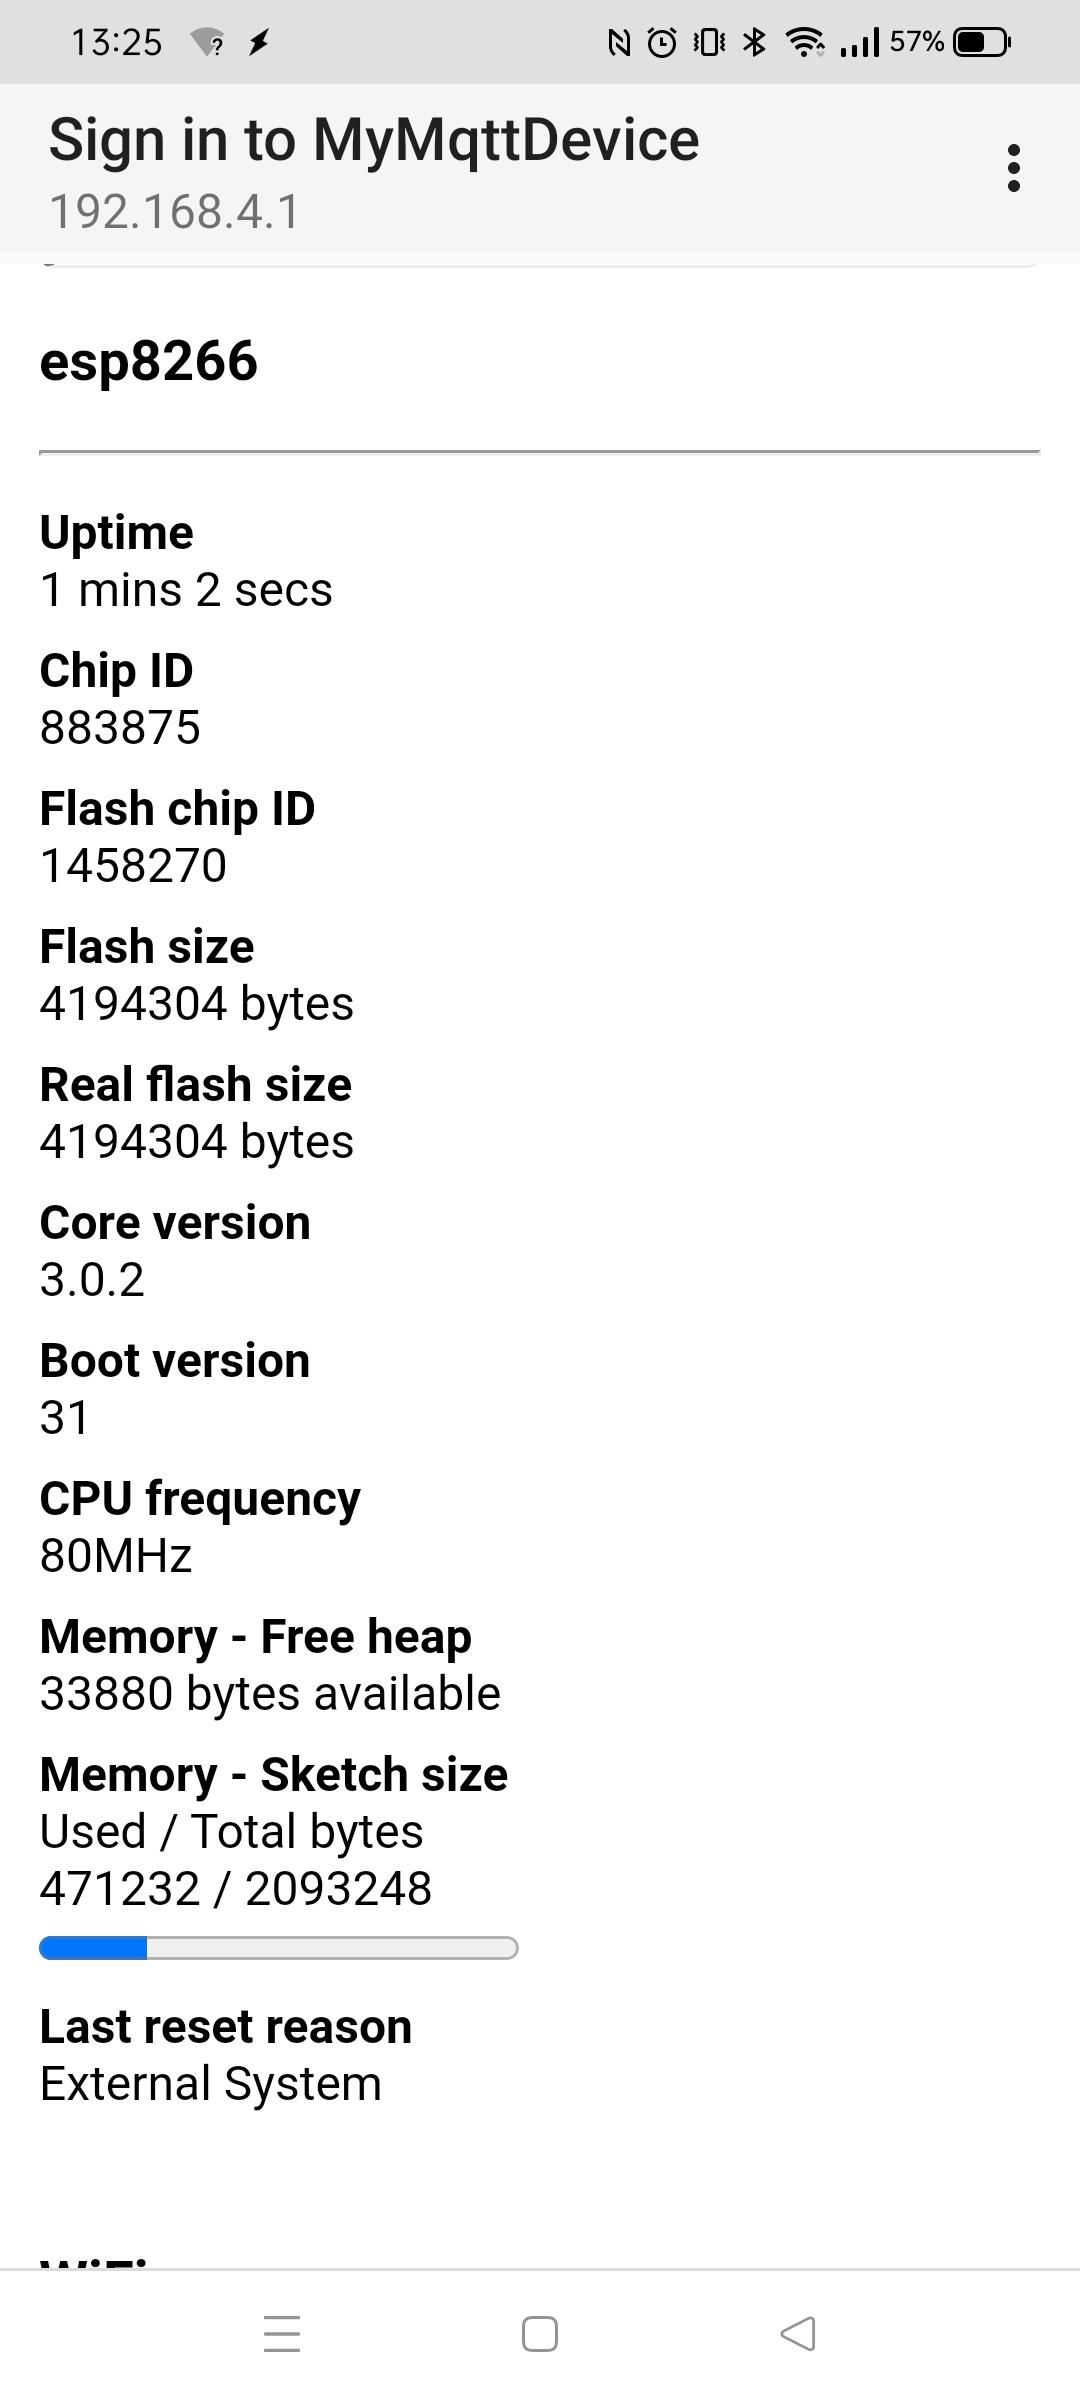
UPDATE: AccessPoint on Arduino implemented with captive portal for Wifi Configuration
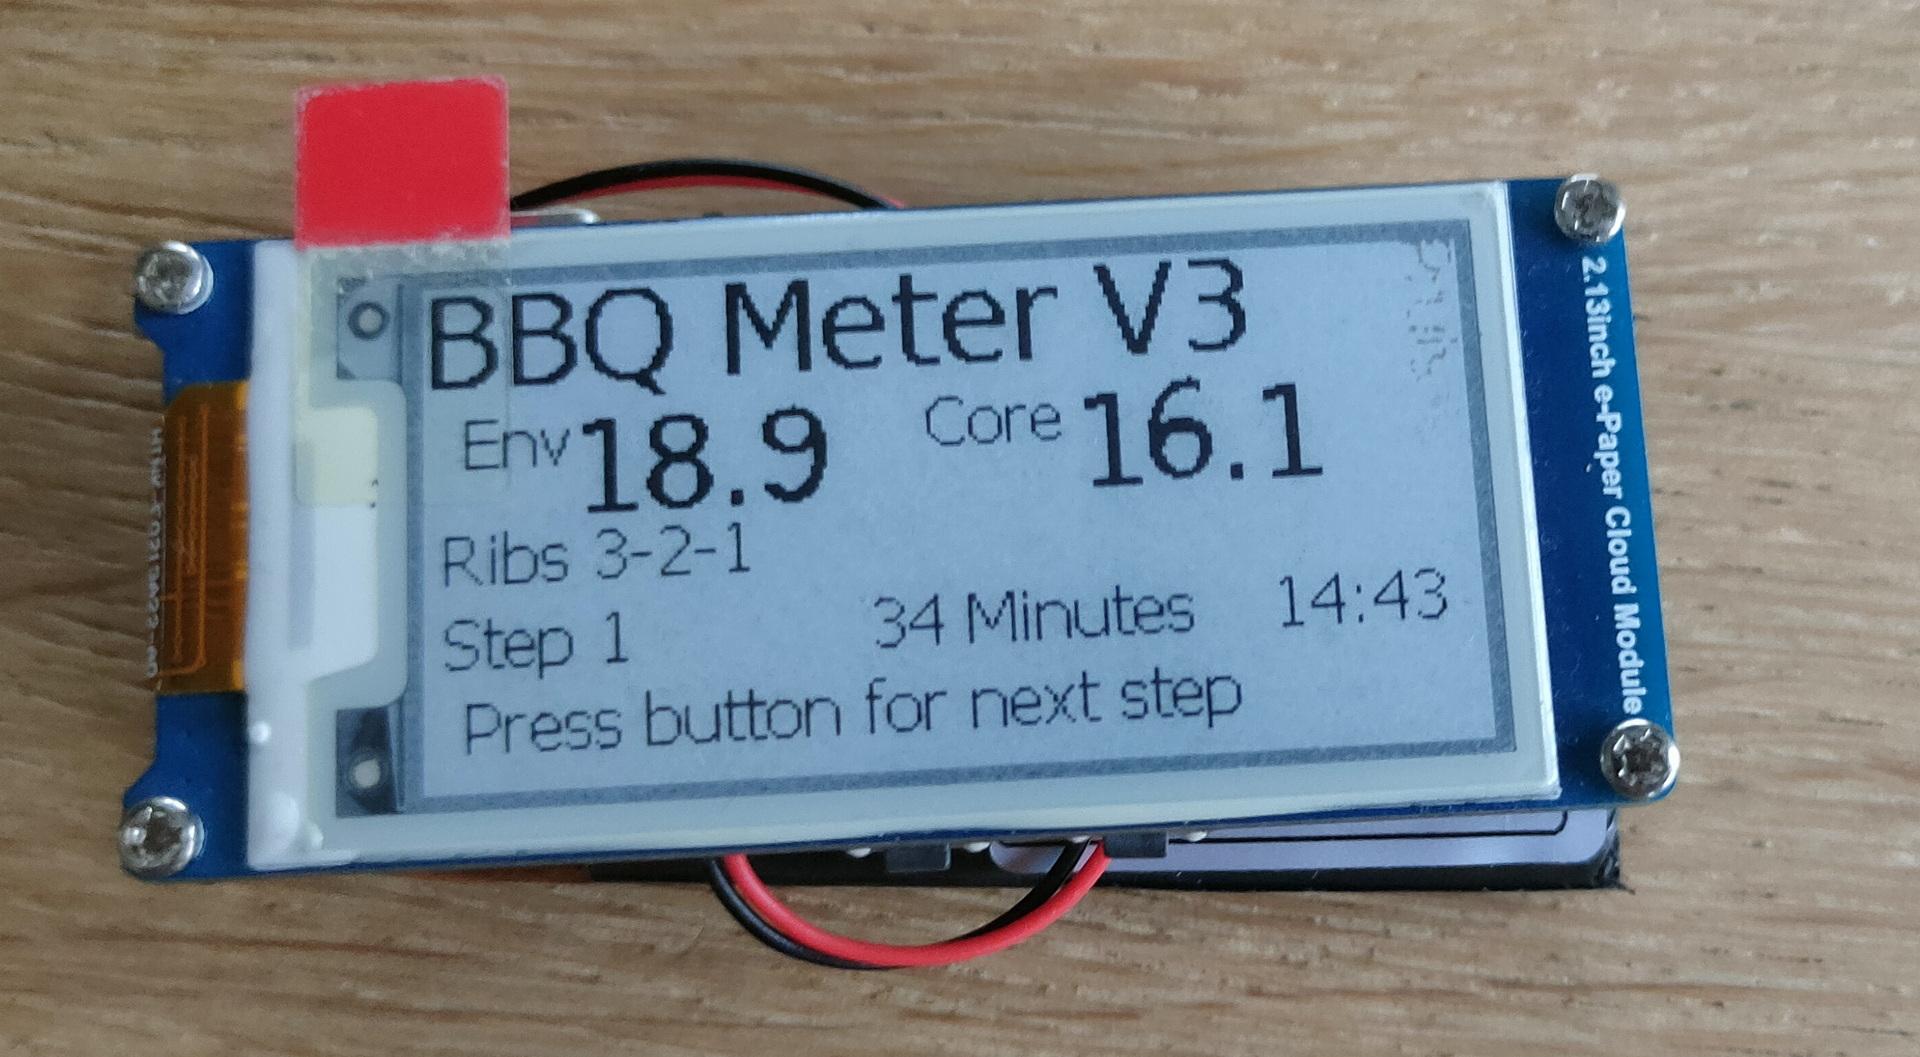
Got my Waveshare Epaper Cloud running on ESPHome
This is a Epaper display with a 2000mAh Lipo and a passive buzzer. Running parts of my Smoker monitor.
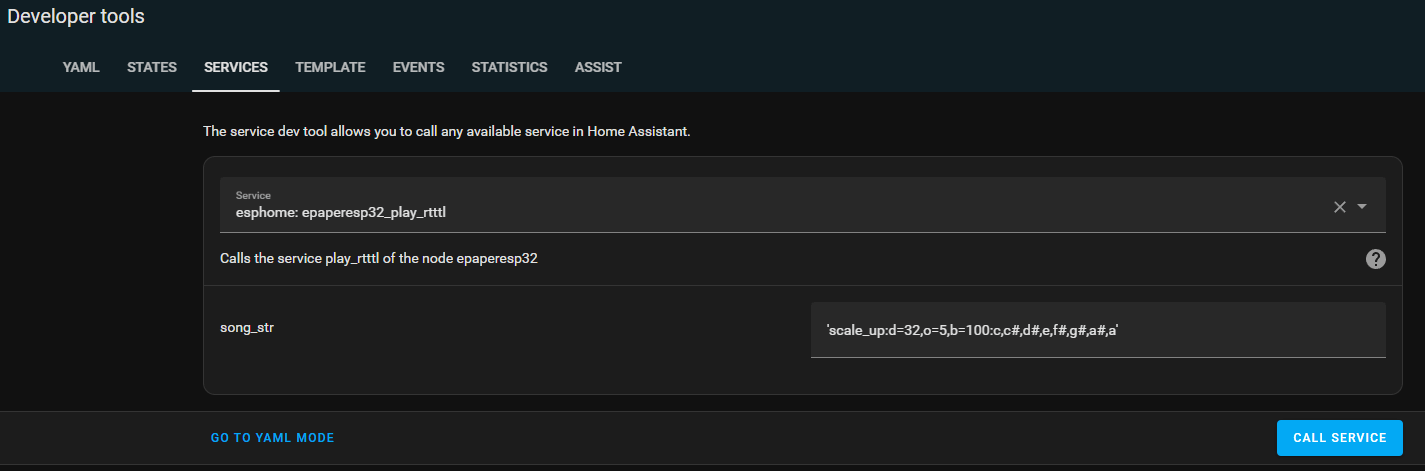
Below a little movie clip with RTTTL sound notification. (Send from Home Assistant) B.t.w. RTTTL are those ringtones we used to have. (Ring Tone Text Transfer Language)
Sending from HA
Parts of the ESPHOME Yaml NOTE: For the time, you need the time integration to get hours:minutes as a sensor!
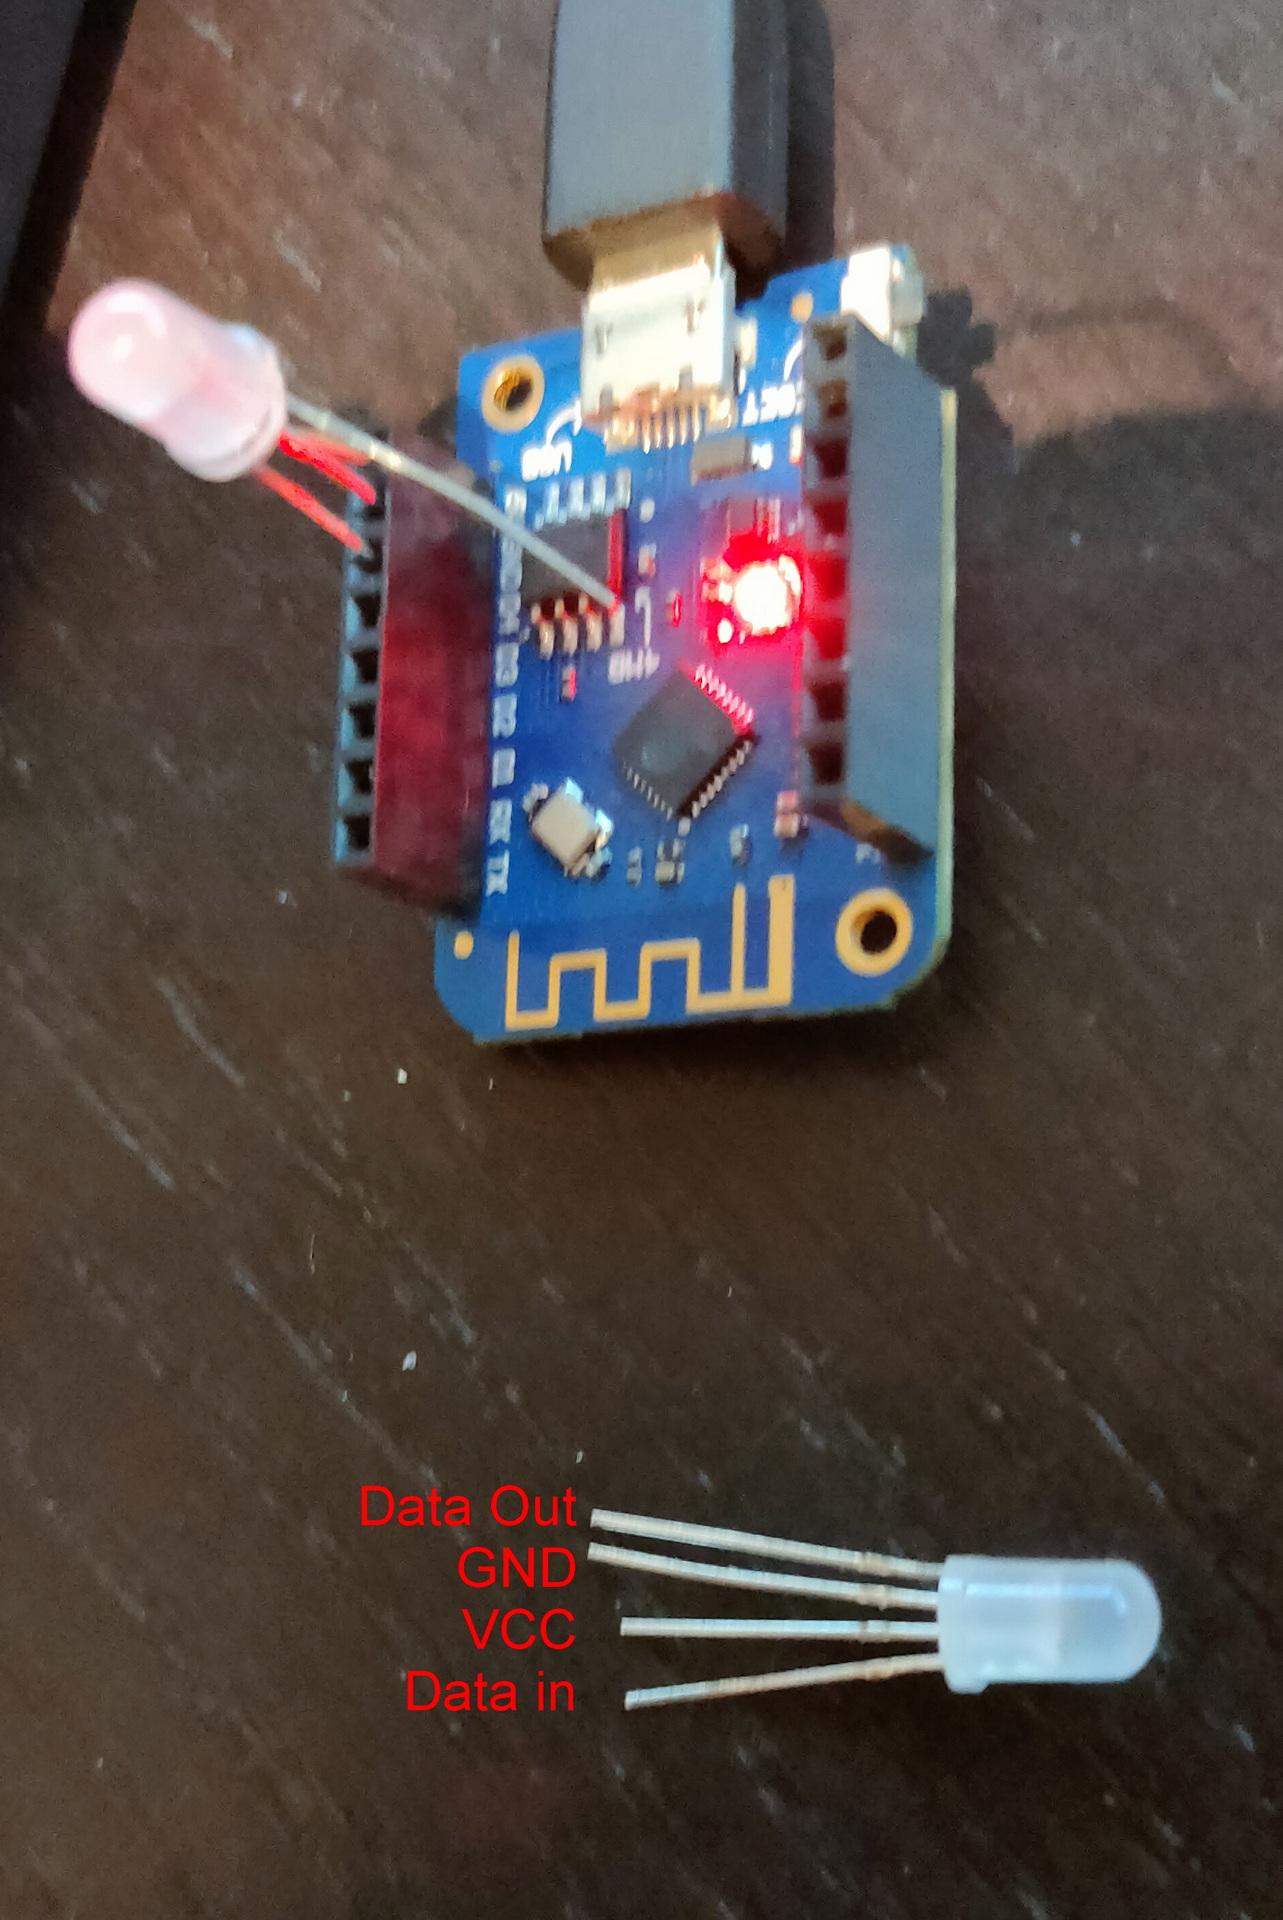
This is part of a test where my friends and me can have notifications LEDs over the internet.
Using certificate parts from: Controlling the led will be done using Mattermost webhooks, or slashcommand with custom scripting. (Mattermost is my own hosted chat server)
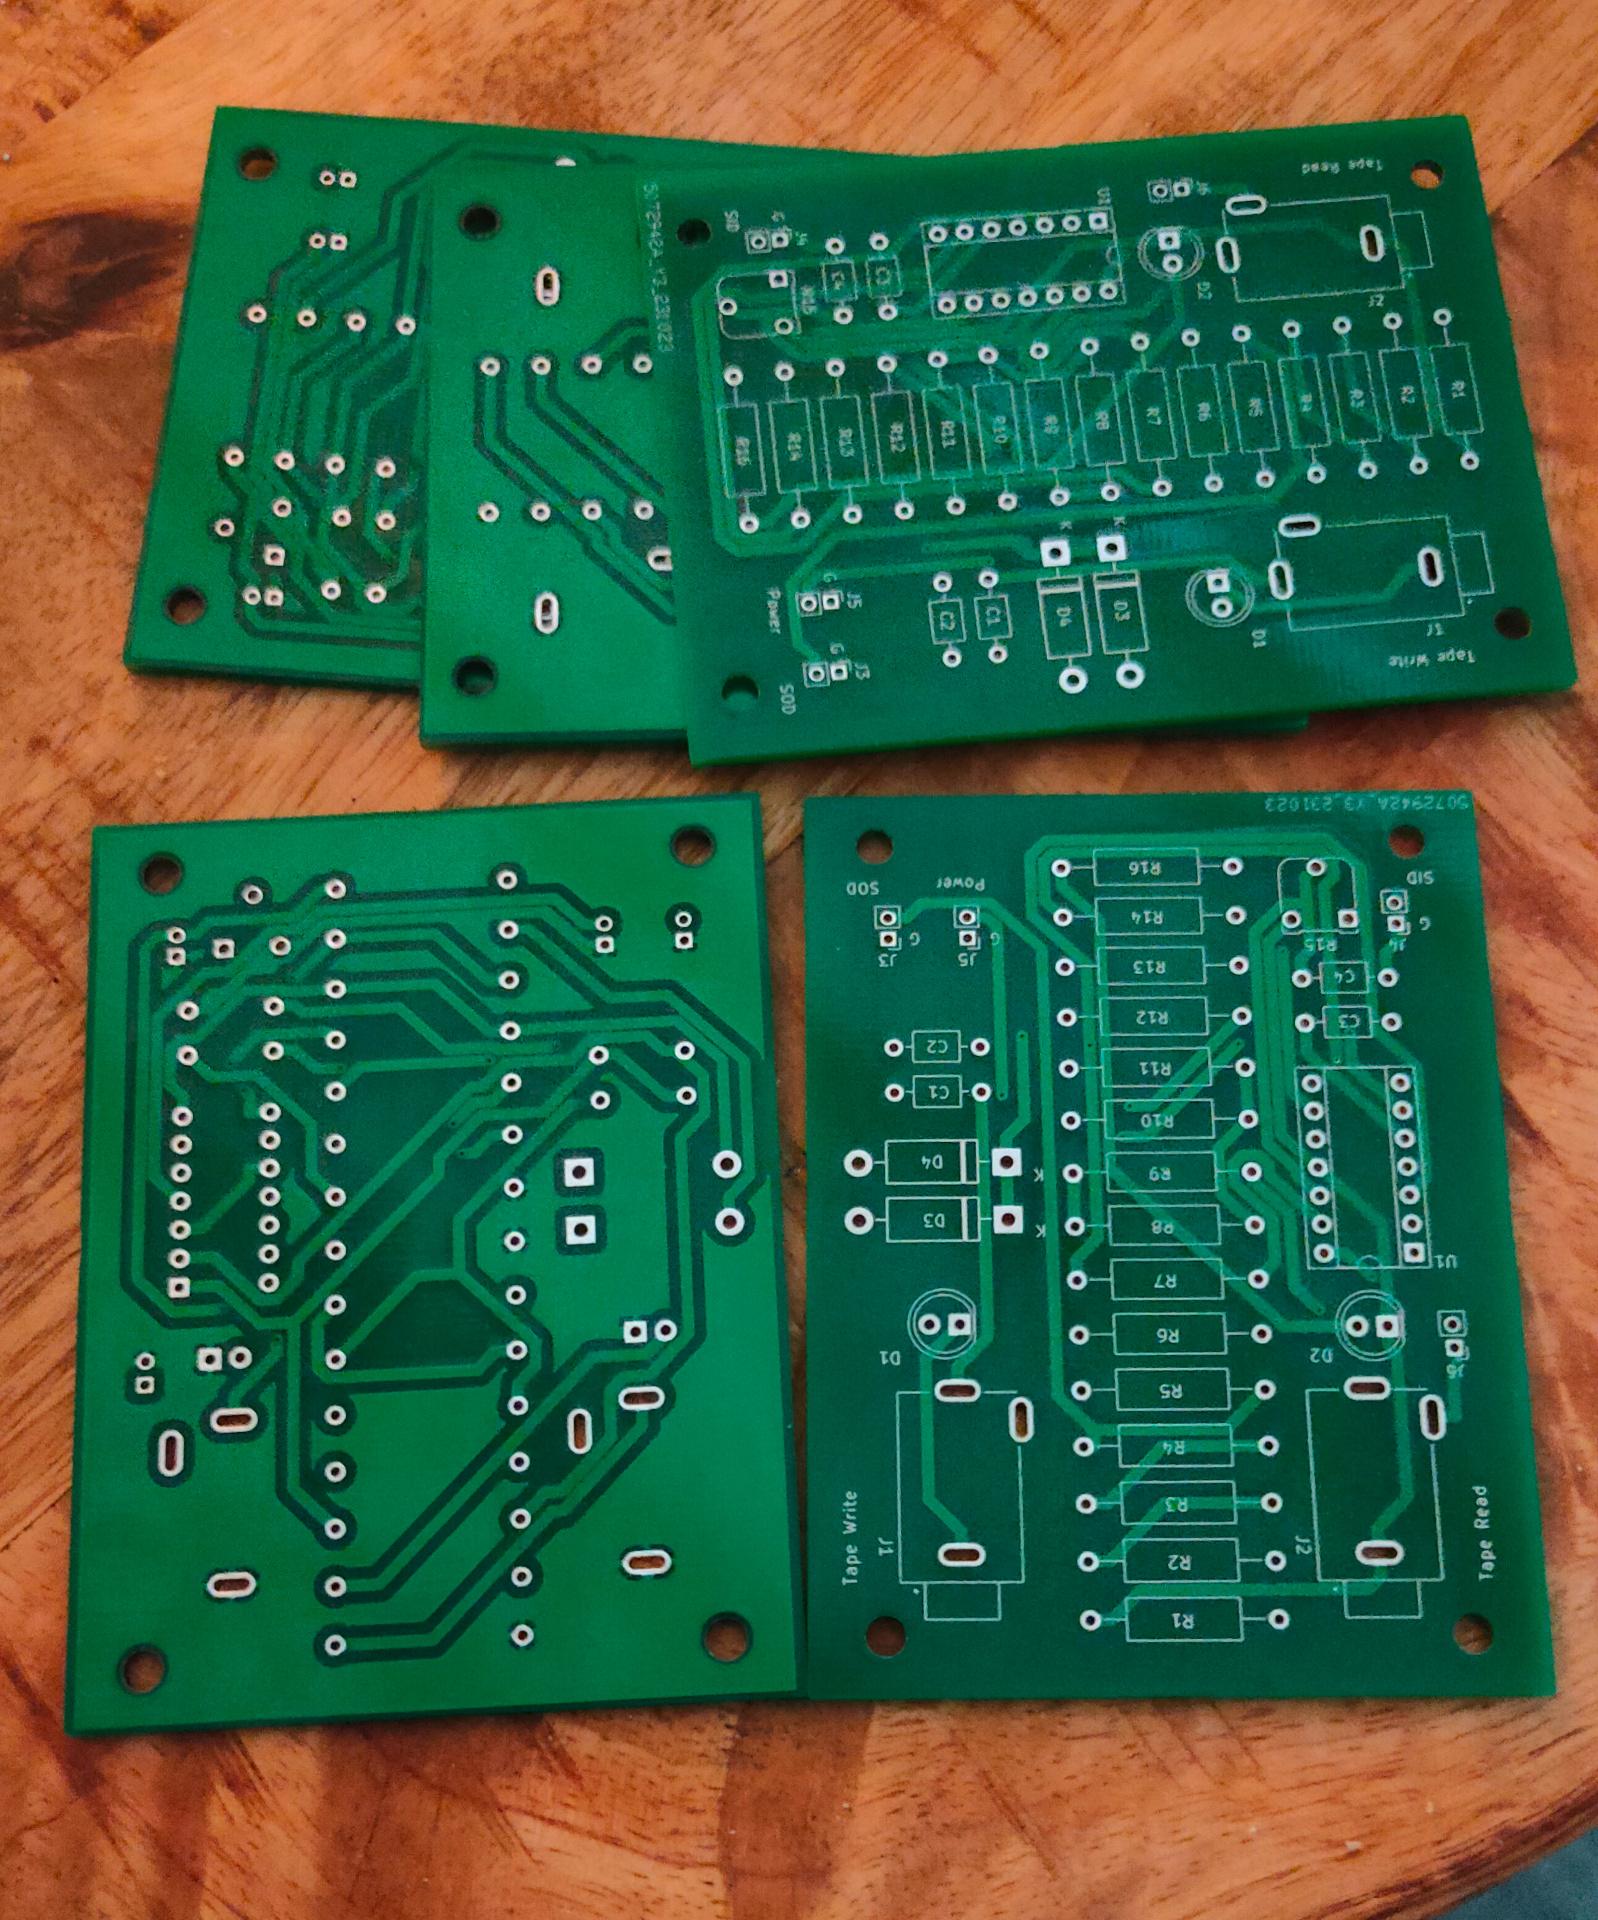
I’ve got my SDK-85 cassette interface PCB’s in, If you want to have the Kicad files. Message me.
My 3D printer has a worn out hot-end .. so a new one to install.
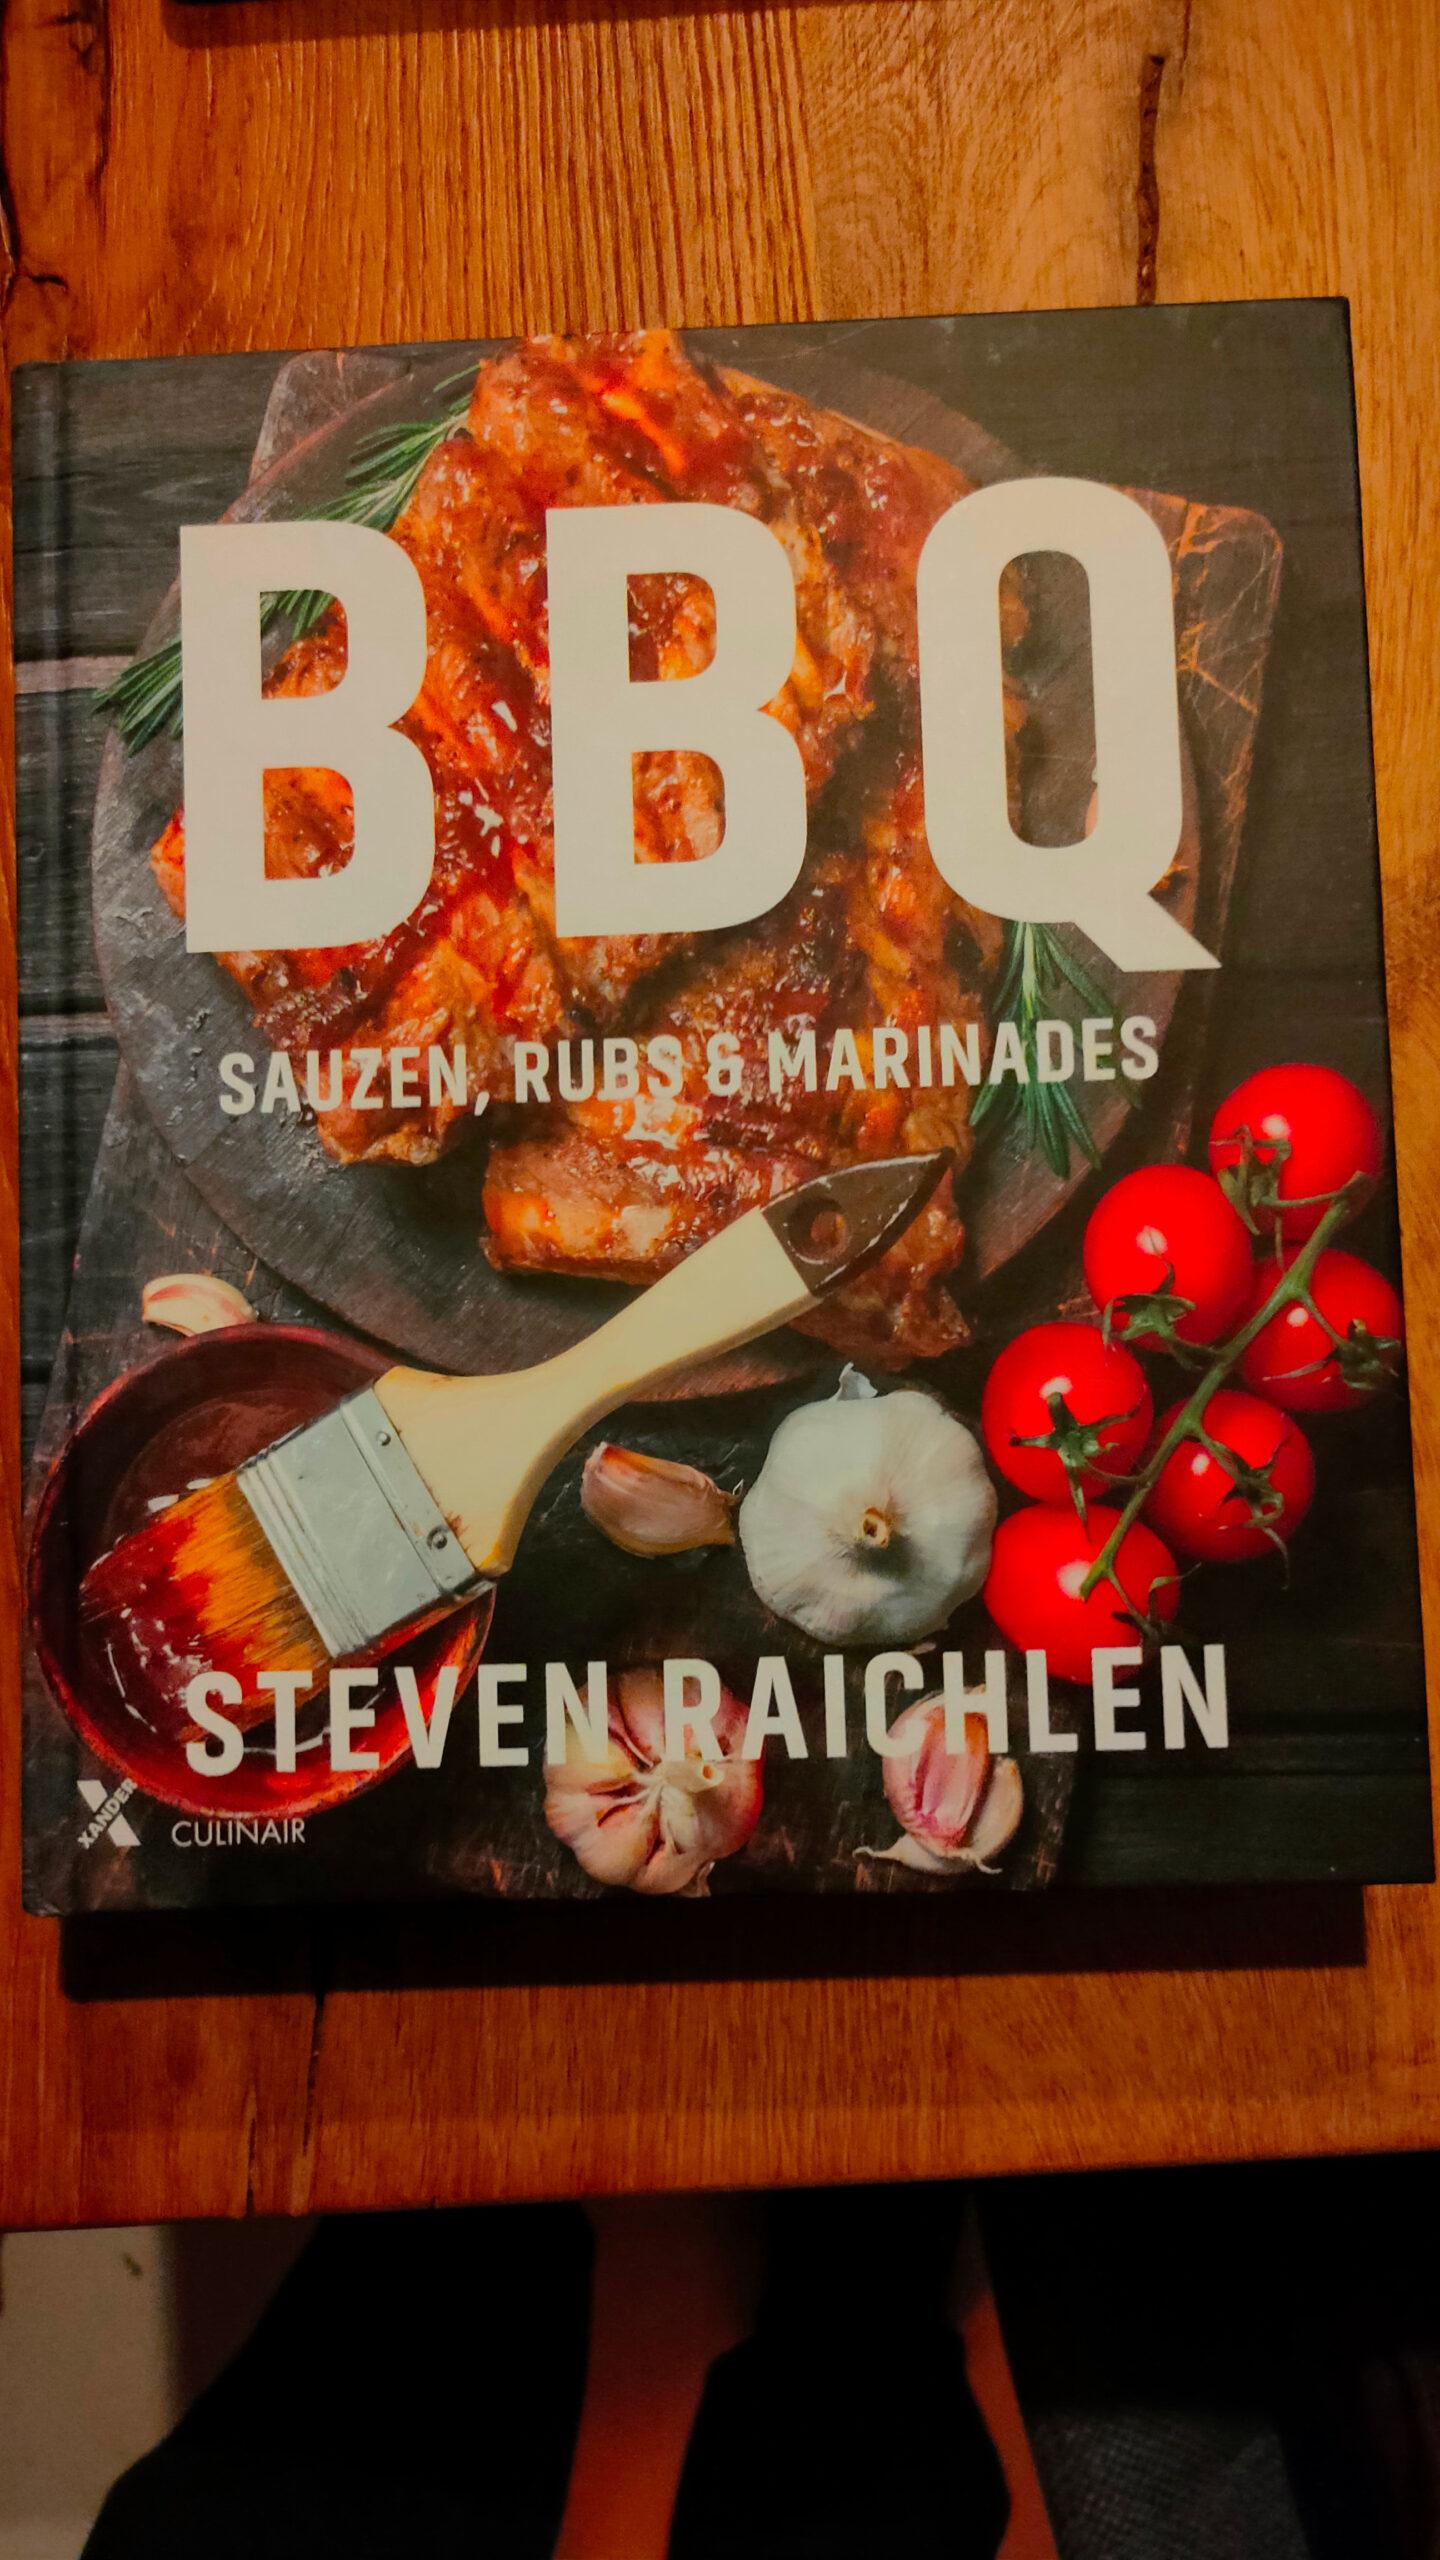
BBQ time! .. That’s from 1-januari till 31-december .. rain, snow storm whatever. I’ve made a lot of Rubs/Sauces and marinades. But a new book i always welcome ..
Also new recipes and tips. Let me know.
Sunday a day of music with our folkband. Played some old and new tunes.
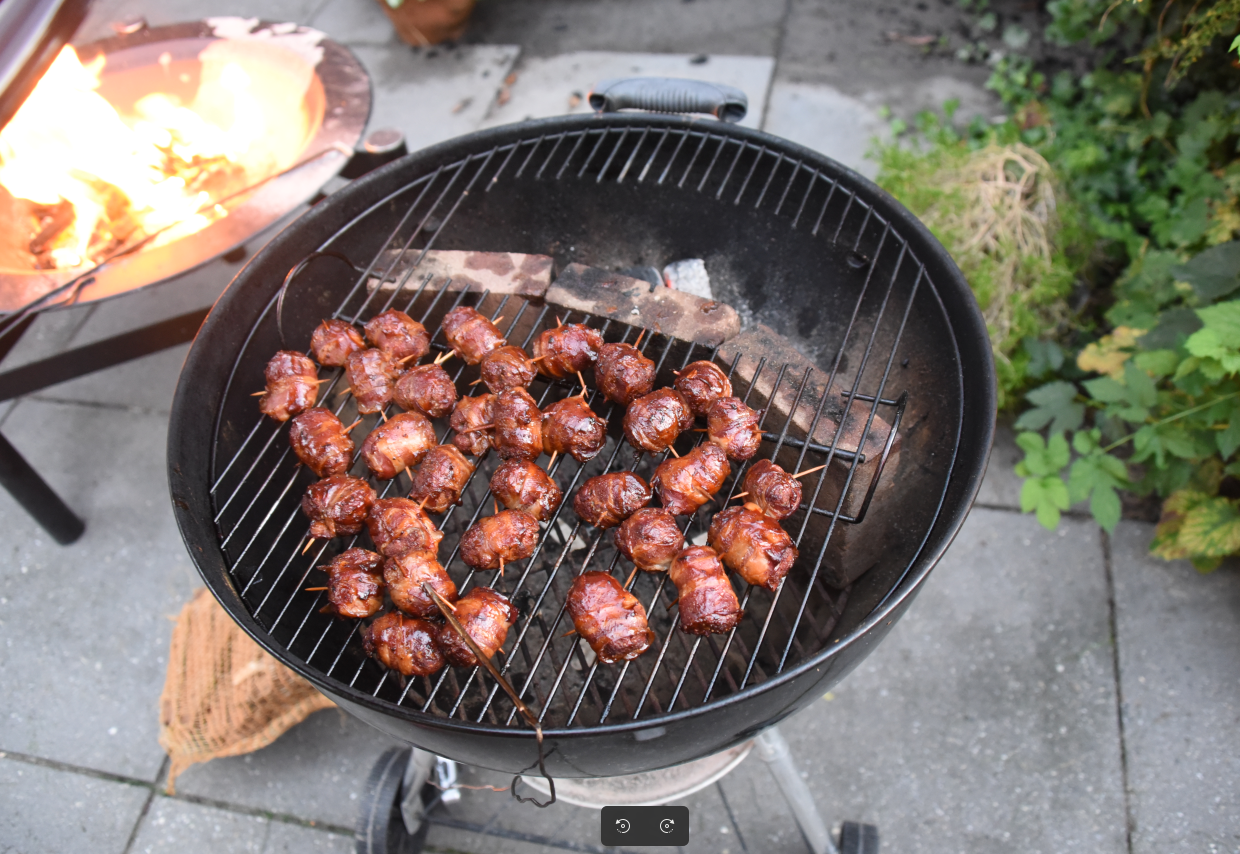
A MOINK Ball is a beef meatball wrapped in pork bacon, sprinkled with rub, smoked, and sauced .. so beef and pork .. hence the name Moo – oink balls.
Made this today .. but forgot to take some pictures. Picture is from another date
Ingredients
500 grams of ground beef
40 grams Parmesan cheese grated
1 egg beaten
40 grams of breadcrumbs
100 ml of milk
1 tablespoon garlic finely chopped
1 teaspoon dried parsley
1/4 teaspoon sea salt
2/3 teaspoon dried oregano
2 packs of (smoked) breakfast bacon
barbecue rub
barbecue sauce
For the balls
ONE of the following
    1/2 teaspoon cayenne pepper
    1/2 teaspoon crushed red pepper flakes
    1/4 teaspoon chili powder
    1 jalapeño pepper, seeded and finely chopped
Recipe
Mix the ingredients of the balls , except for the rub and sauce. Sprinkle the meatballs with the rub. Cool in the fridge. Wrap a slice of bacon around the balls and secure with a cocktail stick. Put your MOINK Balls in the fridge for half an hour to stiffen.
I try to get my smoker at 110C. Using Cherry wood (or apple), I let the balls hit a core temperature of 55C. Brush the balls with barbecue sauce. Remove from the smoker when 70C.
We had a delayed Burns night, seems a bit of a habit of our band. But with Covid, who knows, maybe we are celebrating Burns Night 2020.
I wanted to make Haggis “bitterballen” (Fried balls) but Irmgard has no frying pan. So I made some Haggis sausage rolls.
The others made also a lot of Scottish/Irish themed food. (Too much again) But i don’t have the recipes.
We played some old tunes, and some new. Talking eating and drinking, time flies!
Irmgard and I played a duet on the Harp and some new tunes on the Concertina.
Wellll the recipes:
I wanted to make this one: https://cookingwithbry.com/haggis-bon-bons-recipe/
Instead I made this:
392g haggis, canned haggis ( Holiday 2022, stuffed a load of cans in our car )
3 Sausages (that is about 200 gr)
Bunch fresh parsley, finely chopped
320g ready rolled all-butter puff pastry
2 tbsp Dijon mustard
1 free-range egg, beaten
Mix haggis, sausagemeat and parsley.
I used square “bladerdeeg” for pastry, made a roll out of one square filled with the haggis. (Takes about of 13 sheets). Brushed on the beaten egg, and put on baking paper. 20 Minutes in a 180 degrees oven. Cut up each roll in 3-4 parts.
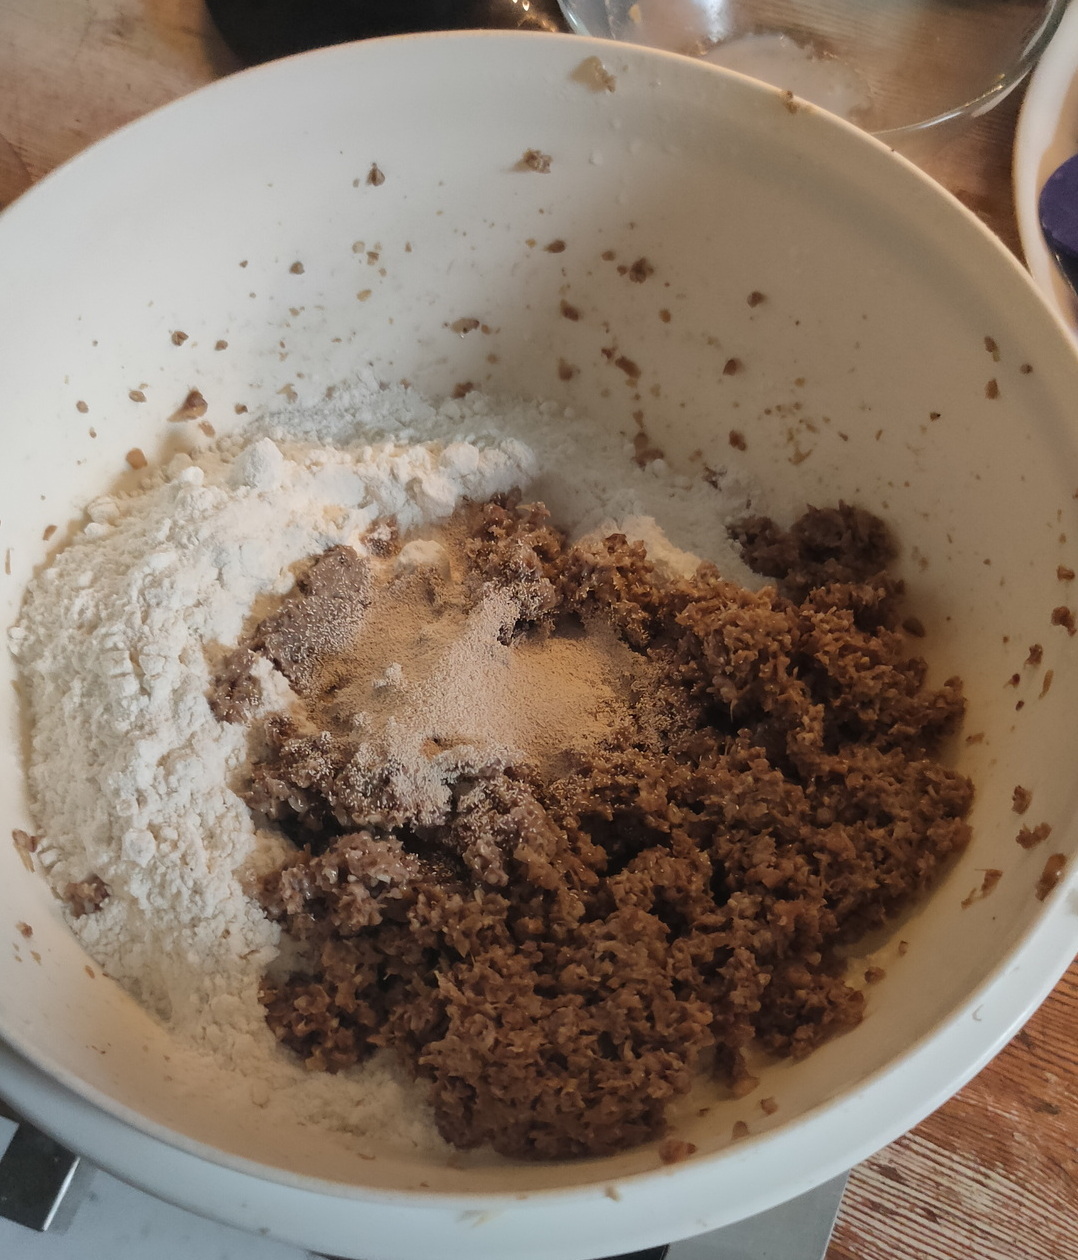
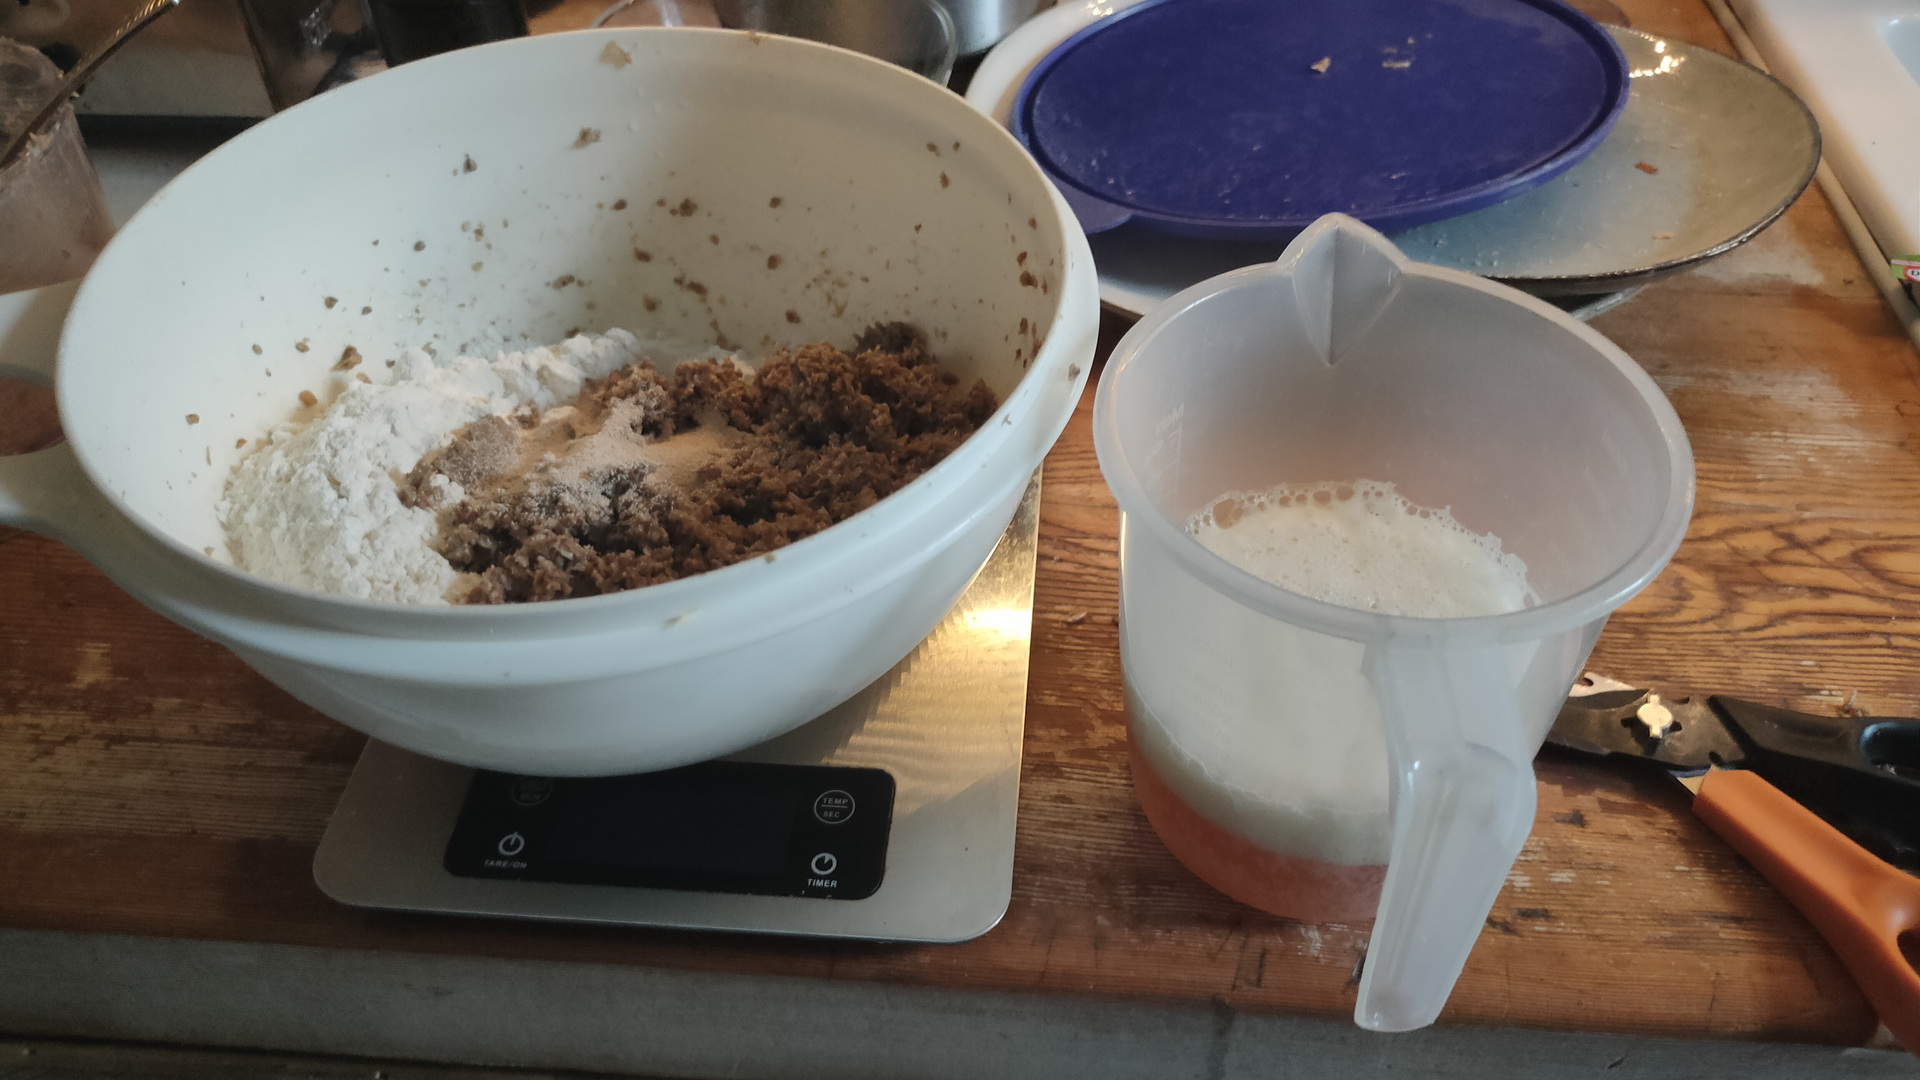
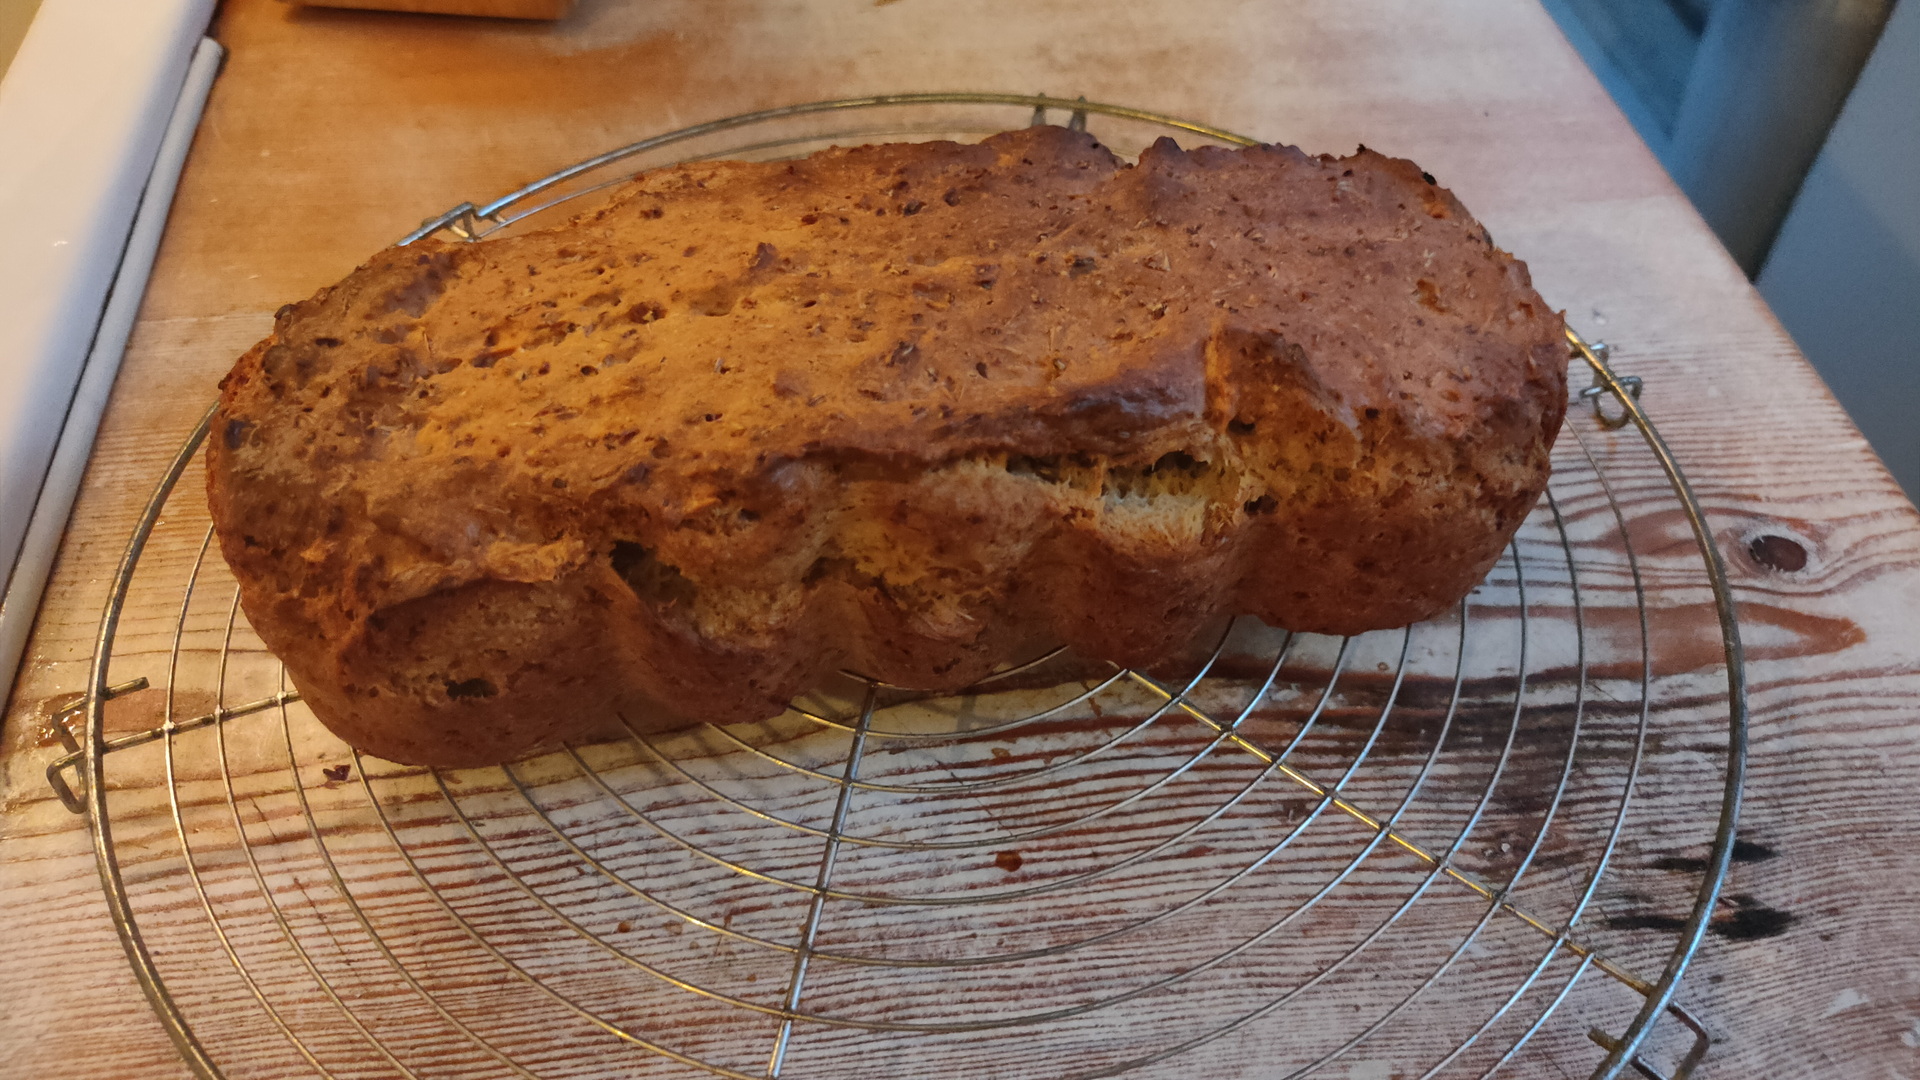
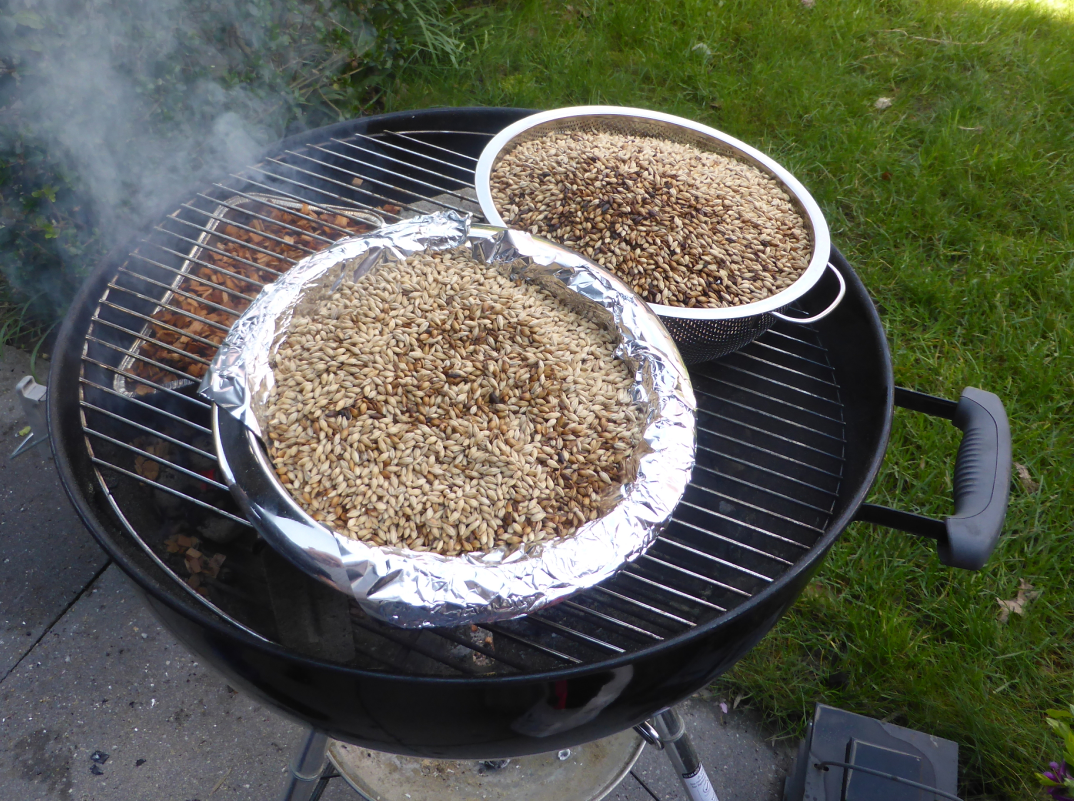
Last saturday we were brewing beer, ending up with a lot of spent grain. (Bier borstel in Dutch) These are the processed grains from the brewing.
Well, let’s bake a delicious bread, very tasty with, for example, salted butter.
Preparation time : 135 minutes Baking time : 60 minutes
What do you need 225 grams of spent grain from the brewing 400 grams of flour 200 ml beer ( I use Leffe Blond) 7 grams of baker’s yeast 50ml olive oil
Put the brewer’s grains in the food processor. (Removes the sharp edges of the malt.) Put the yeast and a little sugar in the beer. This causes the yeast to become active. Knead all ingredients together until it becomes an airy ball. Then let this dough rise for an hour and a half in a warm place in a bowl that is covered with plastic. Then knead the dough briefly and let it rest for another half hour. Preheat the oven to 200º C. Pour the batter into a greased baking pan. Then place the dough in the center of the oven. After about an hour the bread should be ready. You can check this by knocking on the bread. If it sounds hollow, the bread is ready.
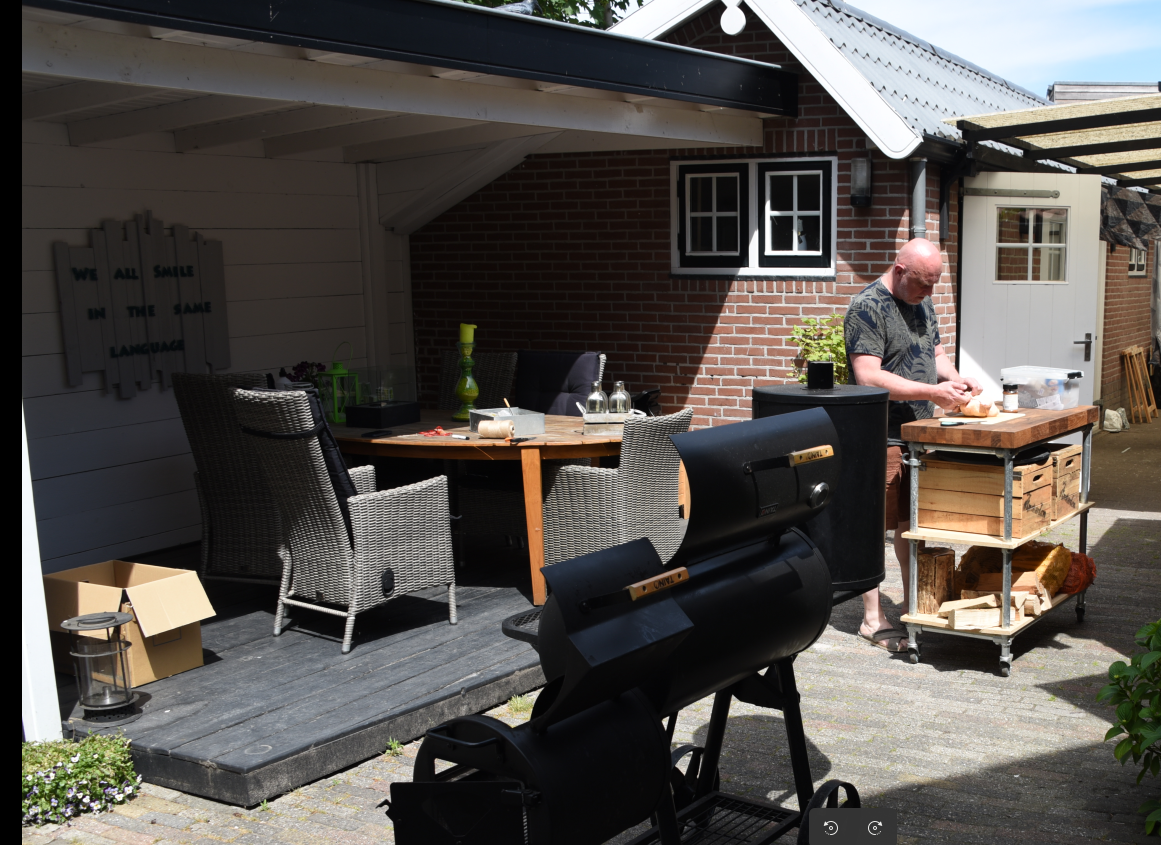
I love to bbq outside, winter, snow/rain whatever. There is no excuse. There are periods where i use a bbq like 3-4 times per week. Sometimes just to get a nice smokey hamburger.
I’ve written this post because sometimes i see (or smell) some rookie mistakes. (Wrong type of smoke, using accelerants)
The tips below are the ones i find useful and are MY opinion, but i’m just an amateur and could be wrong 🙂
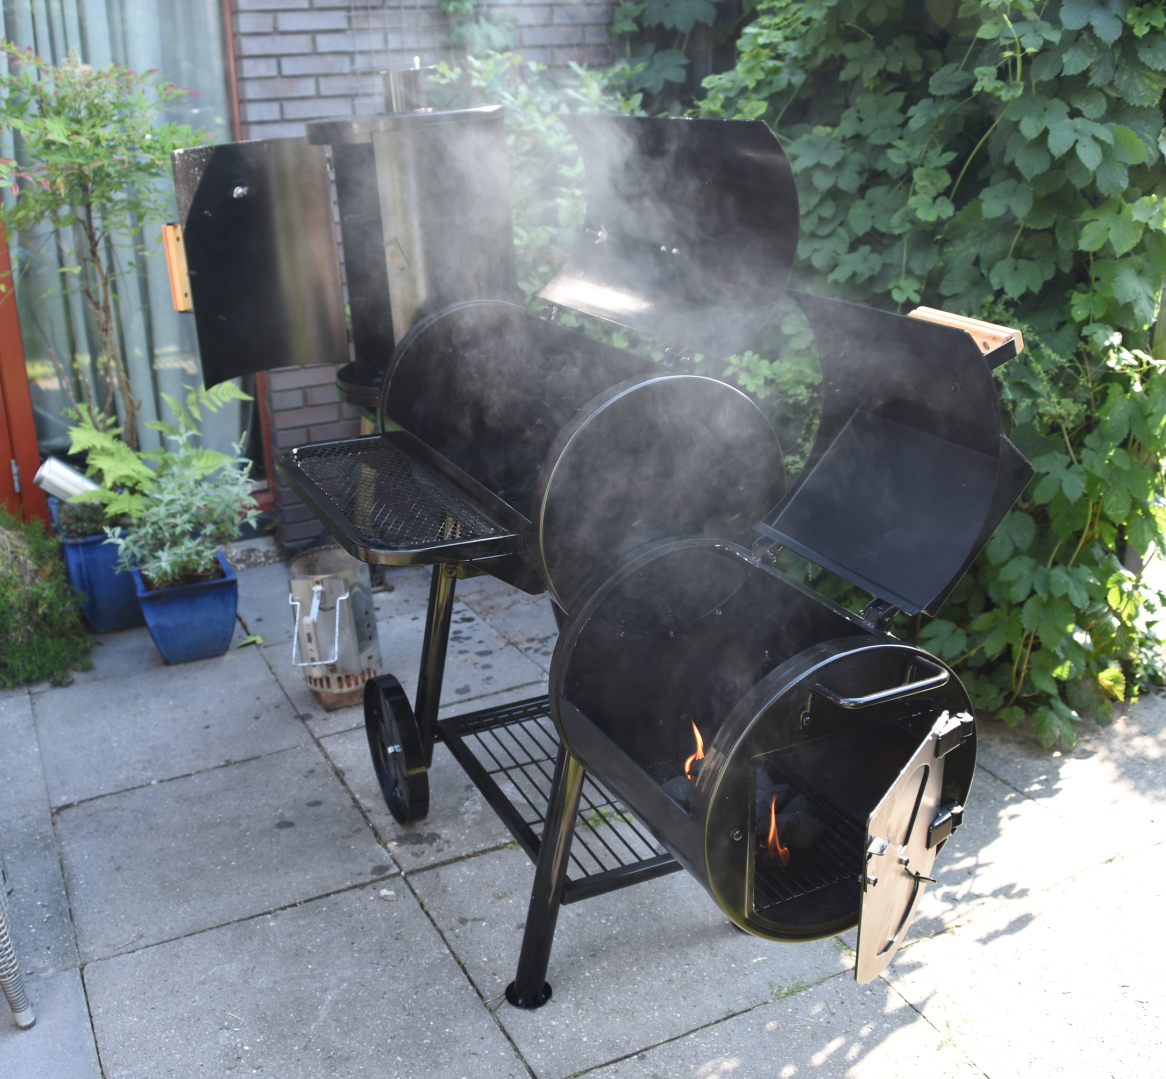
Offset smoker:
Offset smoker with on the left a cold smoke part ( for cheese and fish ) Some hops behind the Smoker
An offset smoker is perfect for ribs, brisket and other meats that are perfect to take some time to absorb smoke and get better when slowly cooked.
When going Low and slow, i follow these rules:
Try to leave the lid closed! No need to let the slowly buildup temperature get away from your meat!
Need to know the temperature? Use the one on your kettle or even better, one with a little cable to leave it outside of the heating chamber. (See tools)
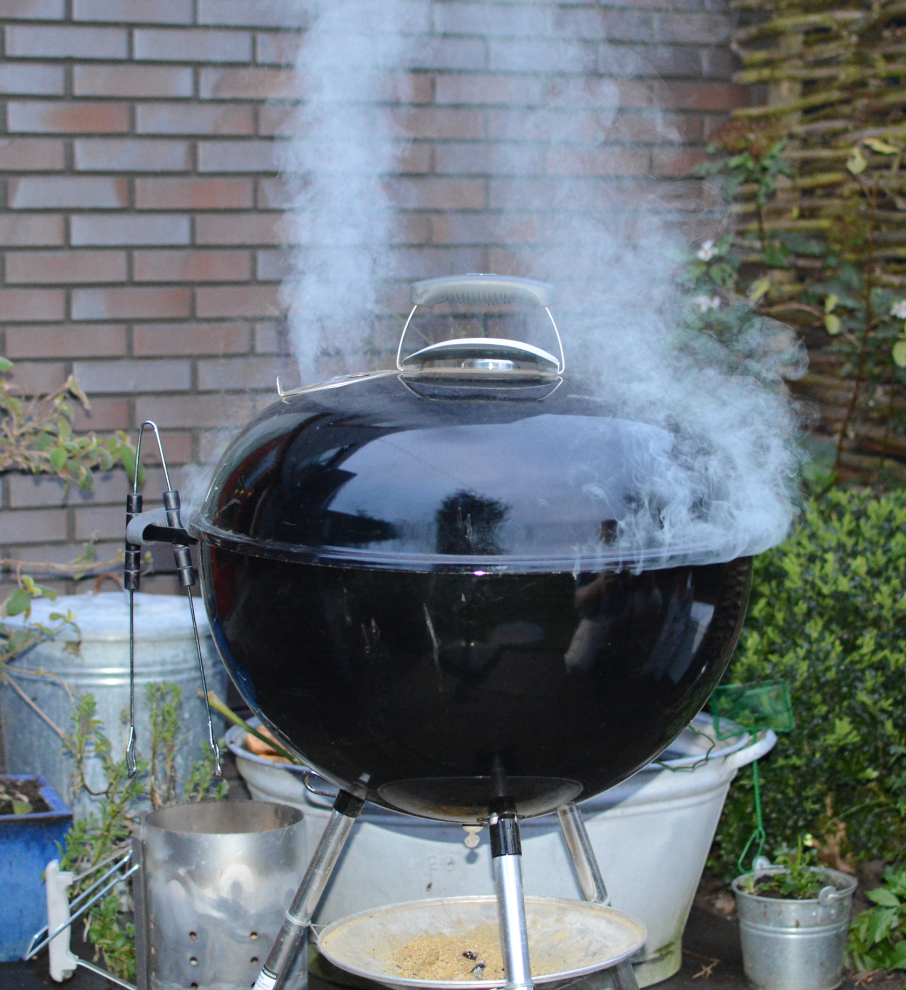
Weber:
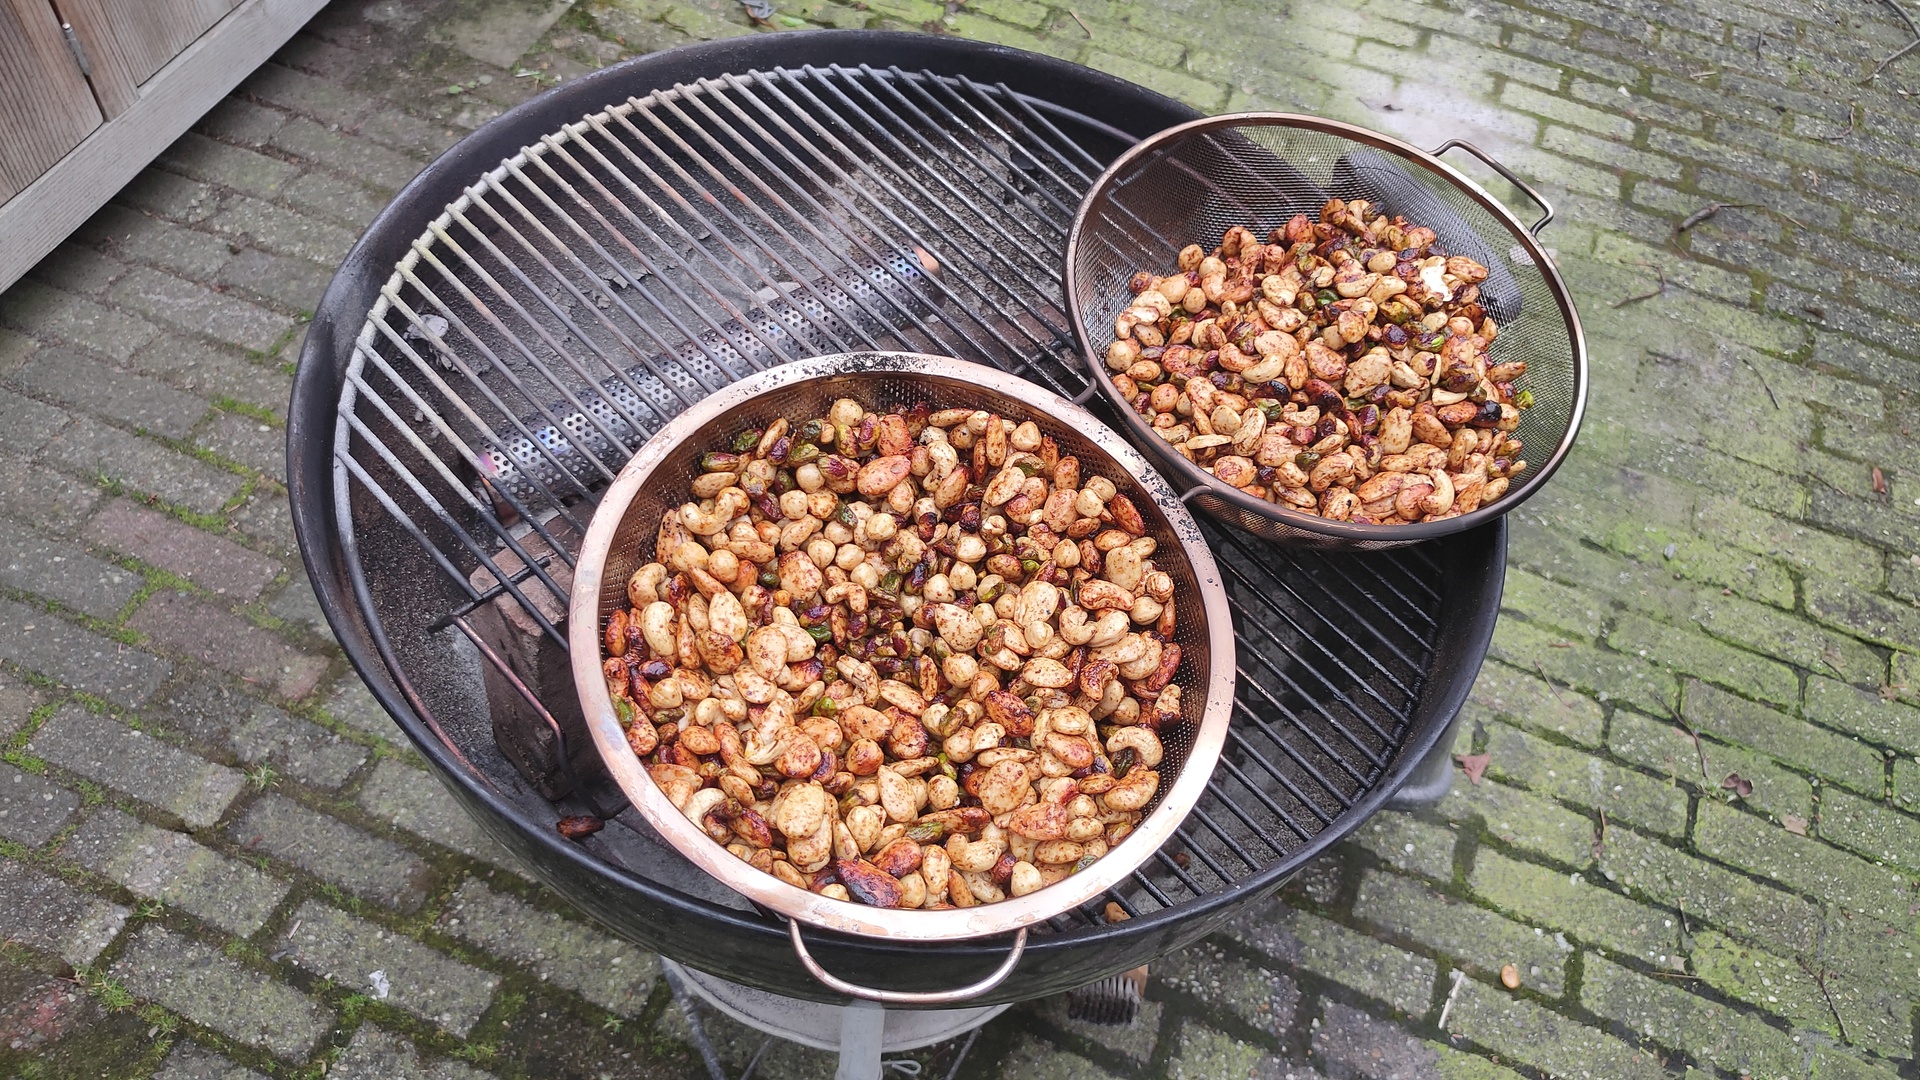
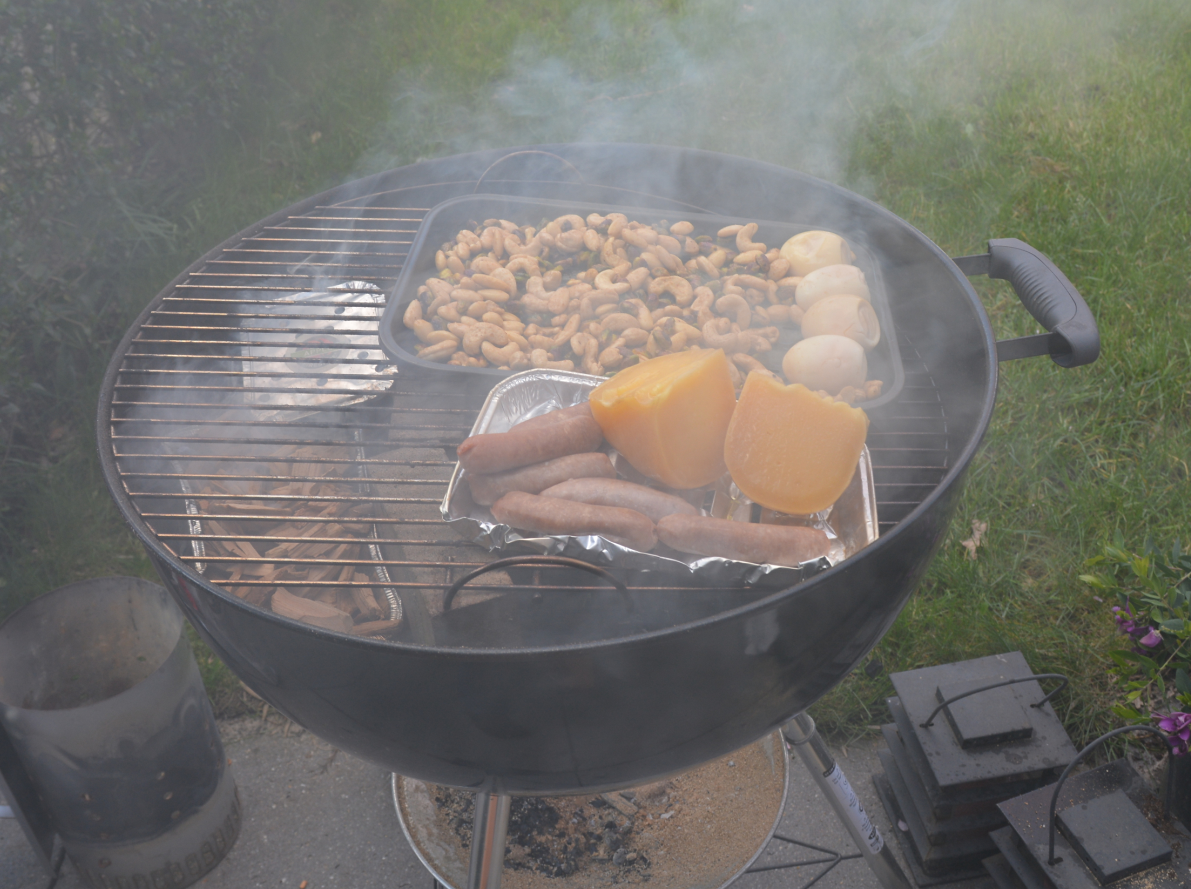
I use this one to do a fast steak (below more about this),smoking nuts and pizza.
Use a lid to hold some of the moisture.
Use a line of bricks though the middle to create a little cold/hot zone. (See pictures)
Buy a second grid/grate with a easy accessible opening. I’ve used an angle grinder to open a part of the grid. This allows easy access to the coals.
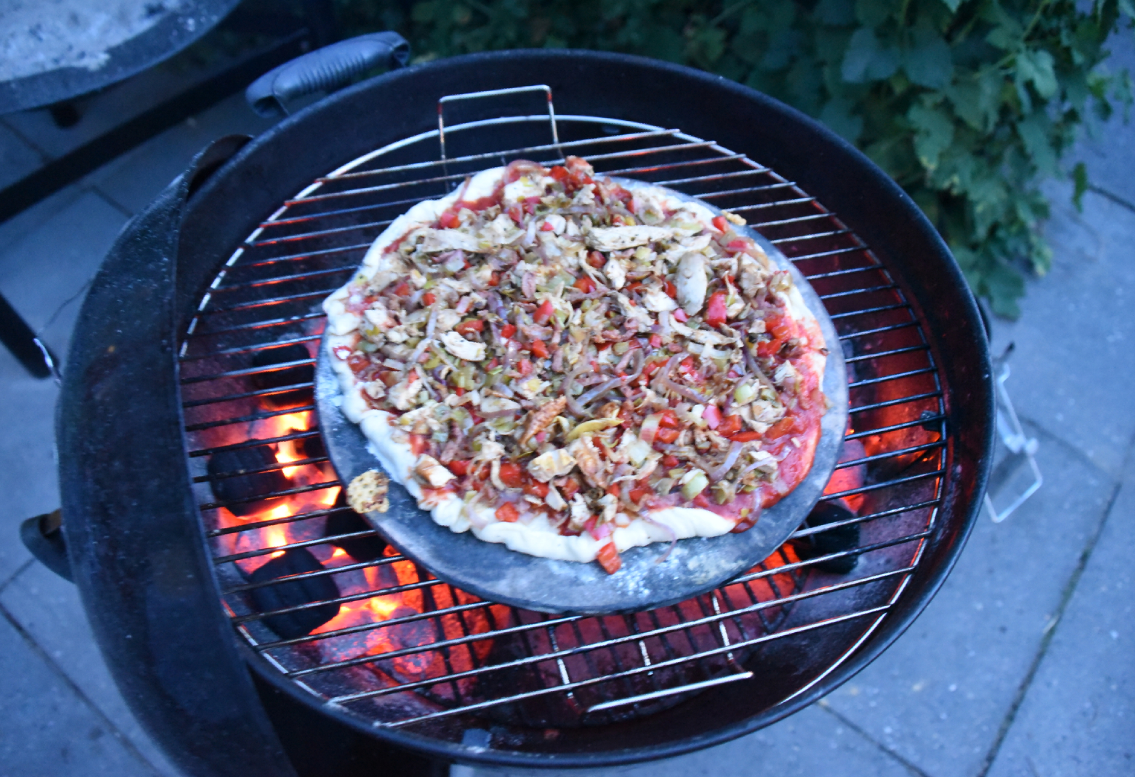
When making pizza, use a stone slate, and lay your coals at the side, in a horseshoe fashion. Some people say .. crank the temperature up to 400 something degrees. Far to high to my liking .. 200 is enough
Tomahawk with a tray below it, brick divider ( indirect / direct part )
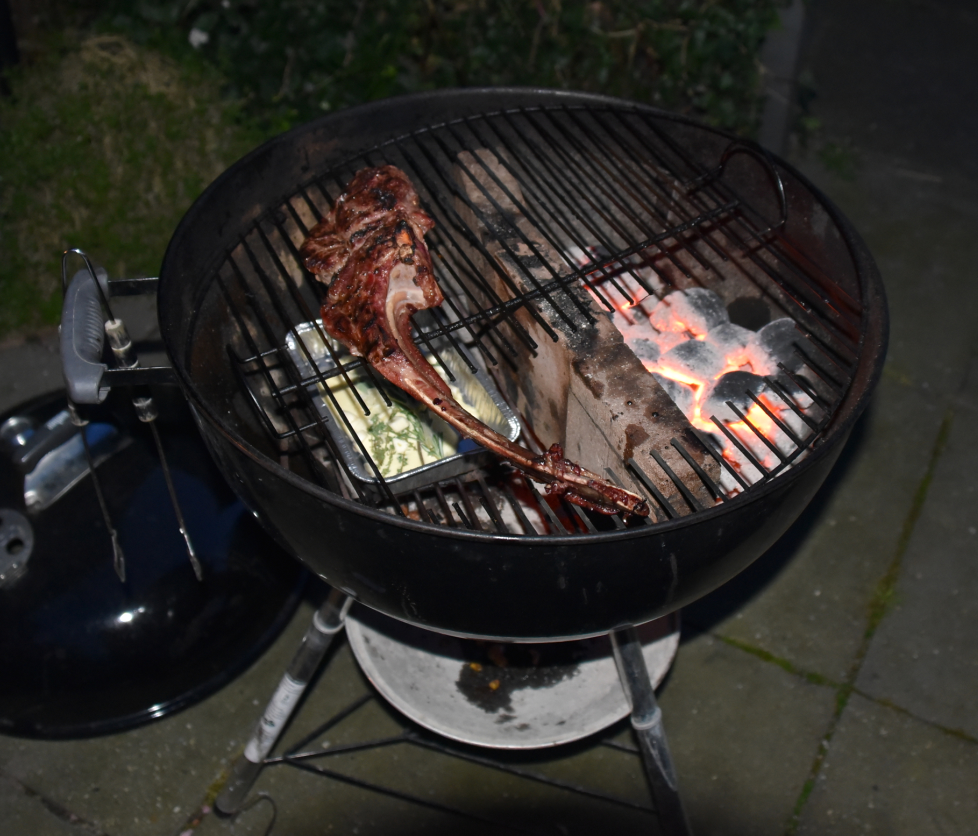
Cold smoked salmon using a cold smoke generator (filled with wood dust)
Pizza on a stone slate, i use this slate also for Smoked Chocolate Chip Cookies !
Smoked nuts, cheese sausages and eggs.
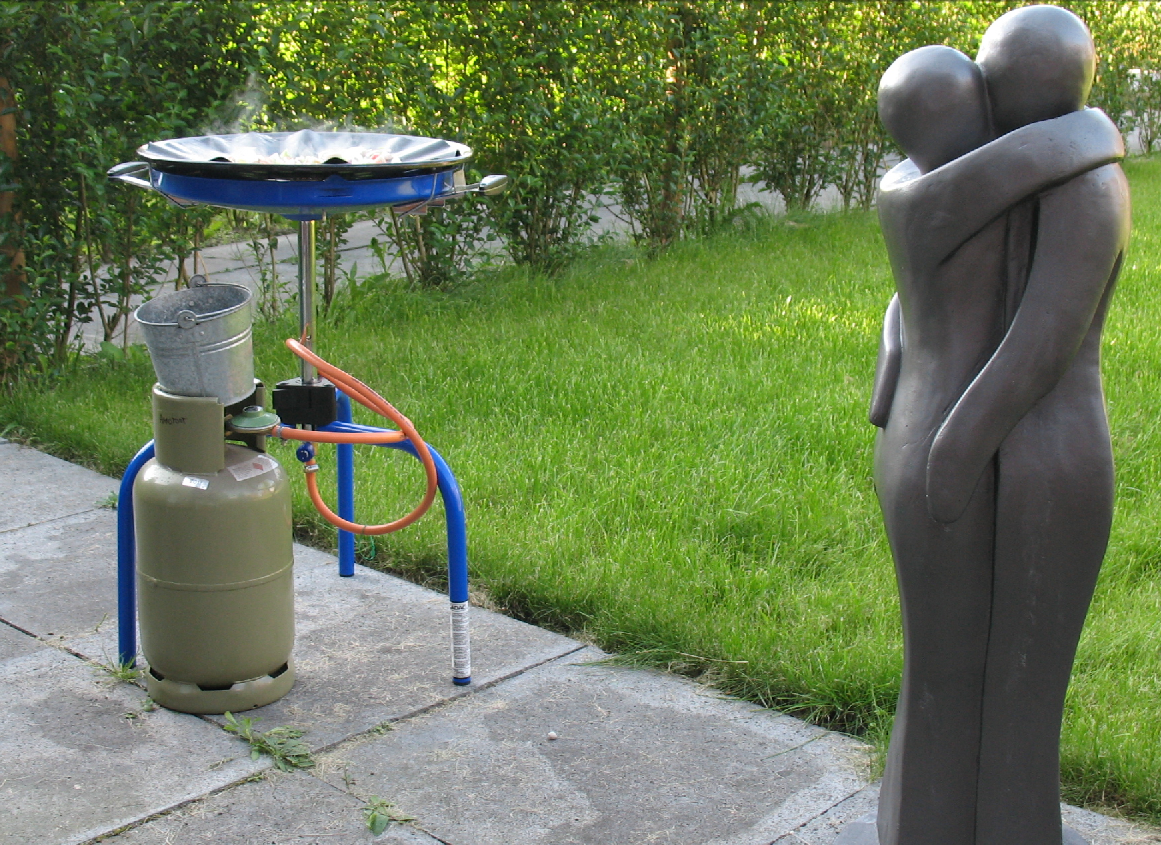
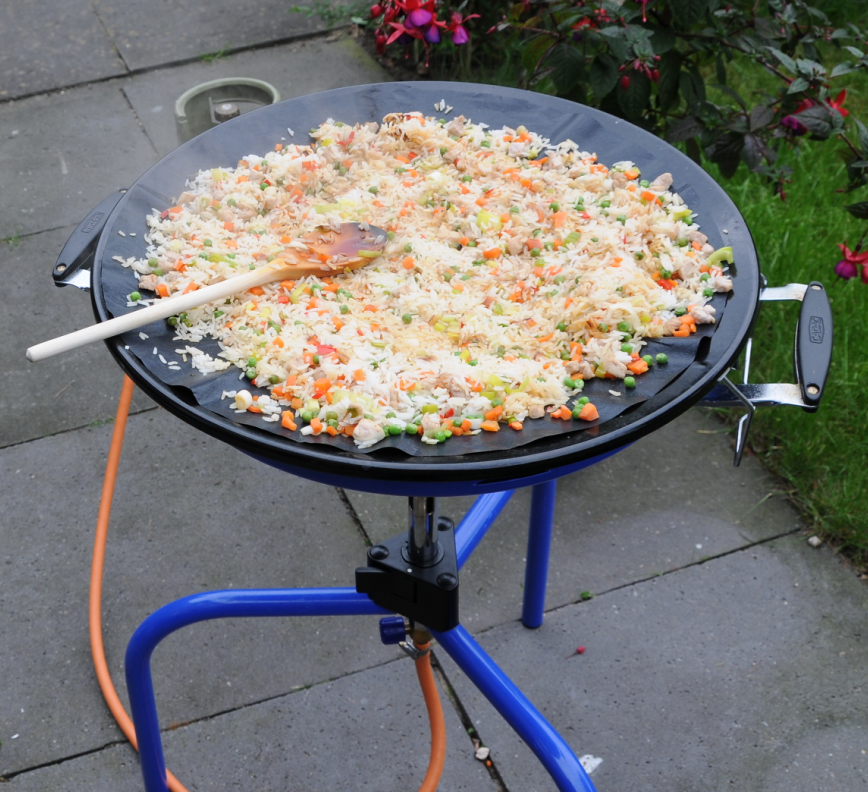
Skottle Braai:
This one is perfect for fried rice, meats/vegetables which need fluids. (Some satay/chinese stirfries or small piece meat like Shawarma.
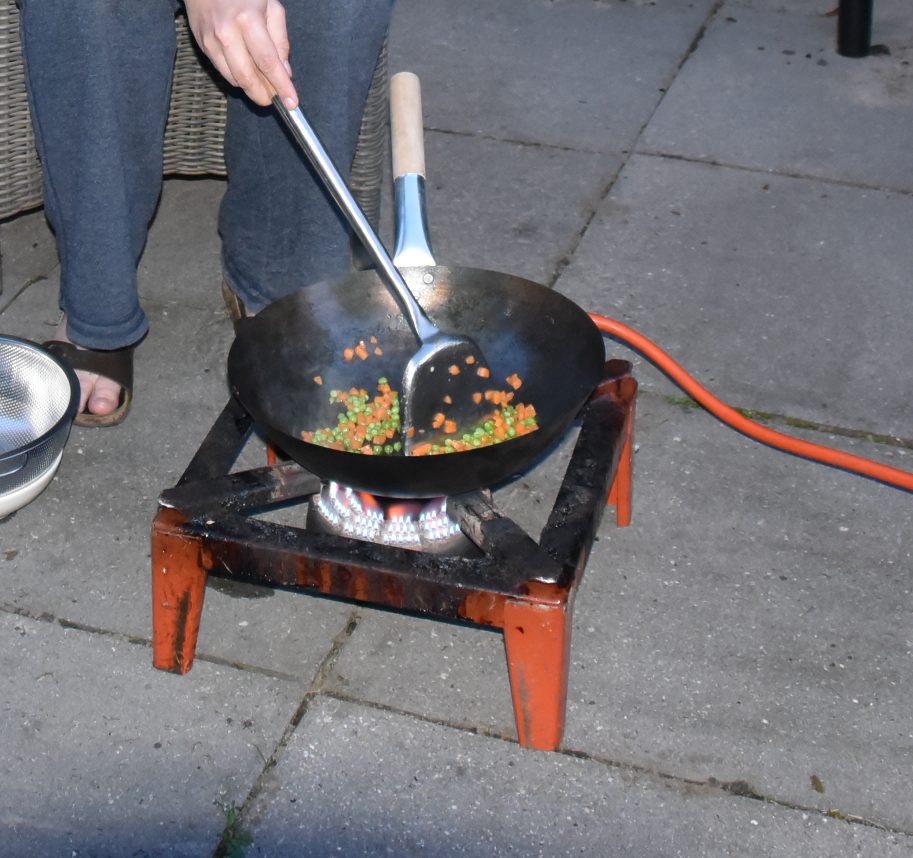
Another way to stir fry is with our beer brew burner
For all things above:
Prepare everything, get your timing right. Sometimes you are smoking for 6+ hours, but when you forgot to make a marinade, getting things sliced or need a product you dont have/forgot/gone bad .. (i’ve been there)
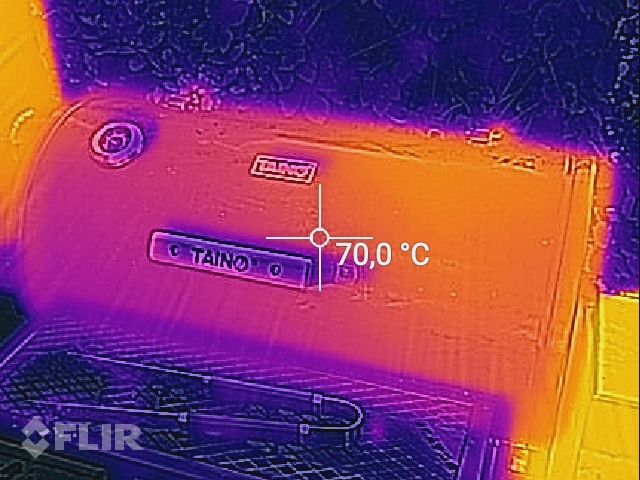
For the offset smoker .. i don’t use tuning plates .. and probably never will. Tuning plates can be used to get your smoker front to back evenly heated. This is only useful when cooking a lot of meat. I seldom do, so i use the colder part whenever things are going too fast.
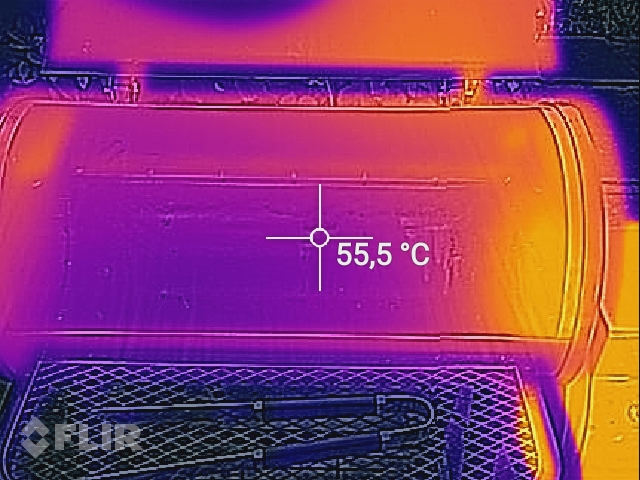
I even used a Flir camera to check the temperature distribution
Using a lot of heat? Don´t put pepper on your meat. It will burn, just wait when it’s on your plate. Salt is fine.
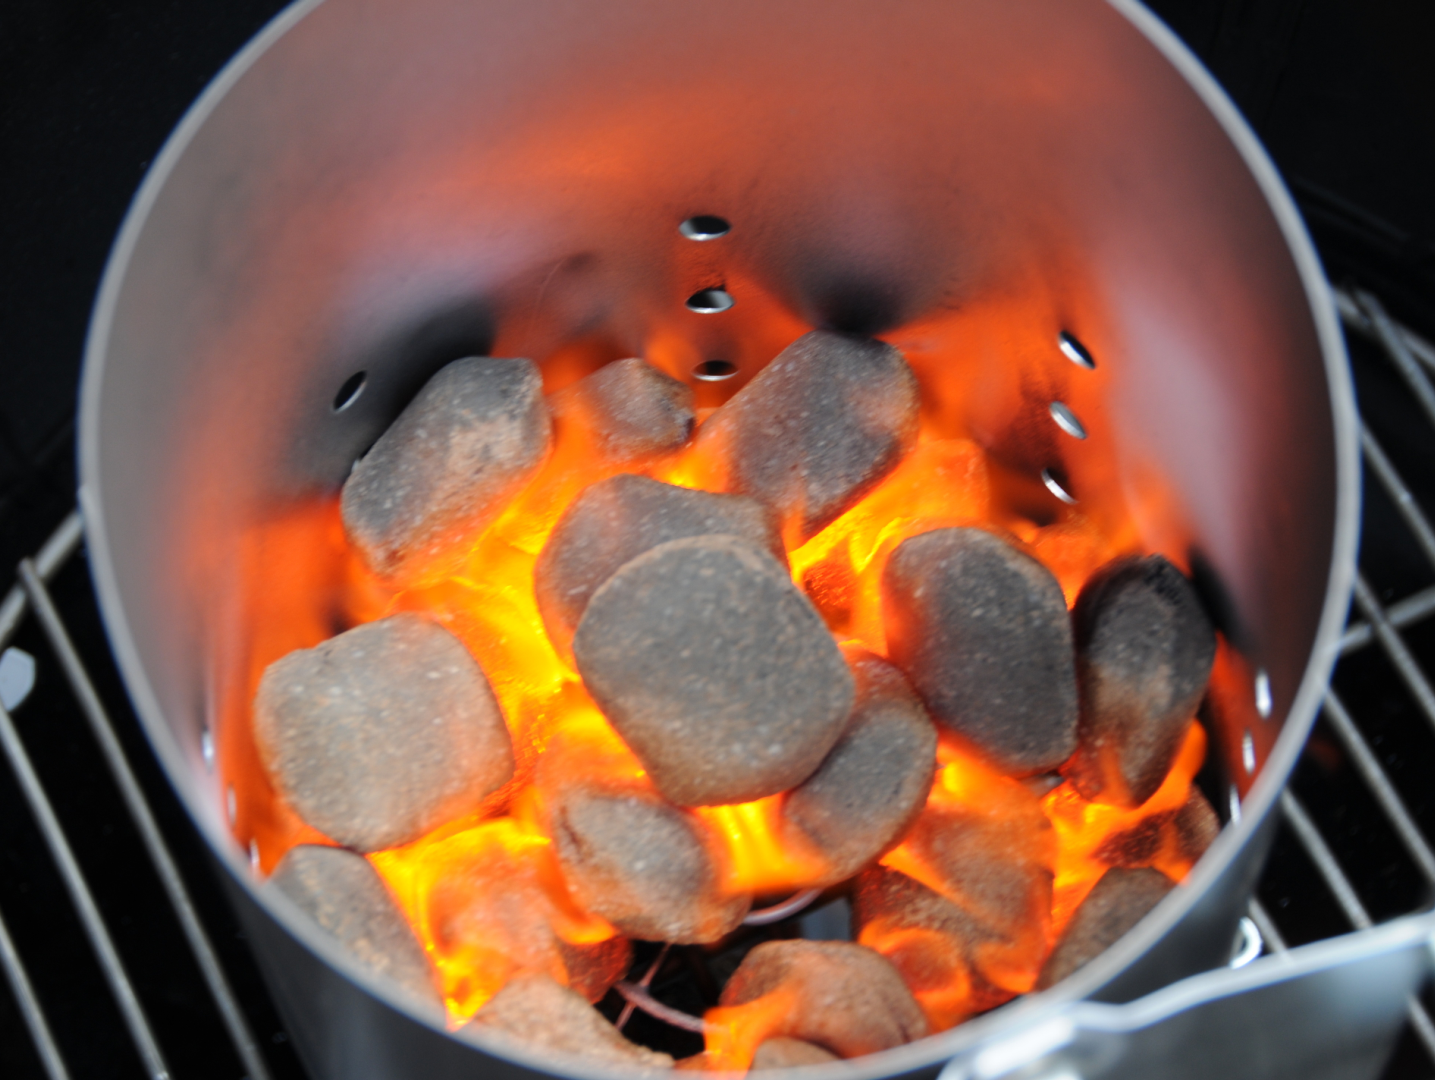
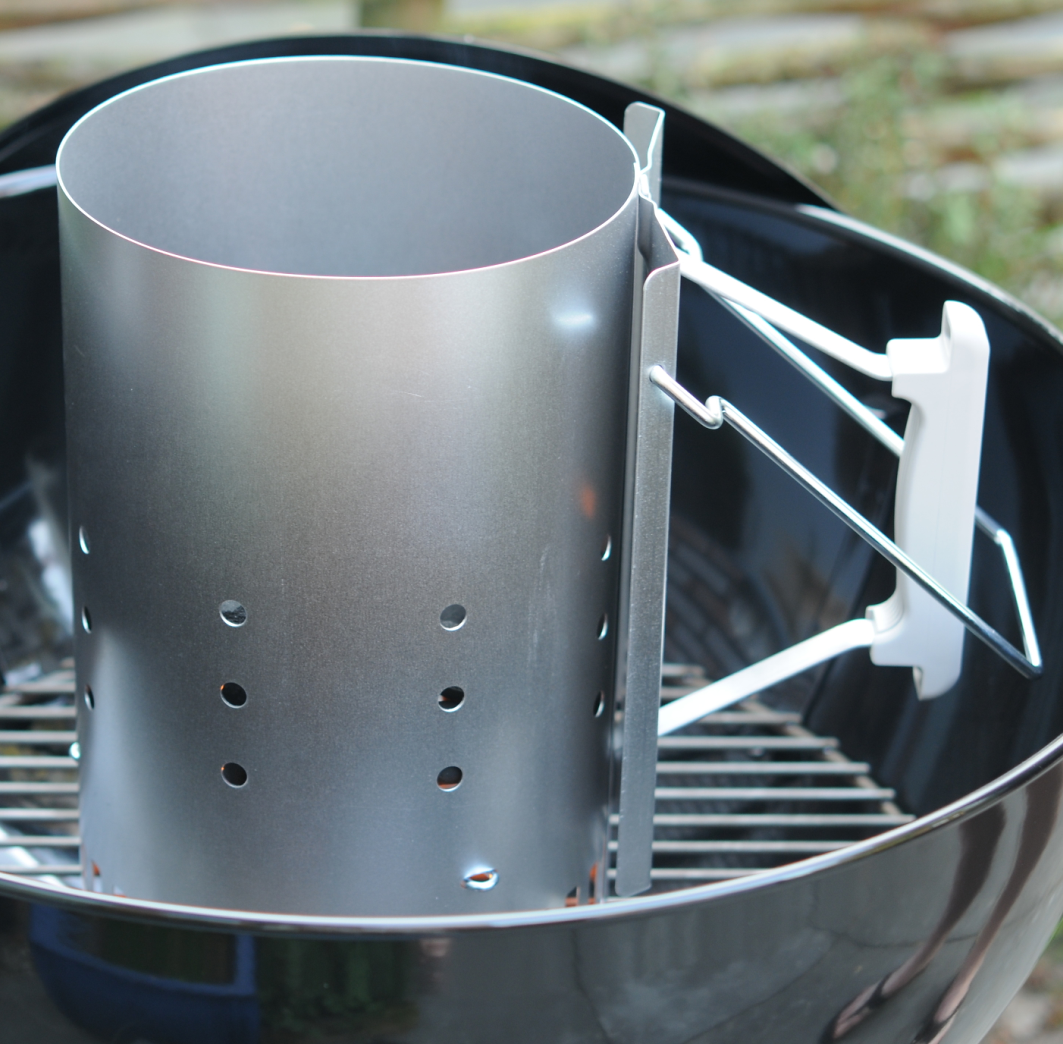
Using briquettes or charcoal? Briquettes, when properly lighted, doesn´t give you a nasty smoke as plain charcoal, charcoal needs more time to burn properly. Briquettes will last for a long time. (See below tools) Coconut briquettes are perfect for slow cooking .. they burn for a long time. Use a chimney and wait until all briquettes are white!
Look at the smoke, it should be thin blue-ish. Not thick or white or even black. Except for smoking woods.
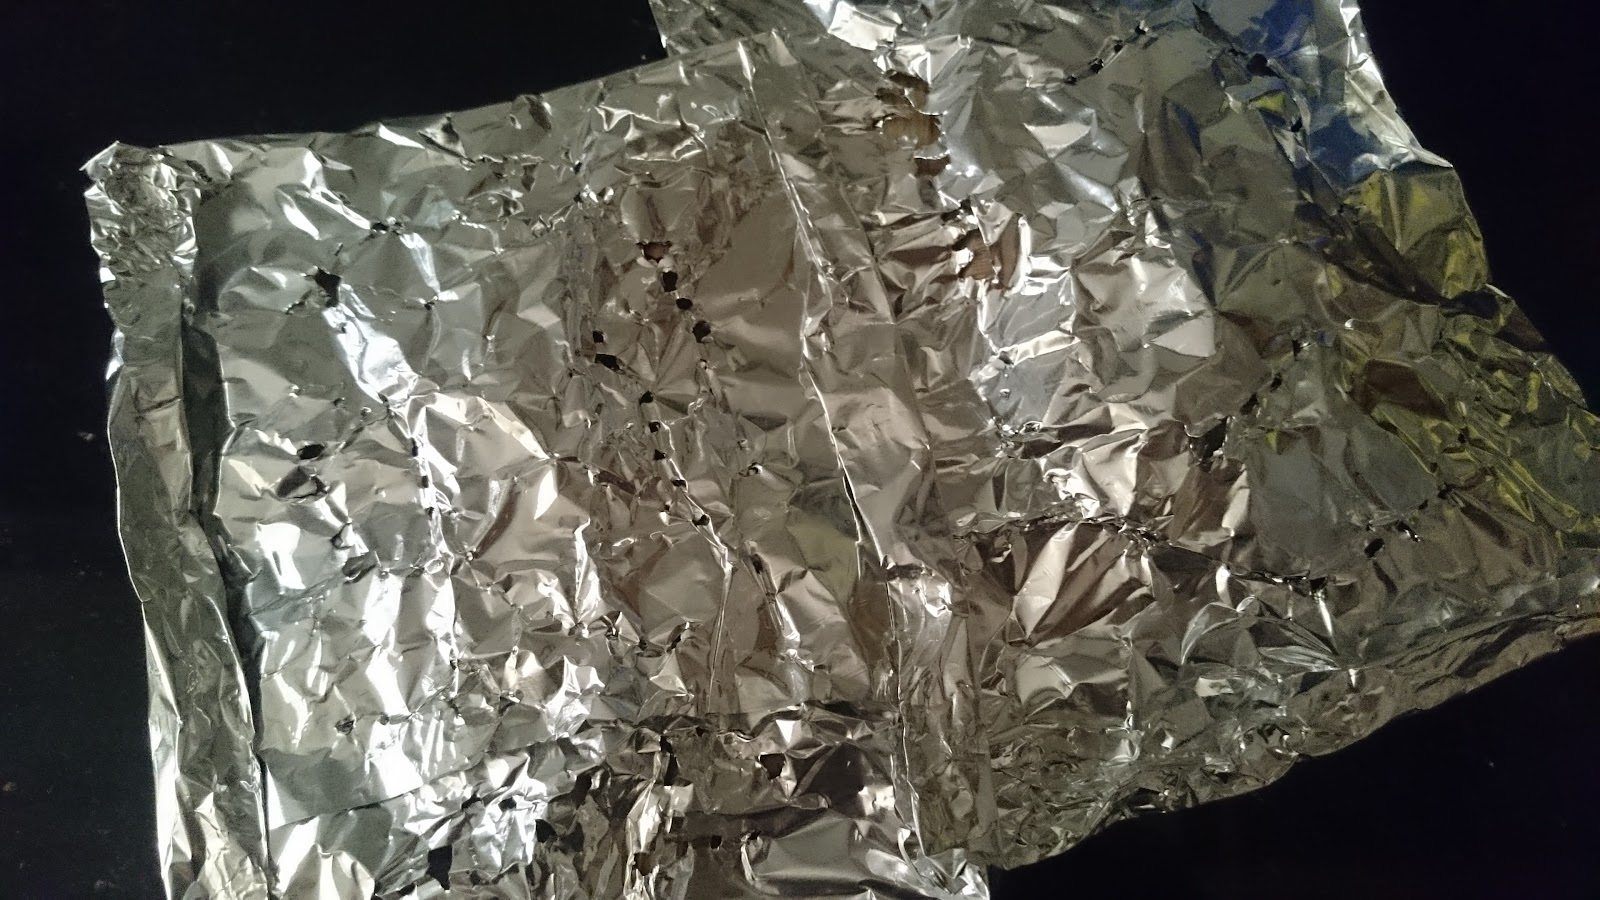
Smoke wood: I’ve tried a lot of smokewoods. Cherry, wine vines, Apple, Pear, hickory, oak, maple and more. Some people and even packages say: “Soak for 30 minutes in water” Well i don’t, then the smoke is mostly water vapor. If you make a neat aluminum foil package with a few little holes, it won’t burst into flames and produces a nice amount of smoke which lasts a while.
Pack tightly and only a few small holes
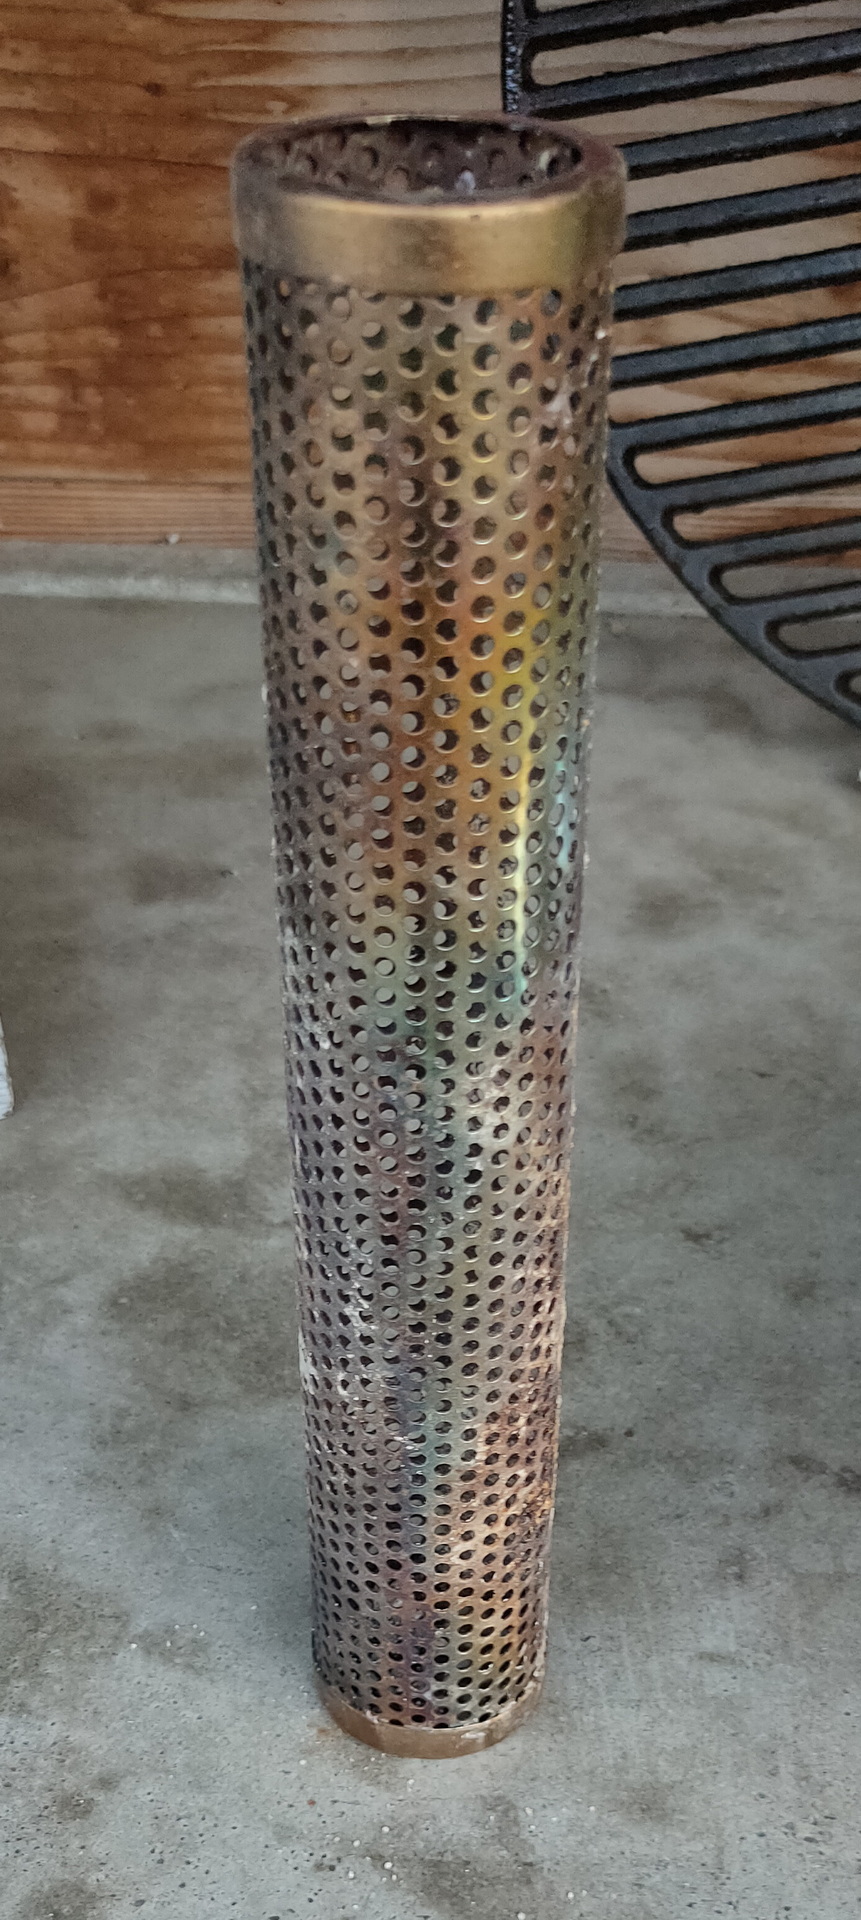
Tube wood chip holder
Don’t use accelerants like spirit. It gives a nasty taste/smell.
Use different plates and tools for raw and cooked meat.
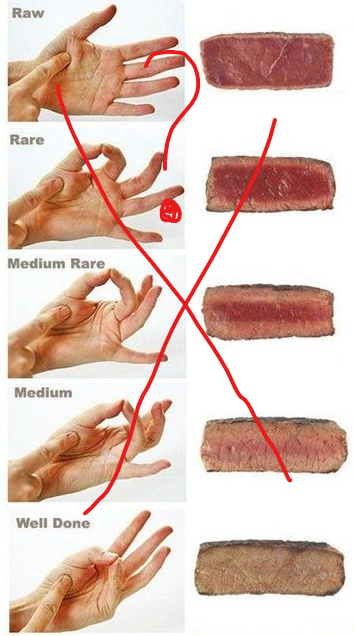
Look at the core temperature, for example for beef
Rare: 50 to 52 degrees
Medium rare: 55 to 58 degrees
Medium: 60 to 63 degrees
Medium Well: 65 to 67 degrees
Well done: 70 to 80 degrees
Stop before it reaches the desired temperature. Wrap in foil and wait a few minutes. The temperature will rise a few degrees
Trying to get your temperature up again by adding briquettes or wood? Sometimes fuel is getting low and temperature is dropping. I seldom but briquettes or wood directly in the fire, it wil give a nasty smoke when it start burning .. I use the chimney to get it burning right. Then i will place it in the offset chamber.
Using a drip bucket? Or want to use more moisture for your meat? Heat some apple juice or plain water, and put this in a container below the meat. (See the tomahawk picture above)
The hand trick to check your meat does not really work. A IT consultant and a bricklayer have different hands, and muscles. 🙂 But it can be an indicator!
Tools:
Spatula, Tongs, Fork, and Basting Brush
Chimney: You need this!
Fast and easy getting your fire ready
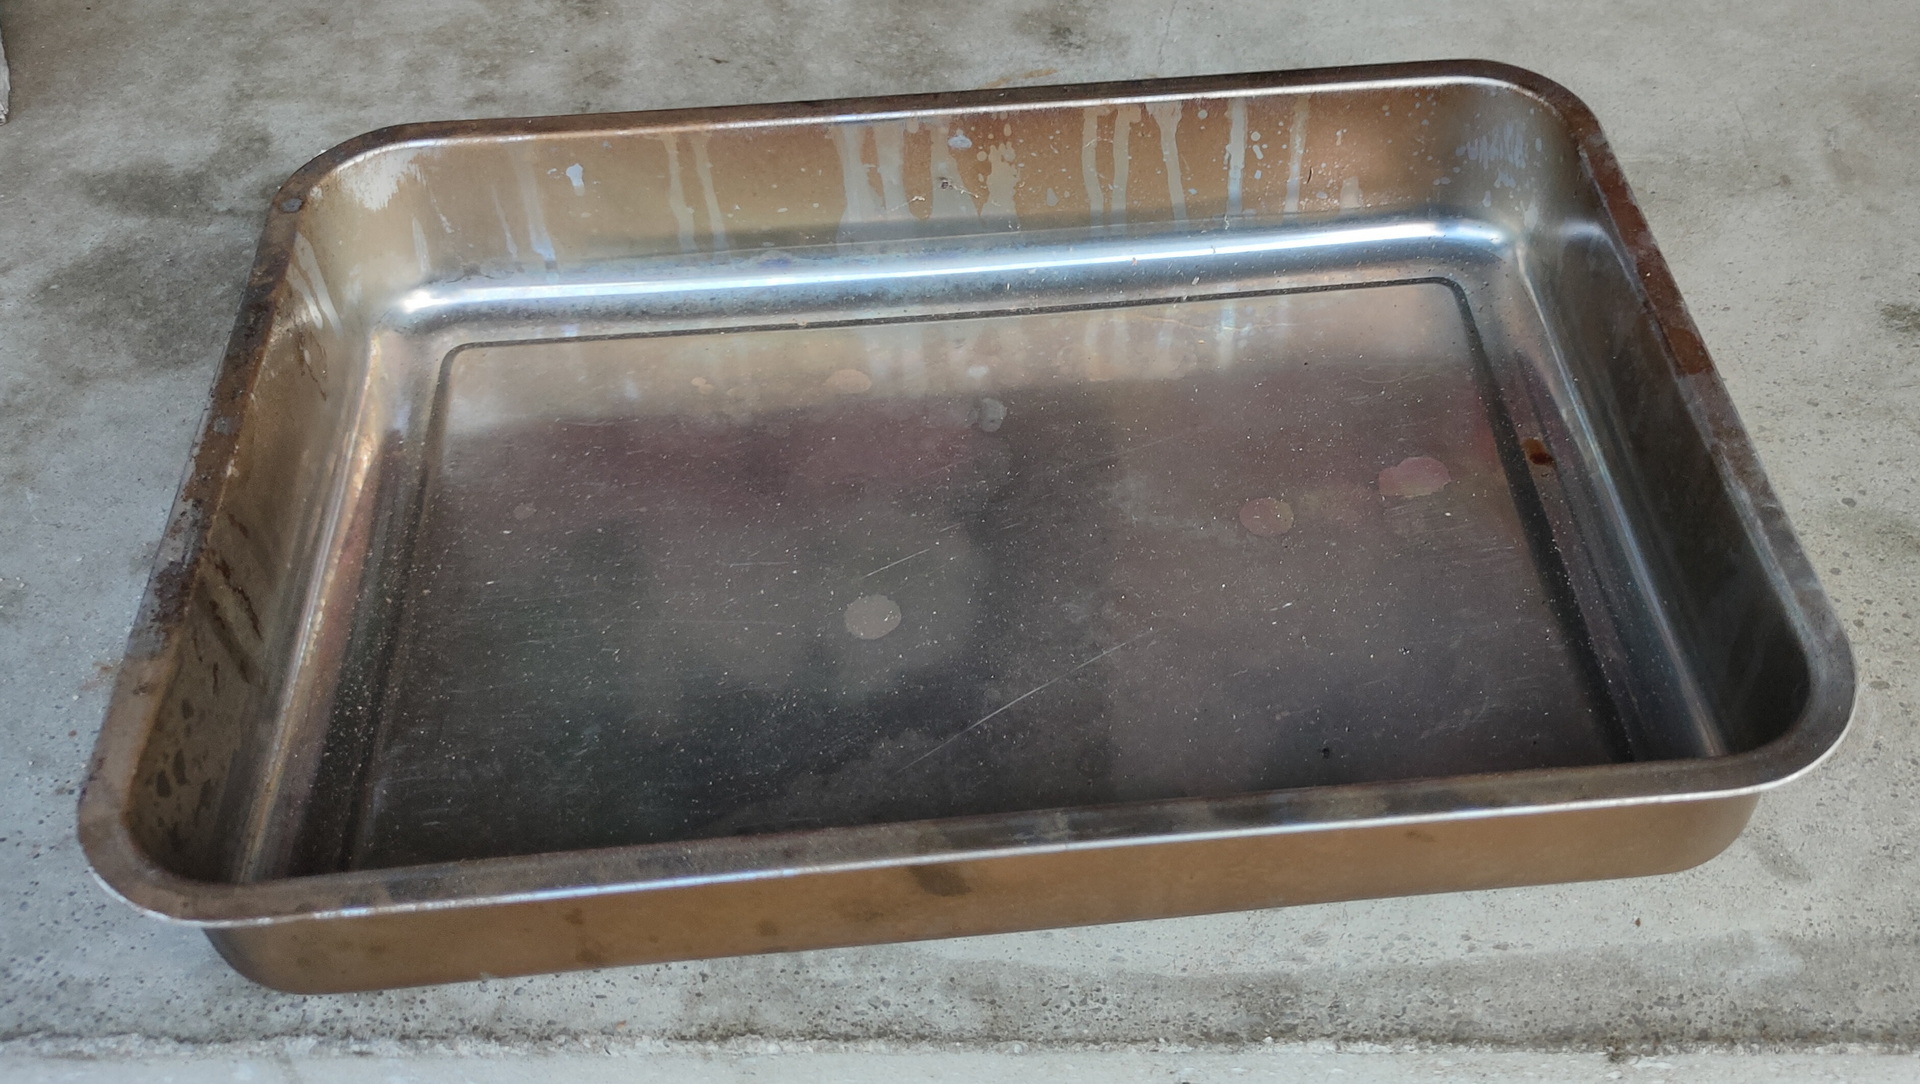
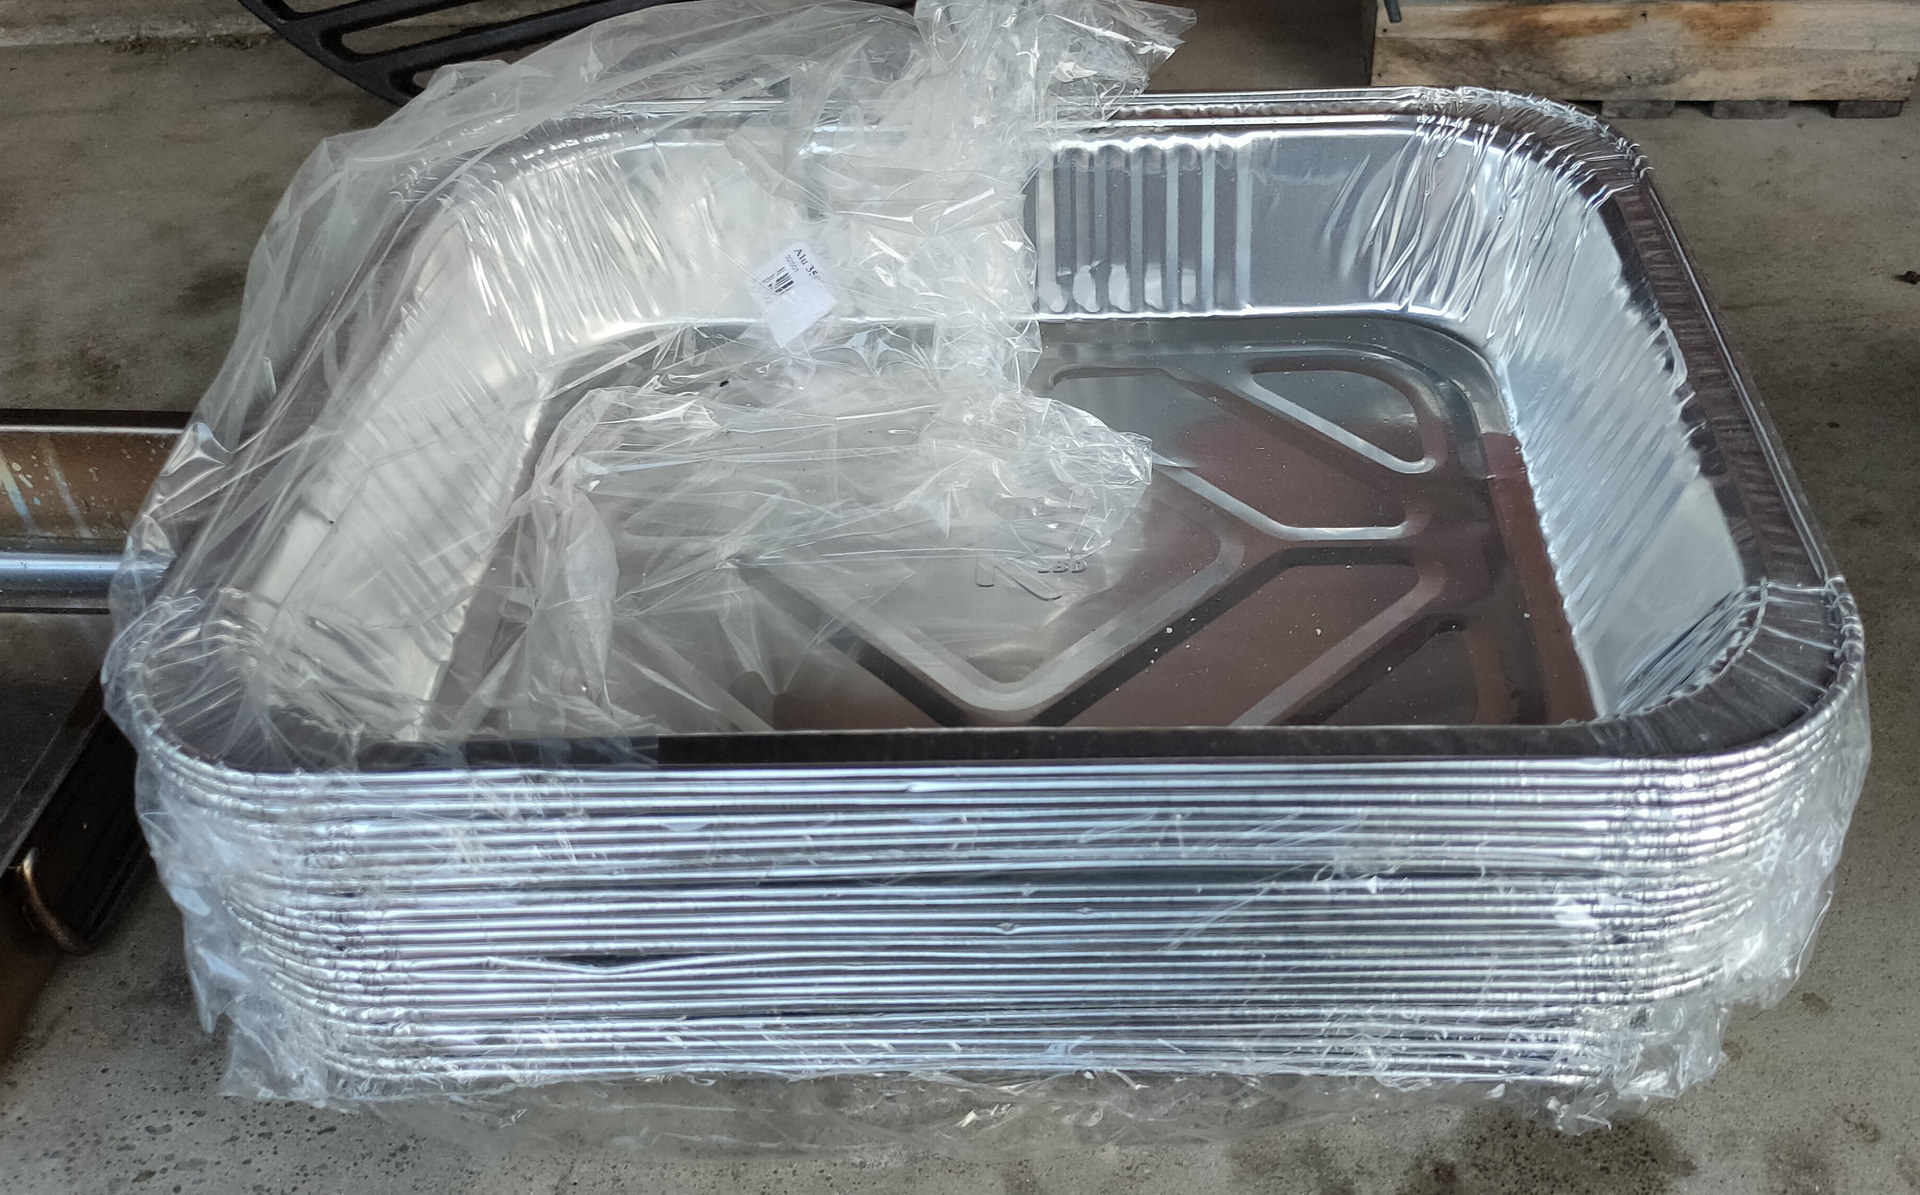
Trays and foils: Use heavy duty aluminum foil.
The open one i also used to smoke grains for beer brewing.
Beer grains
Rubs, sauces and spices: Get yourself some nice different rubs and sauces. Make your own rubs (or sauce) I will post some recipes for rubs and the smokey red wine sauce i’ve made. Remember which spices are going to burn in a dry rub. Sauce is not only to complement the meat, but you can also use it to glace the meat while cooking!
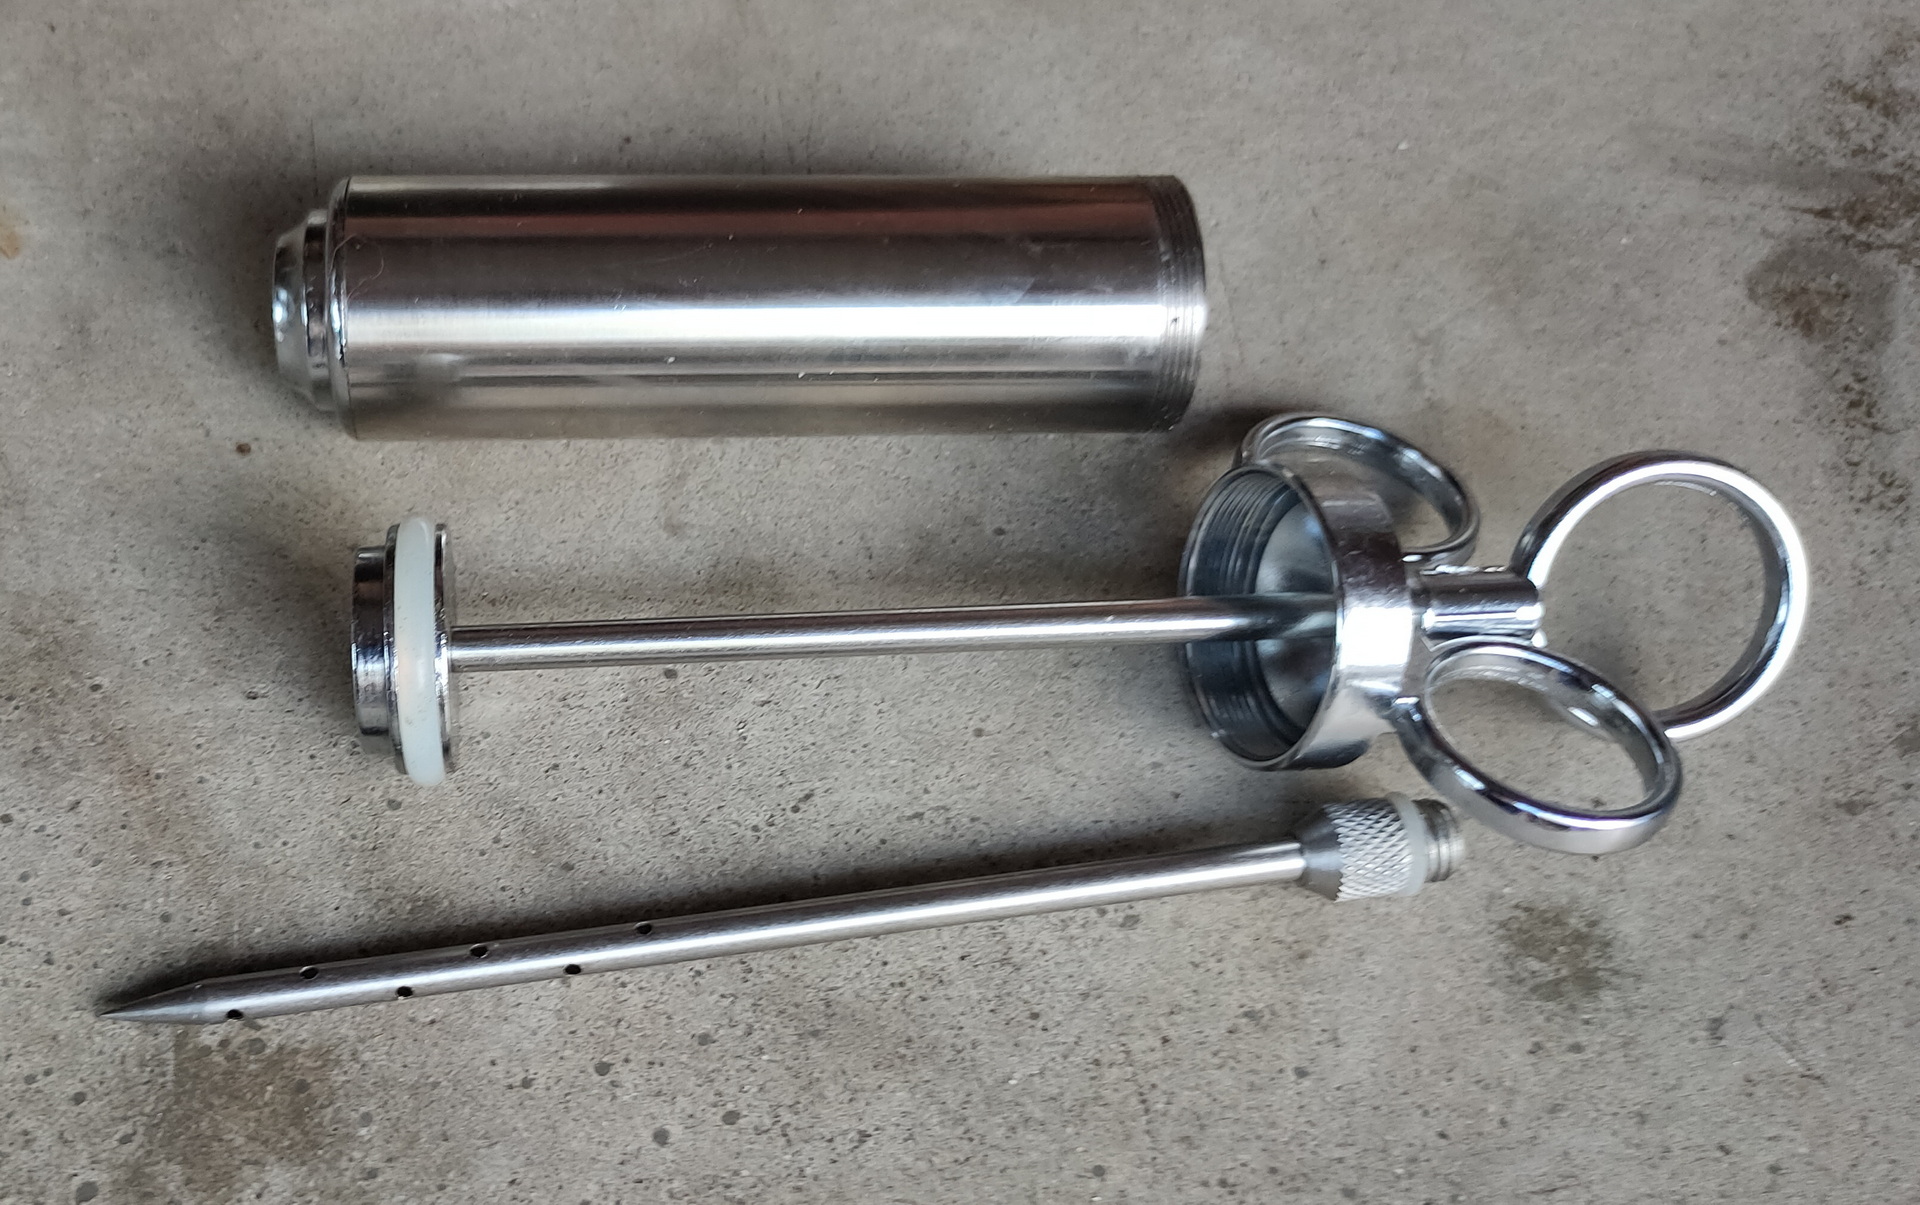
Injecting:
Injecting game stock into meat. Right a spices cabinet i build which can be turned almost 180 degrees.
Injecting meat will give it a nice flavor and tenderness.
Fire starters:
Use a starter which burns clean .. no smoke no odor
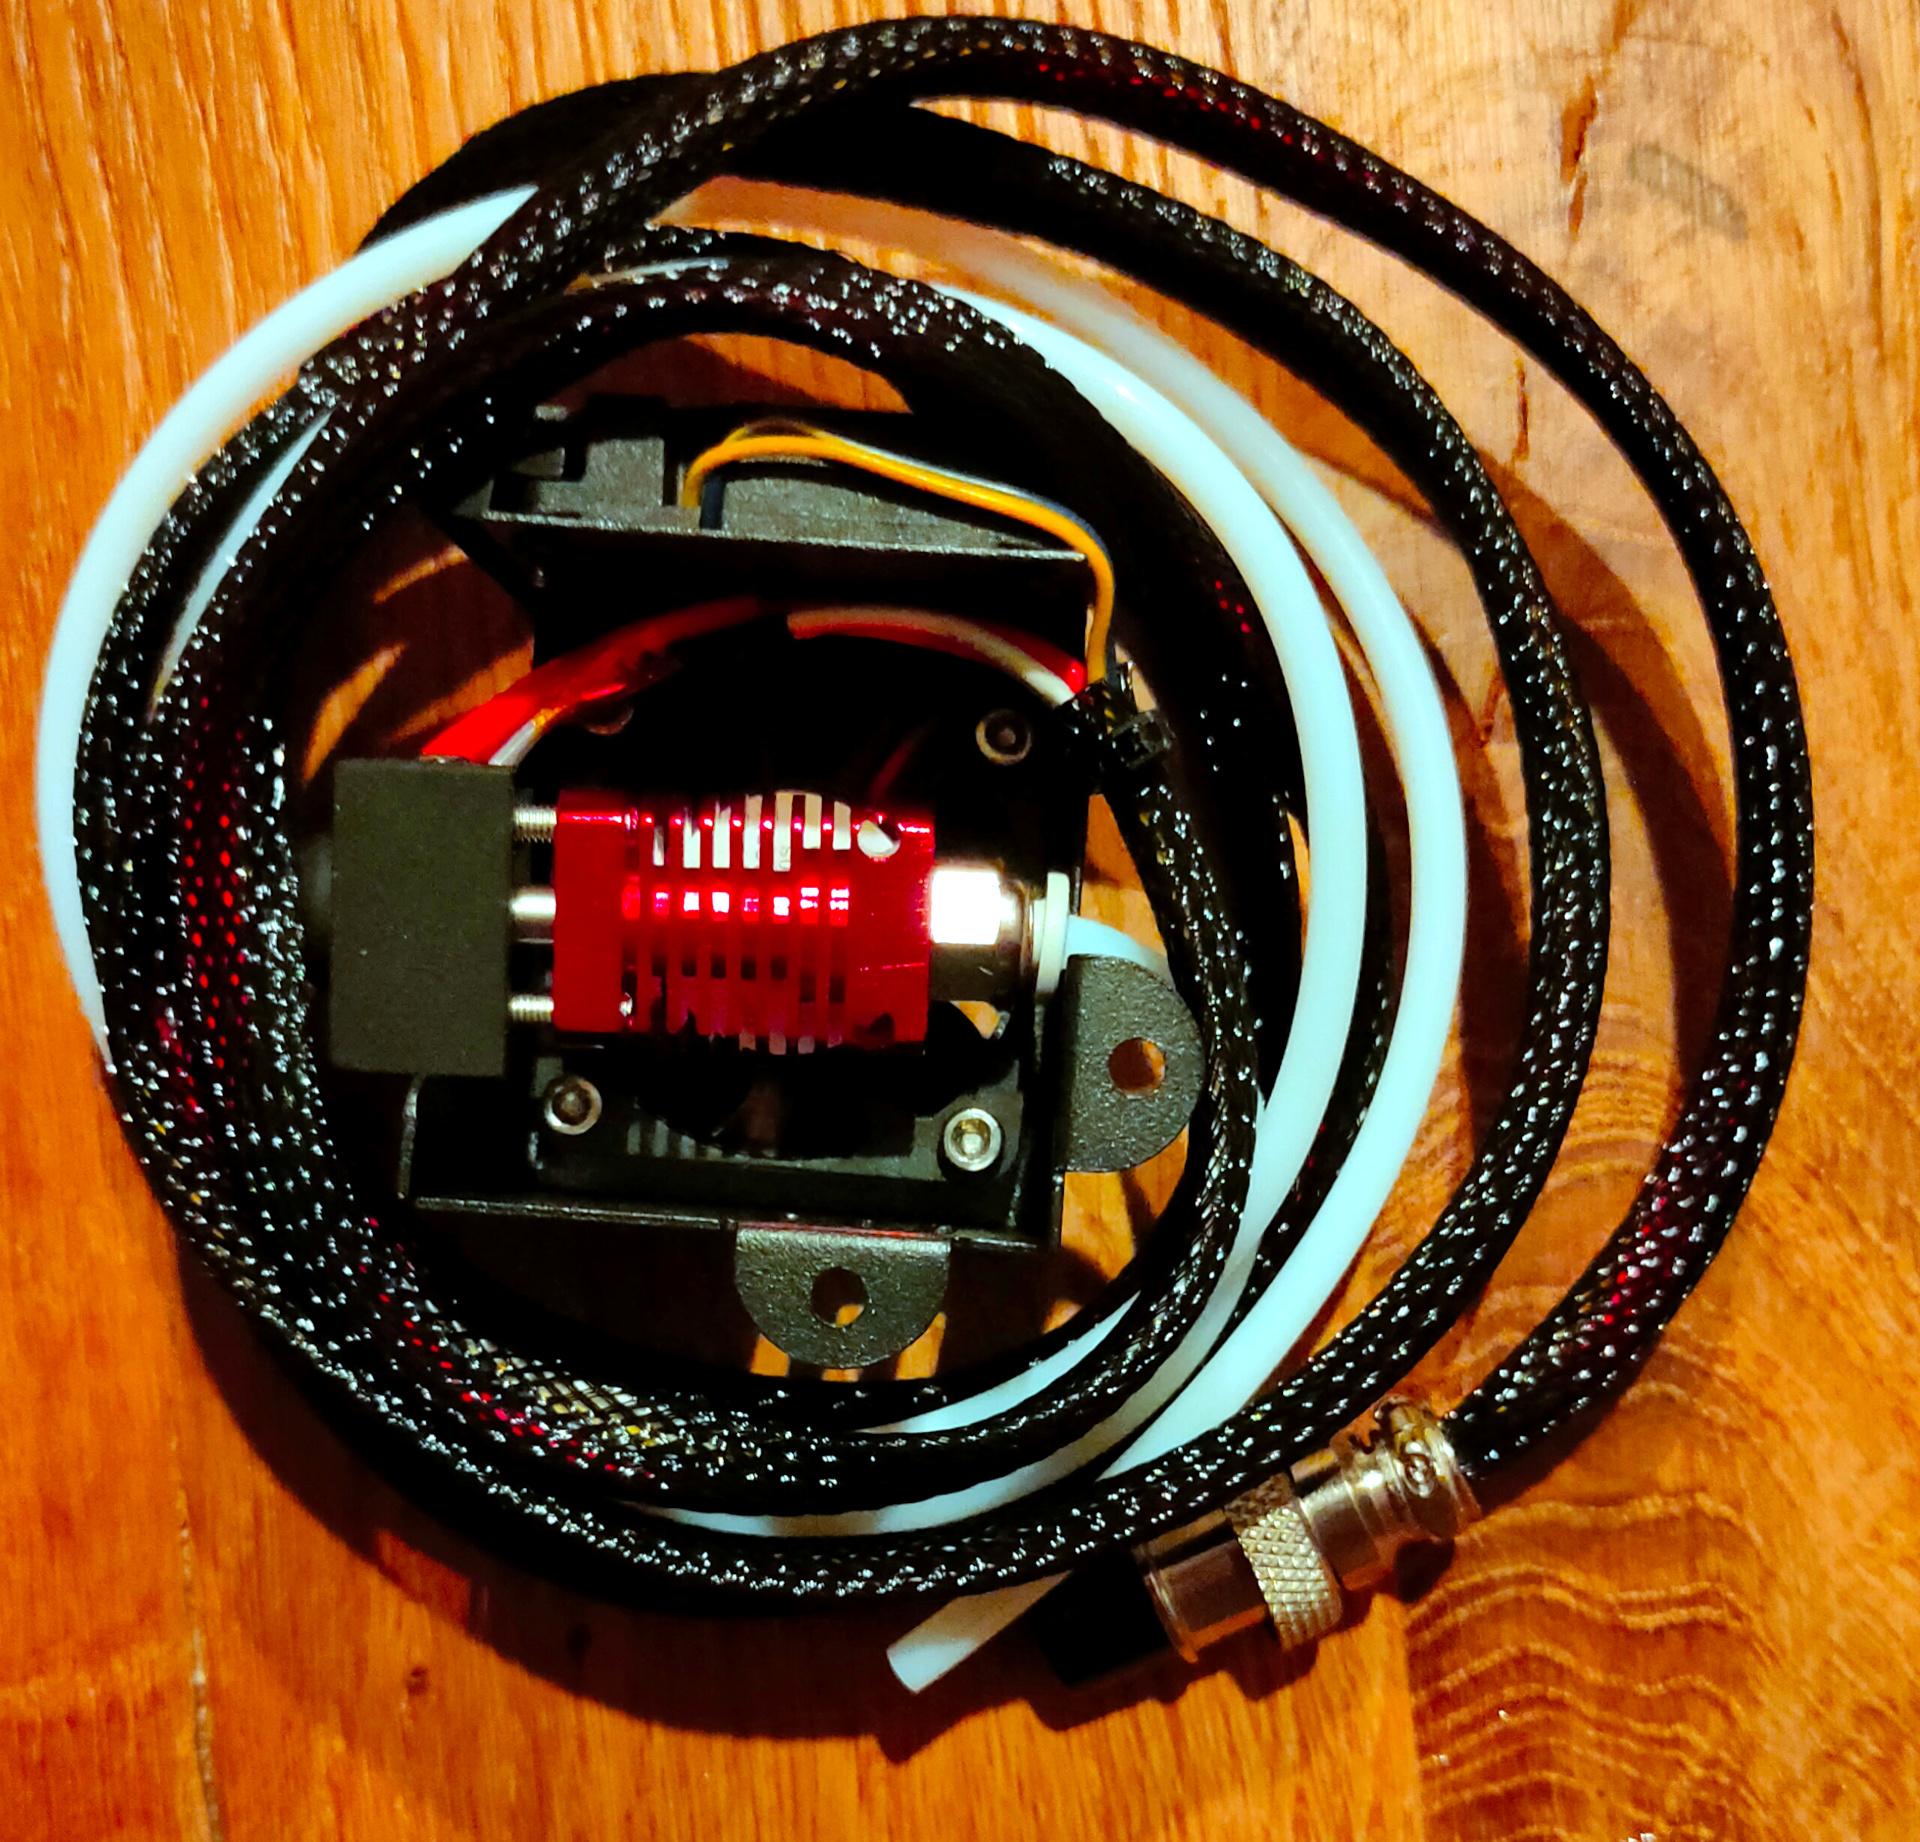
Temperature:
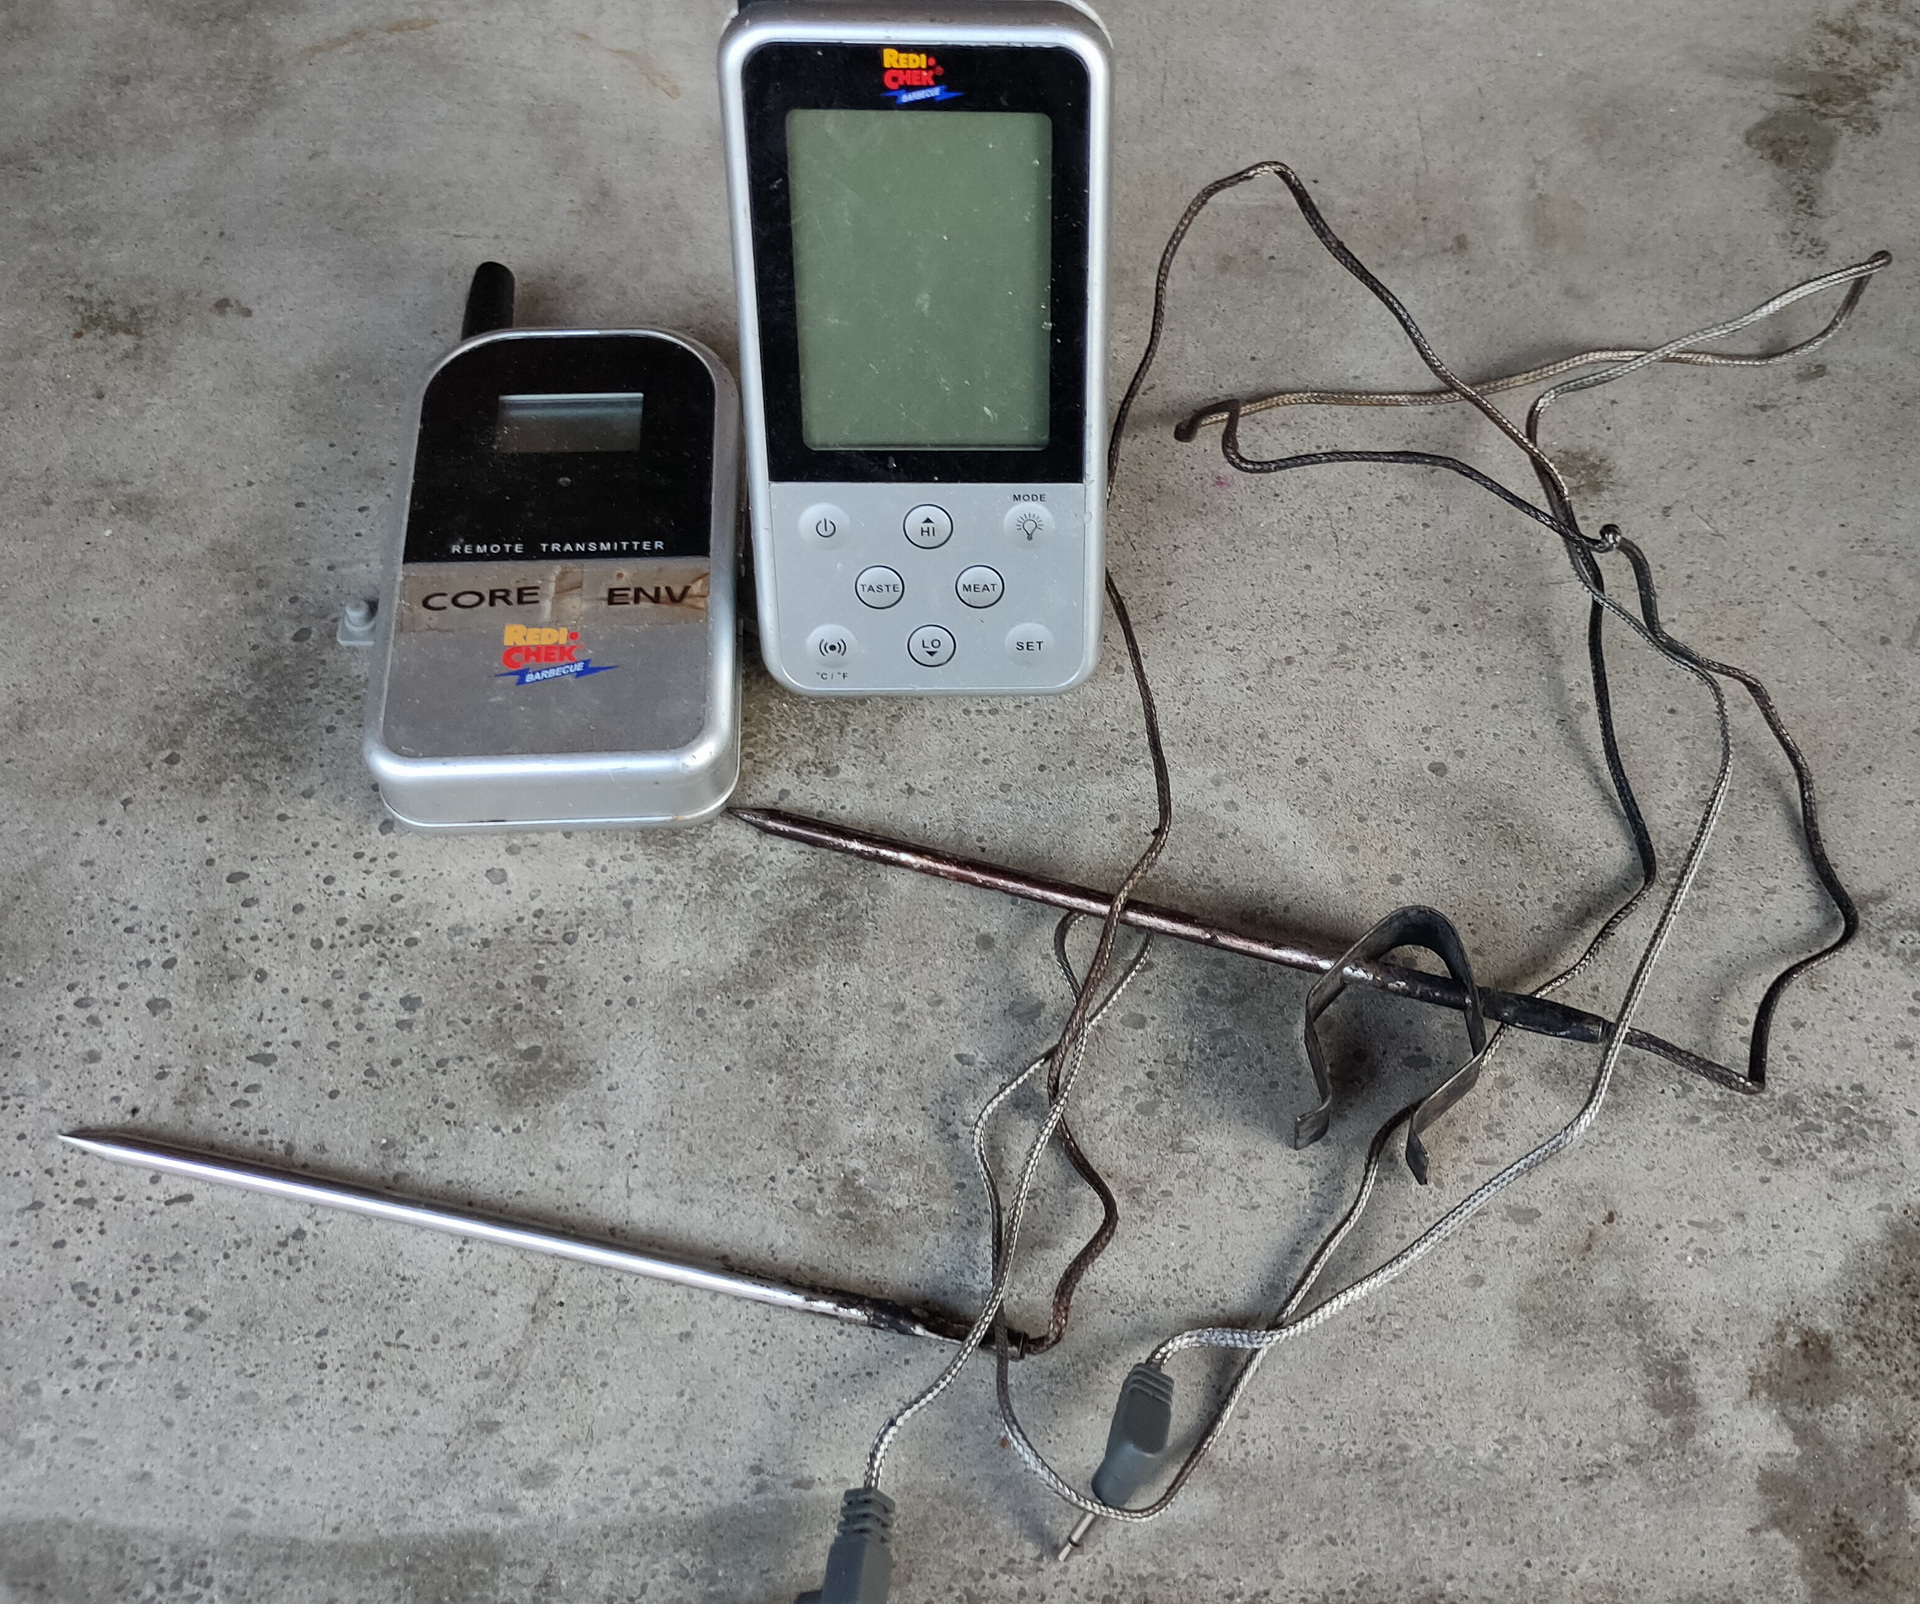
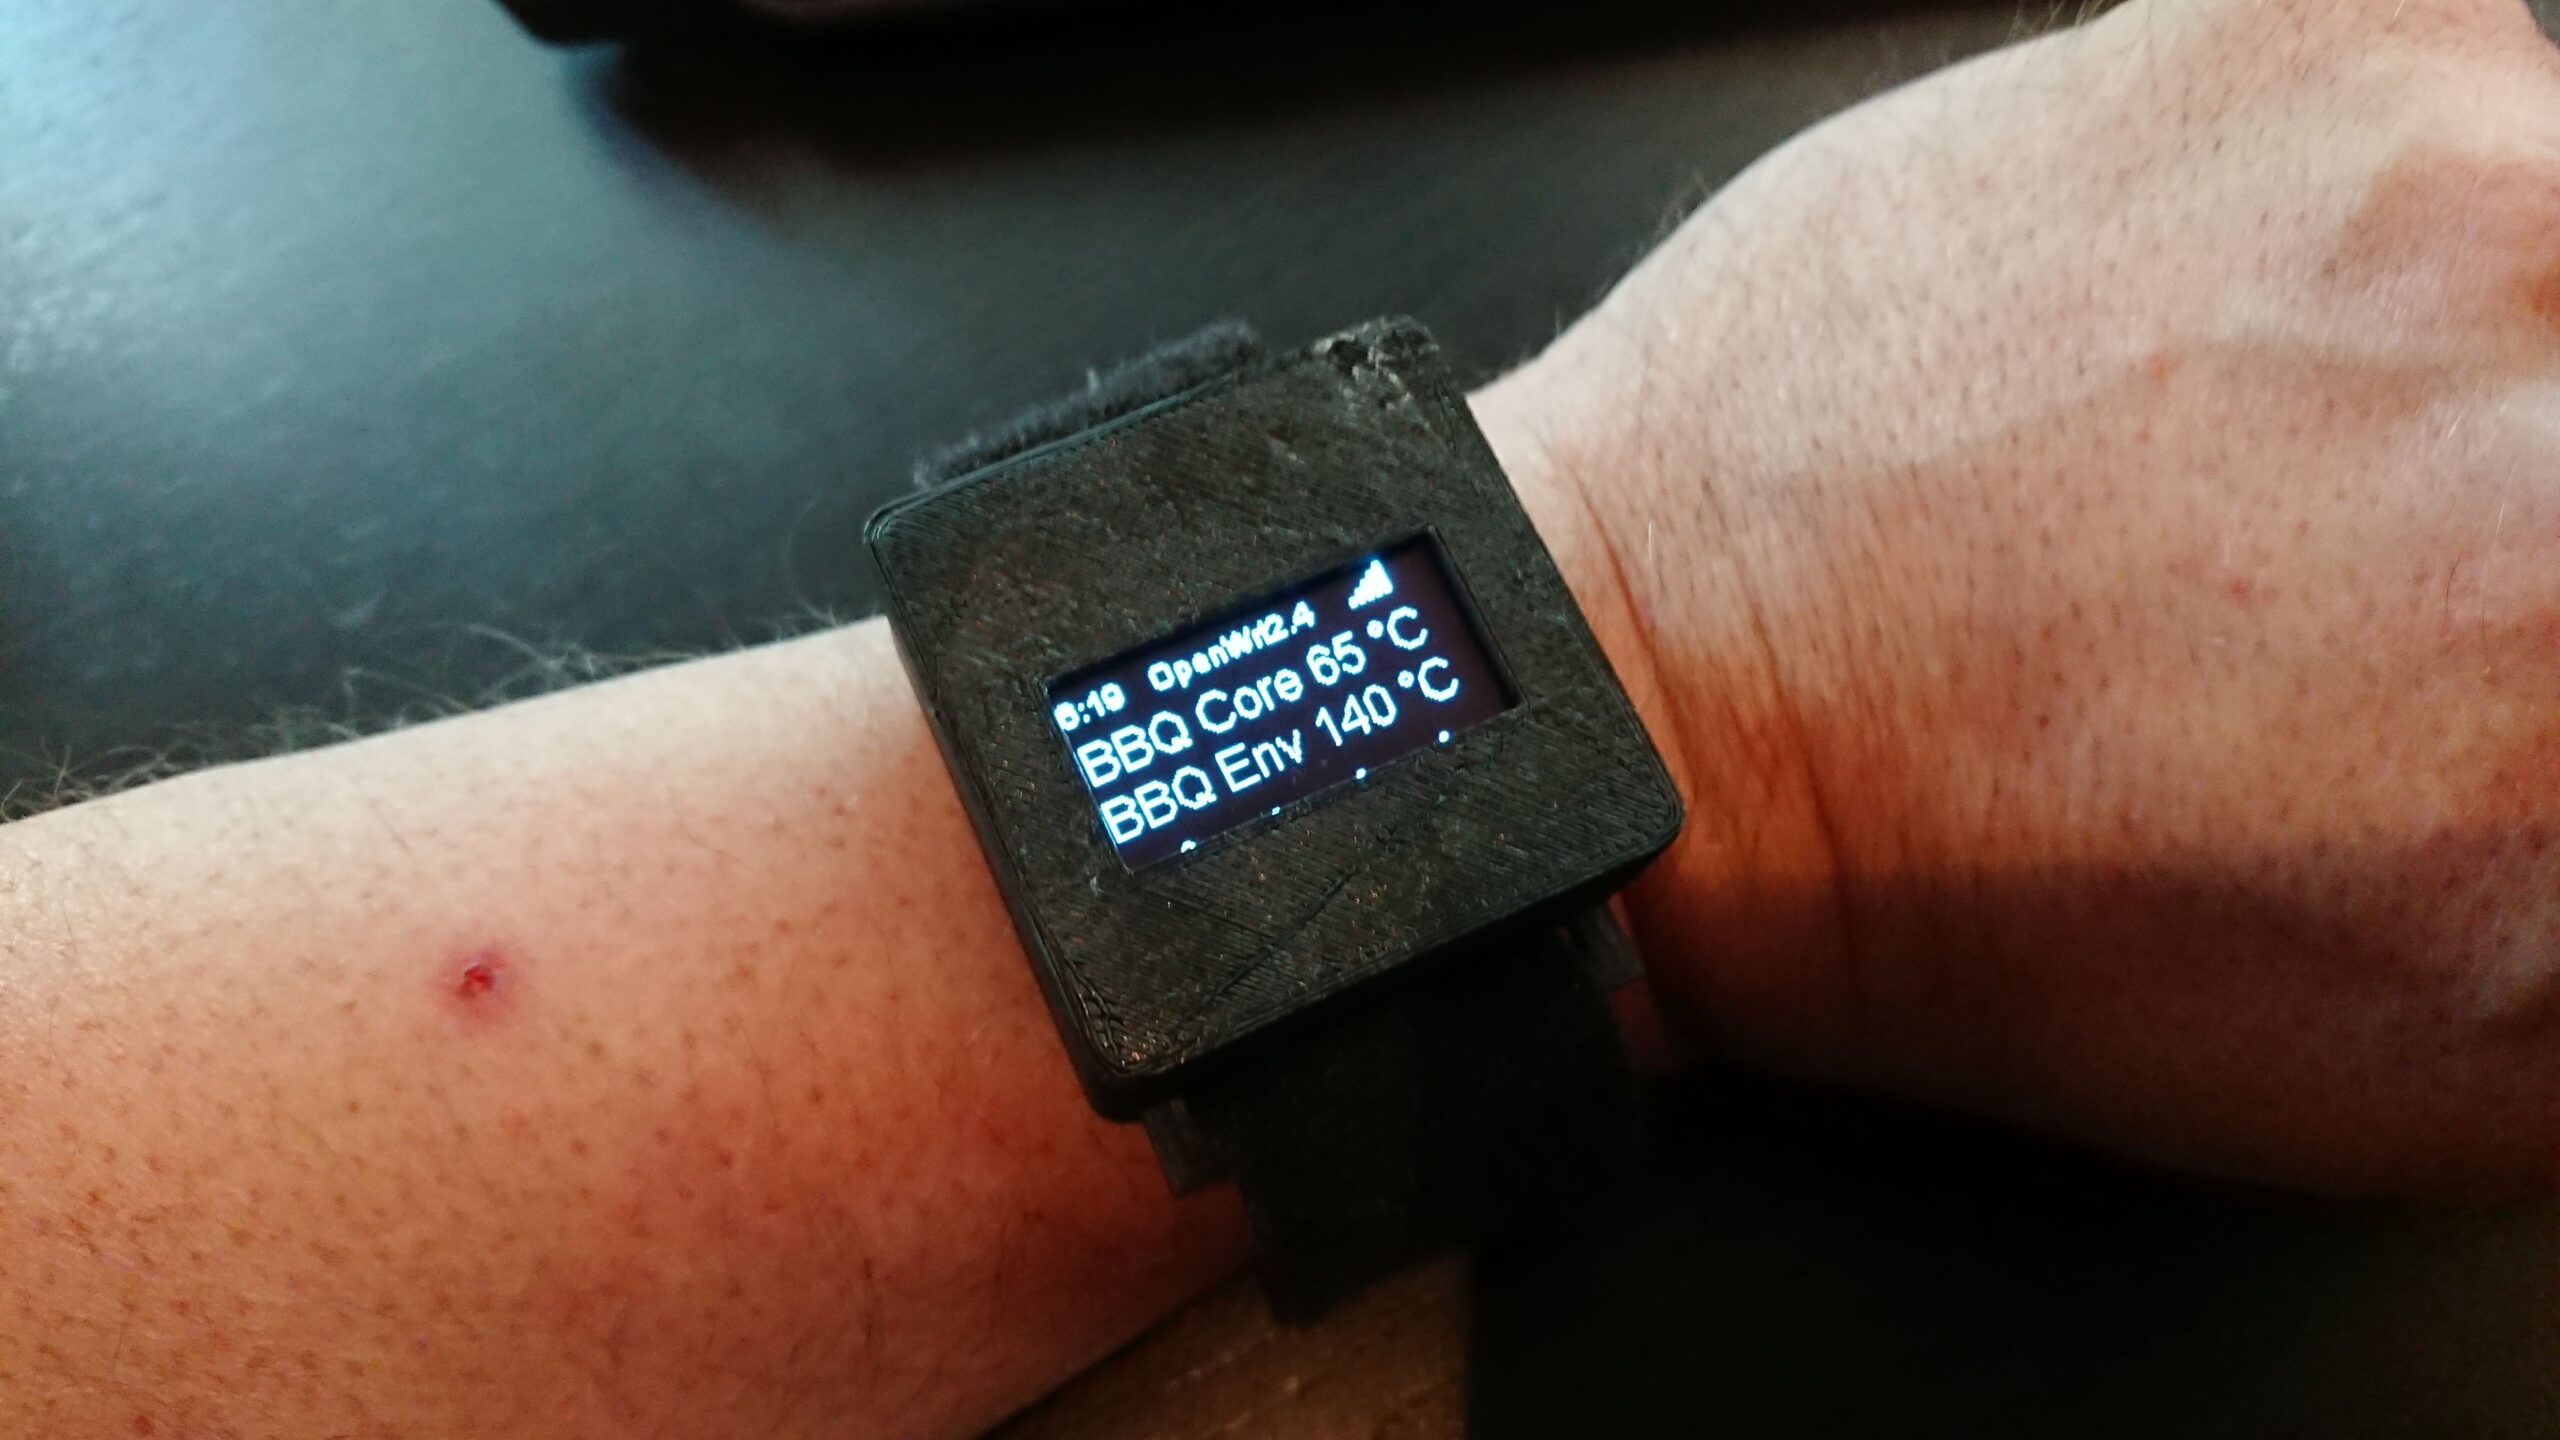
Dual temperature sensor
Use a wireless dual temperature sensor, one for the meat (core) and one for the temperature in the Bbq.
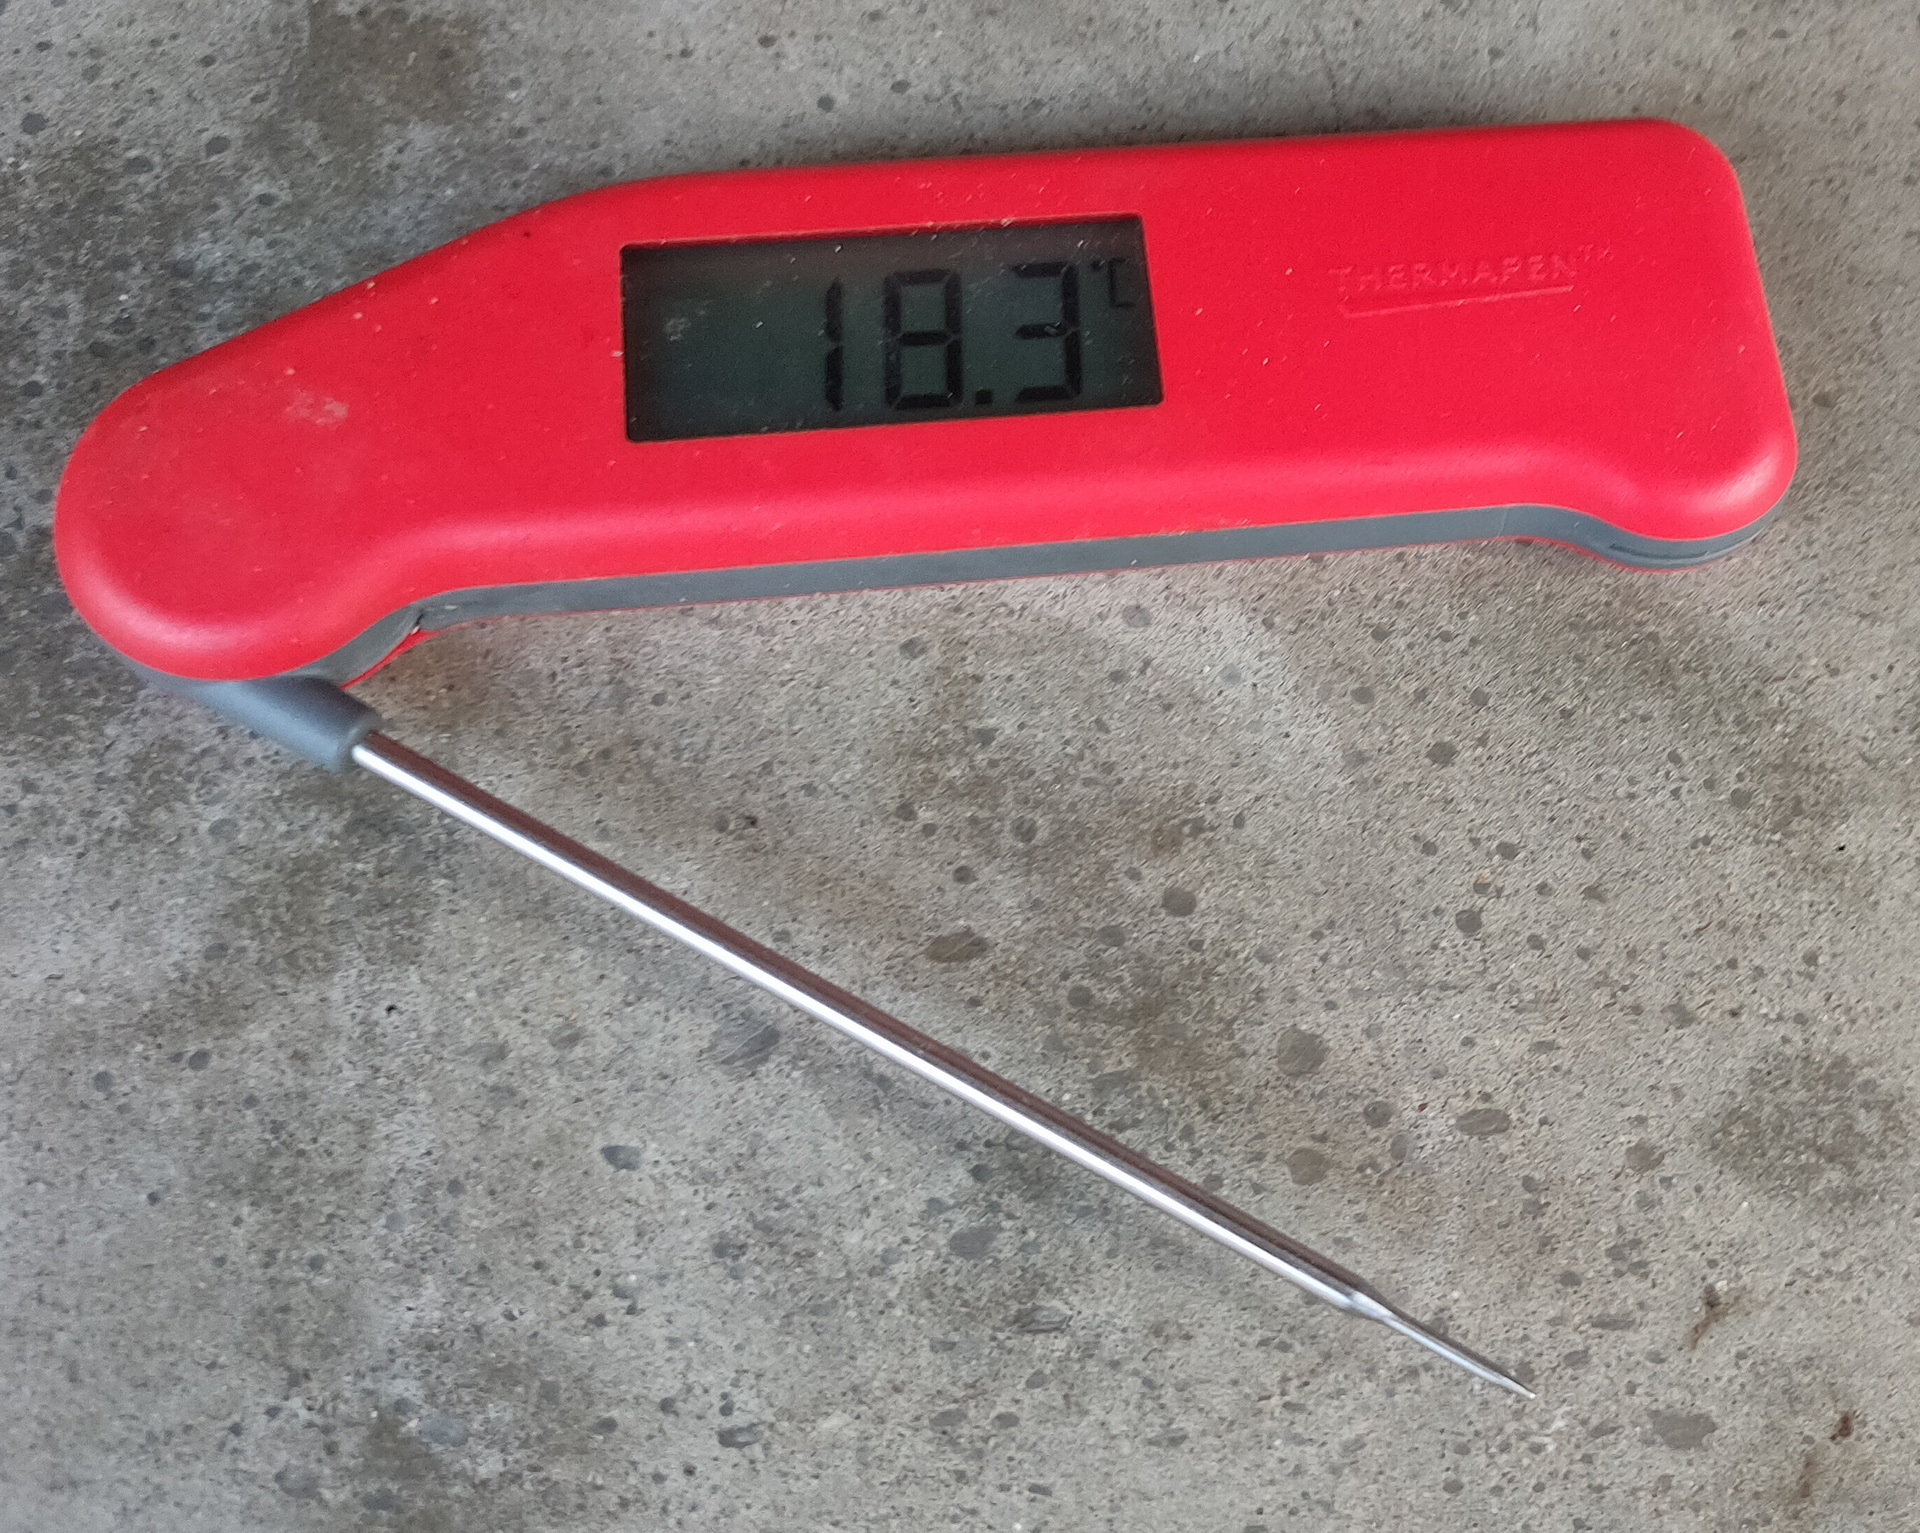
For a fast reading, for example in ribs, i use below speed sensor
Reads temperature in 2 seconds
Use pin for testing tenderness
Or … going fancy with my own build bbq watch .. (separate post)
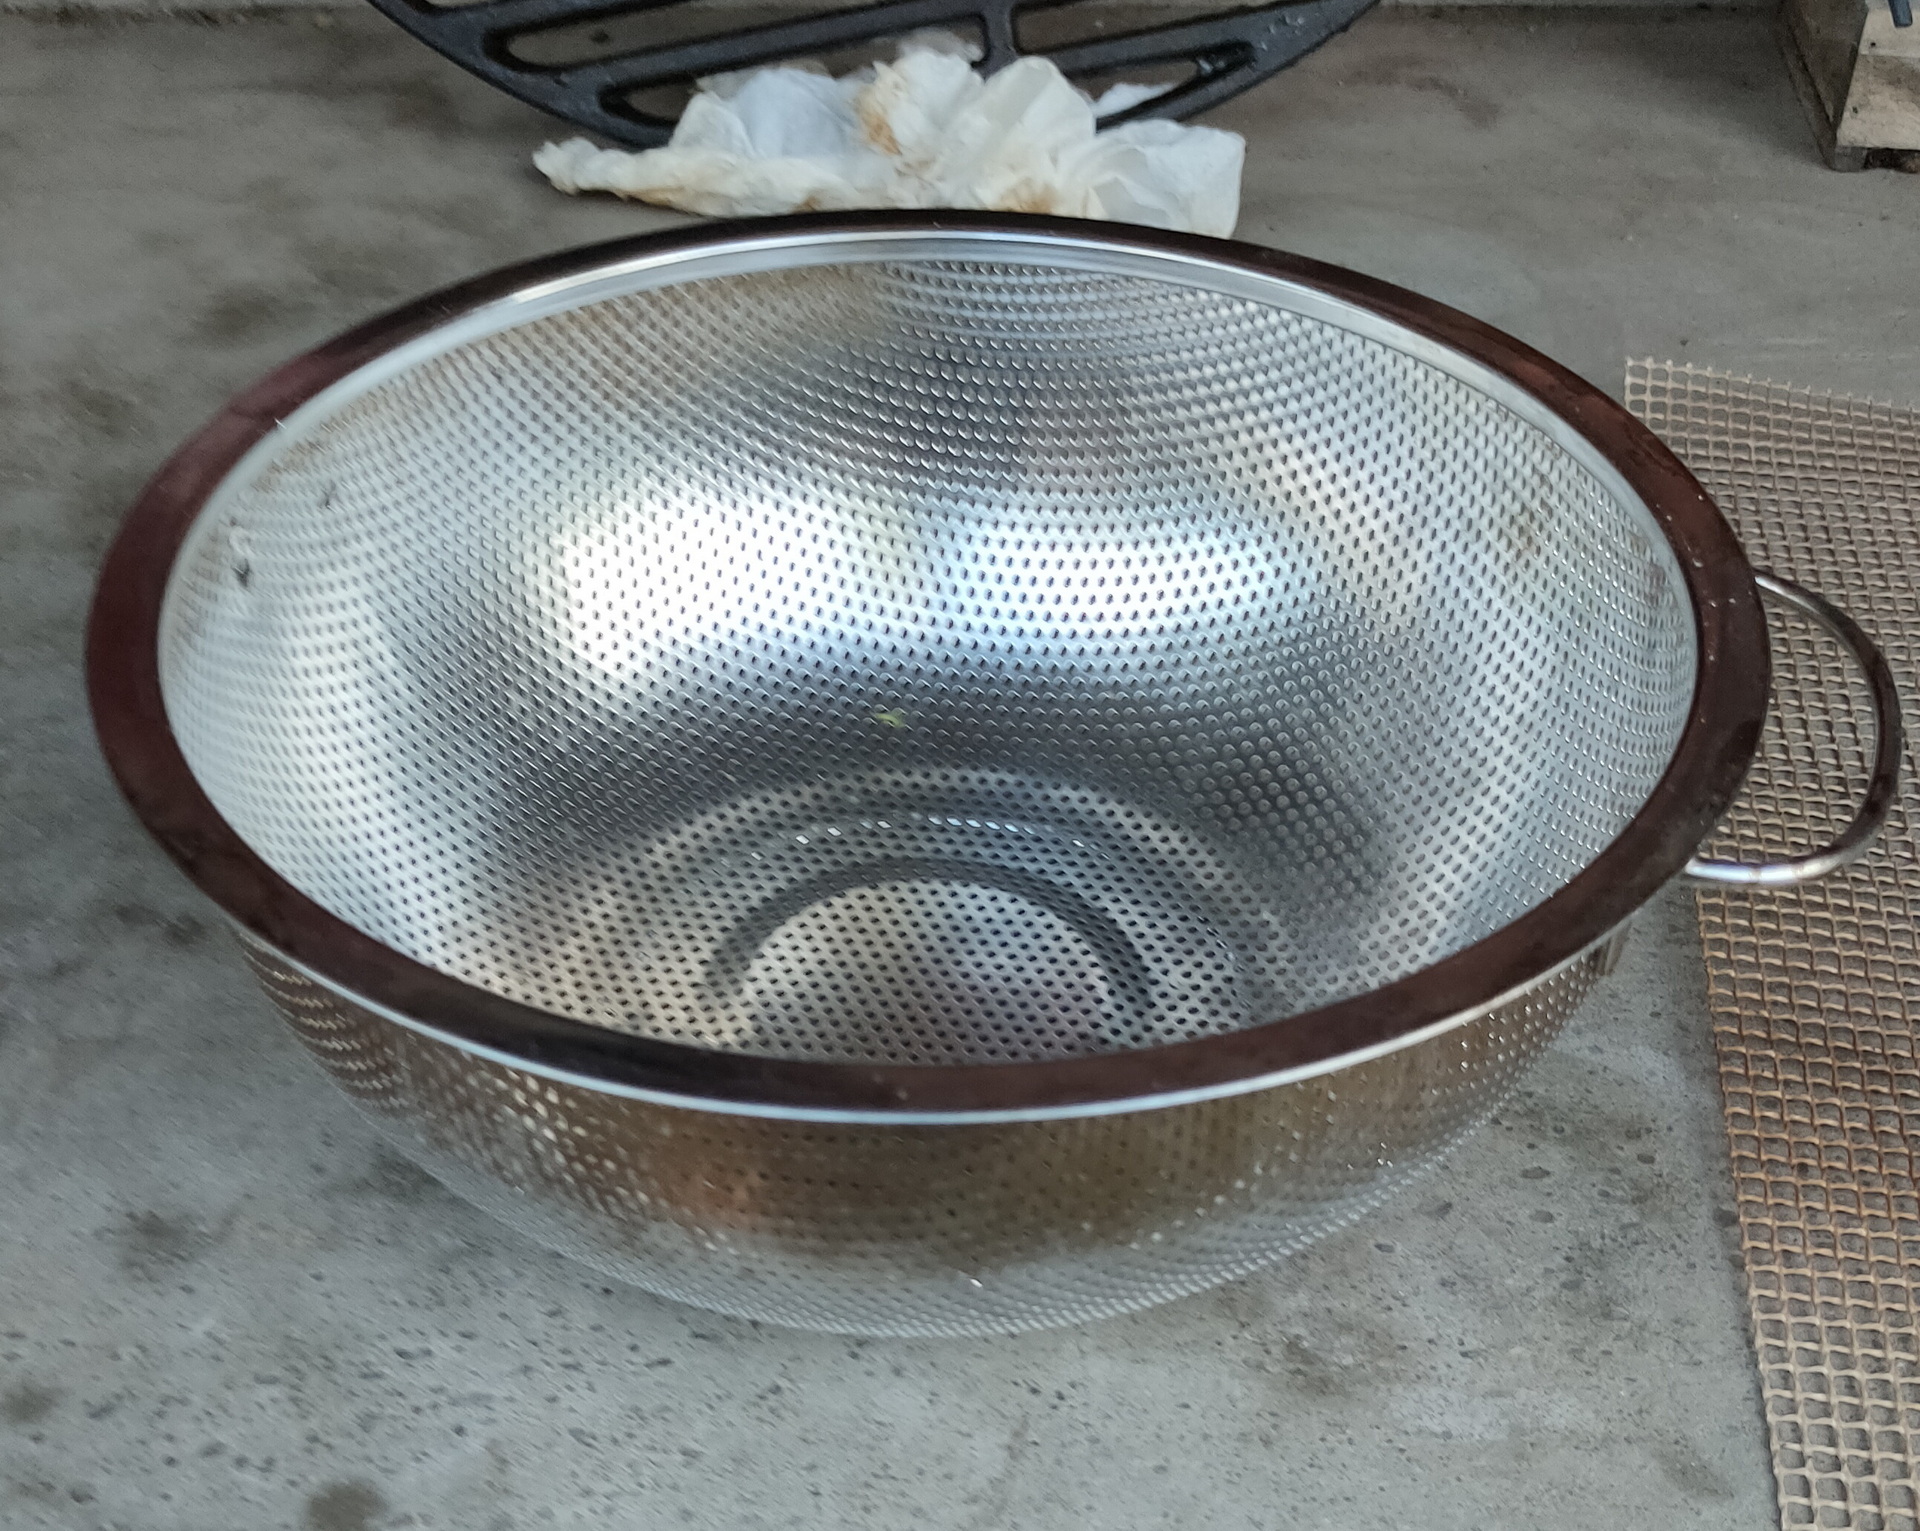
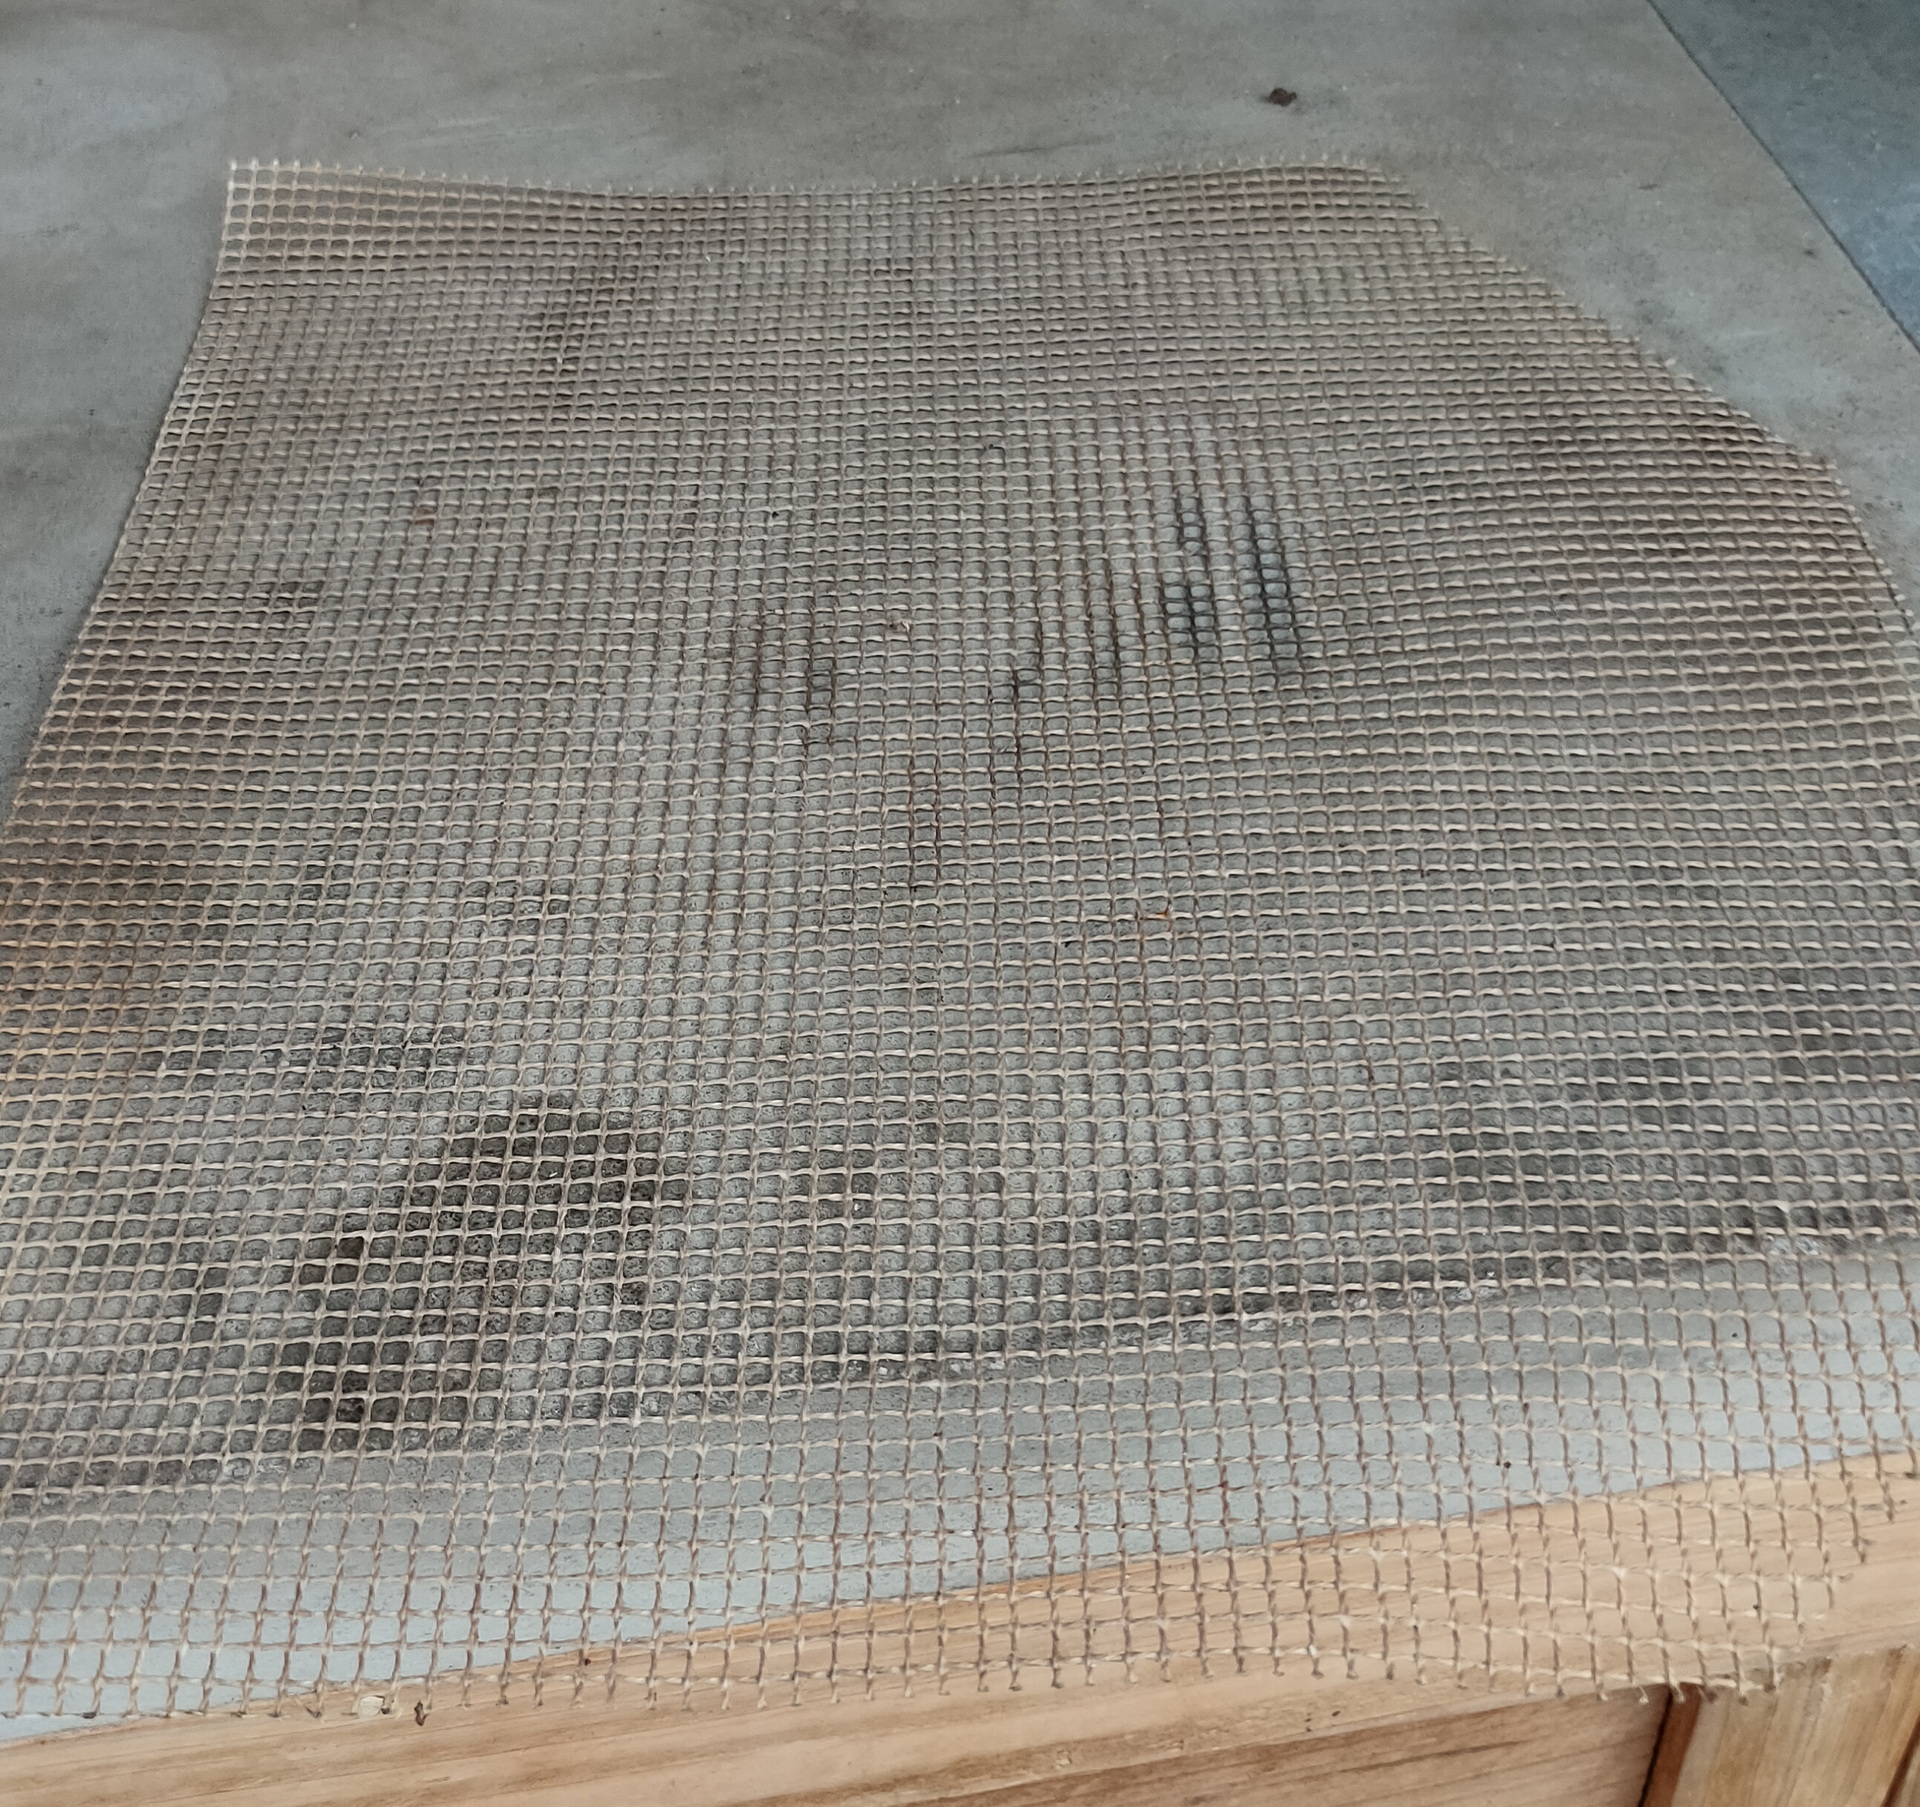
Small pieces of meat? Use a fine mazed mat like this
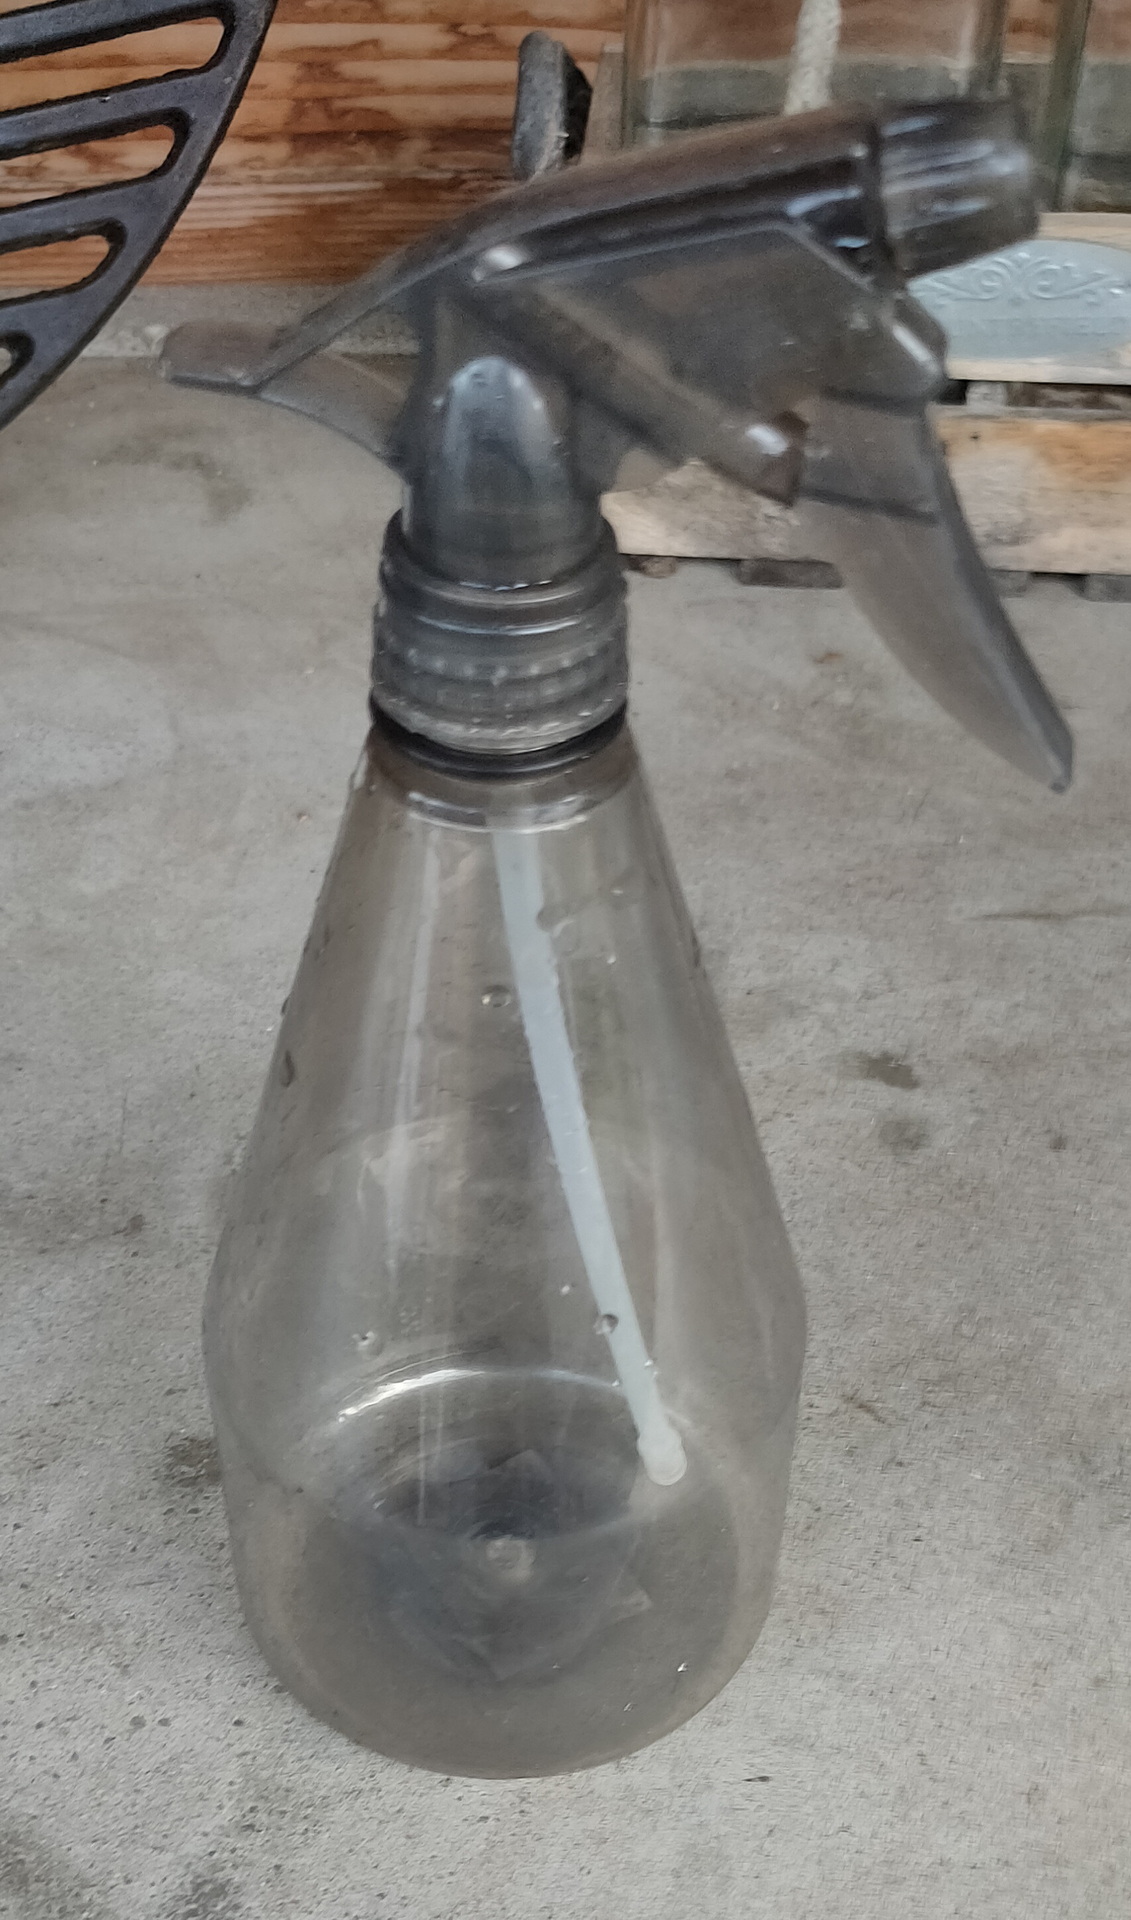
To moisturize your meat or apply seasoning like apple juice, use a plant spay
At last .. some tips for you to try:
(No links to recipes on the internet, just google there are many .. i will post recipes i’ve tried myself)
Ribs 3-2-1 method
Got a nice steak with a fat cap? Try argentina style. Just do a 3-minutes per site. (Even better .. use a pre-heated iron cast grate to get some nice lines. At the end press the meat on the grate, so the fat melts and drips onto the coals. These wil burn and give big flames. Those burning flaming fat wil give your beef a taste to remember!
Cast iron grate
Briskett
Cold smoking
Moinkballs
Beercan Chicken
"If something is worth doing, it's worth overdoing."