Model by wayneclarke, structure paint is cement look from Havo Holland.
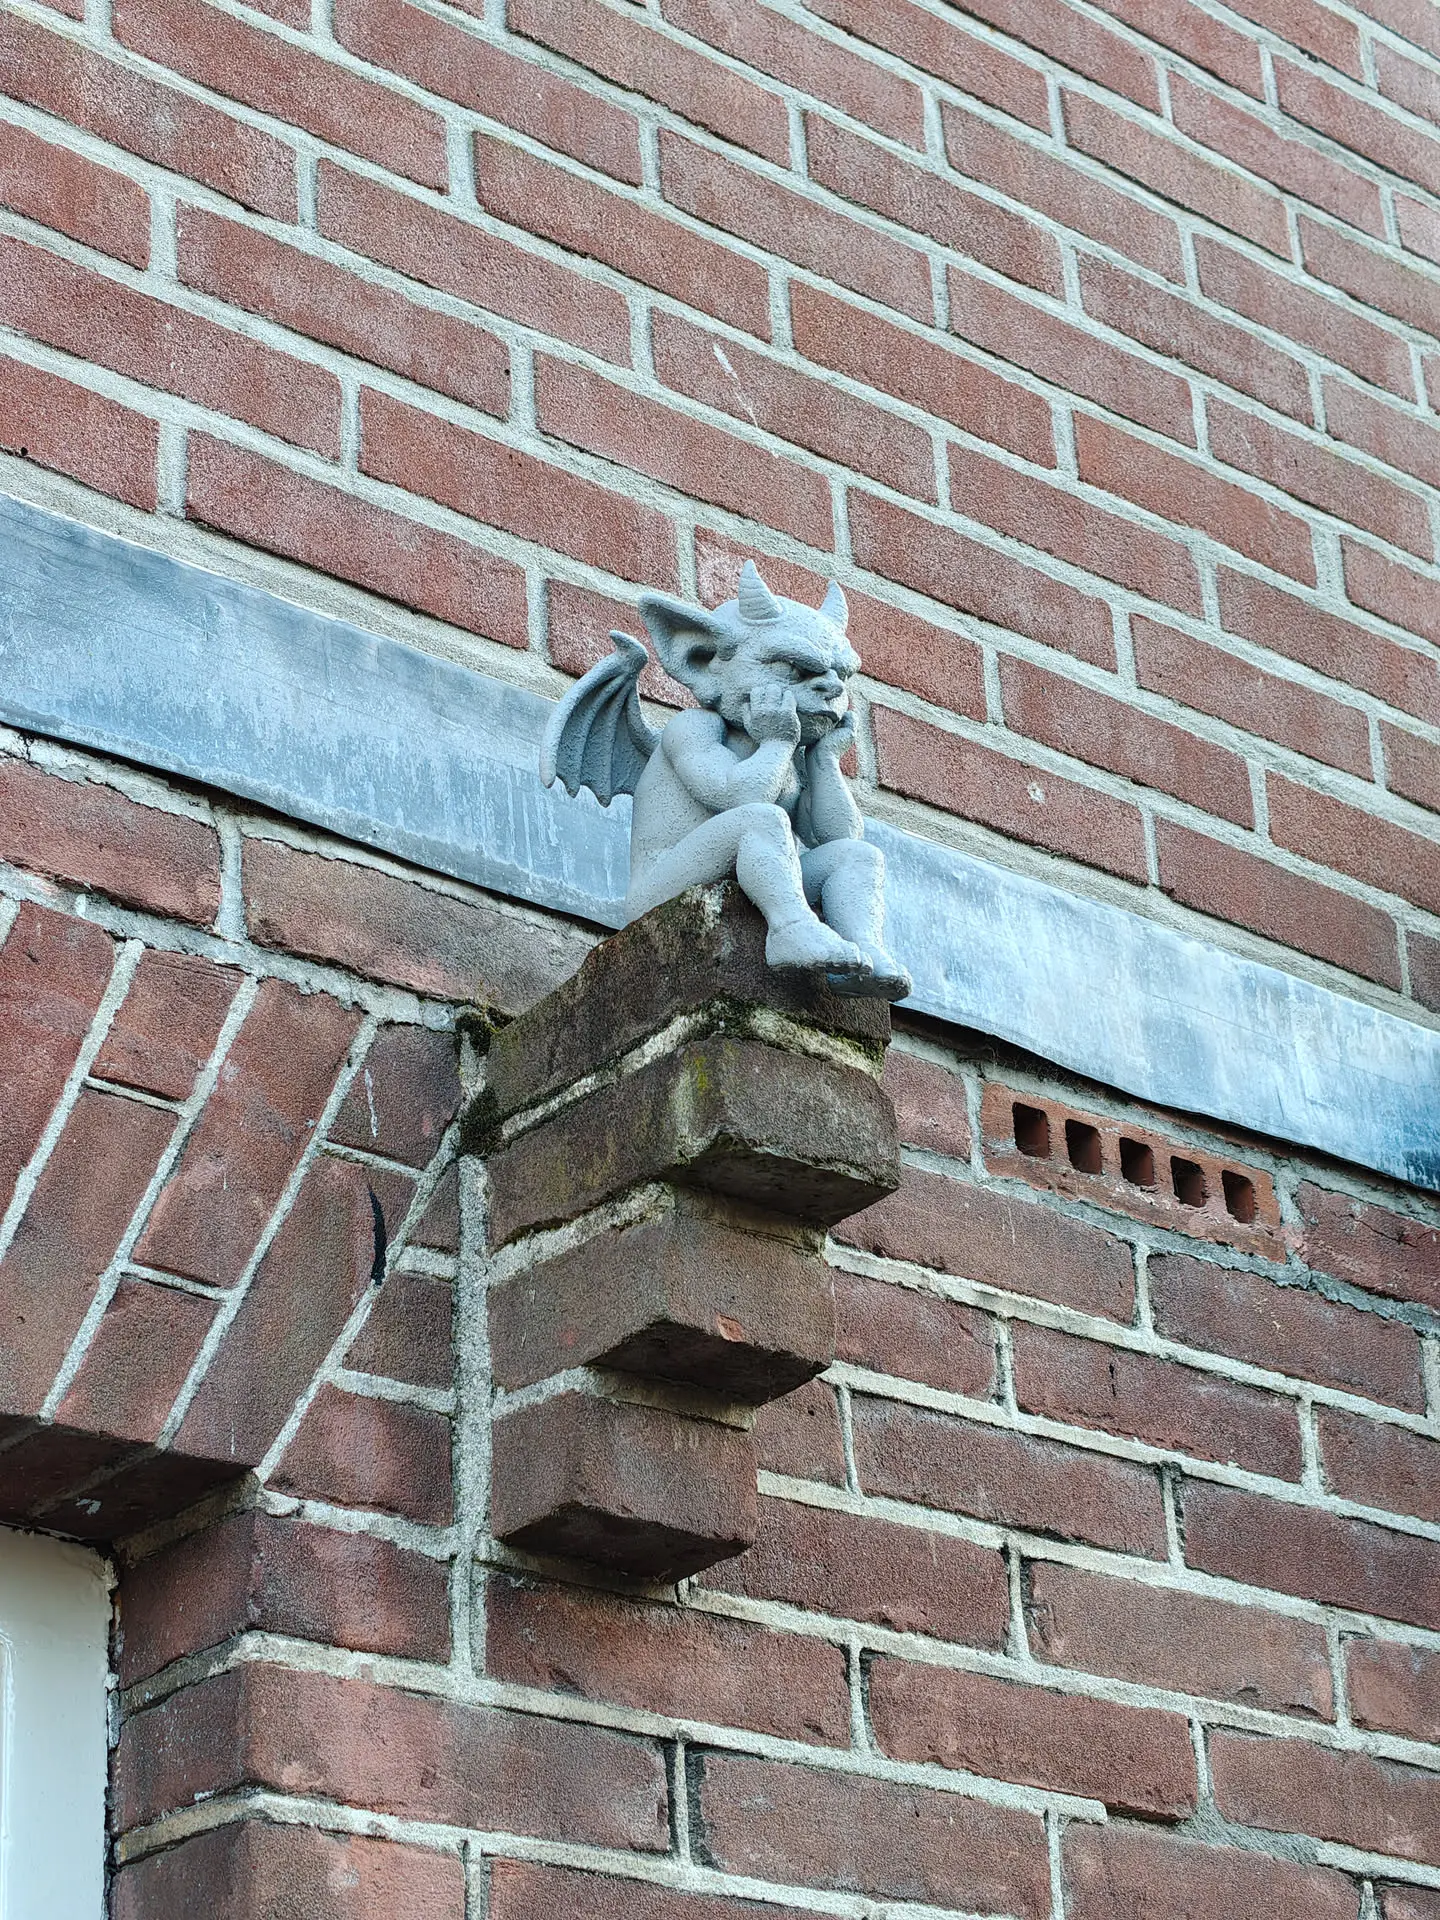
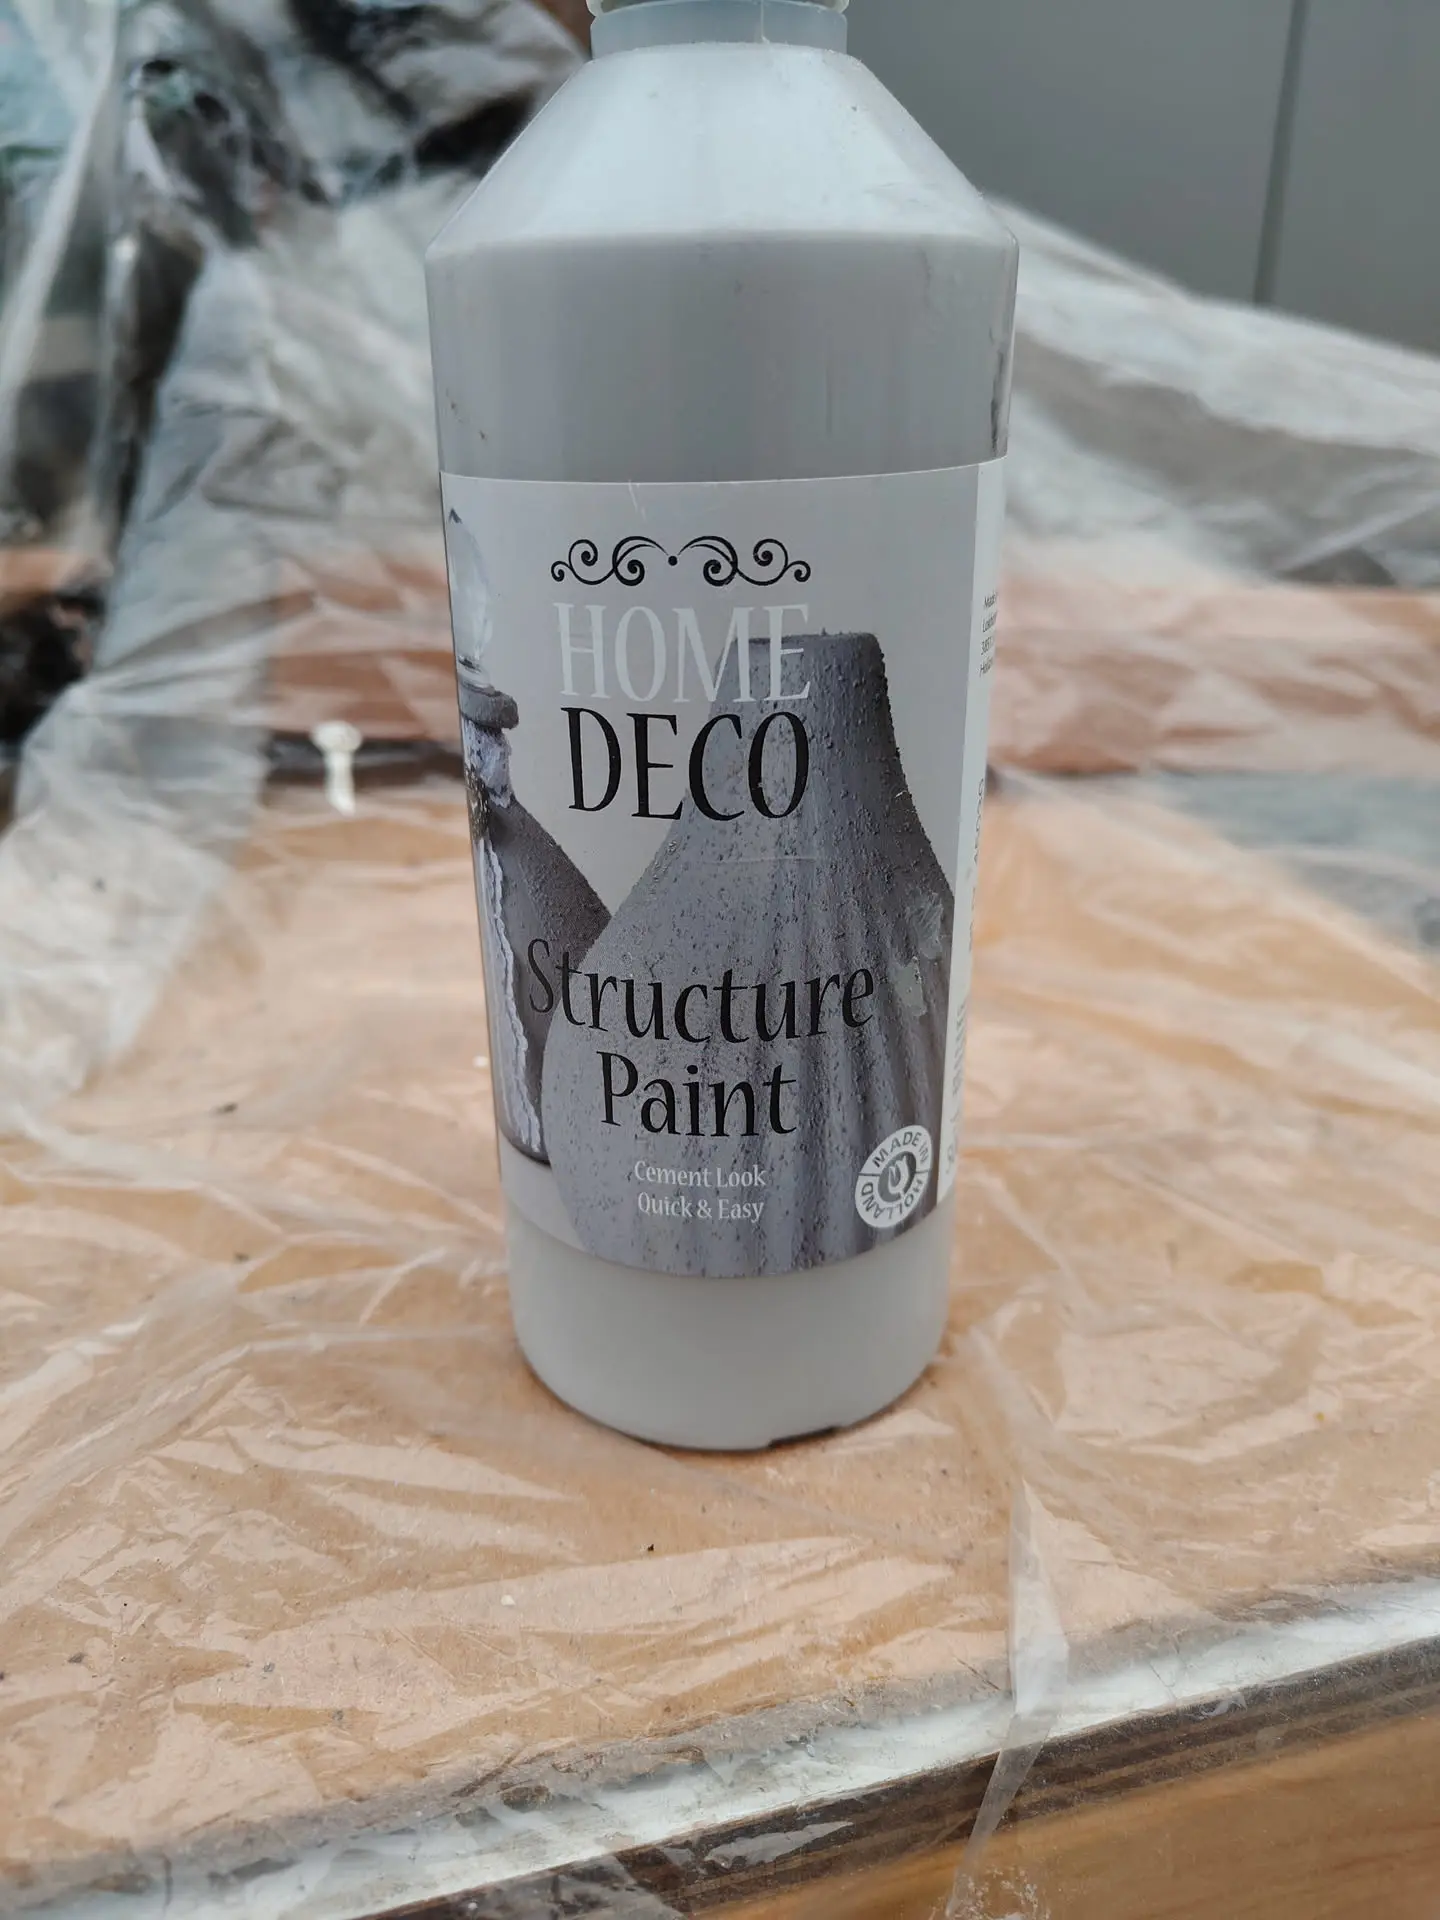
Model by wayneclarke, structure paint is cement look from Havo Holland.
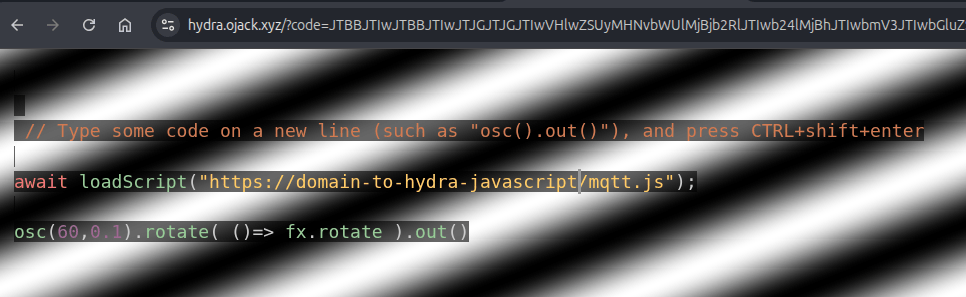
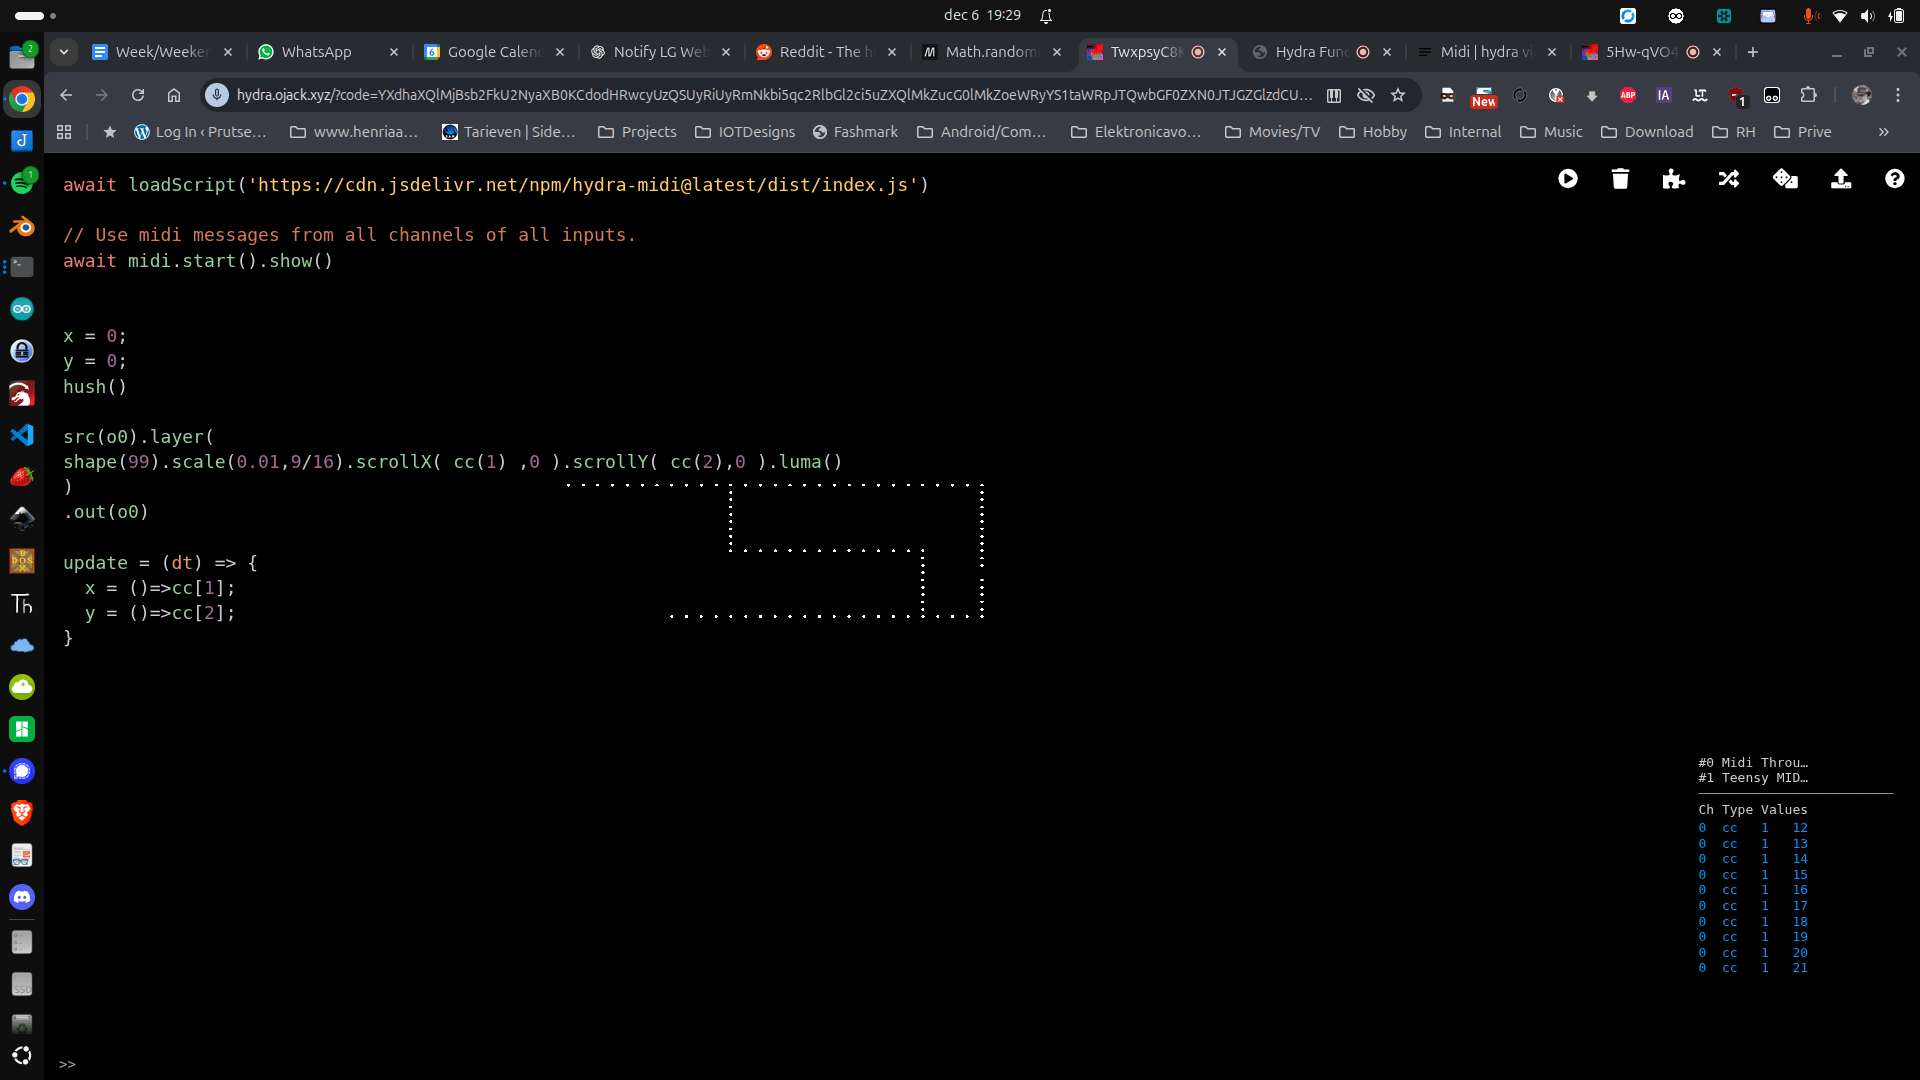
Control your effects using MQTT.
You can add anything to control your effects using RotaryEncoders, sensors and other data values.
I’m fixing the code to make use of free MQTT servers on the internet.
Then I’ll post the JavaScript in the Hydra forum or discord.
Calling the JavaScript in https://hydra.ojack.xyz/ website
https://gist.githubusercontent.com/fashice/2098d1301117b86caed94aca8f2101ff/raw/7d2a7300e7ddf42d4f1793f693dbb517e09bd2d8/gistfile1.txt
change mqtt server and add to hydra using
await loadScript("https://domain/script.js¨);Taking a few minutes every day to get my hydra-fu up to par.
I’m building a library of images and movies to include into hydra effects.
Testing my beamer today. I need a new one!
Not good enough to perform on a stage.
I will add some new effects to the gallery this week.
https://media.henriaanstoot.nl/hydra
Mixed with blender using OBS
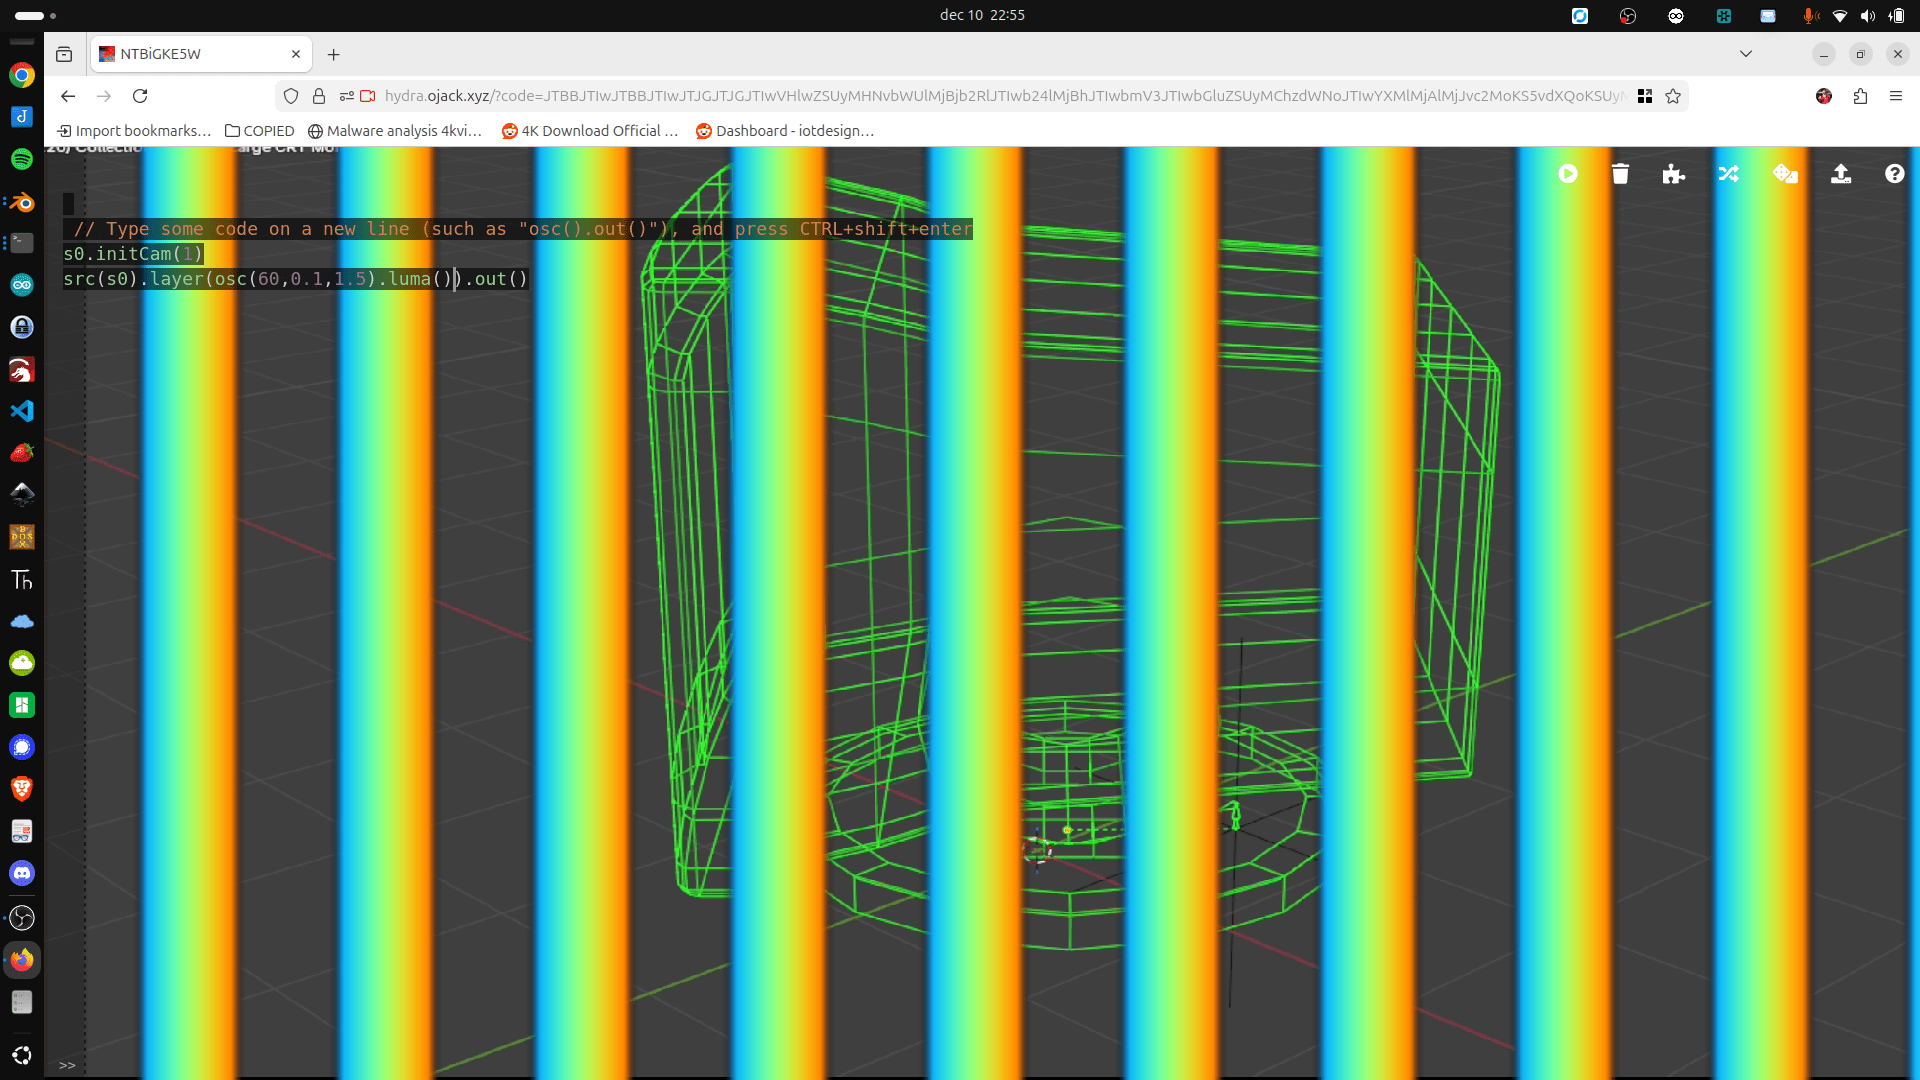
Drawing like etch a sketch using Midi pots input and Hydra feedback
While working on my clients projects, I’ve been busy with other Fun stuff.
All will be posted more about soon
Using 3x SG90s (metal gears).
These performed far better using my Servo tester than the cheap plastic ones.
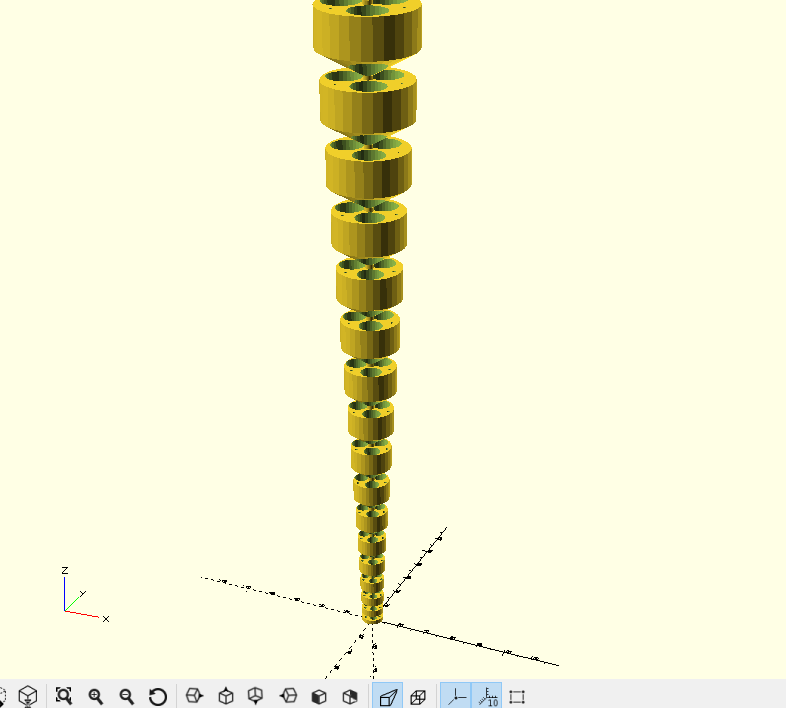
First version using Openscad, with variables to control how it looks.
This is printed using TPU.
RepeatingBit = 4;
nr = 20;
difference(){
union(){
for (a =[0:nr]) {
    translate([0,0,(a * (RepeatingBit))]) {
        translate([0,0,a*a*1.3])

        cylinder ( h=1+(a*1.1), r1=1,r2=7.5+(a*(a/10)), $fn=30 );
        translate([0,0,a*a*1.3+1+(a*1.1)])
        cylinder ( h=3+(a*1.5), r1=7.5+(a*(a/10)),r2=7.5+(a*(a/10)), $fn=30 );

        }
}
translate([0,0,0])
cylinder( h=650, r1=2,r2=4 , $fn=30 );
}

translate([5,0,-10])
rotate([0,2.5,0])
cylinder( h=1000, r1=1,r2=1 , $fn=30 );
translate([-3,4,-10])
rotate([-4/2,-3/2,0])
cylinder( h=1000, r1=1,r2=1 , $fn=30 );
translate([-3,-4,-10])
rotate([4/2,-3/2,0])
cylinder( h=1000, r1=1,r2=1 , $fn=30 );

translate([2,3,-10])
rotate([-1.4,0.6,0])
cylinder( h=1000, r1=2,r2=nr*1.3 , $fn=30 );

translate([2,-3,-10])
rotate([1.6,0.7,0])
cylinder( h=1000, r1=2,r2=nr*1.3 , $fn=30 );

translate([-3.5,0,-10])
rotate([0,-1.8,0])
cylinder( h=1000, r1=2,r2=nr*1.3 , $fn=30 );

}
Video with some organic movement
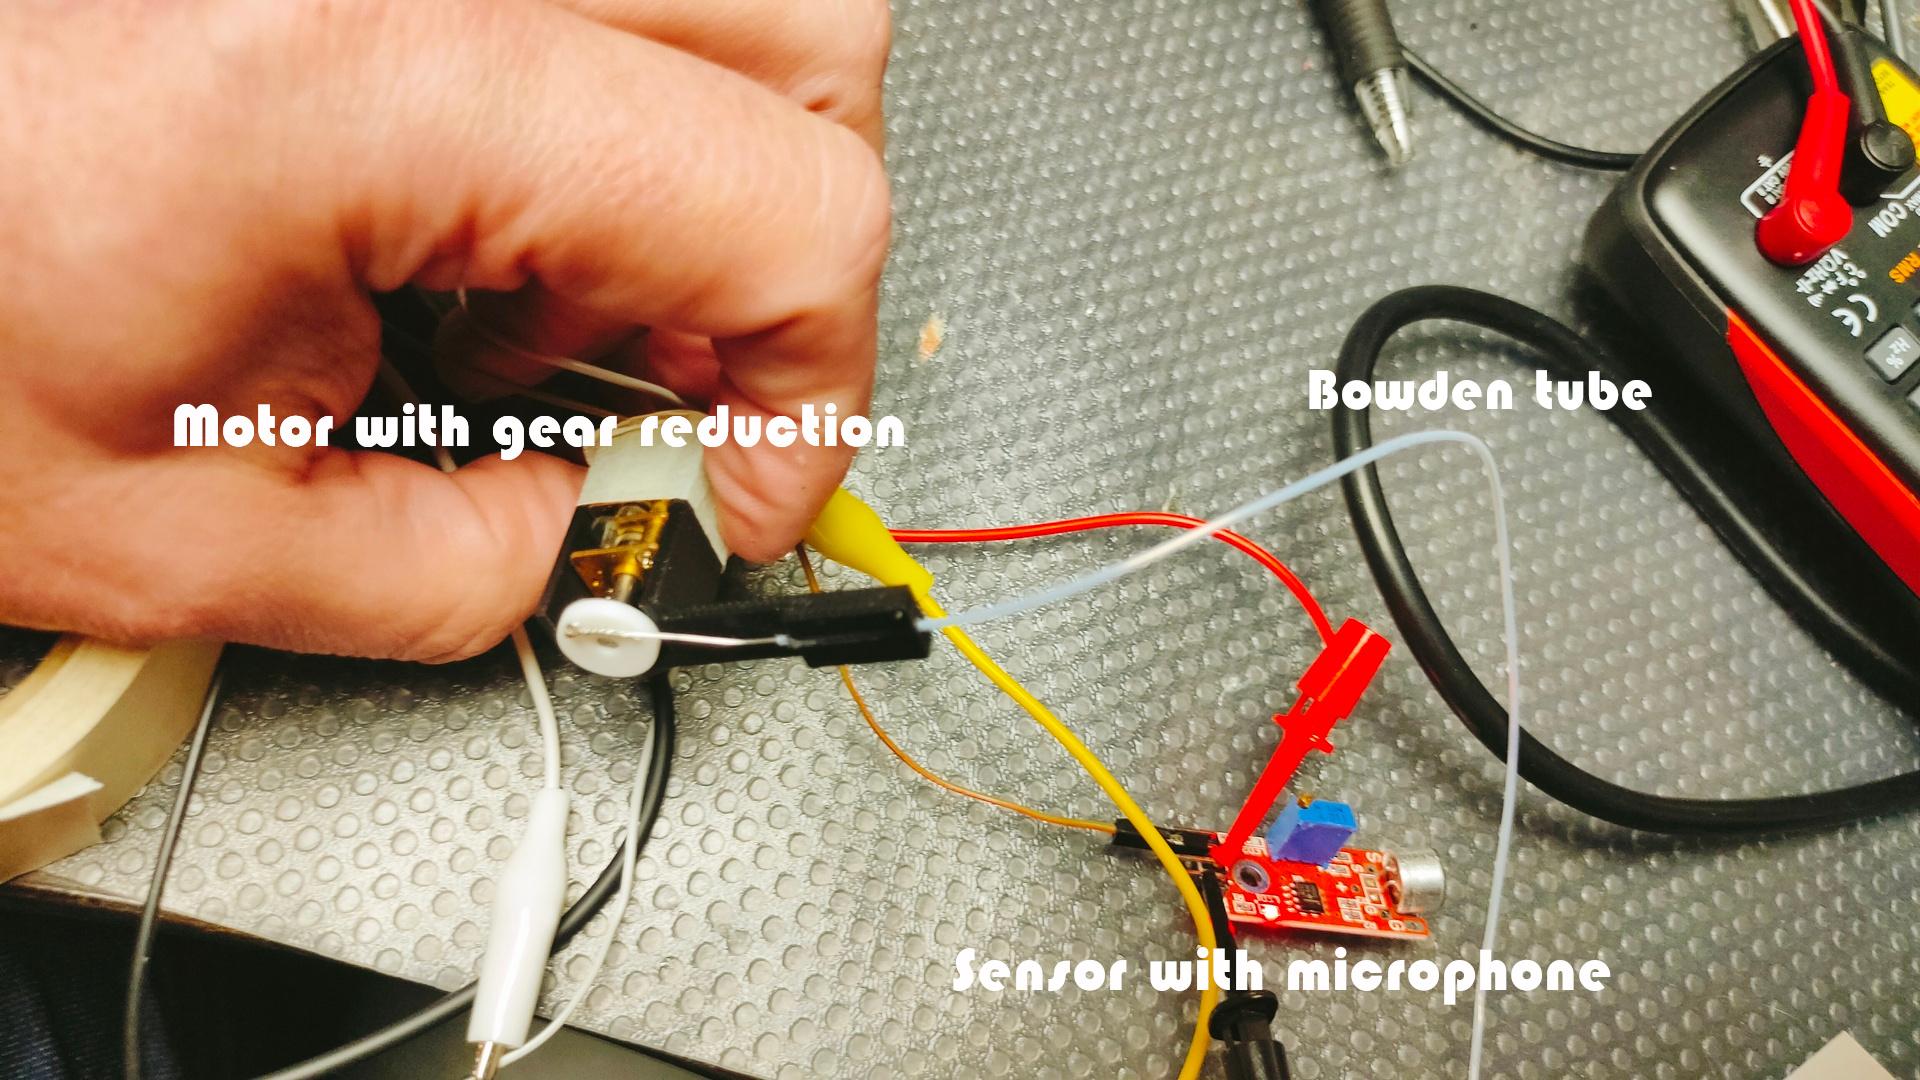
Using a Raspberry Pi, Python3 and a Servo HAT.
Bottom part
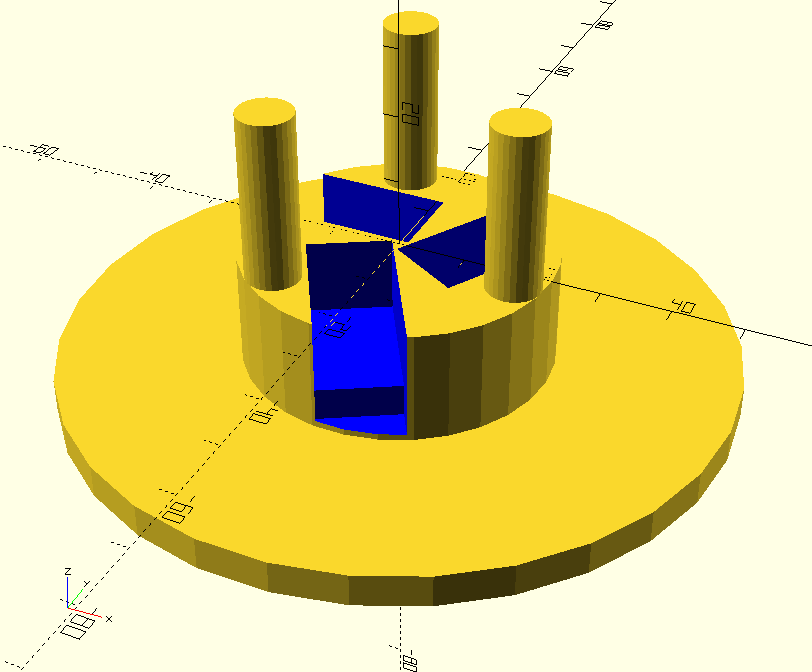
Using a bowden tube (PTFE tube 1mm) with a 3d printed holder.
(ptfe is very smooth)
This is a test setup.
I’ve removed arms and the flute on the bottom picture using AI.
Then printed backpicture and top on sticky paper and stuck it on sturdy heavy paper.
I want to make a moving picture which moves our band members when there is sound (music).
(Guitar, Harp, Bagpipes and Flute)
First test
I’ve got a SculpFun Laser Cutter.
I’m using this a lot … as lasercutter.
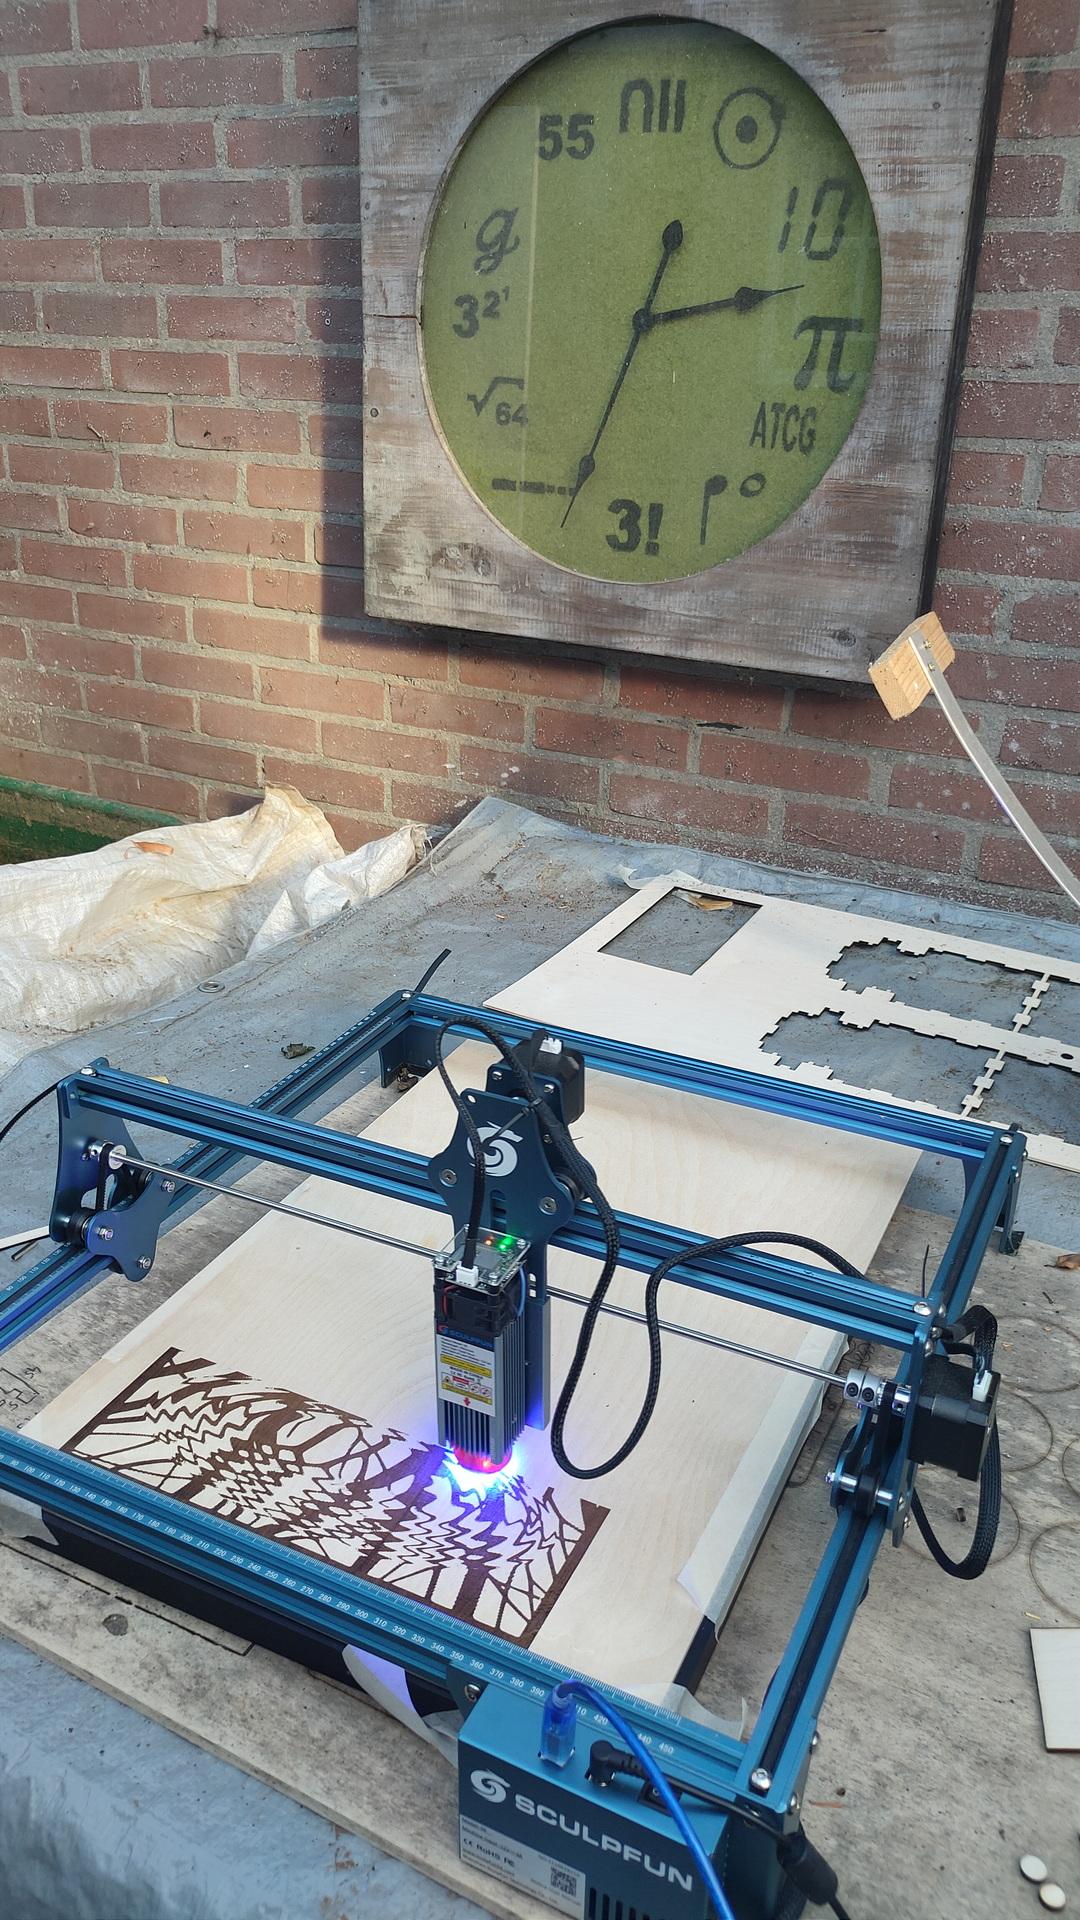
But you can also use a laser cutter as a Plotter or vinyl cutter!
Just remove the laser head, and replace it with a pen or knife!
(360 swivel blade)
First : replace laserhead and make a controllable pen holder.
My Laser Cutter can be controlled using G-codes real-time.
Example my etch a sketch.
Now I just have to add a Z axis controller to control pen up/down.
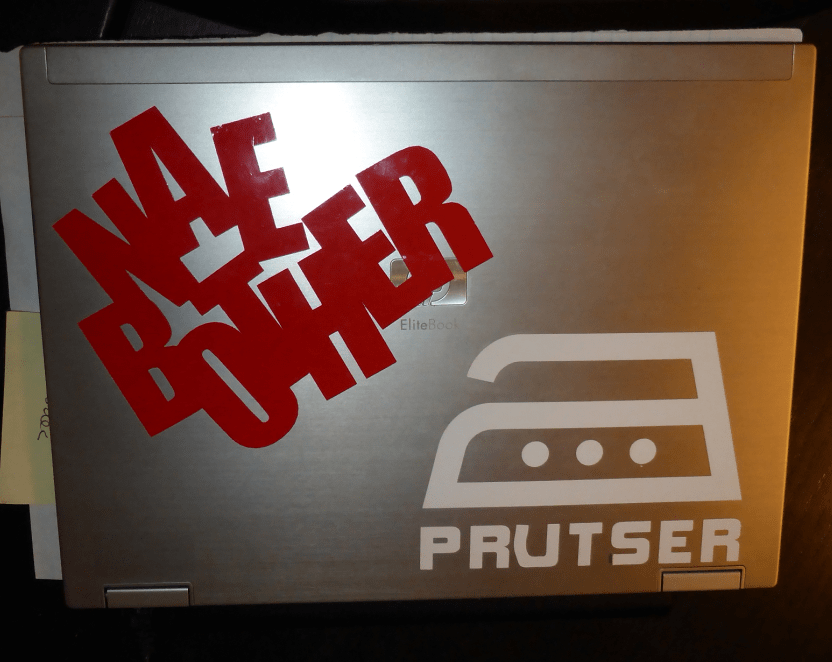
While I’m not afraid to cut things by hand. Like our front door decoration.
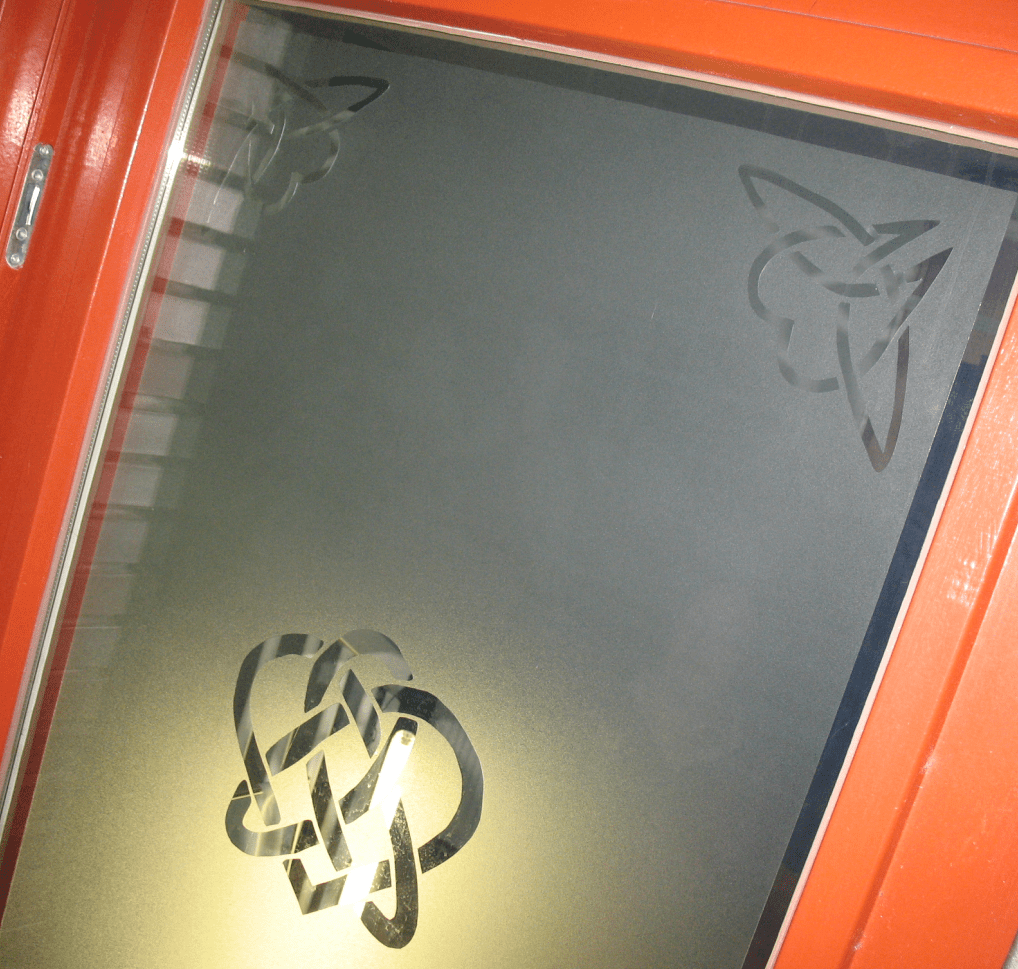
I like a more precise and repeatable way. I’ve cut lots of Nae Bother Logo’s like on my Laptop. (These were made using a computer cutter)
Test code (no gcode yet):
#include <Servo.h>
const int buttonPin = 16;
int lastButtonState = 0;

Servo myservo;

void setup() {
  pinMode(buttonPin, INPUT);
  myservo.attach(2);
  myservo.write(0);
  Serial.begin(115200);
}

void loop() {
  int reading = digitalRead(buttonPin);

      if (reading == 1 && lastButtonState == 0) {
        myservo.write(0);
        Serial.println("UP");
        lastButtonState = 1;
      }
      if (reading == 0 && lastButtonState == 1) {
        myservo.write(160);
        Serial.println("DOWN");
        lastButtonState = 0;
      }

}
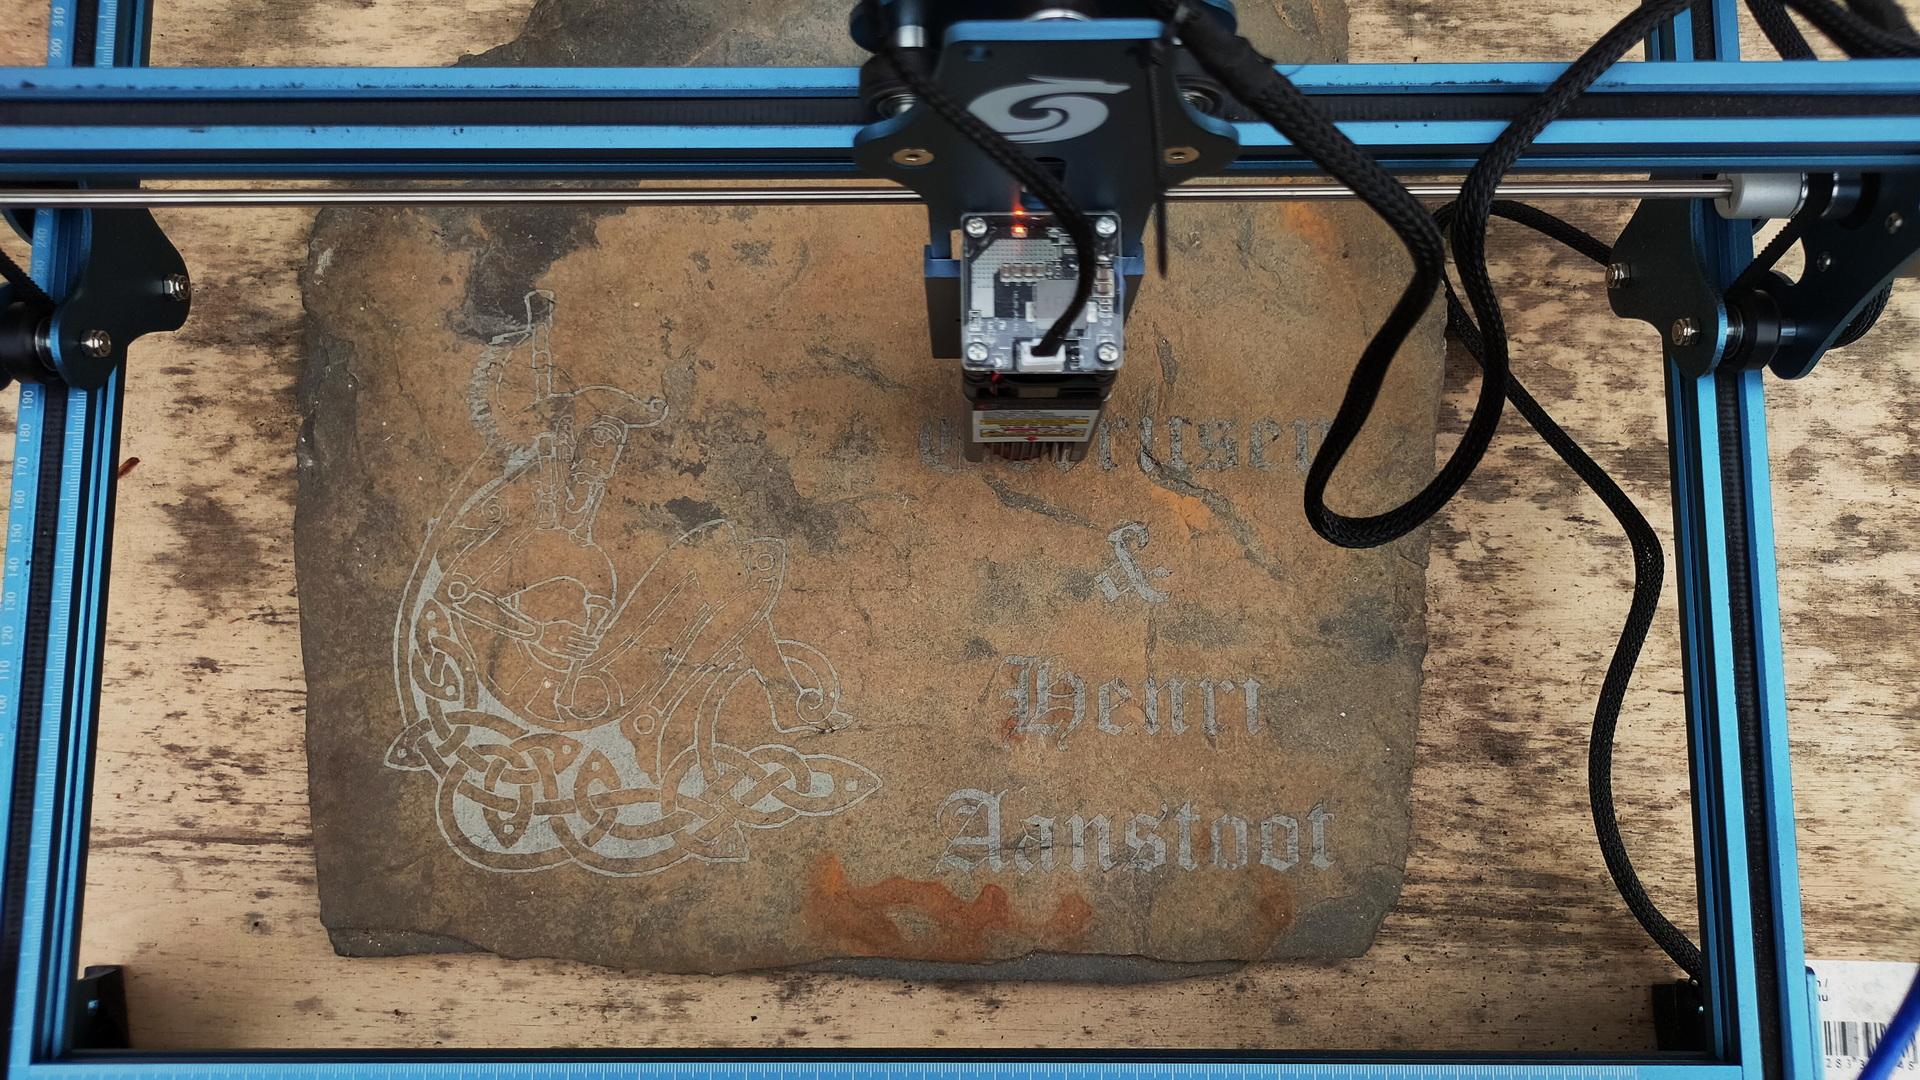
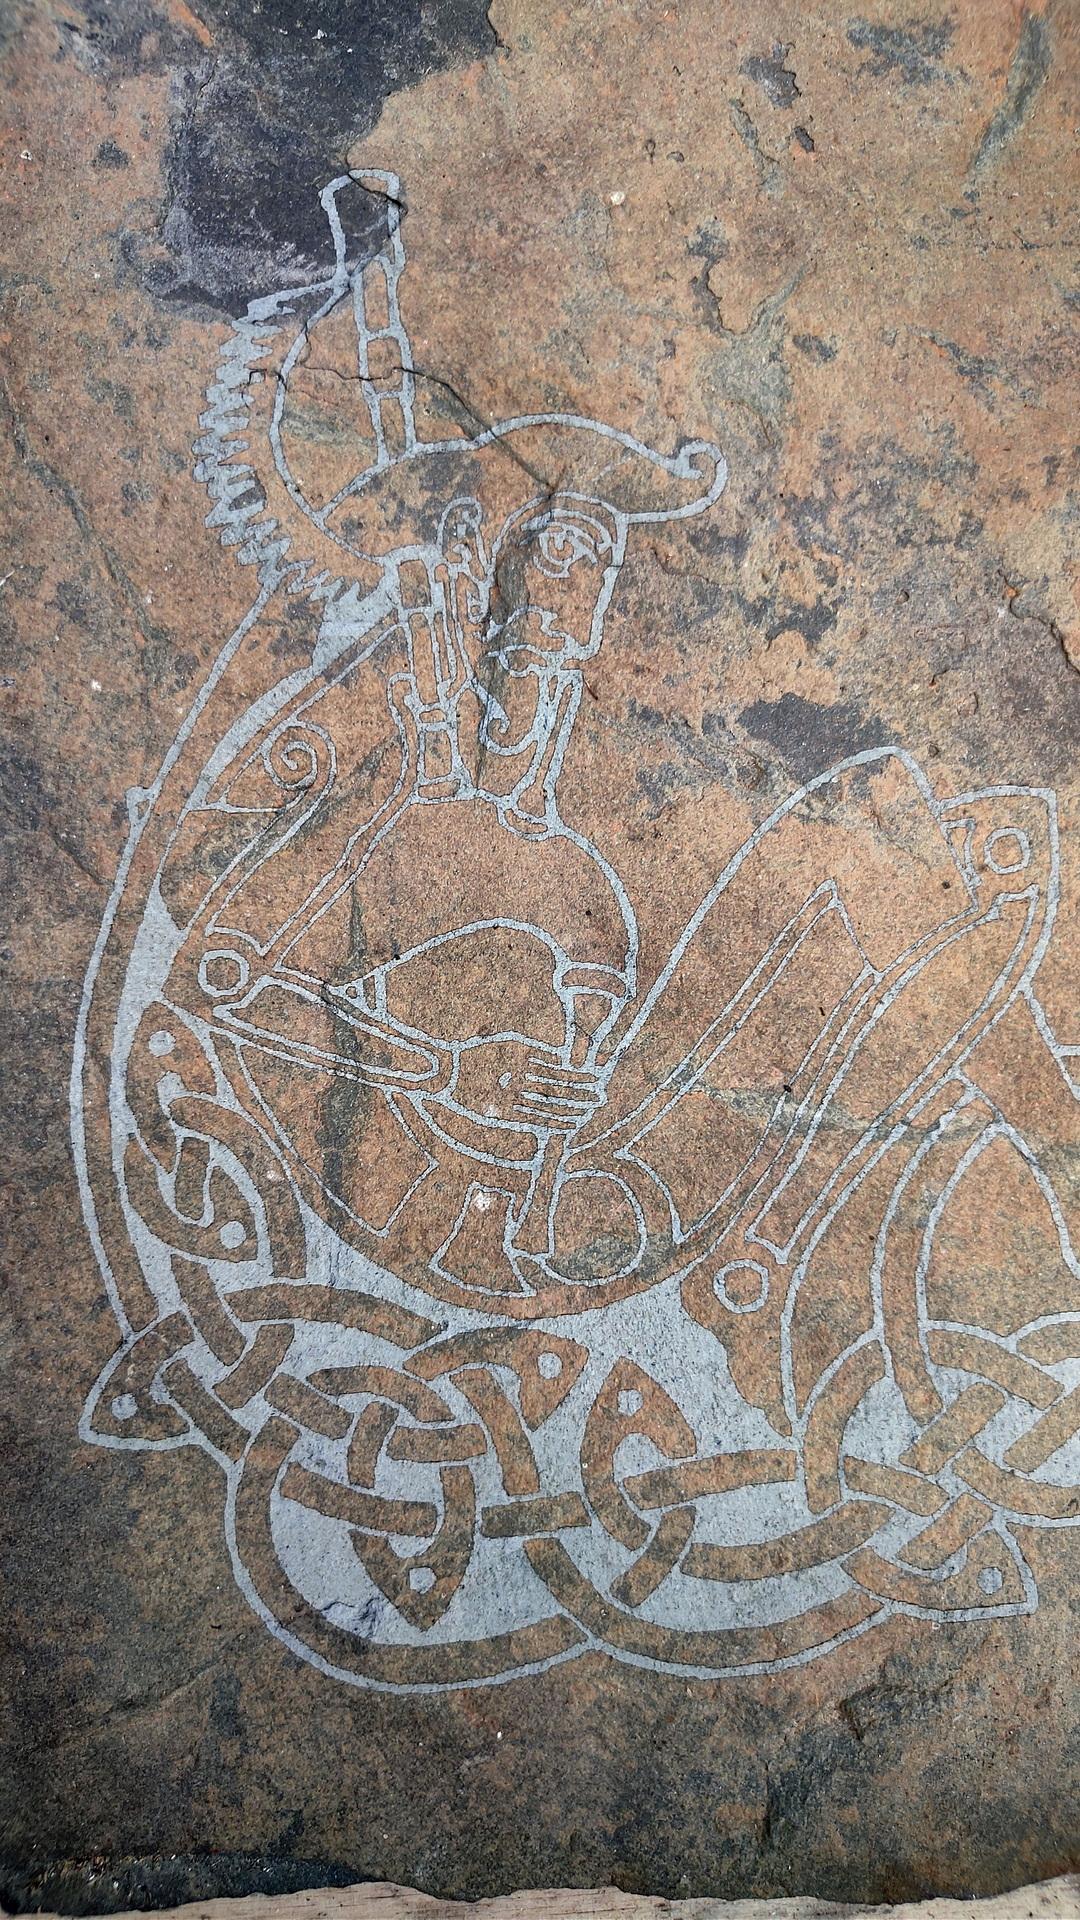
Slate of stone engraved using my Sculpfun S9 Engraver.
It will be placed next to our front door.
Quick mash-up as proof of concept.
400 frames
Let measure the level of beer in a metal tank .. 🙂
I was working on a RP2040 HID project, but I needed some components I didn’t have … right now .. again ..
So I made something else ..
A tiny animator for stop motion animations using my webcam, python and OpenCV.
For claymotion or lego or whatever.
The program displays your webcam with the previous snapshot overlayed, so you can position everything relative to your previous snapshot.

Press B to take a frame.
CODE (short but you need OpenCV)
import  cv2
from datetime import datetime
# black is just a start empty image ..
img=cv2.imread("black.png");
cap = cv2.VideoCapture(0)

while True:

    ret,vid=cap.read()
    dim = (800,600)
    img1 = cv2.resize(img, dim, interpolation = cv2.INTER_AREA)
    vid1 = cv2.resize(vid, dim, interpolation = cv2.INTER_AREA)

    result=cv2.addWeighted(img1,0.5,vid1,0.5,0)
    cv2.imshow('overlay', result)
    if(cv2.waitKey(10) & 0xFF == ord('b')):
            now = datetime.now()
            current_time = now.strftime("%d_%m_%Y_%H_%M_%S")
            filename = '%s.png' % current_time
            if not cv2.imwrite(filename, vid1):
                raise Exception("Could not write image")
            img=cv2.imread(filename);
Pressing B fills your directory with PNG’s
like 24_10_2023_00_01_01.png (date formatted)
convert to GIF
convert -delay 10 -loop 0 24*.png animation.gif