Photo manager addition using ML!

Last Updated or created 2022-05-29

A few years ago i wrote a photo manager .. again .. ( see post about my first previous photo manager )
It is a web gui to find photos in my huge photo archive.
I manually added 190k tags to 120k photos in 20+ years.

I thought wouldn’t it be nice if i can generate additional metadata using Machine Learning. A few years ago i did some testing and followed a podcast and free course about machine learning.

So today i started to implement a addition to my gui. Machine recognition tags!

It already kinda works.

Things to do :

  • Make it a background job, my fileserver doesn’t run Tensorflow on a GPU, so it is slooow
  • Embed in existing GUI and stats
  • Design a editor to remove wrong tags

Below a part of ML images

Command to get a thumbnail sheet with only directory names:

montage -verbose -units PixelsPerInch -density 300 -tile 7x6 -label "%d" -font Arial -pointsize 6 -background "#FFFFFF" -fill "black" -define jpeg:size=253x154 -geometry 253x154+2+2 -auto-orient */*.JPG -title "ML Thumbs" thumbsheet.jpg

Maybe, i can use debug output like below.

['lakeside, lakeshore (score = 0.47934)', 'seashore, coast, seacoast, sea-coast (score = 0.11385)', 'sandbar, sand bar (score = 0.08822)', 'breakwater, groin, groyne, mole, bulwark, seawall, jetty (score = 0.06281)', 'valley, vale (score = 0.01790)', '']

Scraping podcast which uses a javascript to obfuscate mp3 links

Last Updated or created 2022-06-29

wget-ting the page only gave me flat html, but no readable links.

We need the rendered version, phantomjs wil help

wget https://bitbucket.org/ariya/phantomjs/downloads/phantomjs-2.1.1-linux-x86_64.tar.bz2

printsource.js

var system = require('system');
var page   = require('webpage').create();
var url    = system.args[1];
page.open(url, function () {
  console.log(page.content);
  phantom.exit();
});

Run phantomjs

phantomjs-2.1.1-linux-x86_64/bin/phantomjs printsource.js  https://xxxxxxxx/show/xxxx > out

So now i got the rendered page, get mp3’s and titles, for this example

cat out | sed 'N;s/\n/,/' | cut -f2,7 -d\" | while read line ; do
mp3=$( echo $line | cut -f1 -d\")
title=$( echo $line | cut -f3 -d\> | tr -d '/<>[]]\!,;' | tr -d "'" | sed s/CDATA//g | sed s#title##g | sed s/:/-/g )
echo "$mp3 $title"
wget $mp3 -O "$title.mp3"
done

bash downloadscript
done

Portable Logitech Media Server again

Last Updated or created 2022-05-28

See post: https://www.henriaanstoot.nl/2014/04/10/portable-squeeze-server/

In the past i’ve used a home build Logitech Squeezebox server (as it was called then), Picore player and tried volumio.
Picore player has been sitting in my livingroom for ages, but was converted to a Node-Red Dashboard and recently Home Assistant Dashboard. (Has been a dasticz daskboard also)

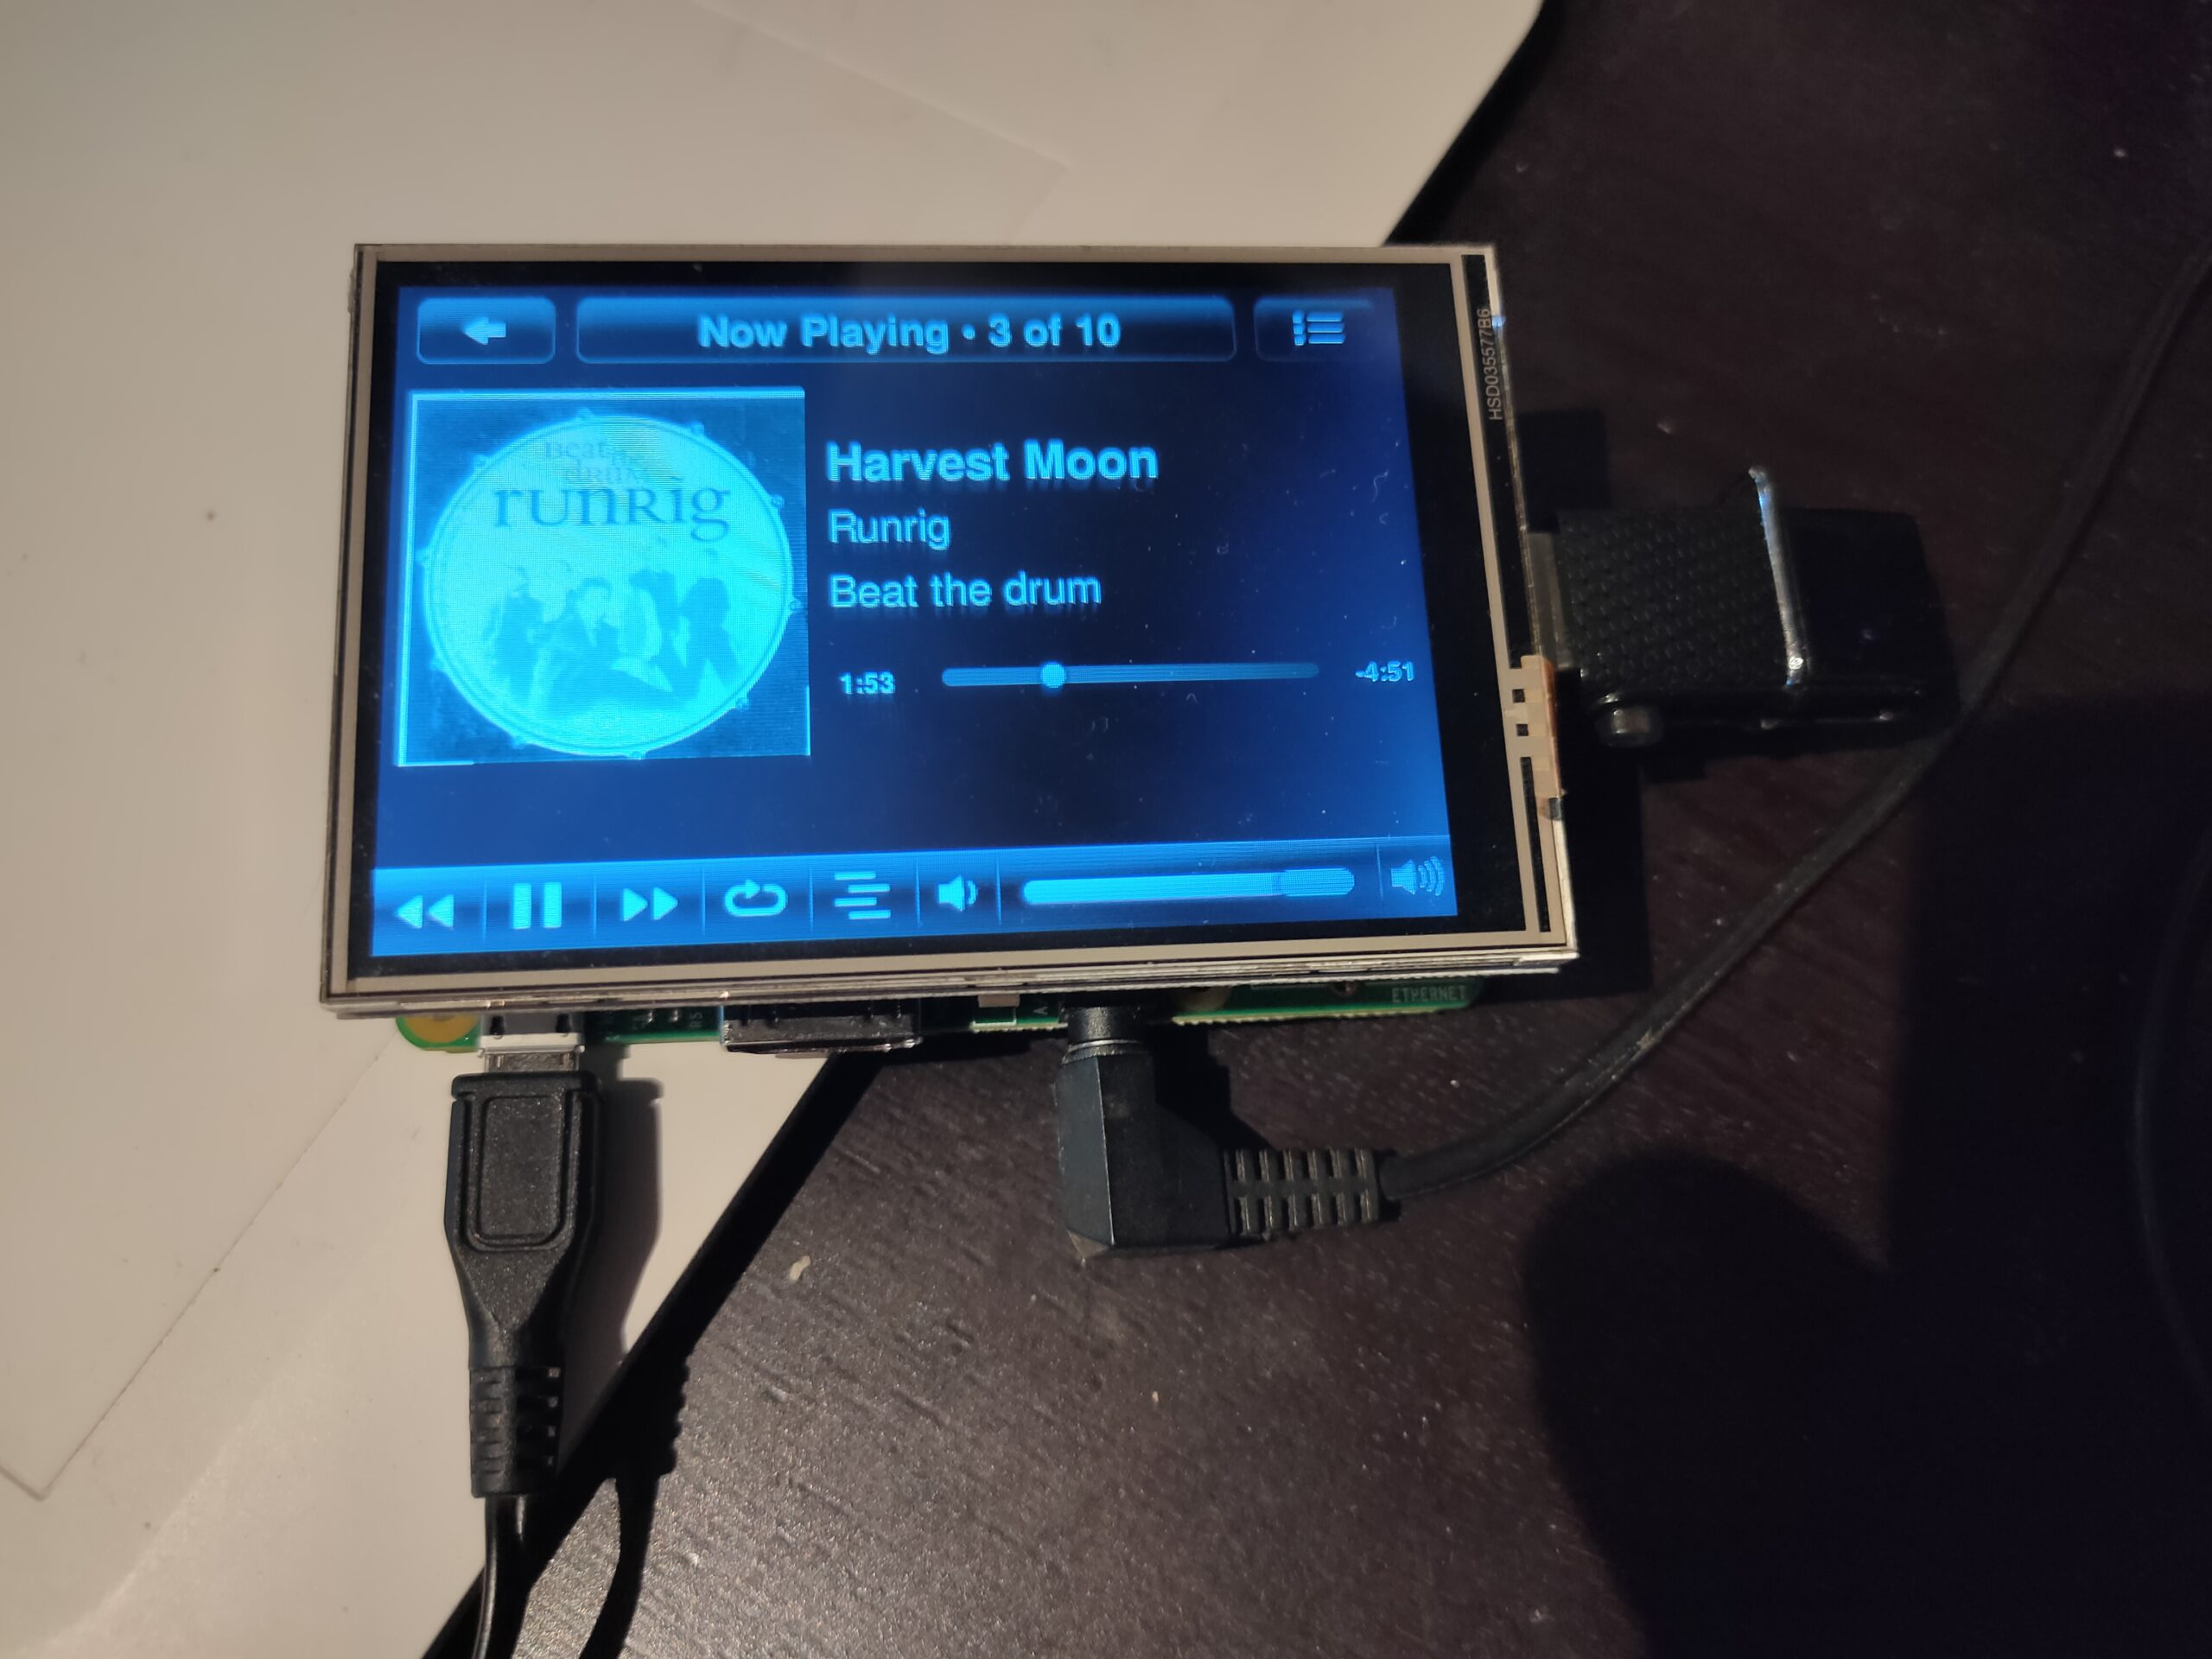
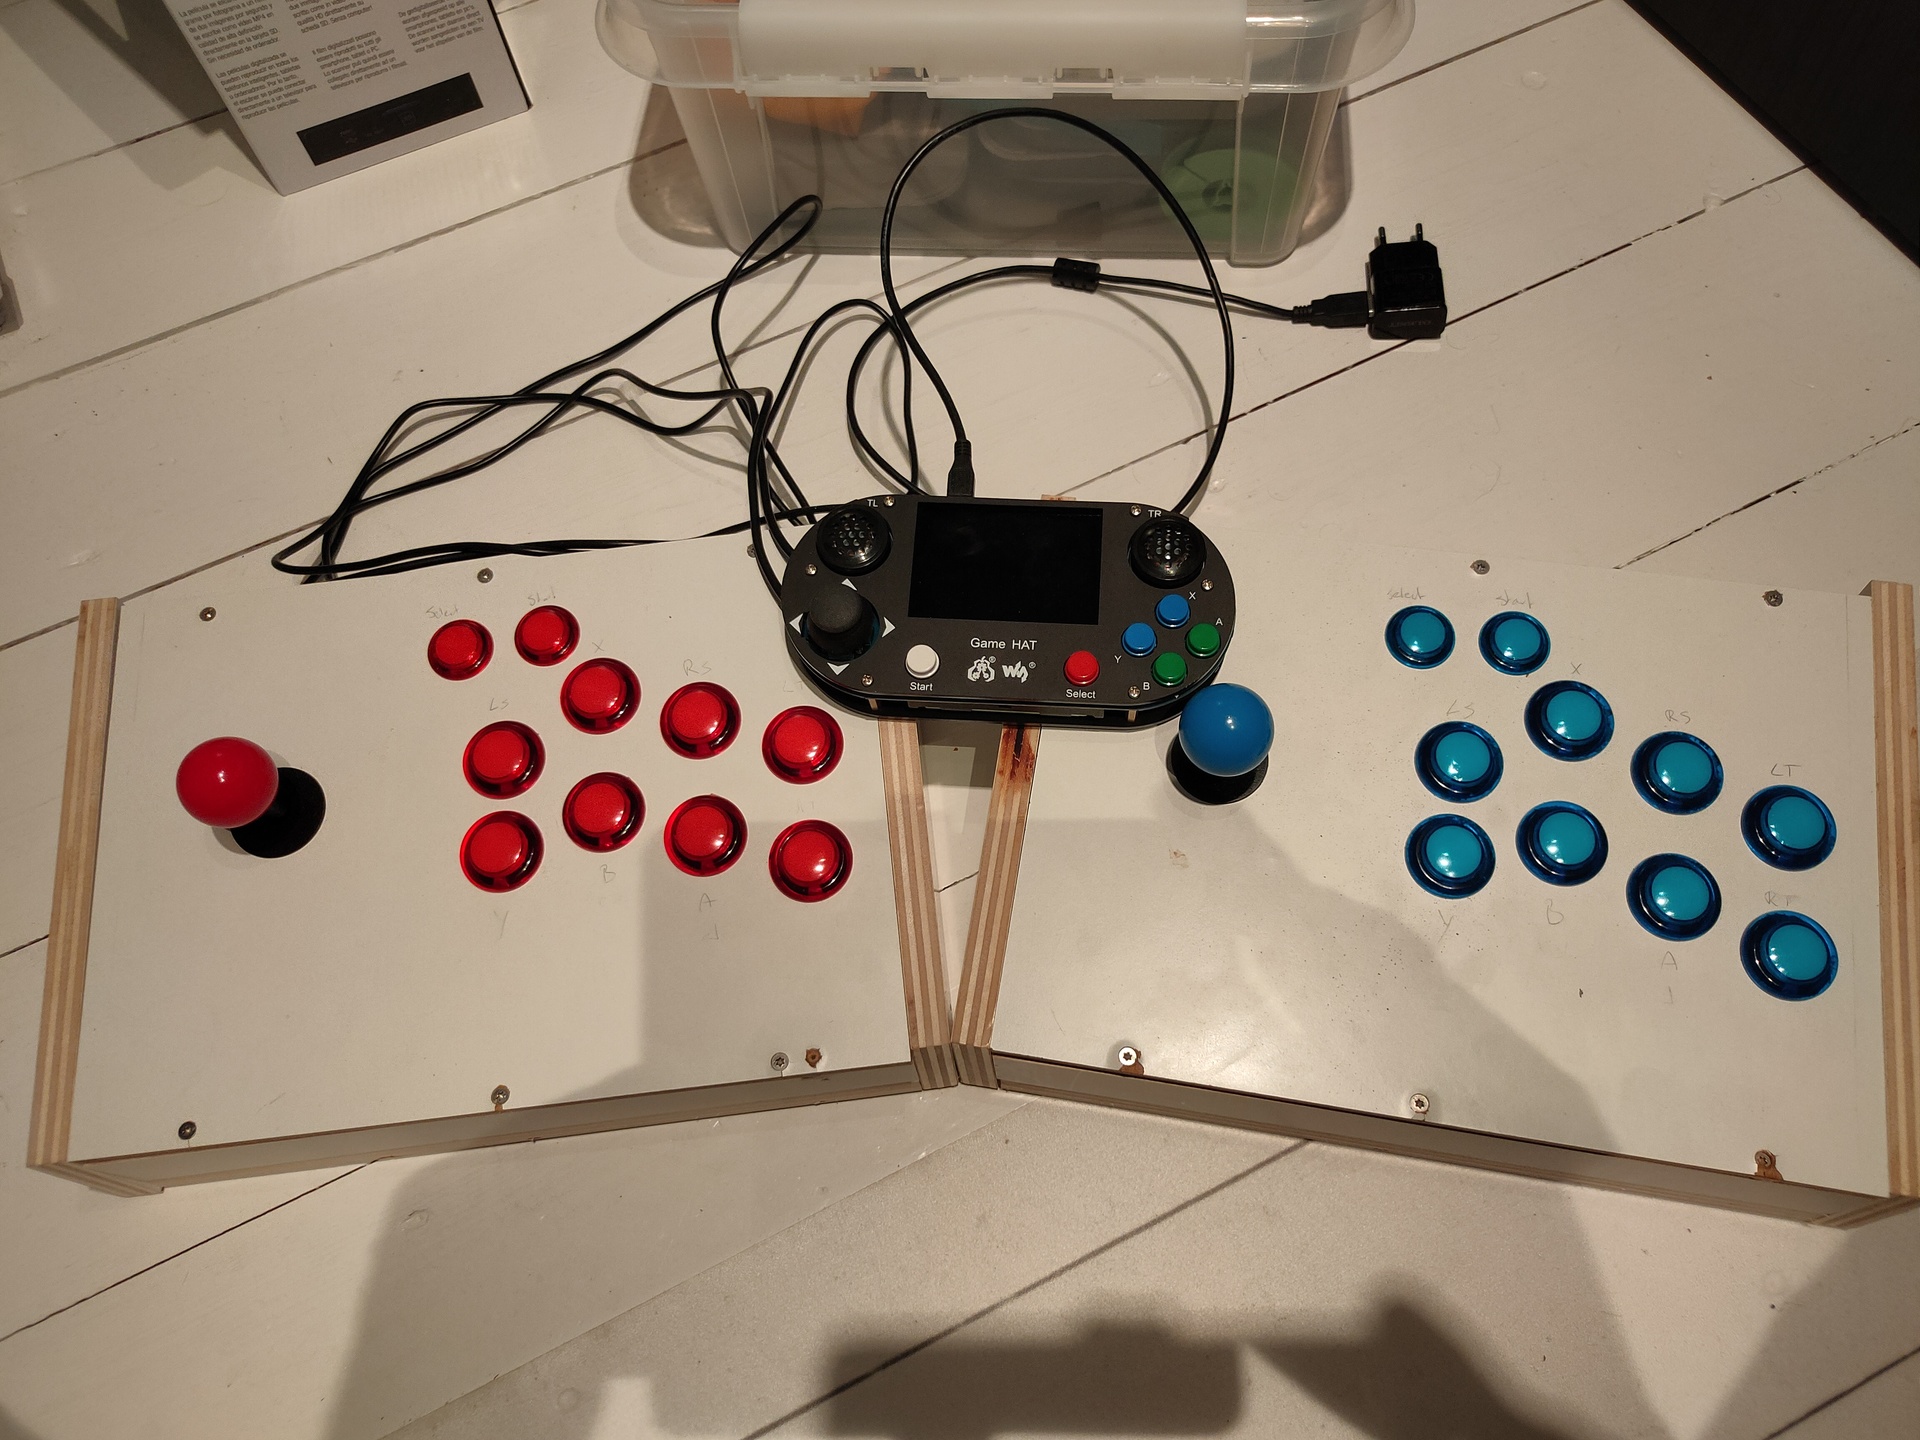
Today i build another version, smaller and with a screen.
Why? .. because of being ‘offline’ or ‘offgrid’ on our holidays.
The car we are driving only has a Aux input.

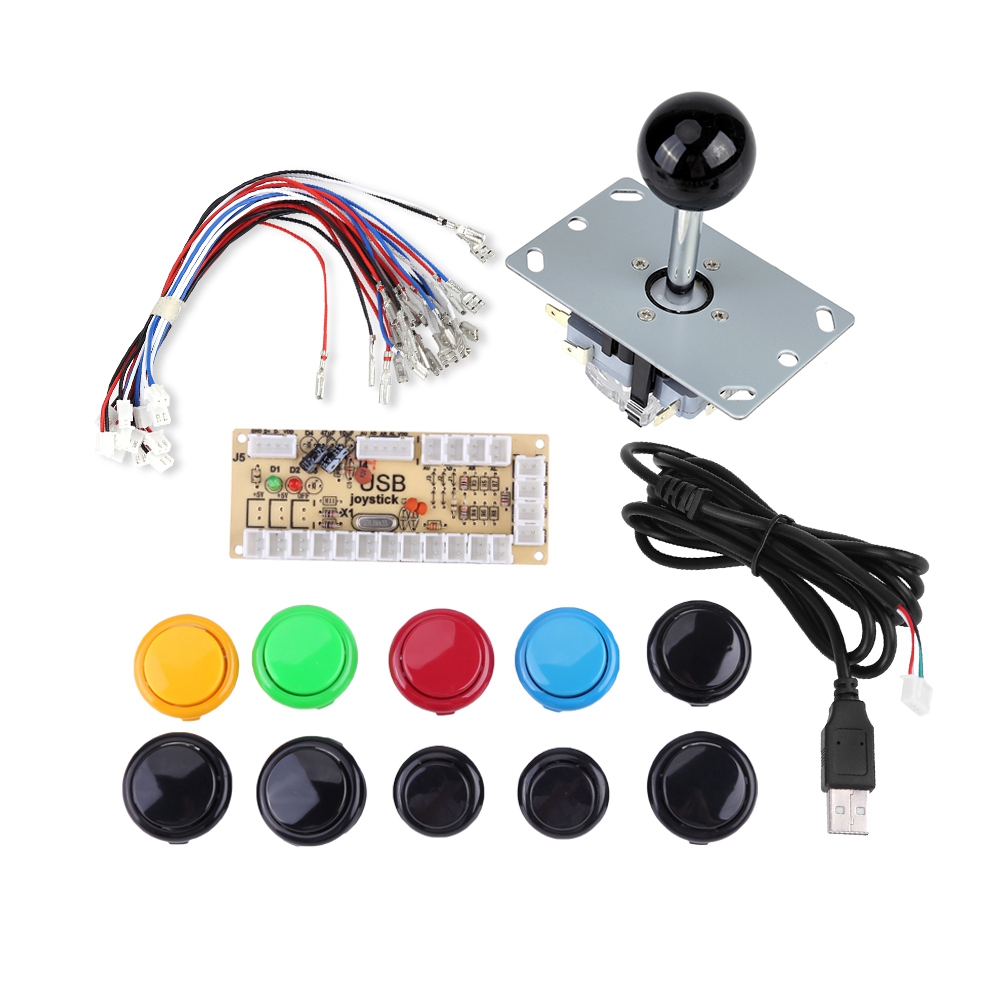
Most of the installation is as mentioned on:
https://docs.picoreplayer.org/projects/add-a-display/

I edited  /opt/bootsync.sh
to get /dev/sda1 mounted persistent
use pcp br after editing.

Default user/pass : tc piCore

Controlling the thing is via touch or a app on my phone using wifi hotspot.

  • Audio cable 3.5mm
  • Raspberry 3
  • Large usb thumbdrive
  • 3.5inch RPi Display – 480×320 Pixel – XPT2046 Touch Controller
  • car cigarette lighter adapter for power

PiCore uses below alliases

ceChange directory to /mnt/mmcblk0p2/tce
ceoChange directory to /mnt/mmcblk0p2/tce/optional
m1Mount the boot partition /mnt/mmcblk0p1
m2Mount the second partition /mnt/mmcblk0p2
c1Change directory to /mnt/mmcblk0p1
c2Change directory to /mnt/mmcblk0p2
vicfgEdit configuration file config.txt using vi
vicmdEdit boot file cmdline.txt using vi
u1Unmount the boot partition /mnt/mmcblk0p1
u2Unmount the second partition /mnt/mmcblk0p2

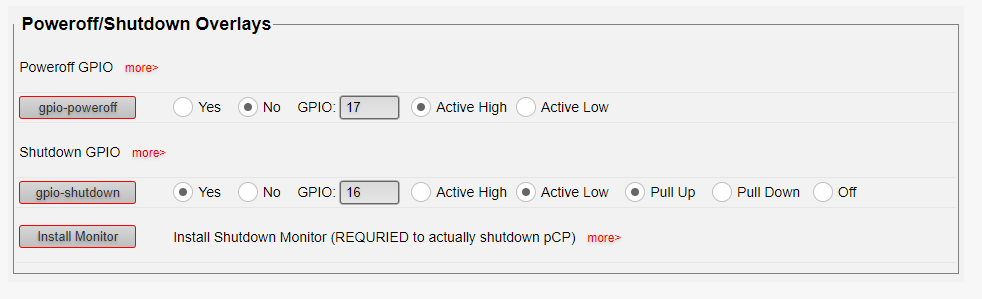
Shutting down piCore is done by cutting the power, due to everything being mounted readonly. EXEPT
When you are using LMS server installation, which uses a database.
But there is a tweak for a shutdown button.

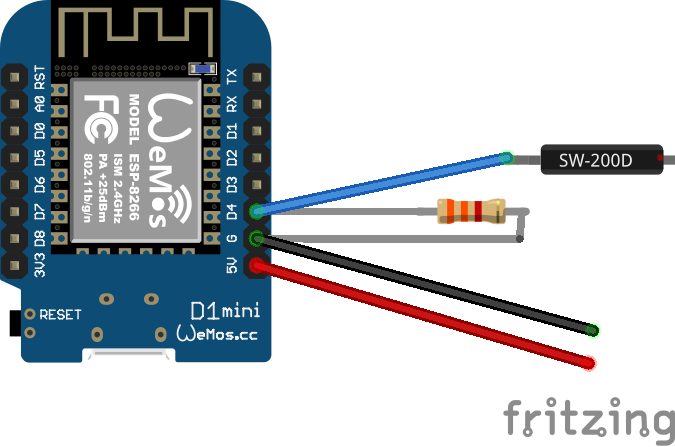
I’m using GPIO 16 because i’ve got a screen connected.
Active LOW, means you have to connect a pushbutton/switch between GND and GPIO pin. (nearest Vcc OR Gnd)

Table lamp hack

Last Updated or created 2024-01-31

Added: ino file 20220525

Bought a cheap table lamp a few weeks ago.
Runs on batteries and when you flip it over, it turns on or off.

I thought, when i strip this thing of its internals. I can make a wifi/mqtt enabled one.


Opening it up today, i saw a minimalistic print and a battery holder. There was a tilt switch like

Which i wanted to replace by a mercury one i bought in a bunch of sensors a few years ago.

So why go though all the trouble stripping and replacing .. so i didnt

GND and 5v to the batteries, and D4 to the tilt switch. (Measure which side you have to take!) .. I used a pull down of 3k3 ohms

Esp was flashed in the past with Easy ESP .. well lets keep that one for now.

INO version

#include <ESP8266WiFi.h>
#include <PubSubClient.h>
#include <Wire.h>
#include <Ethernet.h>

const char* ssid = "SSID";
const char* password = "PASSWORD";
const char* mqtt_server = "mqttserver";
const char* mqtt_username = "";
const char* mqtt_password = "";
const char* clientID = "wankel";

const int tiltPin = 4;
int tiltState = 0;    
int previousState = 0;    
WiFiClient espClient;

PubSubClient client(espClient);

void reconnect() {
  while (!client.connected()) {
    if (client.connect(clientID, mqtt_username, mqtt_password)) {
    } else {
      delay(2000);
    }
  }
}

void setup()
{
  {
    client.setServer(mqtt_server, 1883);
    pinMode(tiltPin, INPUT);
  }
}
void loop() {
  tiltState = digitalRead(tiltPin);
  if (tiltState != previousState) {
    if (tiltState == HIGH) {
      client.publish("onoff-wankel/wankel/State", "0"); //
    } else {
      client.publish("onoff-wankel/wankel/State", "1"); //
    }
    delay(100);
  }
  previousState = tiltState;

  {
    if (!client.connected()) {
      reconnect();
    }
    client.loop();
  }
}
Node red + led server

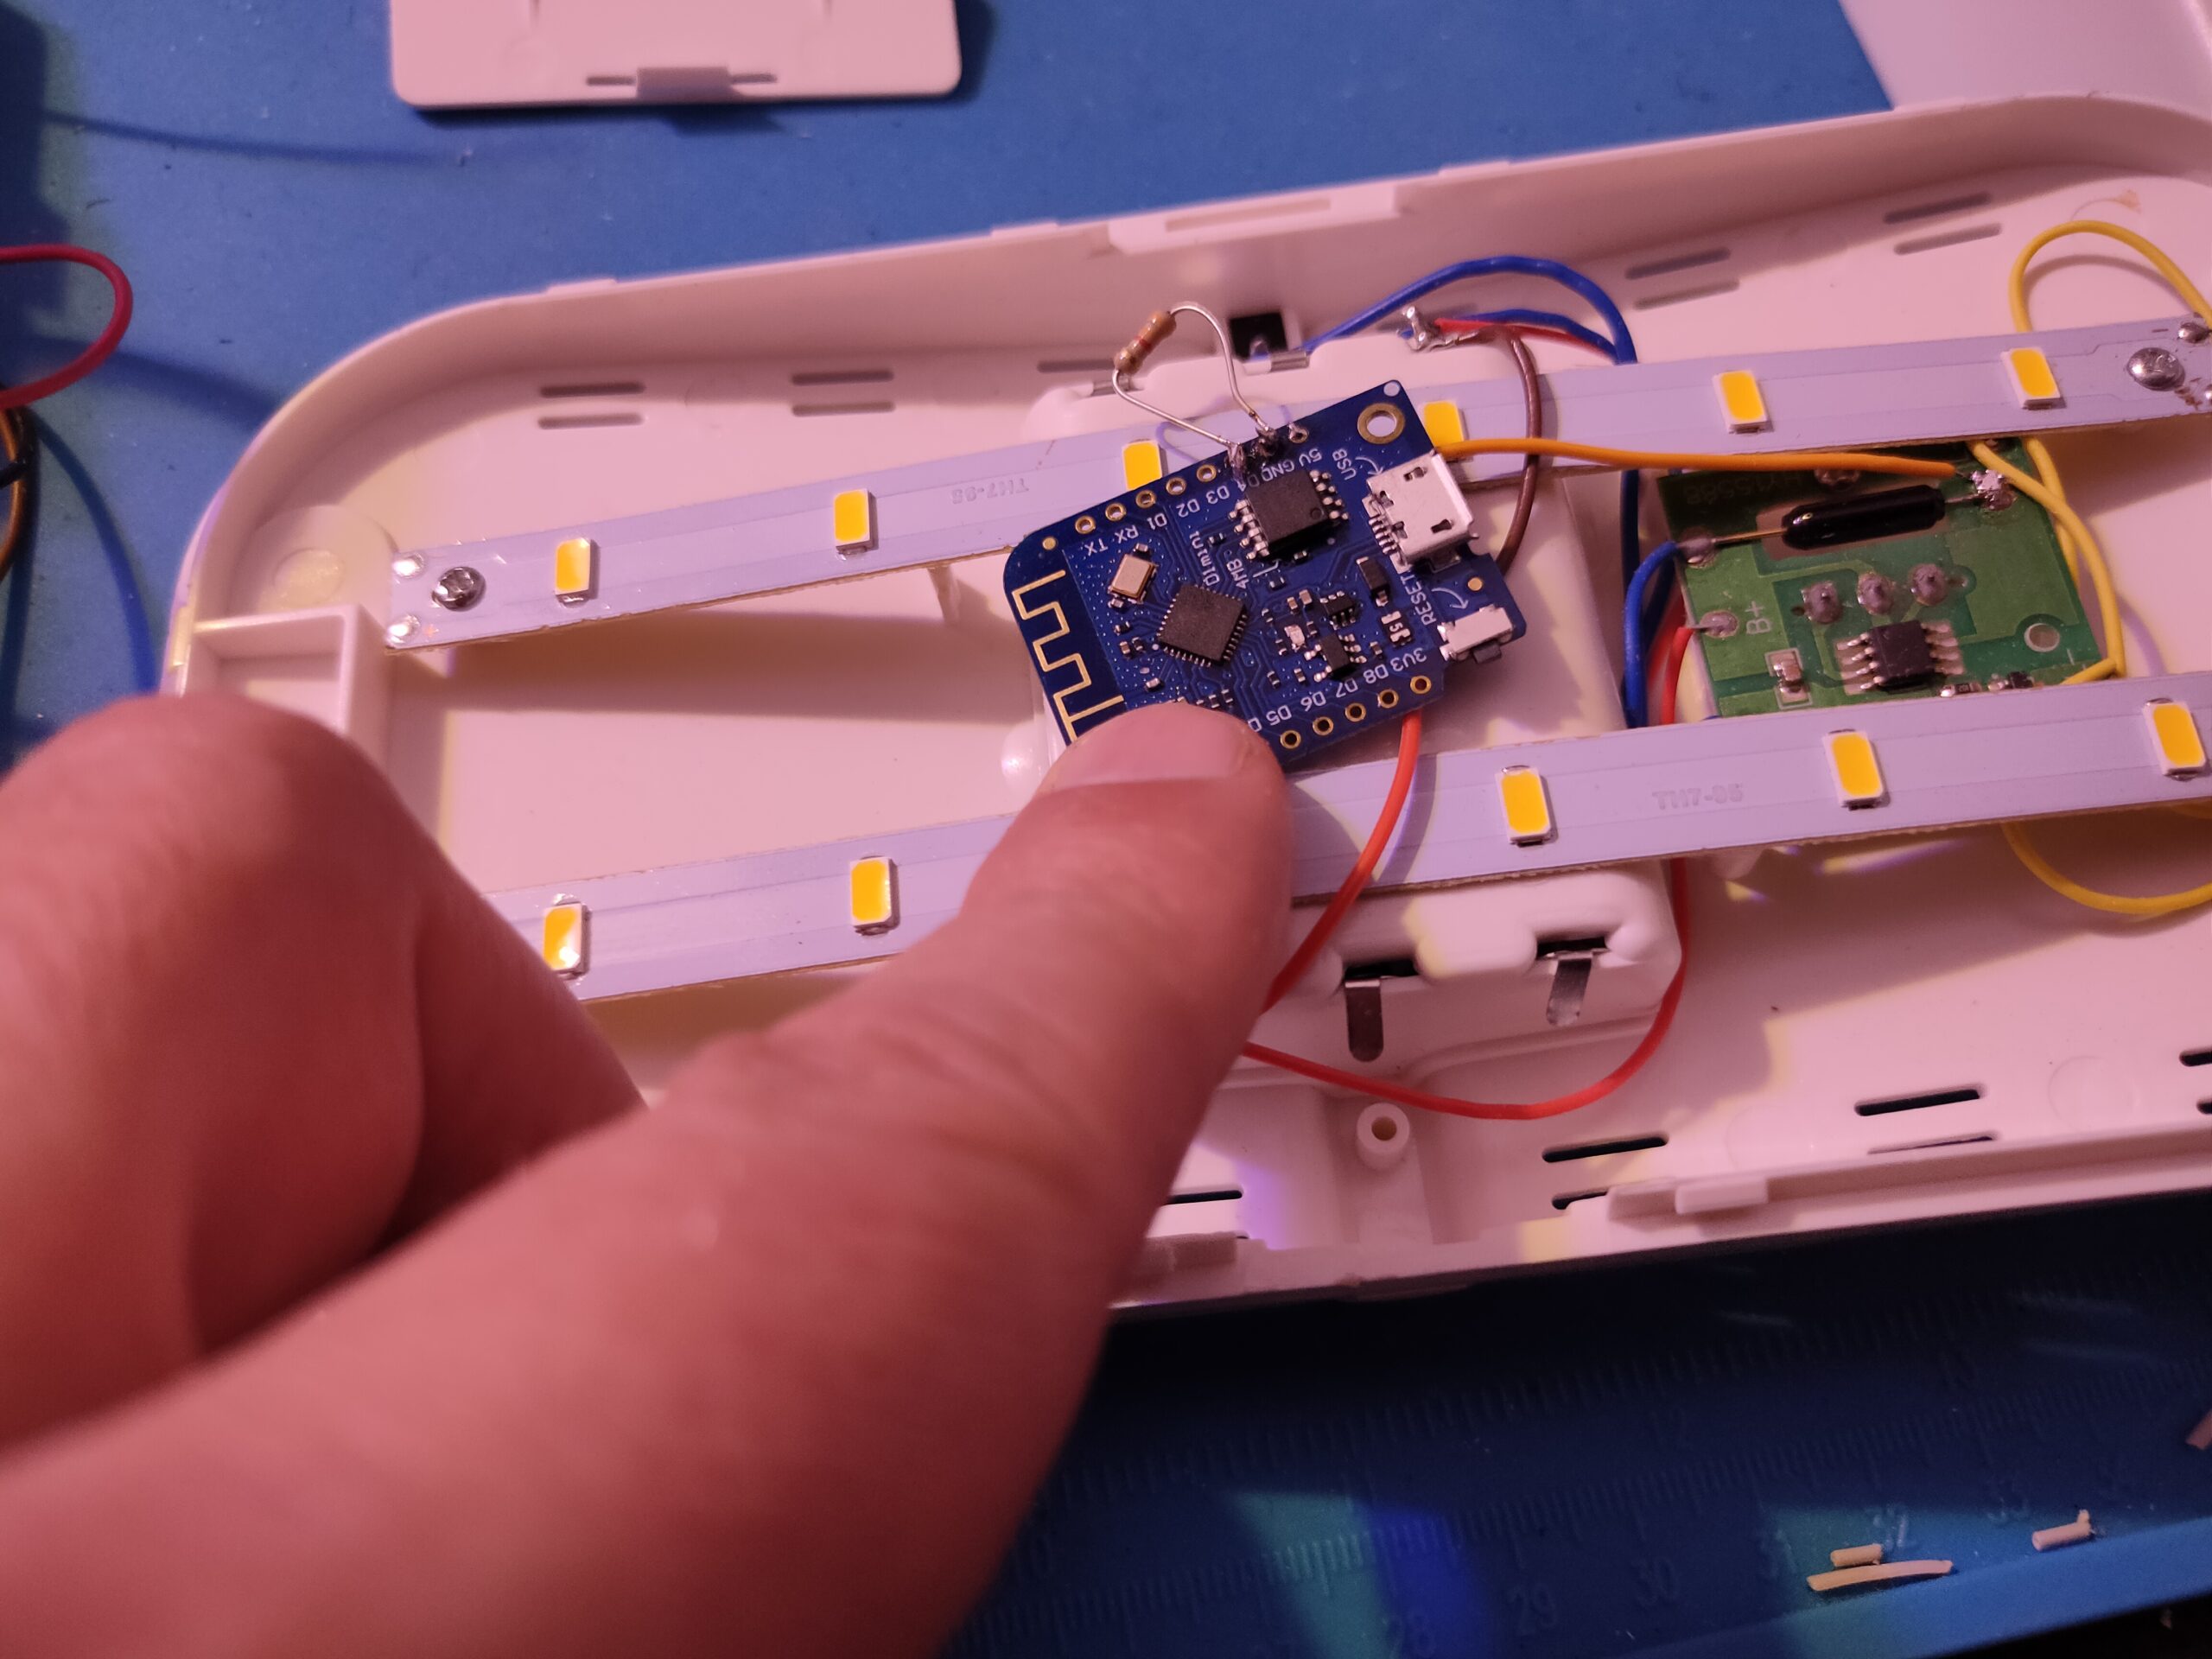
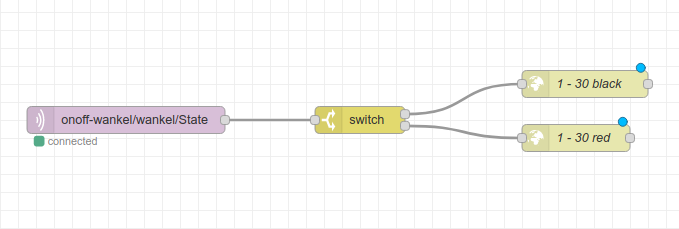
Example is using my ledserver, see other post, but i intent to made a easy to configure node red panel where the to be controlled devices are preconfigured.

[
    {
        "id": "9ec21acaec91aecc",
        "type": "mqtt in",
        "z": "54f3b5b461471f2c",
        "name": "",
        "topic": "onoff-wankel/wankel/State",
        "qos": "2",
        "datatype": "auto",
        "broker": "8c74c5f6.9a7a48",
        "nl": false,
        "rap": true,
        "rh": 0,
        "inputs": 0,
        "x": 400,
        "y": 260,
        "wires": [
            [
                "0fe77b535517f818"
            ]
        ]
    },
    {
        "id": "159f65f444a0d7c2",
        "type": "http request",
        "z": "54f3b5b461471f2c",
        "name": "1 - 30 red",
        "method": "GET",
        "ret": "txt",
        "paytoqs": "ignore",
        "url": "http://ledserver:8080/range/01/30/ff0000",
        "tls": "",
        "persist": false,
        "proxy": "",
        "authType": "",
        "senderr": false,
        "credentials": {},
        "x": 900,
        "y": 280,
        "wires": [
            []
        ]
    },
    {
        "id": "5806fbfd0e99daab",
        "type": "http request",
        "z": "54f3b5b461471f2c",
        "name": "1 - 30 black",
        "method": "GET",
        "ret": "txt",
        "paytoqs": "ignore",
        "url": "http://ledserver:8080/range/01/30/000000",
        "tls": "",
        "persist": false,
        "proxy": "",
        "authType": "",
        "senderr": false,
        "credentials": {
            "user": "",
            "password": ""
        },
        "x": 910,
        "y": 220,
        "wires": [
            []
        ]
    },
    {
        "id": "0fe77b535517f818",
        "type": "switch",
        "z": "54f3b5b461471f2c",
        "name": "",
        "property": "payload",
        "propertyType": "msg",
        "rules": [
            {
                "t": "eq",
                "v": "0",
                "vt": "str"
            },
            {
                "t": "eq",
                "v": "1",
                "vt": "str"
            }
        ],
        "checkall": "true",
        "repair": false,
        "outputs": 2,
        "x": 660,
        "y": 260,
        "wires": [
            [
                "5806fbfd0e99daab"
            ],
            [
                "159f65f444a0d7c2"
            ]
        ]
    },
    {
        "id": "8c74c5f6.9a7a48",
        "type": "mqtt-broker",
        "name": "mqttserver",
        "broker": "mqttserver",
        "port": "1883",
        "clientid": "",
        "usetls": false,
        "compatmode": true,
        "keepalive": "15",
        "cleansession": true,
        "birthTopic": "",
        "birthQos": "0",
        "birthPayload": "",
        "closeTopic": "",
        "closePayload": "",
        "willTopic": "",
        "willQos": "0",
        "willPayload": ""
    }
]

Arcade buttons retro games

Last Updated or created 2023-01-13

Connecting to my little handheld or on the big TV

See post https://www.henriaanstoot.nl/2021/11/21/retropi-handheld/

My good friend Vincent gave me his Arcade setup.

Button set

Games for two players:

Games played:

  • Metal slug
  • 1942
  • Galaga – First time i saw this was in Germany with the Concord Pipe Band
  • Track & Field, also known as Hyper Olympic – played a lot with a friend from the LTS

Cheezy Hamburger

Last Updated or created 2023-03-23

In the past i came up with a hamburger that most liked.
(The computer party burger)

This one is quite cheezy, and heavy cheese, so not to everyones liking.
But we loved this “experiment”!

And indeed an experiment, i’m not a cook. I only know how to smoke meat, slowcook and so on.
The only other thing i can make which gets compliments, is a real Pasta Carbonara

  • Viking blue cheese
  • Camembert cheese
    • Red onion (outer rings only)
  • Brown sugar
  • Rucola lettuce
  • Hamburger made from deer. ( Gamey taste )
    https://www.grutto.com/nl/wild/hert-pakket-groot
  • Chestnut mushrooms
  • Shitake olive oil
  • Balsamic vinegar
  • Teardrop tony roasted onion bbq sauce

Mix a lot of the cheeses and melt in the preheated oven.
Glaze the onion in olive oil and brown sugar.
Fry the mushrooms in shitake olive oil and add some balsamic vinegar.
Prepare the burgers on your BBQ, use some smoke.
(I like to put the cheese on top of the burgers the last 2 minutes or so, it will melt over the burgers and get some smoke)
Slice the burger buns in two, and put in the oven. (Sliced part down)
(until a little brown/crispy)

ZFS replace disk

Last Updated or created 2022-05-18

I’m using ZFS for my main fileserver, this pool was created over 10 years ago.
Meanwhile i’ve: Swapped broken disks, switched disks for bigger ones and effectively resized my storage 2 or 3 times. Never had any corruption.

Yesterday i say a warning that one of the disks in the pool was OFFLINE.
Today i replaced it using below command’s

  • Put the disk in OFFLINE mode (if needed, mine was already offline)
    • zpool offline tank sdb
  • Remove disk from system
    • echo 1 | sudo tee /sys/block/sdb/device/delete
  • Remove the disk physically
  • Insert the replacement disk. And copy headers/structure from another disk
    • sgdisk –replicate=/dev/sdb /dev/sda
    • sgdisk –randomize-guids /dev/sdb
  • Run the zpool replace command. 
    • zpool replace tank /dev/sdb
  • Use online command to activate disk (no needed in my case, it already did that)
Tips:

# My labels with serials fell off :(
dd if=/dev/sdb of=/dev/null -> blinky led .. 

# What is the serial?
sudo hdparm -i /dev/sdb | grep Serial

Output

root@latex:~# sgdisk --replicate=/dev/sdb /dev/sda
The operation has completed successfully.
root@latex:~# sgdisk --randomize-guids /dev/sdb
The operation has completed successfully.
root@latex:~# zpool replace tank /dev/sdb
root@latex:~# zpool status
  pool: tank
 state: DEGRADED
status: One or more devices is currently being resilvered.  The pool will
        continue to function, possibly in a degraded state.
action: Wait for the resilver to complete.
  scan: resilver in progress since Wed May 18 11:31:21 2022
    5.64T scanned out of 14.4T at 331M/s, 7h42m to go
    1.88T resilvered, 39.16% done
config:

        NAME             STATE     READ WRITE CKSUM
        tank             DEGRADED     0     0     0
          raidz1-0       DEGRADED     0     0     0
            sda          ONLINE       0     0     0
            replacing-1  REMOVED      0     0     0
              old        REMOVED      0     0     0
              sdb        ONLINE       0     0     0  (resilvering)
            sdc          ONLINE       0     0     0

errors: No known data errors

New NFO generator using yad

Last Updated or created 2022-05-18

old post : https://www.henriaanstoot.nl/2021/02/08/kodi-movies-and-metadata/

Added poster art generator at the bottom of this page

Made a new NFO generator to get private movies properly scraped in kodi.

What does it do?

  • Genererates NFO for Kodi
  • Goes recursive though given directories
  • Skips movies with existing nfo
  • Previews the movie using VLC (So you can see what it is you are adding information for)
  • Tries to make a nice title from filename and year
  • Gets year from metadata
  • Fills tags from yad forms
  • next version i will add a poster generator from another nfo script i made. (It allready works, but i want to add a frame selector.
  • Adds new genre/actors/places if they dont exists
#!/bin/bash
# Needs mediainfo and yad
#find /media/geisha/private/Media/video/ -type f | egrep -i "mkv$|avi$|mpg$|mp4$|ogv$" | while read ; do
find $1 -type f | egrep -i "mkv$|avi$|mpg$|mp4$|ogv$" | while read ; do
# check if nfo exists
short=$(echo  "$REPLY" | rev | cut -f-2 -d/ | rev)
file=$( echo "$REPLY" | rev | cut -f2 -d. | rev).nfo
filename=$( basename "$REPLY" | cut -f1 -d. )
if [ -f "$file" ] ; then
	echo "$file found .. so skipping"
else
	echo "Not found $file"
nohup vlc "$REPLY" &
# check if find date
year=$(mediainfo "$REPLY" | grep Encoded |head -1 2>/dev/null | awk '{ print $5 }' | cut -c-4)
yeartitle="$year - "
if [ "$year" == "" ] ; then 
	year=$(echo $file | tr -cd '2[0-9][0-9][0-9]')
	if [ ! "$year" == "" ] ; then 
		#no year in filename
		yeartitle=""
	else
		yeartitle="$year - "
	fi
	
fi
# create nfo
forminfo=$(yad --title="nfo form $short" --text="Please enter:" --form --field="Title" --field="Year" --field="Placenew" --field="Genrenew" "$yeartitle $filename" "$year" "" "" --form --columns=2 --item-
separator="," --field="Place":CB --field="Genre":CB "$(paste -s -d"," < places)" "$(paste -s -d"," < genres)")
#echo $forminfo
#2020 - |2020|placenem|genrene|Hilversum|Vacation|
title=$(echo $forminfo | cut -f1 -d\|)
year=$(echo $forminfo | cut -f2 -d\|)
placenew=$(echo $forminfo | cut -f3 -d\|)
genrenew=$(echo $forminfo | cut -f4 -d\|)
place=$(echo $forminfo | cut -f5 -d\|)
genre=$(echo $forminfo | cut -f6 -d\|)
# Plot
plot=$(yad --form --field="Text::TXT" --geometry="600x200")
#plot=$( echo $plot | cut -f1 -d\\)
#plot=$( echo $plot | cut -f1 -d|)
# Actors
actors=$(yad --list  --geometry="200x480"  --print-all --column= --column=:chk --column= --column=:chk $( cat actors | cut -f1 -d" "  |while read user; do echo -n "$user false " ;done ) )
echo $actors | grep "NEW|TRUE" >/dev/null 
if [ $? -eq 0 ] ; then
vi actors
actors=$(yad --list  --geometry="200x480"  --print-all --column= --column=:chk --column= --column=:chk $( cat actors  | cut -f1 -d" " |while read user; do echo -n "$user false " ;done ) )
fi
if [ ! "$placenew" == "" ] ; then
	place="$placenew"
	echo "$placenew" >> places
fi
if [ ! "$genrenew" == "" ] ; then
	genre="$genrenew"
	echo "$genrenew" >> genres
fi
(
echo '<?xml version="1.0" encoding="utf-8" standalone="yes"?>'
echo "<movie>"
echo "  <plot>$plot</plot>"
echo "  <outline />"
echo "  <title>$title</title>"
echo "  <year>$year</year>"
echo "  <country>$place</country>"
cat actors | cut -f1 -d" " | while read actorname ; do
	echo $actors | grep "$actorname|TRUE"  >/dev/null
		if [ $? -eq 0 ] ; then
		name=$(grep $actorname actors | cut -f2 -d\" )
		echo "<actor>"
		echo "  <name>$actorname</name>"
		echo "  <role>$name</role>"
		echo "</actor>"
	fi
done
echo "  <genre>$genre</genre>"
echo "  <art>"
echo "  </art>"
echo "</movie>" 
) > "$file"  
fi
killall vlc
done

And some files

> actors
Firstname "Firstname Lastname"
> genres
Vacation
Pruts
> places
Netherlands

Poster generator (select poster thumbnail to use)

Generates 3 poster images and 3 thumbs to select.
Thumbs are 10 seconds into the movieclip, midway and on 2/3

short=$(basename $1 | cut -f1 -d.)

three=$(( $(mediainfo --Inform="Video;%Duration%" $1) / 3000 ))
rm -f thumb*.jpg poster*.jpg
first=10
#ffmpeg -ss $first -i $1 -vf scale=320:-1 -frames:v 1 -q:v 2 thumb1.jpg  -hide_banner -loglevel error
ffmpeg -ss $first -i $1 -frames:v 1 -q:v 2 thumb1.jpg  -hide_banner -loglevel error
second=$(( $three  ))
ffmpeg -ss $second -i $1 -frames:v 1 -q:v 2 thumb2.jpg  -hide_banner -loglevel error
third=$(( $three * 2 ))
ffmpeg -ss $third -i $1 -frames:v 1 -q:v 2 thumb3.jpg  -hide_banner -loglevel error
convert thumb1.jpg -resize x1000 -gravity center -crop 666x1000 poster1.jpg
convert thumb1.jpg -resize x320 -gravity center -crop 212x320 thumb1s.jpg
convert thumb2.jpg -resize x1000 -gravity center -crop 666x1000  poster2.jpg
convert thumb2.jpg -resize x320 -gravity center -crop 212x320 thumb2s.jpg
convert thumb3.jpg -resize x1000 -gravity center -crop 666x1000  poster3.jpg
convert thumb3.jpg -resize x320 -gravity center -crop 212x320 thumb3s.jpg


out=$(yad --form --title="Select poster thumbnail"  --geometry="+0+0" \
       --columns="3" \
       --field="!thumb1s-1.jpg! :fbtn" "echo poster1-1.jpg"  \
       --field="!thumb2s-1.jpg! :fbtn" "echo poster2-1.jpg"  \
       --field="!thumb3s-1.jpg! :fbtn" "echo poster3-1.jpg"
)
if [ ! "$out" == "|||" ] ; then
choice=$(echo $out | sed s/\ \|\|\|//g | rev | cut -f1 -d" " | rev)
echo cp $choice ${short}-poster.jpg
fi

Add effect to movie using bash

Last Updated or created 2022-05-17

mkdir -p videoframessource videoframes
ffmpeg -r 60 -i sweden.mp4 videoframessource/%05d.png
cd videoframessource
ls *png | while read file ; do ../convert2comic $file ; echo -n "." ;done ; echo ""
ffmpeg -f image2 -r 60  -i videoframes/%05d.png  -vcodec libx264 final.mp4
#!/bin/bash
# convert script .. call me convert2comic
convert -quiet $1 +repage -depth 8 -selective-blur 0x5+10% ./tmp1
convert ./tmp1 -level 0x80% -colorspace gray -posterize 6 -depth 8 -colorspace sRGB ./tmp2
convert ./tmp1 '(' ./tmp2 -blur 0x1 ')' '(' -clone 0 -clone 1 -compose over -compose multiply -composite -modulate 100,150,100 ')' '(' -clone 0 -colorspace gray ')' '(' -clone 3 -negate -blur 0x2 ')' '(' -c
lone 3 -clone 4 -compose over -compose colordodge -composite -evaluate pow 4 -threshold 90% -median 1 ')' -delete 0,1,3,4 -compose over -compose multiply -composite ../videoframes/$1
# Another nice effect
convert frame.png \( +clone -negate -blur 0x6 \) -compose ColorDodge -composite -modulate 100,0,100 out.png