ABC to Animation for Concertina

Last Updated or created 2023-01-05

I want to take simple ABC Music notation tunes and convert these to animations which shows you which keys to press and to push or pull.

This is a work in progress.
Script is using ImageMagick and ffmpeg

I started this in bash, and i should rewrite this in python.

Bash script which generates the images

#!/bin/bash
convert -size 800x600 canvas:white white.png
x=55
y=55
draw=""
for xx in $(seq 1 6); do
for yy in $(seq 1 5); do
	startx=$(( $x * $xx + 100))
	starty=$(( $y * $yy + 200))
if [ $xx -gt 3 ] ; then startx=$(($startx + 200)) ;fi
draw="$draw  -draw \"circle $startx,$starty $(( $startx - 10)),$(( $starty - 10 ))\""
done
done
echo convert $draw white.png          draw_circle.png | bash

for xx in $(seq 1 6); do
for yy in $(seq 1 5); do
        startx=$(( $x * $xx + 100))
        starty=$(( $y * $yy + 200))
if [ $xx -gt 3 ] ; then startx=$(($startx + 200)) ;fi
convert -fill white -stroke black $draw  -draw "circle $startx,$starty $(( $startx - 10)),$(( $starty - 10 ))" draw_circle.png $xx-$yy.png
convert  -draw "rectangle 300,50 500,100"  $xx-$yy.png push-$xx-$yy.png
convert  -draw "rectangle 150,50 650,100"  $xx-$yy.png pull-$xx-$yy.png
done
done

Example movie generated using random notes/length pause

for f in $(seq 1 50) ; do
pushpull=$(shuf -n1 -e push pull)
row=$(shuf -n1 -e 1 2 2 2 2 2 3 4 4 5 5 5 6)
col=$(shuf -n1 -e 1 1 1 2 2 3)
pauze=$(shuf -n1 -e 0 0 0 0 0 0 0 0 1 )
length=$(shuf -n1 -e 1 1 1 1 2 2 3 4)
file="$pushpull-$row-$col.png"
if [ $pauze == "1" ]; then
file="draw_circle.png"
fi
for f in $(seq 1 $lenght) ; do
echo "file $file"
echo "duration 0.5"
done
done

list to mp4

ffmpeg -f concat -i list  -vf fps=10 -pix_fmt yuv420p test.mp4

Above movie shows left and right hand. Keys to press.
And the bar above represents PULL/PUSH

Todo/In progress:

  • abc parser ( started )
  • Push/Pull as text in above movie also note to play??
  • Rewrite to python

Servo’s Rotary encoders, Node-red and Mqtt

Last Updated or created 2023-01-05

Multiple rotary encoders are controlling a servo based lock. 3 players have to work together to open the lock.

Secure MQTT rotary encoder (Can be used over the internet)
Servo based lock
Lock Mockup
Node red test logic

Arduino Rotary button (mqtt)

#include <ESP8266WiFi.h>
#include <WiFiClientSecure.h>
#include <time.h>
#include <PubSubClient.h>

#define encoderCLK 5   //D1
#define encoderDT 4    //D2
int servoAngle = 0;
int crntCLK;
int prvsCLK;
String myString;
char ang[50];

#ifndef SECRET
const char ssid[] = "MYSSID";
const char pass[] = "MSSIDPASS";

#define HOSTNAME "rotary1"

const char MQTT_HOST[] = "securemqttserver";
const int MQTT_PORT = 8883;
const char MQTT_USER[] = "user"; // leave blank if no credentials used
const char MQTT_PASS[] = "pass"; // leave blank if no credentials used

const char MQTT_SUB_TOPIC[] = "escape/" HOSTNAME "/in";
const char MQTT_PUB_TOPIC[] = "escape/" HOSTNAME "/out";
const char MQTT_PUB_TOPIC_angle[] = "escape/" HOSTNAME "/angle";

#ifdef CHECK_CA_ROOT
static const char digicert[] PROGMEM = R"EOF(
-----BEGIN CERTIFICATE-----
MIIFtTCCA52gAwIBAgIUXEEQRLHhYox8a95YiAYX/wQ/XeMwDQYJKoZIhvcNAQEN
----8< snip snap
CyLjTT2rtllw==
-----END CERTIFICATE-----
)EOF";
    #endif

    #ifdef CHECK_PUB_KEY
    // Extracted by: openssl x509 -pubkey -noout -in ca.crt
    static const char pubkey[] PROGMEM = R"KEY(
    -----BEGIN PUBLIC KEY-----
    xxxxxxxxxxxxxxxxxxxxxxxxxxxxxxxxxxxxxxxxxxxxxxxxxxxxxxxxxxxxxxxx
    xxxxxxxxxxxxxxxxxxxxxxxxxxxxxxxxxxxxxxxxxxxxxxxxxxxxxxxxxxxxxxxx
    xxxxxxxxxxxxxxxxxxxxxxxxxxxxxxxxxxxxxxxxxxxxxxxxxxxxxxxxxxxxxxxx
    xxxxxxxxxxxxxxxxxxxxxxxxxxxxxxxxxxxxxxxxxxxxxxxxxxxxxxxxxxxxxxxx
    xxxxxxxxxxxxxxxxxxxxxxxxxxxxxxxxxxxxxxxxxxxxxxxxxxxxxxxxxxxxxxxx
    xxxxxxxxxxxxxxxxxxxxxxxxxxxxxxxxxxxxxxxxxxxxxxxxxxxxxxxxxxxxxxxx
    xxxxxxxxxxxxxxxxxxxxxxxxxxxxxxxxxxxxxxxxxxxxxxxxxxxxxxxxxxxxxxxx
    xxxxxxxxxxxxxxxxxxxxxxxxxxxxxxxxxxxxxxxxxxxxxxxxxxxxxxxxxxxxxxxx
    xxxxxxxx
    -----END PUBLIC KEY-----
    )KEY";
    #endif

    #ifdef CHECK_FINGERPRINT
	// Extracted by: openssl x509 -fingerprint -in ca.crt
    static const char fp[] PROGMEM = "AA:BB:CC:DD:EE:FF:00:11:22:33:44:55:66:77:88:99:AA:BB:CC:DD";
    #endif
#endif

//////////////////////////////////////////////////////

#if (defined(CHECK_PUB_KEY) and defined(CHECK_CA_ROOT)) or (defined(CHECK_PUB_KEY) and defined(CHECK_FINGERPRINT)) or (defined(CHECK_FINGERPRINT) and defined(CHECK_CA_ROOT)) or (defined(CHECK_PUB_KEY) and defined(CHECK_CA_ROOT) and defined(CHECK_FINGERPRINT))
  #error "cant have both CHECK_CA_ROOT and CHECK_PUB_KEY enabled"
#endif

BearSSL::WiFiClientSecure net;
PubSubClient client(net);

time_t now;
unsigned long lastMillis = 0;

void mqtt_connect()
{
  while (!client.connected()) {
    Serial.print("Time: ");
    Serial.print(ctime(&now));
    Serial.print("MQTT connecting ... ");
    if (client.connect(HOSTNAME, MQTT_USER, MQTT_PASS)) {
      Serial.println("connected.");
      client.subscribe(MQTT_SUB_TOPIC);
    } else {
      Serial.print("failed, status code =");
      Serial.print(client.state());
      Serial.println(". Try again in 5 seconds.");
      /* Wait 5 seconds before retrying */
      delay(5000);
    }
  }
}

void receivedCallback(char* topic, byte* payload, unsigned int length) {
  Serial.print("Received [");
  Serial.print(topic);
  Serial.print("]: ");
  for (int i = 0; i < length; i++) {
    Serial.print((char)payload[i]);
  }
}

void setup()
{
  pinMode (encoderCLK,INPUT_PULLUP);
  pinMode (encoderDT,INPUT_PULLUP);
  prvsCLK = digitalRead(encoderCLK);
  Serial.begin(115200);
  Serial.println();
  Serial.println();
  Serial.print("Attempting to connect to SSID: ");
  Serial.print(ssid);
  WiFi.hostname(HOSTNAME);
  WiFi.mode(WIFI_STA);
  WiFi.begin(ssid, pass);
  while (WiFi.status() != WL_CONNECTED)
  {
    Serial.print(".");
    delay(1000);
  }
  Serial.println("connected!");

  Serial.print("Setting time using SNTP");
  configTime(1 * 3600, 0, "pool.ntp.org", "time.nist.gov");
  now = time(nullptr);
  while (now < 1510592825) {
    delay(500);
    Serial.print(".");
    now = time(nullptr);
  }
  Serial.println("done!");
  struct tm timeinfo;
  gmtime_r(&now, &timeinfo);
  Serial.print("Current time: ");
  Serial.print(asctime(&timeinfo));

  #ifdef CHECK_CA_ROOT
    BearSSL::X509List cert(digicert);
    net.setTrustAnchors(&cert);
  #endif
  #ifdef CHECK_PUB_KEY
    BearSSL::PublicKey key(pubkey);
    net.setKnownKey(&key);
  #endif
  #ifdef CHECK_FINGERPRINT
    net.setFingerprint(fp);
  #endif
  #if (!defined(CHECK_PUB_KEY) and !defined(CHECK_CA_ROOT) and !defined(CHECK_FINGERPRINT))
    net.setInsecure();
  #endif

  client.setServer(MQTT_HOST, MQTT_PORT);
  client.setCallback(receivedCallback);
  mqtt_connect();
}

void loop()
{
   crntCLK = digitalRead(encoderCLK);

 if (crntCLK != prvsCLK){
      // If the encoderDT state is different than the encoderCLK state then the rotary encoder is rotating counterclockwise
        if (digitalRead(encoderDT) != crntCLK) {
          servoAngle ++;

        }
        else {
          servoAngle --;
         }
         Serial.println(servoAngle);
          String myString = String(servoAngle);
          myString.toCharArray(ang, myString.length() + 1);
          client.publish(MQTT_PUB_TOPIC_angle, ang, false);
 }
  prvsCLK = crntCLK; 
  
  now = time(nullptr);
  if (WiFi.status() != WL_CONNECTED)
  {
    Serial.print("Checking wifi");
    while (WiFi.waitForConnectResult() != WL_CONNECTED)
    {
      WiFi.begin(ssid, pass);
      Serial.print(".");
      delay(10);
    }
    Serial.println("connected");
  }
  else
  {
    if (!client.connected())
    {
      mqtt_connect();
    }
    else
    {
      client.loop();
    }
  }

  if (millis() - lastMillis > 5000) {
    lastMillis = millis();
    client.publish(MQTT_PUB_TOPIC, ctime(&now), false);
  }
}

Arduino 3 servos using mqtt

#include <ESP8266WiFi.h>
#include <PubSubClient.h>
#include <Servo.h> 
Servo lock1; 
Servo lock2;
Servo lock3;

const char* ssid = "MYSSID";                // WiFi SSID
const char* password = "MYSSIDPASS";        // WiFi Password
const char* mqtt_server = "MQTTSERVER";  // IP Broker MQTT
const char* topic_lock1 = "escape/servo/lock1";
const char* topic_lock2 = "escape/servo/lock2";
const char* topic_lock3 = "escape/servo/lock3";
 
WiFiClient espClient;
PubSubClient client(espClient);
long lastMsg = 0;
char msg[50];
int value = 0;

void setup() {

  Serial.begin(115200);
  lock1.attach(D1);
  lock2.attach(D2);
  lock3.attach(D3);
  setup_wifi();
  client.setServer(mqtt_server, 1883);
  client.setCallback(callback);
}

void setup_wifi() {
  delay(10);
  // We start by connecting to a WiFi network
  Serial.println();
  Serial.print("Connecting to ");
  Serial.println(ssid);

  WiFi.begin(ssid, password);

  while (WiFi.status() != WL_CONNECTED) {
    delay(500);
    Serial.print(".");
  }

  Serial.println("");
  Serial.println("WiFi connected");
  Serial.println("IP address: ");
  Serial.println(WiFi.localIP());
}

void callback(char* topic, byte* payload, unsigned int length) {
 String string;
 Serial.print("Message arrived [");
 Serial.print(topic);
 Serial.print("] ");
 for (int i = 0; i < length; i++) {
 string+=((char)payload[i]); 
 }
 Serial.print(string);
 Serial.print(" toInt ");
 int pos = string.toInt(); 
 Serial.println(pos);

 
 if ( strcmp(topic, topic_lock1) == 0 ) {
 Serial.print("lock1 ");
 Serial.println(pos);
 lock1.write(pos); 
 }
 if ( strcmp(topic, topic_lock2) == 0 ) {
 Serial.print("lock2 ");
 Serial.println(pos);
 lock2.write(pos); 
 }
 if ( strcmp(topic, topic_lock3) == 0 ) {
 Serial.print("lock3 ");
 Serial.println(pos);
 lock3.write(pos); 
 }
 
 delay(15); 
}

void reconnect() {
  // Loop until we're reconnected
  while (!client.connected()) {
    Serial.print("Attempting MQTT connection...");
    // Attempt to connect
    if (client.connect("ESP8266servolocks")) {
      Serial.println("connected");
      client.subscribe(topic_lock1); 
      client.subscribe(topic_lock2); 
      client.subscribe(topic_lock3); 
    } else {
      Serial.print("failed, rc=");
      Serial.print(client.state());
      Serial.println(" try again in 5 seconds");
      // Wait 5 seconds before retrying
      delay(5000);
    }
  }
}
void loop() {   
  if (!client.connected()) {
    reconnect();
  }
  client.loop();
  delay(100);
}

Two minute timelapse of oyster mushrooms growing.

Last Updated or created 2023-01-05

#!/bin/bash
# capture images from Foscam ( 5 minute interval )
while true; do
wget -q "http://IP-WEBCAM:88/cgi-bin/CGIProxy.fcgi?cmd=snapPicture2&usr=adminuser&pwd=adminpass" -O $(date +%Y%m%d%H%M).jpg
sleep 300
done

# from jpg to mp4
ffmpeg -f image2 -r 24 -pattern_type glob -i '*.jpg'   -vcodec libx264 -profile:v high444 -refs 16 -crf 0 -preset ultrafast -vf scale=1920:1080 paddo.mp4

If your ipcam can’t add timestamps, use below part to add text (replace in above script)

...
...
wget -q "http://IP-WEBCAM:88/cgi-bin/CGIProxy.fcgi?cmd=snapPicture2&usr=adminuser&pwd=adminpass" -O /tmp/1.jpg
convert -fill white -pointsize 30 -draw "text 10,30 '$(date)'" /tmp/1.jpg $(date +%Y%m%d%H%M).jpg
rm -f /tmp/1.jpg 
...
...

Escape game world generator

Last Updated or created 2023-08-17

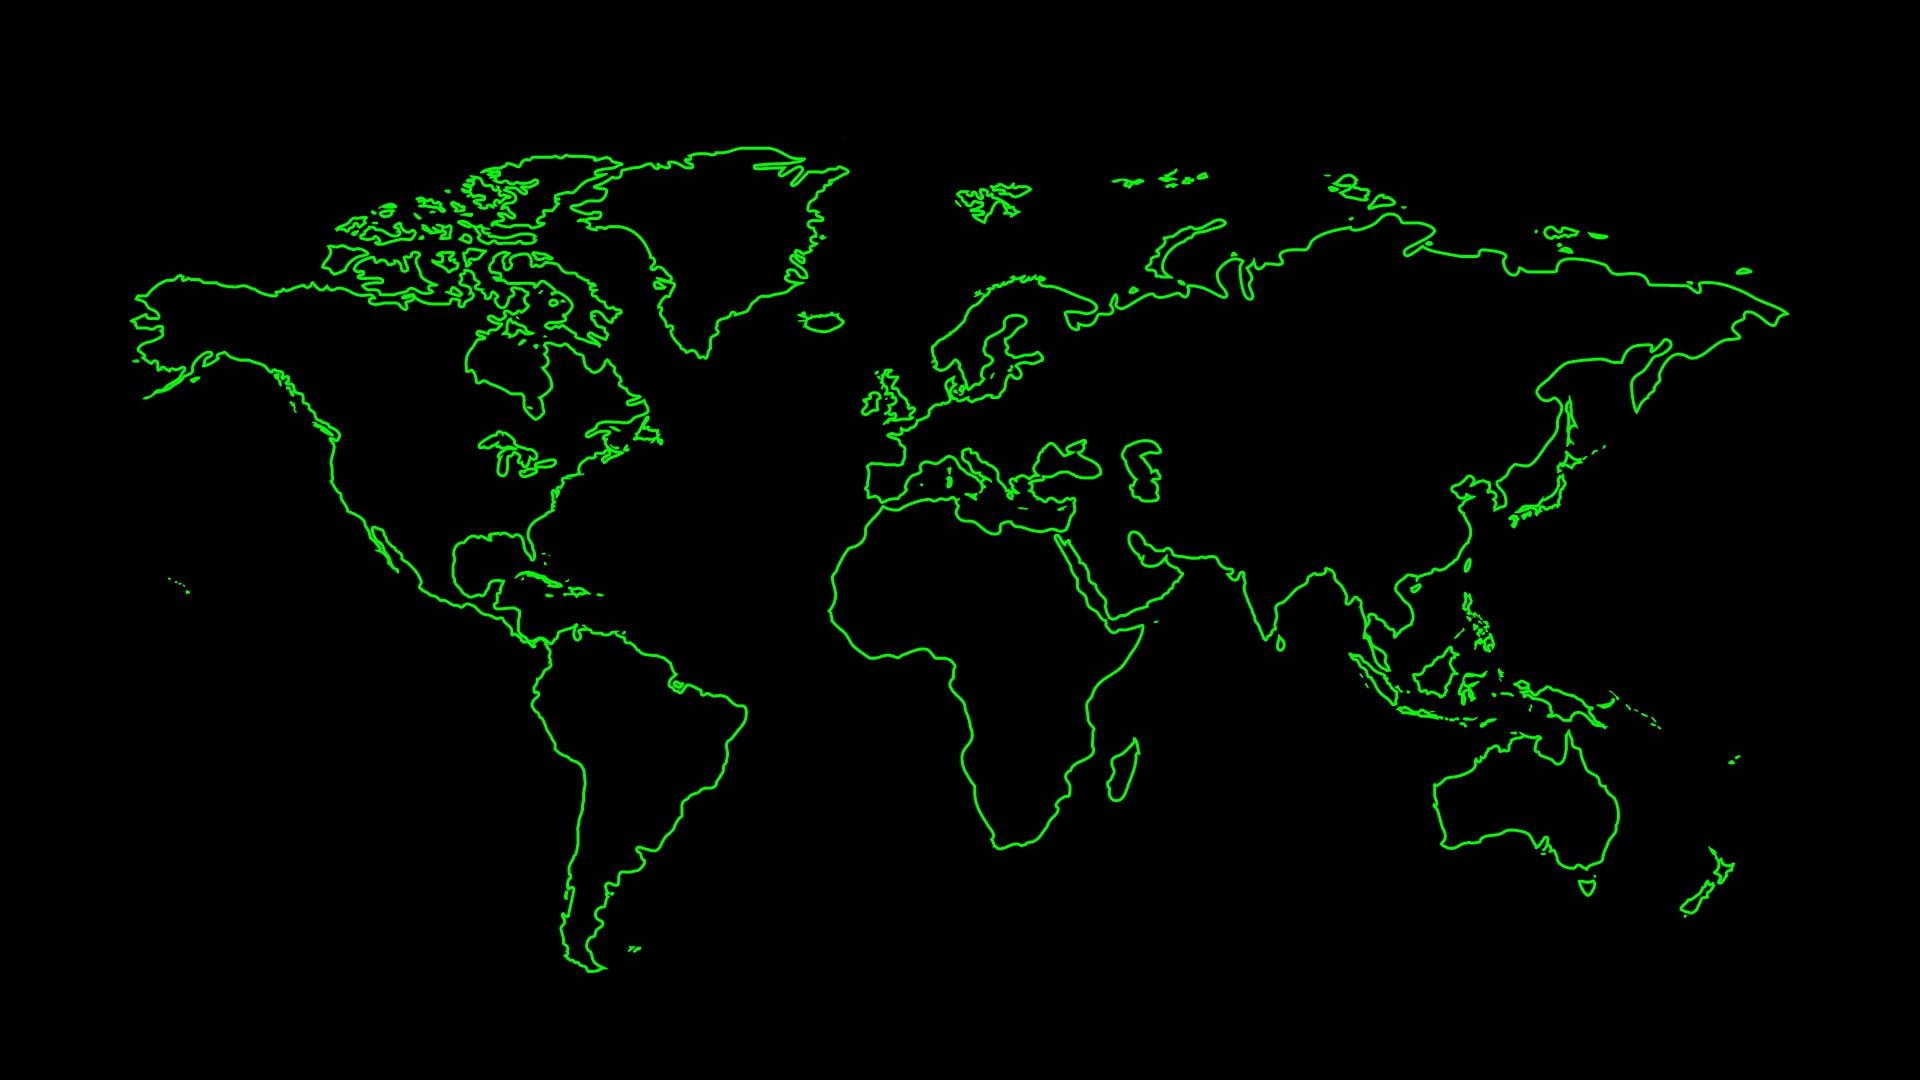
A world map generator in php.
This php script selects randomly 3 cities from a CSV file and draws these on a worldmap.
No cities wil be choosen which have could cause a drawing overlap.
Every player can see the same generated worldmap with a countdown timer.

CSV example with places and coordinates (cities.csv)

London,905,412
Amsterdam,929,414
Wellington,1722,867
Costa Rica,524,640
New Delhi,1270,514
New York,567,477
Tokio,1548,500

generate.html

<html><body bgcolor=black>
<header>
  <div class="menu_area"></div>
  <center>
<p id="demo" style="text:white;"></p>
  </center>
</header>
<style>
html, body, header {
    overflow: hidden; /* Hide scrollbars */
    height: 100%;
    text: white;
}
header {
    background-image: url('world.php');
    background-size: cover;
}
  p {
  color: white;
  font-size: large;
  font-family: Verdana, Arial, sans-serif;
  font-size: 42px;
 }
</style>
<script>
	Date.prototype.addHours= function(h){
    this.setHours(this.getHours()+h);
    return this;
}

var countDownDate = new Date().addHours(1).getTime();
  var x = setInterval(function() {
  var now = new Date().getTime();
  var distance = countDownDate - now;
  var days = Math.floor(distance / (1000 * 60 * 60 * 24));
  var hours = Math.floor((distance % (1000 * 60 * 60 * 24)) / (1000 * 60 * 60));
  var minutes = Math.floor((distance % (1000 * 60 * 60)) / (1000 * 60));
  var seconds = Math.floor((distance % (1000 * 60)) / 1000);

  document.getElementById("demo").innerHTML = days + "d " + hours + "h "
  + minutes + "m " + seconds + "s ";

  if (distance < 0) {
    clearInterval(x);
    document.getElementById("demo").innerHTML = "EXPIRED";
  }
}, 1000);
</script>
</body></html>

Used world image to draw on.

The squares and city names are dynamically drawn using php GD lib.

apt-get install apache2 php php-gd

php example:

// create image from source
$src = imagecreatefromjpeg('world.jpg');
$dest = imagecreatetruecolor(1920, 1080);
// 1920x1080
imagecopy($dest, $src, 0, 0, 0,0, 1920, 1080);
// assign color
$white = imagecolorallocate($dest, 255, 255, 255);
// rectangle example
imagerectangle($dest, $x, $y, $x2, $y2, $white);
// add text
Imagettftext($dest, 24, 0, $x, $y, $white, $font, "Text");
// set header output as image
header('Content-Type: image/jpg');
// output to browser
imagejpeg($dest);
// output to file
imagejpeg($dest, 'generatedworld.jpg');
// Free memory
imagedestroy($dest);
imagedestroy($src);

world.php is included as image, it dynamically generates the map

<?php

putenv('GDFONTPATH=' . realpath('.'));

// Name the font to be used (note the lack of the .ttf extension)
$font = 'tahoma.ttf';
$city1="";
$city2="";
$city3="";

// Create image instances
$src = imagecreatefromjpeg('world.jpg');
$dest = imagecreatetruecolor(1920, 1080);

// Copy
imagecopy($dest, $src, 0, 0, 0,0, 1920, 1080);

$green = imagecolorallocate($dest, 255, 255, 255);


$rows = file("cities.csv");
$len = count($rows);
$rand = [];
while (count($rand) < 1) {
    $r = rand(0, $len-1);
    if (!in_array($r, $rand)) {
        $rand[] = $r;
    }
}
foreach ($rand as $r) {
    $csv = $rows[$r];
    $data = str_getcsv($csv);
    $city1="$data[0]";
    $x1=$data[1];
    $y1=$data[2];
}

imagerectangle($dest, $x1-50, $y1-50, $x1+50, $y1+50, $green);
imagerectangle($dest, $x1-49, $y1-49, $x1+49, $y1+49, $green);
imagerectangle($dest, $x1-10, $y1, $x1+10, $y1-1, $green);
imagerectangle($dest, $x1, $y1-10, $x1-1, $y1+10, $green);
Imagettftext($dest, 24, 0, $x1-50, $y1-60, $green, $font, "$city1");

while($city2 == "") {

$rows = file("cities.csv");
$len = count($rows);
$rand = [];
while (count($rand) < 1) {
    $r = rand(0, $len-1);
    if (!in_array($r, $rand)) {
        $rand[] = $r;
    }
}
foreach ($rand as $r) {
    $csv = $rows[$r];
    $data = str_getcsv($csv);
    $x2=$data[1];
    $y2=$data[2];
    $deltax=abs($x2-$x1);
    $deltay=abs($y2-$y1);
}
if($data[0] != $city1 && $deltax > 100 && $deltay > 100 ){
	$city2=$data[0];
}

}


imagerectangle($dest, $x2-50, $y2-50, $x2+50, $y2+50, $green);
imagerectangle($dest, $x2-49, $y2-49, $x2+49, $y2+49, $green);
imagerectangle($dest, $x2-10, $y2, $x2+10, $y2-1, $green);
imagerectangle($dest, $x2, $y2-10, $x2-1, $y2+10, $green);
Imagettftext($dest, 24, 0, $x2-50, $y2-60, $green, $font, "$city2");


while($city3 == "") {

$rows = file("cities.csv");
$len = count($rows);
$rand = [];
while (count($rand) < 1) {
    $r = rand(0, $len-1);
    if (!in_array($r, $rand)) {
        $rand[] = $r;
    }
}
foreach ($rand as $r) {
    $csv = $rows[$r];
    $data = str_getcsv($csv);
    $x3=$data[1];
    $y3=$data[2];
    $deltax=abs($x3-$x1);
    $deltay=abs($y3-$y1);
    $deltax1=abs($x3-$x2);
    $deltay1=abs($y3-$y2);
}
if($data[0] != $city1 && $data[0] != $city2 && $deltax > 100 && $deltay > 100 && $deltax1 > 100 && $deltay1 > 100 ){
	$city3=$data[0];
}
}
imagerectangle($dest, $x3-50, $y3-50, $x3+50, $y3+50, $green);
imagerectangle($dest, $x3-49, $y3-49, $x3+49, $y3+49, $green);
imagerectangle($dest, $x3-10, $y3, $x3+10, $y3-1, $green);
imagerectangle($dest, $x3, $y3-10, $x3-1, $y3+10, $green);
Imagettftext($dest, 24, 0, $x3-50, $y3-60, $green, $font, "$city3");


// Output and free from memory
header('Content-Type: image/jpg');
imagejpeg($dest);
imagejpeg($dest, 'generatedworld.jpg');


imagedestroy($dest);
imagedestroy($src);
?>

Movie to txt in dutch

Last Updated or created 2023-01-05

In the past i’ve converted some VHS movies speech to text, using all kinds of tools.
Lets use some opensource tools!

pip install moviepy
pip install SpeechRecognition

Create a python script with the following:
(Called mine wav2txt.py)

import math, contextlib
import speech_recognition as sr
from moviepy.editor import AudioFileClip
movie_audio_file_name = "movieadiofile.wav"
with contextlib.closing(wave.open(movie_audio_file_name,'r')) as f:
    frames = f.getnframes()
    rate = f.getframerate()
    duration = frames / float(rate)
total_duration = math.ceil(duration / 60)
r = sr.Recognizer()
for i in range(0, total_duration):
    with sr.AudioFile(movie_audio_file_name) as source:
        audio = r.record(source, offset=i*60, duration=60)
    f = open("transcription.txt", "a")
    f.write(r.recognize_google(audio, language="nl-NL"))
    f.write(" ")
f.close()

Now convert a movie to wav using below.

ffmpeg -i /fileserver/path/koolhoven.mkv movieaudiofile.wav

run python3 wav2txt.py

output
(Note .. these are not timestamped for subtitles)
I only needed the things being said in the home movie recordings as text.

Ik zit hier in de film The James Dean aan de
wereld voorstelde en daarmee de tienerfilm ingeleverd introduceren zelden werden onrustige 10 asiel zo mooi blootgelegd als ik deze film van Nicolas bij en dat wordt dan meteen toevallig even de mooiste
titels ooit wel eens autocross vanavond kijken we naar de kom ik nog even veel zomer dat je voor het eerste meisje Zoem de eerste baantje

etc..

TM1637 7 Segment Module (with mqtt )

Last Updated or created 2023-01-05

These tiny modules use a Clock and Data signal.
The rest of the pins are for 3.3V and Gnd.

There are many libraries you can choose from, i’ve tried several.
For now, i ended up with this one.

Another promising one is https://github.com/AKJ7/TM1637
Another one i’ve tested https://github.com/bxparks/AceSegment

Now i have to add Wifi and Mqtt so it can remotely controlled.

Connected like this

Code with Wifi/Mqtt

#include <Arduino.h>
#include <TM1637Display.h>
#include <ESP8266WiFi.h>
#include <PubSubClient.h>

const char* ssid = "MYSSID";
const char* password = "MYSSIDPASS";
const char* mqtt_server = "MQTT-SERVER-IP";
 
const int CLK = D6; //Set the CLK pin connection to the display
const int DIO = D5; //Set the DIO pin connection to the display
 
int numCounter = 0;
int mydata = 0;
 
// The amount of time (in milliseconds) between tests
#define TEST_DELAY   2000

const uint8_t SEG_DONE[] = {
  SEG_B | SEG_C | SEG_D | SEG_E | SEG_G,           // d
  SEG_A | SEG_B | SEG_C | SEG_D | SEG_E | SEG_F,   // O
  SEG_C | SEG_E | SEG_G,                           // n
  SEG_A | SEG_D | SEG_E | SEG_F | SEG_G            // E
  };

TM1637Display display(CLK, DIO);

WiFiClient espClient;
PubSubClient client(espClient);
unsigned long lastMsg = 0;
#define MSG_BUFFER_SIZE  (50)
char msg[MSG_BUFFER_SIZE];
int value = 0;


void setup()
{
 display.setBrightness(0x0a); //set the diplay to maximum brightness
  Serial.begin(115200);
  setup_wifi();
  client.setServer(mqtt_server, 1883);
  client.setCallback(callback);
}


void setup_wifi() {

  delay(10);
  // We start by connecting to a WiFi network
  Serial.println();
  Serial.print("Connecting to ");
  Serial.println(ssid);

  WiFi.mode(WIFI_STA);
  WiFi.begin(ssid, password);

  while (WiFi.status() != WL_CONNECTED) {
    delay(500);
    Serial.print(".");
  }

  client.setServer(mqtt_server, 1883);
  client.setCallback(callback);


  randomSeed(micros());

  Serial.println("");
  Serial.println("WiFi connected");
  Serial.println("IP address: ");
  Serial.println(WiFi.localIP());
}


void callback(char* topic, byte* payload, unsigned int length) {
  char buffer[4];
  Serial.print("Message arrived [");
  Serial.print(topic);
  Serial.print("] ");
  for (int i = 0; i < length; i++) {
    Serial.print((char)payload[i]);
    buffer[i] = int(payload[i]);
  }
  Serial.println();
//  mydata=int(payload[0])+int(payload[1]*10);
int  n;
n = atoi(buffer);

  display.showNumberDec(n); //Display the numCounter value;


}


void reconnect() {
  // Loop until we're reconnected
  while (!client.connected()) {
    Serial.print("Attempting MQTT connection...");
    // Create a random client ID
    String clientId = "ESP8266Client-";
    clientId += String(random(0xffff), HEX);
    // Attempt to connect
    if (client.connect(clientId.c_str())) {
      Serial.println("connected");
      // Once connected, publish an announcement...
      client.publish("escape/seg1ping", "seg1alive");
      // ... and resubscribe
      client.subscribe("escape/seg1data");
    } else {
      Serial.print("failed, rc=");
      Serial.print(client.state());
      Serial.println(" try again in 5 seconds");
      // Wait 5 seconds before retrying
      delay(5000);
    }
  }
}

void loop() {

  if (!client.connected()) {
    reconnect();
  }
  client.loop();

  unsigned long now = millis();
  if (now - lastMsg > 2000) {
    lastMsg = now;
    ++value;
    snprintf (msg, MSG_BUFFER_SIZE, "seg1alive #%ld", value);
    Serial.print("Publish message: ");
    Serial.println(msg);
    client.publish("escape/seg1ping", msg);
  }
}

Connect the wires puzzle

Last Updated or created 2023-01-05

As part of my internet based escape room.

I took the idea from the Keep-talking-and-nobody-explodes game.

When starting up, is gets the configuration from a Mqtt Topic.
So i can create a different setup over the internet.

The result is also send back via MQTT.

(example play, all players are on different locations)

  • Player 1 figures out the wires.
  • Player 2 connects the wires.
  • Player 3 sees the result (correct or not) and next puzzle opens up for Player 3

I used a wire with a line. Multiple colors for jacks and sockets.
It’s also possible to connect a jack to a jack.
Loads of possibilities.

Todo:

Wifi and Mqtt part
Debounce software or hardware

Bella Ciao on Concertina

Last Updated or created 2023-07-18

In post below i posted the score for Bella Ciao
https://www.henriaanstoot.nl/2022/12/09/generating-pdfs-from-abc-files-to-include-in-tunebooks/

Here is a quick ‘n dirty recording (sound a little distorted)

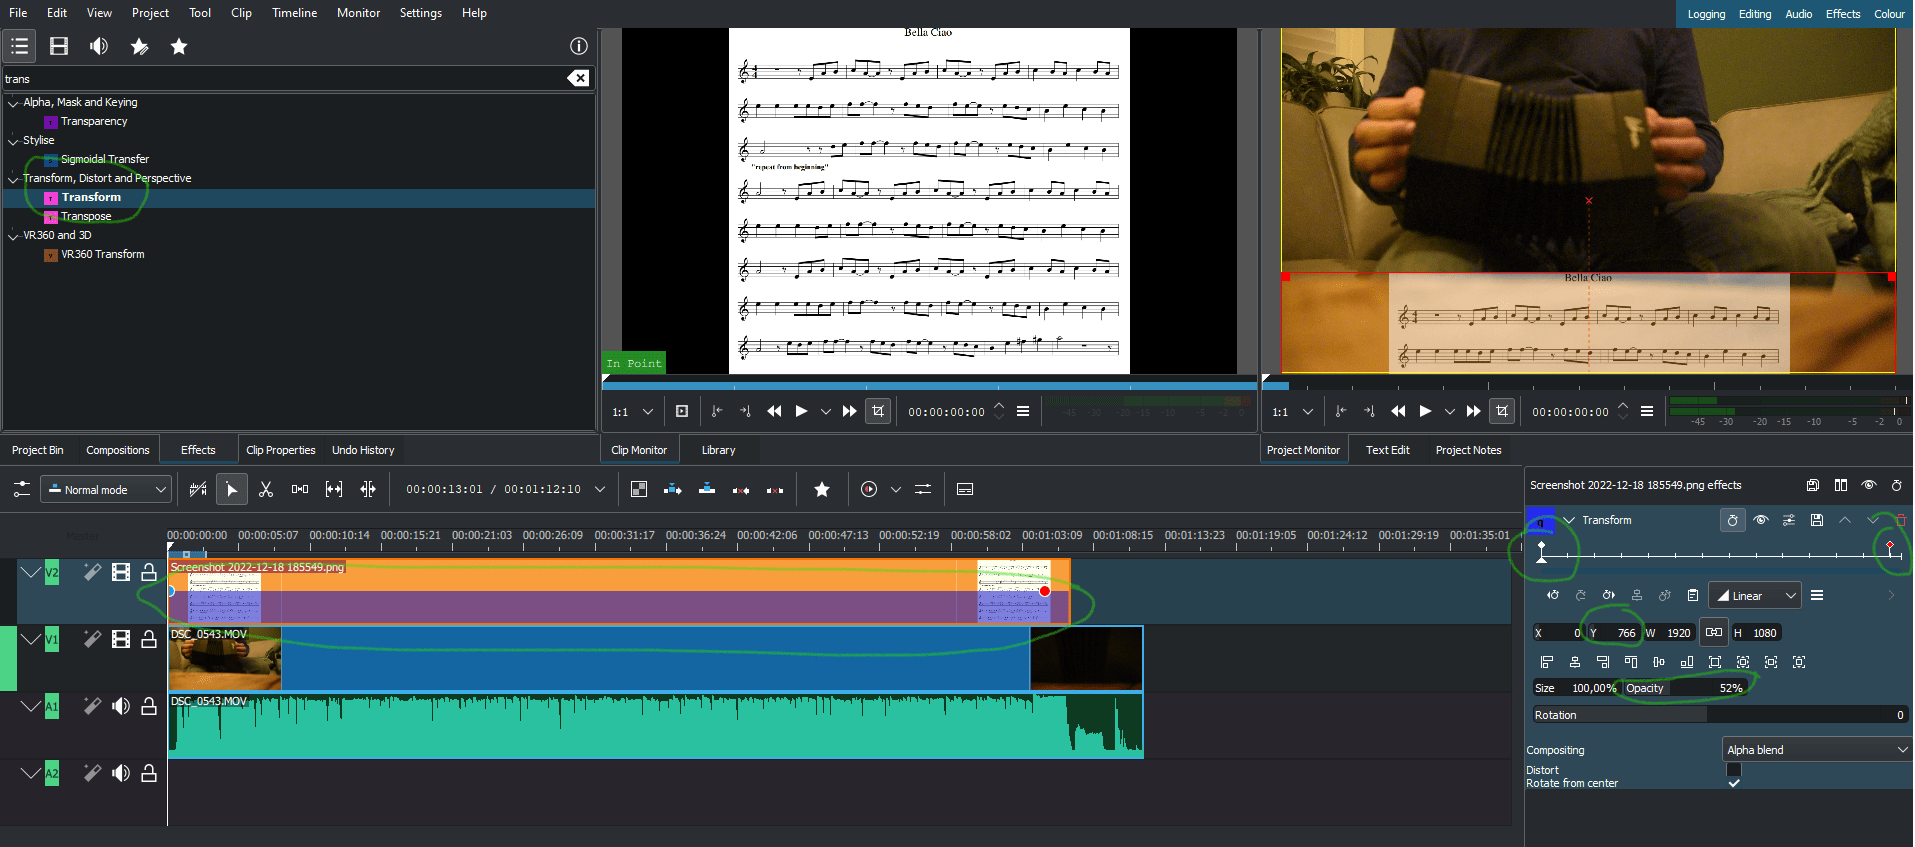
Edited with Kdenlive

I’ve imported the score as an image.
Drag a transform effect on the image.
Move the image to the bottom of the screen.
Add a keyframe.
Move to the end of the movie, add another keyframe.
Adjust the Y position to 0
Set opacity to a nice position and render

Winter cocktail

Last Updated or created 2023-01-05

I love making cocktails for the ladies. Its cold outside, so here is my take on the Chocolate Amnesia Cocktail.

(Some make this with ice, this is a heated version)

  • 2 Part cream. ( Just Cream, not whipped, i don’t like that)
  • 4 Parts Chocolate Milk
  • 2 Parts KahlĂșa Liqueur
  • 1 Part Vodka

Mix and heat in a (sauce) pan .. enjoy