Tag Archives: mqtt

Mqtt Bash Nodered Notify

When running scripts which take a long time, i don’t want to wait for things to finish before i can start the next one.

For example, using my dedup script or compiling stuff. I wanna know when it is finished.

So i made some scripts

Maybe you can hear the spoken text in the background playing downstairs

I’ve put a function in .bashrc, so i can use a command like
notify “Compiling is ready”
A command like this i can put at the end of a command or in a script file at the end.
make && make install && notify “compile ready”

What does it do when executed?

  • Send a mqtt message to the broker
  • Node-red will read this message and:
    • Send a message to my display on my desk – Sound and message notification. (See another post how i made this )
    • Send a message to a script on my Domoticz instance downstairs.
      • This will use a script to get a speech file from google, and play this on some small speakers in my livingroom
    • Send a pushover message to my phone
    • Display a message on my TV ( not in code below )

How?

At the end of your .bashrc

function notify() {
    if [ -z "$1" ]; then
        echo "Usage: $0 \"message\"";
        exit 1;
    fi
    mosquitto_pub -h 10.1.0.17 -t notify/bashscript -m "$1"
}

Scripts on my Domoticz instance

Python script

#!/usr/bin/python
import paho.mqtt.client as mqttClient
import time
import os
import subprocess
import shlex
Connected = False

def on_connect(client, userdata, flags, rc):
    if rc == 0:
        print("Connected to broker")
        global Connected
        Connected =True
    else:
        print("Connection failed")

def on_message(client, userdata, message):
    print "Message received: " + message.topic + " : " + message.payload
    fileName = "/home/pi/domoticz/scripts/speech" + " \"" + message.payload + "\""
    print fileName
    args = shlex.split(fileName)
    time.sleep(1)
    p = subprocess.Popen(args)


broker_address = "10.1.0.17"
port = 1883
#user = "user"
#password = "password"
client = mqttClient.Client("speechcmd")
#client.username_pw_set(user, password=password)
client.on_connect = on_connect
client.on_message = on_message

client.connect(broker_address, port=port)
client.loop_start()

while Connected != True:
    time.sleep(0.1)

client.subscribe('speech/cmd')

try:
    while True:
        time.sleep(1)

except KeyboardInterrupt:
    print "exiting"
    client.disconnect()
    client.loop_stop()

Caching speech script

This script will look for a cached audiofile with requested text, and uses that. Else it wil request a audio file from google, caches it and plays it though the speakers.

#!/bin/bash
INPUT=$*
input2=$(echo $INPUT | base64)
echo "$input2 = $INPUT" >> /home/pi/cache/files-text-relation
if [ -f /home/pi/cache/$input2.mp3 ] ; then
mpg123 -q /home/pi/cache/$input2.mp3 1>/dev/null 2>/dev/null
else
echo not cached
STRINGNUM=0

ary=($INPUT)
for key in "${!ary[@]}"
  do
    SHORTTMP[$STRINGNUM]="${SHORTTMP[$STRINGNUM]} ${ary[$key]}"
    LENGTH=$(echo ${#SHORTTMP[$STRINGNUM]})
    #echo "word:$key, ${ary[$key]}"
    #echo "adding to: $STRINGNUM"
    if [[ "$LENGTH" -lt "100" ]]; then
      #echo starting new line
      SHORT[$STRINGNUM]=${SHORTTMP[$STRINGNUM]}
    else
      STRINGNUM=$(($STRINGNUM+1))
      SHORTTMP[$STRINGNUM]="${ary[$key]}"
      SHORT[$STRINGNUM]="${ary[$key]}"
    fi
done

for key in "${!SHORT[@]}"
  do
    echo "Playing line: $(($key+1)) of $(($STRINGNUM+1))"
    NEXTURL=$(echo ${SHORT[$key]} | xxd -plain | tr -d '\n' | sed 's/\(..\)/%\1/g')
echo $NEXTURL
    mpg123 -w $input2 -q "http://translate.google.com/translate_tts?ie=UTF-8&client=tw-ob&q=$NEXTURL&tl=En-us"
    ffmpeg -i $input2 -codec:a libmp3lame -qscale:a 2 /home/pi/cache/$input2.mp3
mpg123 /home/pi/cache/$input2.mp3
done
fi

Node-red flow

function notify() {
    if [ -z "$1" ]; then
        echo "Usage: $0 \"message\"";
        exit 1;
    fi
    mosquitto_pub -h 10.1.0.17 -t notify/bashscript -m [
    {
        "id": "1442fca698589679",
        "type": "mqtt in",
        "z": "cb6f001b.721c3",
        "name": "",
        "topic": "notify/bashscript",
        "qos": "2",
        "datatype": "auto",
        "broker": "8c74c5f6.9a7a48",
        "nl": false,
        "rap": false,
        "inputs": 0,
        "x": 180,
        "y": 580,
        "wires": [
            [
                "ddf5744bb5b73d4d",
                "faa5c794652d7a57",
                "b4e0107399248fea",
                "443f960b5d1cf40e"
            ]
        ]
    },
    {
        "id": "ddf5744bb5b73d4d",
        "type": "mqtt out",
        "z": "cb6f001b.721c3",
        "name": "",
        "topic": "speech/cmd",
        "qos": "",
        "retain": "",
        "broker": "8c74c5f6.9a7a48",
        "x": 590,
        "y": 560,
        "wires": []
    },
    {
        "id": "e95e828451d83158",
        "type": "comment",
        "z": "cb6f001b.721c3",
        "name": "bash notify",
        "info": "",
        "x": 170,
        "y": 540,
        "wires": []
    },
    {
        "id": "faa5c794652d7a57",
        "type": "mqtt out",
        "z": "cb6f001b.721c3",
        "name": "",
        "topic": "mqttlcd/message",
        "qos": "",
        "retain": "",
        "broker": "8c74c5f6.9a7a48",
        "x": 570,
        "y": 720,
        "wires": []
    },
    {
        "id": "b4e0107399248fea",
        "type": "delay",
        "z": "cb6f001b.721c3",
        "name": "",
        "pauseType": "delay",
        "timeout": "5",
        "timeoutUnits": "seconds",
        "rate": "1",
        "nbRateUnits": "1",
        "rateUnits": "second",
        "randomFirst": "1",
        "randomLast": "5",
        "randomUnits": "seconds",
        "drop": false,
        "outputs": 1,
        "x": 480,
        "y": 640,
        "wires": [
            [
                "ac4faf30b8adbe3f"
            ]
        ]
    },
    {
        "id": "ac4faf30b8adbe3f",
        "type": "function",
        "z": "cb6f001b.721c3",
        "name": "Empty payload",
        "func": "msg.payload = \"\";\nreturn msg;",
        "outputs": 1,
        "noerr": 0,
        "initialize": "",
        "finalize": "",
        "libs": [],
        "x": 640,
        "y": 640,
        "wires": [
            [
                "faa5c794652d7a57"
            ]
        ]
    },
    {
        "id": "dfbe26c12fc5e742",
        "type": "pushover",
        "z": "cb6f001b.721c3",
        "name": "Alleen Henri",
        "device": "rmx1931",
        "title": "Node-Red-Pushover",
        "priority": "1",
        "sound": "pushover",
        "url": "",
        "url_title": "",
        "html": false,
        "x": 850,
        "y": 500,
        "wires": []
    },
    {
        "id": "443f960b5d1cf40e",
        "type": "function",
        "z": "cb6f001b.721c3",
        "name": "Set pushover payload",
        "func": "\nmsg.topic = \"Bash Notify\";\nmsg.priority = 1;\nmsg.sound = \"cosmic\";\nreturn msg;",
        "outputs": 1,
        "noerr": 0,
        "initialize": "",
        "finalize": "",
        "libs": [],
        "x": 660,
        "y": 500,
        "wires": [
            [
                "dfbe26c12fc5e742"
            ]
        ]
    },
    {
        "id": "8c74c5f6.9a7a48",
        "type": "mqtt-broker",
        "name": "10.1.0.17",
        "broker": "10.1.0.17",
        "port": "1883",
        "clientid": "",
        "usetls": false,
        "compatmode": true,
        "keepalive": "15",
        "cleansession": true,
        "birthTopic": "",
        "birthQos": "0",
        "birthPayload": "",
        "closeTopic": "",
        "closePayload": "",
        "willTopic": "",
        "willQos": "0",
        "willPayload": ""
    }
]

Scripts on my domoticz instance

Script NO1:
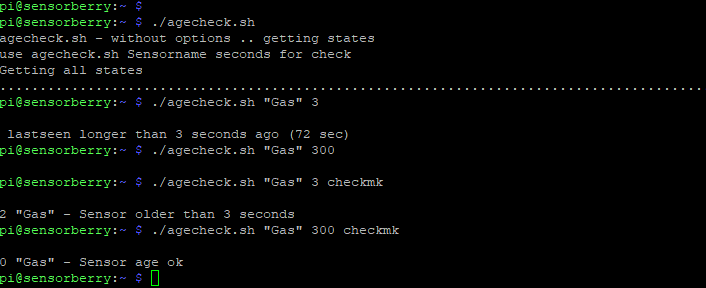
Below is a script which checks all sensors and switches available on my domoticz instance, and gives me information about last updates.
For example when a device is out of reach or battery empty.

Usage:

Outputs to console, or you can use it in check_mk monitoring.
(For the latter, create a script

vi /usr/lib/check_mk_agent/local/checkfrontdoor
chmod +x /usr/lib/check_mk_agent/local/checkfrontdoor
put in the script 
#!/bin/bash
cd /path/to/script/
./belowscript "Frontdoor" 300 checkmk

Code:

#!/bin/bash
#set -x
# after running once check stateseconds for names
if [ $# -eq 0 ]; then
echo "$(basename $0) - without options .. getting states"
echo "use $(basename $0) "Sensorname" seconds" for check
echo "Getting all states"
: > stateseconds
curl -s -i -H "Accept: application/json" "http://127.0.0.1:8080/json.htm?type=devices&filter=all&used=true&order=Name" | egrep "Name|Last" | grep -v HardwareName |grep -vi levelnames> states
sed -i 'N;s/\n/,/' states
now=$(date +%s)
cat states  | awk '{ print $3" "$4$7$8$9$10$11$12 }' | sed s/,,/,/g |rev | cut -c2- | rev | while read ; do
name="$(echo $REPLY | cut -f2 -d, )"
dater="$(echo $REPLY | cut -f1 -d, | sed s/\"//g)"
#echo $dater
seen=$(date -d "$dater" +%s)
#echo $seen
echo "$name $(( $now - $seen))" >> stateseconds
echo -n "."
done
fi
echo ""
if [[ ! -z "$1" && ! -z $2 ]]; then
checkold=$(cat stateseconds | grep "$1\"" | head -1 | awk '{ print $2 }')
total=$(( checkold - $2 ))
if [ -z $3 ] ; then
if [ $checkold -gt $2 ] ; then echo "$name lastseen longer than $2 seconds ago ($total sec)" ; exit 1 ;fi
else
if [ $checkold -gt $2 ] ; then echo "2 \"$1\" - Sensor older than $2 seconds" ; exit 1
else
echo "0 \"$1\" - Sensor age ok" ; exit 0
fi
fi
fi

Above to your Mqtt broker?

#!/bin/bash
# change 300 ( age below 5 minutes )
# and $2>=900 ( age above 15 minutes )
./agecheck.sh # Updates statefile
cat stateseconds | tr -d '"-/:"_' | sort -n -k2 | awk '$2<=300' | while read; do
sensorname=$(echo $REPLY | awk '{ print $1 }' )
age=$(echo $REPLY | awk '{ print $2 }' )
mosquitto_pub -h 10.1.0.17 -t sensorsage/$sensorname -m "$age"
done

Script NO:2
This is a mqtt speech script with caching sounds, speech generated for me by google

MQTT Part

#!/usr/bin/python
import paho.mqtt.client as mqttClient
import time
import os
import subprocess
import shlex
Connected = False

def on_connect(client, userdata, flags, rc):
    if rc == 0:
        print("Connected to broker")
        global Connected
        Connected =True
    else:
        print("Connection failed")

def on_message(client, userdata, message):
    print "Message received: " + message.topic + " : " + message.payload
    fileName = "/home/pi/domoticz/scripts/speech" + " \"" + message.payload + "\""
    print fileName
    args = shlex.split(fileName)
    time.sleep(1)
    p = subprocess.Popen(args)


broker_address = "mqttbroker"
port = 1883
user = "myuser"
password = "mysecretpass"
client = mqttClient.Client("speechcmd")
client.username_pw_set(user, password=password)
client.on_connect = on_connect
client.on_message = on_message

client.connect(broker_address, port=port)
client.loop_start()

while Connected != True:
    time.sleep(0.1)

client.subscribe('speech/cmd')

try:
    while True:
        time.sleep(1)

except KeyboardInterrupt:
    print "exiting"
    client.disconnect()
    client.loop_stop()

Speech part (uses mpg123 to play sound though speaker)

#!/bin/bash
#set -x

INPUT=$*
input2=$(echo $INPUT | base64)
echo "$input2 = $INPUT" >> /home/pi/cache/files-text-relation
if [ -f /home/pi/cache/$input2.mp3 ] ; then
mpg123 -q /home/pi/cache/$input2.mp3 1>/dev/null 2>/dev/null
else
echo not cached
STRINGNUM=0

ary=($INPUT)
for key in "${!ary[@]}"
  do
    SHORTTMP[$STRINGNUM]="${SHORTTMP[$STRINGNUM]} ${ary[$key]}"
    LENGTH=$(echo ${#SHORTTMP[$STRINGNUM]})
    #echo "word:$key, ${ary[$key]}"
    #echo "adding to: $STRINGNUM"
    if [[ "$LENGTH" -lt "100" ]]; then
      #echo starting new line
      SHORT[$STRINGNUM]=${SHORTTMP[$STRINGNUM]}
    else
      STRINGNUM=$(($STRINGNUM+1))
      SHORTTMP[$STRINGNUM]="${ary[$key]}"
      SHORT[$STRINGNUM]="${ary[$key]}"
    fi
done

for key in "${!SHORT[@]}"
  do
    #echo "line: $key is: ${SHORT[$key]}"

    echo "Playing line: $(($key+1)) of $(($STRINGNUM+1))"
    NEXTURL=$(echo ${SHORT[$key]} | xxd -plain | tr -d '\n' | sed 's/\(..\)/%\1/g')
echo $NEXTURL
    mpg123 -w $input2 -q "http://translate.google.com/translate_tts?ie=UTF-8&client=tw-ob&q=$NEXTURL&tl=En-us"
    ffmpeg -i $input2 -codec:a libmp3lame -qscale:a 2 /home/pi/cache/$input2.mp3
mpg123 /home/pi/cache/$input2.mp3
done
fi

set msg.payload to “Doorbell”
and Mqtt topic to “speech/cmd”

To be continued !

Mikrotik Mqtt

Today Vincent mentioned a link about mqtt and mikrotiks, i knew about addons, but not mqtt .. lets try this.

When you want to use MQTT with Mikrotik you have to install the iot package from extra_packages.

  • Download correct package zip from ( https://mikrotik.com/download )
    • Download extra packages zip for your system
  • Extract and use file upload
  • Reboot your mikrotik

(i had to upgrade my firmware first, iot package was not build for my version)

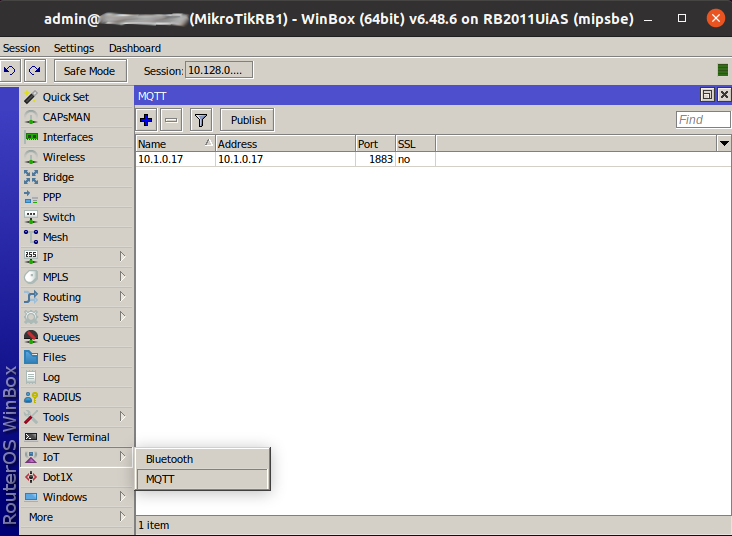
Create a entry in IoT > Mqtt to your broker.

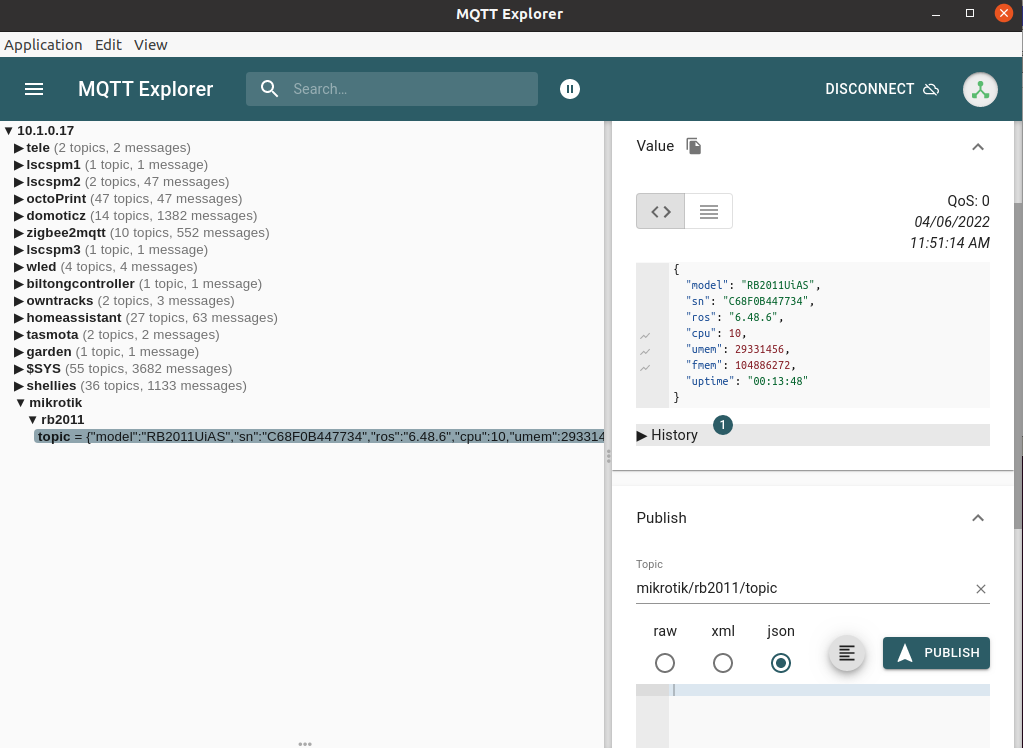
save below in a script ending with a .rsc extention, and upload in file manager

# Required packages: iot

################ Configuration #################
# Name of an existing MQTT broker that should be used for publishing, the one you just created
:local broker "10.1.0.17"

# MQTT topic where the message should be published
# i've got mine in a tree called mikrotik/switchtype/
:local topic "mikrotik/rb2011/topic"

############### System ###############
# You can create your own variables below
:put ("[*] Gathering system info...")
:local cpuLoad [/system resource get cpu-load]
:local freeMemory [/system resource get free-memory]
:local usedMemory ([/system resource get total-memory] - $freeMemory)
:local rosVersion [/system package get value-name=version \
    [/system package find where name ~ "^routeros"]]
:local model [/system routerboard get value-name=model]
:local serialNumber [/system routerboard get value-name=serial-number]
:local upTime [/system resource get uptime]

################## MQTT ###################
# create a message
:local message \
    "{\"model\":\"$model\",\
                \"sn\":\"$serialNumber\",\
                \"ros\":\"$rosVersion\",\
                \"cpu\":$cpuLoad,\
                \"umem\":$usedMemory,\
                \"fmem\":$freeMemory,\
                \"uptime\":\"$upTime\"}"

:log info "$message";
:put ("[*] Total message size: $[:len $message] bytes")
:put ("[*] Sending message to MQTT broker...")
/iot mqtt publish broker=$broker topic=$topic message=$message
:put ("[*] Done")

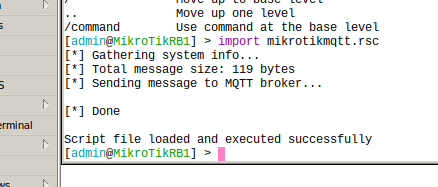
Import script using

import mikrotikmqtt.rsc

Todo’s:

Import is just @ import time, need to “cron” this?

Secure MQTT with bridge for owntracks

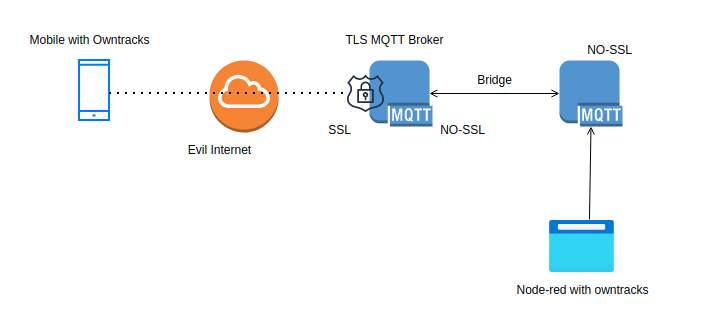
A little diagram explaining what i’m using to get a secure mqtt owntracks setup. (reinstall)

Mobile connects with certificates and password to my server in DMZ using port 8883 (no sockets activated at the moment)

Mqtt server in DMZ connects via a bridge to my internal mqtt server. (Both Mosquitto)

Node-red using a worldmap plugin displays the current position of my mobile. Coordinates are stored in a InfluxDB and geolocation is being used to activate/de-activate other node-red nodes.

Start with downloading :

https://github.com/owntracks/tools/blob/master/TLS/generate-CA.sh

Get some environment stuff into place

export IPLIST="83.161.x.x 192.168.1.1 10.12.1.1"
export HOSTLIST="internalhostname.my.lab henriaanstoot.nl mqtt.henriaanstoot.nl"

Generate Certificates and client certificates.

./generate-CA.sh # creates ca.crt and server.{key,crt}
./generate-CA.sh mqttserver # creates server certs
./generate-CA.sh client workstation # creates client certs
./generate-CA.sh client mobile # creates mobile cert

NOTE:
My workstation client is MQTT-explorer, no need to change anything
For owntracks on your mobile you need a P12 certicate, thats a combined cert+key certificate.

openssl pkcs12 -export -in mobile.crt -inkey mobile.key -out mobile.p12

Check certs with

openssl x509 -noout -text -in server.crt  | grep DNS:

Download p12 and ca.crt to you mobile.
MQTT-explorer, add a new connection and select workstation.crt ca.crt and workstation.key

Create a mqtt password file

mosquitto_passwd -c /etc/mosquitto/passwordfile firstuser
mosquitto_passwd -b /etc/mosquitto/passwordfile nextuser

TLS mosquitto example, change where needed. (this is a multi setup, portforward ONLY 8883 to this instance)
1883 is only for internal bridge communication.

# Place your local configuration in /etc/mosquitto/conf.d/
#
# A full description of the configuration file is at
# /usr/share/doc/mosquitto/examples/mosquitto.conf.example
pid_file /var/run/mosquitto.pid
persistence true
persistence_location /var/lib/mosquitto/
# Plain MQTT protocol
listener 1883
# End of plain MQTT configuration
# MQTT over TLS/SSL
listener 8883
cafile /etc/mosquitto/certs/ca.crt
certfile /etc/mosquitto/certs/server.crt
keyfile /etc/mosquitto/certs/server.key
allow_anonymous false
password_file /etc/mosquitto/passwords
# End of MQTT over TLS/SLL configuration
listener 9001
protocol websockets
# End of plain Websockets configuration
# WebSockets over TLS/SSL
listener 9883
protocol websockets
cafile /etc/mosquitto/certs/ca.crt
certfile /etc/mosquitto/certs/server.crt
keyfile /etc/mosquitto/certs/server.key
log_dest file /var/log/mosquitto/mosquitto.log
#include_dir /etc/mosquitto/conf.d
connection bridge-01
address INTERNALIP:1883
topic owntracks/# both 0

Plain internal ‘open’ mosquitto setup only needs bridge config

connection bridge-01
address TLSMOSQUITTOINSTANCE-IP:1883
topic # in 2
Node-red Flow
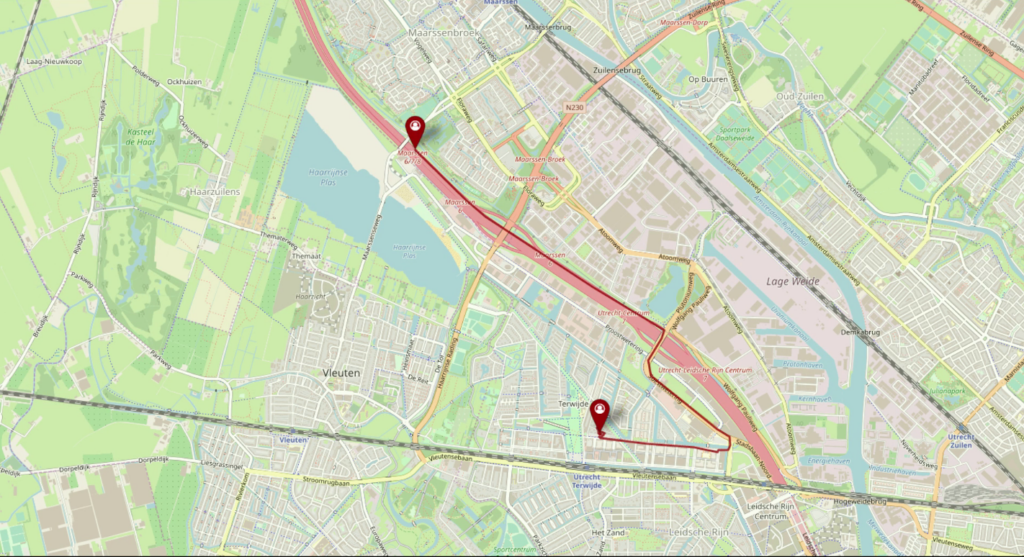
Nov 2019 example of a track in nodered (A2 to our old home)

Hex Dimmer

Control a dimmer using a hex wireless box.

Parts

  • Wemos Mini
  • MPU6050 – Gyroscope Module
  • 10k Resistor
  • TP4056 – Battery Charger Module
  • Mini Battery
  • Wireless Charger

Put the box flat on the table to switch off.
When you put it on one side, it will controll your lights brightness.
20,40,60,80 and 100%, just by rotating and putting it down on its sides.

3D printed case

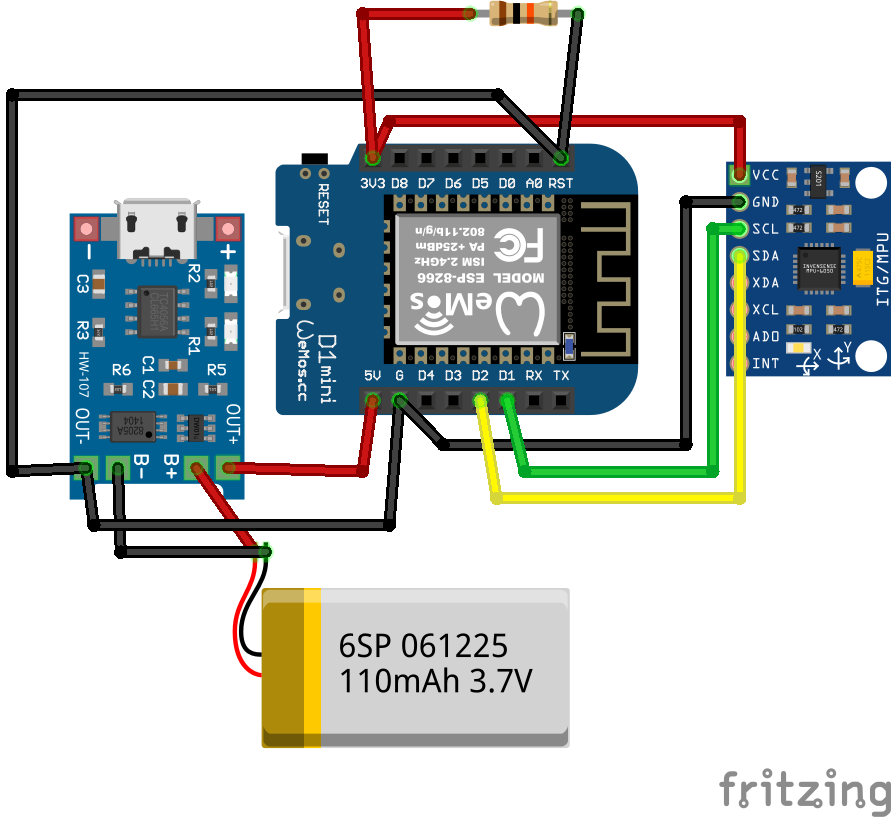
Schematics (without the wireless charging part)

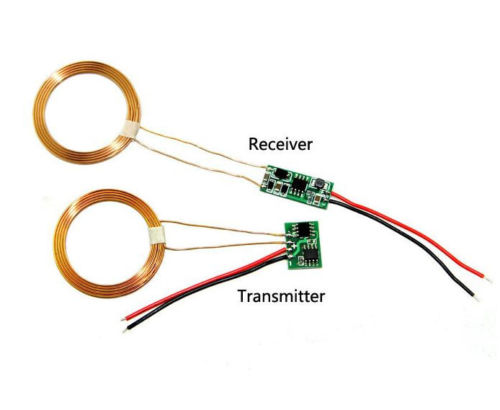
Wireless part

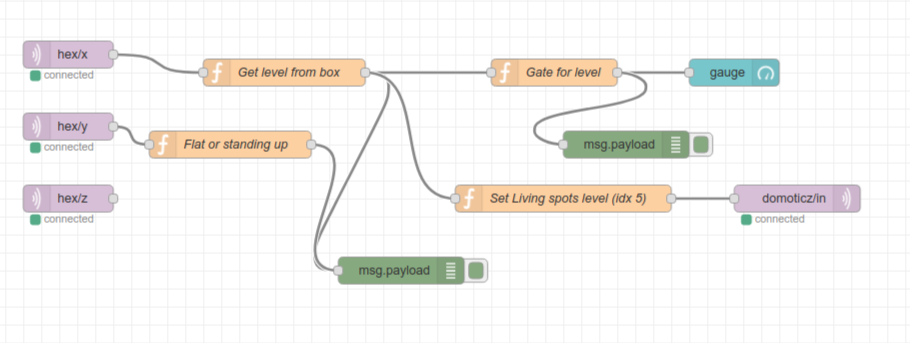
Node-Red Controll part (source below)

Nice to have’s :
Arduino-sleep mode, wakeup with a movement sensor.

Arduino Code

#include <Wire.h>
//#include <SPI.h>
#include <PubSubClient.h>
//#include <string.h>
//#include <stdio.h>
#include <ESP8266WiFi.h>

// Wifi settings
const char* ssid = "MTAP1";
const char* password = "xxxxxxxxxx";
const char* mqtt_server = "10.1.0.17";

// I2C address of the MPU-6050 - 0x68 or 0x69 if AD0 is pulled HIGH
const int MPU = 0x68;
int16_t AcX, AcY, AcZ, GyX, GyY, GyZ;
float gForceX, gForceY, gForceZ, rotX, rotY, rotZ;

// Wifi MAC address
byte mac[]= {  0xDE, 0xED, 0xBA, 0xFE, 0xFE, 0xED };

WiFiClient espClient;
IPAddress ip;
PubSubClient mqttClient(espClient);

// IP address of your MQTT server
const char* server = "10.1.0.17";
//const char* outTopic = "test/";
//const char* server = "iot.eclipse.org";

void dataReceiver(){
  Wire.beginTransmission(MPU);
  Wire.write(0x3B);  // starting with register 0x3B (ACCEL_XOUT_H)
  Wire.endTransmission(false);
  Wire.requestFrom(MPU,14,true);  // request a total of 14 registers
  AcX = Wire.read()<<8|Wire.read();  // 0x3B (ACCEL_XOUT_H) & 0x3C (ACCEL_XOUT_L)     
  AcY = Wire.read()<<8|Wire.read();  // 0x3D (ACCEL_YOUT_H) & 0x3E (ACCEL_YOUT_L)
  AcZ = Wire.read()<<8|Wire.read();  // 0x3F (ACCEL_ZOUT_H) & 0x40 (ACCEL_ZOUT_L)
  GyX = Wire.read()<<8|Wire.read();  // 0x43 (GYRO_XOUT_H) & 0x44 (GYRO_XOUT_L)
  GyY = Wire.read()<<8|Wire.read();  // 0x45 (GYRO_YOUT_H) & 0x46 (GYRO_YOUT_L)
  GyZ = Wire.read()<<8|Wire.read();  // 0x47 (GYRO_ZOUT_H) & 0x48 (GYRO_ZOUT_L)
  processData();
}

void processData(){
  gForceX = AcX / 16384.0;
  gForceY = AcY / 16384.0; 
  gForceZ = AcZ / 16384.0;
  
  rotX = GyX / 131.0;
  rotY = GyY / 131.0; 
  rotZ = GyZ / 131.0;
}

void debugFunction(int16_t AcX, int16_t AcY, int16_t AcZ, int16_t GyX, int16_t GyY, int16_t GyZ){
  // Print the MPU values to the serial monitor
  Serial.print("Accelerometer: ");
  Serial.print("X="); Serial.print(gForceX);
  Serial.print("|Y="); Serial.print(gForceY);
  Serial.print("|Z="); Serial.println(gForceZ);  
  Serial.print("Gyroscope:");
  Serial.print("X="); Serial.print(rotX);
  Serial.print("|Y="); Serial.print(rotY);
  Serial.print("|Z="); Serial.println(rotZ);
}

void reconnect() {
  // Loop until we're reconnected
  while (!mqttClient.connected()) {
    Serial.print("Attempting MQTT connection...");
    // Attempt to connect
    if (mqttClient.connect("arduinoClient")){
      Serial.println("connected");
    } 
    else {
      Serial.print("failed, rc=");
      Serial.print(mqttClient.state());
      Serial.println(" try again in 5 seconds");
//      Wait 5 seconds before retrying
      delay(1000);
    }
  }
}

void setup(){
  Serial.begin(9600);

    setup_wifi();
  
  Wire.begin(0,2);
  Wire.beginTransmission(MPU);
  Wire.write(0x6B);  // PWR_MGMT_1 register
  Wire.write(0);     // set to zero (wakes up the MPU-6050)
  Wire.endTransmission(true);

  mqttClient.setServer(server, 1883);
  
//  Ethernet.begin(mac);
//  ip = Ethernet.localIP();
  
  Serial.println(ip);  
  Serial.println(server);
  //delay(1500);
}

char* init(float val){
  
  char buff[100];

  for (int i = 0; i < 100; i++) {
      dtostrf(val, 4, 2, buff);  //4 is mininum width, 6 is precision
  }
   return buff;

}

void setup_wifi() {

  delay(10);
  // We start by connecting to a WiFi network
  Serial.println();
  Serial.print("Connecting to ");
  Serial.println(ssid);

  WiFi.begin(ssid, password);

  while (WiFi.status() != WL_CONNECTED) {
    delay(500);
    Serial.print(".");
  }

  Serial.println("");
  Serial.println("WiFi connected");
  Serial.println("IP address: ");
  Serial.println(WiFi.localIP());
}

void dataAcc(){

  char mpu6050X[100]= "";   
  strcat(mpu6050X,init(gForceX));

  char mpu6050Y[100]= "";   
  strcat(mpu6050Y,init(gForceY));

  char mpu6050Z[100]= "";   
  strcat(mpu6050Z,init(gForceZ));

  // accelerometer - "topic, mpu6050"
  mqttClient.publish("AcX/", mpu6050X);
  mqttClient.publish("AcY/", mpu6050Y);
  mqttClient.publish("AcZ/", mpu6050Z);
//  mqttClient.publish(outTopic, "text to send via mqtt");
}


void dataGy(){

  char mpu6050X[100]= "";
  strcat(mpu6050X,init(rotX));

  char mpu6050Y[100]= "";
  strcat(mpu6050Y,init(rotY));

  char mpu6050Z[100]= "";
  strcat(mpu6050Z,init(rotZ));
  
  // gyroscope - "topic, mpu6050"
  mqttClient.publish("GyX/", mpu6050X);
  mqttClient.publish("GyY/", mpu6050Y);
  mqttClient.publish("GyZ/", mpu6050Z);
//  mqttClient.publish(outTopic, "text to send via mqtt");
}

void loop(){
  dataReceiver();
  debugFunction(AcX,AcY,AcZ,GyX,GyY,GyZ);

  if (!mqttClient.connected()) {
    reconnect();
  }

  mqttClient.loop(); 

  dataAcc();
  dataGy();

  delay(2000);
}

Nodered Flow

[
    {
        "id": "7550958a.b29dec",
        "type": "mqtt in",
        "z": "a0126a6a.9c70b8",
        "name": "",
        "topic": "hex/x",
        "qos": "2",
        "broker": "8c74c5f6.9a7a48",
        "x": 270,
        "y": 100,
        "wires": [
            [
                "d251dd79.5700d"
            ]
        ]
    },
    {
        "id": "e84b0a1.18096f8",
        "type": "mqtt in",
        "z": "a0126a6a.9c70b8",
        "name": "",
        "topic": "hex/y",
        "qos": "2",
        "broker": "8c74c5f6.9a7a48",
        "x": 270,
        "y": 180,
        "wires": [
            [
                "9c27bc8f.b62dd"
            ]
        ]
    },
    {
        "id": "6a1a0d8d.b3e754",
        "type": "mqtt in",
        "z": "a0126a6a.9c70b8",
        "name": "",
        "topic": "hex/z",
        "qos": "2",
        "broker": "8c74c5f6.9a7a48",
        "x": 270,
        "y": 260,
        "wires": [
            []
        ]
    },
    {
        "id": "2d2a911a.6af3fe",
        "type": "ui_gauge",
        "z": "a0126a6a.9c70b8",
        "name": "",
        "group": "d43a9f25.6c874",
        "order": 23,
        "width": 0,
        "height": 0,
        "gtype": "gage",
        "title": "gauge",
        "label": "units",
        "format": "{{value}}",
        "min": "0",
        "max": "100",
        "colors": [
            "#00b500",
            "#e6e600",
            "#ca3838"
        ],
        "seg1": "",
        "seg2": "",
        "x": 1010,
        "y": 120,
        "wires": []
    },
    {
        "id": "d251dd79.5700d",
        "type": "function",
        "z": "a0126a6a.9c70b8",
        "name": "Get level from box",
        "func": "var my=msg.payload;\nmsg.payload = {};\nif (my == 0.85){\n    msg.payload=20;\n    return msg;\n}\nelse if (my == 0.86){\n    msg.payload=20;\n    return msg;\n}\nelse if (my == 0.87){\n    msg.payload=20;\n    return msg;\n}\n\nelse if (my == 0.03){\n    msg.payload=40;\n    return msg;\n}\nelse if (my == 0.02){\n    msg.payload=40;\n    return msg;\n}\n\nelse if (my == 3.17){\n    msg.payload=60;\n    return msg;\n}\nelse if (my == 3.18){\n    msg.payload=60;\n    return msg;\n}\n\nelse if (my == 0.04){\n    msg.payload=80;\n    return msg;\n}\nelse if (my == 0.05){\n    msg.payload=80;\n    return msg;\n}\n\nelse if (my == 3.95){\n    msg.payload=100;\n    return msg;\n}\nelse if (my == 3.96){\n    msg.payload=100;\n    return msg;\n}\nelse {\n    return msg;\n    \n}\n",
        "outputs": 1,
        "noerr": 0,
        "x": 510,
        "y": 120,
        "wires": [
            [
                "ecd746cc.fce348",
                "8721e902.45d8b8",
                "39c8f1ac.86affe"
            ]
        ]
    },
    {
        "id": "39c8f1ac.86affe",
        "type": "function",
        "z": "a0126a6a.9c70b8",
        "name": "Set Living spots level (idx 5)",
        "func": "var level = Number(msg.payload);\nmsg.payload = {};\nmsg.payload.idx = 5;\nmsg.payload.switchcmd = (\"Set Level\");\nmsg.payload.command = \"switchlight\";\nmsg.payload.level = level;\nreturn msg;  ",
        "outputs": 1,
        "noerr": 0,
        "x": 820,
        "y": 260,
        "wires": [
            [
                "bc0d6507.1d7748"
            ]
        ]
    },
    {
        "id": "bc0d6507.1d7748",
        "type": "mqtt out",
        "z": "a0126a6a.9c70b8",
        "name": "",
        "topic": "domoticz/in",
        "qos": "",
        "retain": "",
        "broker": "8c74c5f6.9a7a48",
        "x": 1080,
        "y": 260,
        "wires": []
    },
    {
        "id": "9c27bc8f.b62dd",
        "type": "function",
        "z": "a0126a6a.9c70b8",
        "name": "Flat or standing up",
        "func": "var mya=msg.payload;\nmsg.payload = {};\nif (mya < -3.80){\n    flow.set(\"levely\",1);\n    msg.payload  = \"plat\";\n        }\nelse {\n    flow.set(\"levely\",2);\n    msg.payload  = \"rechtop\";\n}\nreturn msg;",
        "outputs": 1,
        "noerr": 0,
        "x": 450,
        "y": 200,
        "wires": [
            [
                "ecd746cc.fce348"
            ]
        ]
    },
    {
        "id": "ecd746cc.fce348",
        "type": "debug",
        "z": "a0126a6a.9c70b8",
        "name": "",
        "active": true,
        "tosidebar": true,
        "console": false,
        "tostatus": false,
        "complete": "false",
        "x": 640,
        "y": 340,
        "wires": []
    },
    {
        "id": "8721e902.45d8b8",
        "type": "function",
        "z": "a0126a6a.9c70b8",
        "name": "Gate for level ",
        "func": "\nvar x = msg.payload;\ny = flow.get(msg.payload);\nvar y = flow.get('levely') || 0;\n\nif (y == 1){\n    msg.payload = {};\n        msg.payload = 0;\n} else {\n    msg.payload = x;\n}\n\nreturn msg;",
        "outputs": 1,
        "noerr": 0,
        "x": 810,
        "y": 120,
        "wires": [
            [
                "2d2a911a.6af3fe",
                "da72437e.88376"
            ]
        ]
    },
    {
        "id": "da72437e.88376",
        "type": "debug",
        "z": "a0126a6a.9c70b8",
        "name": "",
        "active": true,
        "tosidebar": true,
        "console": false,
        "tostatus": false,
        "complete": "false",
        "x": 890,
        "y": 200,
        "wires": []
    },
    {
        "id": "8c74c5f6.9a7a48",
        "type": "mqtt-broker",
        "z": "",
        "name": "10.1.0.17",
        "broker": "10.1.0.17",
        "port": "1883",
        "clientid": "",
        "usetls": false,
        "compatmode": true,
        "keepalive": "15",
        "cleansession": true,
        "birthTopic": "",
        "birthQos": "0",
        "birthPayload": "",
        "closeTopic": "",
        "closePayload": "",
        "willTopic": "",
        "willQos": "0",
        "willPayload": ""
    },
    {
        "id": "d43a9f25.6c874",
        "type": "ui_group",
        "z": "",
        "name": "Control",
        "tab": "739541e2.18396",
        "order": 1,
        "disp": true,
        "width": "6",
        "collapse": false
    },
    {
        "id": "739541e2.18396",
        "type": "ui_tab",
        "z": "",
        "name": "7inch",
        "icon": "dashboard",
        "order": 1,
        "disabled": false,
        "hidden": false
    }
]

Mattermost Mqtt Flag Integration

UPDATE 20231020 – Via USB Serial (also schematic for below integration)
https://www.henriaanstoot.nl/2023/10/20/thunderbird-mail-notification-flag-via-usb/

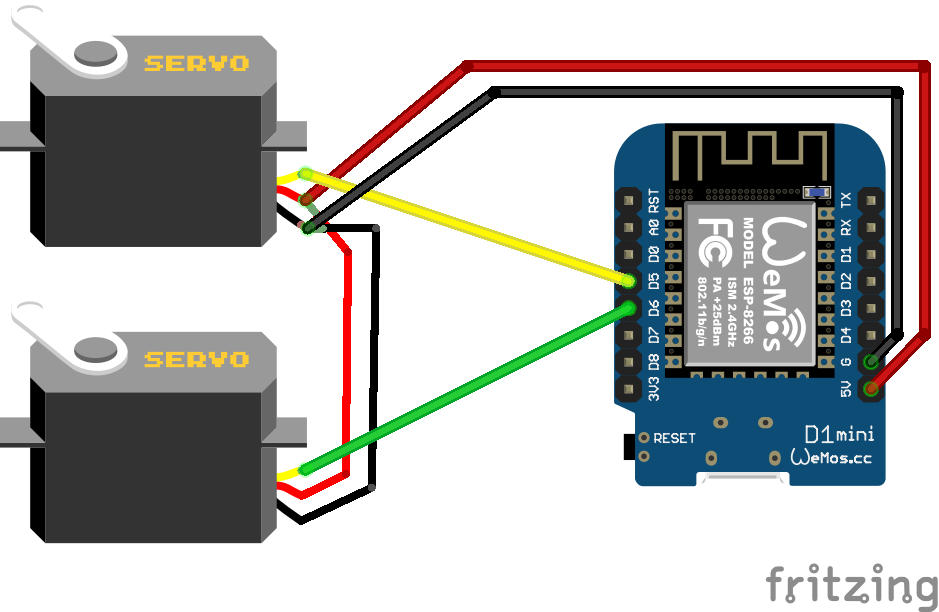
Using a servo which is MQTT controlled, and a slash command in Mattermost, i can be notified by friends and colleages.

Flag, and monitor-stand are 3D printed.

ESP is a simple wemos mini.

Note the slash command, M5 stick flow is unrelated!

Laser pointer web controlled

Coline sometimes plays games with her sisters online using my streaming server. (Due to Covid)

Some games are difficult because you have to point to a location on the table. So i came up with a laser pointer solution.

The idea is: Send a url to the players with a streaming camera, you see the game on your screen but you can click on a location on the screen to move a laser pointer to that location.

Below is a proof of concept using the Lasercut worldmap on the wall and a website with a worldmap.

Laser pointer module

Code to place on the ESP:

This will connect to the MQTT broker and listens for messages on the servo/pan and tilt topic.

#include <ESP8266WiFi.h>
#include <PubSubClient.h>
#include <Servo.h> 
Servo pan; 
Servo tilt;

const char* ssid = "MYSSI";                
const char* password = "MYWIFIPASS";
const char* mqtt_server = "IPMQTTBROKER";
const char* topic_pan = "servo/pan";
const char* topic_tilt = "servo/tilt";
 
WiFiClient espClient;
PubSubClient client(espClient);
long lastMsg = 0;
char msg[50];
int value = 0;

void setup() {
  pan.attach(D5);
  tilt.attach(D6);
  setup_wifi();
  client.setServer(mqtt_server, 1883);
  client.setCallback(callback);
}

void setup_wifi() {
  delay(5);
  WiFi.begin(ssid, password);

  while (WiFi.status() != WL_CONNECTED) {
    delay(500);
  }
}

void callback(char* topic, byte* payload, unsigned int length) {
 String string;
 for (int i = 0; i < length; i++) {
 string+=((char)payload[i]); 
 }
 int pos = string.toInt(); 
 if ( strcmp(topic, topic_pan) == 0 ) {
 pan.write(pos); 
 }
 if ( strcmp(topic, topic_tilt) == 0 ) {
 tilt.write(pos); 
 }
 delay(15); 
}

void reconnect() {
  while (!client.connected()) {
    if (client.connect("ESP8266Client")) {
      client.subscribe(topic_pan); 
      client.subscribe(topic_tilt); 
    } else {
      delay(5000);
    }
  }
}
void loop() {   
  if (!client.connected()) {
    reconnect();
  }
  client.loop();
  delay(100);
}

Website PHP code:

This has some calibration code to get coordinates lined-up

<?Php
$foo_x=$_POST['foo_x'];
$foo_y=$_POST['foo_y'];
echo "X=$foo_x, Y=$foo_y ";
$x=160 - round($foo_x/30);
$y=38 - round($foo_y/100);

system('/usr/bin/mosquitto_pub -h 10.1.0.17 -t servo/pan -m "' . $x . '"');
system('/usr/bin/mosquitto_pub -h 10.1.0.17 -t servo/tilt -m "' . $y . '"');
?>
<form action='' method=post>
<input type="image" alt=' Finding coordinates of an image' src="worldmap.jpg"
name="foo" style=cursor:crosshair;/>
</form>

POC

Pressure Lab

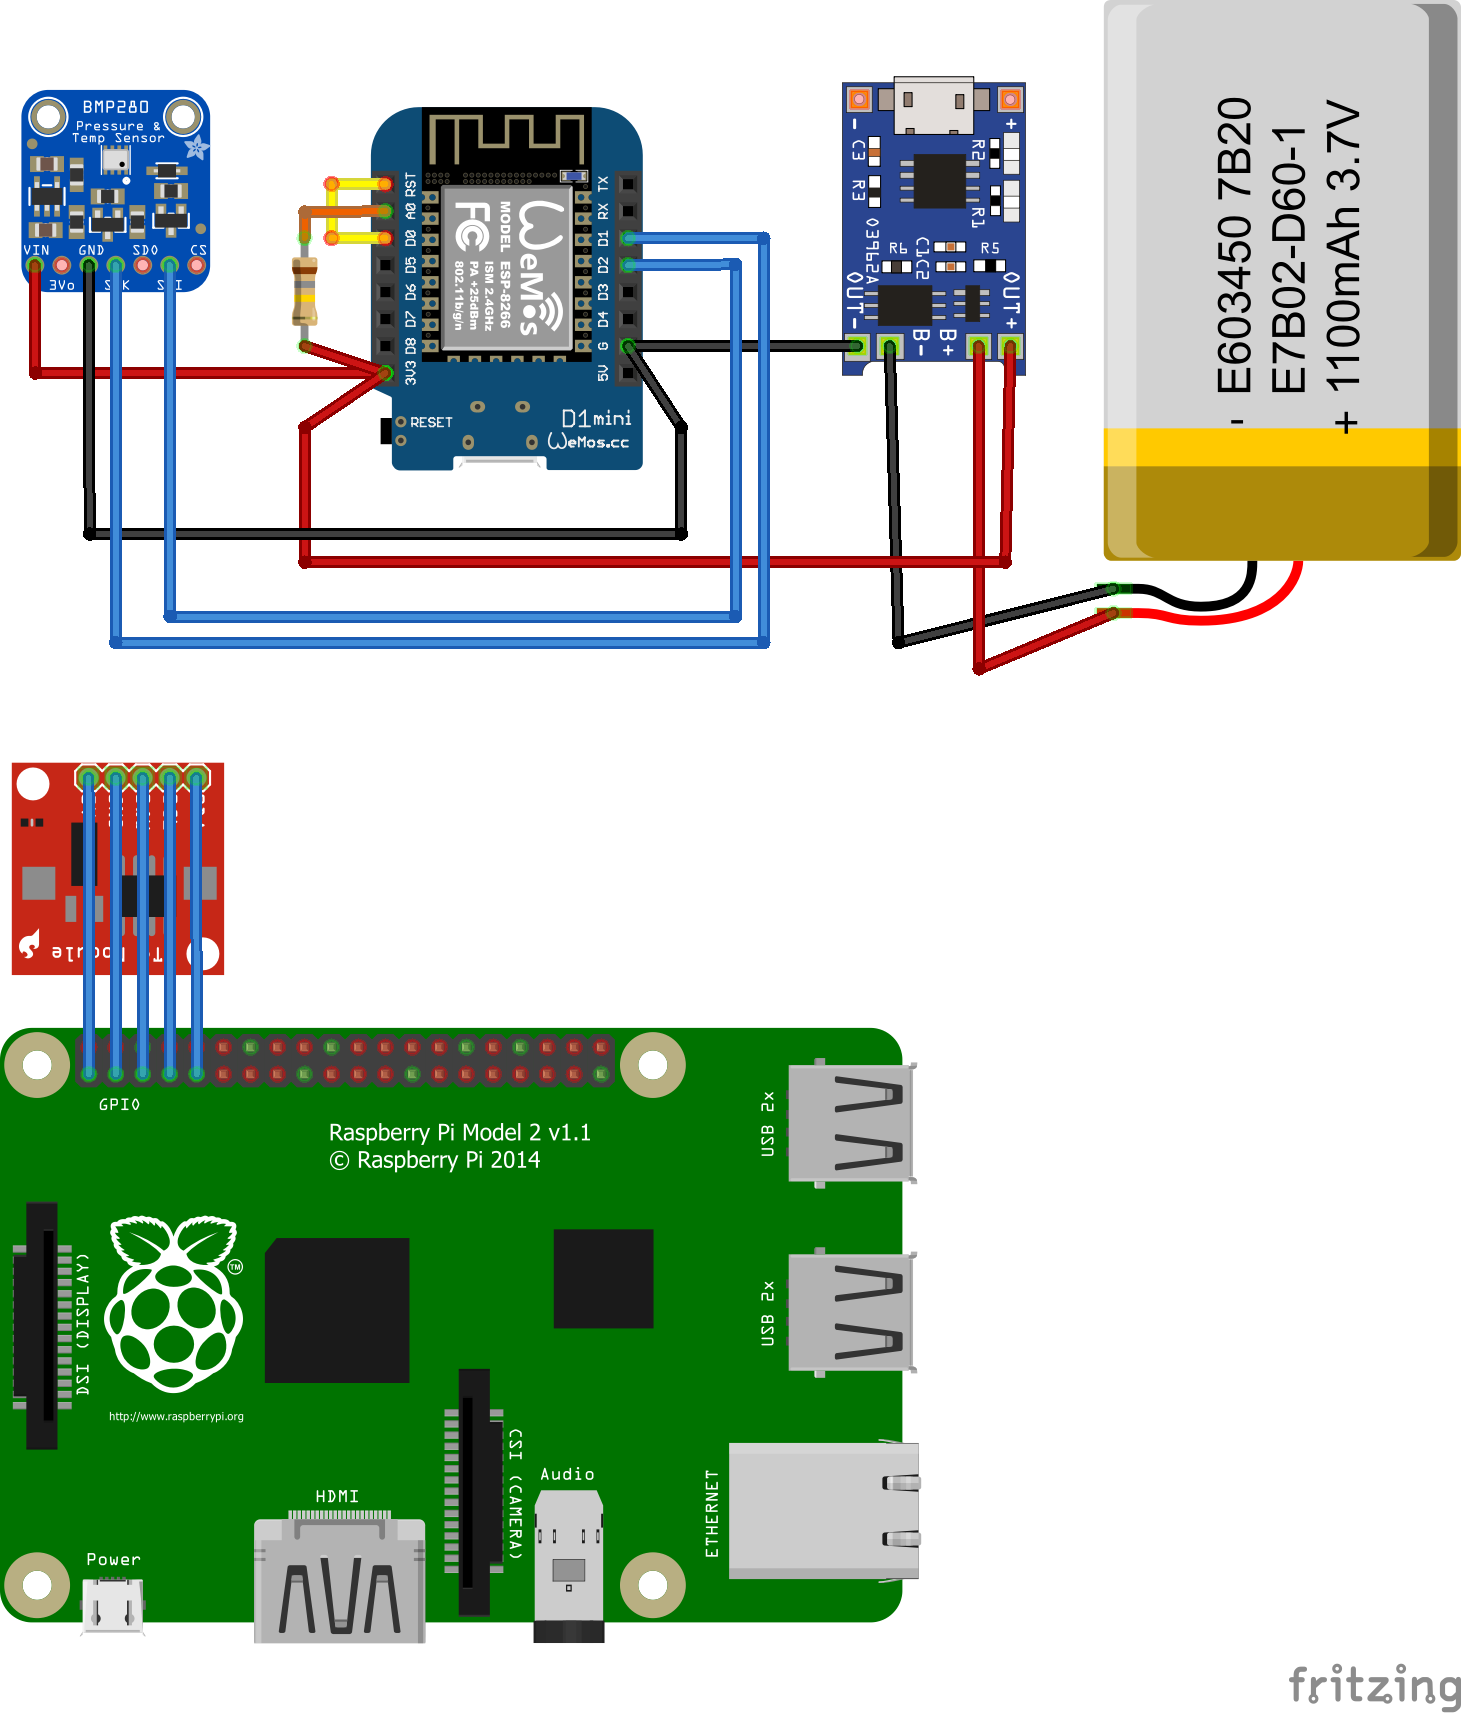
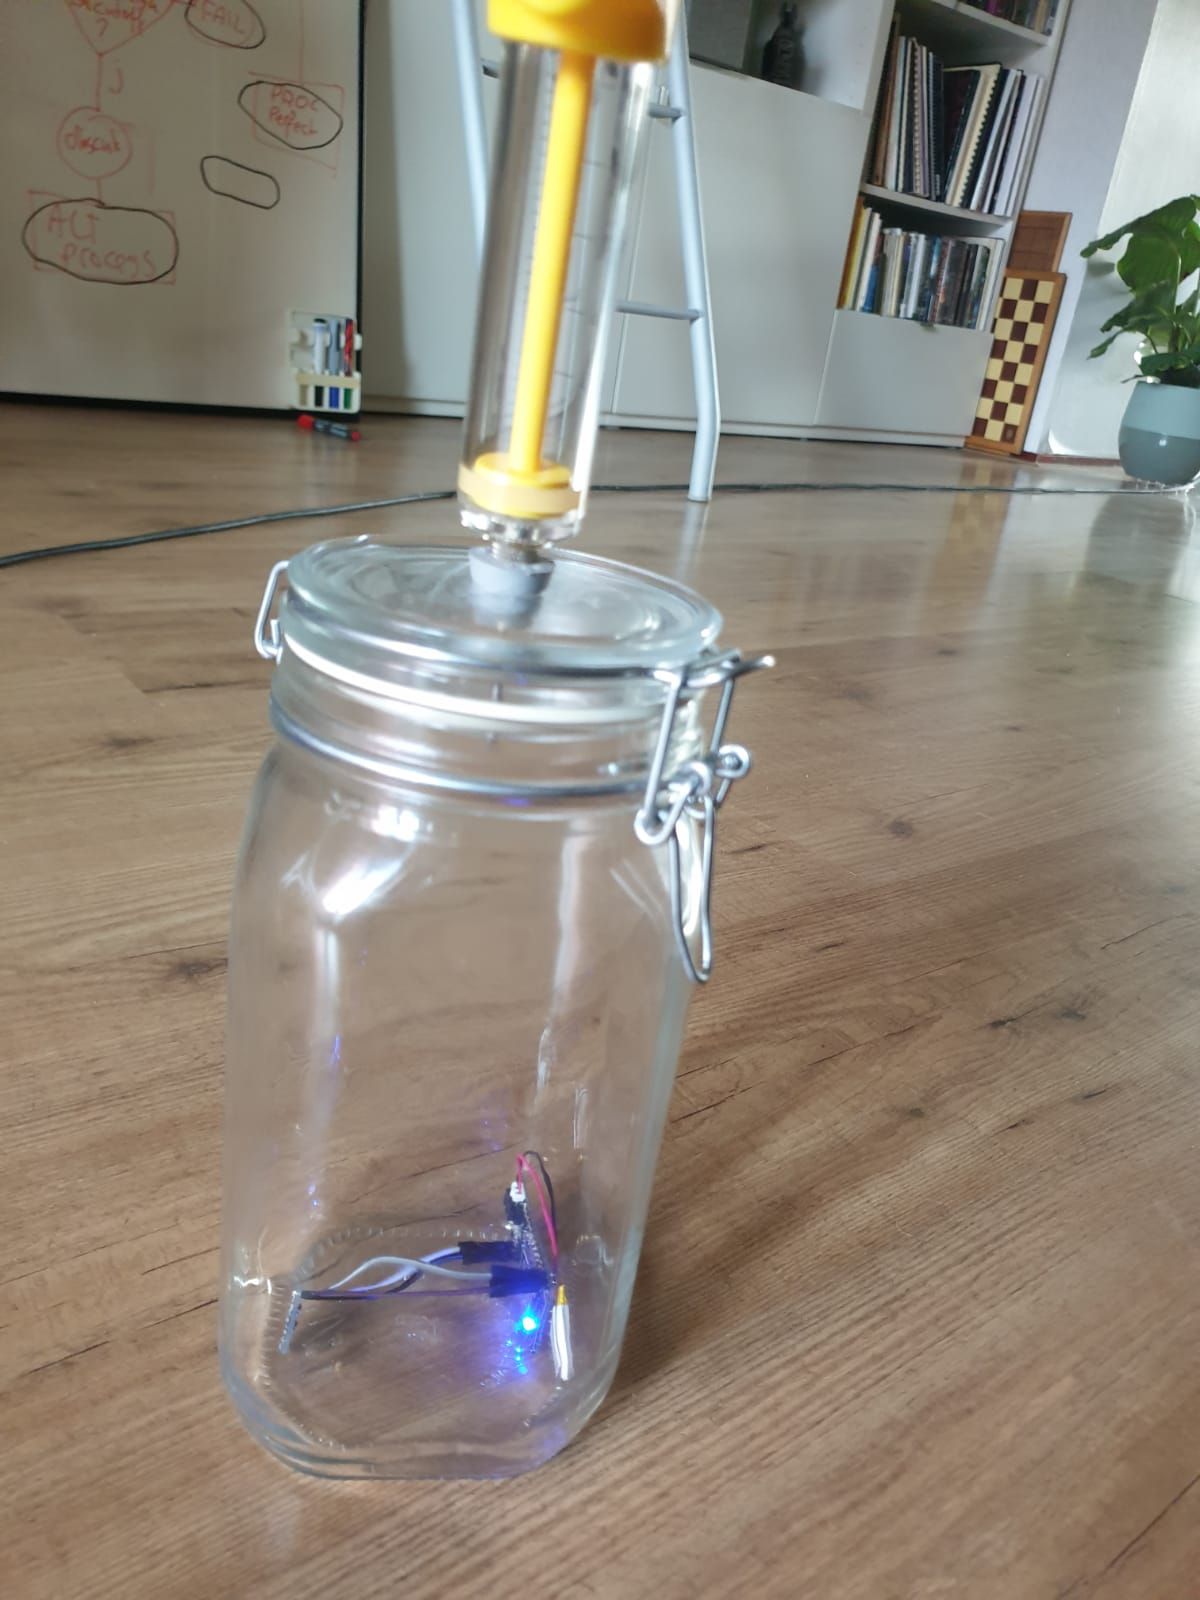
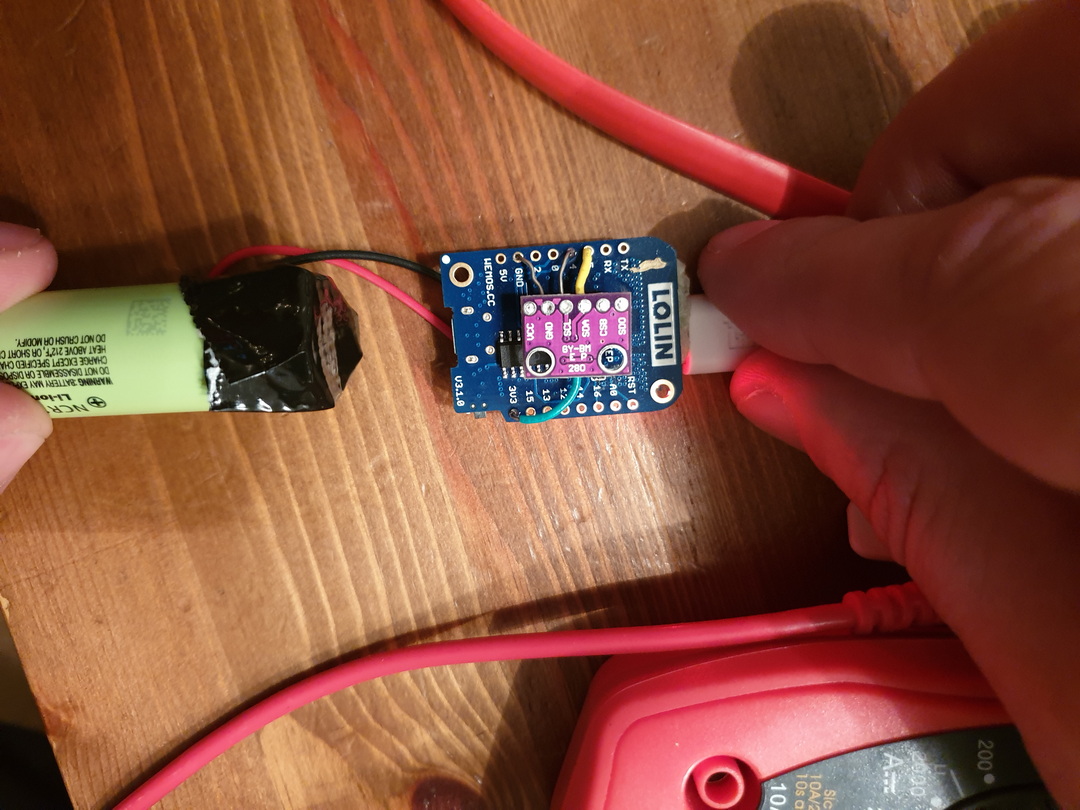
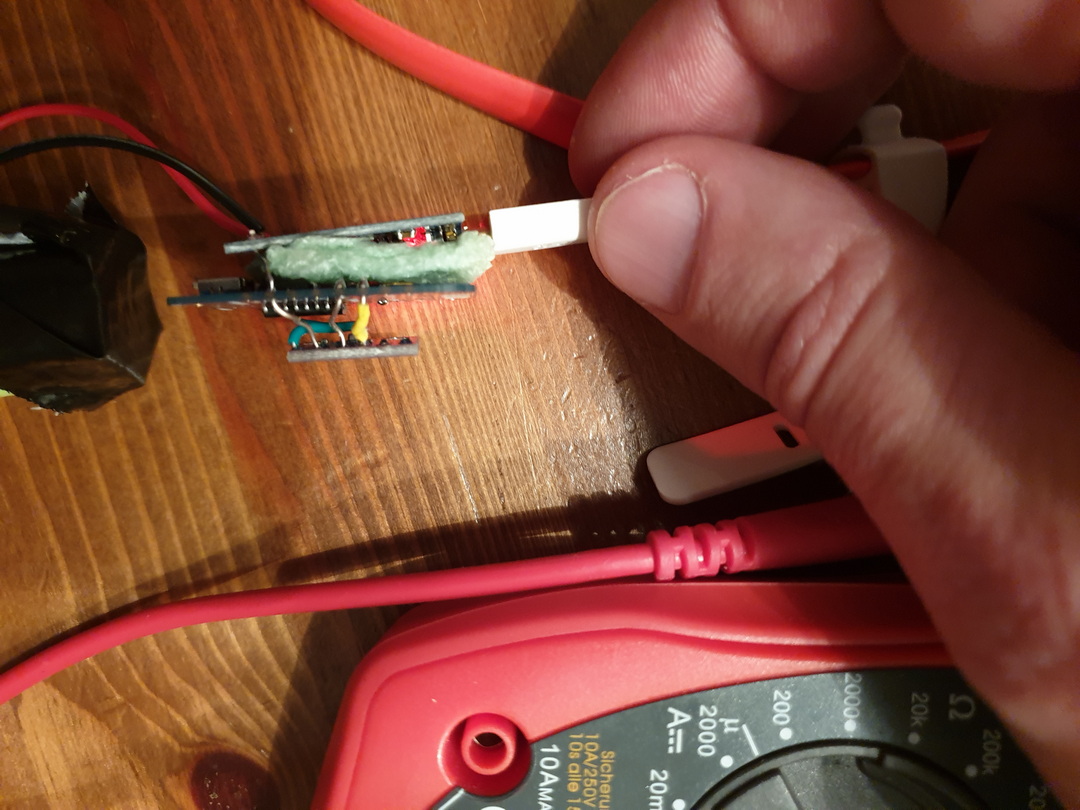
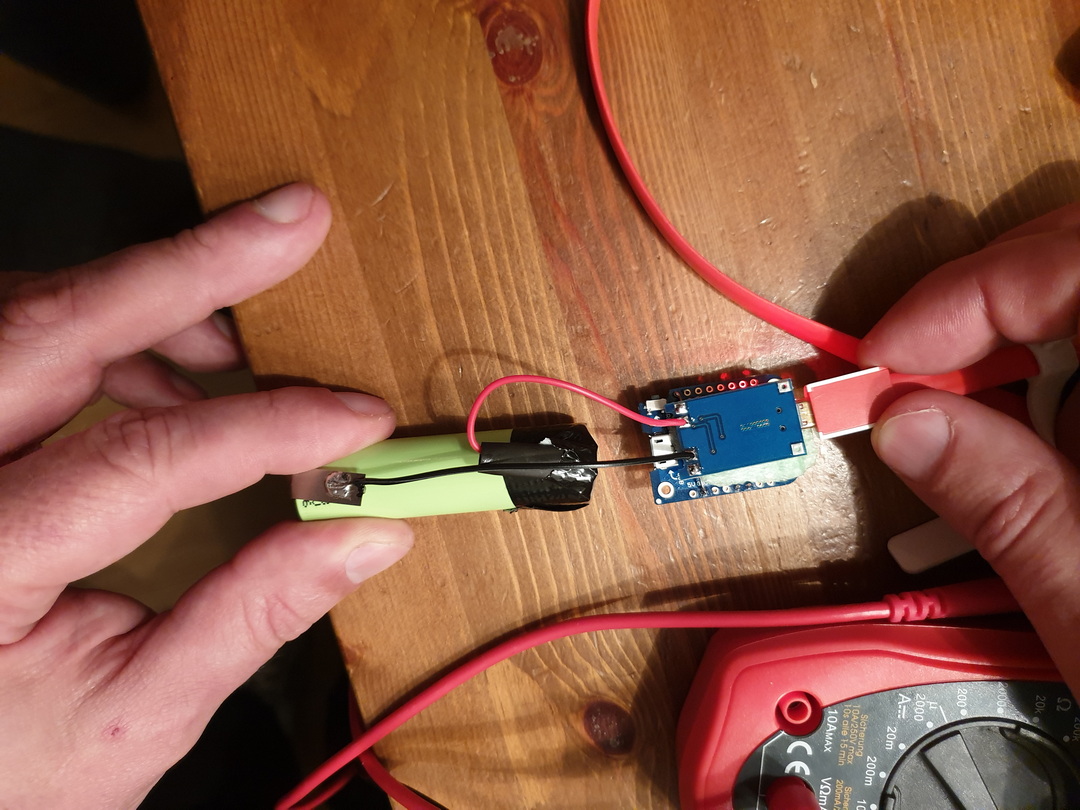
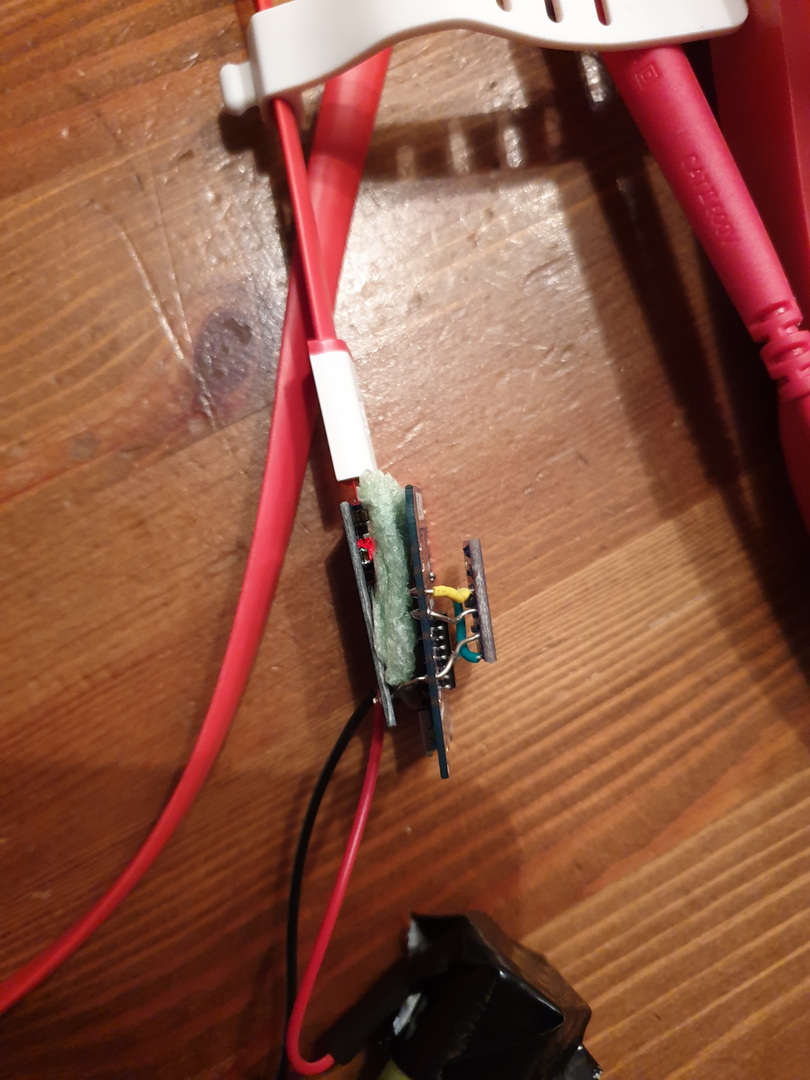
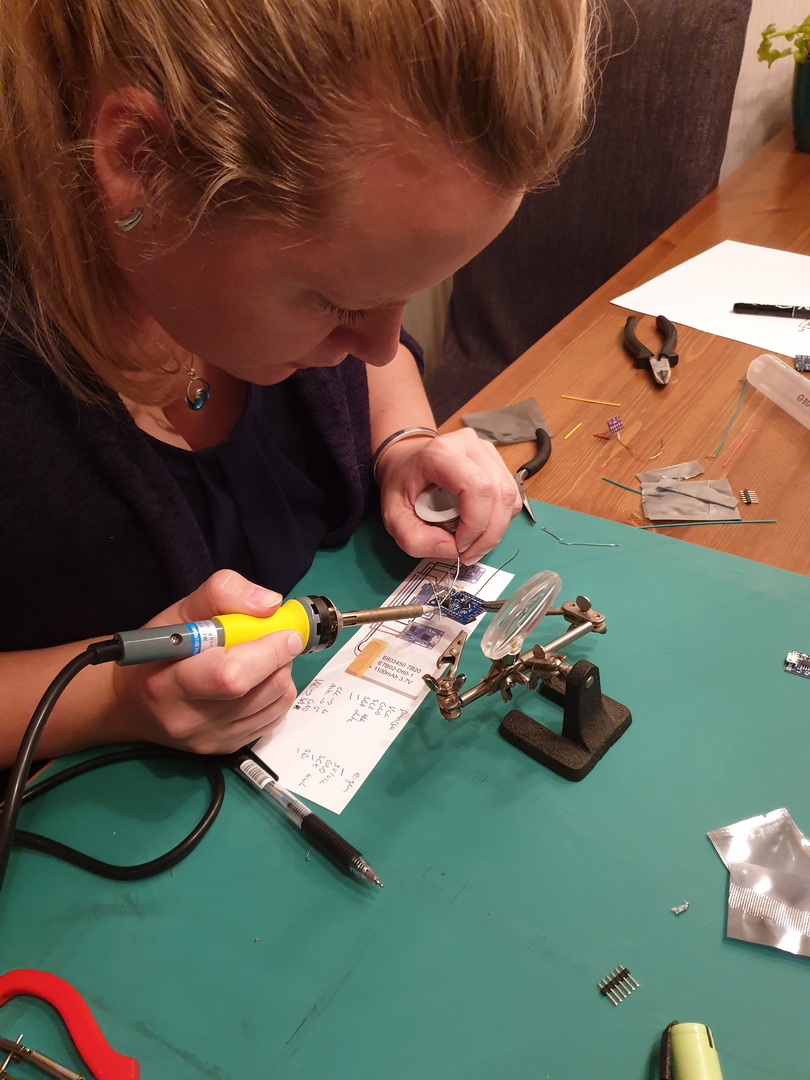
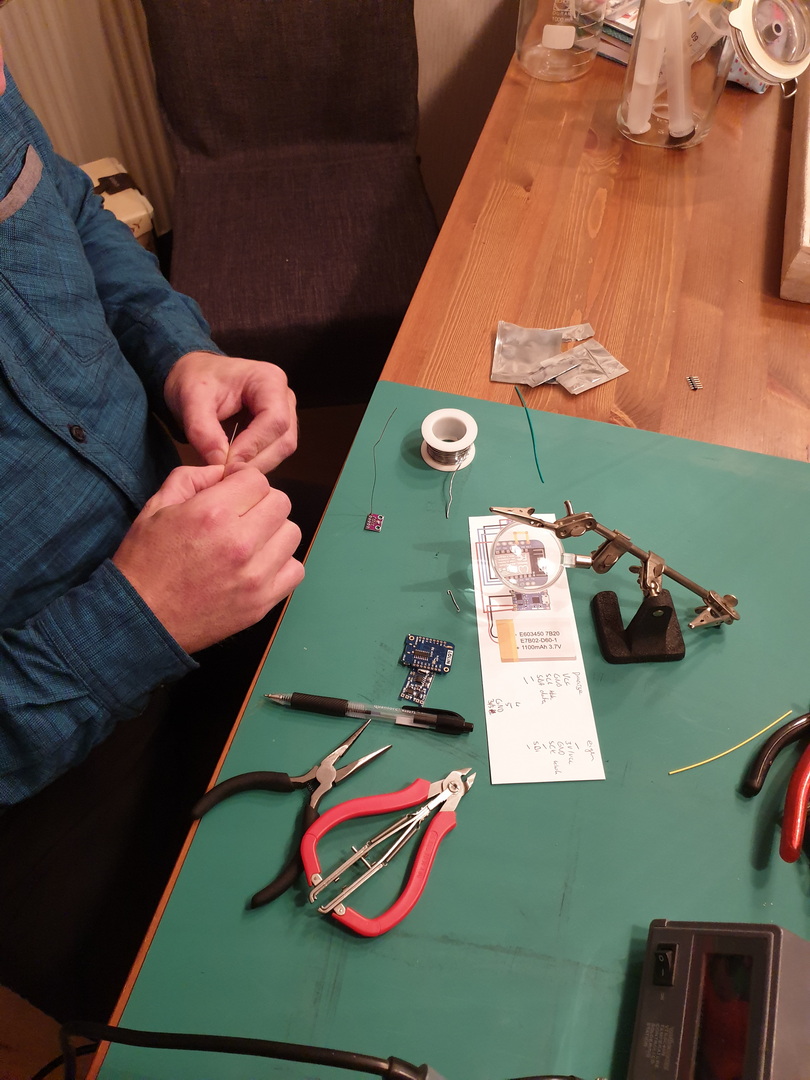
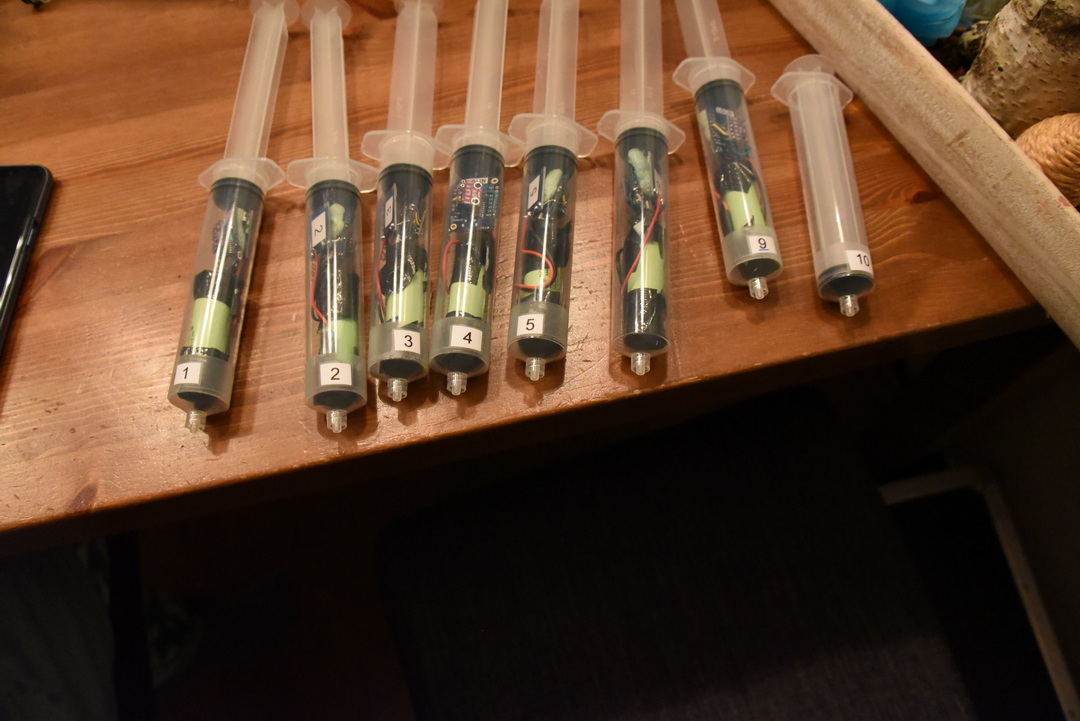
For measuring pressure in fermentation containers, I designed a pressure sensor which could be wireless connected to a fermentation container.
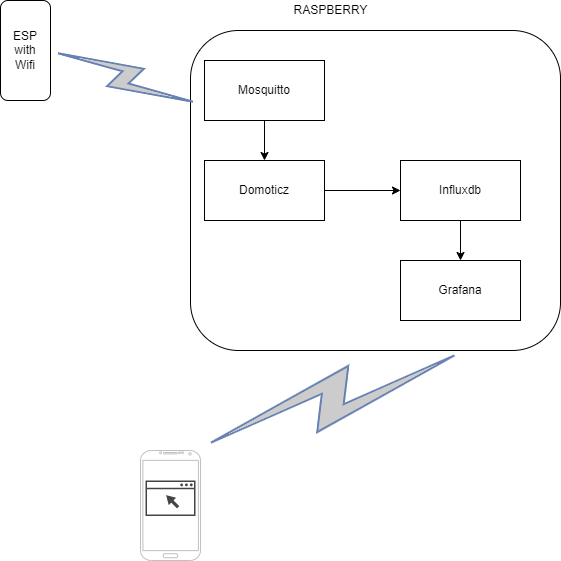
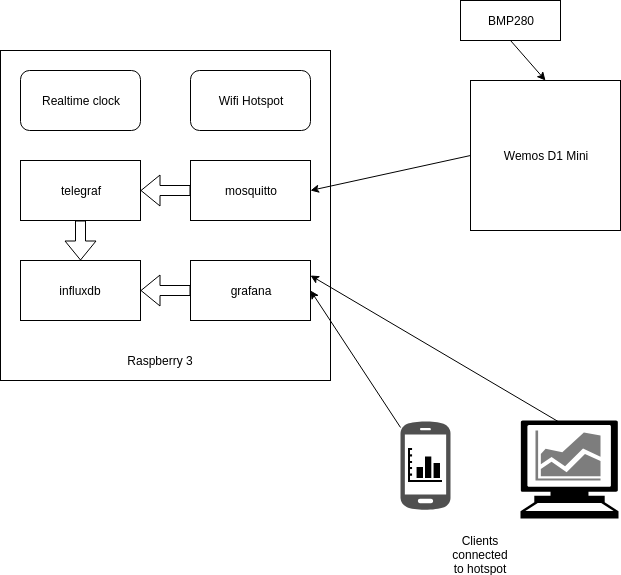
The sensor would transmit the values to a Raspberry which was configured as a Access Point and would store the measurements and generated graphs using Grafana.

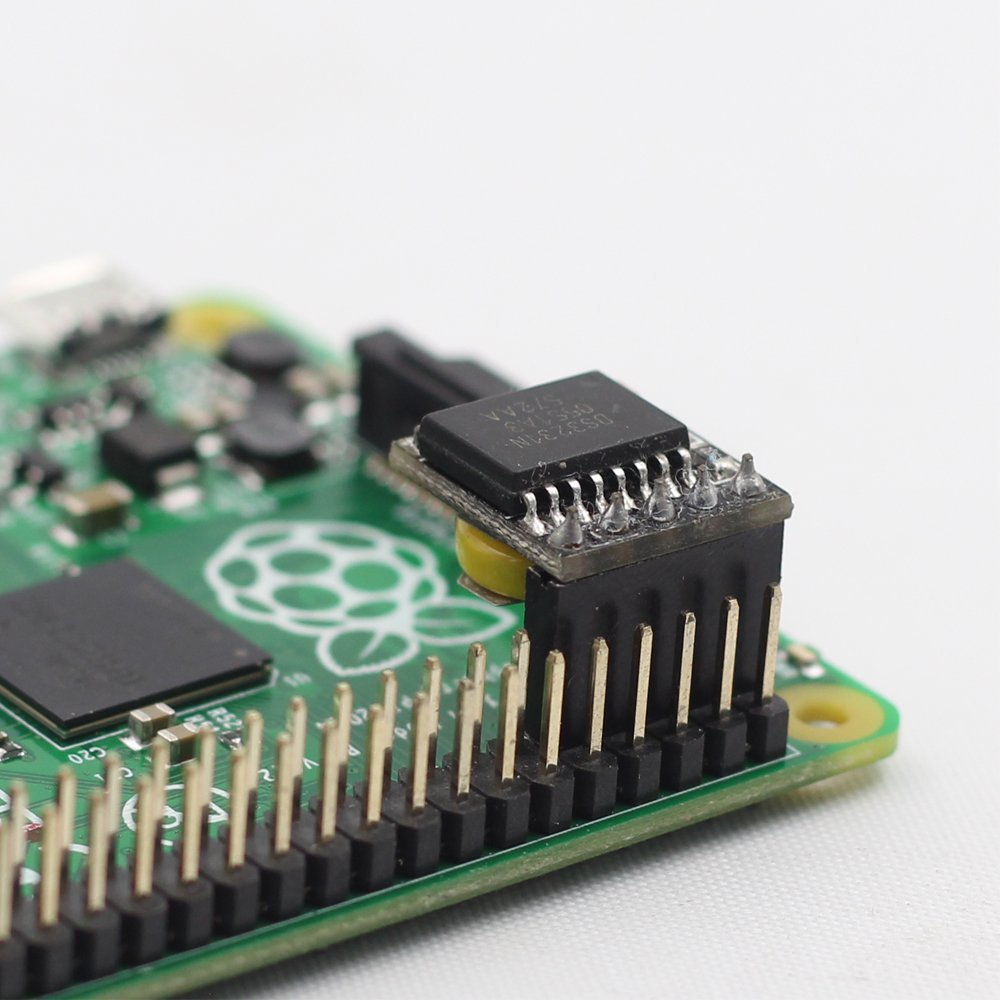
Raspberry with RealtimeClock
RTC on raspberry

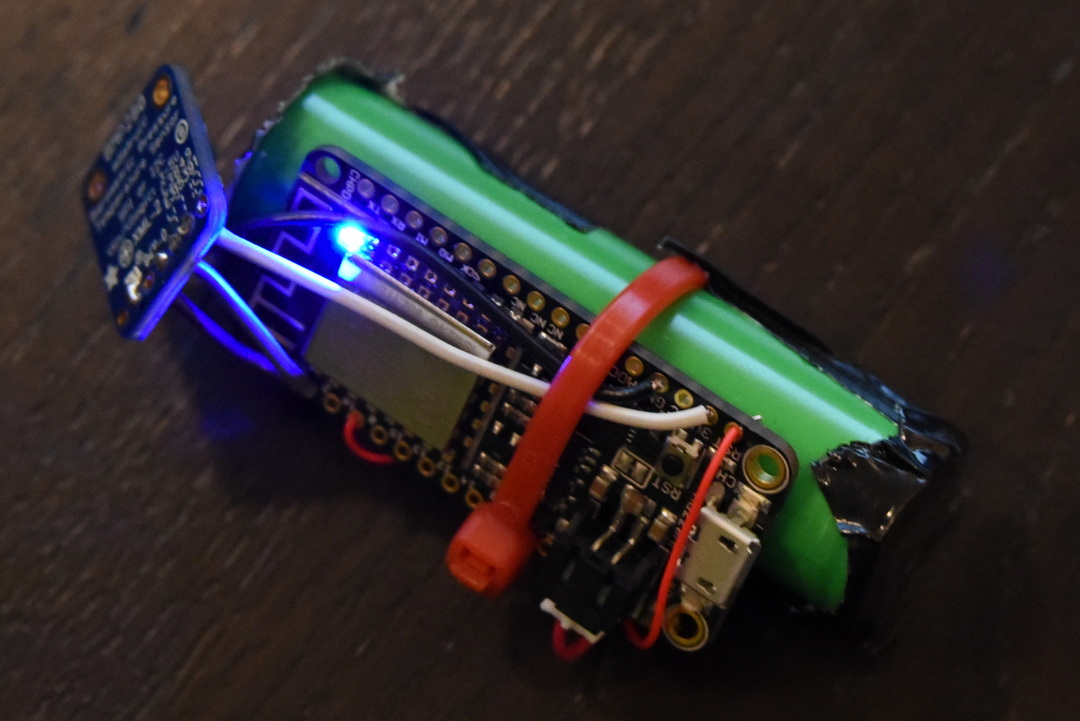
3D printed holder, designed in blender. Holds battery prints and has little handle to lift from container

Nodes config:

Esp configuration, connect with micro-usb
Flashing with linux

esptool.py -p /dev/ttyUSB0  write_flash 0x00000  ESP_Easy_mega-20190311_normal_ESP8266_4M.bin

Make a connection with the ESP Access point

Connect esp with a power source.
Look for a AP with ESP_Easy_0

Use password “configesp” to connect

Start you browser and enter http://192.168.4.1

In wifi wizard setup select “pressurespot”
Enter password “pressurespot”

Press connect

Wait 20s and look in the raspberry logs which IP the ESP got.

Connect laptop/mobile to wifi “pressurespot”and connect

Enter found IP from ESP in your browser.

Proceed to main config

Main setting table, set the following

  • Unit name & number + append
  • SSID and WPA key pressurespot
  • Client IP block level allow all
  • Press submit

Press controller tab

Press first edit button and set following
– Protocol: domoticz http
Next set
– Controller IP : 10.42.0.1
– Toggle enabled and press submit

Resulting in:

Next we got to Hardware

I2C interface switch GPIO-4 and GPIO-5

  • GPIO – SDA: GPIO-4 (D2) change to GPIO-5 (D1)
  • GPIO – SCL: GPIO-5 (D1) change to GPIO-4 (D2)
  • Press “Submit”

Devices TAB

Press edit, and select device “Environment – BMx280” from the pulldown menu.

Next, set the following

  • Name: pressure
  • Enable on
  • I2C address : 0x76 ( Is there is no 0x76 of 0x77 .. do a i2c scan on the next tab )
  • Send to controller , mark this
  • IDX: give this the number you had given this node (this is the one you have to use in domoticz )
  • interval 10Seconds
  • and press submit

In the Devices tab, you should be able to see the sensor with the values (Temperature and pressure)

No values? Do a i2c scan and/or reboot ESP ( You can find these in the tools tab)

Tools TAB

Press I2C scan, when seeing a address like 0x76 or 0x77 use this in previous tabs.
Still nothing, even after reboot? Maybe faulty hardware?

Everything okay? Back to the config tab

We are going to set the sleep mode.
Warning ! .. when setting this it is hard to get into the config pages again.
ESP will startup, connect to wifi, send values and goes to sleep again.

At the bottom set: Sleep awake time 1 sec

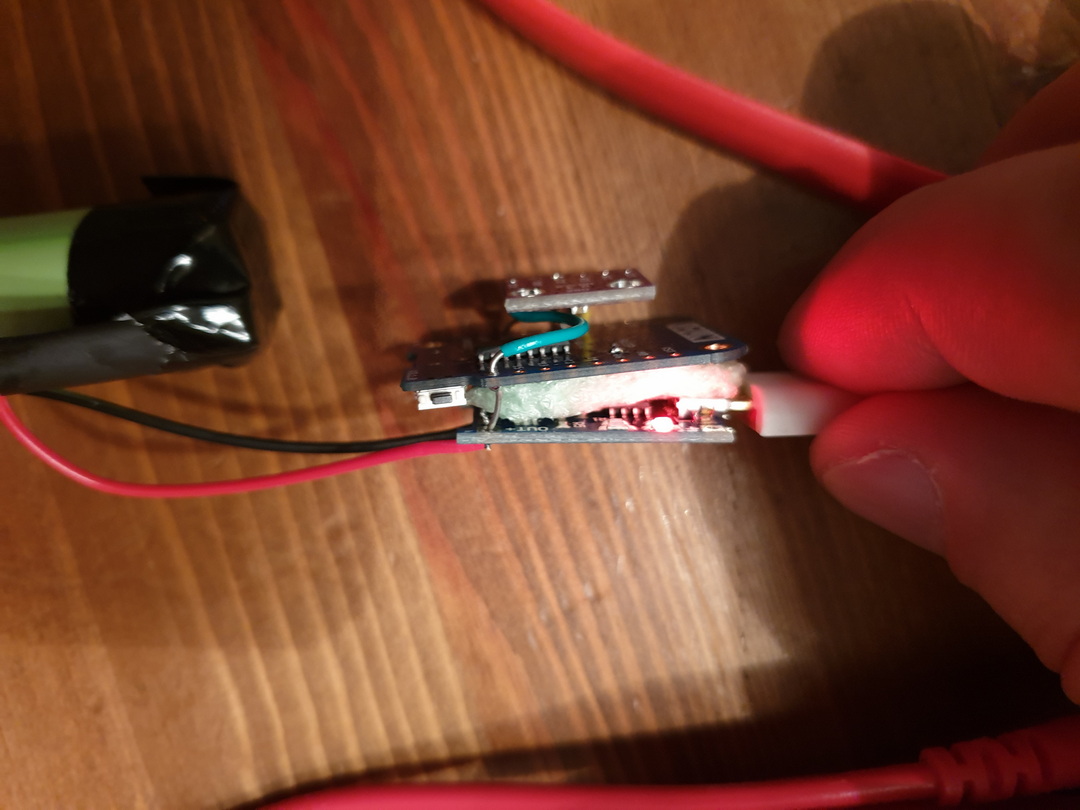
Buttons on the raspberry / pressurespot

Red button :

  • Less than 3 seconds is reboot
  • Longer than 3 seconds is shut down
    • Charger can be removed, when the green light is off

Led lights on the sensors

  • Red light (R2; constant): battery is charging
  • Blue light (R1; constant): battery is full
  • Blue light (R1; constant) & red light (R2; blinking): trying to charge, but no battery connected

Add shutdown script to /etc/rc.local

python /usr/local/bin/power-switch.py &amp;

/usr/local/bin/power-switch.py

#!/usr/bin/python
import threading, subprocess
import RPi.GPIO as GPIO
def shutdown():
    subprocess.call('sudo shutdown -h now', shell=True)
def edge_detected(pin):
    if GPIO.input(pin):
        t.cancel()
        subprocess.call('sudo reboot', shell=True)
    else:
        t.start()
if __name__ == '__main__':
    try:
        GPIO.setmode(GPIO.BOARD)
        GPIO.setup(5, GPIO.IN)
        GPIO.add_event_detect(5, GPIO.BOTH, callback=edge_detected, bouncetime=10)
        t = threading.Timer(3.0, shutdown)
        while True:
            pass
    finally:
        GPIO.cleanup()

/usr/local/bin/ledoff.py

#!/usr/bin/python
import RPi.GPIO as GPIO
import time
GPIO.setmode(GPIO.BCM)
GPIO.setwarnings(False)
GPIO.setup(18,GPIO.OUT)
GPIO.output(18,GPIO.LOW)

/usr/local/bin/ledon.py

#!/usr/bin/python
import RPi.GPIO as GPIO
import time
GPIO.setmode(GPIO.BCM)
GPIO.setwarnings(False)
GPIO.setup(18,GPIO.OUT)
GPIO.output(18,GPIO.HIGH)

nmcli device wifi hotspot ssid pressurespot password pressurespot

 /etc/NetworkManager/system-connections/Hotspot-1

[connection]
id=Hotspot-1
uuid=c2c05528-63f9-44c7-93ce-264187a45086
type=wifi
permissions=
timestamp=1553708934

[wifi]
hidden=true
mac-address=B8:27:EB:7F:D5:E7
mac-address-blacklist=
mode=ap
seen-bssids=B8:27:EB:7F:D5:E7;
ssid=pressurespot

[wifi-security]
group=ccmp;
key-mgmt=wpa-psk
pairwise=ccmp;
proto=rsn;
psk=pressurespot

[ipv4]
dns-search=
method=shared

[ipv6]
addr-gen-mode=stable-privacy
dns-search=
method=ignore

/usr/bin/servicecheck.sh (in rc.local and crontab root user – every minute

#!/bin/bash
nmcli connection show  | grep "Hotspot-1           c2c05528-63f9-44c7-93ce-264187a45086  802-11-wireless  wlan0" &gt;/dev/null &amp;&amp; touch /tmp/wlan || rm -f /tmp/wlan
for f in influx domoticz telegraf grafana mosquitto ; do
pgrep $f &gt;/dev/null &amp;&amp; touch /tmp/$f || rm -f /tmp/$f
done
count=$(ls  /tmp/influx /tmp/domoticz /tmp/telegraf /tmp/grafana /tmp/mosquitto /tmp/wlan | wc -l)
if [ $count -eq 6 ]  ; then
/usr/local/bin/ledon.py
exit 0
fi

for timer in {1..10} ; do
/usr/local/bin/ledon.py
sleep 1

/usr/local/bin/ledoff.py
sleep 1
done

Rest services to be installed on Raspberry

At the moment the raspberry uses domoticz between the Mqtt broker (Mosquitto) and the database (Influx)
Data wil be displayed using grafana.

tail -f /var/log/syslog shows which ip to which ESP
DHCPACK(wlan0) 10.42.0.104 cc:50:e3:c4:96:61 lab-
DHCPACK(wlan0) 10.42.0.181 cc:50:e3:c4:8d:73 lab-4
DHCPACK(wlan0) 10.42.0.186 cc:50:e3:c4:9b:ef lab-1

Configuring the raspberry

Install influx and grafana

First we add Influx repositories to apt:

wget -qO- https://repos.influxdata.com/influxdb.key | sudo apt-key add -
source /etc/os-release
echo "deb https://repos.influxdata.com/debian $(lsb_release -cs) stable" | sudo tee /etc/apt/sources.list.d/influxdb.list

Update apt with the new repo & install.

sudo apt update && sudo apt install -y influxdb

Then start the influxdb service and set it to run at boot:

sudo systemctl enable influxdb --now

Again we need to add the Grafana packages to apt:

wget -q -O - https://packages.grafana.com/gpg.key | sudo apt-key add -
echo "deb https://packages.grafana.com/oss/deb stable main" | sudo tee /etc/apt/sources.list.d/grafana.list

We can now update and install the binaries:

sudo apt update && sudo apt install -y grafana

Then simply enable the service and set to run at boot:

sudo systemctl enable grafana-server.service --now

Now we can check that grafana is up by loading it in a browser: http://10.42.0.1:3000. If so, you can log in with the username and password = admin and set a new admin password.

Install mosquitto

sudo apt install mosquitto mosquitto-clients

Install domoticz using below command

<code><strong>curl -sSL install.domoticz.com | sudo bash</strong></code>

Under hardware add MQTT server adress 127.0.0.1

Add virtual sensors to domoticz.

Click hardware and create virtual sensor, lab with sensornumber. Sensor type is Temp+Baro.

When looking at devices you will see the virtual devices.

Here you can see if data is coming from the ESP’s

Pushing the data into Influxdb:

Goto settings > more options > data push > influxdb

Add temperature

  • Device name: lab* (lab plus unit number)
  • Value to send: temperature
  • Target type: direct (NOTE screenshot below is wrong)
  • press add

Add barometer

  • Device name: lab* (lab plus unit number)
  • Value to send: Barometer
  • Target type: direct (NOTE screenshot below is wrong)
  • press add

Configure Grafana

Go with your browser to http://10.42.0.1 when connected to the rpi access point

Goto settings and data sources, add influxdb with source http://localhost:8086
Goto dashboard and create a new one.

Data source is influx, select A Barometer
And the IDX that was used in configuring the ESP
Axes: Units in millibars, above example had temperature, for both Baro and Temp in one graph.
Select null value as connected

TODO

Telegraf/mosquito
Services in domoticz
Rpi status display
Sensor test / monitor