I’ve been working on some modular gadgets which can be combined to make a complete puzzle.
I like games like Keep-talking-and-nobody-dies. (Which is a computer game, but you have to play it with multiple persons and a physical “manual” Great fun!)
https://keeptalkinggame.com/
And i like real escape rooms.
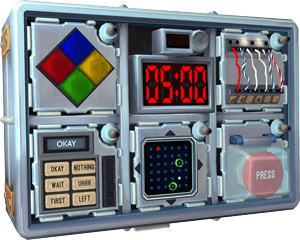
There are some puzzle “rooms” you can buy in the game store, it is okay but many are for single use only.

I’ve been following some people on youtube, i saw some great ideas but not a remote over the internet using physical knobs and switches.
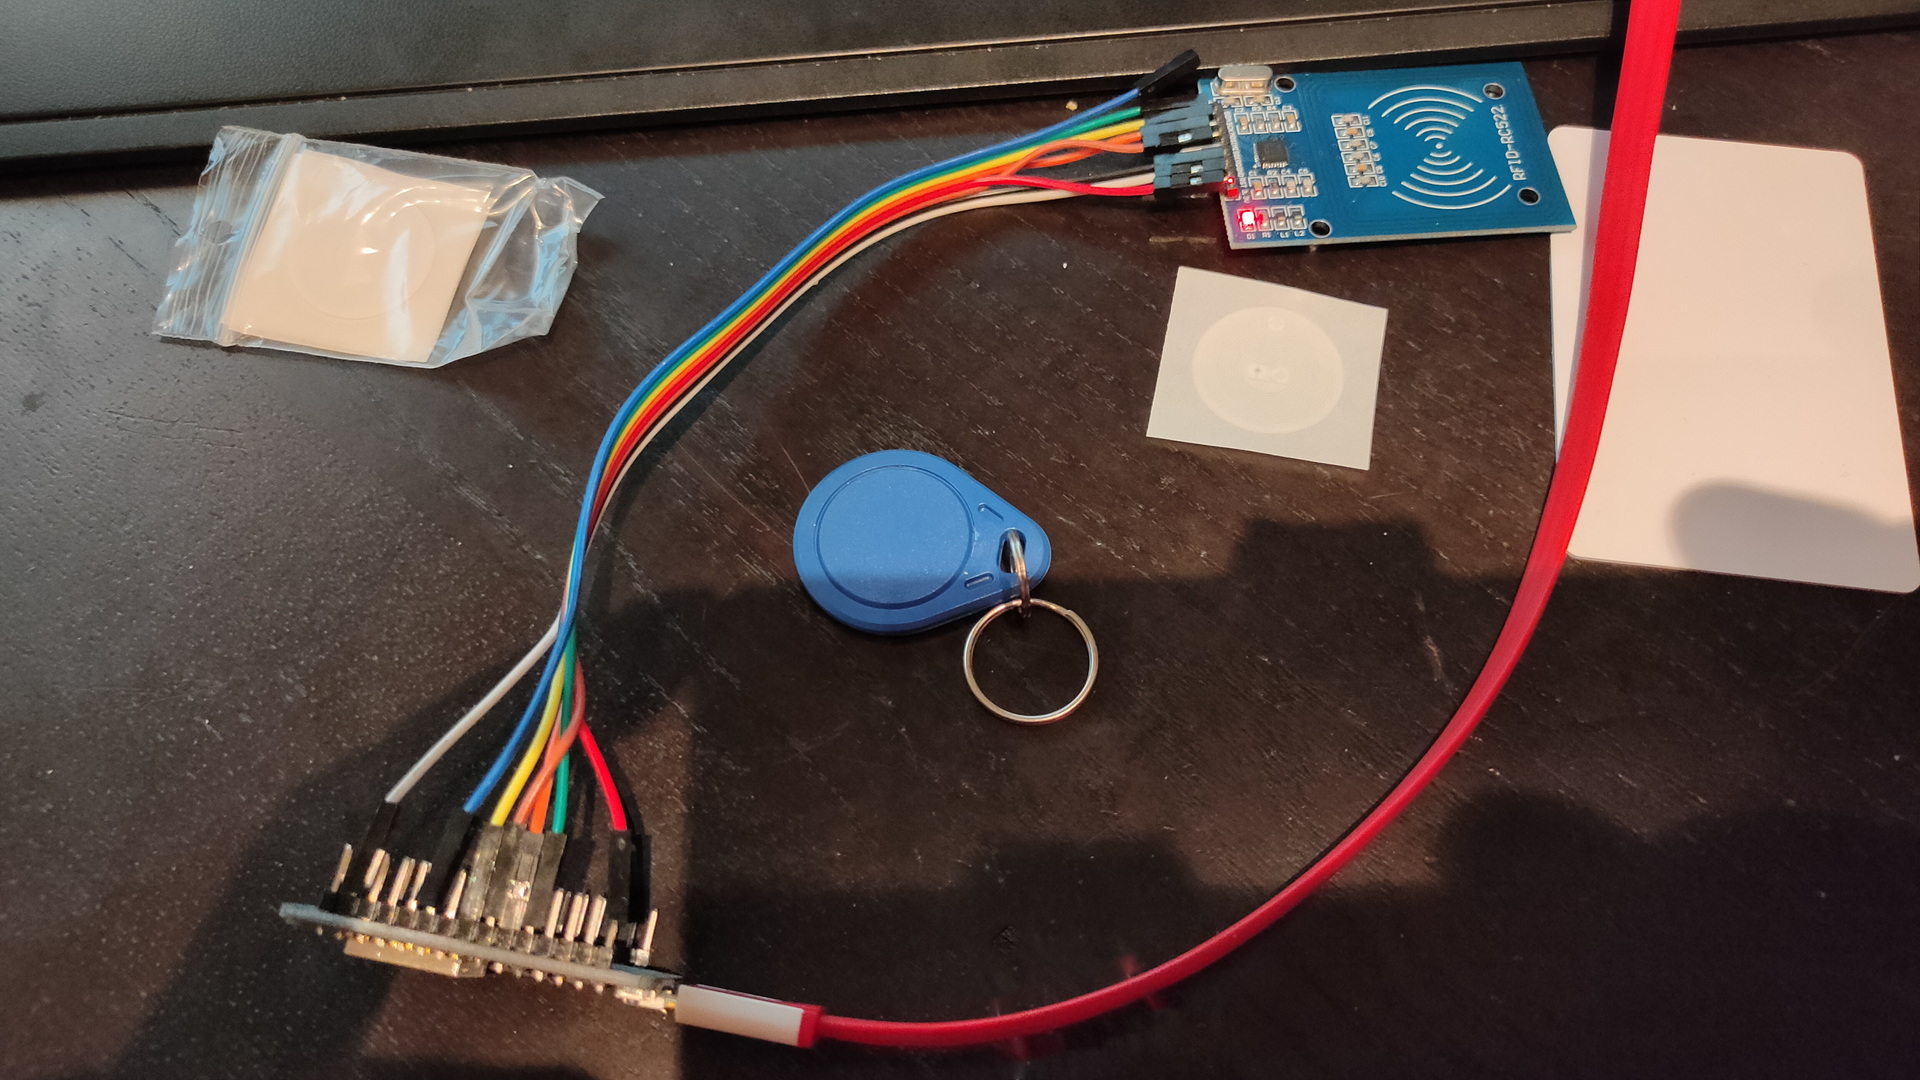
This is a RFID reader with an old Amico Esp8266 Arduino. It sends RFID information to the MQTT broker
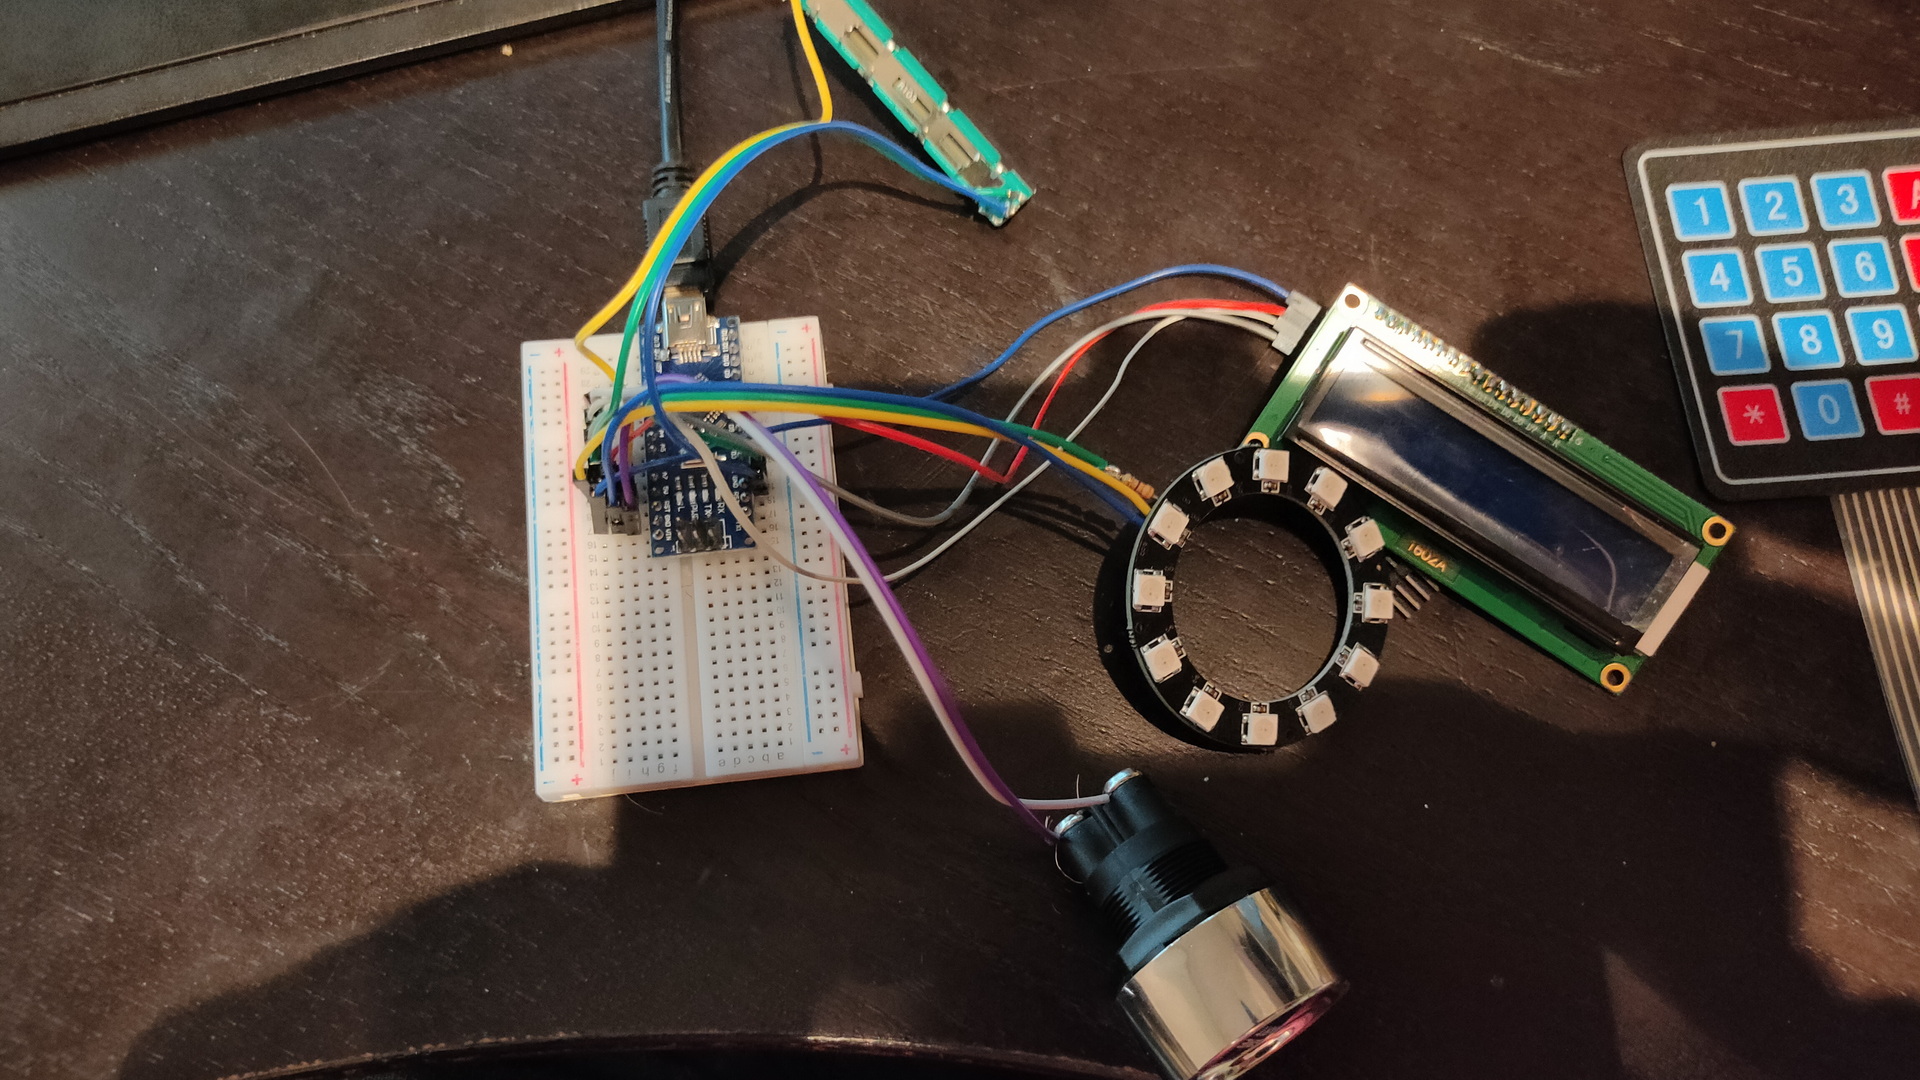
Some other tools ‘n knobs .. and stuff
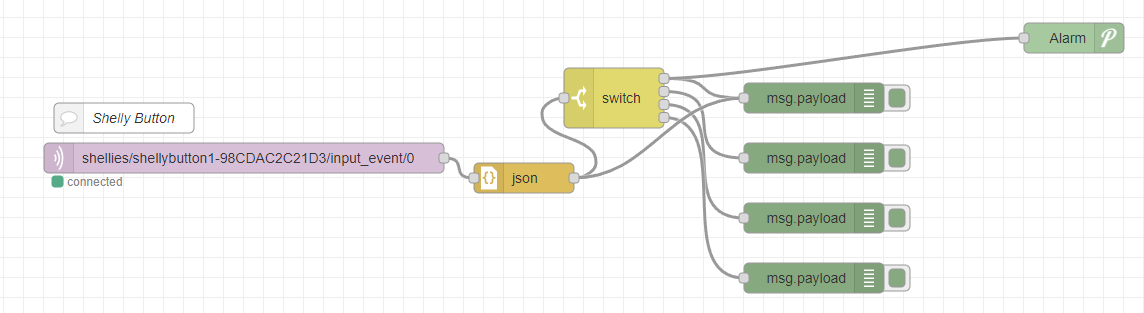
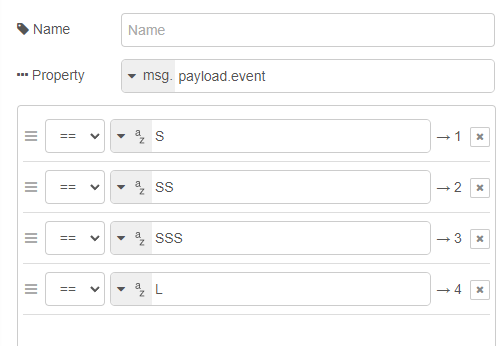
I want to use Adhoc Wifi and a Mqtt/Nodered setup which uses a mqtt over the internet to get people (and their knobs) connected
I already got a lot of test schematics
Schematic for the MQTT enabled RFID module
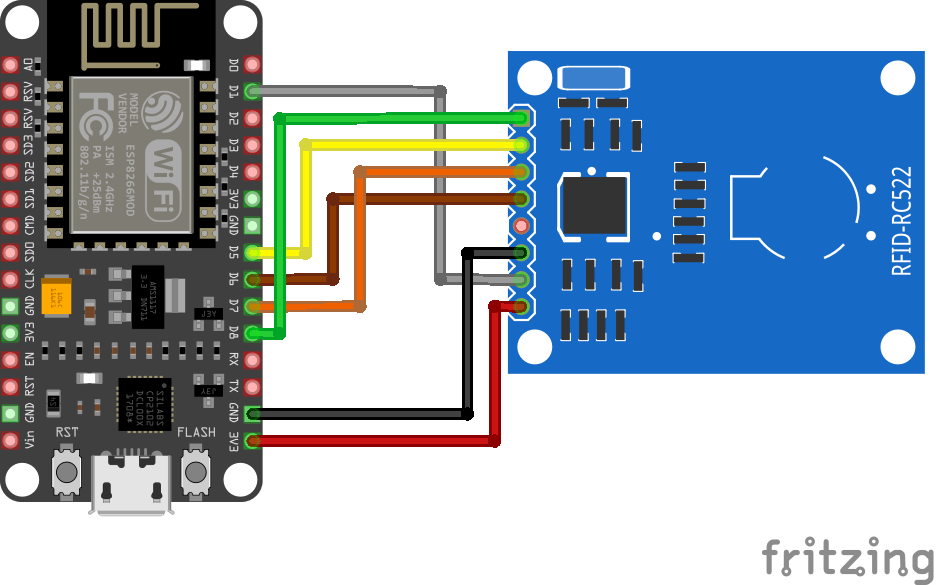
ESP8266 <-> RC522
D8            SDA
D5            SCK
D7           MOSI
D6           MISO
GND           GND
D1            RST
3V3           3V3
Code
Below will write the RFID id to “rfid/id” and resets this when you remove the tag to “rfid/id = 0”
#include <ESP8266WiFi.h>
#include <WiFiClient.h>
#include <PubSubClient.h>
#include <MFRC522.h>

#define SS_PIN D8
#define RST_PIN D1

MFRC522 mfrc522(SS_PIN, RST_PIN);
unsigned long cardId = 0;

WiFiClient net;
PubSubClient client(net);

const char* mqtt_server = "MQTTBROKER";
const char* ssid = "MYSSID";
const char* password = "MYWIFIPASSWD";

void setup() {
  SPI.begin();
  mfrc522.PCD_Init();

  WiFi.mode(WIFI_AP_STA);
  WiFi.begin(ssid, password);

  client.setServer(mqtt_server, 1883);
}

void reconnect() {
  while (WiFi.waitForConnectResult() != WL_CONNECTED) {
    WiFi.begin(ssid, password);
  }

  while (!client.connected()) {
    String clientId = "NodeMCUClient-";
    clientId += String(random(0xffff), HEX);

    if (!client.connect(clientId.c_str(), "rfidclient", "...")) {
      delay(5000);
    }
  }
}

void loop() {
  reconnect();

  if (!mfrc522.PICC_IsNewCardPresent()) {
    return;
  }

  if (!mfrc522.PICC_ReadCardSerial()) {
    return;
  }

  cardId = getCardId();

  char buffer[10];
  sprintf(buffer, "%lu", cardId);
  client.publish("rfid/id", buffer);

  uint8_t control = 0x00;

  do {
    control = 0;
    for (int i = 0; i < 3; i++) {
      if (!mfrc522.PICC_IsNewCardPresent()) {
        if (mfrc522.PICC_ReadCardSerial()) {
          control |= 0x16;
        }

        if (mfrc522.PICC_ReadCardSerial()) {
          control |= 0x16;
        }
        control += 0x1;
      }
      control += 0x4;
    }

    delay(0);
  } while (control == 13 || control == 14);

  reconnect();
  client.publish("rfid/id", "0");
  delay(500);

  mfrc522.PICC_HaltA();
  mfrc522.PCD_StopCrypto1();
}

unsigned long getCardId() {
  byte readCard[4];
  for (int i = 0; i < 4; i++) {
    readCard[i] = mfrc522.uid.uidByte[i];
  }

  return (unsigned long)readCard[0] << 24
    | (unsigned long)readCard[1] << 16
    | (unsigned long)readCard[2] << 8
    | (unsigned long)readCard[3];
}
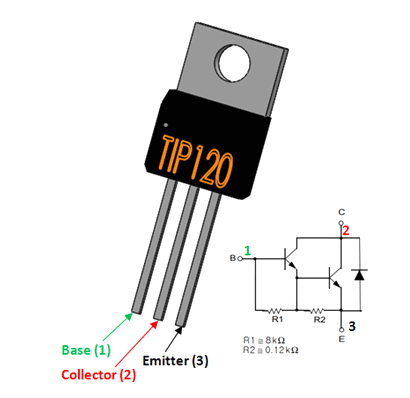
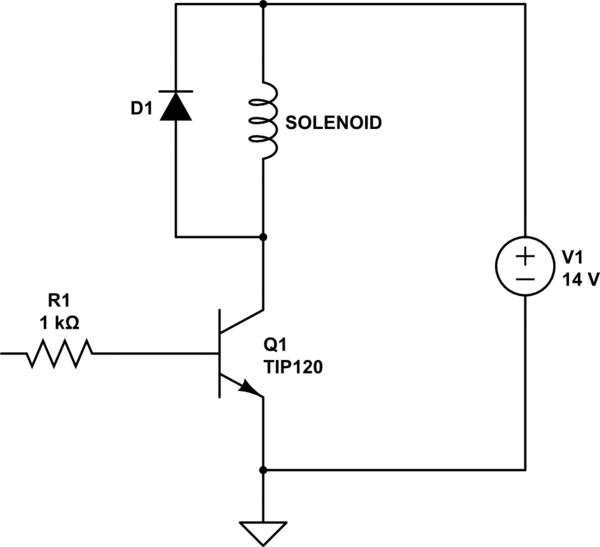
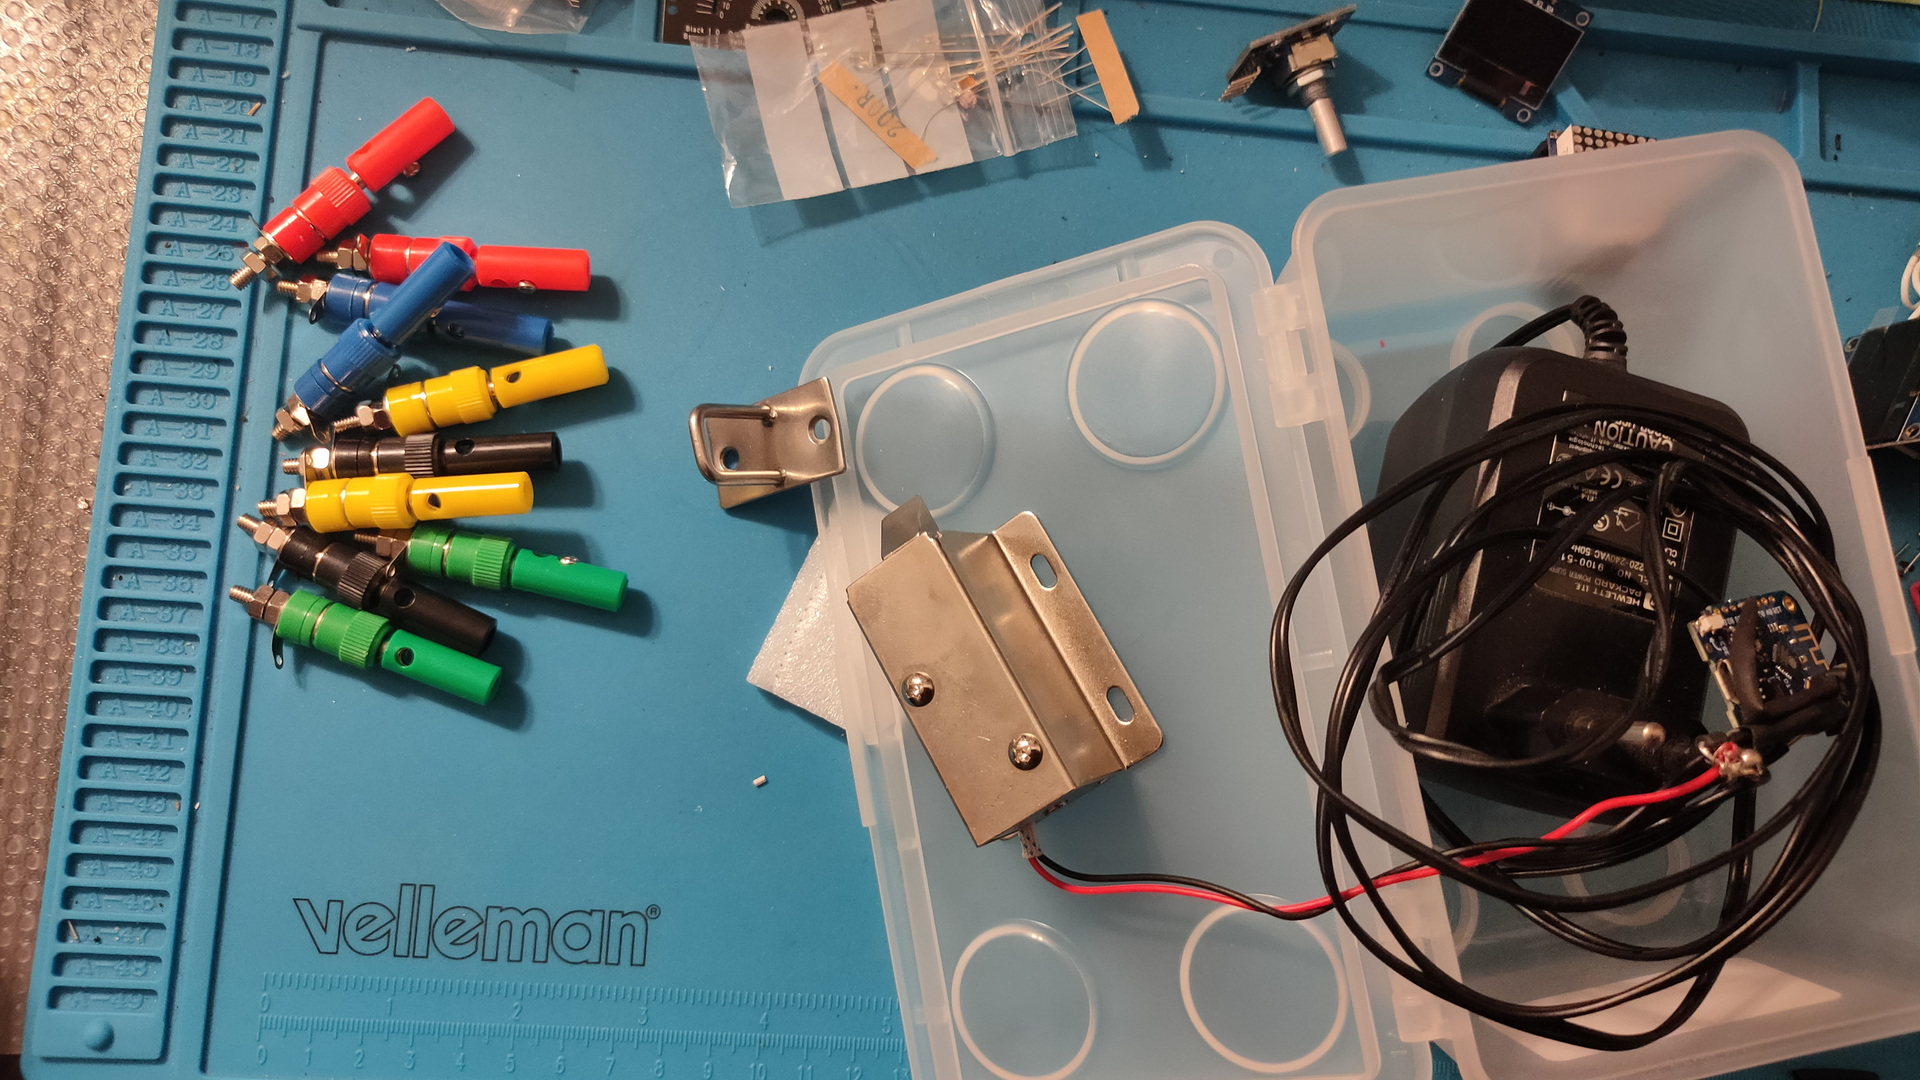
Schematics used for the Solenoid lock
Software is a mqtt example from the internet which toggles a PIN on the arduino.