All posts by fash

Photoshoots again

Today we did a photoshoot again. (Arja needed some pictures again). Nice to have some practice again.
I’ve been setting up a little studio in our shed. i’ve got a nice interchangeable background with multiple colors/fabrics. (White/Black/Chromagreen/Blue cloth)
I also installed the semi professional lights below.

Nice lightweight stands, with a lightbox, and a remote trigger system.
It has two modes. Flash and permanent lighting. It’s a nice piece of equipment, don’t get me wrong. But lately i’ve been using this!

These are led panels, meant for installing in suspended ceilings. I’ve got these from a friend.

I like these because they are white, and the other one a little yellow. And produce a lot of light!
Unlike the permanent lighting mode of the FalconEyes. (When using the permanent lighting mode you see what the lighting wil be. Unlike using a flash. (Which is also great, when going for other photographs)

When using a reflector like below, you can see the effect instantly.

We used the golden part to get a little warmth into the pictures.

I’m using my big painting-easel to hold the led panels. I just placed the picture holder upside down.

Those led panels are cheap, and you can get them in 3000k,4000k and 6000k (Kelvin) those three i’ve seen in online shops doing a quick search.

The rest of my equipment is for another post.

  • Nikon D750
  • Nikon D7100
  • Lenses: 60mm/35mm/200mm and 300mm

Blender transparent animation for logo

First test to make a personalised logo for myself to use embedded on movies or in OBS streams.

Created a simple animation in Blender.

We need to export in RGBA (A for aplha), One of the supported video codex you can use is : Quicktime – QT rle.
Select this one, and make sure it’s RGBA and not RGB

Now i can use the exported video file in OBS for streaming.
I made the animation i a way that it can be looped.
(Don’t forget to set this option in OBS.)

Also useable in Kdenlive editor as watermark.

Android tips

Using hotspot?
Want to see which devices are connected?
https://www.henriaanstoot.nl/2022/09/16/android-and-devices-in-your-neighbourhood/

Another JuiceSSH tip .. connection type mosh, will open a ssh session using udp to your server.
( If you got mosh installed on your server )
A disconnect or bad connections will not break your ssh session, it just resumes.
Even when you are changing from network, and have a different IP.

Your android as Webcam (in OBS)

Install scrcpy on your linux machine, and opencamera on your android.
If you got adb installed plug in your android and start scrcpy.
You should be seening your android screen on your linux workstation.
When you openup the stock version of your camera you get a overlay of the gui, which you probably can’t disable/remove. There where’s opencamera comes in.
https://play.google.com/store/apps/details?id=net.sourceforge.opencamera

Settings > On screen GUI > Immersive Mode and select Hide everything
You probably want to set the aspect ratio to 19.5:9 so the whole screen will be used.

There is a lot more you can do with scrcpy !
https://github.com/Genymobile/scrcpy
https://www.henriaanstoot.nl/2022/02/02/android-oculus-quest-screen-record/

Android and devices in your neighbourhood

When i play around with Arduino’s which i have flashed and start with their own access points. It’s sometimes not clear which remote IP is connected.

Applications like Tasmota,Wled and Easyesp startup with their own Access Point, which you can use to connect to and configure them to your real accesspoint.
So you connect to this temporary AP, and want to remote access it with your phone’s browser. Not all apps (certainly not my apps) have a captive portal. Most won’t .. Which ip to use to connect?

Install JuiceSSH of you don’t have it .. it’s a must have really

Select quick connect – local device

Enter command “ip neigh”, It wil show devices connected to your android phone or which where broadcasting in your network-neighbourhood

Most of the times it also your default gw .. which can be found in settings. But above gives you more information.

DrawIO

I used to draw my network using inkscape, or graphviz. But the last years i’ve been using DrawIO. A friend is drawing his. So i posted some tips.

When using inkscape, i liked the way that i could view more or less details using layers. But editing was hard.

Getting DrawIO:

There is a online version: https://app.diagrams.net/
You can download a AppImage
And .. install it in your nextcloud, which is the way i’m using it.
(Login as admin, click Apps and search for draw.io)

Some tips on using images ..
Below is a example of a Mikrotik switch with connector points.

Use a search engine to look for images, the ones with front facing connectors are easier to use.
I always look for images which have a transparent background.
Using google you can use below ‘trick’
google > images > tools > color > transparent
Just copy-paste into your DrawIO document, it is better to have a large picture which you can resize as the other way around.

Adding connection points:

Left click the image in DrawIO, right mouse and Edit connection points

Now you can place/remove edit connection points.

Due to security reasons i won’t be posting my complete network image ..

Another tip:

Network sheet a friend is working on

Device is not straight, so its harder to get the connections right. Besides that, the lines are below the device. Click line and select bring to front.

Keyboard leds sound reactive

How much fun …. just wanted to share my recording

I’ve written some tools for my keyboard like a mqtt client, but this is someone else’s. But it gave me some ideas …

My keyboard is a Razer BlackWidow V3

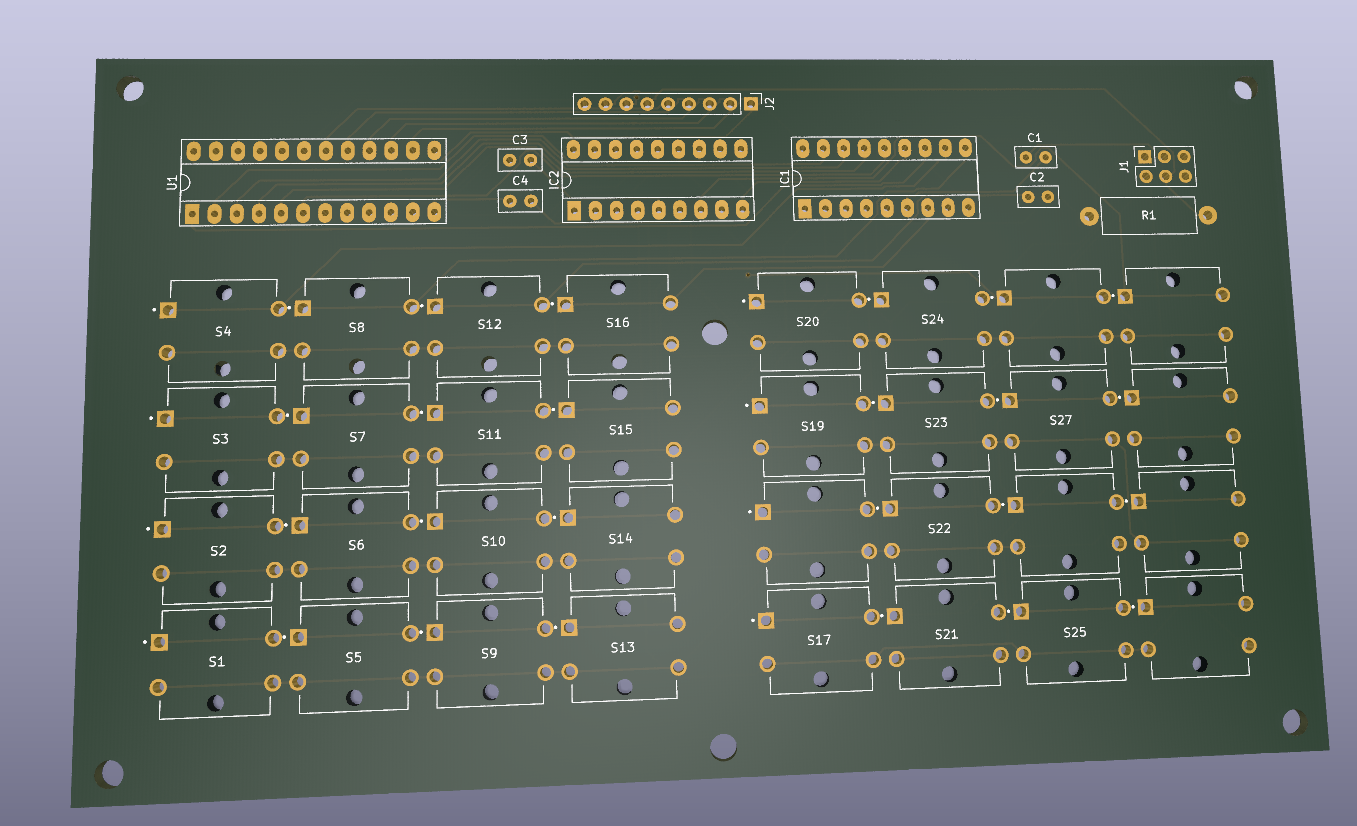
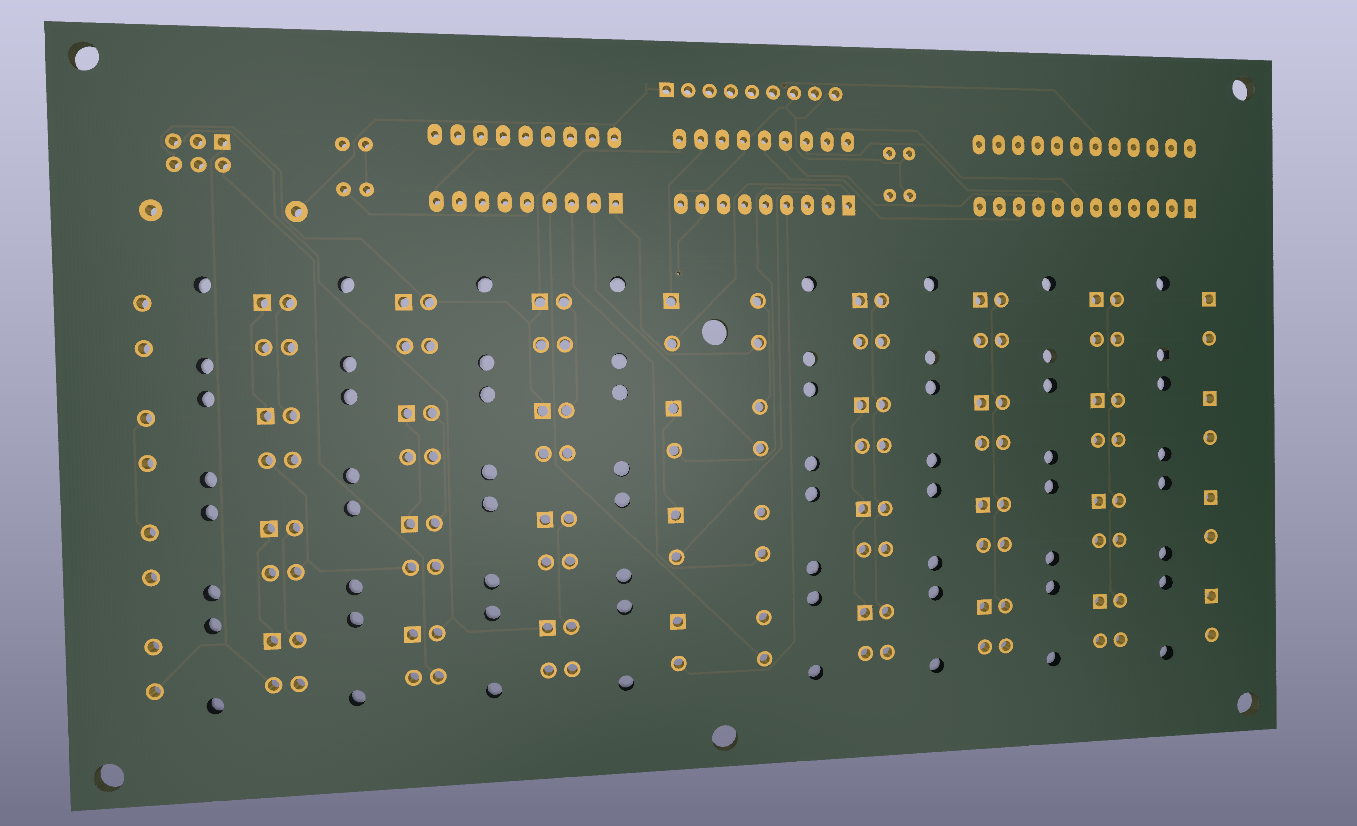
So i wasn’t being stupid designing a dual matrix keyboard thingy

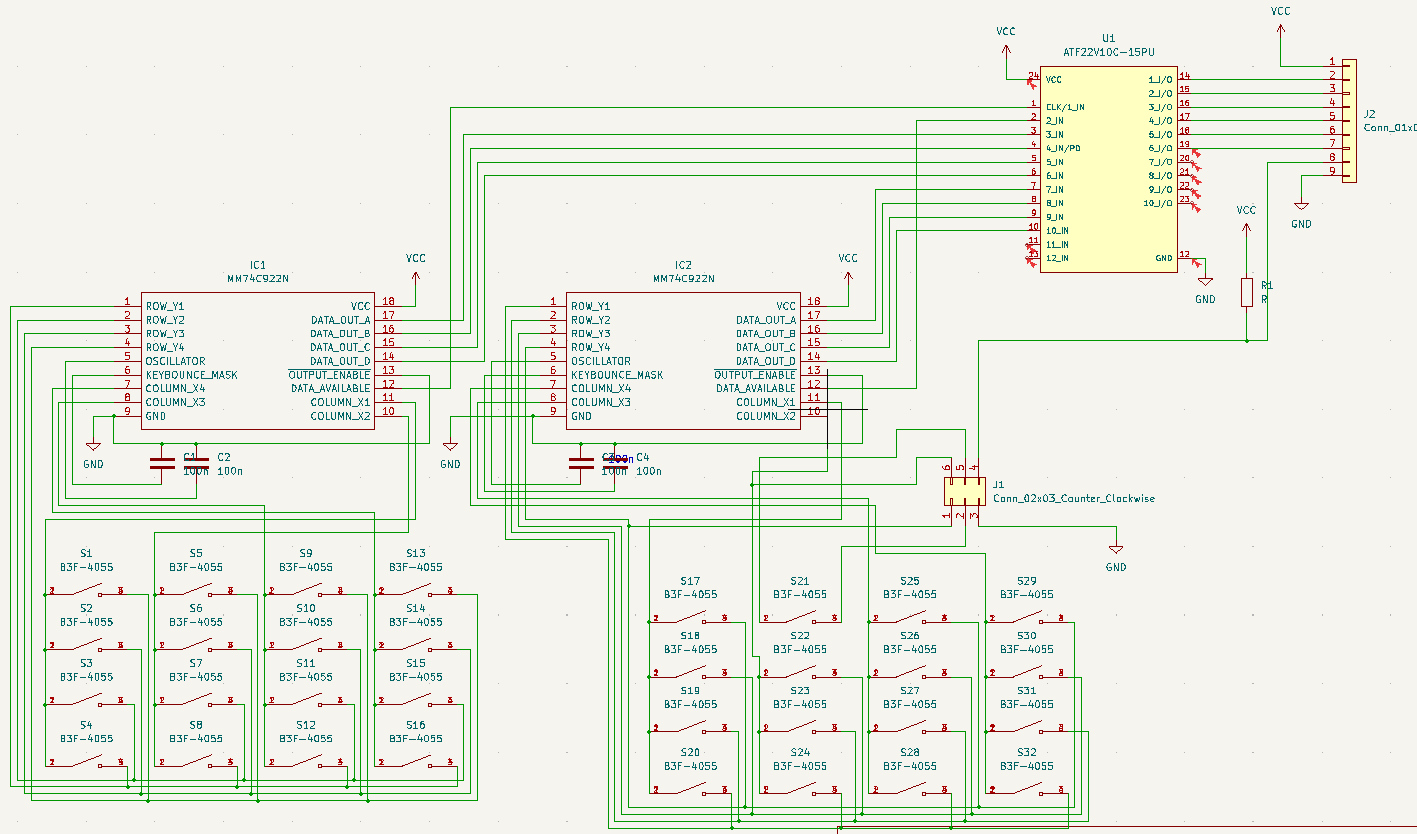
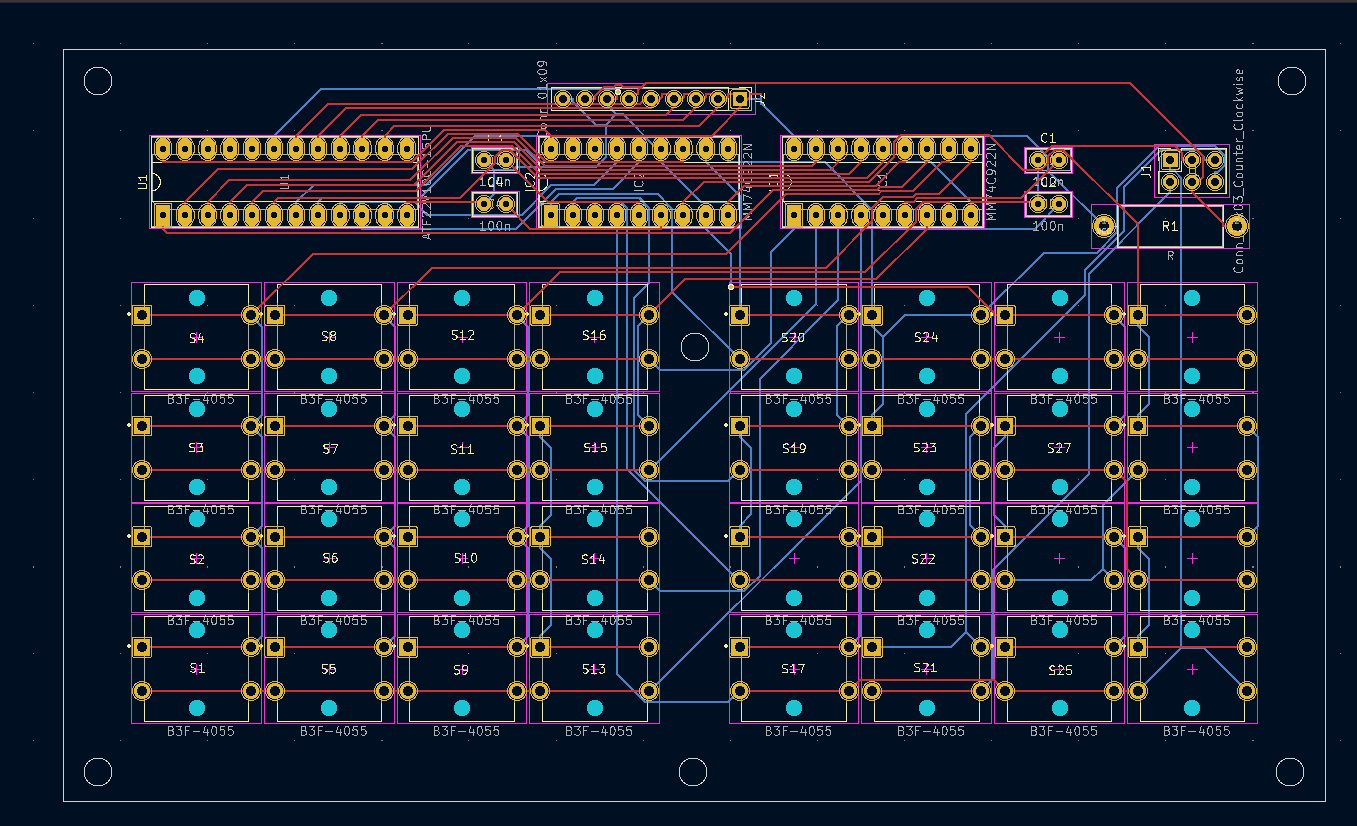
As previously posted, i had an idea to create a dual matrix keyboard mashup using available components.

I mentioned that “it should theoretically work”. But only being using atf22v10c for a couple of days. It was a long shot.

I’ve put it to the test .. and it worked first time.

I can use above, to connect my extended matrix keyboard to a 6522 VIA chip using 5 pins and sending a data available signal to CA1.

This keyboard i was planning to use

Spotify export

Nice .. you can request a data export from spotify, much like google’s takeout.

I wil export your streaming history, playlists, library and more.

Login spotify on a desktop, goto privacy settings and request data.

Nice to generate some statistics from this data.

For now the top 50 played artists (nr of times, artist)

790     "Rammstein"
507     "Fred Morrison"
478     "Lincoln Hilton"
437     "Avicii"
420     "Shooglenifty"
347     "Treacherous Orchestra"
323     "Battlefield Band"
321     "Breabach"
295     "Nightwish"
254     "The Fraser Shaw Trust"
236     "Michael McGoldrick"
207     "Peatbog Faeries"
207     "Calum Stewart"
203     "Lúnasa"
197     "Martyn Bennett"
194     "Jeff Wayne"
193     "The Prodigy"
173     "Kíla"
172     "Ross Ainslie and Jarlath Henderson"
170     "Buena Vista Social Club"
153     "Ross Ainslie"
150     "Dàimh"
138     "Bliss"
125     "Hans Zimmer"
124     "Rare Air"
118     "Michael McCann"
107     "Kyle Tuttle"
107     "Beinn Lee"
105     "Bourne & Macleod"
 89     "Wolfstone"
 88     "Ímar"
 83     "Afro Celt Sound System"
 81     "Gordon Duncan"
 81     "Armin van Buuren"
 80     "Face The West"
 79     "Tyurgen Kam"
 79     "Aly Bain"
 72     "Keltik Elektrik"
 71     "Duncan Chisholm"
 66     "Liz Carroll"
 63     "Project Smok"
 63     "Blazin' Fiddles"
 62     "Dagda"
 61     "Trail West"
 59     "Julian Winding"
 57     "Solar Fields"
 57     "Dougie McCance"
 56     "John McSherry"
 56     "AES DANA"
 52     "Gaelic Storm"

Get top 50 script

 cat  *json | grep artistName  | sort | uniq -c | sort -nr | head -50 | cut -f1,4,5 -d\" | sed s/,$//g

Generic matrix keyboard

In this case designed for my 6502, but it is a generic setup.

I it just a dual 16key matrix decoder merged together. You can probably use this with raspberries, arduinos etc.

I wanted to use 74C923 but these are nowhere to be found. And even then, the number of keys wil be 20.
So i am tying together two 74C922 using some logic in a PLD.

First draft

It wil be something like above. Using the data availabe signal i can combine both 16key matrixes. (In theory .. it is all untested)

PLD Code

GAL22V10
Address Decoder

PHI2 DA0 DA1 D01 D02 D03 D04 D11 D12 D13 D14 GND
NC D0 D1 D2 D3 D4 DA NC NC NC NC VCC

DA = DA0 + DA1
D0 = D01 & DA0 + D11 & DA1
D1 = D02 & DA0 + D12 & DA1
D2 = D03 & DA0 + D13 & DA1
D3 = D04 & DA0 + D14 & DA1
D4 = DA1 

DESCRIPTION
Key matrix merger

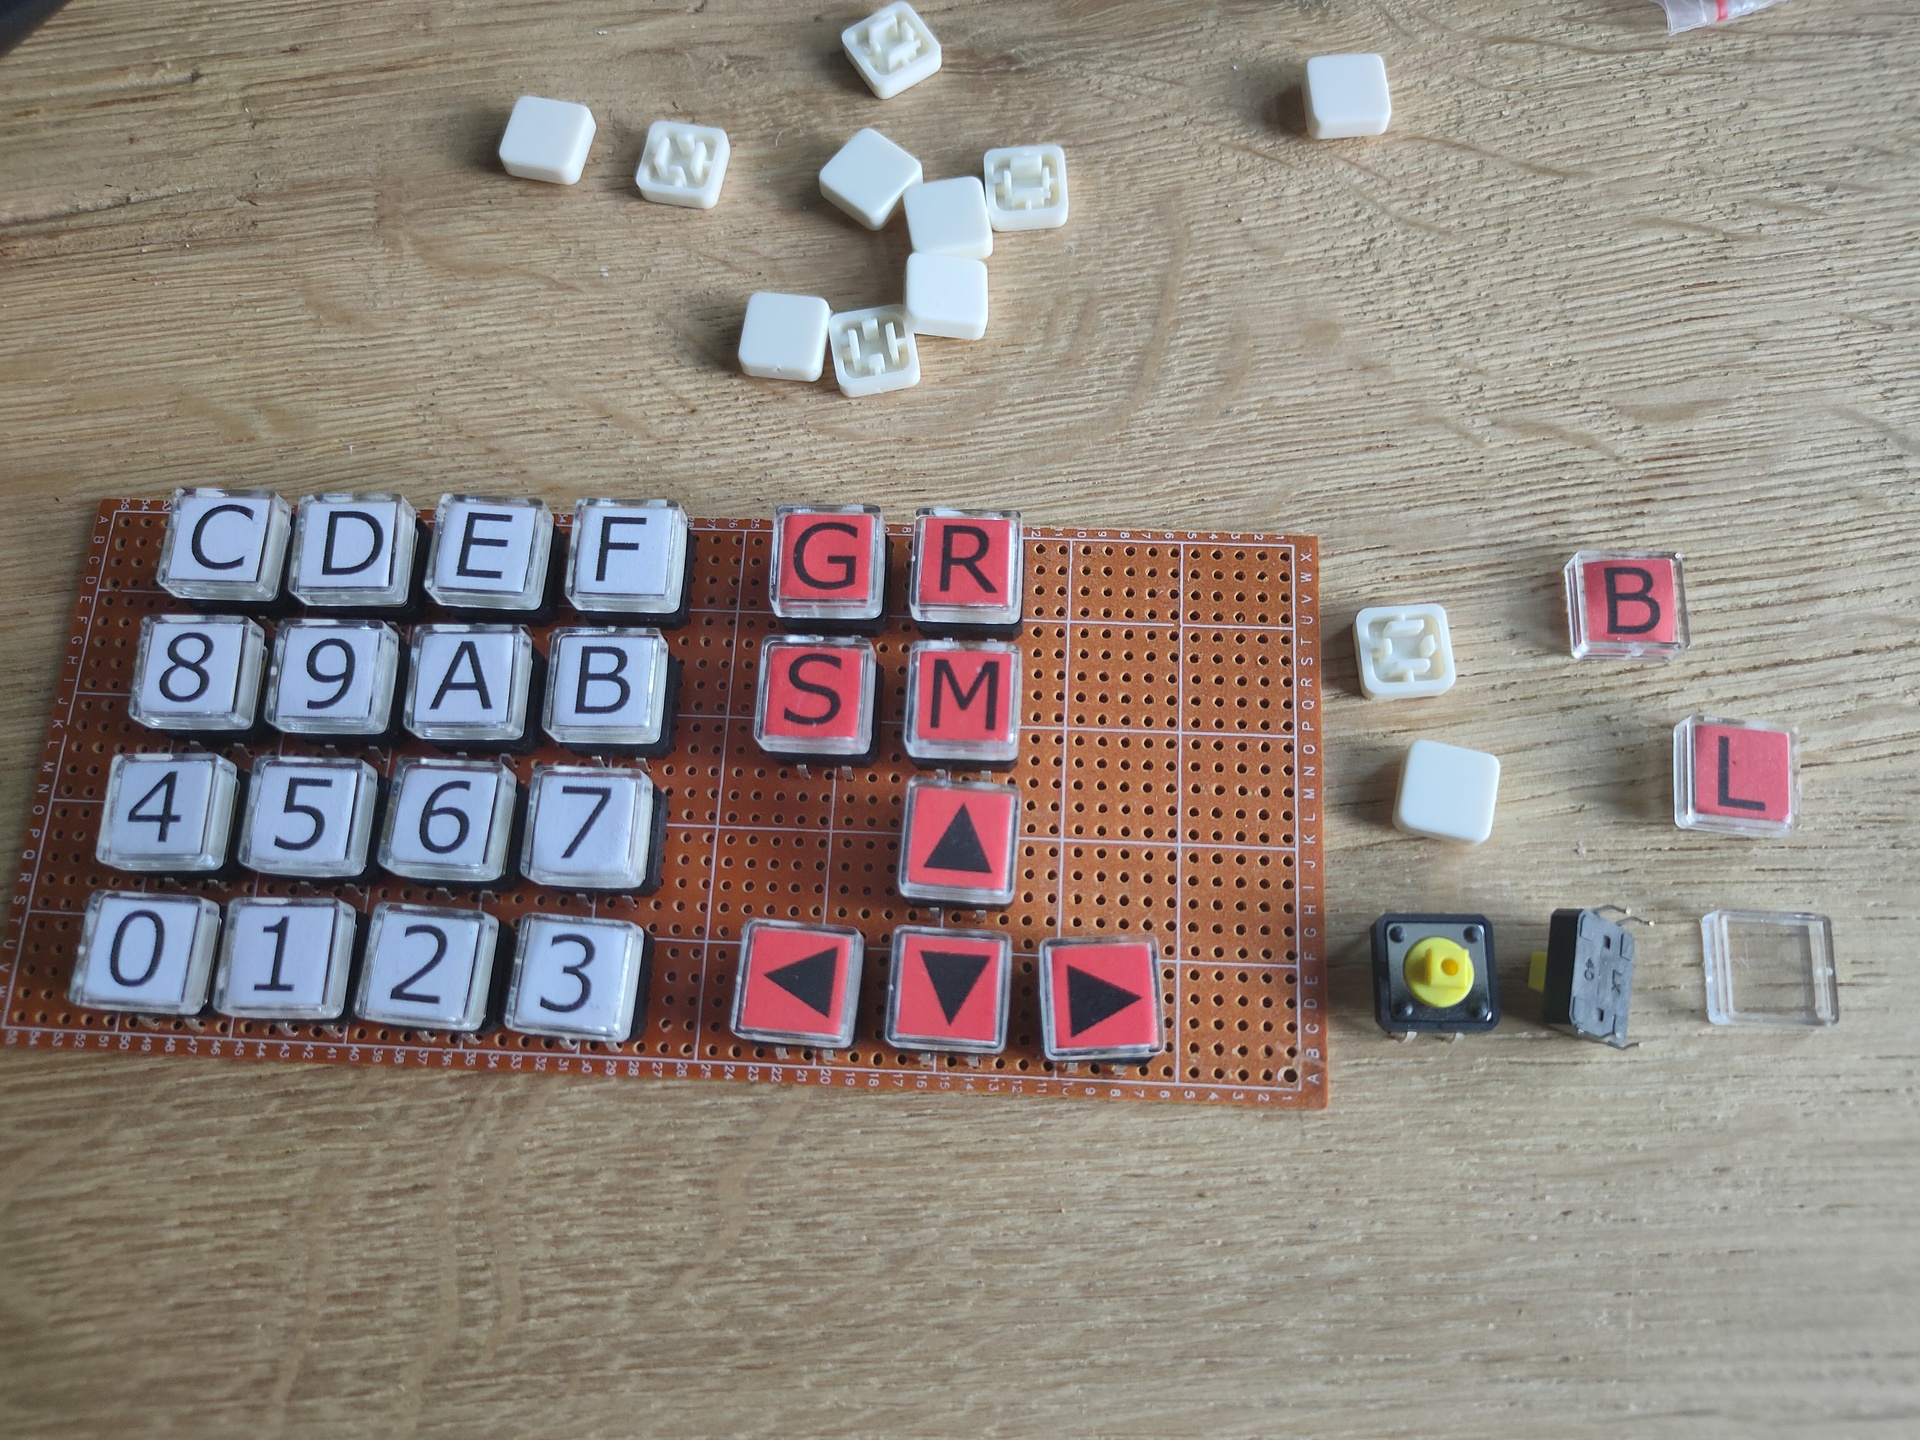
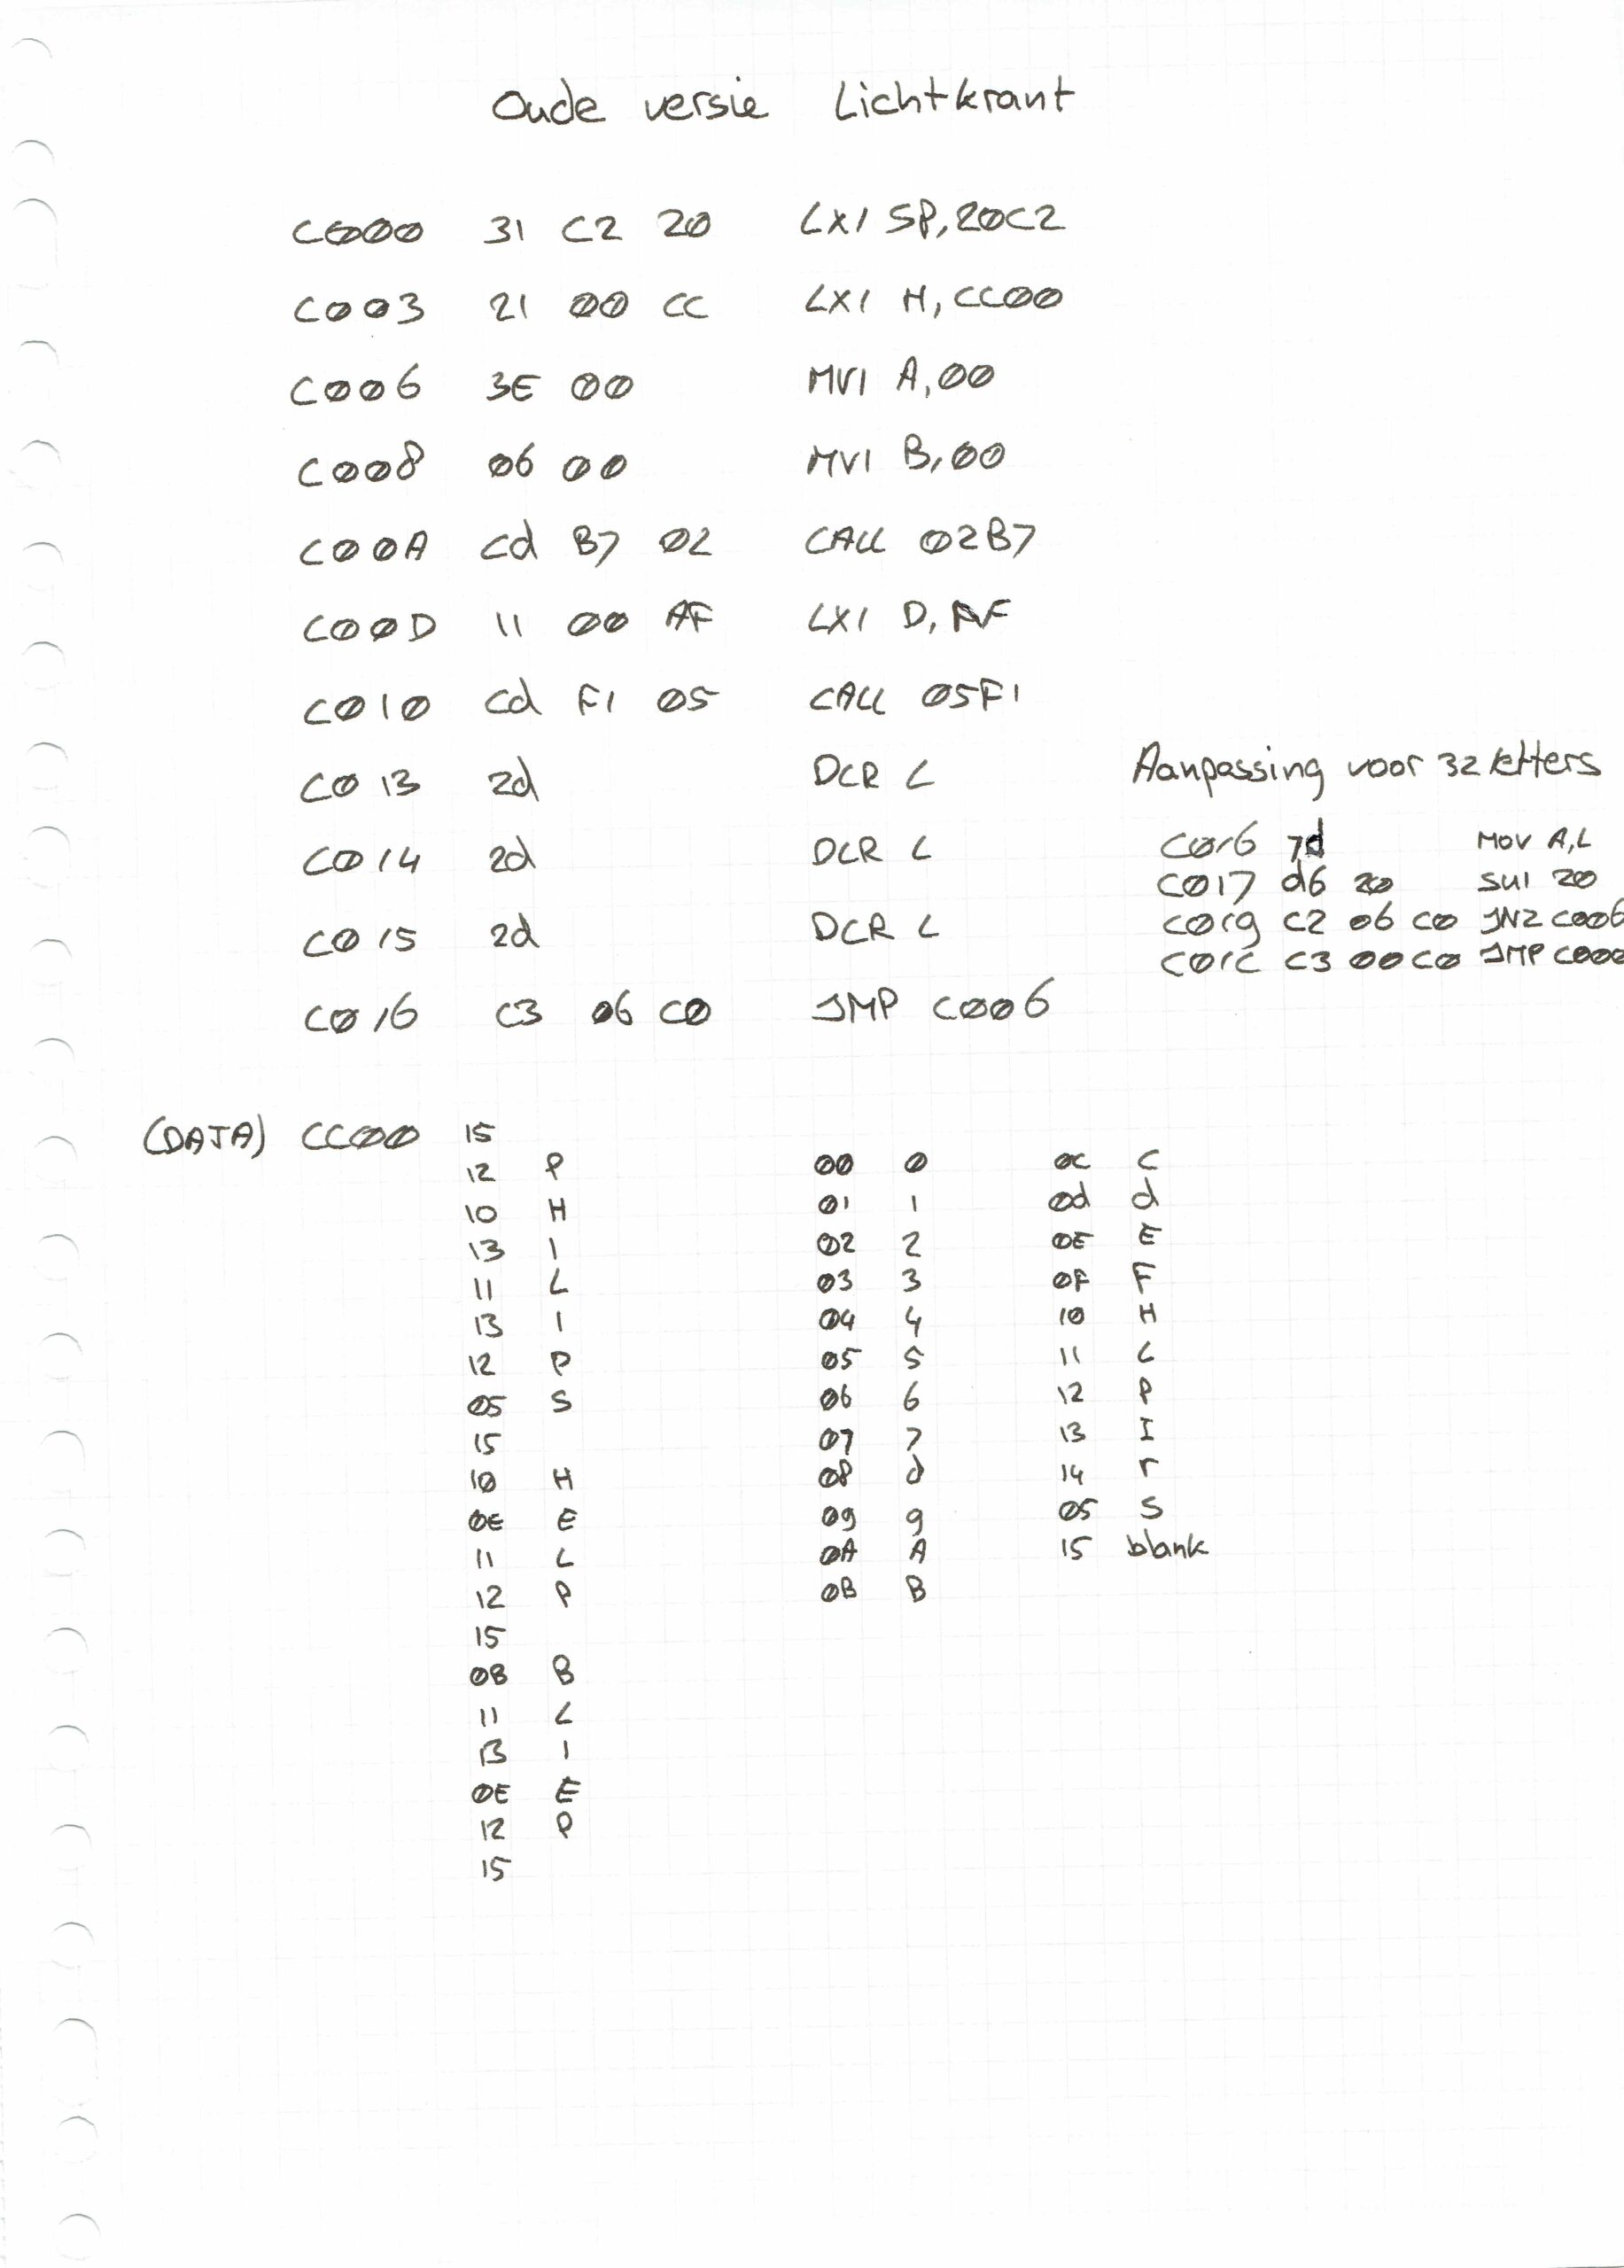
I’ve got my new keys of the keyboard in today!

  • 0-F – hex keys
  • G = Go
  • R = Reset
  • S = Step
  • M = Memory
  • Cursor keys (up/down for memory locations)
  • ??? I’ve got room for 8 more keys

My inkscape template (keys are 10/10mm)

Printed on white and red paper

https://media.henriaanstoot.nl/keyboardmatrix.svg

Blender 360 degrees test

Next to try is a VR setup.

Another blender project i’m planning to do this week is a movie displaying my logo to overlay on my videos.
So i have to render a transparent movie for this.

Howto:

Open a scene, i took the liberty to get one from blenderkit.

Change output to cycles, eevee doesn’t work

Make x/y large enough in output tab. X = 2 * Y !

Next select your camera, and open camera tab

Change Type to panoramic and then you can change panorama type to Equirectangular

Position your camera and hit F12, it wil take a long time!

You get something like this

Use a proper plugin for your website, or view with your VR glasses!