I’m using ZFS for my main fileserver, this pool was created over 10 years ago. Meanwhile i’ve: Swapped broken disks, switched disks for bigger ones and effectively resized my storage 2 or 3 times. Never had any corruption.
Yesterday i say a warning that one of the disks in the pool was OFFLINE. Today i replaced it using below command’s
Put the disk in OFFLINE mode (if needed, mine was already offline)
zpool offline tank sdb
Remove disk from system
echo 1 | sudo tee /sys/block/sdb/device/delete
Remove the disk physically
Insert the replacement disk. And copy headers/structure from another disk
sgdisk –replicate=/dev/sdb /dev/sda
sgdisk –randomize-guids /dev/sdb
Run the zpool replace command.
zpool replace tank /dev/sdb
Use online command to activate disk (no needed in my case, it already did that)
Tips:

# My labels with serials fell off :(
dd if=/dev/sdb of=/dev/null -> blinky led ..

# What is the serial?
sudo hdparm -i /dev/sdb | grep Serial
Output
root@latex:~# sgdisk --replicate=/dev/sdb /dev/sda
The operation has completed successfully.
root@latex:~# sgdisk --randomize-guids /dev/sdb
The operation has completed successfully.
root@latex:~# zpool replace tank /dev/sdb
root@latex:~# zpool status
  pool: tank
 state: DEGRADED
status: One or more devices is currently being resilvered.  The pool will
        continue to function, possibly in a degraded state.
action: Wait for the resilver to complete.
  scan: resilver in progress since Wed May 18 11:31:21 2022
    5.64T scanned out of 14.4T at 331M/s, 7h42m to go
    1.88T resilvered, 39.16% done
config:

        NAME             STATE     READ WRITE CKSUM
        tank             DEGRADED     0     0     0
          raidz1-0       DEGRADED     0     0     0
            sda          ONLINE       0     0     0
            replacing-1  REMOVED      0     0     0
              old        REMOVED      0     0     0
              sdb        ONLINE       0     0     0  (resilvering)
            sdc          ONLINE       0     0     0

errors: No known data errors
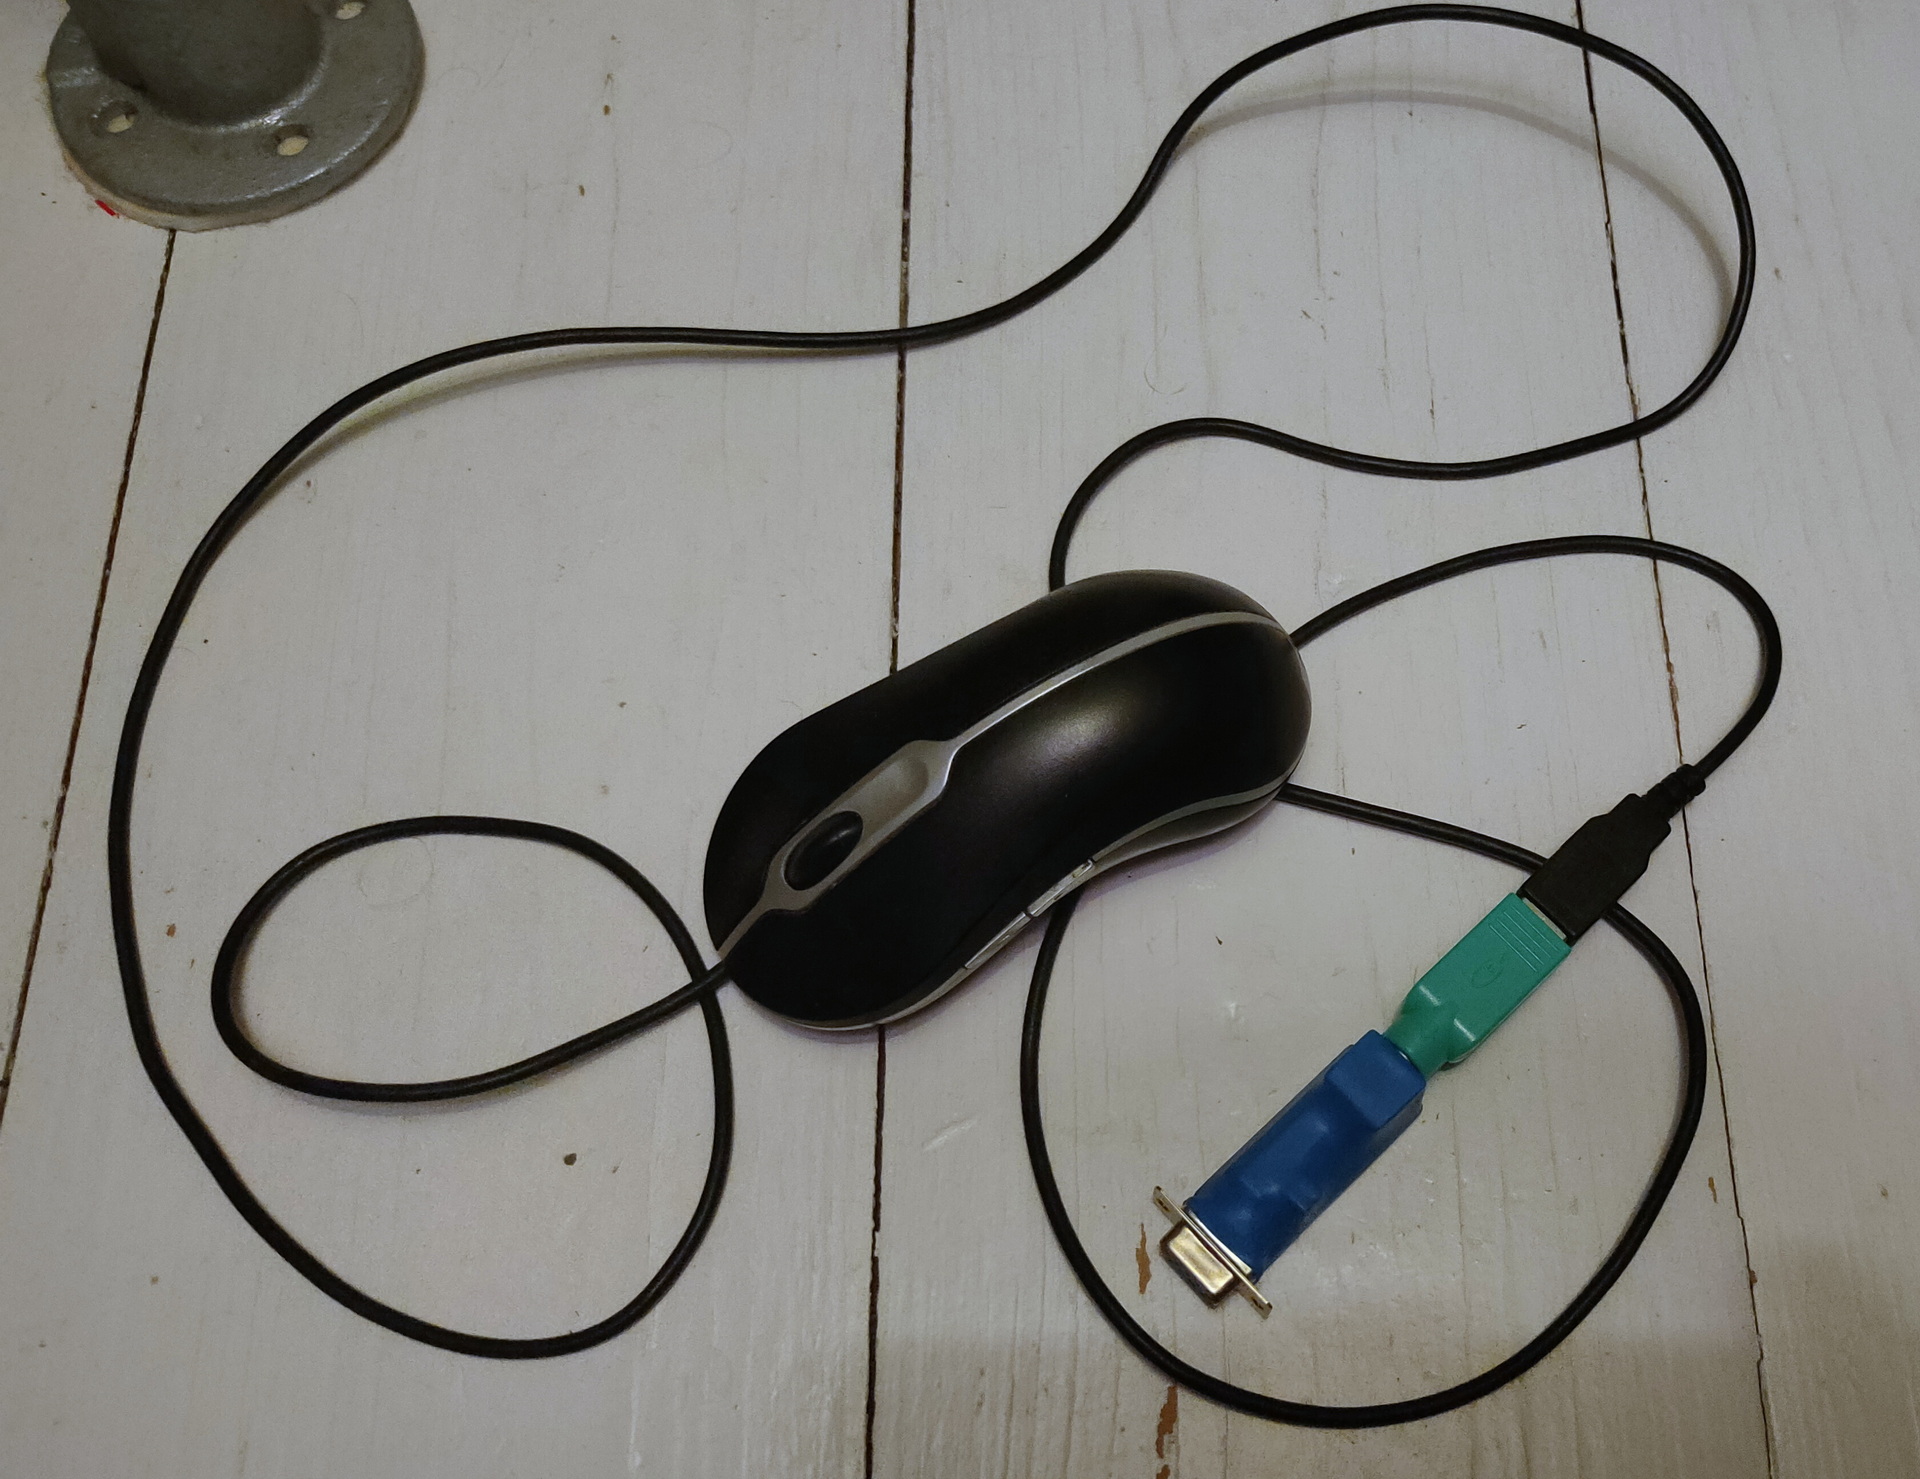
My tank mouse died .. beyond repair. Blue 9pins to ps2 works great!
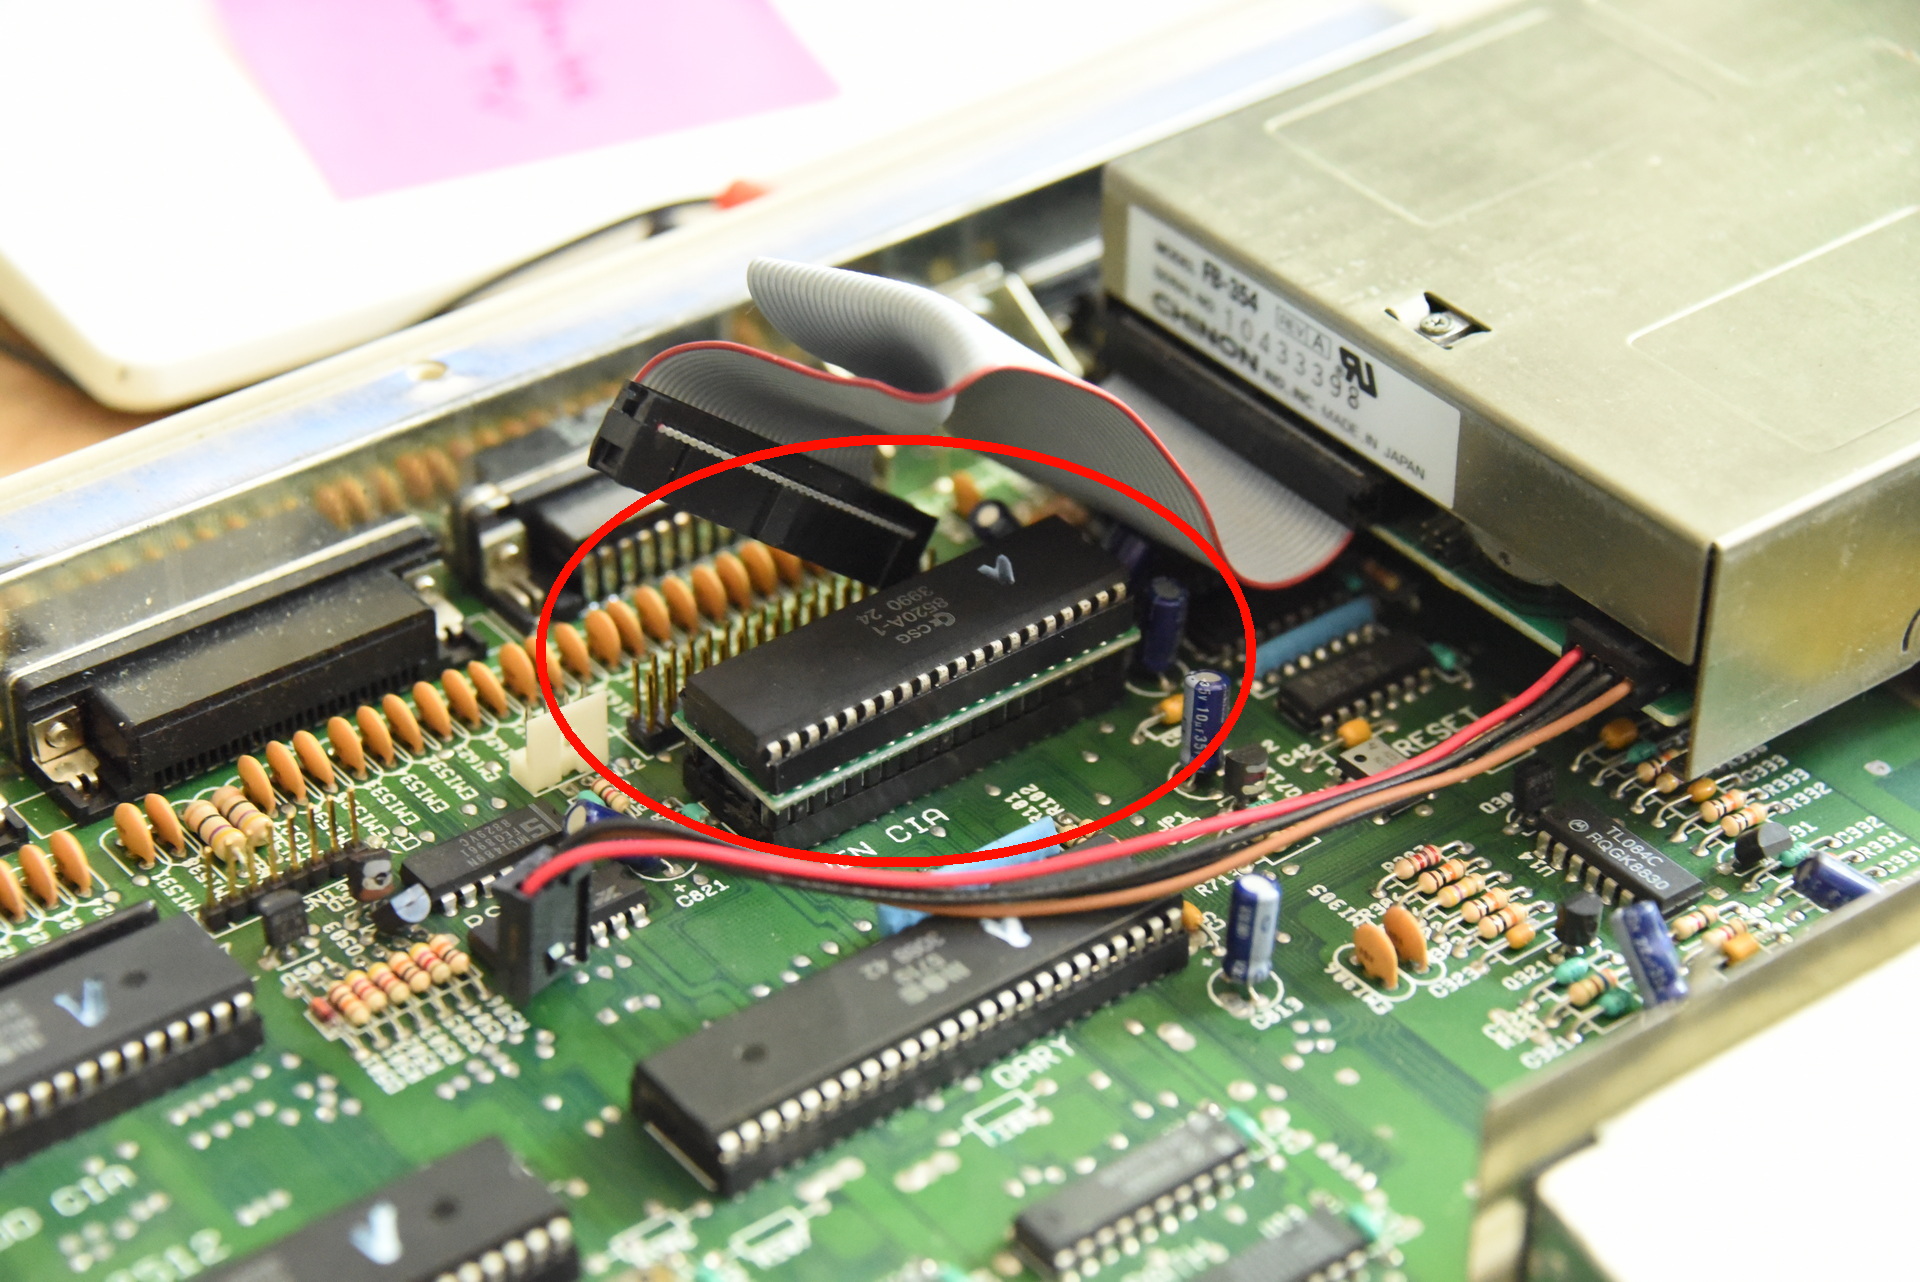
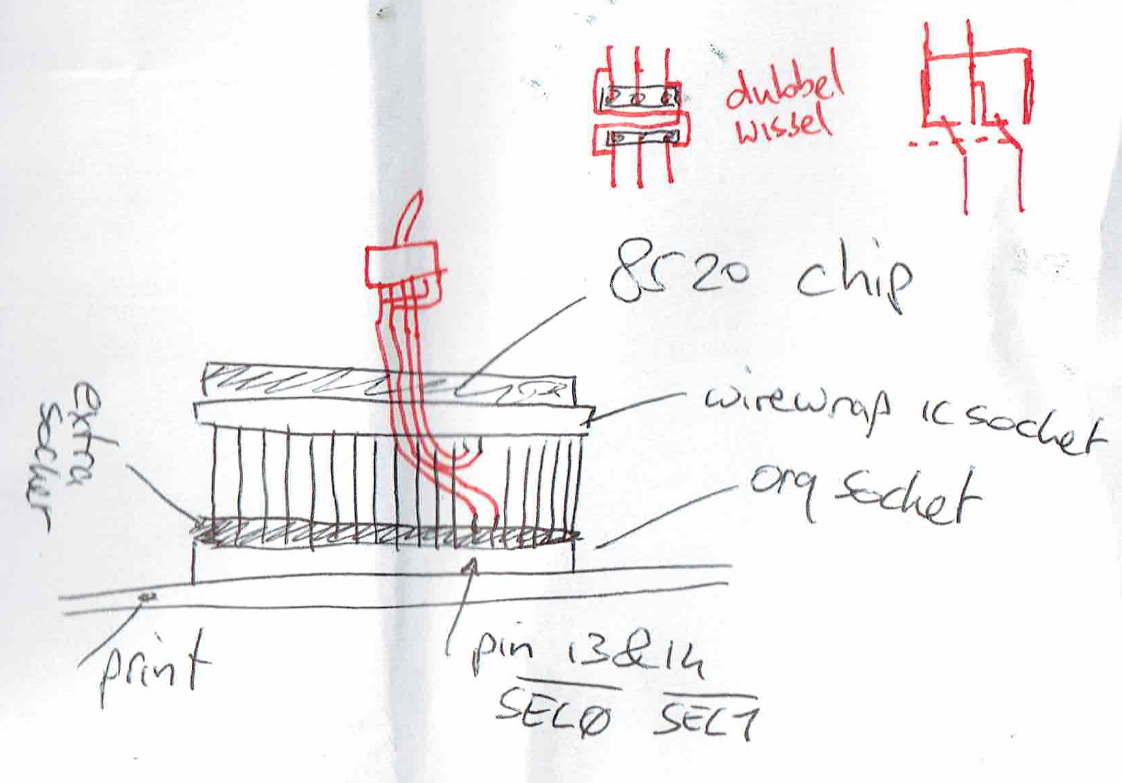
A switchless (using key combination) diskdrive switcher df0<>df1
I used to make a floppy switch myself in the past, i used a wirewrap socket, and a cross switch. Made a hole in the back, with the little switch. This one does not need a hole in your case for the switch.
Own floppy switch
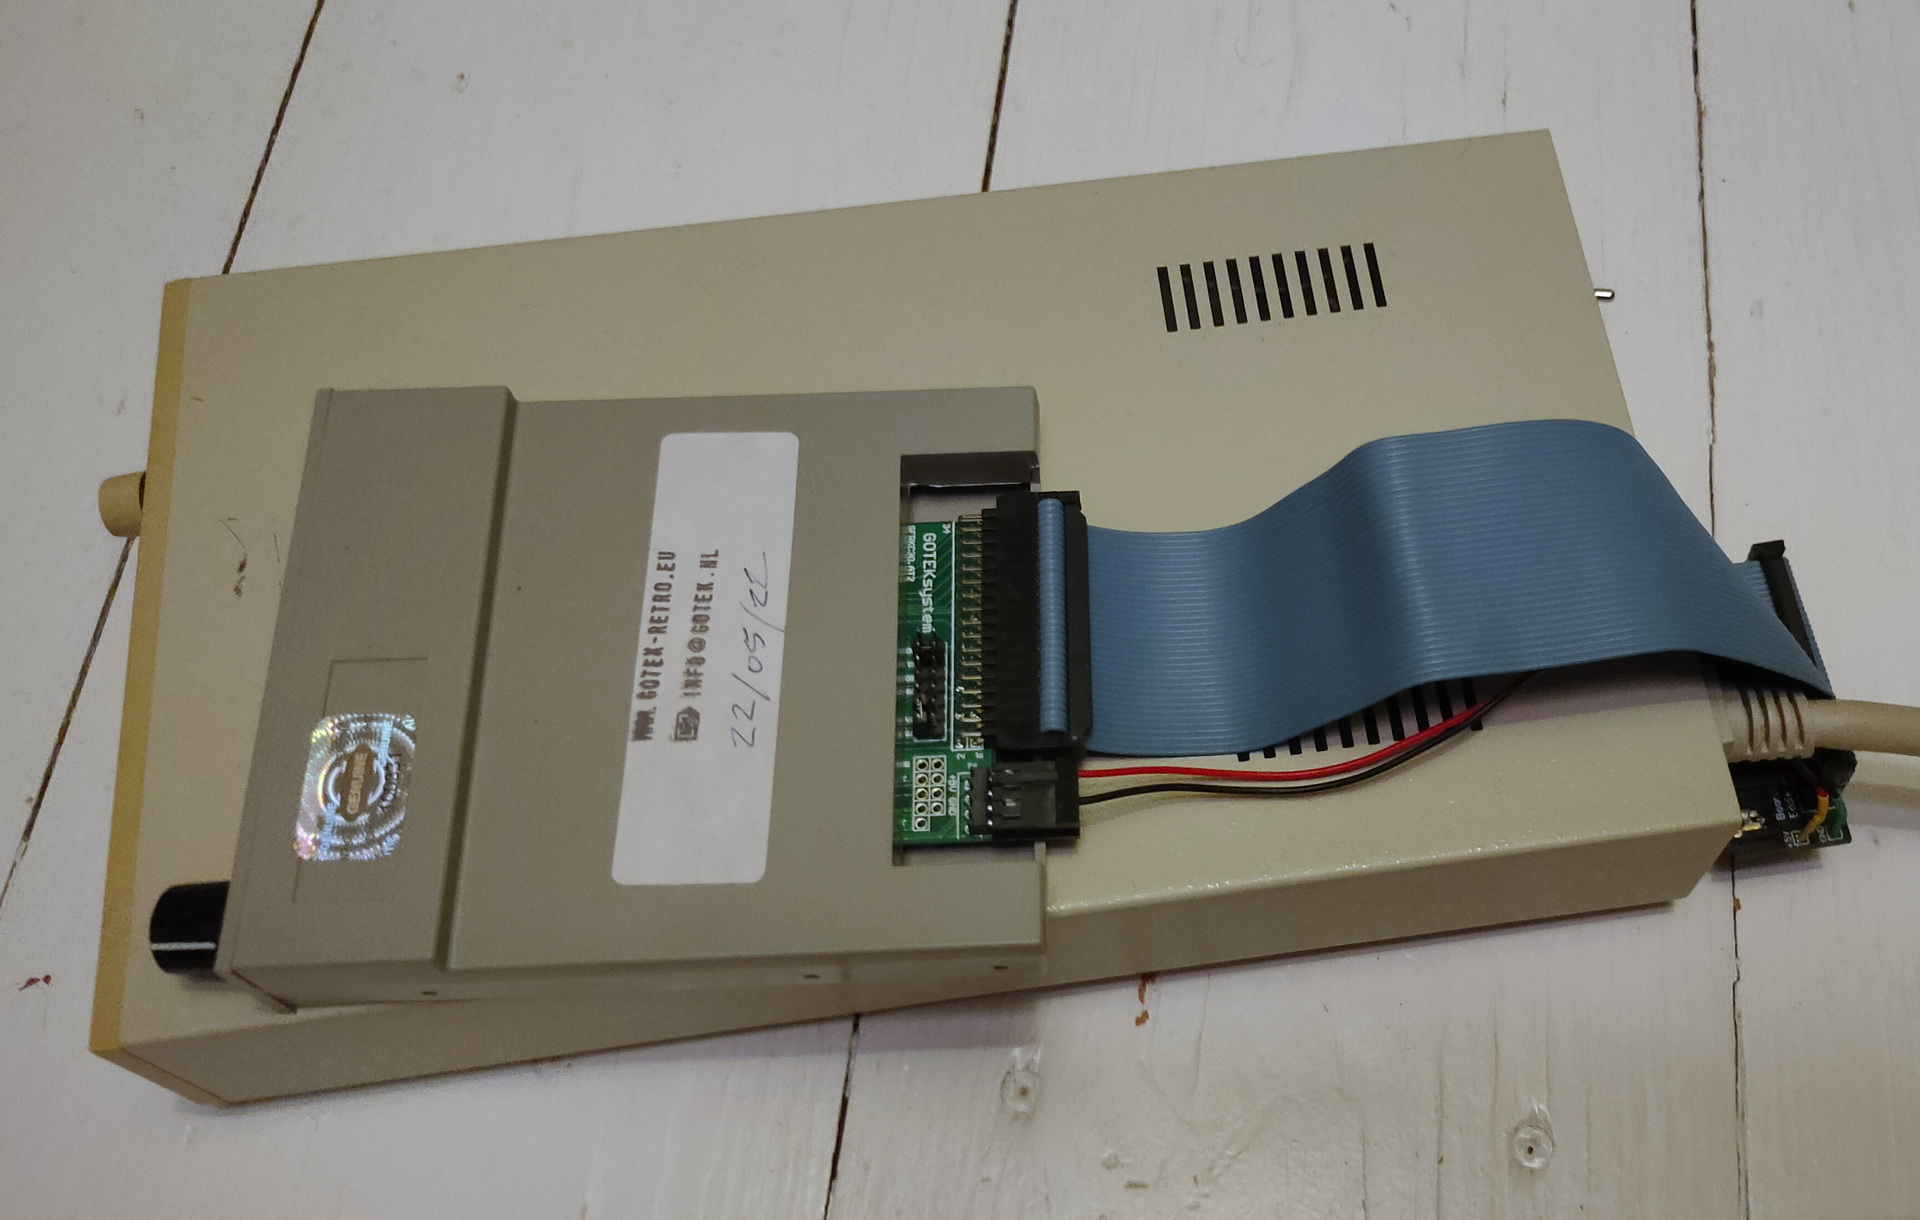
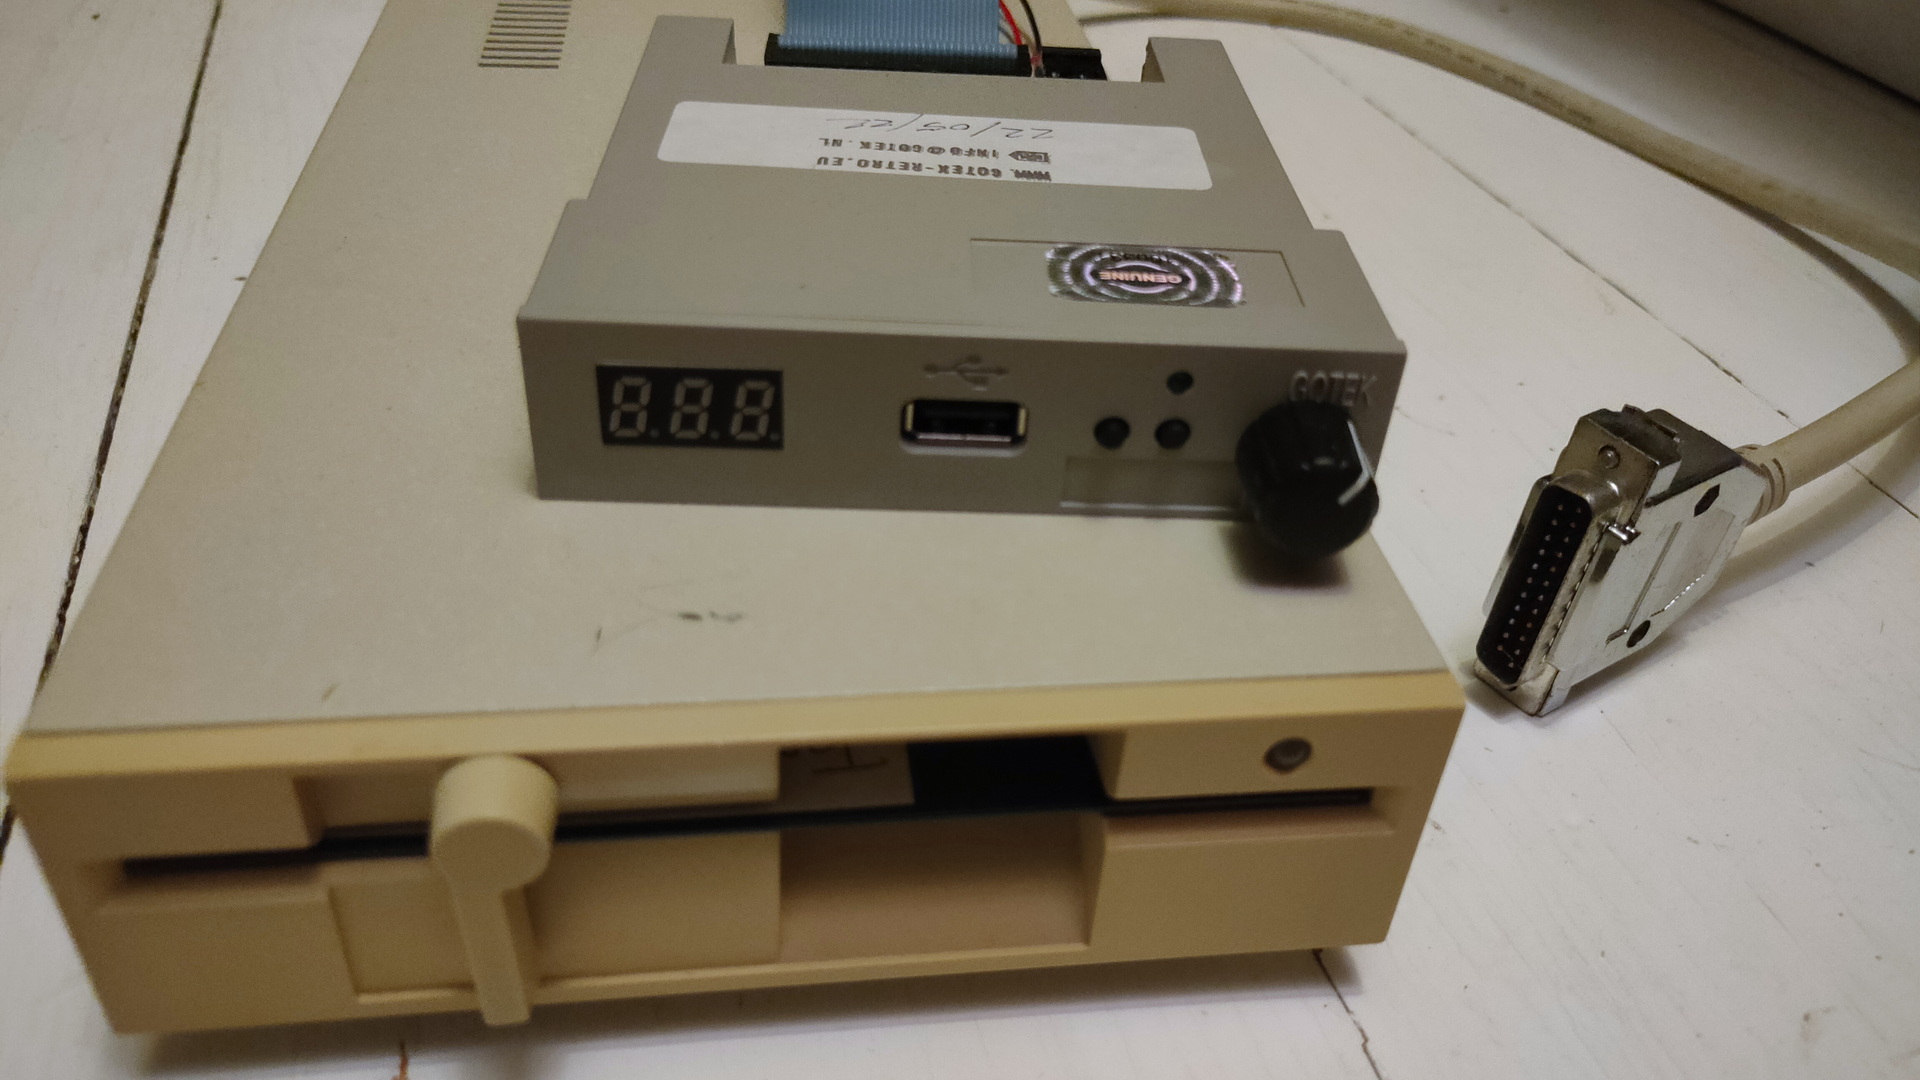
Gotek Floppydrive Emulator with Rotary Encoder
Gotek drive ontop of my 5.25″ drive with adaptorDisplay and usbstick port
This drive supports a lot of disk formats and systems, i will have to look into that .. https://github.com/keirf/FlashFloppy/wiki/Host-Platforms
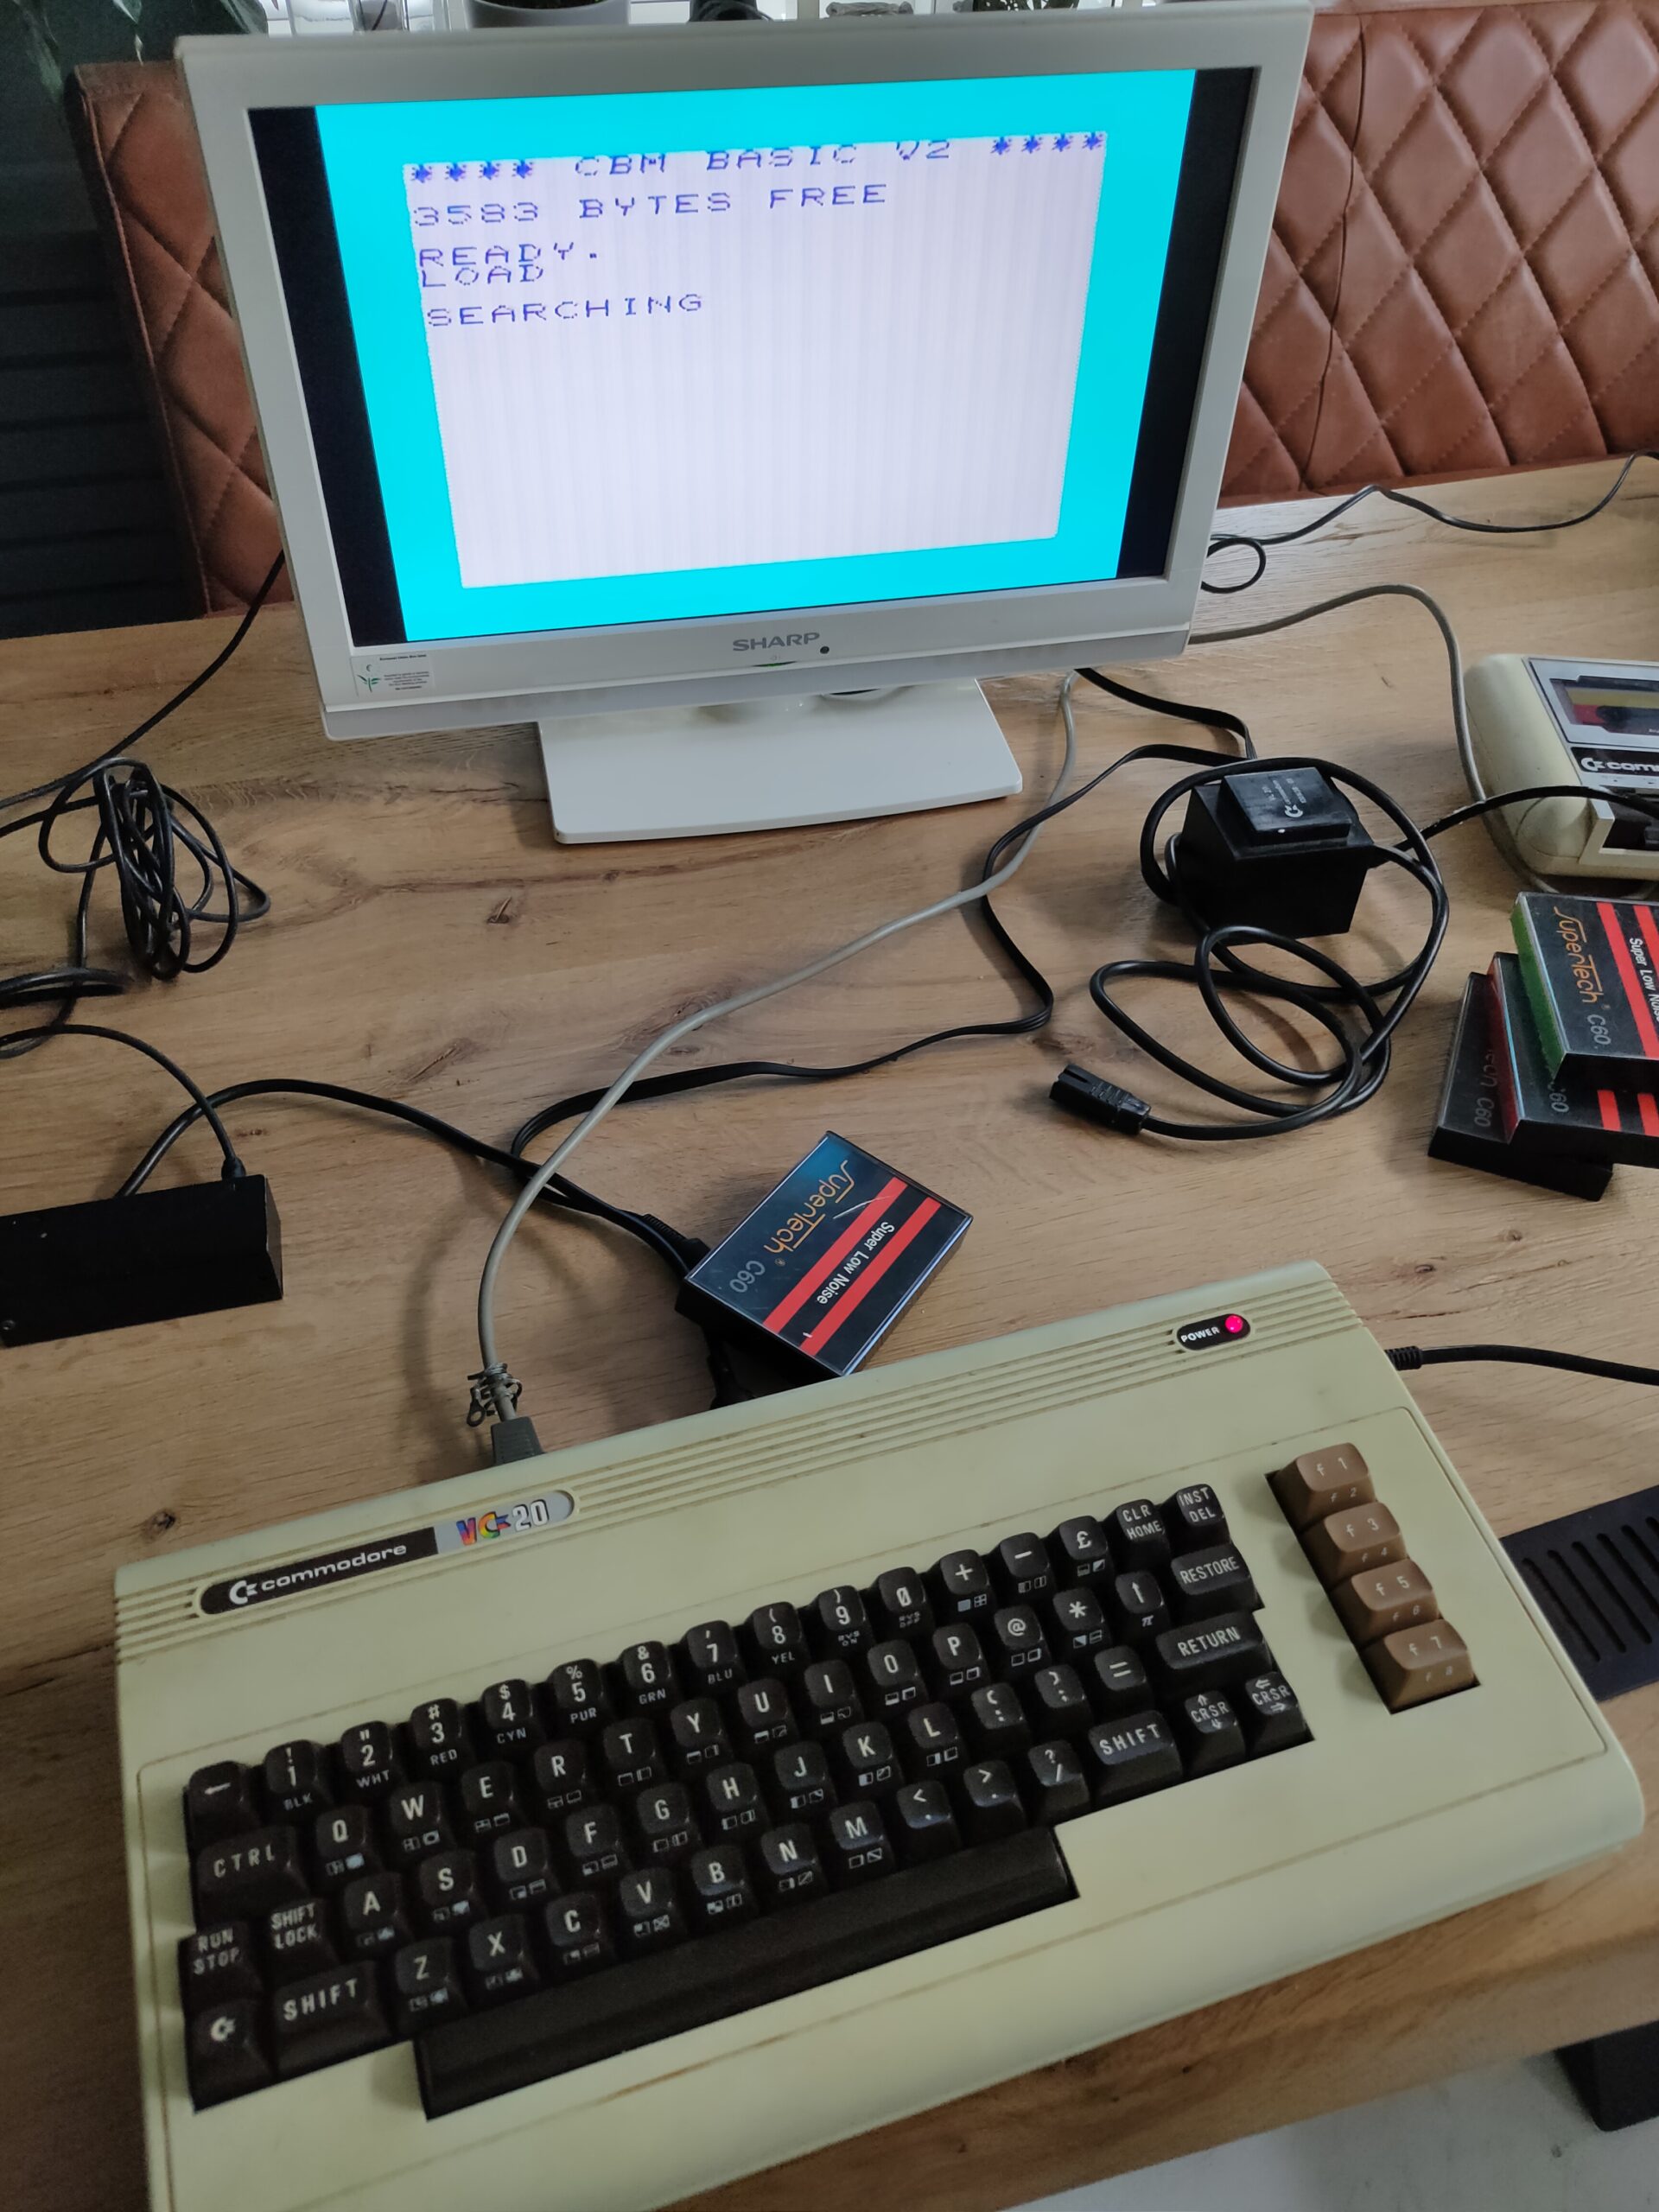
One Vic-20 working ( switched some keyboards and chips around )
Something i made in 1984? .. then the fuse in my vic-20 power blew (250v 160mA)
Another Vic-20 – with a Bad U31 (Oscillator)? or Vic video chip?
Left Vic-20 with buildin power convertor, right more common version.C64 C with a broken color-ram OR U29 74LS74 chipVic Graf Cartridge, graph a function with annoying sound
When running scripts which take a long time, i don’t want to wait for things to finish before i can start the next one.
For example, using my dedup script or compiling stuff. I wanna know when it is finished.
So i made some scripts
Maybe you can hear the spoken text in the background playing downstairs
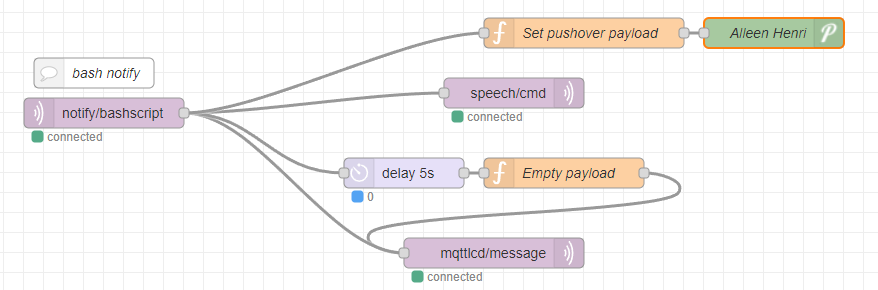
I’ve put a function in .bashrc, so i can use a command like notify “Compiling is ready” A command like this i can put at the end of a command or in a script file at the end. make && make install && notify “compile ready”
What does it do when executed?
Send a mqtt message to the broker
Node-red will read this message and:
Send a message to my display on my desk – Sound and message notification. (See another post how i made this )
Send a message to a script on my Domoticz instance downstairs.
This will use a script to get a speech file from google, and play this on some small speakers in my livingroom
Send a pushover message to my phone
Display a message on my TV ( not in code below )
How?
At the end of your .bashrc
function notify() {
    if [ -z "$1" ]; then
        echo "Usage: $0 \"message\"";
        exit 1;
    fi
    mosquitto_pub -h 10.1.0.17 -t notify/bashscript -m "$1"
}
This script will look for a cached audiofile with requested text, and uses that. Else it wil request a audio file from google, caches it and plays it though the speakers.
#!/bin/bash
INPUT=$*
input2=$(echo $INPUT | base64)
echo "$input2 = $INPUT" >> /home/pi/cache/files-text-relation
if [ -f /home/pi/cache/$input2.mp3 ] ; then
mpg123 -q /home/pi/cache/$input2.mp3 1>/dev/null 2>/dev/null
else
echo not cached
STRINGNUM=0

ary=($INPUT)
for key in "${!ary[@]}"
  do
    SHORTTMP[$STRINGNUM]="${SHORTTMP[$STRINGNUM]} ${ary[$key]}"
    LENGTH=$(echo ${#SHORTTMP[$STRINGNUM]})
    #echo "word:$key, ${ary[$key]}"
    #echo "adding to: $STRINGNUM"
    if [[ "$LENGTH" -lt "100" ]]; then
      #echo starting new line
      SHORT[$STRINGNUM]=${SHORTTMP[$STRINGNUM]}
    else
      STRINGNUM=$(($STRINGNUM+1))
      SHORTTMP[$STRINGNUM]="${ary[$key]}"
      SHORT[$STRINGNUM]="${ary[$key]}"
    fi
done

for key in "${!SHORT[@]}"
  do
    echo "Playing line: $(($key+1)) of $(($STRINGNUM+1))"
    NEXTURL=$(echo ${SHORT[$key]} | xxd -plain | tr -d '\n' | sed 's/\(..\)/%\1/g')
echo $NEXTURL
    mpg123 -w $input2 -q "http://translate.google.com/translate_tts?ie=UTF-8&client=tw-ob&q=$NEXTURL&tl=En-us"
    ffmpeg -i $input2 -codec:a libmp3lame -qscale:a 2 /home/pi/cache/$input2.mp3
mpg123 /home/pi/cache/$input2.mp3
done
fi
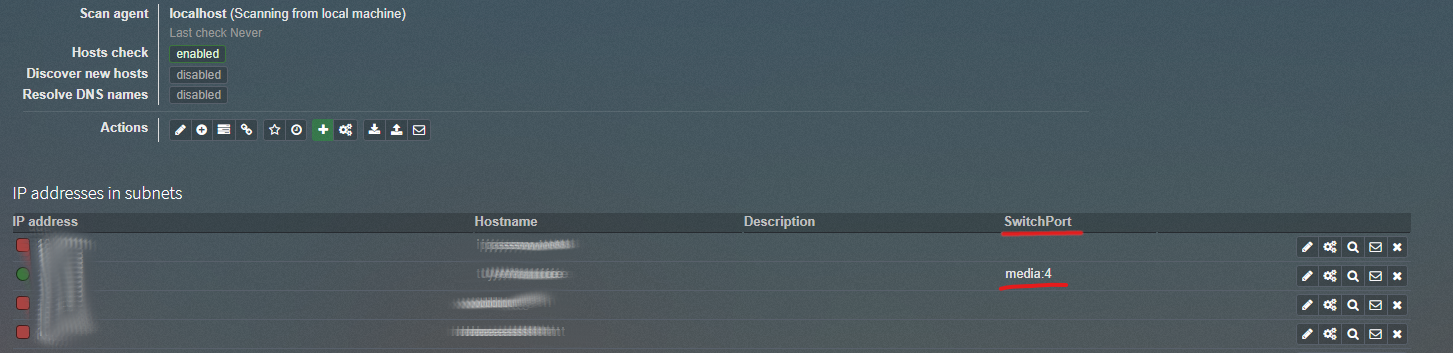
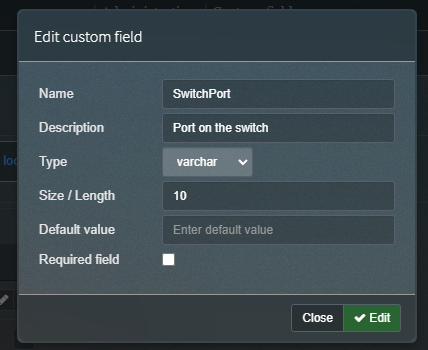
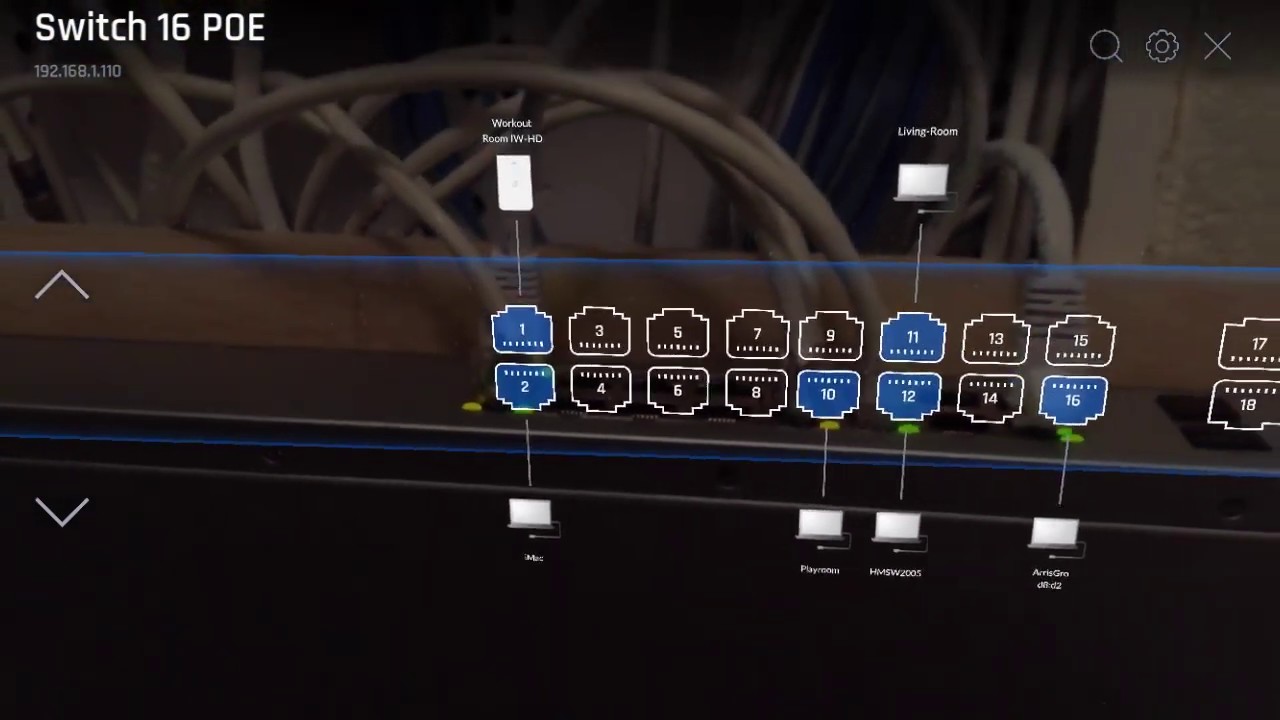
Added custom fields to Phpipam, so i can remove my port sheet and administer everything in Phpipam. And to prepare for a Augmented reality project i want to create.
Howto add fields: Go to the administrator menu on the right. Select IP related management > Custom fields Custom IP addresses fields press the plus sign Give it a name and description. I’m using varchar(10) at the moment so i can enter switchname:port (media:4)
See below for a example: Using a QR code and the information, i want to display port information using a app.
Sorting out my fileserver, i had the need for a deduplication script. Many files i’ve been copying from backup, clouds mobile devices and workstation. Inevitable to get many copies.
Below script walks a directory, using locate it tries to find files with same name. Using a md5sum it wil check if it is the same file, when found a simular file it stops searching, removes the one from the check-directory and checks the next one.
#!/bin/bash
# Copy this script to your to clean directory,
# when you got a copy on your fileserver from this script
# then the copy in your clean dir will be removed also.
# Dont want that? change
# find -type f |
# into
# find -type f | grep -v <nameofthisscript> |

# dont is current directory, skip these from locations
dont=$(pwd)
# Never start in /mnt ? uncomment below
# echo "$dont" | grep "^/mnt" && ( echo "start in tank" ; exit )

find -type f | while read file ; do
        filemd5=$(md5sum "$file" | cut -f1 -d" ")
        basenamefile=$(basename "$file")
        echo "searching $basenamefile"
        locate -i "/$basenamefile" | grep -v "$dont" | while read location ; do
        if [ -f "$location" ] ; then
                locatedfilemd5sum=$(md5sum "$location" | cut -f1 -d" ")
                if [ "$filemd5" == "$locatedfilemd5sum" ] ; then
                        echo "found same md5sum at $location"
                        rm "$file"
                        break
                fi
        fi
        done
done
# Remove empty dirs?
# find . -type d -empty -delete
Locate can be slow, sometimes it is better to put the locate DB in memory of on another fast storage system.
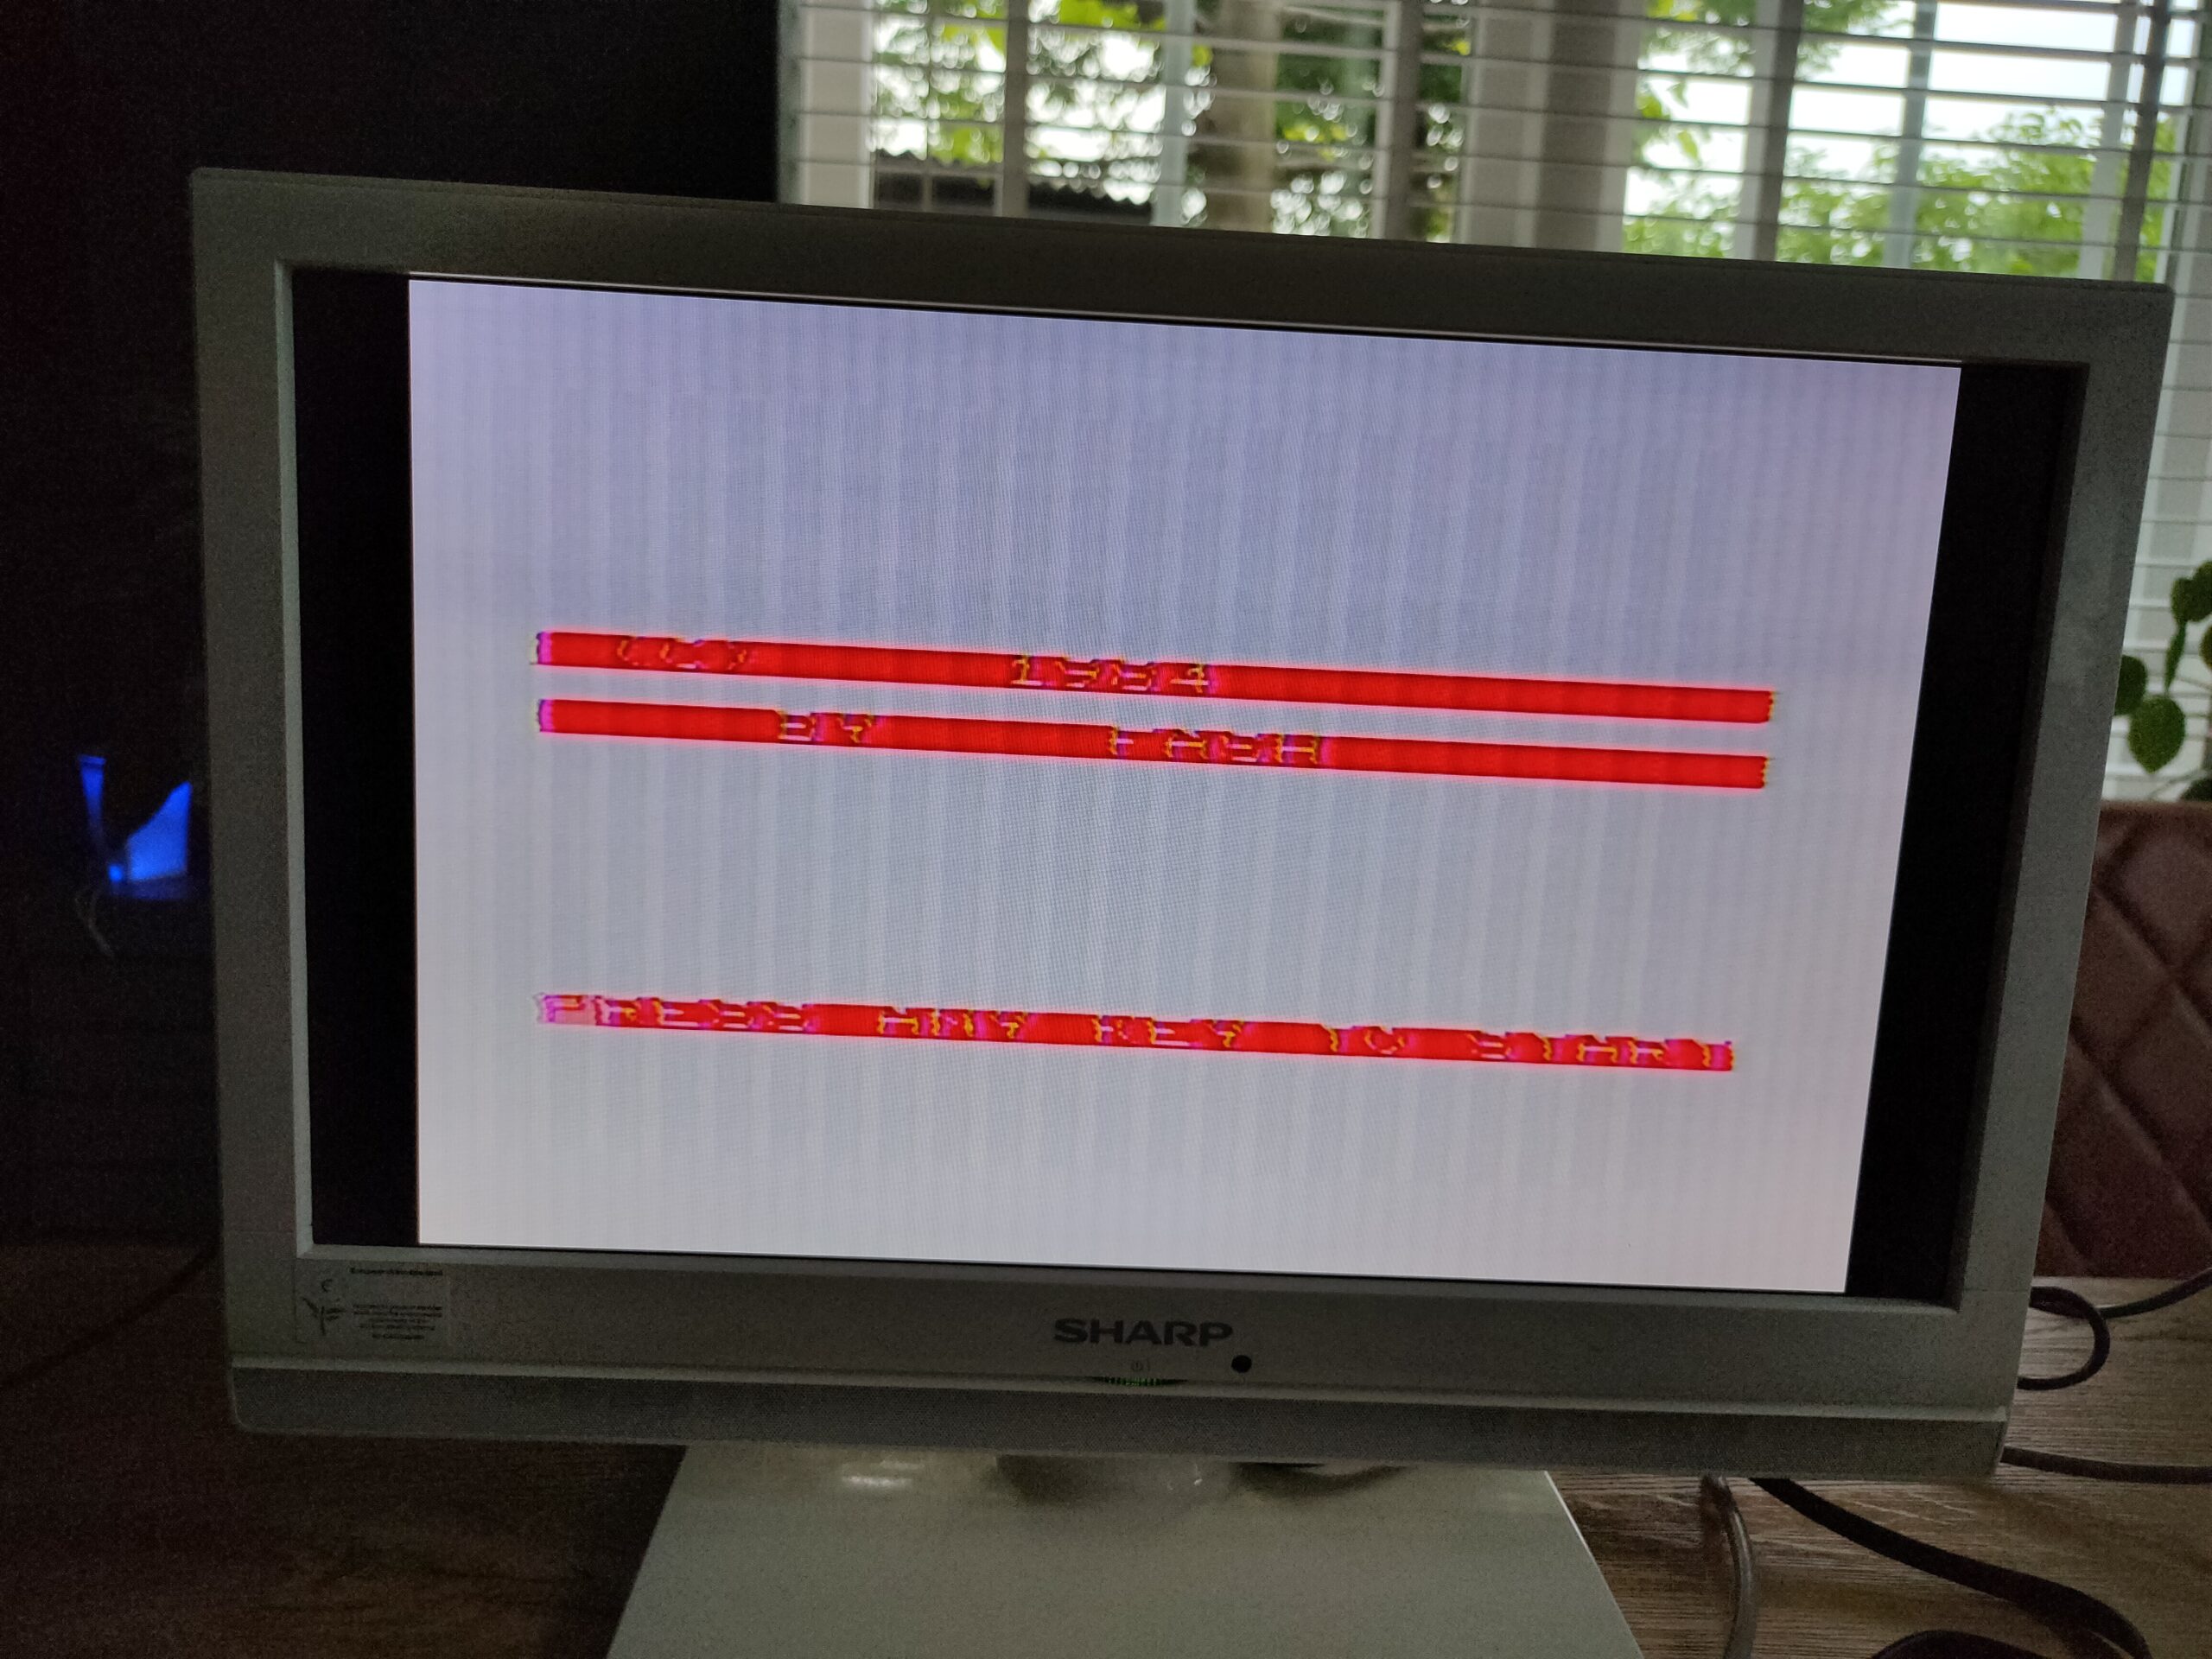
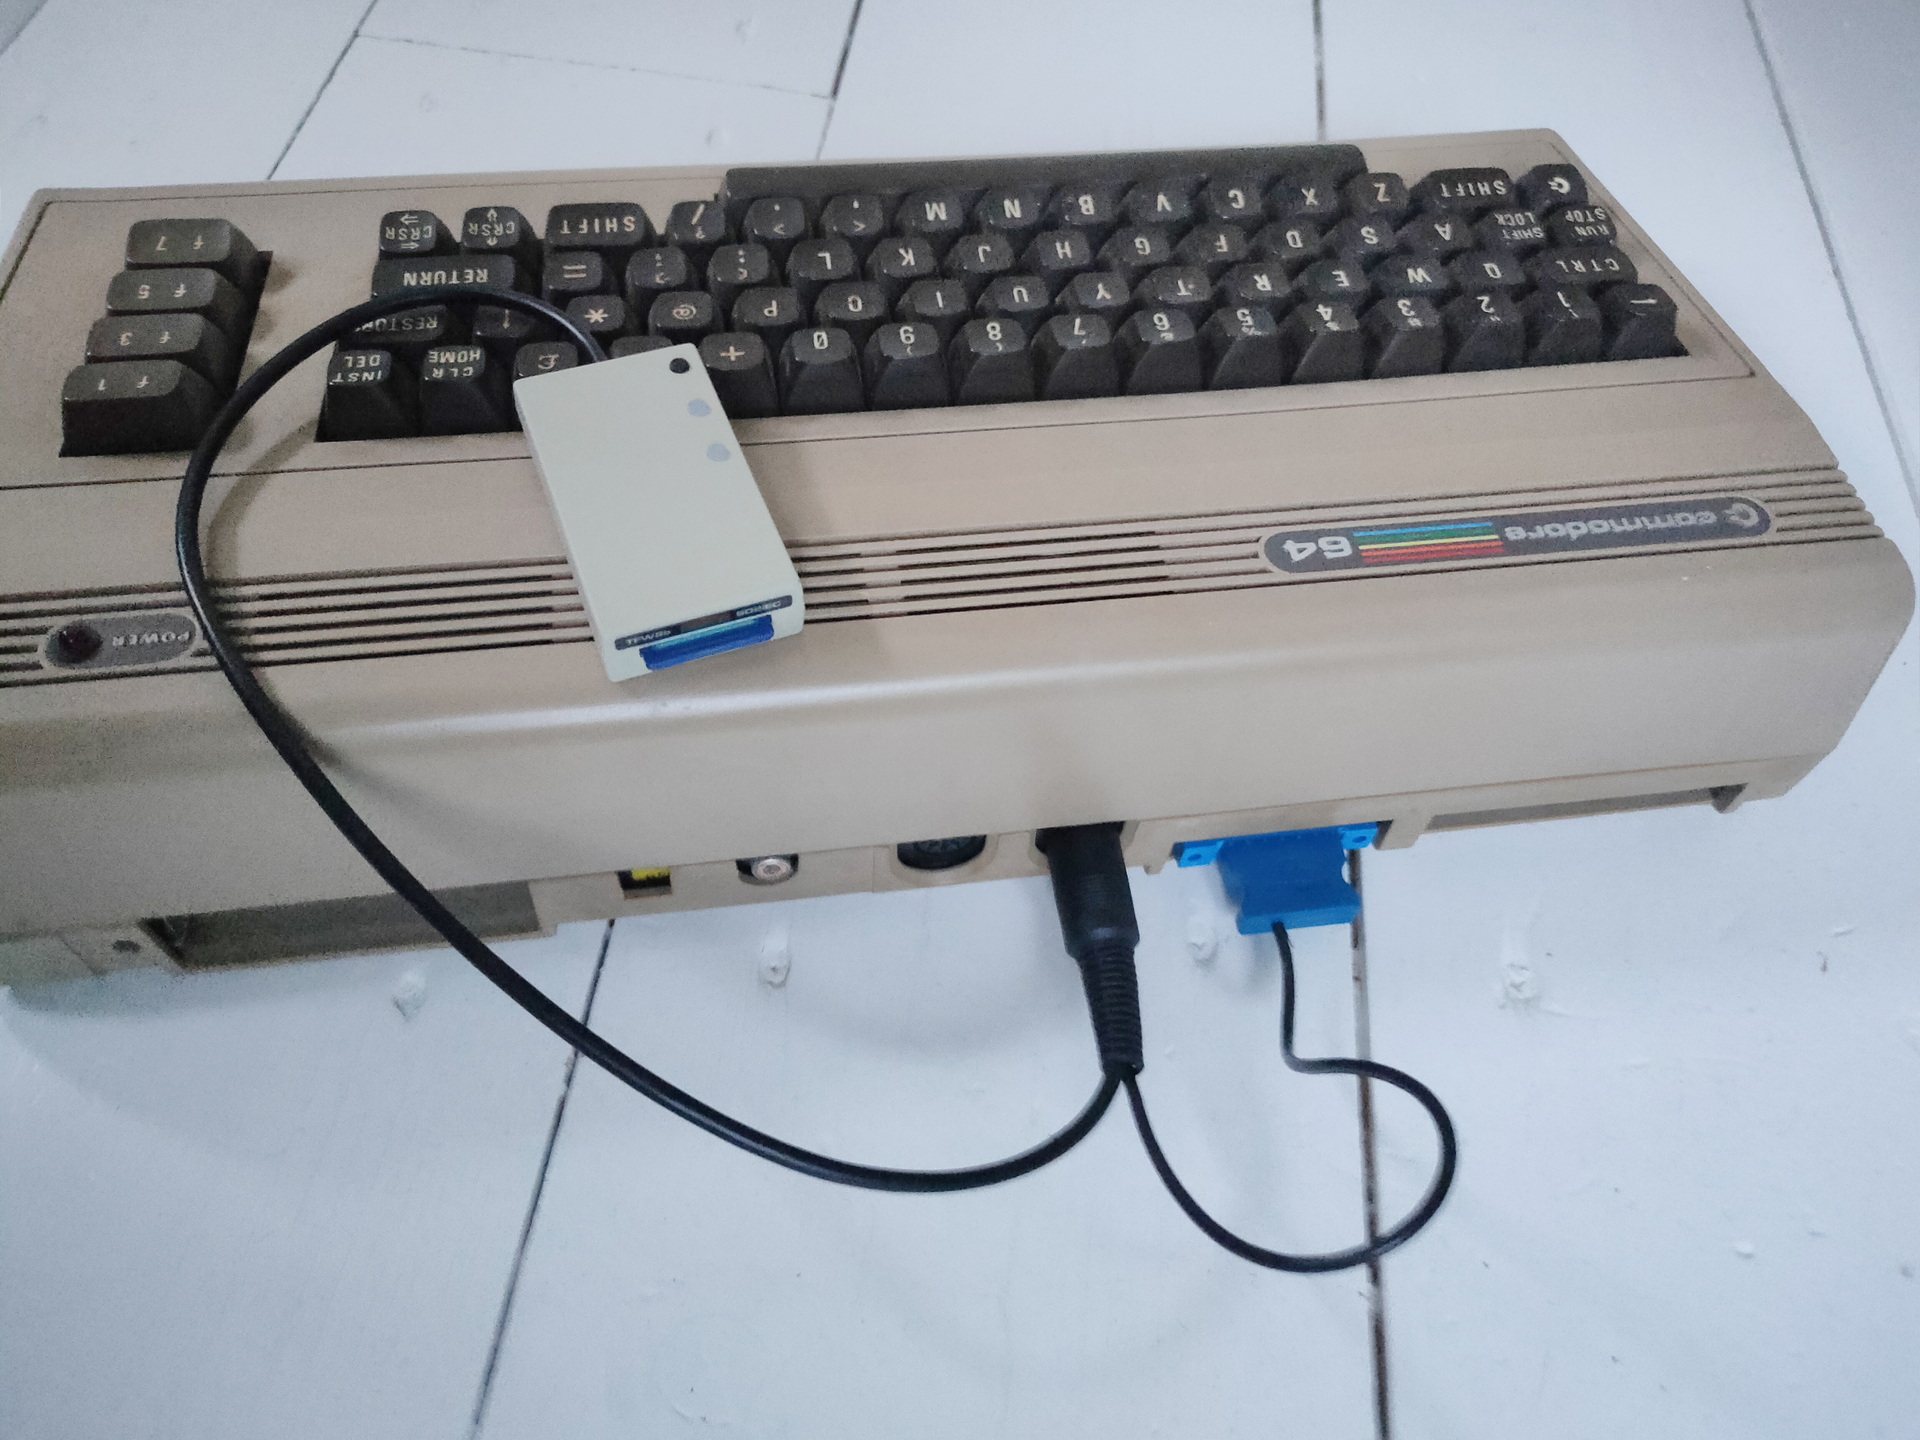
I’ve been using this for a while now, and i’m really impressed by it. It just connects to the Serial Din of your C64, draws power from the Cassette port. … And even looks like a mini drive!
I’ve been converting Disks to images as well as runnig previously converted D64 images on a real C64 again.
Also the internet provides loads of images to run again.
Converting and running:
For real floppy to image i used a empty image file. Made my real original drive device number 9, and used Dracopy (also below)
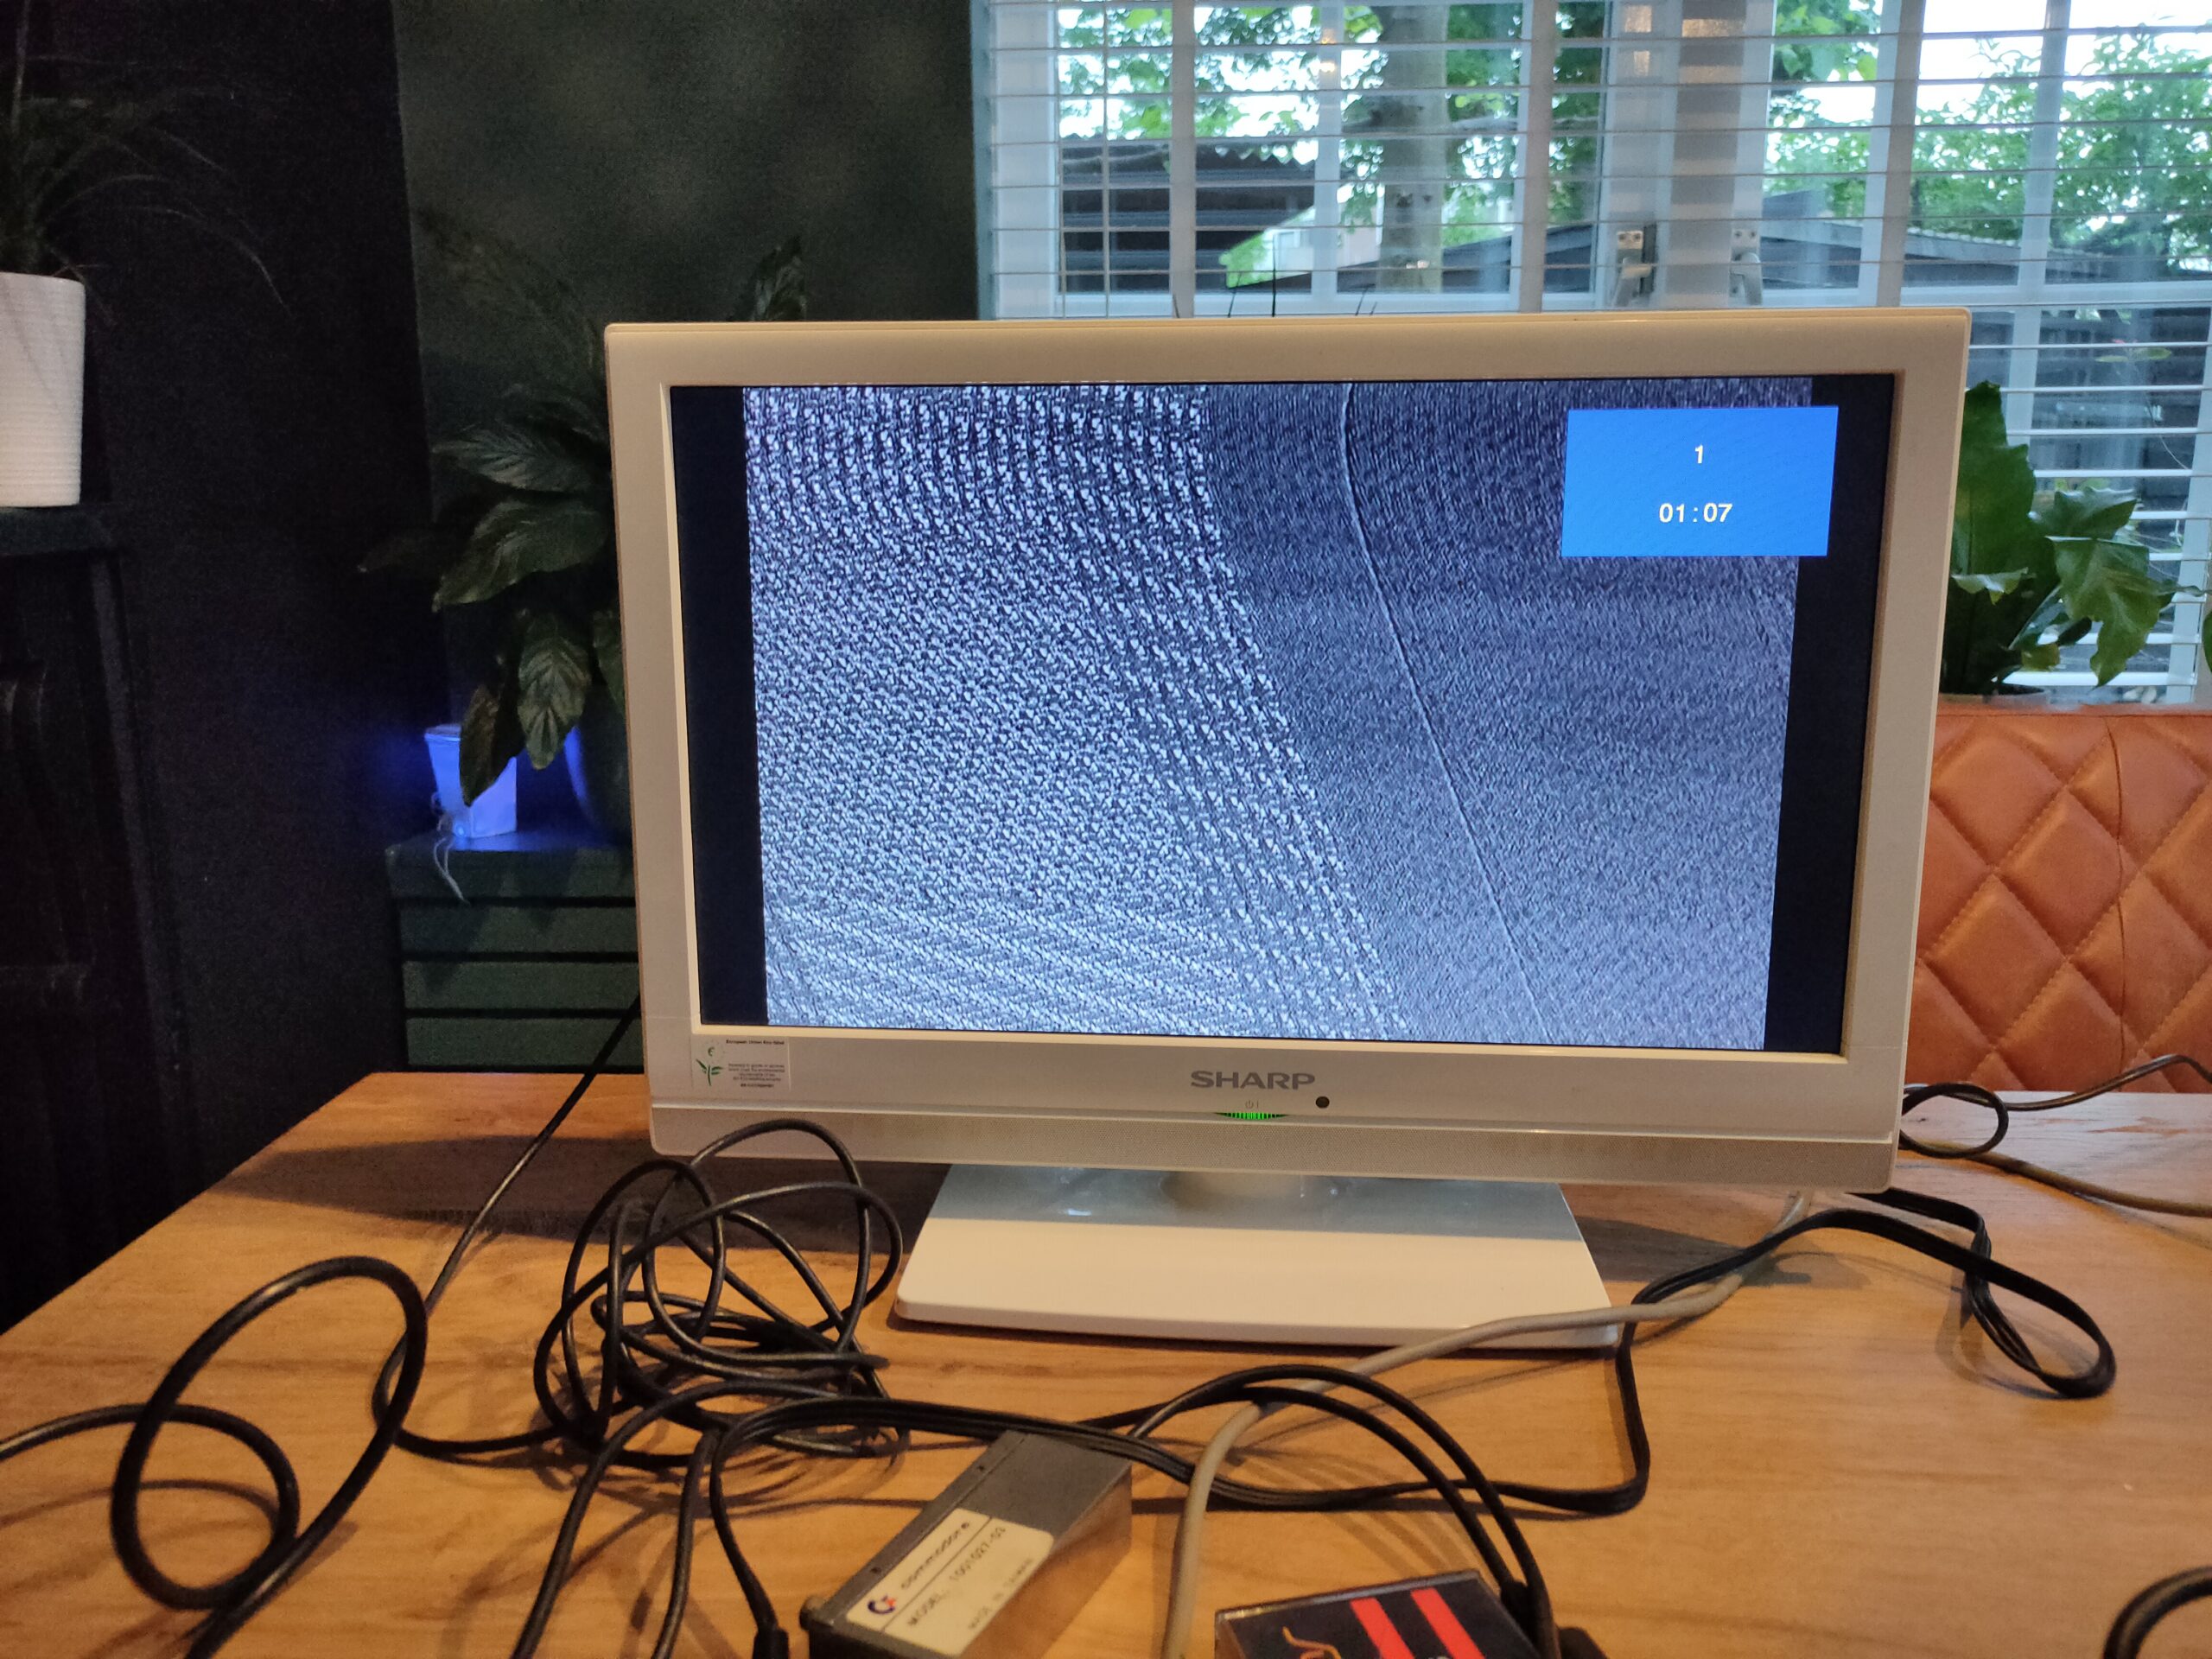
Image running on your real C64, just put a D64 disk image on your SDcard.
There is a disk selector and run program you can use. (See below) Also you can use the buttons for disk swap/change.