Step by step document
Category Archives: Computer
Antenna tweaking
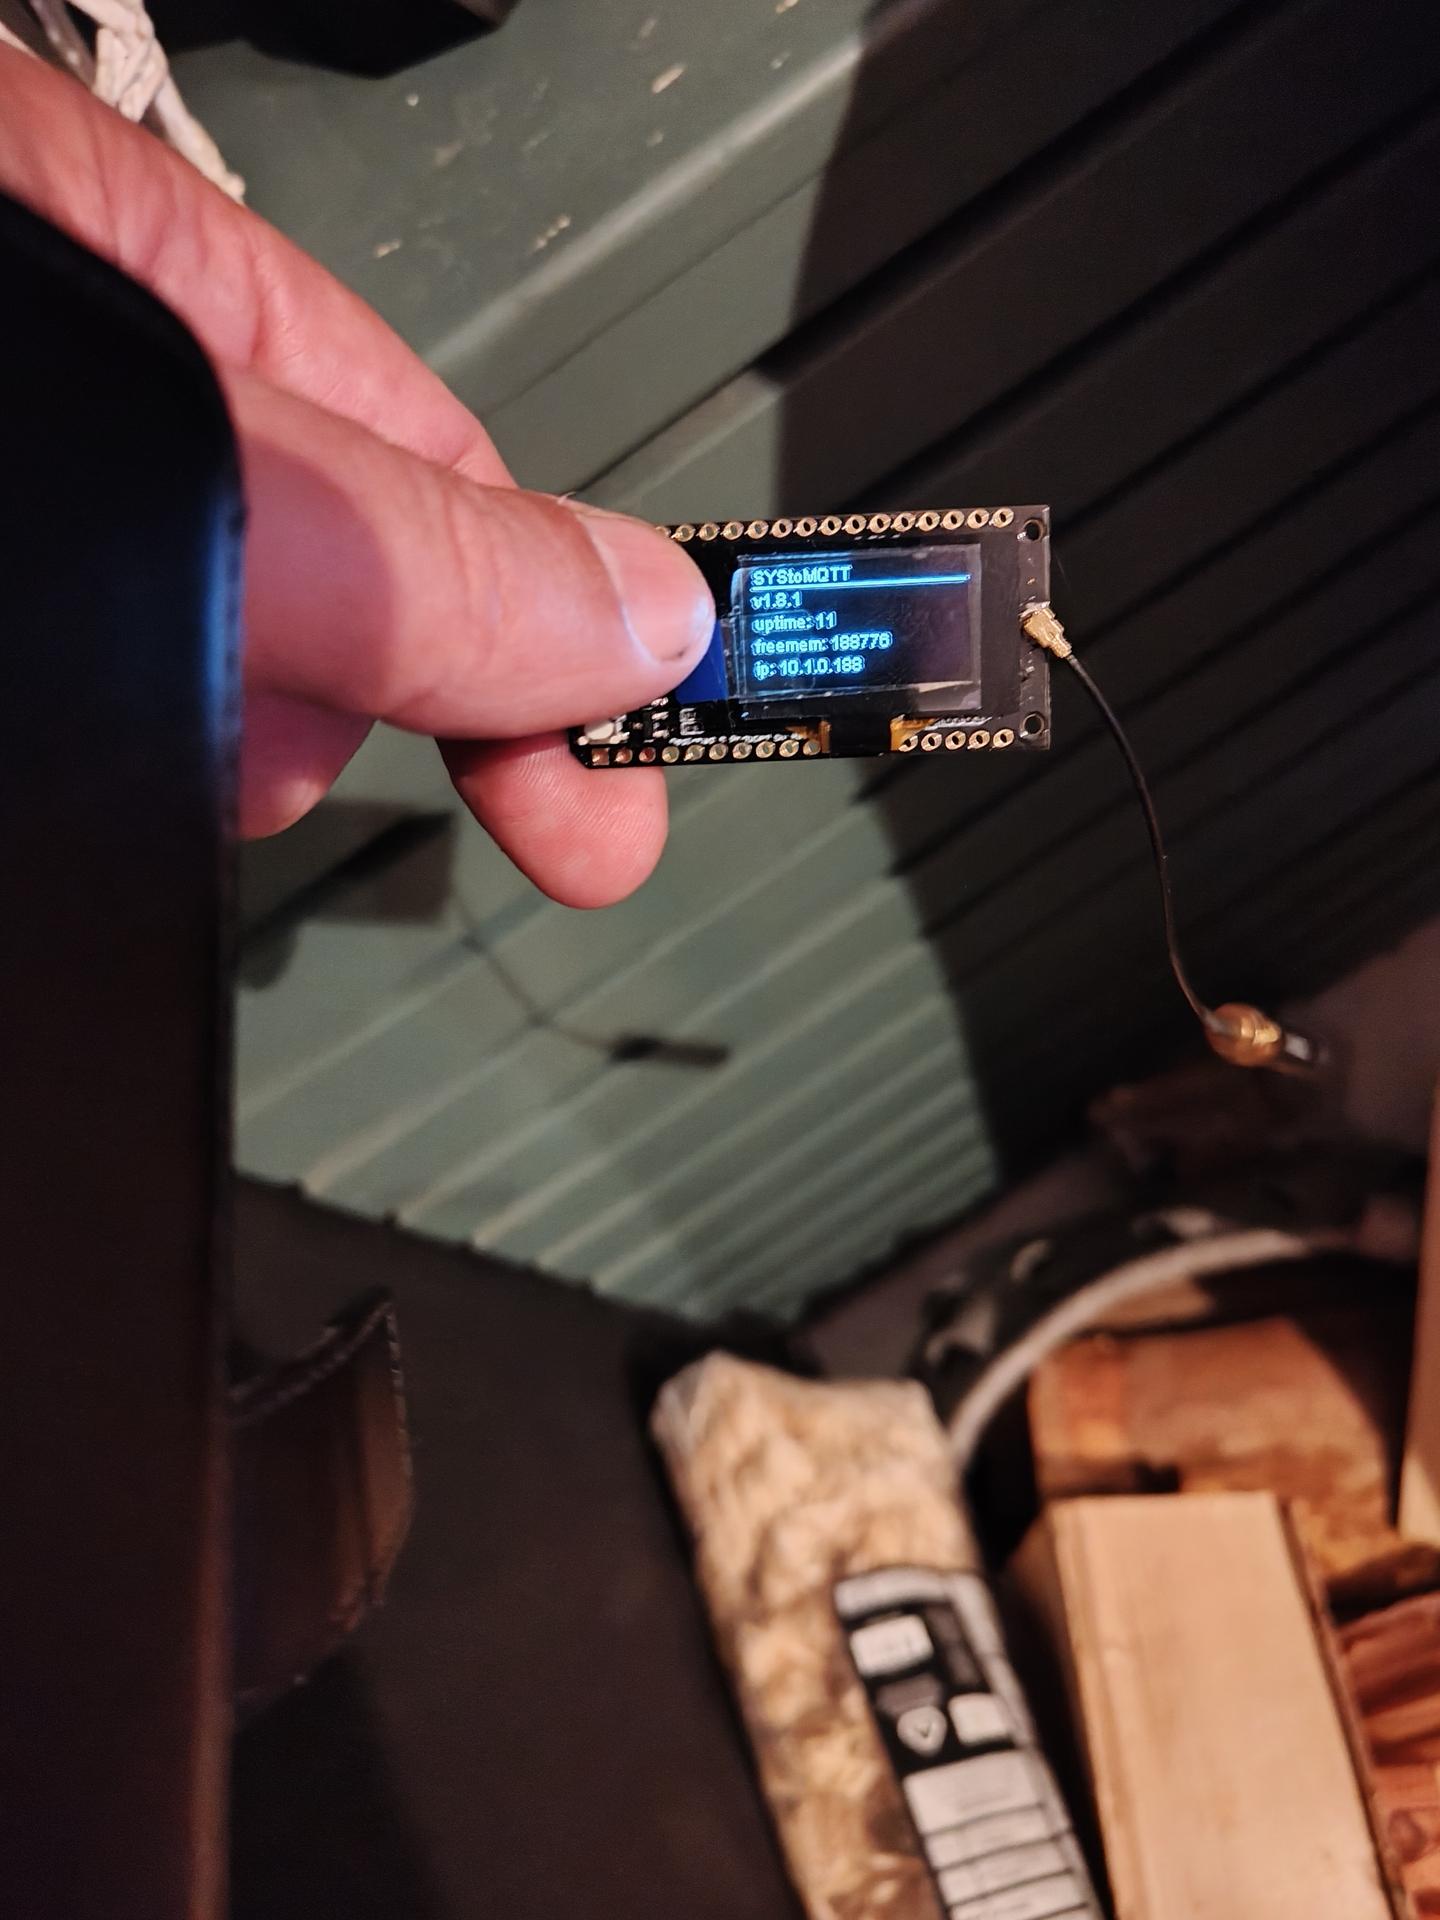
A while ago I was playing with LoRa (Long Range radio), I made a simple setup which worked good enough.
After that I installed Meshtastic
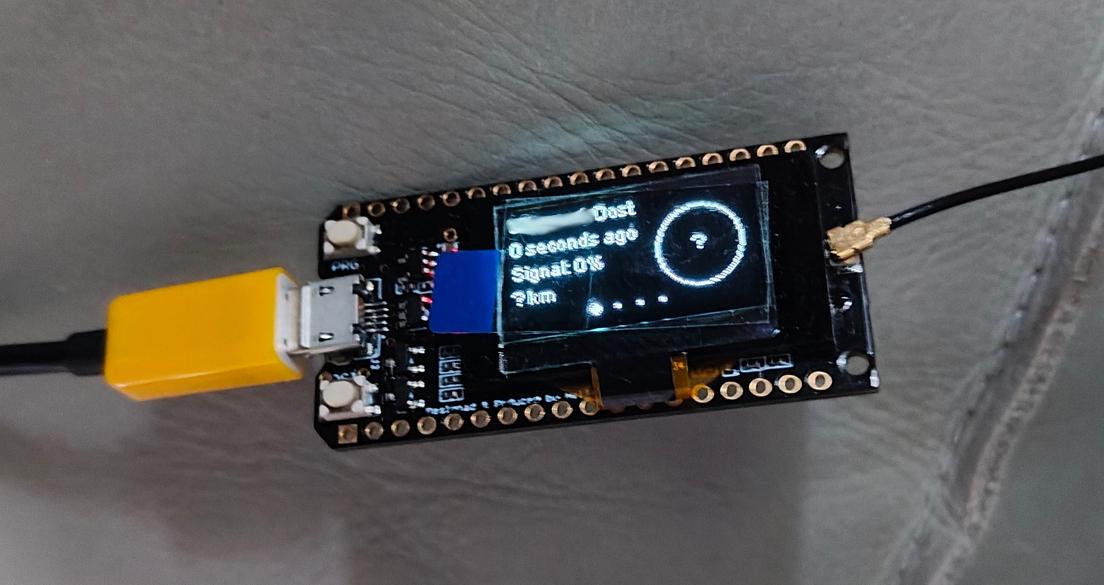
I also used OpenMqttGateway with LoRa.
I’ve been using antennas also with SDR(Software Defined Radio.
Not happy with the performance, I bought a Nano-VNA.
(Vector network analyser)
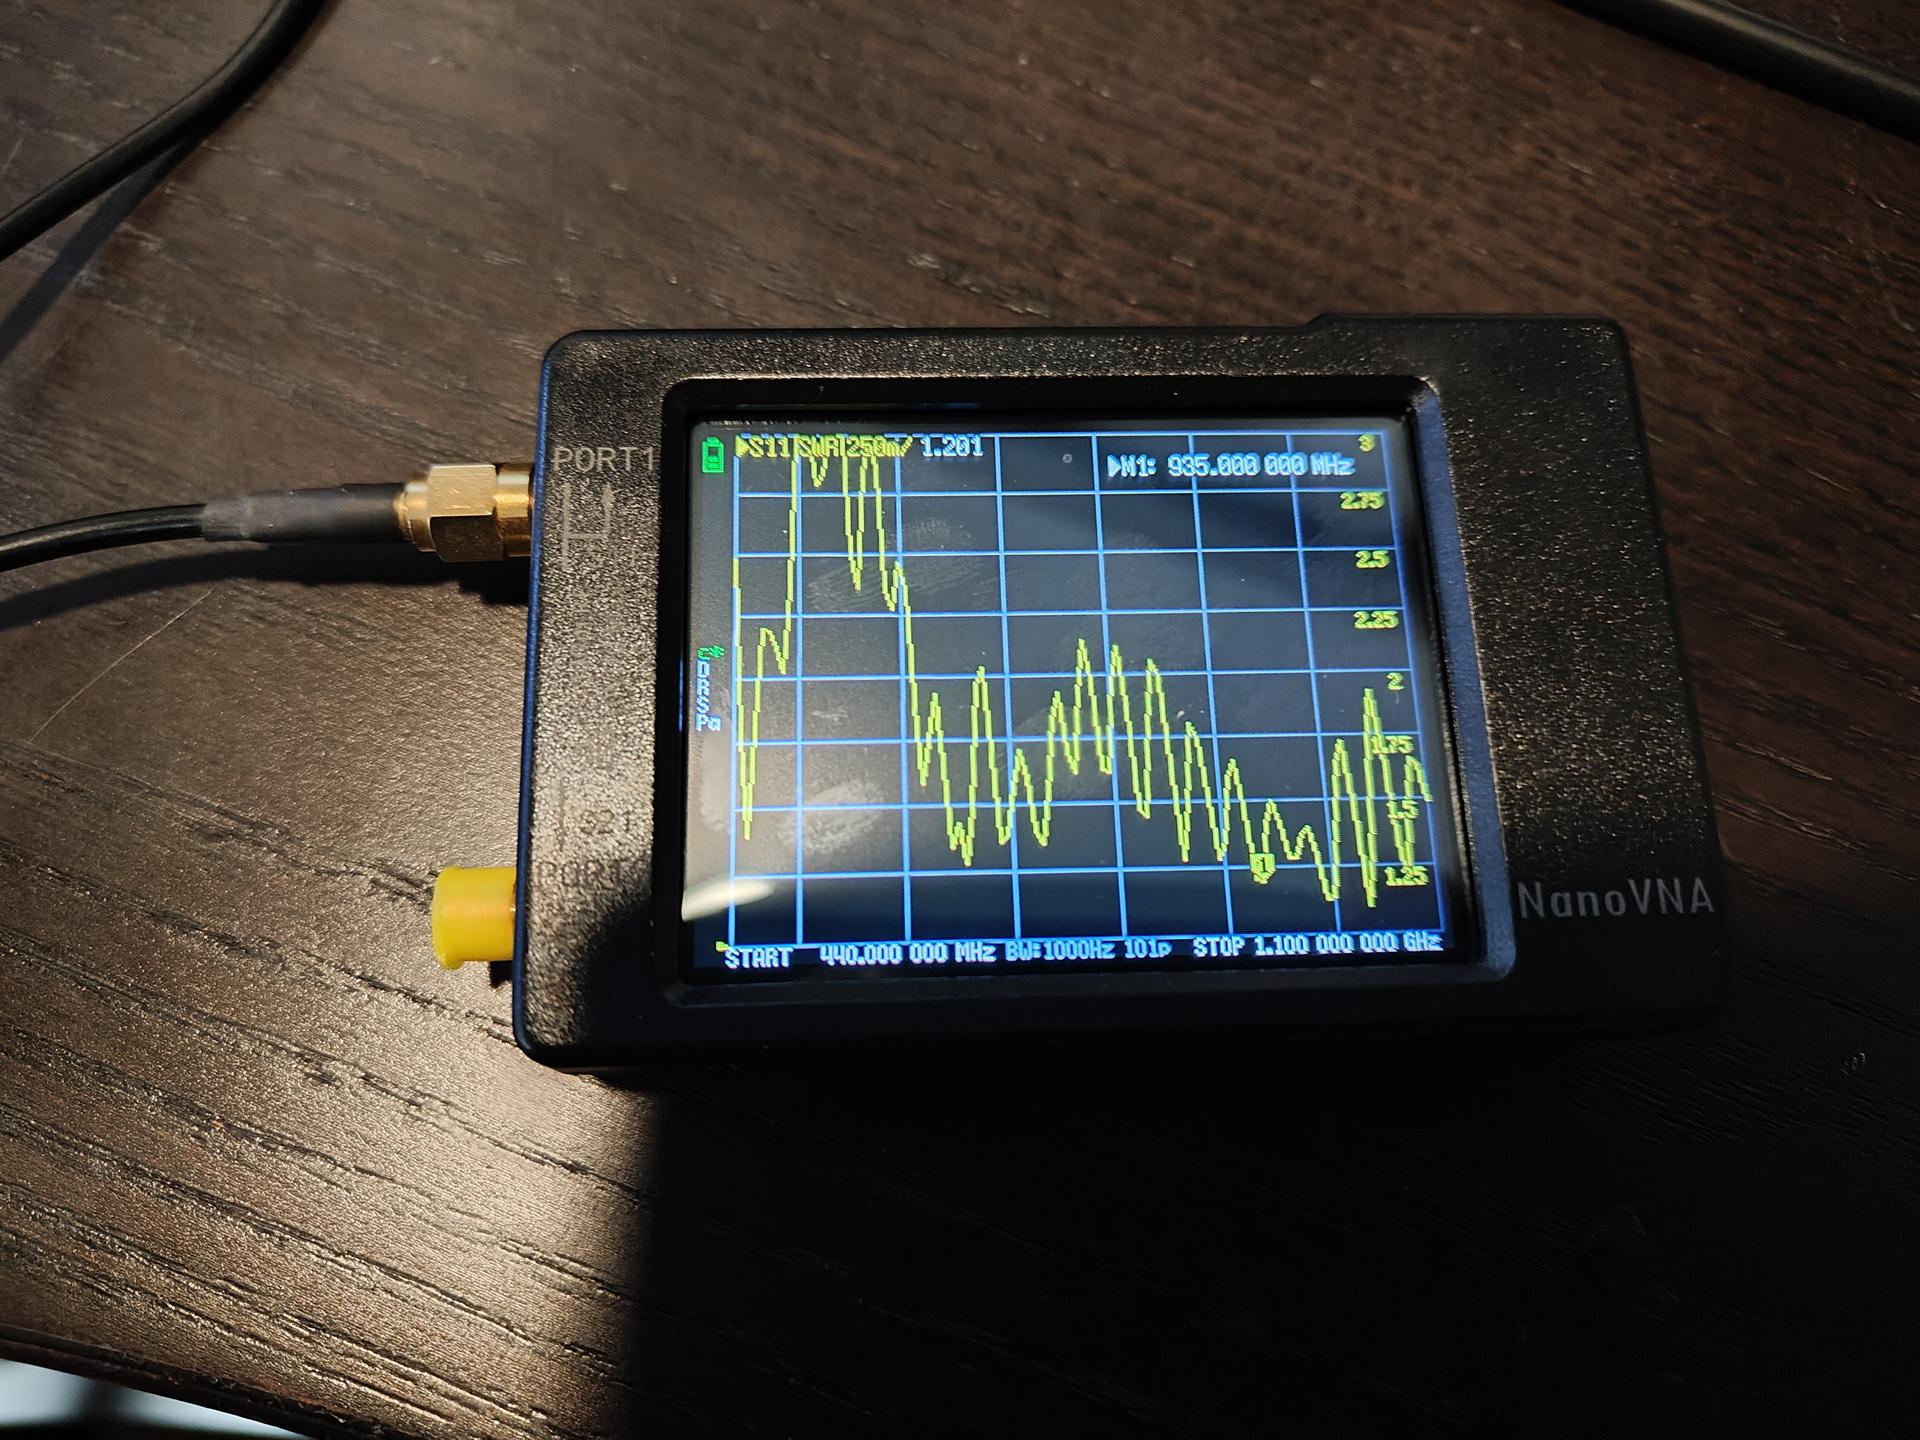

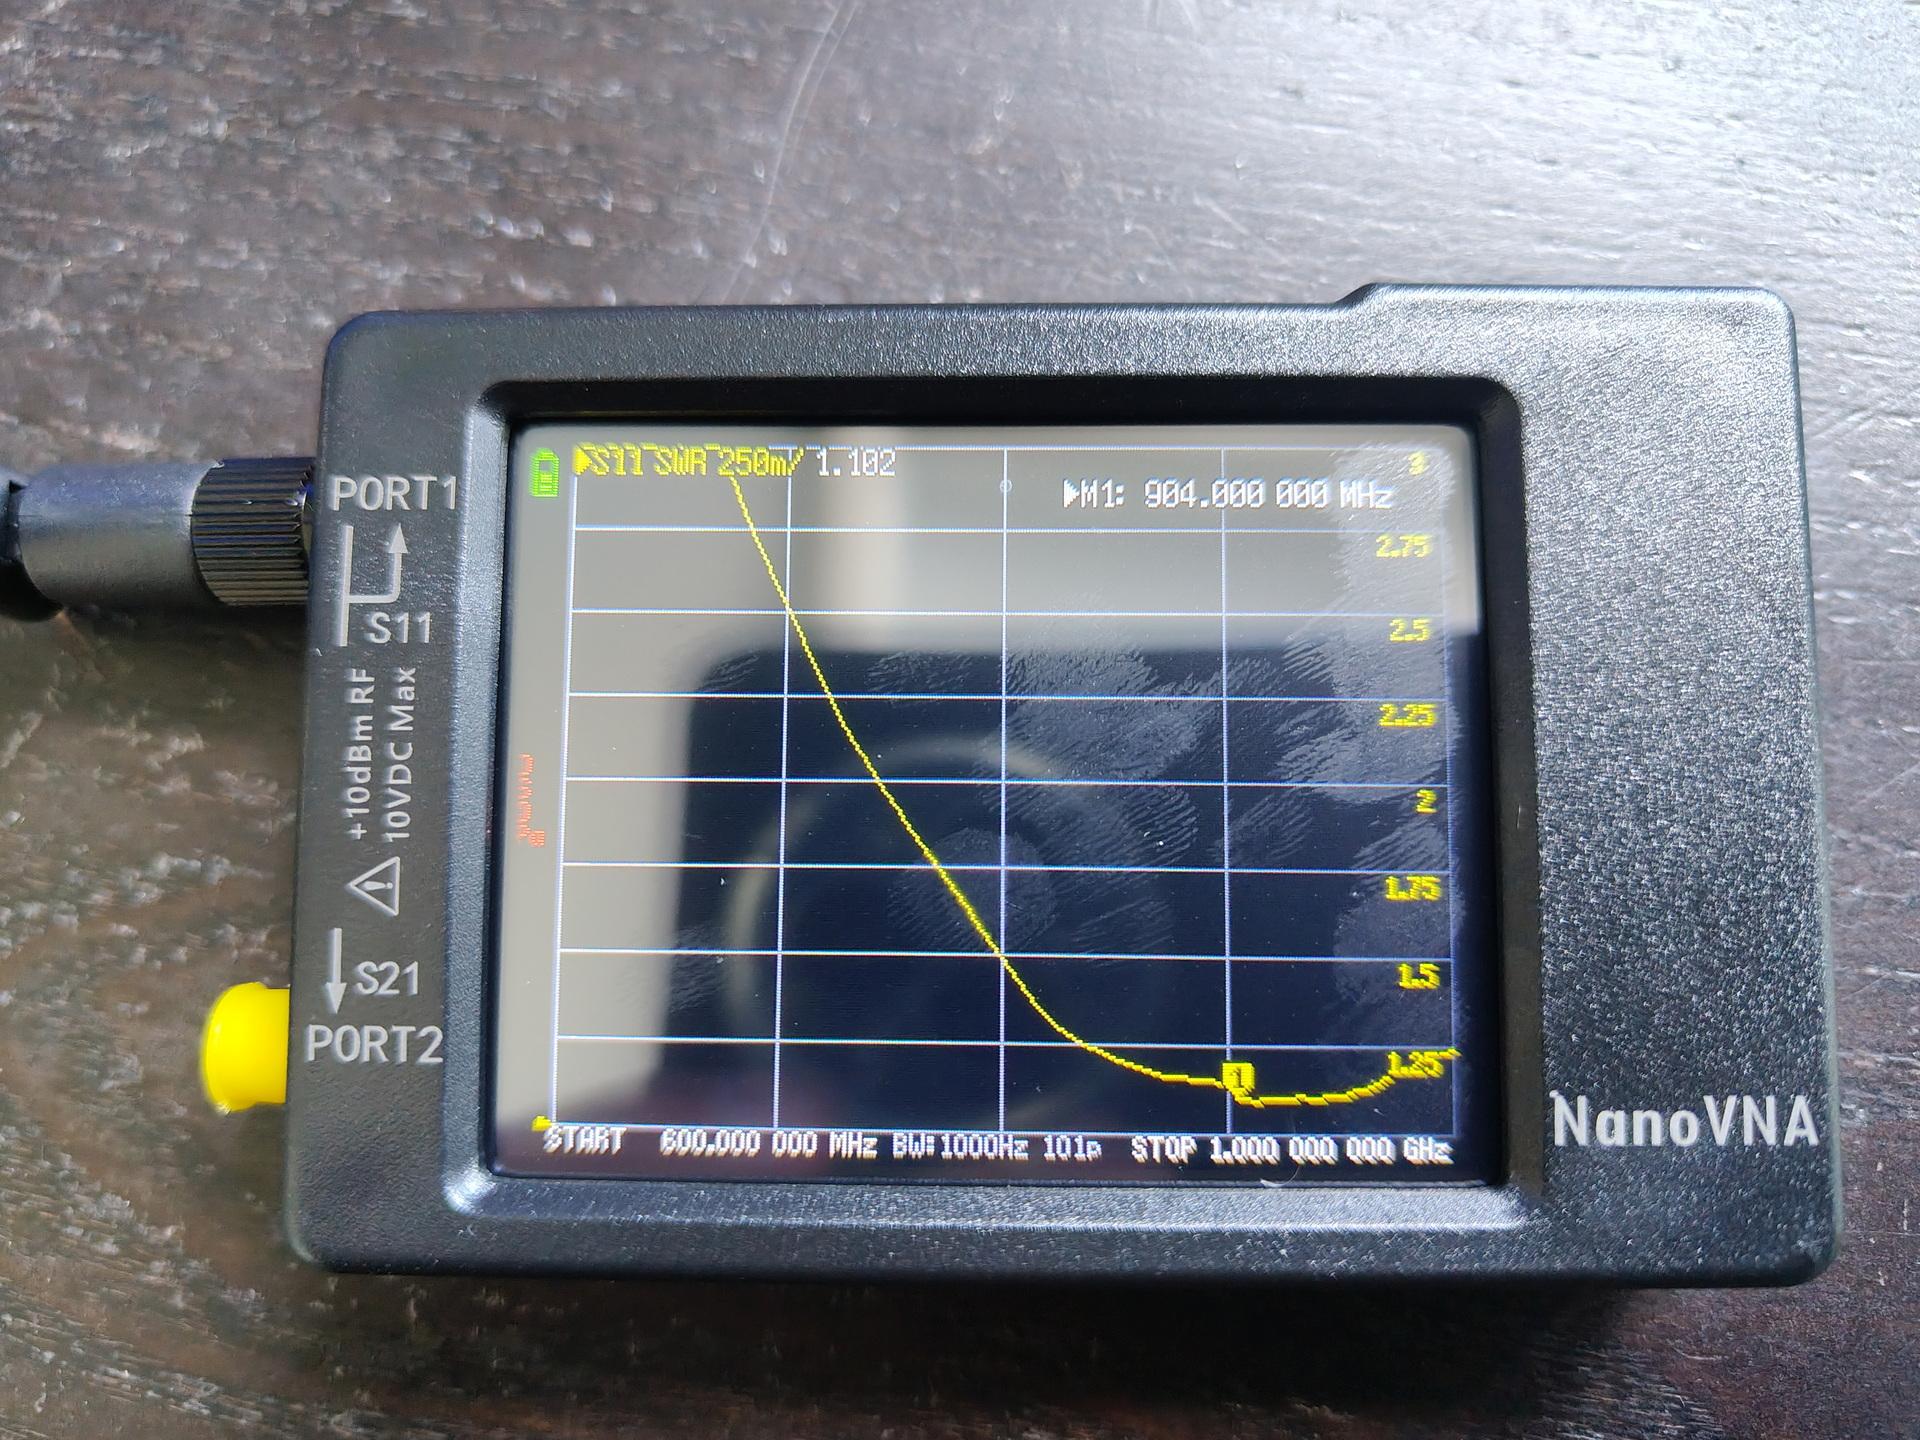
Due to the many options, I was lost at first. Maybe I have to ask Bigred.
Calibrating I get now, but I can’t easily calibrate an antenna with fixed cable.
Much to learn, but that’s what I want. 🙂
I bought a VNA/Antenna test board from Ali.
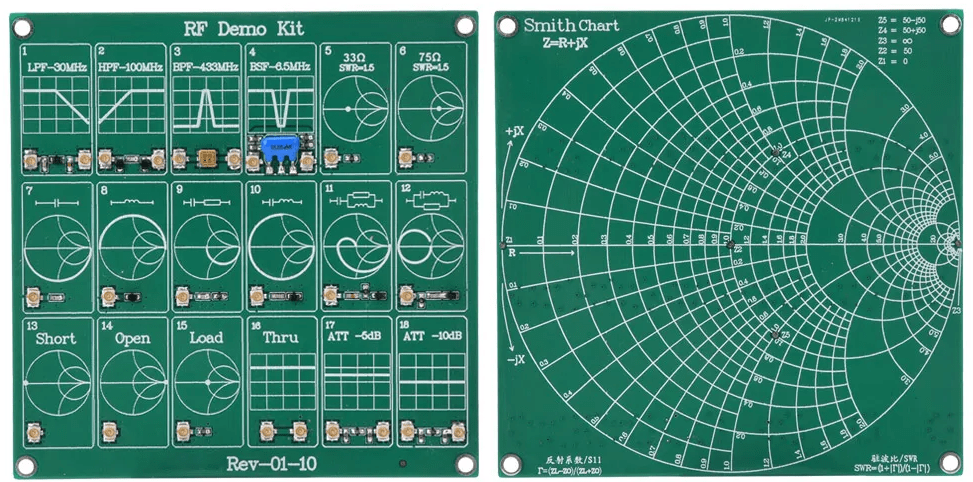
Feature:
- RF Demo Kit RF test board demo calibration board for learning Vector Analyzer and Antenna Analyzer test calibration.
- The board is fully integrated with 18 functional modules.
- Equipped with 2 UFL patch cords for convenient use.
- Each module is carefully selected for high quality and reliability.
- The board is small and lightweight, easy to carry.
Specification:
Product type: RF Demo Kit
- Filters:
- A. Short low-pass filter (LPF): 30 MHz
- B. FM high-pass filter (HPF): 100 MHz
- C. Commonly used SAW band-pass filter (BPF): 433 MHz
- D. Video ceramic notch (band-stop filter, BSF): 6.5 MHz
- RLC series and parallel circuits
- Includes R, L, C and combination circuits
- Open/short and load calibration circuit
- Attenuation circuit
Package List:
- 1 × RF Demo Kit Board
- 2 × UFL patch cables
WHY2025
In case of doubt .. MORE LEDS!
We went to WHY2025 a hackers camp in the Netherlands.
The first time I went was in 1997, with Bigred.
Many followed after that.
Tyrone, Bigred were also there from our old Crew.
Coline joined me several times since 2005.
I joined the Badge team, and was making spacers for the Badges in bulk using my 3D printer.
Also made some fancy cases.
In case of doubt .. more leds!
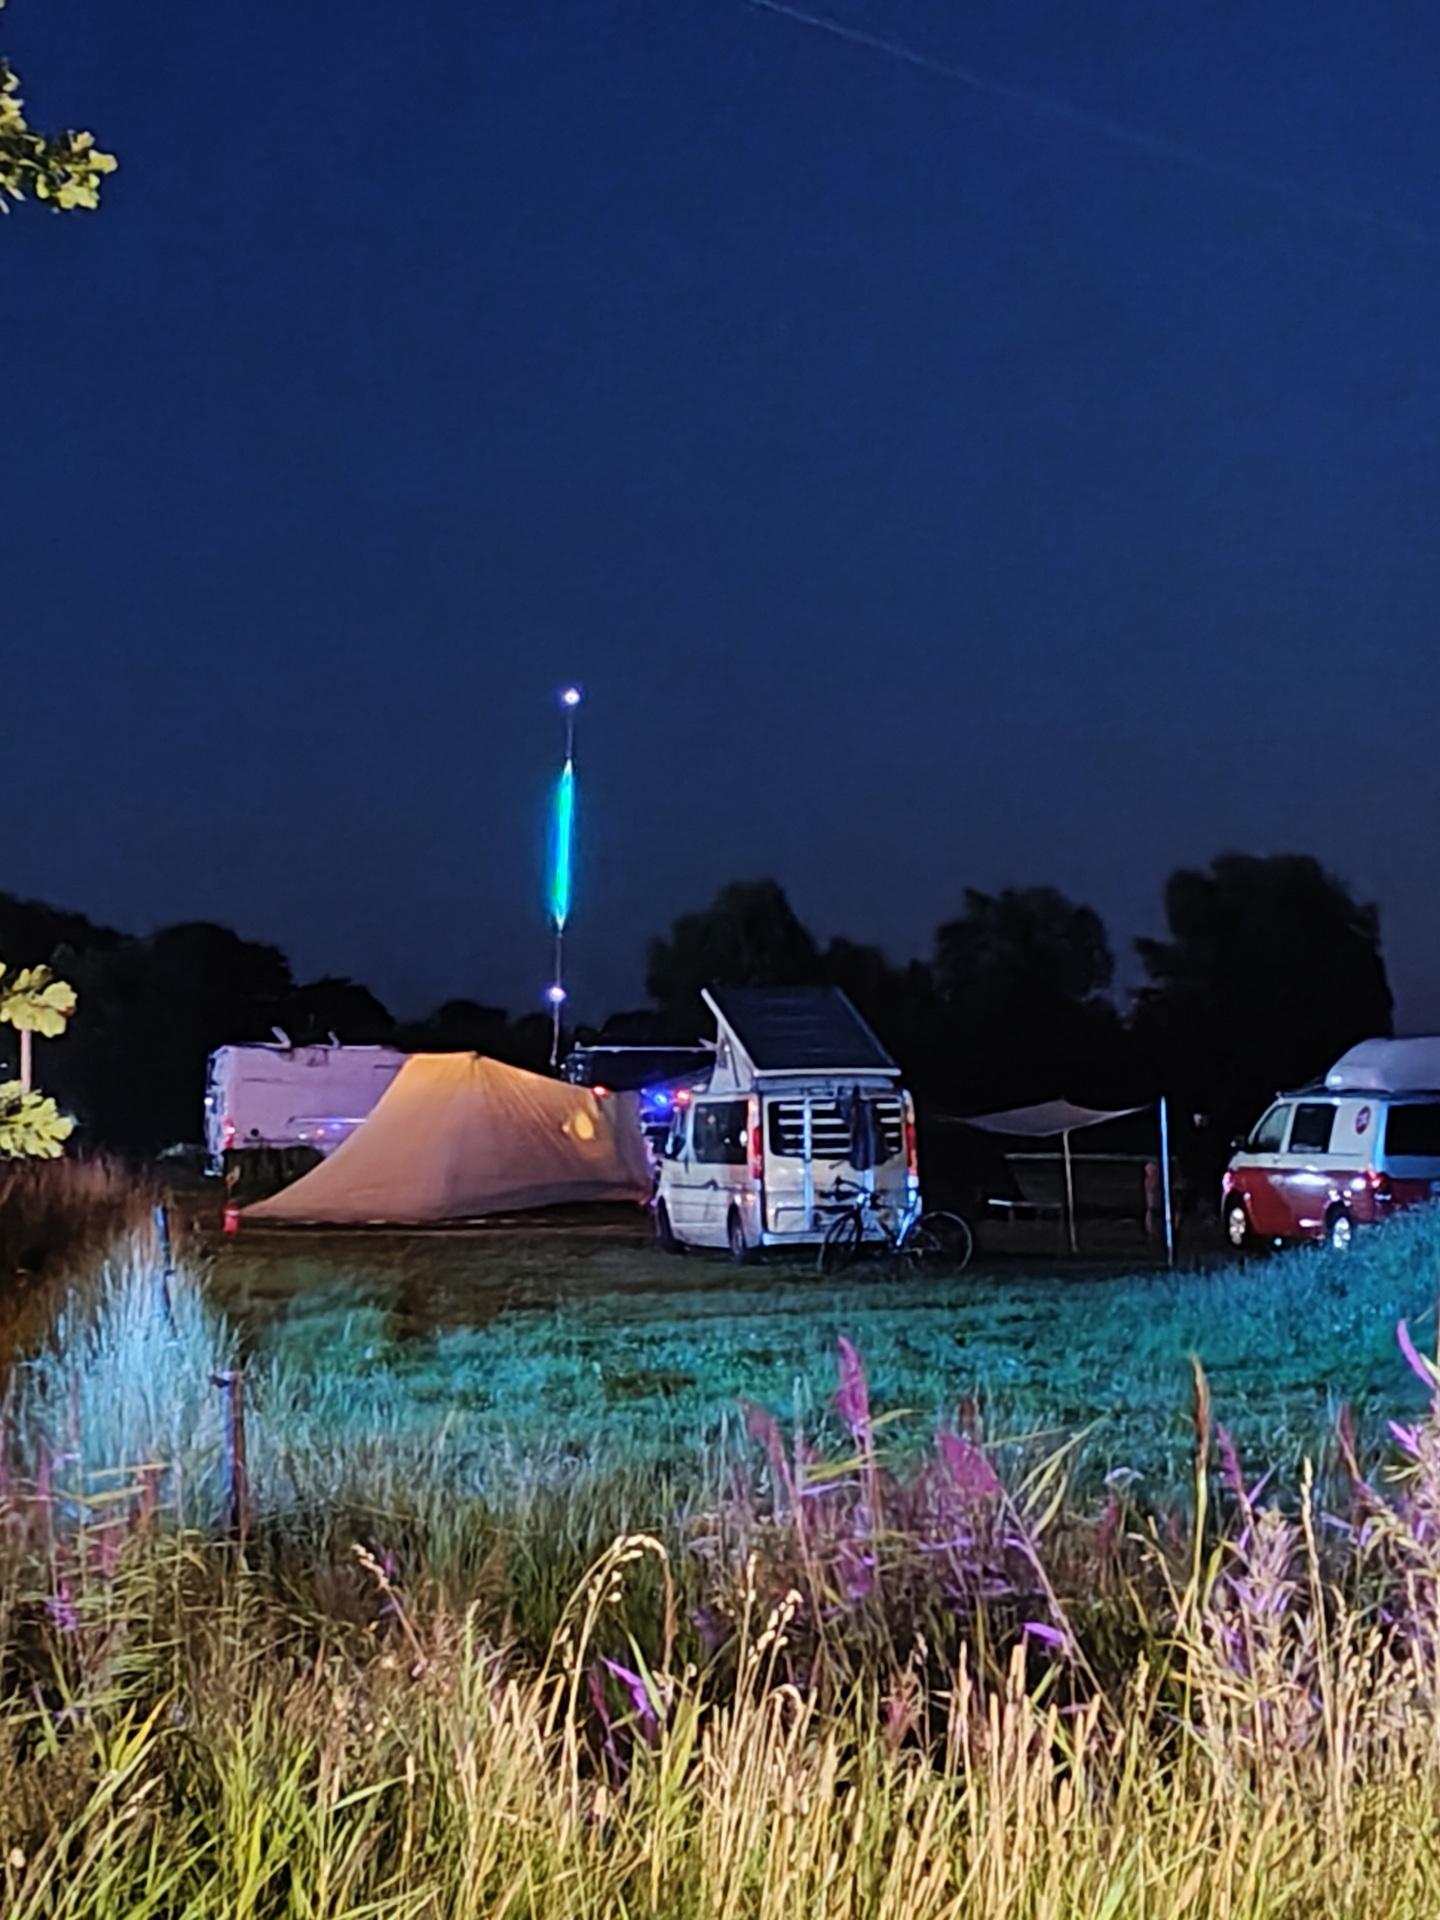
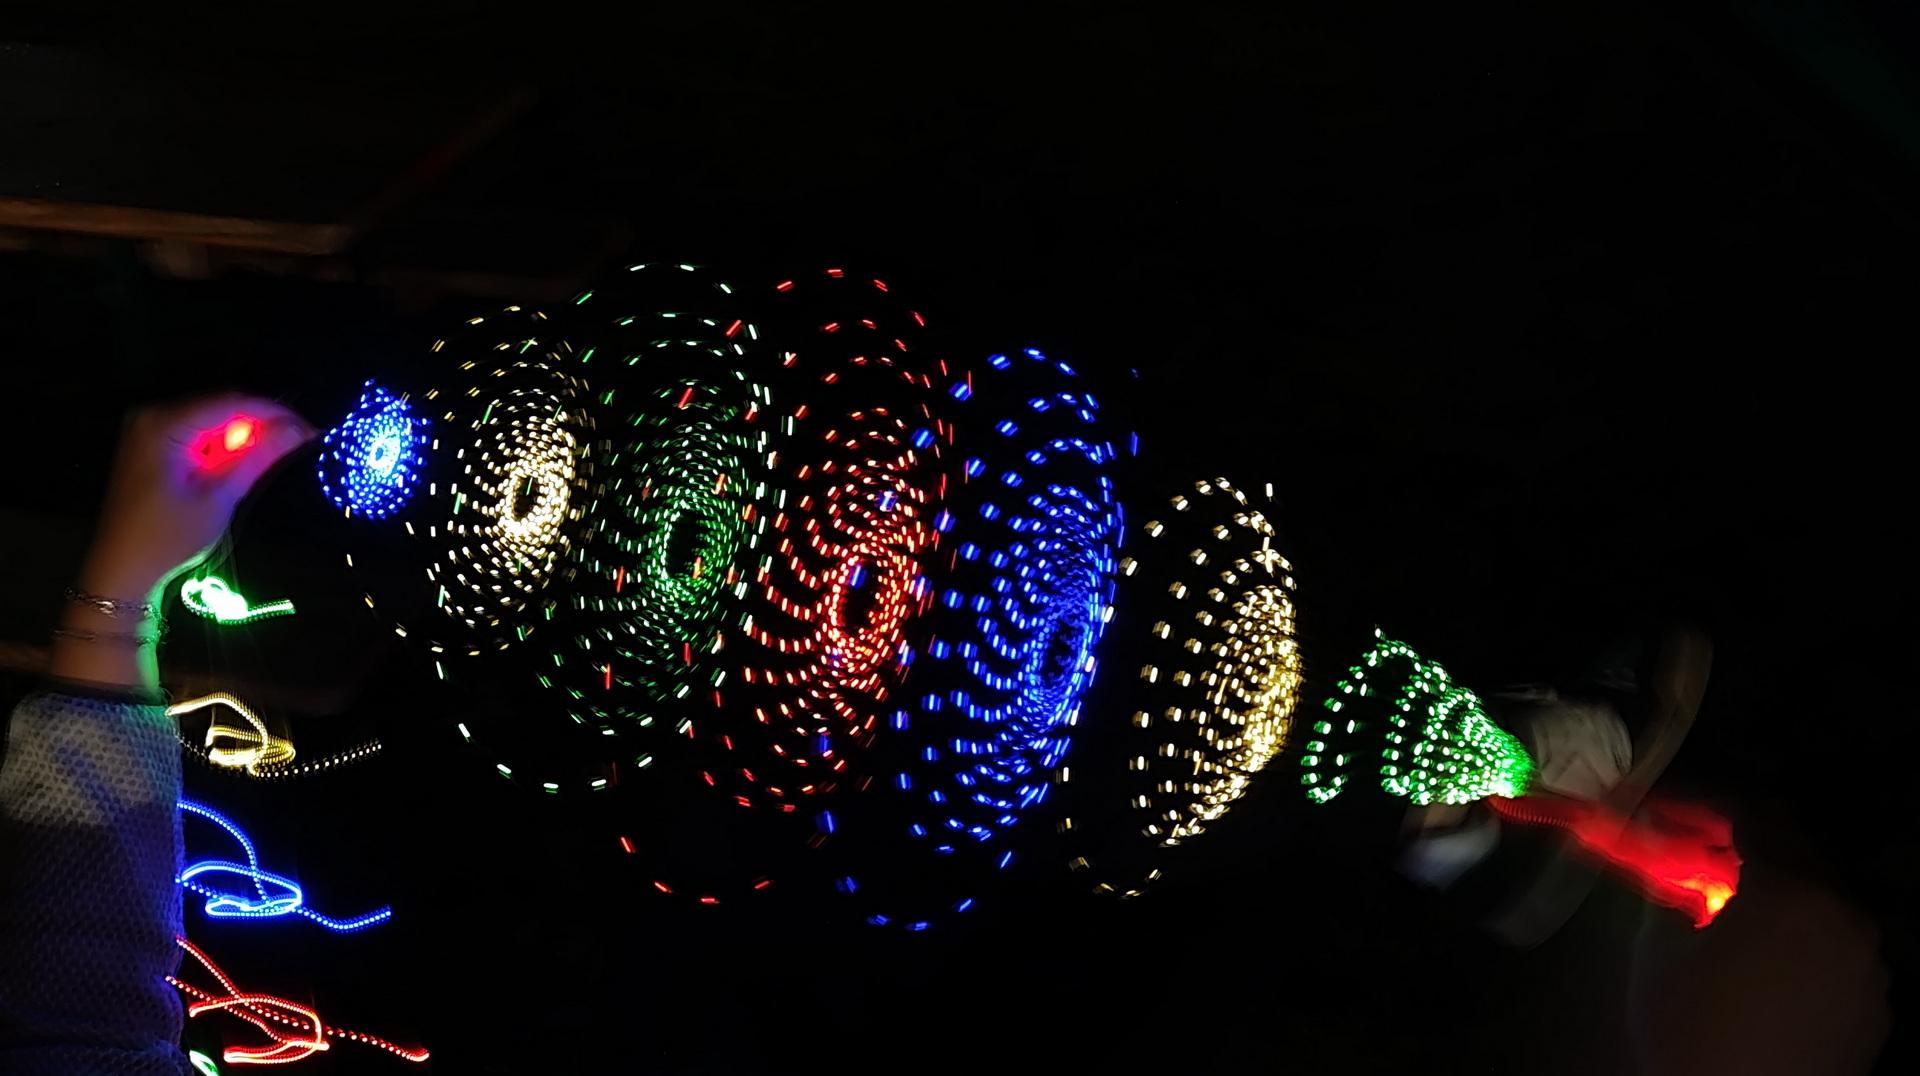
Nice weather, good friends. New friends. Booze. Food and Hacking.
We visited a lot of talks and enjoyed the music. (And fire)
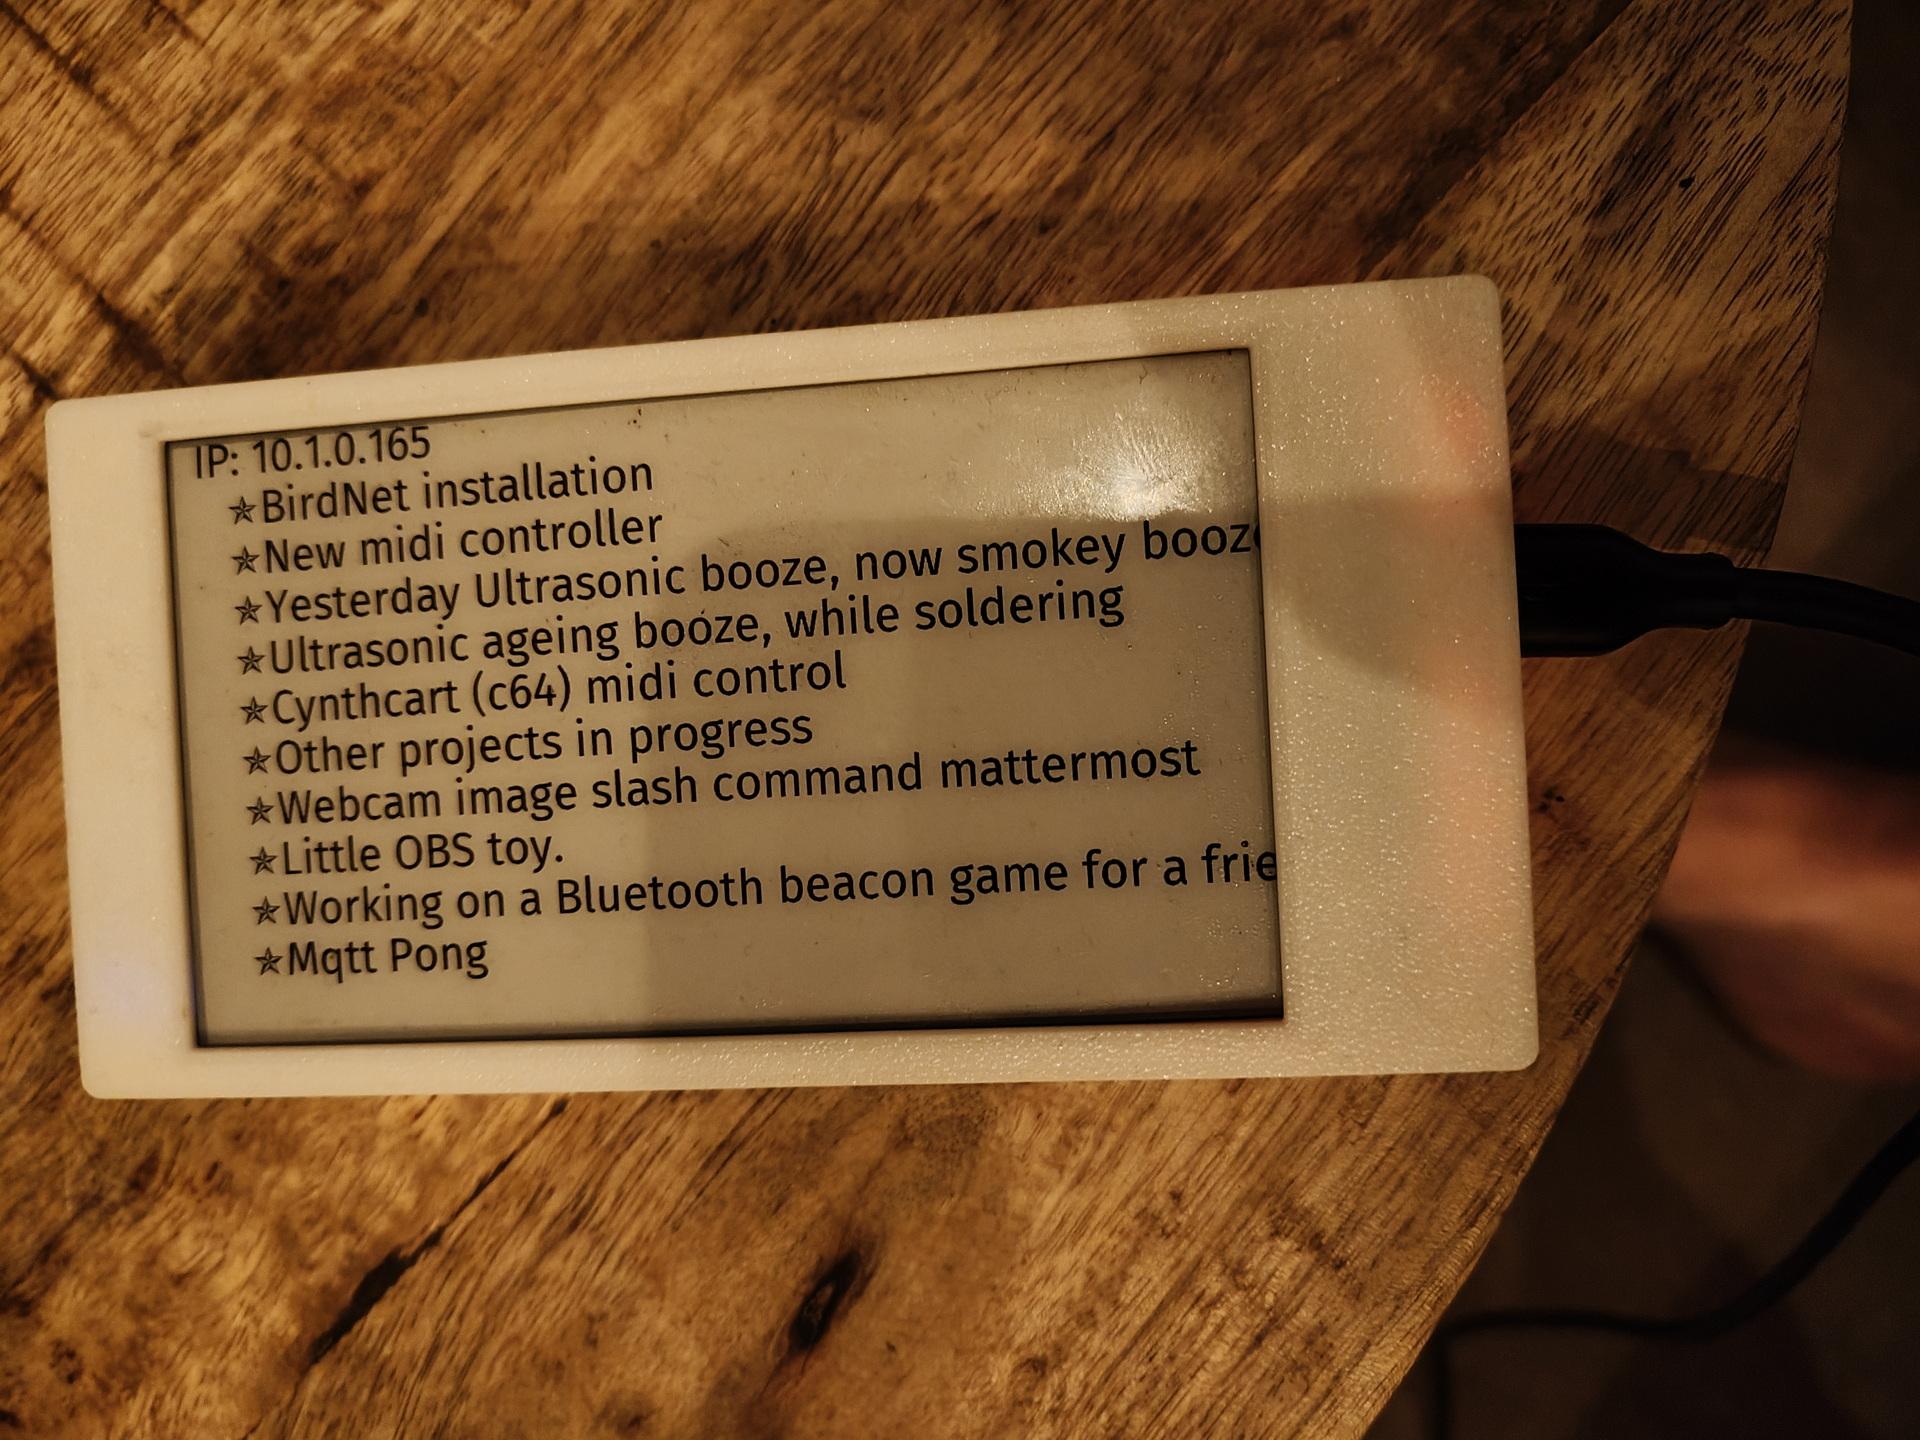
I worked on: RSS feed on a epaper display, Midi monitor and the MQTT Pong website.
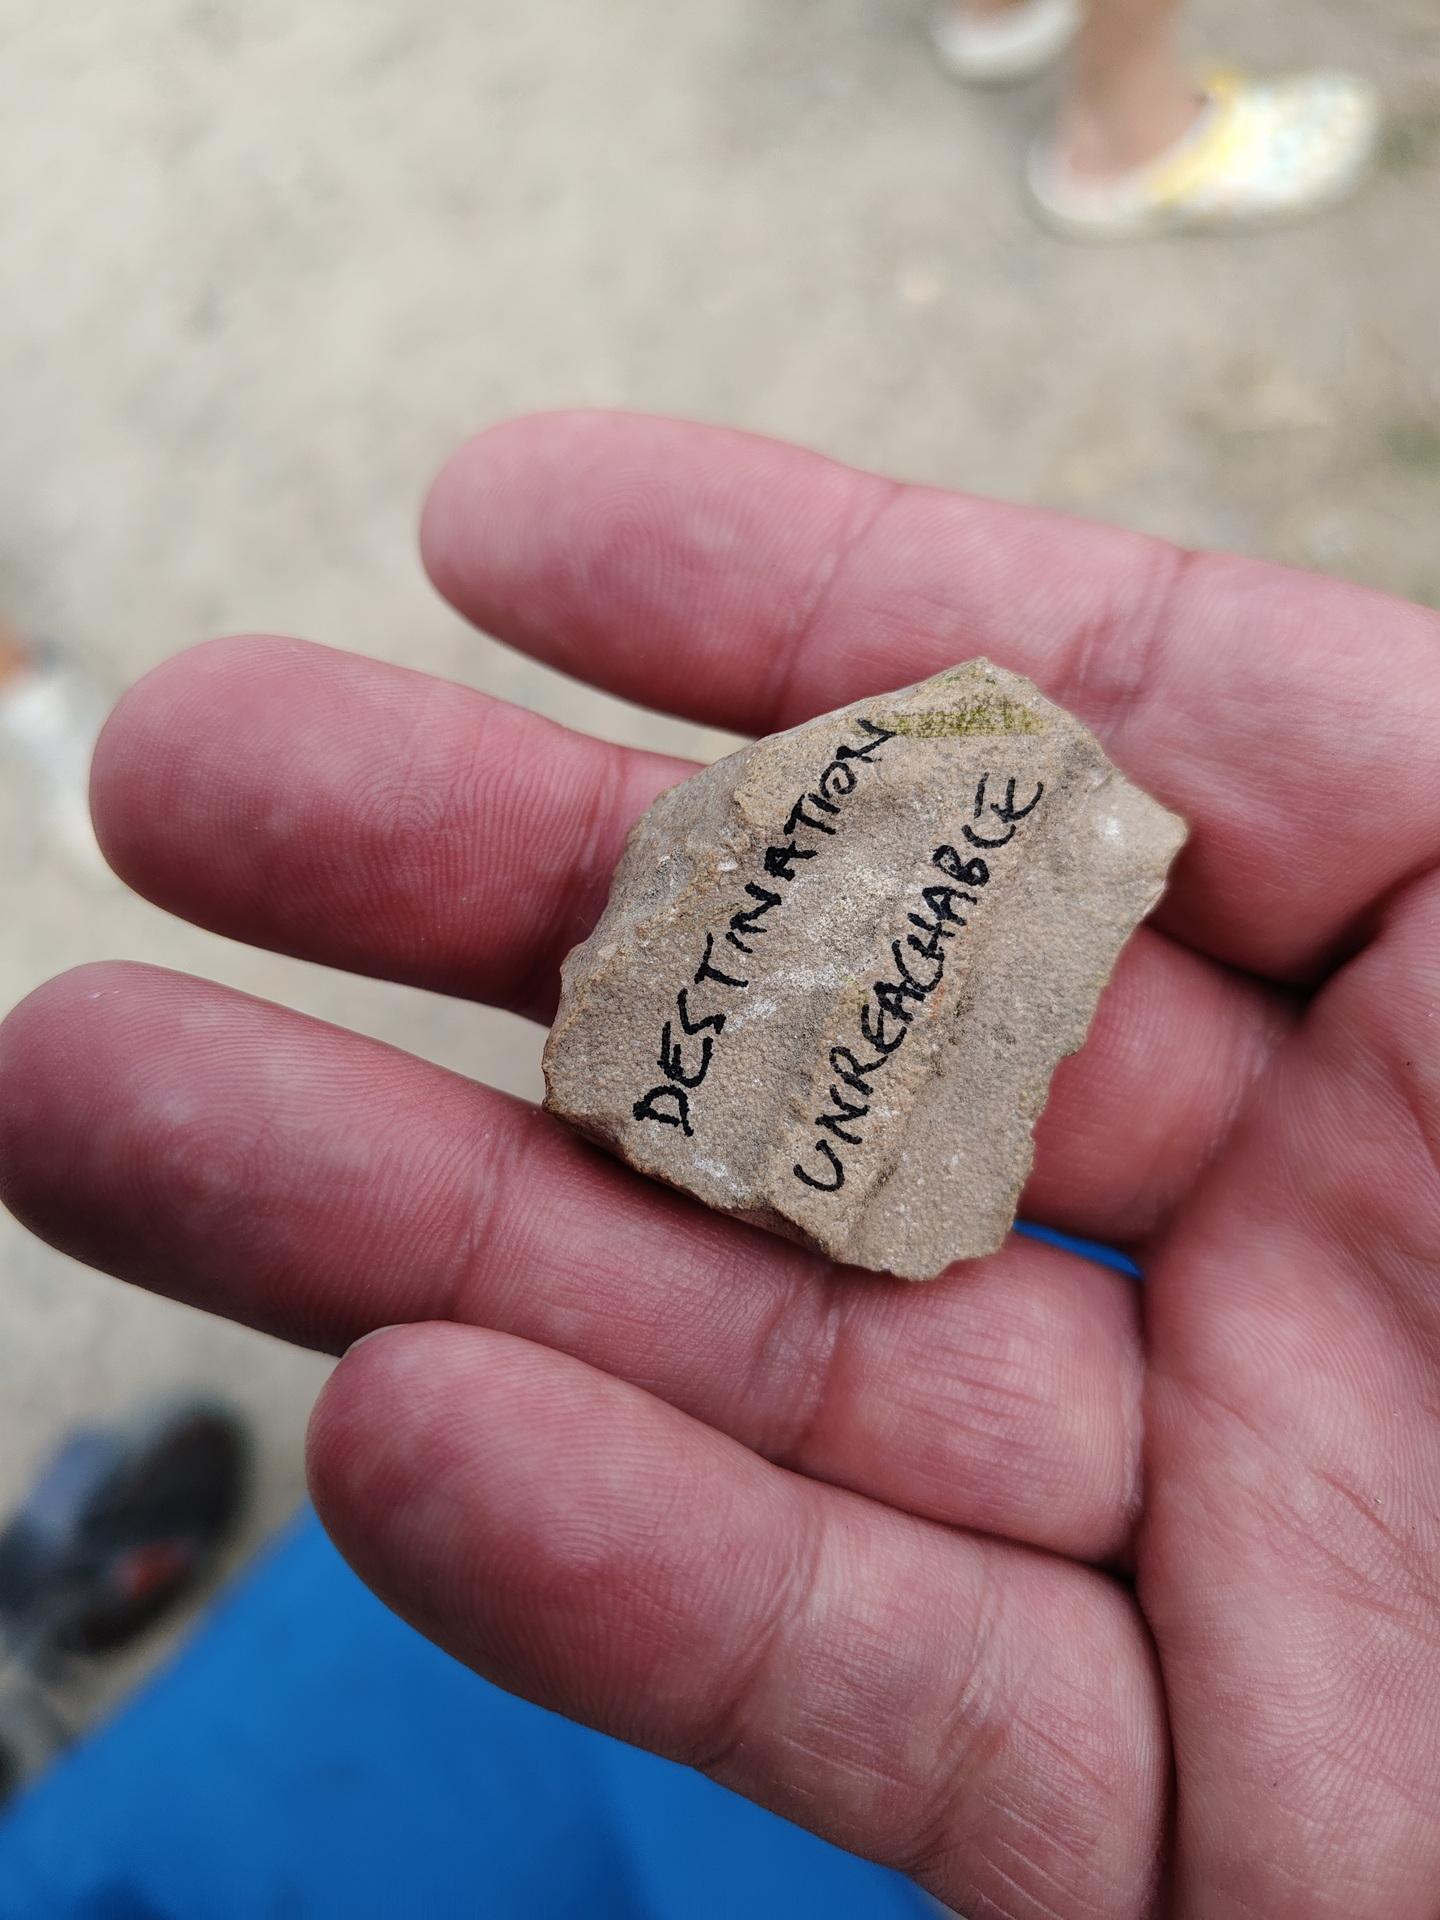
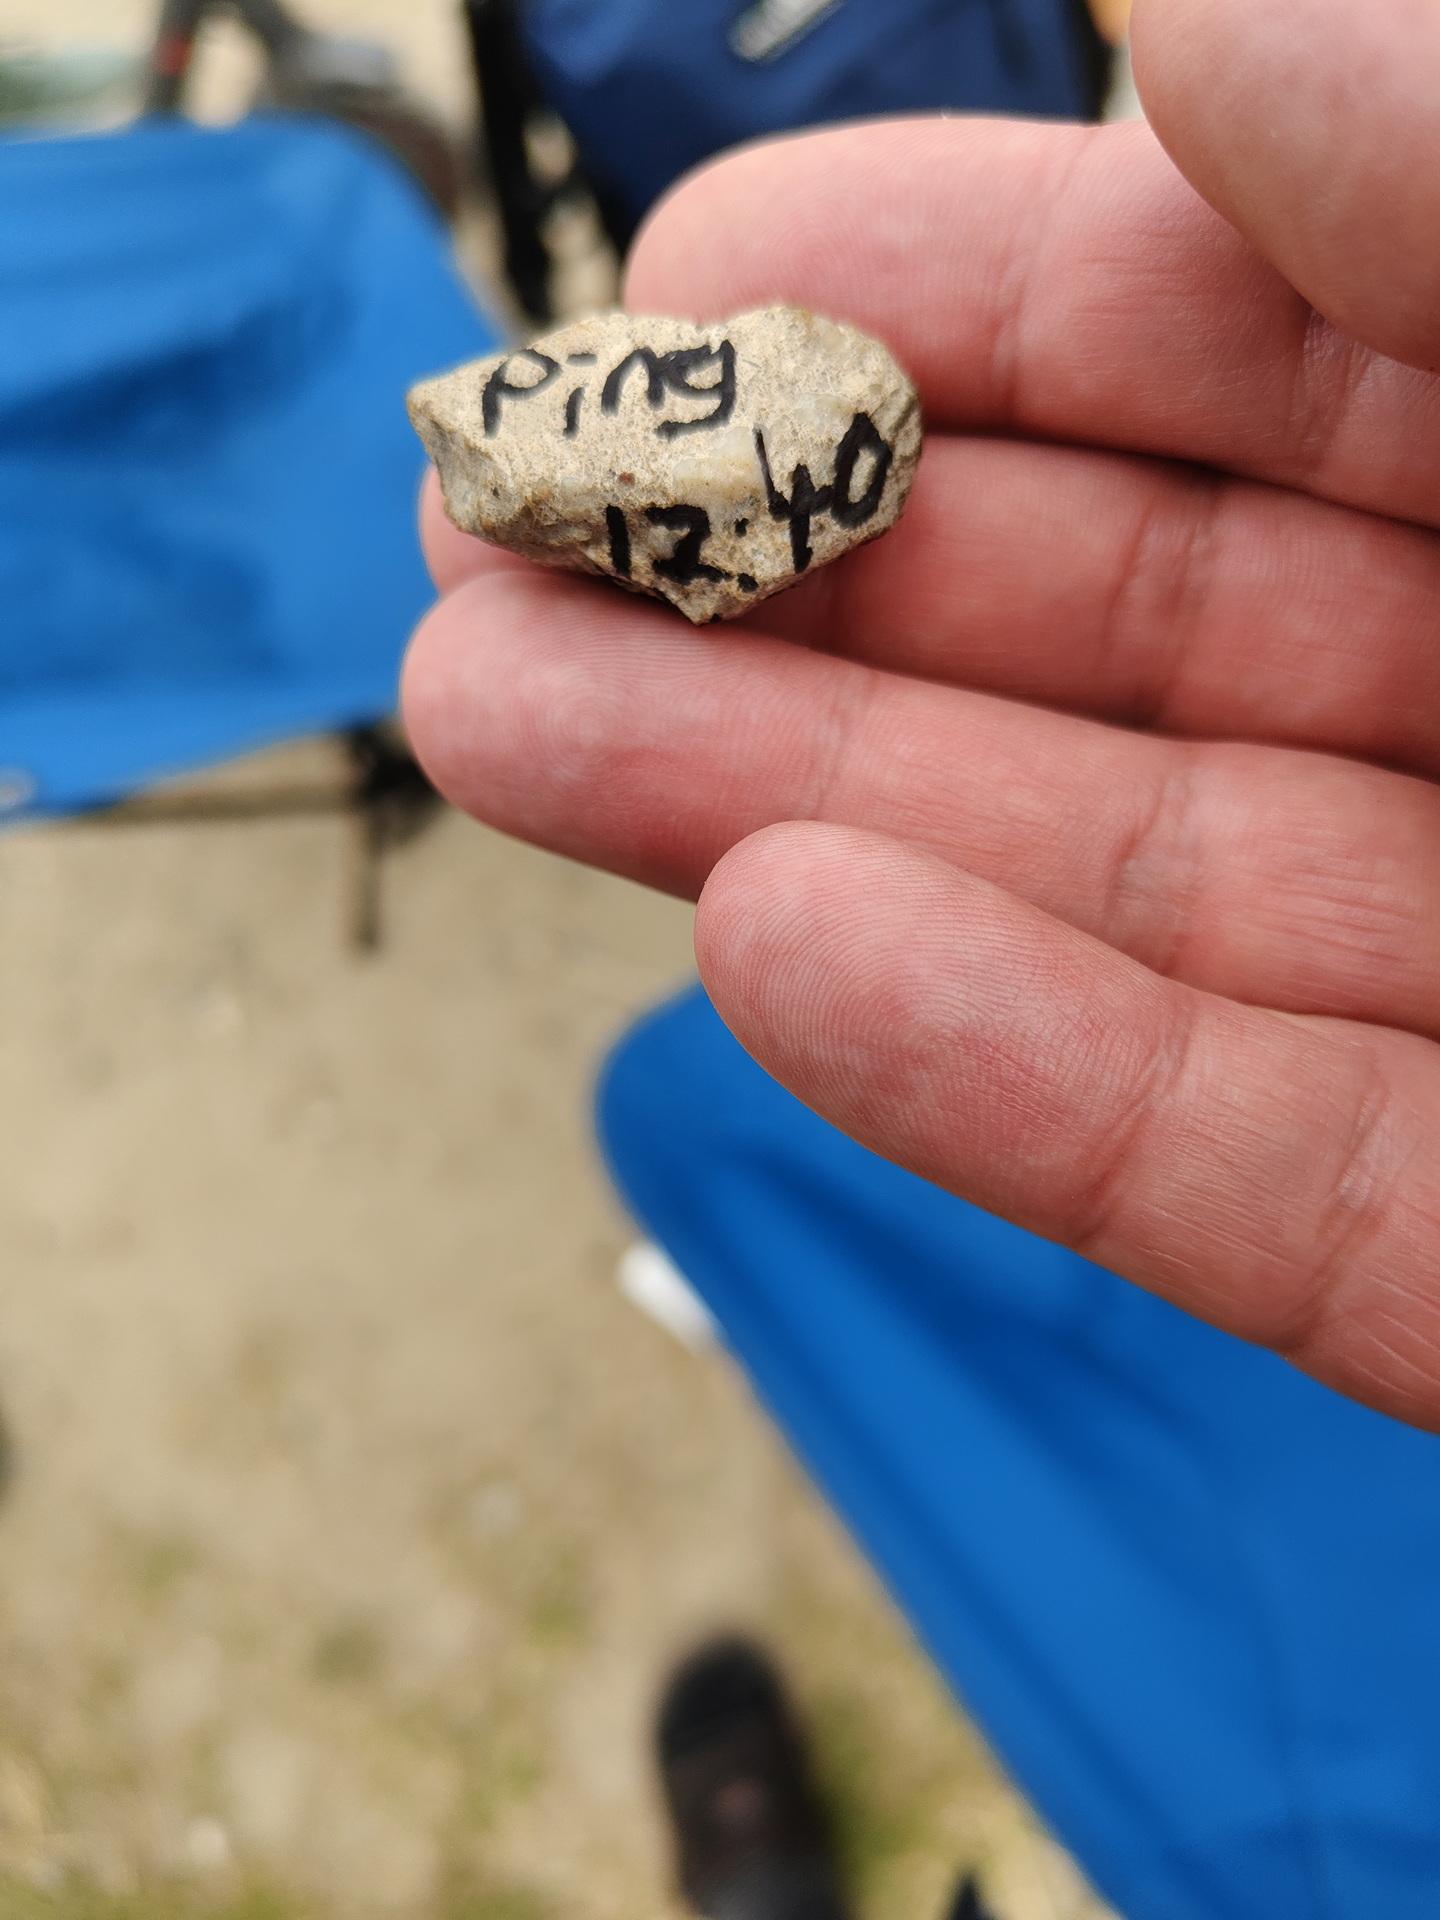
While waiting in line for the Badge:
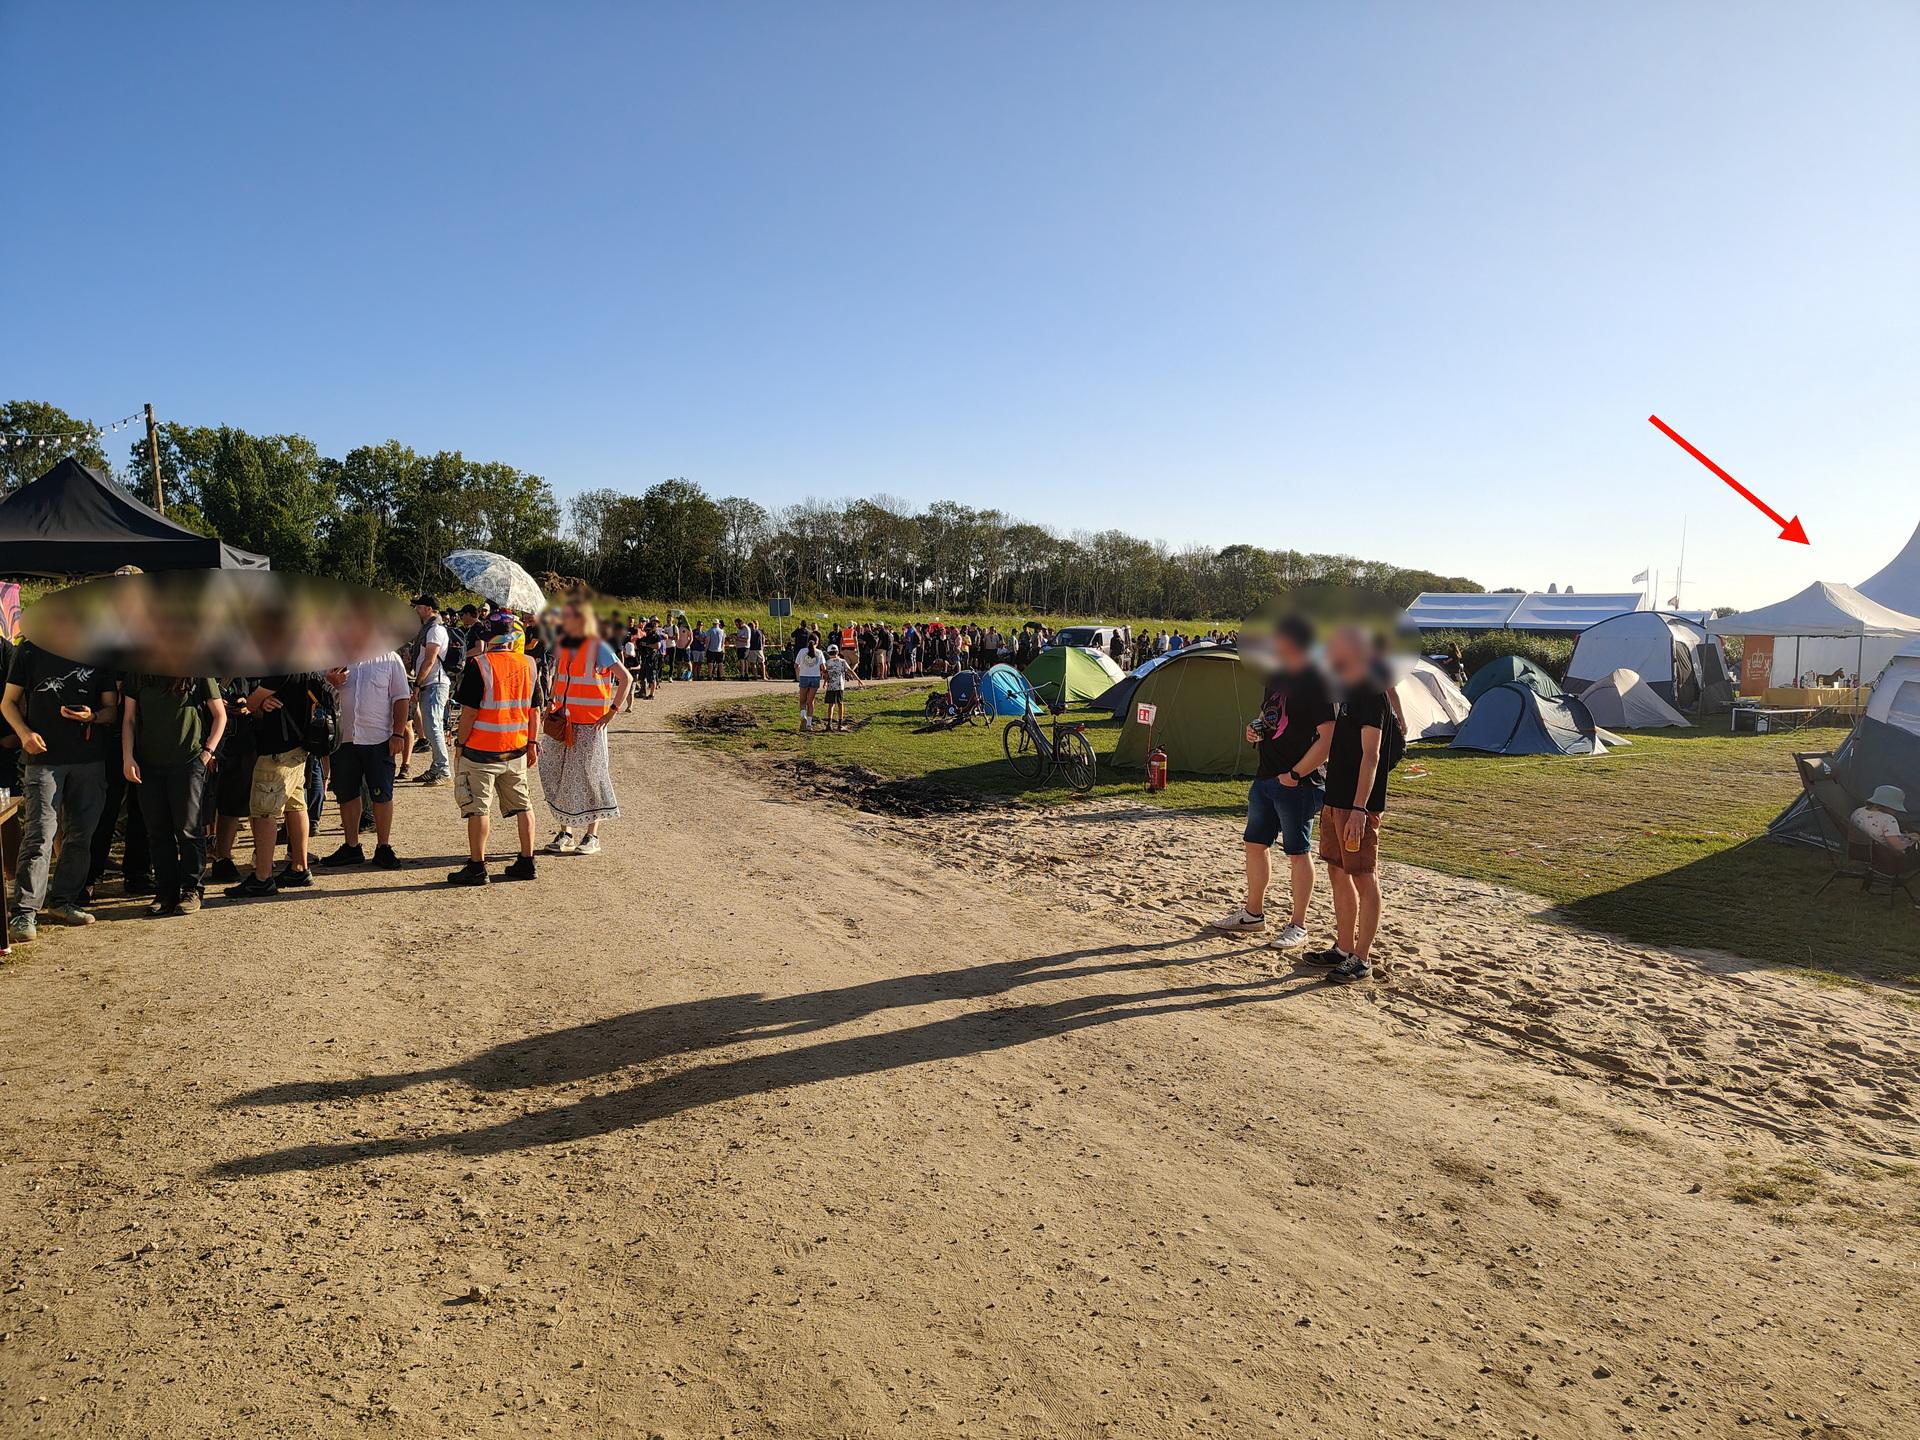
A stone was passed from behind!
It was a ping request. We passed it forward, and 15 minutes later a TTL time exceeded stone came from the front of the line.
You gotta love those nerds!
The Badge:
This should have got much potential ..
Many misses, much to learn.
Sadly broken:
Our 7M Led string attached to Bigred’s Antenna.
BirdNet installation
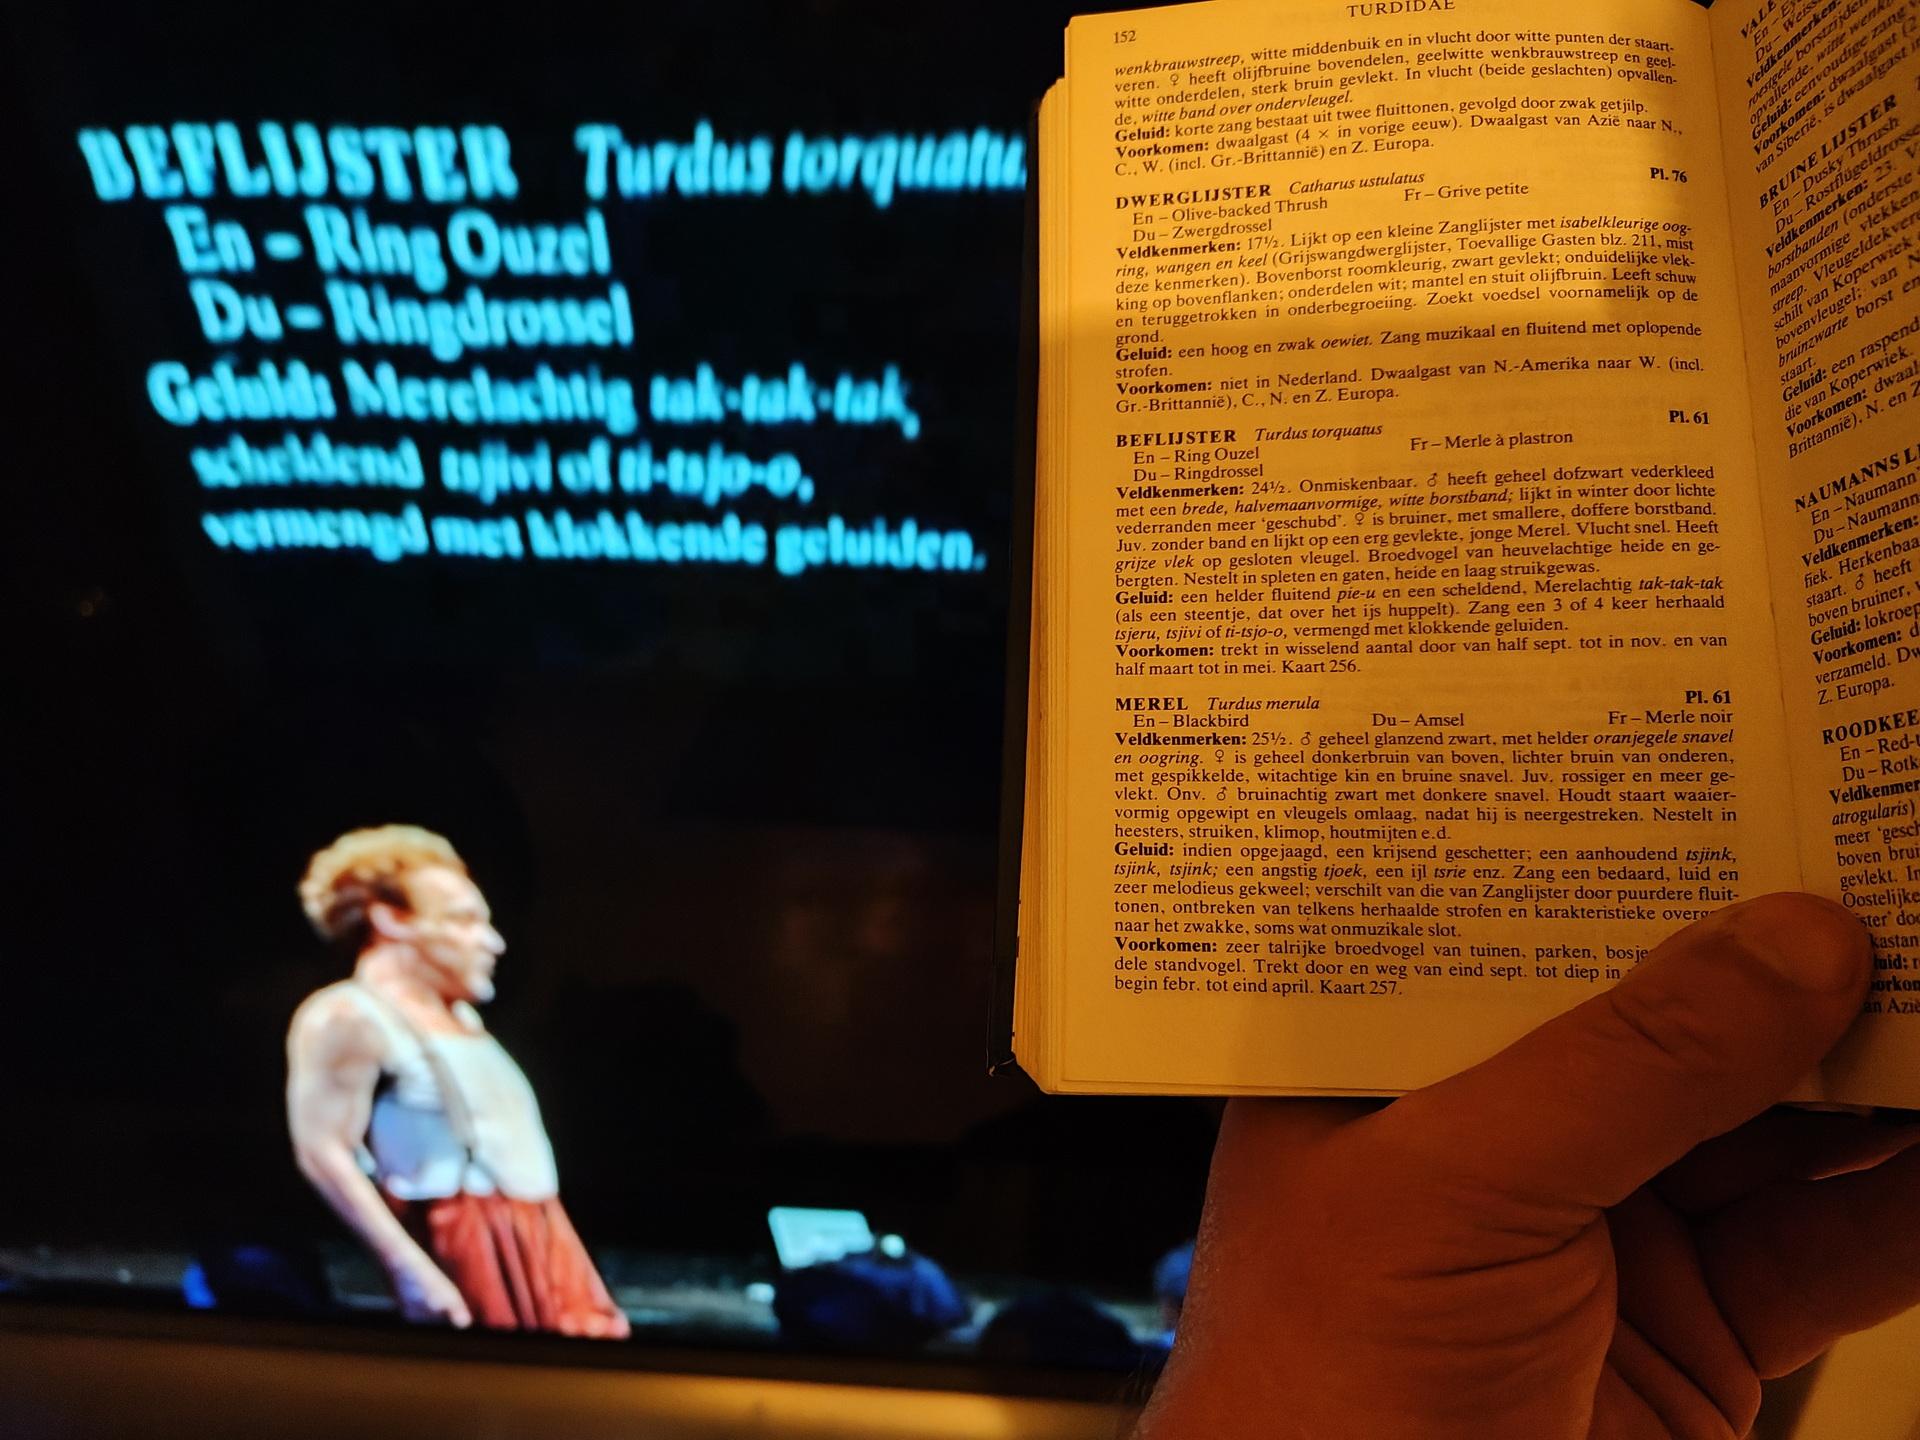
I bought Peterson’s Vogelgids, just for fun.
It’s an old version, but that’s on purpose.

Then I saw a little project named BirdNet Pi.
(I used the Android app already)
This is a Raspberry installation which recognises bird sounds. And gives you statistics about the detected birds.
Cool for identifying birds in my garden.
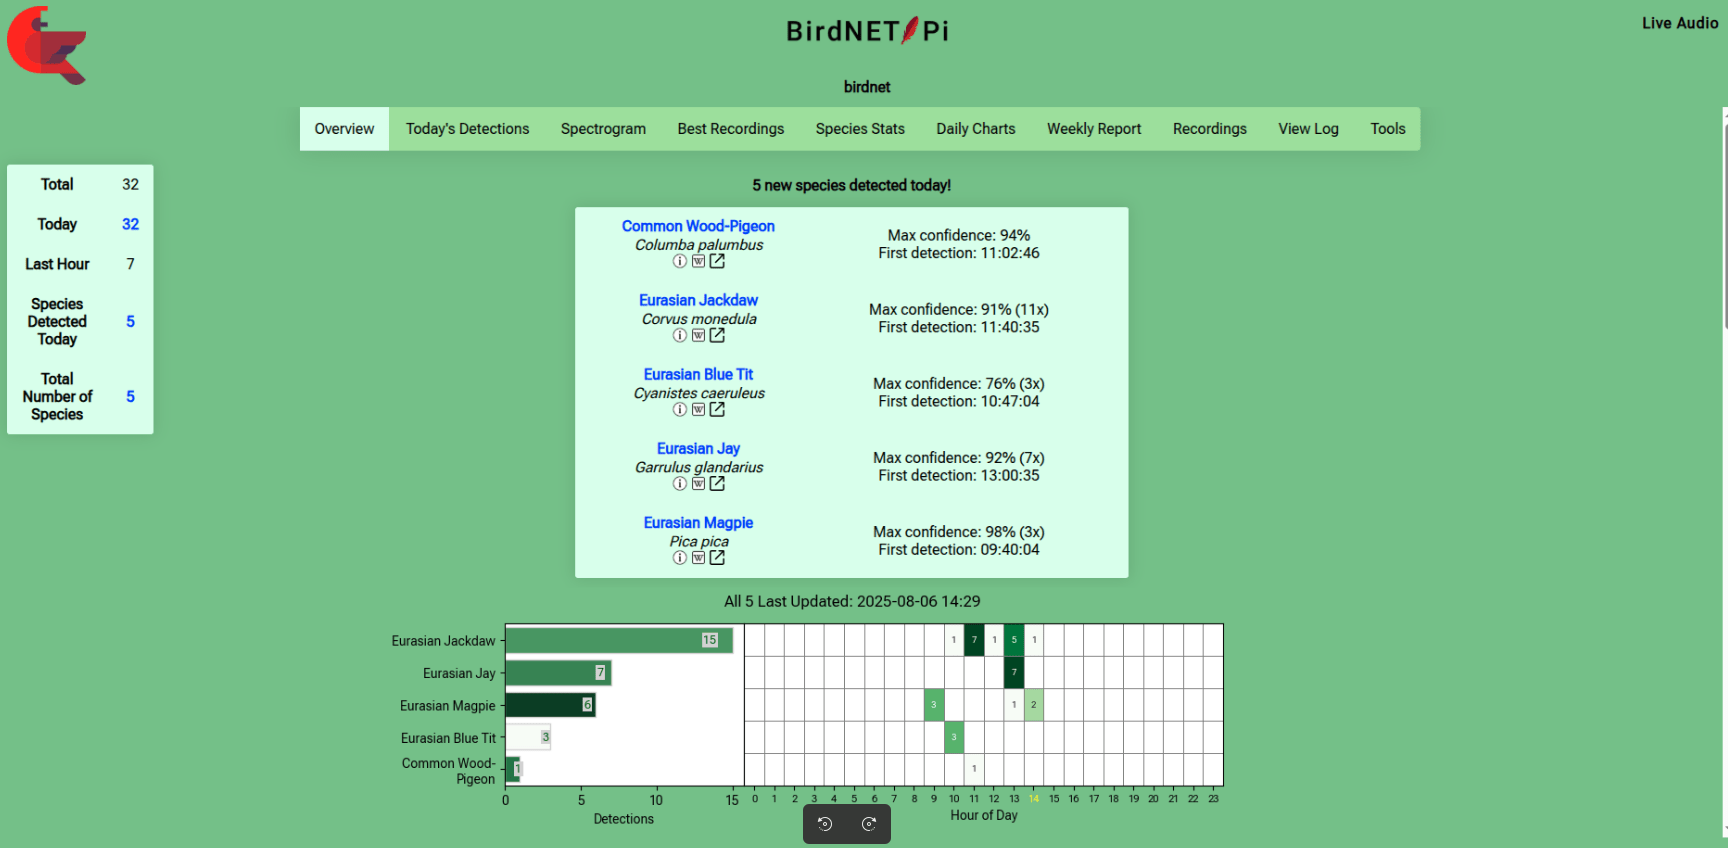
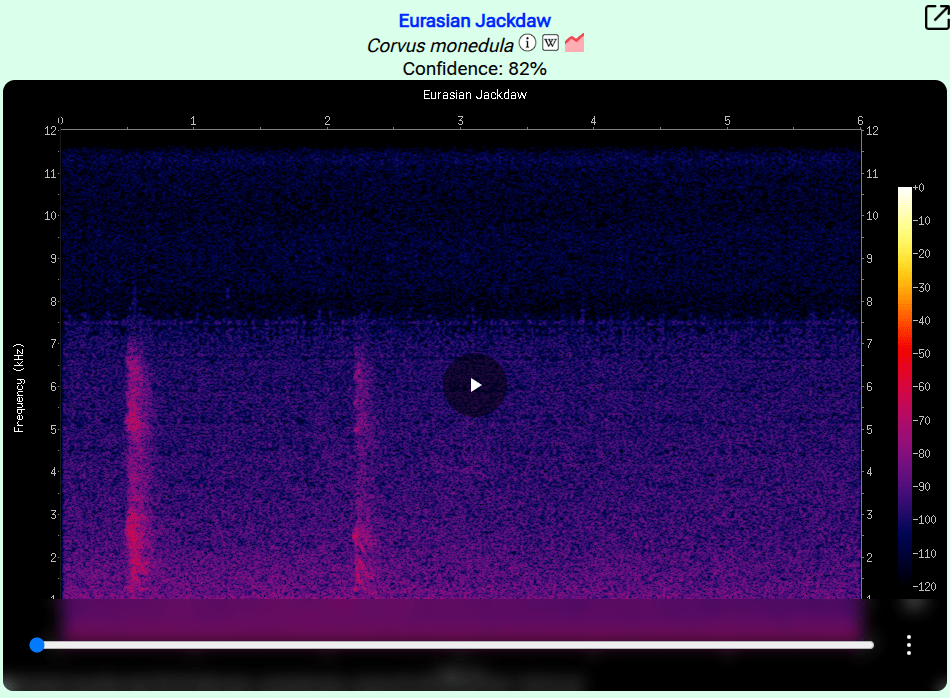
Next to do : Integration in Home Assistant
Bert Visscher has the same book.
Teensy 5.0 with audio shield.
I bought a little audio shield for the Teensy 4.0.
Using the designer at : https://www.pjrc.com/teensy/gui/
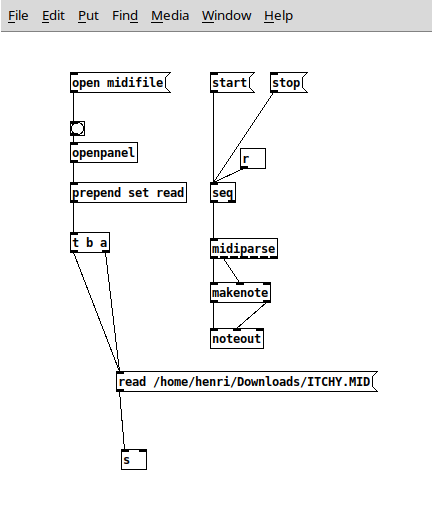
And some Arduino code I made a little midi player.
Melody is being sent with PureData over Midi-USB
Config designer for teensy
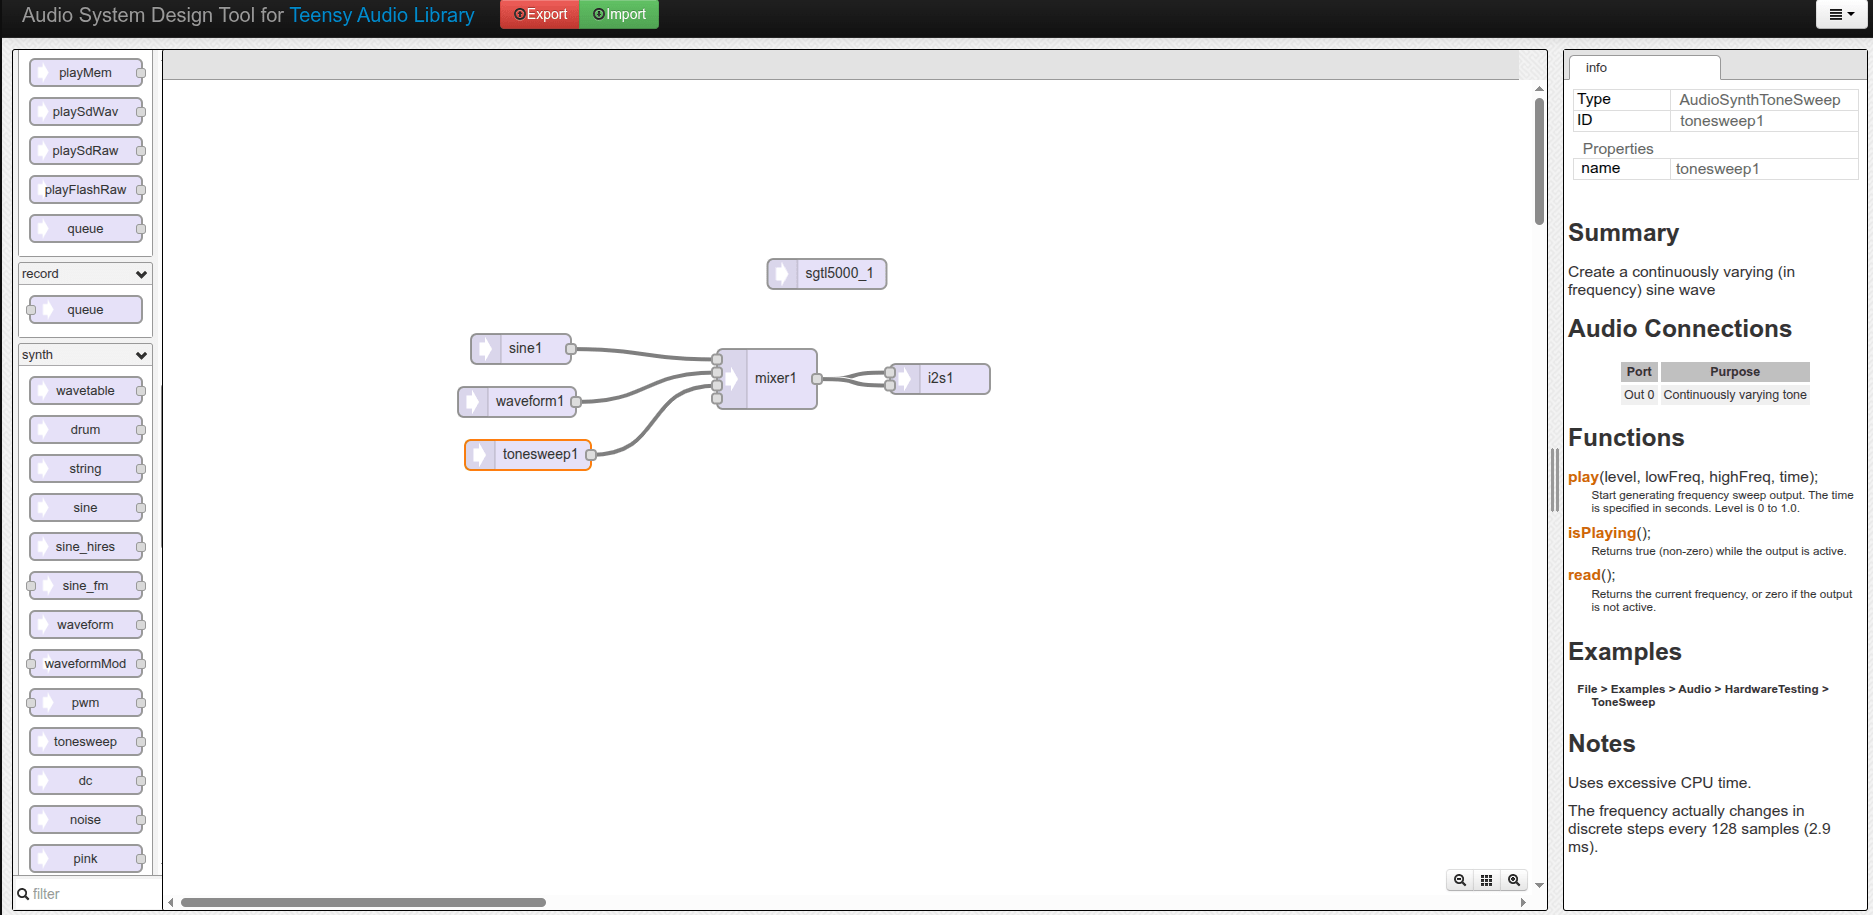
Very nice toy, lots to experiment with.
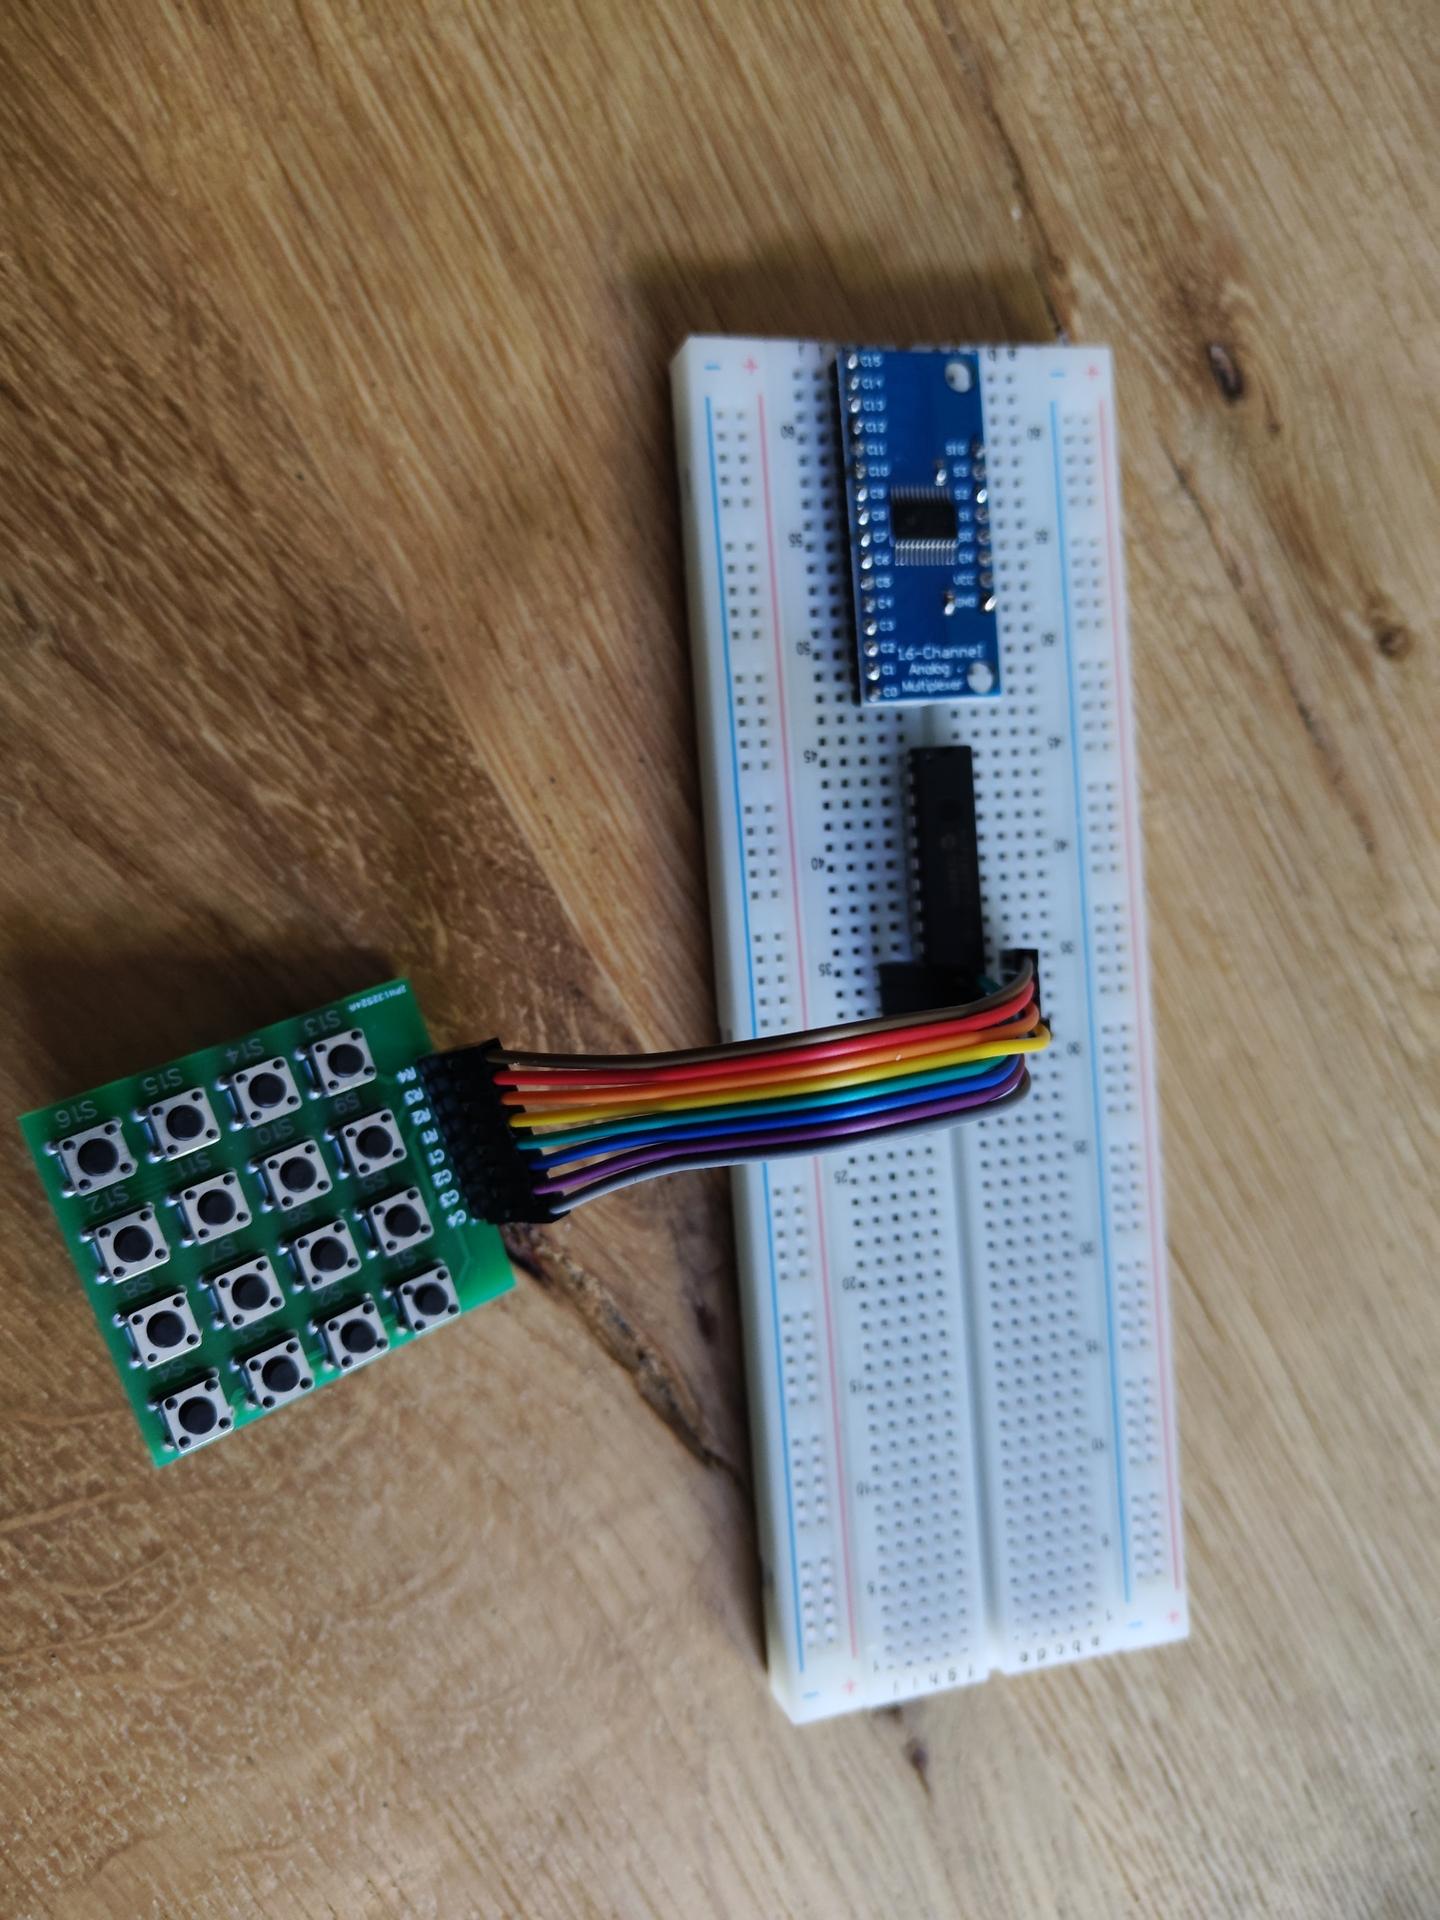
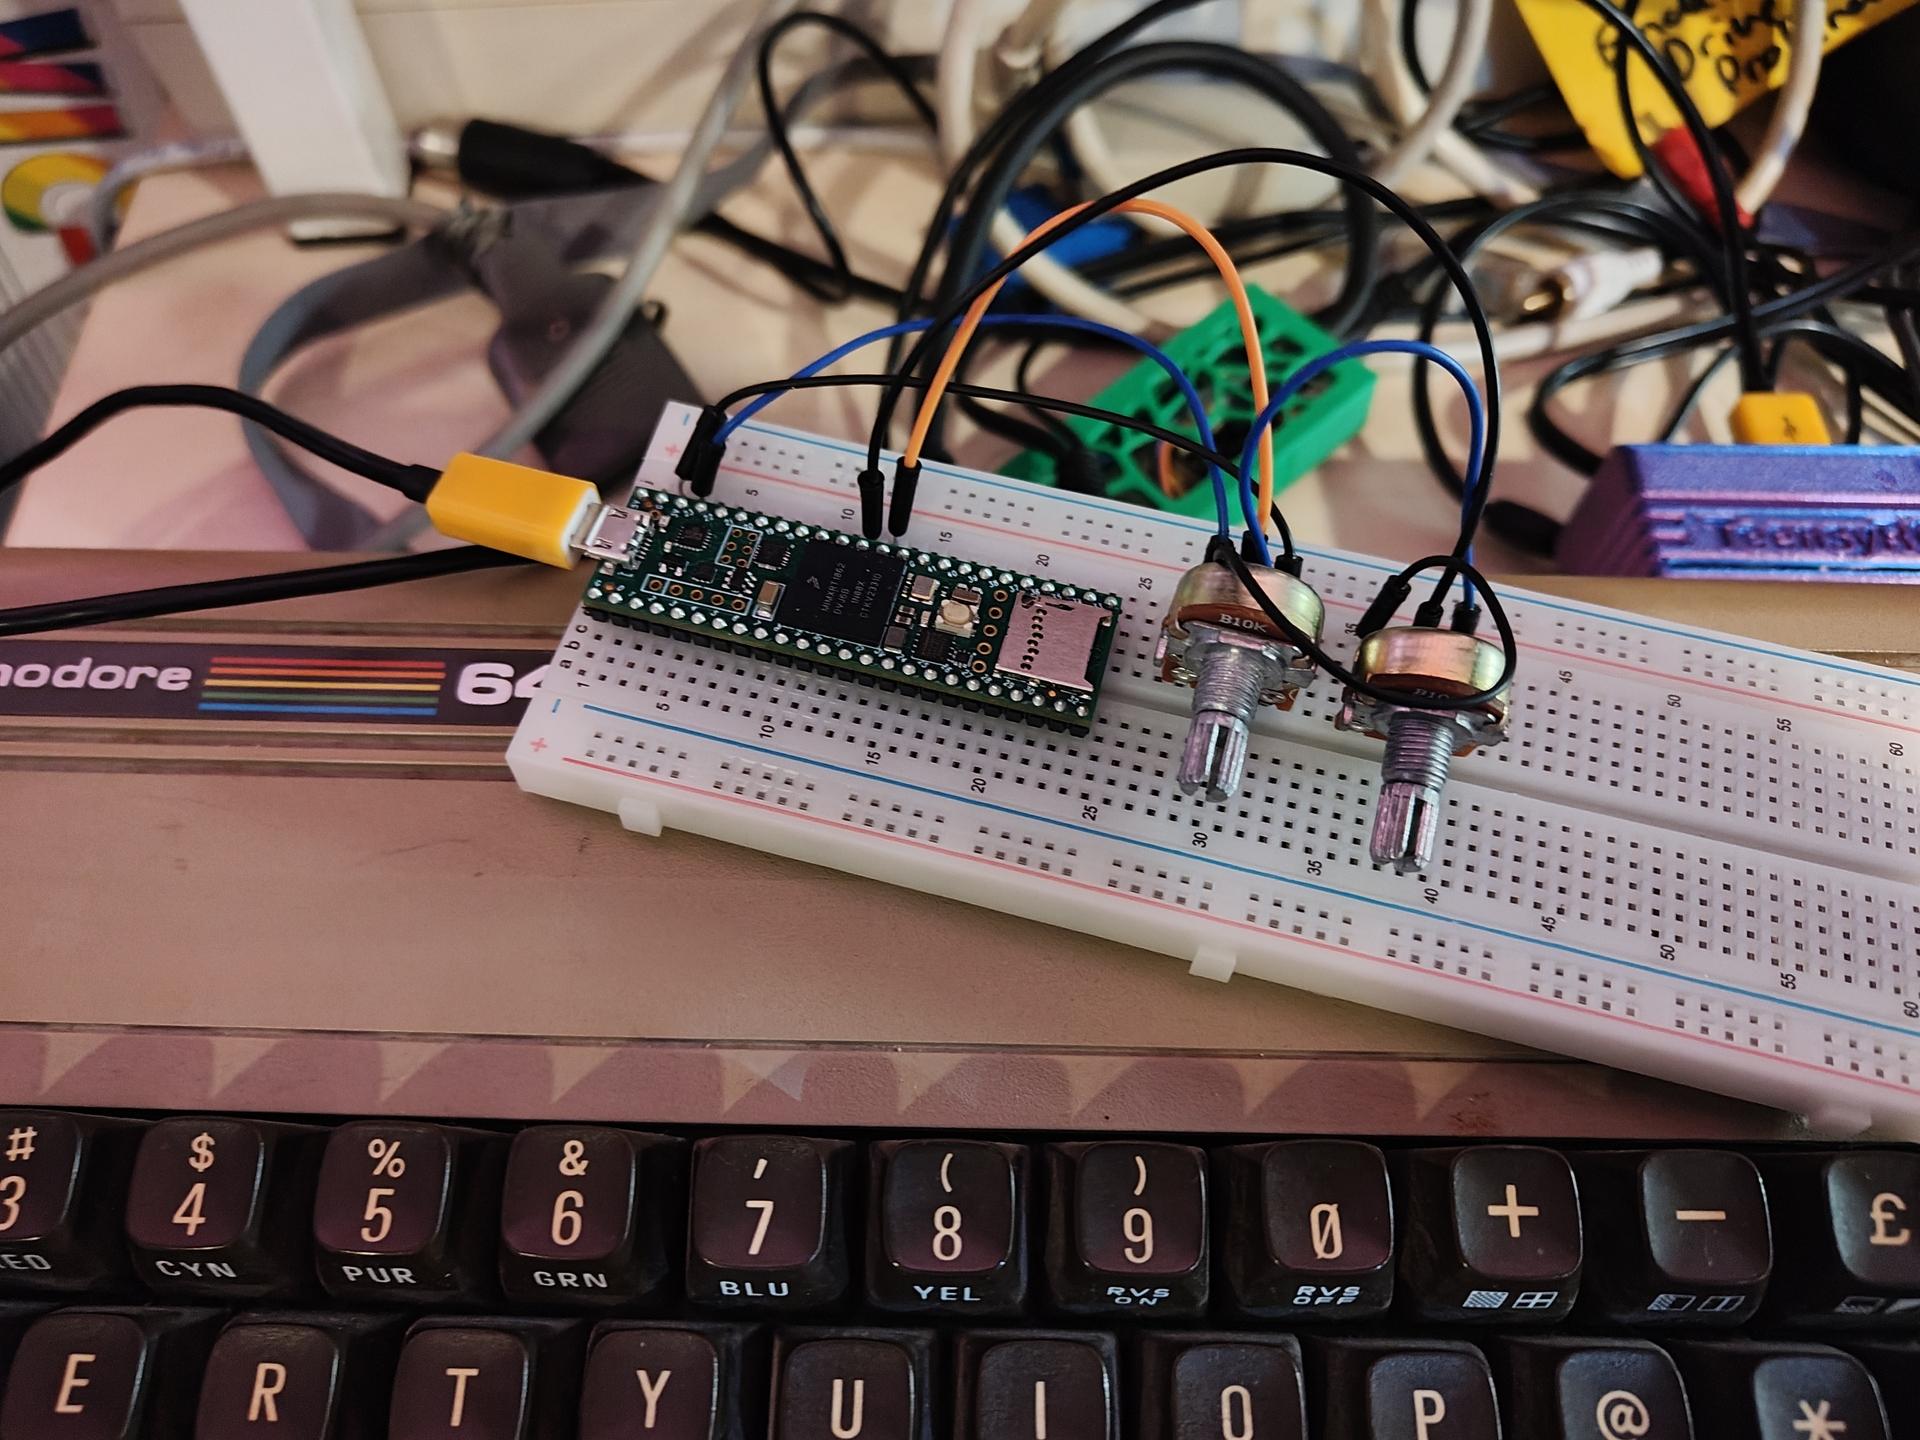
New midi controller
Designing a new, more flexible, midi controller
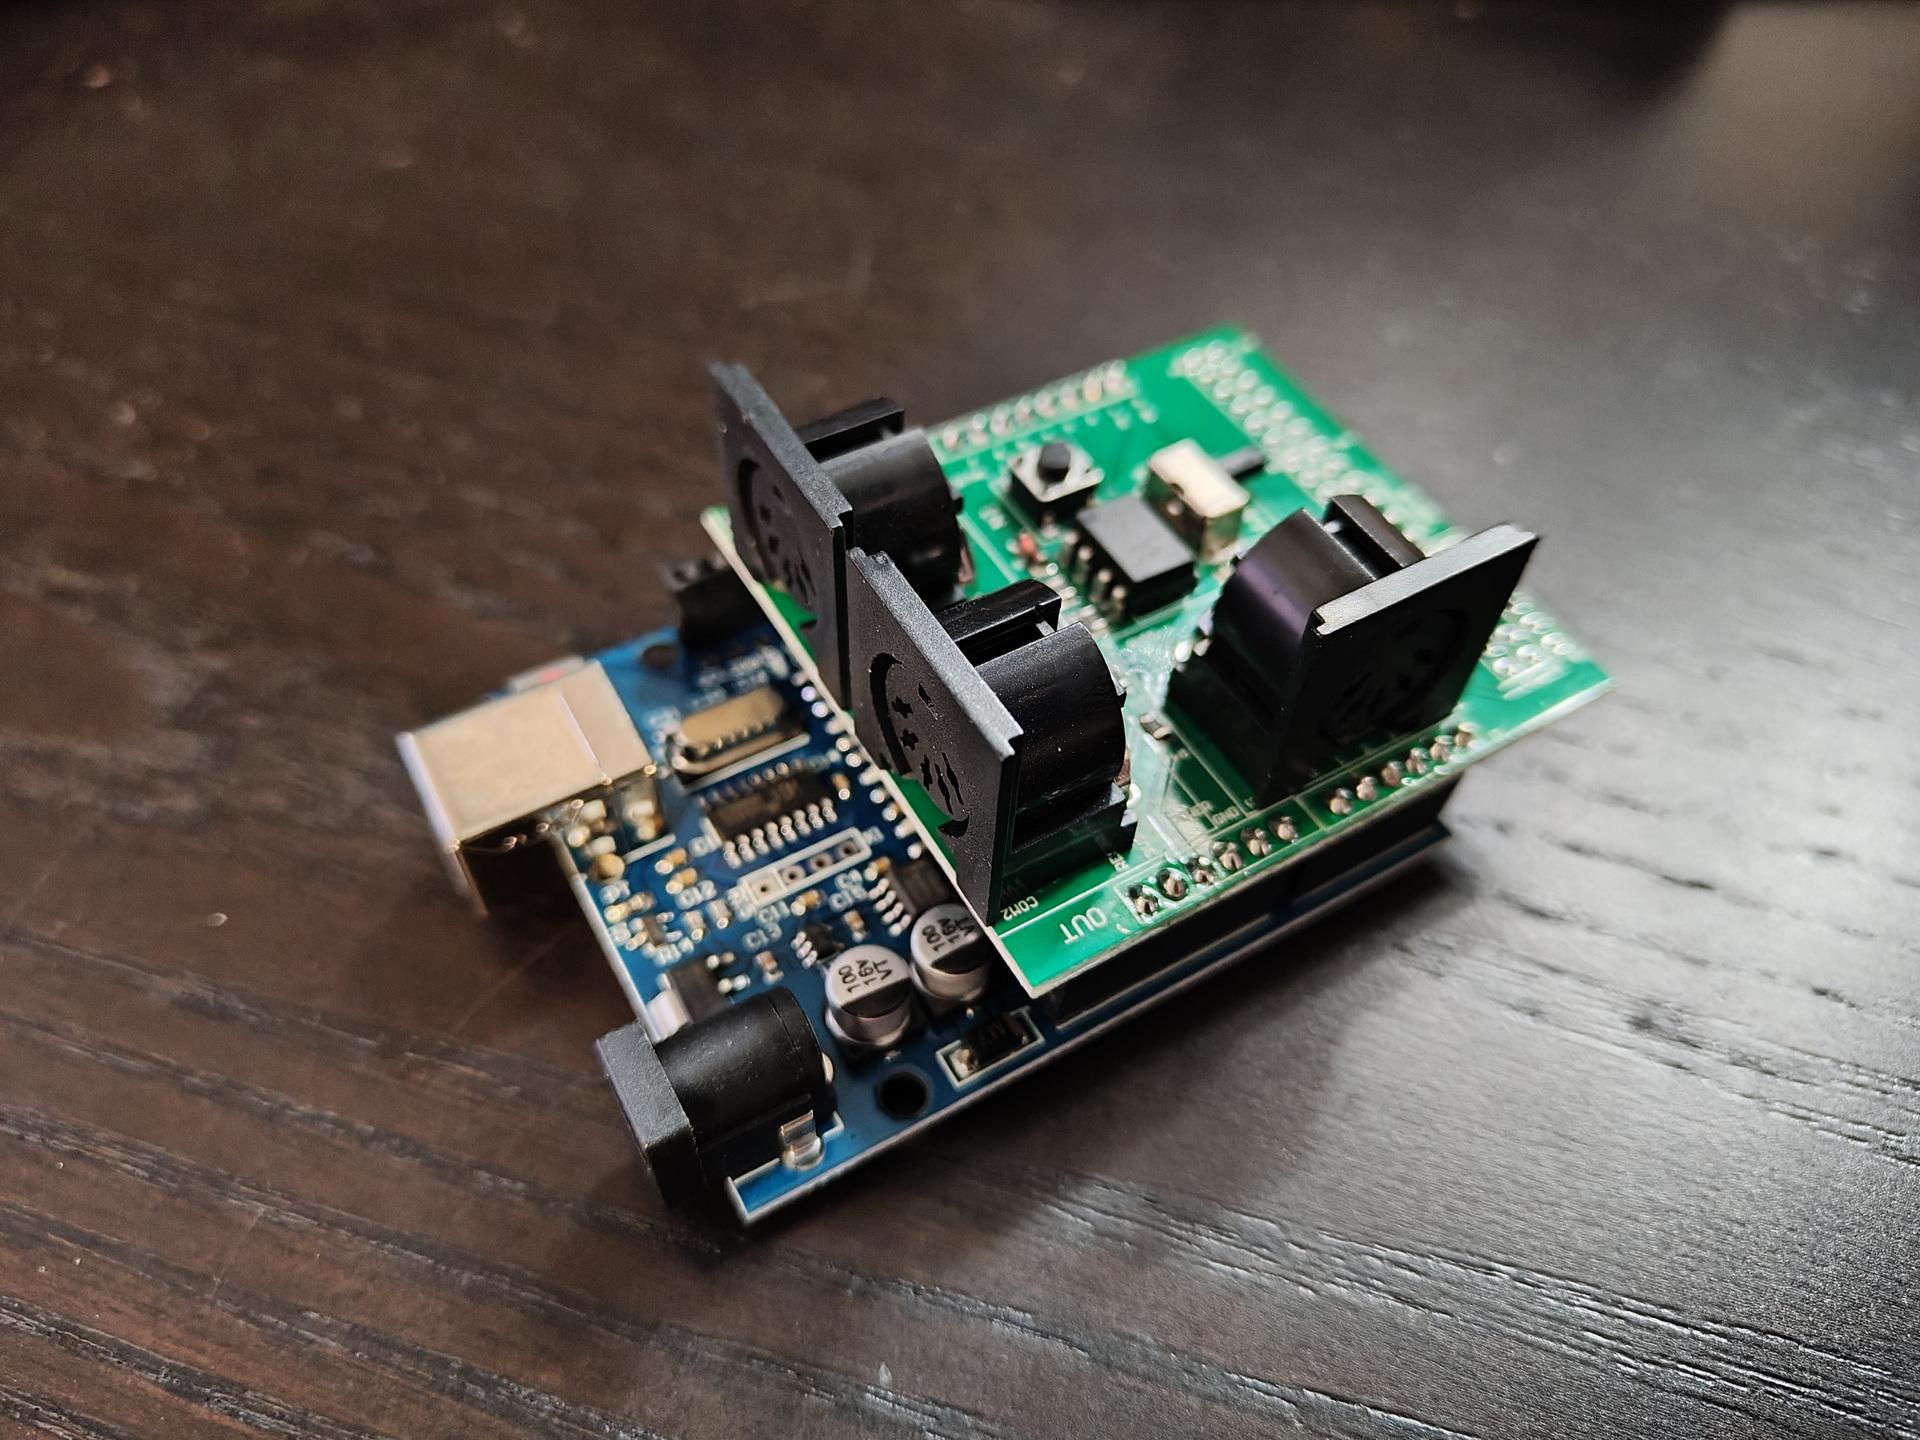
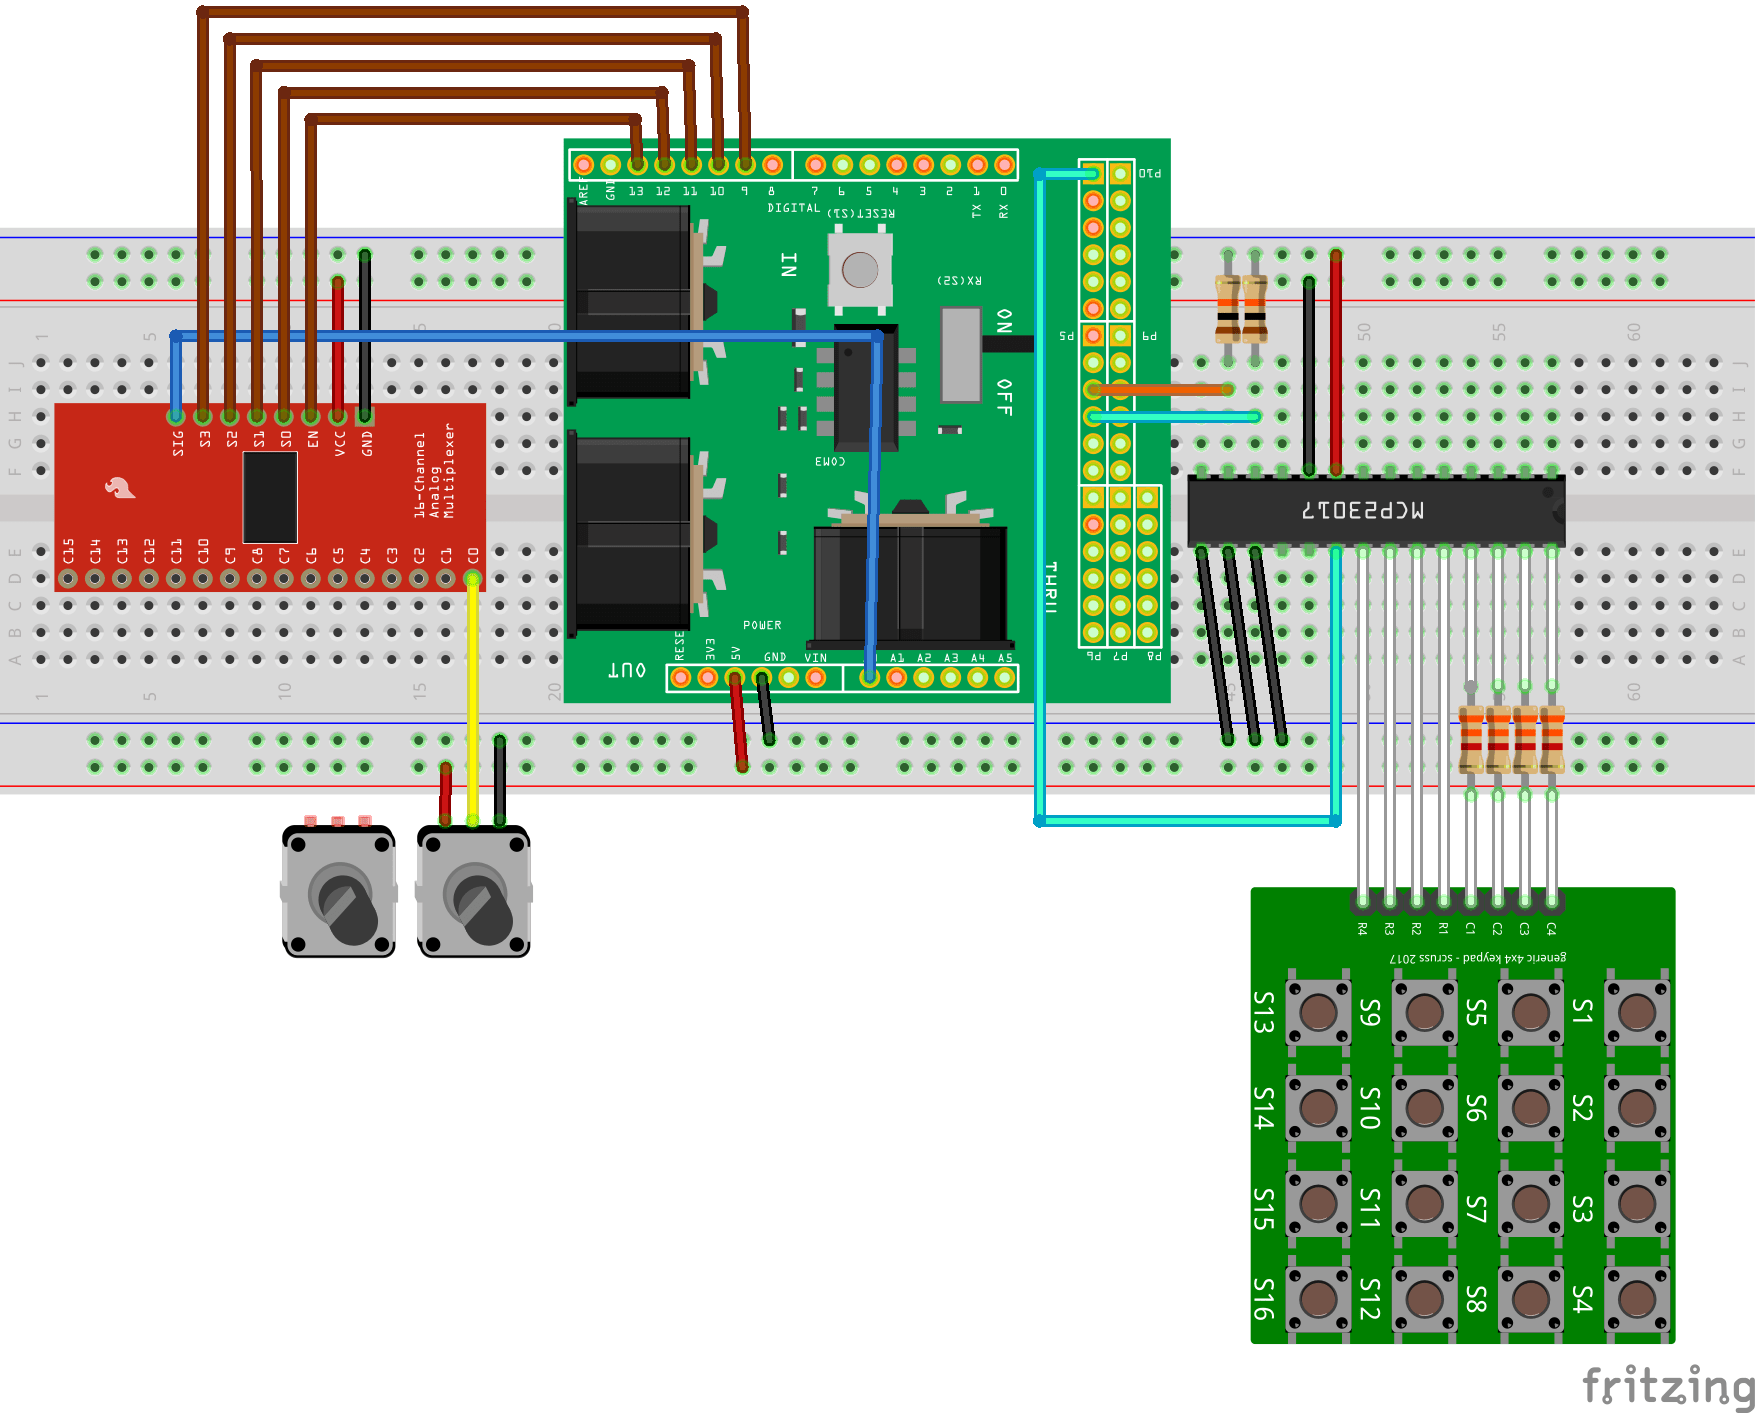
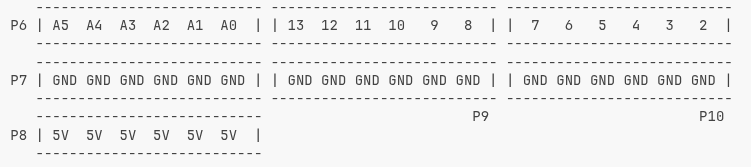
Analogue multiplexer for potentiometers, and MCP I2C IO extender for matrix keyboard.

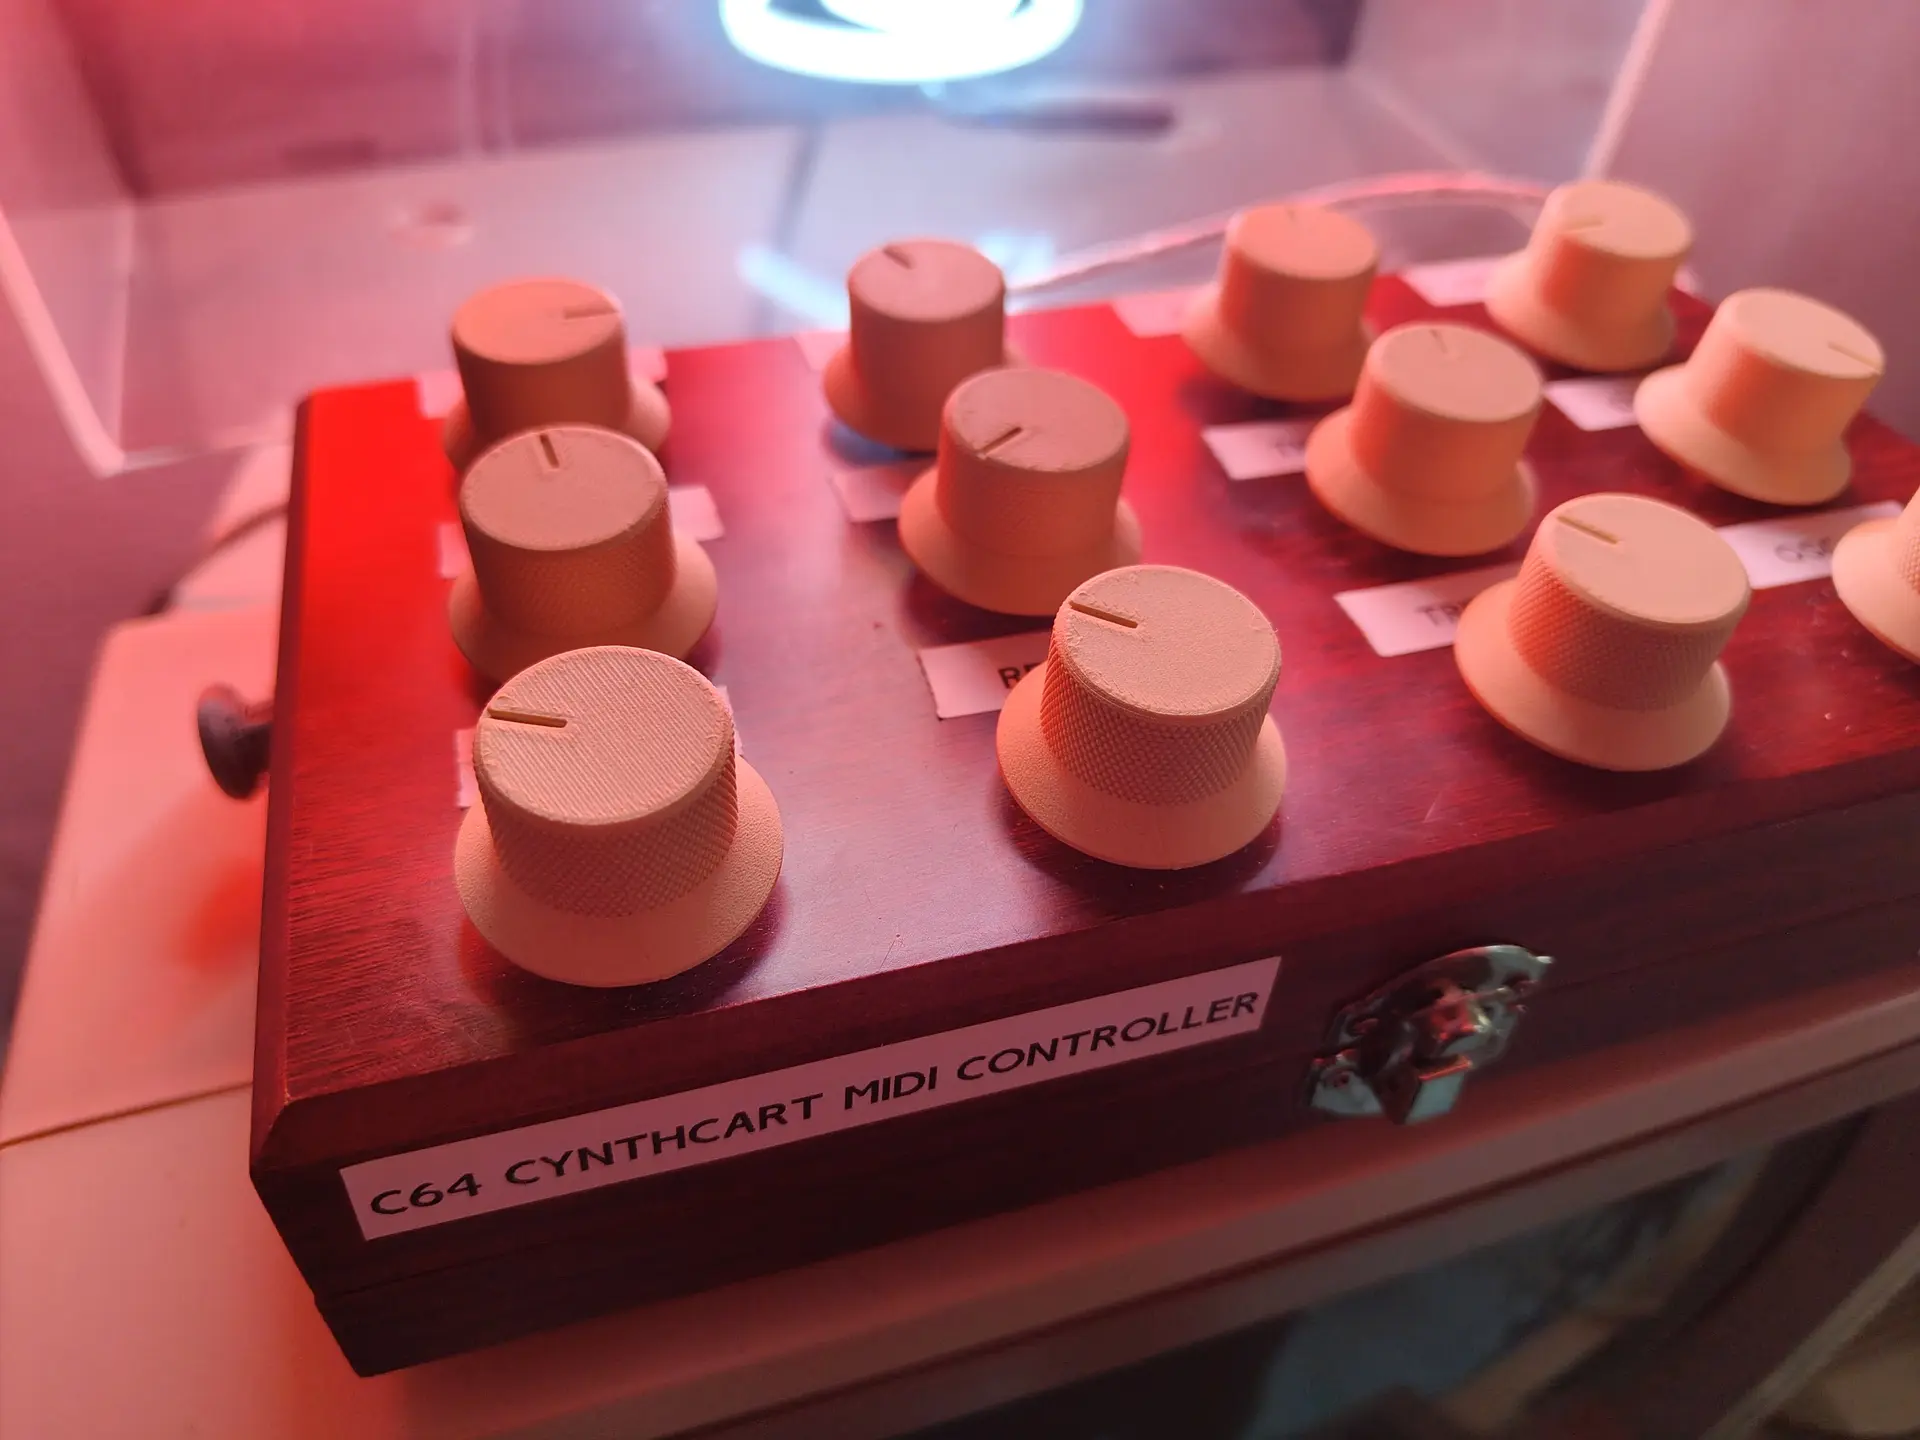
Cynthcart (c64) midi control
I bought a teensyrom a while ago.
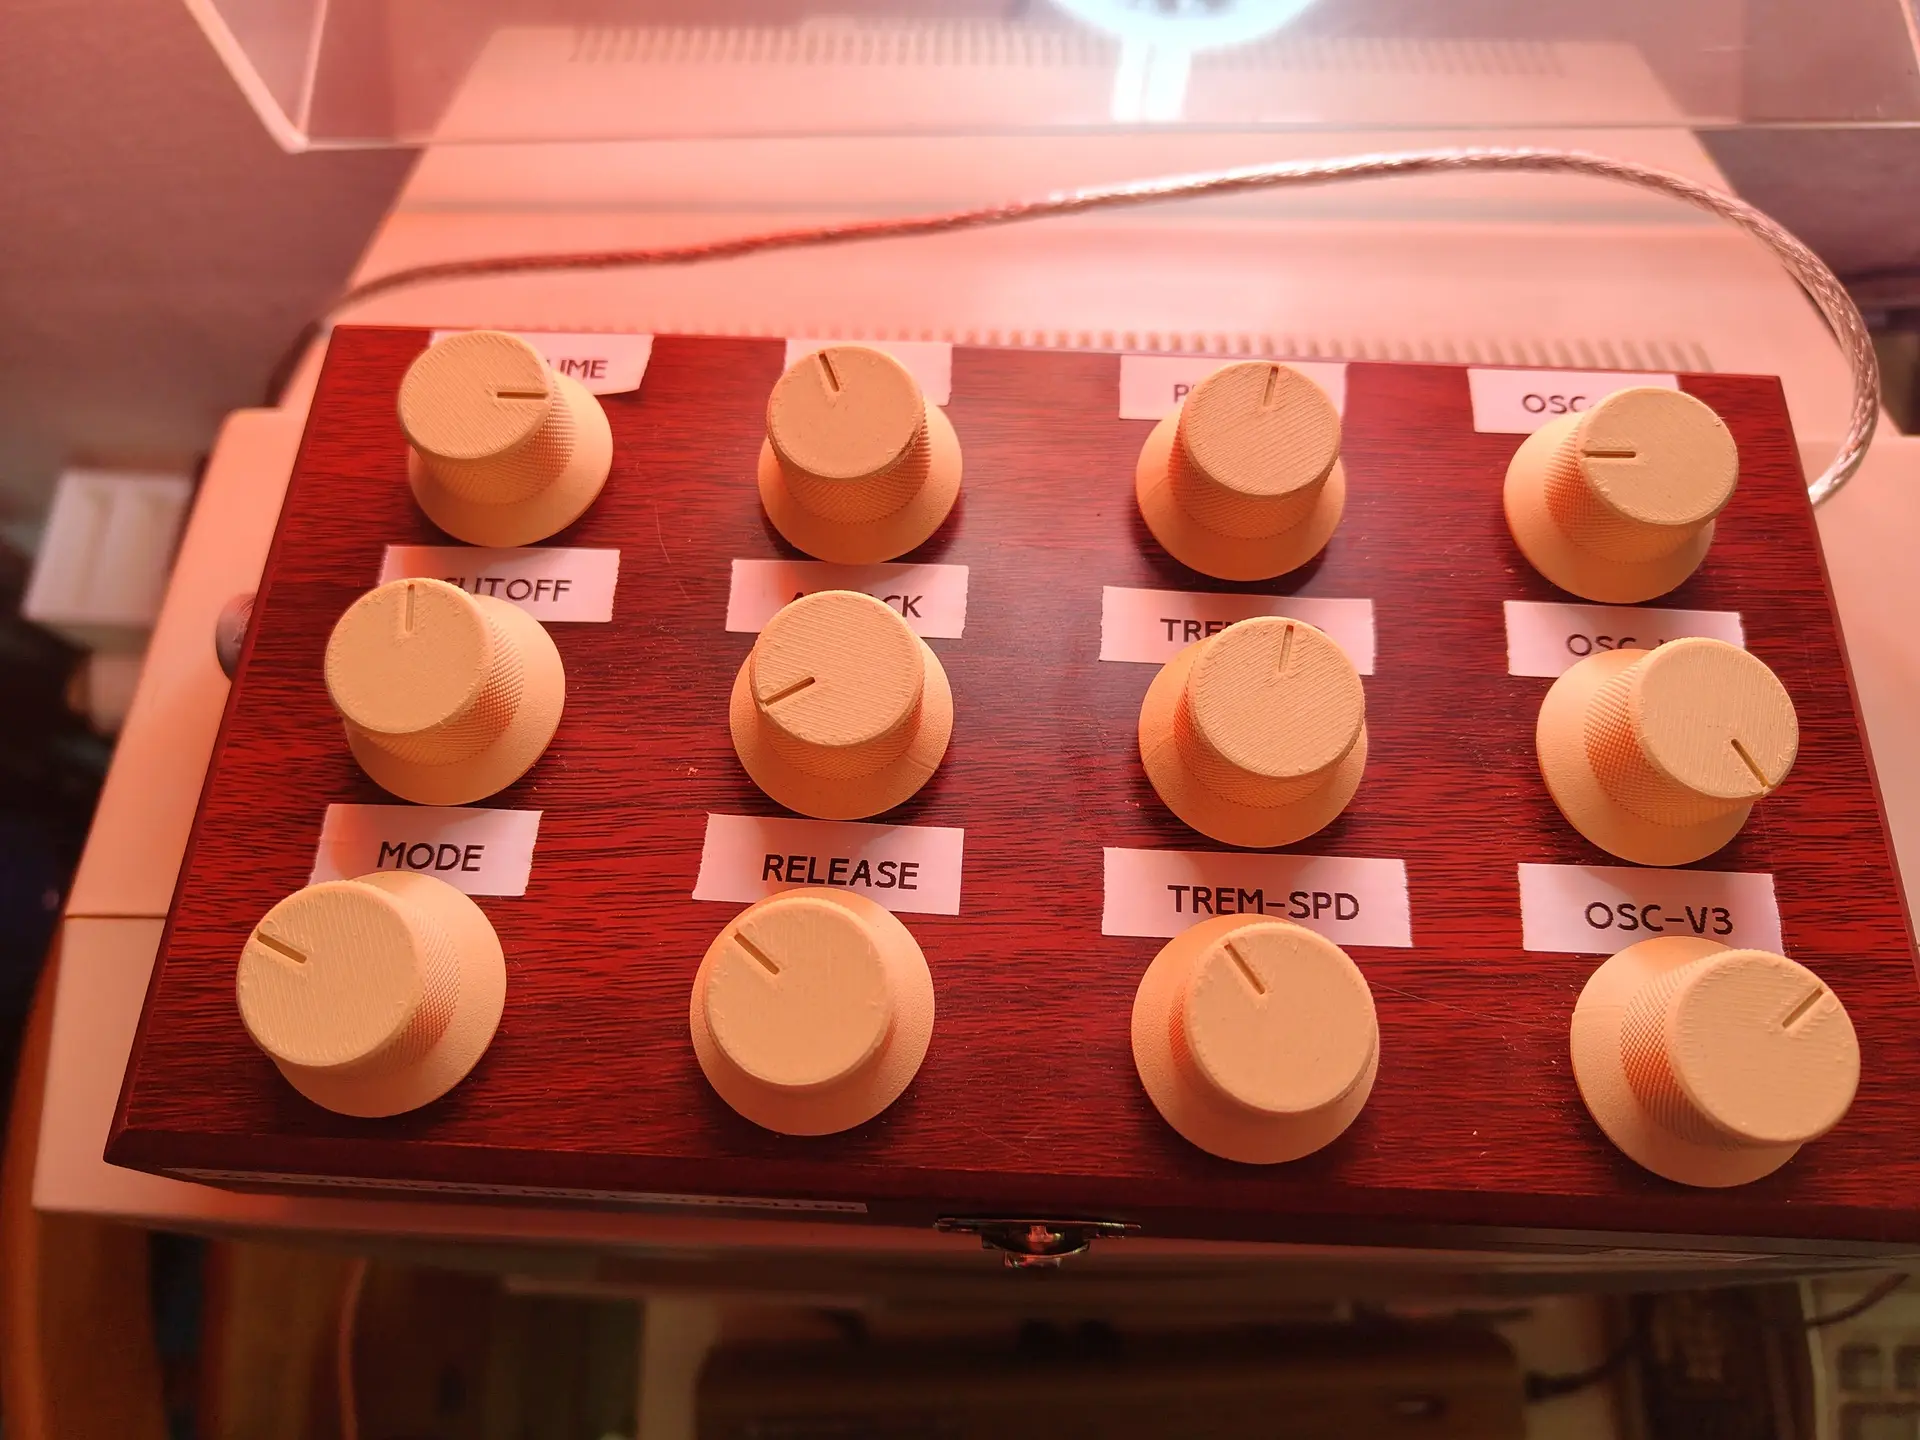
UPDATE 20250712 : Display
UPDATE 20250904 : Added PitchBend and stabilized potmeters.
Tyrone and I wanted to control the settings using potmeters.
So I grabbed a Teensy 4.1 controller and some 10K potmeters, and worte some code
Code for 12 pots, pitch bend and display, don’t forget to set your USB mode to midi!
Schematic soon, also all tweaks and note sending.
Todo: Nice 3D printed Pitch Bend wheel, rest of display code and extra buttons!
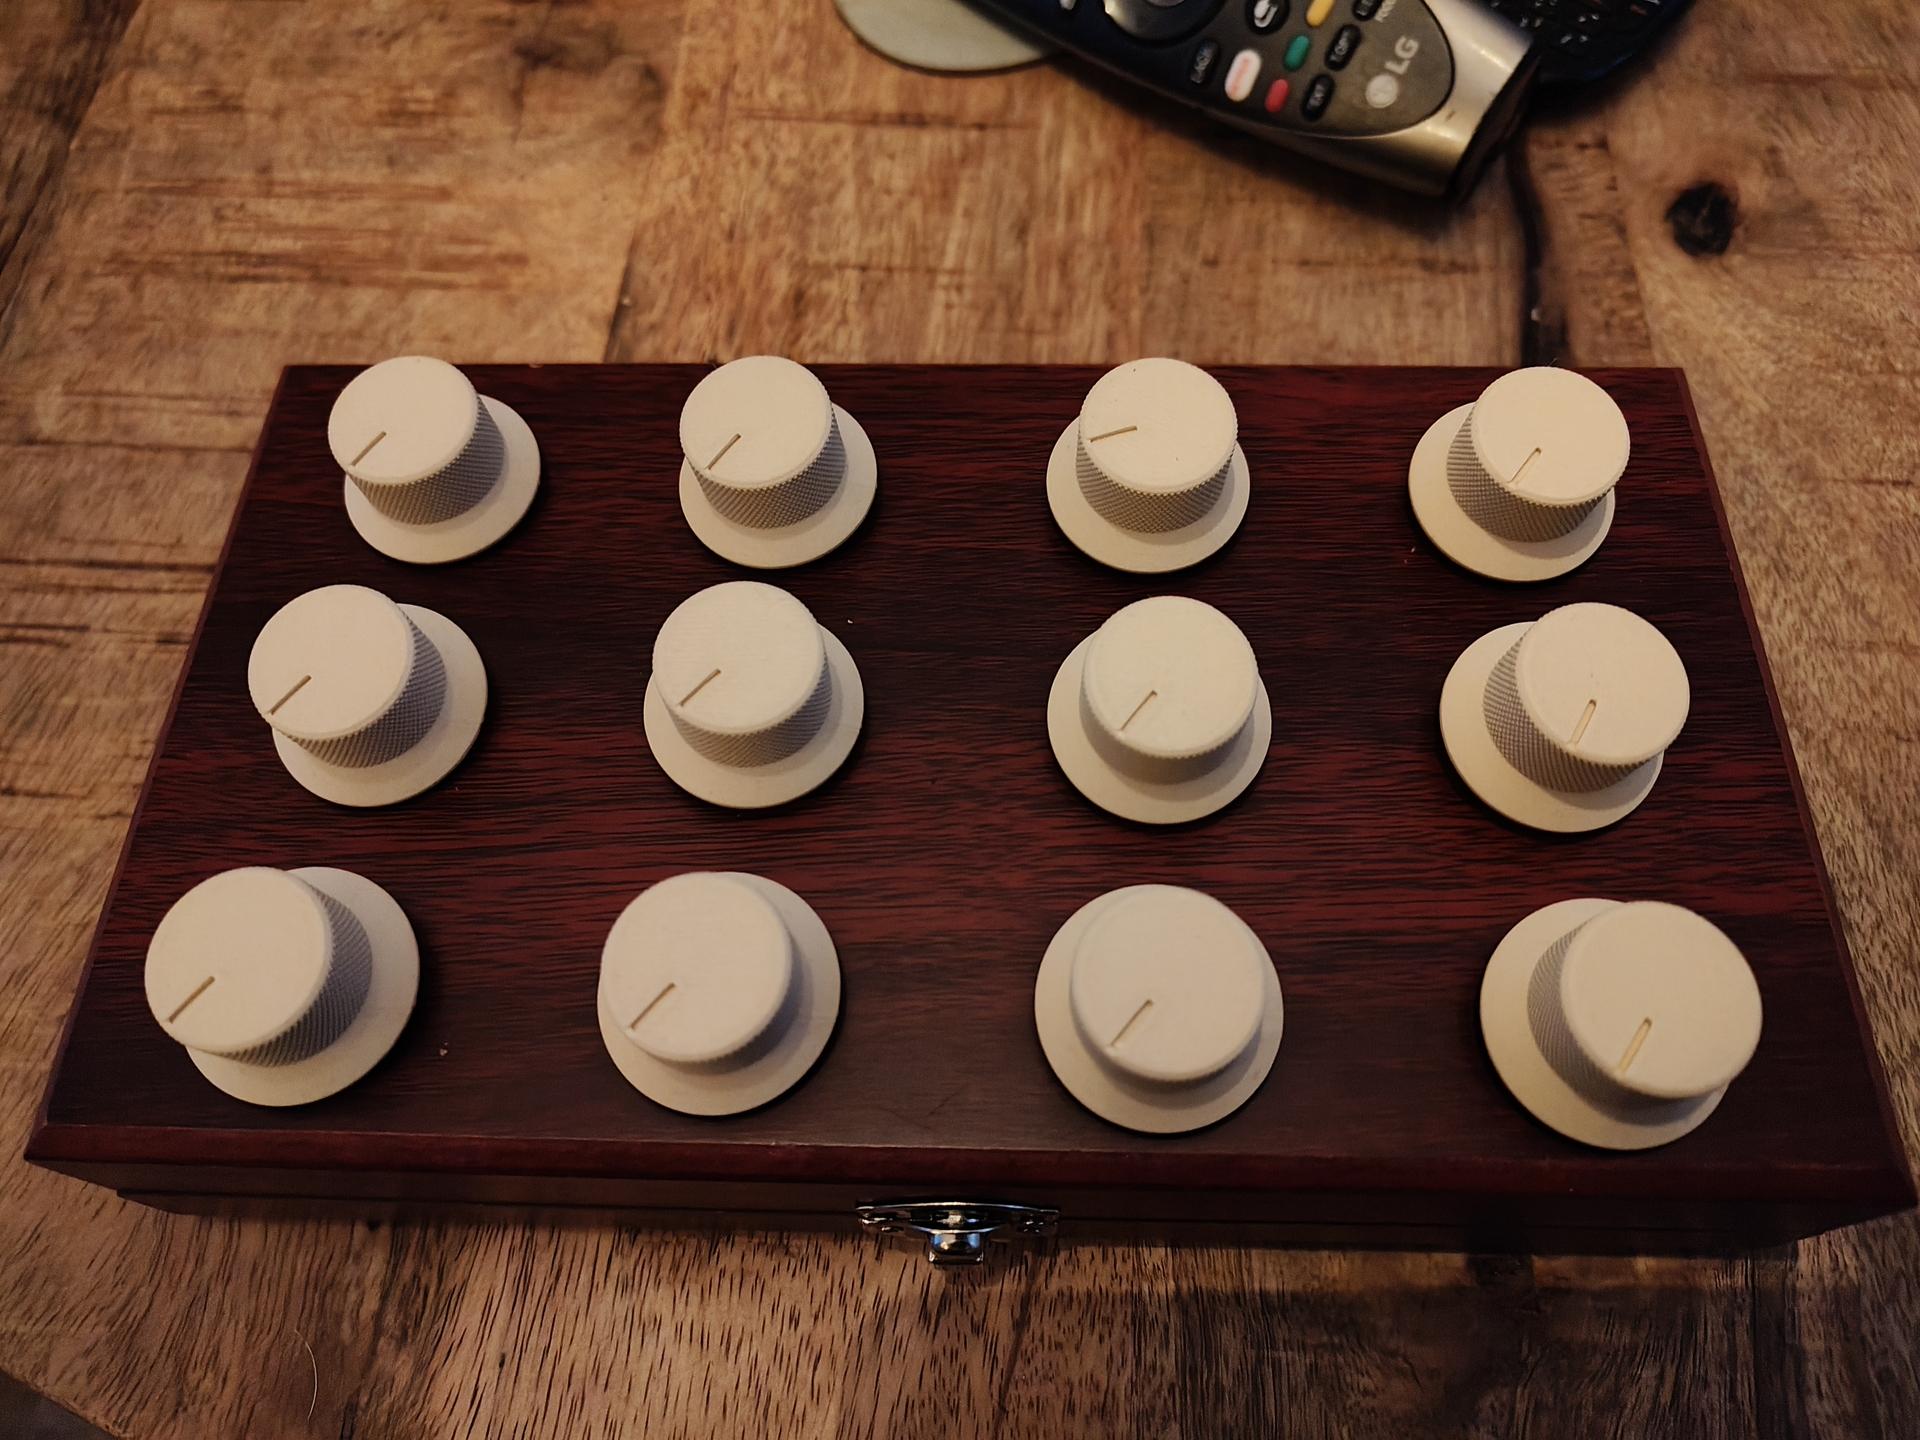
Let’s use an old box to hold the pots!
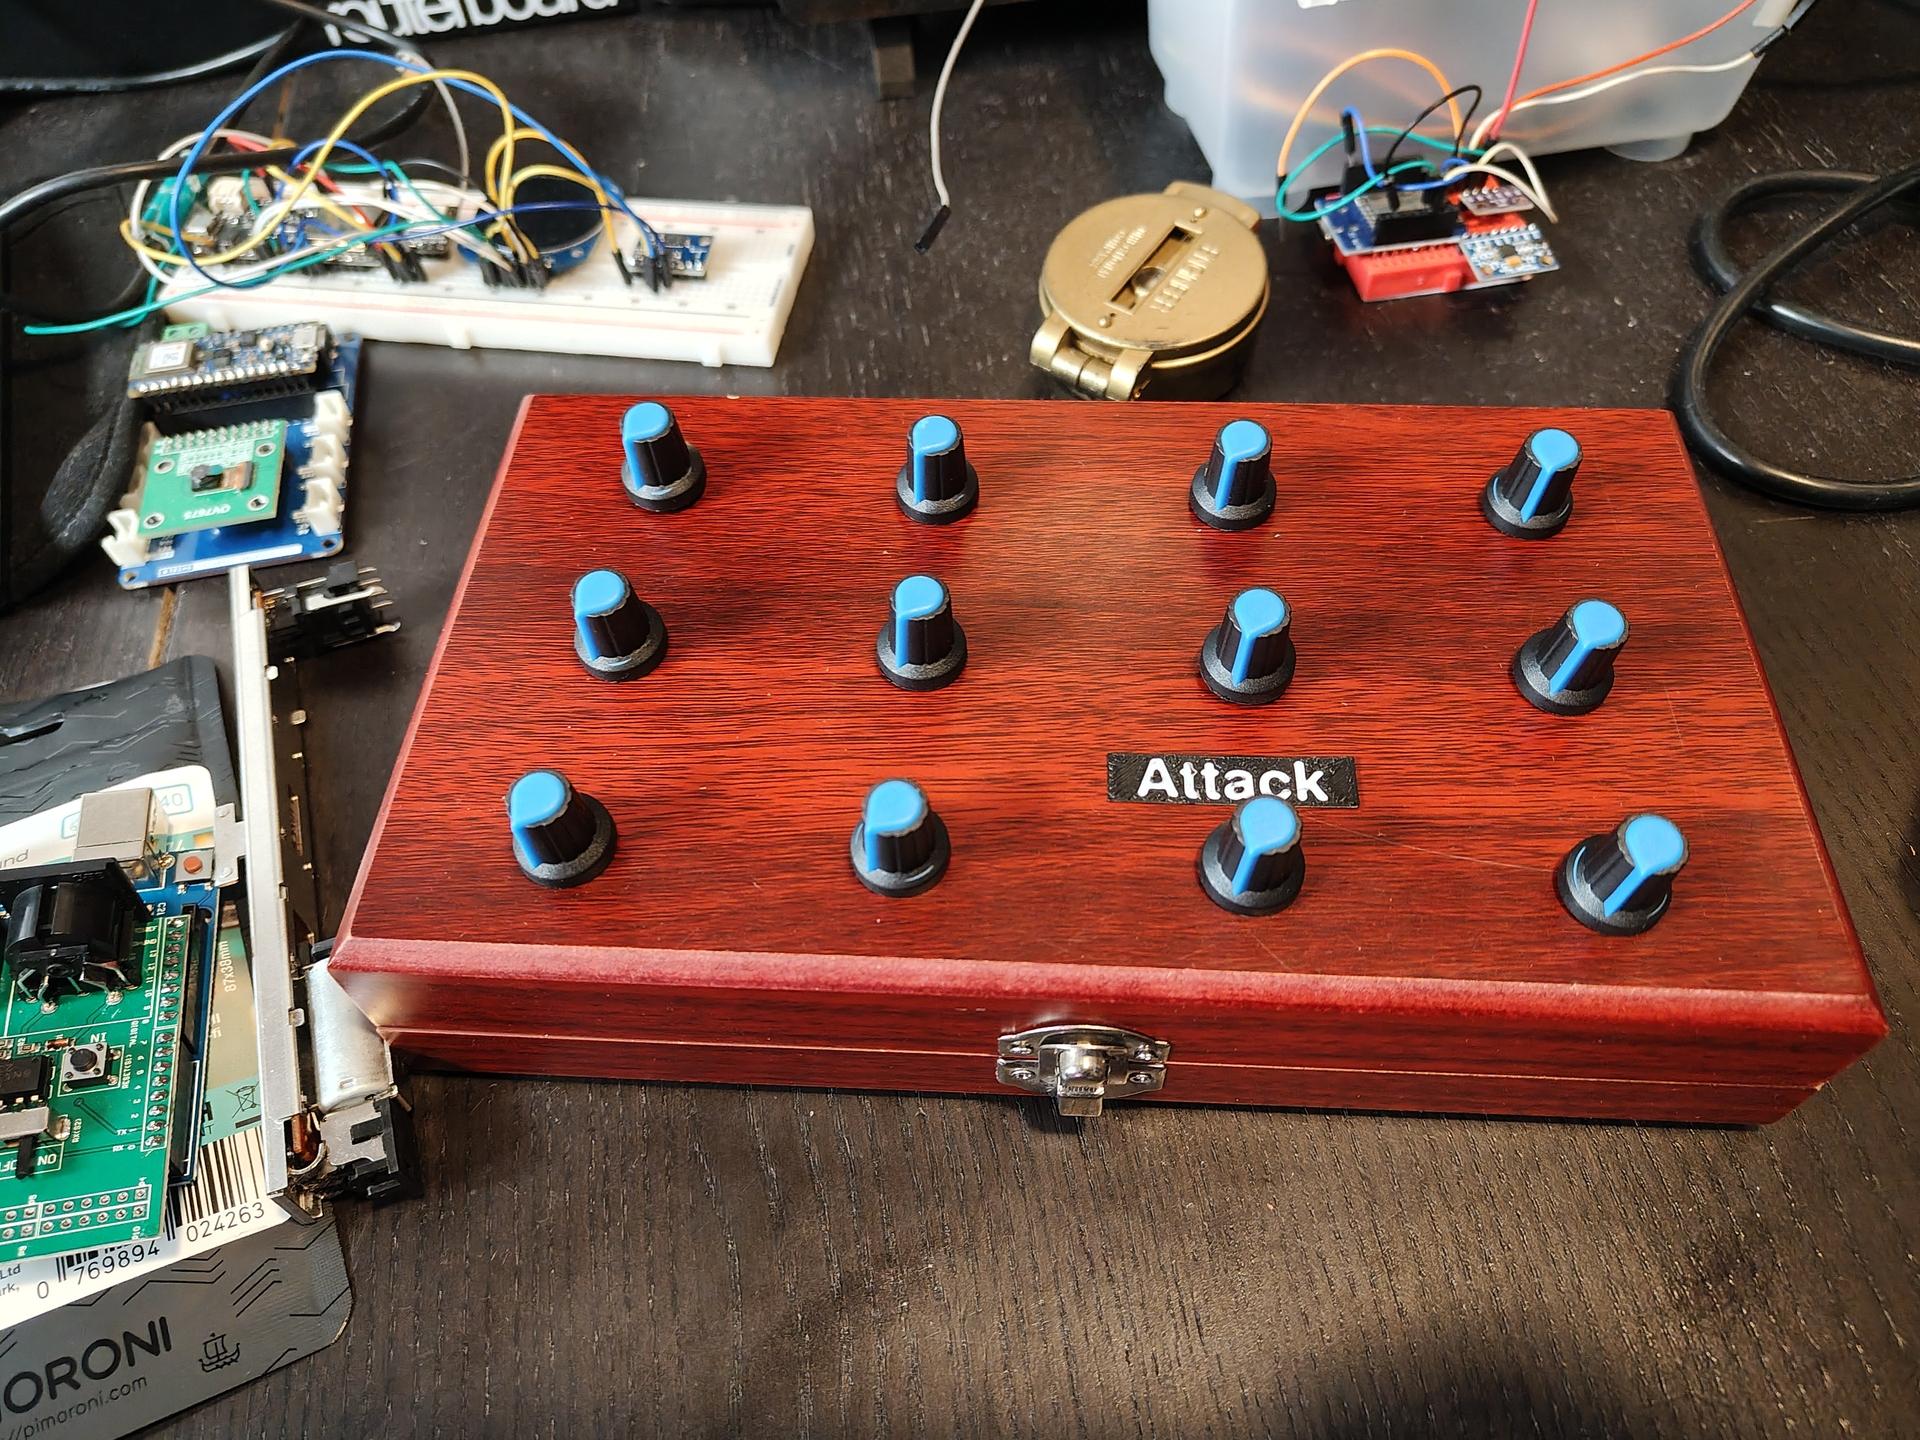
Knob 1 = volume now, and left of box has centering Pitch Bend.
CODE
#include <MIDIUSB.h>
#include <ResponsiveAnalogRead.h>

const int pitchbend = A14;
const int filterresonance = A0;
const int filtercutoff = A1;
const int voicemode = A2;
const int modulationmode = A3;
const int attack = A4;
const int release = A5;
const int pulsewidth = A6;
const int tremolodepth = A7;
const int tremolospeed = A8;
const int oscwave = A9;
const int oscvoice2 = A10;
const int oscvoice3 = A11;
const int volume = A12;

ResponsiveAnalogRead analogpitchbend(pitchbend, true);

ResponsiveAnalogRead analogfilterresonance(filterresonance, true);
ResponsiveAnalogRead analogfiltercutoff(filtercutoff, true);
ResponsiveAnalogRead analogvoicemode(voicemode, true);
ResponsiveAnalogRead analogmodulationmode(modulationmode, true);
ResponsiveAnalogRead analogattack(attack, true);
ResponsiveAnalogRead analogrelease(release, true);
ResponsiveAnalogRead analogpulsewidth(pulsewidth, true);
ResponsiveAnalogRead analogtremolodepth(tremolodepth, true);
ResponsiveAnalogRead analogtremolospeed(tremolospeed, true);
ResponsiveAnalogRead analogoscwave(oscwave, true);
ResponsiveAnalogRead analogoscvoice2(oscvoice2, true);
ResponsiveAnalogRead analogoscvoice3(oscvoice3, true);
ResponsiveAnalogRead analogvolume(volume, true);


// A0 -> A3, A6 -> A13
const int numPots = 12;


int lastfilterresonance = -1;
int lastfiltercutoff = -1;
int lastvoicemode = -1;
int lastmodulationmode = -1;
int lastattack = -1;
int lastrelease = -1;
int lastpulsewidth = -1;
int lasttremolodepth = -1;
int lasttremolospeed = -1;
int lastoscwave = -1;
int lastoscvoice2 = -1;
int lastoscvoice3 = -1;
int lastvolume = -1;


// CC 7 ff niet

// Custom mappings:
const int potPins[numPots]     = {A0, A1, A2, A3, A6, A7, A8, A9, A10, A11, A12, A13};  // Analog pins
const int ccNumbers[numPots]   = {0,1,2,3,4,5,6,8,9,13,14,15};             // CC numbers
const int midiChannels[numPots]= {1,1,1,1,1,1,1,1,1,1,1,1};                // MIDI channels (1–16)

int lastValues[numPots];  // Store last values to reduce redundant MIDI messages


void setup() {
  Serial.begin(9600);
  for (int i = 0; i < numPots; i++) {
    pinMode(potPins[i], INPUT);
    lastValues[i] = -1;
  }
  pinMode(pitchbend, INPUT);
}

void loop() {
  analogfilterresonance.update();
  if(analogfilterresonance.hasChanged()) {
    int analogValue = analogfilterresonance.getValue();
    int midiValue = analogValue / 8;  // Scale 0–1023 to 0–127
    if (abs(midiValue - lastfilterresonance) > 0){
    usbMIDI.sendControlChange(7, midiValue, 1);
    lastfilterresonance = midiValue;
    }
  }

  analogfiltercutoff.update();
  if(analogfiltercutoff.hasChanged()) {
    int analogValue = analogfiltercutoff.getValue();
    int midiValue = analogValue / 8;  // Scale 0–1023 to 0–127
    if (abs(midiValue - lastvoicemode) > 0){
    usbMIDI.sendControlChange(1, midiValue, 1);
    lastvoicemode = midiValue;
    }
  }

  analogvoicemode.update();
  if(analogvoicemode.hasChanged()) {
    int analogValue = analogvoicemode.getValue();
    int midiValue = analogValue / 8;  // Scale 0–1023 to 0–127
    if (abs(midiValue - lastvoicemode) > 0){
    usbMIDI.sendControlChange(2, midiValue, 1);
    lastvoicemode = midiValue;
    }
  }

  analogmodulationmode.update();
  if(analogmodulationmode.hasChanged()) {
    int analogValue = analogmodulationmode.getValue();
    int midiValue = analogValue / 8;  // Scale 0–1023 to 0–127
    if (abs(midiValue - lastmodulationmode) > 0){
    usbMIDI.sendControlChange(3, midiValue, 1);
    lastmodulationmode = midiValue;
    }
  }


  analogattack.update();
  if(analogattack.hasChanged()) {
    int analogValue = analogattack.getValue();
    int midiValue = analogValue / 8;  // Scale 0–1023 to 0–127
    if (abs(midiValue - lastattack) > 0){
    usbMIDI.sendControlChange(4, midiValue, 1);
    lastattack = midiValue;
    }
  }


  analogrelease.update();
  if(analogrelease.hasChanged()) {
    int analogValue = analogrelease.getValue();
    int midiValue = analogValue / 8;  // Scale 0–1023 to 0–127
    if (abs(midiValue - lastrelease) > 0){
    usbMIDI.sendControlChange(5, midiValue, 1);
    lastrelease = midiValue;
    }
  }


  analogpulsewidth.update();
  if(analogpulsewidth.hasChanged()) {
    int analogValue = analogpulsewidth.getValue();
    int midiValue = analogValue / 8;  // Scale 0–1023 to 0–127
    if (abs(midiValue - lastpulsewidth) > 0){
    usbMIDI.sendControlChange(6, midiValue, 1);
    lastpulsewidth = midiValue;
    }
  }


  analogtremolodepth.update();
  if(analogtremolodepth.hasChanged()) {
    int analogValue = analogtremolodepth.getValue();
    int midiValue = analogValue / 8;  // Scale 0–1023 to 0–127
    if (abs(midiValue - lasttremolodepth) > 0){
    usbMIDI.sendControlChange(8, midiValue, 1);
    lasttremolodepth = midiValue;
    }
  }


  analogtremolospeed.update();
  if(analogtremolospeed.hasChanged()) {
    int analogValue = analogtremolospeed.getValue();
    int midiValue = analogValue / 8;  // Scale 0–1023 to 0–127
    if (abs(midiValue - lasttremolospeed) > 0){
    usbMIDI.sendControlChange(9, midiValue, 1);
    lasttremolospeed = midiValue;
    }
  }


  analogoscwave.update();
  if(analogoscwave.hasChanged()) {
    int analogValue = analogoscwave.getValue();
    int midiValue = analogValue / 8;  // Scale 0–1023 to 0–127
    if (abs(midiValue - lastoscwave) > 0){
    usbMIDI.sendControlChange(13, midiValue, 1);
    lastoscwave = midiValue;
    }
  }


  analogoscvoice2.update();
  if(analogoscvoice2.hasChanged()) {
    int analogValue = analogoscvoice2.getValue();
    int midiValue = analogValue / 8;  // Scale 0–1023 to 0–127
    if (abs(midiValue - lastoscvoice2) > 0){
    usbMIDI.sendControlChange(14, midiValue, 1);
    lastoscvoice2 = midiValue;
    }
  }


  analogoscvoice3.update();
  if(analogoscvoice3.hasChanged()) {
    int analogValue = analogoscvoice3.getValue();
    int midiValue = analogValue / 8;  // Scale 0–1023 to 0–127
    if (abs(midiValue - lastoscvoice3) > 0){
    usbMIDI.sendControlChange(15, midiValue, 1);
    lastoscvoice3 = midiValue;
    }
  }


// PITCHBEND!
  analogpitchbend.update();
  if(analogpitchbend.hasChanged()) {
    int pitchBend = map(analogpitchbend.getValue(), 0, 1023, 0, 16383); // Map to MIDI Pitch Bend range
    sendPitchBend(pitchBend, 0);
  }
  /*
  int potValue = analogRead(A14);         // Read pot (0–1023)
  int pitchBend = map(potValue, 0, 1023, 0, 16383); // Map to MIDI Pitch Bend range
  //pitchBend = pitchBend + 8192;


  if (abs(pitchBend - lastPitch) > 250) { // Send only on significant change
    sendPitchBend(pitchBend, 0);
        Serial.println(pitchBend);

    lastPitch = pitchBend;
  }
  */


  delay(5);  // CPU-friendly update rate
}

void sendPitchBend(int value, byte channel) {
  byte lsb = value & 0x7F;
  byte msb = (value >> 7) & 0x7F;

  midiEventPacket_t pitchBendPacket = {0x0E, 0xE0 | (channel & 0x0F), lsb, msb};
  MidiUSB.sendMIDI(pitchBendPacket);
  // Needed?
  MidiUSB.flush();
}
CODE for display
#include <MIDIUSB.h>
#include <Adafruit_GFX.h>
#include <Adafruit_SSD1306.h>

#define SCREEN_WIDTH 128 // OLED display width, in pixels
#define SCREEN_HEIGHT 64 // OLED display height, in pixels
#define OLED_RESET 4
Adafruit_SSD1306 display(SCREEN_WIDTH, SCREEN_HEIGHT, &Wire, OLED_RESET);

// A0 -> A3, A6 -> A13
const int numPots = 12;

// A14 - Pitch bend!
int lastPitch = -1;

//A4 A5 I2C display


// Custom mappings:
const int potPins[numPots]     = {A0, A1, A2, A3, A6, A7, A8, A9, A10, A11, A12, A13};  // Analog pins
const int ccNumbers[numPots]   = {0,1,2,3,4,5,19,7,8,9,13,14};             // CC numbers
const int midiChannels[numPots]= {1,1,1,1,1,1,1,1,1,1,1,1};                // MIDI channels (1–16)

int lastValues[numPots];  // Store last values to reduce redundant MIDI messages

void setup() {
  for (int i = 0; i < numPots; i++) {
    pinMode(potPins[i], INPUT);
    lastValues[i] = -1;
  }
  display.begin(SSD1306_SWITCHCAPVCC, 0x3C);
  display.setTextSize(2);
  display.setTextColor(WHITE);
  display.clearDisplay();
  display.display();
}

void loop() {
  for (int i = 0; i < numPots; i++) {
    int analogValue = analogRead(potPins[i]);
    int midiValue = analogValue / 8;  // Scale 0–1023 to 0–127

    if (abs(midiValue - lastValues[i]) > 1) {
      usbMIDI.sendControlChange(ccNumbers[i], midiValue, midiChannels[i]);
      lastValues[i] = midiValue;
    }
  }
  int potValue = analogRead(A12);         // Read pot (0–1023)
  int pitchBend = map(potValue, 0, 1023, 0, 16383); // Map to MIDI Pitch Bend range

  if (abs(pitchBend - lastPitch) > 5) { // Send only on significant change
    sendPitchBend(pitchBend, 0); // Channel 1
    lastPitch = pitchBend;
  }

  displayInfo();


  delay(5);  // CPU-friendly update rate
}

void sendPitchBend(int value, byte channel) {
  byte lsb = value & 0x7F;
  byte msb = (value >> 7) & 0x7F;

  midiEventPacket_t pitchBendPacket = {0x0E, 0xE0 | (channel & 0x0F), lsb, msb};
  MidiUSB.sendMIDI(pitchBendPacket);
  // Needed?
  MidiUSB.flush();
}

void displayInfo(){
 byte x0, y0, x1, y1;     // start/end coordinates for drawing lines on OLED
  display.clearDisplay();
  display.setCursor(0, 0);
  display.print("Attack / Release");

  // draw attack line
  x0 = 0;
  y0 = 63;
  x1 = map(attackParam, 0, 127, 0, ((SCREEN_WIDTH / 4) - 1));
  y1 = 20;
  display.drawLine(x0, y0,  x1,  y1, SH110X_WHITE);

   // draw release line
  x0 = x1;  // start line from previous line's final x,y location
  y0 = y1;
  x1 = x0 + map(releaseParam, 0, 127, 0, ((SCREEN_WIDTH / 4) - 1));
  y1 = 63;
  display.drawLine(x0, y0,  x1,  y1, SH110X_WHITE);

  display.display();

}
Webcam image slash command mattermost
I’ve got my own chat server, because WhatsApp sucks.
With this I can play around.
Below is a script to capture an image from a (Reolink) webcam, and show this in a Mattermost channel.
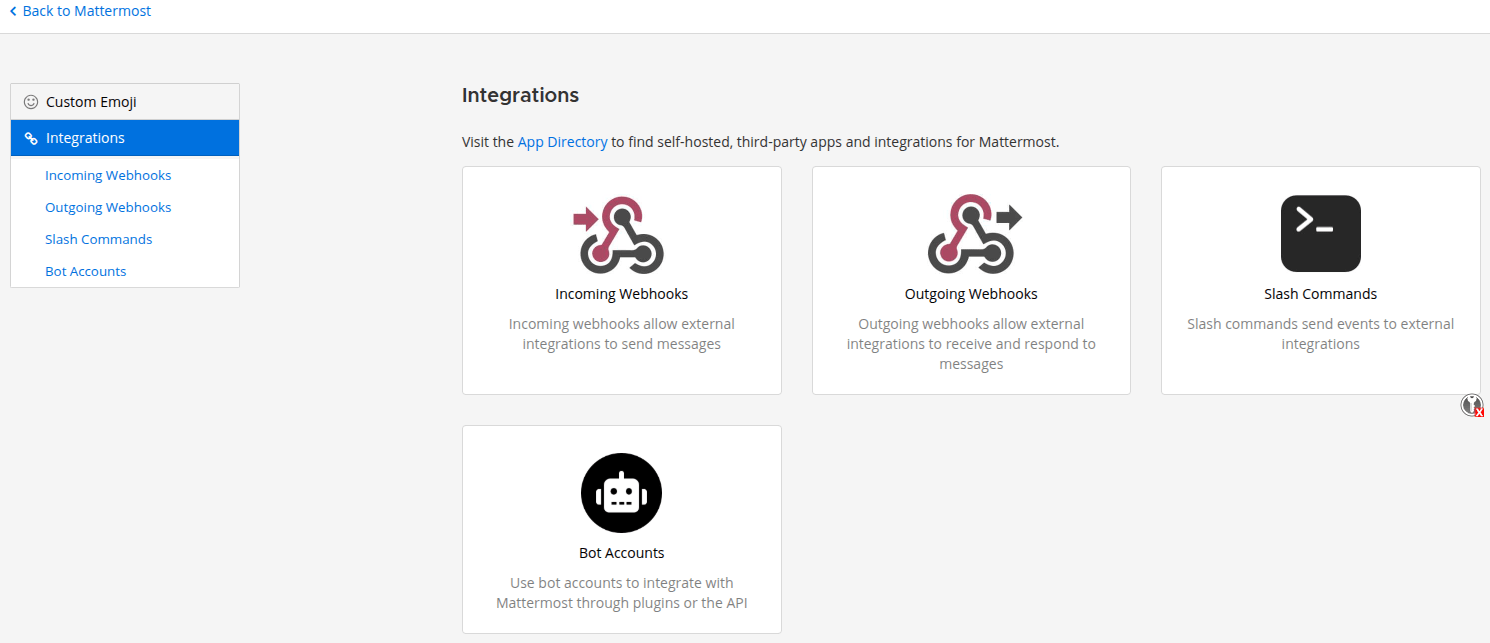
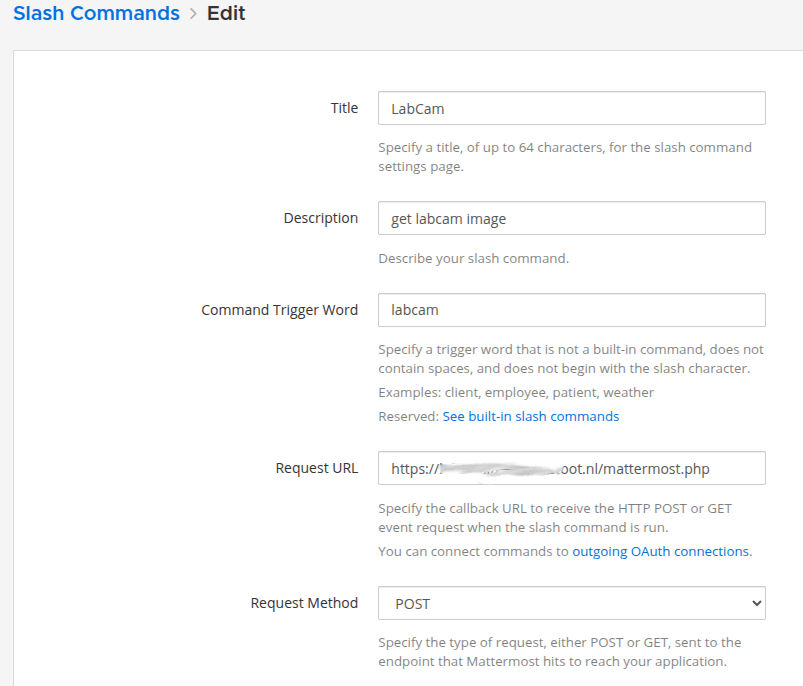
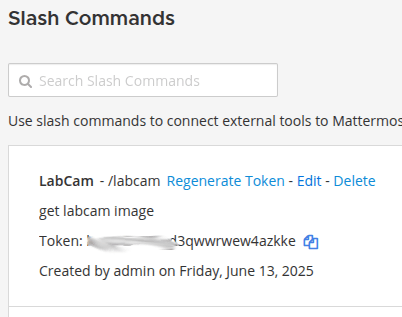
You need to configure your /slash command in Mattermost and a webserver with PHP
When entering
/labcam
in a channel, an image will be shown.
Code:
<?php

// See token from screenshots above
$expected_token = 'YOUR_MATTERMOST_TOKEN';
$token = $_POST['token'] ?? '';

if ($token !== $expected_token) {
    http_response_code(403);
    echo 'Invalid token, go away';
    exit;
}


// Reolink camera settings
$ip = '192.168.1.2'; // Replace with your camera IP
$user = 'admin';       // Camera username
$pass = 'admin';// Camera password
$rs = uniqid();        // Unique request string

$url = "http://$ip/cgi-bin/api.cgi?cmd=Snap&channel=0&rs=$rs&user=$user&password=$pass";

// Temporary image save path (ensure this directory is public and writable)
$image_filename = 'snapshot_' . time() . '.jpg';
$image_path = __DIR__ . '/snapshots/' . $image_filename;  // e.g., public_html/snapshots/
$image_url = 'https://labcam.henriaanstoot.nl/snapshots/' . $image_filename; // Public URL

// Fetch image from Reolink using cURL
$ch = curl_init($url);
curl_setopt($ch, CURLOPT_RETURNTRANSFER, true);
curl_setopt($ch, CURLOPT_FOLLOWLOCATION, true);
curl_setopt($ch, CURLOPT_HEADER, false);
curl_setopt($ch, CURLOPT_HTTPAUTH, CURLAUTH_BASIC);
curl_setopt($ch, CURLOPT_USERPWD, "$user:$pass");
$image_data = curl_exec($ch);
$http_code = curl_getinfo($ch, CURLINFO_HTTP_CODE);
curl_close($ch);

if ($http_code !== 200 || !$image_data) {
    echo json_encode([
        'response_type' => 'ephemeral',
        'text' => 'Failed to get snapshot from Reolink camera.',
    ]);
    exit;
}

// Save image
file_put_contents($image_path, $image_data);

// Respond to Mattermost
$response = [
    'response_type' => 'in_channel',
    'text' => 'Live snapshot from camera:',
    'attachments' => [[
        'image_url' => $image_url,
        'fallback' => 'Reolink snapshot'
    ]]
];

header('Content-Type: application/json');
echo json_encode($response);
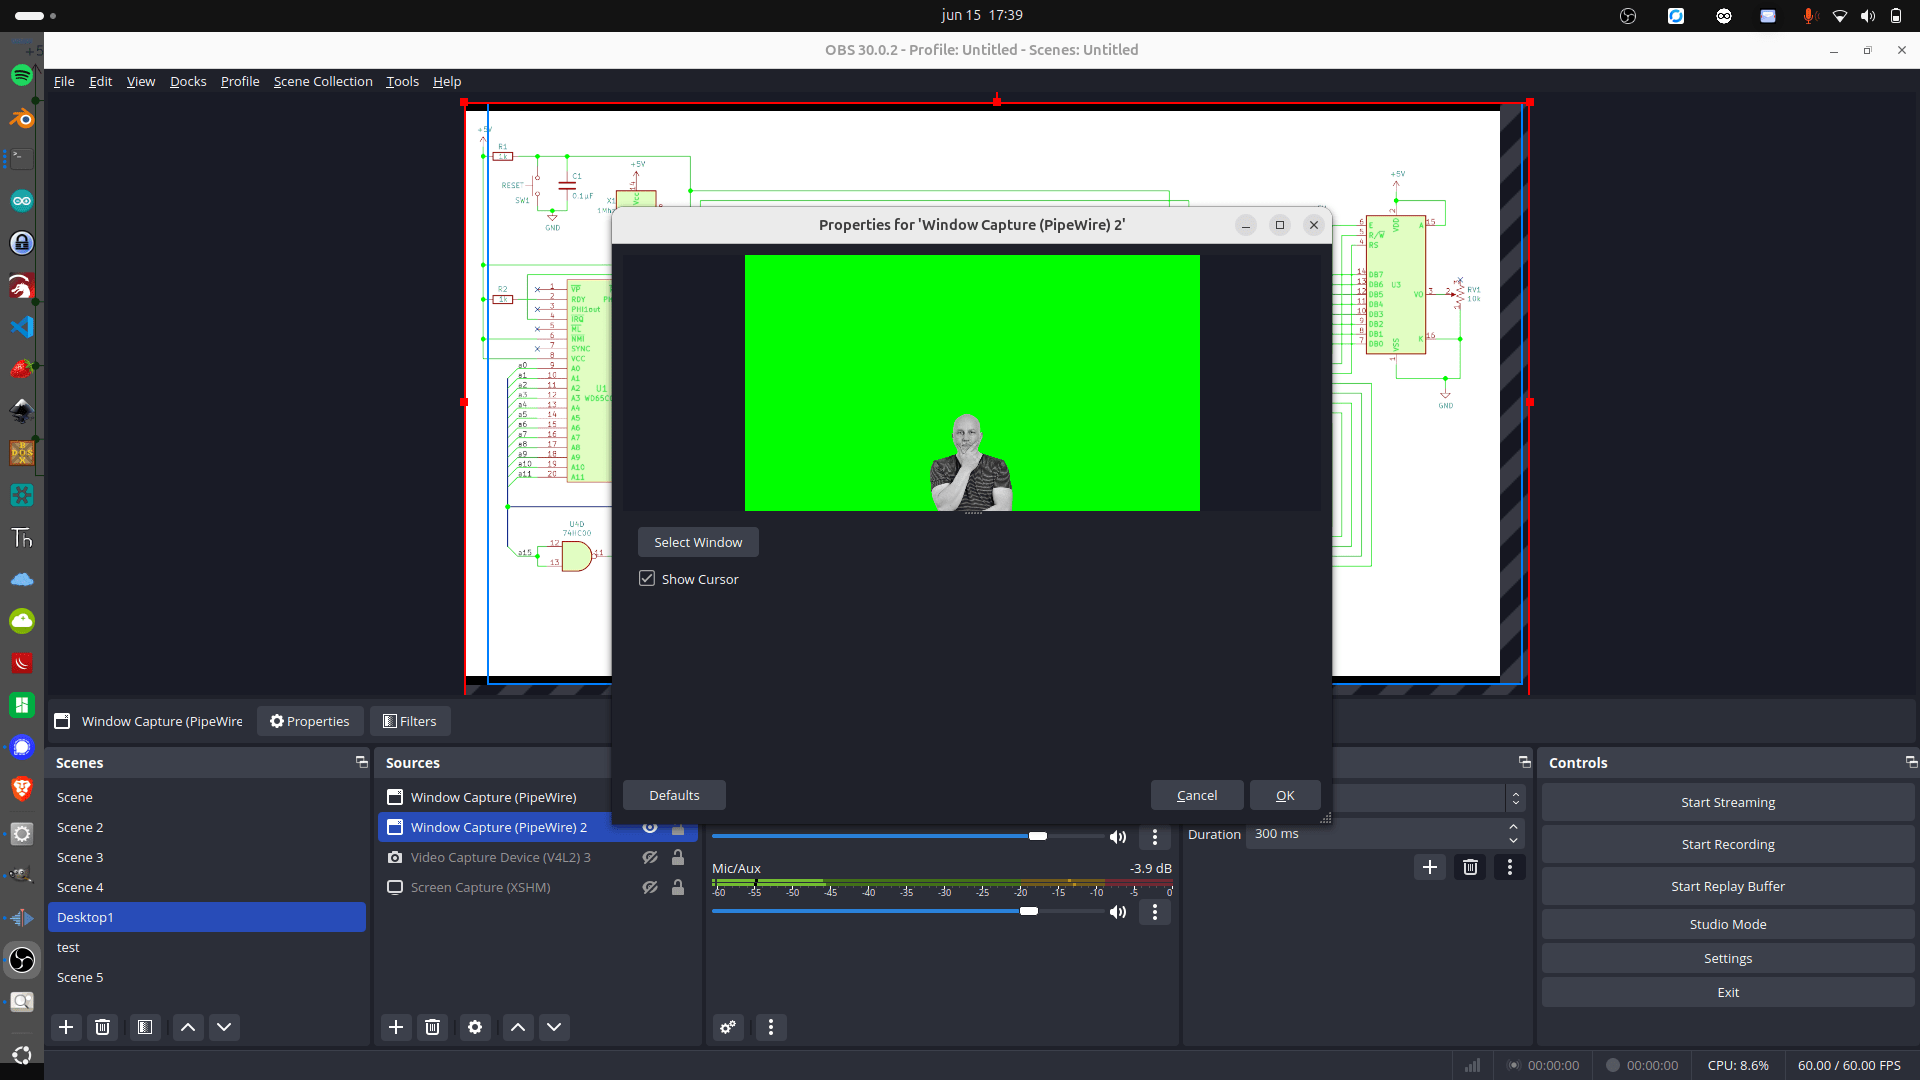
Little OBS toy.
I use OBS sometimes to explain things, I thought it would be nice to have a moving avatar thingy in my screencast which moves when I talk.
The image is a transparent PNG, and I’m moving it up and down using the microphone and a python script.

CODE:
import pygame
import pyaudio
import numpy as np
import sys

# Settings
PNG_PATH = "your_image.png"  # Replace with your transparent PNG path
CHUNK = 1024
FORMAT = pyaudio.paInt16
CHANNELS = 1
RATE = 44100
MOVEMENT_THRESHOLD = 1
GRAVITY = 3 # Tweak this, to get smoother "talk" bounch
JUMP_MULTIPLIER = 3  # Controls jump power Tweak this shit
MAX_JUMP_HEIGHT = 30   # Max  bounce
START_OFFSET = -450      # How far below screen the PNG starts ( so my avator stays covered in bottom )

# Initialize PyAudio
p = pyaudio.PyAudio()
stream = p.open(format=FORMAT,
                channels=CHANNELS,
                rate=RATE,
                input=True,
                frames_per_buffer=CHUNK)

# Initialize Pygame
pygame.init()
info = pygame.display.Info()
screen_width, screen_height = info.current_w, info.current_h
screen = pygame.display.set_mode((screen_width, screen_height), pygame.FULLSCREEN)
pygame.display.set_caption("Mic Bounce PNG")

# Load image
image = pygame.image.load(PNG_PATH).convert_alpha()
img_rect = image.get_rect()
img_rect.centerx = screen_width // 2
img_rect.top = screen_height + START_OFFSET  # Start below the screen

velocity_y = 0
clock = pygame.time.Clock()

def get_loudness():
    data = np.frombuffer(stream.read(CHUNK, exception_on_overflow=False), dtype=np.int16)
    volume = np.linalg.norm(data)
    return volume / CHUNK

# Bottom and top bounce limits
bottom_y = screen_height + START_OFFSET
top_y = screen_height + START_OFFSET - MAX_JUMP_HEIGHT

try:
    while True:
        for event in pygame.event.get():
            if event.type == pygame.QUIT or \
               (event.type == pygame.KEYDOWN and event.key == pygame.K_ESCAPE):
                raise KeyboardInterrupt

        loudness = get_loudness()

        if loudness > MOVEMENT_THRESHOLD and img_rect.top >= bottom_y:
            # Jump upward with capped power
            velocity_y = -int(min((loudness - MOVEMENT_THRESHOLD) * JUMP_MULTIPLIER, MAX_JUMP_HEIGHT))

        # Apply gravity
        velocity_y += GRAVITY
        img_rect.y += velocity_y

        if img_rect.top >= bottom_y:
            img_rect.top = bottom_y
            velocity_y = 0

        if img_rect.top <= top_y:
            img_rect.top = top_y
            velocity_y = 0

        # Draw chromakey green background
        screen.fill((0, 255, 0))

        # Draw PNG
        screen.blit(image, img_rect)

        pygame.display.flip()
        clock.tick(60)

except KeyboardInterrupt:
    stream.stop_stream()
    stream.close()
    p.terminate()
    pygame.quit()
    sys.exit()
Working on a Bluetooth beacon game for a friend.
Got some bluetooth beacons in the mail.
The plan is to hide these in the woods, and children have to find them using a scanner device.
Using a ESP32 with bluetooth, using RSSI (strength of signal) I can limit the range of detection.
The order of finding the tags is important, so a hidden tag should not be found when another should be found first.
These tags, hidden in toys, should be placed in a treasure chest.
(In order)
Then lights and sounds should hint the kids that they have successfully completed the mission.
So same detecting but even shorter range ESP is hidden in the Chest.
Some leds or a single blinking one should give hints about the distance of the object.
=== Matching iTags ===
MAC: 5b:08:10:4d:2a:01 | RSSI: -47
MAC: 5b:45:aa:0d:f7:9c | RSSI: -31 #### NEAR
MAC: 5b:88:fc:fc:e8:a9 | RSSI: -94 #### FAR AWAY
MAC: 5b:8b:00:00:1d:40 | RSSI: -66
Some test code:
#include <BLEDevice.h>
#include <BLEUtils.h>
#include <BLEScan.h>
#include <BLEAdvertisedDevice.h>

int scanTime = 5; // seconds
BLEScan* pBLEScan;

void setup() {
  Serial.begin(115200);
  Serial.println("Starting BLE scan...");

  BLEDevice::init("");
  pBLEScan = BLEDevice::getScan();
  pBLEScan->setActiveScan(true);
  pBLEScan->setInterval(100);
  pBLEScan->setWindow(99);
}

void loop() {
  BLEScanResults results = *pBLEScan->start(scanTime, false);
  Serial.println("=== Matching iTags ===");

  for (int i = 0; i < results.getCount(); i++) {
    BLEAdvertisedDevice device = results.getDevice(i);
    String mac = device.getAddress().toString();

    if (mac.startsWith("5b:")) {
      Serial.print("MAC: ");
      Serial.print(mac);
      Serial.print(" | RSSI: ");
      Serial.println(device.getRSSI());
    }
  }

  Serial.println("======================");
  pBLEScan->clearResults();
  delay(2000);
}