I needed to change a lot to the javascript on the website to fix some stuff.
Fix IPhone control. (I hate iphone)
Fix screenlock timeout
Added meta refresh
The XMAS/Fireworks controller was often used, and I got notifications via my TV. (see other posts)
Now I want to see when MQTT movement when I’m in the livingroom. So I programmed a Wemos controller to blink the internal when MQTT messages are received.
CODE:
#include <ESP8266WiFi.h>
#include <PubSubClient.h>

const char* ssid = "WIFIAP";
const char* password = "WIFIPASS";

const char* mqtt_server = "MQTTBROKER";  // MQTT broker IP
const char* mqtt_topic  = "game/tilt";

WiFiClient espClient;
PubSubClient client(espClient);

String lastPayload = "";

void setup_wifi() {
  delay(10);
  WiFi.begin(ssid, password);
  while (WiFi.status() != WL_CONNECTED) {
    delay(500);
  }
}

void blinkLED() {
    digitalWrite(LED_BUILTIN, LOW);   // LED ON
    delay(200);
    digitalWrite(LED_BUILTIN, HIGH);  // LED OFF
    delay(200);
}

void callback(char* topic, byte* payload, unsigned int length) {
  String message;
  for (unsigned int i = 0; i < length; i++) {
    message += (char)payload[i];
  }

  // Blink only if topic value changed
  if (message != lastPayload) {
    blinkLED();
    lastPayload = message;
  }
}

void reconnect() {
  while (!client.connected()) {
    if (client.connect("WemosClientMqttBlink")) {
      client.subscribe(mqtt_topic);
    } else {
      delay(2000);
    }
  }
}

void setup() {
  pinMode(LED_BUILTIN, OUTPUT);
  digitalWrite(LED_BUILTIN, HIGH);

  setup_wifi();

  client.setServer(mqtt_server, 1883);
  client.setCallback(callback);
}

void loop() {
  if (!client.connected()) {
    reconnect();
  }
  client.loop();
}
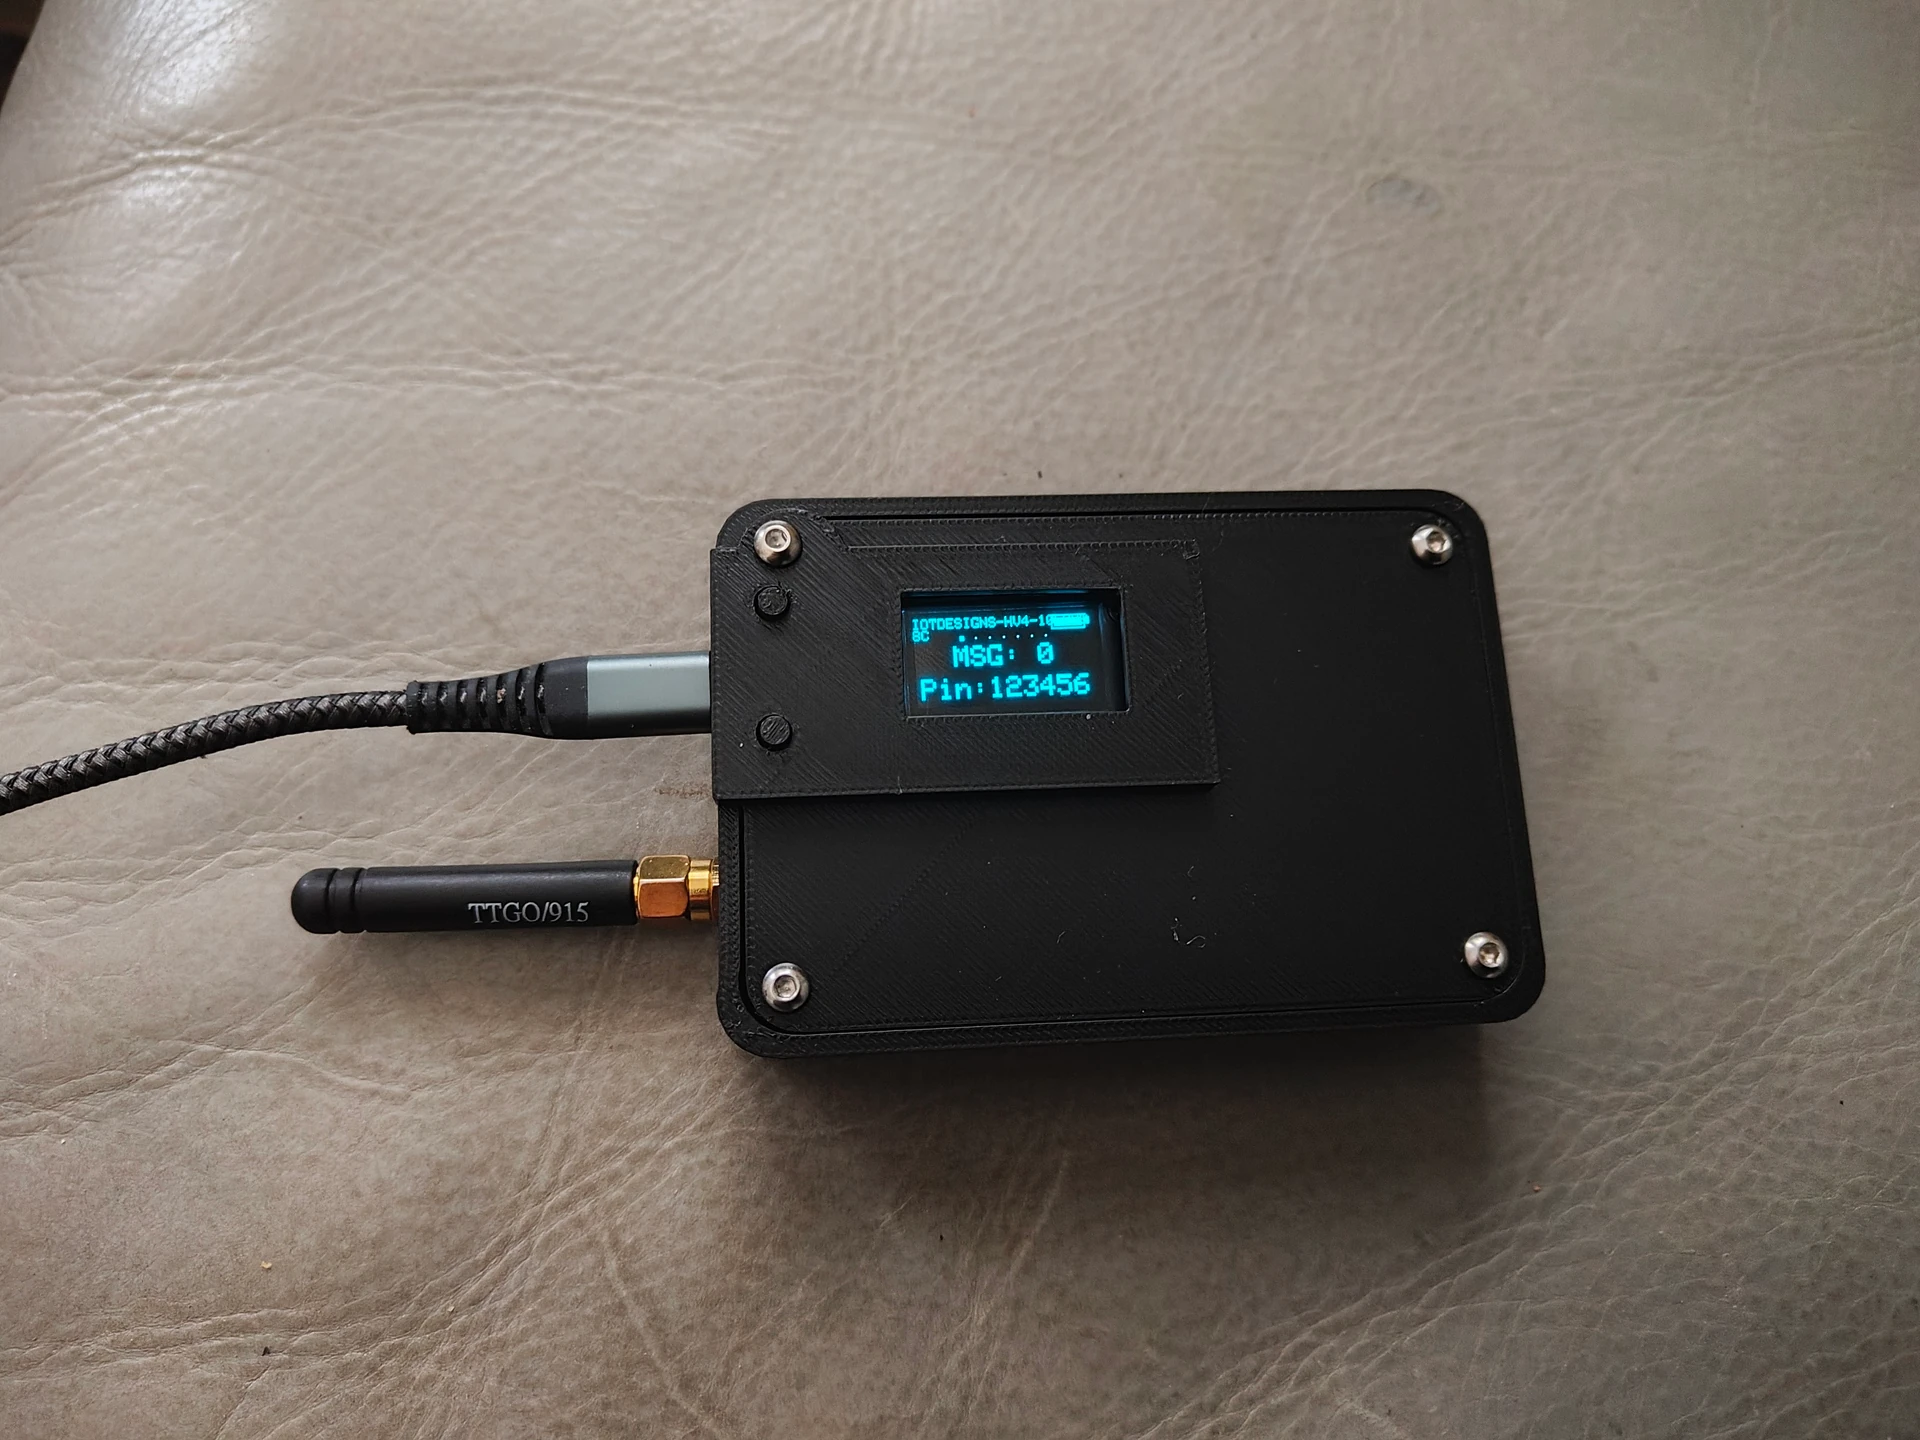
I’ve been playing with LoRa for some time now, mostly with two adhoc LilyGO nodes. After seeing a YT clip from Andreas Spiess I installed a meshtastic node on a Heltec V3. Wanting more, I bought a Heltec V4 and an 8DBi (60cm) antenna. Heltec V3 got a new home in Tyrone’s home.
GPS for the Heltec V4 module!
Via meshtastic I communicated with a guy here in the neighbourhood. I installed Meshcore and my LoRa playground grew!
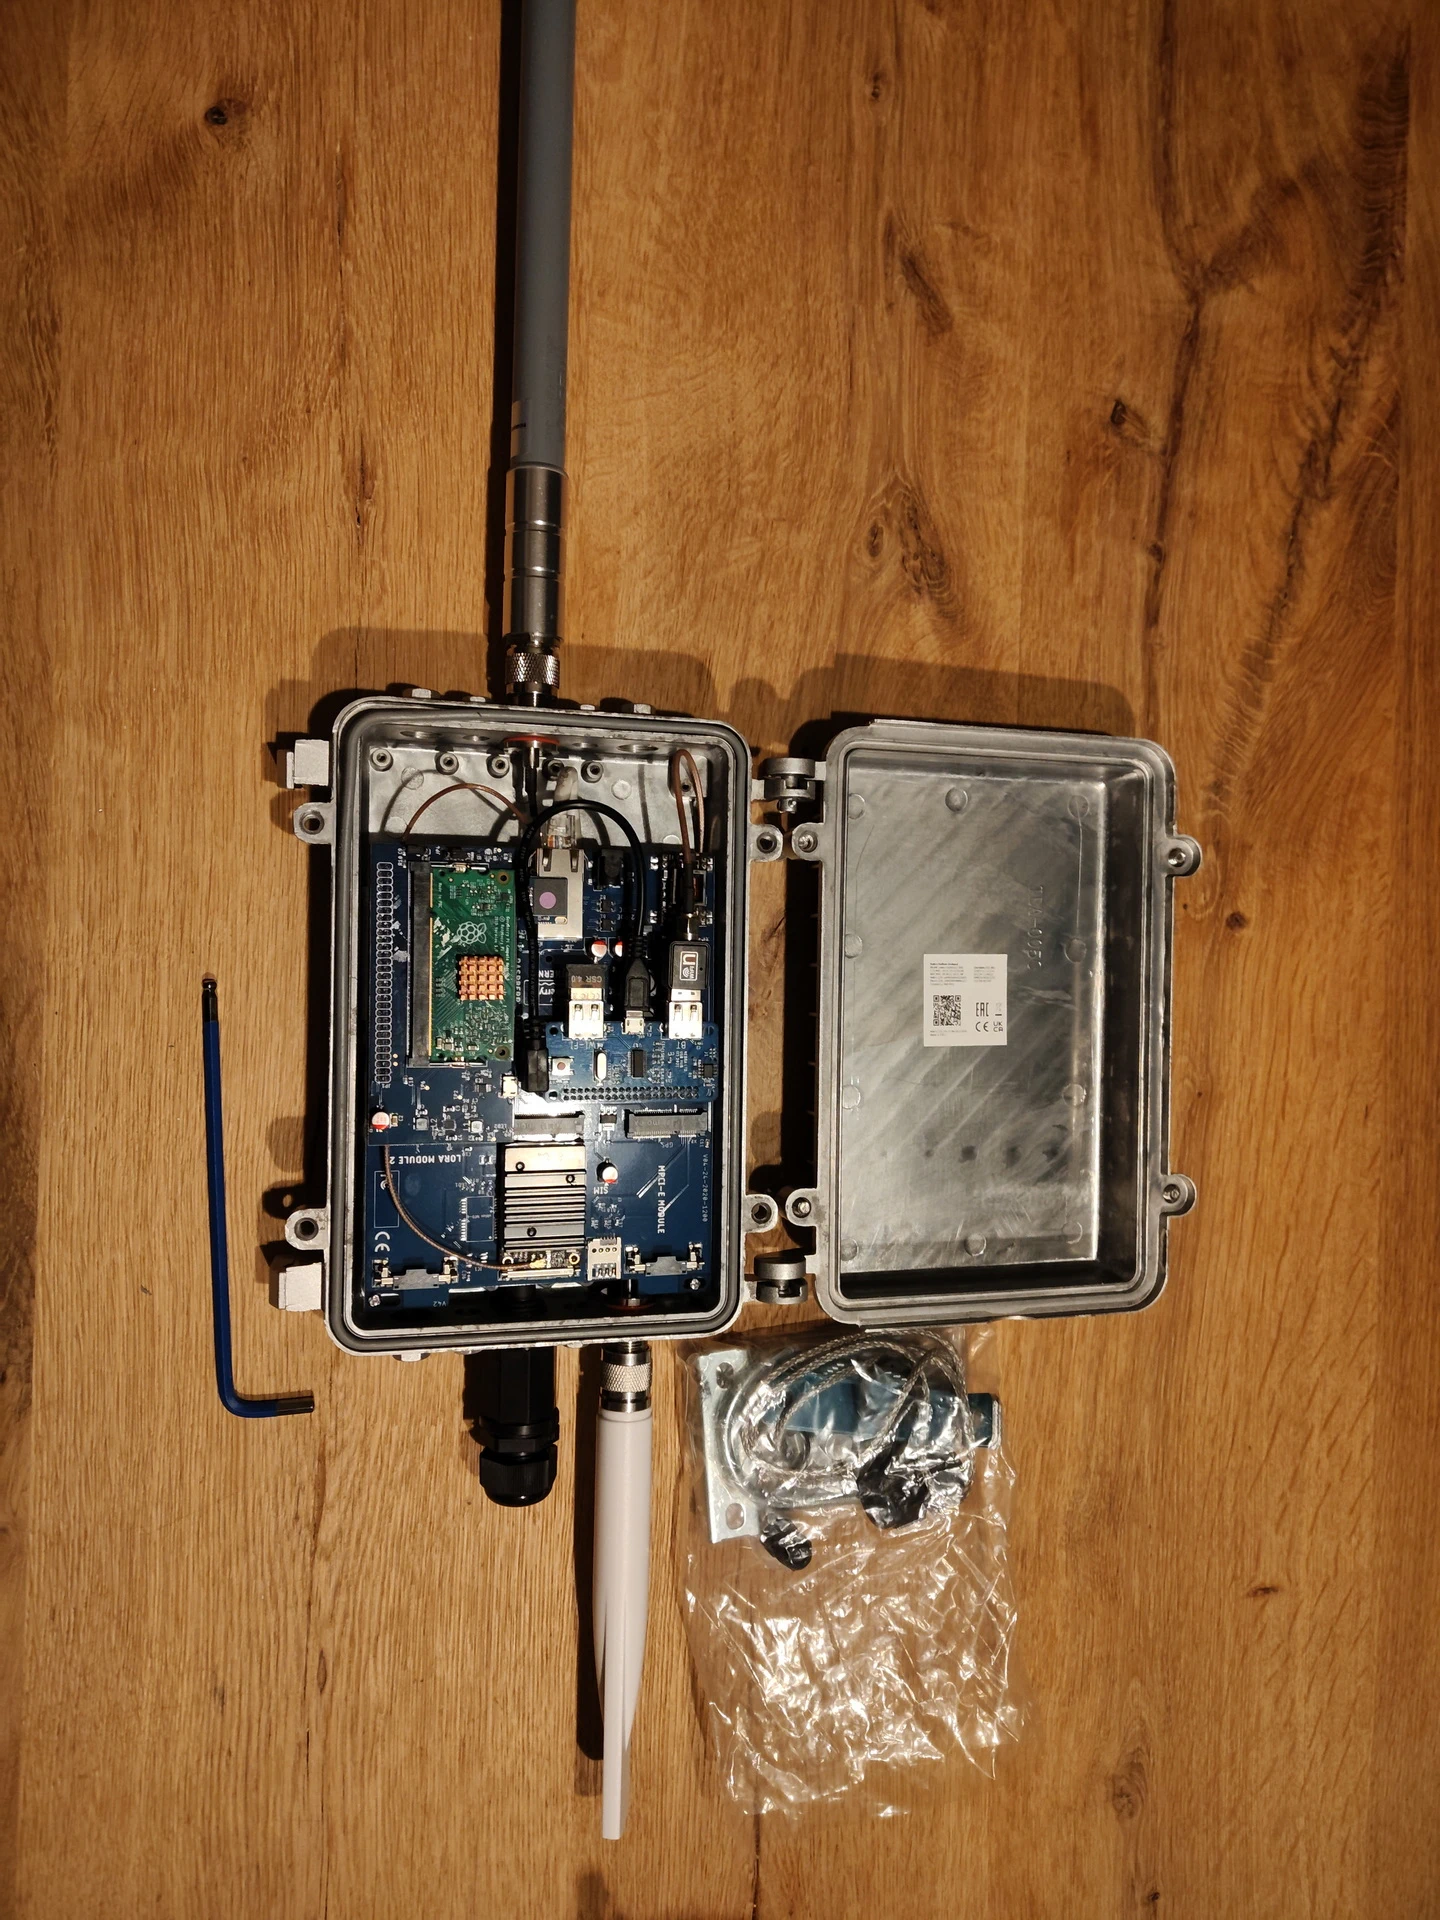
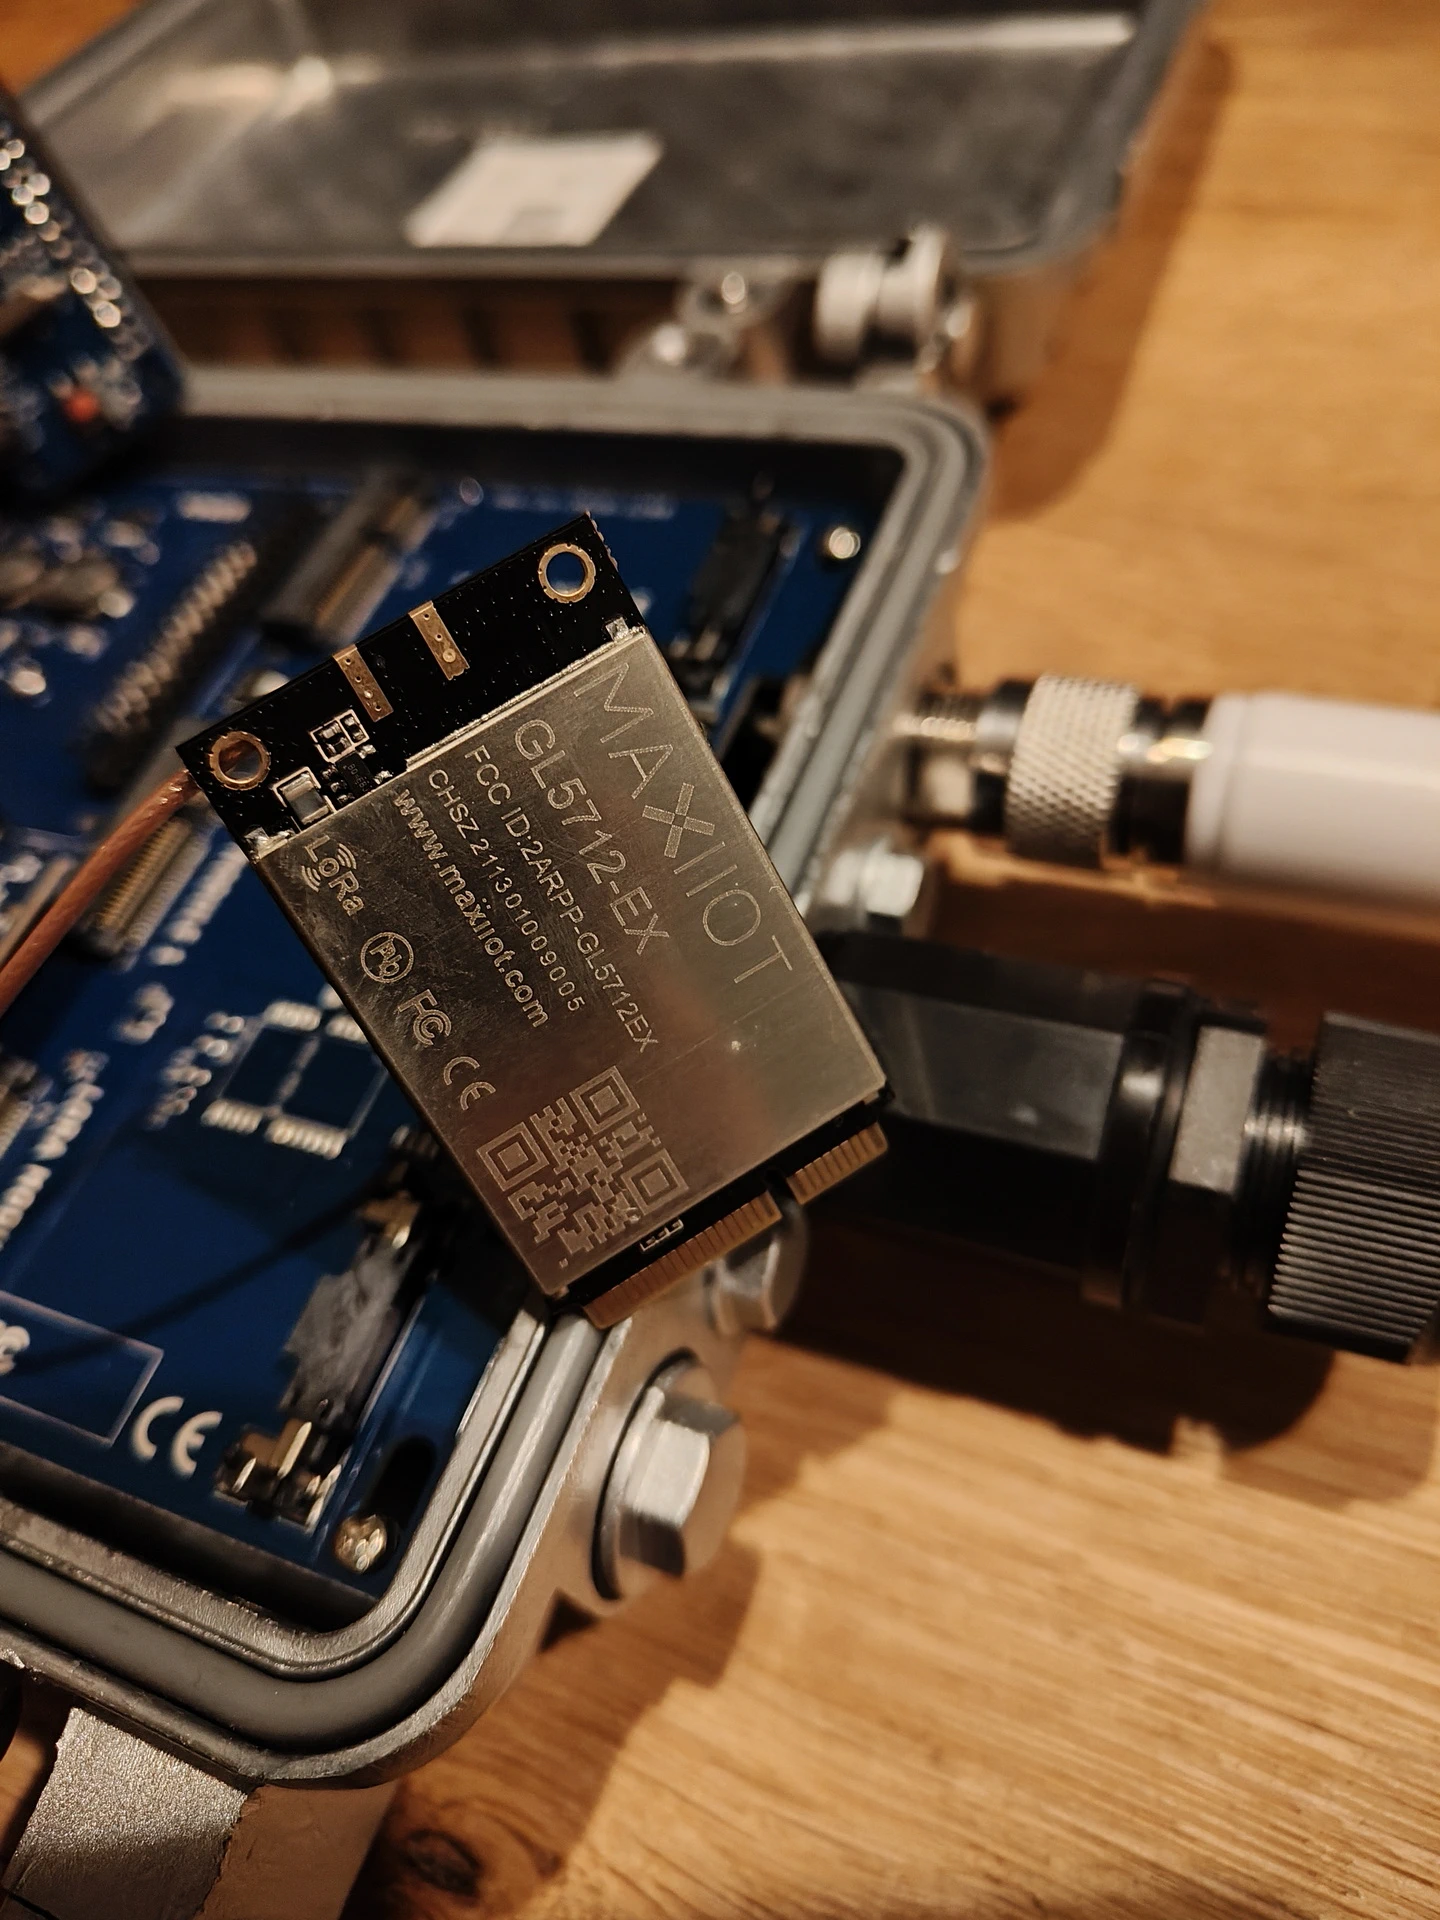
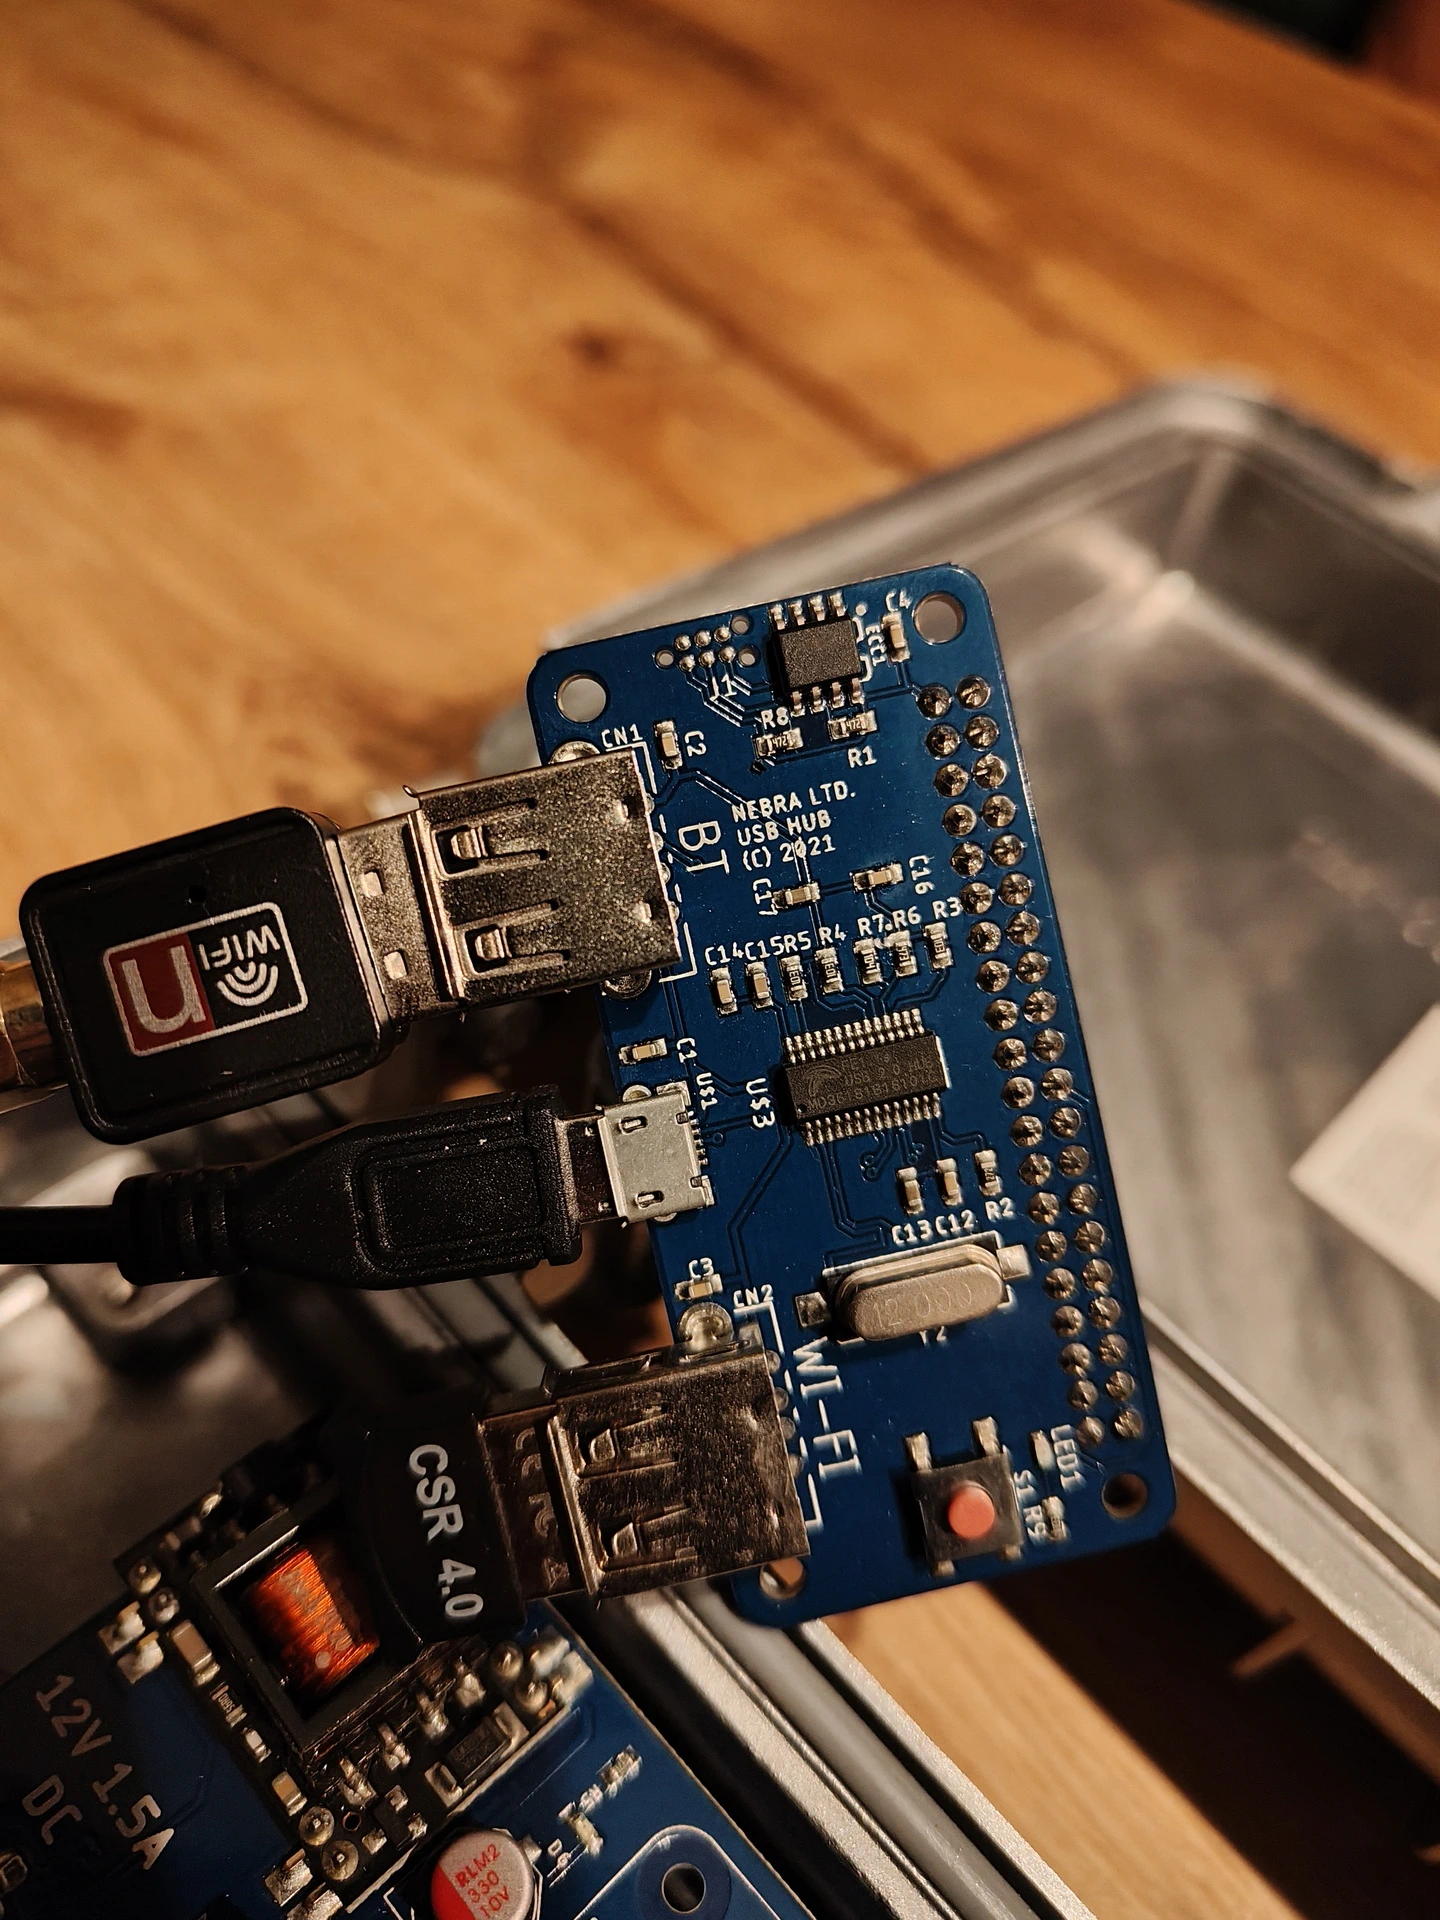
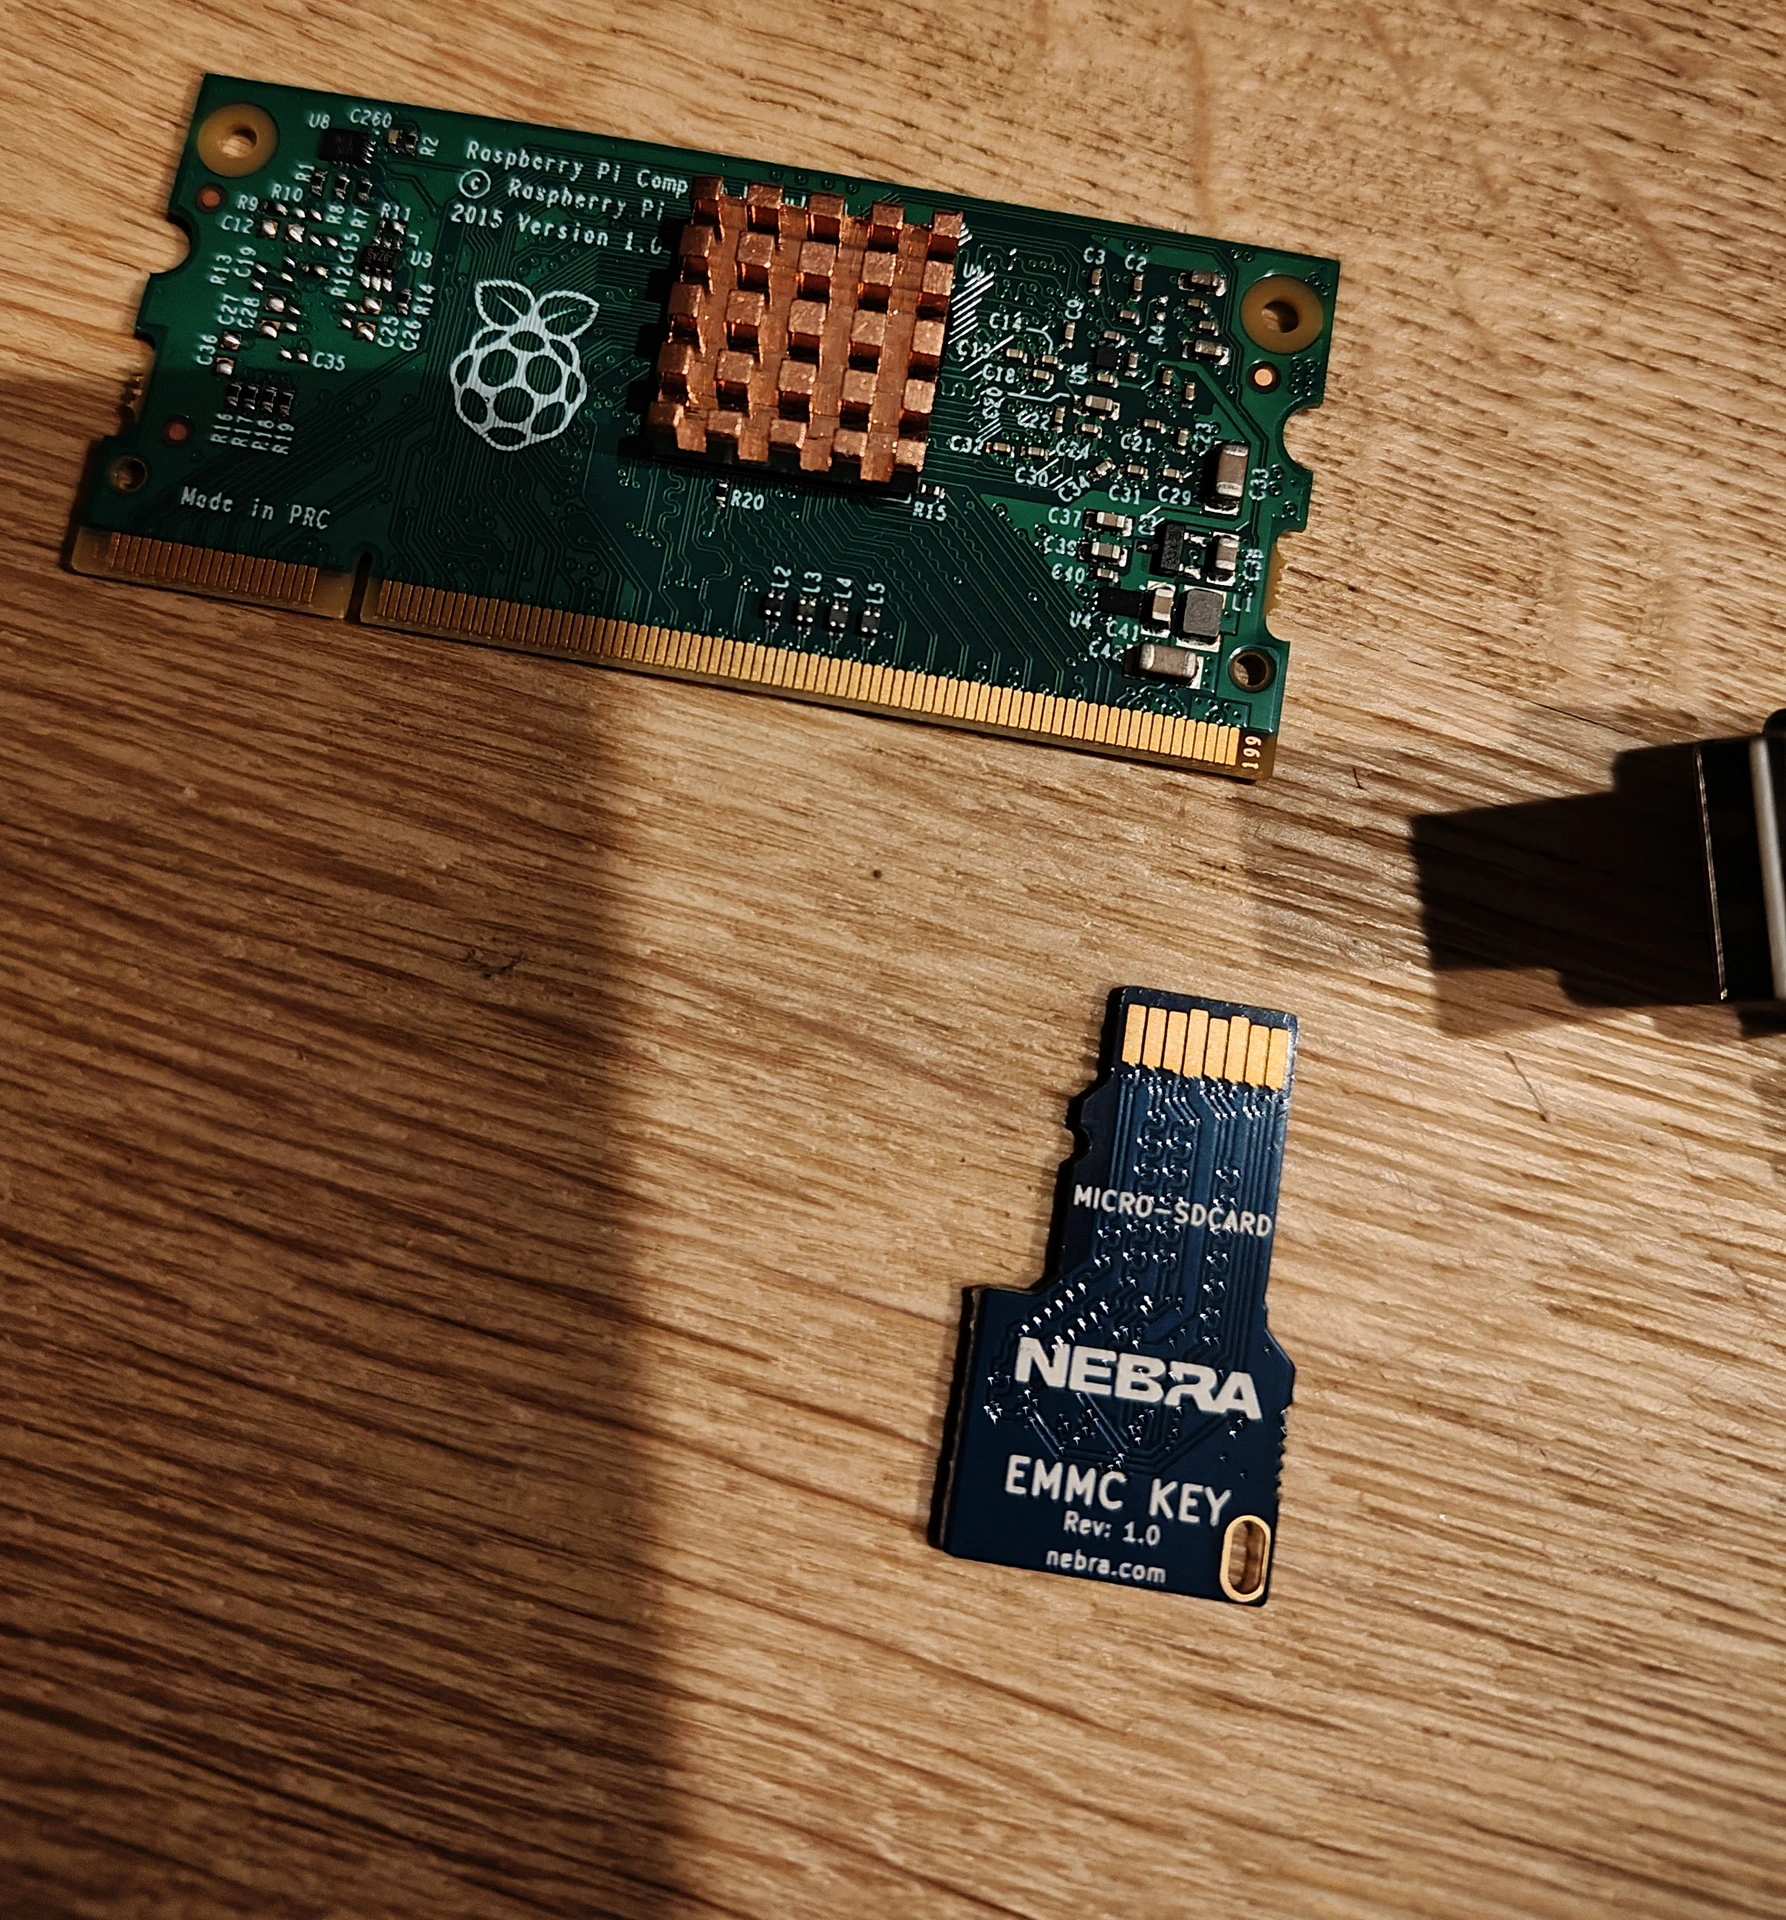
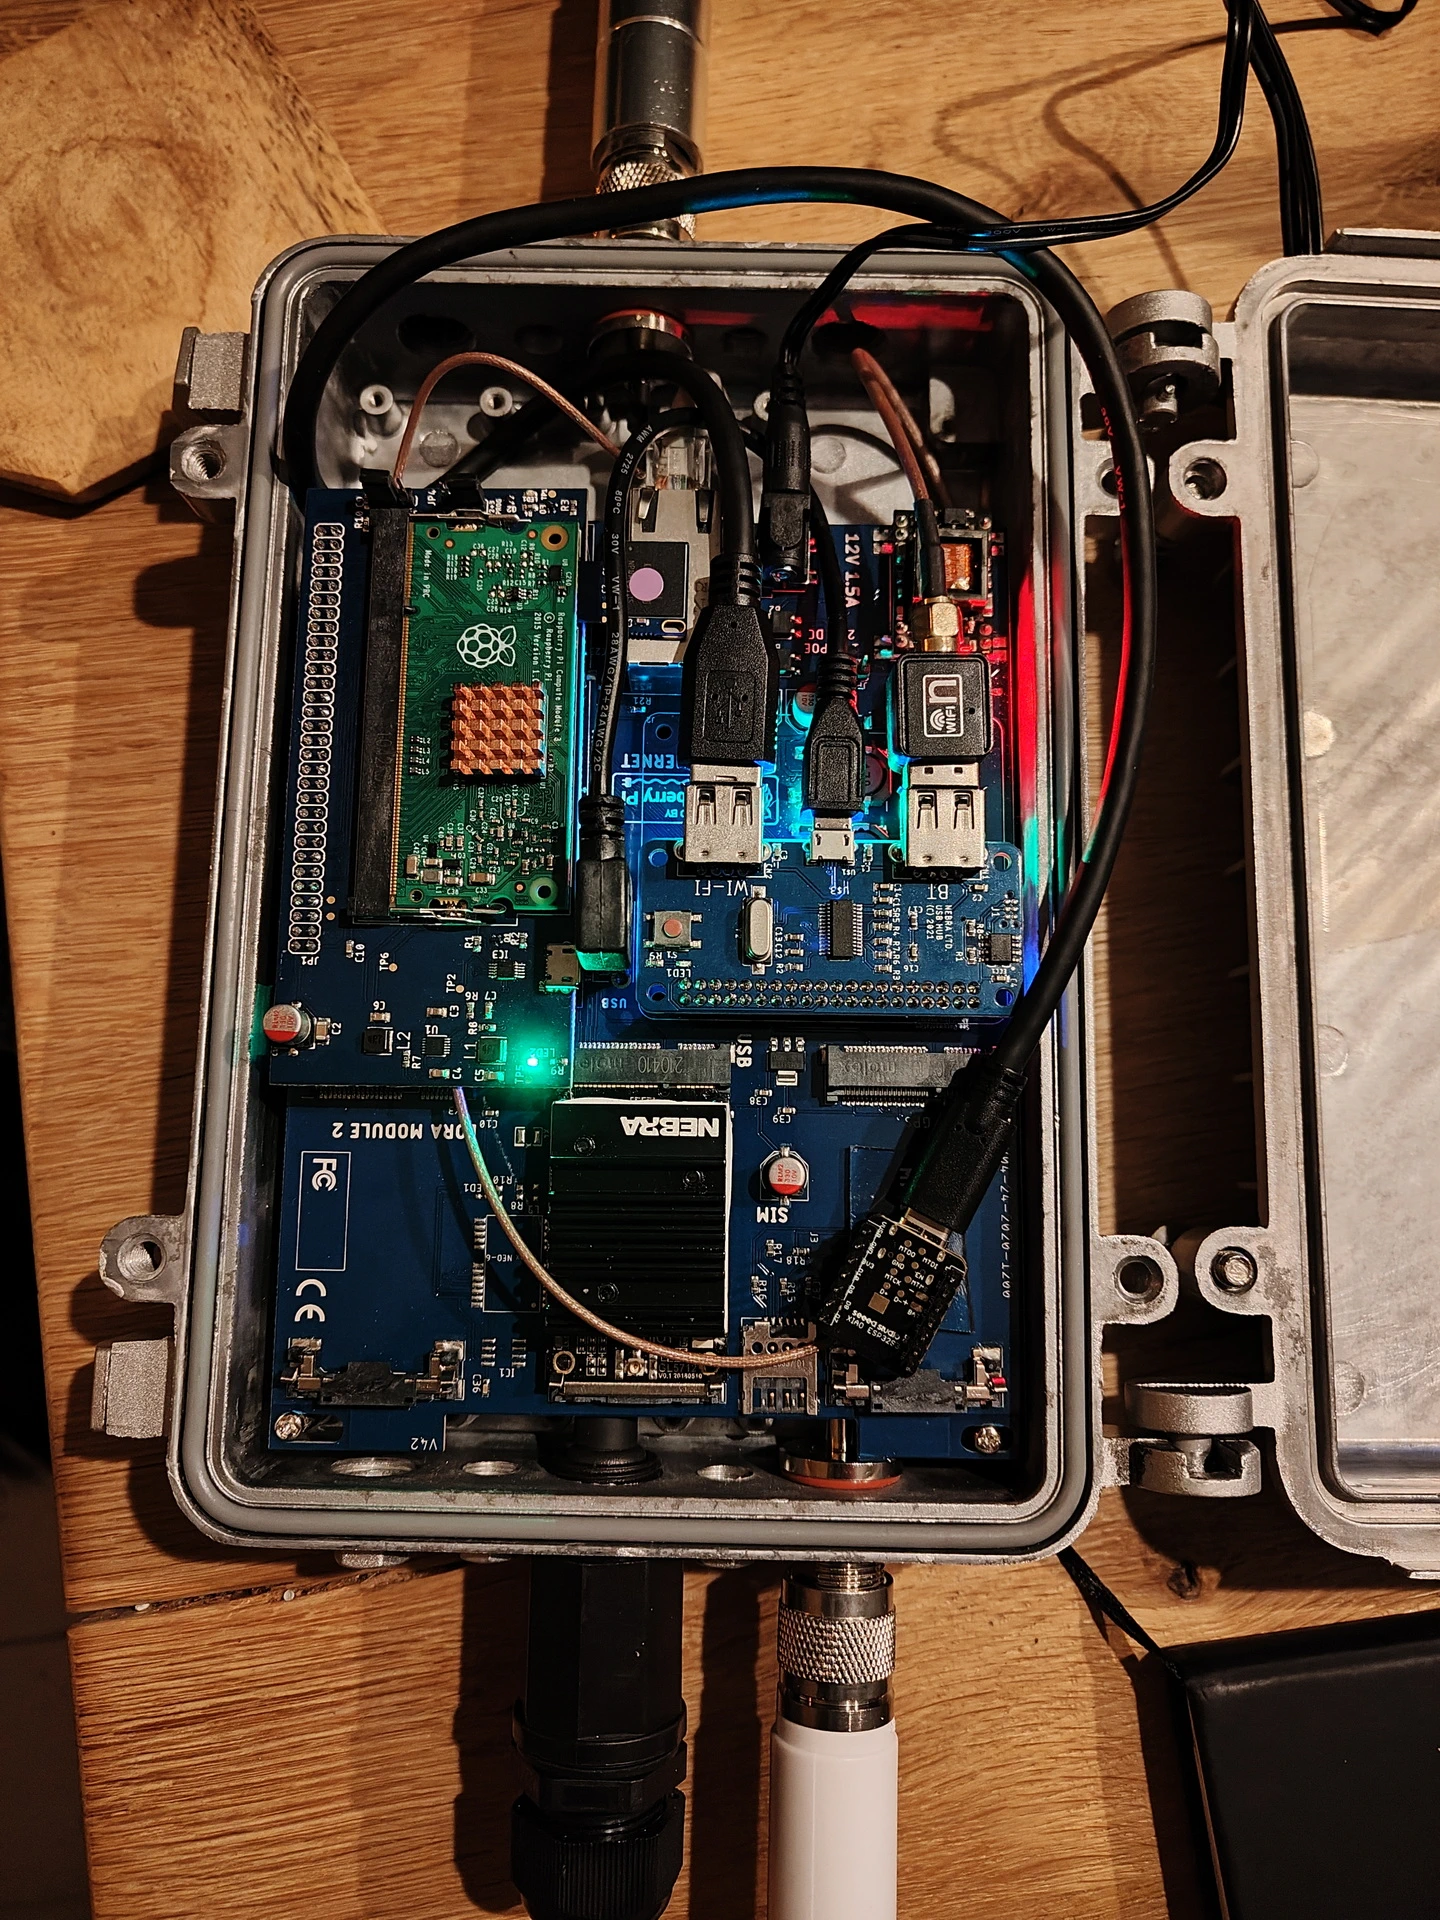
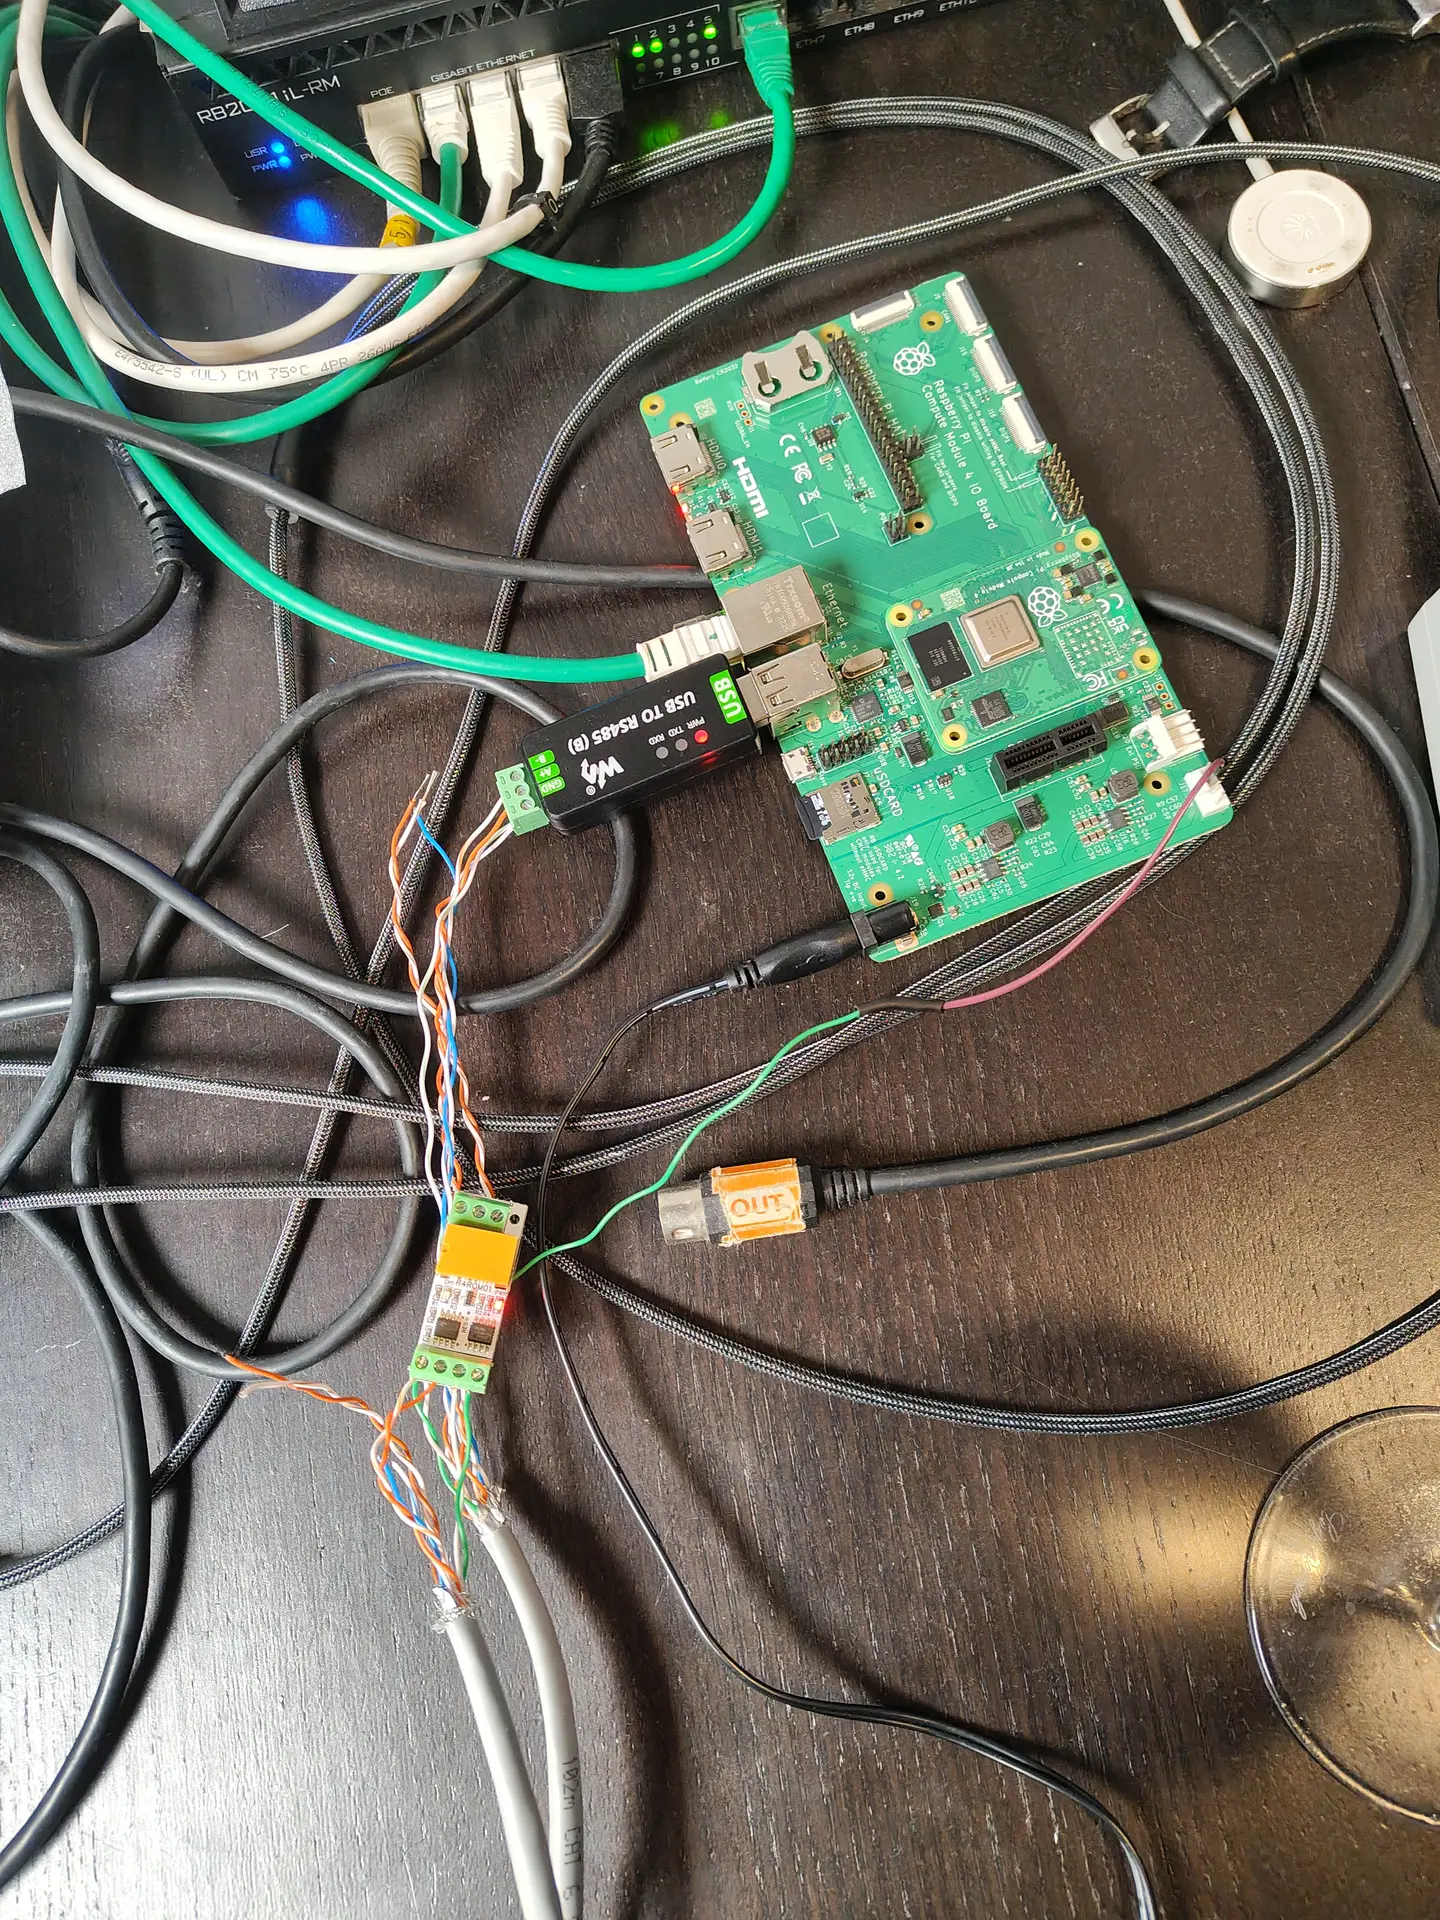
There is a Raspberry CM3 in there (Compute module) Some big antenna’s and a waterproof case. Using POE to power the thing, the plan is to have this installation at a high point around my house. (LED pole?!? 🙂 )
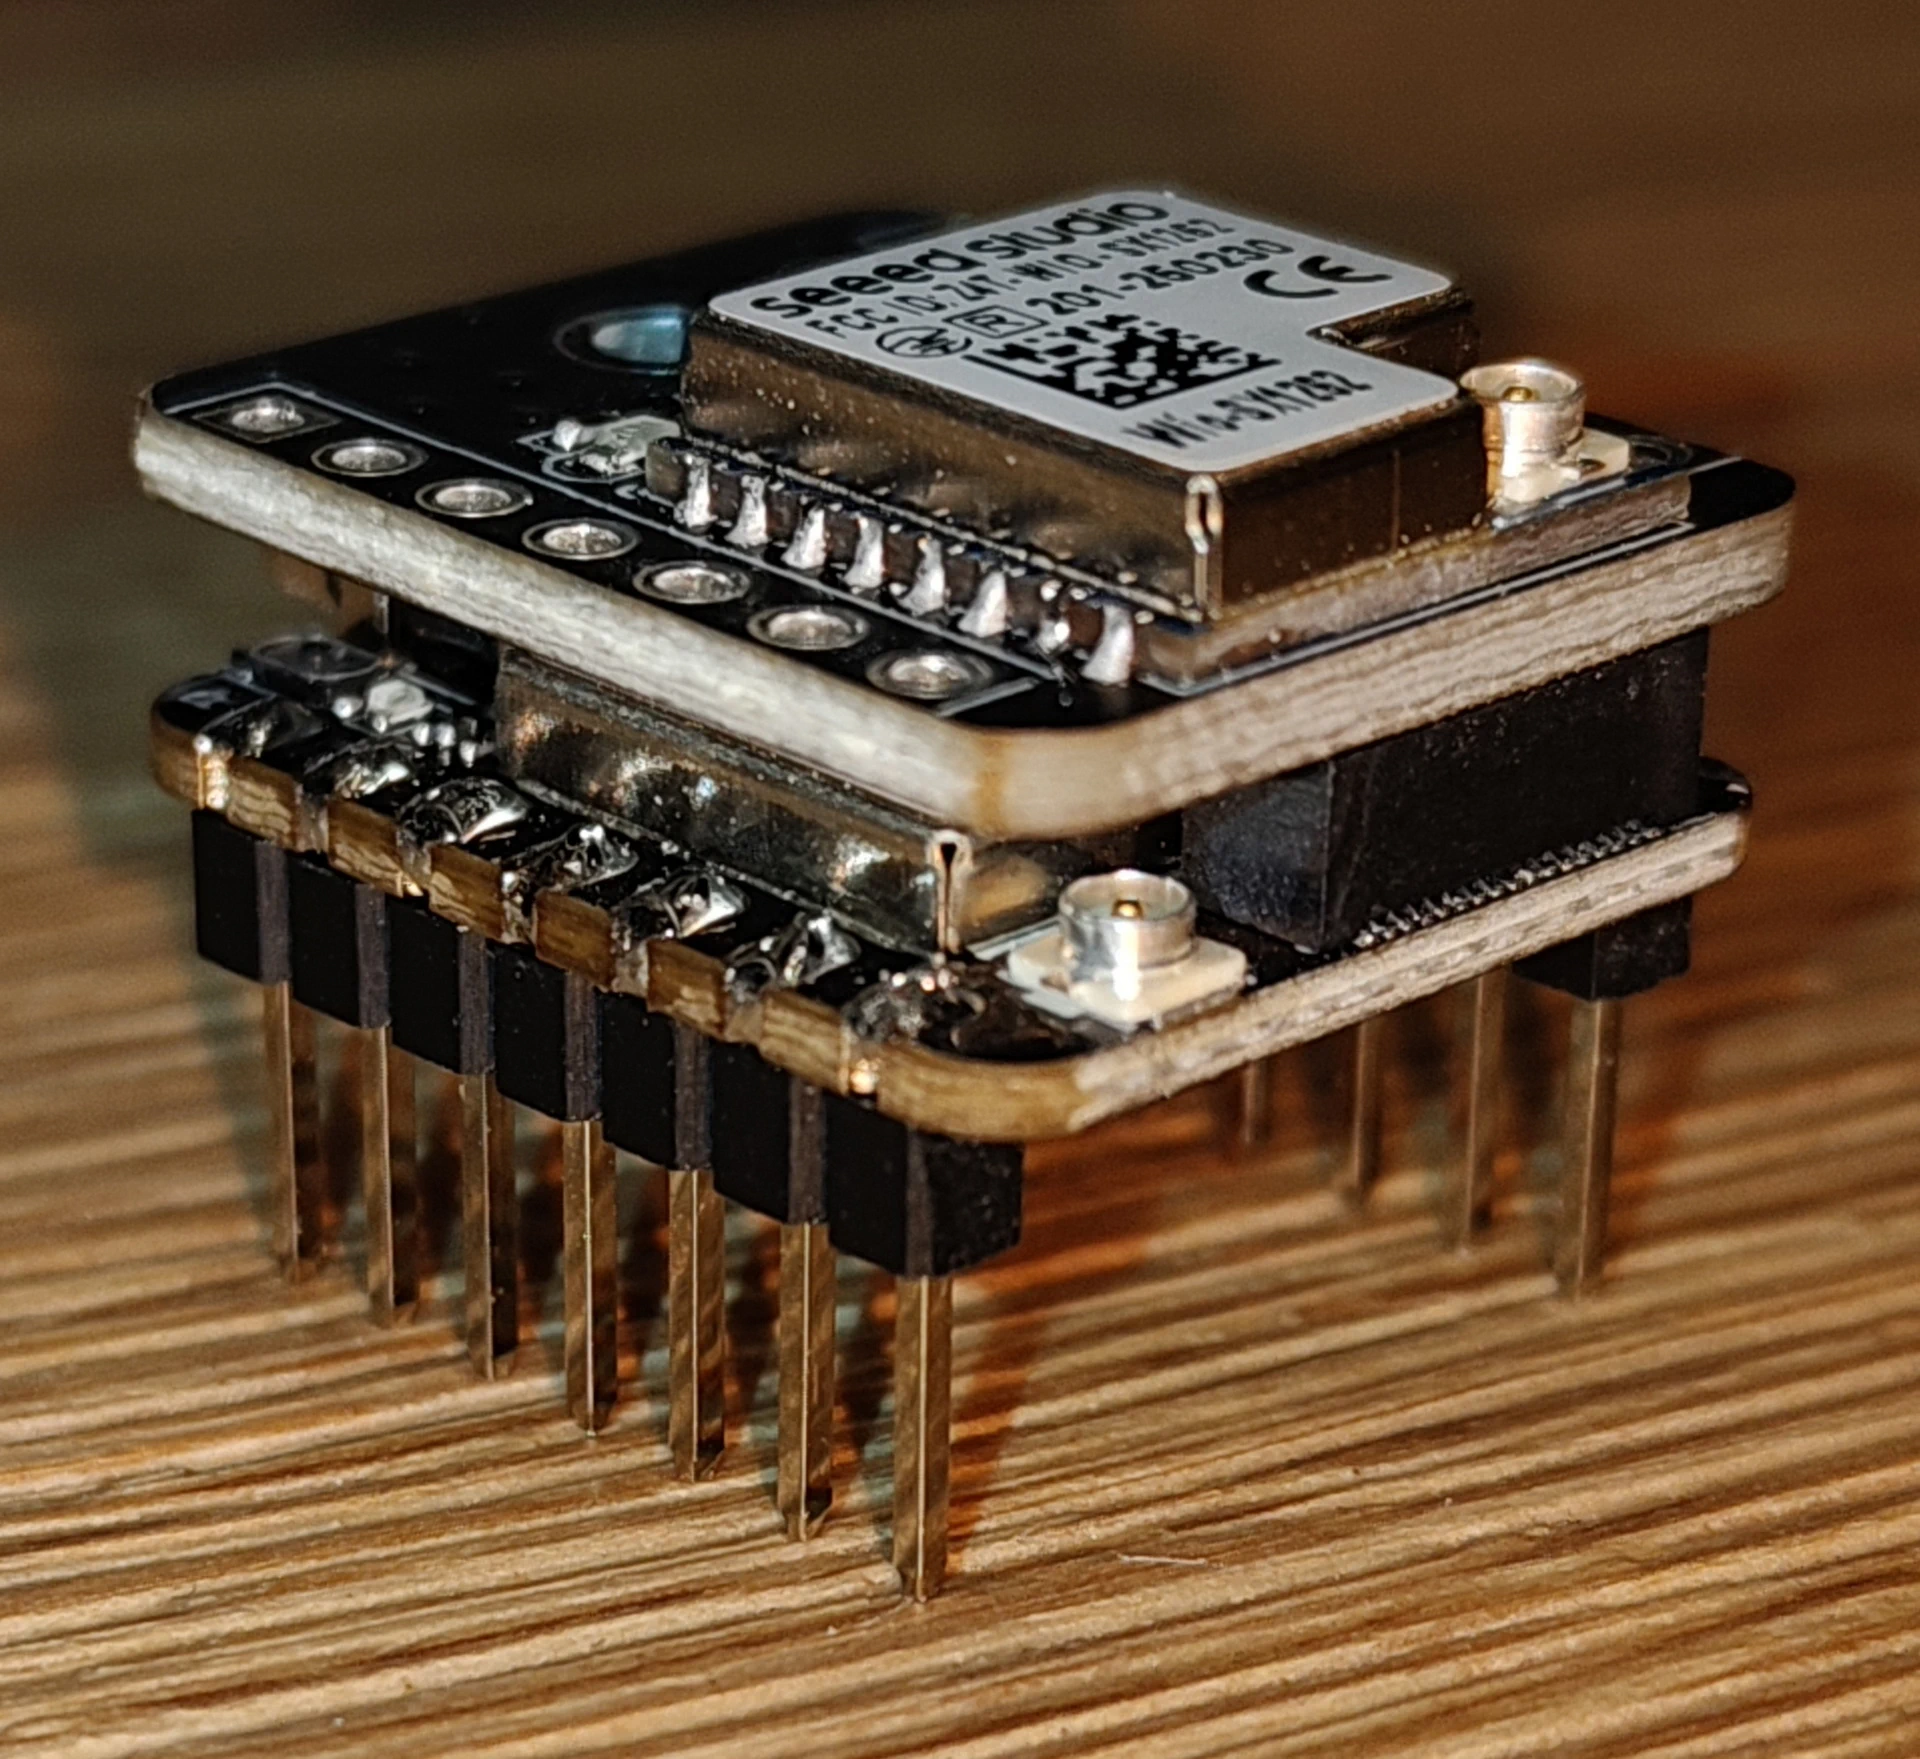
Meanwhile I got these : Seeed Xiao Lora ESP32 modules
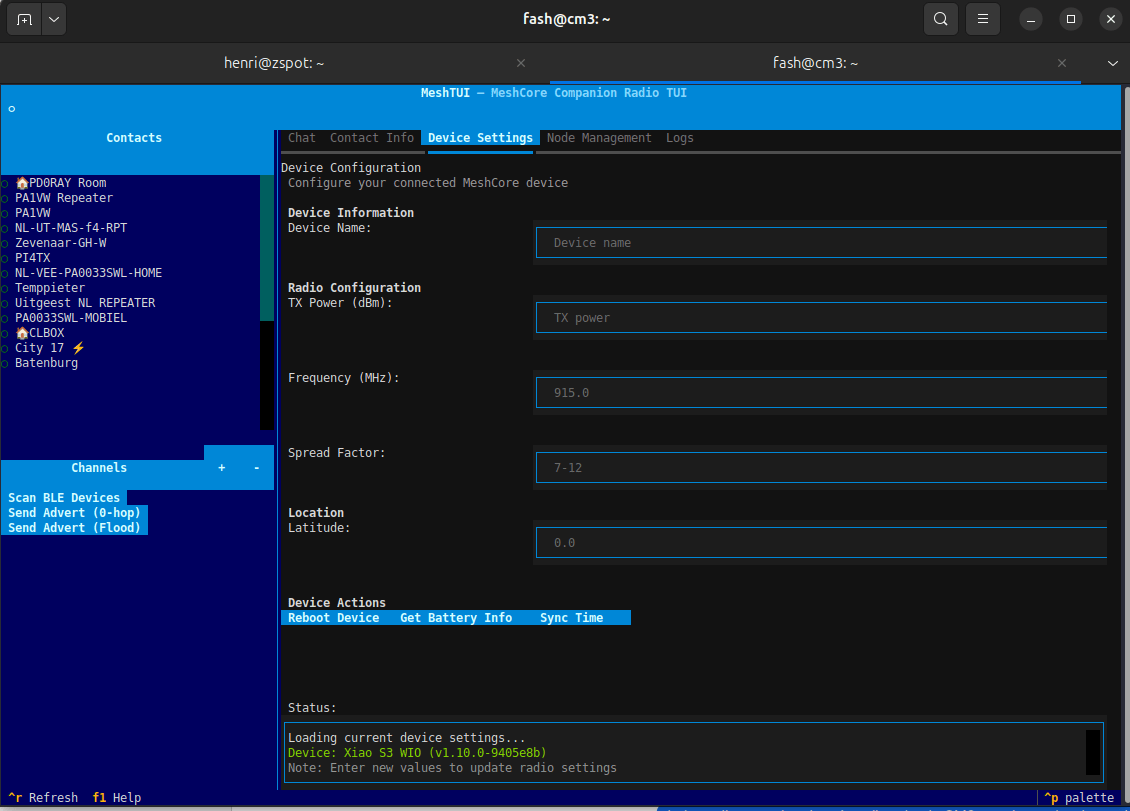
MeshTUI
My mobile Heltec V4, big antenna coming and battery operated, so I can add to https://mapme.sh
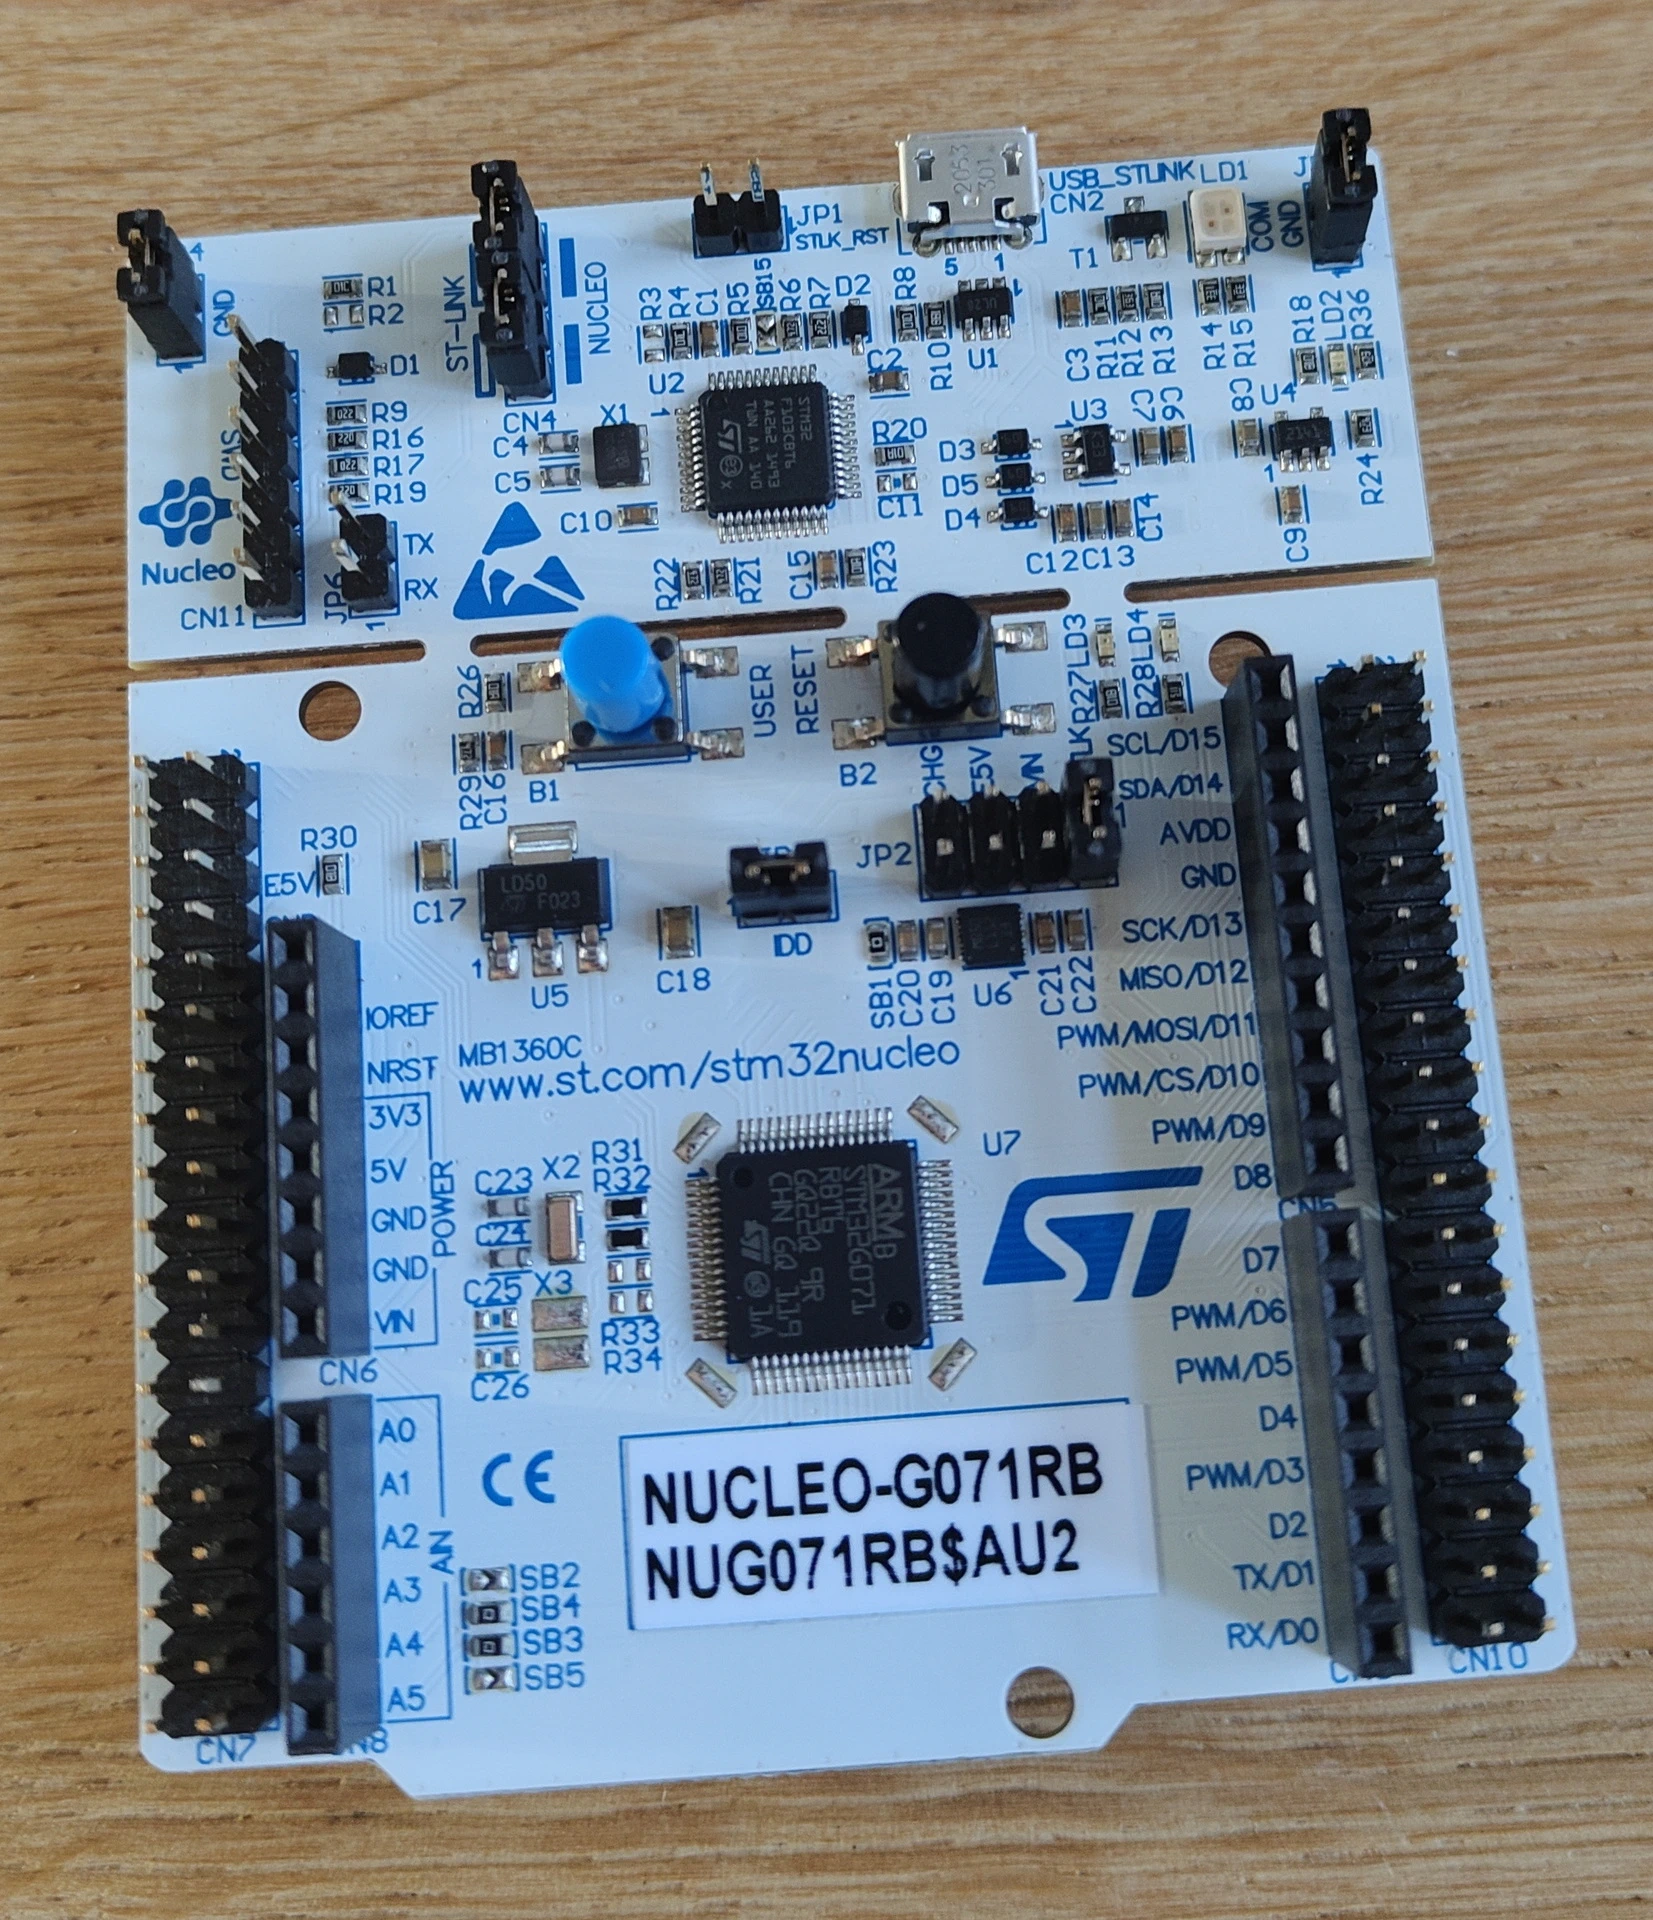
I’ve been playing with all kinds of MicroControllers, but not this one.
Something new to learn.
The STM32 Nucleo-64 board provides a flexible way to try out the STM32 microcontroller. The Arduino Uno V3 can be connected as a shield.
STM32 excels in high-performance, deterministic industrial control with better real-time capability, lower power, and rich peripherals, using ARM Cortex-M cores, while ESP32 dominates IoT with built-in Wi-Fi/Bluetooth, lower cost, easier Arduino/PlatformIO access, and strong community, but with higher power and less precise real-time control (Xtensa cores), making ESP32 great for connected projects and STM32 for industrial/precision tasks.
STM32 (STMicroelectronics) Strengths:
Performance: Superior real-time processing, deterministic behavior, efficient for complex control.
Power: Advanced low-power modes, excellent for battery-powered devices.
Reliability: Strong for industrial, medical, and automotive applications.
Tools: STM32CubeIDE/MX, HAL/LL libraries.
Weaknesses:
Higher cost and learning curve.
Requires external modules for Wi-Fi/Bluetooth.
ESP32 (Espressif Systems) Strengths:
Connectivity: Integrated Wi-Fi and Bluetooth (BLE).
Cost & Ease: Cost-effective, easy entry with Arduino IDE/PlatformIO, great for rapid prototyping.
Community: Strong open-source community.
Features: Dual-core (often), built-in OTA updates, good for audio/AI.
Weaknesses:
Less deterministic/real-time performance than STM32.
Higher active power consumption, less precise analog.
Can have complex debugging/compilation.
When to Choose Which
Choose STM32 for: Industrial automation, precise instrumentation, medical devices, complex motor control, low-power wearables, general embedded systems learning.
Choose ESP32 for: IoT devices, smart home products, Bluetooth beacons, educational projects, rapid prototyping, audio/voice applications.
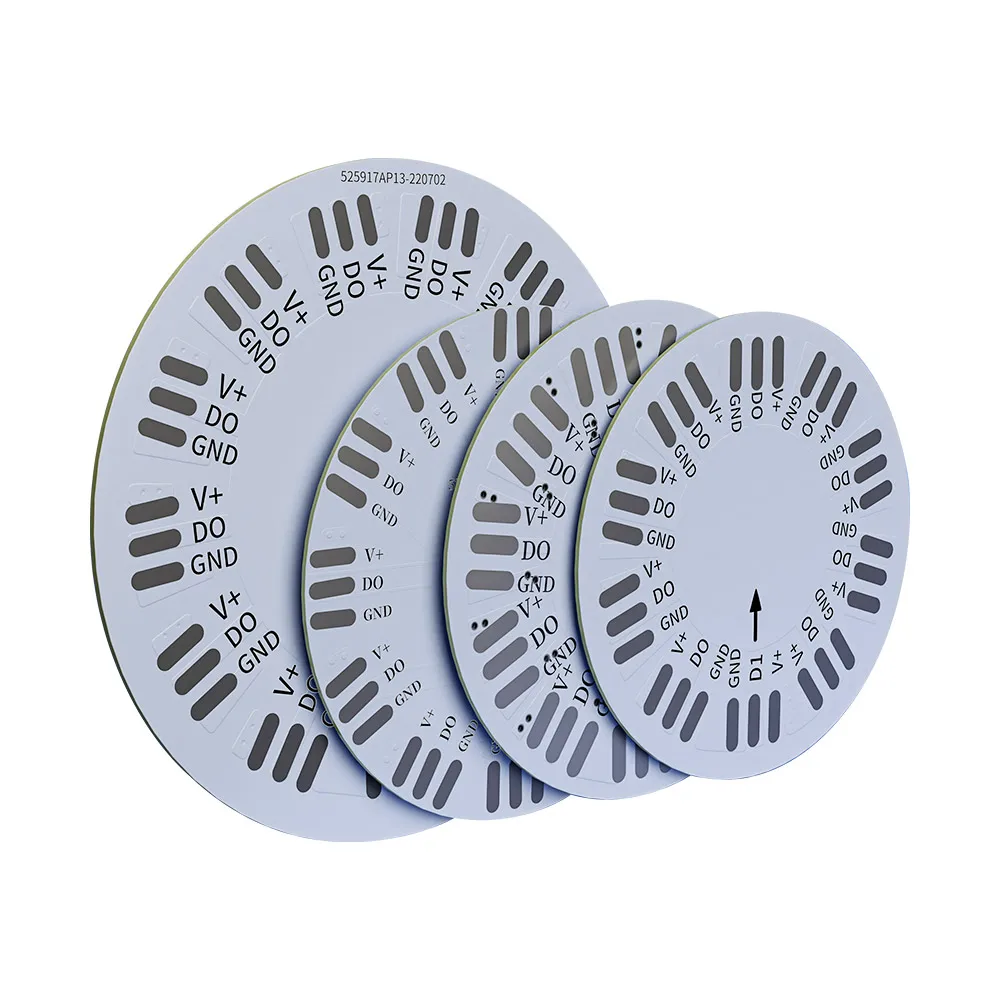
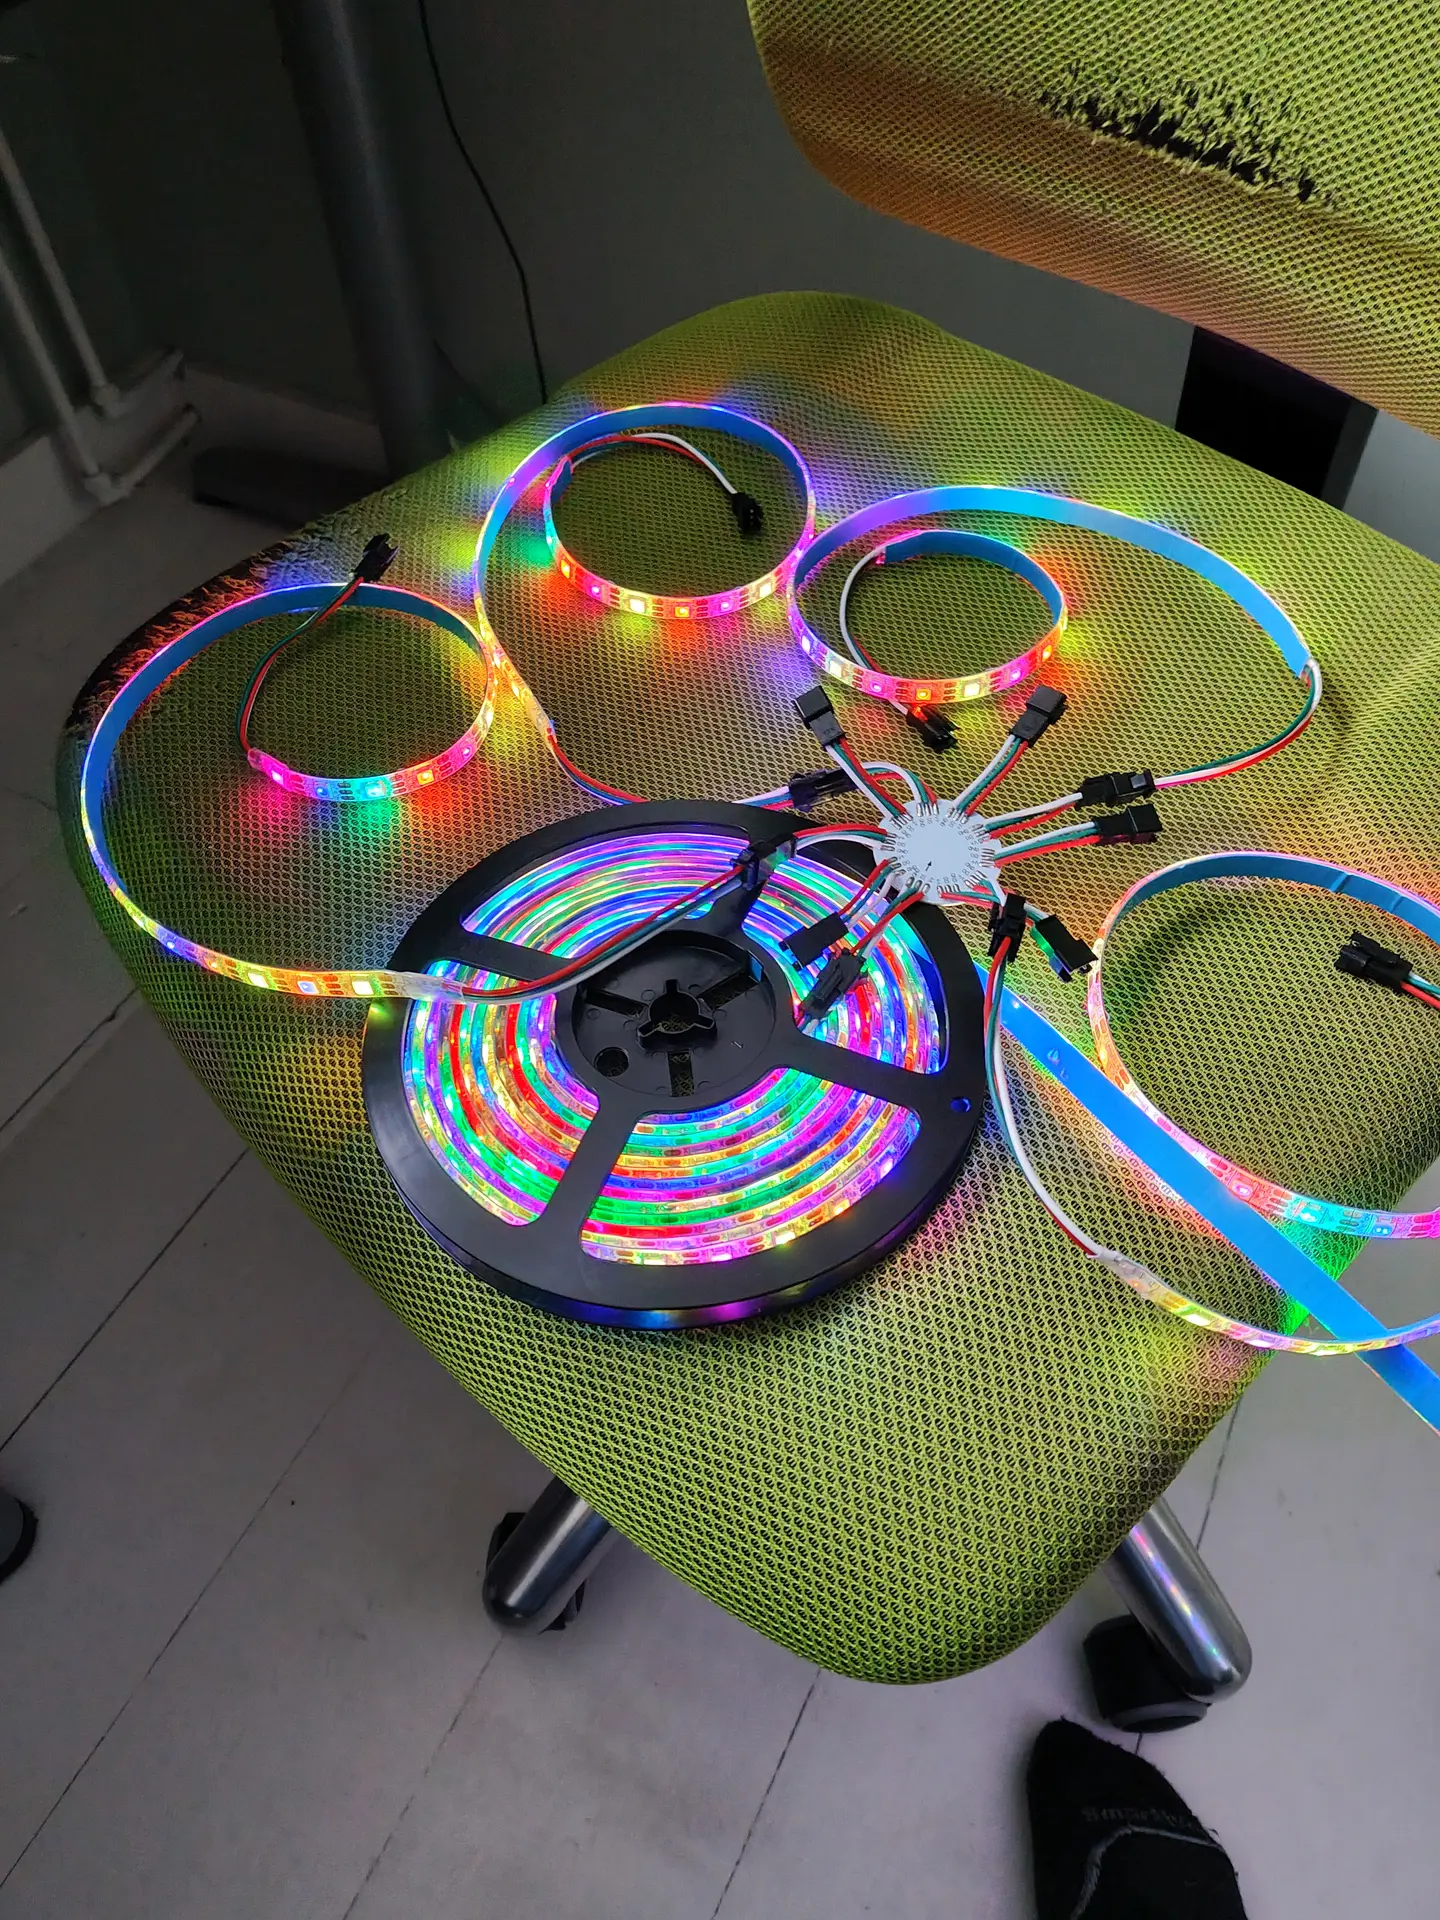
I saw some LED strip dividers on Aliexpress, next year it’s going to have a star on top.
Like this….
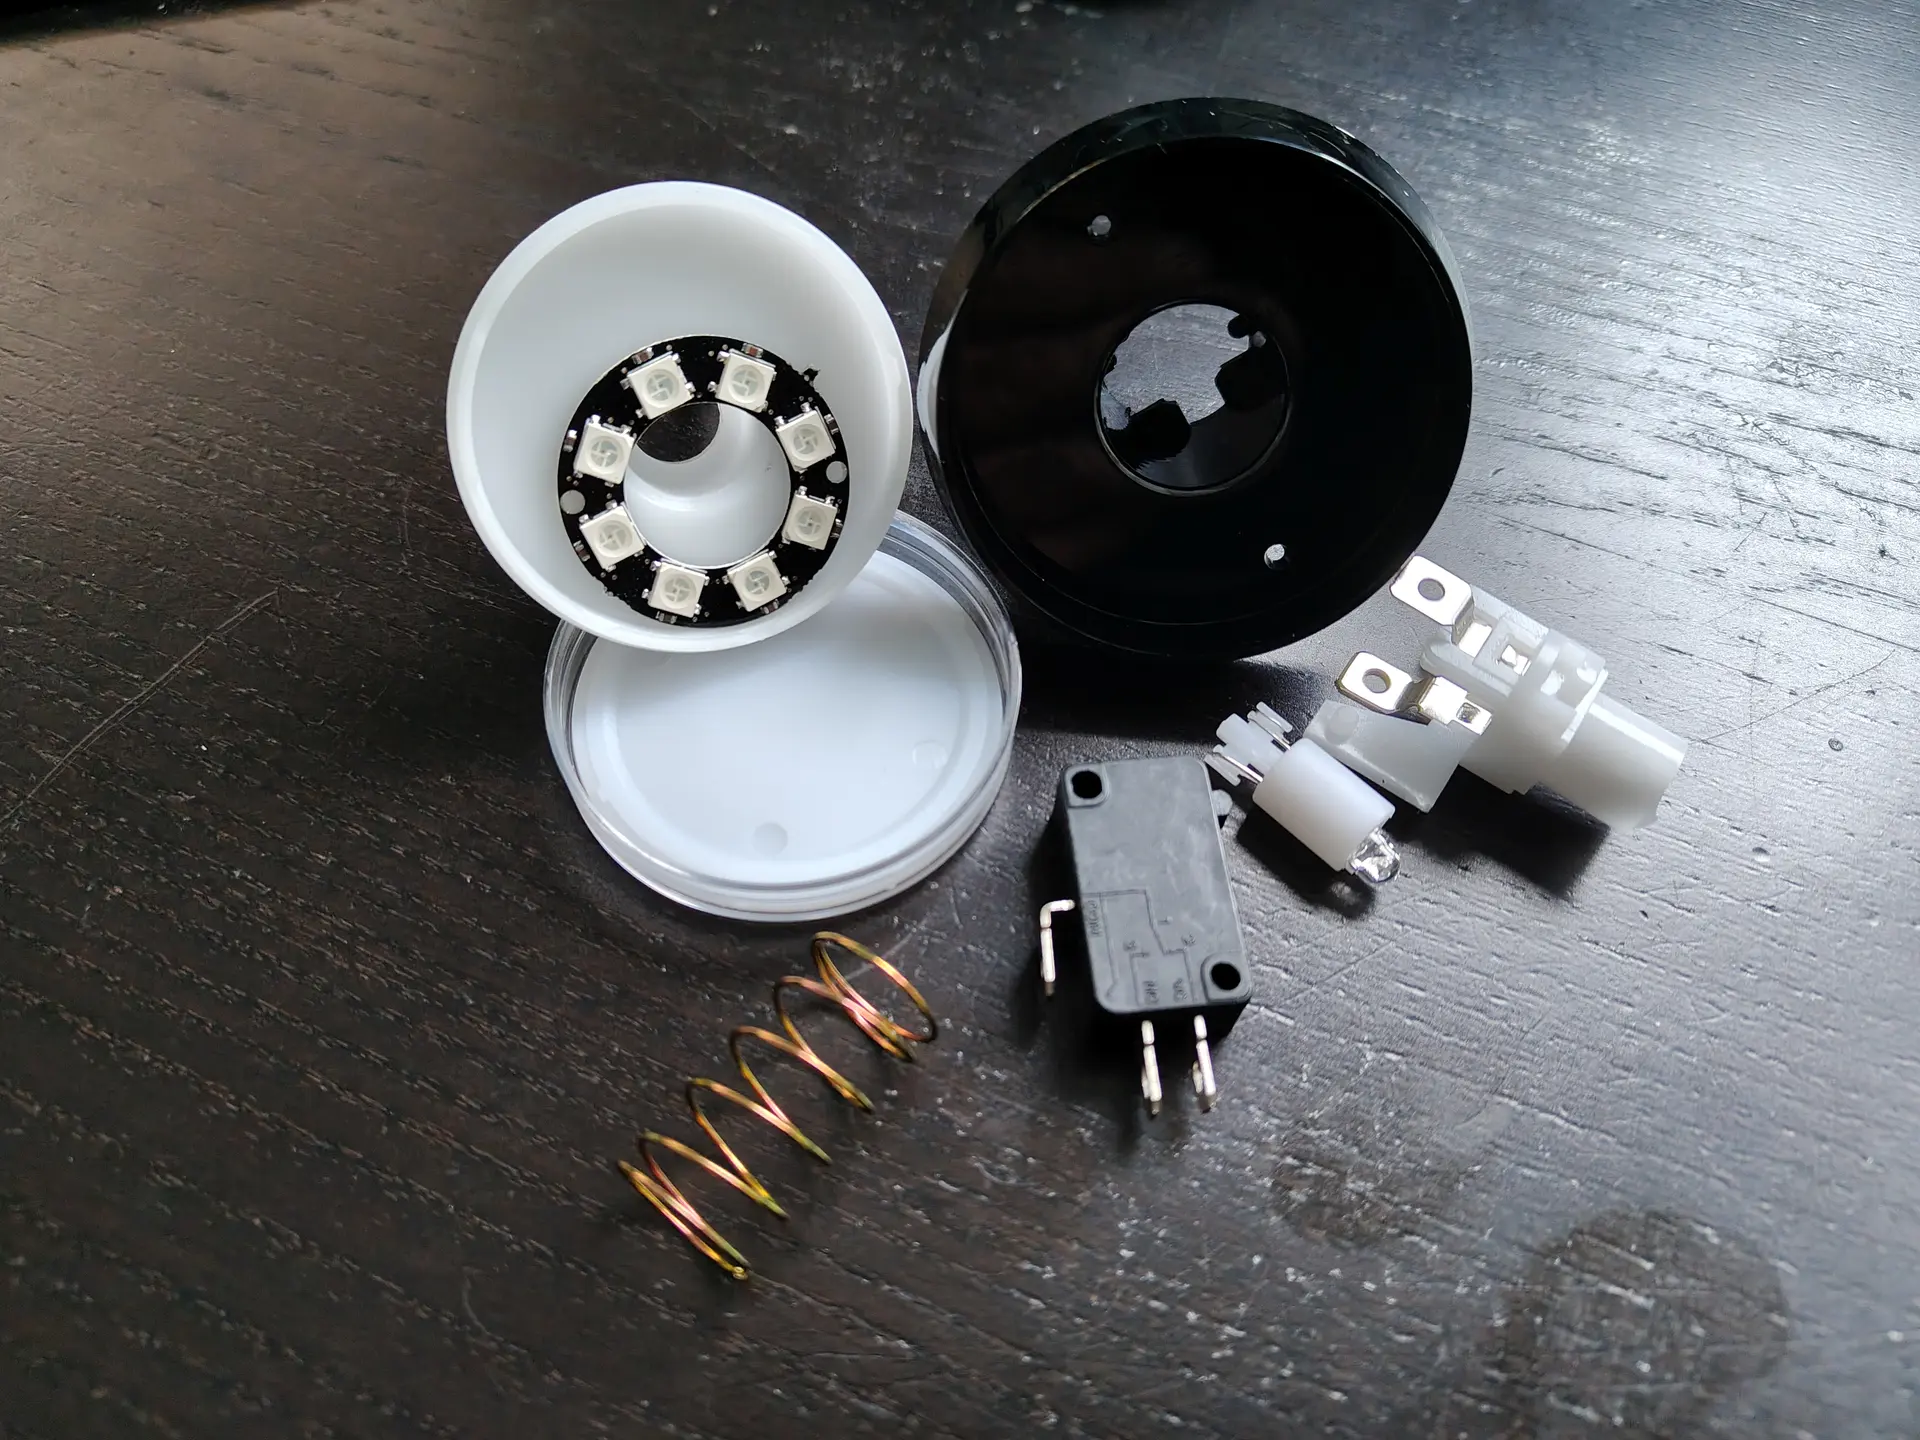
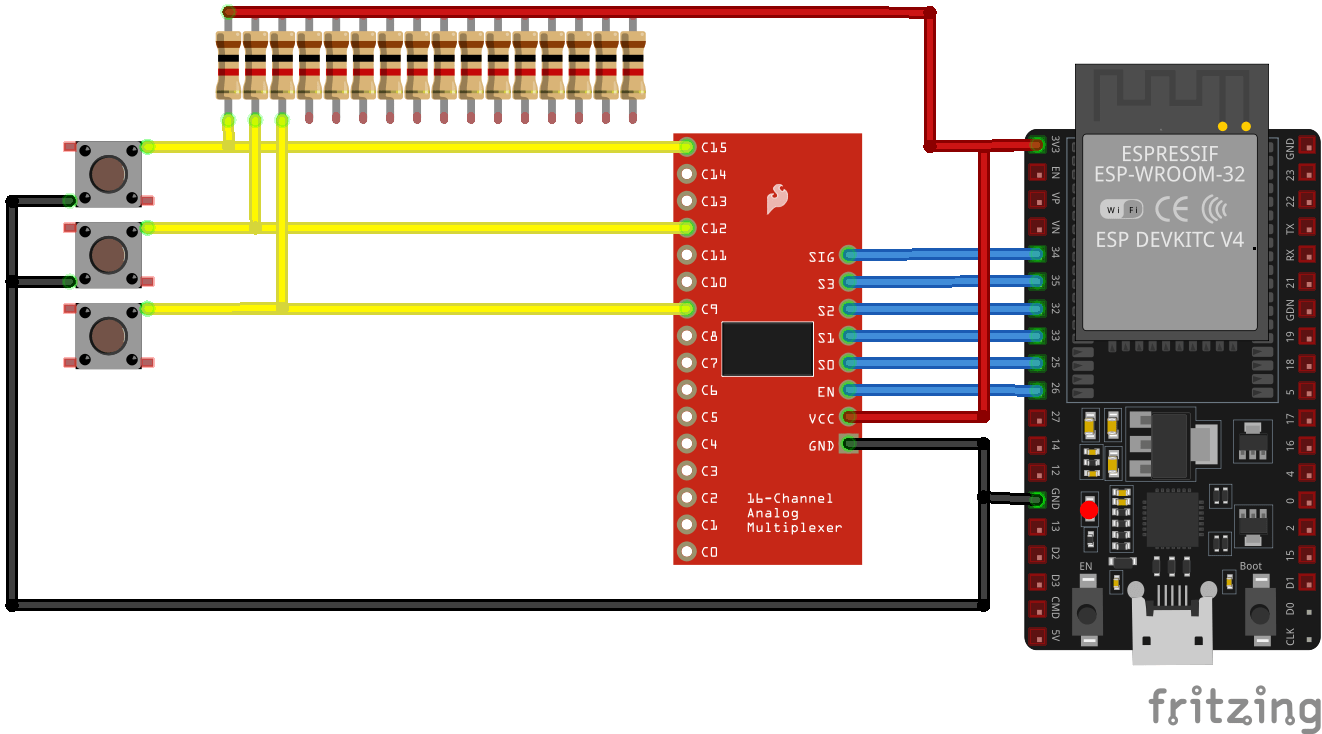
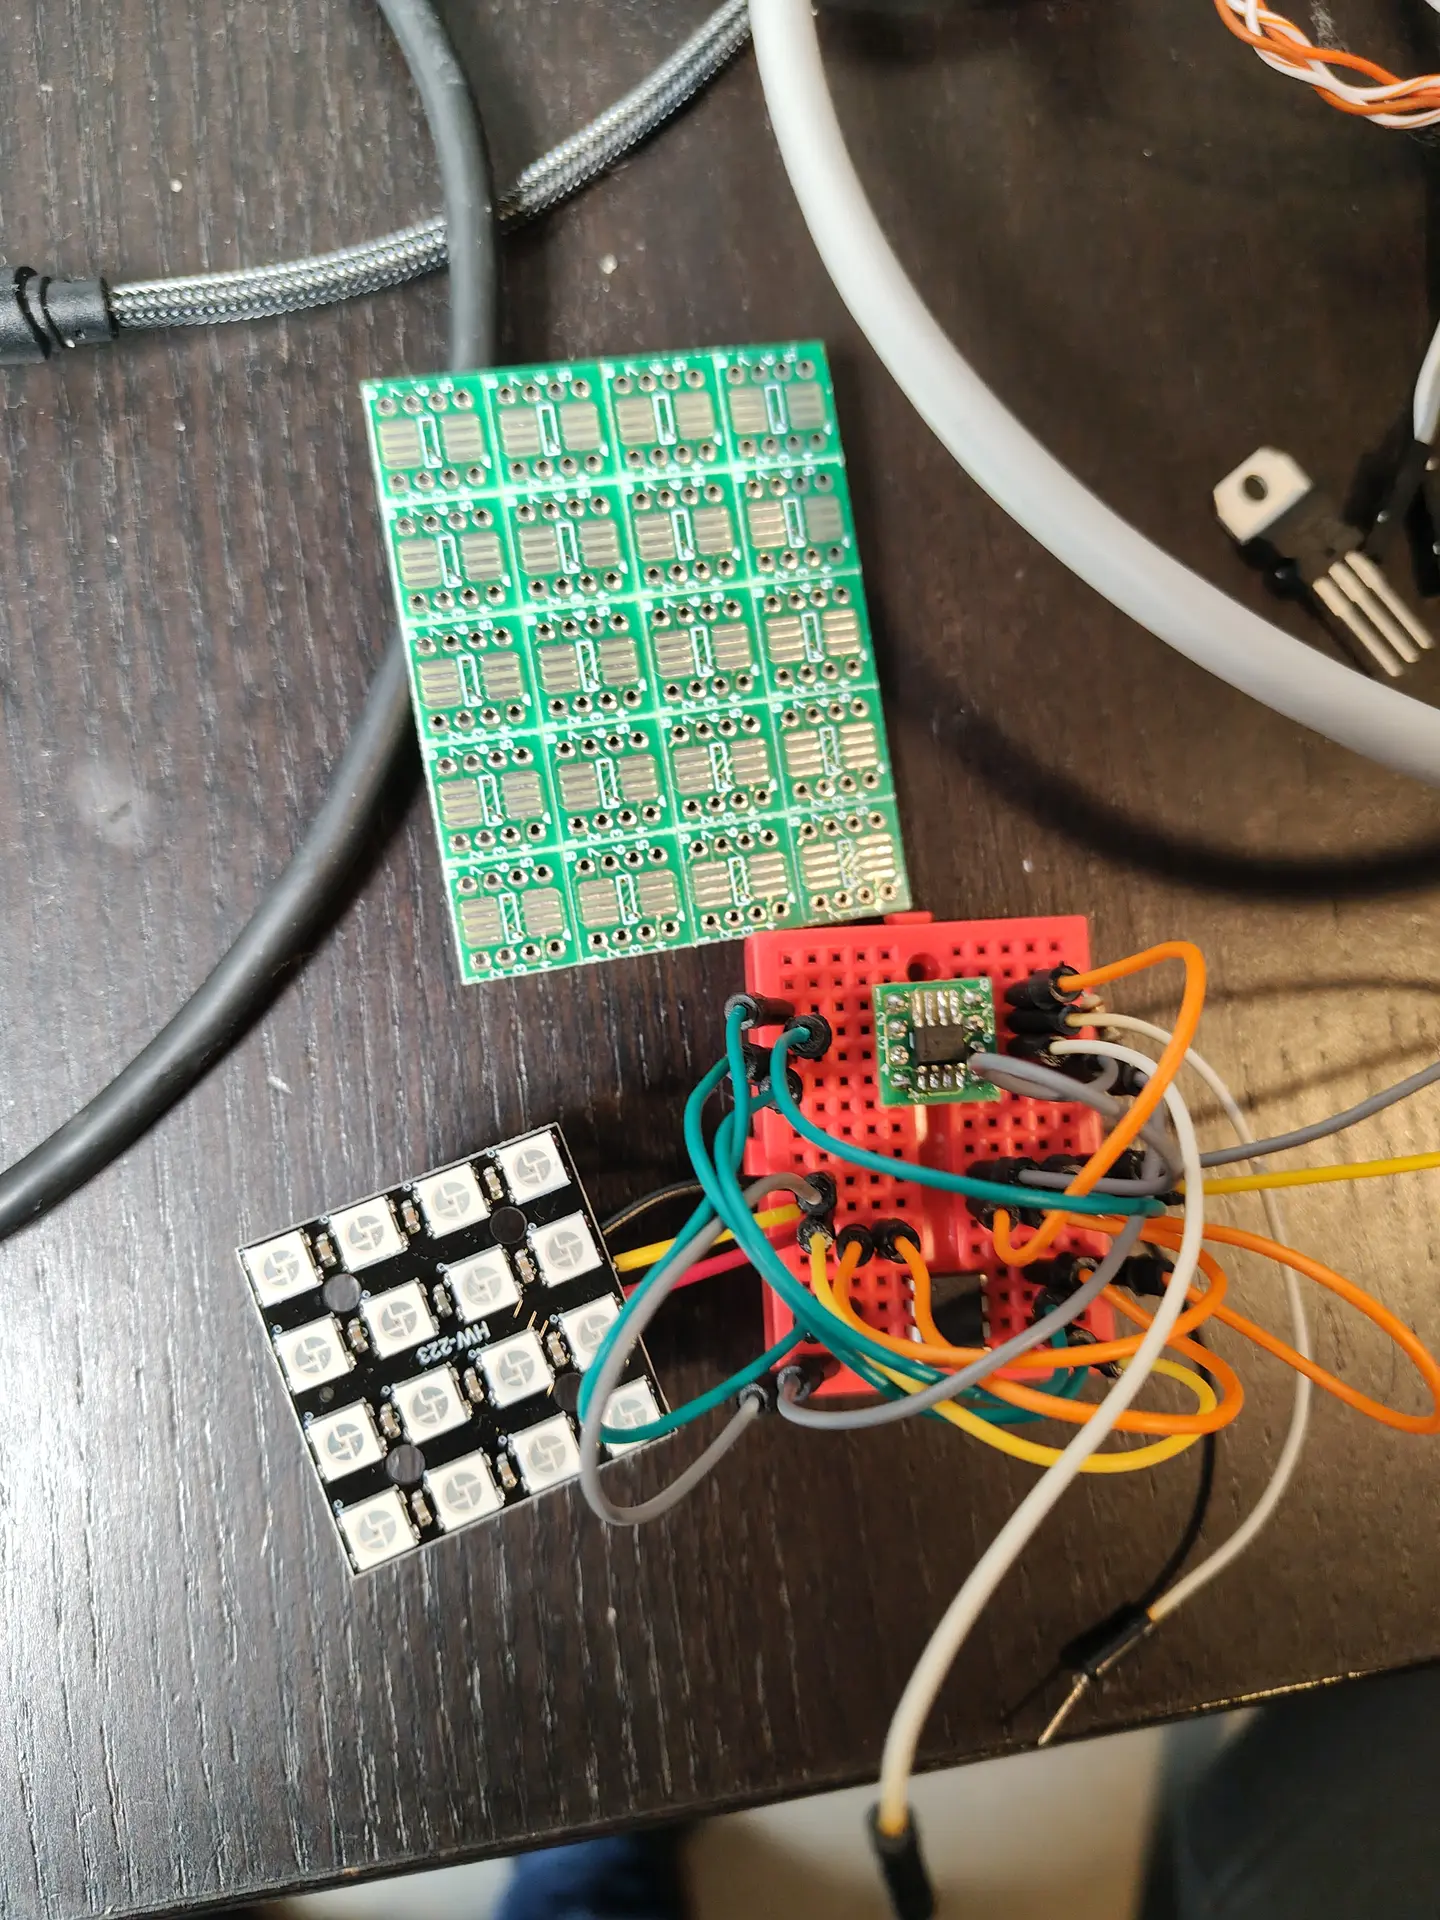
Another LED related project I started today is a Whack-A-Mole game with multiple levels. For this I need to convert a simple arcade button to a programmable multicolor version.
From single white LED to multi color, programmable.
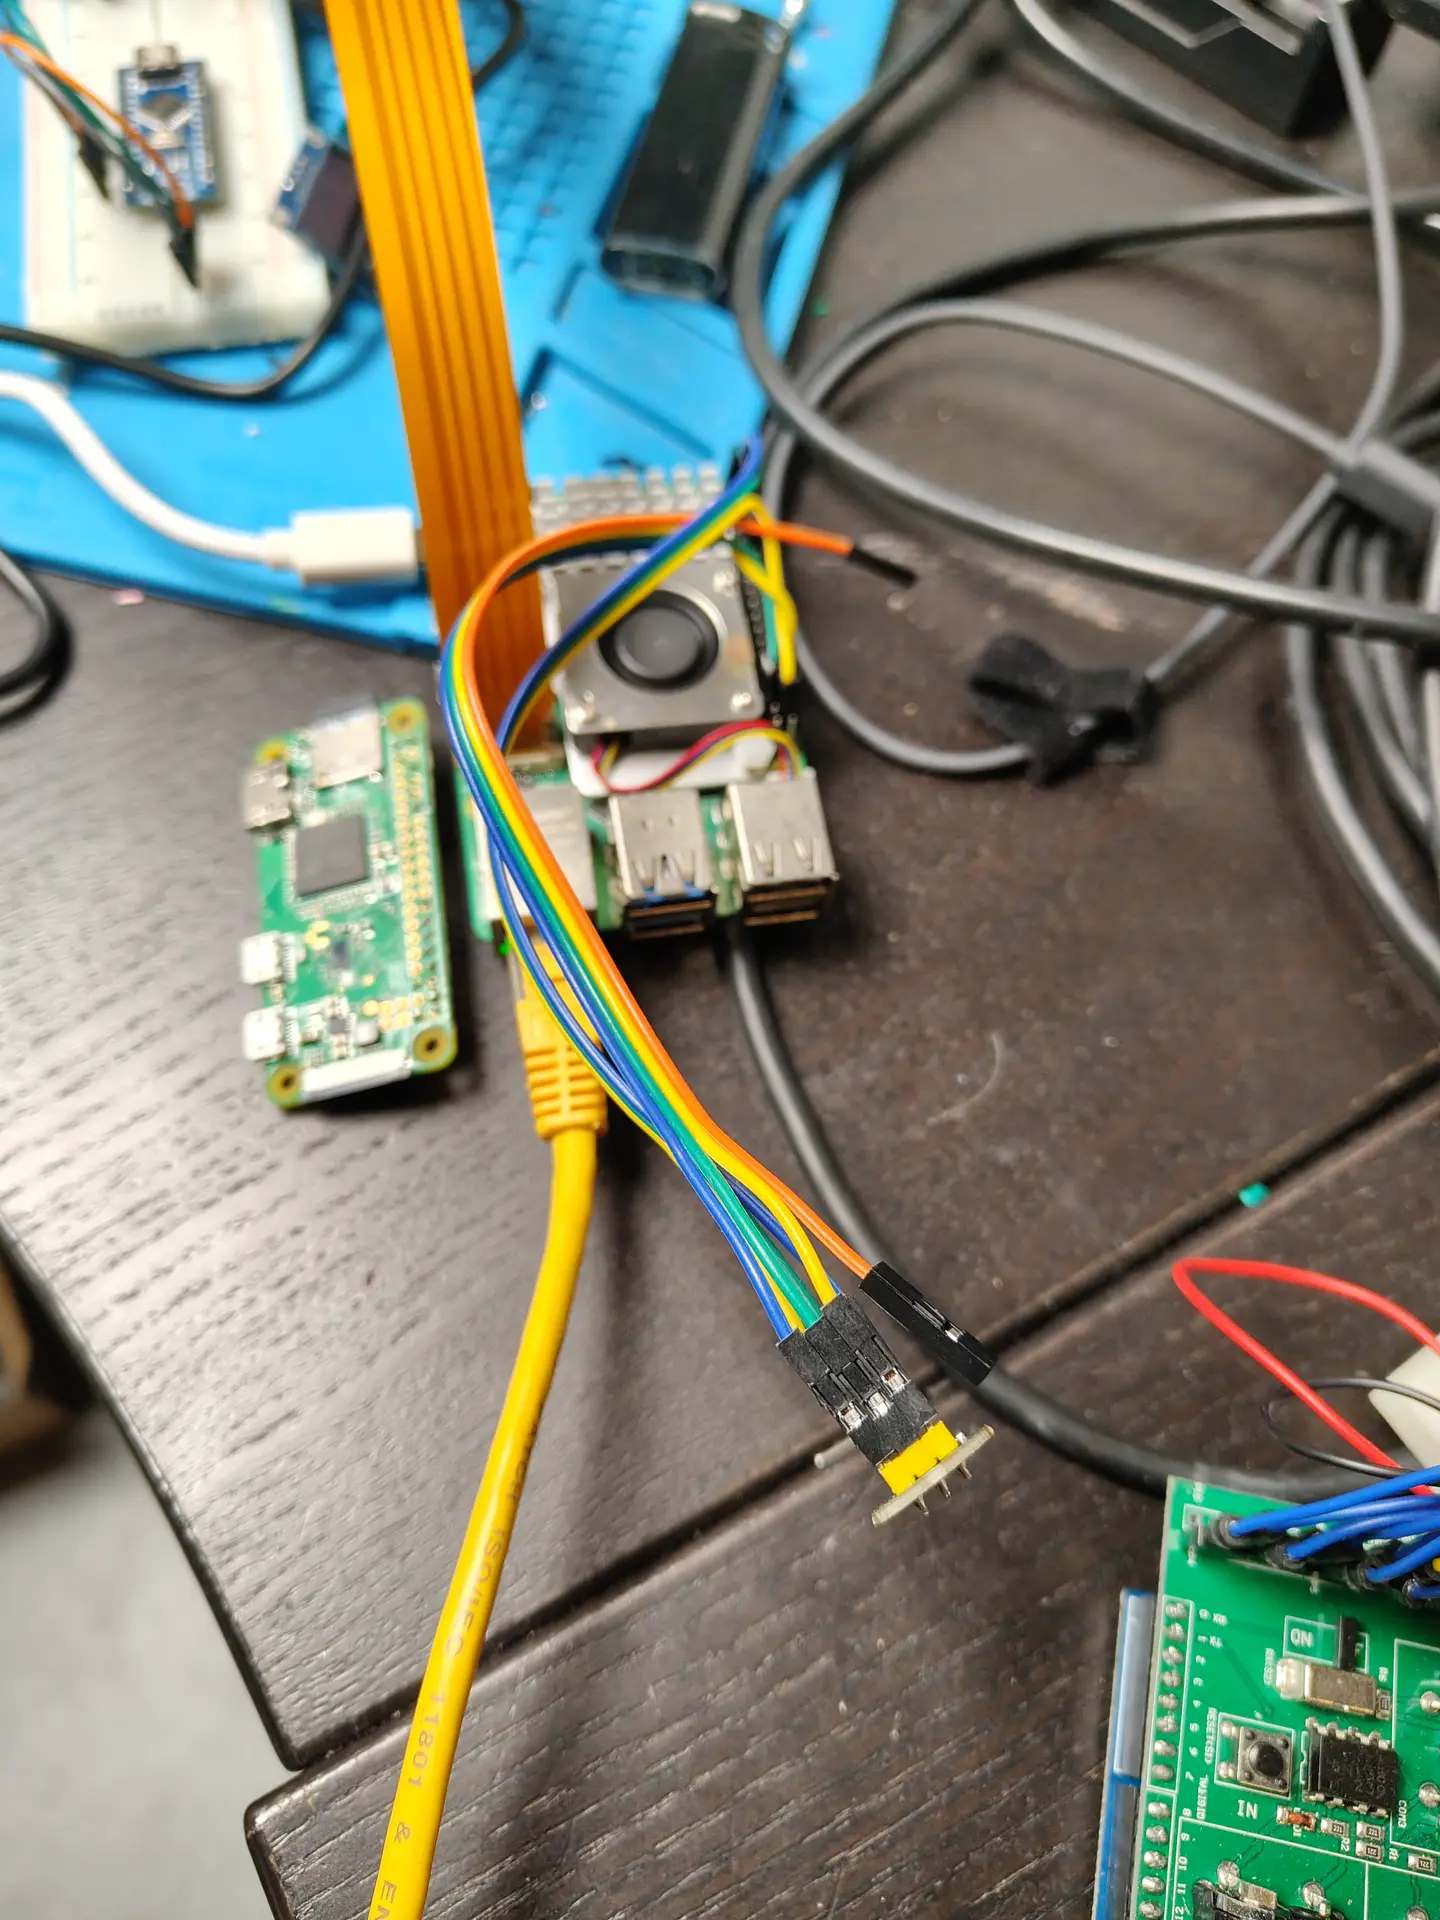
Another game in the making is a Red Light – Green Light game. Like in Squid Game. This will use a lidar and a python script which detect movement using a camera.
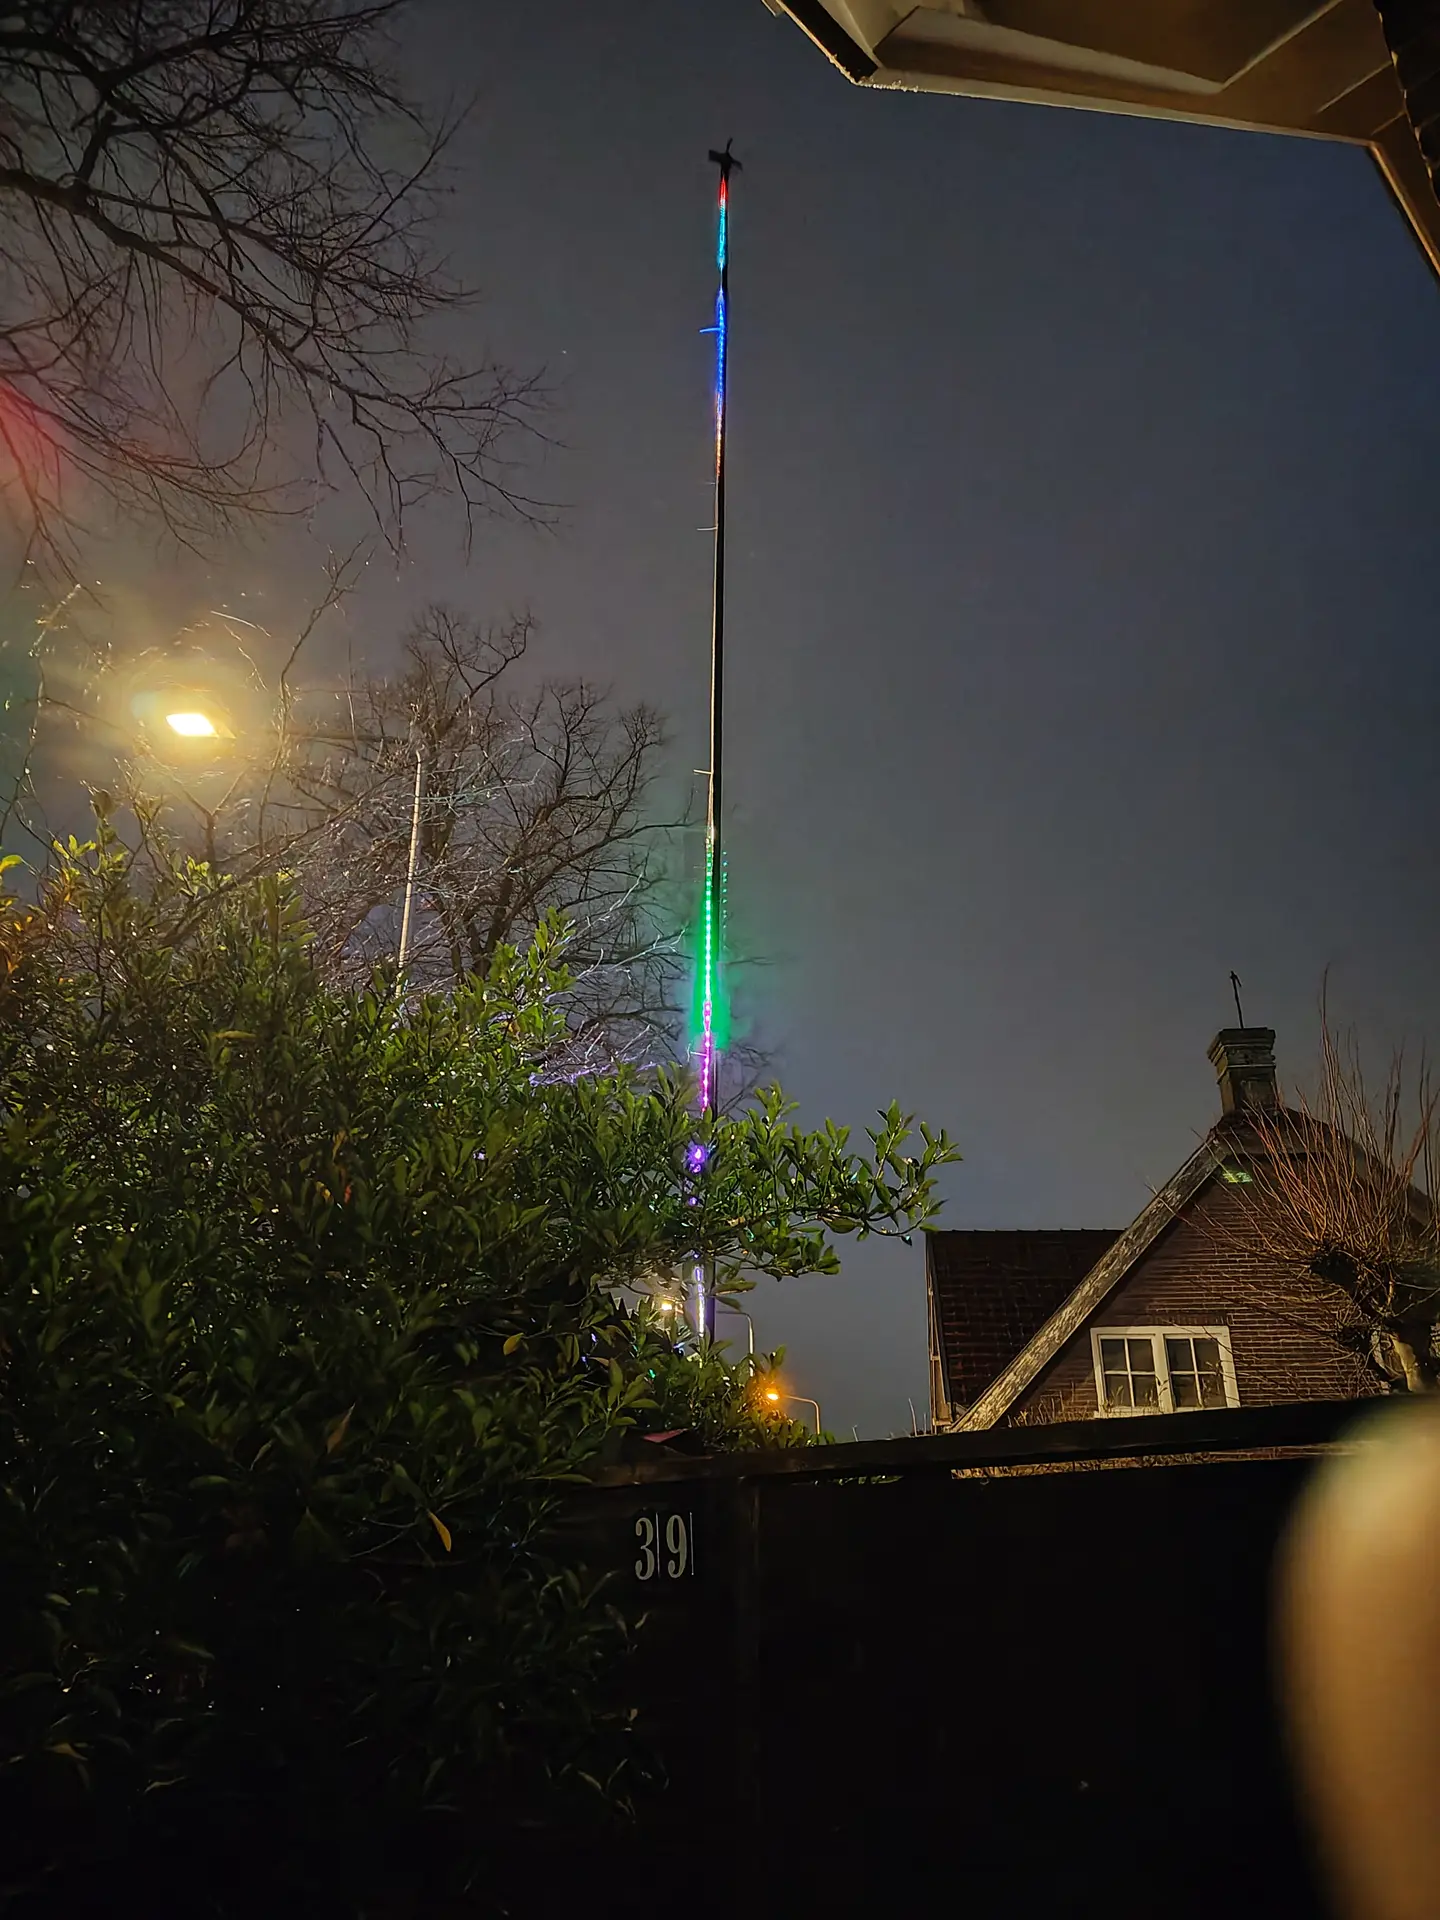
It gave me the idea to make a pole which displays digital “fireworks” using leds. Fireworks are becoming illegal the next year in the Netherlands, I think.
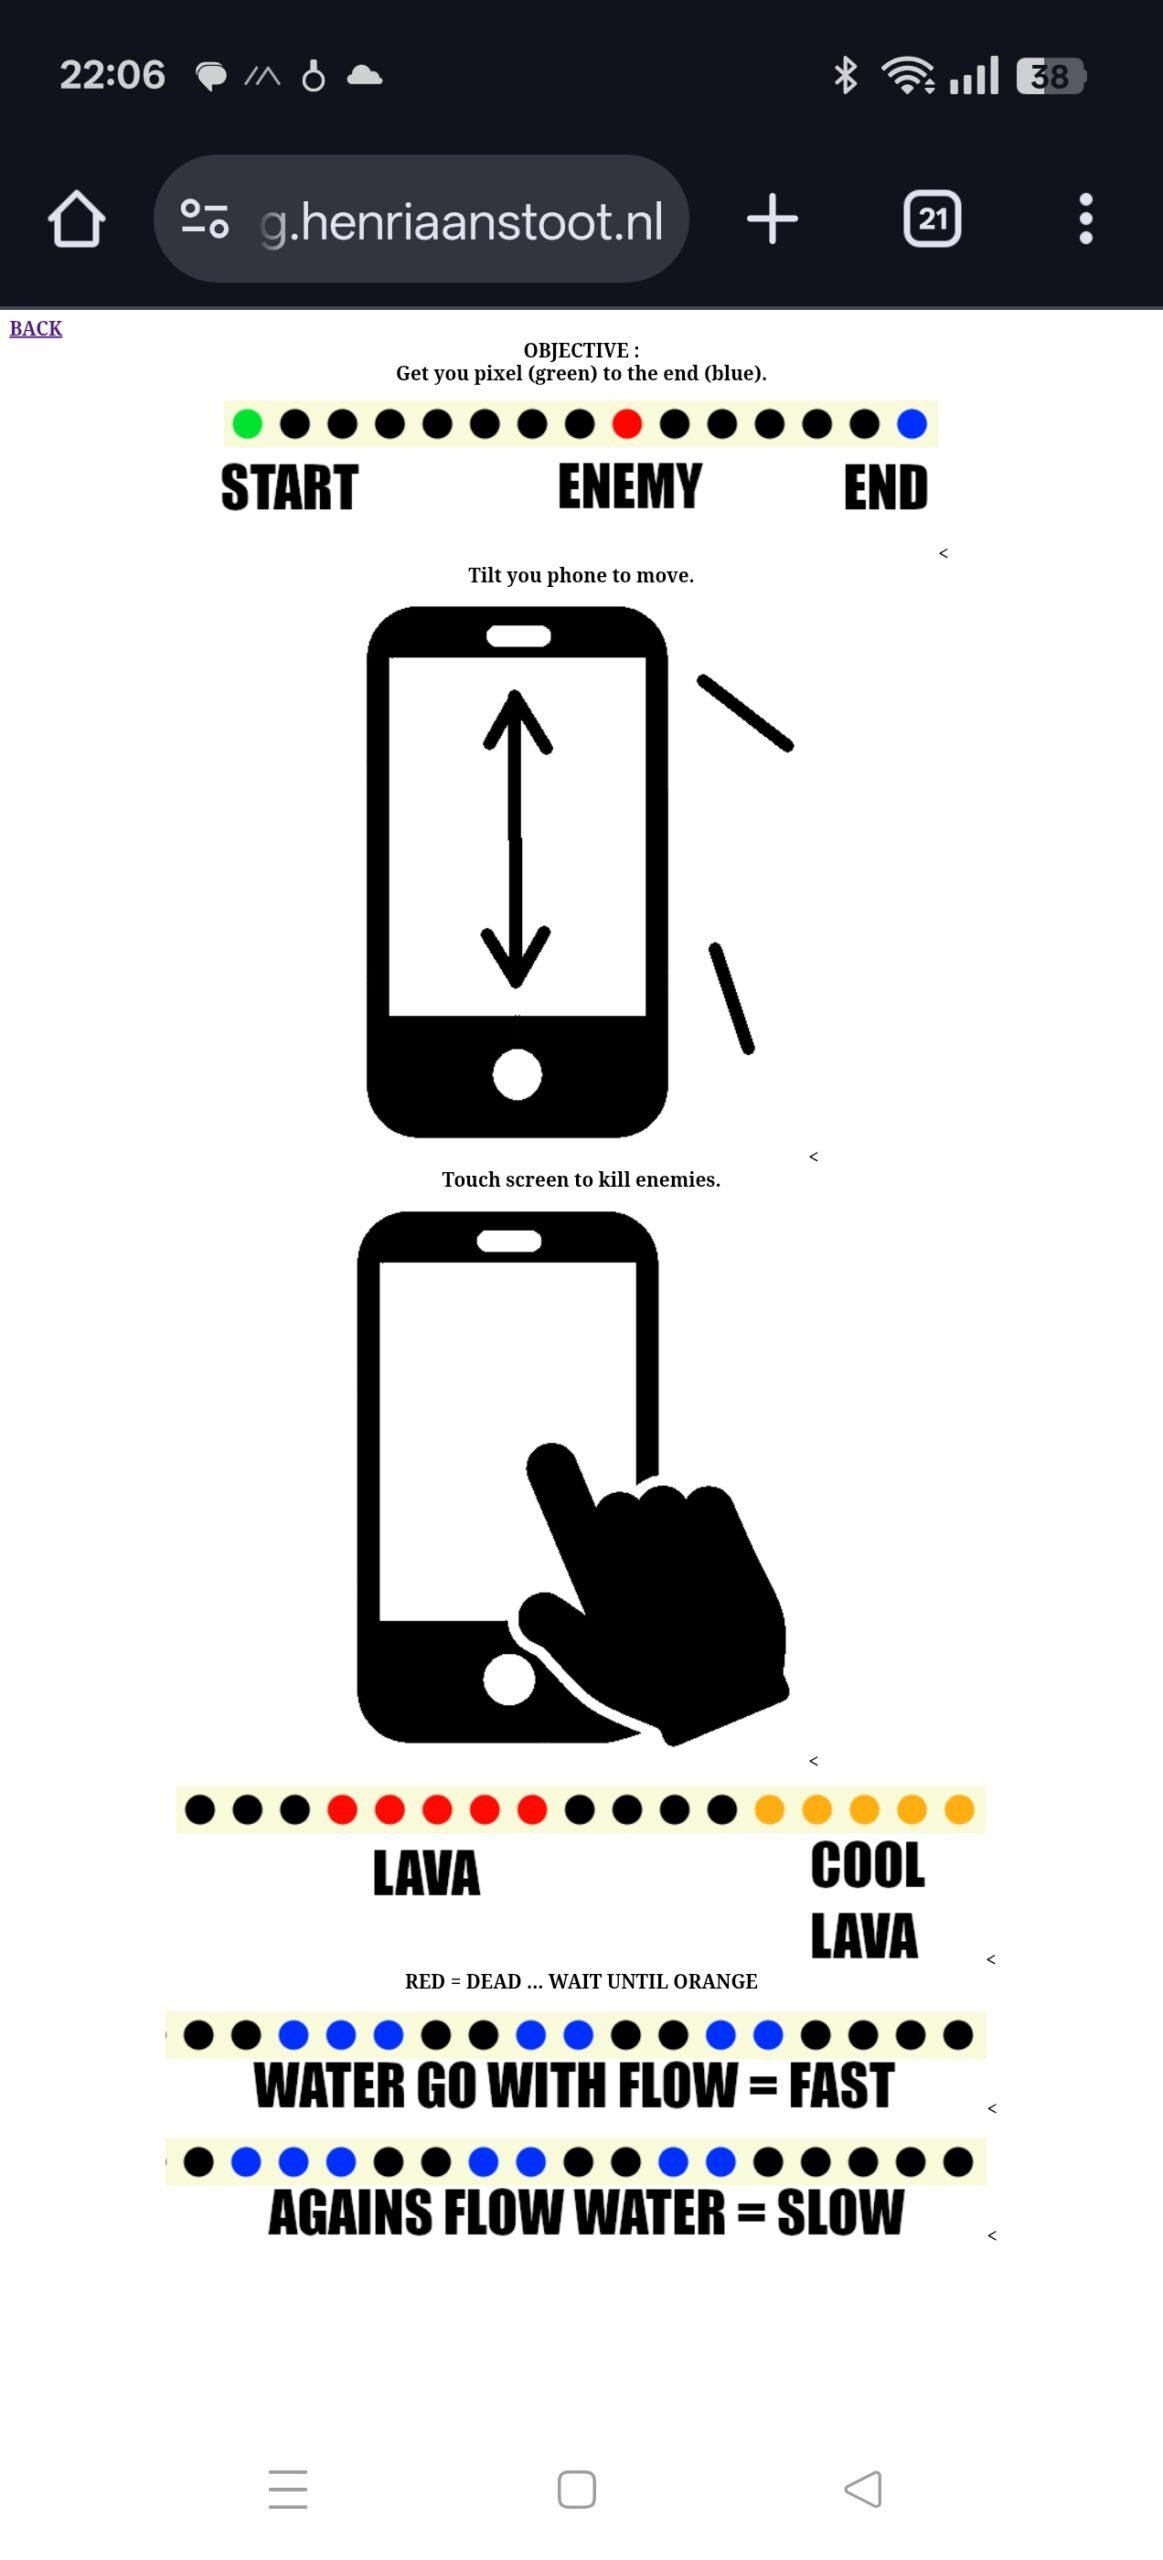
So why not going digital? 12 Meter pole, 300 Leds.
There is a QR code and a website link mentioned on a page at the gate. 10 presets to select via a website.
Notification on my TV
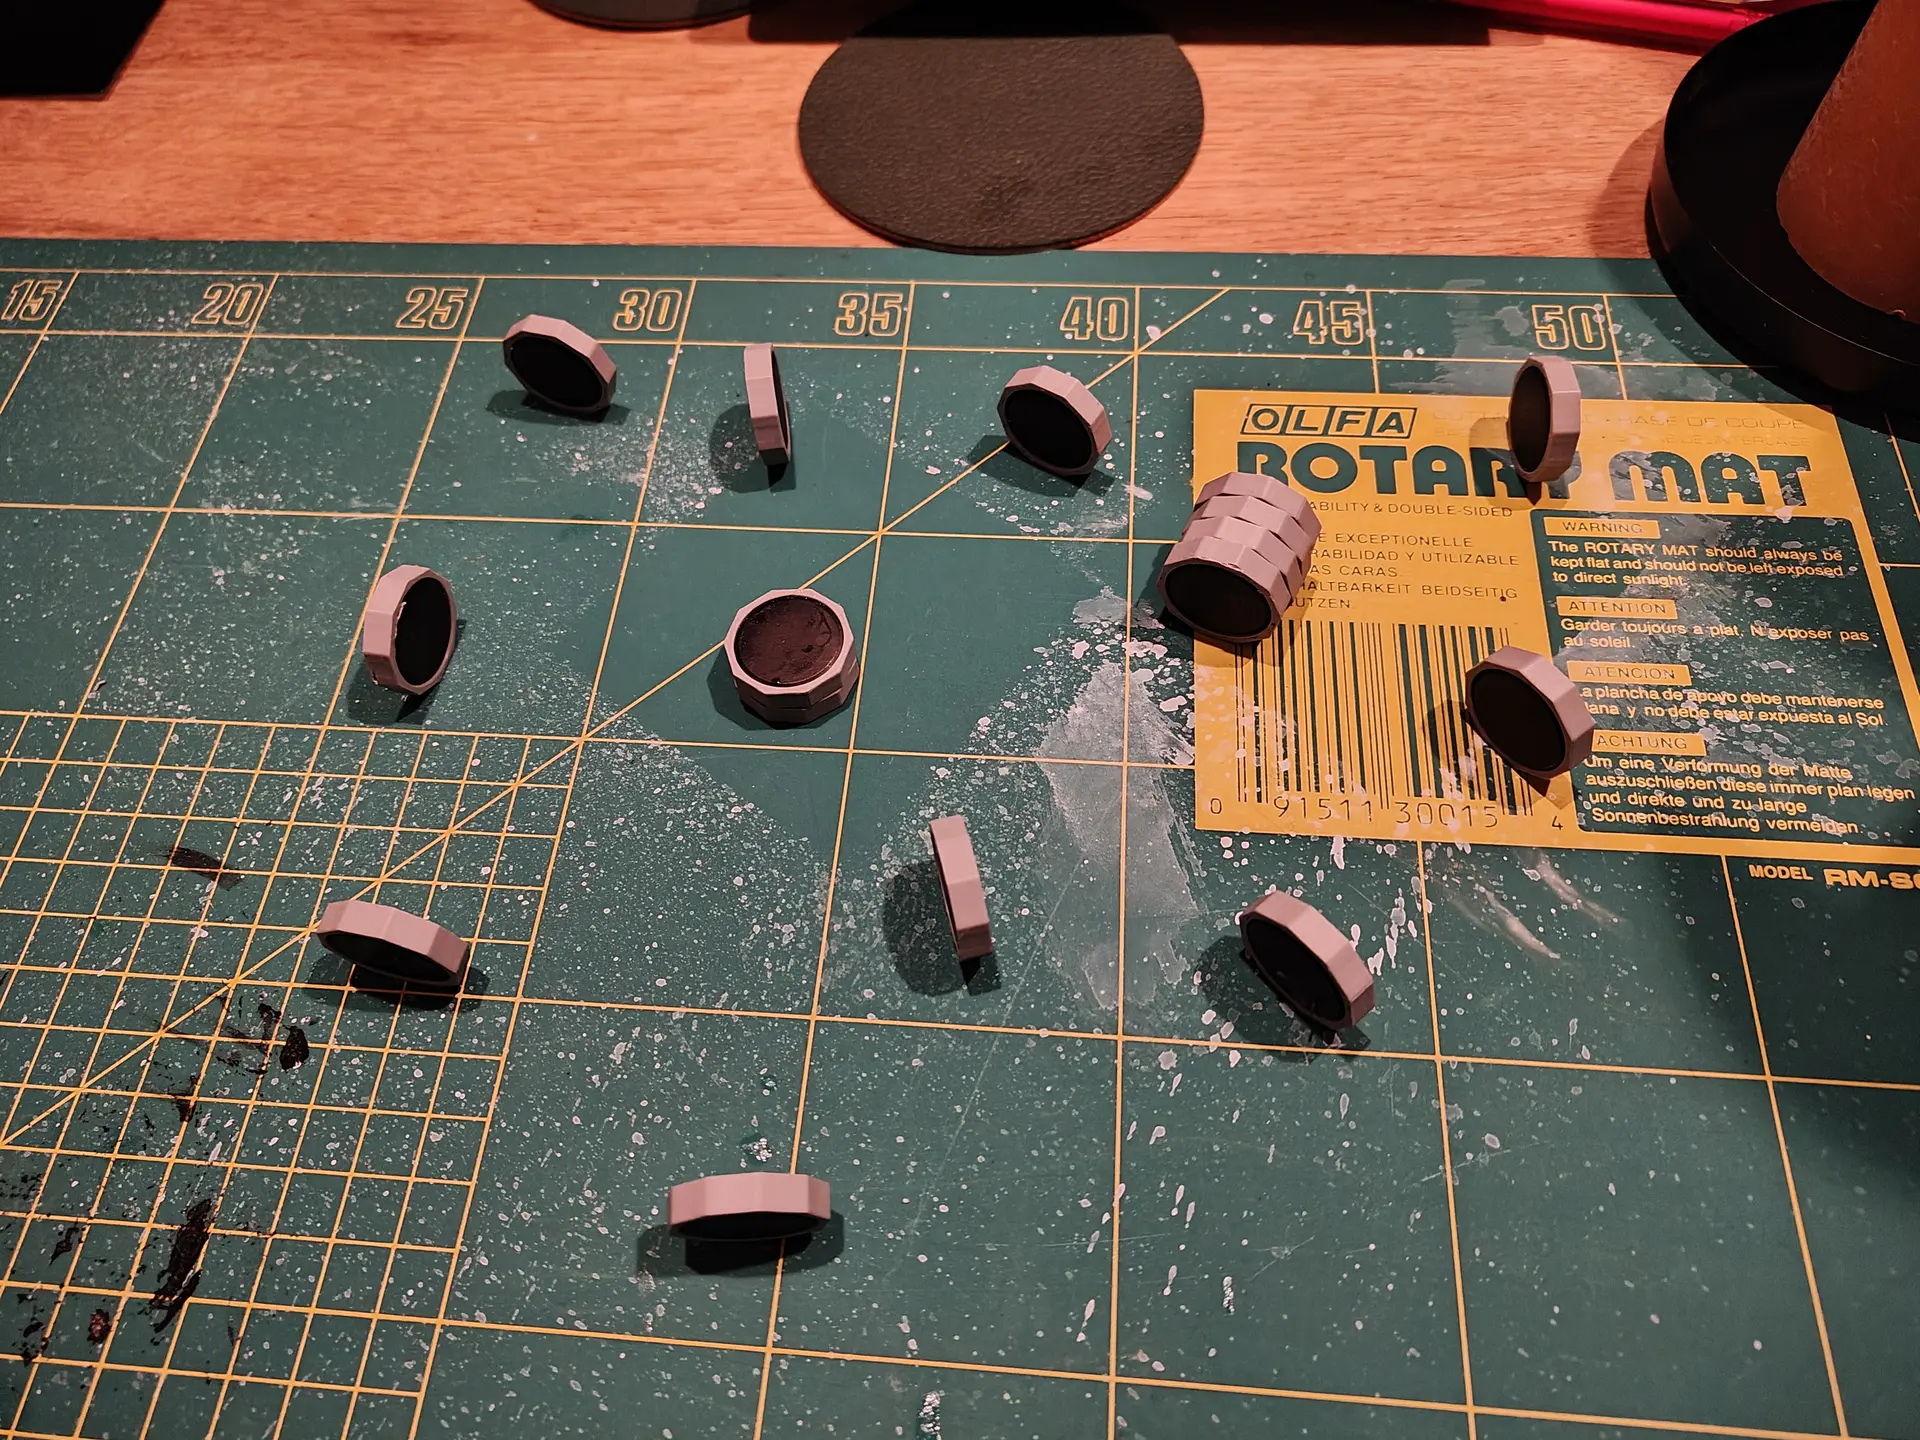
While waiting for the first visitor I made a magnetic game. Using a bunch of magnets, and 3D printed hexagon rings. Two players try to place magnets in a small area without moving the others. If magnets slam together, you have more pieces to place. (Below, last player has to take those 6 pieces)