Category Archives: Photography

Photo timelapse slider fixed

I got my DIY timelapse slider out of storage, and notished it wasn’t working any more.
I’t was a quick and dirty build, using minimal components and could be build with minimal effort.
We could not take a lot of stuff with us to New Zealand.
Camera and powerbanks, those we always take with us. So i only needed:

  • Raspberry Pi
  • Steppermotor and a plastic sheet where it was mounted on (using tiewraps you can undo)
  • Timingbeld
  • Two metal feet it was mounted on

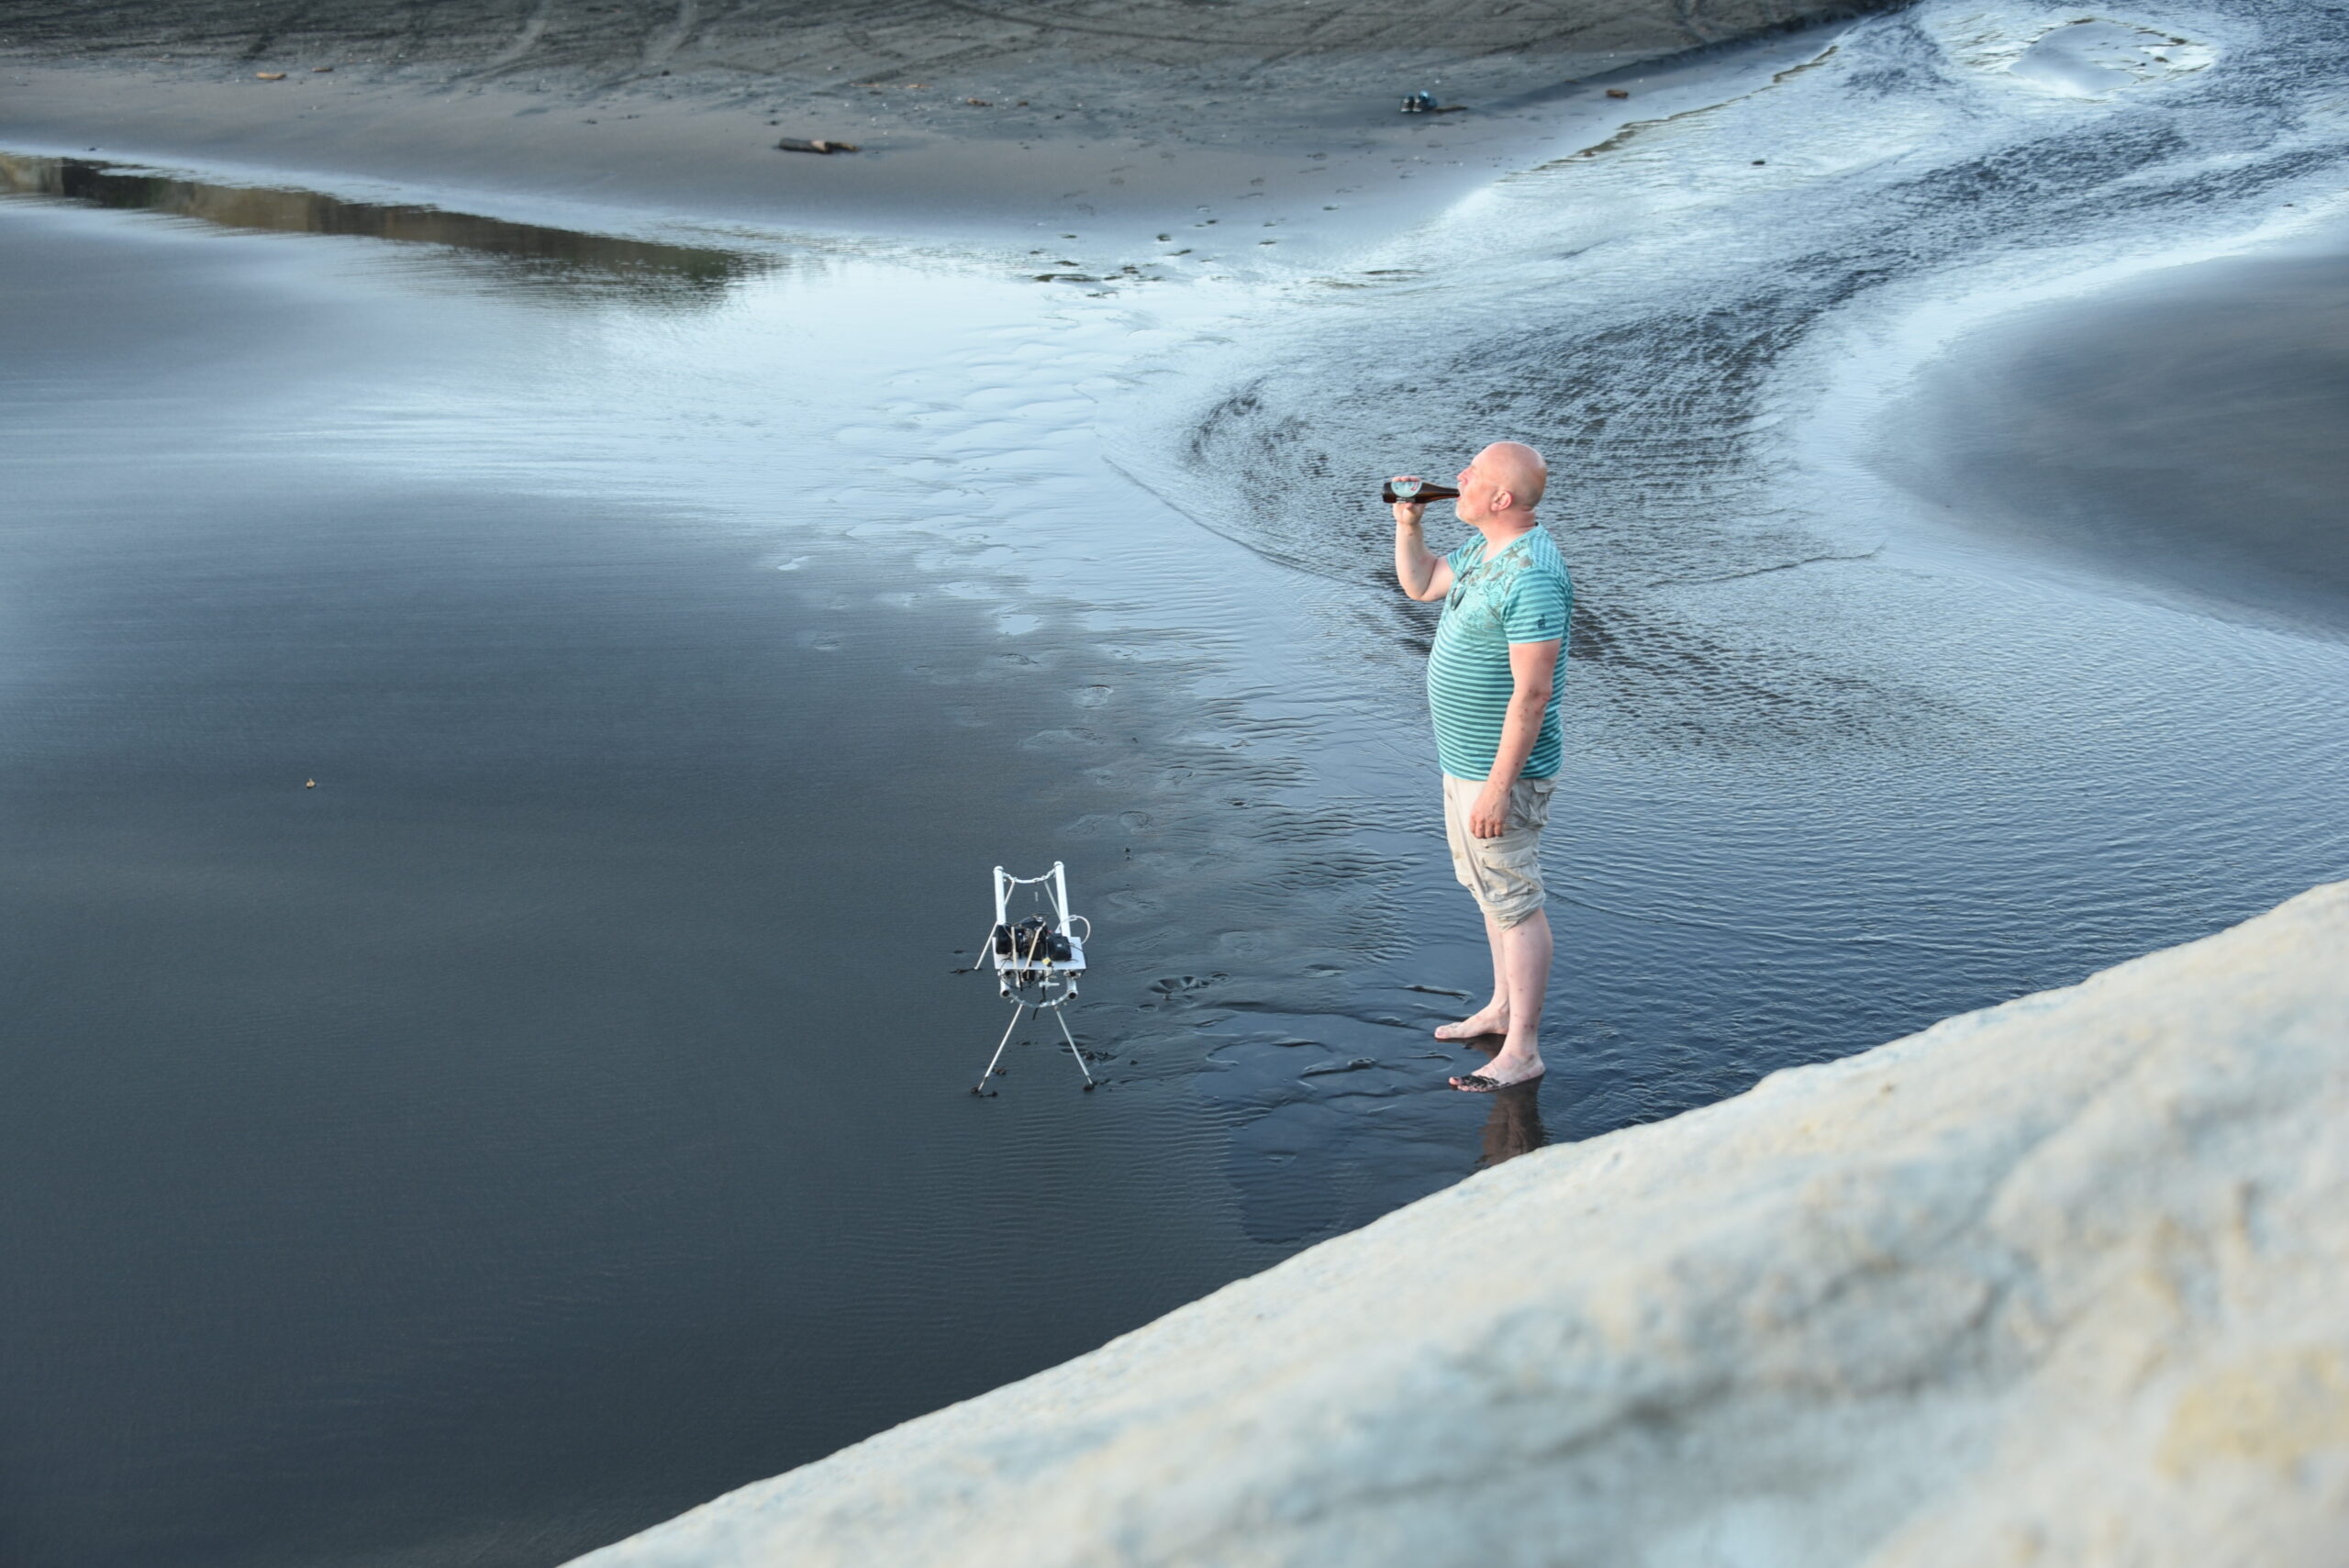
It had to be build strong enough to hold a Nikon 750, and didn’t get out of balance when moving the camera on two metal tubes i bought in NZ.

The RPI would not start anymore, just a red power smd led. SO it didn’t boot.
Taking the mini sdcard out of the raspberry trying to put it in my cardreader .. note the trying part.
The damn thing broke into two parts, never seen anything like it.
Damn, did i backup the latest version? No, i used my mobile and wifi in NZ to modify the scripts.
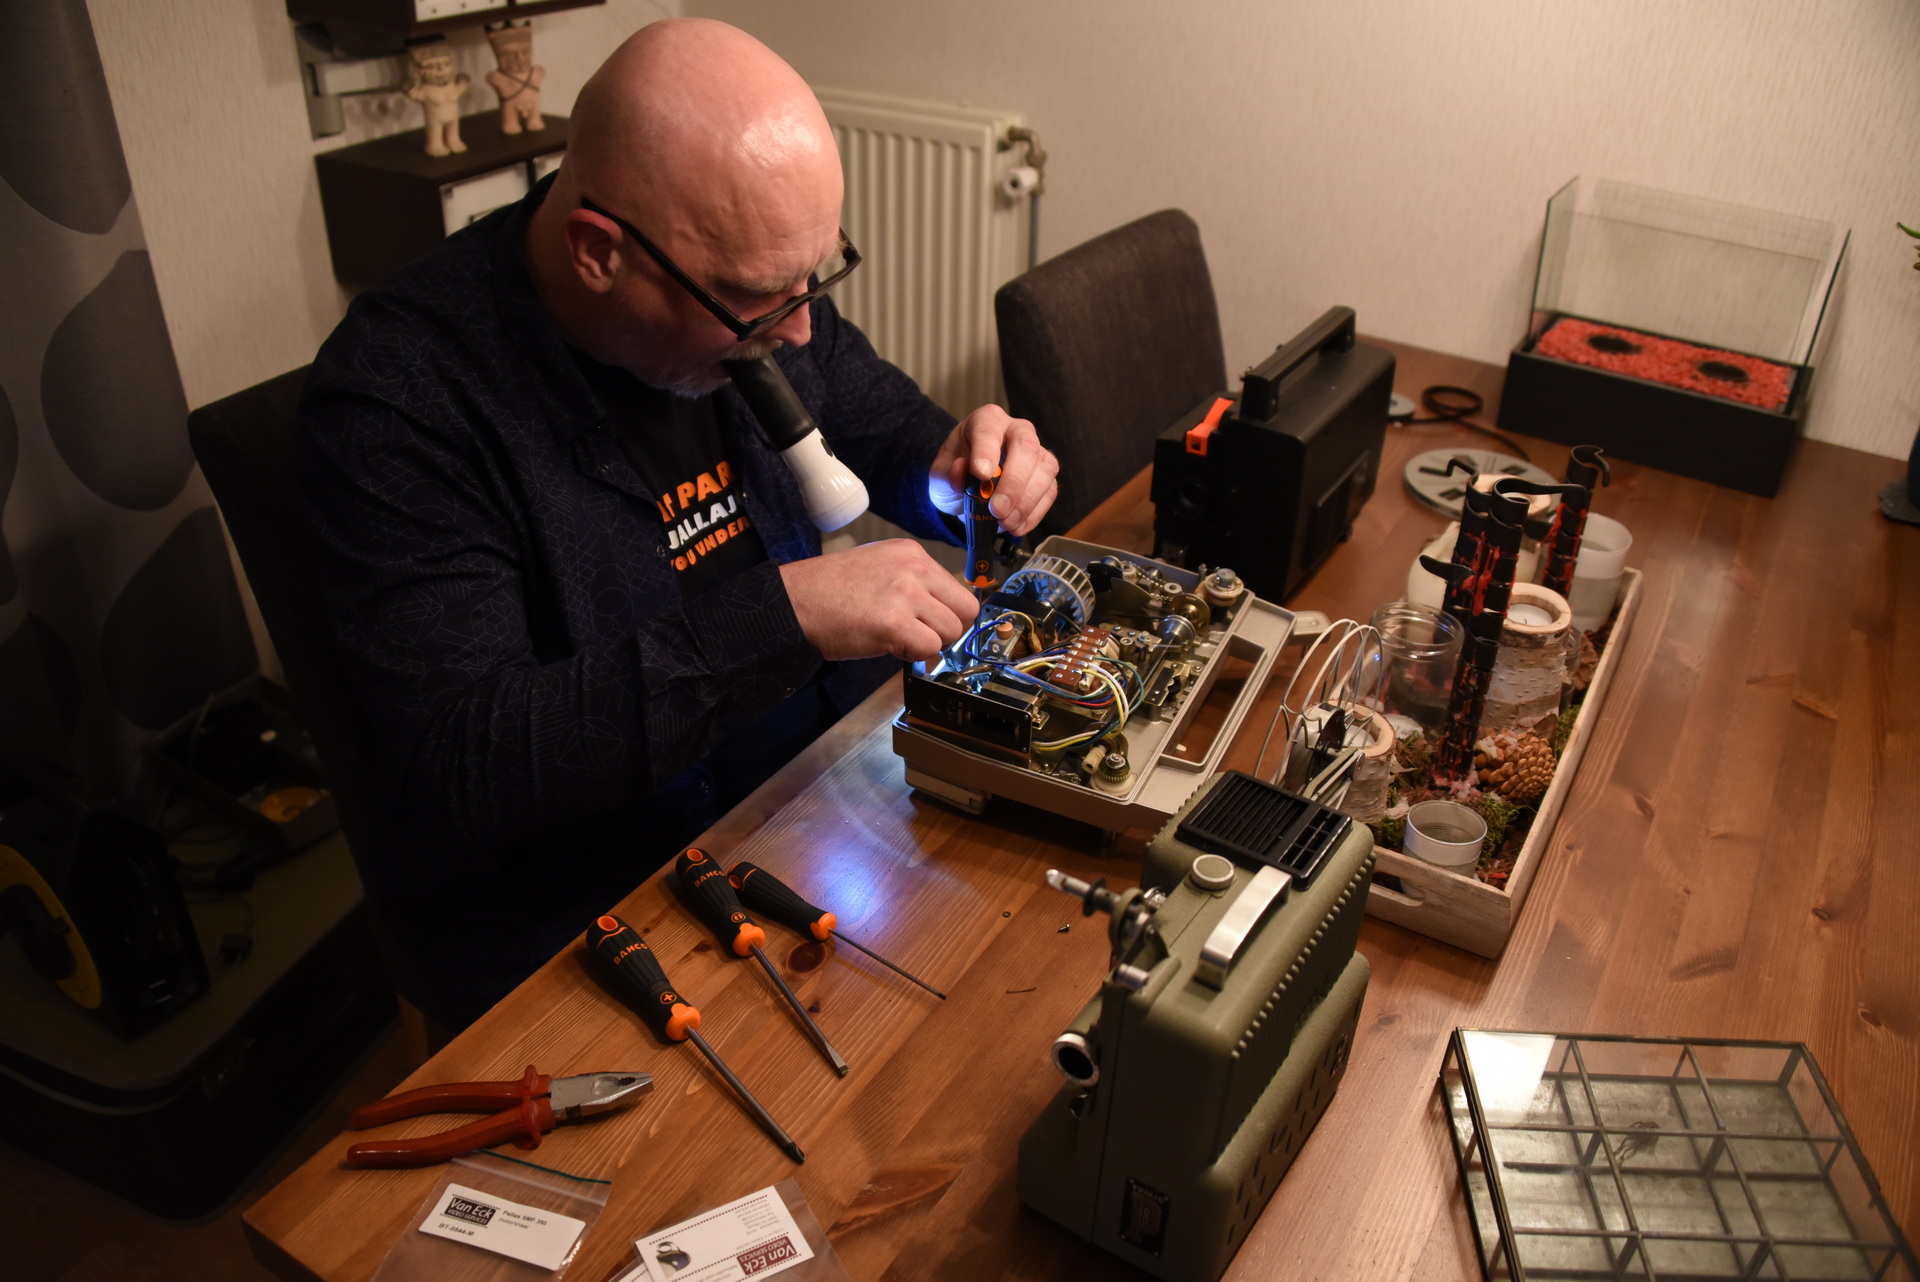
Well .. “We can rebuild him, we have the technology”
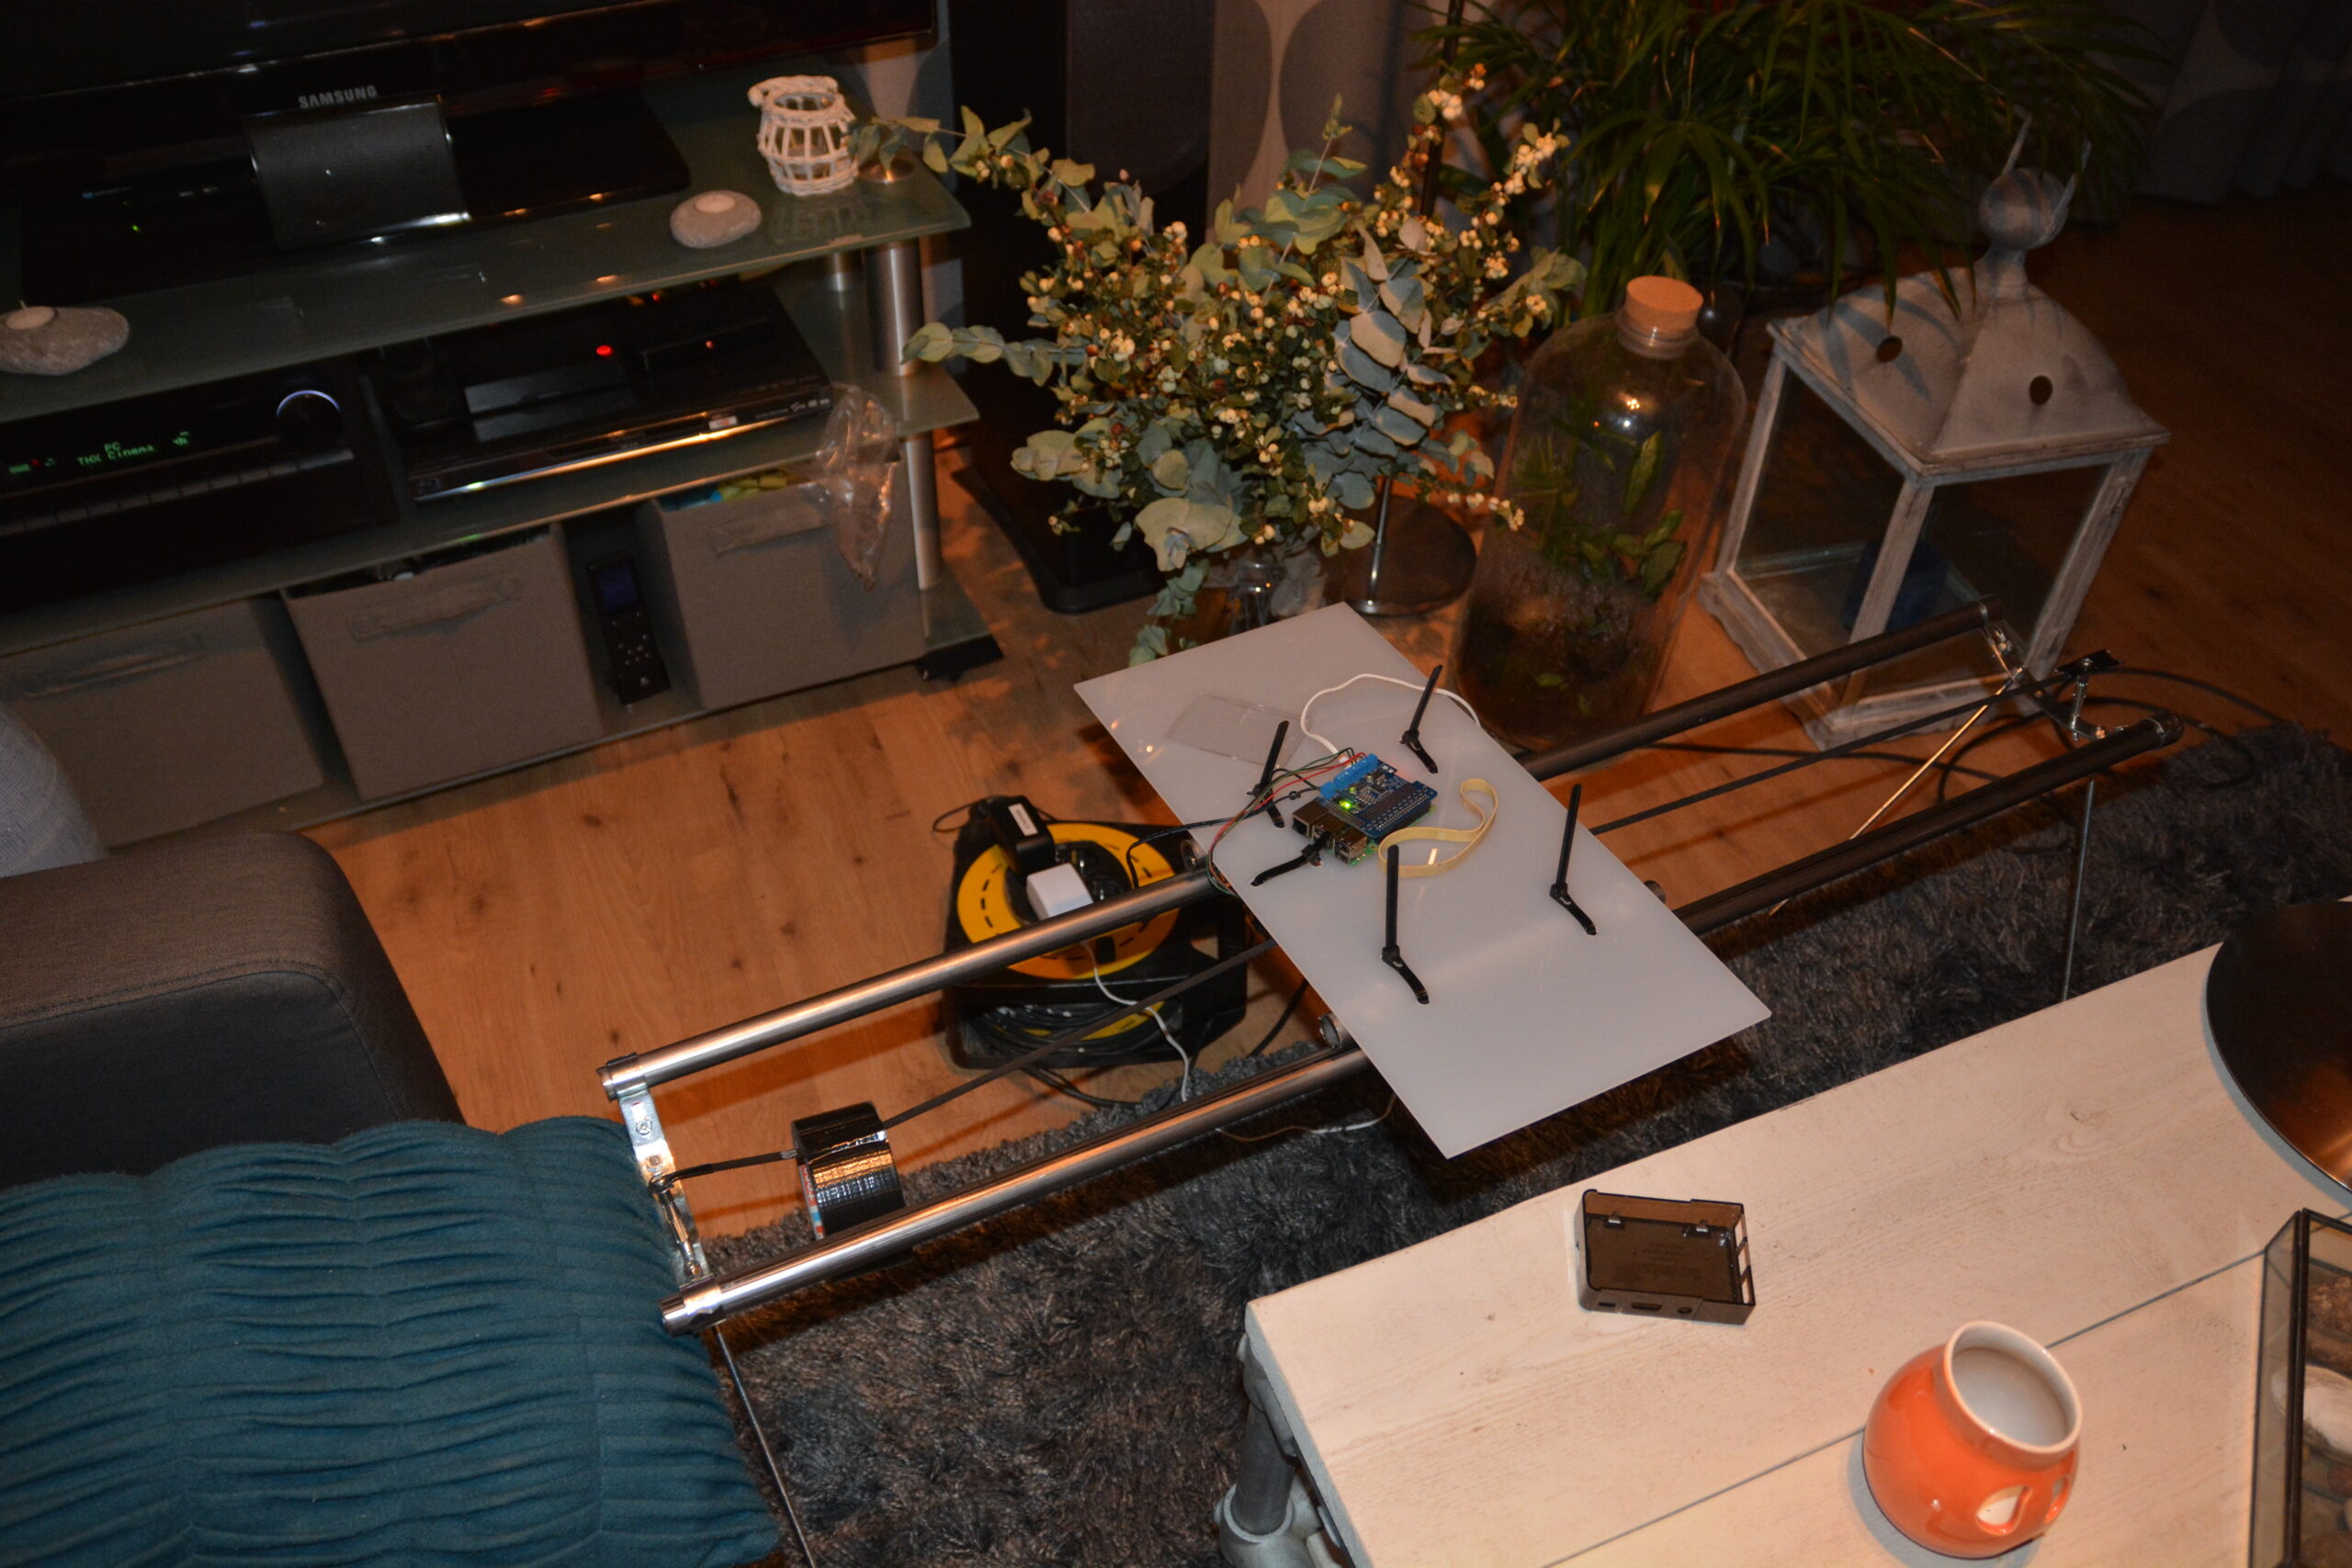
How does it work?

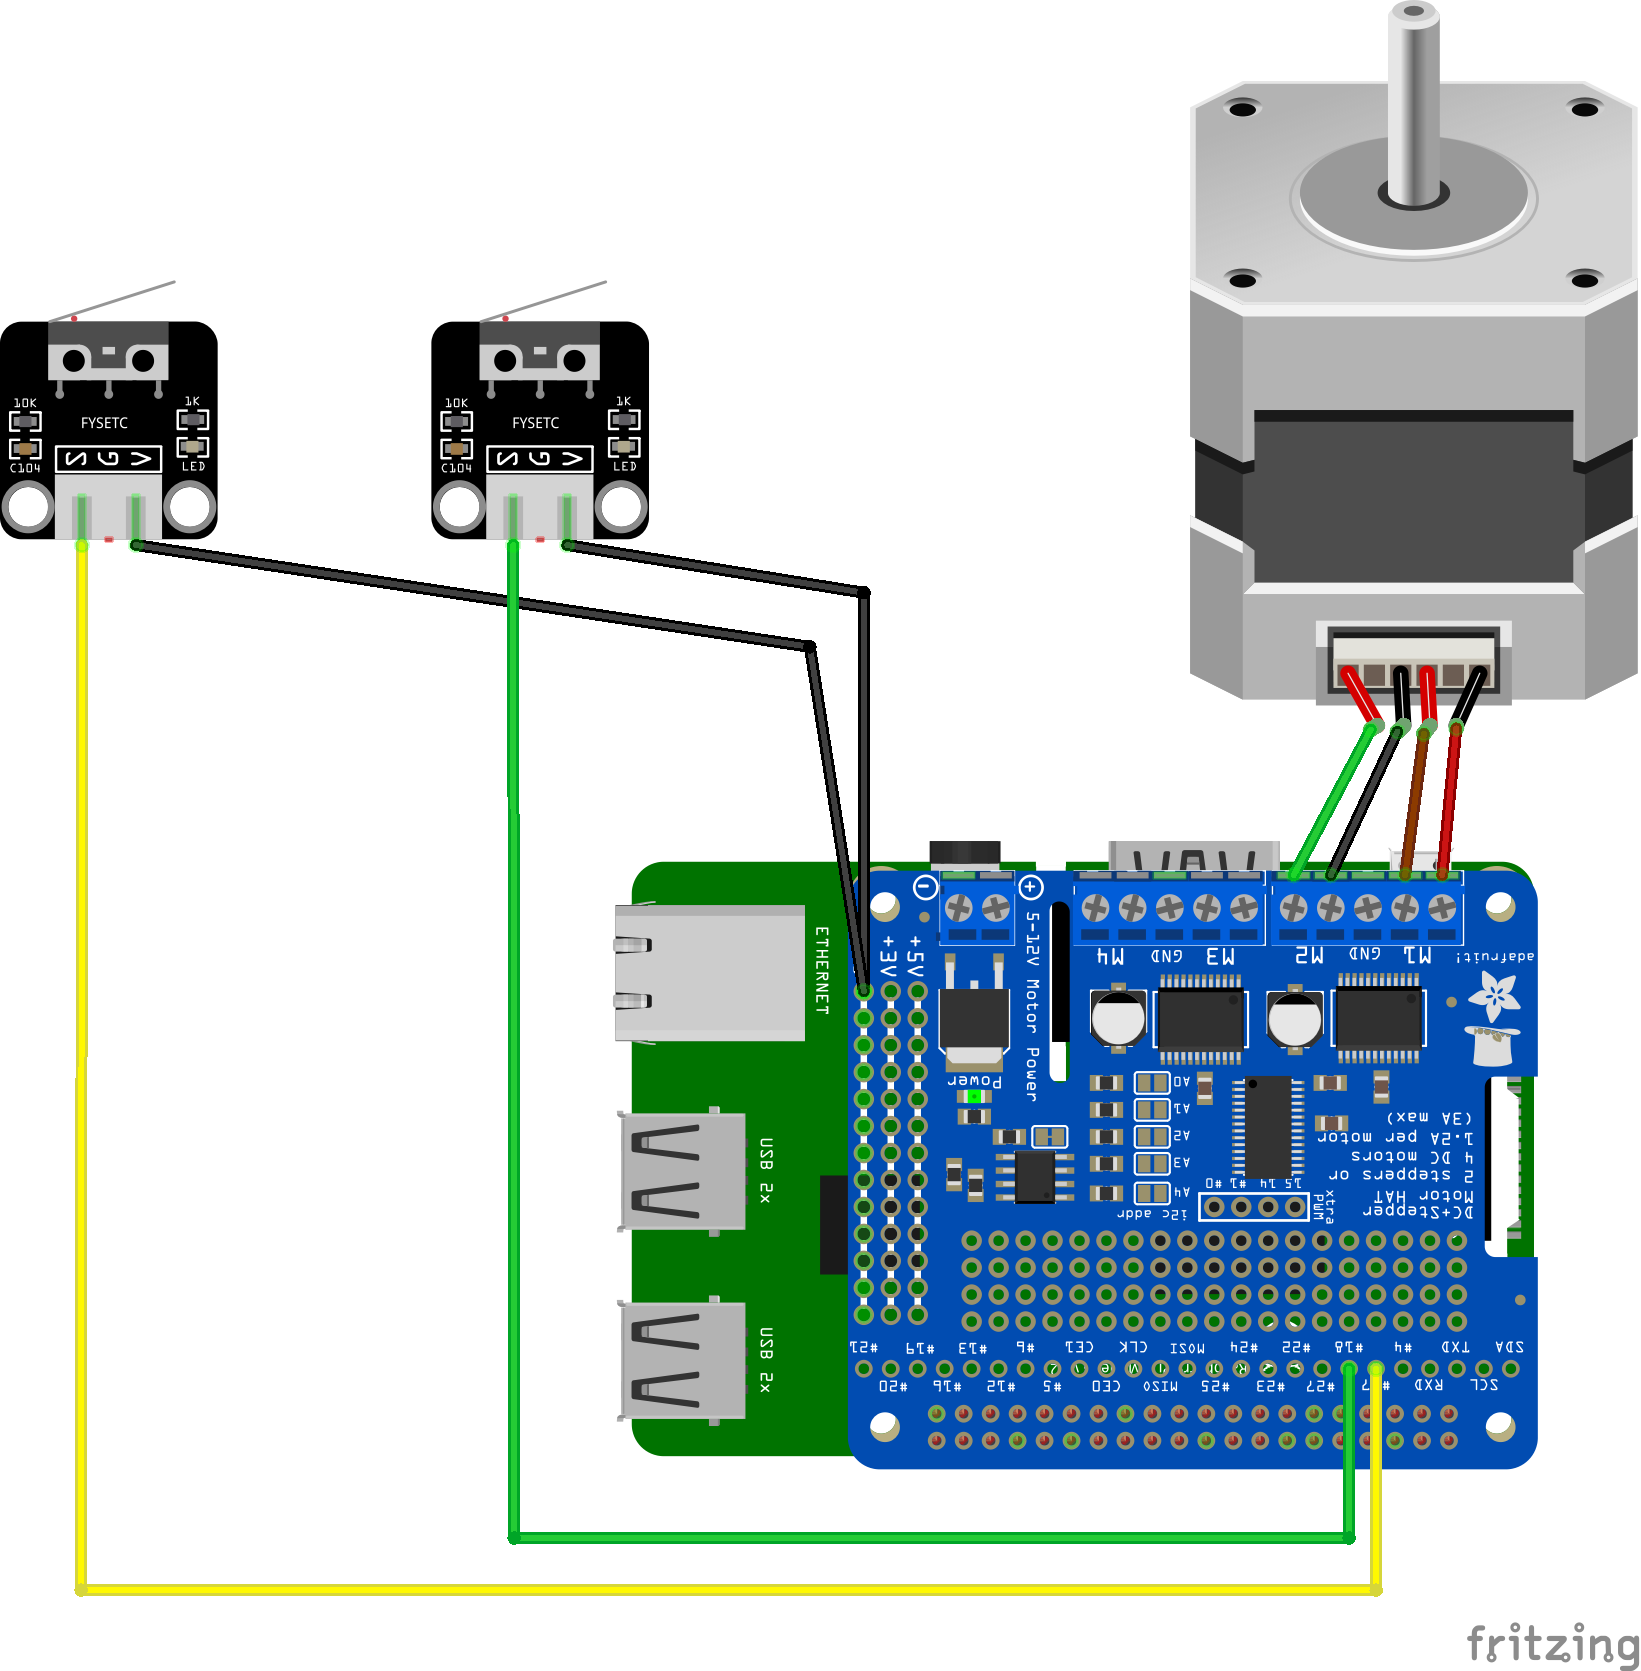
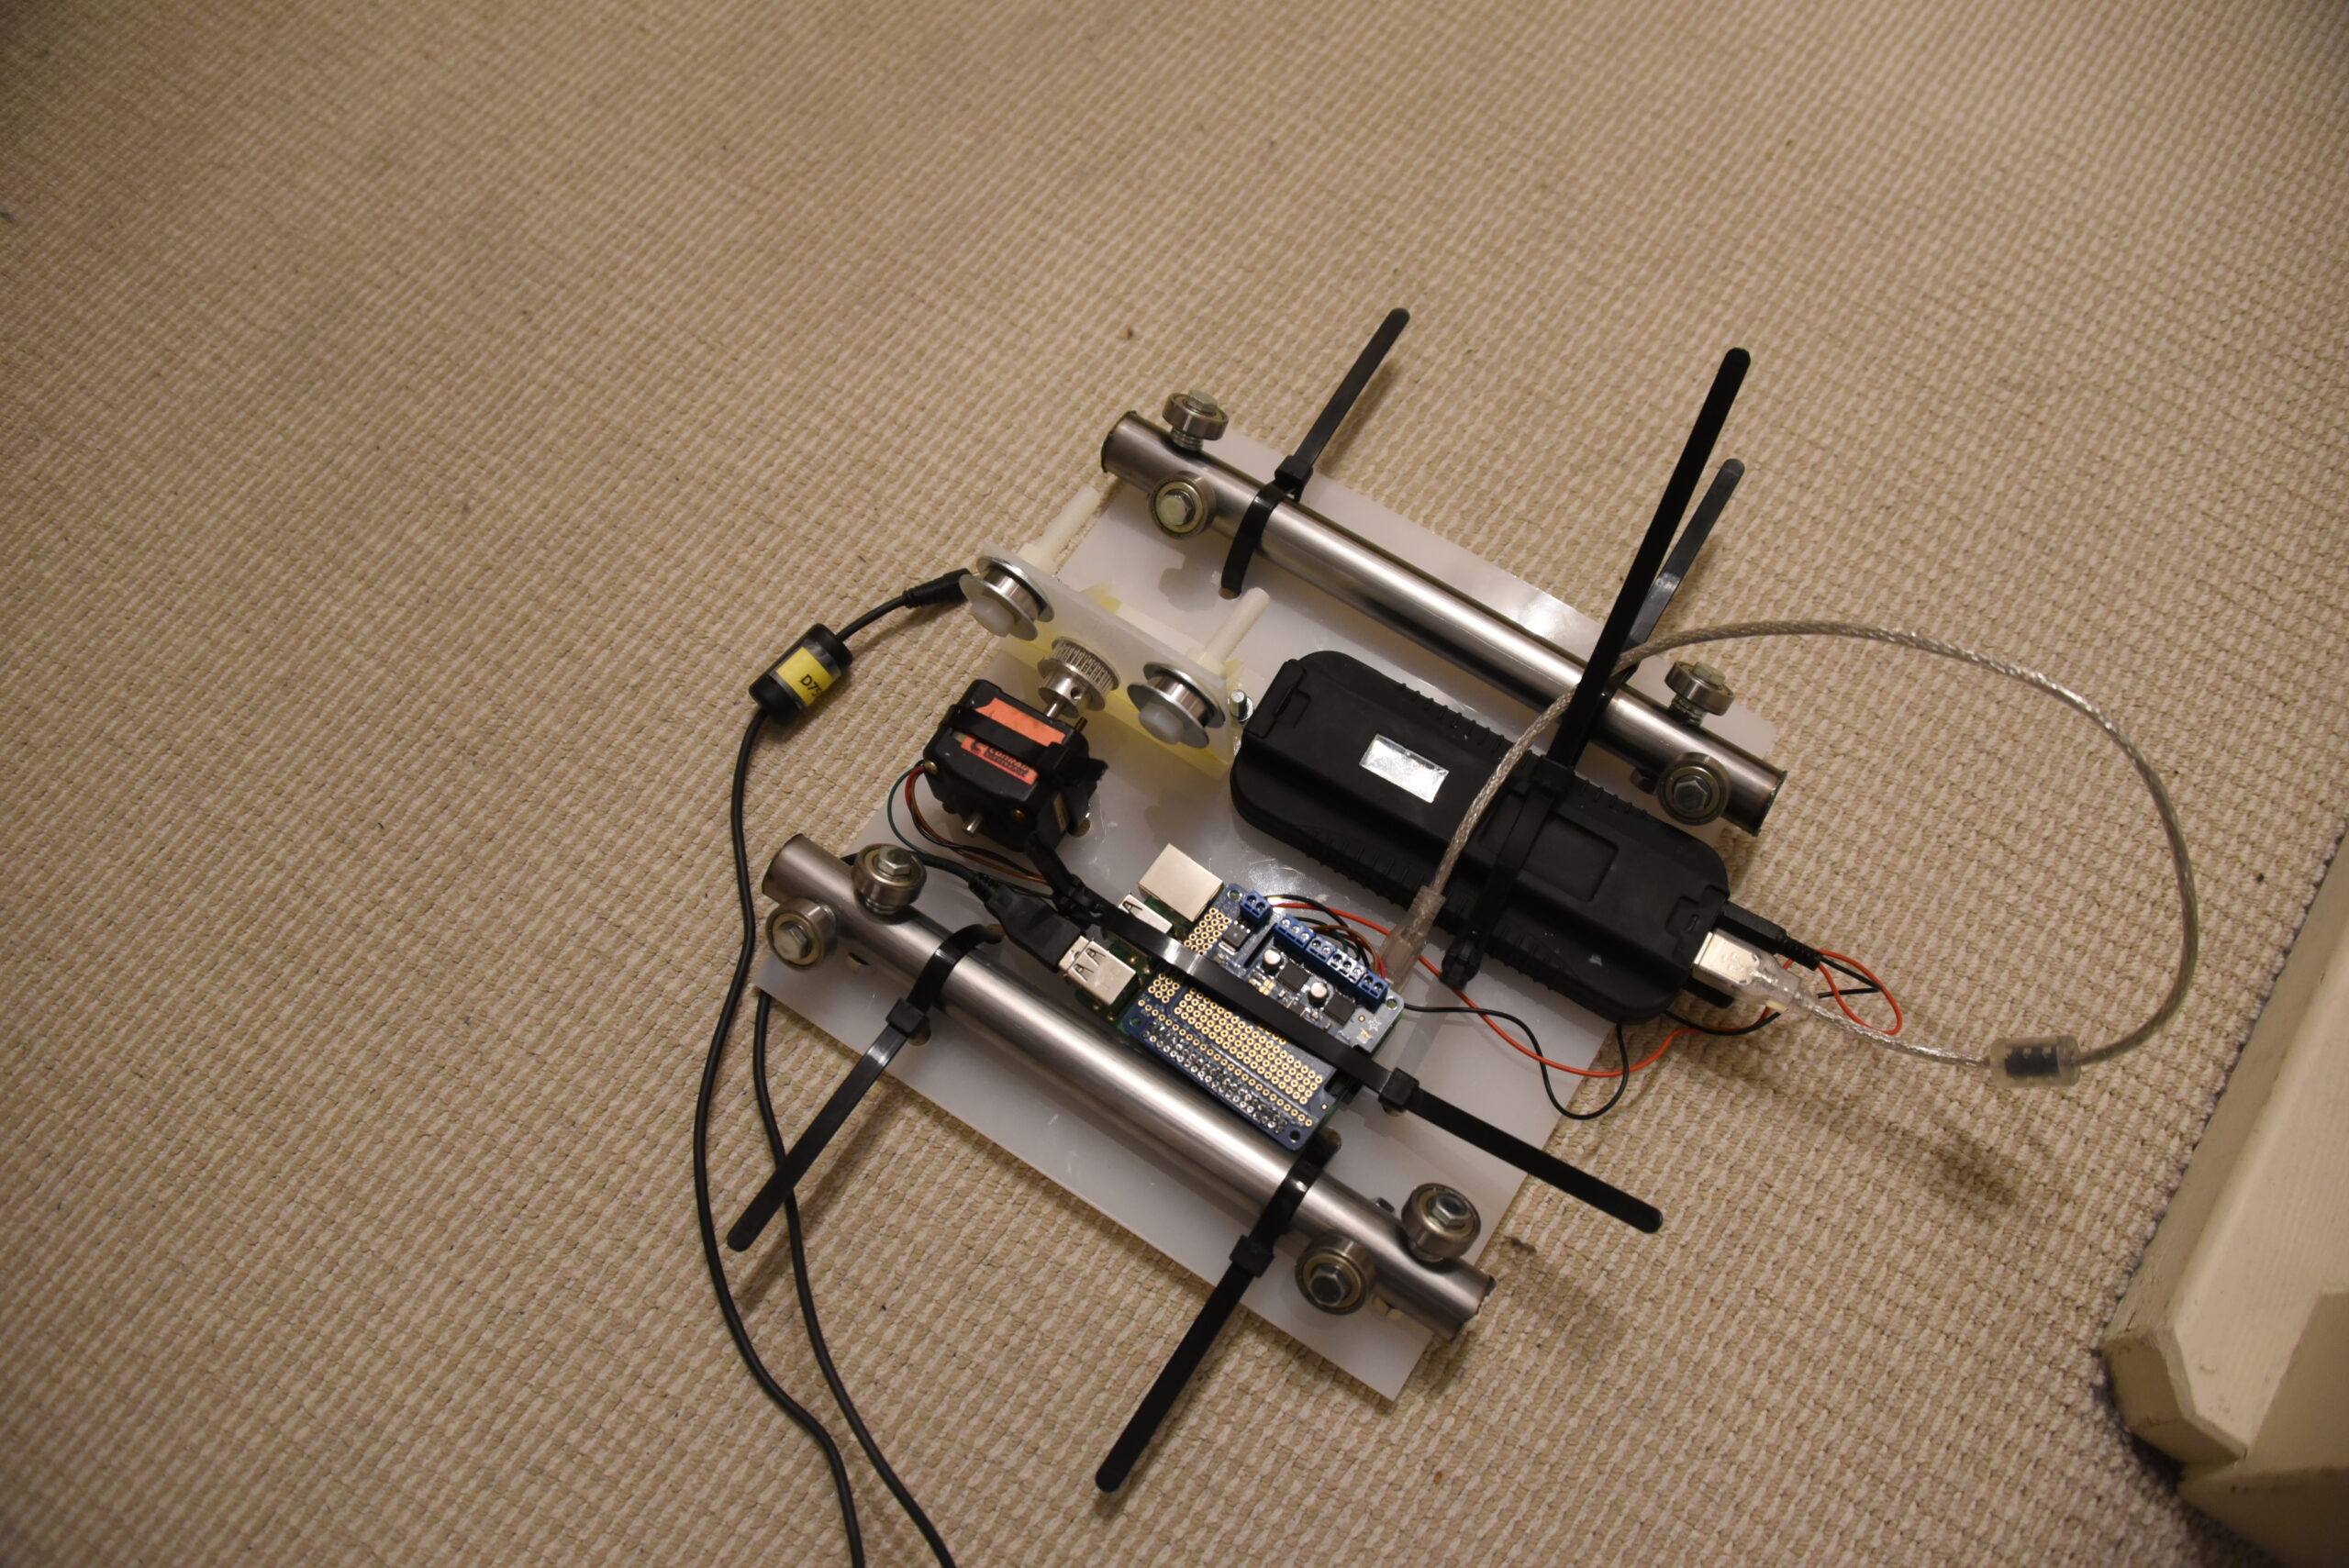
Stepper motors move my camera over two metal rods, with ball bearing wheels.
The raspberry controls my nikon using a usb cable. Mounted on the raspberry is a steppermotor hat (adafruit) which can control DC motors and stepper motors. ( In this project i used only one stepper )
The stepper motor carries the platform containing itself, a raspberry and my nikon over the “rails”
Two switches on each side sends a signal to the program to stop.
All timing are set via the Webgui.

Steps

  • At reboot, python script wil be started
  • Moving platform to the left, until switch detects the edge
  • Waiting for in structions
  • Entering for example timer 30, speed 10 and r
  • Platform wil move distance 10 to the right
  • Wait 30 seconds
  • Grab a picture
  • And loops until end of rod reached, then it wil move to left again.

Notes:

  • Gphoto works with other camera’s also
  • When placing the camera on the platform, focus once. Disable autofocus, also put your camera in manual mode, setting Apeture, ISO and shutterspeed same as your test photo. (bear in mind: when doing sundown shots maybe start with a little light over compensation)

Below old 2018 version

New Sdcard. Format, put lite on this

# install gphoto2
apt-get install photo2
# connect nikon with usb, capture test with
gphoto2 --capture-image-and-download --interval 5
# Next steppers
apt-get install python3-pip
pip3 install adafruit-circuitpython-motorkit
# enable I2C
raspi-config -> enable i2c
reboot

# Test python script
import time
import board
from adafruit_motorkit import MotorKit

kit = MotorKit(i2c=board.I2C())

for i in range(100):
    kit.stepper1.onestep()
    time.sleep(0.01)

# Create a API
apt-get install python3-flask python3-flaskext.wtf

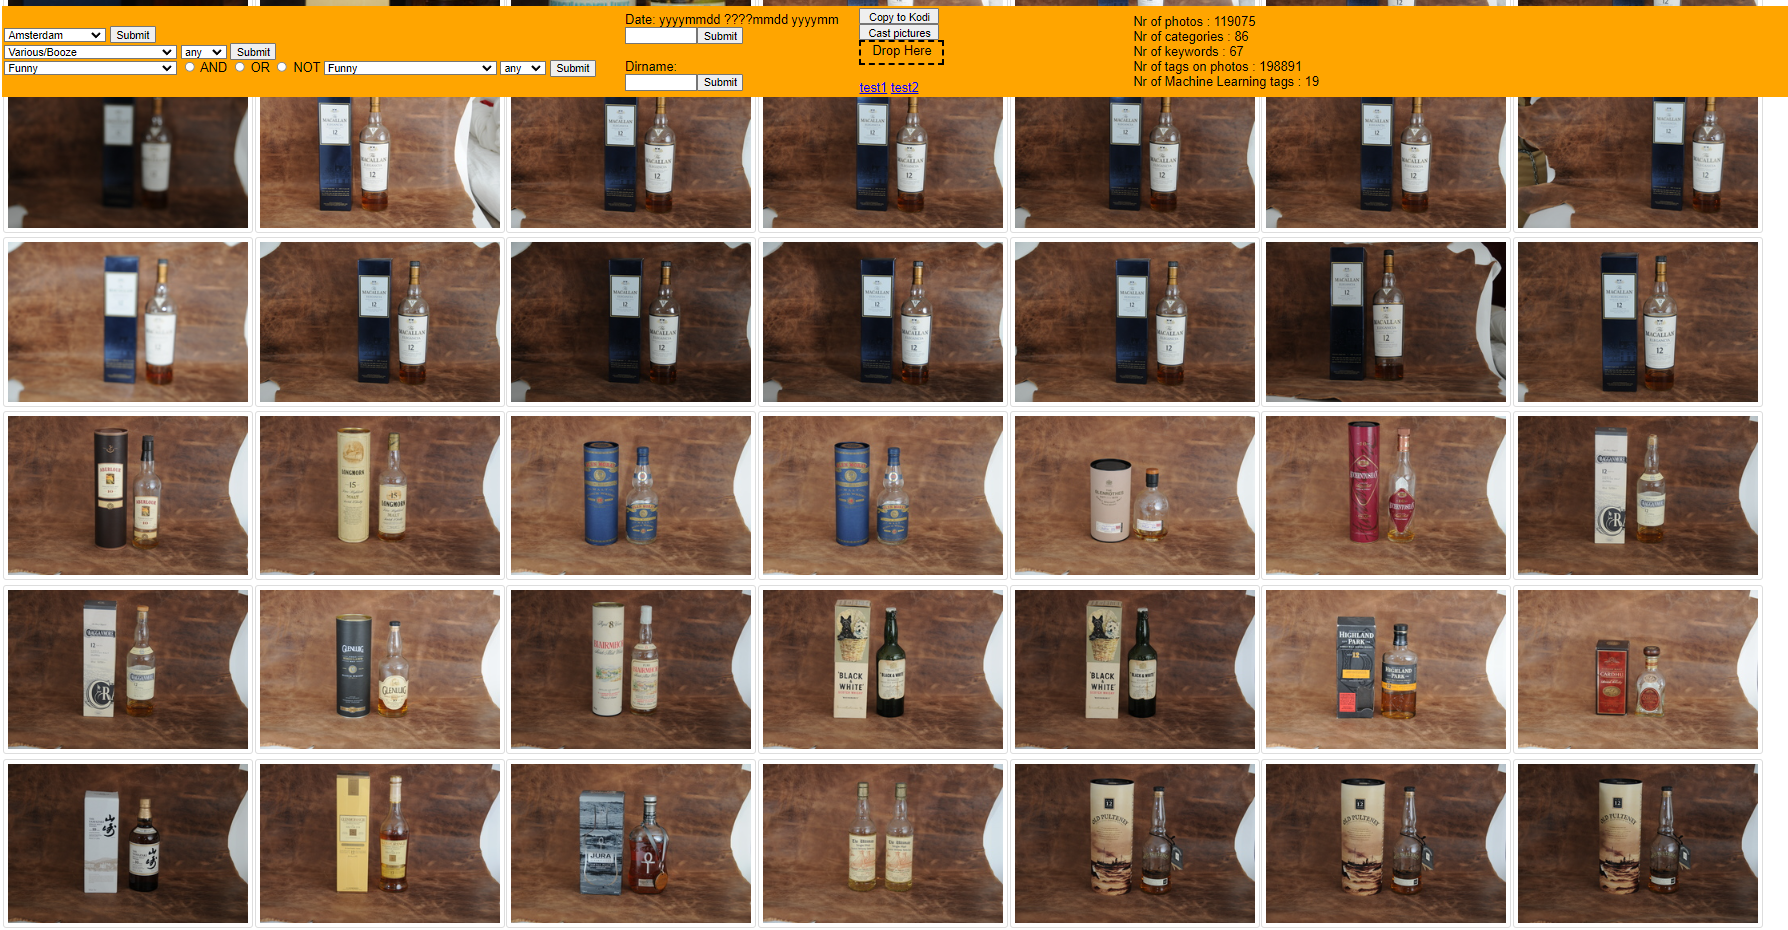
I’m using my phone in Hotspot mode, Timelapser will connect to my phone.
Open a browser and enter : http://<ip of timelapser>:8080/form

timer in seconds to shoot pictures
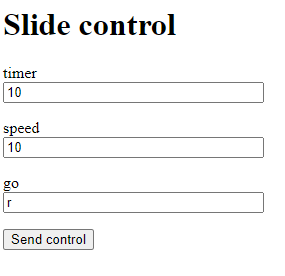
speed is the movement on the rail
go = r(ight) or l(eft)
go + timer 0, move until you reach the end (switch detect)

Todo: Need to change CSS to mobile responsive gui .. like my quizzer

import time
import subprocess
from flask import Flask, jsonify
from multiprocessing import Process, Value
from flask_wtf import FlaskForm
from wtforms import StringField, PasswordField, BooleanField, SubmitField, TextAreaField
from wtforms.validators import DataRequired
from flask import Flask, render_template, request
from flask import render_template
import board
from adafruit_motor import stepper
from adafruit_motorkit import MotorKit
import RPi.GPIO as GPIO
import os; myenv = os.environ.copy(); myenv["LANG"] = "C"


# NOTE: 
# timer = seconds between shots
# speed = distance stepper travel

# Using gpio pins to detect max left/right with switches
# BCM Numbering
GPIO.setmode(GPIO.BCM)
# pullup to 17 &amp; 18
GPIO.setup(17, GPIO.IN, pull_up_down=GPIO.PUD_UP)
GPIO.setup(18, GPIO.IN, pull_up_down=GPIO.PUD_UP)

# Stepper HAT is i2c
kit = MotorKit(i2c=board.I2C())

kit.stepper1.release()

global timer
global speed
timer=0
speed=0
go="nix"

app = Flask(__name__)
app.config['SECRET_KEY'] = 'you-will-never-guess'

class FormForm(FlaskForm):
    timer = StringField('timer', validators=[DataRequired()])
    speed = StringField('speed', validators=[DataRequired()])
    go = StringField('go', validators=[DataRequired()])
    submit = SubmitField('Send control')

# Make below in something like : nikon record .. slowly 10s to the right and recording stop?
# Or bounch left/right using gpio sensors
@app.route("/control/&lt;time&gt;/&lt;speed&gt;")
def action(number, message):
 
    time.sleep(1)

# Print form on: http://&lt;IP&gt;:8080/form = start page 
@app.route("/form")
def form():
    form = FormForm()
    return render_template('web.html', title='Web slide control', form=form)


# process form
@app.route('/data', methods = ['POST', 'GET'])
def data():
    if request.method == 'GET':
        return "The URL /data is accessed directly. Try going to '/form' to submit form"
    if request.method == 'POST':
         
        timer = request.form['timer']
        speed = request.form['speed']
        go = request.form['go']
        timer = int(timer)
        speed = int(speed)
        if timer == 0:
            print("Turn off")
            p = Process(target=record_loop, args=(False,speed,timer,go))
            p.start() 
            if str(go) == "l":
               while GPIO.input(17) == True:
                kit.stepper1.onestep(direction=stepper.FORWARD)
                time.sleep(0.01)
            if str(go) == "r":
               while GPIO.input(18) == True:
                kit.stepper1.onestep(direction=stepper.BACKWARD, style=stepper.DOUBLE)
                time.sleep(0.01)

        else: 
            print("Turn on")
            p = Process(target=record_loop, args=(True,speed,timer,go))
            p.start()  
# print form again
        form = FormForm()
        return render_template('web.html', title='Web slide control', form=form)


# main loop, controls stepper and camera
def record_loop(loop_on,myspeed,mytimer,mygo):
   while True:
      if loop_on == True:
# test if switch hit yet, else move
         print('timer' + str(mytimer))
         print('speed' + str(myspeed))
         time.sleep(2)
         if str(mygo) == "l":
             if GPIO.input(17):
                print("Pin 17 is HIGH")
                for i in range(myspeed):
                        kit.stepper1.onestep(direction=stepper.FORWARD, style=stepper.DOUBLE)
                        time.sleep(0.01)
                kit.stepper1.release()
             else:
                print("Pin 17 is LOW")
         if str(mygo) == "r":
             if GPIO.input(18):
                print("Pin 18 is HIGH")
                for i in range(myspeed):
                        kit.stepper1.onestep(direction=stepper.BACKWARD, style=stepper.DOUBLE)
                        time.sleep(0.01)
                kit.stepper1.release()
             else:
                print("Pin 18 is LOW")
         time.sleep(mytimer)
         subprocess.run(['/root/mycapture'])
         subprocess.Popen([
        "gphoto2",
        "--capture-image"],stdout=subprocess.PIPE)

# Main loop
if __name__ == "__main__":
   while GPIO.input(17) == True:
         kit.stepper1.onestep(direction=stepper.FORWARD, style=stepper.DOUBLE)
         time.sleep(0.01)
   kit.stepper1.release()
   p = Process(target=record_loop, args=(False,0,0,go))
   p.start()  
   app.run(host='0.0.0.0', port=8080, debug=False)
   p.join()
Other files
cat templates/web.html 
{% block content %}
    <h1>Slide control</h1>
	    <form action="/data" method = "POST">

        {{ form.hidden_tag() }}
        <p>
            {{ form.timer.label }}<br>
            {{ form.timer(size=32) }}
        </p>
        <p>
            {{ form.speed.label }}<br>
            {{ form.speed(size=32) }}
        </p>
        <p>
            {{ form.speed.go }}<br>
            {{ form.go(size=32) }}
        </p>
        <p>{{ form.submit() }}</p>
    </form>
{% endblock %}

gphoto running from cron/python is a b*tch, had to rewrite subprocess and running from screen

Start screen @reboot, just crontab -e
# crontab entry
@reboot screen -dmS slide /usr/bin/python3 /root/control.py
RPI with Stepper Hat and two Limit switches and a stepper motor
Datasheet showing me which colors are what


Photo manager addition using ML!

A few years ago i wrote a photo manager .. again .. ( see post about my first previous photo manager )
It is a web gui to find photos in my huge photo archive.
I manually added 190k tags to 120k photos in 20+ years.

I thought wouldn’t it be nice if i can generate additional metadata using Machine Learning. A few years ago i did some testing and followed a podcast and free course about machine learning.

So today i started to implement a addition to my gui. Machine recognition tags!

It already kinda works.

Things to do :

  • Make it a background job, my fileserver doesn’t run Tensorflow on a GPU, so it is slooow
  • Embed in existing GUI and stats
  • Design a editor to remove wrong tags

Below a part of ML images

Command to get a thumbnail sheet with only directory names:

montage -verbose -units PixelsPerInch -density 300 -tile 7x6 -label "%d" -font Arial -pointsize 6 -background "#FFFFFF" -fill "black" -define jpeg:size=253x154 -geometry 253x154+2+2 -auto-orient */*.JPG -title "ML Thumbs" thumbsheet.jpg

Maybe, i can use debug output like below.

['lakeside, lakeshore (score = 0.47934)', 'seashore, coast, seacoast, sea-coast (score = 0.11385)', 'sandbar, sand bar (score = 0.08822)', 'breakwater, groin, groyne, mole, bulwark, seawall, jetty (score = 0.06281)', 'valley, vale (score = 0.01790)', '']

FFmpeg tricks

Mp4 to gif (resize, cut and convert)

startsecond=0
duration=3
ffmpeg -ss $startsecond -t $duration -i 'input.mp4' -vf "fps=10,scale=320:-1:flags=lanczos,split[s0][s1];[s0]palettegen[p];[s1][p]paletteuse" -loop 0 output.gif

Gif to MP4

ffmpeg -i kanban.gif -movflags faststart -pix_fmt yuv420p -vf "scale=trunc(iw/2)*2:trunc(ih/2)*2" gifkanban.mp4

Converting MP4 for Davinci MOV

ffmpeg -i input.mp4 -c:v dnxhd -profile:v dnxhr_hq -pix_fmt yuv422p -c:a pcm_s16le -f mov output.mov

And back from Davinci to MP4

ffmpeg -i render.mov -c:v libx264 -pix_fmt yuv420p -crf 16 -force_key_frames 'expr:gte(t,n_forced/2)' -bf 2 -vf yadif -use_editlist 0 -movflags +faststart -c:a aac -q:a 1 -ac 2 -ar 48000 -f mp4 out.mp4

QTVR to png (note number of frames)

ffmpeg -i ../test.mov %02d.png
ffmpeg -i %02d.png -vf "tile=1x24,transpose=1" mh.png

Nikon MOV to mp4 (no reencoding)

ffmpeg -i input.mov -c copy -movflags +faststart  output.mp4

Nikon MOV to mp4 (problems with audio?
“Could not find tag for codec pcm_s16le in stream #1, codec not currently supported in container”

ffmpeg -i input.mov -c copy -c:a aac -b:a 128k -movflags +faststart  output.mp4
Maybe add -strict experimental 

MPG to MP4 (Not happy with this one)

ffmpeg -i vhs-rip.mpg"  -c:v libx264 -crf 10 -strict -2 1993-luv.mp4

FLV to MP4

ffmpeg -i filename.flv -c:v libx264 -crf 19 -strict experimental filename.mp4

Lossless cut with ffmpeg

ffmpeg  -ss 00:$2 -t 00:$3 -i $1 -vcodec copy -an cut_$1  
# an = no sound
# use -acodec copy for same codec as original audio

Timelapse JPG to MP4

ffmpeg -f image2 -r 24 -start_number 8296 -i "750_%04d.JPG"  -vcodec libx264 -profile:v high444 -refs 16 -crf 0 -preset ultrafast -vf scale=1920:1080 b.mp4

png to gif from a list

#cat png.list
file off.png
duration 1
file 20.png
duration 1
file 40.png
duration 1
file 60.png
duration 1
file 80.png
duration 1
file 90.png
duration 1
file 100.png
duration 1

# ffmpeg -f concat -i png.list -loop 0 hexlight.gif


Rotate mp4 clockwise/anticlockwise

ffmpeg -i VID20230110132531.mp4 -filter:v transpose=2 -c:v libx264 -preset veryfast -crf 22 -c:a copy -metadata:s:v rotate="" test.mp4

Concat video together

ffmpeg -f concat -i inputs.txt -c copy merge.mp4
inputs.txt
file start.mp4
file end.mp4


Error “width/height not divisible by 2 (1301×933)”

ffmpeg -i input.mp4 -vf "crop=trunc(iw/2)*2:trunc(ih/2)*2" output.mp4

Dvd/DV/Mpg etcetera overviews

I made two scripts, which take a movie, find out its lenght divide by 9. And generates a image montage of snapshots at certain times in the movie. ( A movie of 90 minutes, gets a snapshot every 10 minutes )

Example of snapshots of a movie

Below takes images as above and convert them into animated gifs. All movies in a path or directory structure gets a index page containing all animated gifs.

Example of generated directory index

I’ll post something about my media sorter also.
A ajax website using drag drop viewing/sorting images (png/gifs/jpgs) and movies.

#!/bin/bash
# Uses montage, ffmpeg, convert and mediainfo
rm thumbs/*
rm montage/*
(
set -x
numberofframes=9
find  -type f | egrep -i "flv$|mov$|mkv$|avi$|mpg$|mp4$|VTS_01_1.VOB$|wmv$" |  while read filez; do
        crunchpath=$(echo $filez | sed "s,/,,g" |  sed "s, ,,g" |tr -cd '[:alnum:]' ).gif
        crunchback=$crunchpath
        echo $crunchpath
        if [ -f thumbs/$crunchpath ] ; then
                echo "$file exists"
                else
	mkdir /tmp/thumbs/ 2>/dev/null
	mkdir thumbs 2>/dev/null
	mkdir montage 2>/dev/null
        rm -f /tmp/thumbs/*png
sec=0
                totaltime1=$( mediainfo -f "$filez" | grep ^Dura  | awk '{print $3}' |grep -v "\:" | tail -1 )
                totaltime2=$( mediainfo -f "$filez" | grep ^Dura  | awk '{print $4}' |grep -v "\:" | tail -1 )
totaltime1a=$(echo $totaltime1| tr -d 'a-z')
echo $totaltime1 | grep h && sec=$((3600 * $totaltime1a))
echo $totaltime1 | grep mn && sec=$((60 * $totaltime1a))
echo $totaltime1 | grep s && sec=$totaltime1a
echo "sec : $sec"
echo $totaltime2 | grep -v ms | grep  s && sec=$[ $sec + $(echo $totaltime2 | tr -d 'a-z')]
echo "sec : $sec"
                width=$( mediainfo -f "$filez" | grep "Width"| grep pixels | awk '{ print $3 }' )
                height=$( mediainfo -f "$filez" | grep "Height"| grep pixels | awk '{ print $3 }' )
        if [ "$sec" == "" ] ; then sec=1 ; fi
                timer=$[ $sec / $numberofframes ]
                        echo  "converting step "
                        echo  "timer is $timer"
mark=0
                for f in `seq -w 1 $numberofframes` ; do
                        echo  "$f,$timer"
			echo $[$f*$timer]
                        ffmpeg -ss $[$f*$timer] -i "$filez" -vframes 1 /tmp/thumbs/$f.png 1>/dev/null 2>/dev/null </dev/null
if [ $f -eq 8 ] ; then cp /tmp/thumbs/8.png /tmp/thumbs9.png ;fi
newsizer=$(echo -n $widther ; echo -n "x" ; echo -n $sizeh)
if [ $sizeh -gt $sizew ] ; then mv /tmp/thumbs/$f.png /tmp/ff.png ; convert -resize $newsizer\! /tmp/ff.png /tmp/thumbs/$f.png ; echo aangepast ; echo $newsizer ; mark=1; fi
                done
                        echo " "
                        echo "generating $crunchpath"
	newwidth=$[ $width / 2 ]
	newheight=$[ $height / 2 ]
	newsize=$(echo -n $newwidth ; echo -n "x" ; echo -n $newheight)
	newsize2=$(echo -n $width ; echo -n "x" ; echo -n $newheight)
	echo $newsize
if [ $mark == 0 ] ; then        convert -delay 100 -resize $newsize\! /tmp/thumbs/*.png thumbs/$crunchpath </dev/null ; else
convert -delay 100 -resize $newsize2\! /tmp/thumbs/*.png thumbs/$crunchpath </dev/null 
fi
montage /tmp/thumbs/*png  -geometry +3+3 -tile 3x3 montage/$crunchpath.jpg
	echo "<img src=\"$crunchpath\">" >> thumbs/_index.html
        fi
done
) > /tmp/thumb.log

Ipcam sphere panorama

I made a little script to make a 360 spherical panorama photo, using a remote controlled IP cam,

Looking at the API CGI, i only needed to control the movement of the camera and getting a snapshot.

  • Point camera down
  • Point camera maximal left
  • Take picture
  • Point a little to the right
  • Take picture, loop until max right
  • Point a little more up and go max left
  • Doing same loop as above, until pointing maximal up
Made a little animation in blender

After getting all those pictures, i only needed to stitch them using Hugin.
When viewing the image with VR Glasses, i could look around my room, without image distortion, like below flattend example.

The ipcam generates a token, which you have to use in your curl commands.

TOKEN PART

token=$( curl -s -d  '[{"cmd":"Login","action":0,"param":{"rs": "abcd", "User":{"userName":"admin","password":"SECRETPASSWORD"}}}]'  "http://camera.ip.number.here/cgi-bin/api.cgi?cmd=Login&token=null"  -H 'Content-Type: application/json' | grep name | cut -f4 -d\" )

GETTING A IMAGE FROM IPCAM

wget "http://camera.ip.number.here/cgi-bin/api.cgi?cmd=Snap&channel=0&rs=123asd&user=admin&password=SECRETPASSWORD" -O output.jpg

CONTROLLING MOVEMENT

curl -X POST  -d '[{"cmd":"PtzCtrl","action":0,"param":{"rs": "abcd", "channel":0,"op":"Left","speed":1,"id":1}}]' "http://camera.ip.number.here/cgi-bin/api.cgi?cmd=PtzCtrl&token=$token"

COMPLETE SCRIPT

#!/bin/bash
token=$( curl -s -d  '[{"cmd":"Login","action":0,"param":{"rs": "abcd", "User":{"userName":"admin","password":"SECRETPASSWORD"}}}]'  "http://camera.ip.number.here/cgi-bin/api.cgi?cmd=Login&token=null"  -H 'Content-Type: application/json' | grep name | cut -f4 -d\" )
echo $token

if [ $2 == "max" ]; then
curl -X POST  -d '[{"cmd":"PtzCtrl","action":0,"param":{"rs": "abcd", "channel":0,"op":"'$1'","speed":1,"id":1}}]' "http://camera.ip.number.here/cgi-bin/api.cgi?cmd=PtzCtrl&token=$token"
exit 0
fi


for x in $(seq -w 1 25) ; do
	for y in $(seq -w 1 12) ; do
                wget "http://camera.ip.number.here/cgi-bin/api.cgi?cmd=Snap&channel=0&rs=123asd&user=admin&password=SECRETPASSWORD" -O ${x}${y}.jpg
		curl -X POST  -d '[{"cmd":"PtzCtrl","action":0,"param":{"rs": "abcd", "channel":0,"op":"Right","speed":1,"id":1}}]' "http://camera.ip.number.here/cgi-bin/api.cgi?cmd=PtzCtrl&token=$token"
		sleep 0.5
		curl -X POST  -d '[{"cmd":"PtzCtrl","action":0,"param":{"rs": "abcd", "channel":0,"op":"Stop","speed":1,"id":1}}]' "http://camera.ip.number.here/cgi-bin/api.cgi?cmd=PtzCtrl&token=$token"
		sleep 5
	done

	curl -X POST  -d '[{"cmd":"PtzCtrl","action":0,"param":{"rs": "abcd", "channel":0,"op":"Left","speed":1,"id":1}}]' "http://camera.ip.number.here/cgi-bin/api.cgi?cmd=PtzCtrl&token=$token"
	sleep 30
	curl -X POST  -d '[{"cmd":"PtzCtrl","action":0,"param":{"rs": "abcd", "channel":0,"op":"Stop","speed":1,"id":1}}]' "http://camera.ip.number.here/cgi-bin/api.cgi?cmd=PtzCtrl&token=$token"
	sleep 1
        curl -X POST  -d '[{"cmd":"PtzCtrl","action":0,"param":{"rs": "abcd", "channel":0,"op":"Up","speed":1,"id":1}}]' "http://camera.ip.number.here/cgi-bin/api.cgi?cmd=PtzCtrl&token=$token"
	sleep 0.5
	curl -X POST  -d '[{"cmd":"PtzCtrl","action":0,"param":{"rs": "abcd", "channel":0,"op":"Stop","speed":1,"id":1}}]' "http://camera.ip.number.here/cgi-bin/api.cgi?cmd=PtzCtrl&token=$token"
sleep 5
done
1st panorama (Black and White due to night mode camera)

Bluetooth Macro Keyboard for Photo Management

Arduino Bluetooth Photo view marco keyboard
  • Cursor pad on the left
  • 1 till 5 (see below)
  • star + 1-5, rates 1 till 5 stars
  • outline star – removes rating
  • bookmark + 1-5, color marks image
  • Triangle – start slideshow
  • zoom-in, rotate CCW, reset zoom, rotate CW, zoom-out
  • previous image, open image, fullscreen, exit fullscreen to manager and next image

I’ve used a esp32 with 18650 battery holder.

I still have to 3d print a case 🙂

Code:

#include <BleConnectionStatus.h>
#include <BleKeyboard.h>
#include <KeyboardOutputCallbacks.h>

#define DEBUG 0micro joystick
#define STAR 16
#define FLAG 17
#define COL1 18
#define COL2 19
#define COL3 21
#define COL4 22
#define COL5 23
#define COL6 25
#define ROW1 26
#define ROW2 27
#define ROW3 32
#define ROW4 33

int flagstate = 0;
int starstate = 0;
int row1state = 0;
int row2state = 0;
int row3state = 0;
int row4state = 0;
int col1state = 0;
int col2state = 0;
int col3state = 0;
int col4state = 0;
int col5state = 0;
int col6state = 0;

int colstate = 1;

BleKeyboard bleKeyboard;

void setup() {
#ifdef DEBUG
  Serial.begin(9600);
#endif
  bleKeyboard.begin();
  pinMode(STAR, INPUT_PULLUP);
  pinMode(FLAG, INPUT_PULLUP);
  pinMode(ROW1, INPUT_PULLUP);
  pinMode(ROW2, INPUT_PULLUP);
  pinMode(ROW3, INPUT_PULLUP);
  pinMode(ROW4, INPUT_PULLUP);
  pinMode(COL1, OUTPUT);
  pinMode(COL2, OUTPUT);
  pinMode(COL3, OUTPUT);
  pinMode(COL4, OUTPUT);
  pinMode(COL5, OUTPUT);
  pinMode(COL6, OUTPUT);
}
void loop() {
#ifdef DEBUG
  Serial.print("Colstate : ");
  Serial.print(colstate);
  Serial.print('\n');
#endif

  if (colstate == 1) {
    digitalWrite(COL1, LOW);
    digitalWrite(COL2, HIGH);
    digitalWrite(COL3, HIGH);
    digitalWrite(COL4, HIGH);
    digitalWrite(COL5, HIGH);
    digitalWrite(COL6, HIGH);
  }
  if (colstate == 2) {
    digitalWrite(COL1, HIGH);
    digitalWrite(COL2, LOW);
    digitalWrite(COL3, HIGH);
    digitalWrite(COL4, HIGH);
    digitalWrite(COL5, HIGH);
    digitalWrite(COL6, HIGH);
  }
  if (colstate == 3) {
    digitalWrite(COL1, HIGH);
    digitalWrite(COL2, HIGH);
    digitalWrite(COL3, LOW);
    digitalWrite(COL4, HIGH);
    digitalWrite(COL5, HIGH);
    digitalWrite(COL6, HIGH);
  }
  if (colstate == 4) {
    digitalWrite(COL1, HIGH);
    digitalWrite(COL2, HIGH);
    digitalWrite(COL3, HIGH);
    digitalWrite(COL4, LOW);
    digitalWrite(COL5, HIGH);
    digitalWrite(COL6, HIGH);
  }
  if (colstate == 5) {
    digitalWrite(COL1, HIGH);
    digitalWrite(COL2, HIGH);
    digitalWrite(COL3, HIGH);
    digitalWrite(COL4, HIGH);
    digitalWrite(COL5, LOW);
    digitalWrite(COL6, HIGH);
  }
  if (colstate == 6) {
    digitalWrite(COL1, HIGH);
    digitalWrite(COL2, HIGH);
    digitalWrite(COL3, HIGH);
    digitalWrite(COL4, HIGH);
    digitalWrite(COL5, HIGH);
    digitalWrite(COL6, LOW);
  }
  delay (100);
  flagstate = digitalRead(FLAG);
  starstate = digitalRead(STAR);
  row1state = digitalRead(ROW1);
  row2state = digitalRead(ROW2);
  row3state = digitalRead(ROW3);
  row4state = digitalRead(ROW4);
#ifdef DEBUG
  Serial.print("Rowstates : ");
  Serial.print(row1state);
  Serial.print(row2state);
  Serial.print(row3state);
  Serial.print(row4state);
  Serial.print('\n');
#endif
  // ROW1 = UP,DOWN,LEFT,RIGHT
  if (bleKeyboard.isConnected() && colstate == 1) {
    // UP
#ifdef DEBUG
    Serial.print("Up Pressed ");
    Serial.print('\n');
#endif

    if (row1state == 0) {
      bleKeyboard.press(KEY_UP_ARROW);
      delay (100);
      bleKeyboard.releaseAll();
    }
    // DOWN
    if (row2state == 0) {
      bleKeyboard.press(KEY_DOWN_ARROW);
      delay (100);
      bleKeyboard.releaseAll();
    }
    // LEFT
    if (row3state == 0) {
      bleKeyboard.press(KEY_LEFT_ARROW);
      delay (100);
      bleKeyboard.releaseAll();
    }
    // RIGHT
    if (row4state == 0) {
      bleKeyboard.press(KEY_RIGHT_ARROW);
      delay (100);
      bleKeyboard.releaseAll();
    }
  }
  // ROW2 = (1),(star),ZOOMIN,PREVIOUS
  if (bleKeyboard.isConnected() && colstate == 2) {
    // 1 - star
    if (row1state == 0 && starstate == 0) {
      bleKeyboard.press(KEY_LEFT_CTRL);
      bleKeyboard.press('1');
      delay (100);
      bleKeyboard.releaseAll();
    }
    // 1 - flag
    if (row1state == 0 && flagstate == 0) {
      bleKeyboard.press(KEY_LEFT_ALT);
      bleKeyboard.press('1');
      delay (100);
      bleKeyboard.releaseAll();
    }
    // NO ROWSTATE2

    // zoom in
    if (row3state == 0) {
      bleKeyboard.press('+');
      delay (100);
      bleKeyboard.releaseAll();
    }
    // PREVIOUS
    if (row4state == 0) {
      bleKeyboard.press(KEY_LEFT_CTRL);
      bleKeyboard.press(KEY_LEFT_ARROW);
      delay (100);
      bleKeyboard.releaseAll();
    }
  }
  // ROW3 = (2),unstar,CCWrotate,open
  if (bleKeyboard.isConnected() && colstate == 3) {
    // 2 - star
    if (row1state == 0 && starstate == 0) {
      bleKeyboard.press(KEY_LEFT_CTRL);
      bleKeyboard.press('2');
      delay (100);
      bleKeyboard.releaseAll();
    }
    // 2 - flag
    if (row1state == 0 && flagstate == 0) {
      bleKeyboard.press(KEY_LEFT_ALT);
      bleKeyboard.press('2');
      delay (100);
      bleKeyboard.releaseAll();
    }
    // unstar
    if (row2state == 0) {
      bleKeyboard.press(KEY_LEFT_CTRL);
      bleKeyboard.press('0');
      delay (100);
      bleKeyboard.releaseAll();
    }
    // CCW rotate
    if (row3state == 0) {
      bleKeyboard.press(KEY_LEFT_CTRL);
      bleKeyboard.press(KEY_LEFT_ALT);
      bleKeyboard.press(KEY_LEFT_ARROW);
      delay (100);
      bleKeyboard.releaseAll();
    }
    // open
    if (row4state == 0) {
      bleKeyboard.press(KEY_RETURN);
      delay (100);
      bleKeyboard.releaseAll();
    }
  }

  // ROW4 = (3),(flag),zoom,fullscreen
  if (bleKeyboard.isConnected() && colstate == 4) {
    // 3 - star
    if (row1state == 0 && starstate == 0) {
      bleKeyboard.press(KEY_LEFT_CTRL);
      bleKeyboard.press('3');
      delay (100);
      bleKeyboard.releaseAll();
    }
    // 3 - flag
    if (row1state == 0 && flagstate == 0) {
      bleKeyboard.press(KEY_LEFT_ALT);
      bleKeyboard.press('3');
      delay (100);
      bleKeyboard.releaseAll();
    }
    // NO ROWSTATE2

    // zoom reset
    if (row3state == 0) {
      bleKeyboard.press('*');
      delay (100);
      bleKeyboard.releaseAll();
    }
    // fullscreen
    if (row4state == 0) {
      bleKeyboard.press('f');
      delay (100);
      bleKeyboard.releaseAll();
    }
  }

  // ROW5 = (4),unflag,CWrotate,exit
  if (bleKeyboard.isConnected() && colstate == 5) {
    // 4 - star
    if (row1state == 0 && starstate == 0) {
      bleKeyboard.press(KEY_LEFT_CTRL);
      bleKeyboard.press('4');
      delay (100);
      bleKeyboard.releaseAll();
    }
    // 4 - flag
    if (row1state == 0 && flagstate == 0) {
      bleKeyboard.press(KEY_LEFT_ALT);
      bleKeyboard.press('4');
      delay (100);
      bleKeyboard.releaseAll();
    }
    // unflag
    if (row2state == 0) {
      bleKeyboard.press(KEY_LEFT_ALT);
      bleKeyboard.press('0');
      delay (100);
      bleKeyboard.releaseAll();
    }
    // CW rotate
    if (row3state == 0) {
      bleKeyboard.press(KEY_LEFT_CTRL);
      bleKeyboard.press(KEY_LEFT_ALT);
      bleKeyboard.press(KEY_RIGHT_ARROW);
      delay (100);
      bleKeyboard.releaseAll();
    }
    // exit
    if (row4state == 0) {
      bleKeyboard.press(KEY_ESC);
      delay (100);
      bleKeyboard.releaseAll();
    }
  }

  // ROW6 = (5),slideshow,zoomout,next
  if (bleKeyboard.isConnected() && colstate == 6) {
    // 5 - star
    if (row1state == 0 && starstate == 0) {
      bleKeyboard.press(KEY_LEFT_CTRL);
      bleKeyboard.press('5');
      delay (100);
      bleKeyboard.releaseAll();
    }
    // 5 - flag
    if (row1state == 0 && flagstate == 0) {
      bleKeyboard.press(KEY_LEFT_ALT);
      bleKeyboard.press('5');
      delay (100);
      bleKeyboard.releaseAll();
    }
    // slideshow
    if (row2state == 0) {
      bleKeyboard.press(KEY_ESC);
      bleKeyboard.press(KEY_LEFT_CTRL);
      bleKeyboard.press('s');
      delay (100);
      bleKeyboard.releaseAll();
    }
    // zoom out
    if (row3state == 0) {
      bleKeyboard.press('-');
      delay (100);
      bleKeyboard.releaseAll();
    }
    // next
    if (row4state == 0) {
      bleKeyboard.press(KEY_LEFT_CTRL);
      bleKeyboard.press(KEY_RIGHT_ARROW);
      delay (100);
      bleKeyboard.releaseAll();
    }
  }
  colstate++;
  if (colstate == 7) {
    colstate = 1;
  }
}
Keyboard layout

Wacom tablet doesn’t behave

Changed some code controlling my wacom drawing tablet.
I use this one to draw Art, diagrams and touch up photo’s.

When using multiple screens, i had the problem it would stretch the draw area over multiple screens, streching the ratio. Or it took the work screen to work on.

#!/bin/bash
# using xinput here, check post about two mouses/keyboards on one machine

# Use xrandr to check names check 
MONITOR="DP-1"
PAD_NAME='Wacom BambooFun 6x8 Pad pad'

#undo
xsetwacom --set "$PAD_NAME" Button 1 "key +ctrl +z -z -ctrl" 
xsetwacom --set "$PAD_NAME" Button 2 "key e"
xsetwacom --set "$PAD_NAME" Button 3 "key h"

ID_STYLUS=`xinput | grep "Pen stylus" | cut -f 2 | cut -c 4-5`
xinput map-to-output $ID_STYLUS $MONITOR
ID_STYLUS_2=`xinput | grep "Pen eraser" | cut -f 2 | cut -c 4-5`
xinput map-to-output $ID_STYLUS_2 $MONITOR

exit 0

Most of the times i use Krita and Gimp.

3D printed a stone

Why? Because i can

While on holiday in New Zealand i made photos of a rock i found on the campsite we where. Nothing special about the rock, but it was a nice subject to try to replicate.

So i took many many pictures of the stone from all sides.

Imported those images in meshroom and convered it to a 3D stl object.

Blender object

Printing and airbrushing

Added some grass from our clock project

Mount Taranaki New Zealand

While traveling New Zealand we went to see Mt Taranaki

Mount Taranaki (Māori: Taranaki Maunga), also known as Mount Egmont, is a dormant stratovolcano in the Taranaki region on the west coast of New Zealand’s North Island. It is the second highest point in the North Island, after Mount Ruapehu.

I made this timelapse using a Nikon D750.

Convert a series of jpgs into a mp4

ffmpeg -f image2 -r 24 -start_number 8296 -i "750_%04d.JPG"  -vcodec libx264 -profile:v high444 -refs 16 -crf 0 -preset ultrafast -vf scale=1920:1080 output.mp4

Working on 8mm film projectors

I’ve got some old 8mm film from my father. And i wanted to digitise them.
Luckily he had some projectors. One was his own and a borrowed one.
Don’t know about the third one.

Not being used for 30+ years, none of them worked.

So i took them apart and tried to fix them.

Most of them had a driving belt issue, and two of them needed a new bulb.

In the end I had three working projectors. Let the digitising begin!

I started off with putting a Nikon camera beside it and selecting 24 frames/second and putting the speed dial just right .. i got a decent recording.

Tips:

Most drive belts still can be bought, sometimes you have to search for an alternative with same dimensions.

Measure the resistance of the power connector. The old transformers could have a shorted connection. (cause: dried out insulation of copper wires)

Use a pressurized can of air to clean the insides.

Keep track of the parts when disassembling. Those things are not made to be easy fixed.

Below a uncut/unaltered recording, so the media needs some cropping!
I love the authentic shutter sound!