I’ve been testing automations using an IPCam instead of a PIR.
If dark, person detected on Reolink camera -> turn on light.
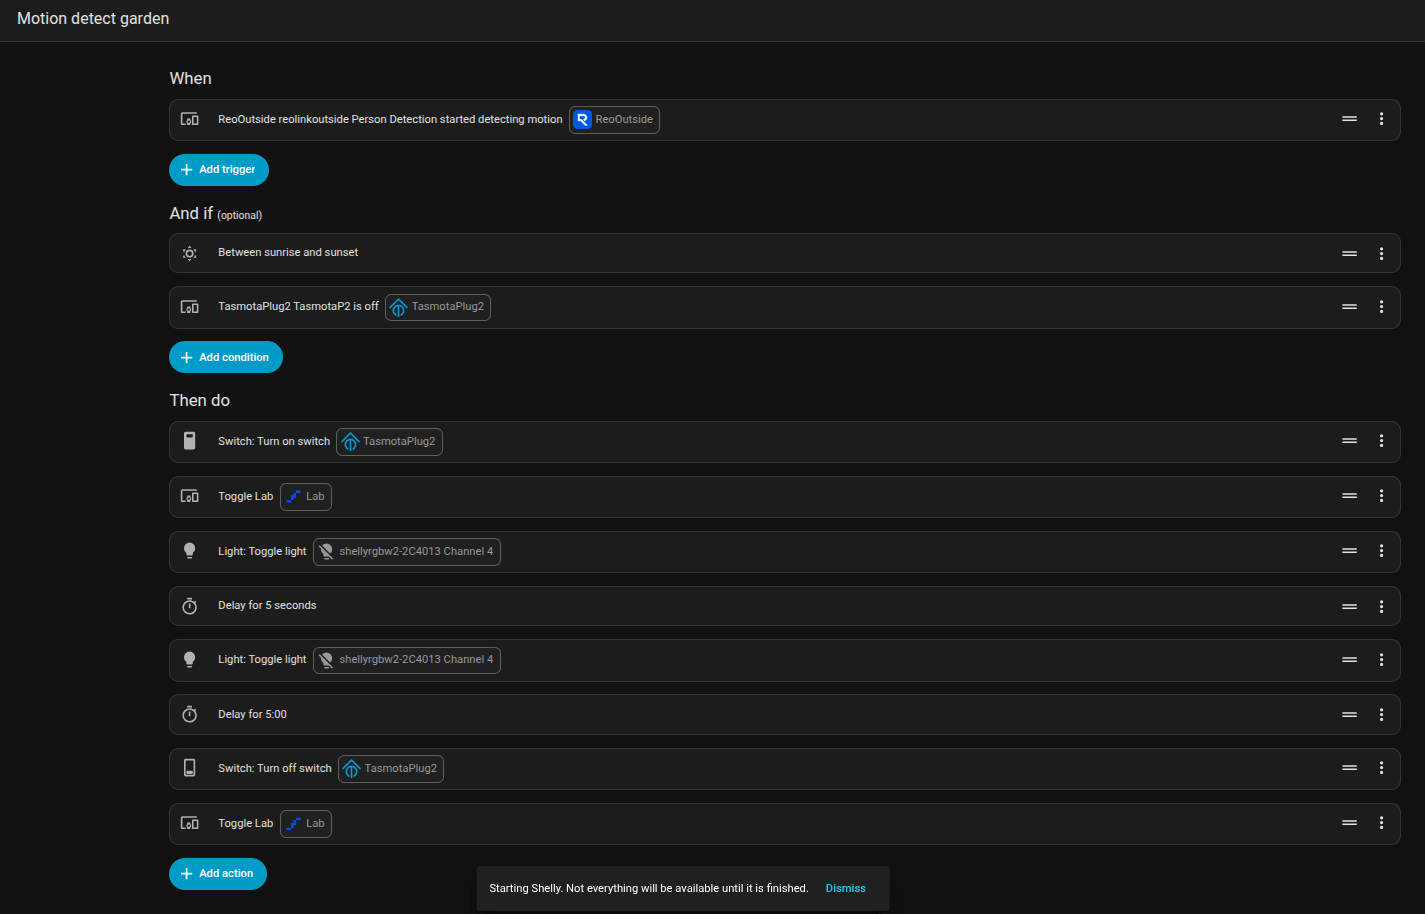
CODE
alias: Motion detect garden
description: ""
triggers:
  - type: motion
    device_id: 3459783a628a0065fd5540af988f0b60
    entity_id: 4f4193f01ceb5c5ec21a2e5bf3f6c9e3
    domain: binary_sensor
    trigger: device
    for:
      hours: 0
      minutes: 0
      seconds: 2
conditions:
  - condition: sun
    before: sunrise
    after: sunset
  - condition: device
    type: is_off
    device_id: 2189b12c73679451fa1af406b0b492d1
    entity_id: 4bb88f1b2f7bd1d6701cc924ecbb3cb1
    domain: switch
    for:
      hours: 0
      minutes: 0
      seconds: 5
actions:
  - action: switch.turn_on
    metadata: {}
    data: {}
    target:
      device_id: 2189b12c73679451fa1af406b0b492d1
  - type: toggle
    device_id: 348056095d7d3217280b235cf0969dc6
    entity_id: 7c02a433ce73b03df62d2187a97ad9b0
    domain: light
  - action: light.toggle
    metadata: {}
    target:
      entity_id: light.shellyrgbw2_2c4013_channel_4
    data: {}
  - delay:
      hours: 0
      minutes: 0
      seconds: 5
      milliseconds: 0
  - action: light.toggle
    metadata: {}
    target:
      entity_id: light.shellyrgbw2_2c4013_channel_4
    data: {}
  - delay:
      hours: 0
      minutes: 5
      seconds: 0
      milliseconds: 0
  - action: switch.turn_off
    metadata: {}
    target:
      device_id: 2189b12c73679451fa1af406b0b492d1
    data: {}
  - type: toggle
    device_id: 348056095d7d3217280b235cf0969dc6
    entity_id: 7c02a433ce73b03df62d2187a97ad9b0
    domain: light
mode: single