Below some examples and connection diagrams to control displays. More code and complete schematics will be added on this page or on a separate projects page.
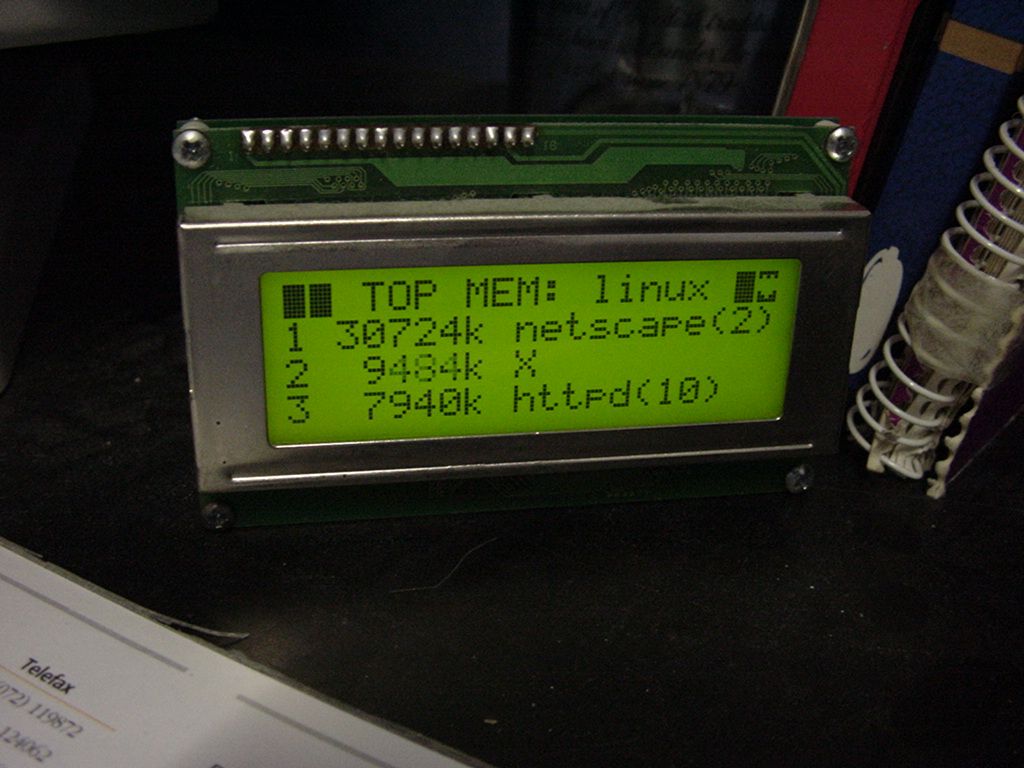
UPDATE 20230119 Cost of 20×4 display in 1998
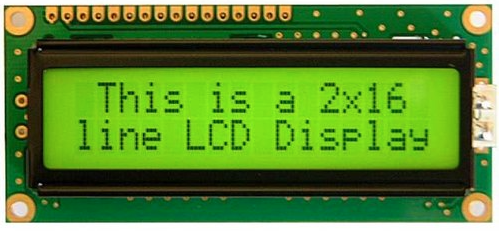
LCD
I’ve used a LCD display like this (HITACHI HD44780) on my PC in the 90s, and also written code to use this as a monitoring device on my amiga.
On Linux i used LcdProc – This module also was equiped with a serial connector
Now (2023) it is 8 euros! When bought now fl to euro 98 Euro or 107 $
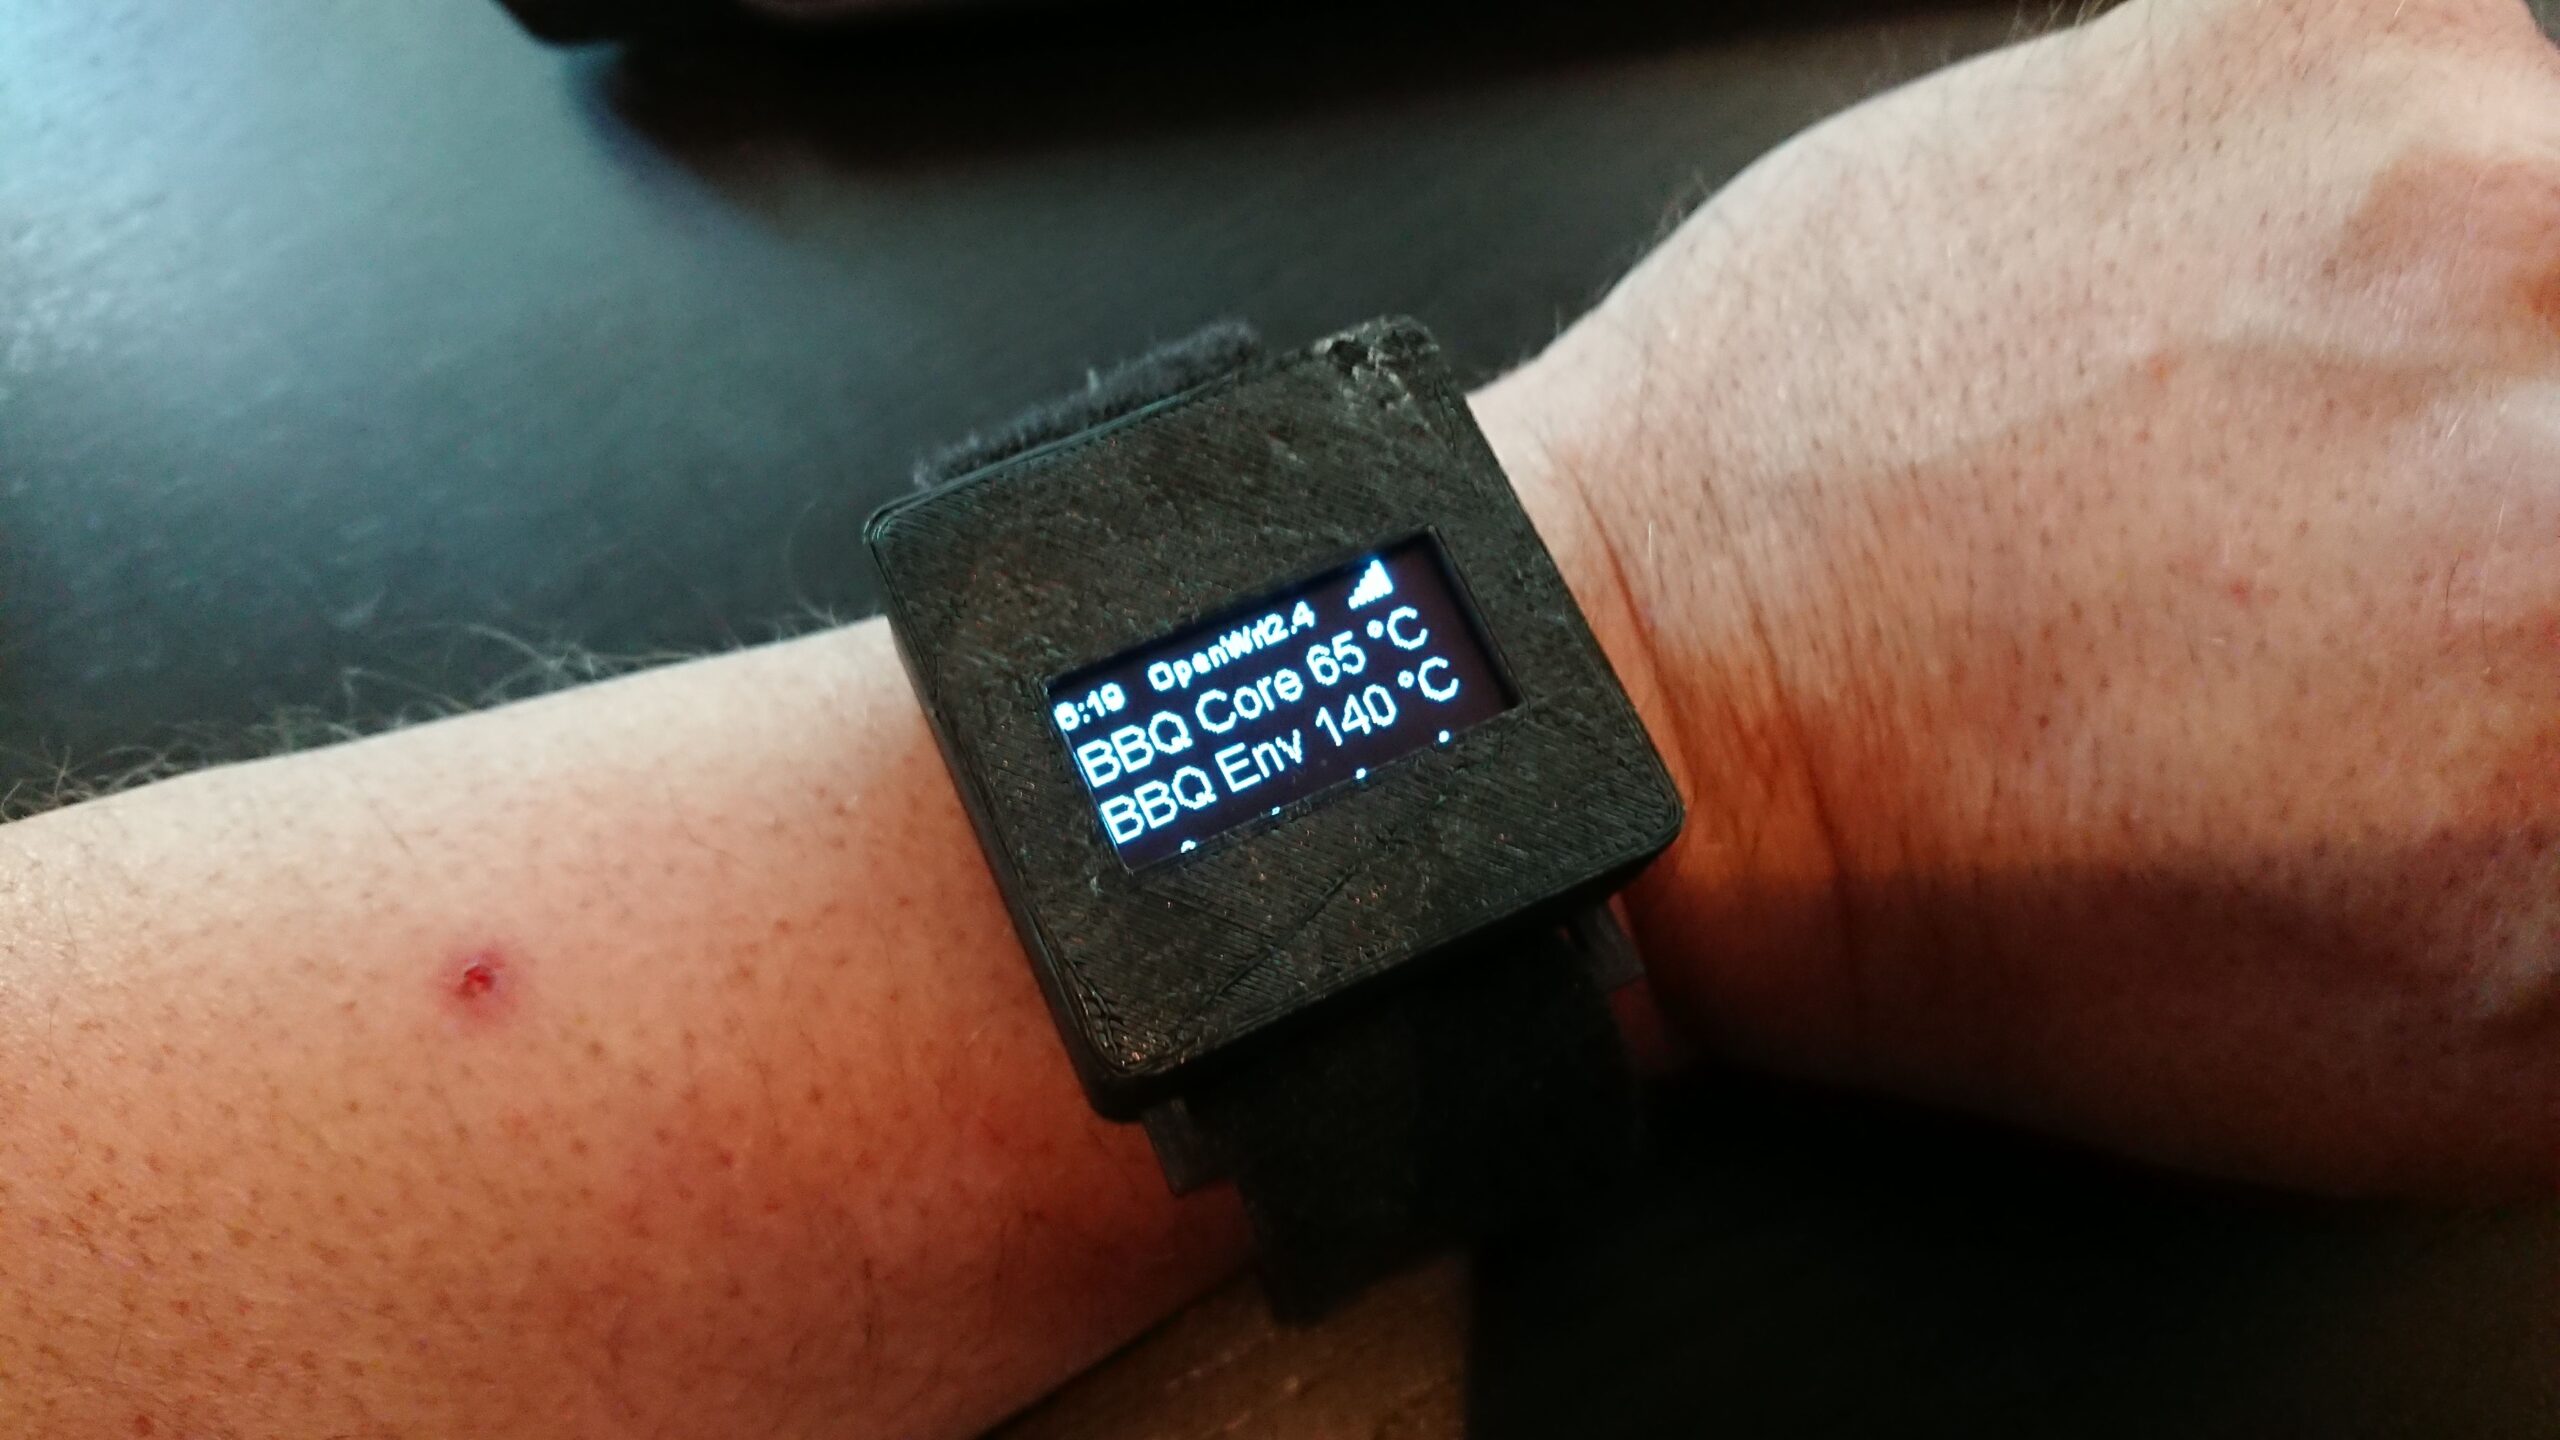
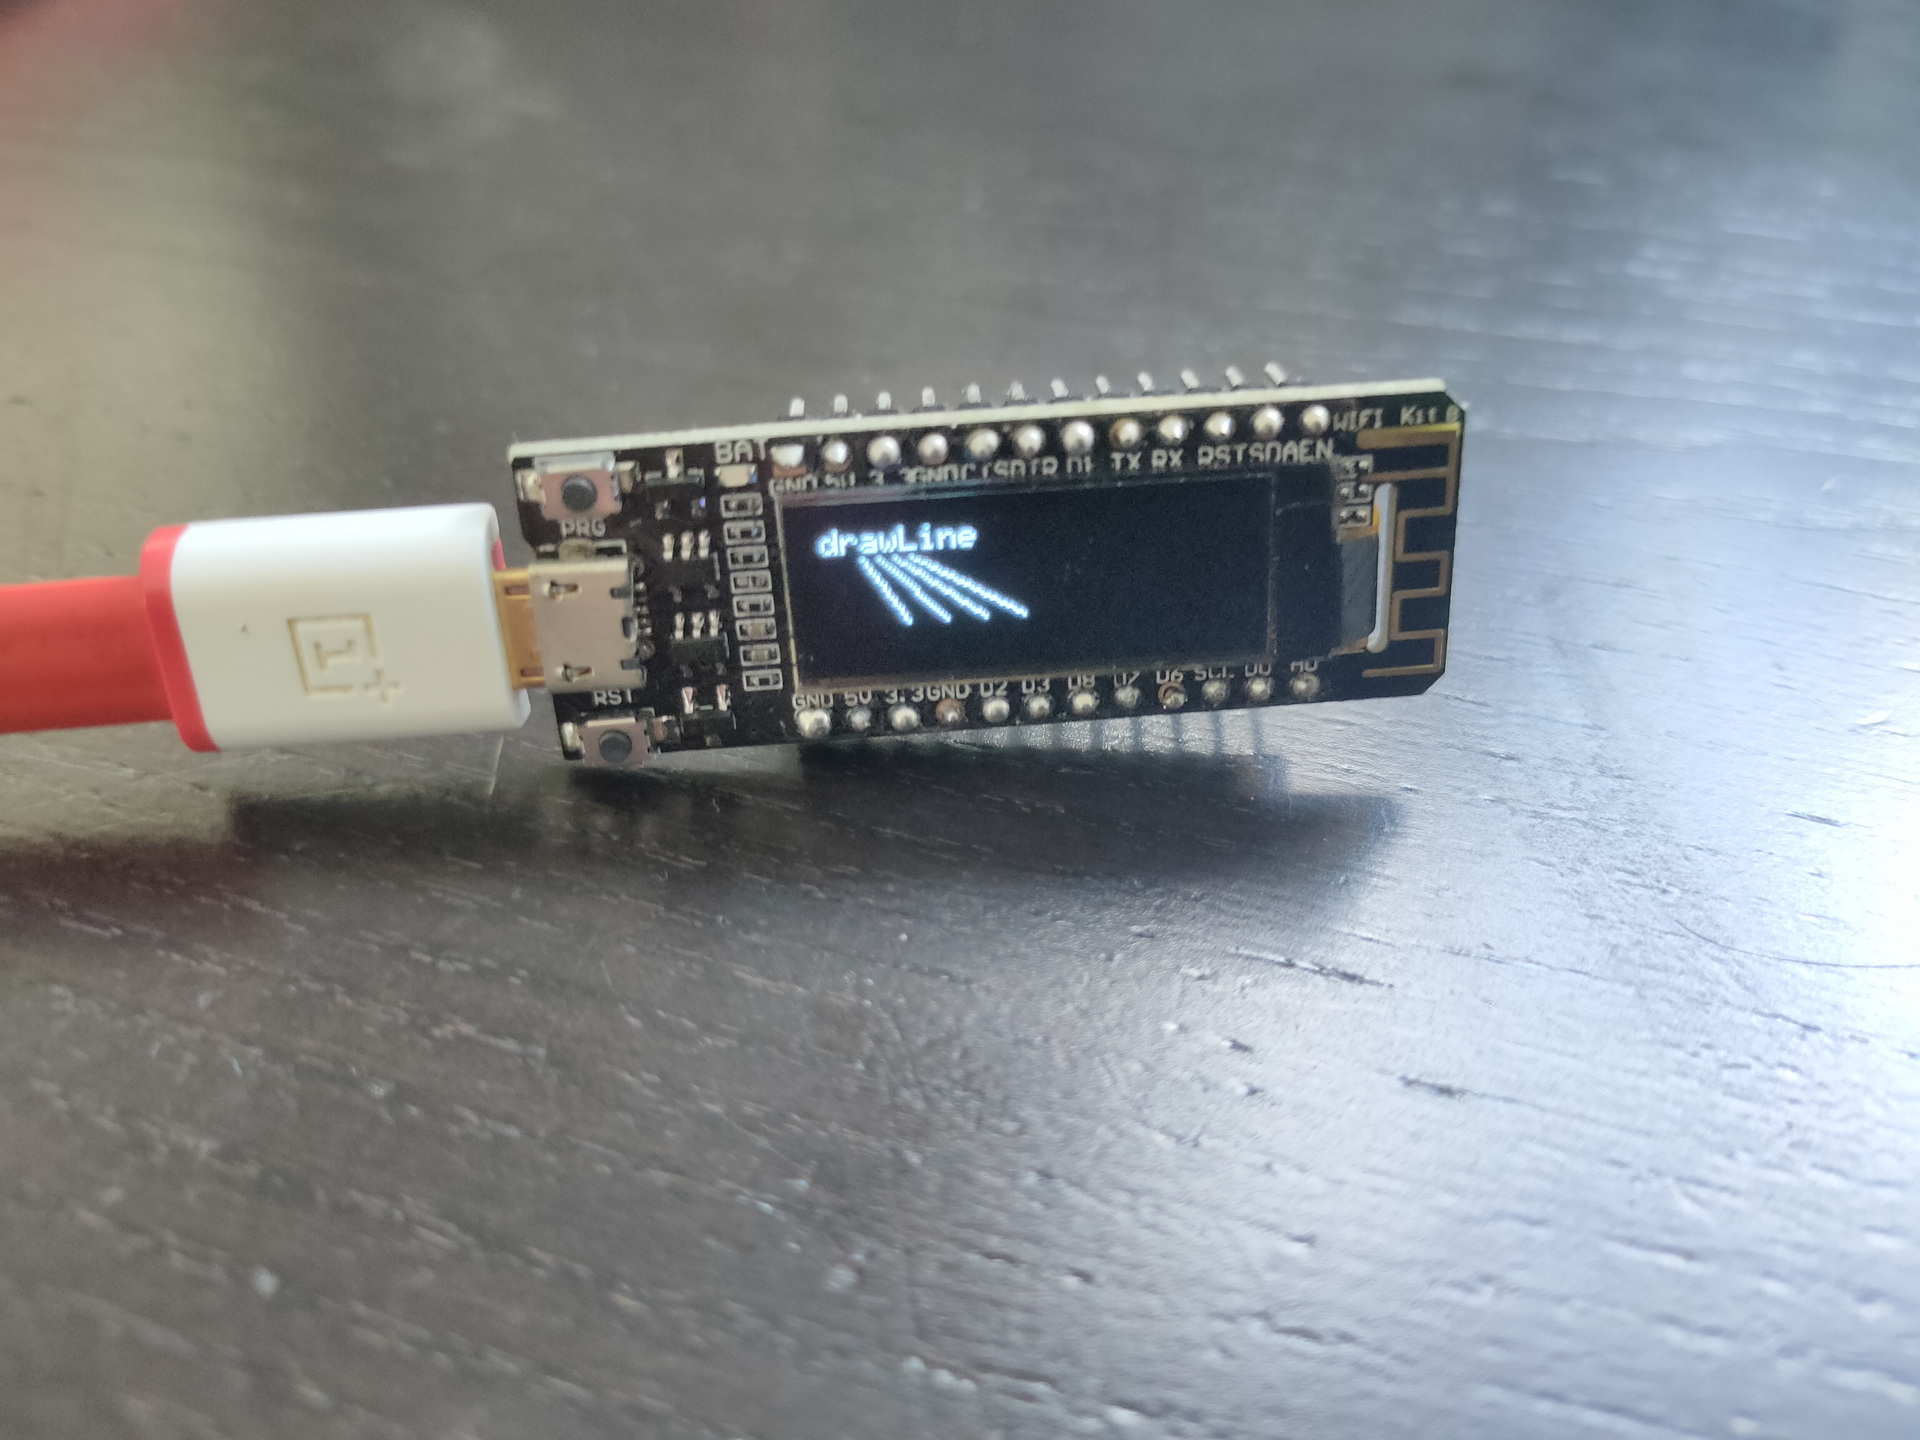
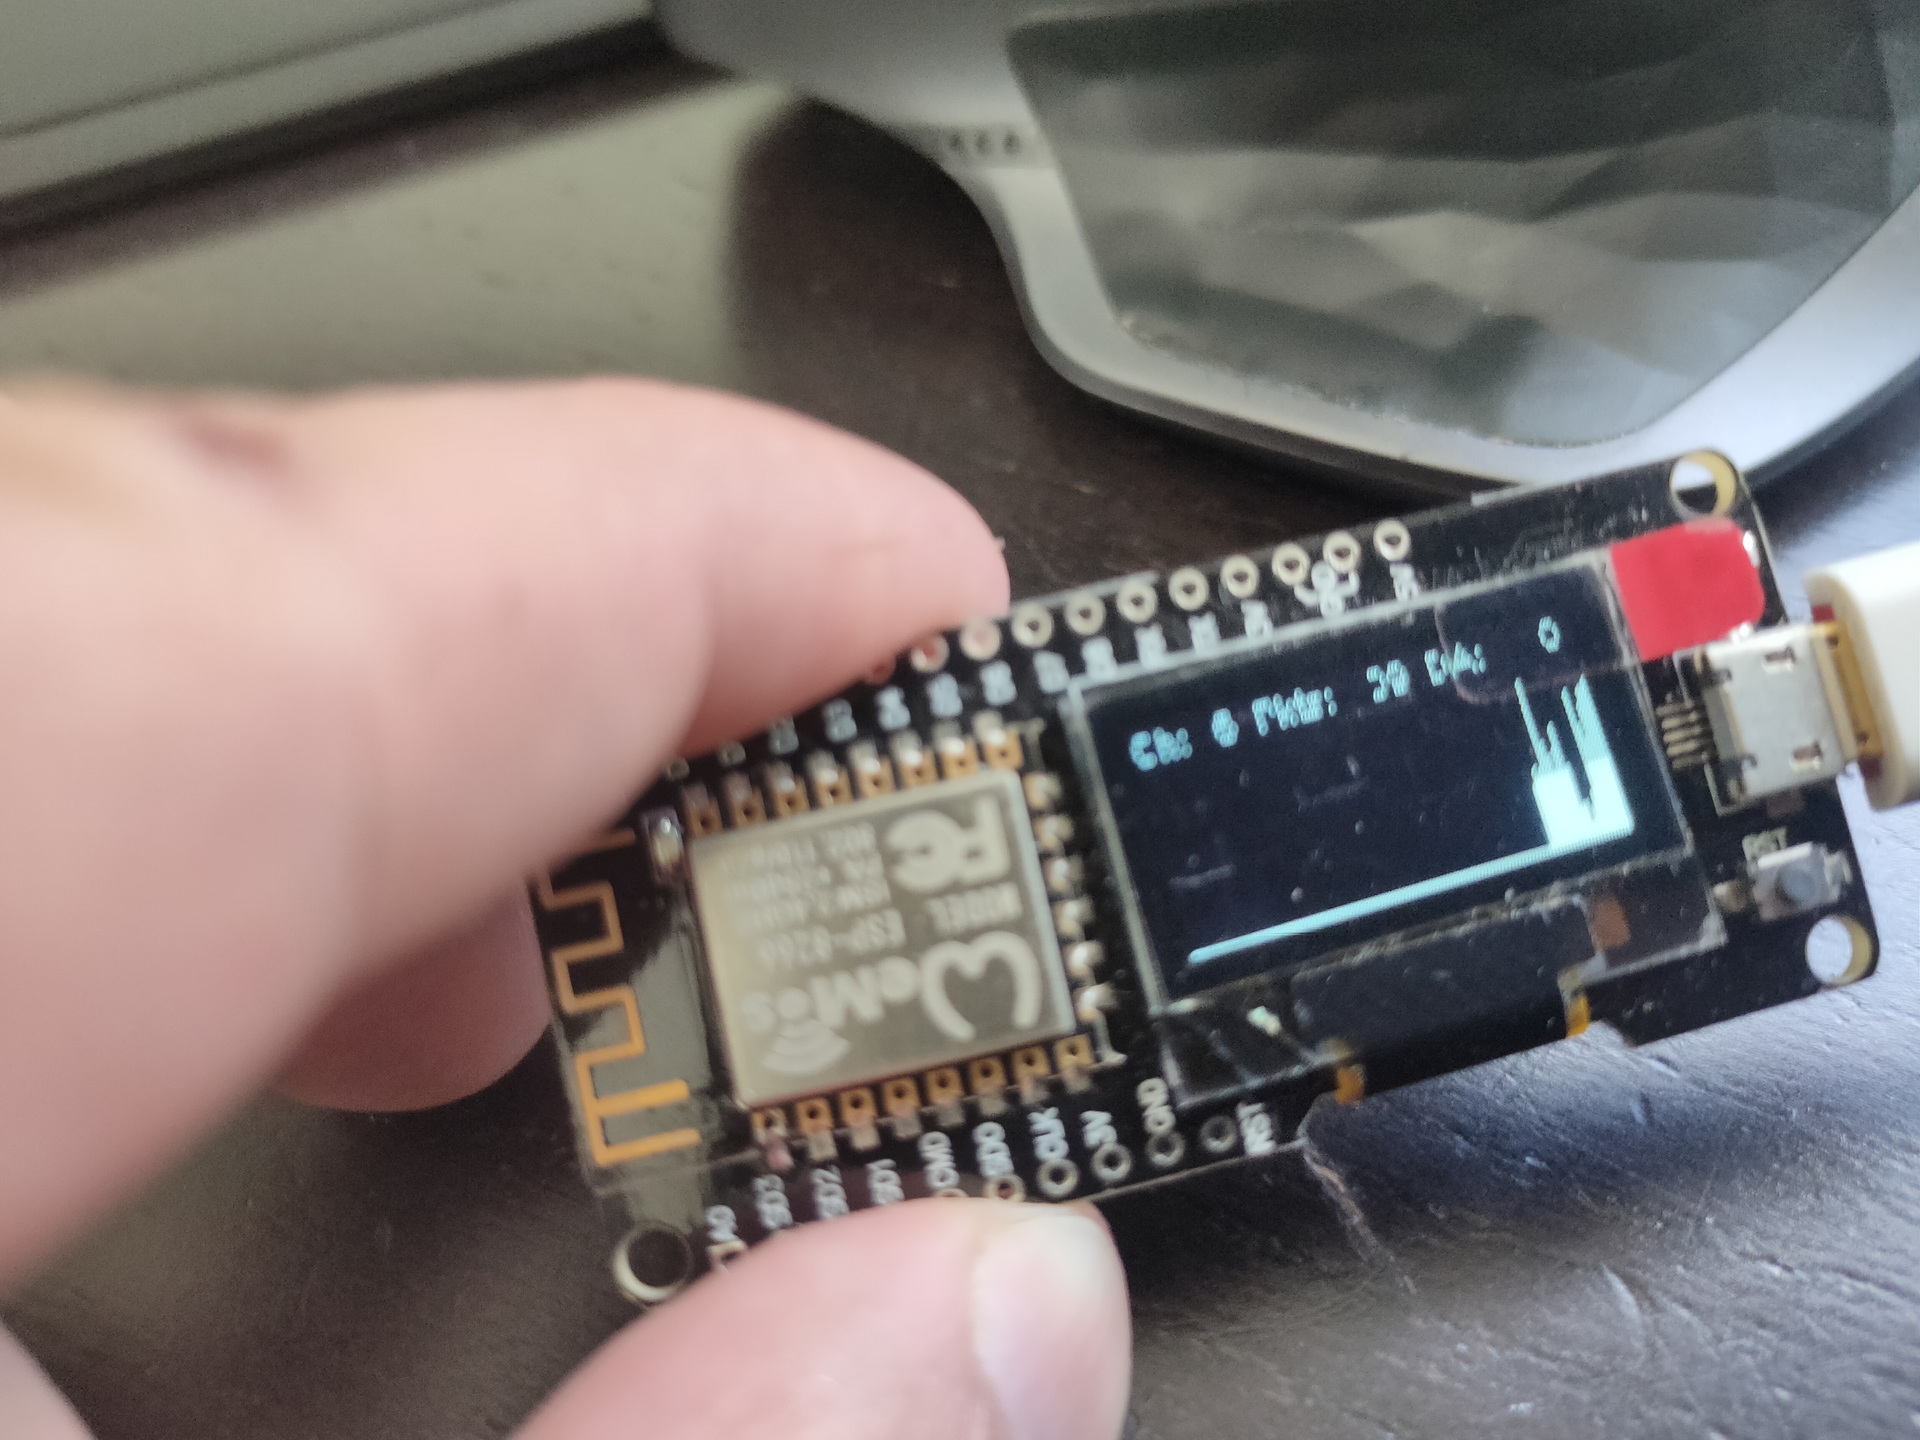
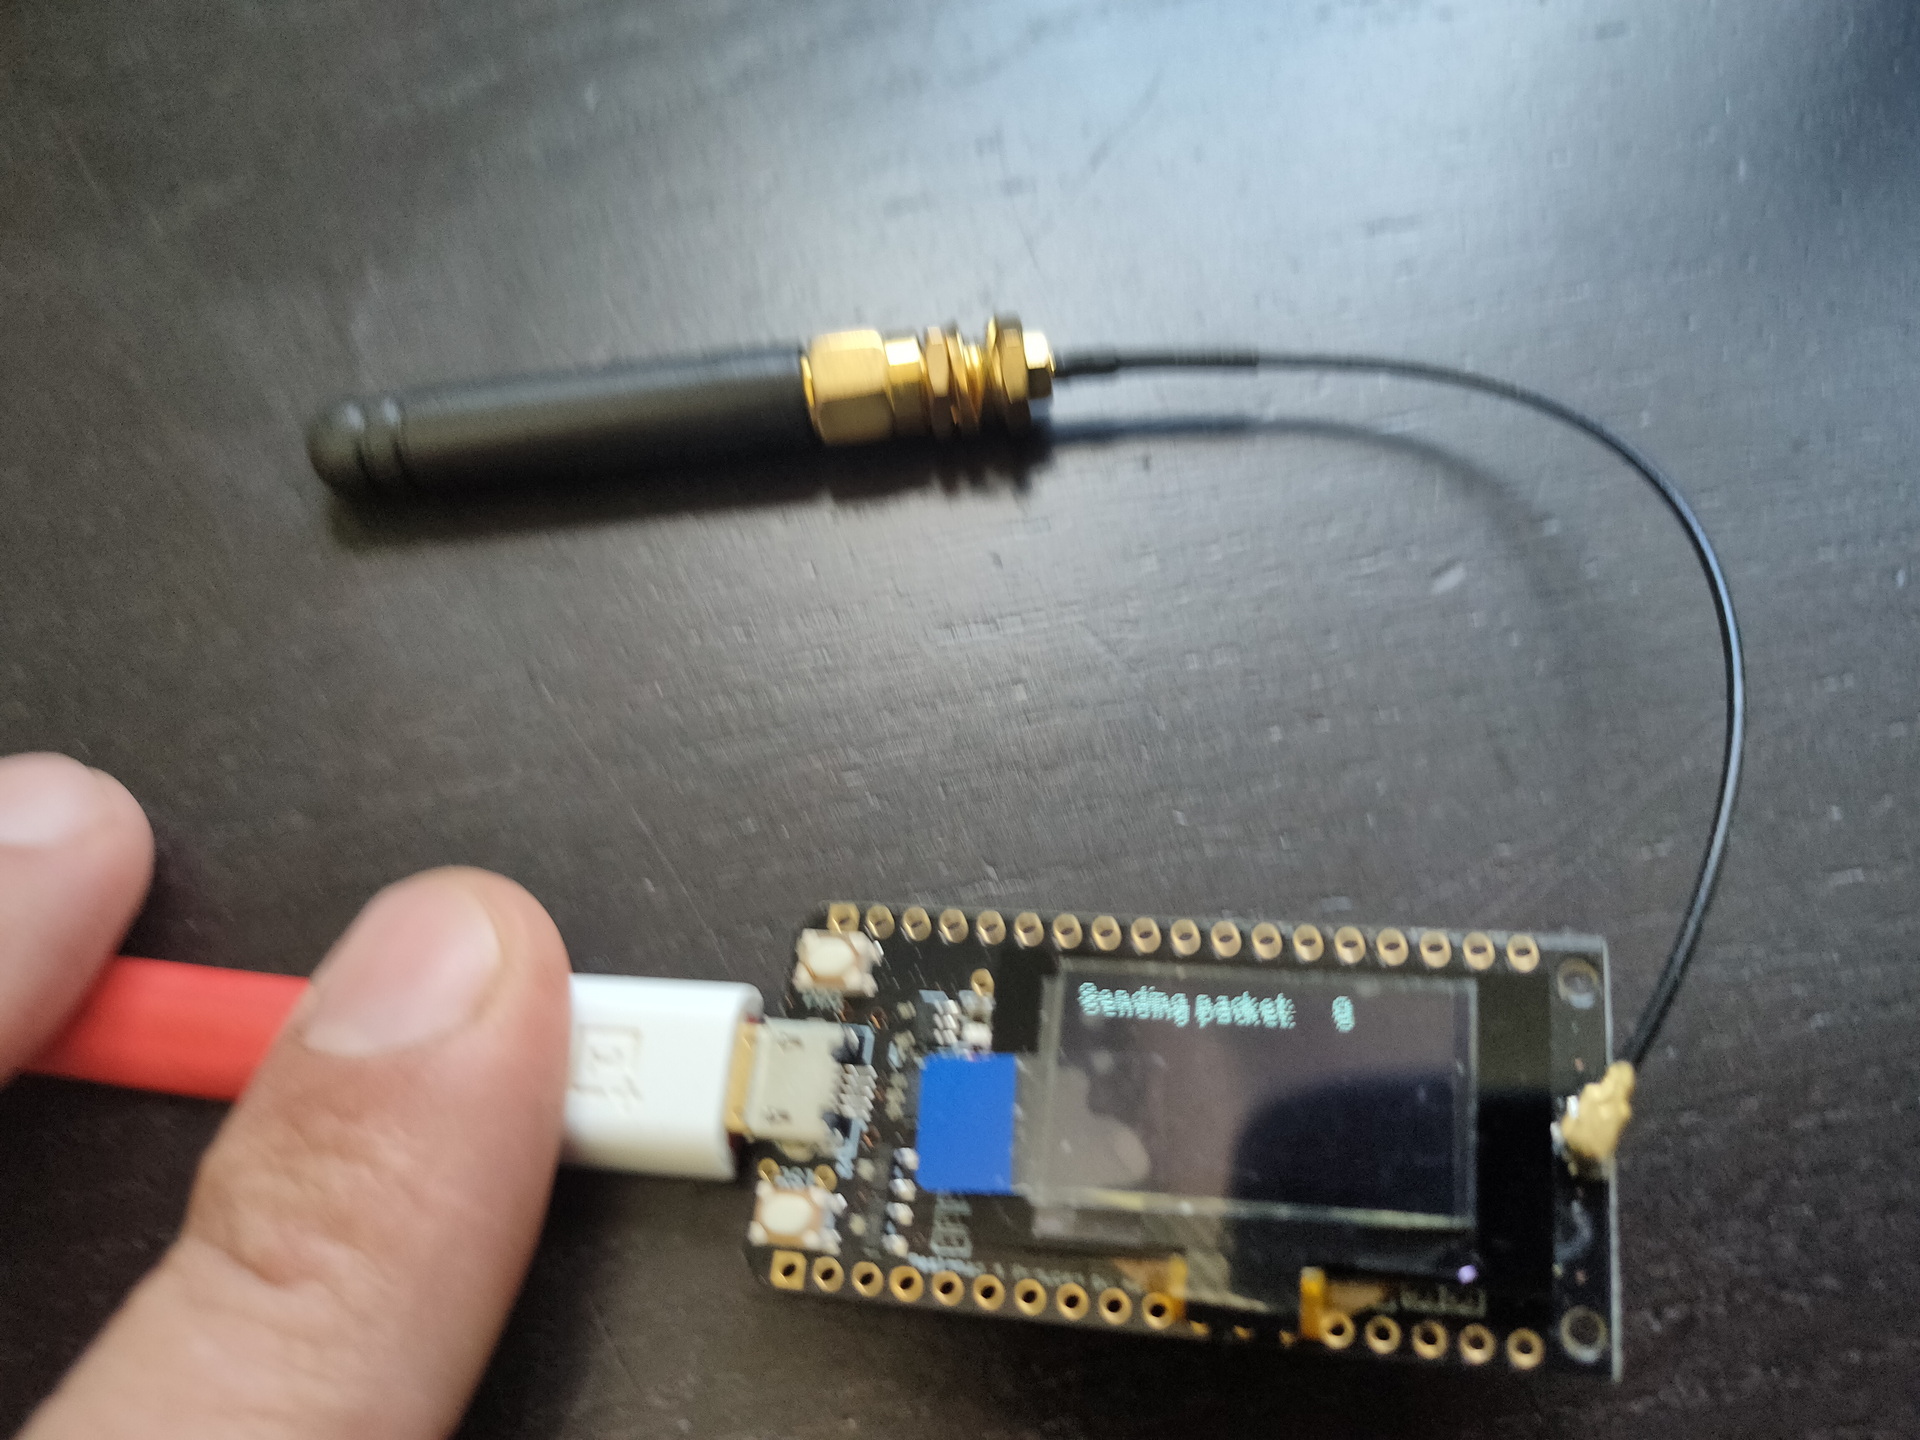
Some arduino’s have embedded displays like those i’ve used for a Lora project.
No usedWifi packet monitorLora test
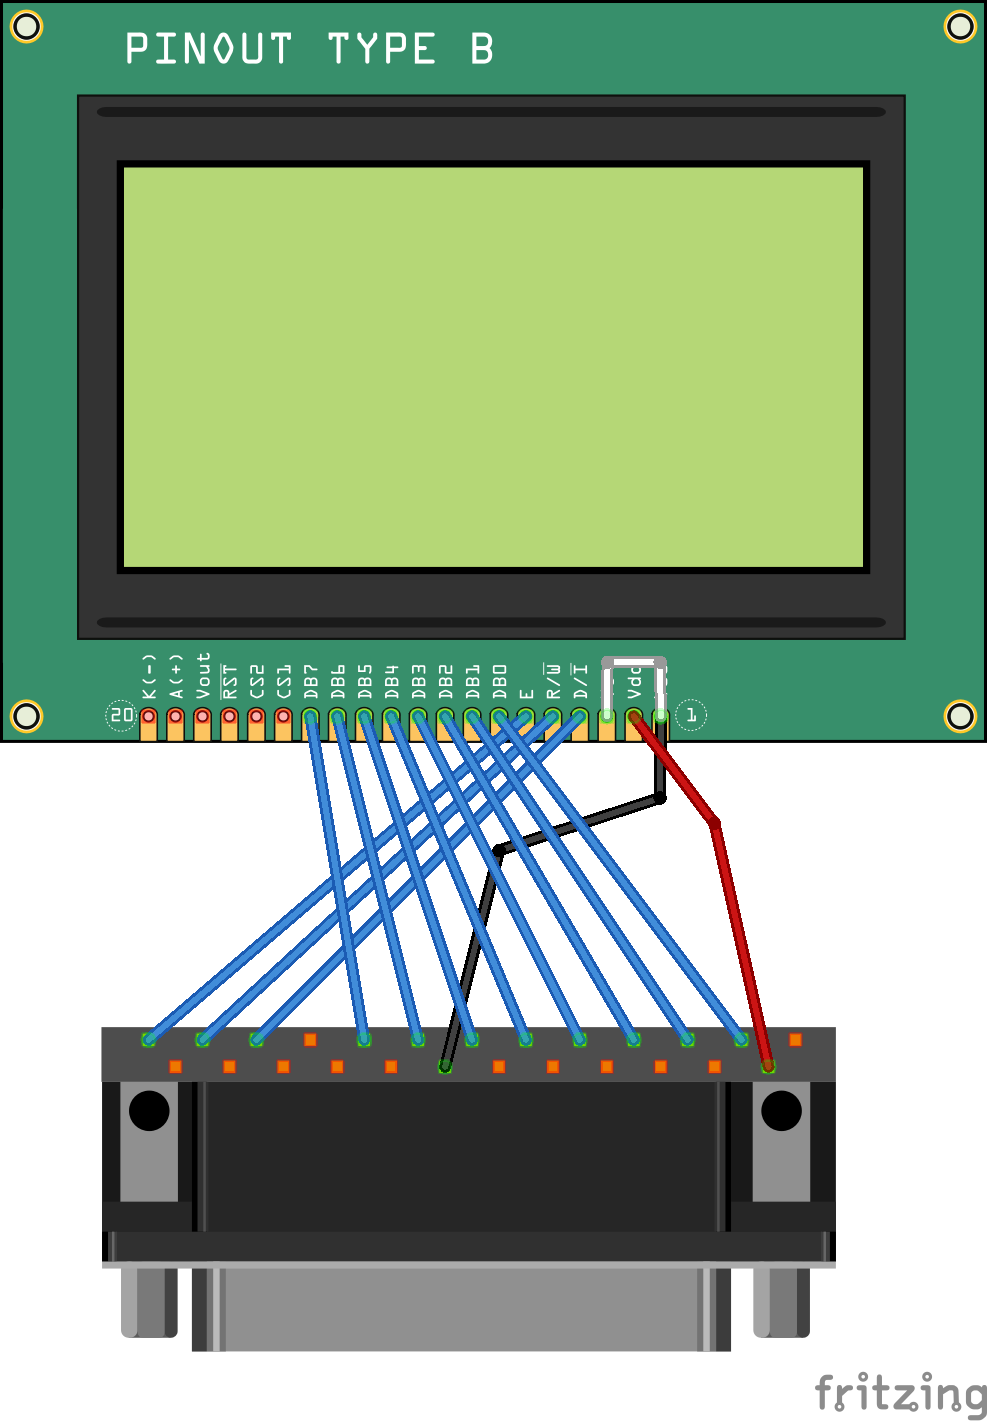
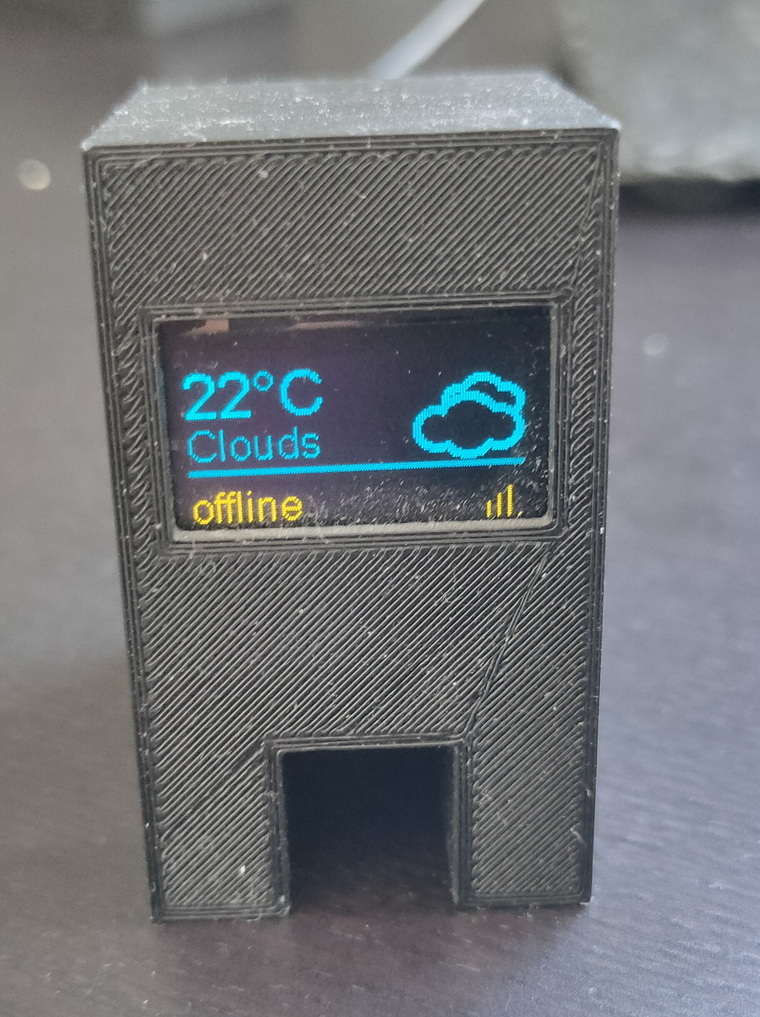
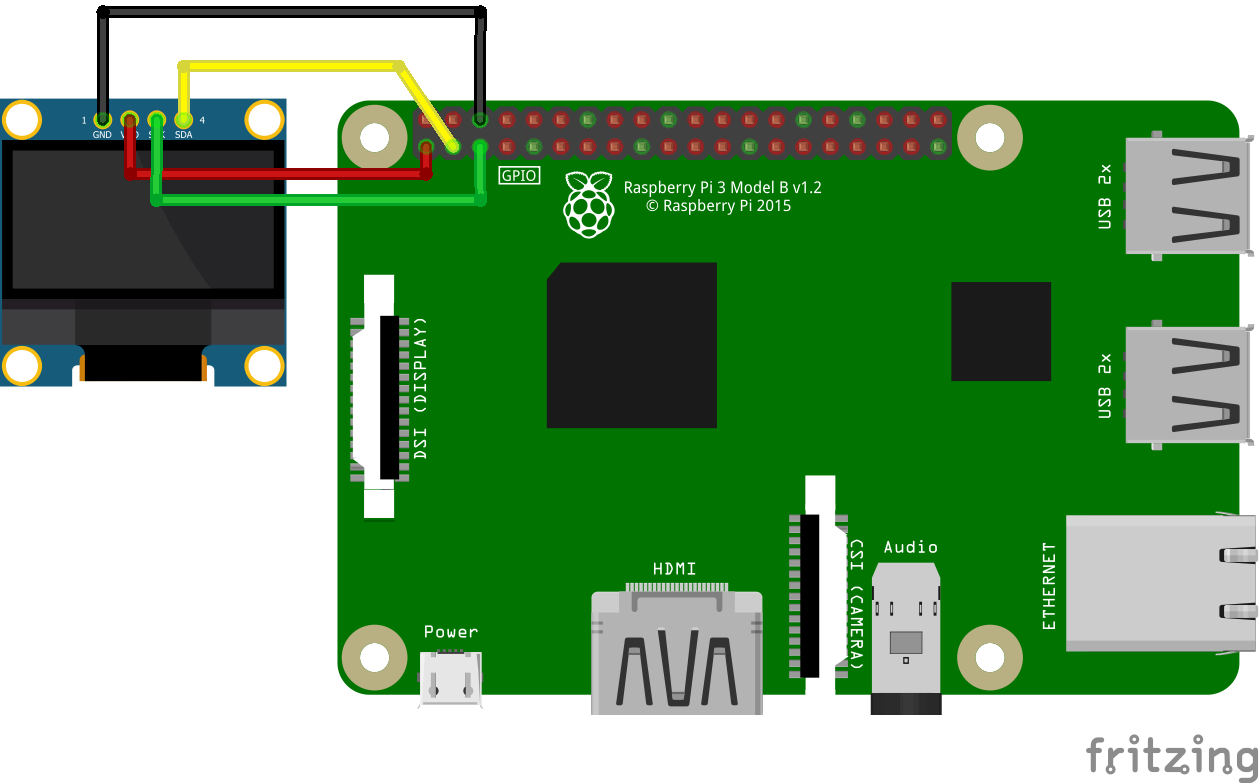
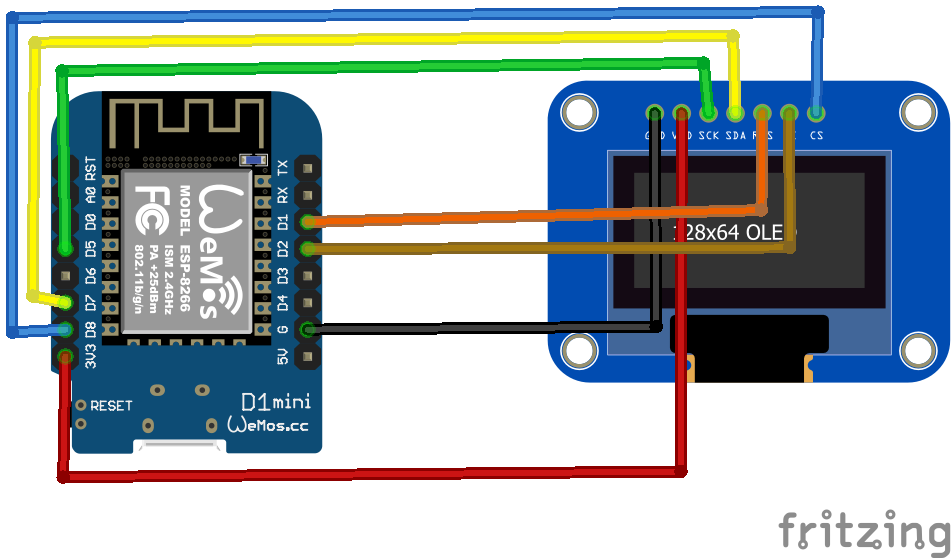
Other means of connecting : SPI
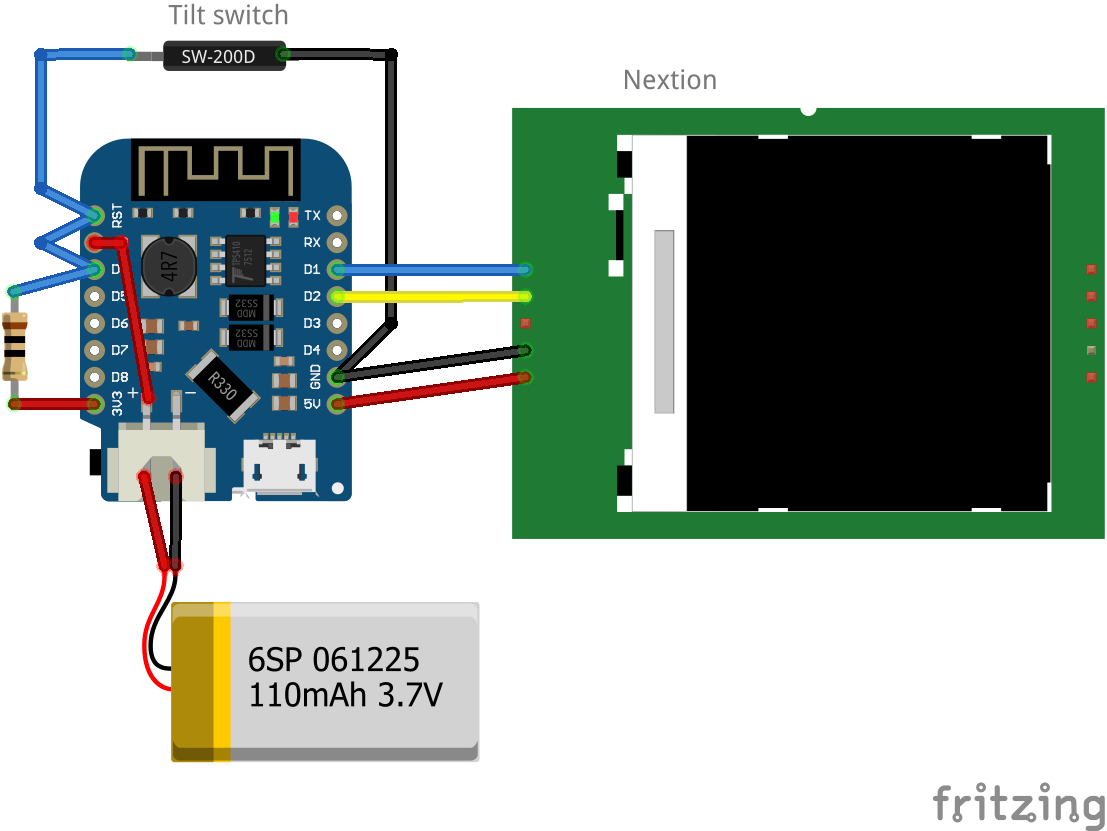
SPI connected display
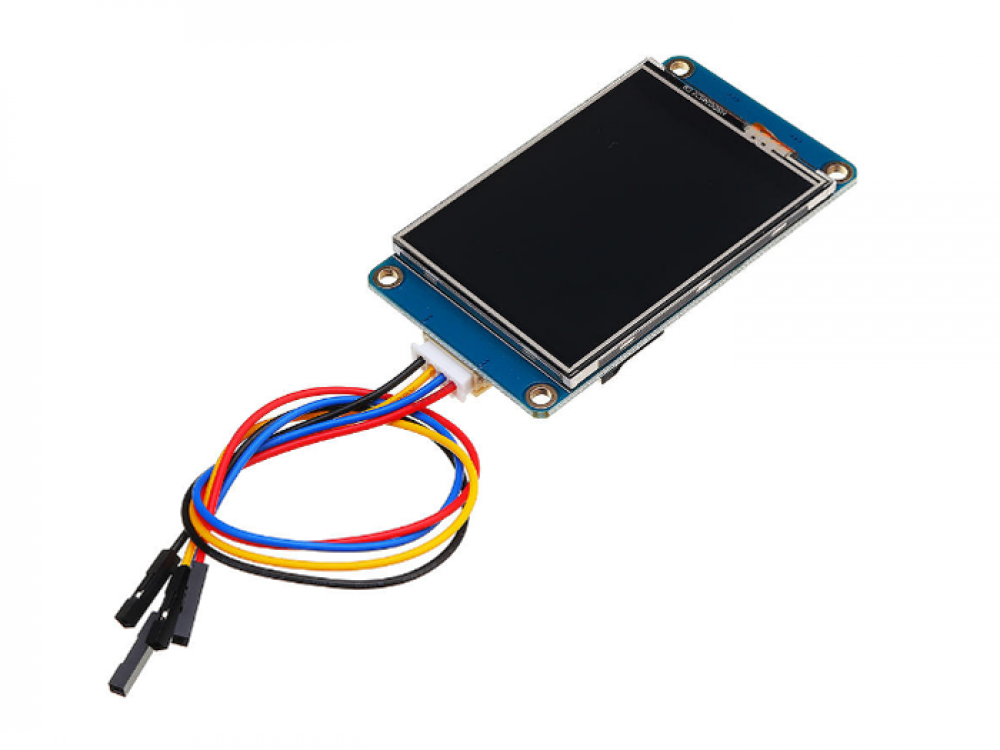
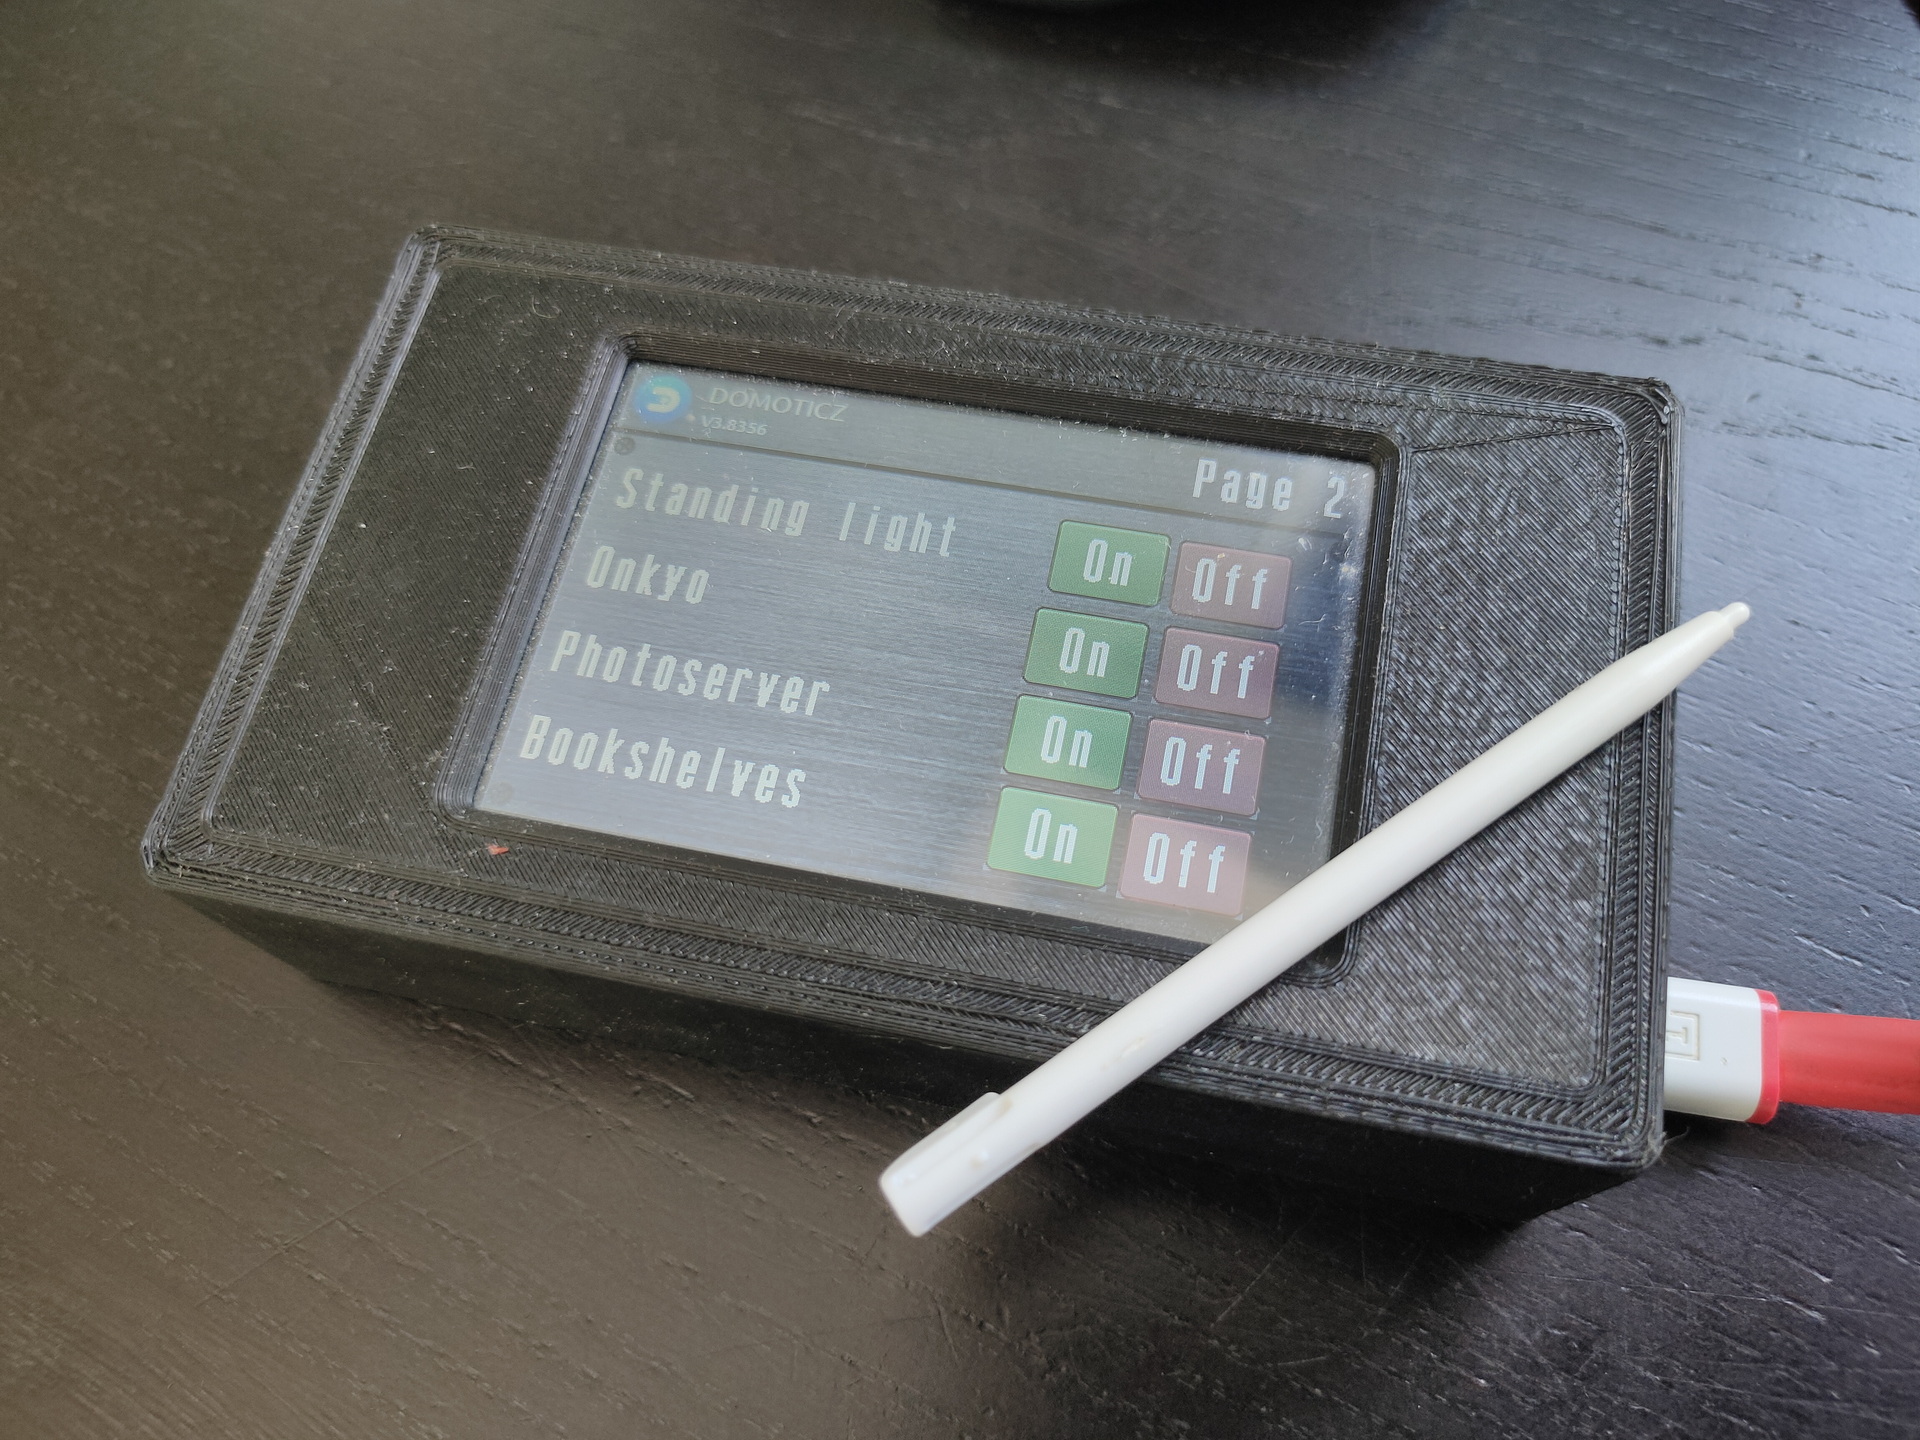
Nextion
Nextion is a Human Machine Interface (HMI) solution combining an onboard processor and memory touch display with Nextion Editor software for HMI GUI project development.
Using the Nextion Editor software, you can quickly develop the HMI GUI by drag-and-drop components (graphics, text, button, slider, etc.) and ASCII text-based instructions for coding how components interact on the display side.
Nextion HMI display connects to peripheral MCU via TTL Serial (5V, TX, RX, GND) to provide event notifications that peripheral MCU can act on, the peripheral MCU can easily update progress, and status back to Nextion display utilizing simple ASCII text-based instructions.
edit cmdline.txt
add "fbcon=map:10 fbcon=font:ProFont6x11 logo.nologo"
at the end
edit config.txt
add between custom comments at the bottom
dtoverlay=piscreen,speed=24000000,rotate=90
# Or check http://www.lcdwiki.com/3.5inch_RPi_Display
Above display’s i’ve used for Picore Players and the Lidar POC
To try: Getting above display running with a arduino https://github.com/PaulStoffregen/XPT2046_Touchscreen
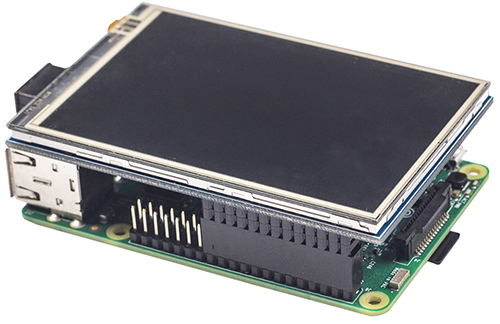
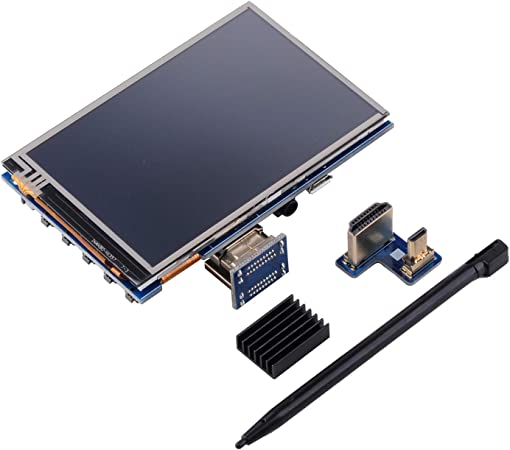
Raspberry HDMI display
Easiest of them all, just connect with HDMI, there is a adaptor for hdmi-hdmi (versions 1,2,3) and hdmi-mini-hdmi for RPi4 variants.
Epaper and 7-Segment displays
Other means of displaying information are for example
Epaper
ESP with epaper module, disconnected power for a while, artifacts appear.
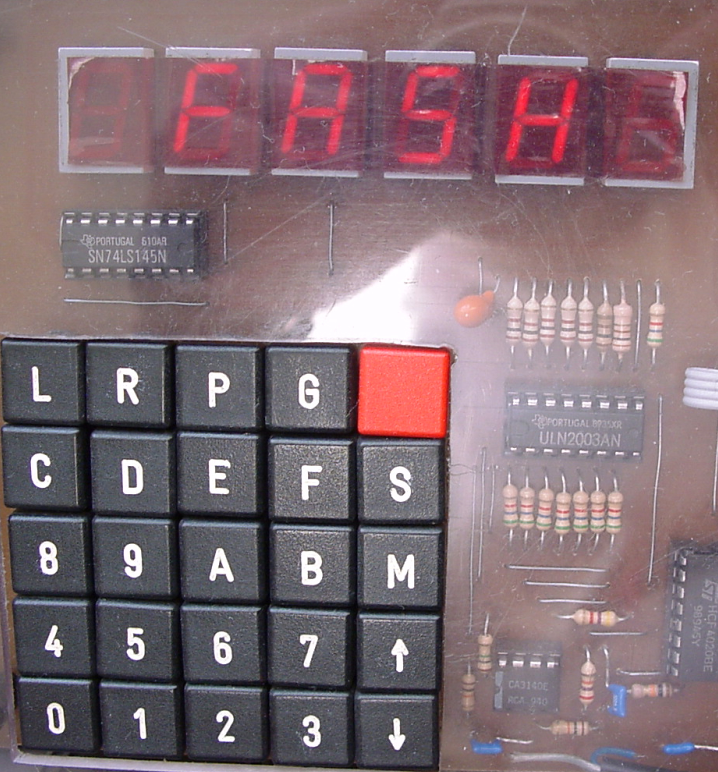
7 Segment displays
I used a lot of 7-Segment display’s in the past. They look cool and are hardcore.
My homebrew computer uses this
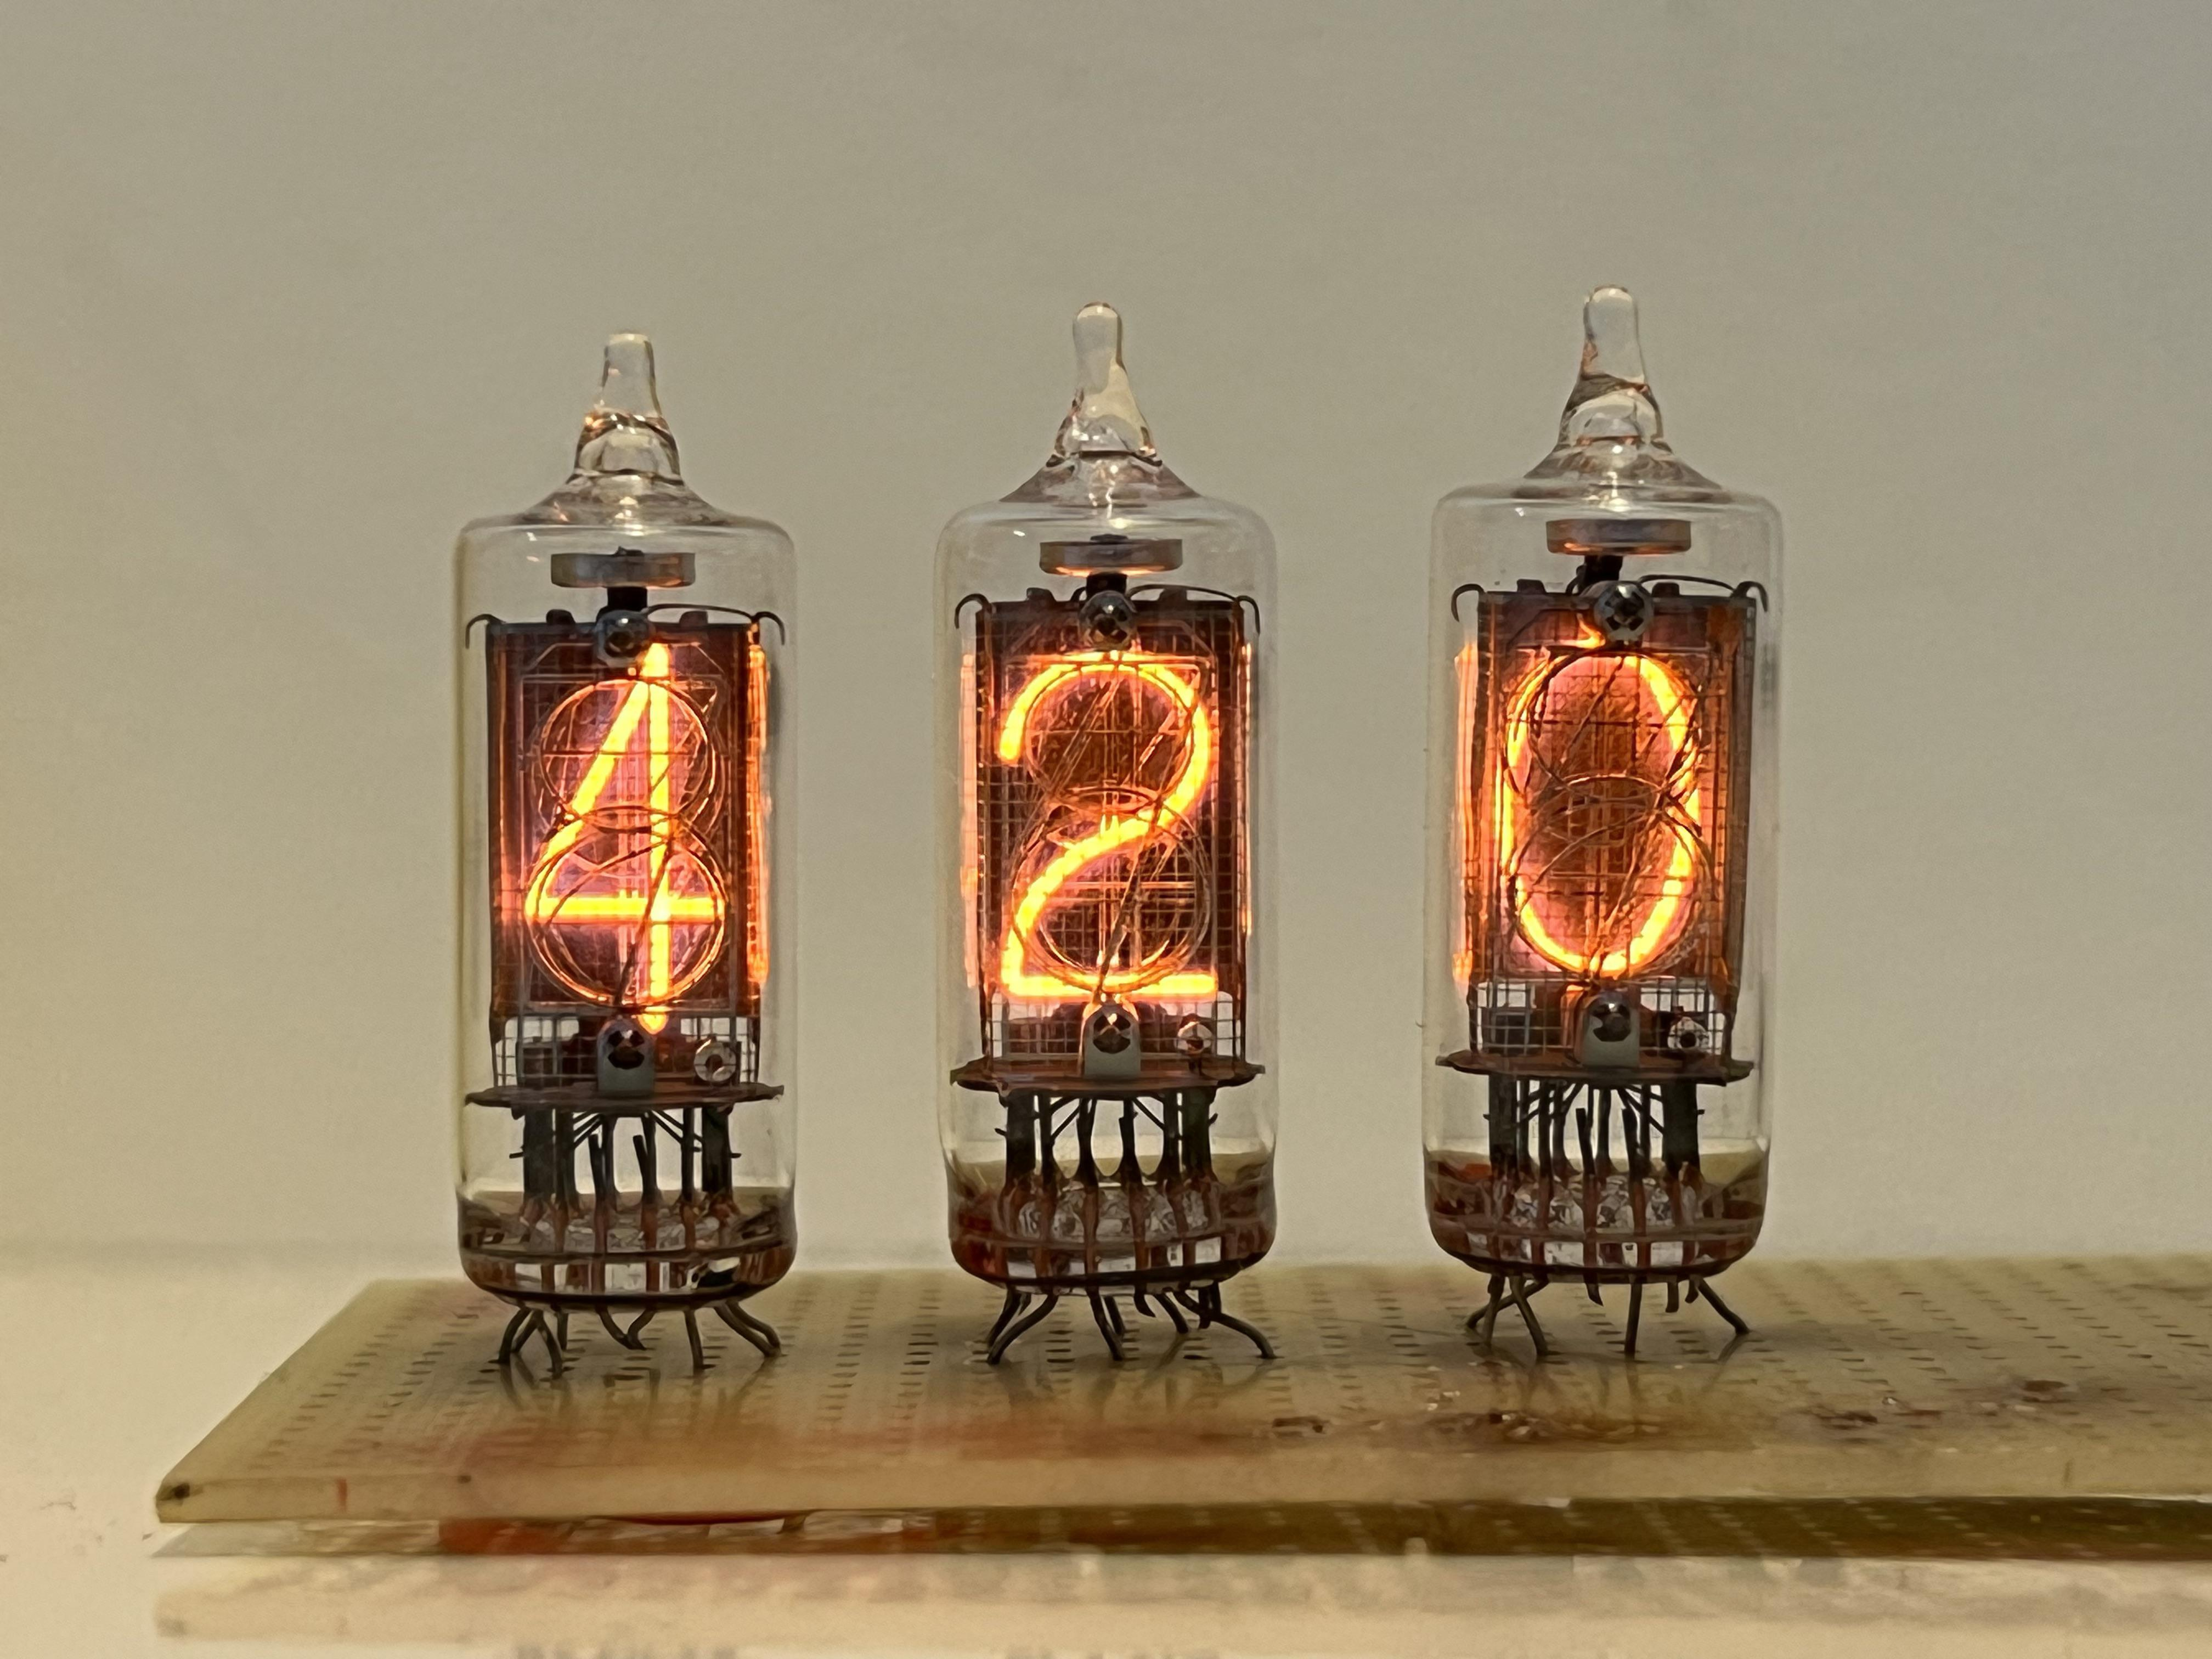
Nixie tubes!
And there are https://en.wikipedia.org/wiki/Nixie_tube .. I’ve never had those
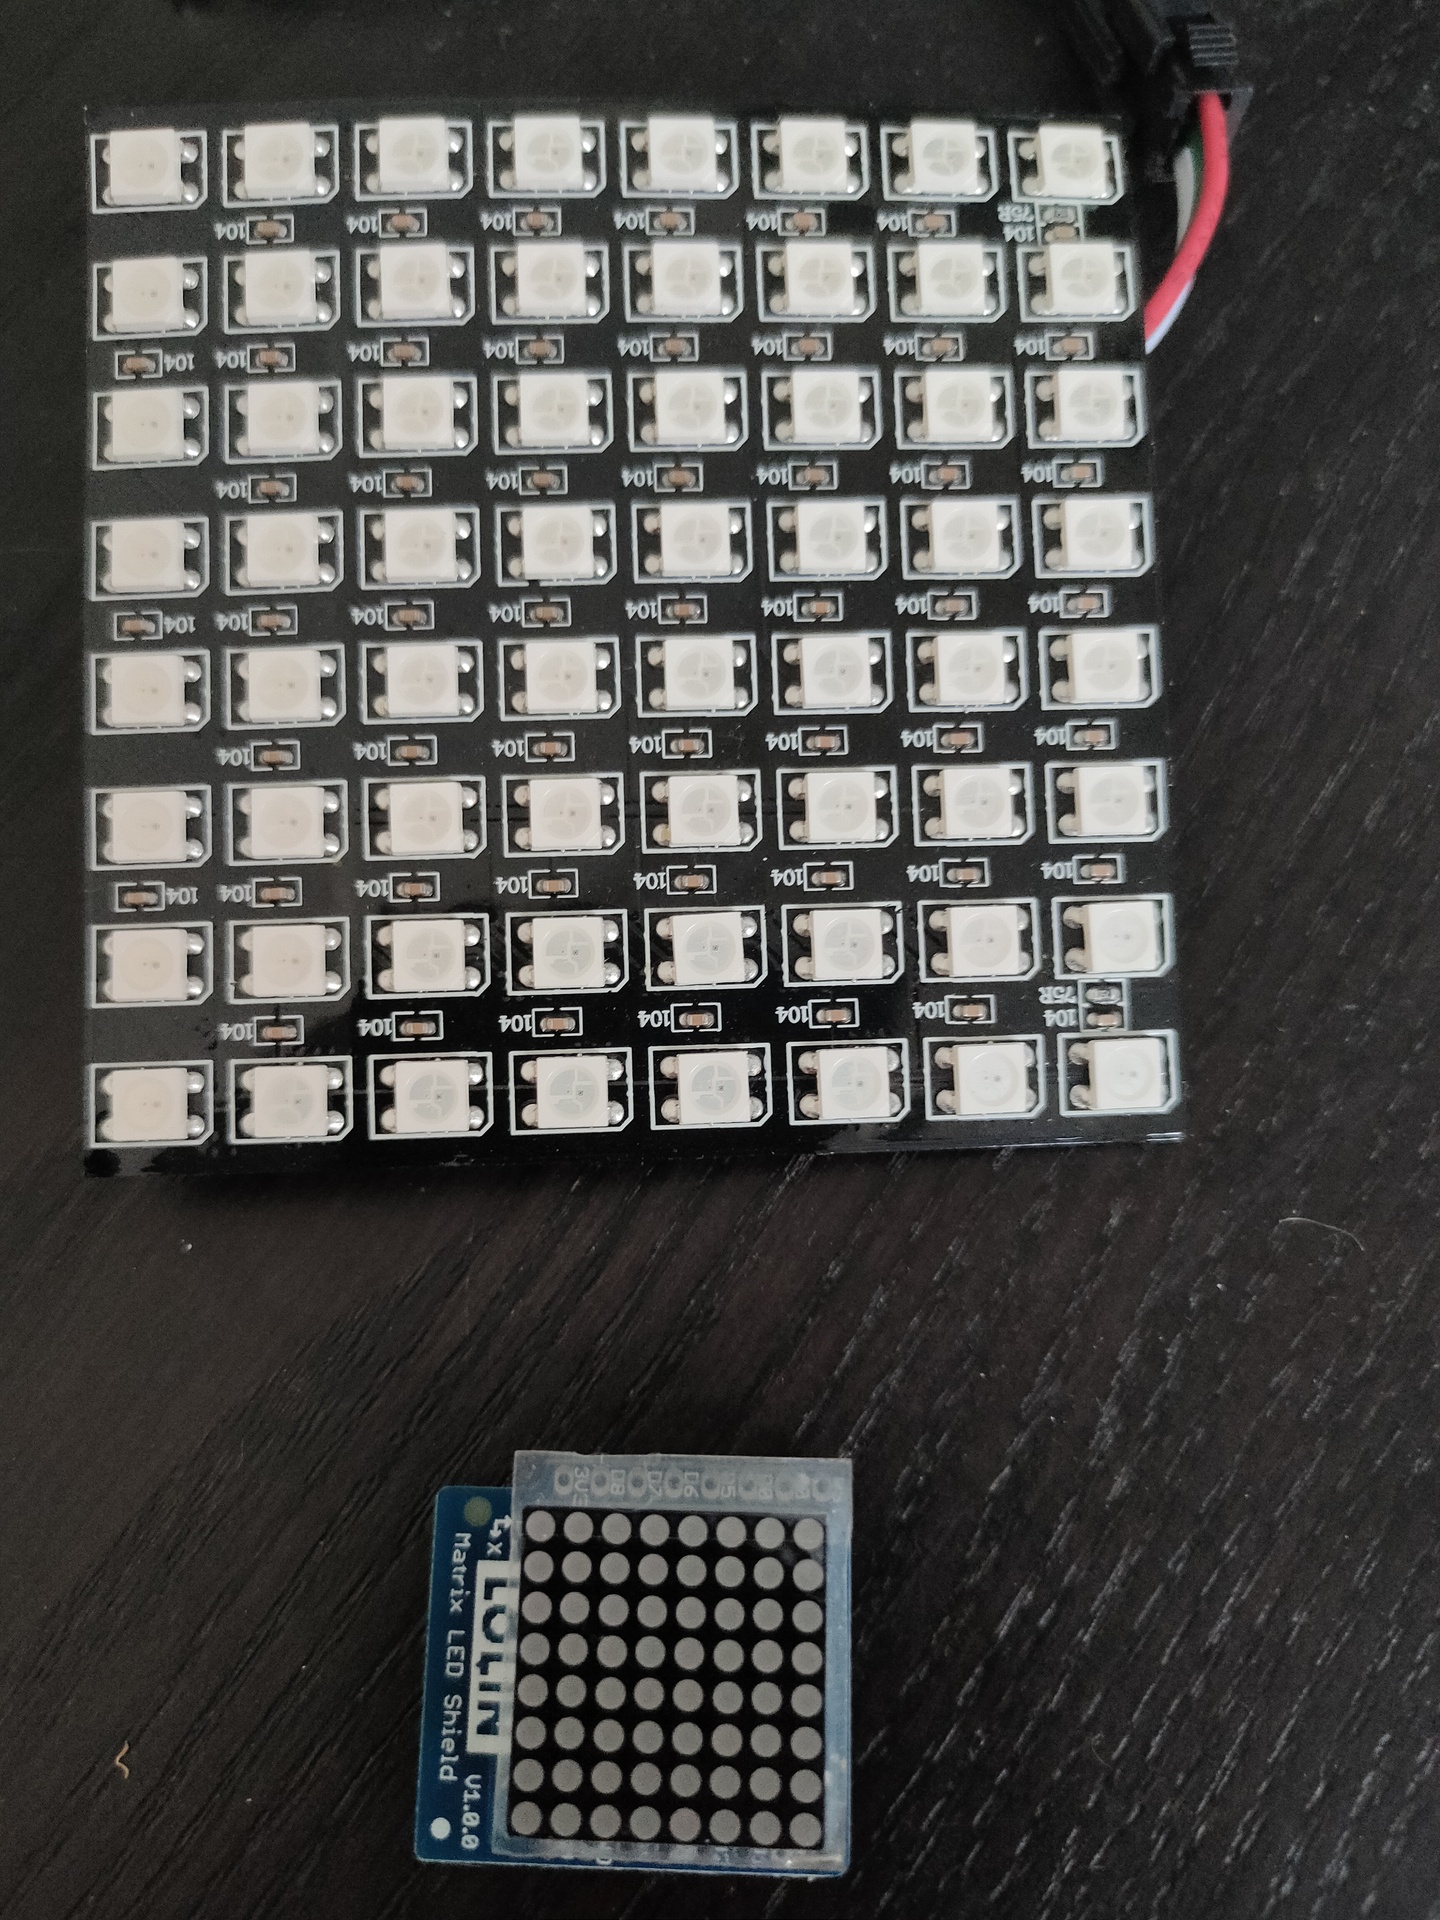
Above bigger 2D display i used with Wled and a digital microphone, so its sound reactive. The lower part i got in recently .
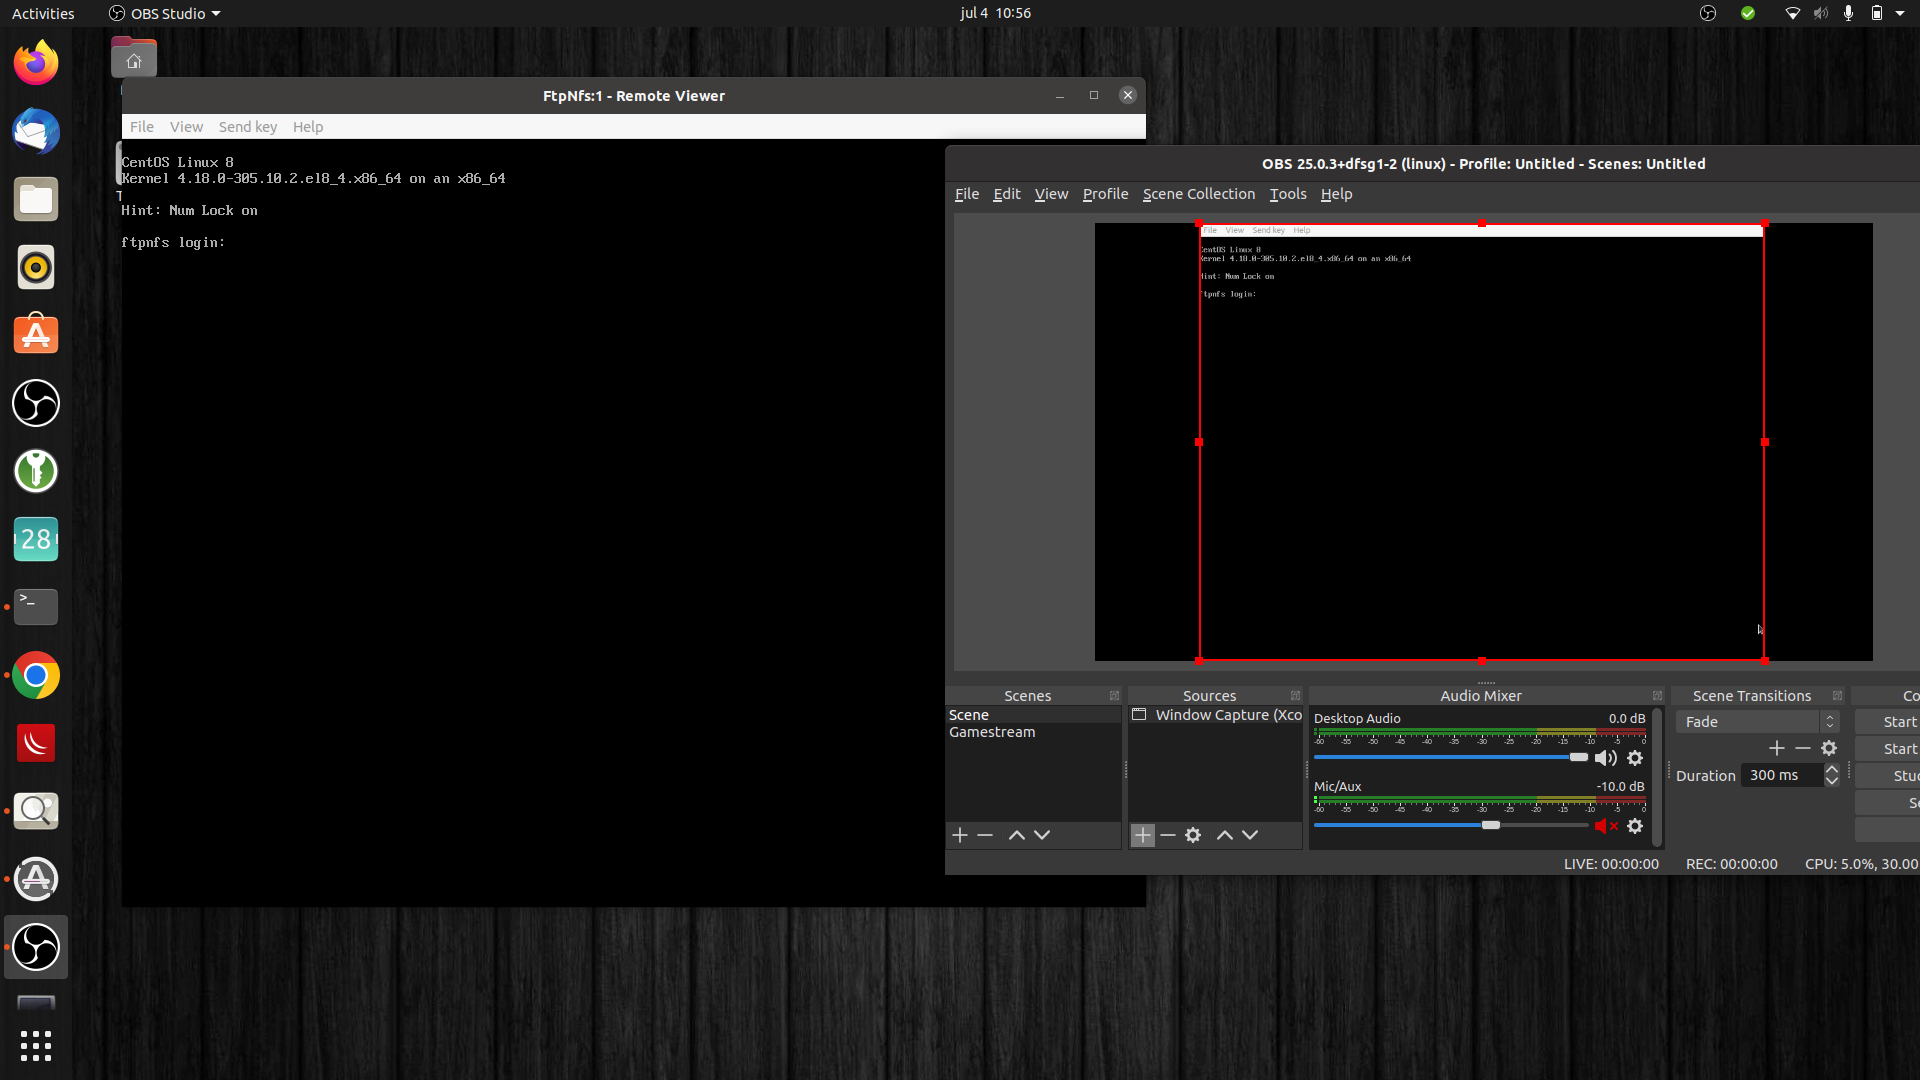
While you can use screencapture to record virtual machines, to real machines it is a different story.
Virtual machines running locally or remote can be accessed with spice/vnc or rdesktop. So you have a window displaying the remote screen, which you can capture using window capture.
There are also emulators which you can window-capture. But i want the real thing when available. Emulators give a too crisp screen output. And you want to have the real SID chip sound.
Hardware capturing:
Recording Virtual machines
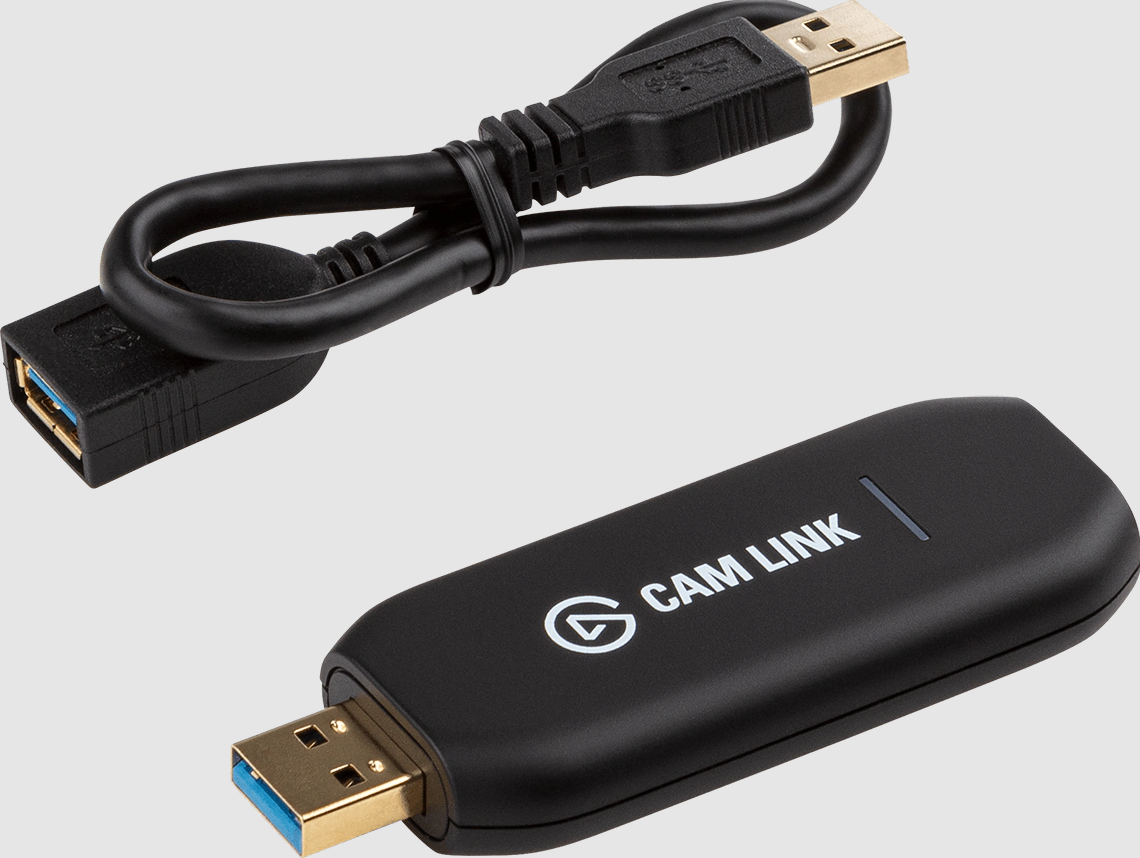
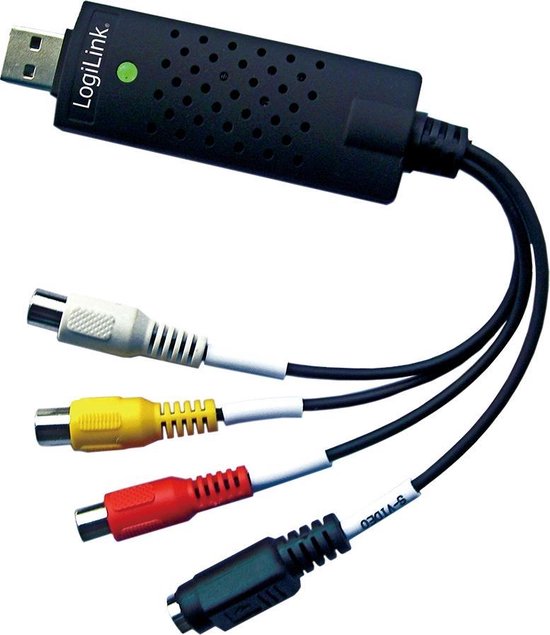
I’ve got two capturing usb sticks:
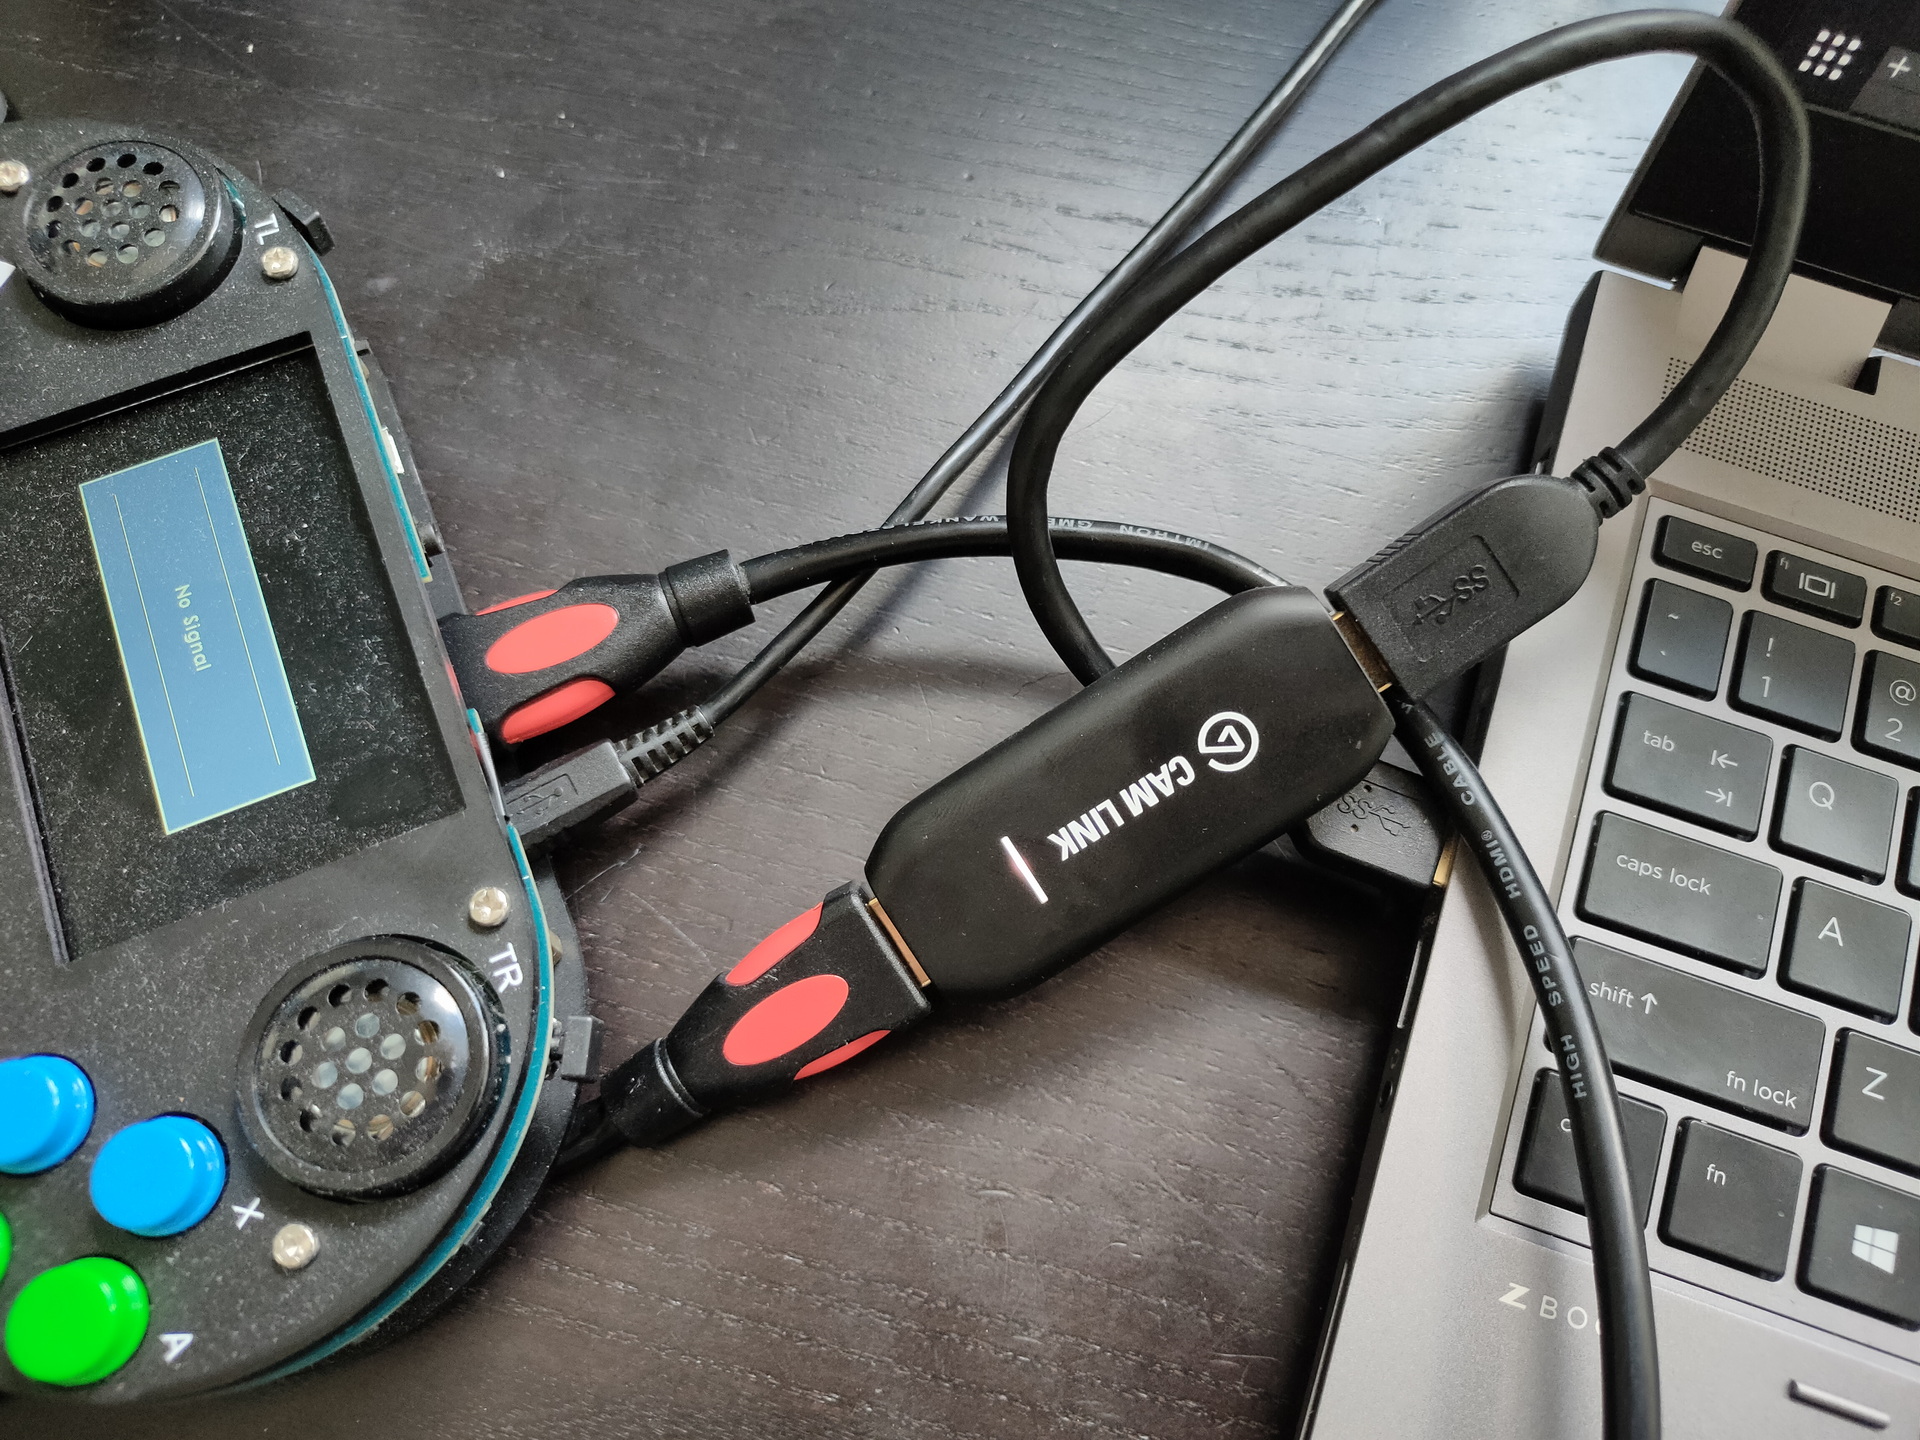
Camlink 4K for hdmi capturing (Which i use mainly for my nikon)
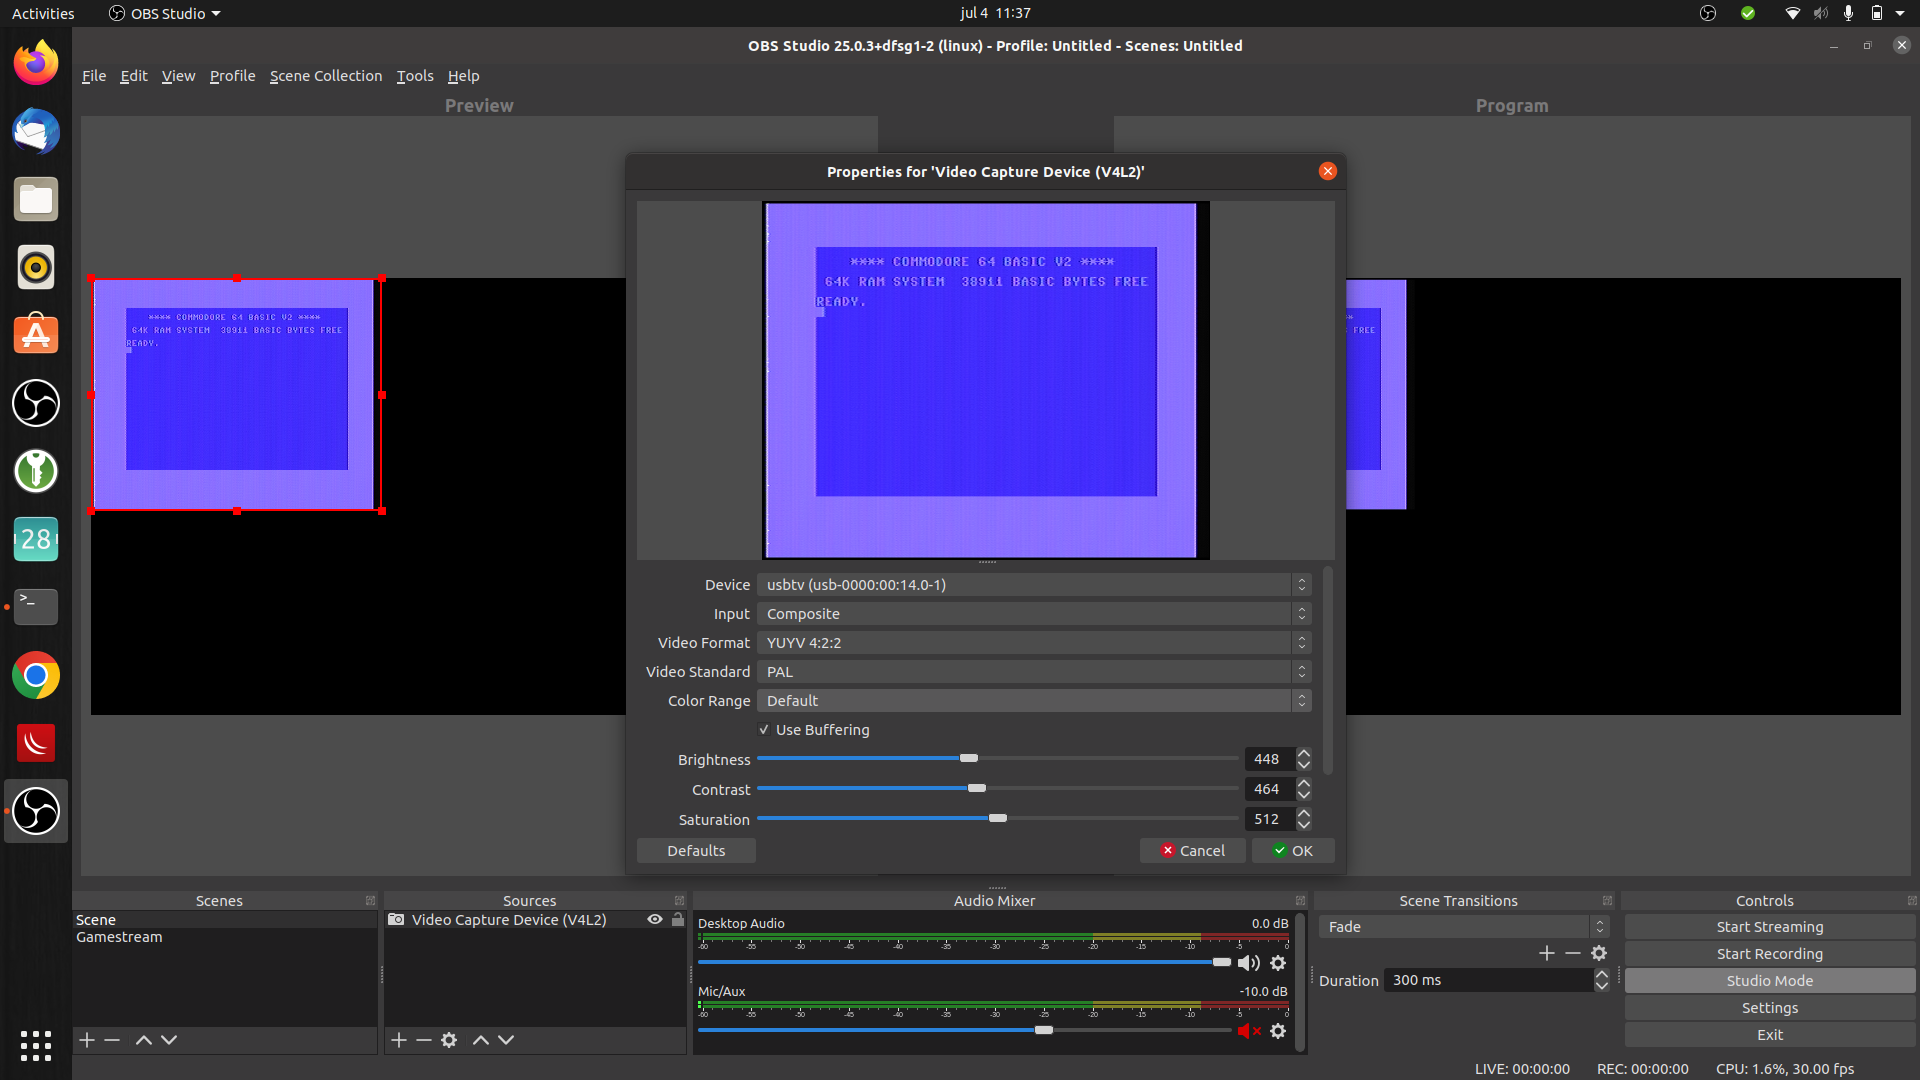
Basetech BR116 RCA and S-Video capture (NTSC 720 x 480 , 30 FPS/PAL 720 x 576 , 25 FPS)
Devices and recording:
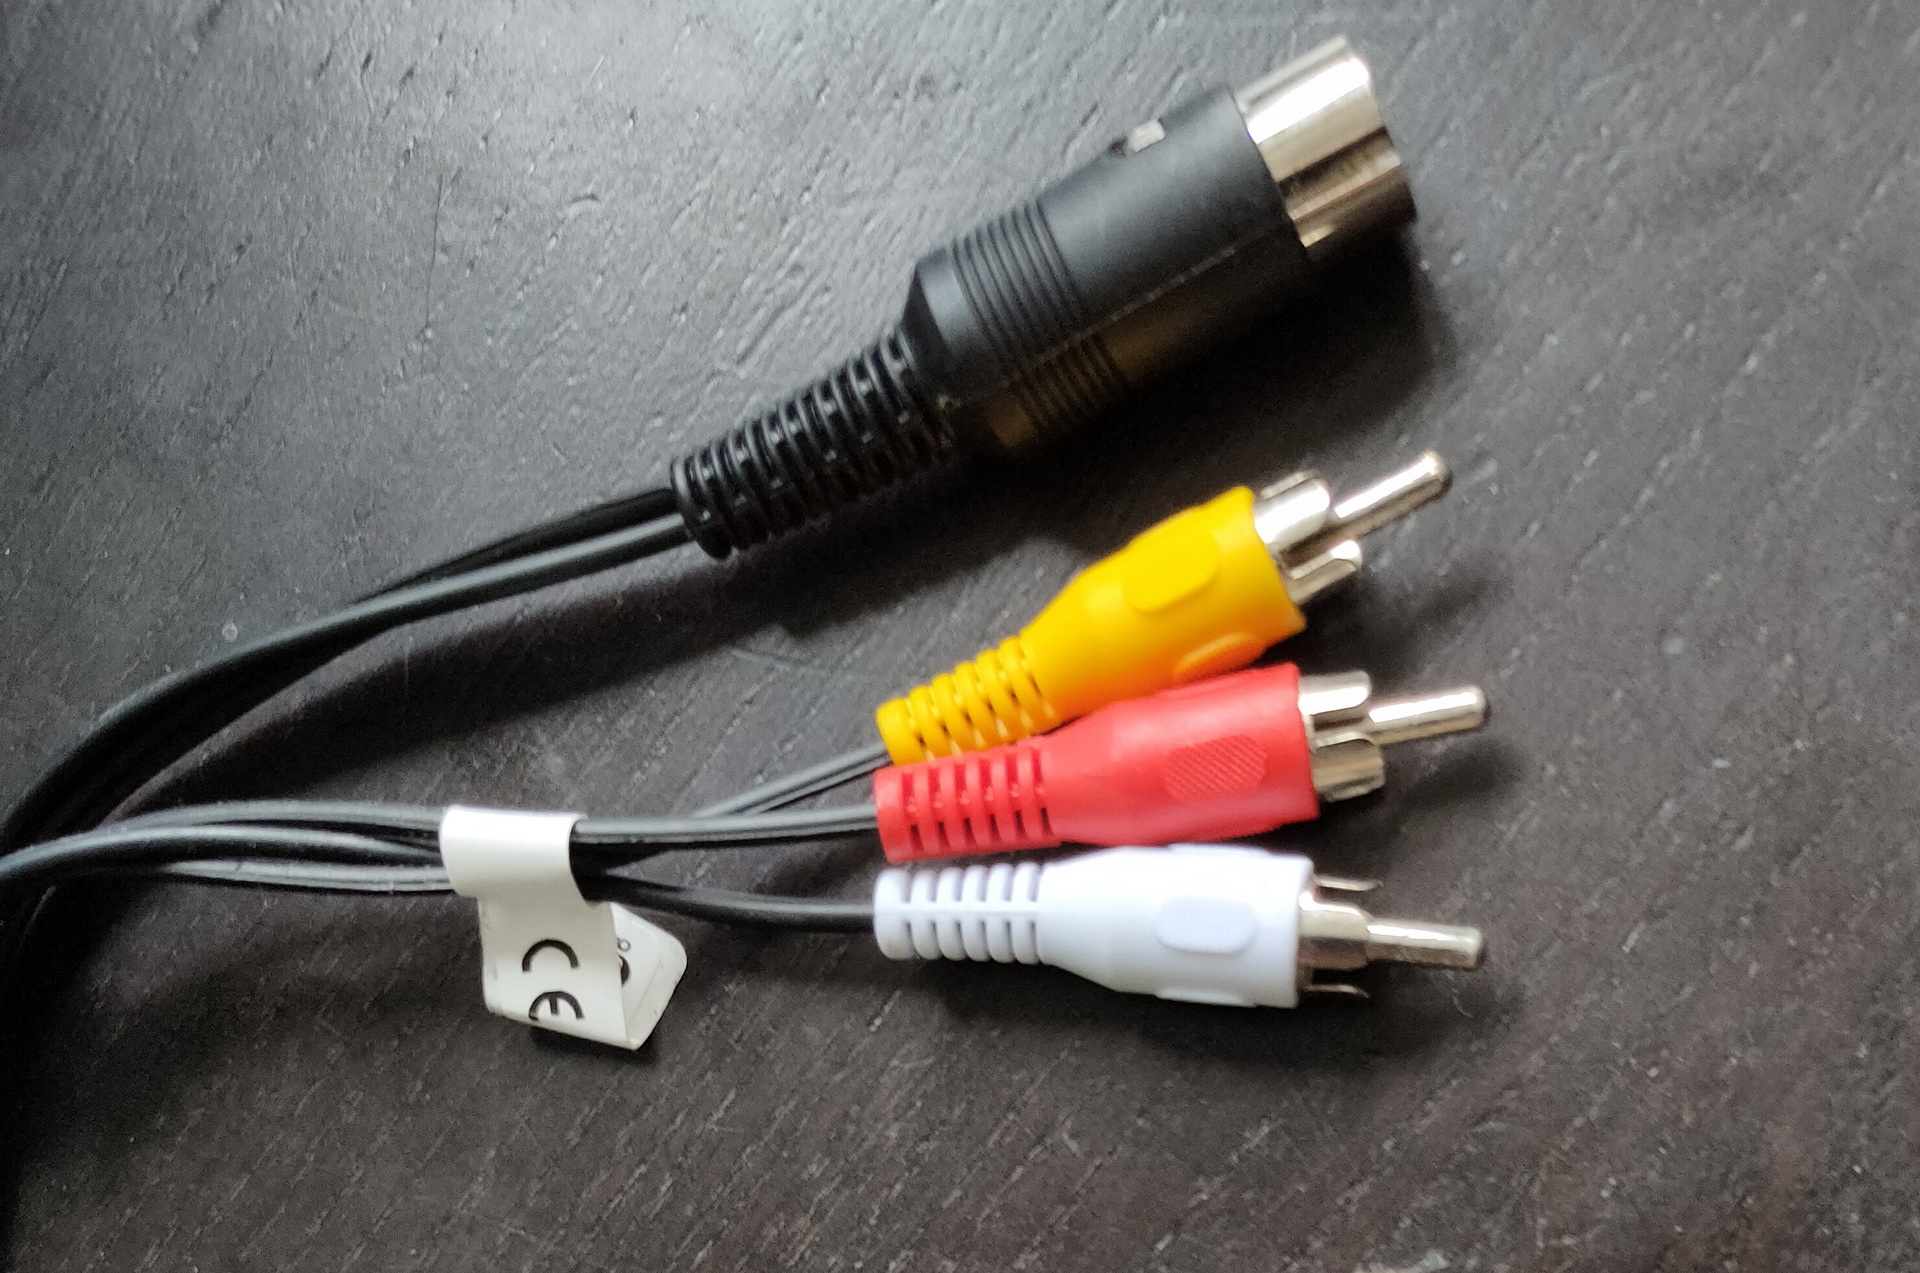
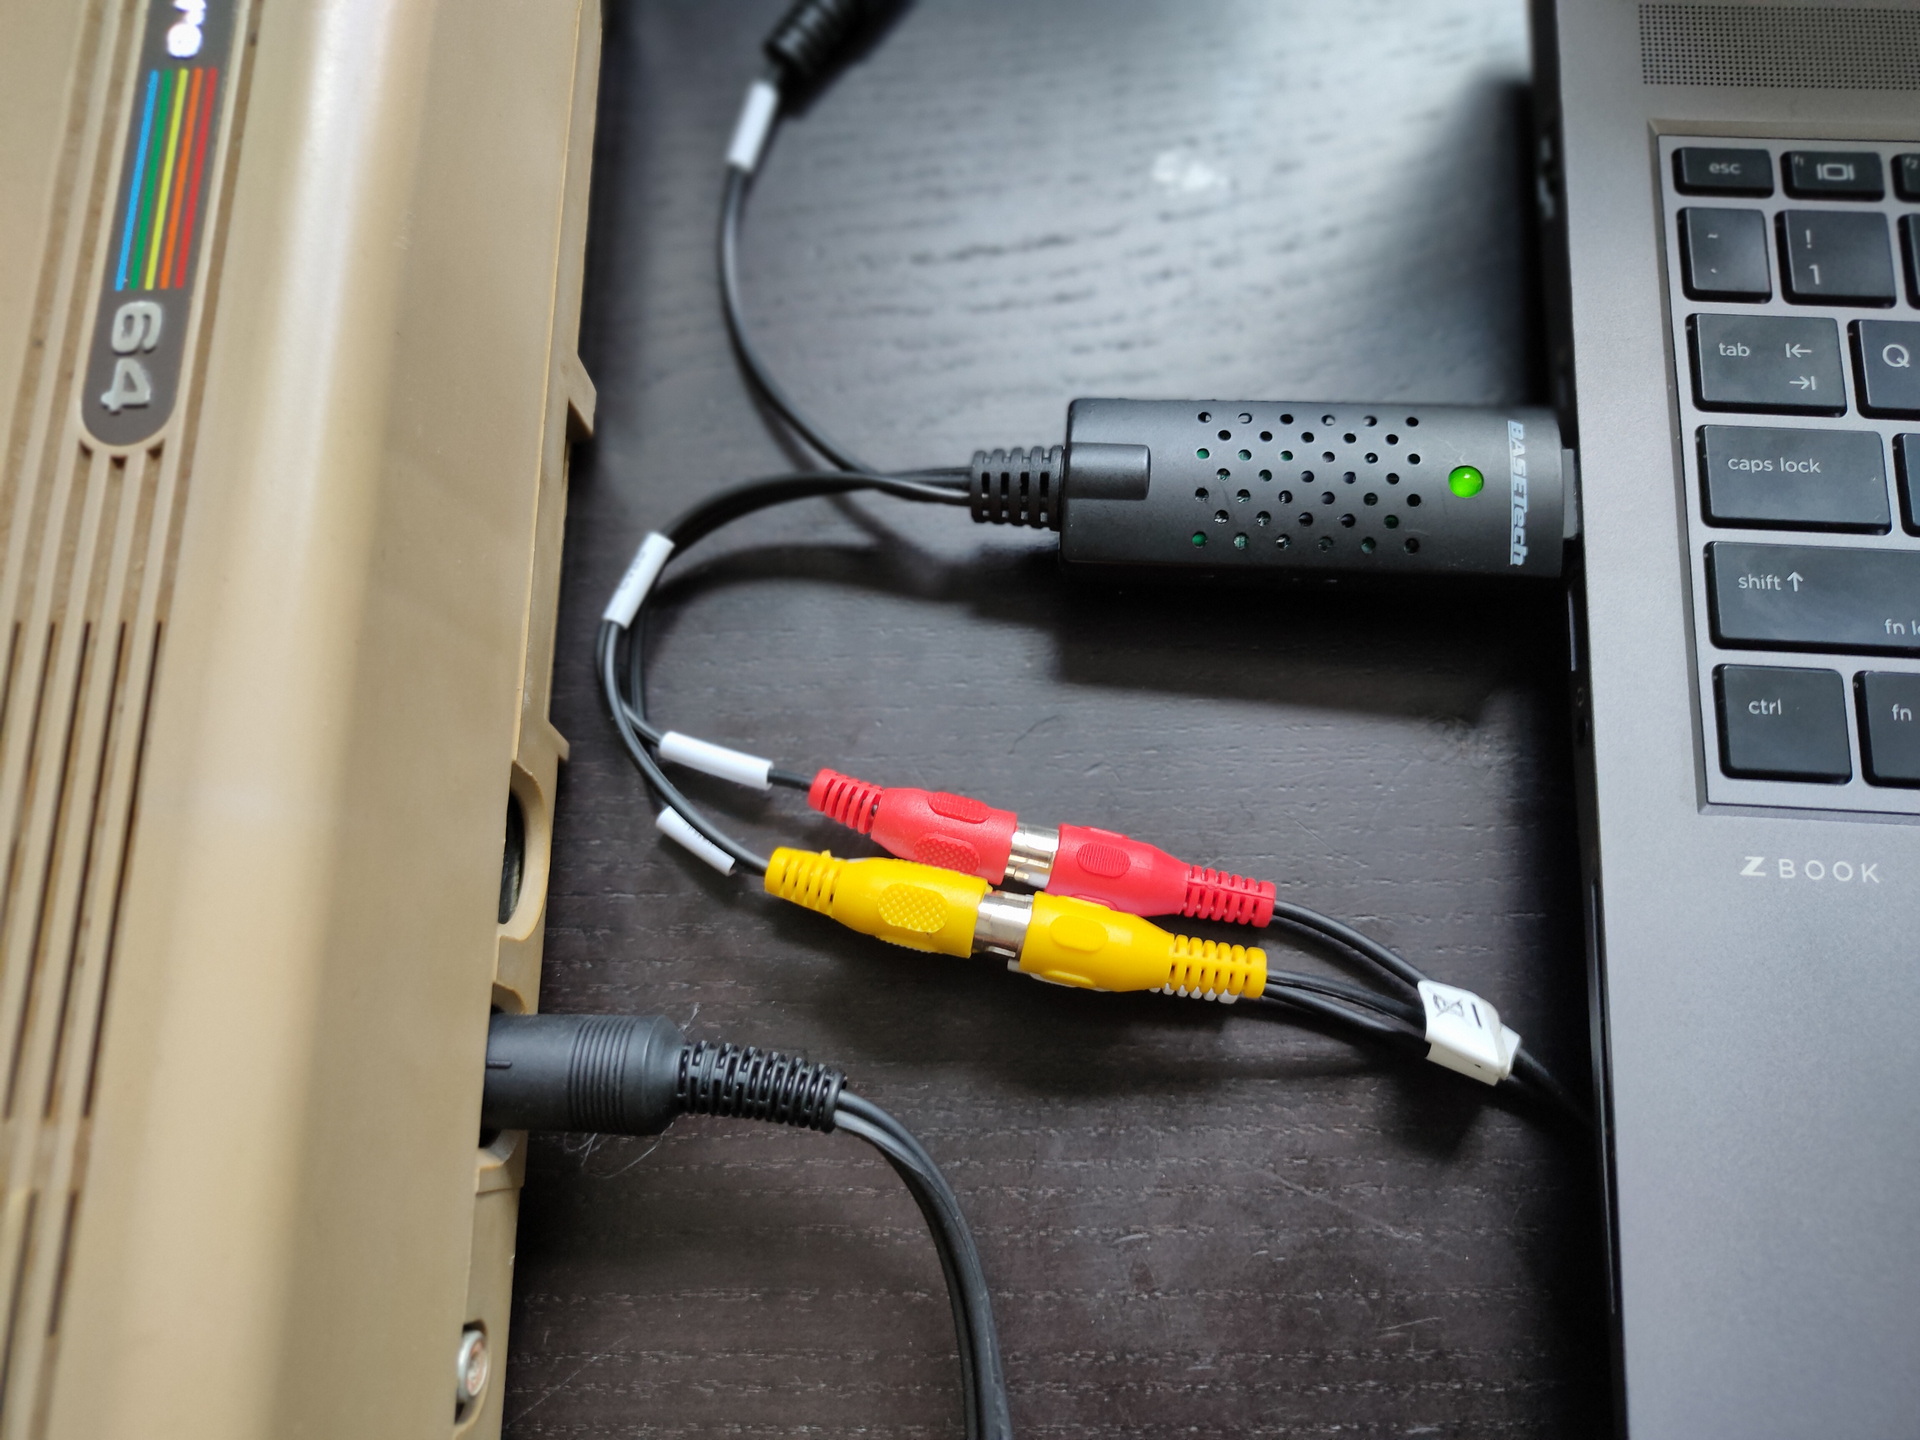
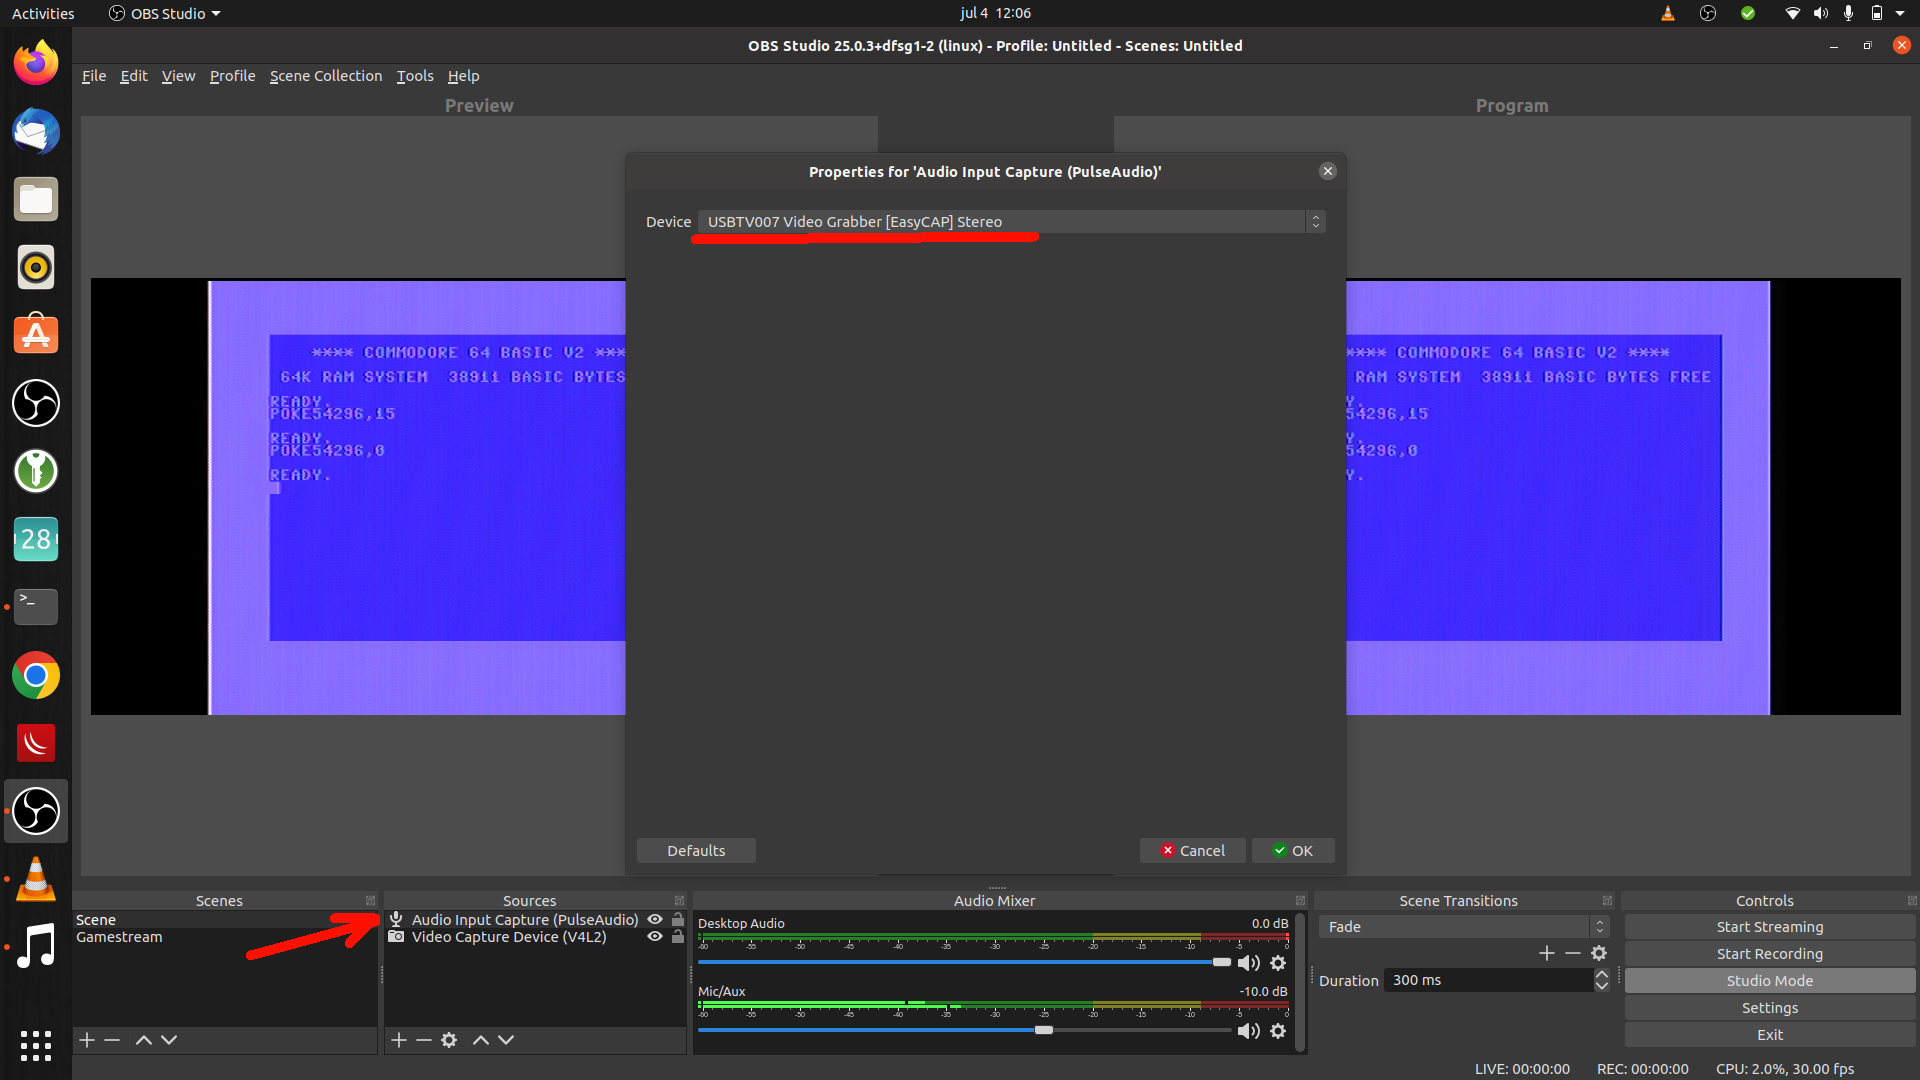
C64 – Use Basetech, and the DIN to RCA cable
Vic-20 – same as above
Raspberry – Use a HDMI and Camlink
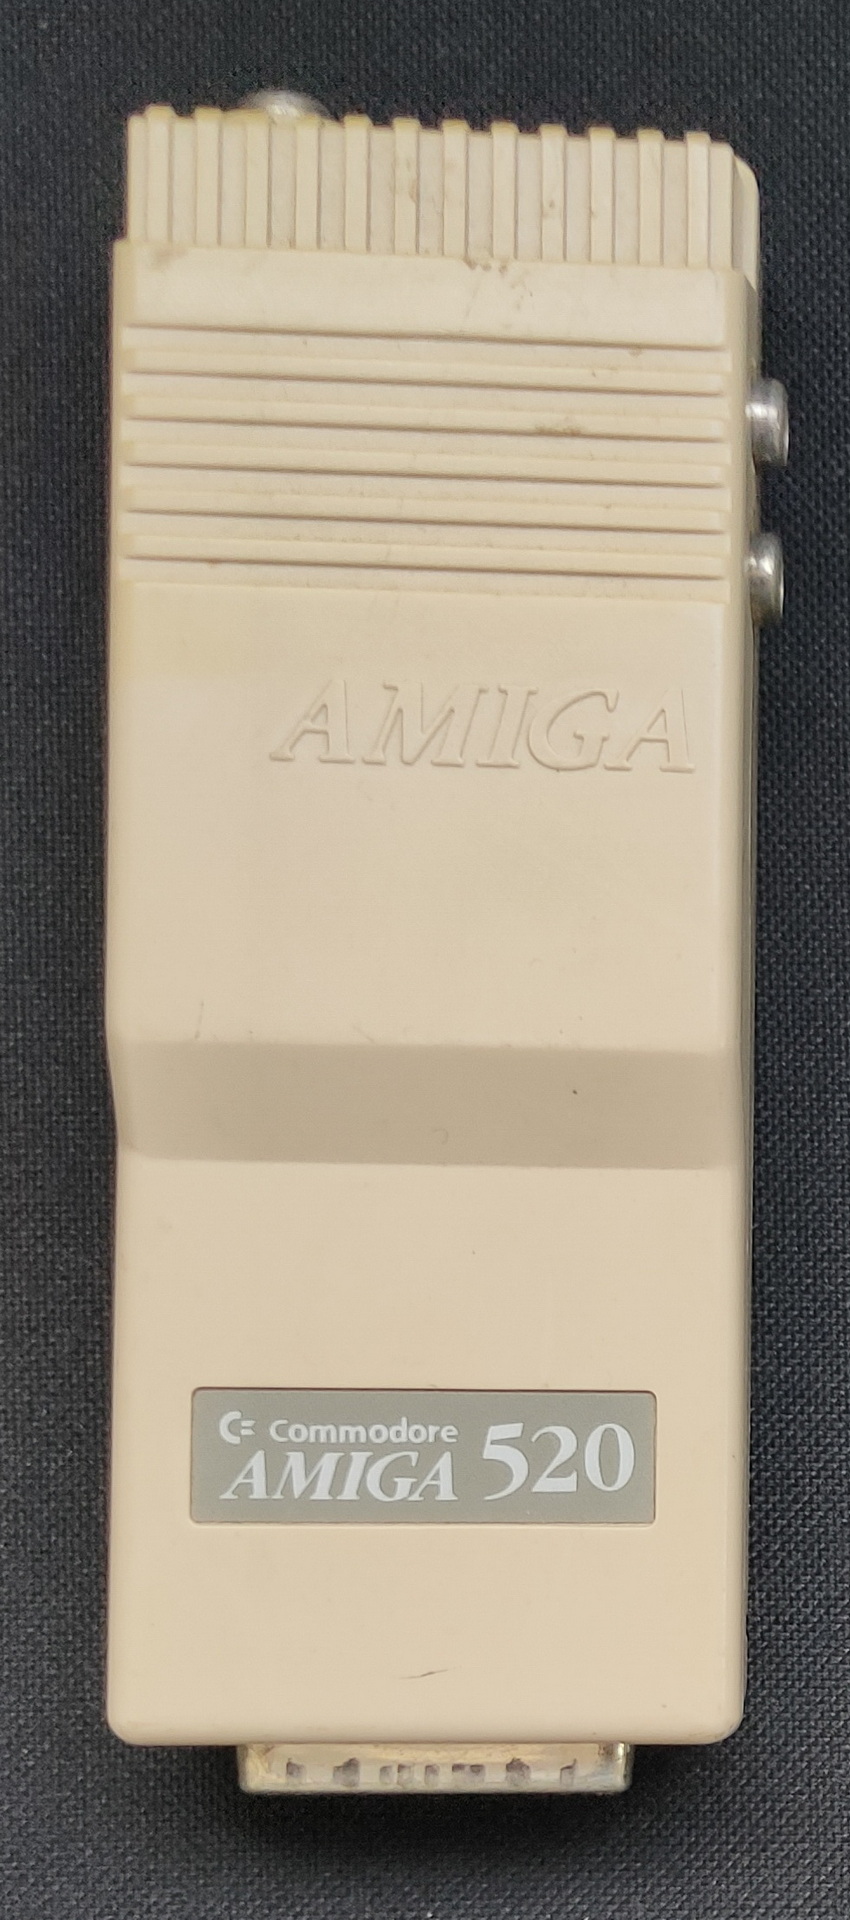
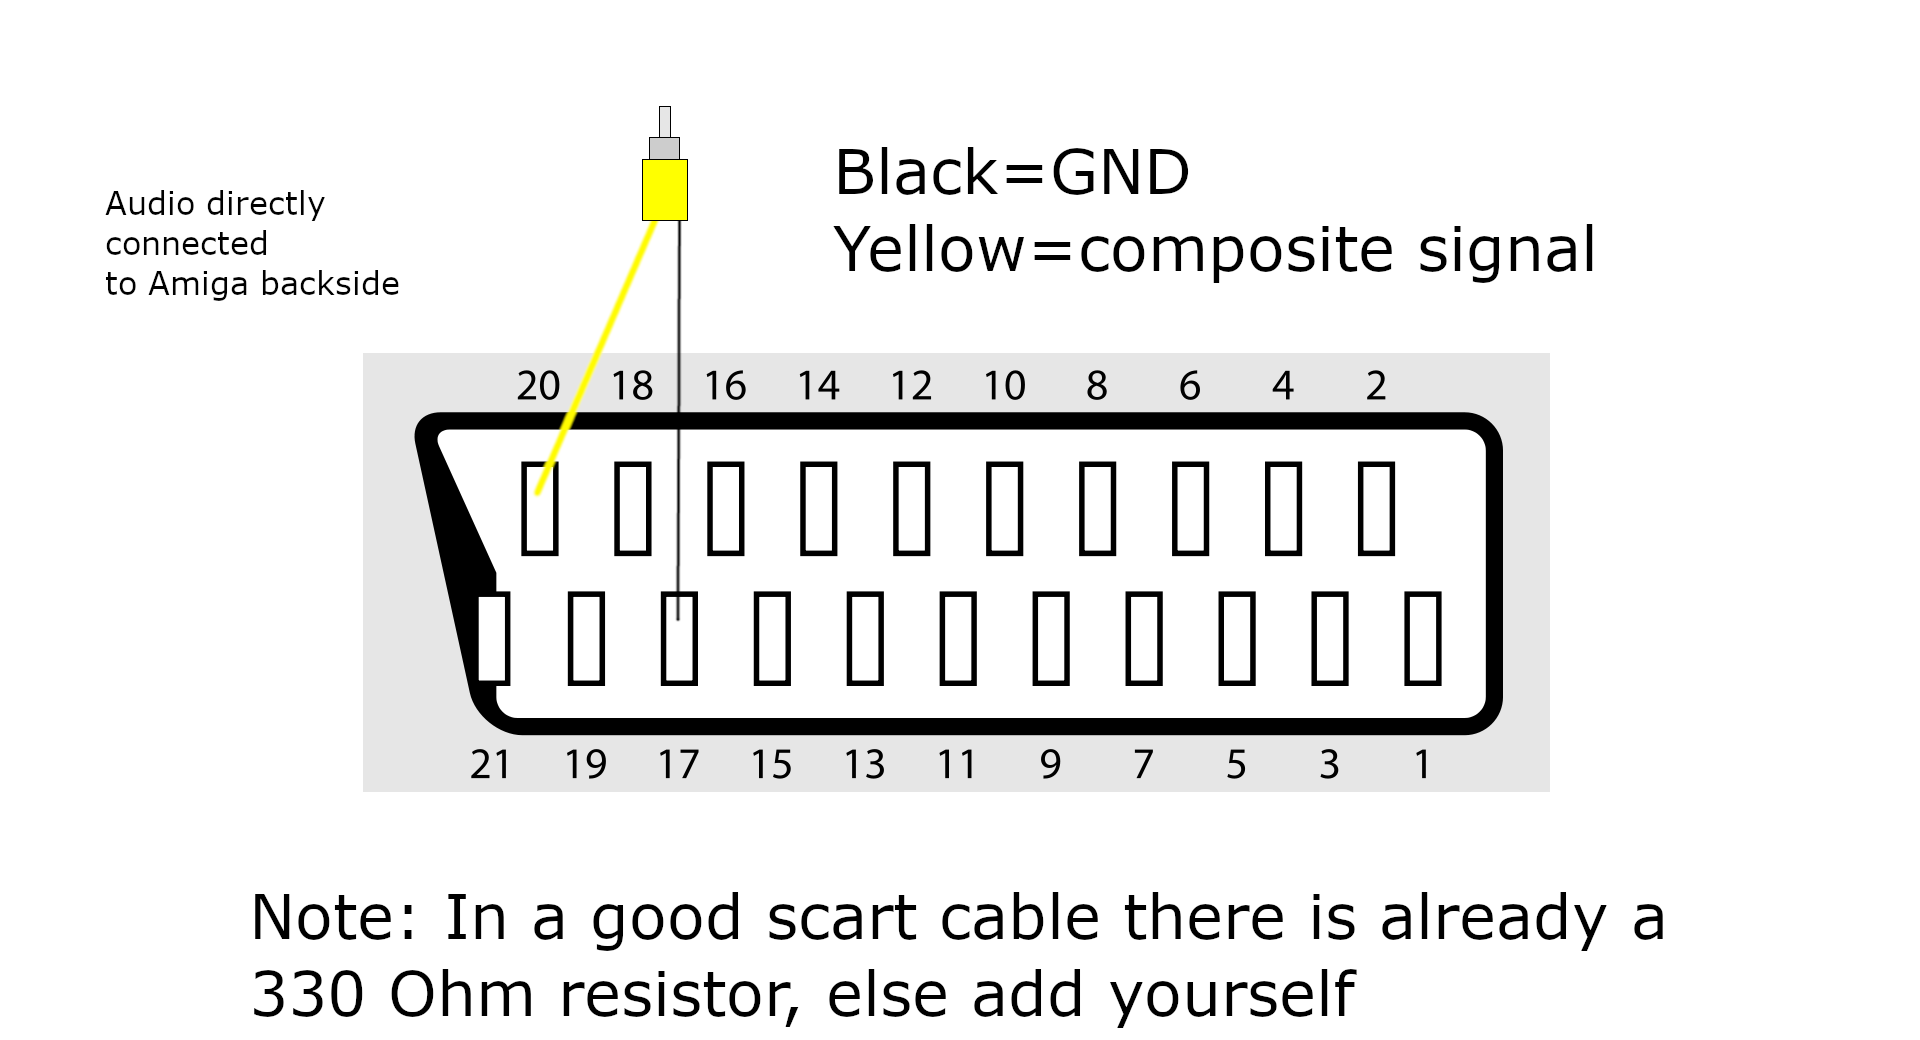
Amiga – I use the basetech and grab the composite signal from the Scart connector, another solution is to use a A520 Modulator, which has Composite out. (There are schematics on the internet to connect hdmi to your amiga)
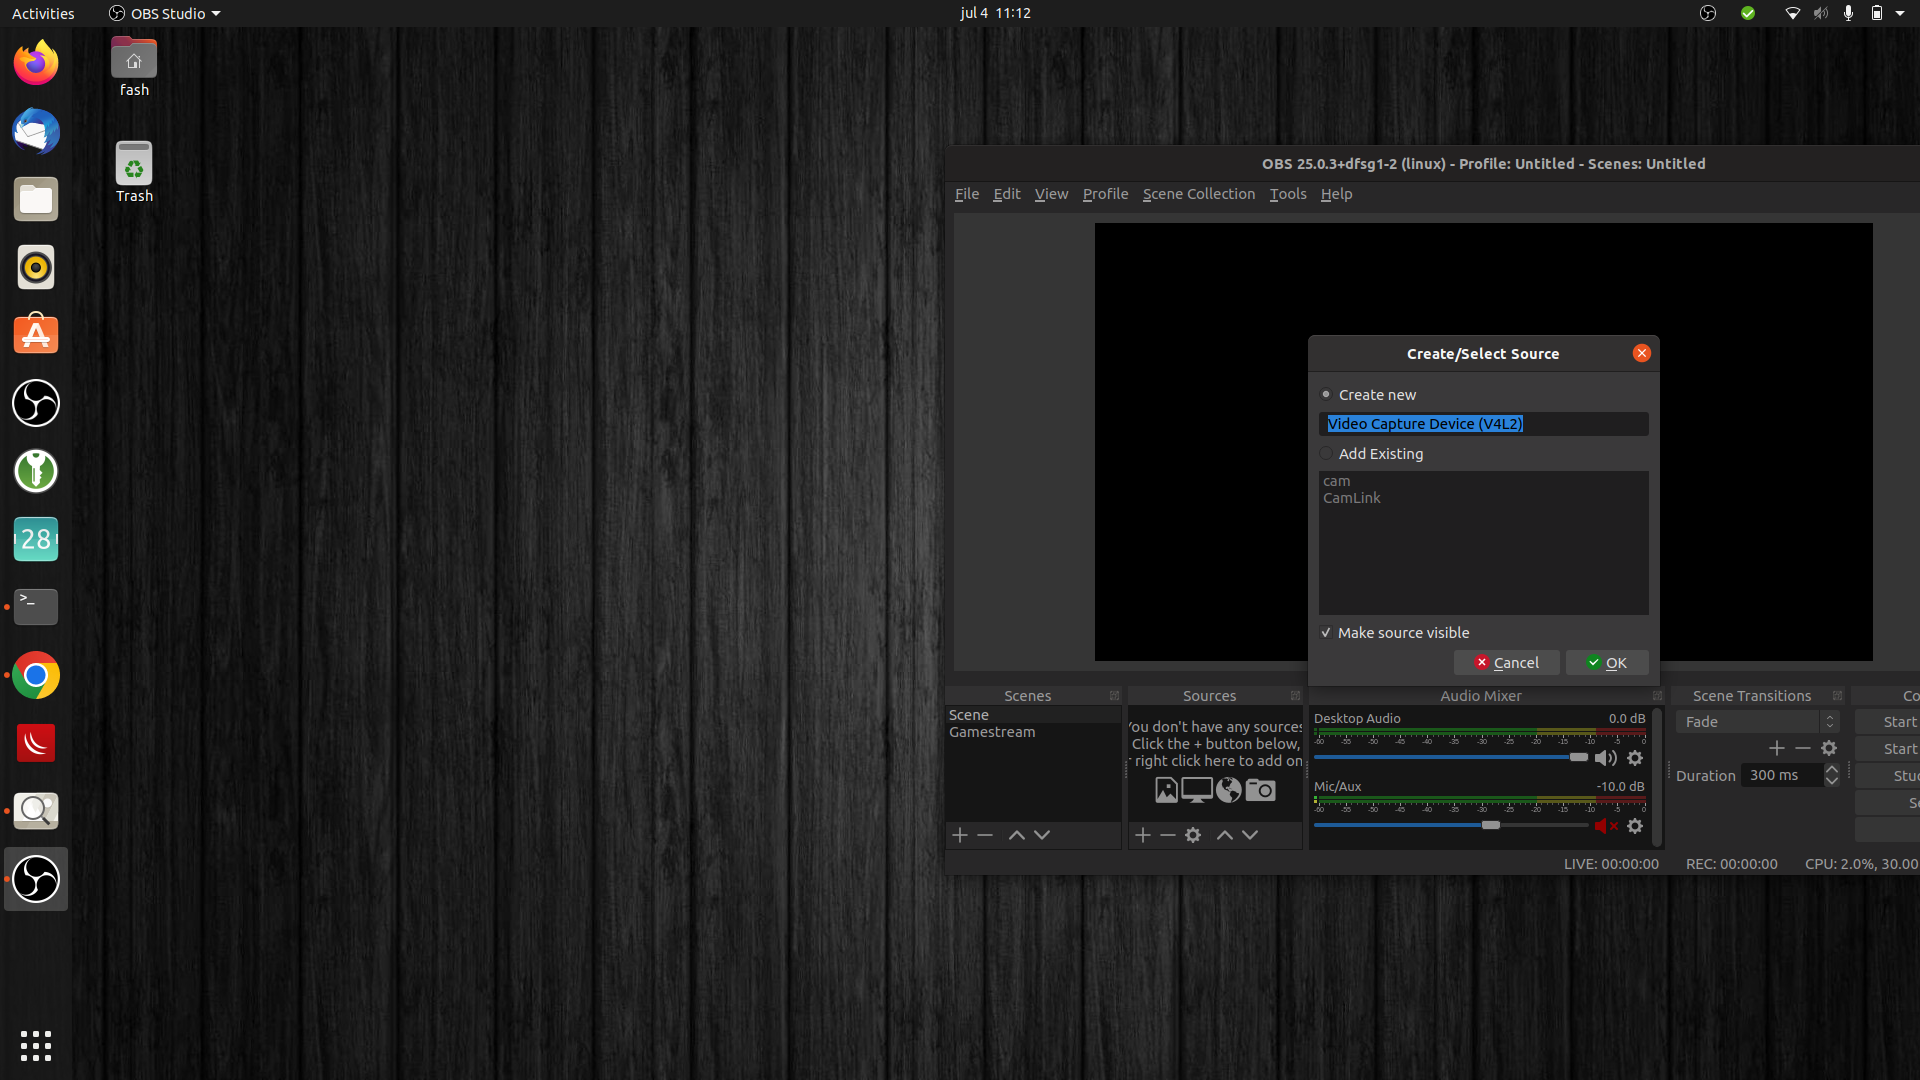
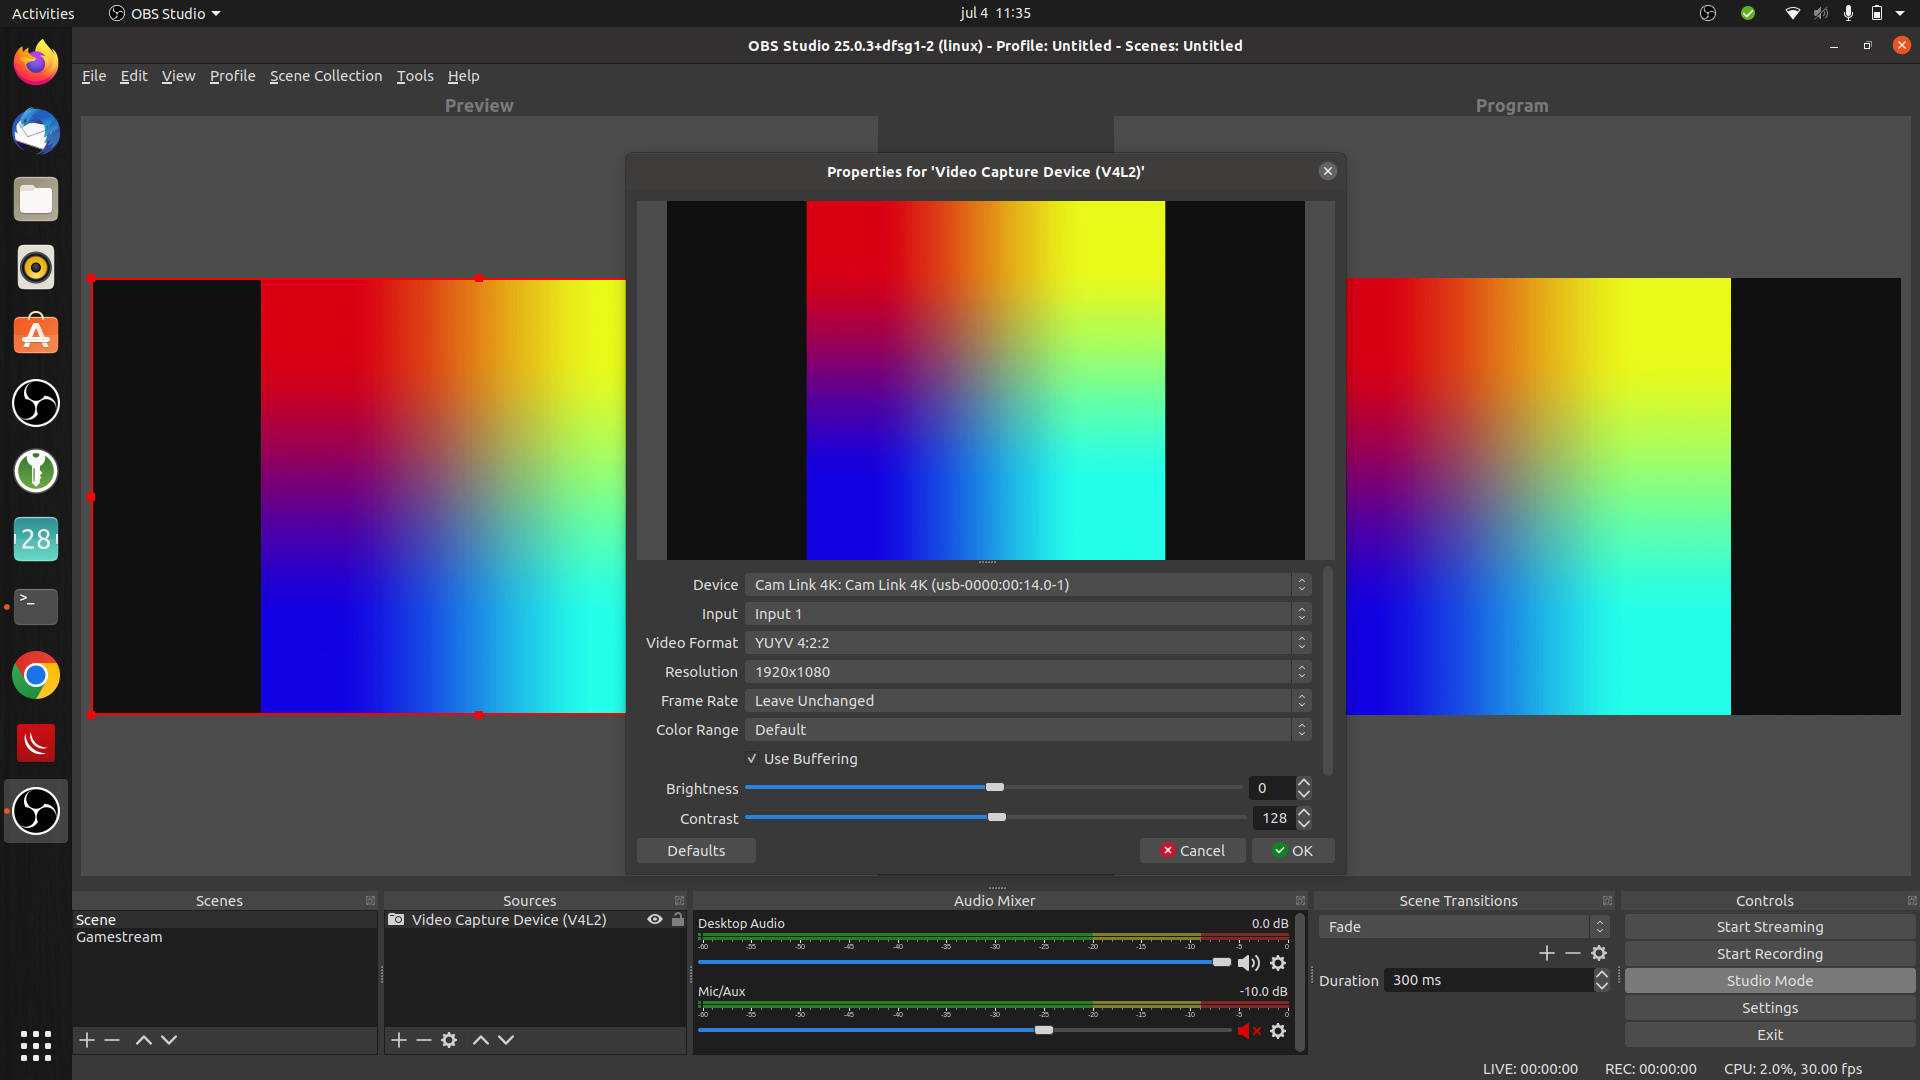
C64 DIN RCA cableC64 connectedAdd video capture deviceRaspberry HDMIRaspberry bootingC64 settings
Amiga A520 Modulator
The 520 Modulator connects to the amiga using a DB23 connector, and a Y cable for the 2 rca audio jacks. It outputs a composite video signal, and RF modulated signal to connect to a old Tube/Crt monitor
How i connected my amigaSubD23 to Scart plus audio
When recording video from those screens, i configure my OBS file format to MP4. This makes it easier to embed into websites. Only downside on writing to MP4 instead of mkv is the fact that the file probably isn’t recoverable when something crashes.
Audio capturing :
When capturing your movie don’t forget to add a audio source to your OBS sources. Use Audio input capture, or you can use Audio output capture when sound is playing by your system.
Demo a friend made using a demomaker (Music starts half way)
Flightsim on a Amiga (See more on flightsims)C64 Hellraiser (part 1) no de-comb/de-interlace filter
Note: check your output/cables https://www.youtube.com/watch?v=entQosOLjEI
Instead of saying PPM is parts per million, i say Peats per minute! Henri
3 – 26 Juni zijn we op vakantie geweest in Schotland. Daarbij hebben we met name de western isles bezocht.
Henri
Hieronder heb ik stukken uit ons logboek geplakt aangaande bezoeken aan whisky distillers.
Naast de vele distillers op Islay, hebben we nog wat andere bezocht op de andere eilanden.
Isle of Islay
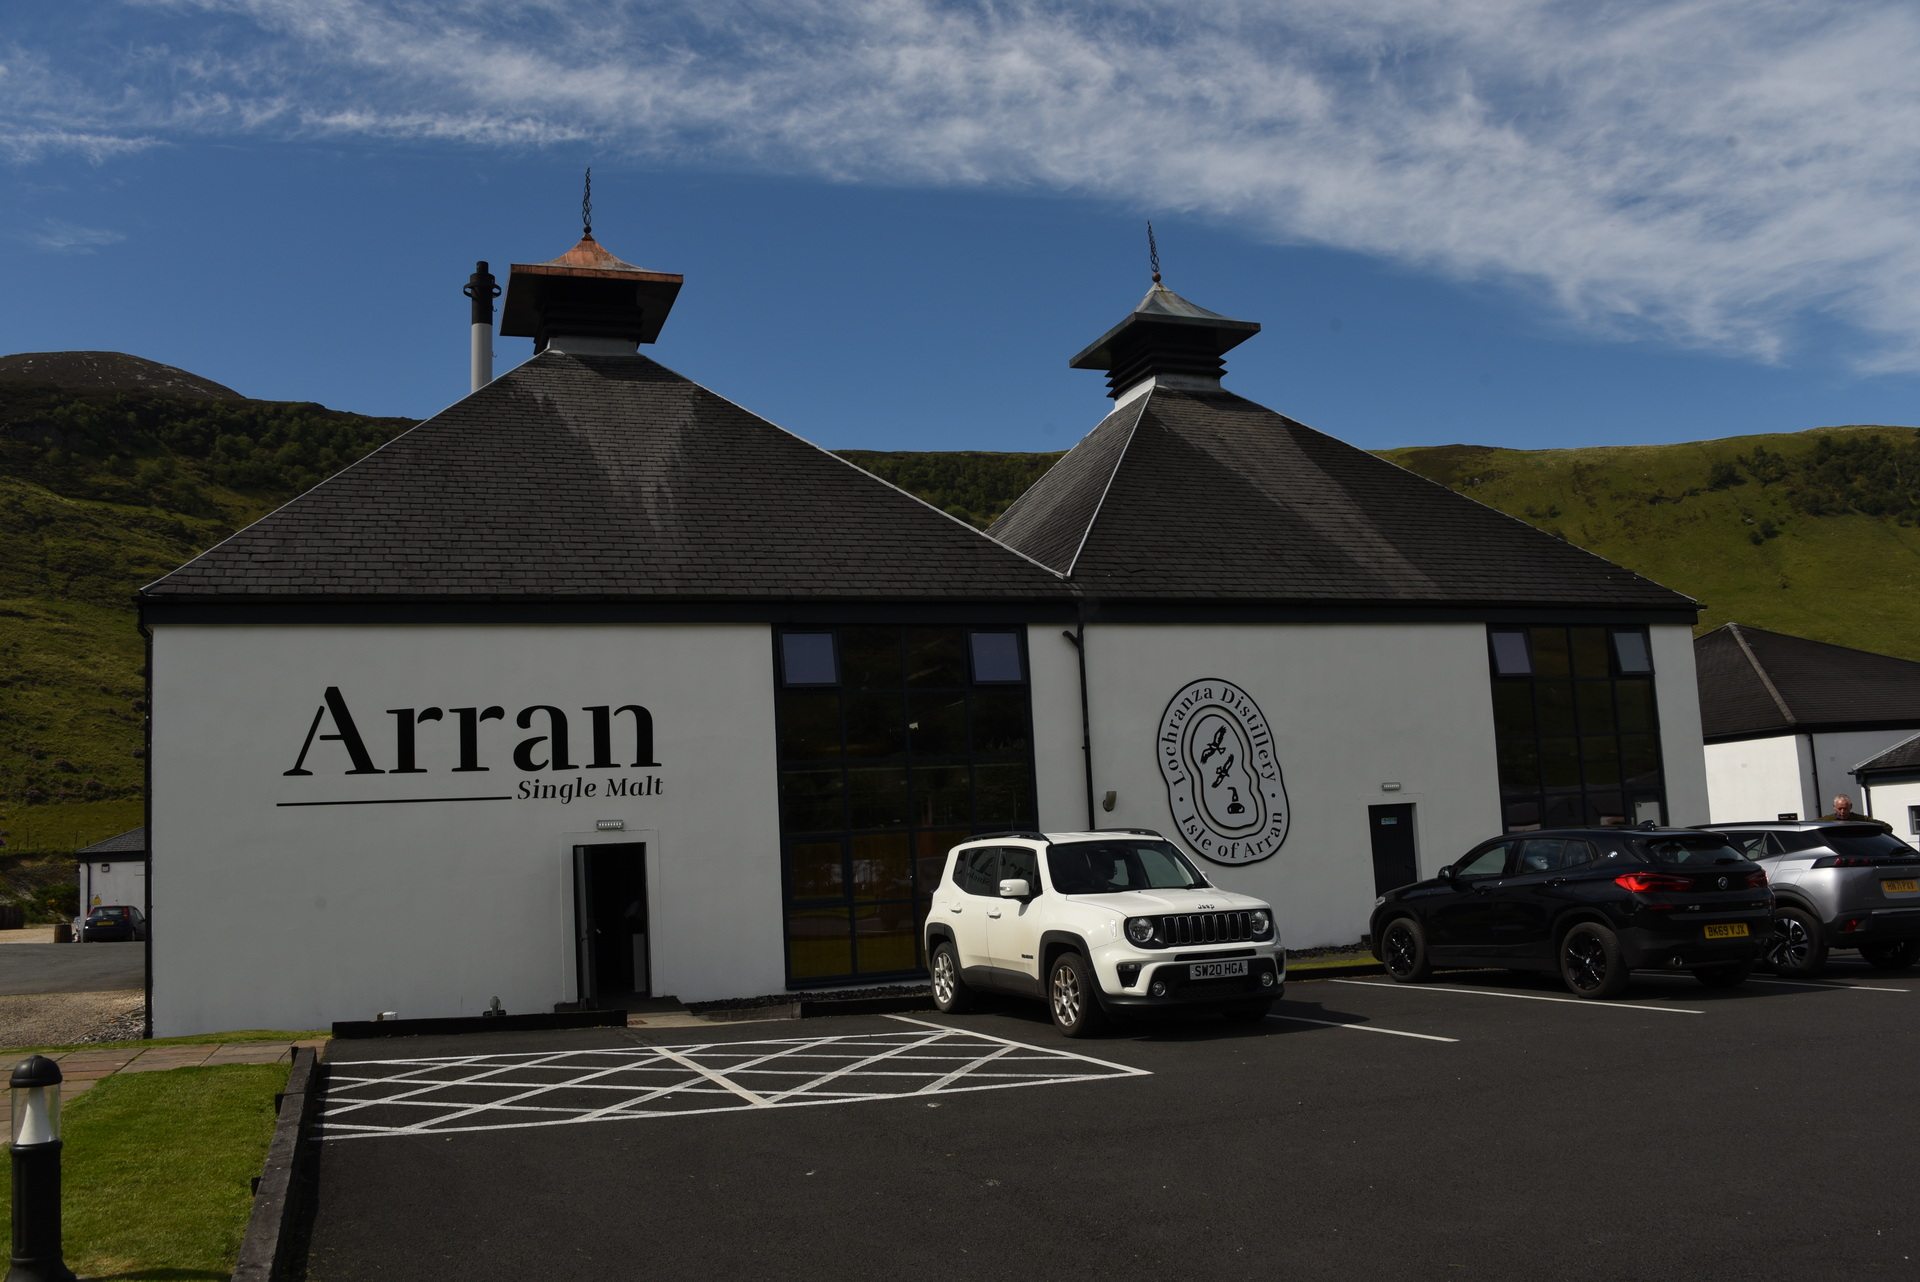
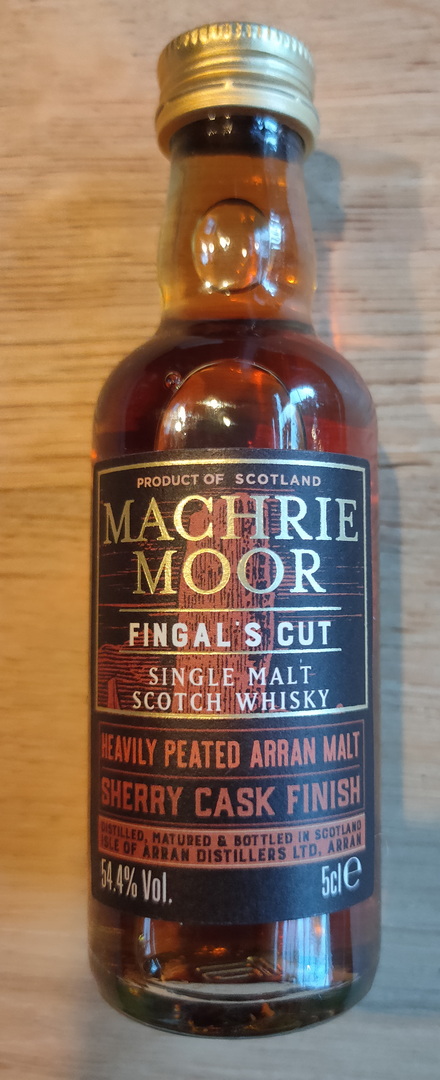
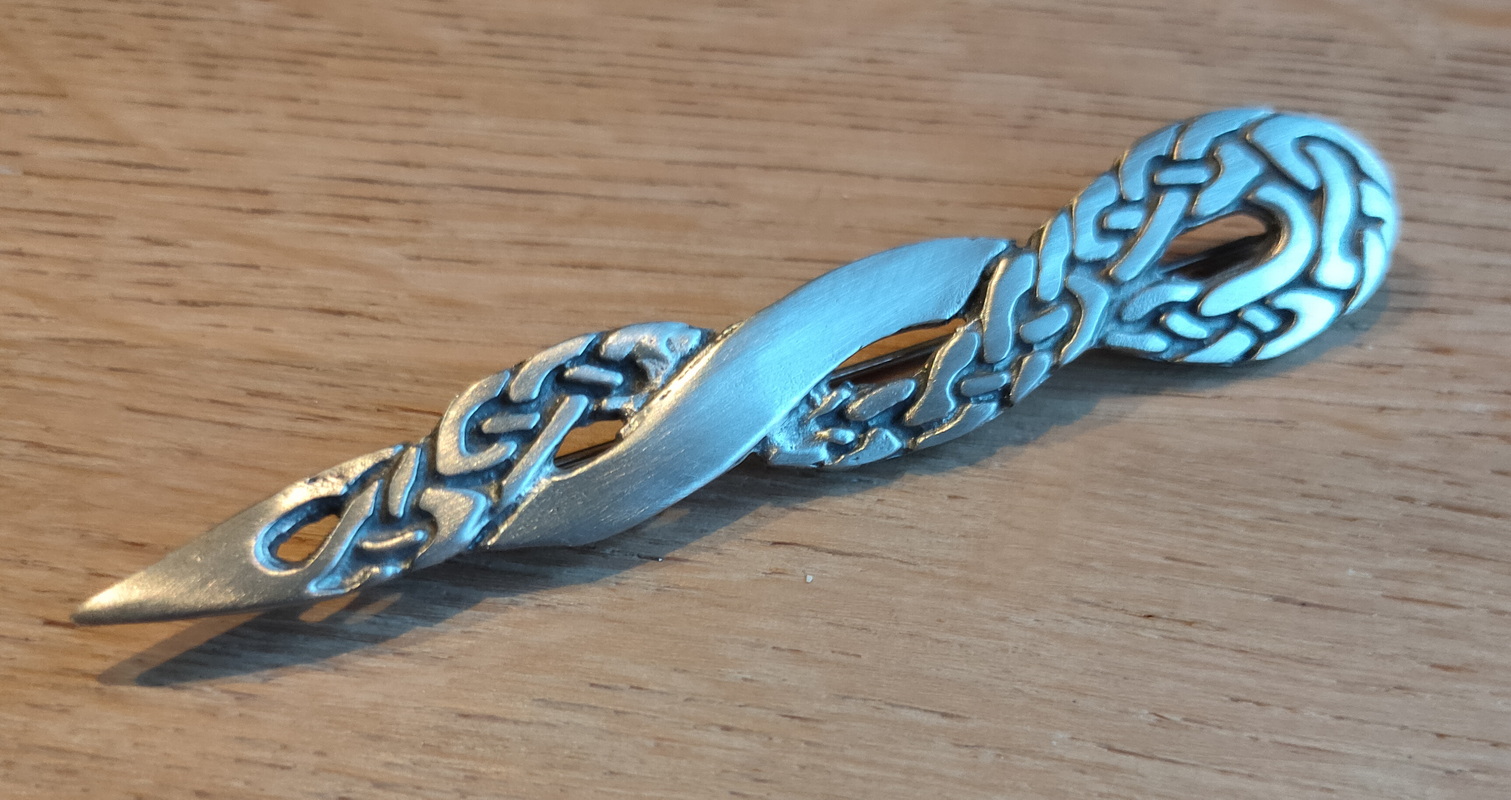
7 Juni – Arran distiller (Isle of Arran)
Hier een fles whisky gekocht en een kiltpin (van beide kun je er nooit genoeg hebben)
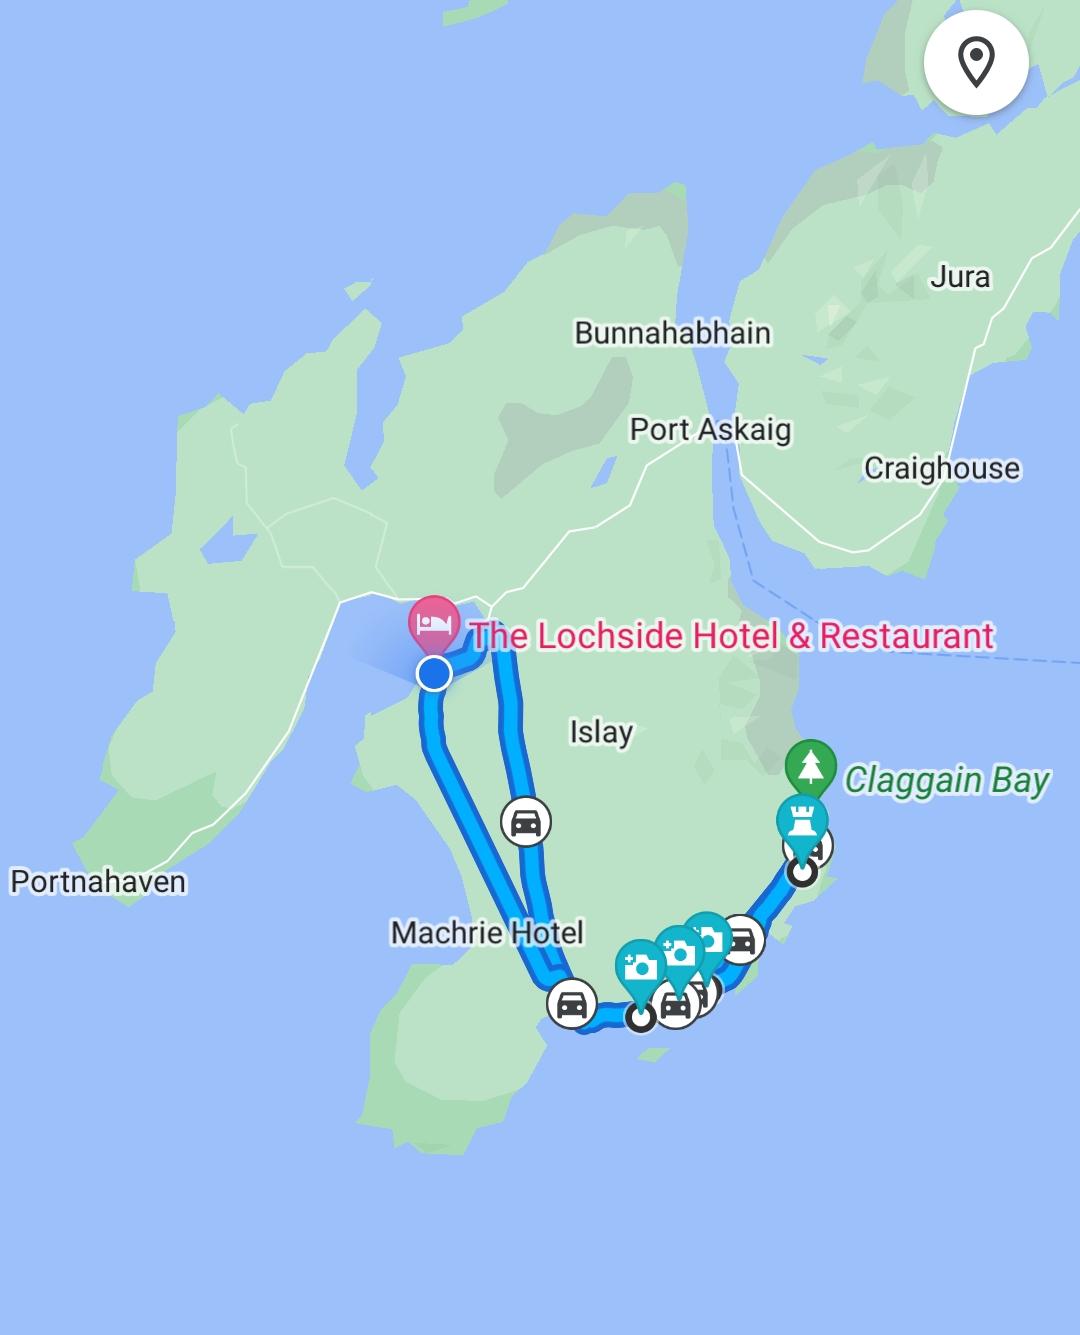
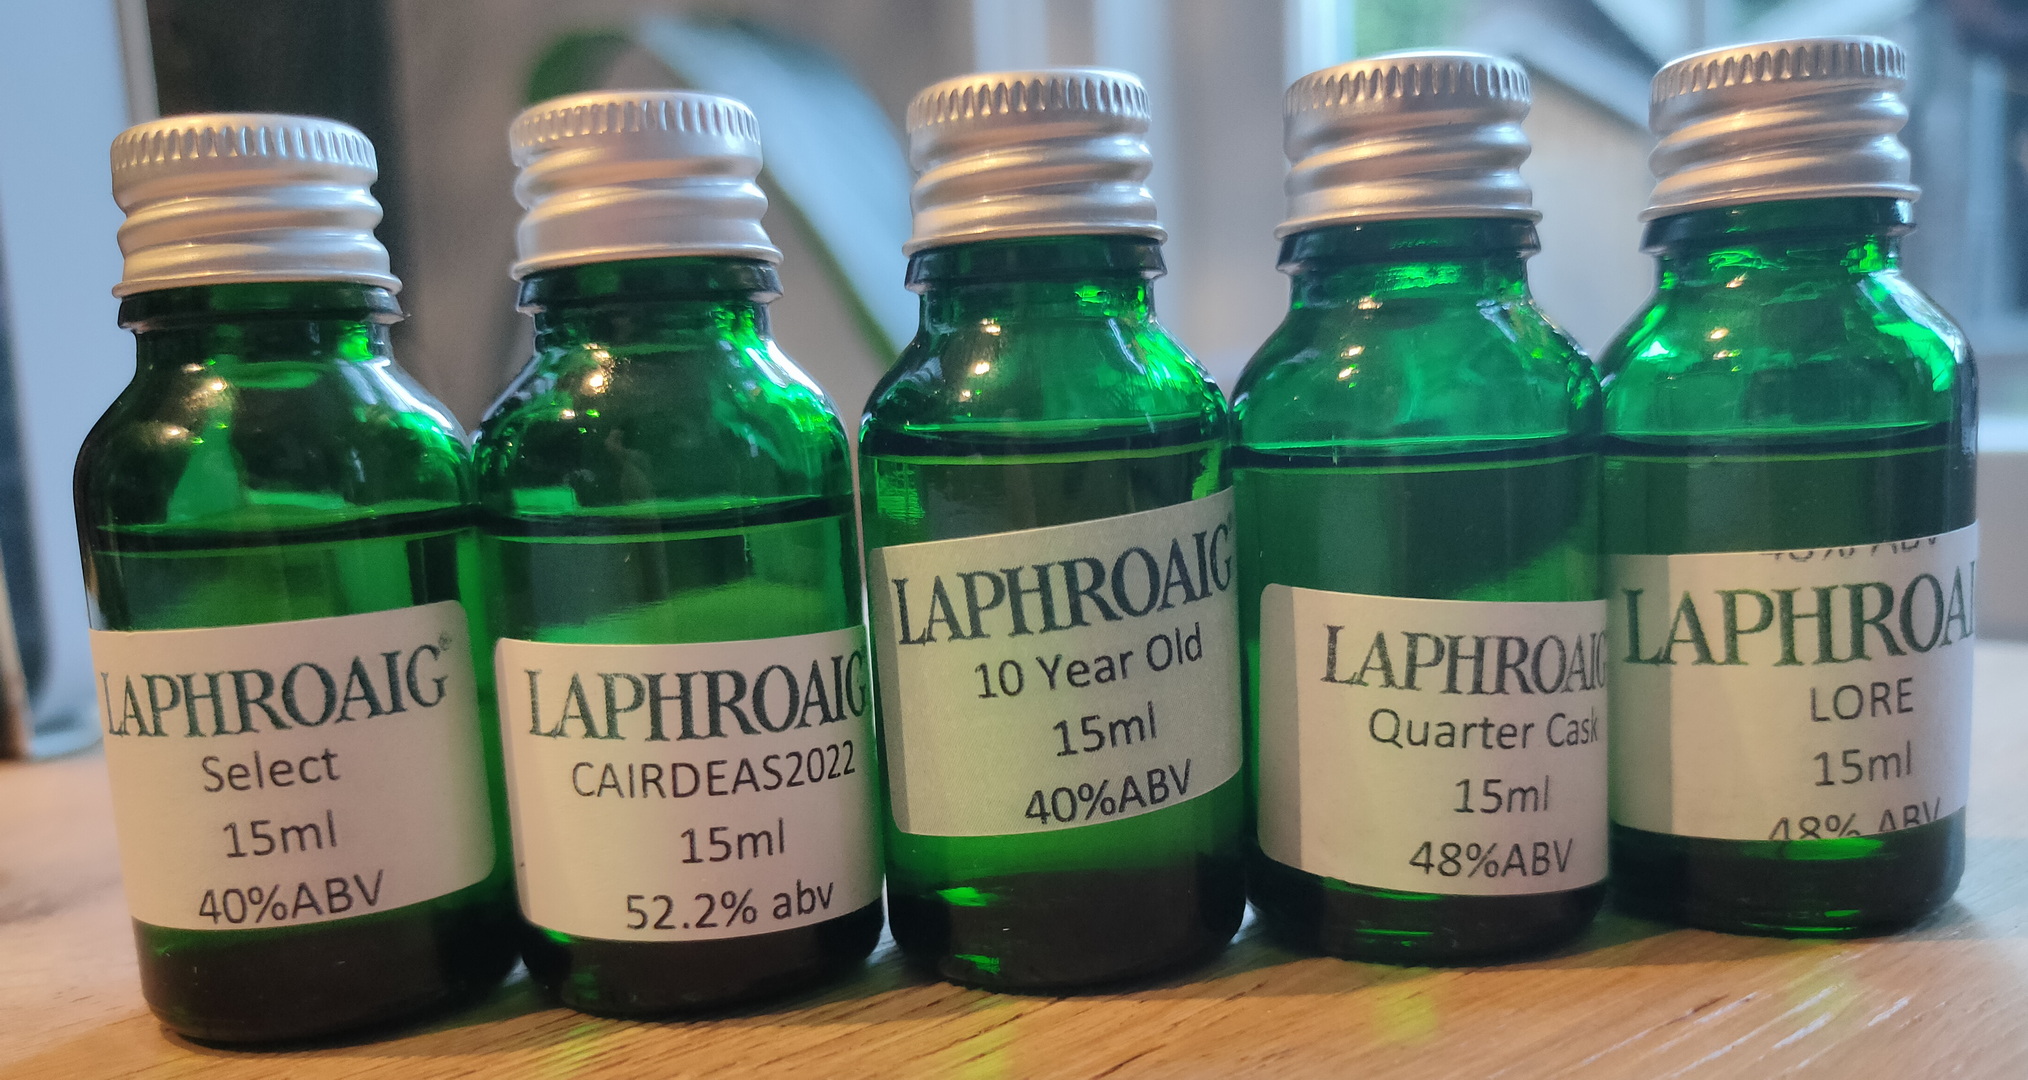
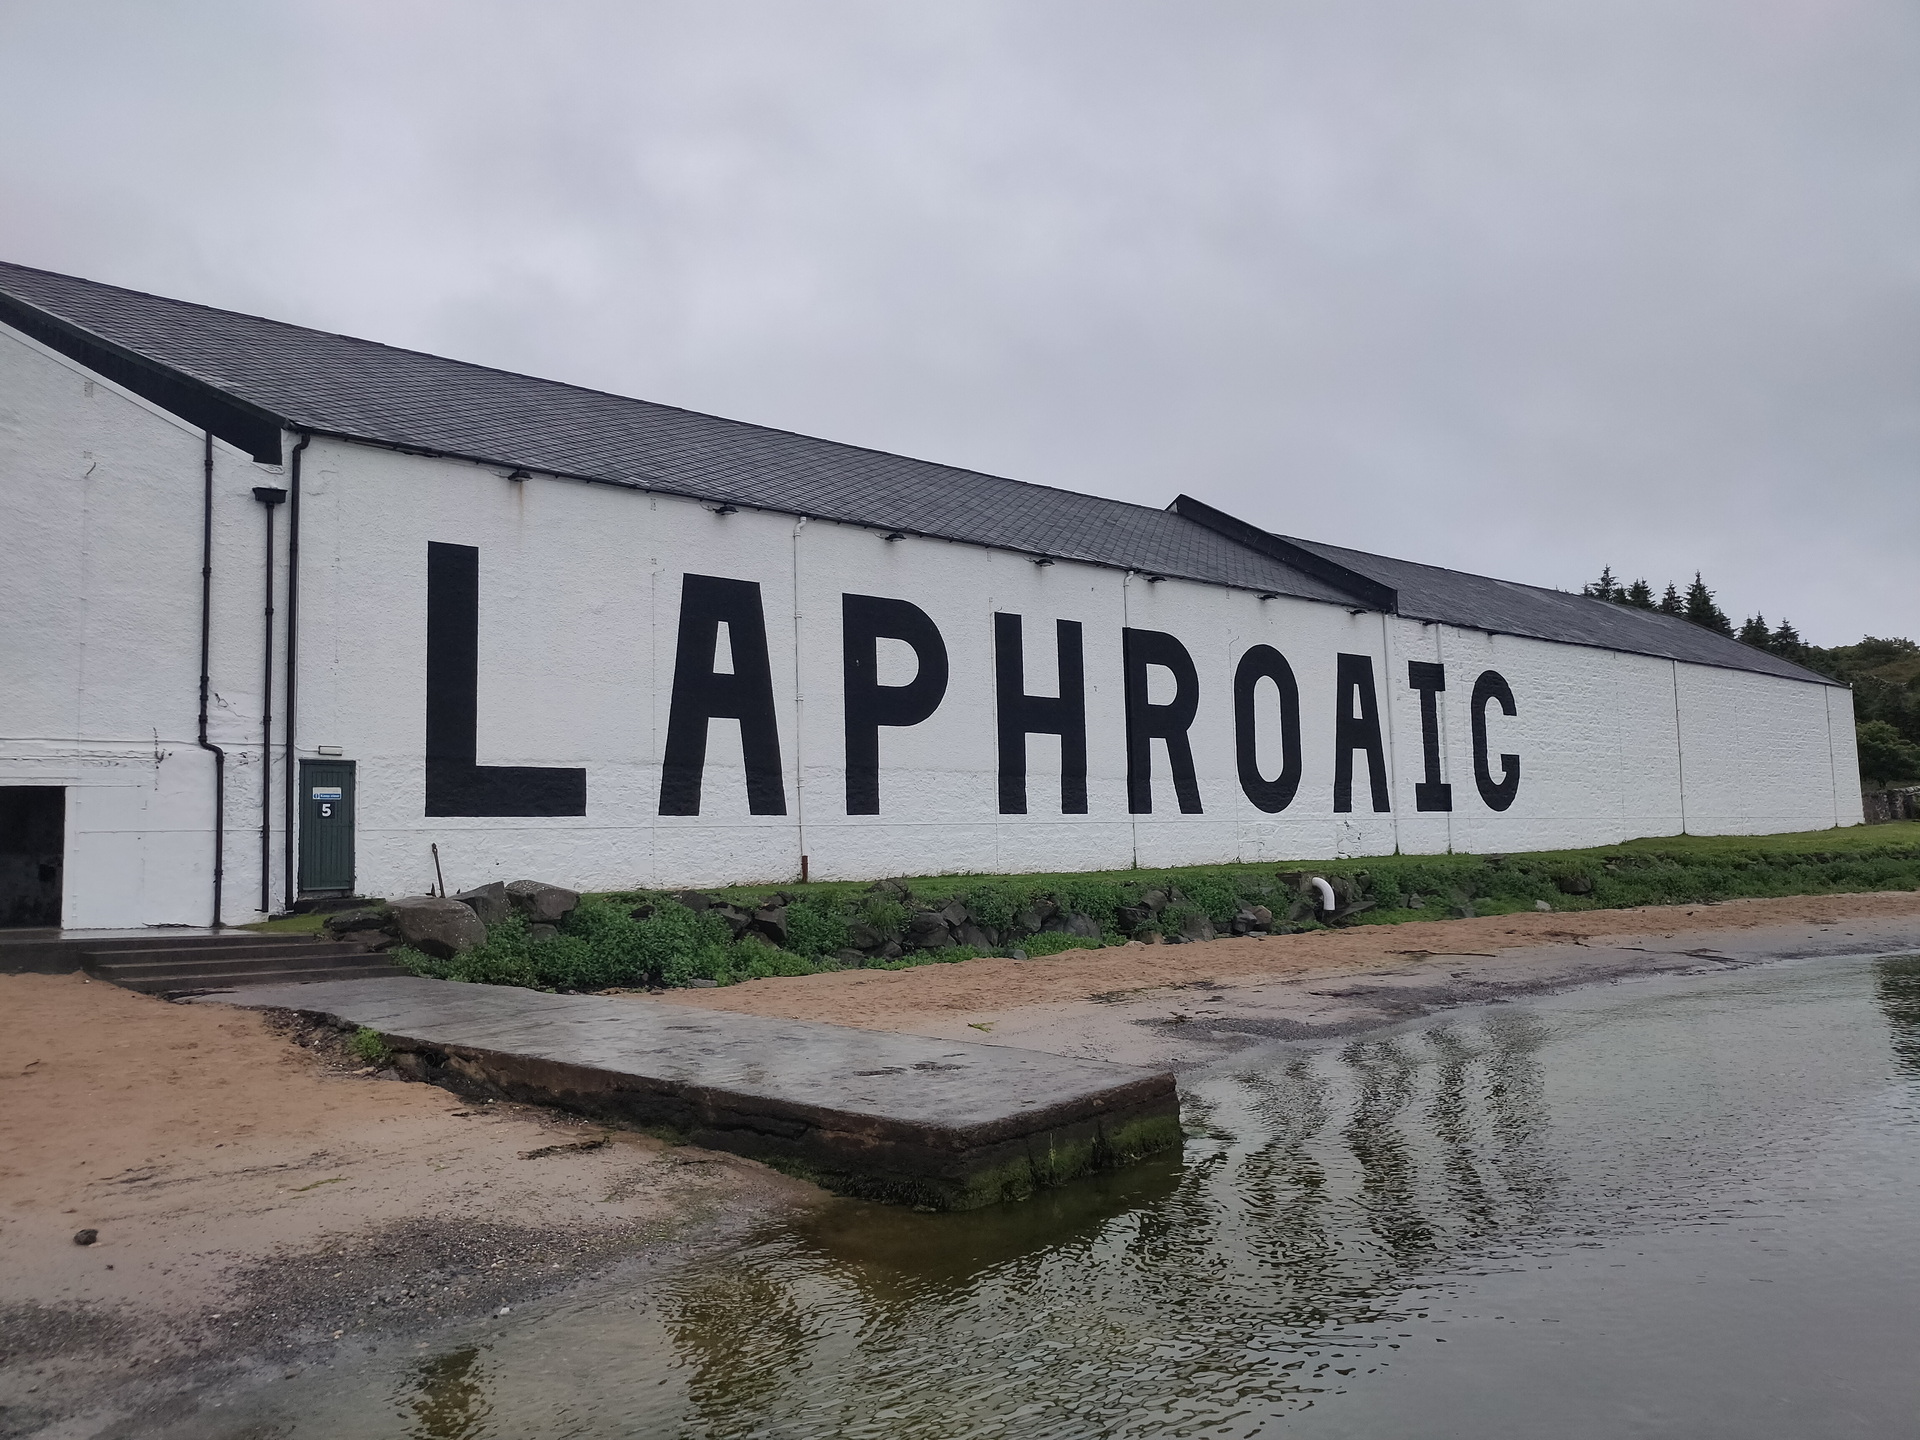
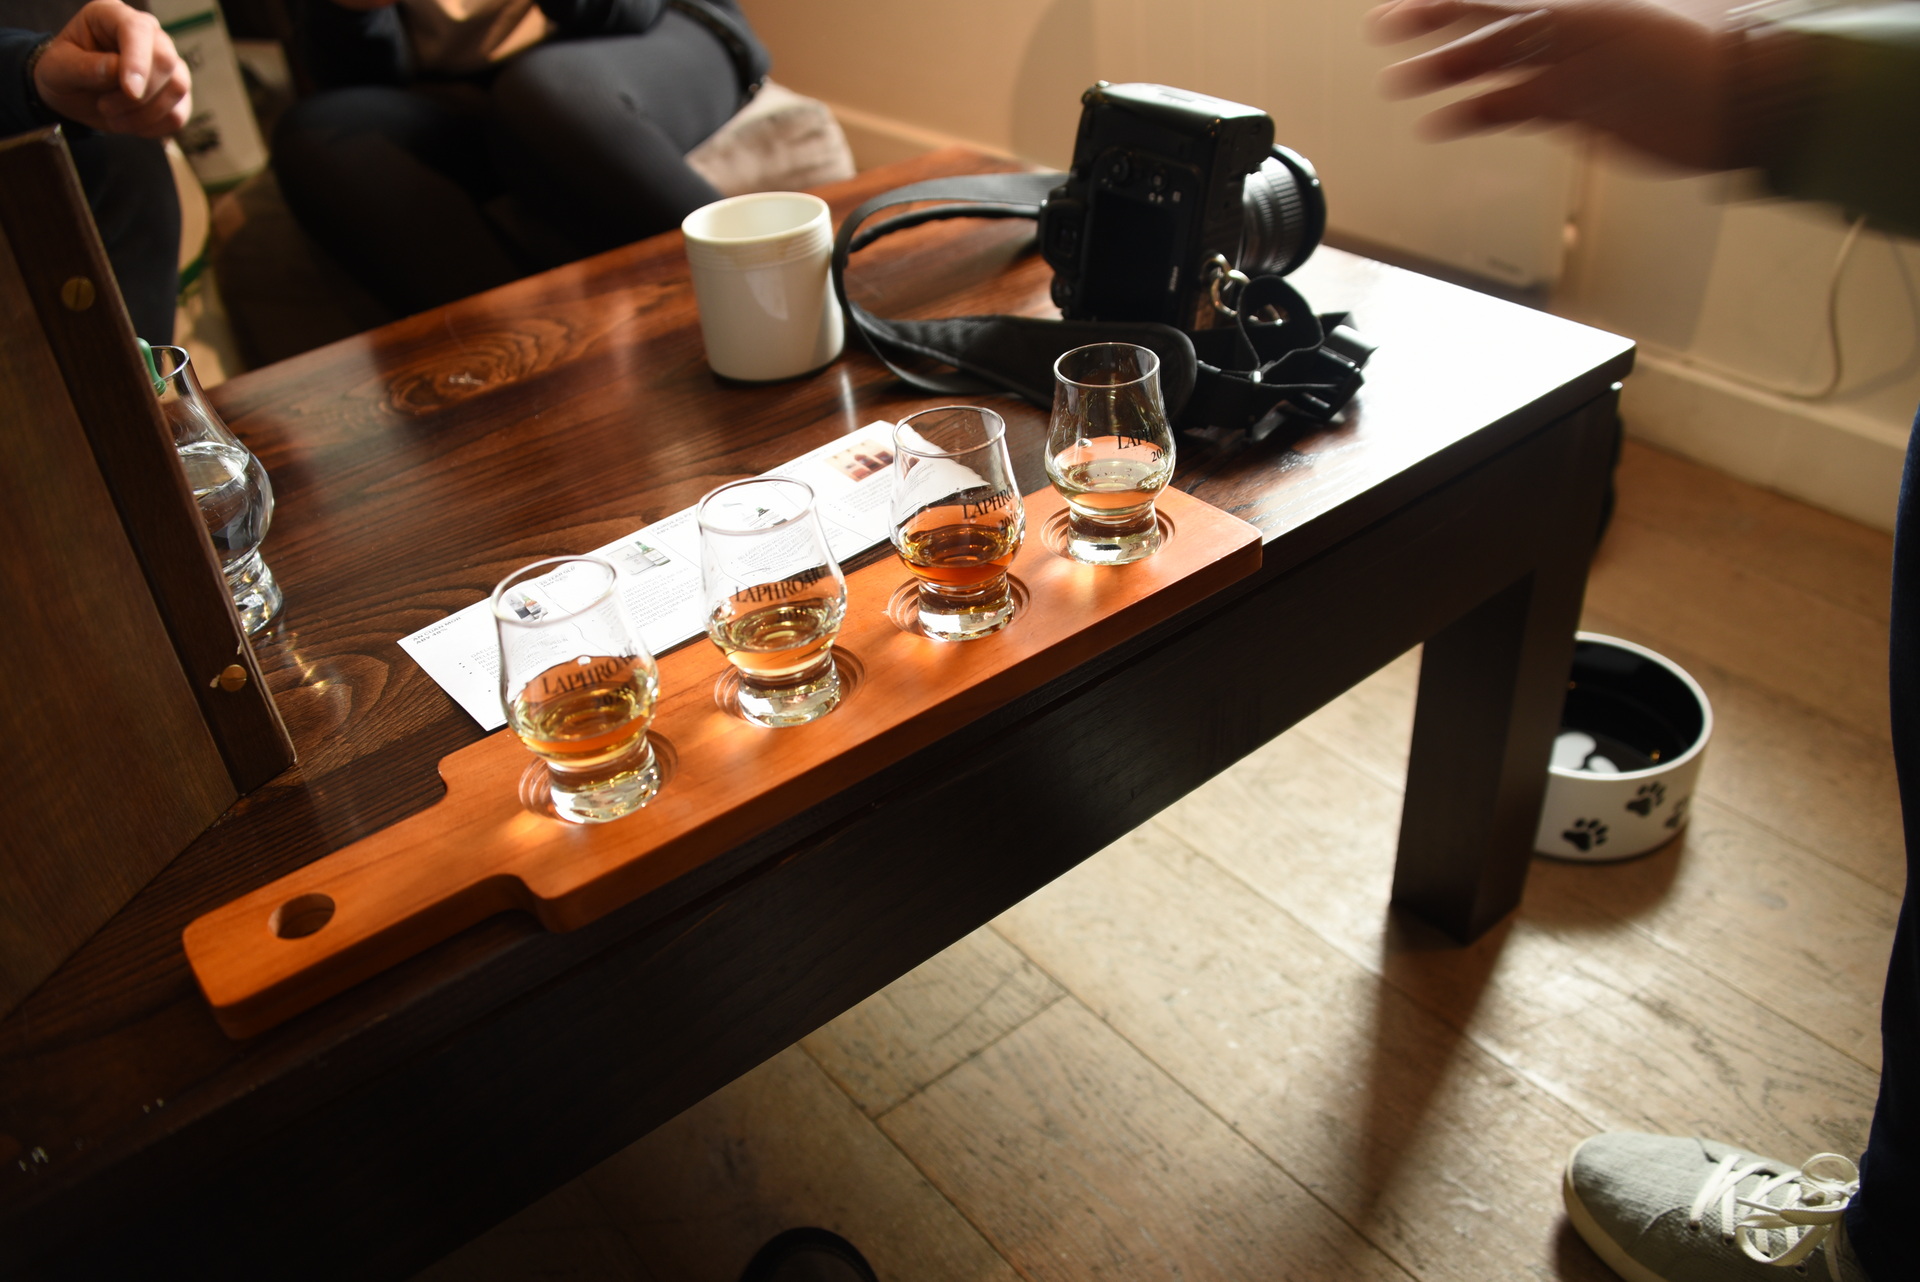
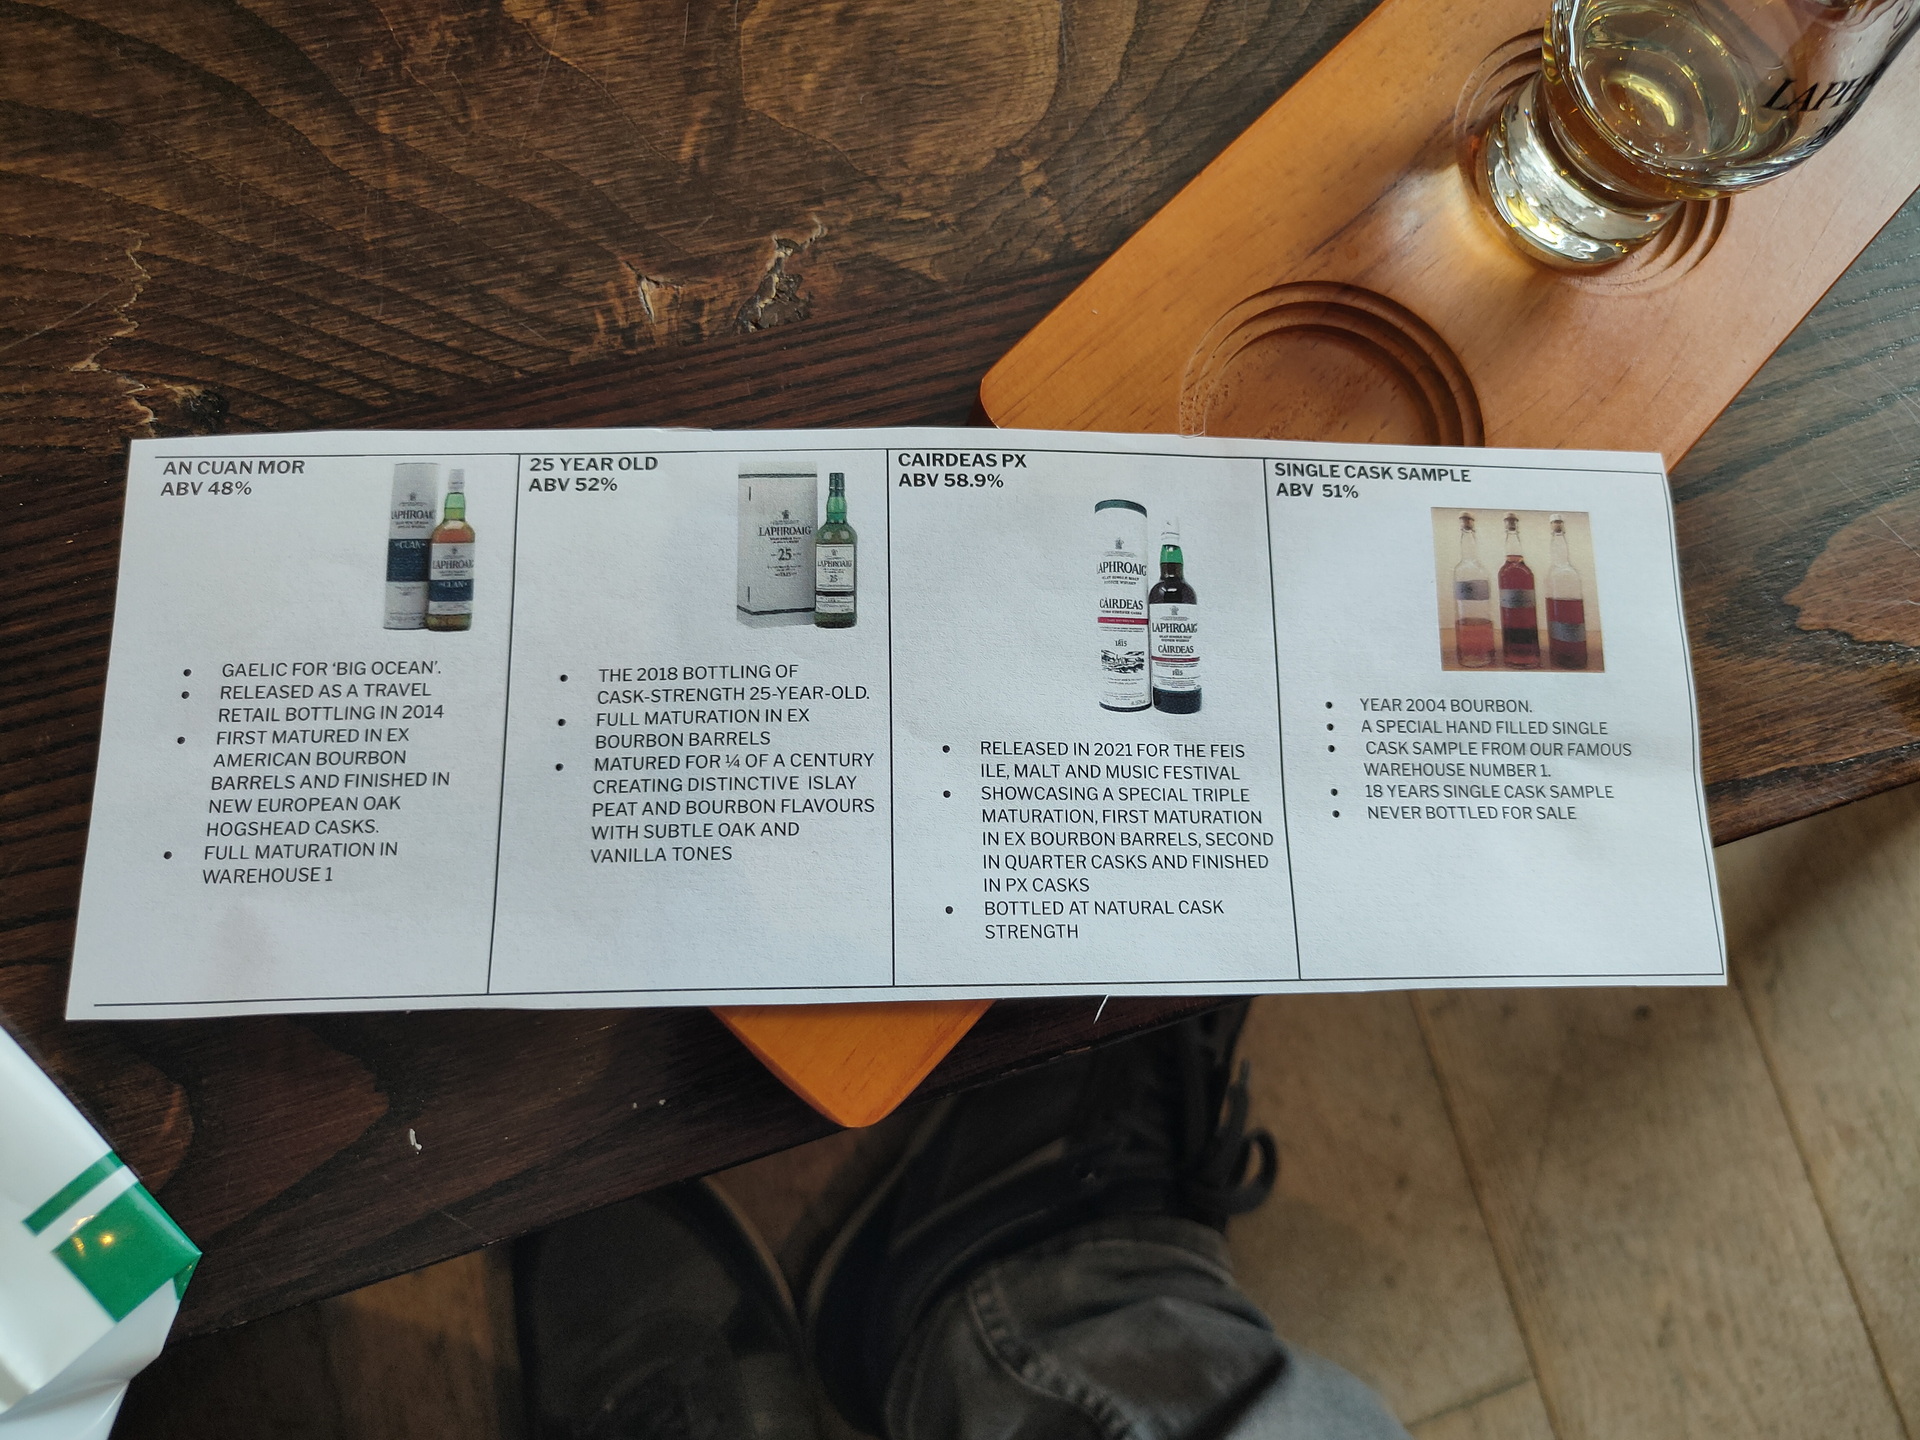
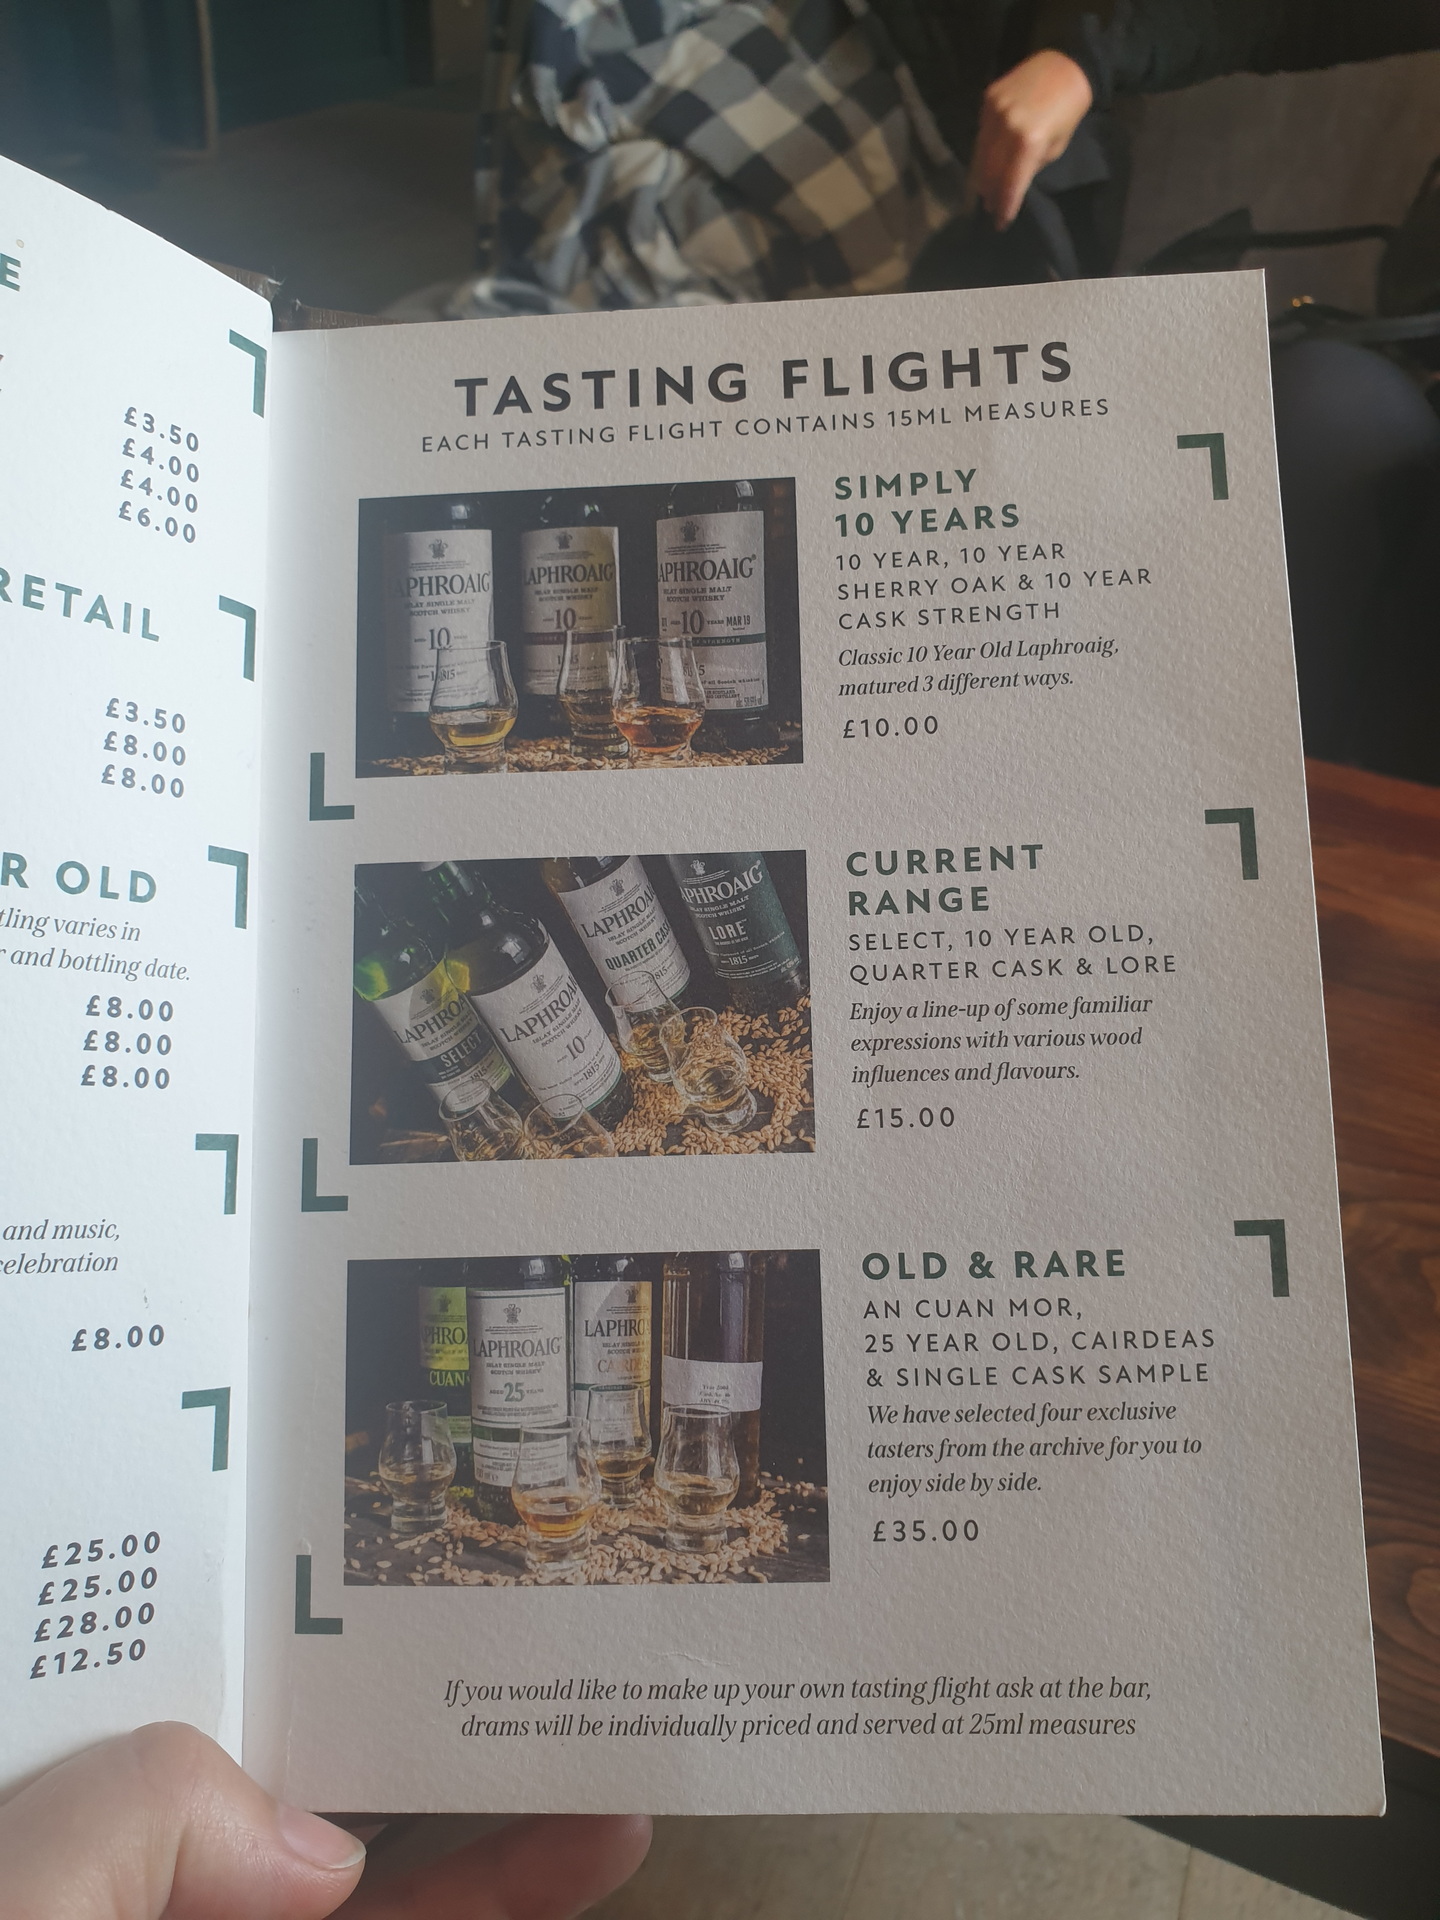
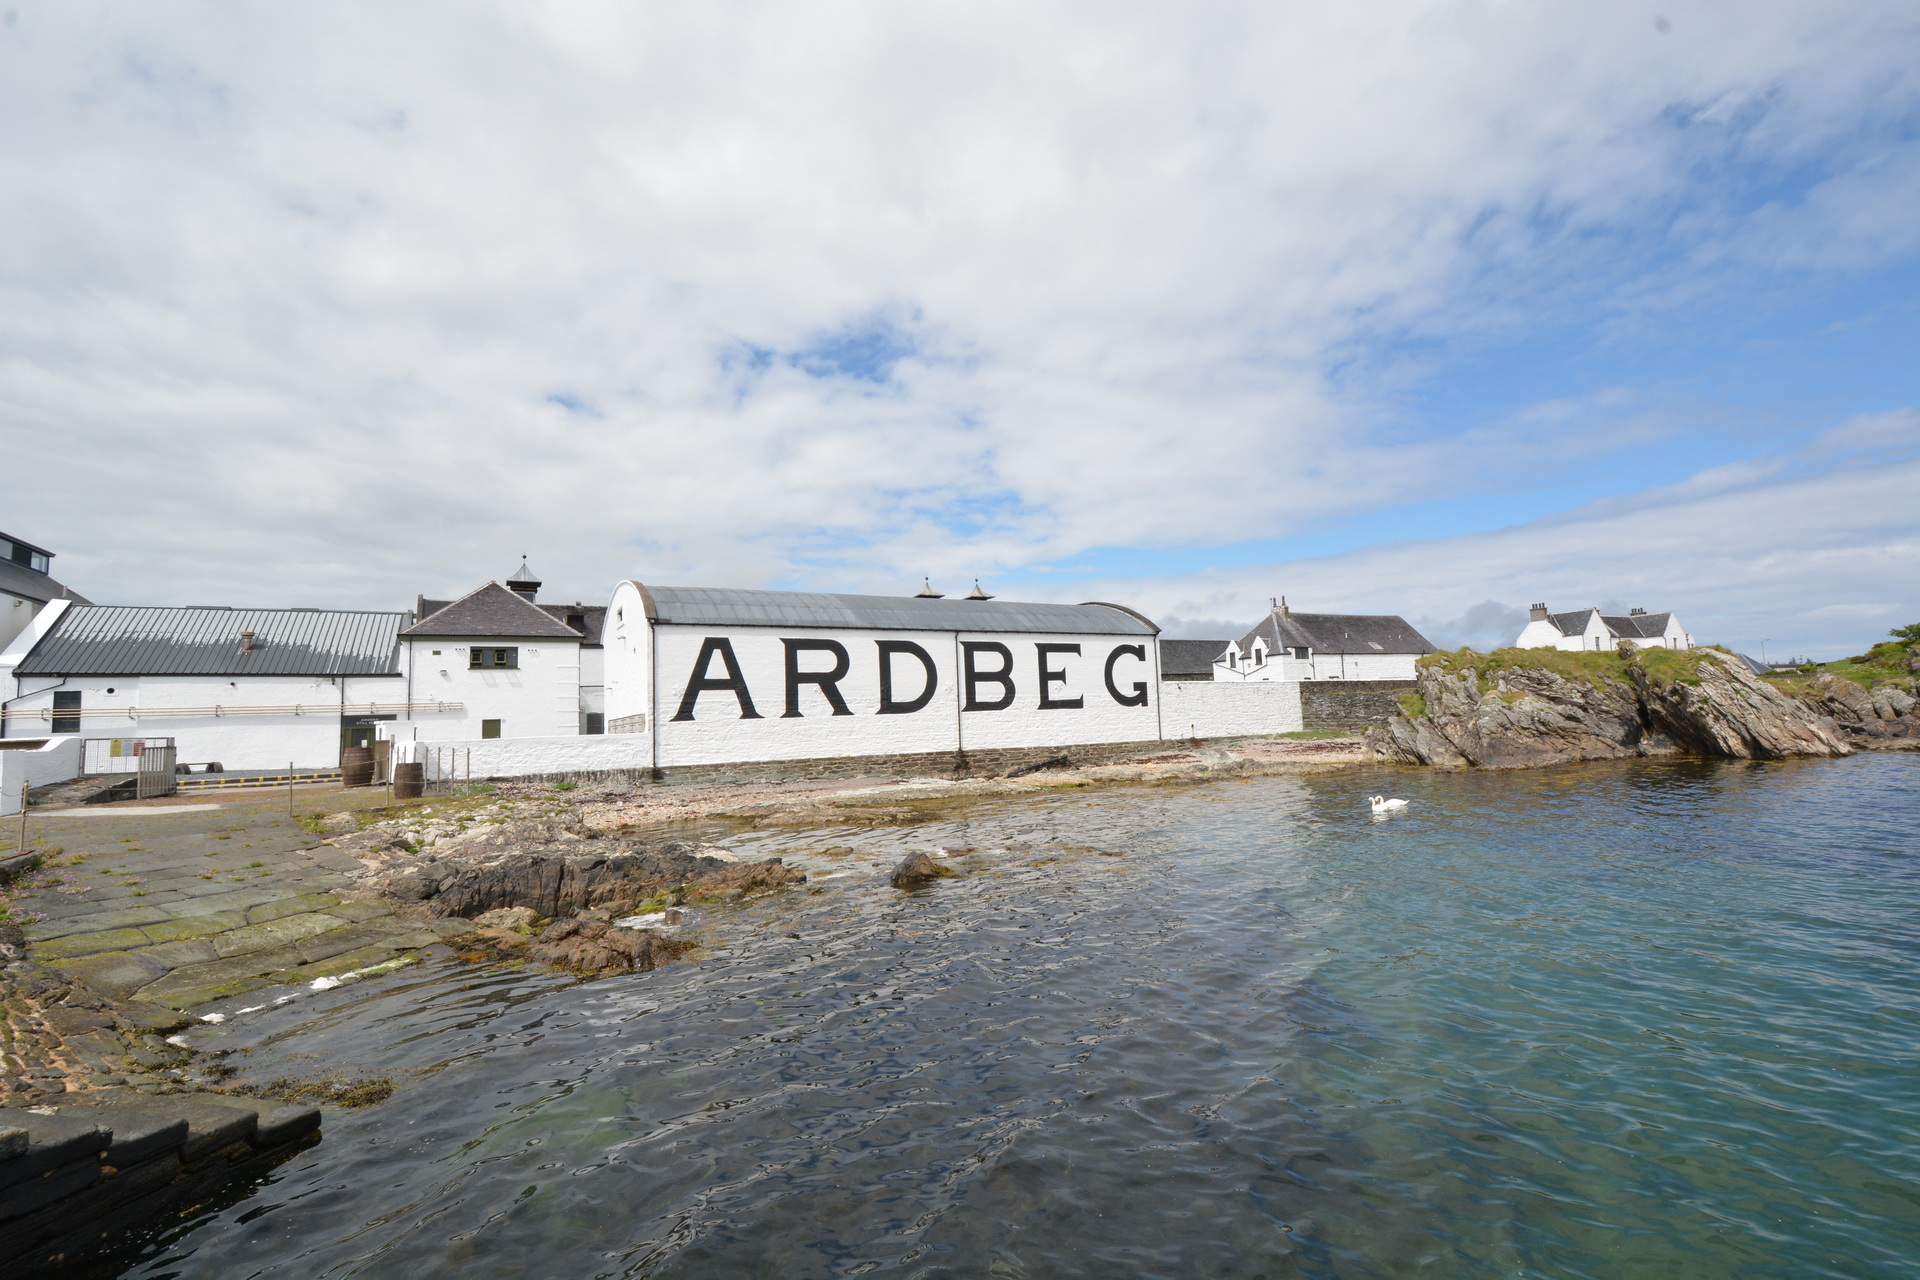
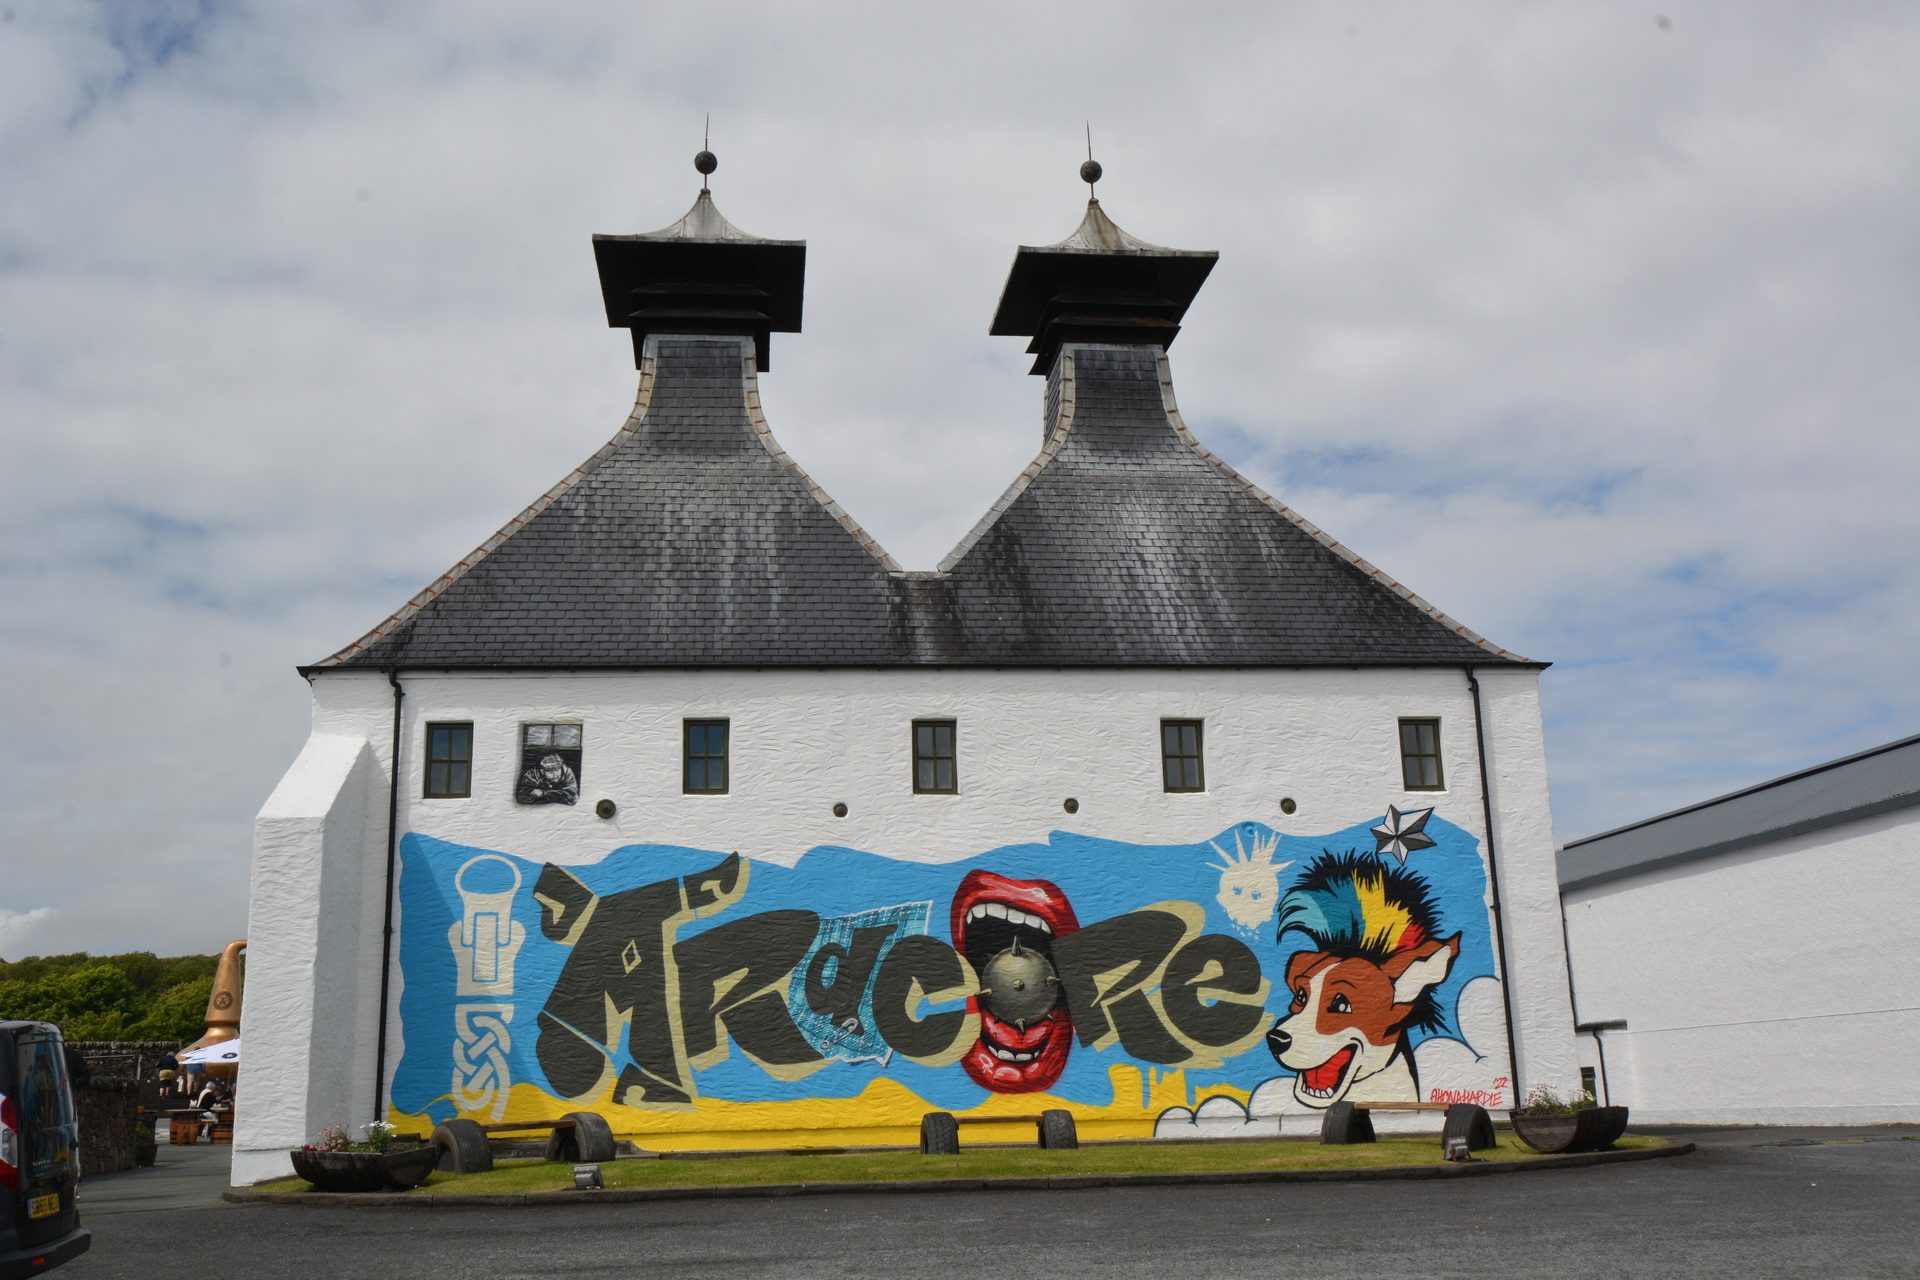
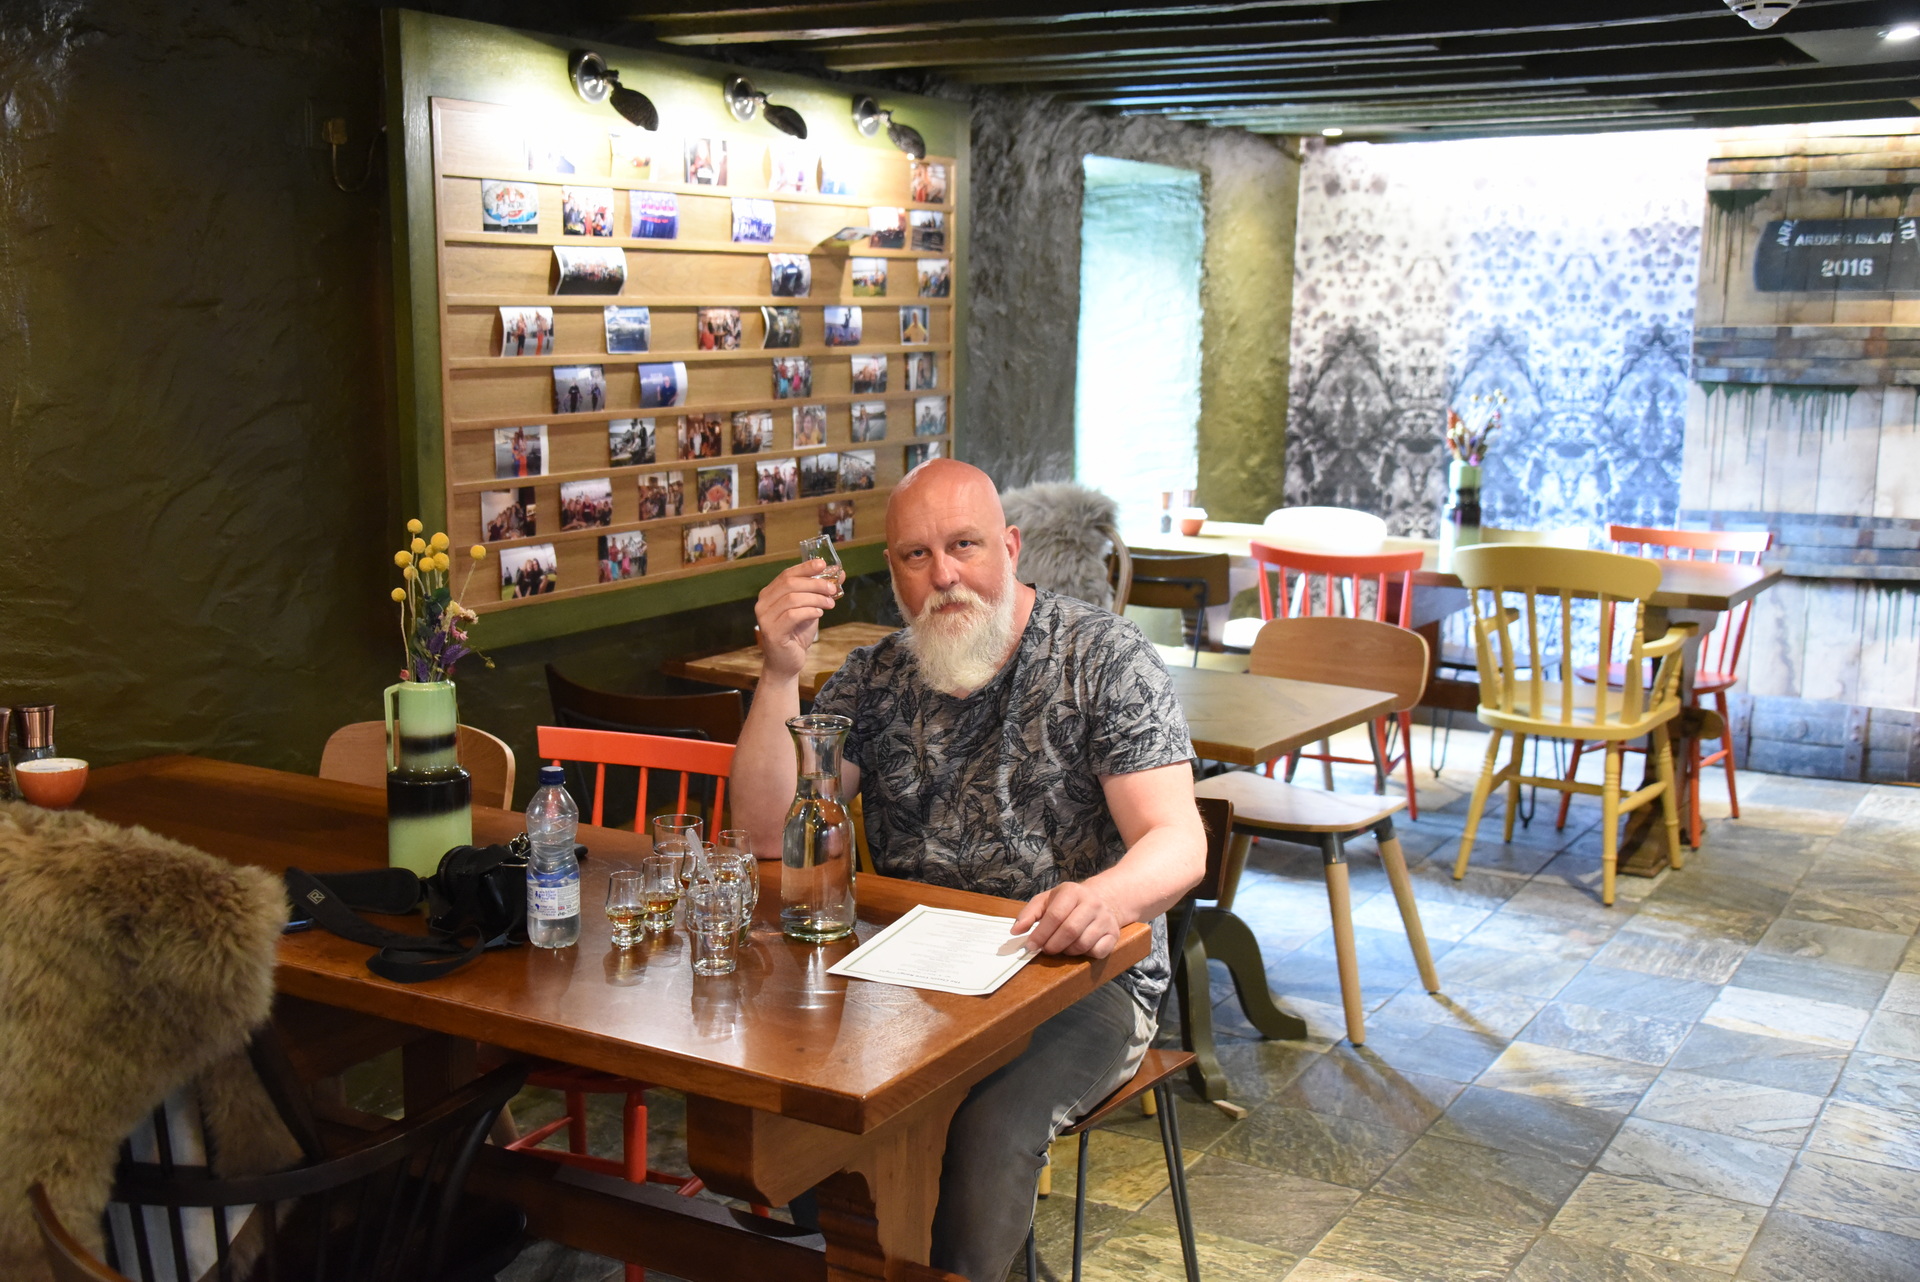
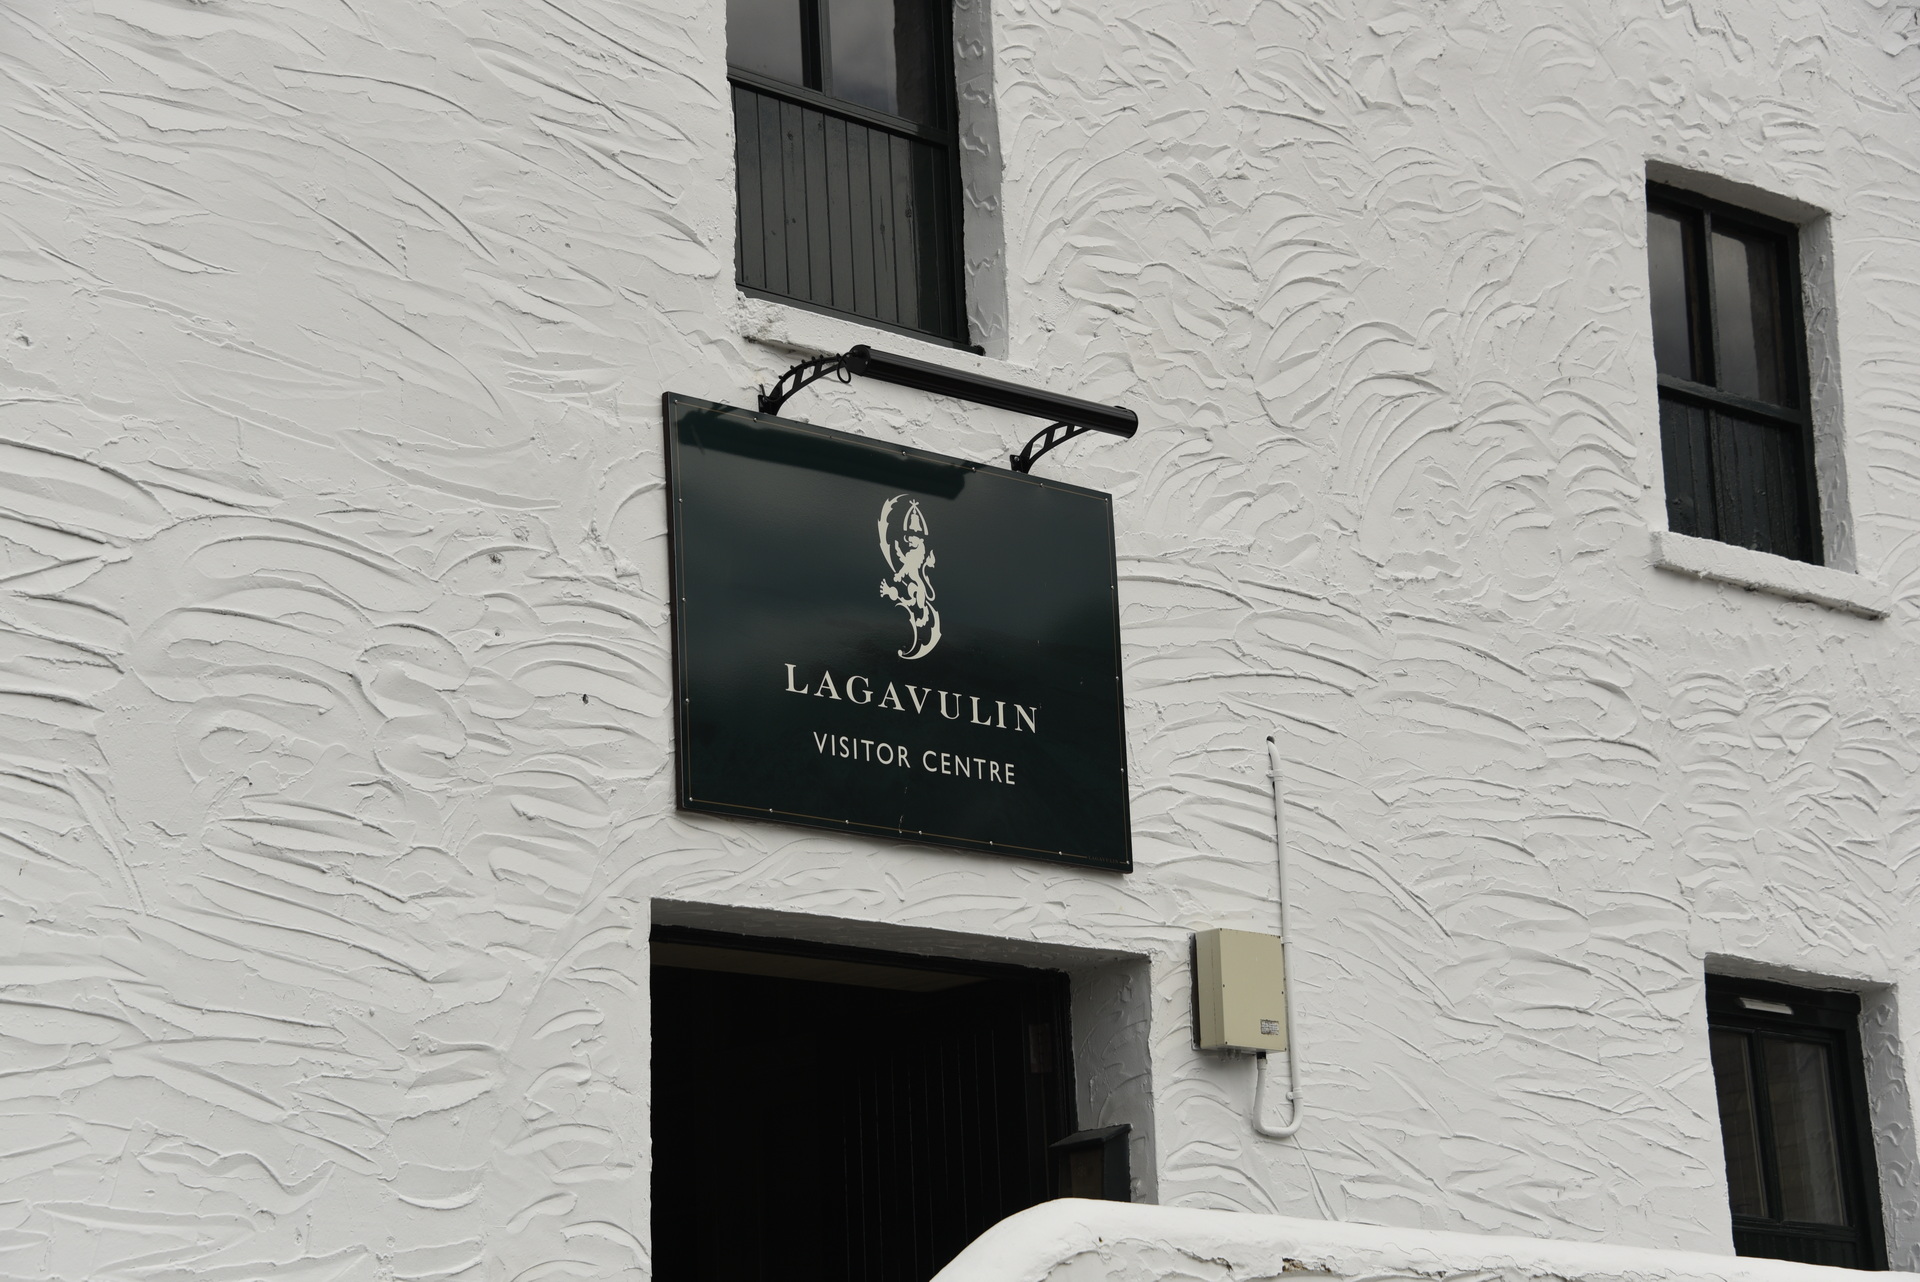
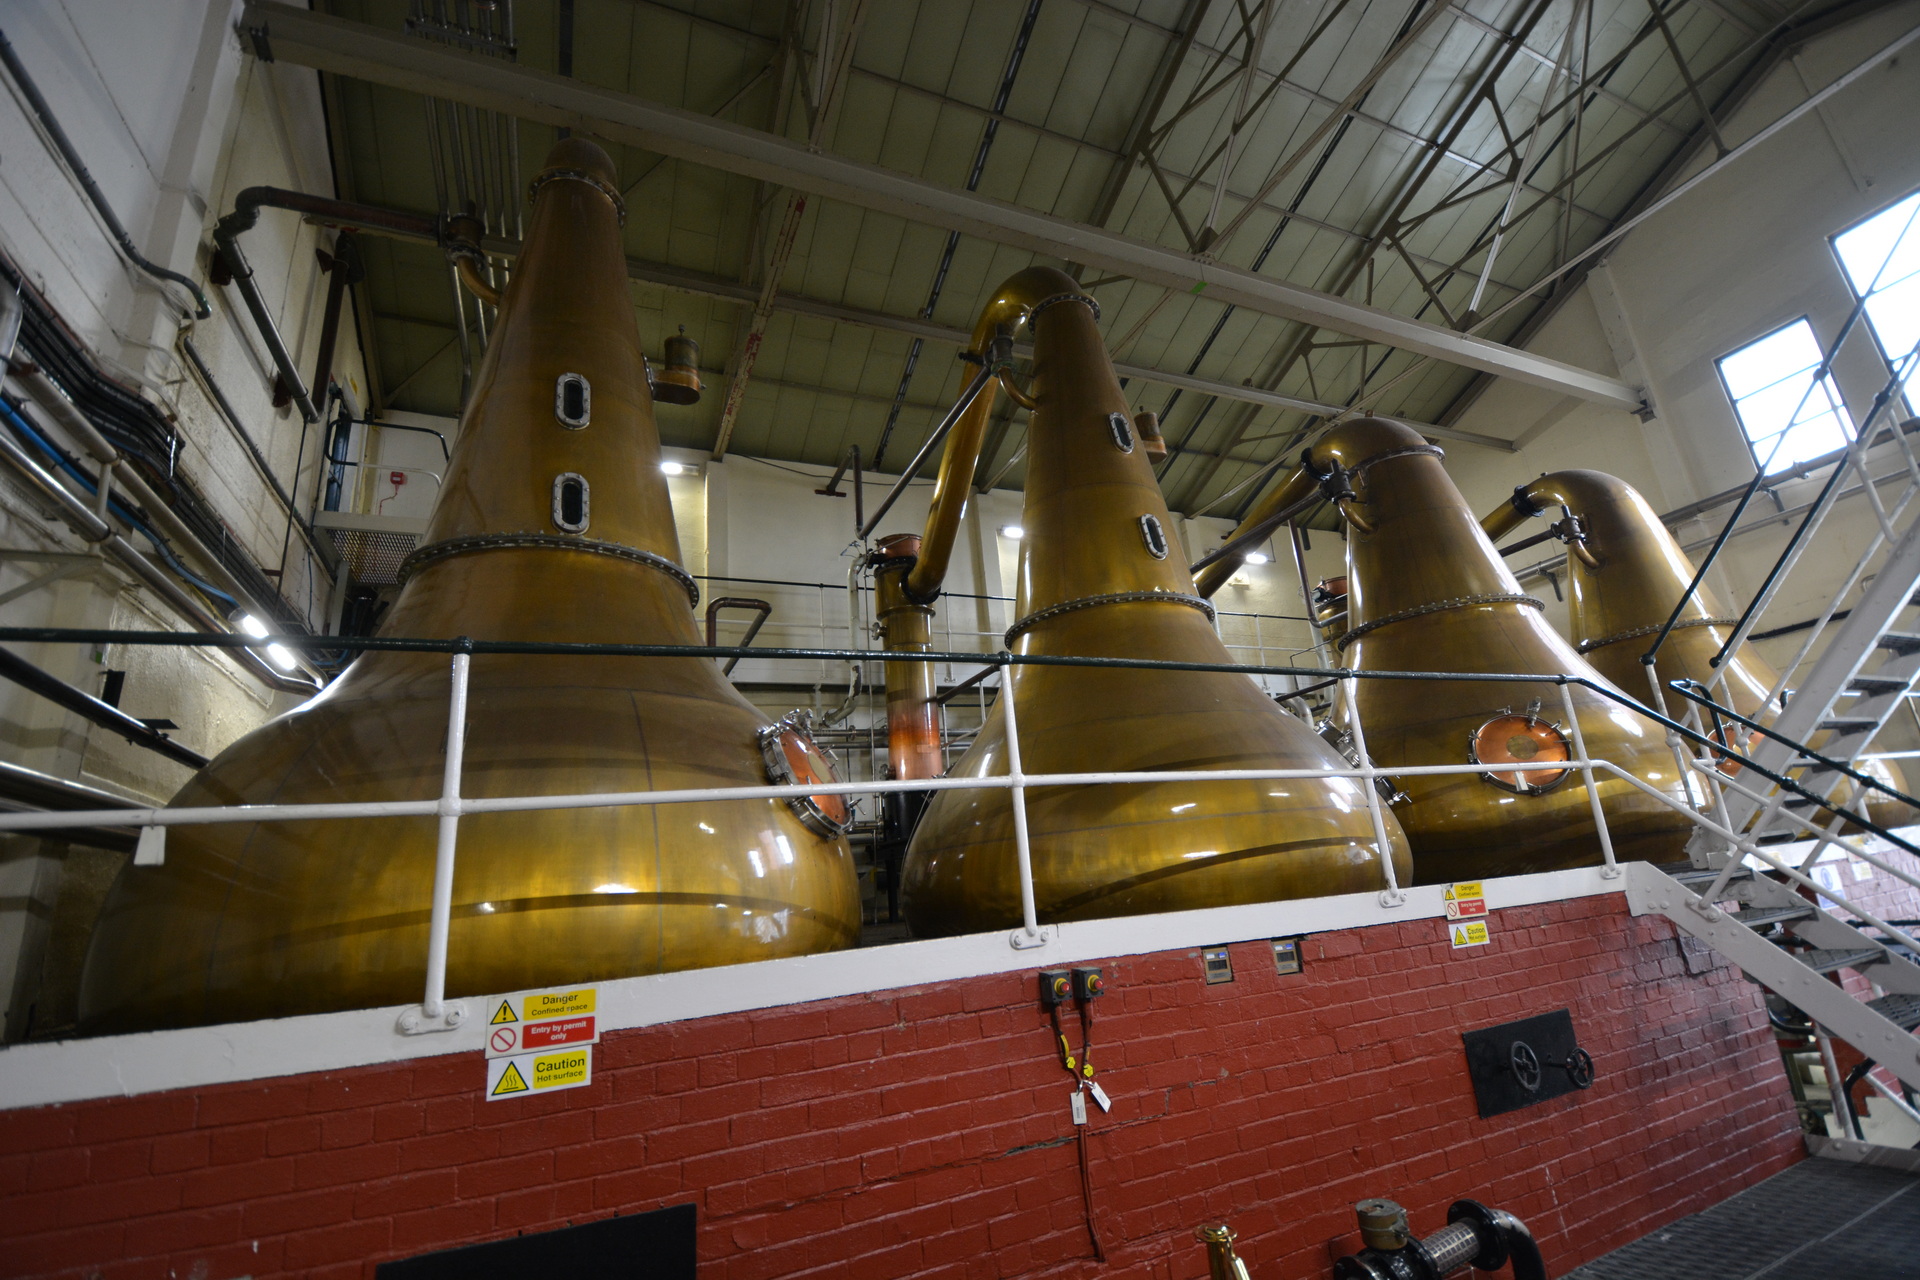
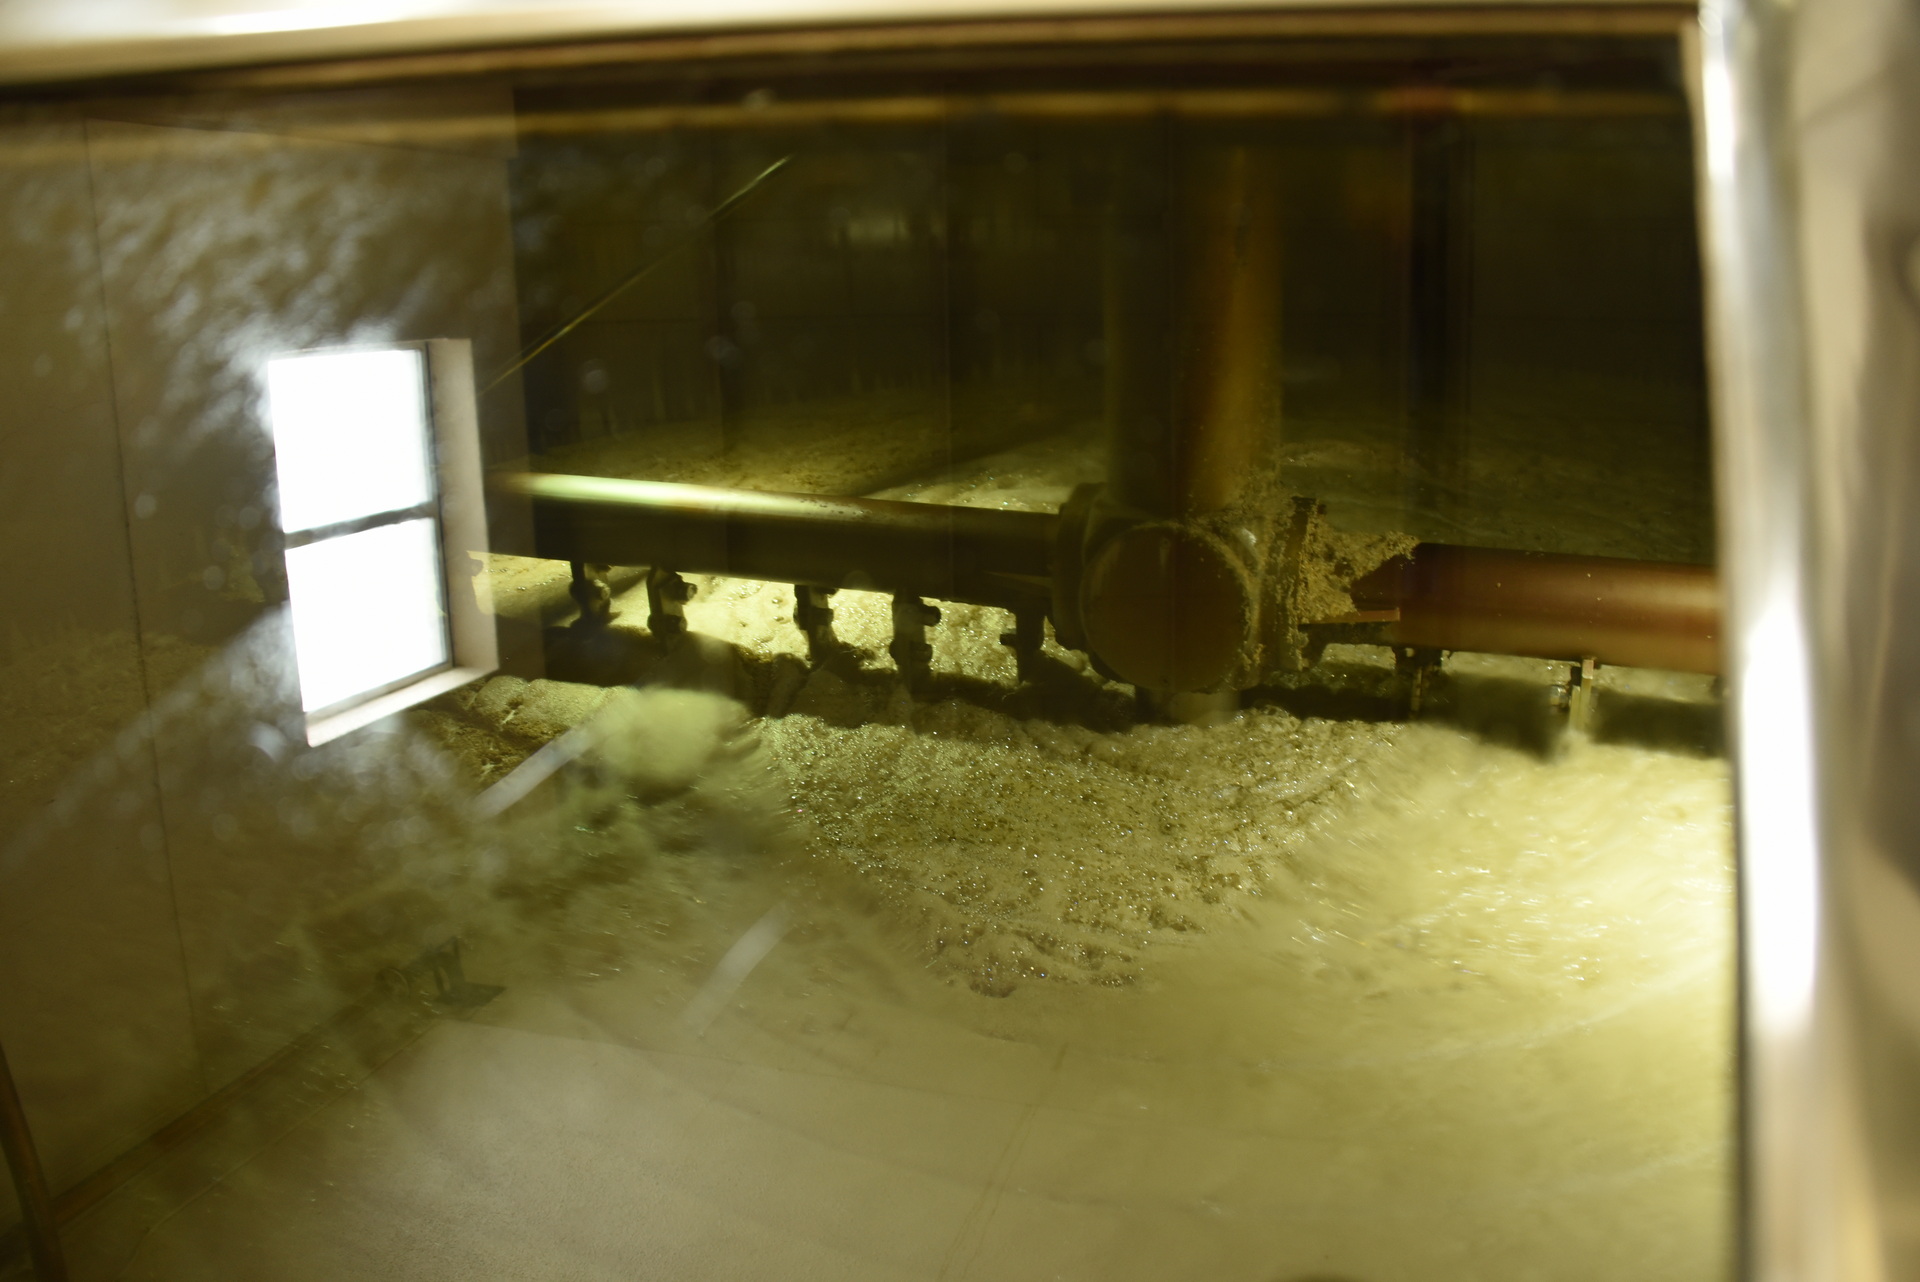
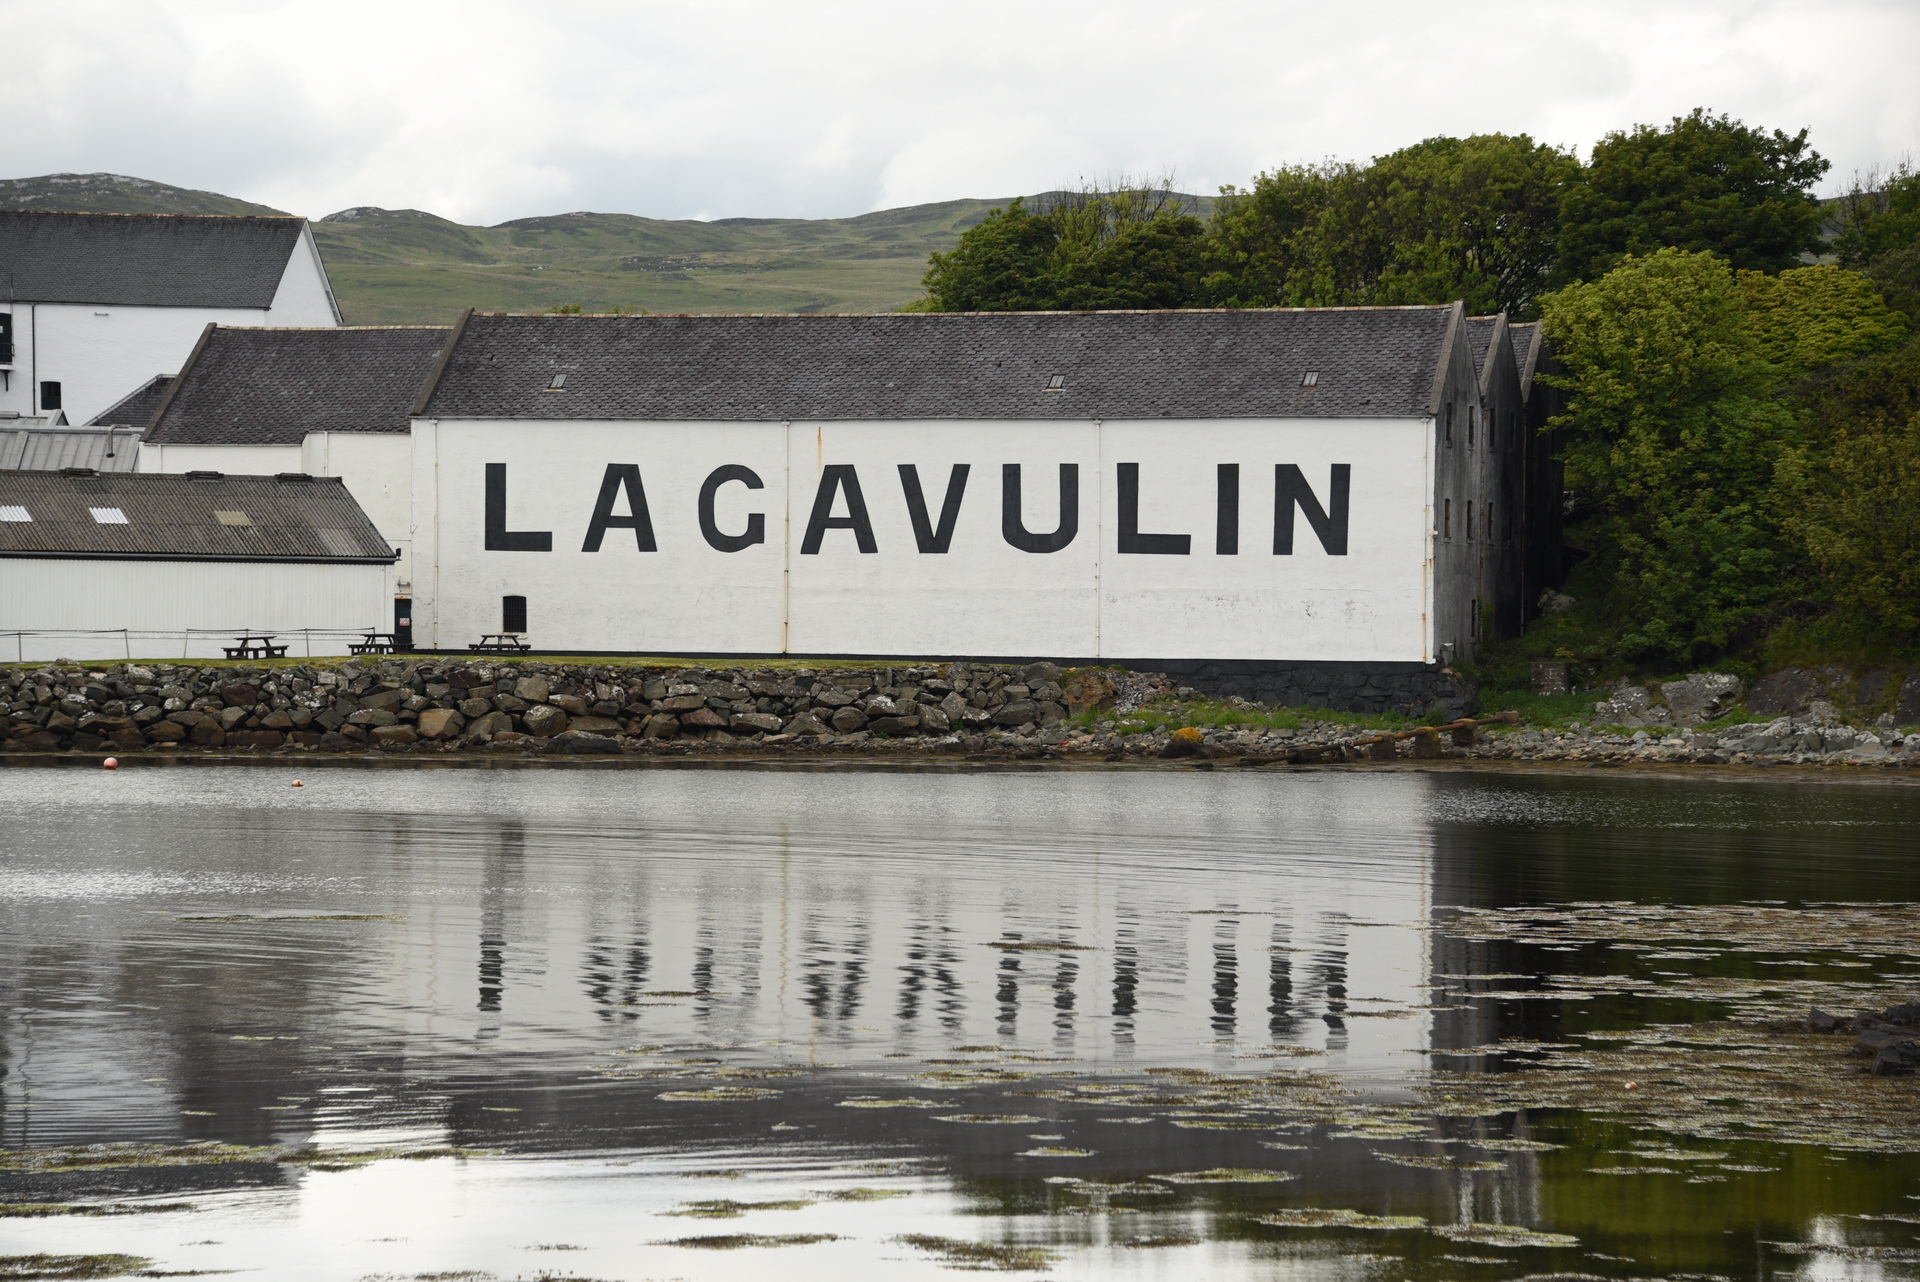
8 Juni – Laphroaig, Ardbeg, Lagavullin distillers (Isle of Islay)
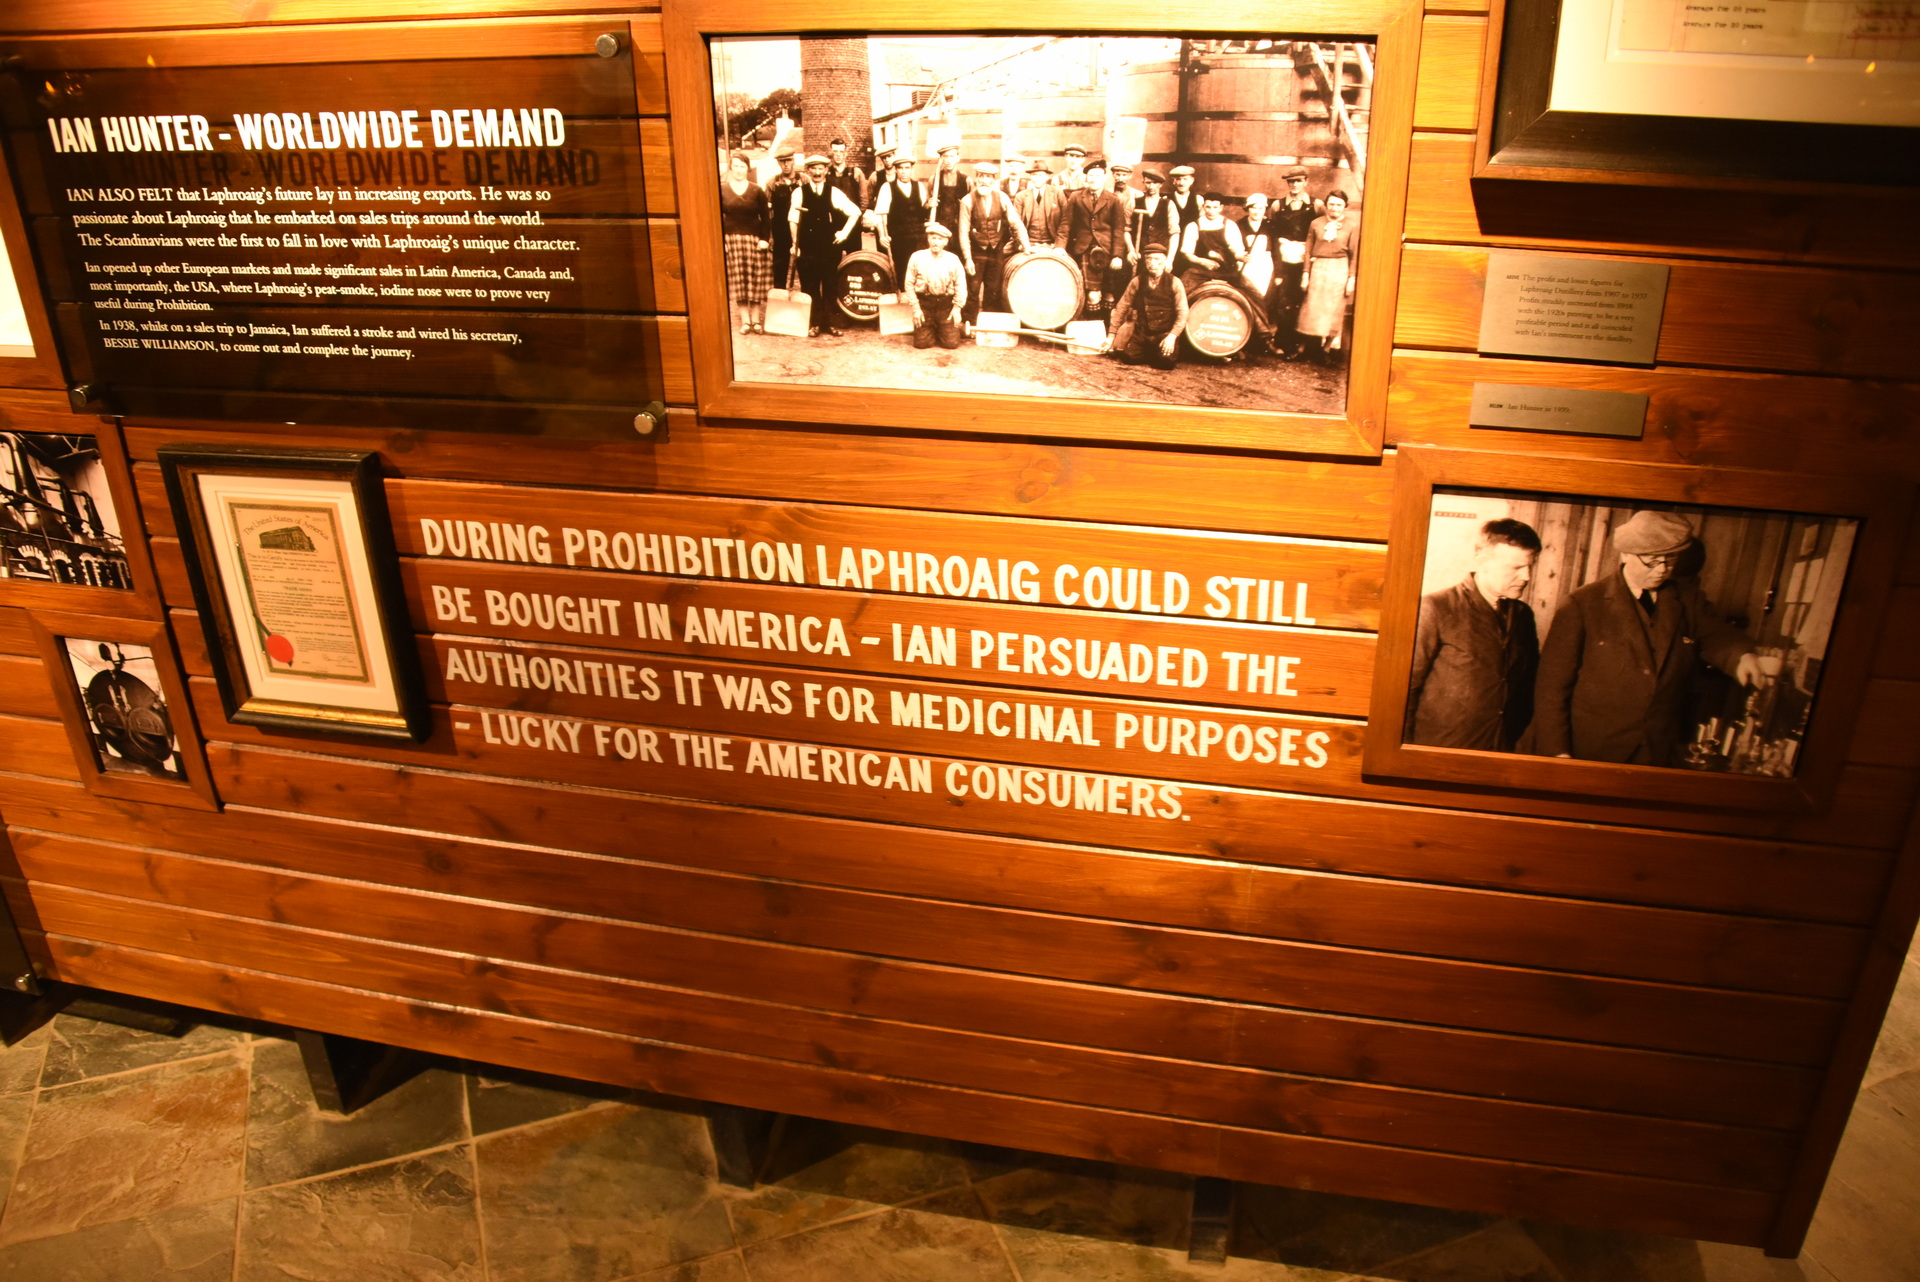
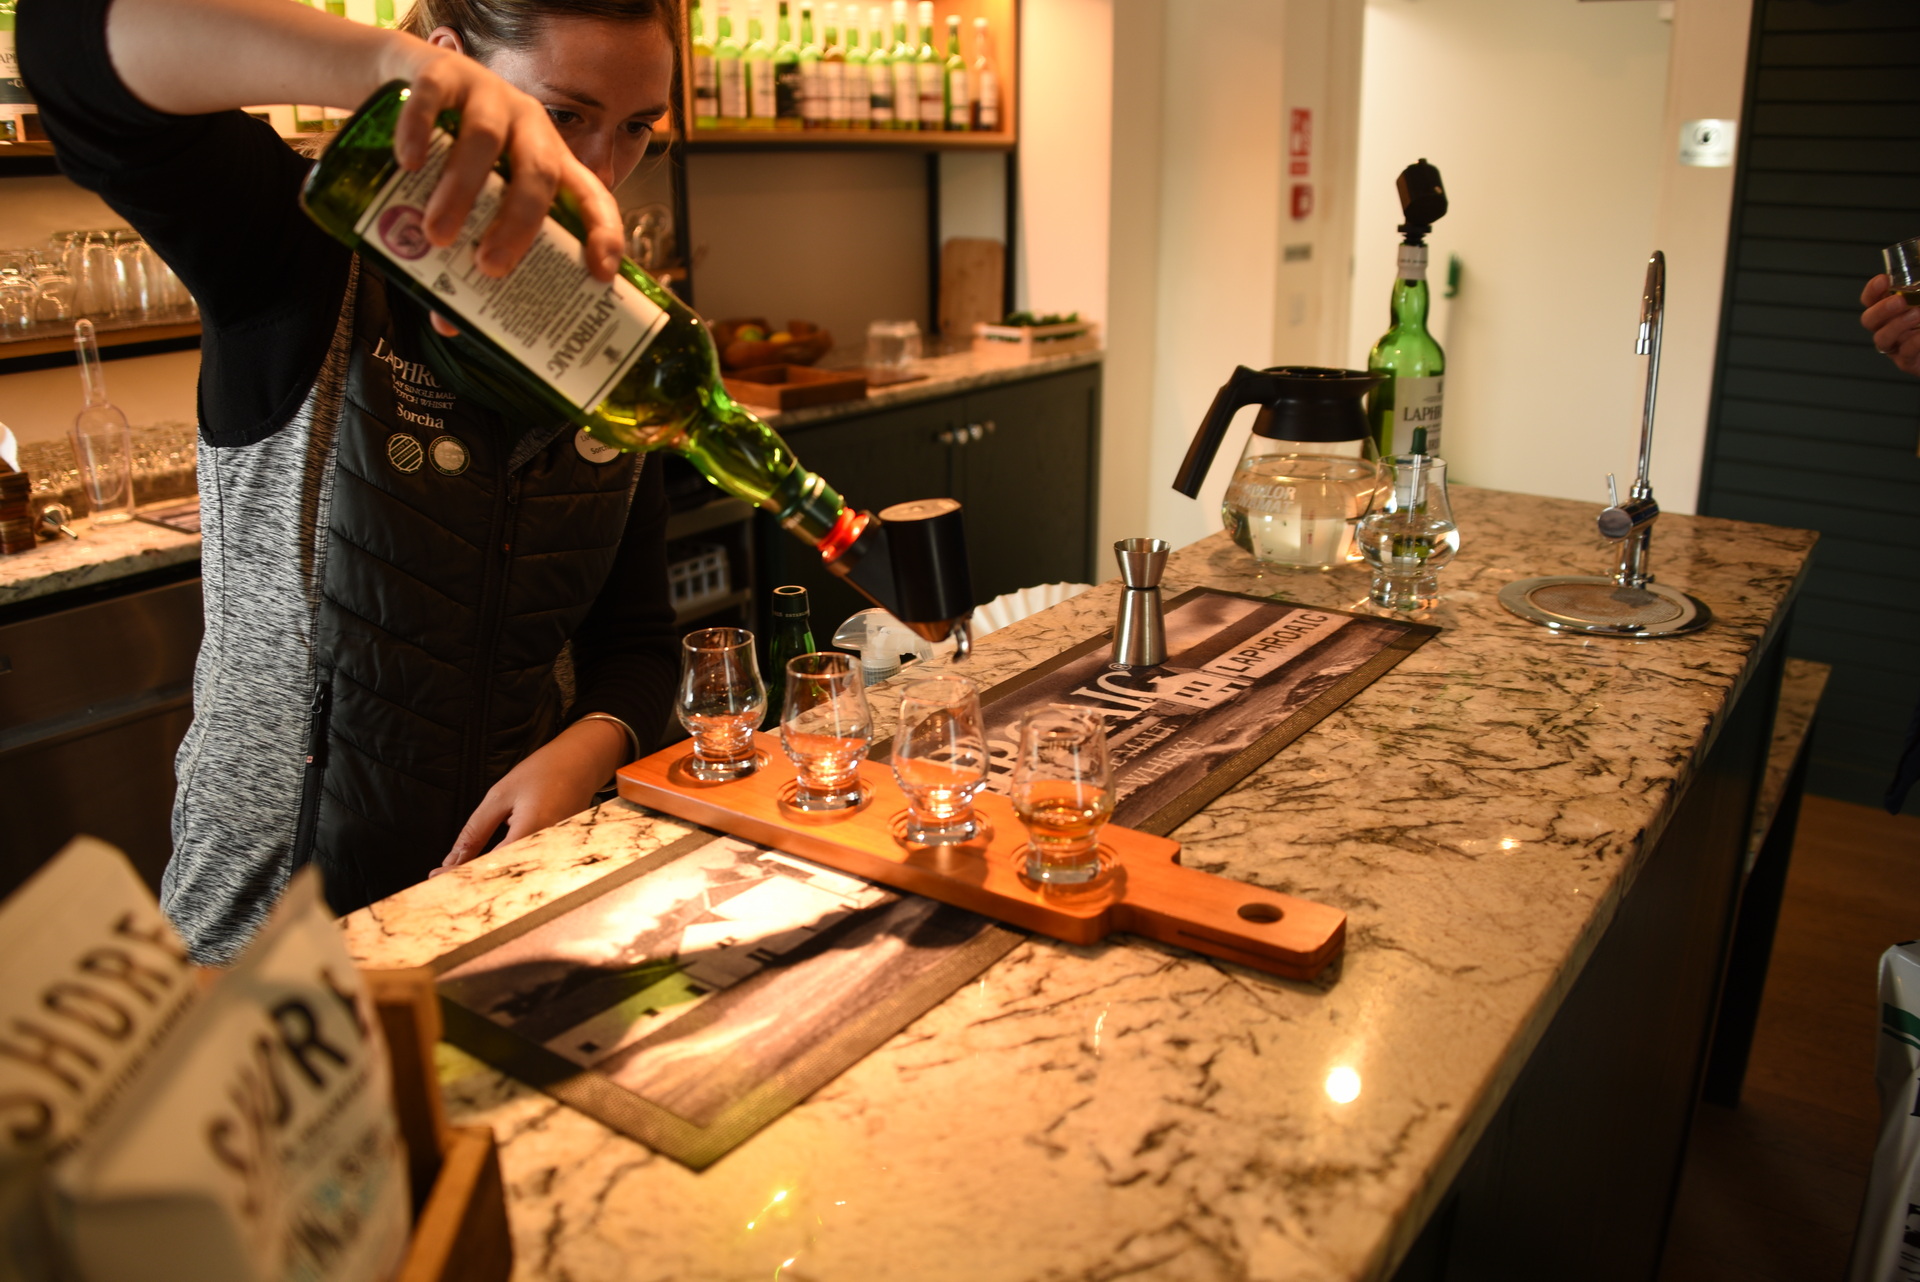
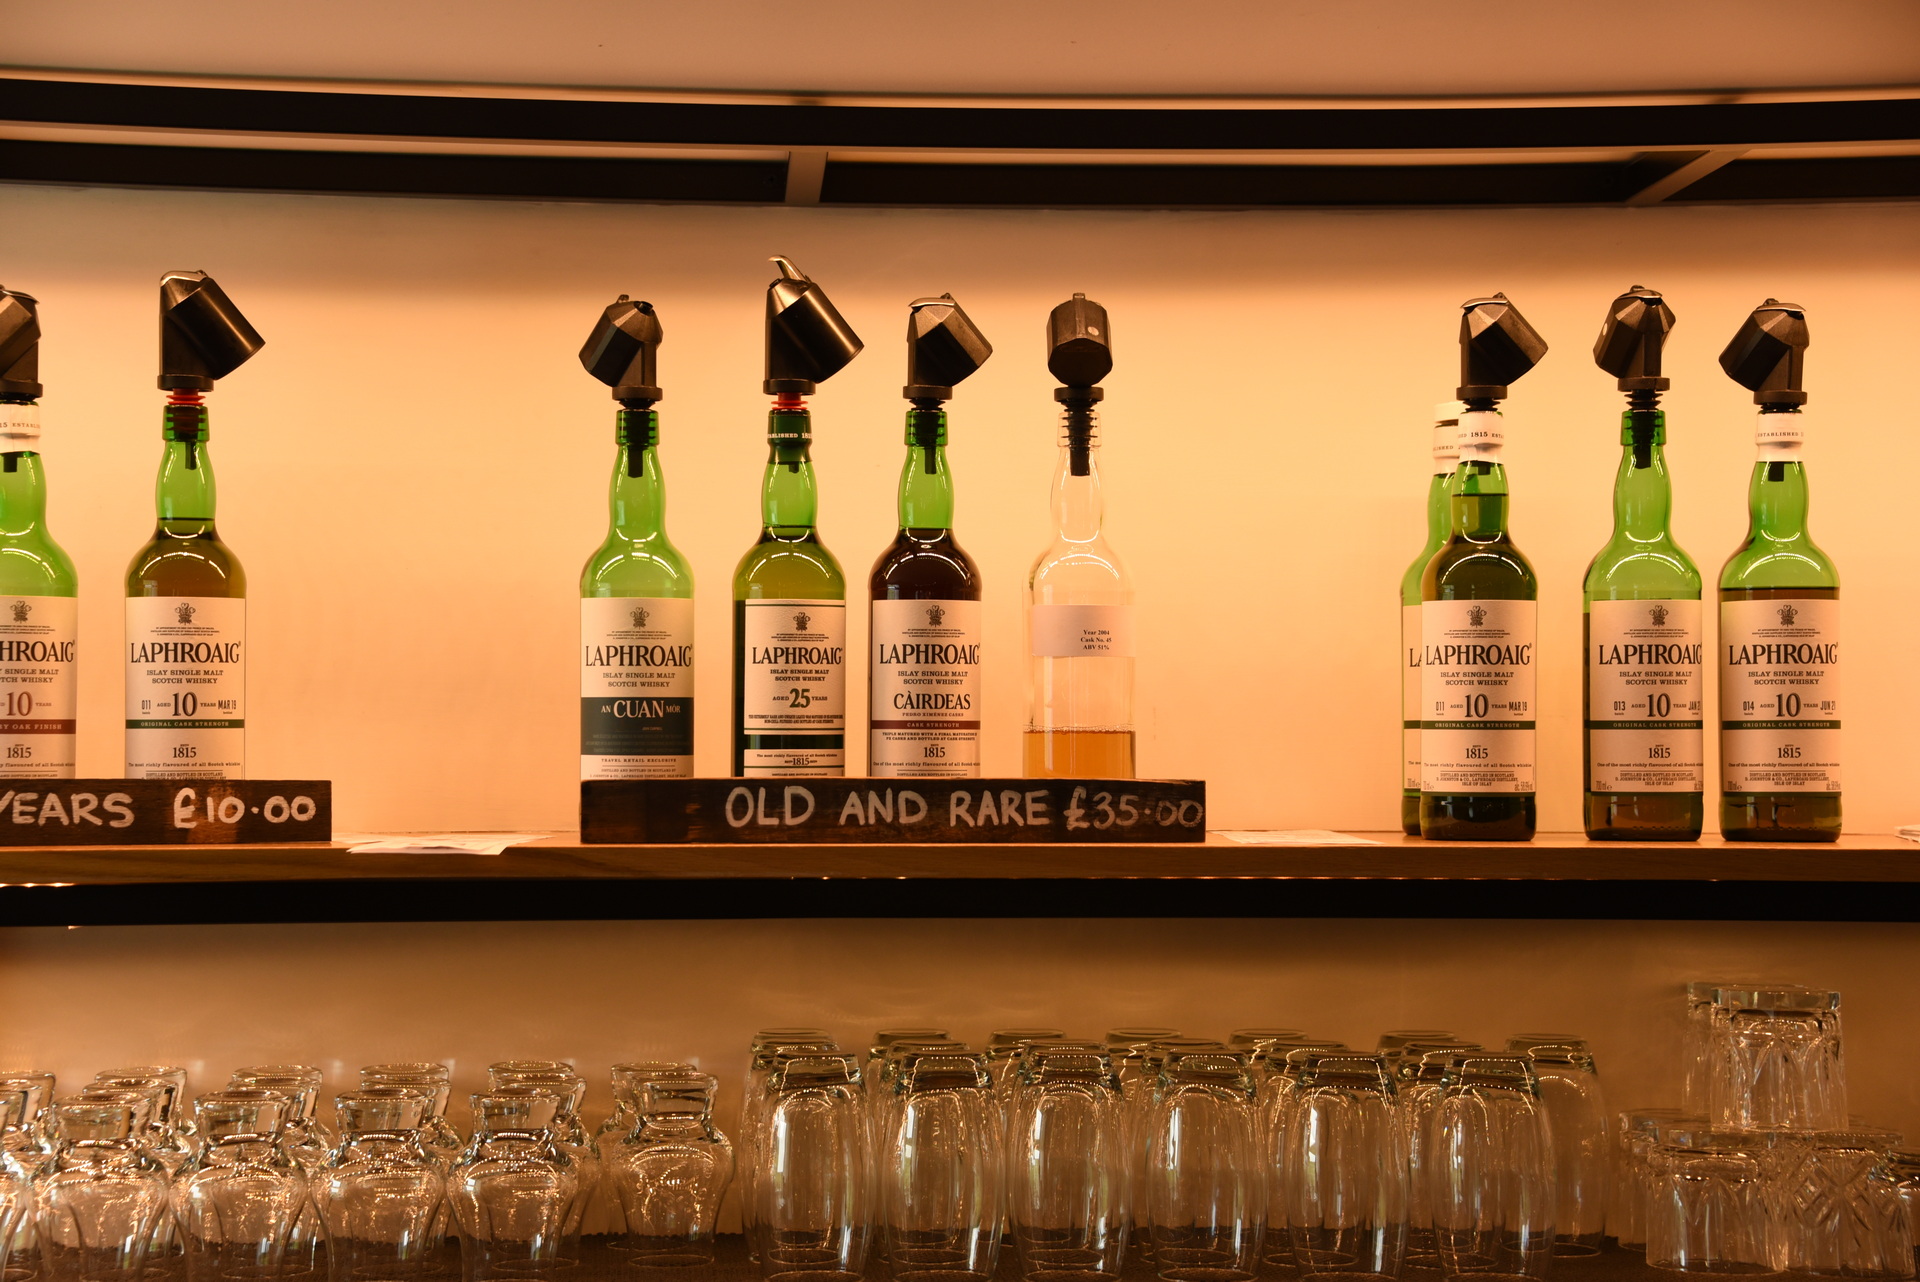
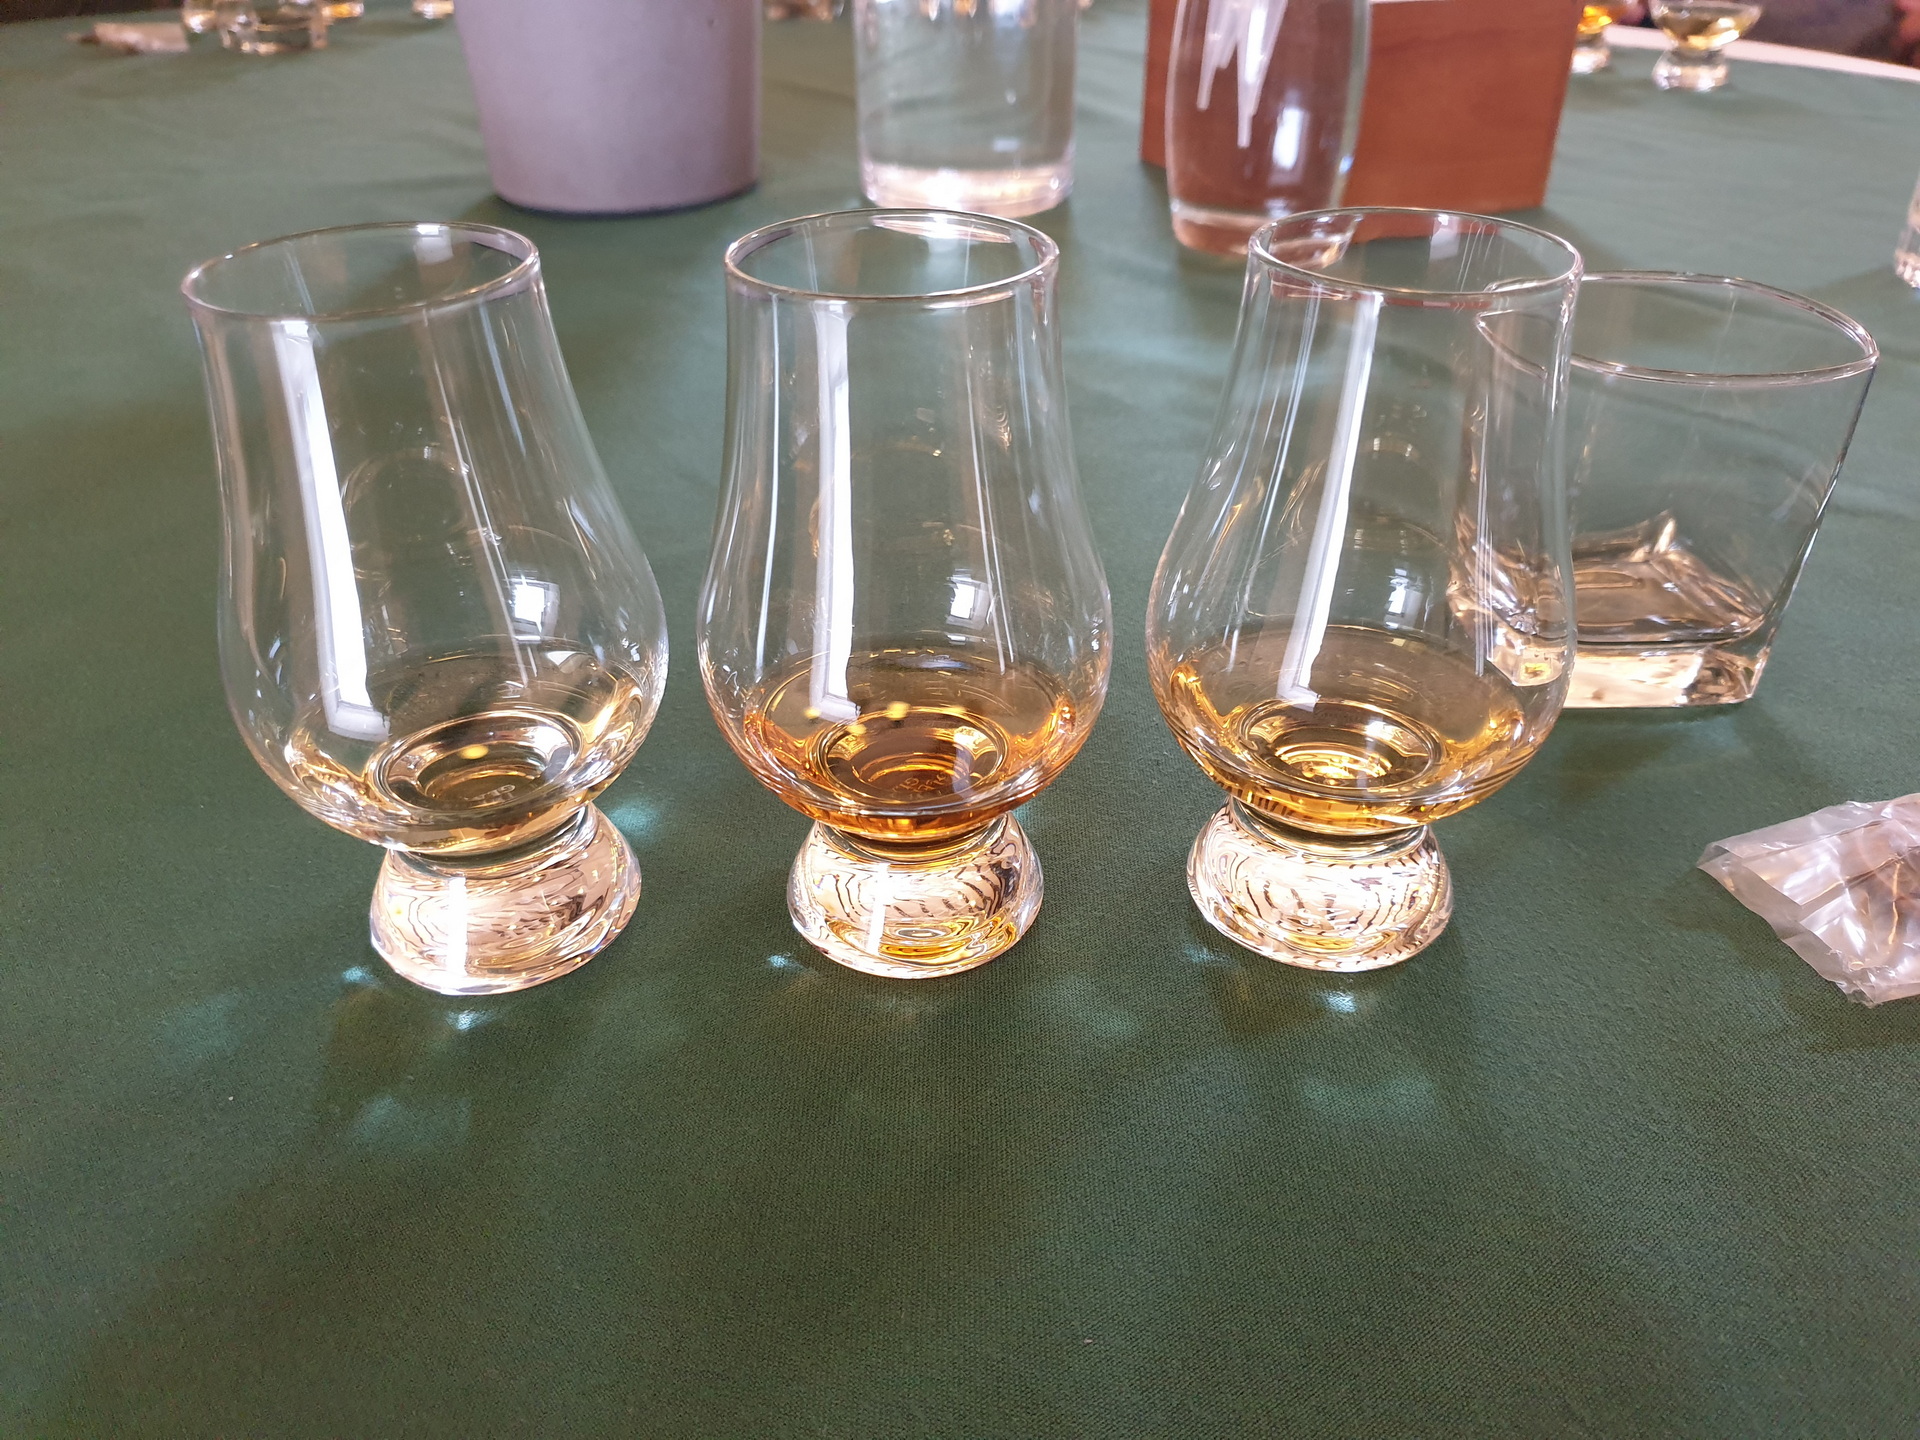
Na een ontbijt van 2 chokolade koekjes en een banaan, de eerste destileerderij Laphroaig bezocht. We zijn door het mini-museumpje gelopen met hierin een aantal informatieborden met hierop de geschiedenis van de distilleerderij. Vervolgens hebben we een taster genomen met 4 whisky’s. We hebben een andere taster in driver’s flesjes meegenomen, en de complimentary drink uit de festival fles. Hier een boek over distillers gekocht.
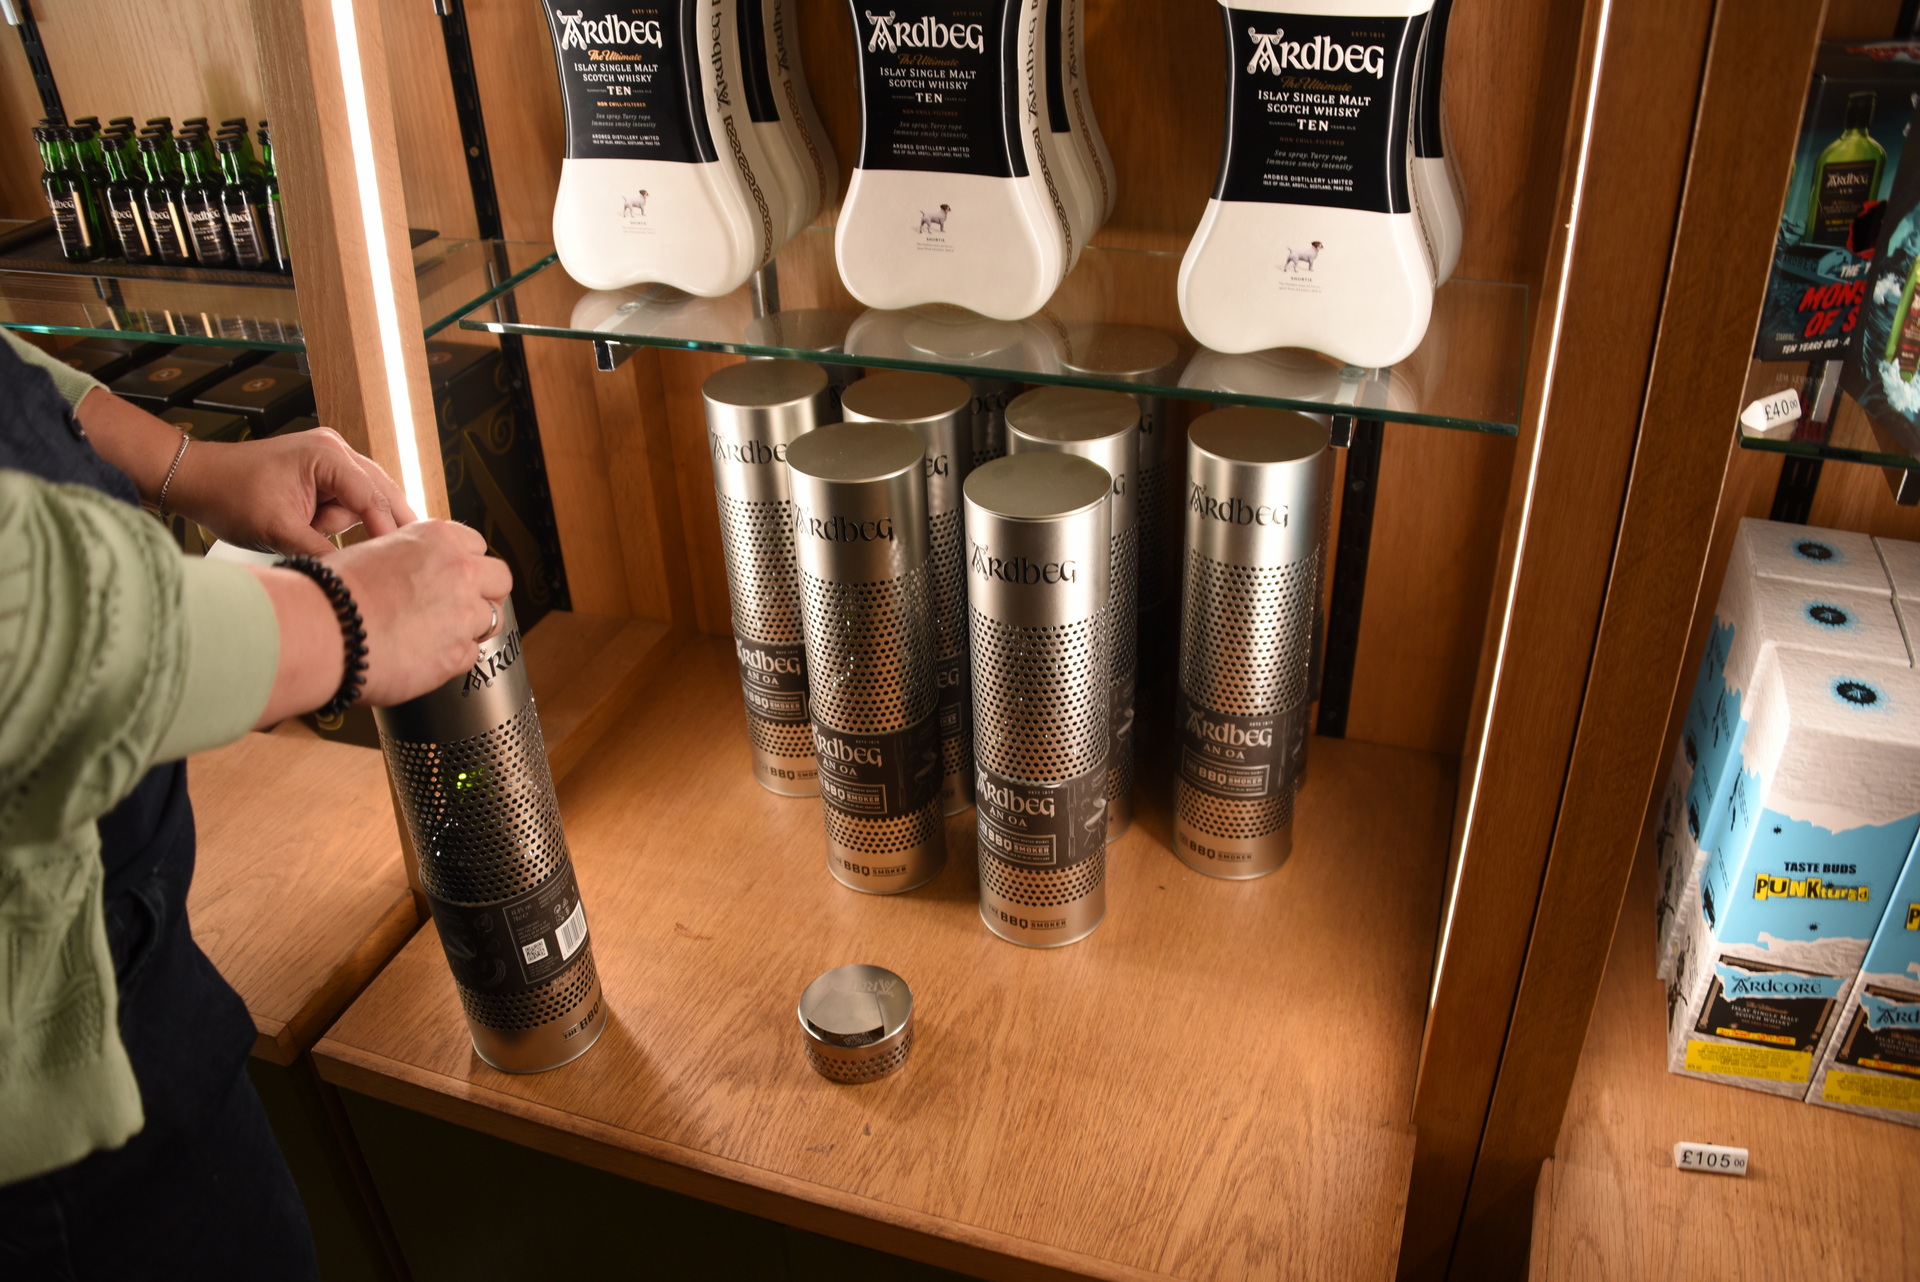
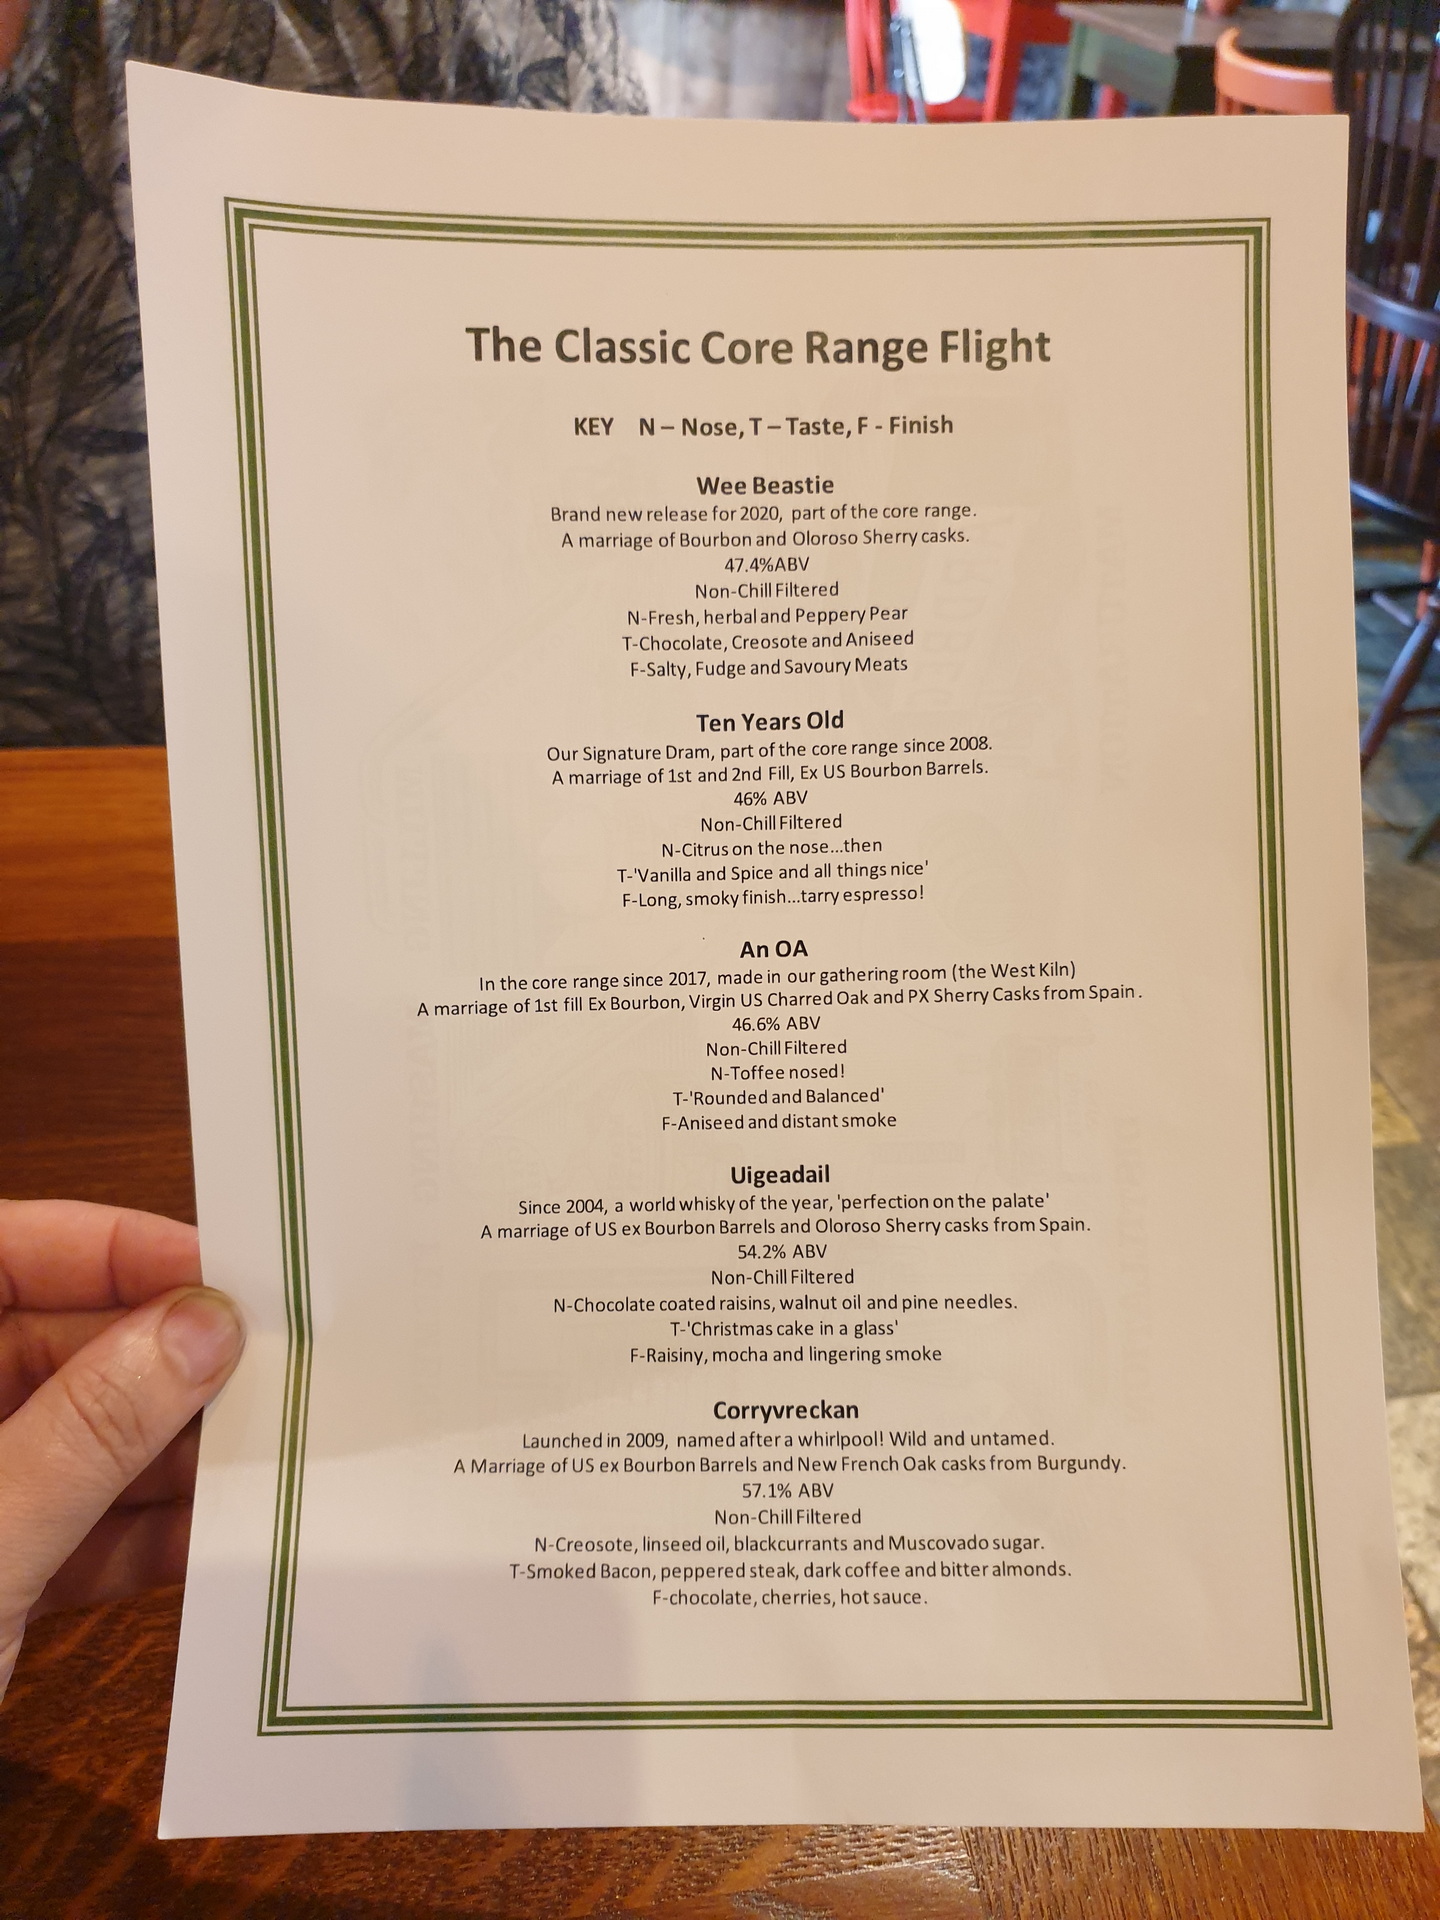
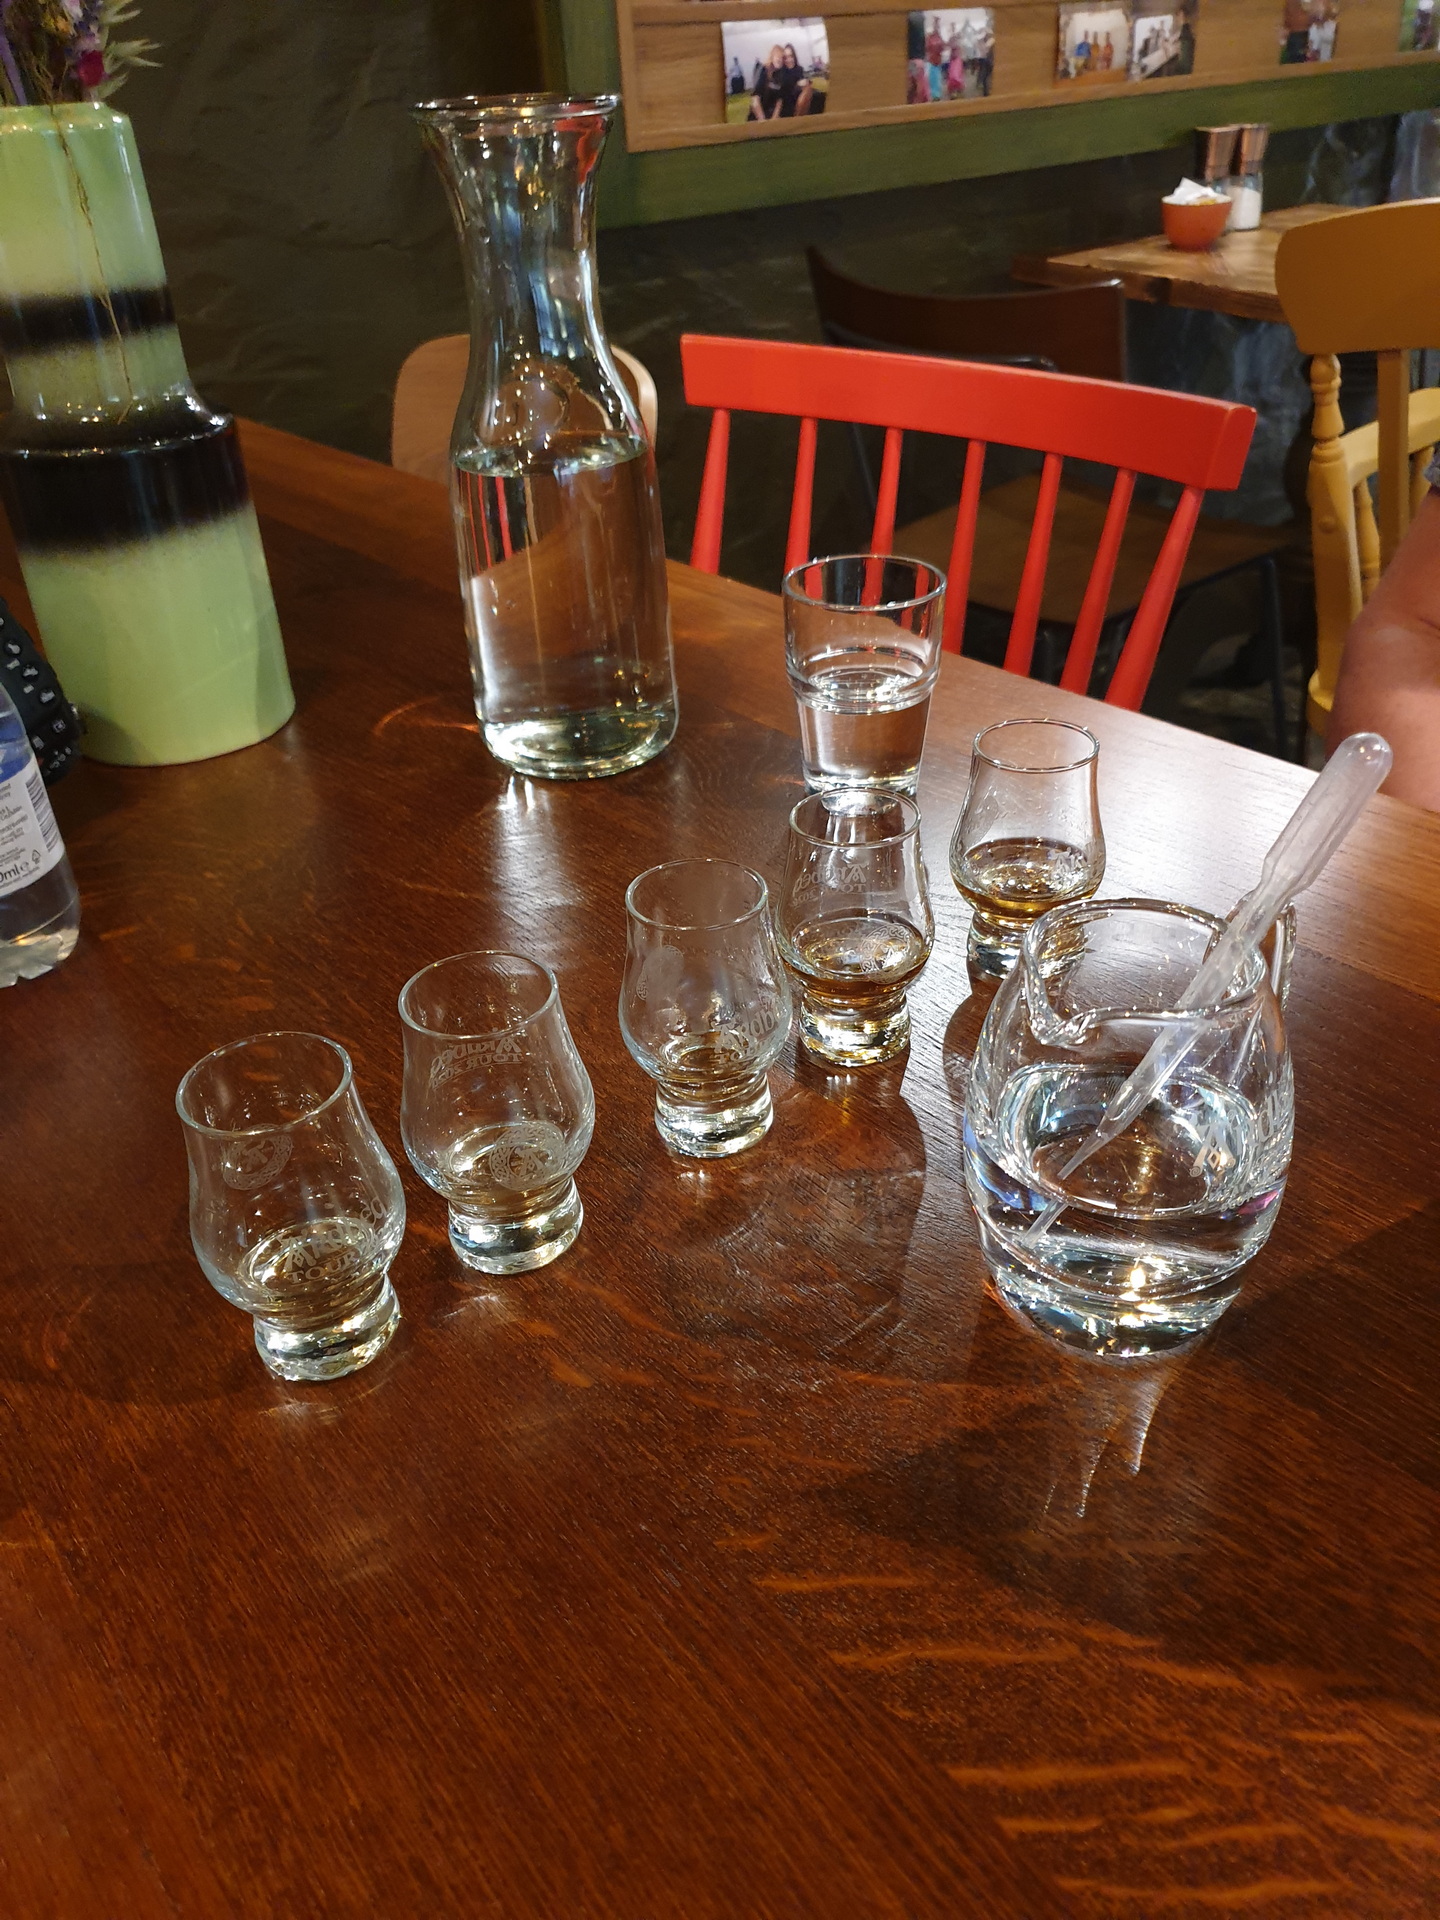
Rond 13en kwamen we aan bij de Ardbeg destileerderij, 7km verderop. Ook hier zijn we eerst door het shopje gelopen. We hebben hier een CD en tunebook van Fraser Shaw gekocht. Vervolgens hebben we een broodje gehaald bij de foodtruck die buiten stond, en hebben we deze buiten opgegeten (gelukkig was het nog steeds droog). Ook hier hebben we weer een taster genomen van 5 whisky’s.
BBQ Smoker kokerSláinte !
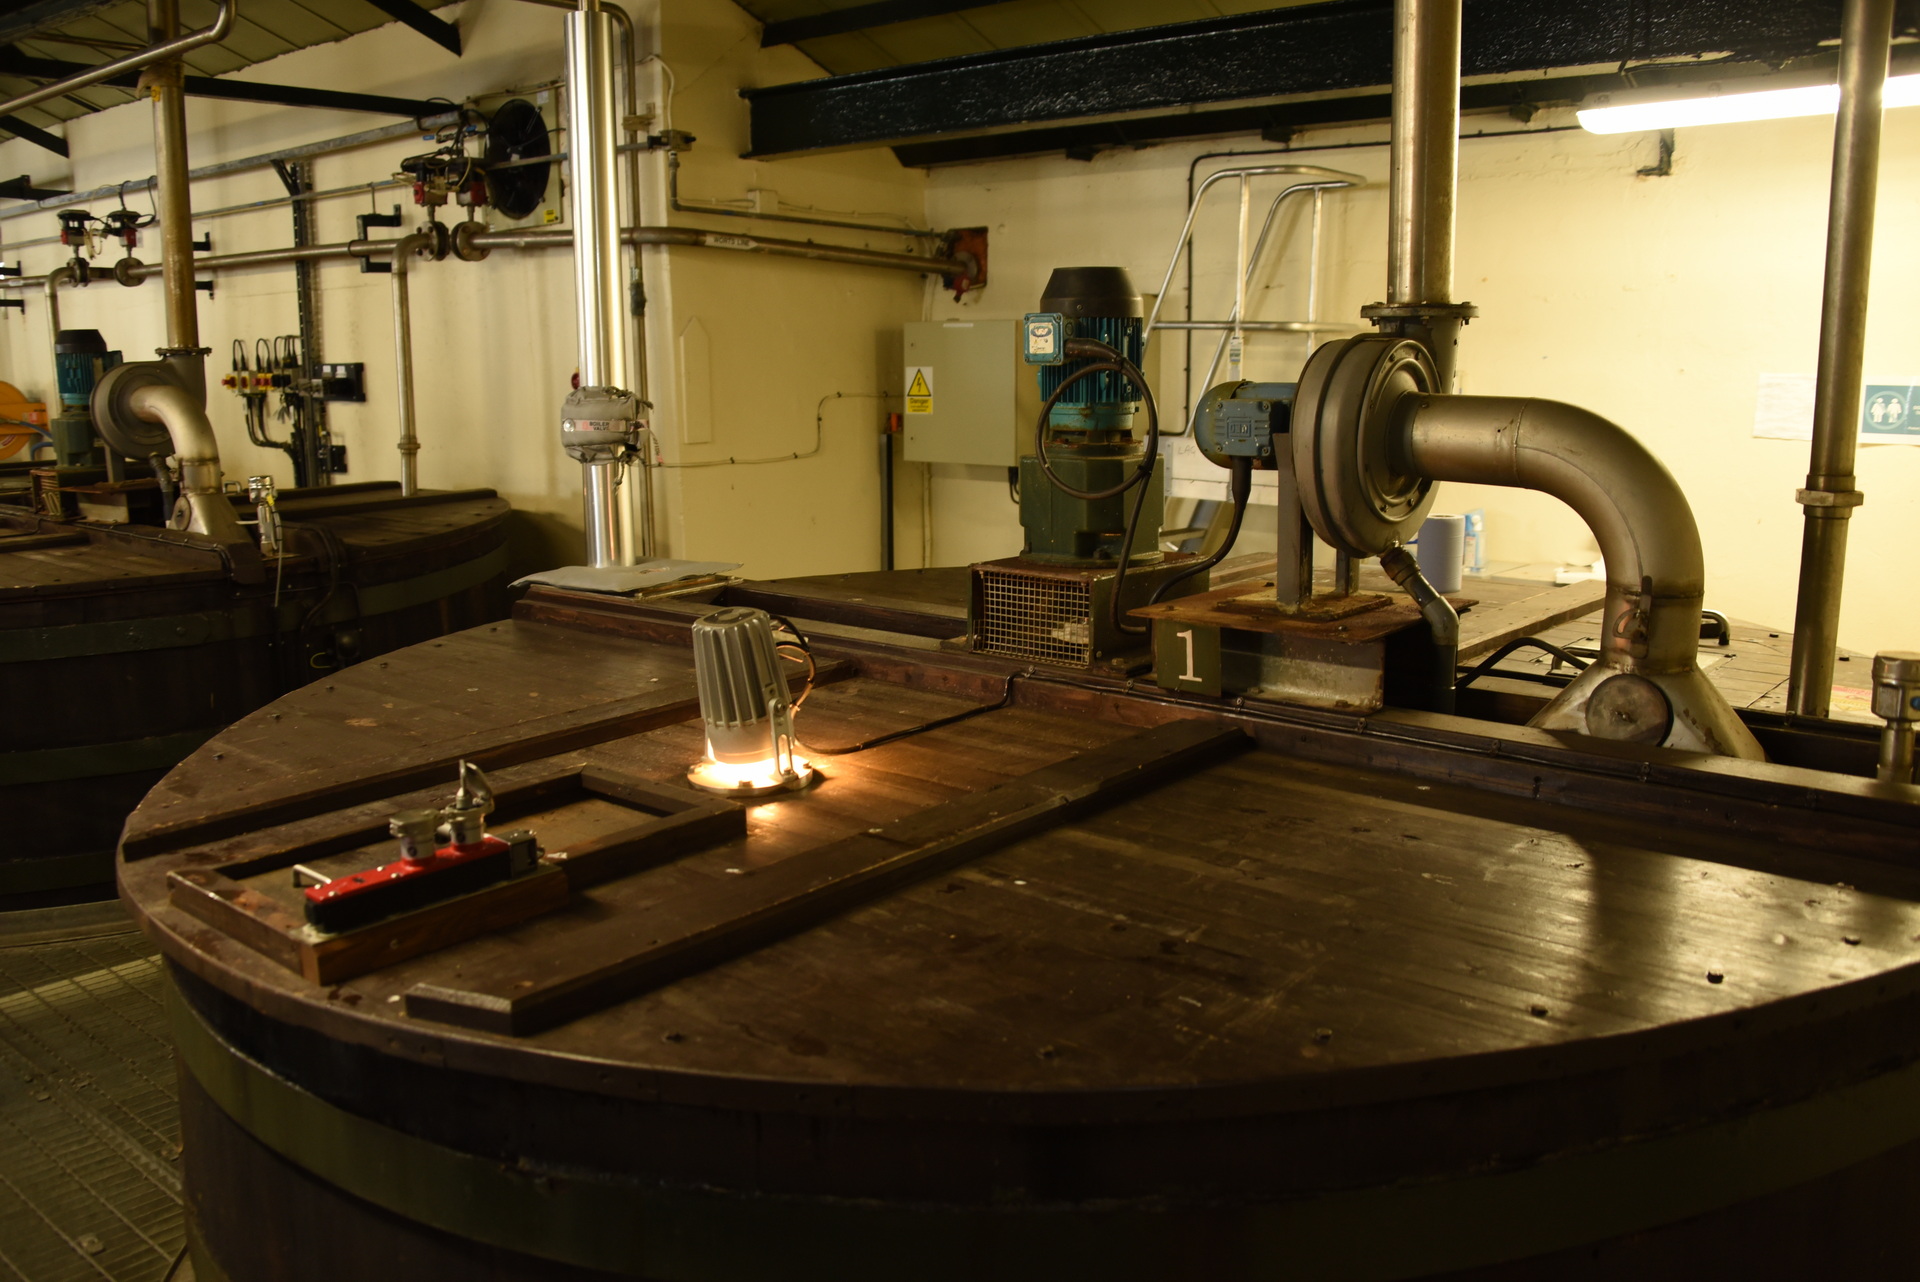
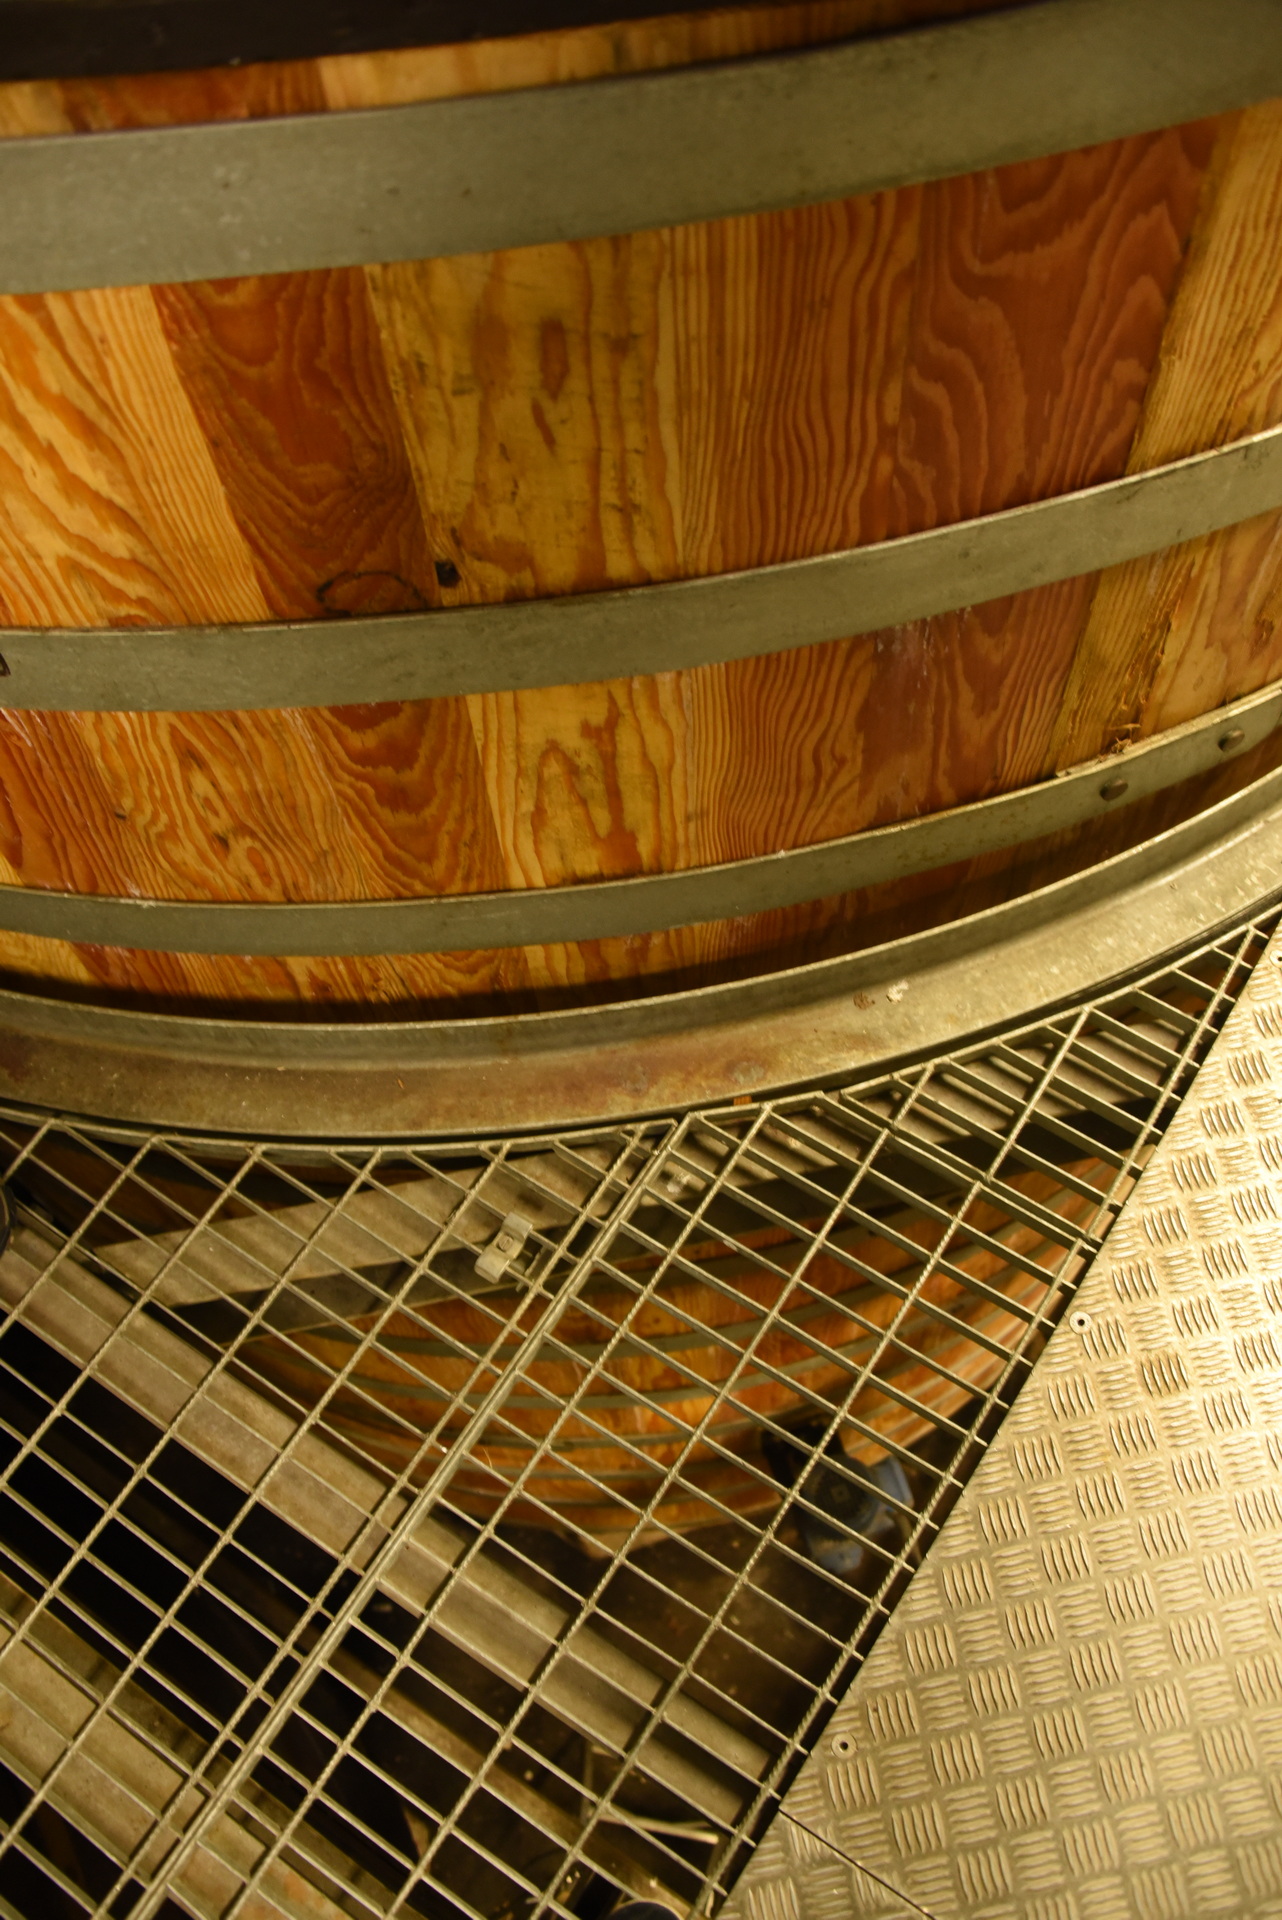
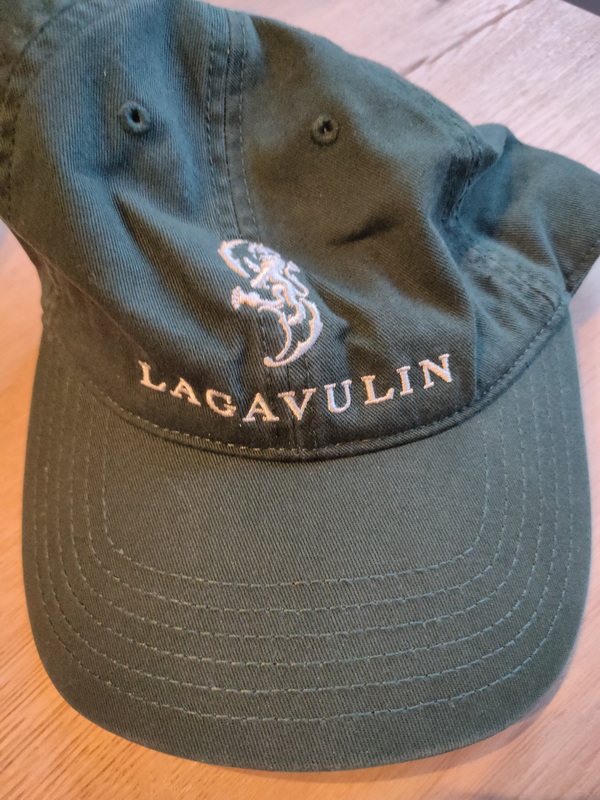
Daarna zijn we weer 1.5km terug gereden naar de Lagavulin destileerderij. Nadat we weer even in de souveniershop hadden rondgekeken (een Lagavulin petje gekocht) meldde we ons voor de rondleiding. Om 15.30 ging de rondleiding van start een heeft Beth ons een uurtje door de distillery heengeleidt. De rondleiding eindigde met een tasting met 3 whisky’s: de 8 jaar, de 16 jaar, en de Festival fles van dit jaar. We waren het er over eens dat we deze laatste wel een beetje scherp in smaak vonden. Coline kon haar 3 tasters meenemen in driver’s flesjes (Zij was deze dag de BOB) . Na de rondleiding zijn we nog even naar de resten van Dunyvaig Castle gelopen. Vanaf hier had je namelijk een mooi uitzicht op de Lagavulin distillery, opnieuw met de naam in grote zwarte letters op de witte muur van het warehouse. We hebben de ruine beklommen, waarbij we een groot gat moesten overbruggen.
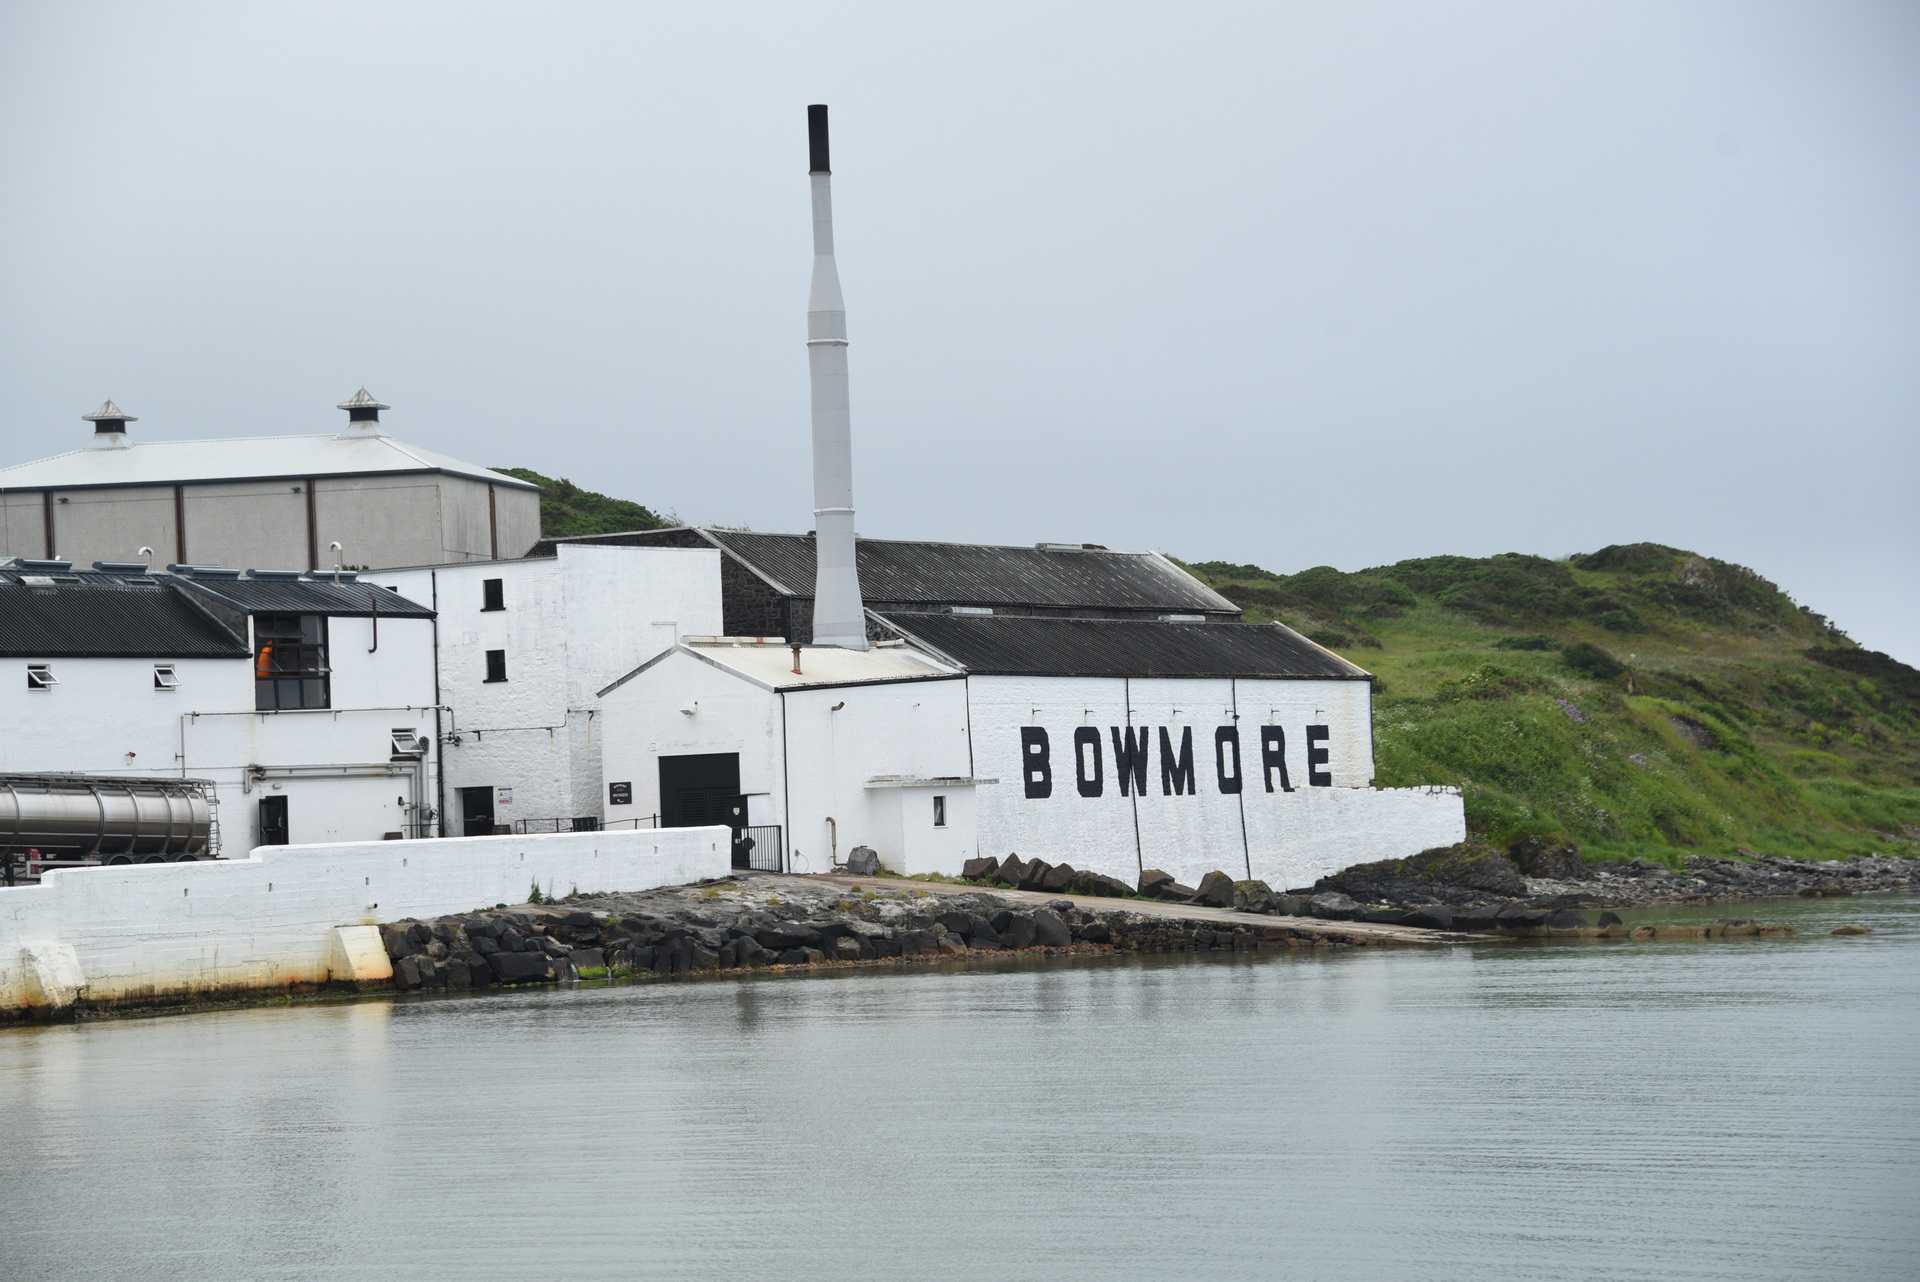
Savonds nog even fotos gemaakt van de Bowmore destileerderij.
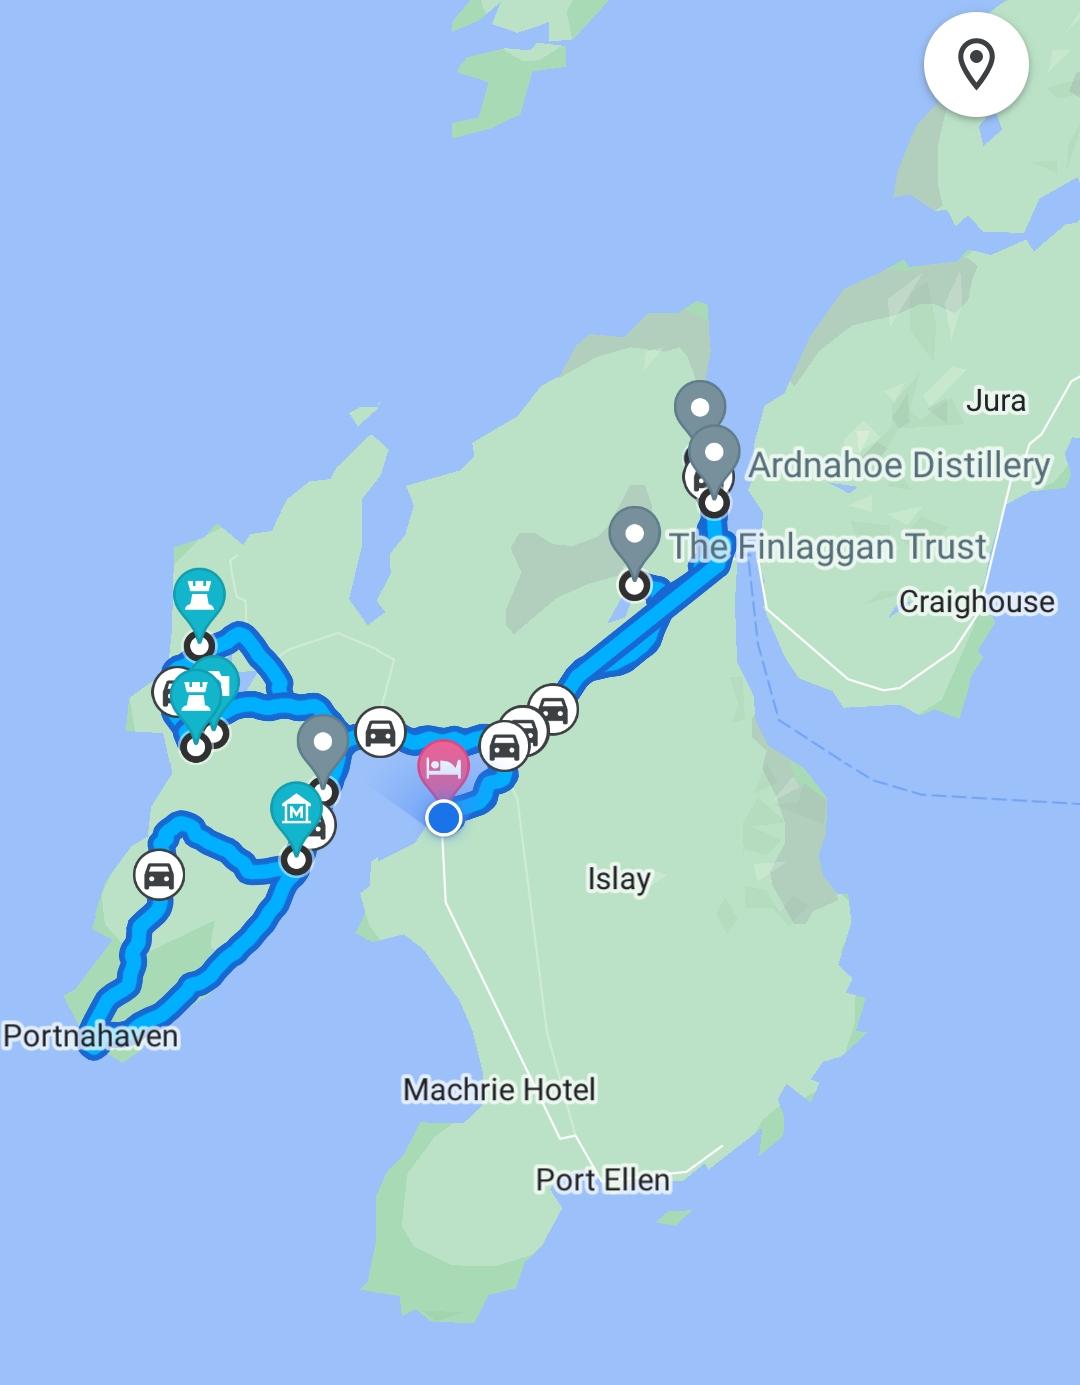
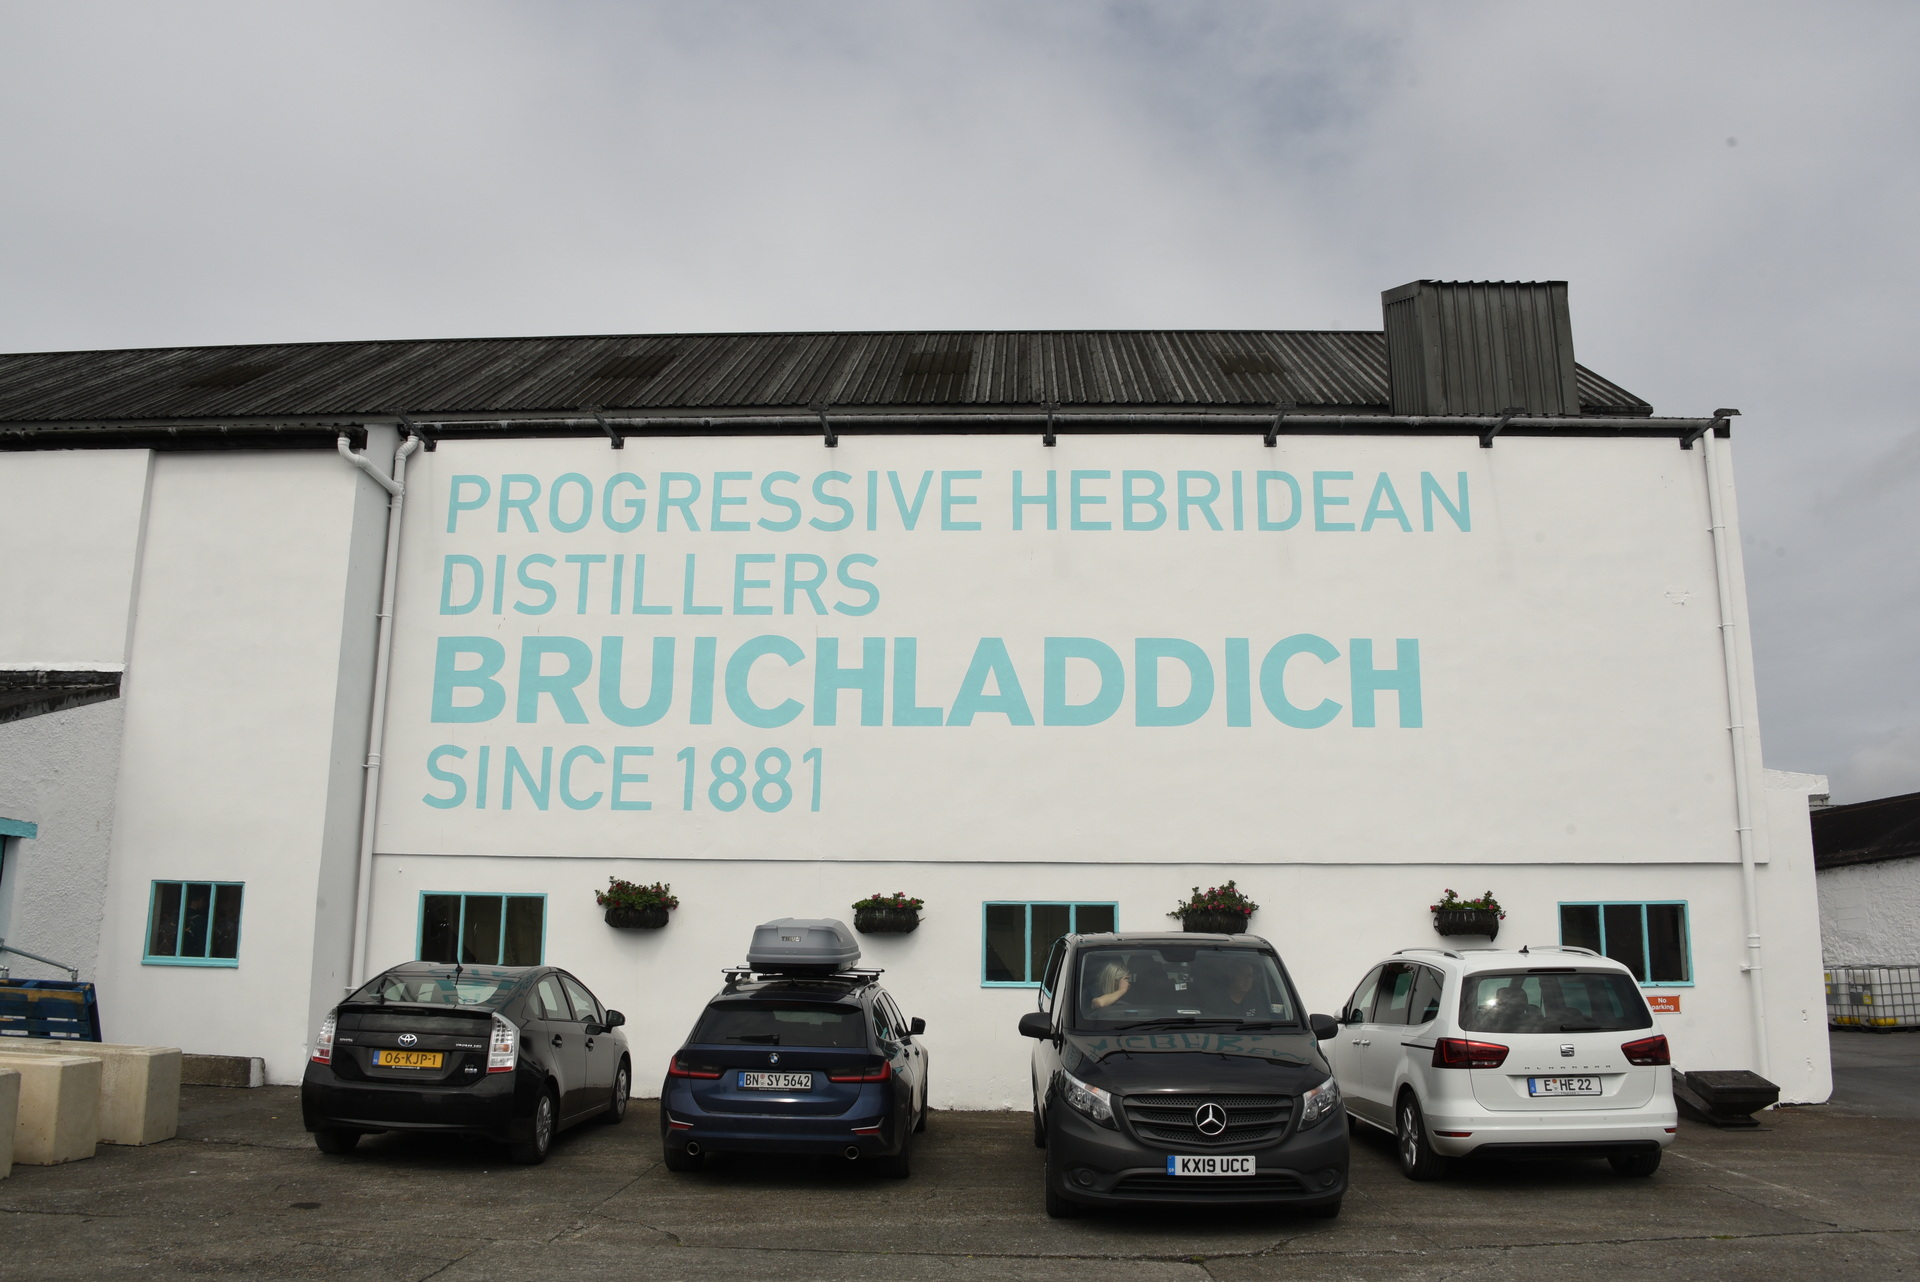
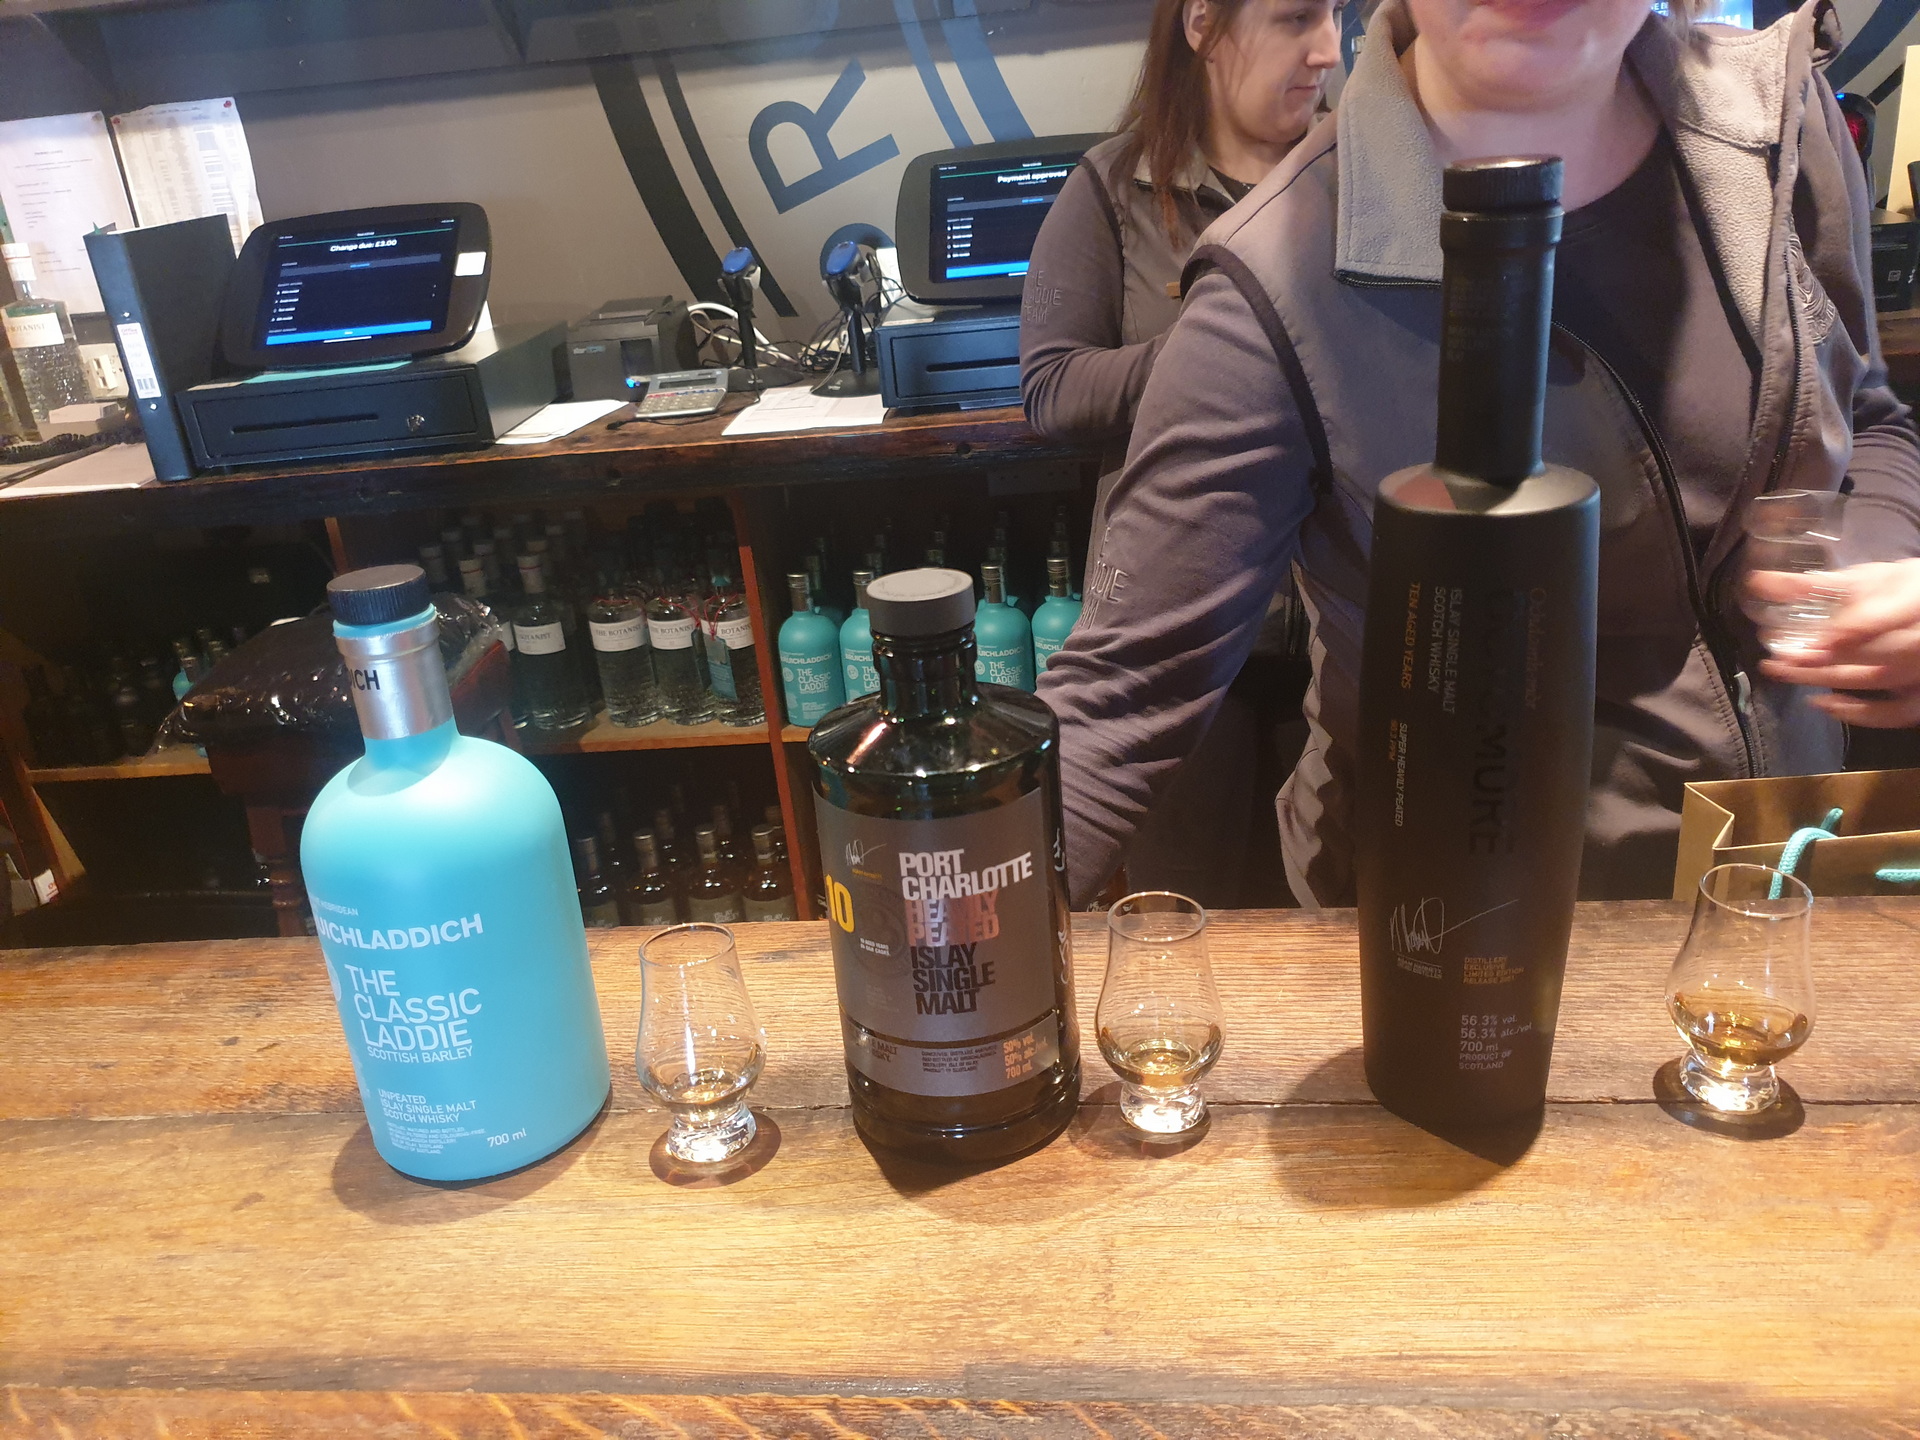
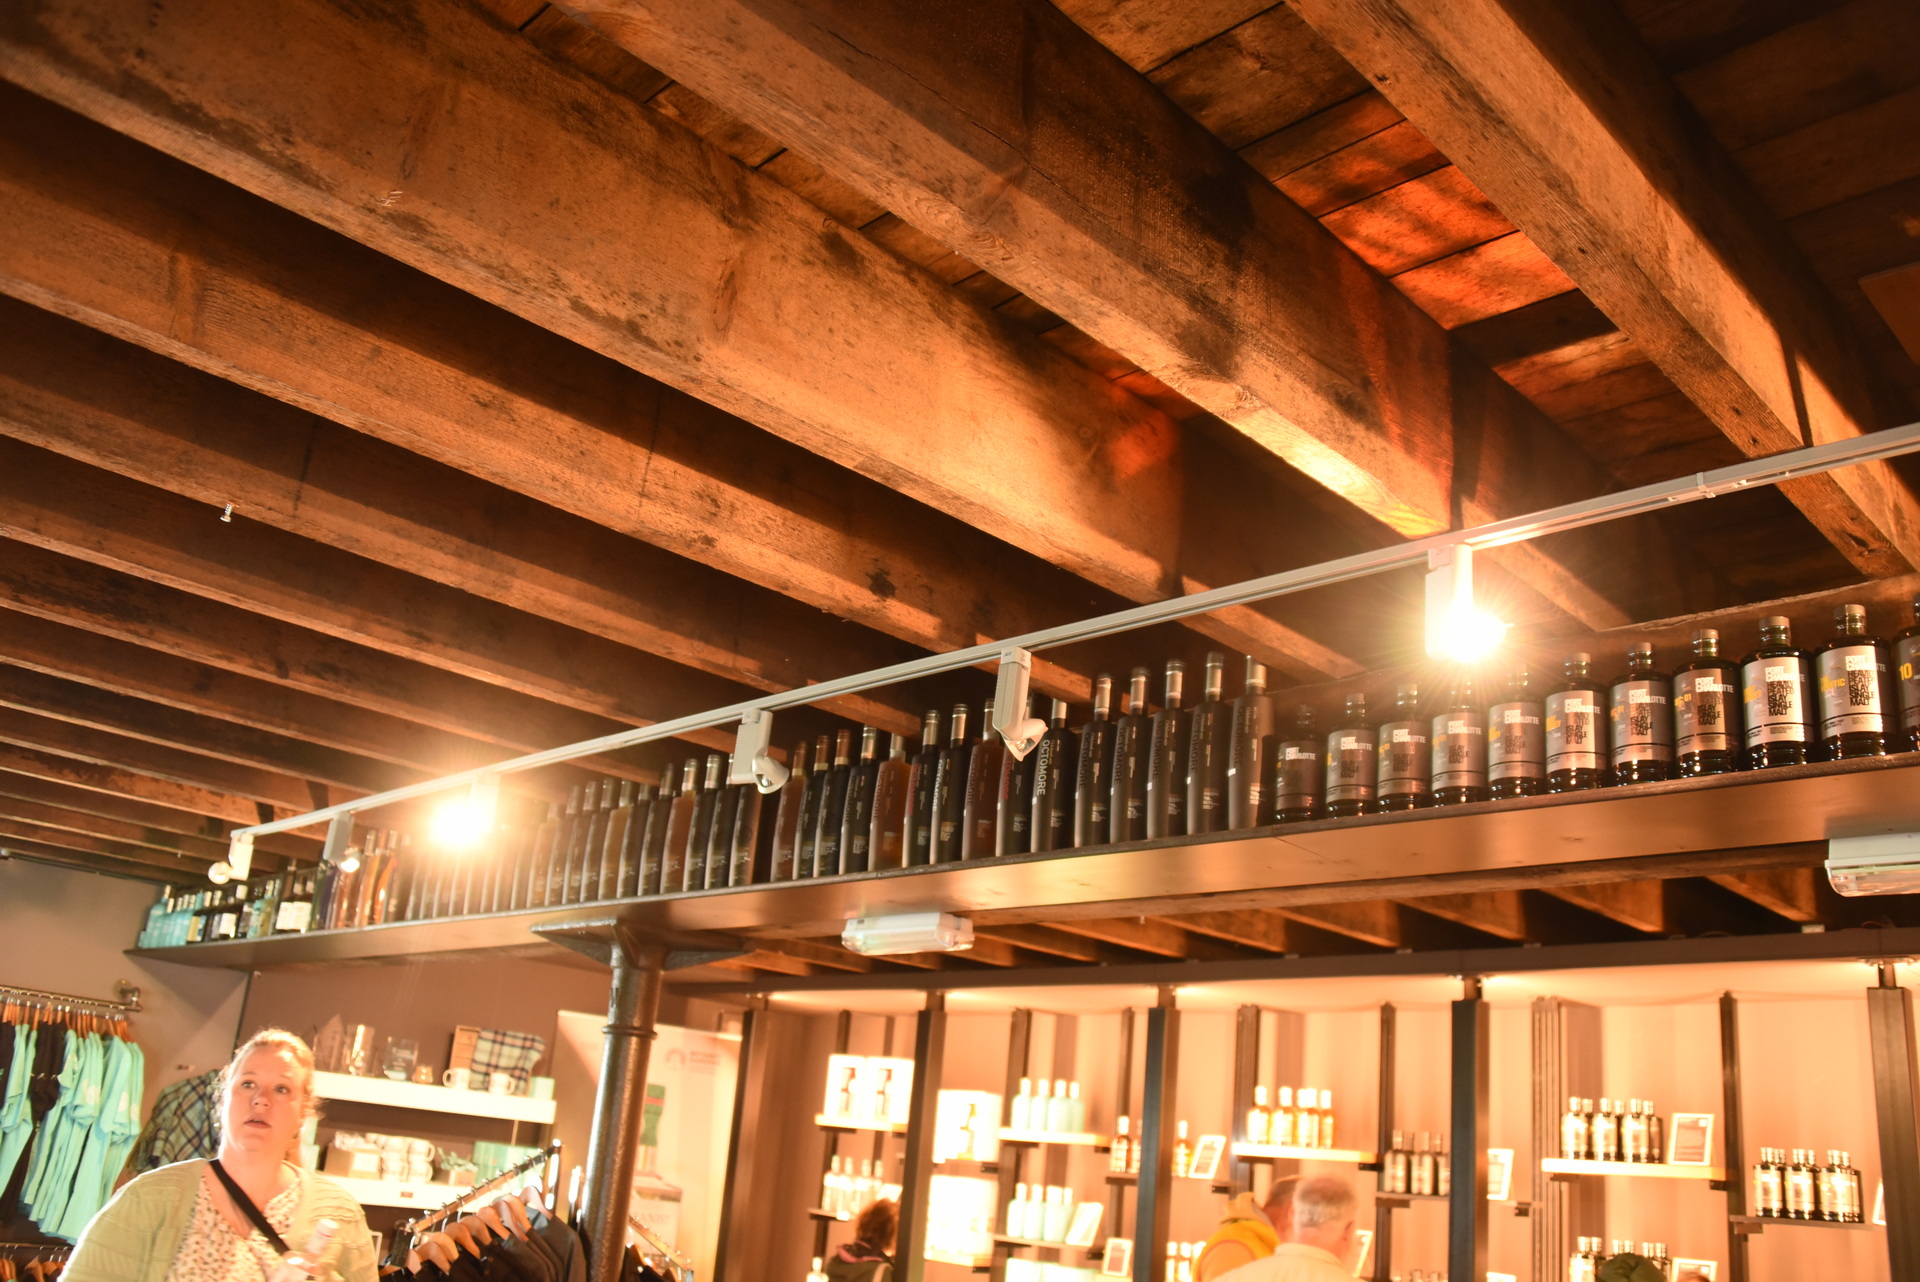
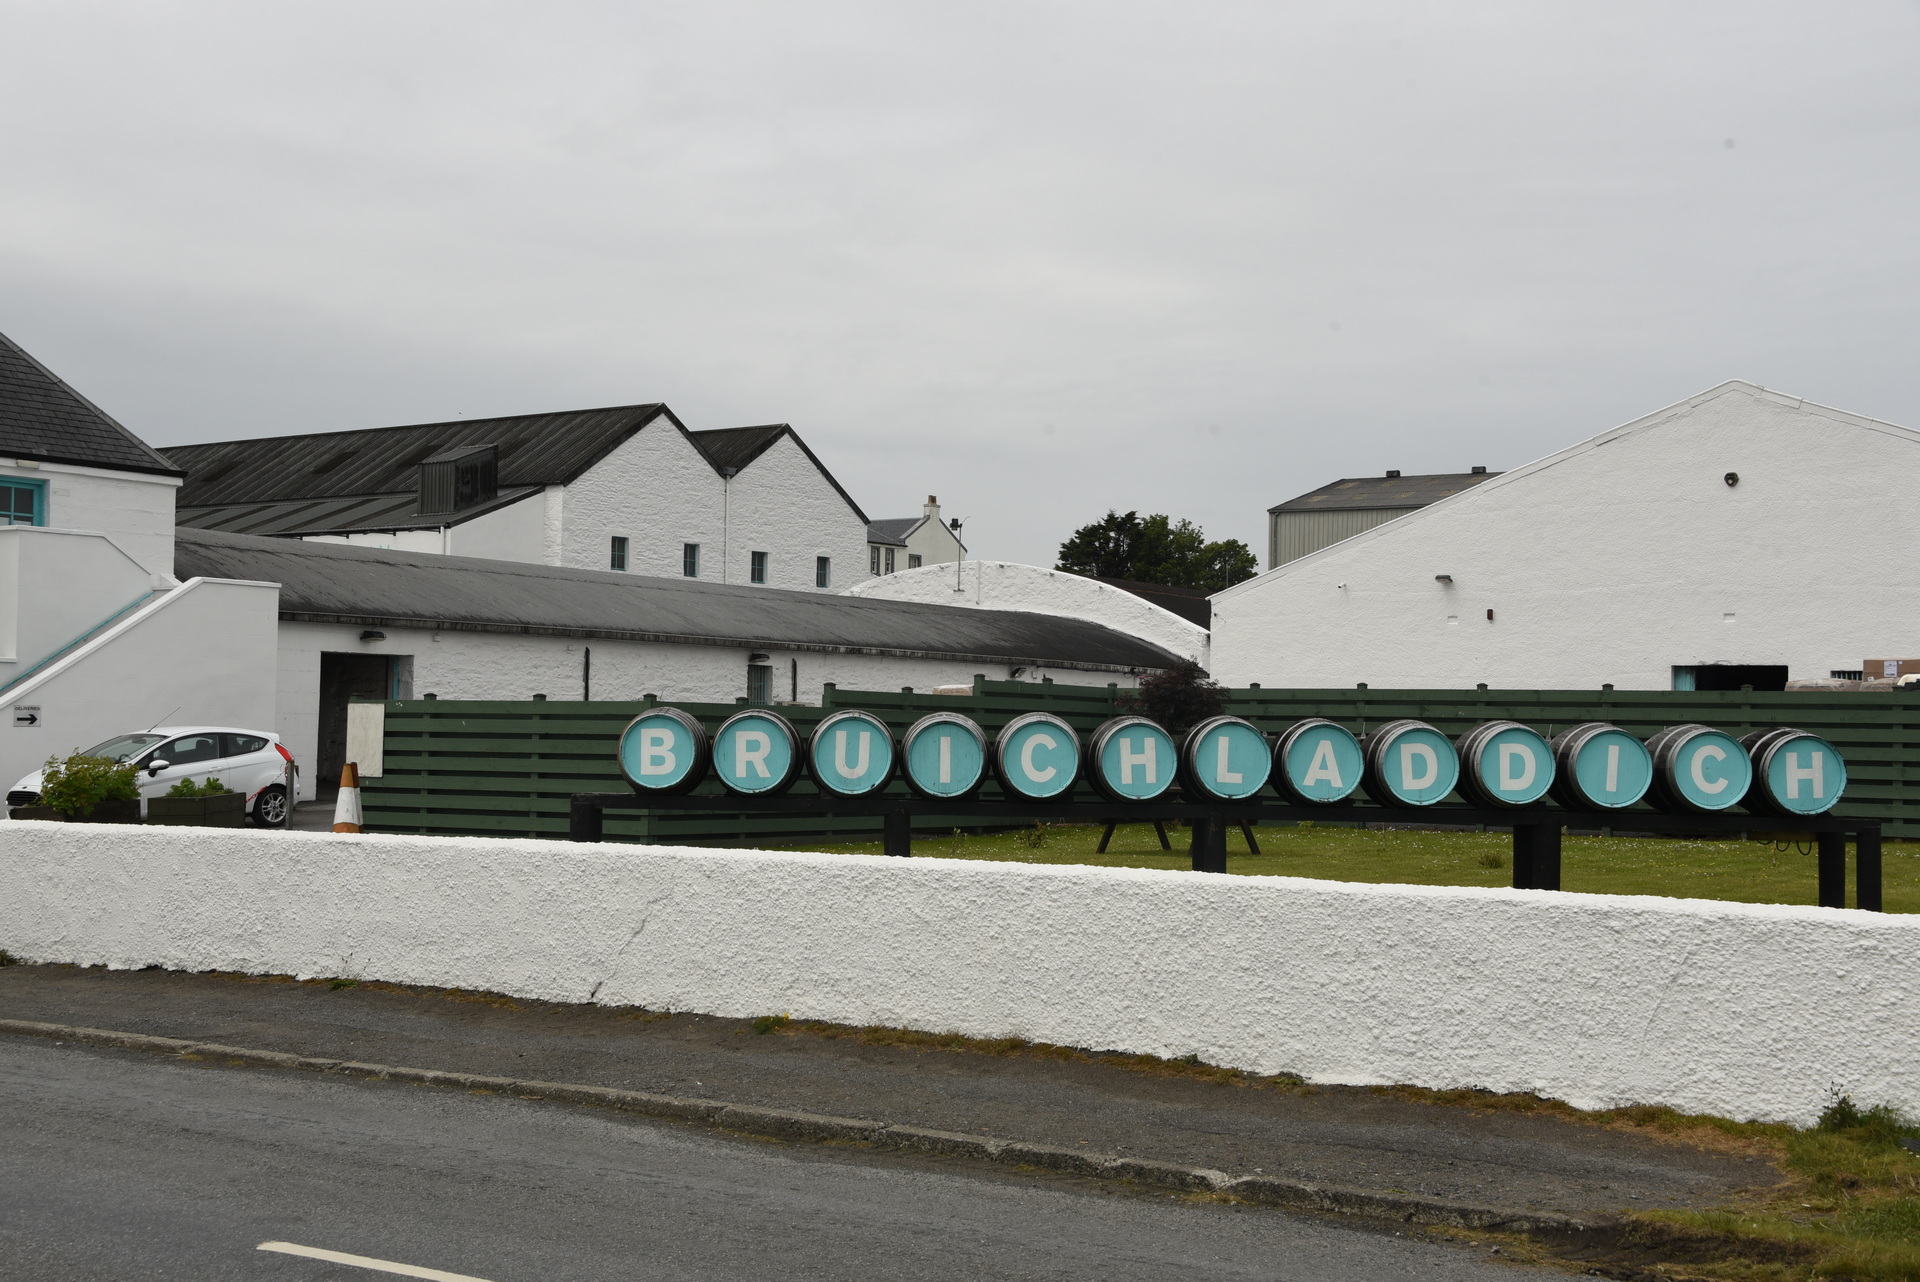
9 Juni – Bruichladdich, Kilchoman, Ardnahoe, Bunnahabhain distillers (Isle of Islay)
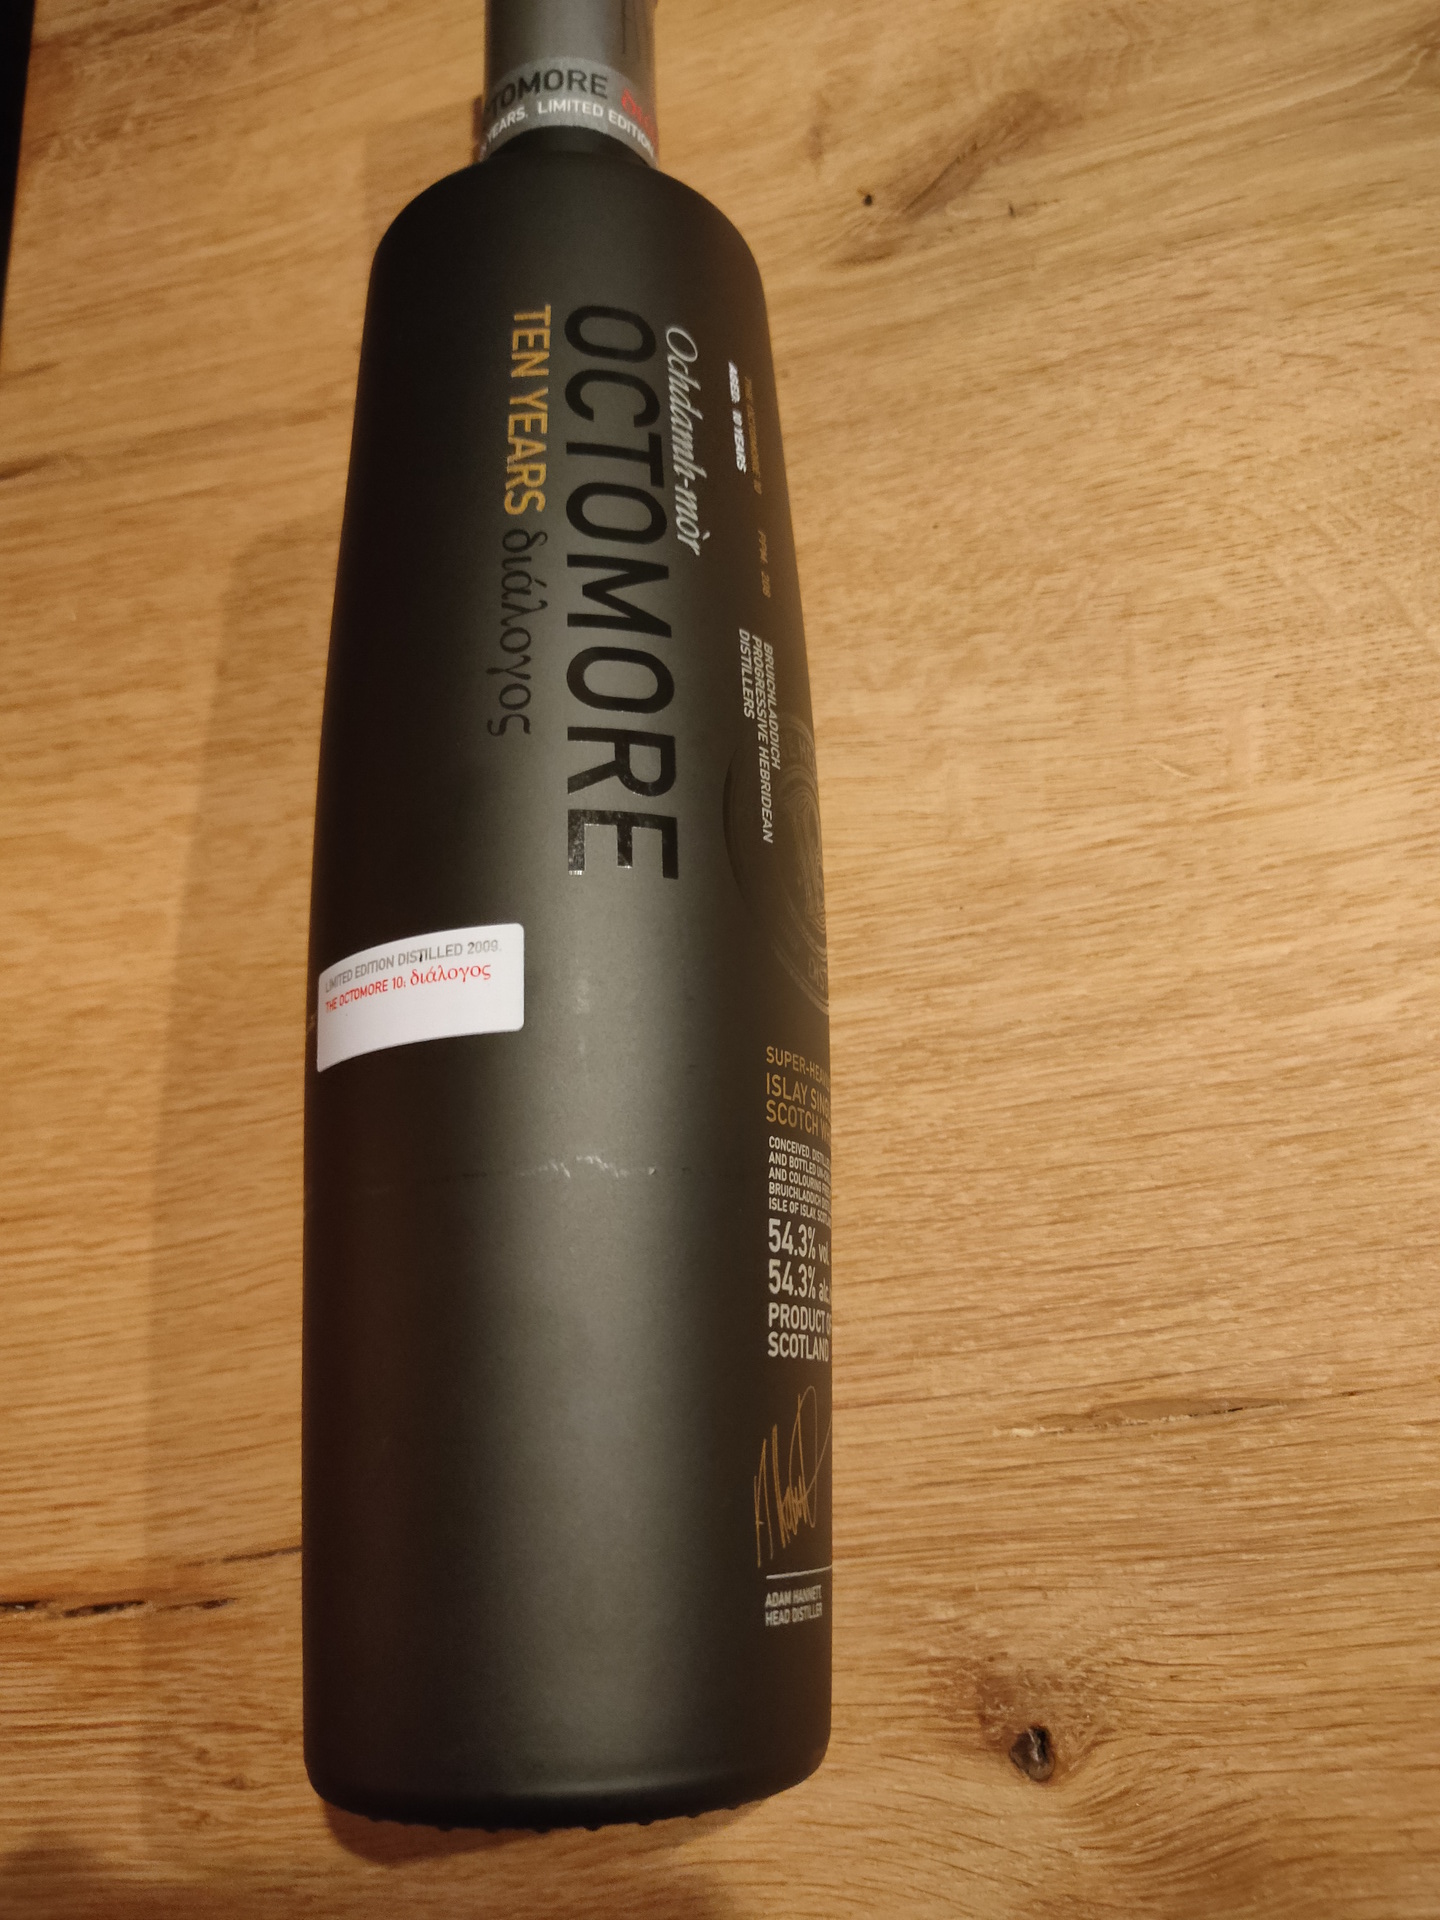
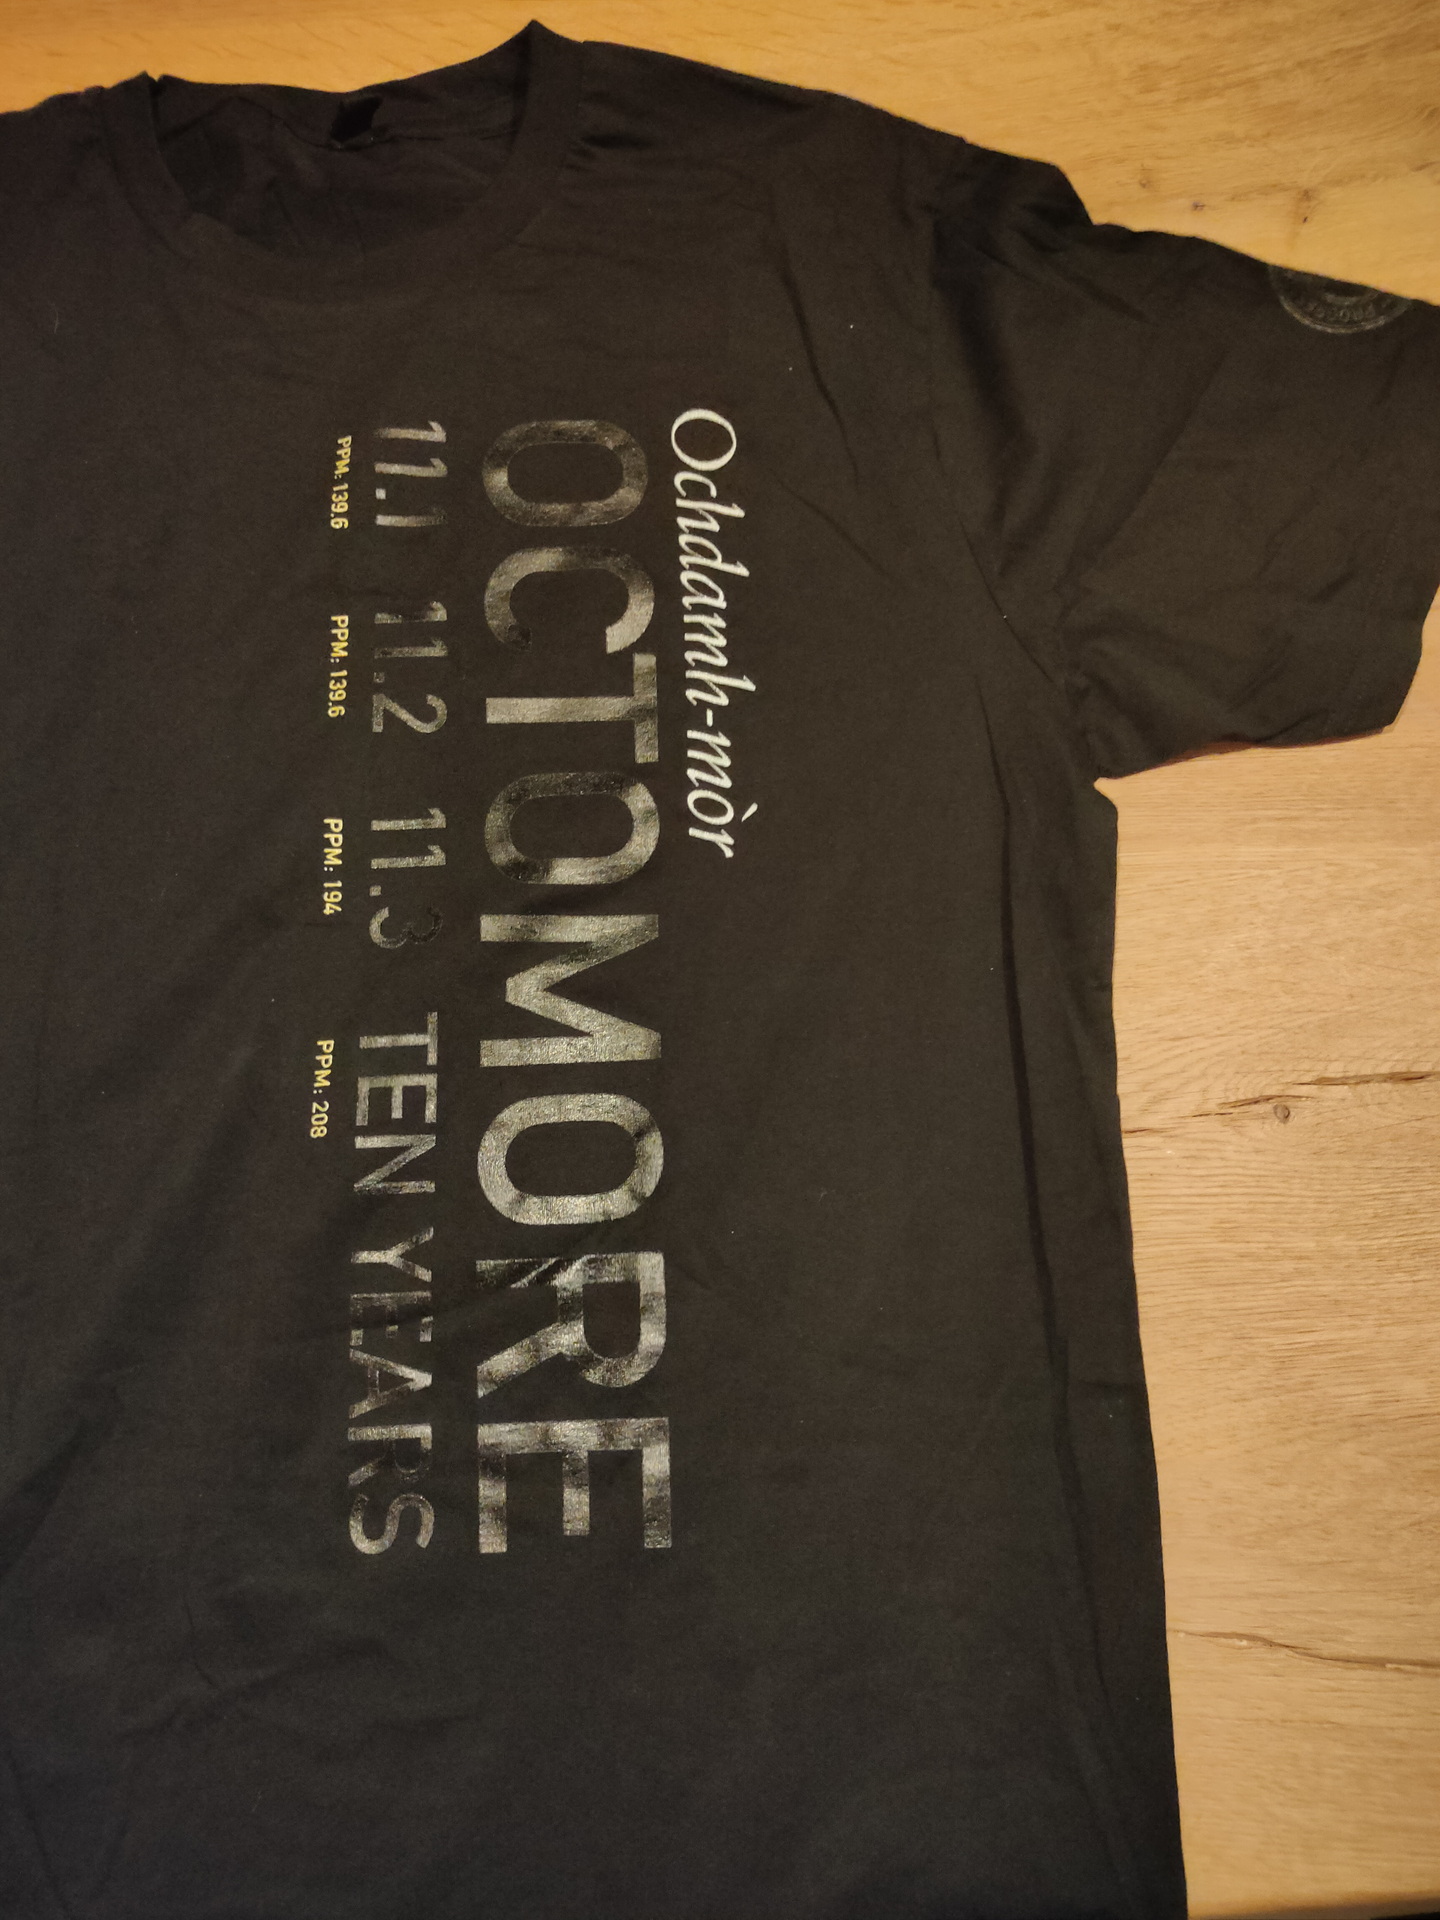
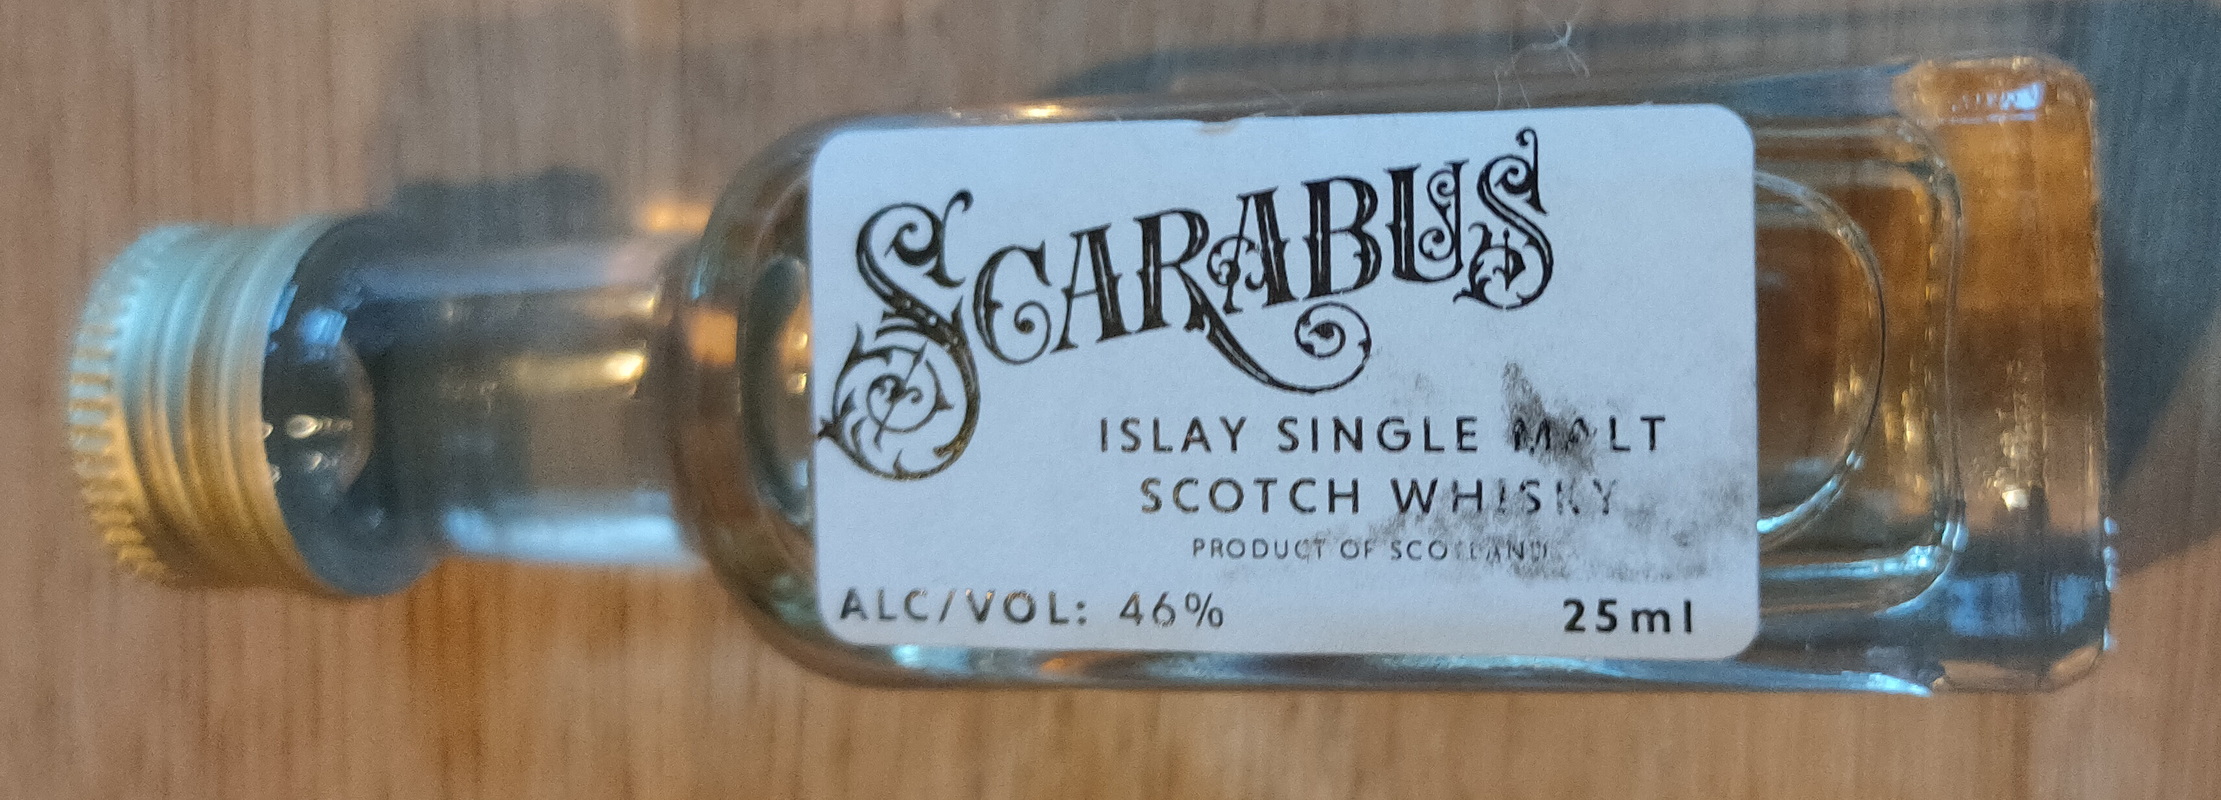
Rond 11en zijn we vervolgens naar de Bruichladdich distillery gereden. Hier hebben we een bezoekje gebracht aan de shop. We hebben een kleine (gratis) tasting gedaan met 3 whisky’s: de bruchladdie, de 10 year Port Charlotte, en de Octomore 5th edition. Het meisje achter de sampling bar was erg enthousiast en vertelde veel. Later hebben we ook nog de botanist gin geproefd. we hebben een fles octomore (208ppm), een flesje Octomore-BBQ saus, een fles botanist gin, en een T-shirt gekocht.
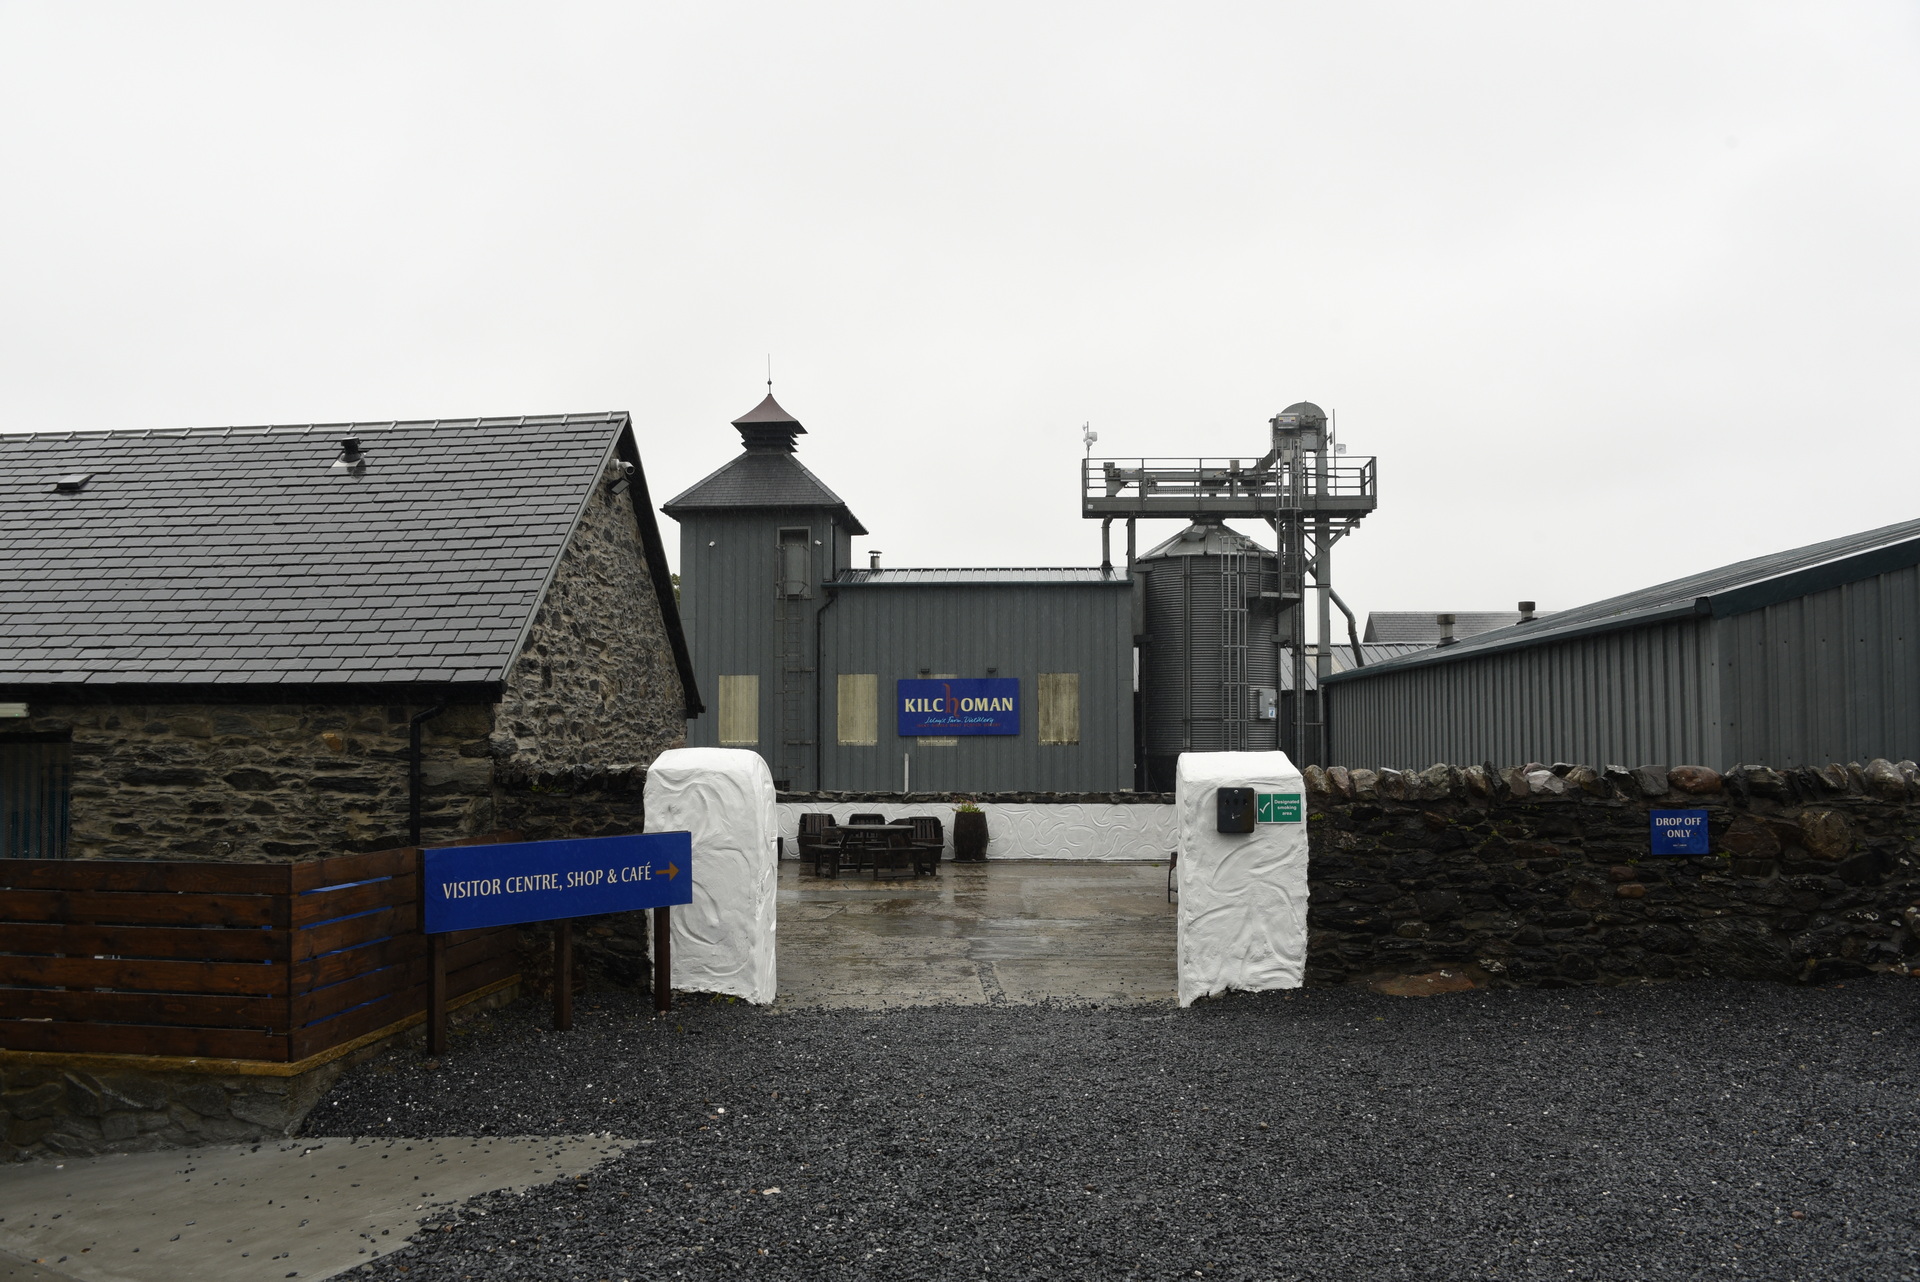
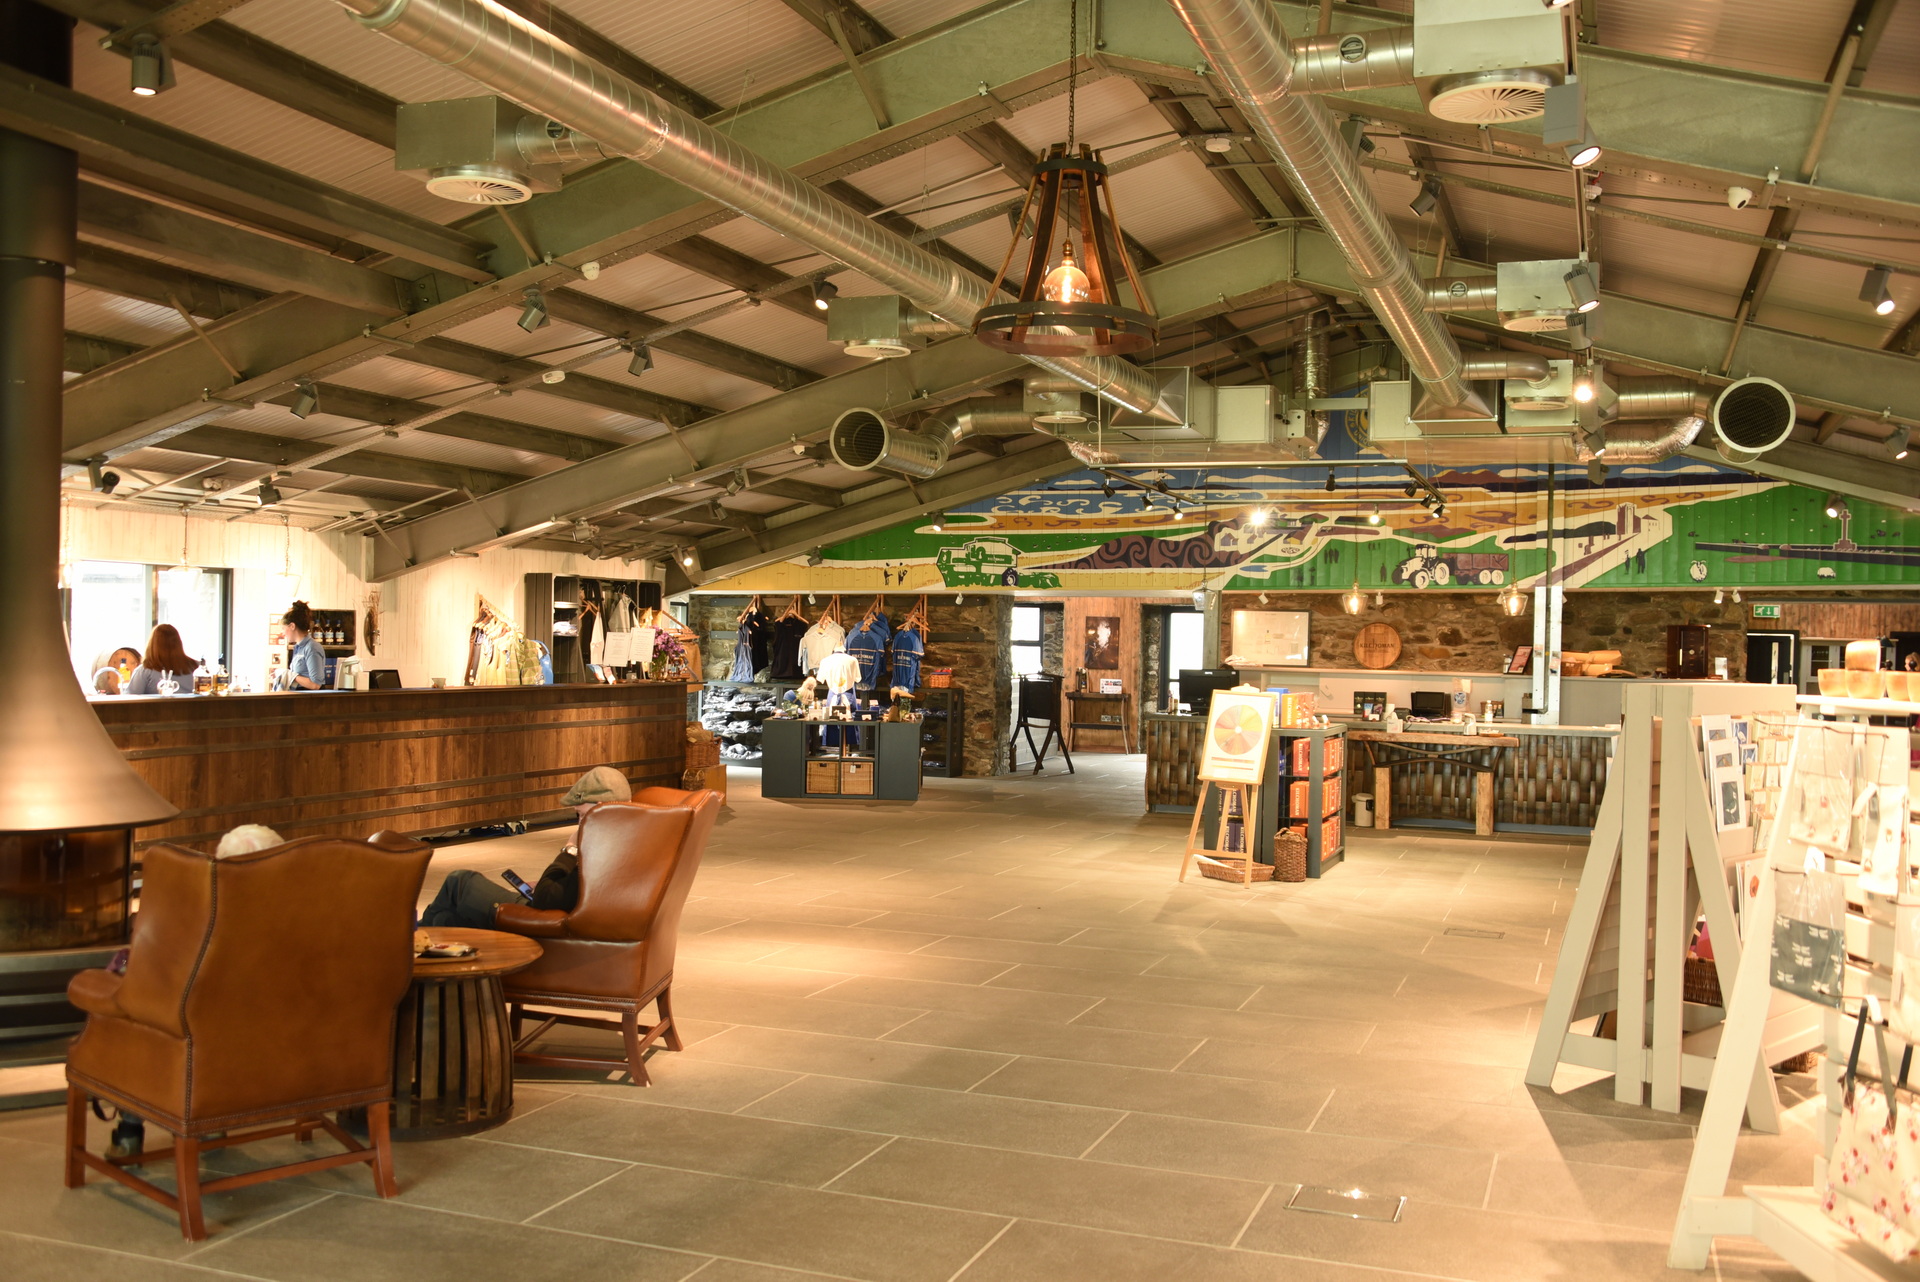
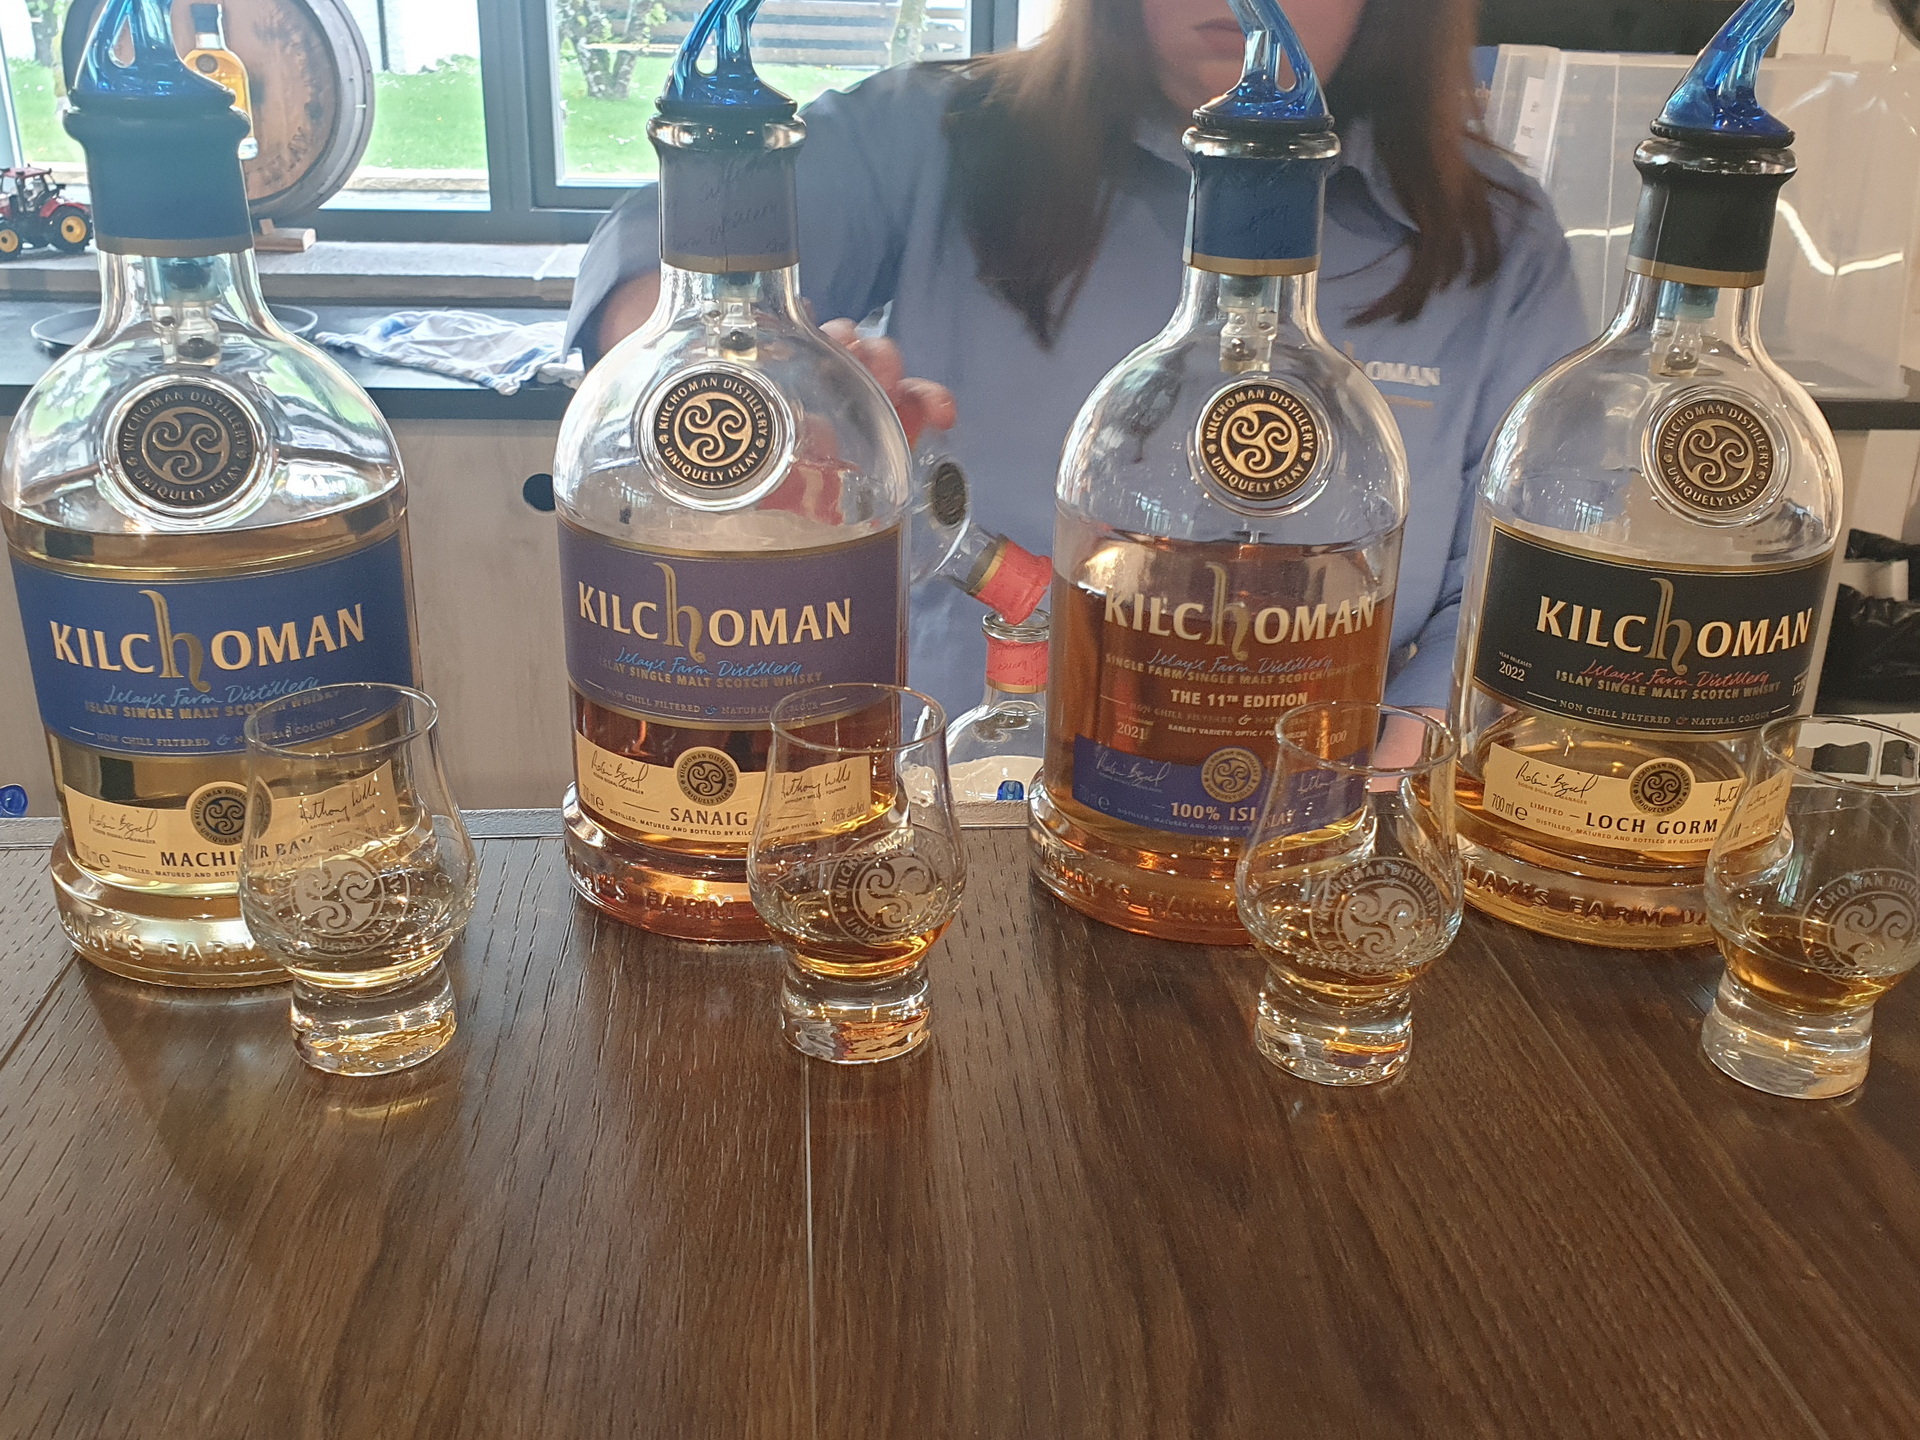
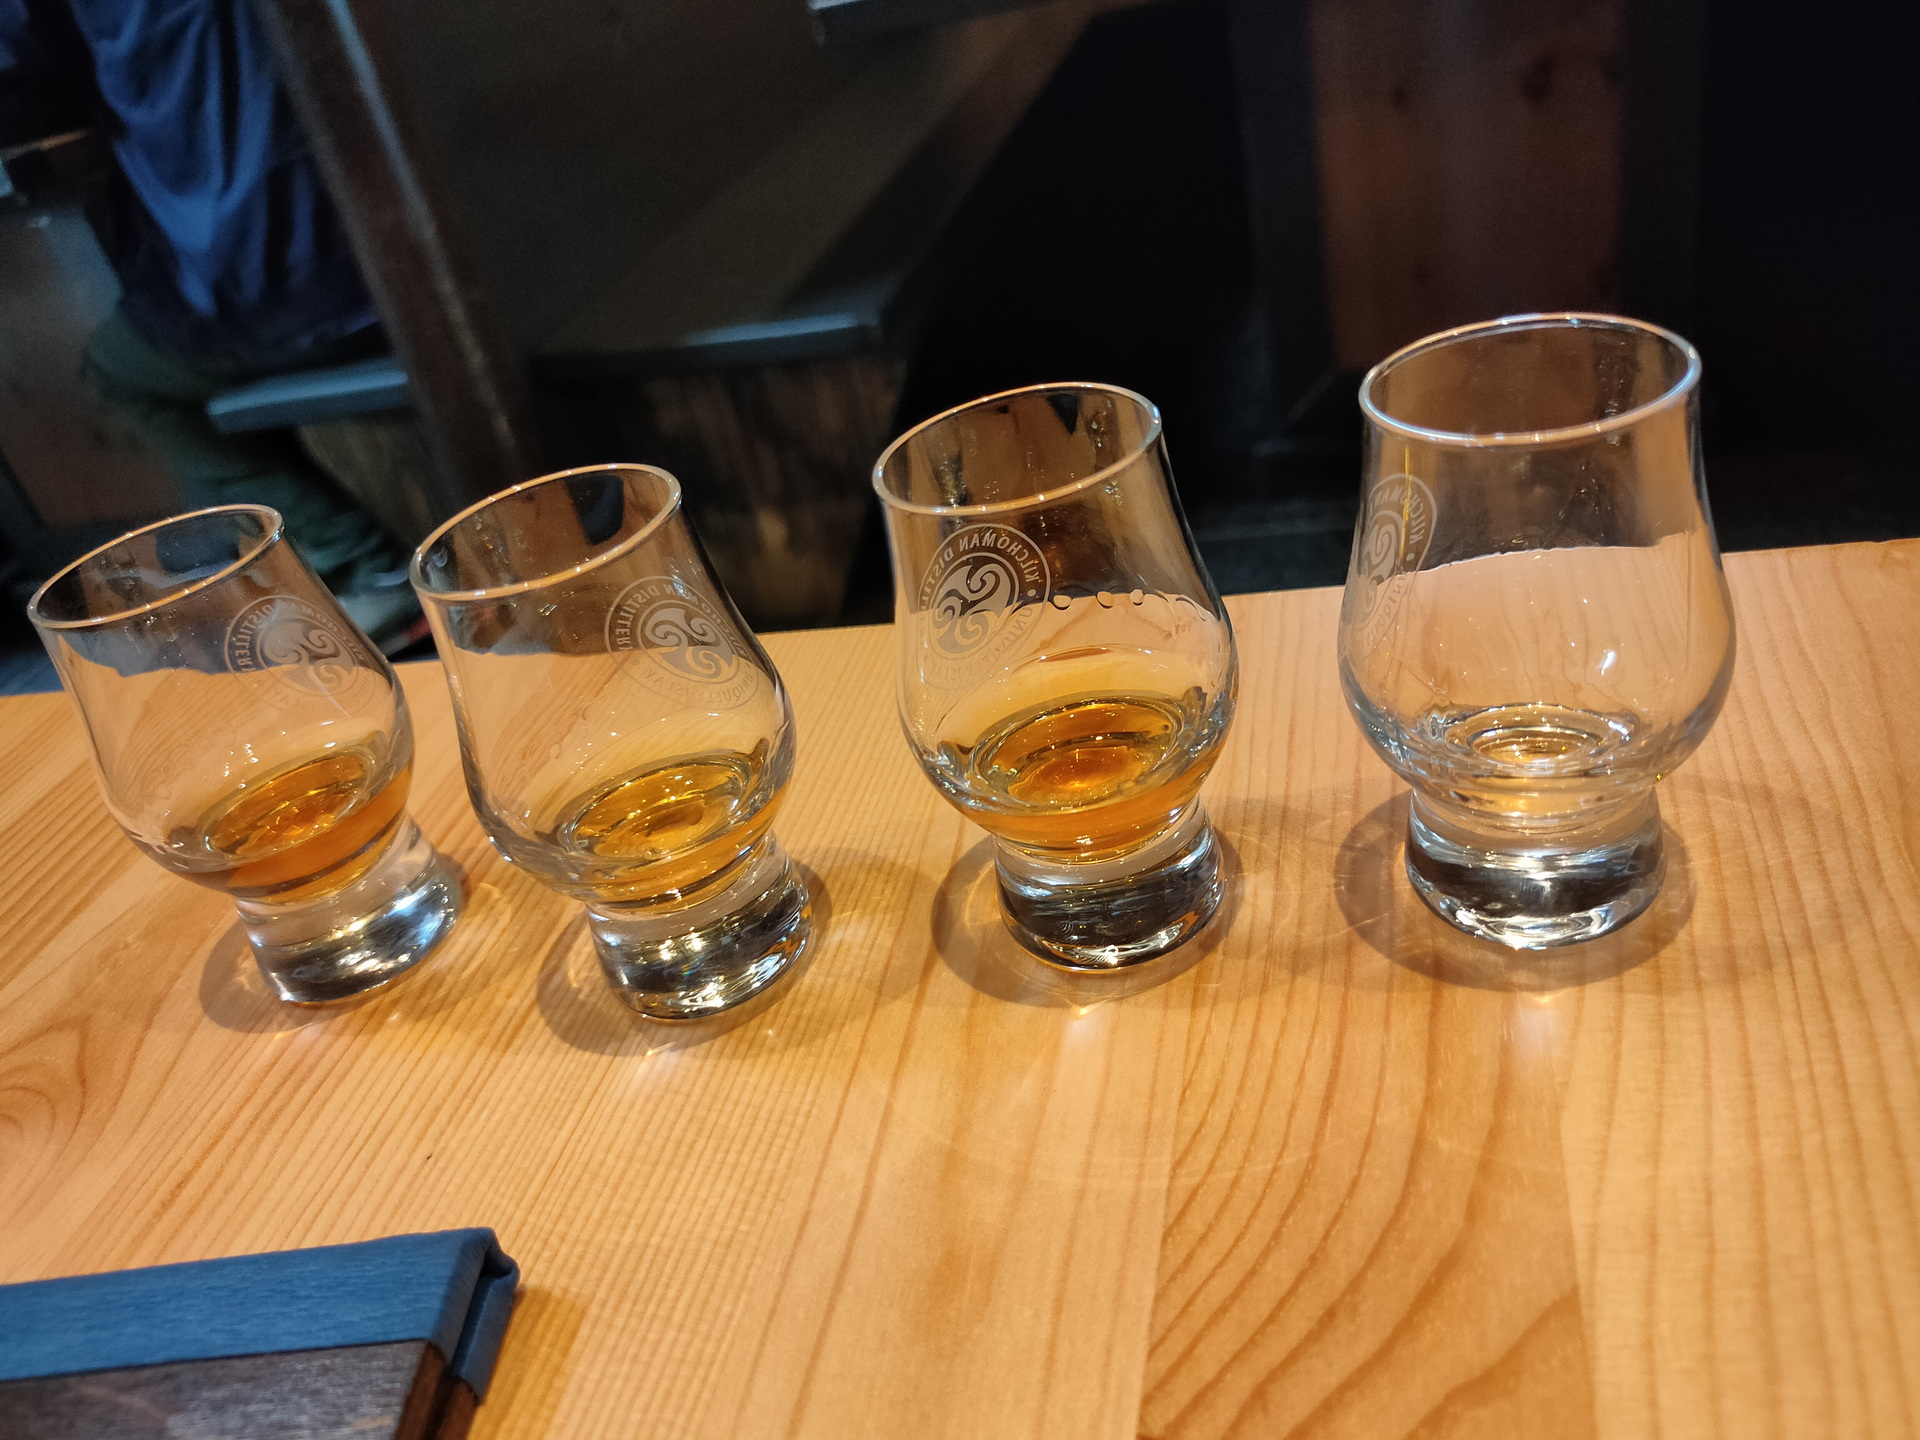
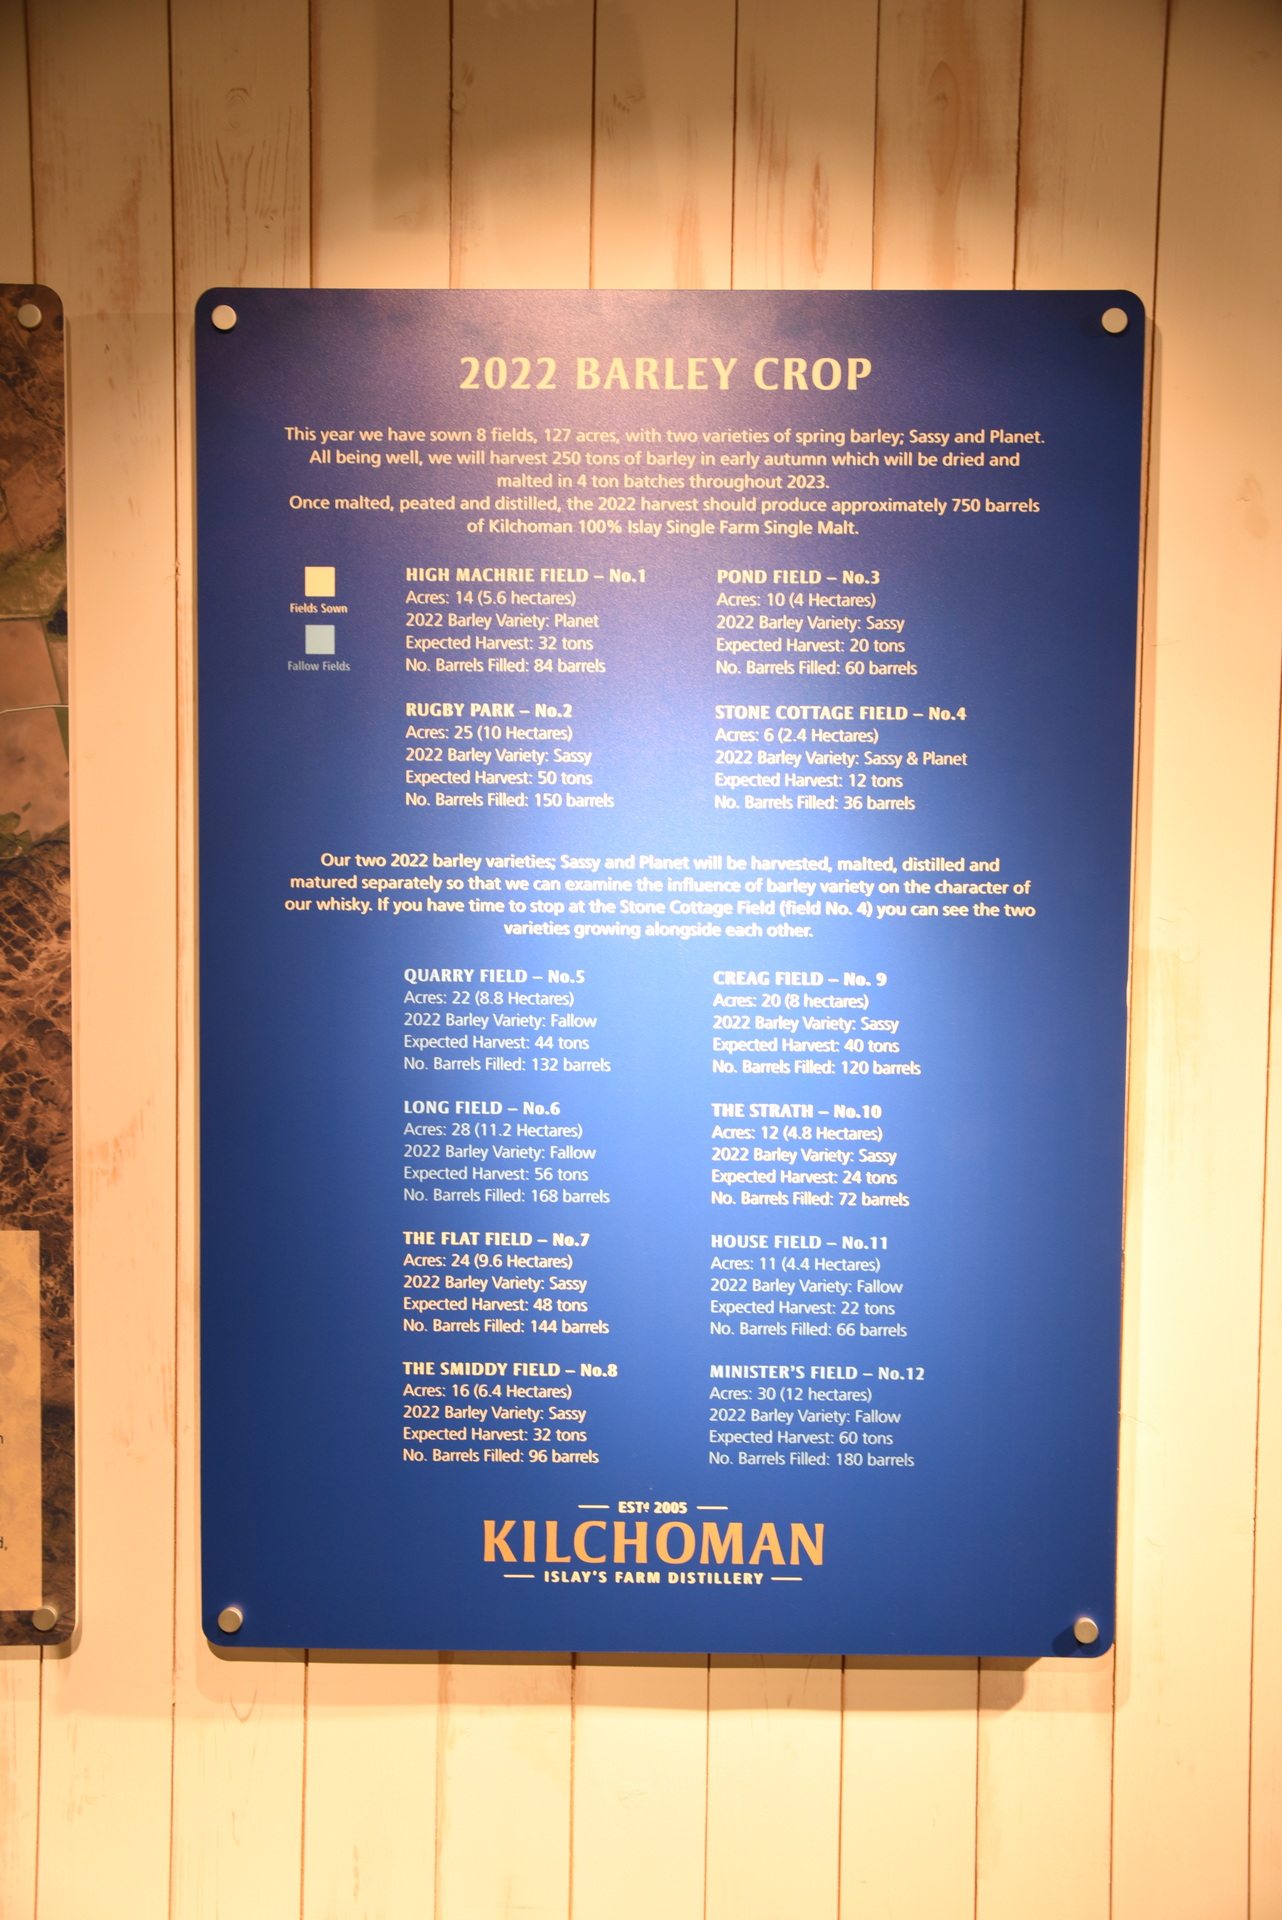
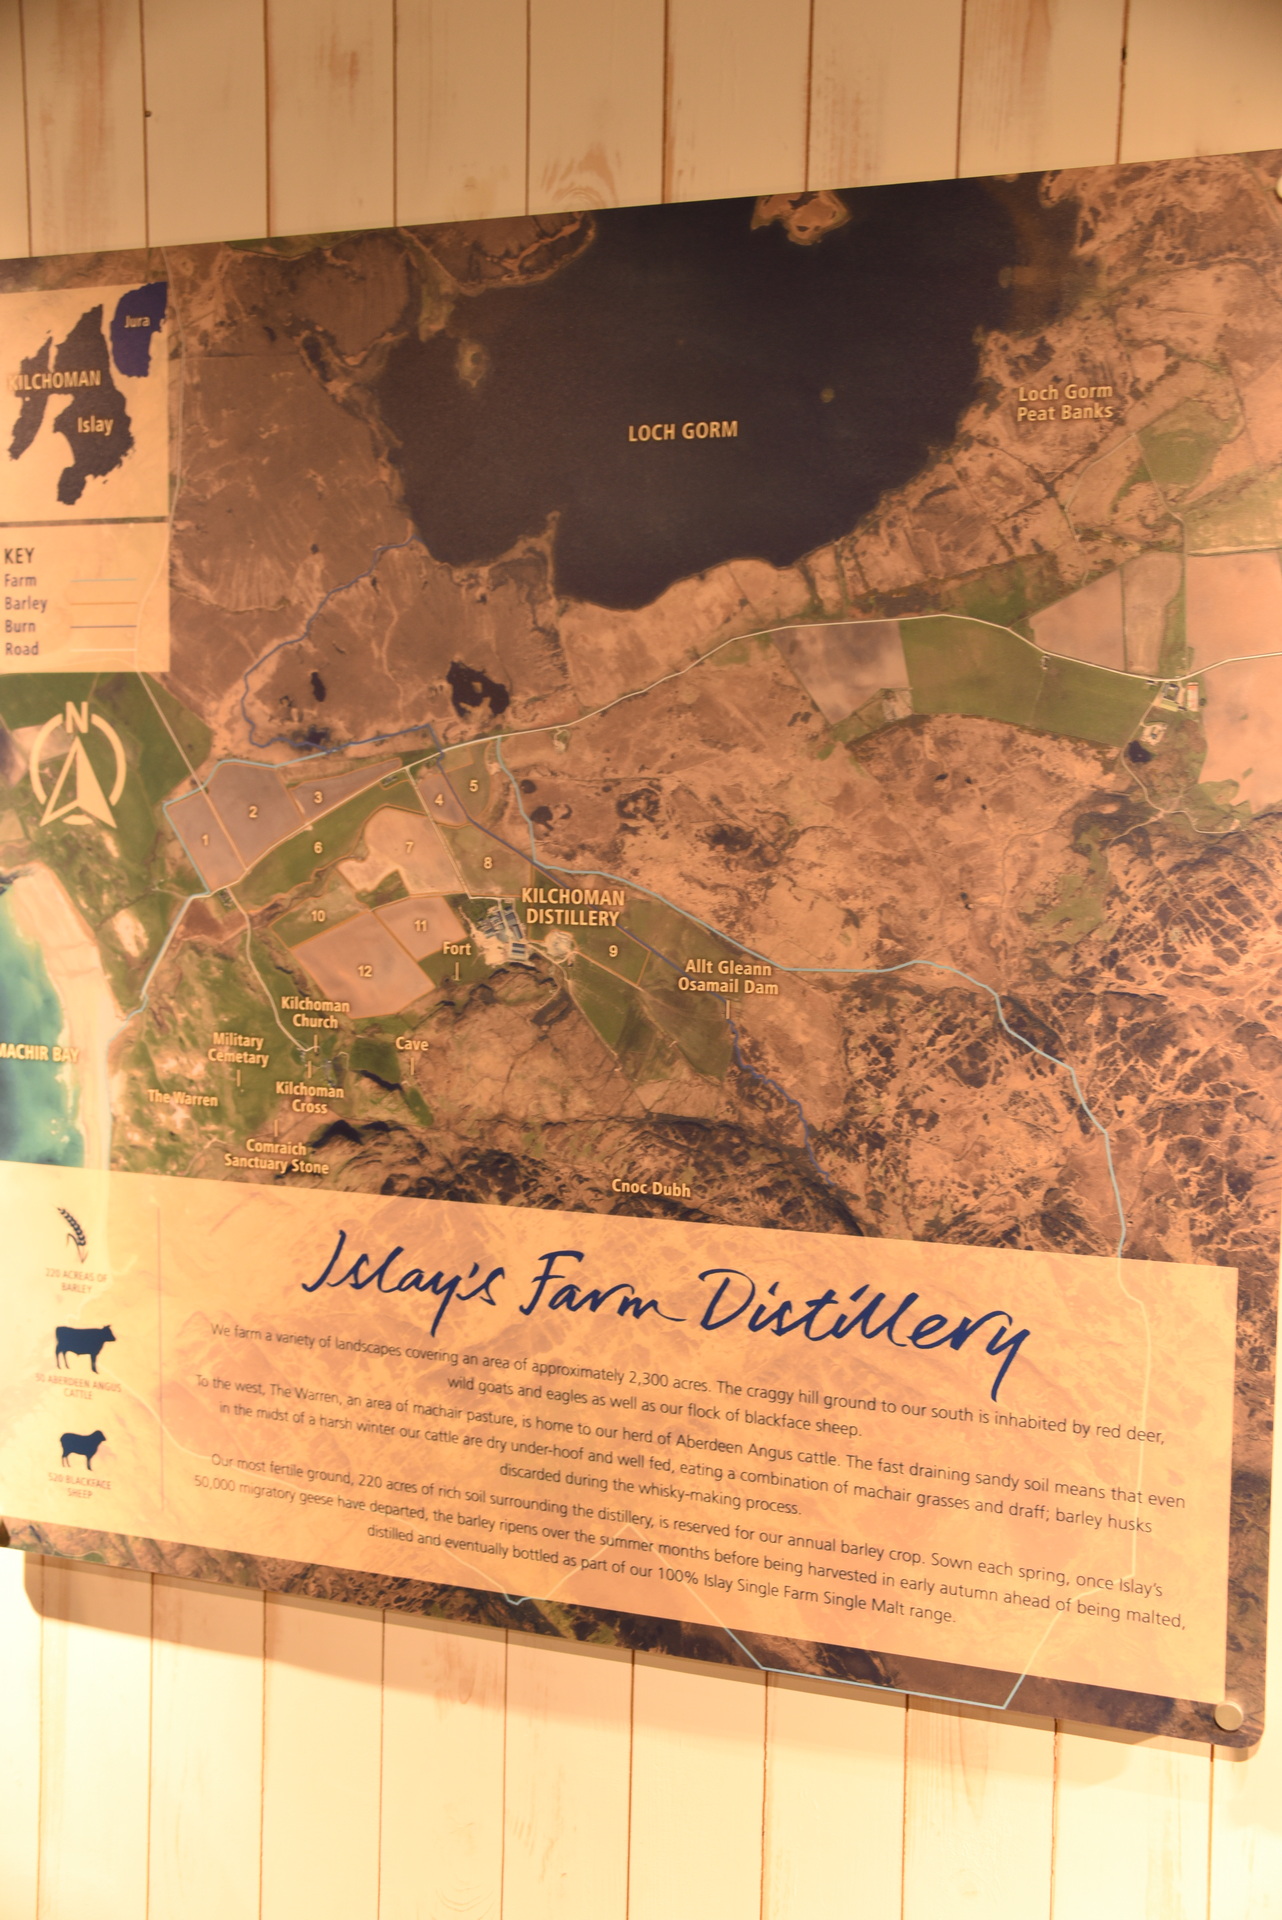
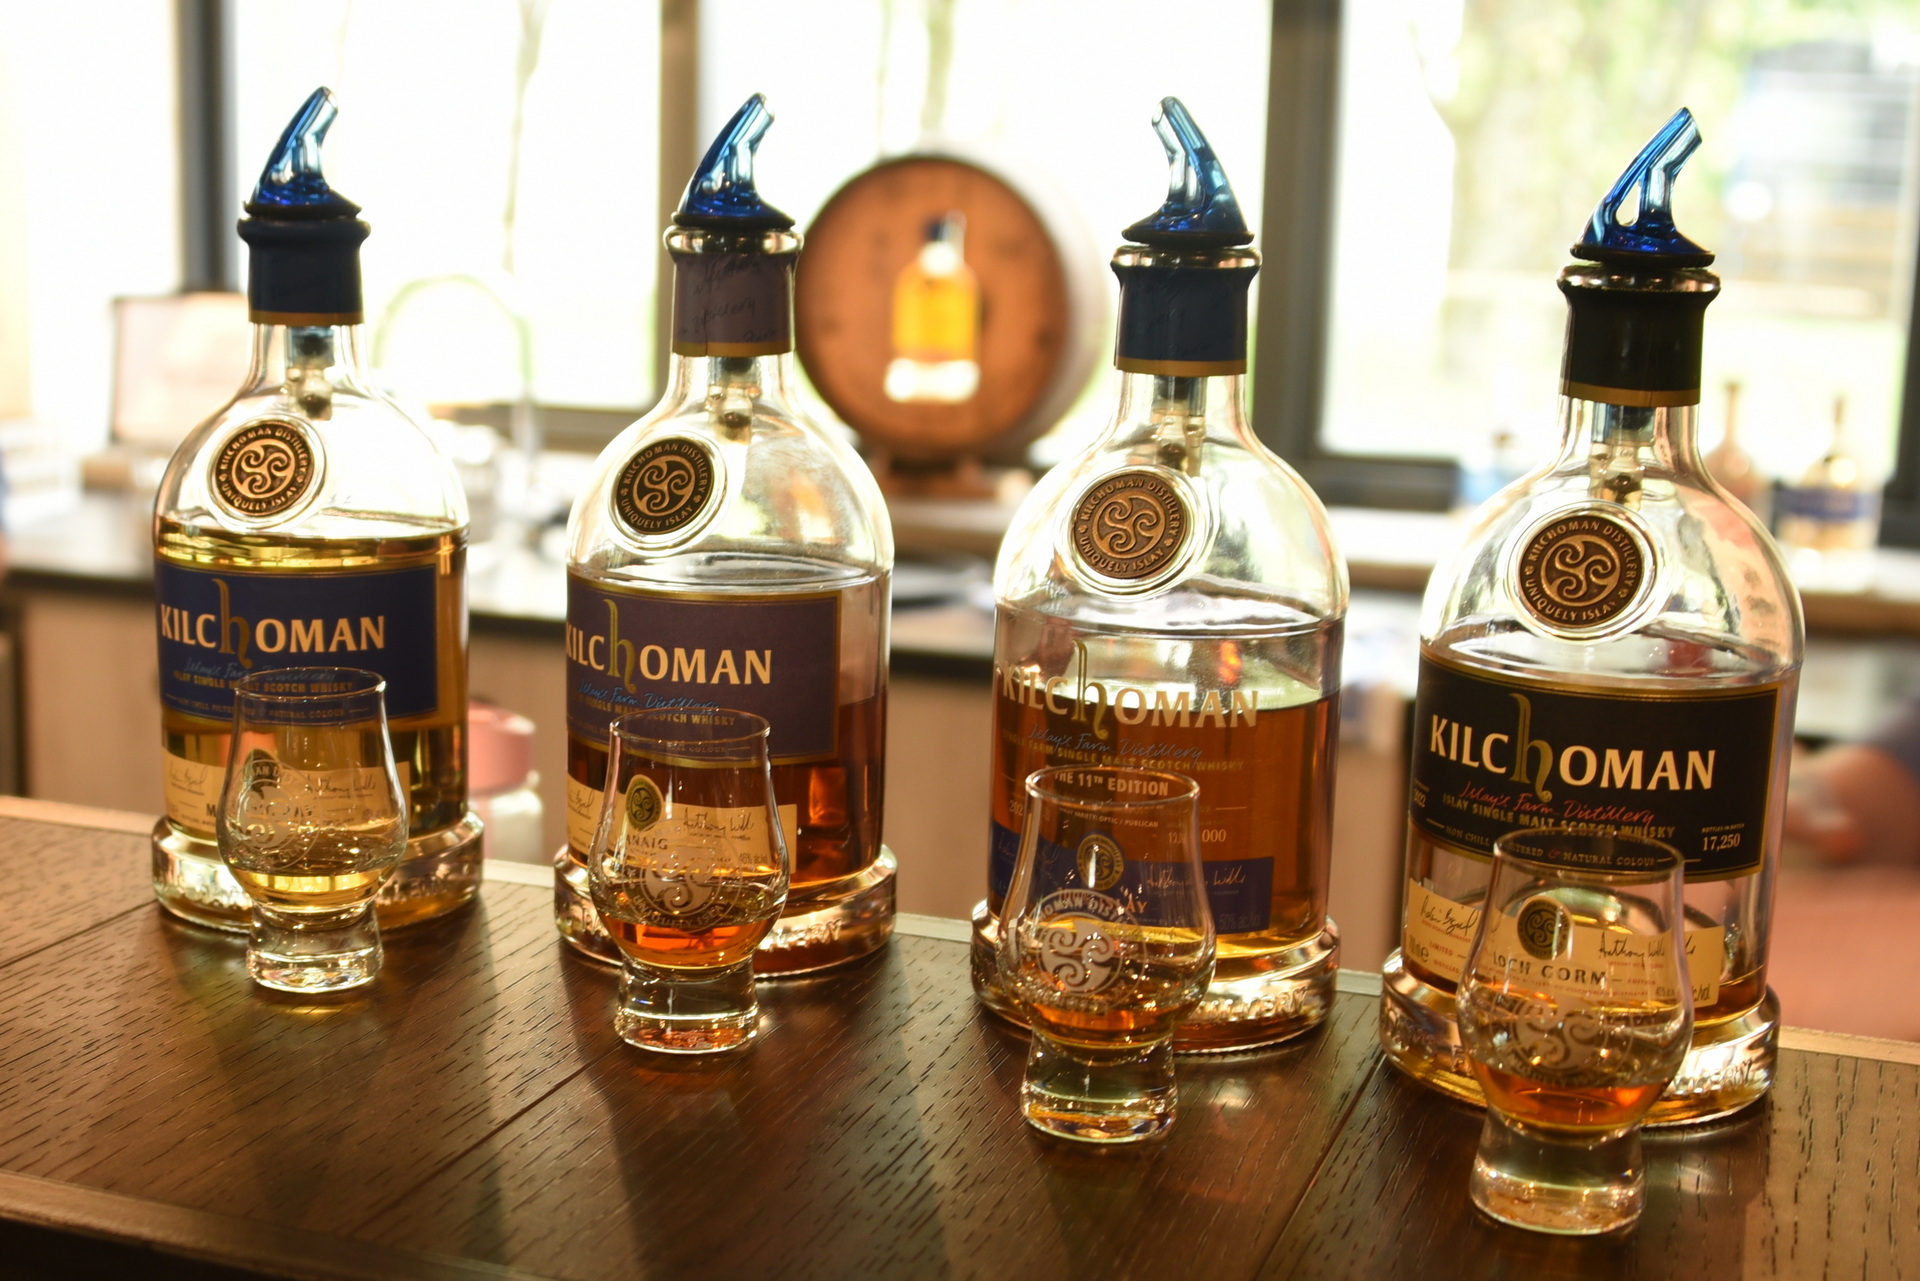
We zijn doorgereden naar de Kilchoman distillery. Hier kwamen we rond 14.15 aan. Het was inmiddels wel lunchtijd, dus we waren blij verrast dat ze hier een groot visitors centre hadden met een restaurant gedeelte. Terwijl we wachtte op een vrij tafeltje hebben we ook een tasting gedaan met een core range met 4 samplers.
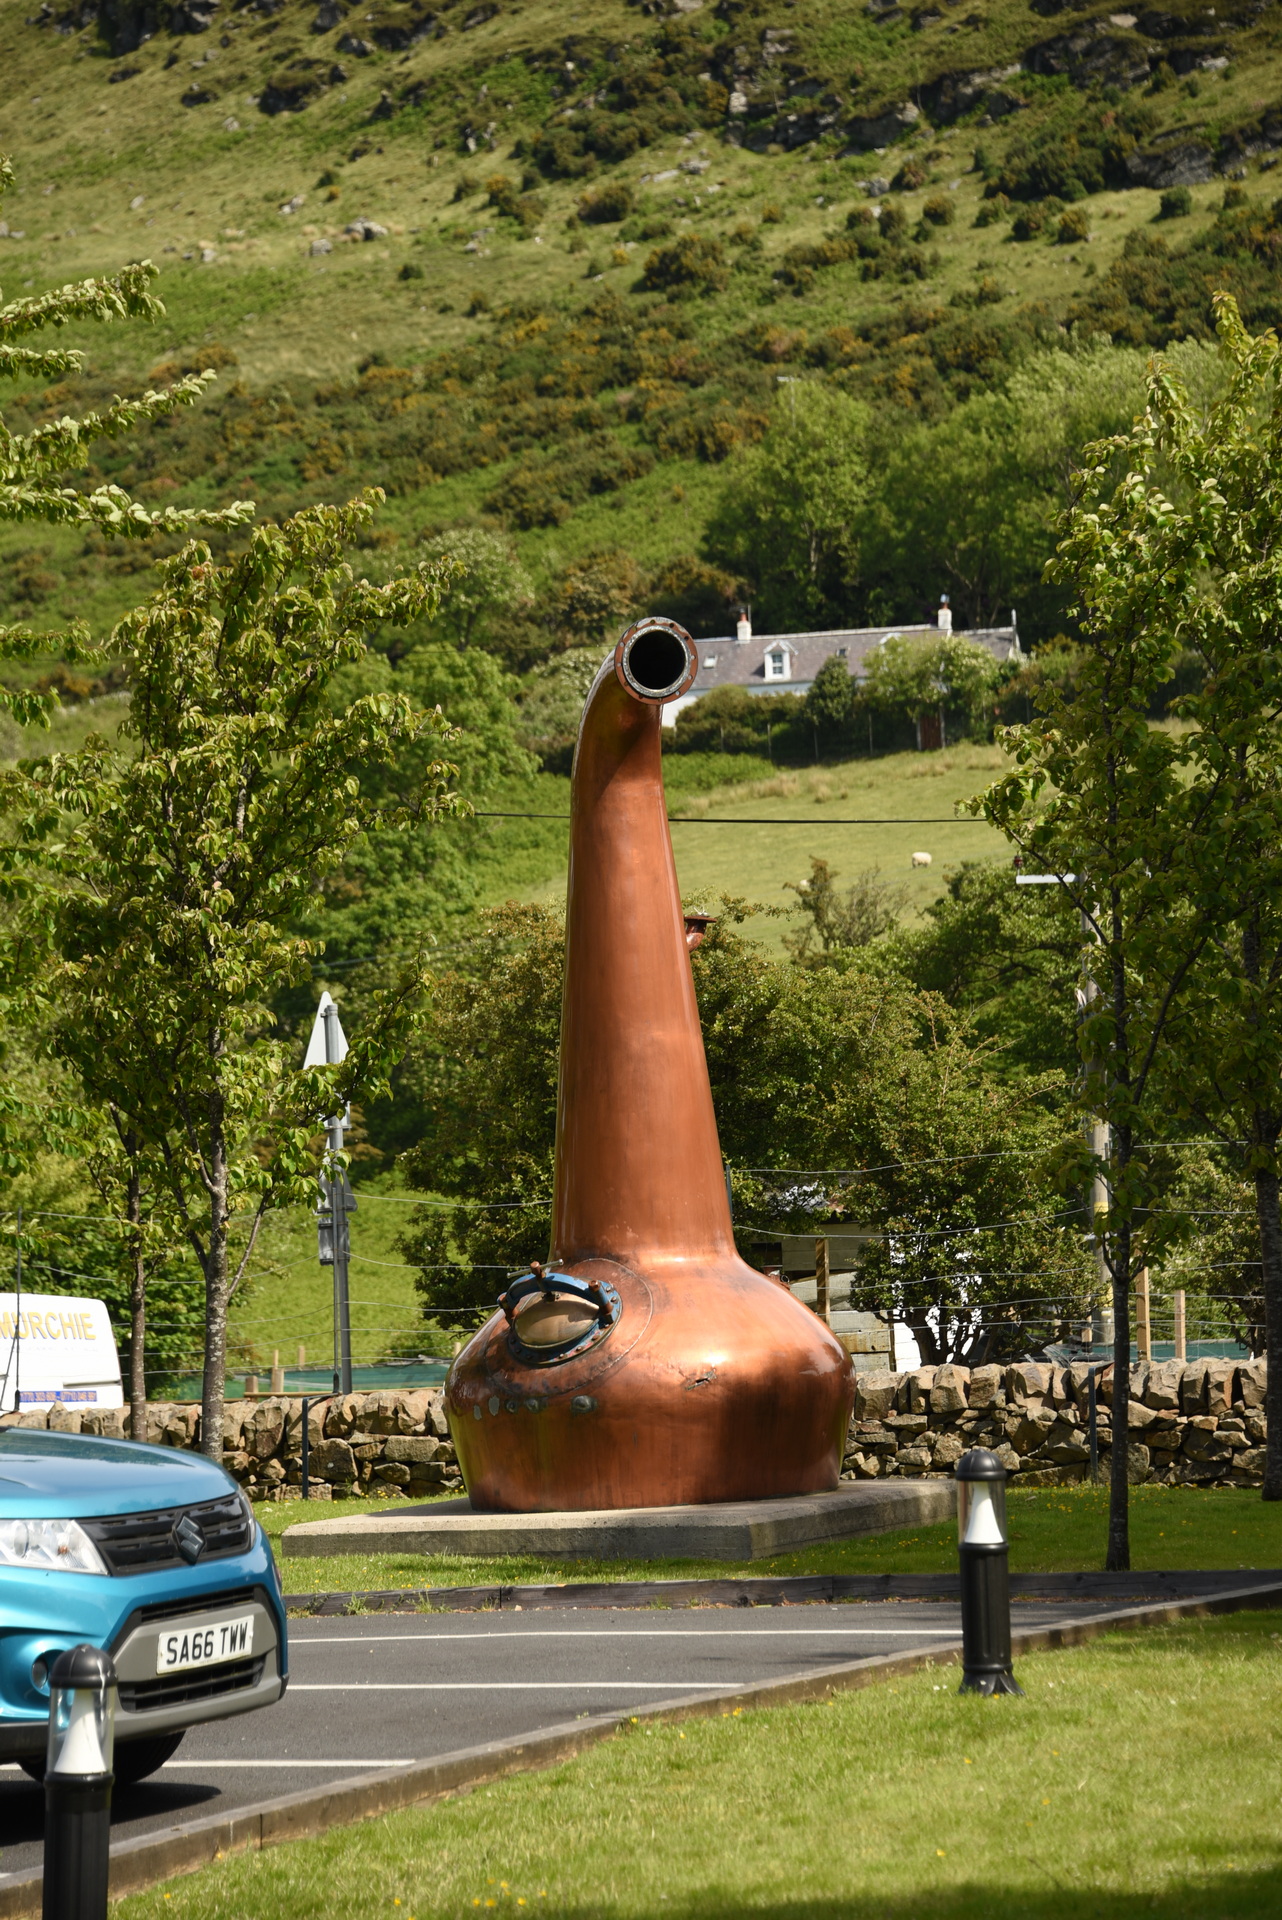
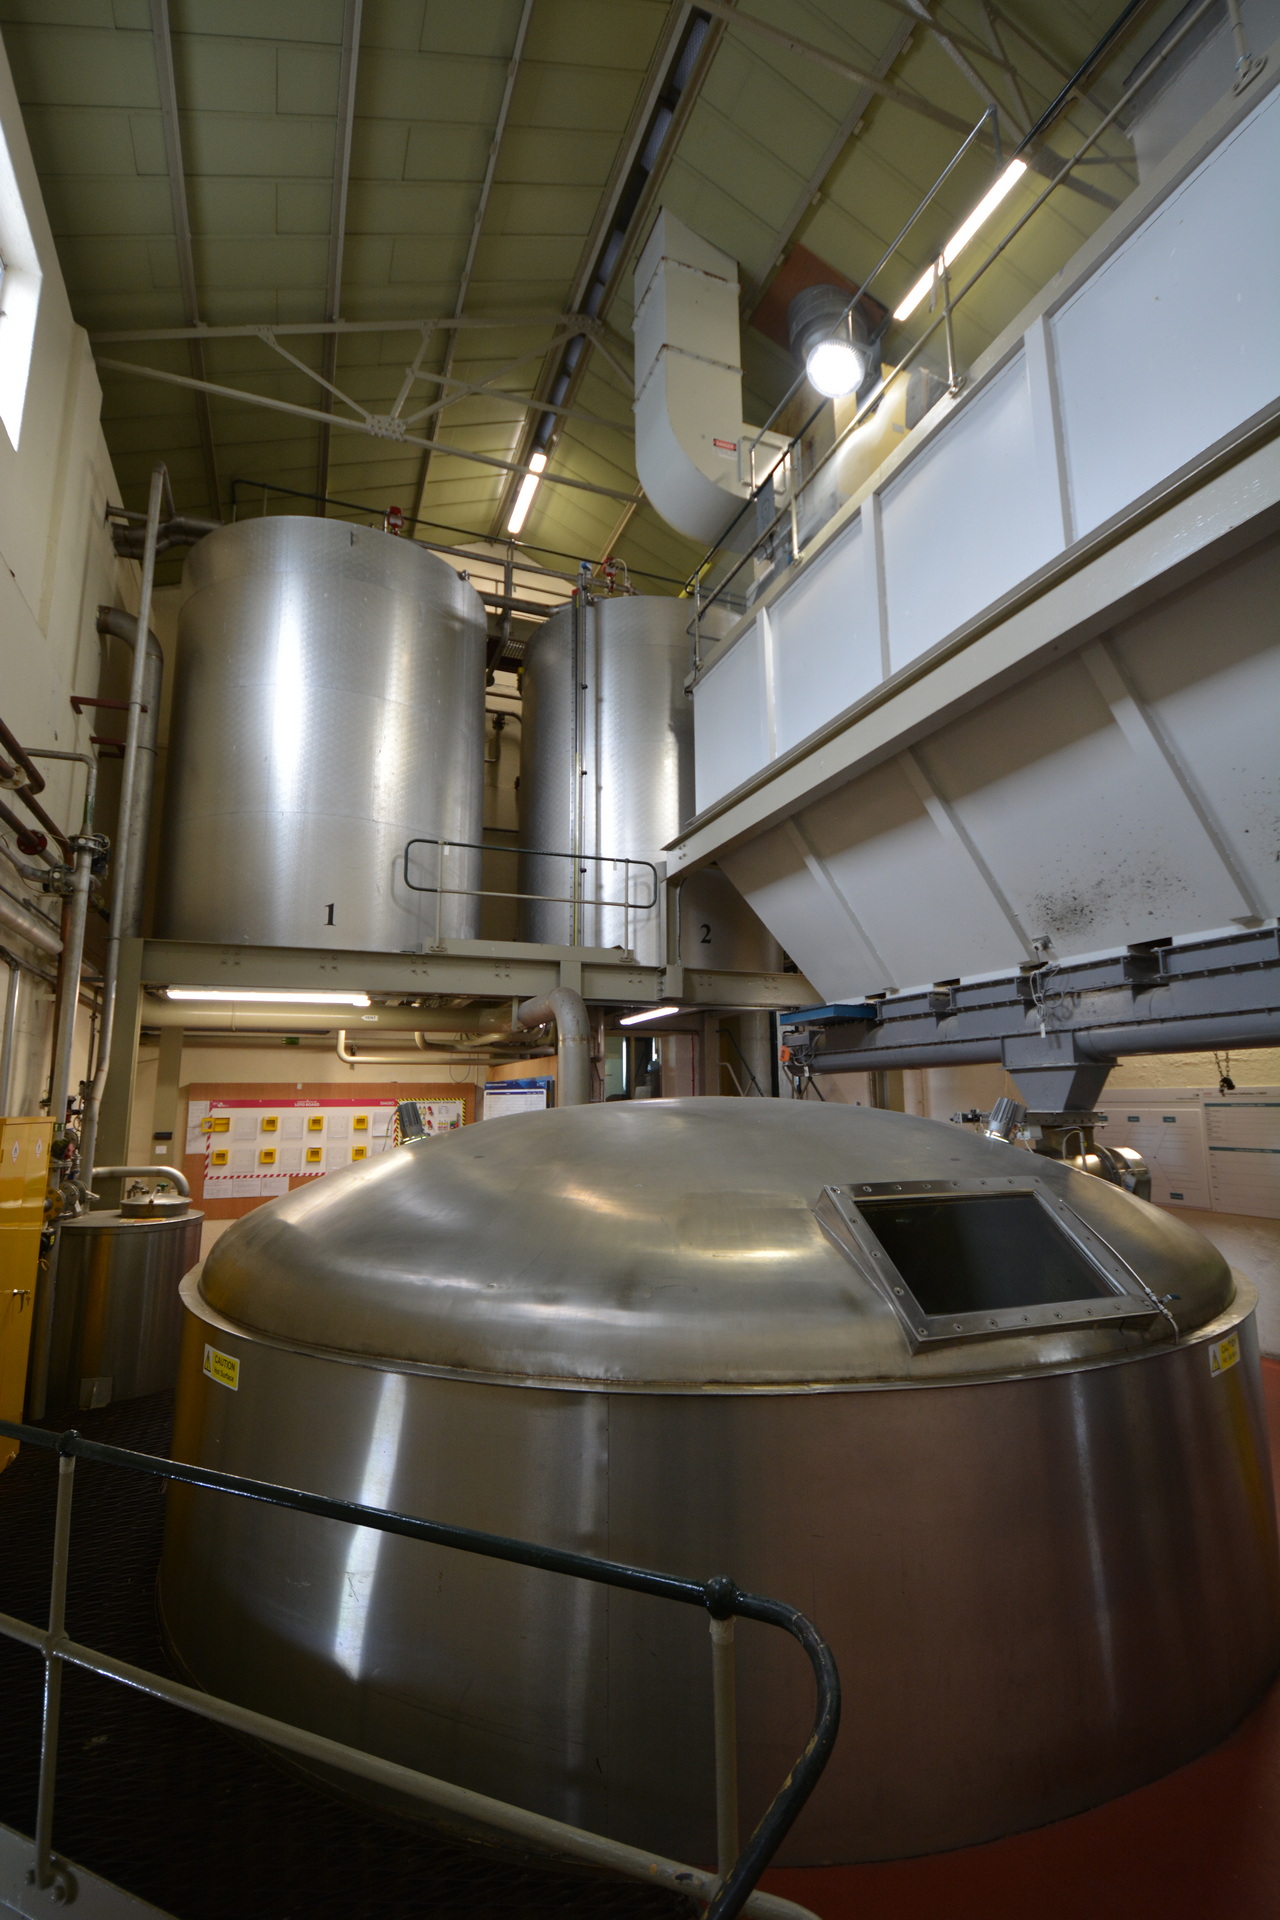
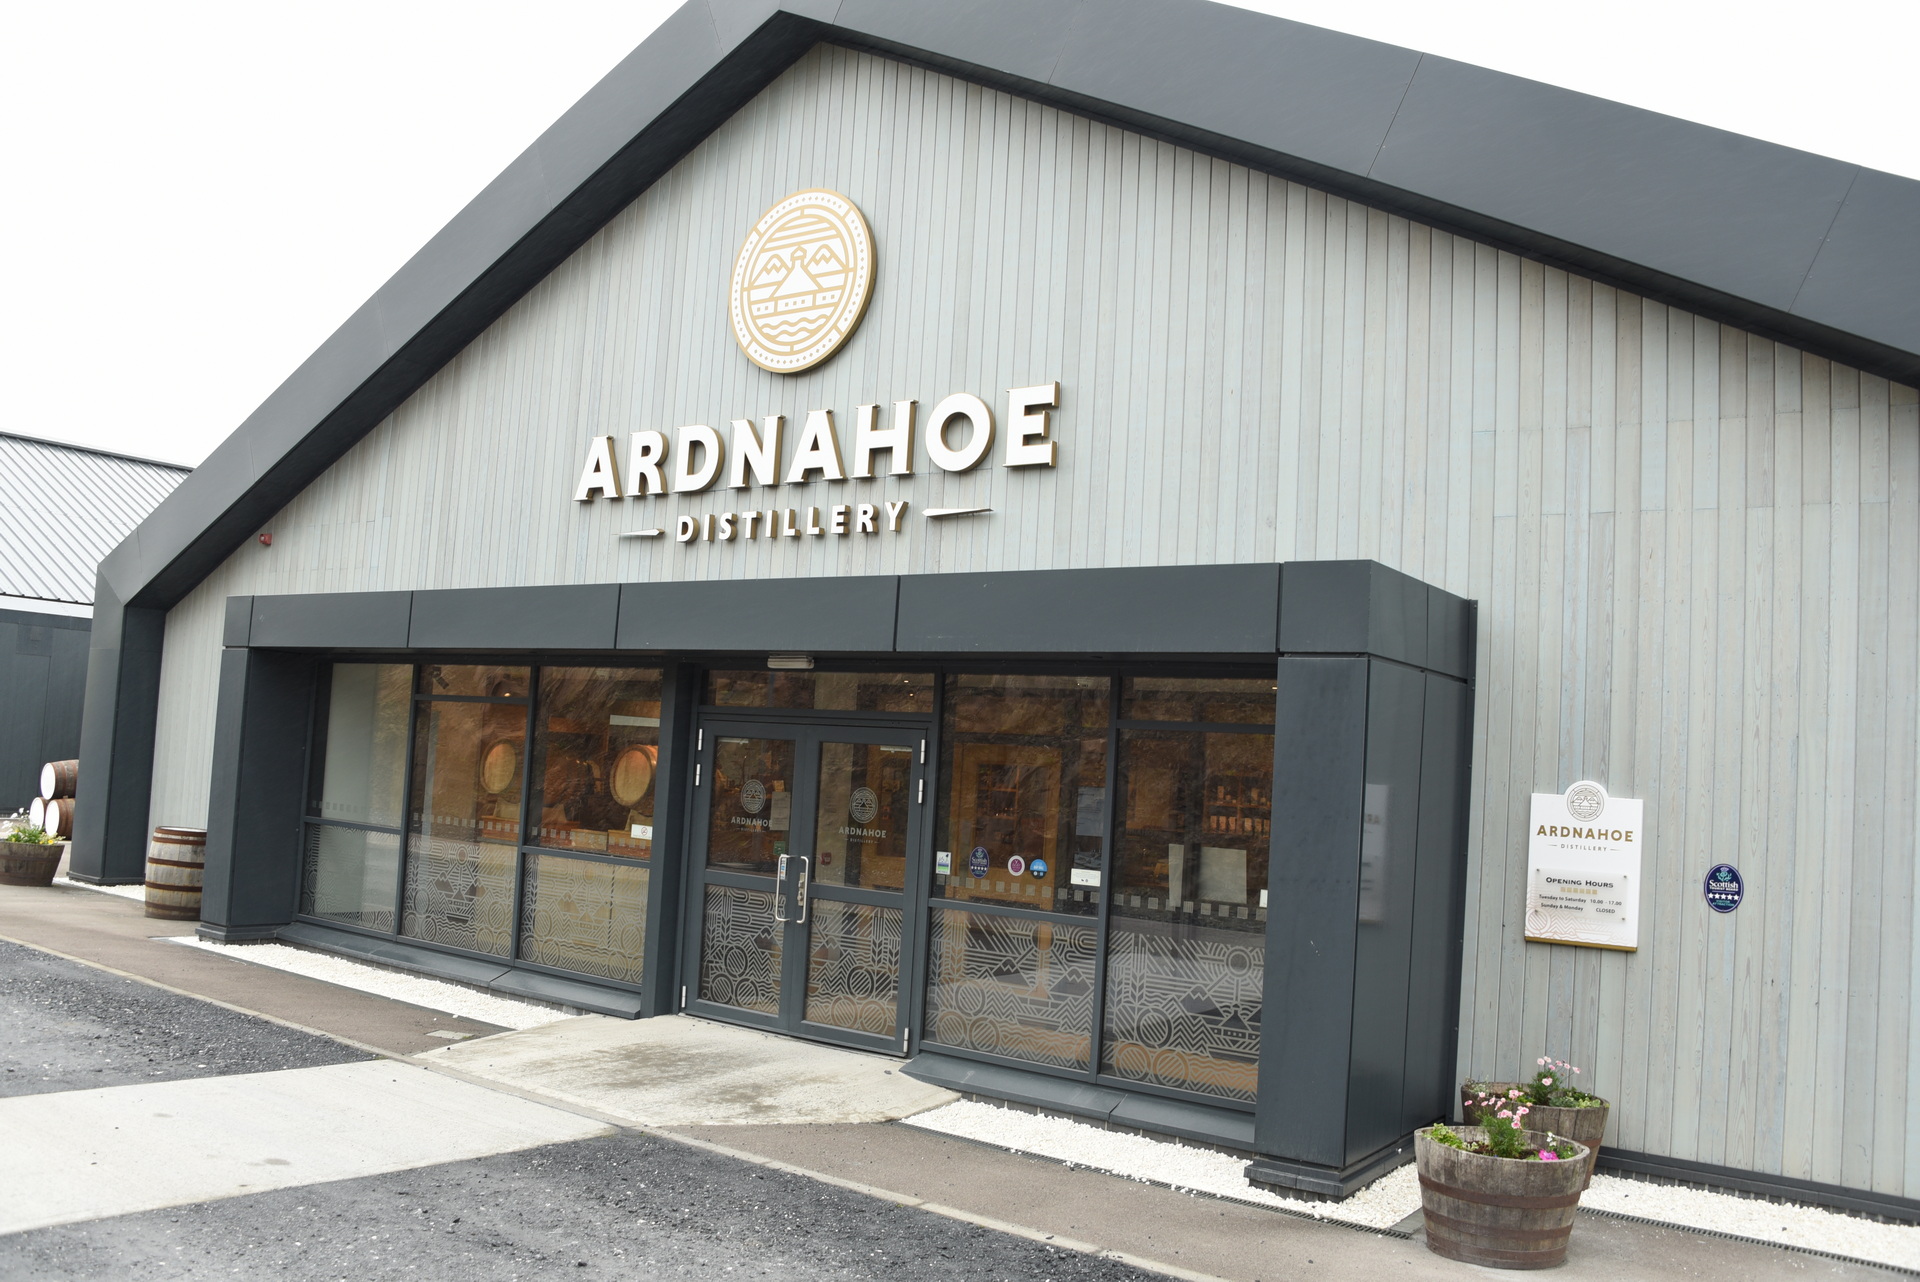
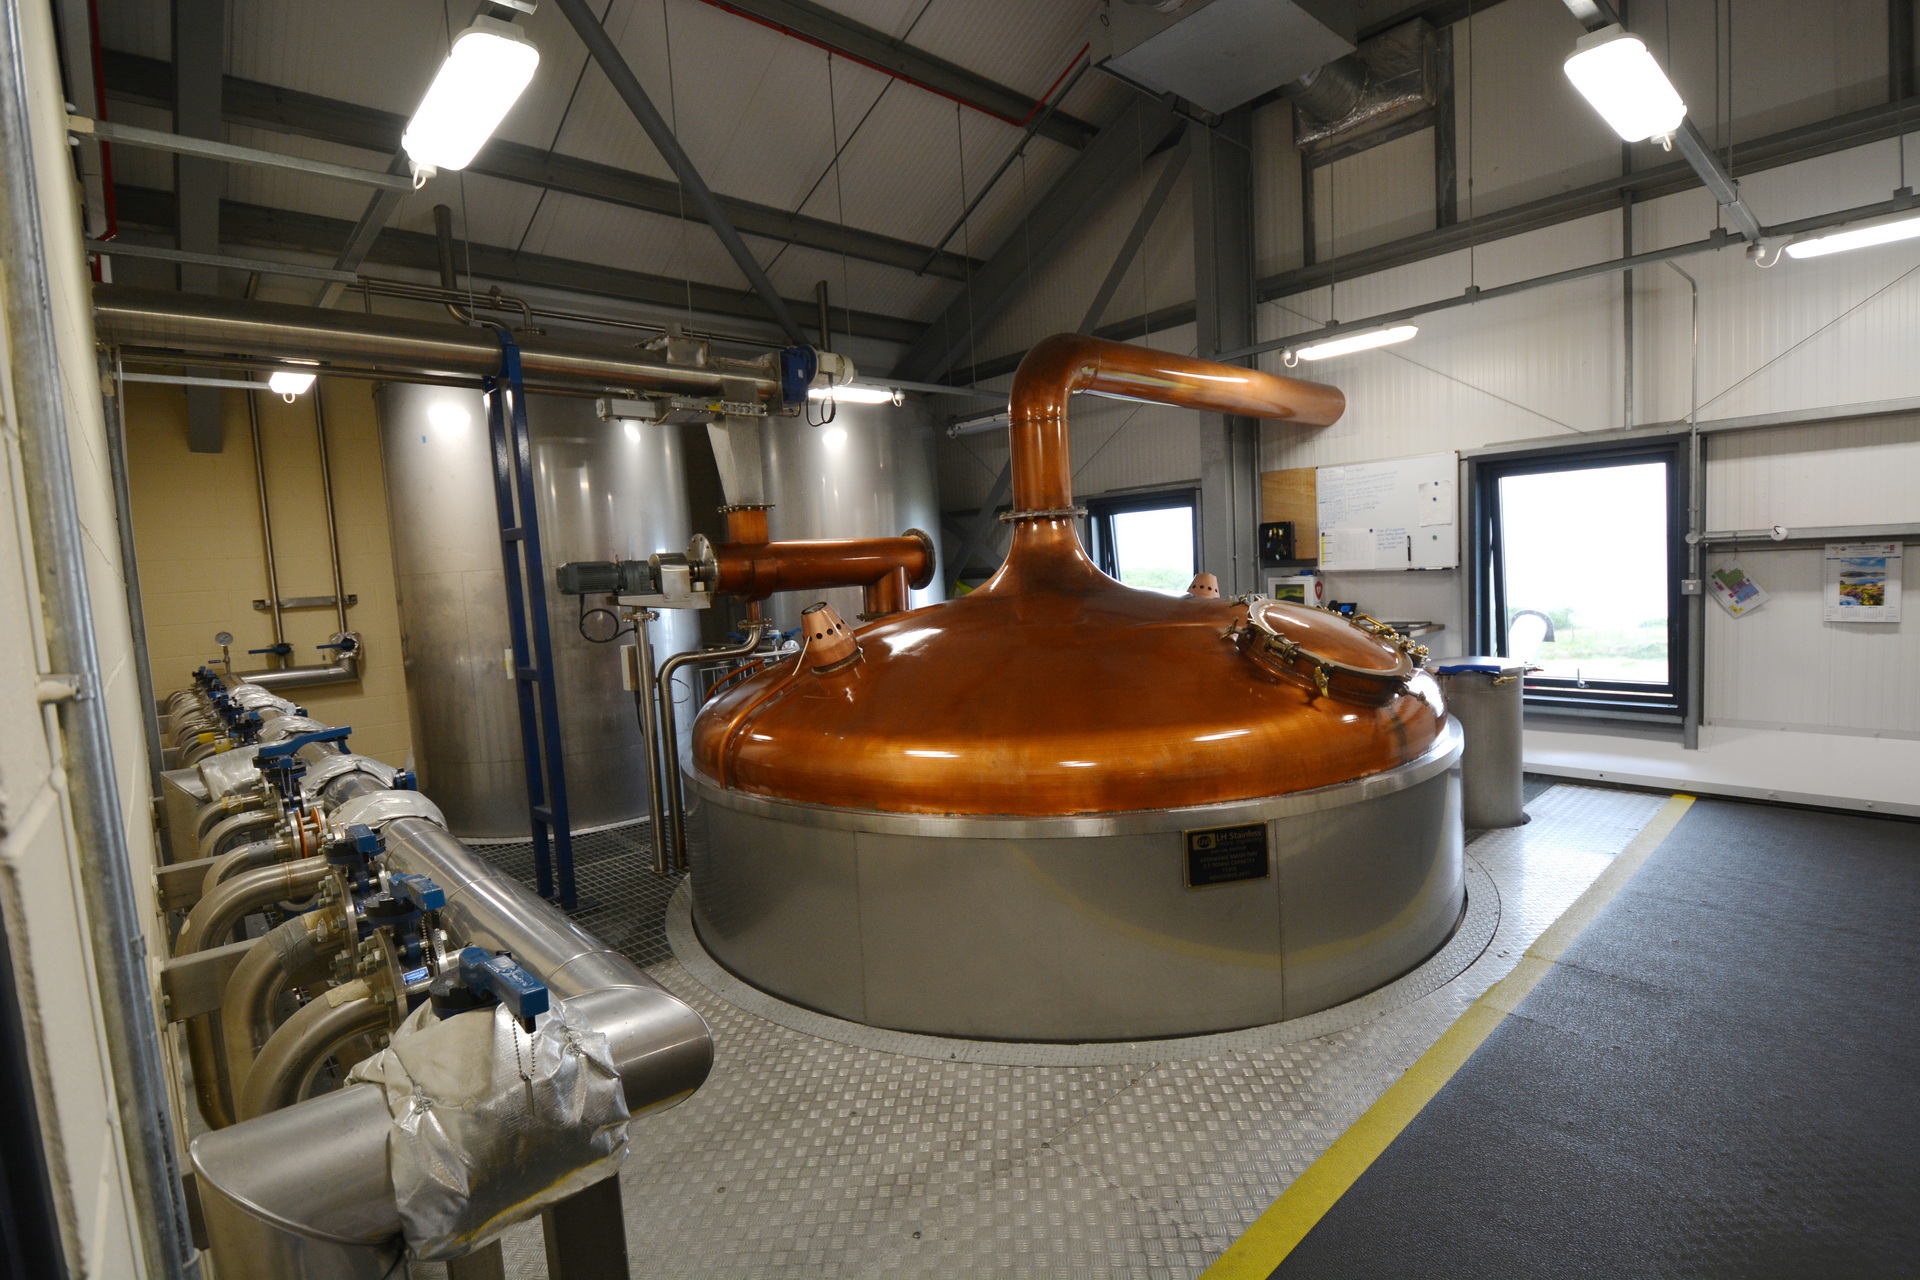
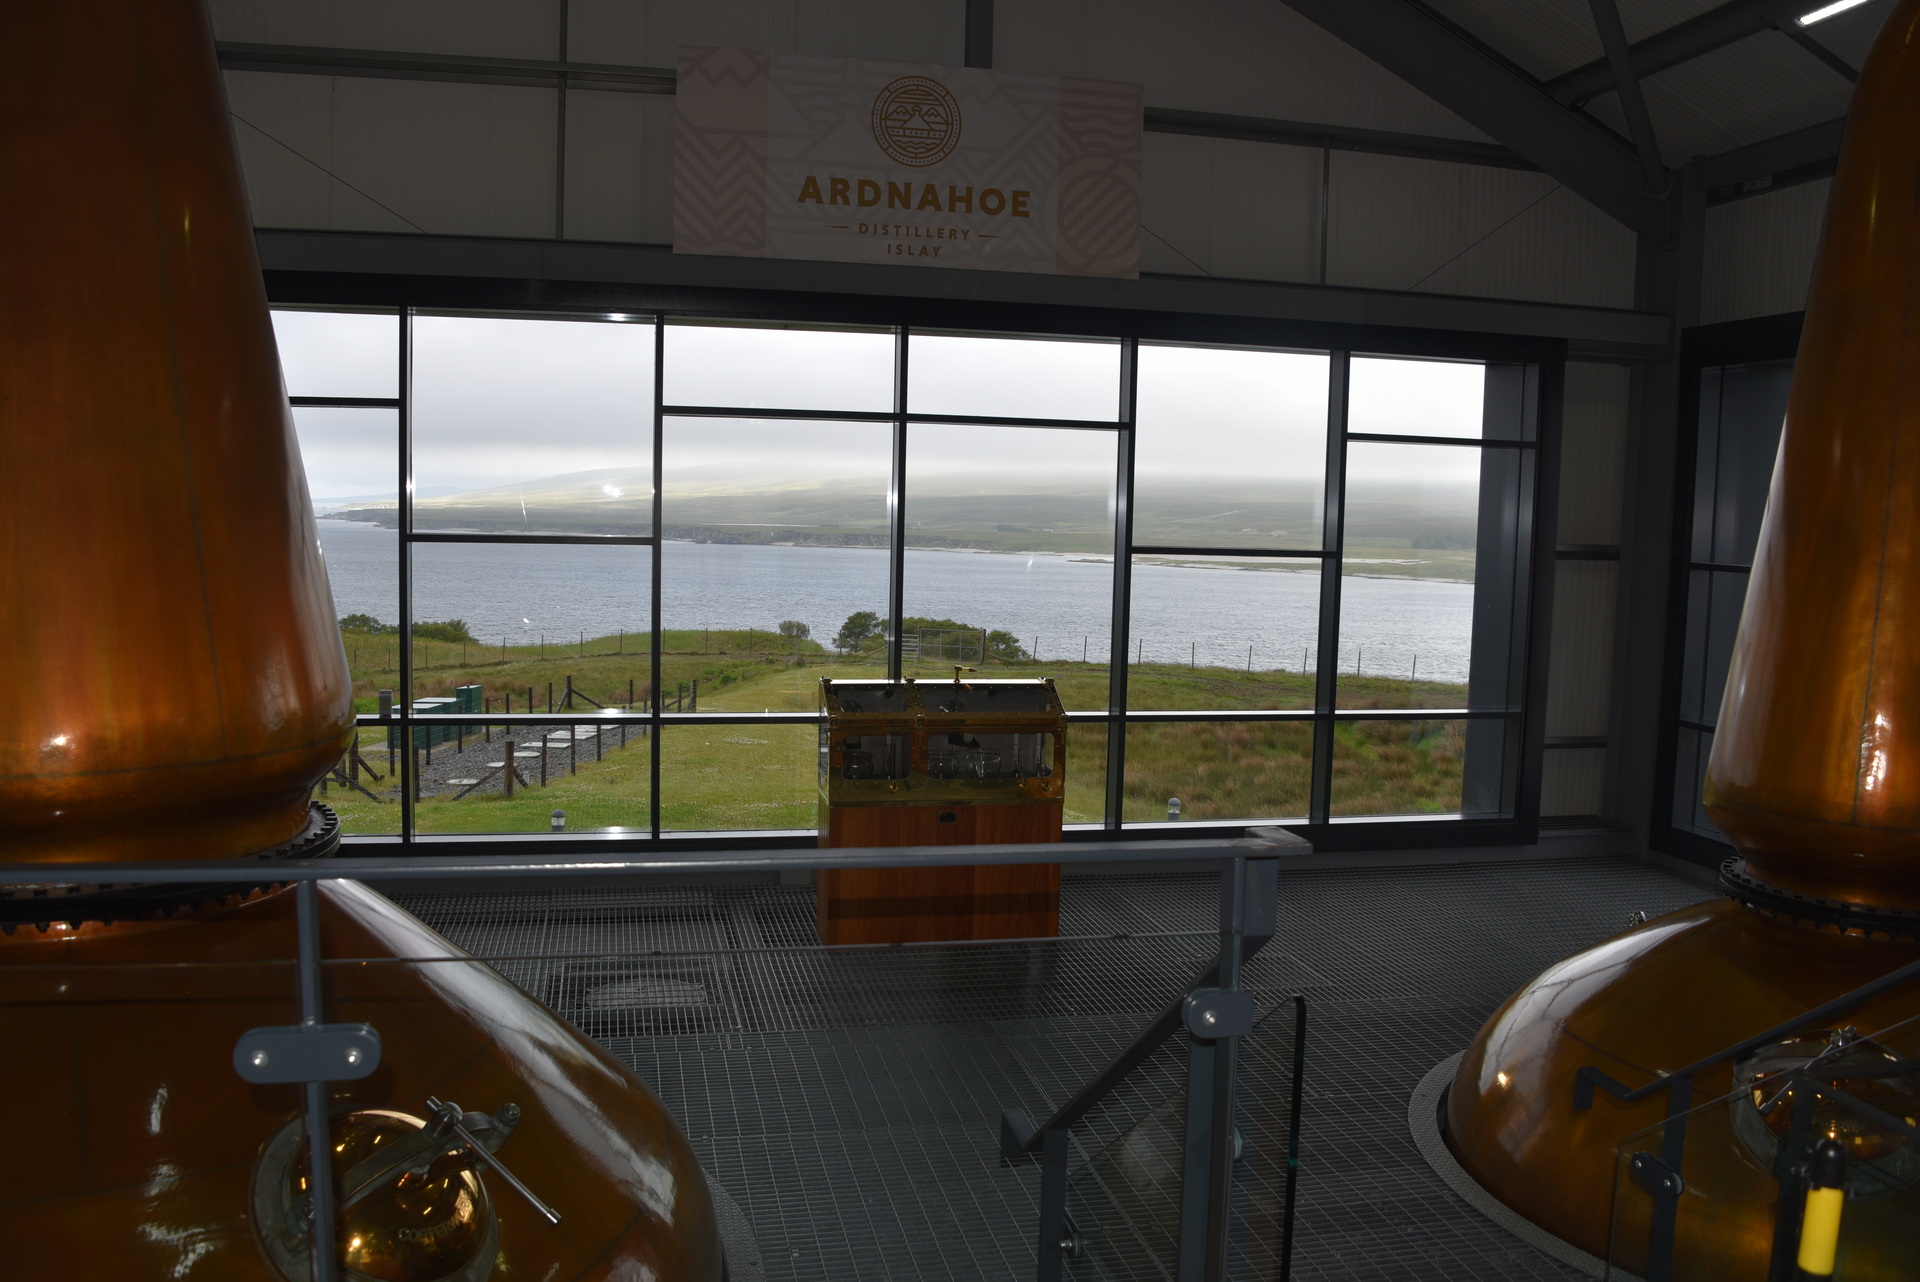
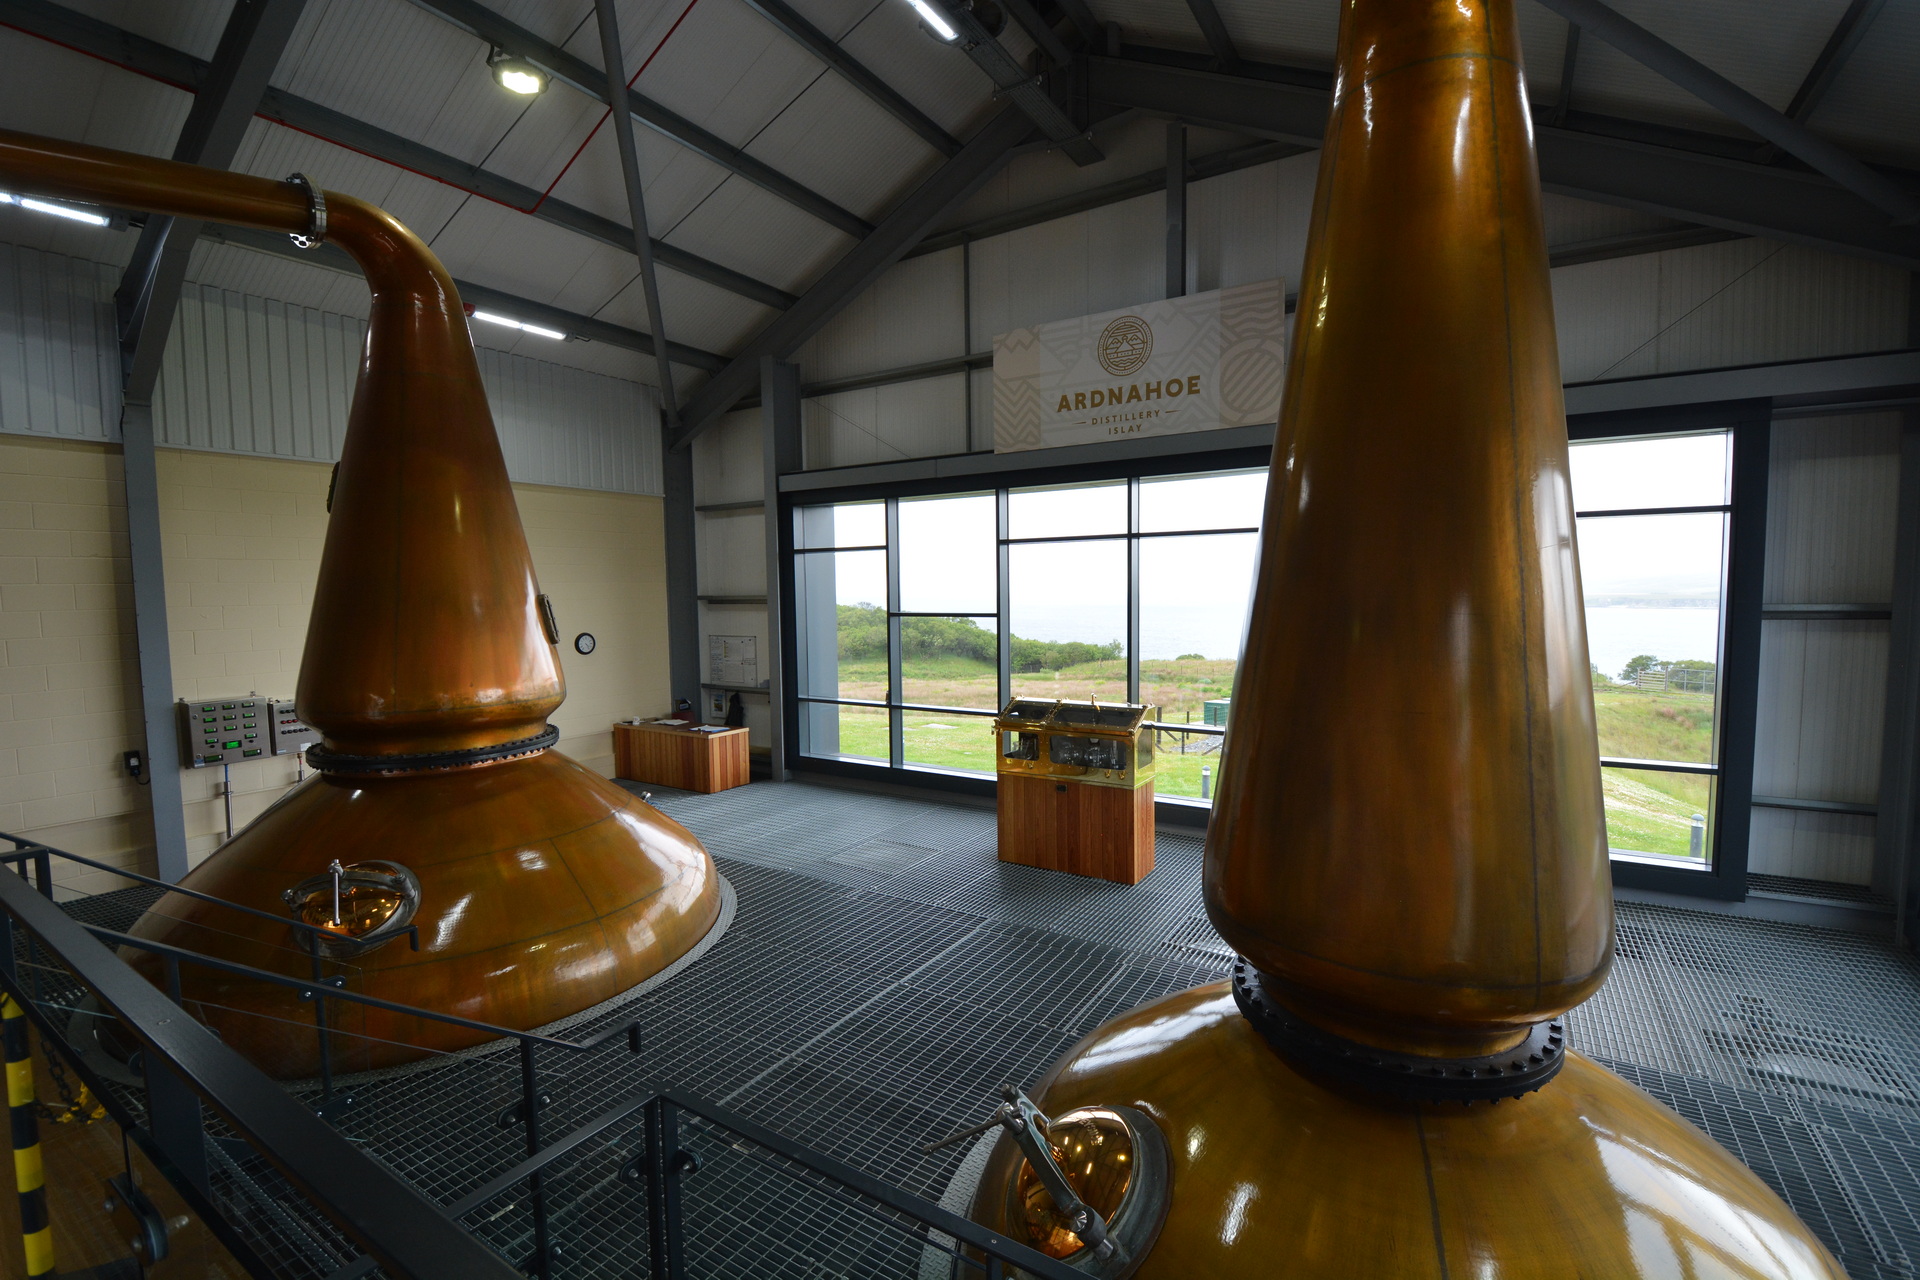
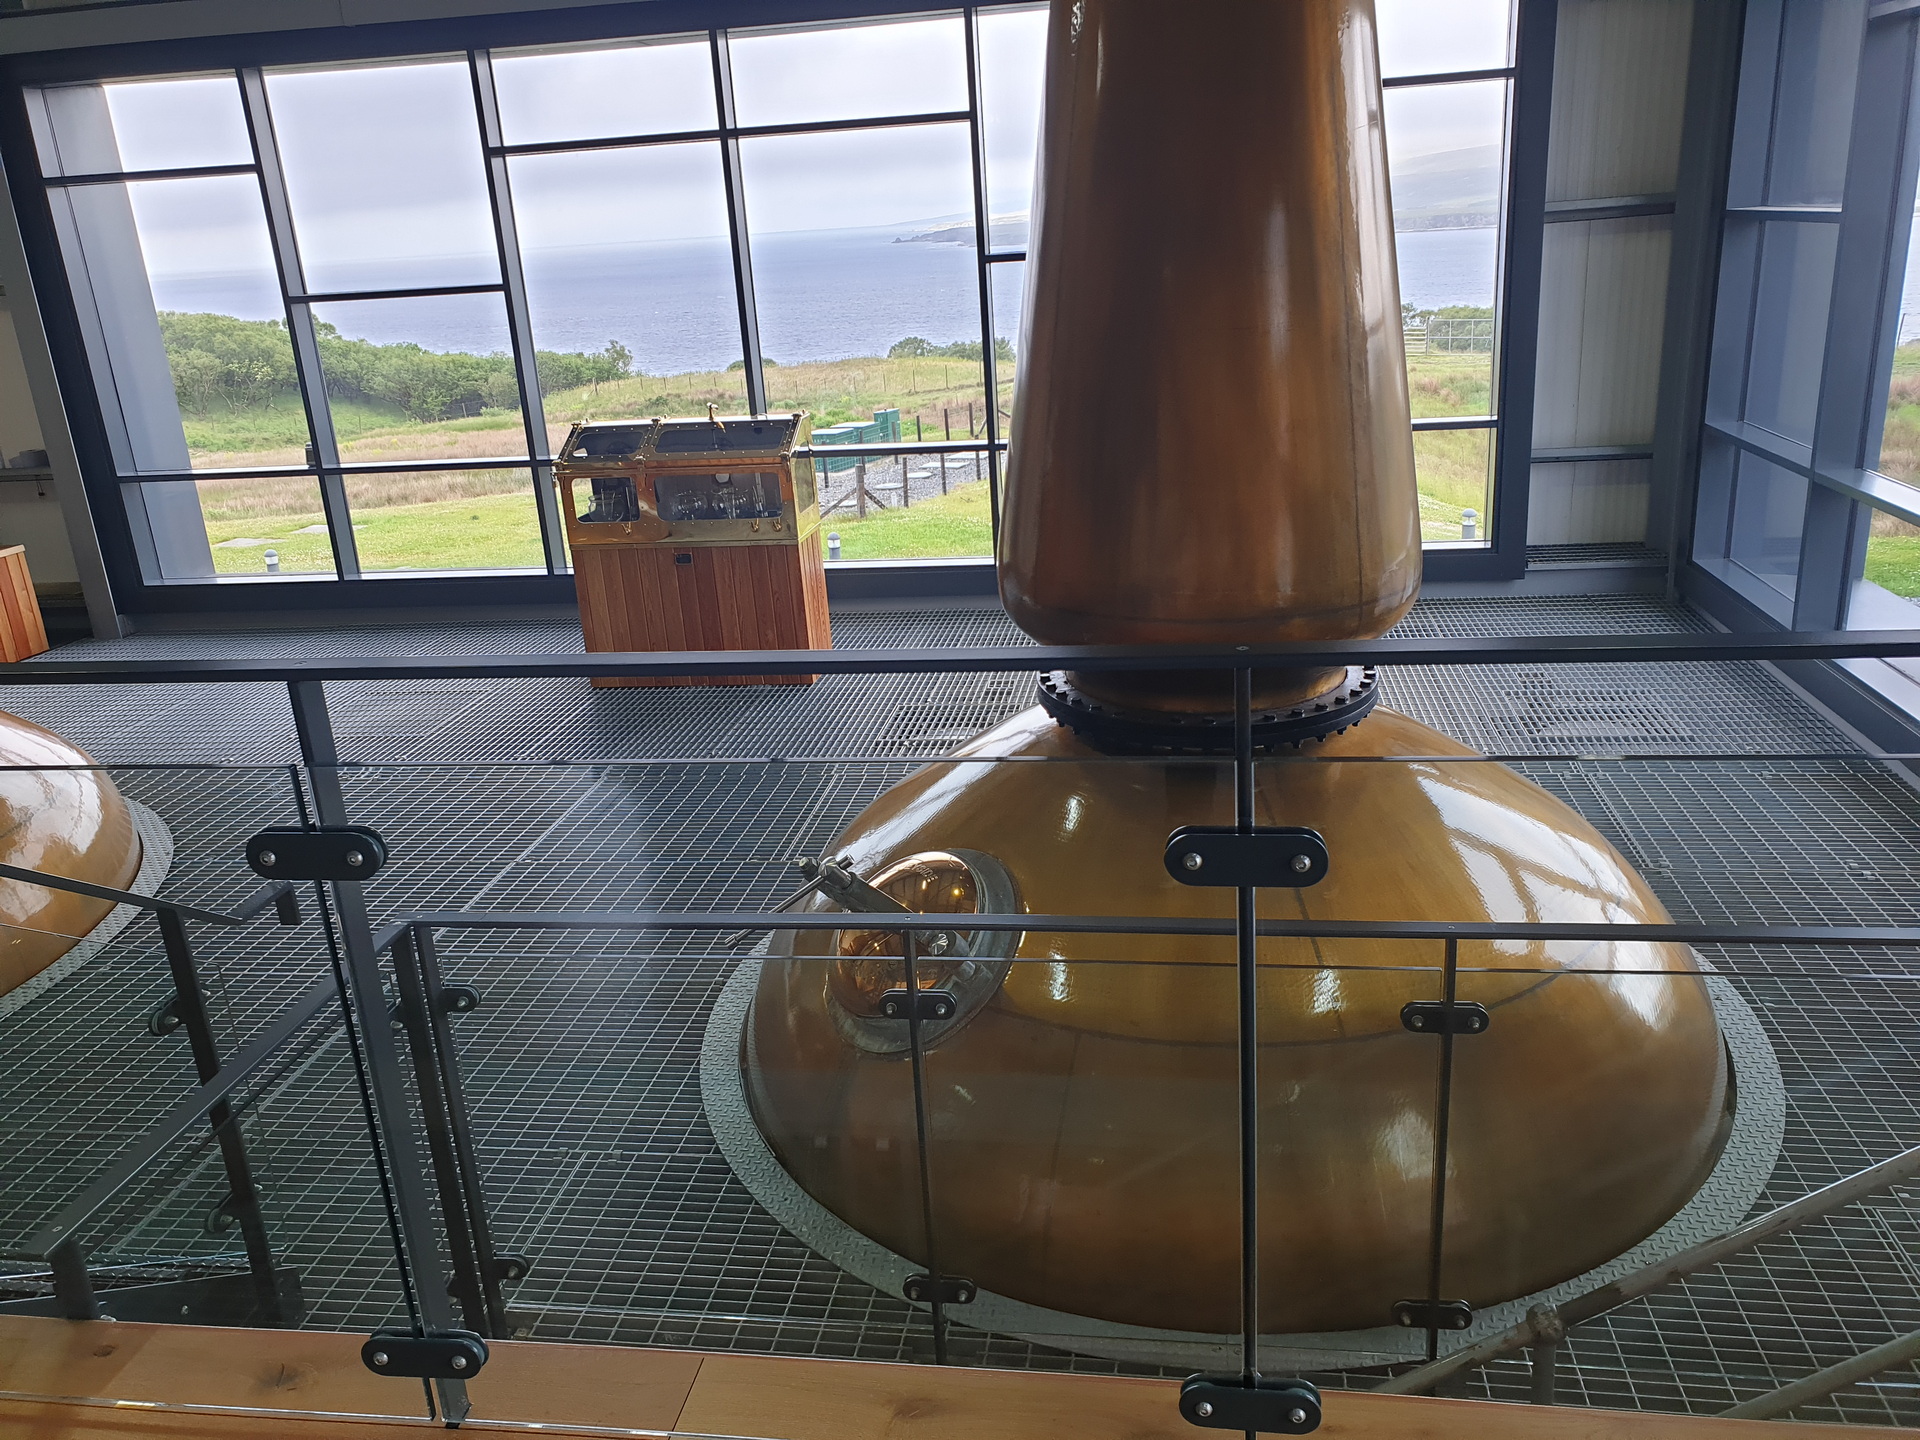
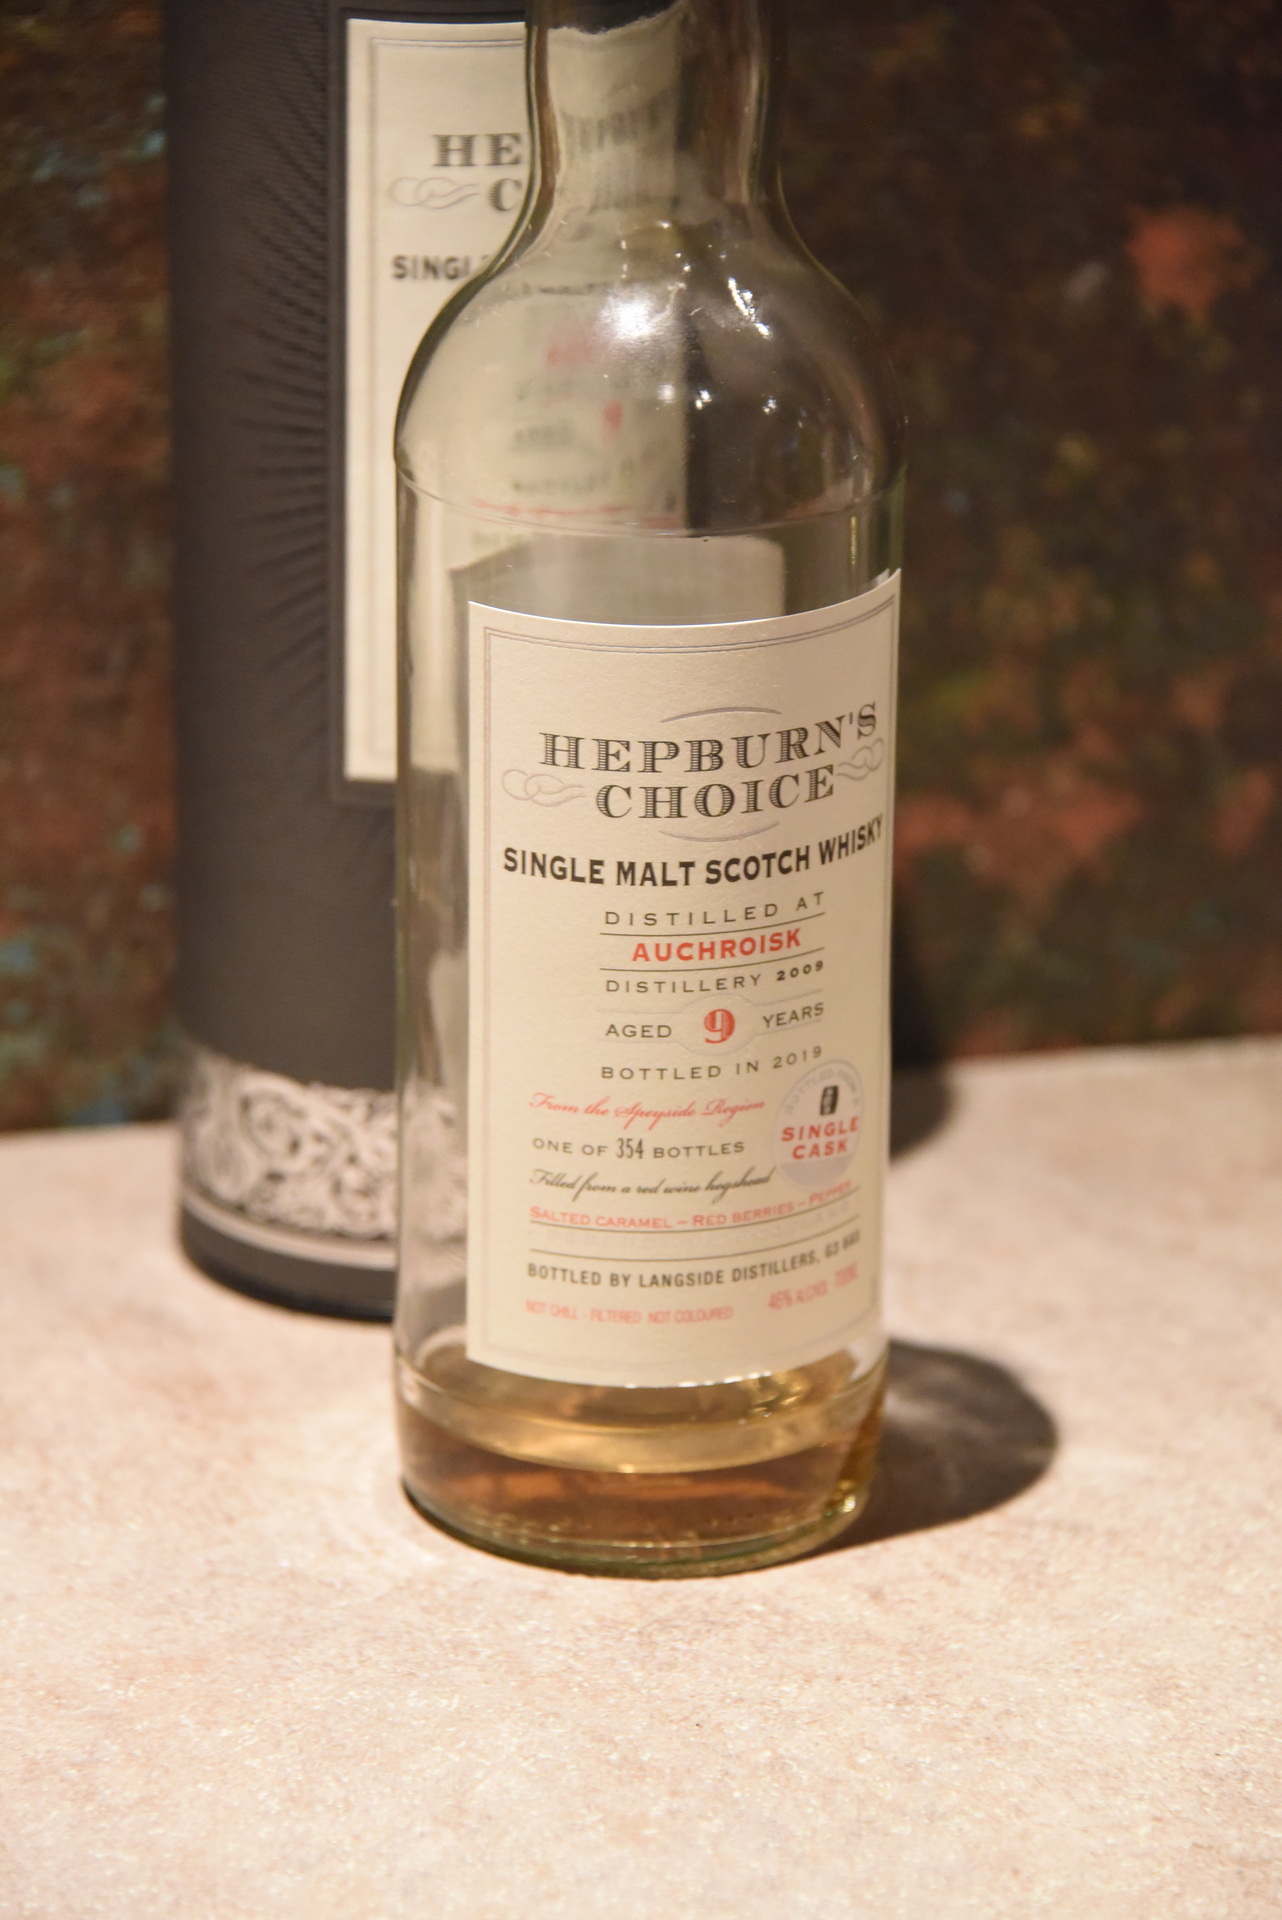
Vervolgens moesten we een beetje aanmaken om op tijd voor de rondleiding bij de Ardnahoe distillery te zijn, het was namelijk 15.15 en het was minstens nog een half uur rijden terwijl we onze rondleiding om 16 van start zou gaan. Na ons aangemeld te hebben, hadden we zelfs nog even tijd om door het shopje heen te lopen. Om 16 uur ging onze tour van start. Ardnahoe is de jongste distillery op Islay en is pas sinds 2018 in werking. Dit betekende dat we wel een rondleiding door de werkende distillery konden krijgen, maar nog niet hun eigen whisky konden proeven. Na rondgeleid te zijn, waarbij de stills het meest indrukwekkend waren oa door de ruimte waarin ze stonden met een prachtig uitzicht richting Jura, konden we kiezen uit 4 flessen van welke we een dram wilde proeven, 1 van de 2 mystery blends of 1 van de 2 mystery malts. Henri nam de Hepburn’s choice (Auchroisk 9yr) die gematureerd was op rode wijnvaten, en Coline heeft de andere malt meegenomen in een driver’s flesje. Hier mochten we de tasting glaasjes meenemen. Nadat we onze tasters op hadden zijn we er snel vandoor gegaan om nog net voor sluitingstijd bij de Bunnahabhain distillery het shopje in te kunnen duiken.
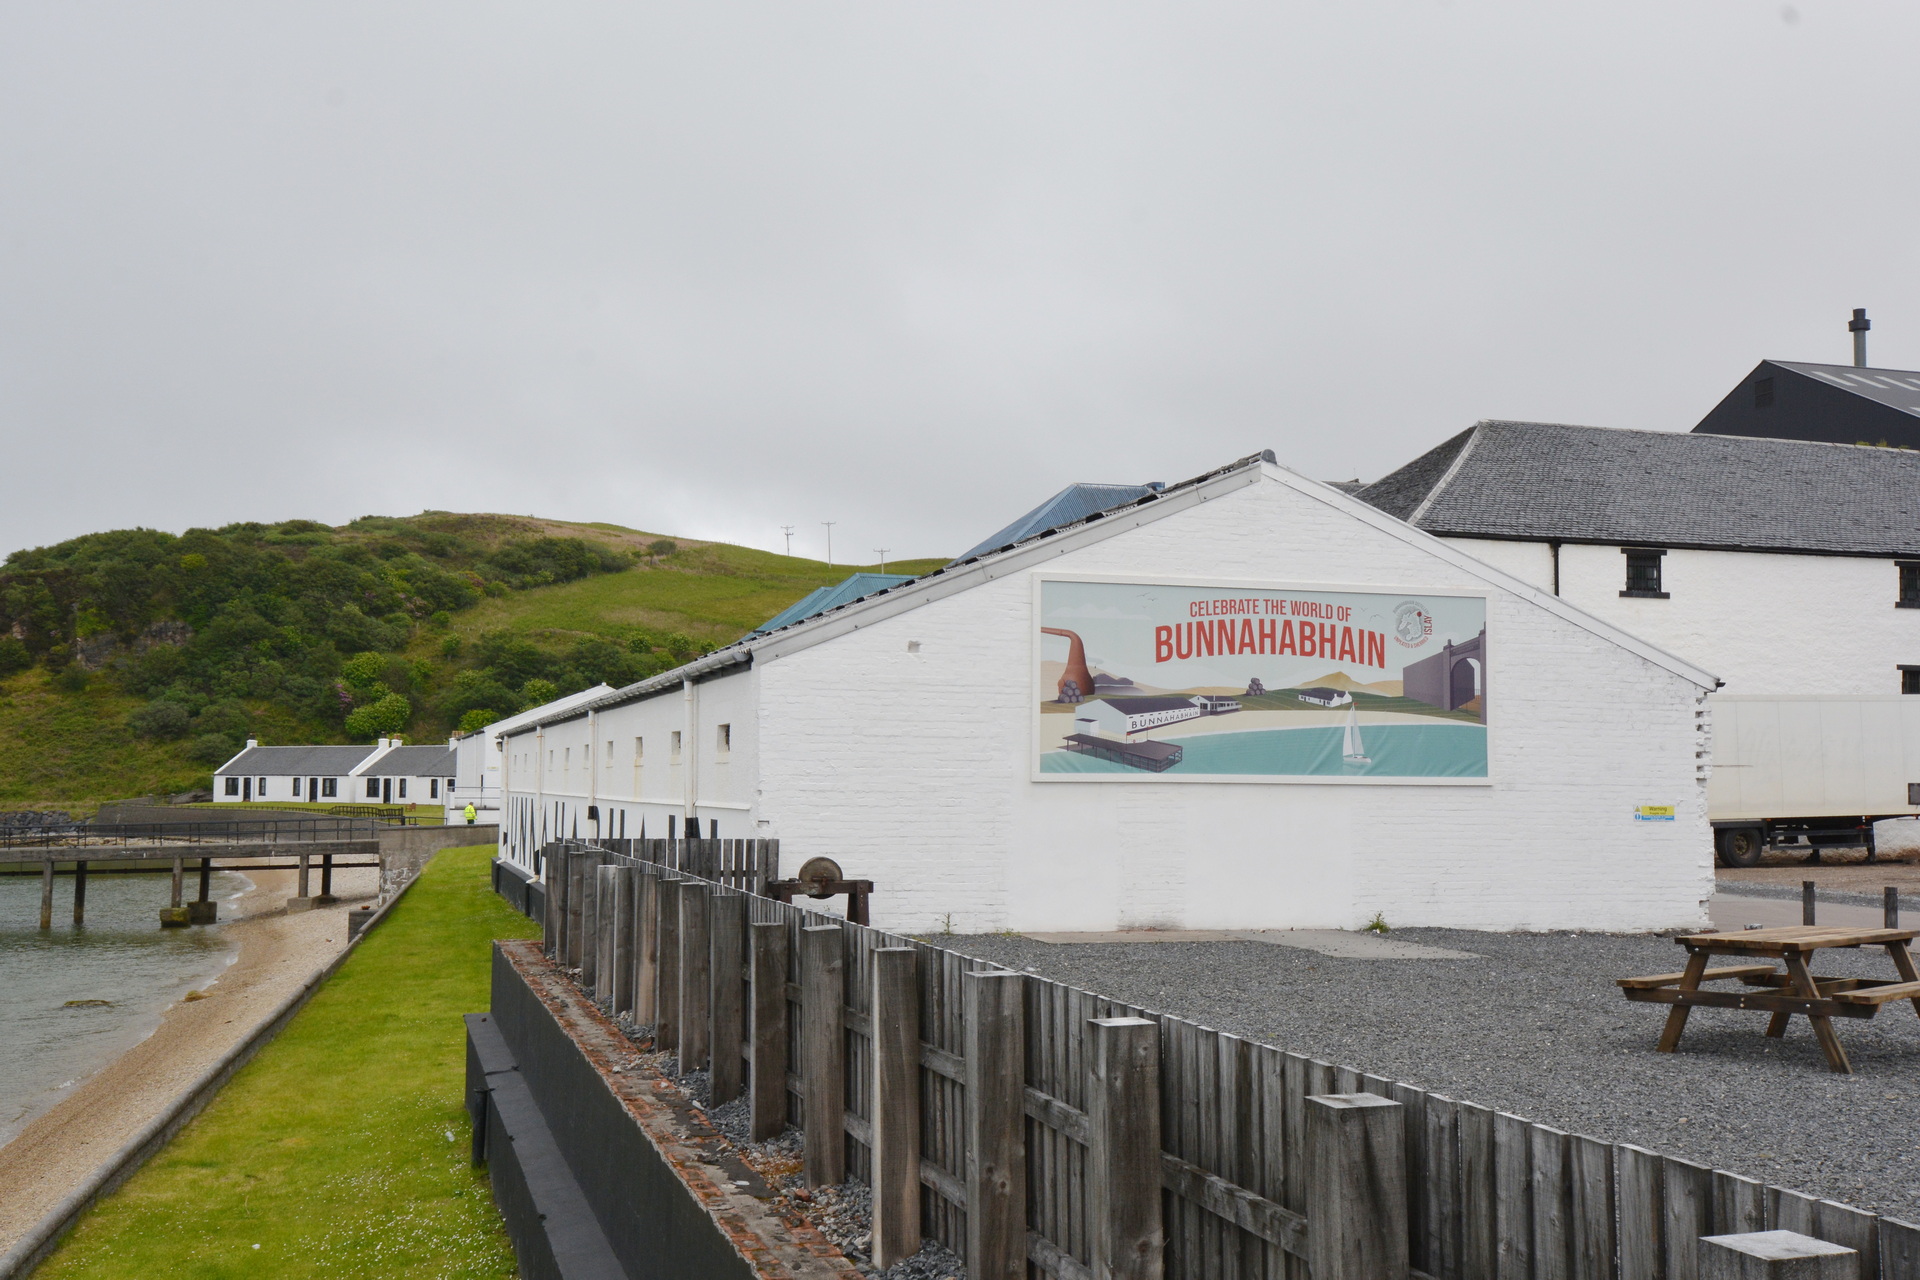
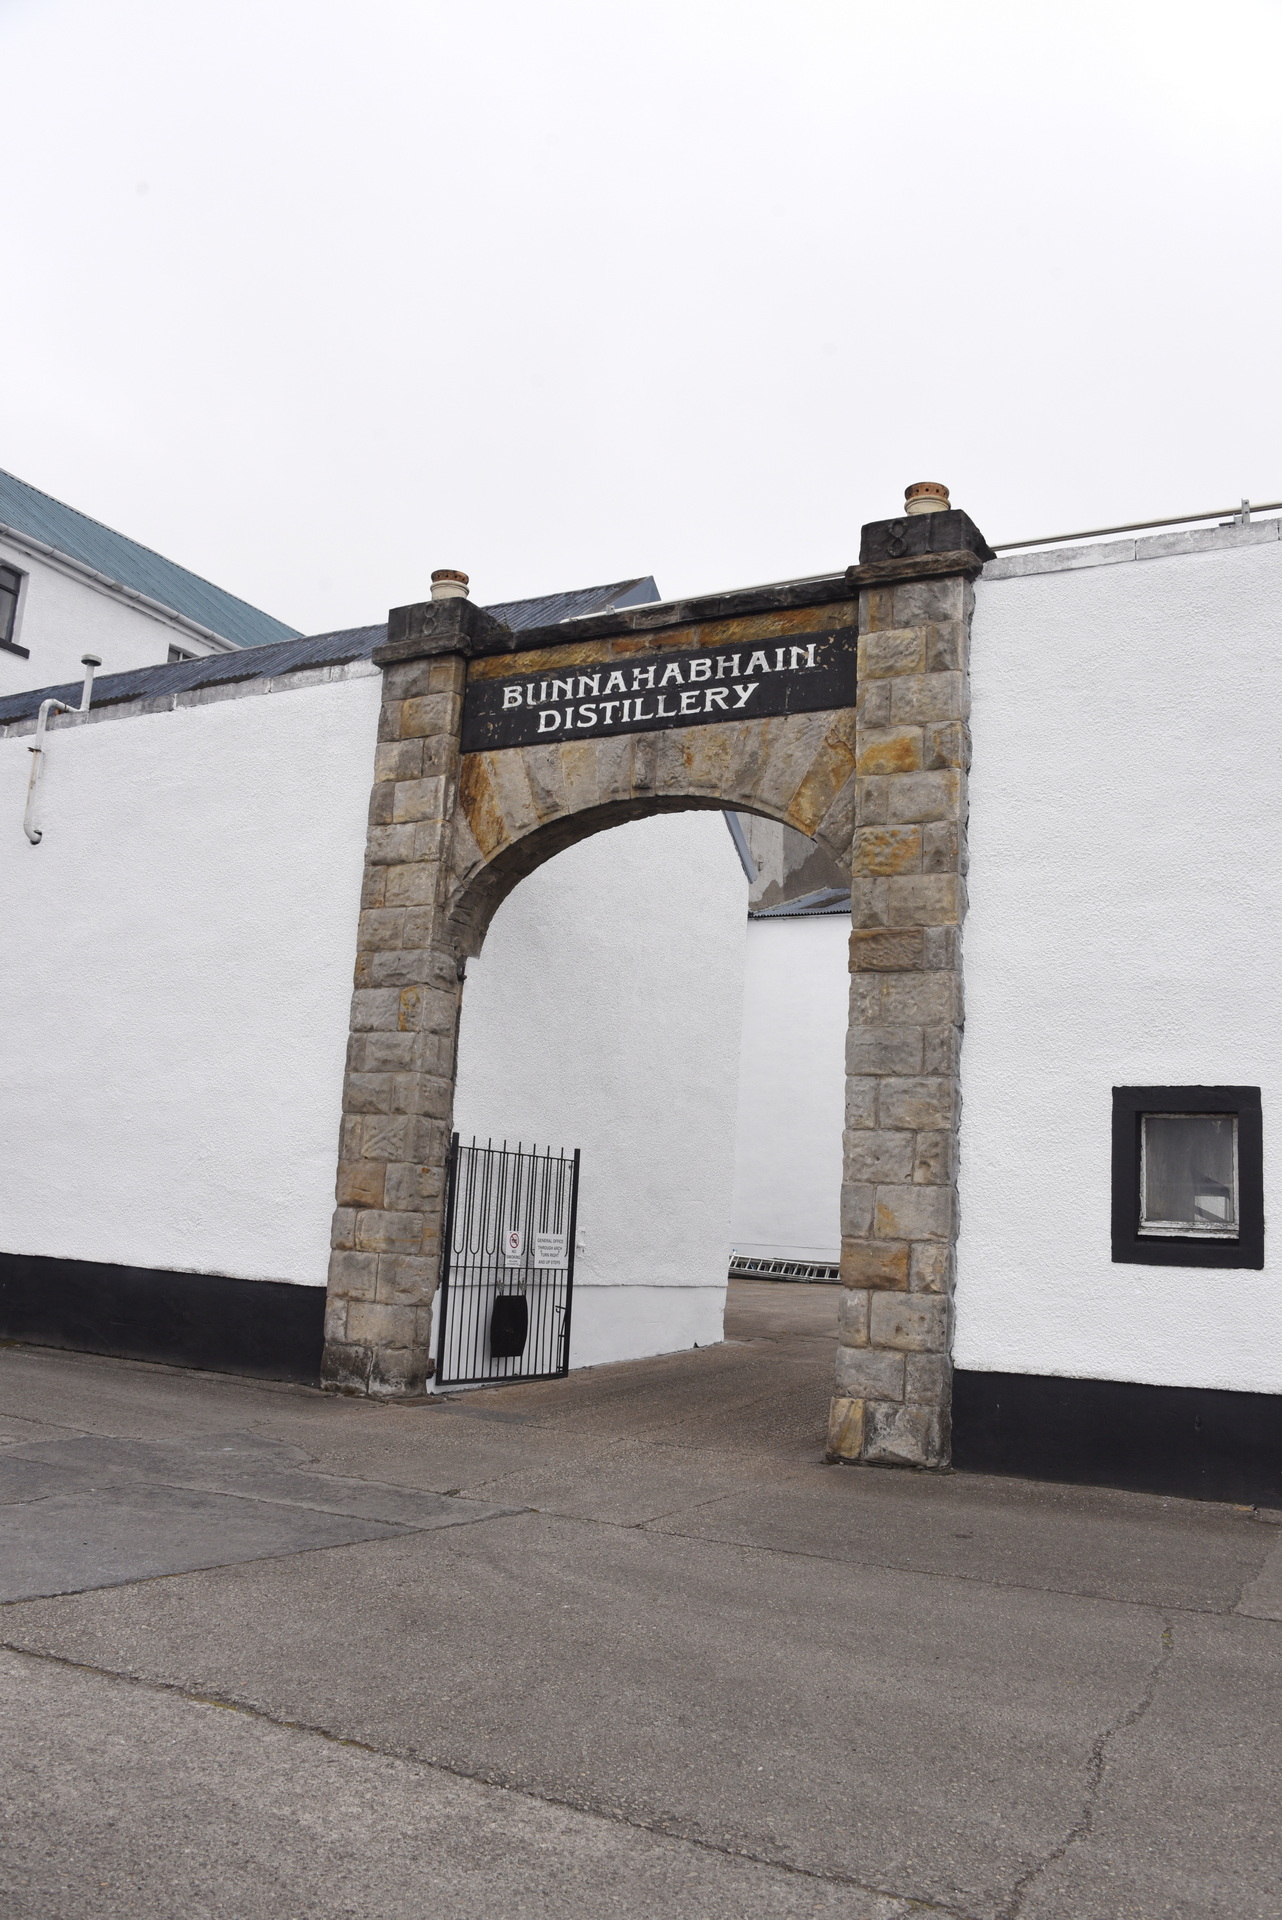
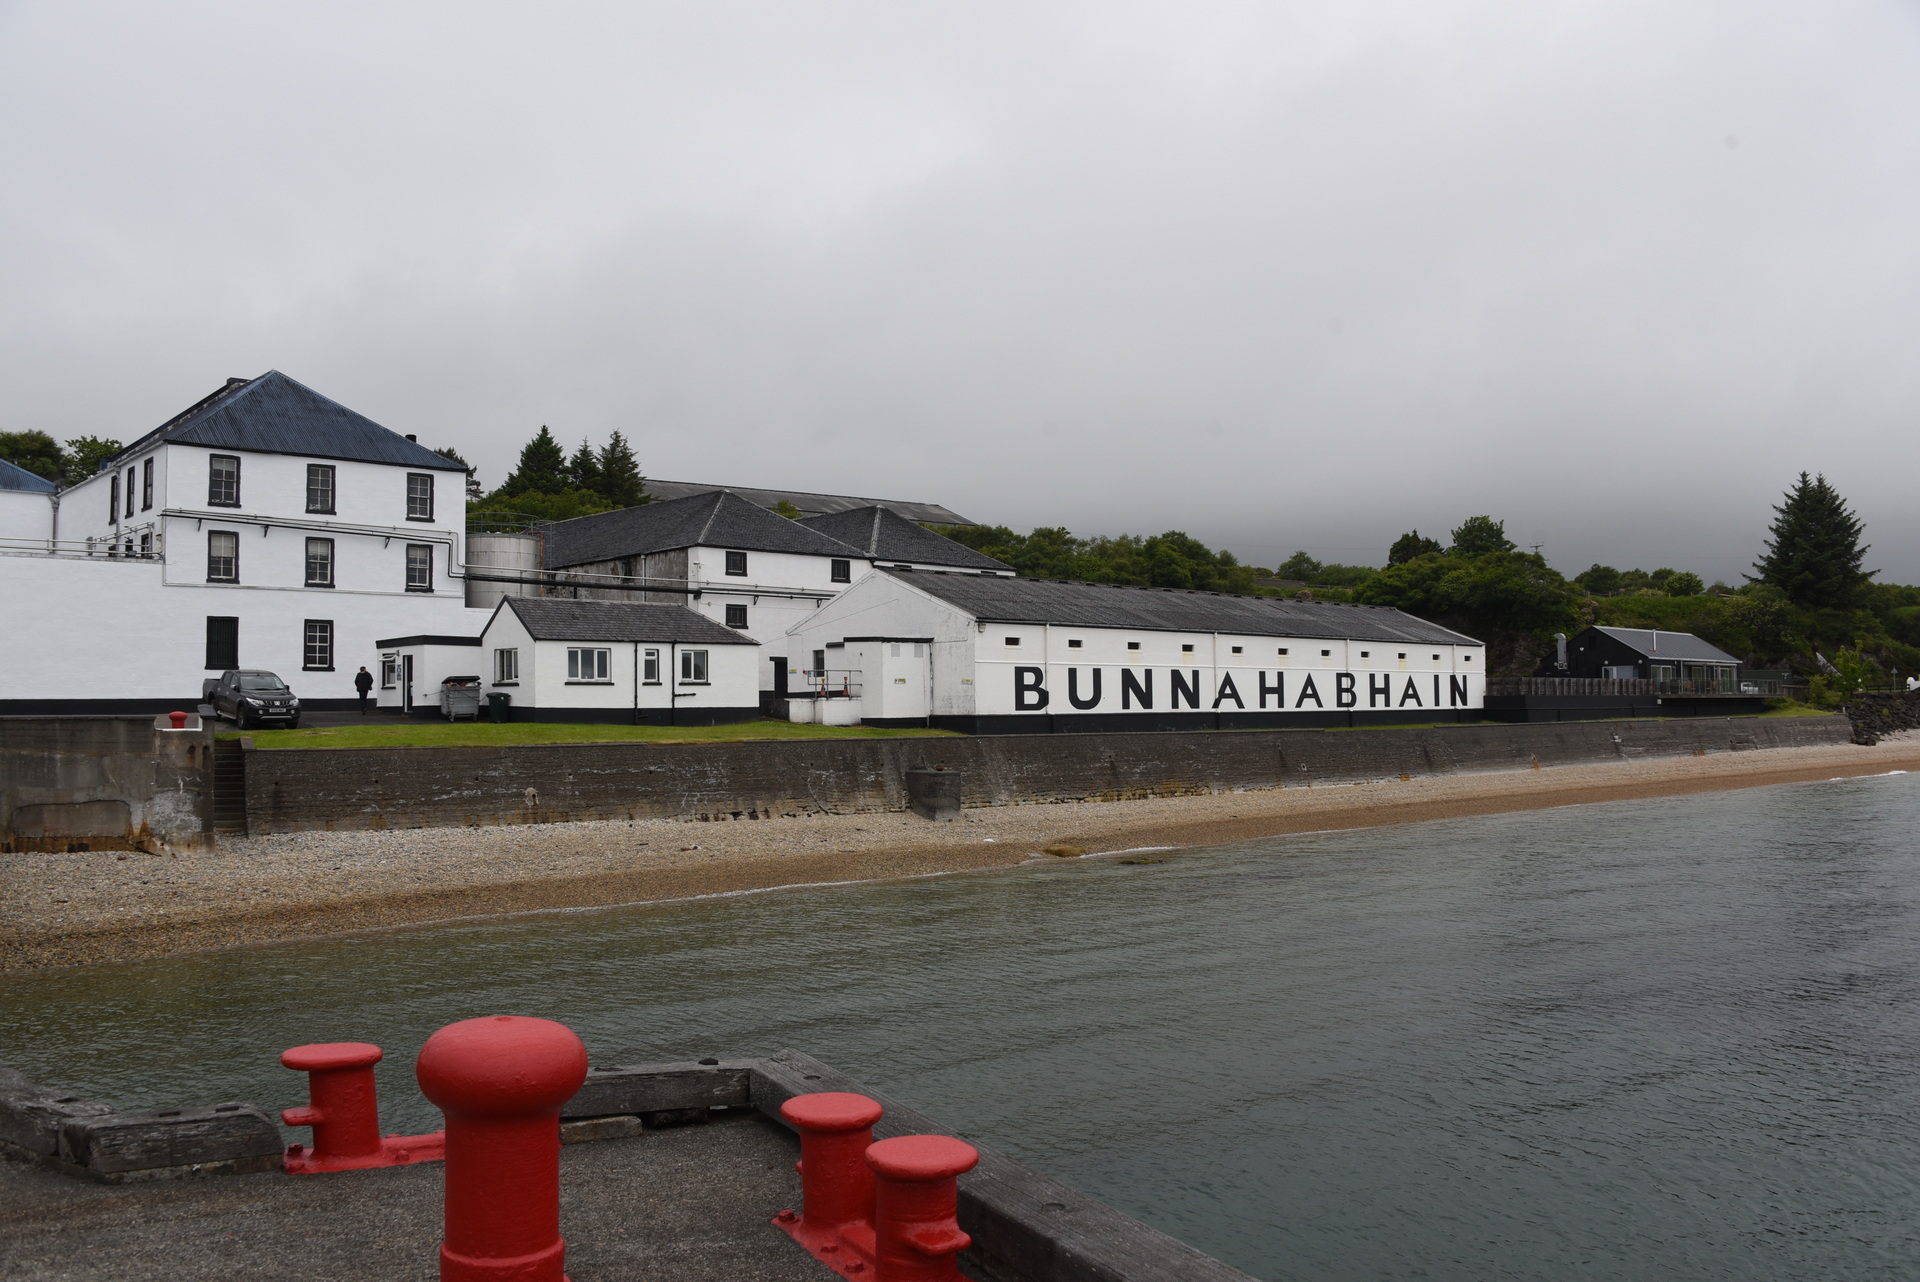
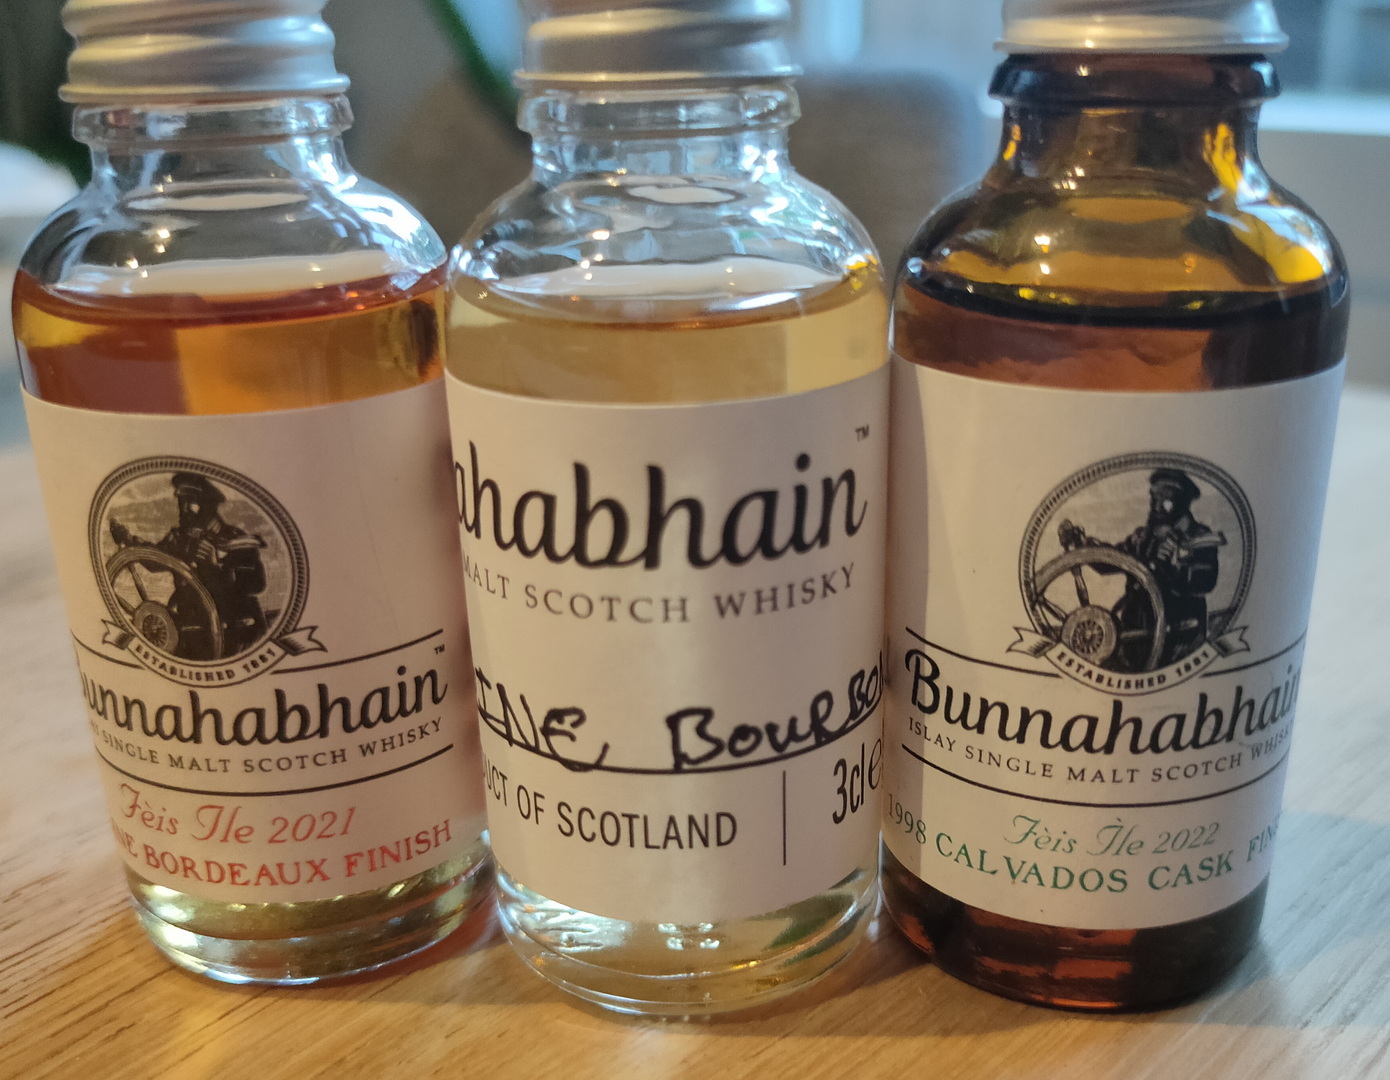
Bunnahabhain lag zo’n 2 km verderop dus we kwamen even voor 17en aan, en we konden inderdaad nog net even het shopje inlopen. We waren te laat om daar ter plekke nog een tasting te doen, maar we hebben van 3 whisky’s een 3cl tasting flesje meegenomen en nog een T-shirt gekocht. Eenmaal buiten zijn we nog even het terrein opgelopen en de pier, zodat we ook hier nog even het witte warehouse met de naam Bunnahabhain in zwarte letters konden fotograferen.
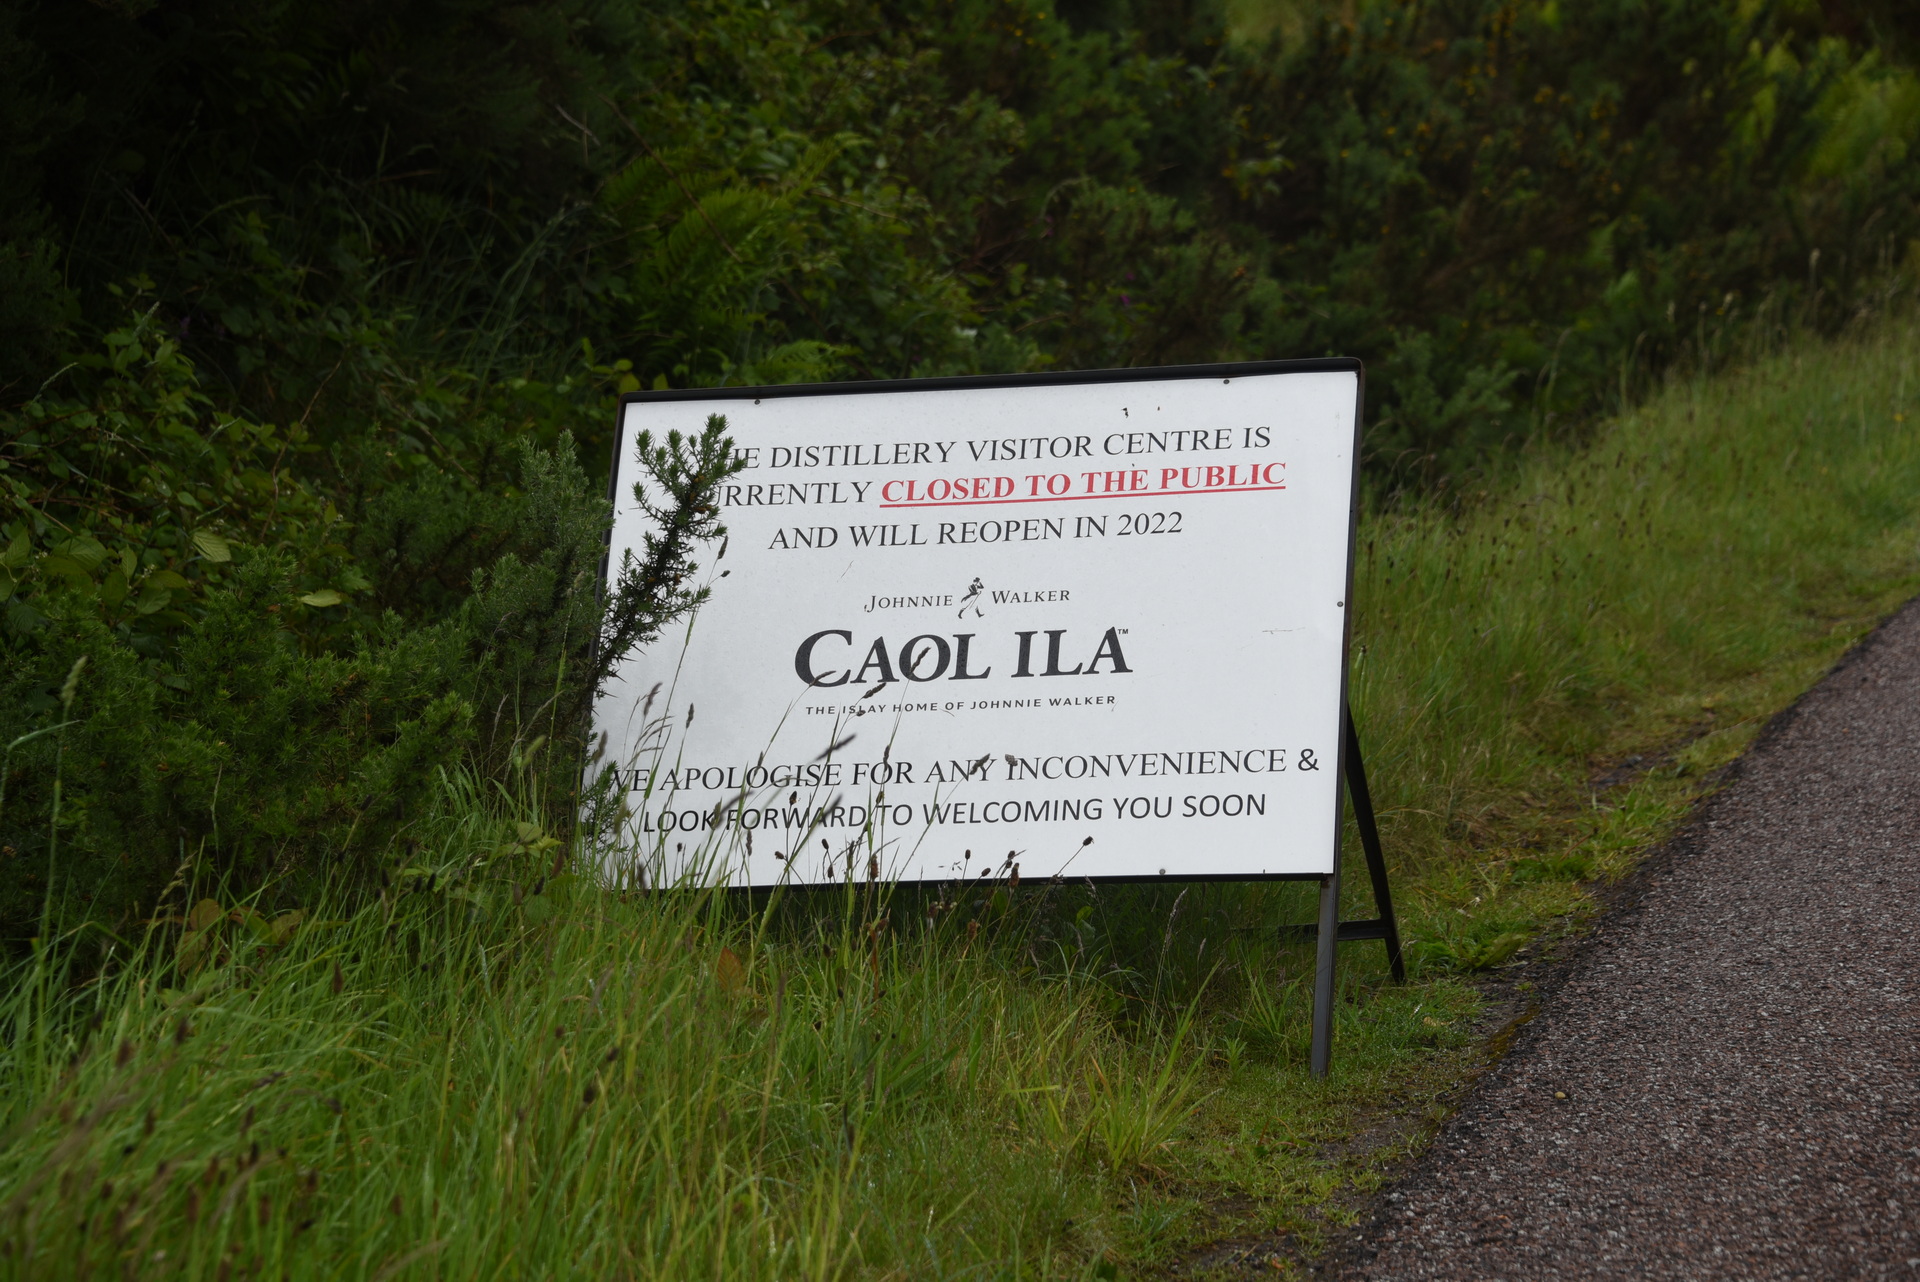
We wilden eigenlijk ook nog even langs de Caol Ila distillery rijden om ook hier een foto te maken van het witte warehouse met de naam Caol Ila in zwarte letters, maar we wisten dat deze gesloten was voor onderhoud. Maar de weg ernaartoe was ook afgesloten. We hebben het geprobeerd, maar de weg ernaartoe lag ook echt open, dus dat ging ‘m helaas echt niet worden.
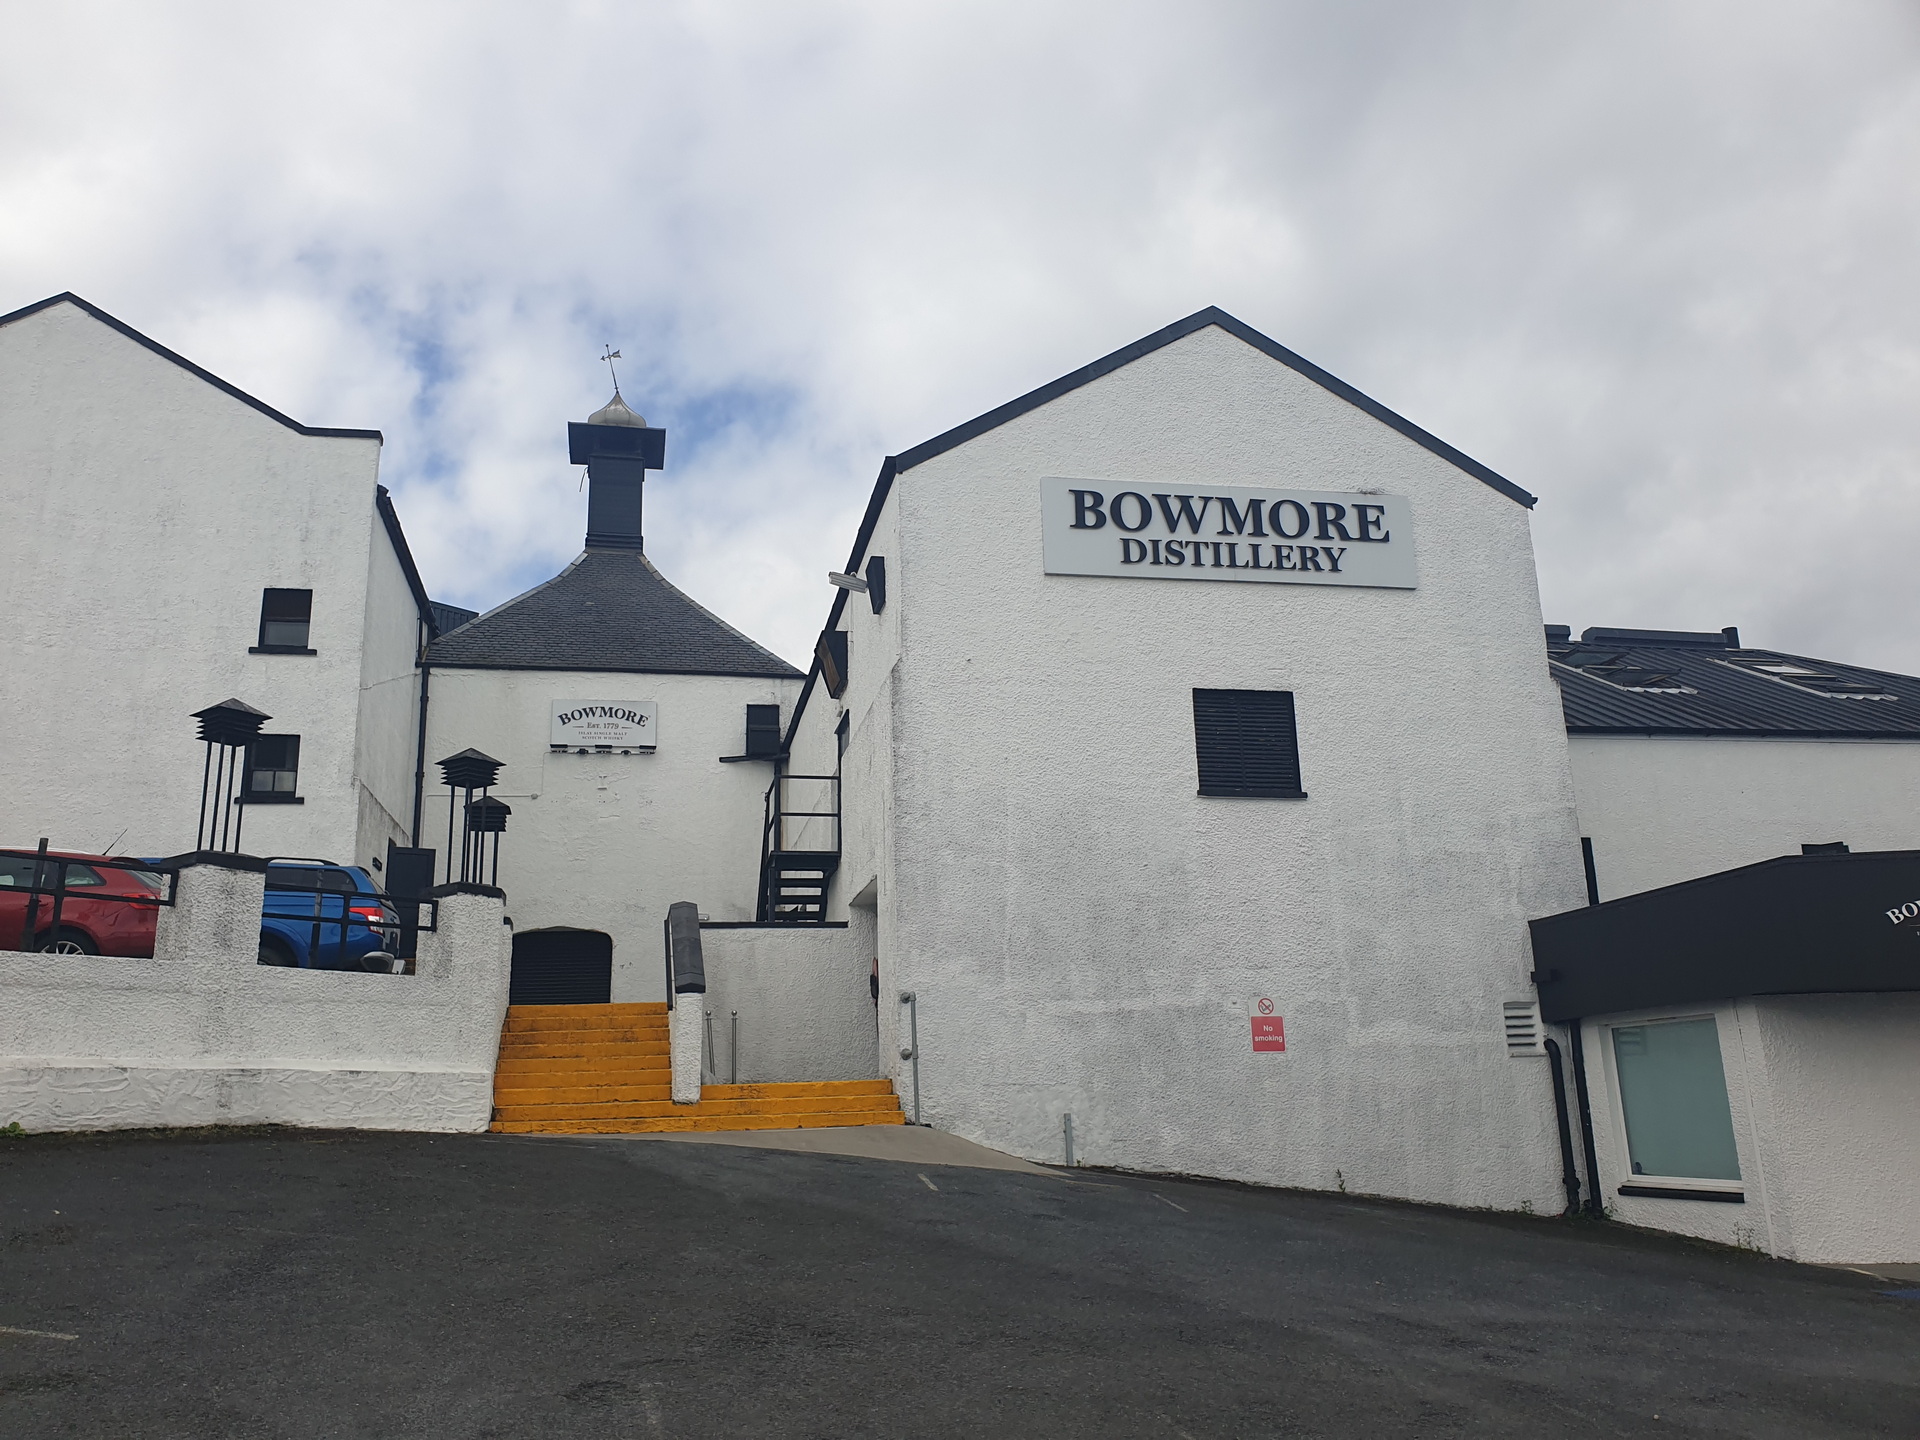
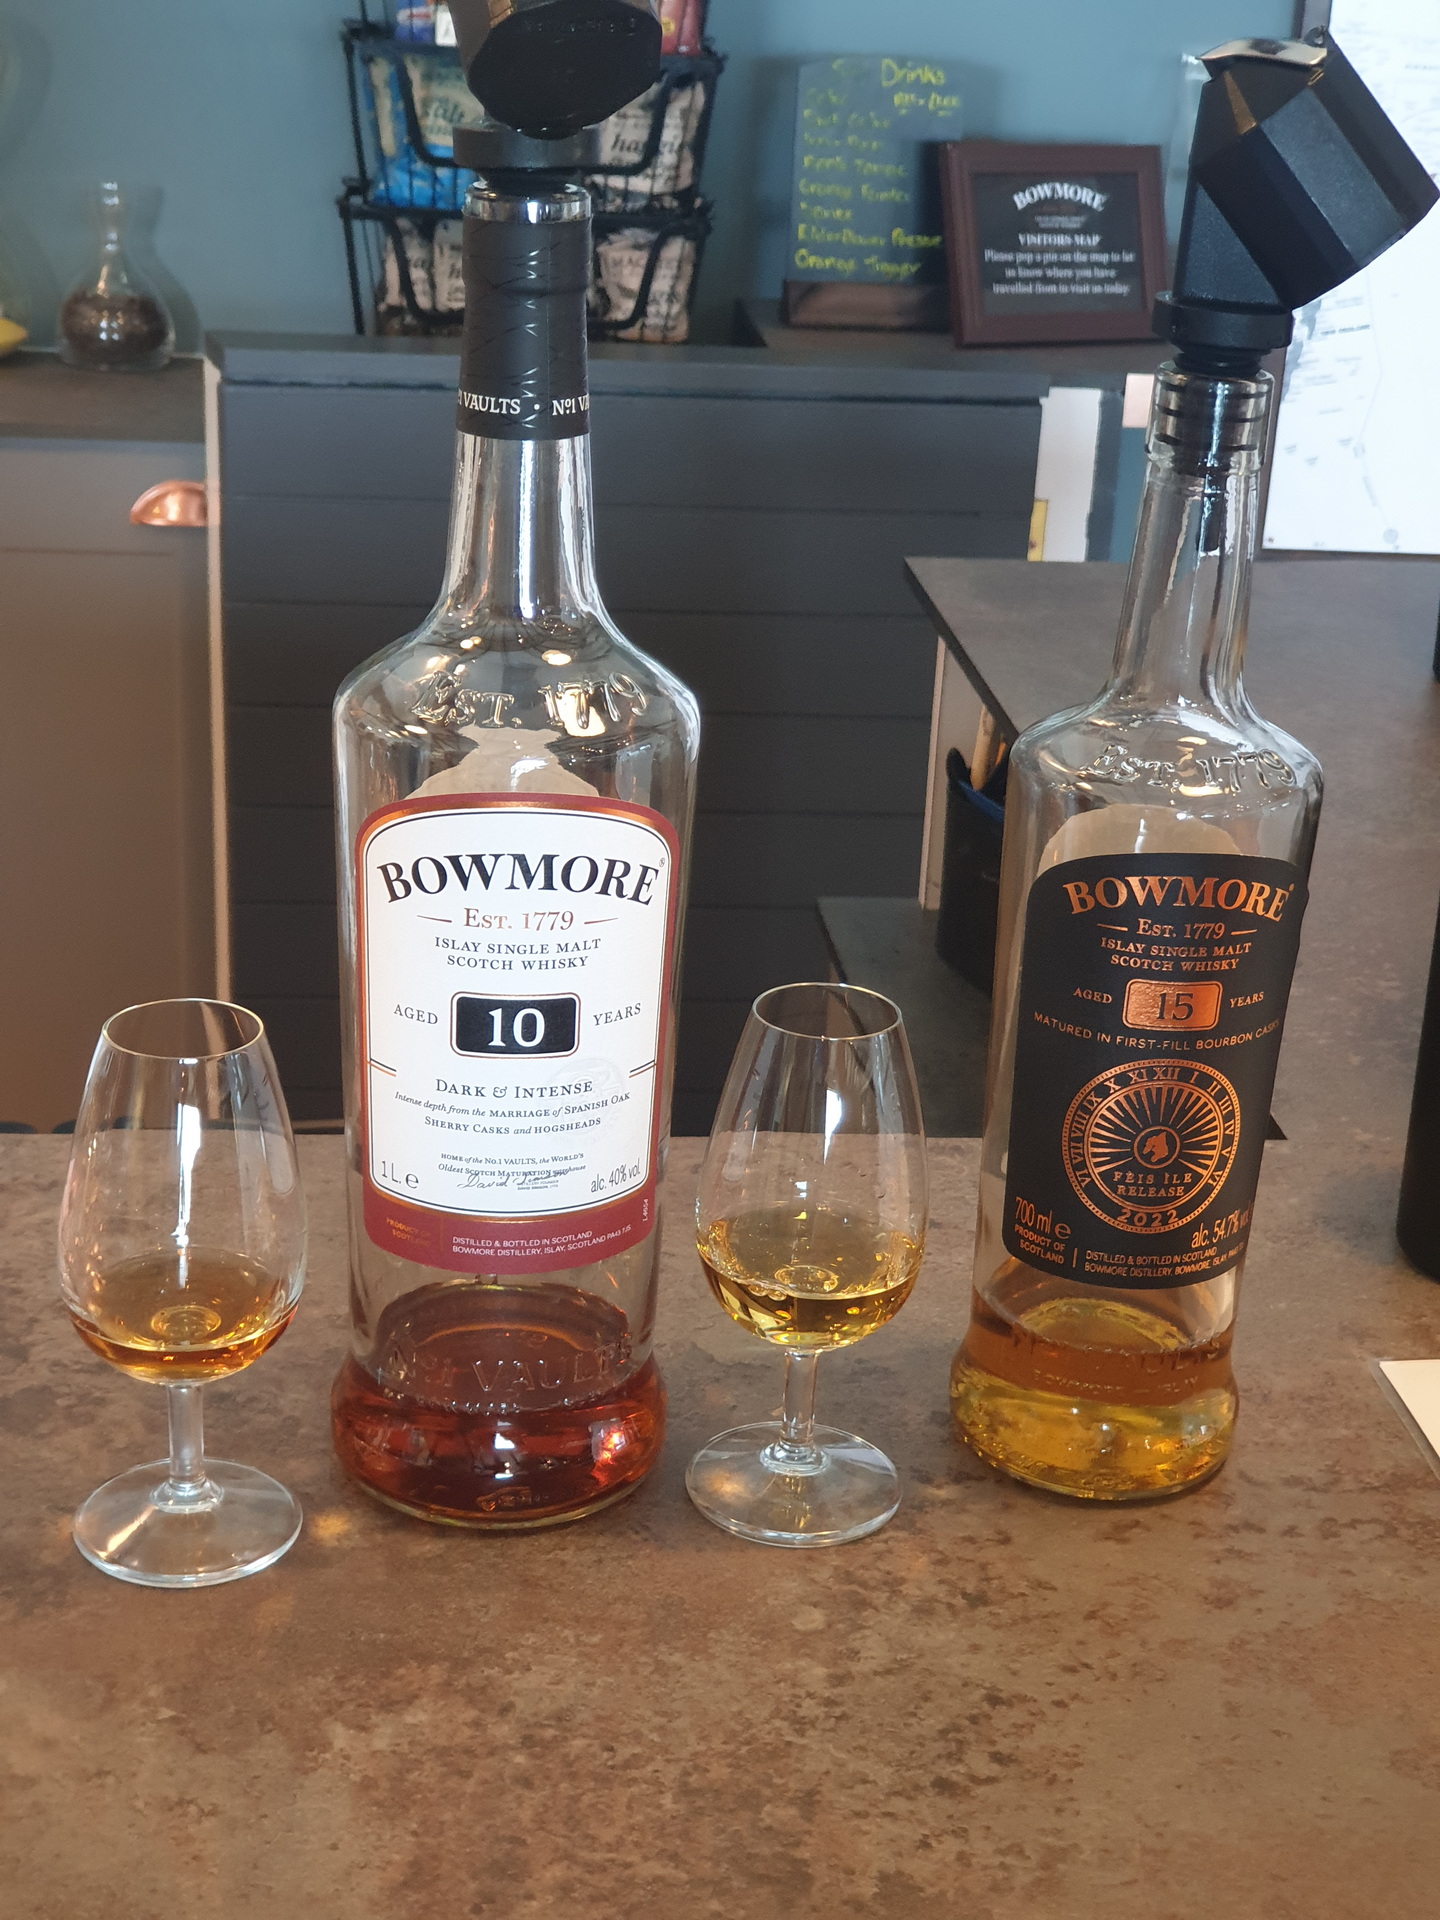
10 Juni – Bowmore, Port Ellen distillers (Isle of Islay)
Een bezoekje gebracht aan de distillery shopje, waar we ook weer een kleine tasting hebben gedaan met de 10yr old (deze was complimentary), en Henri heeft nog een dram genomen uit de fles van het Fèis ìle festival van dit jaar.
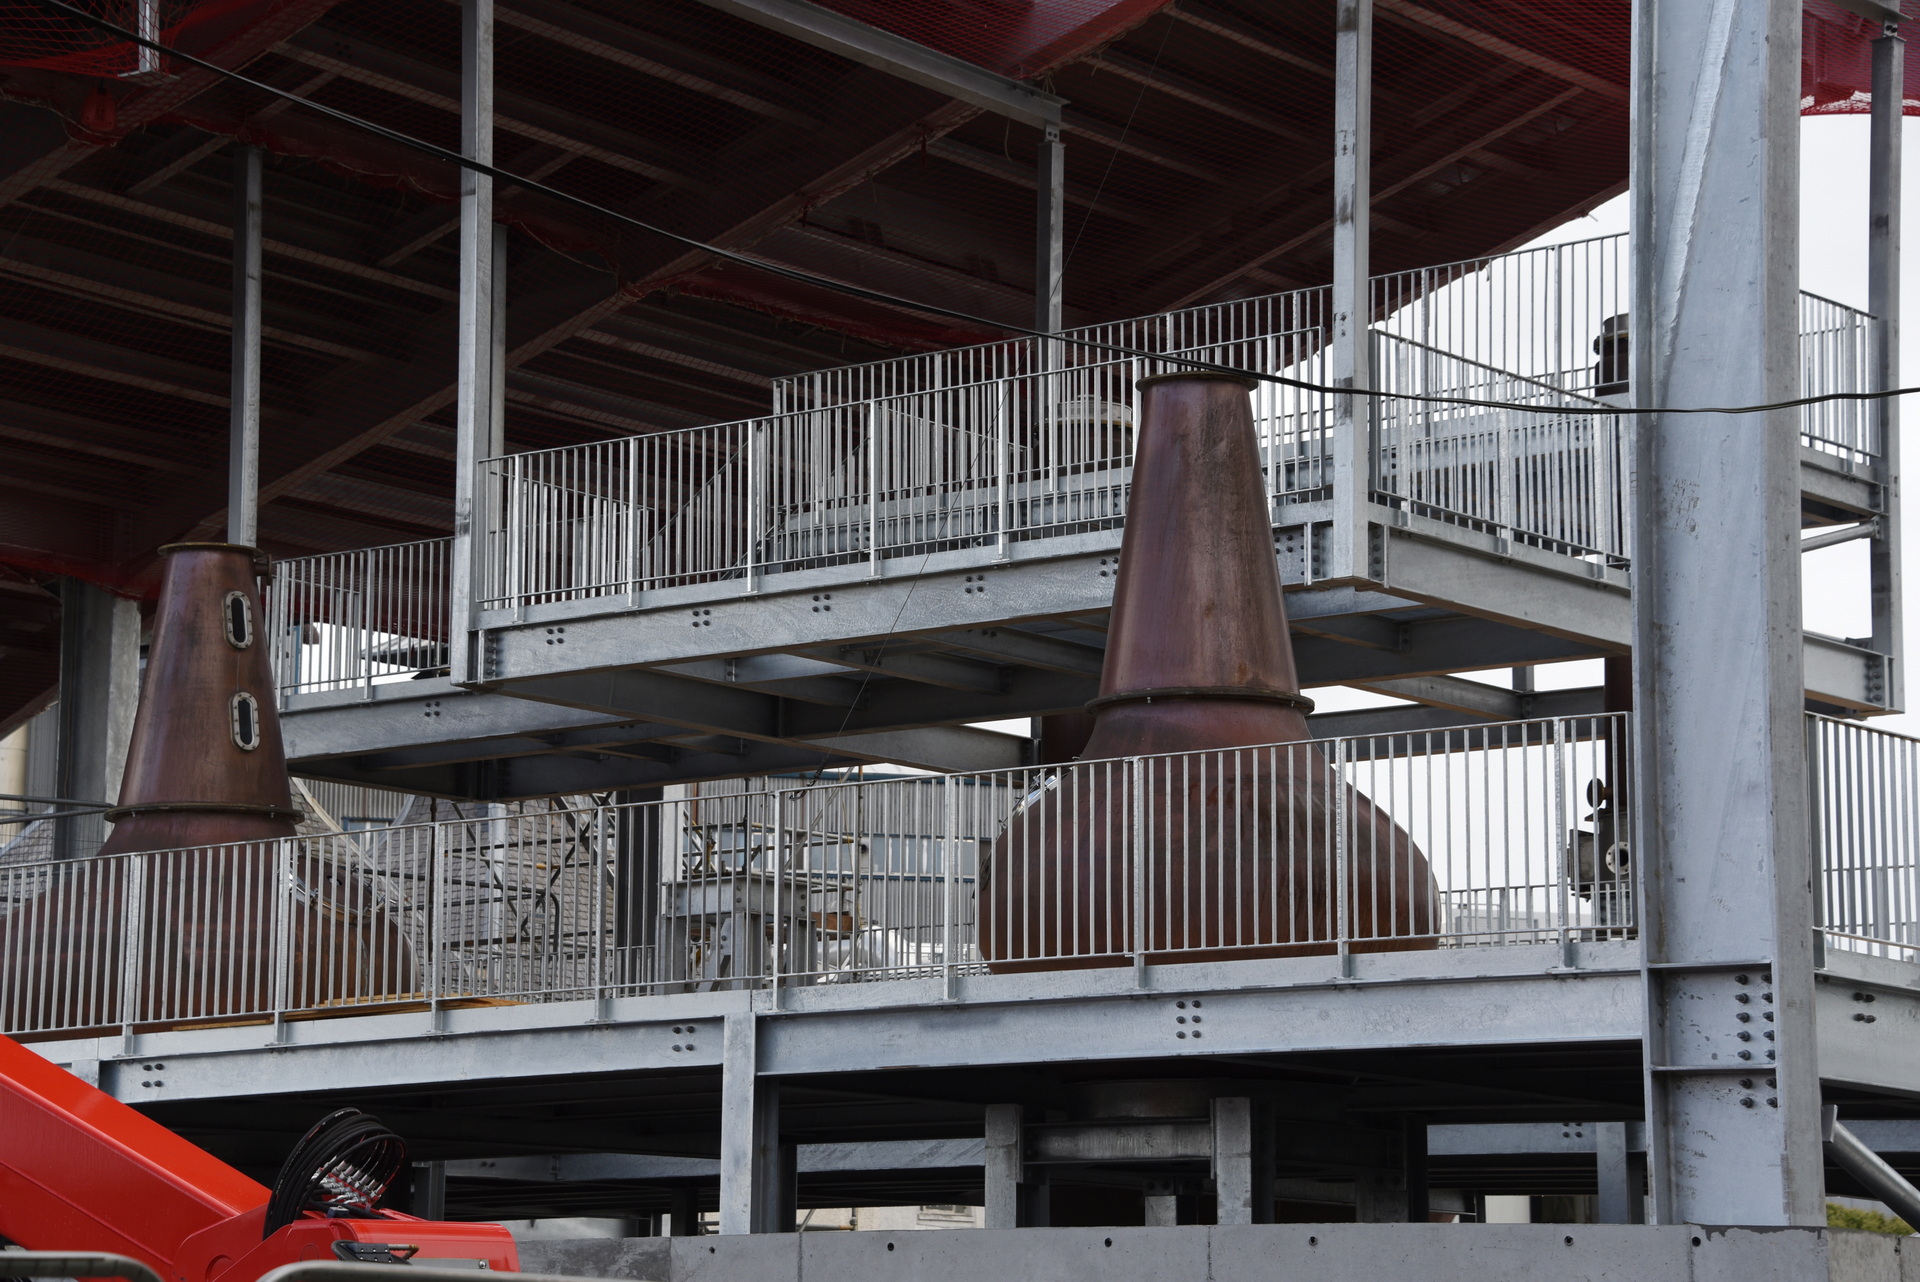
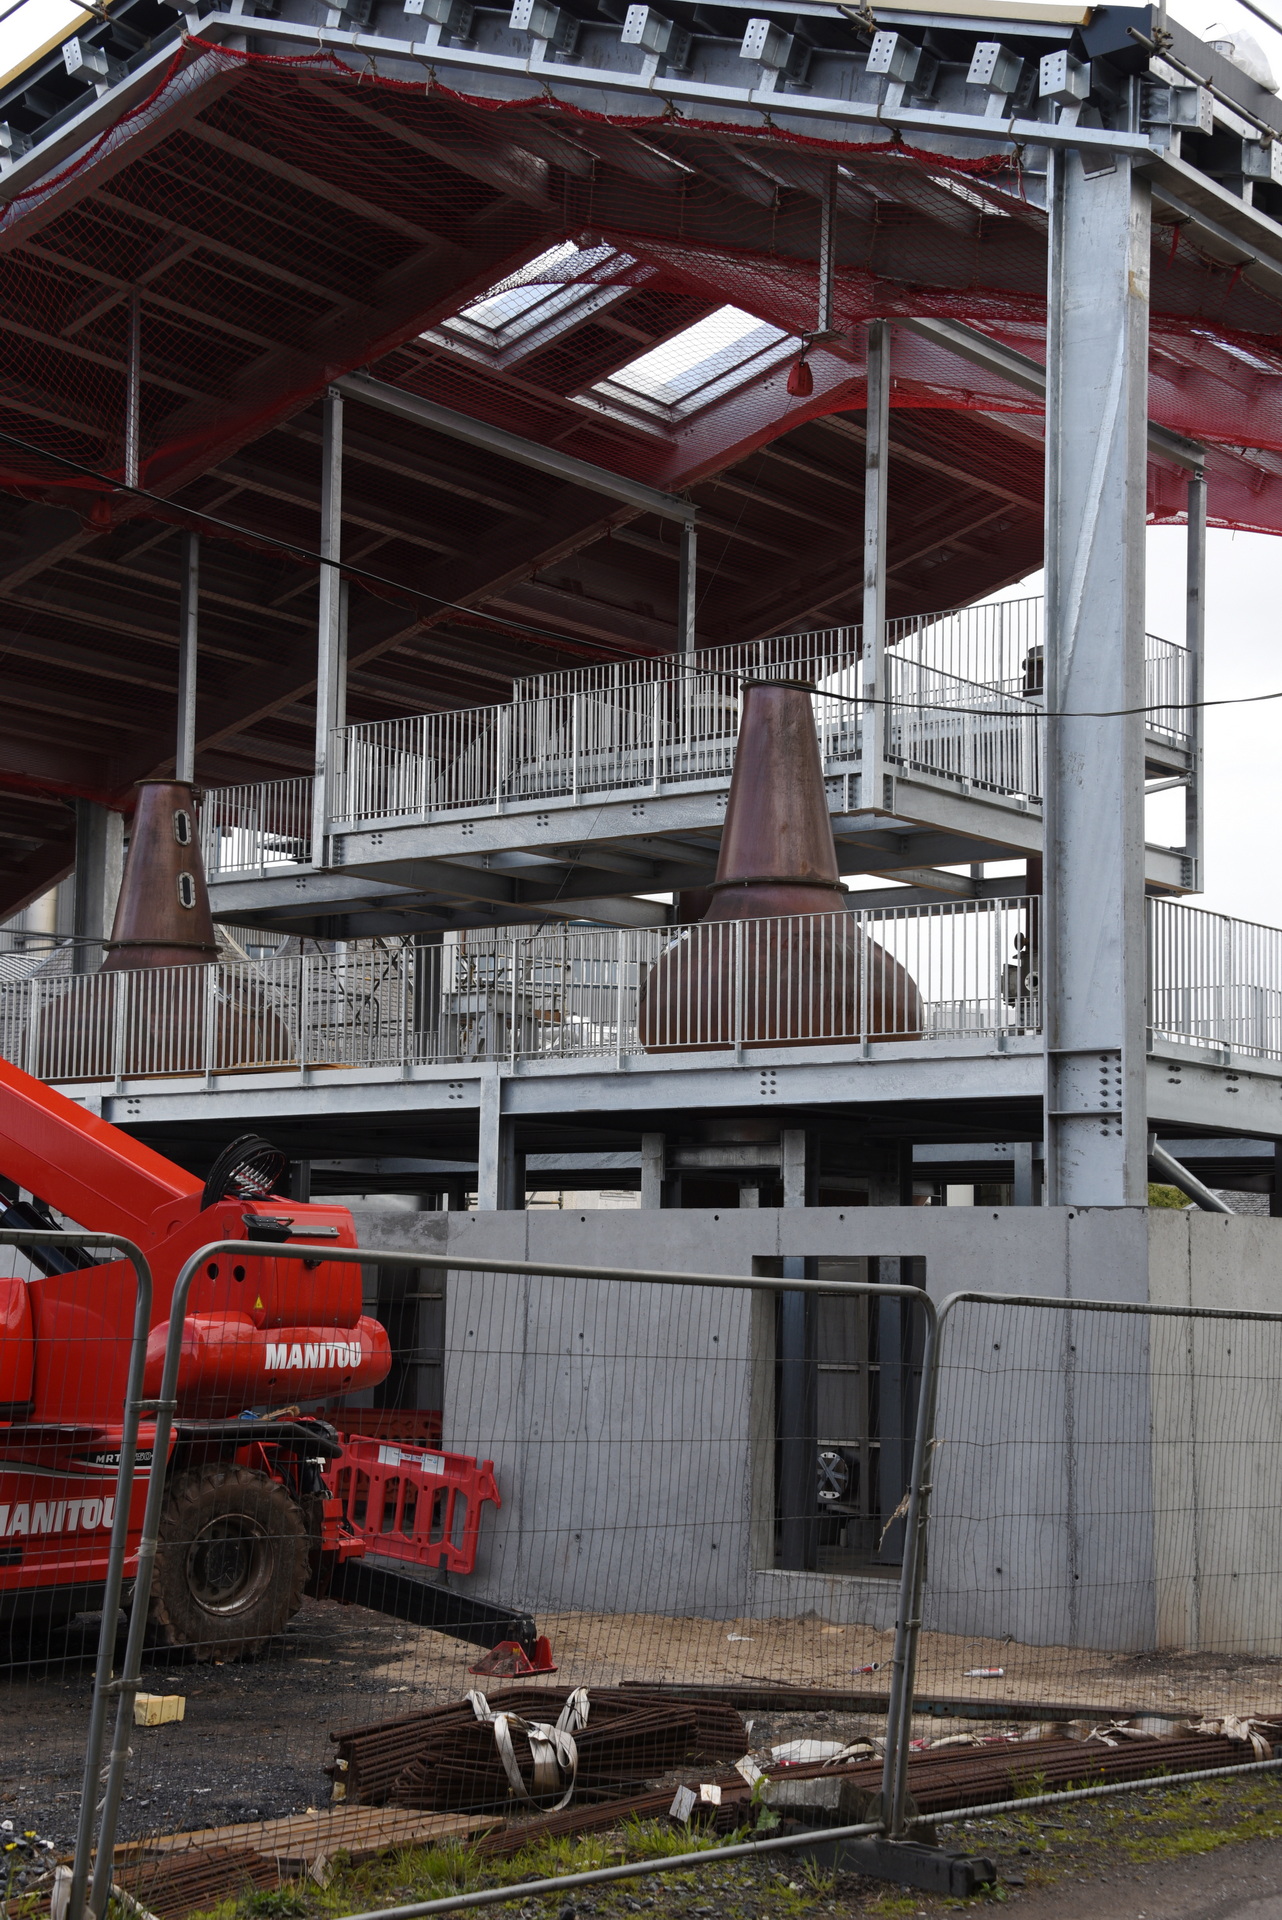
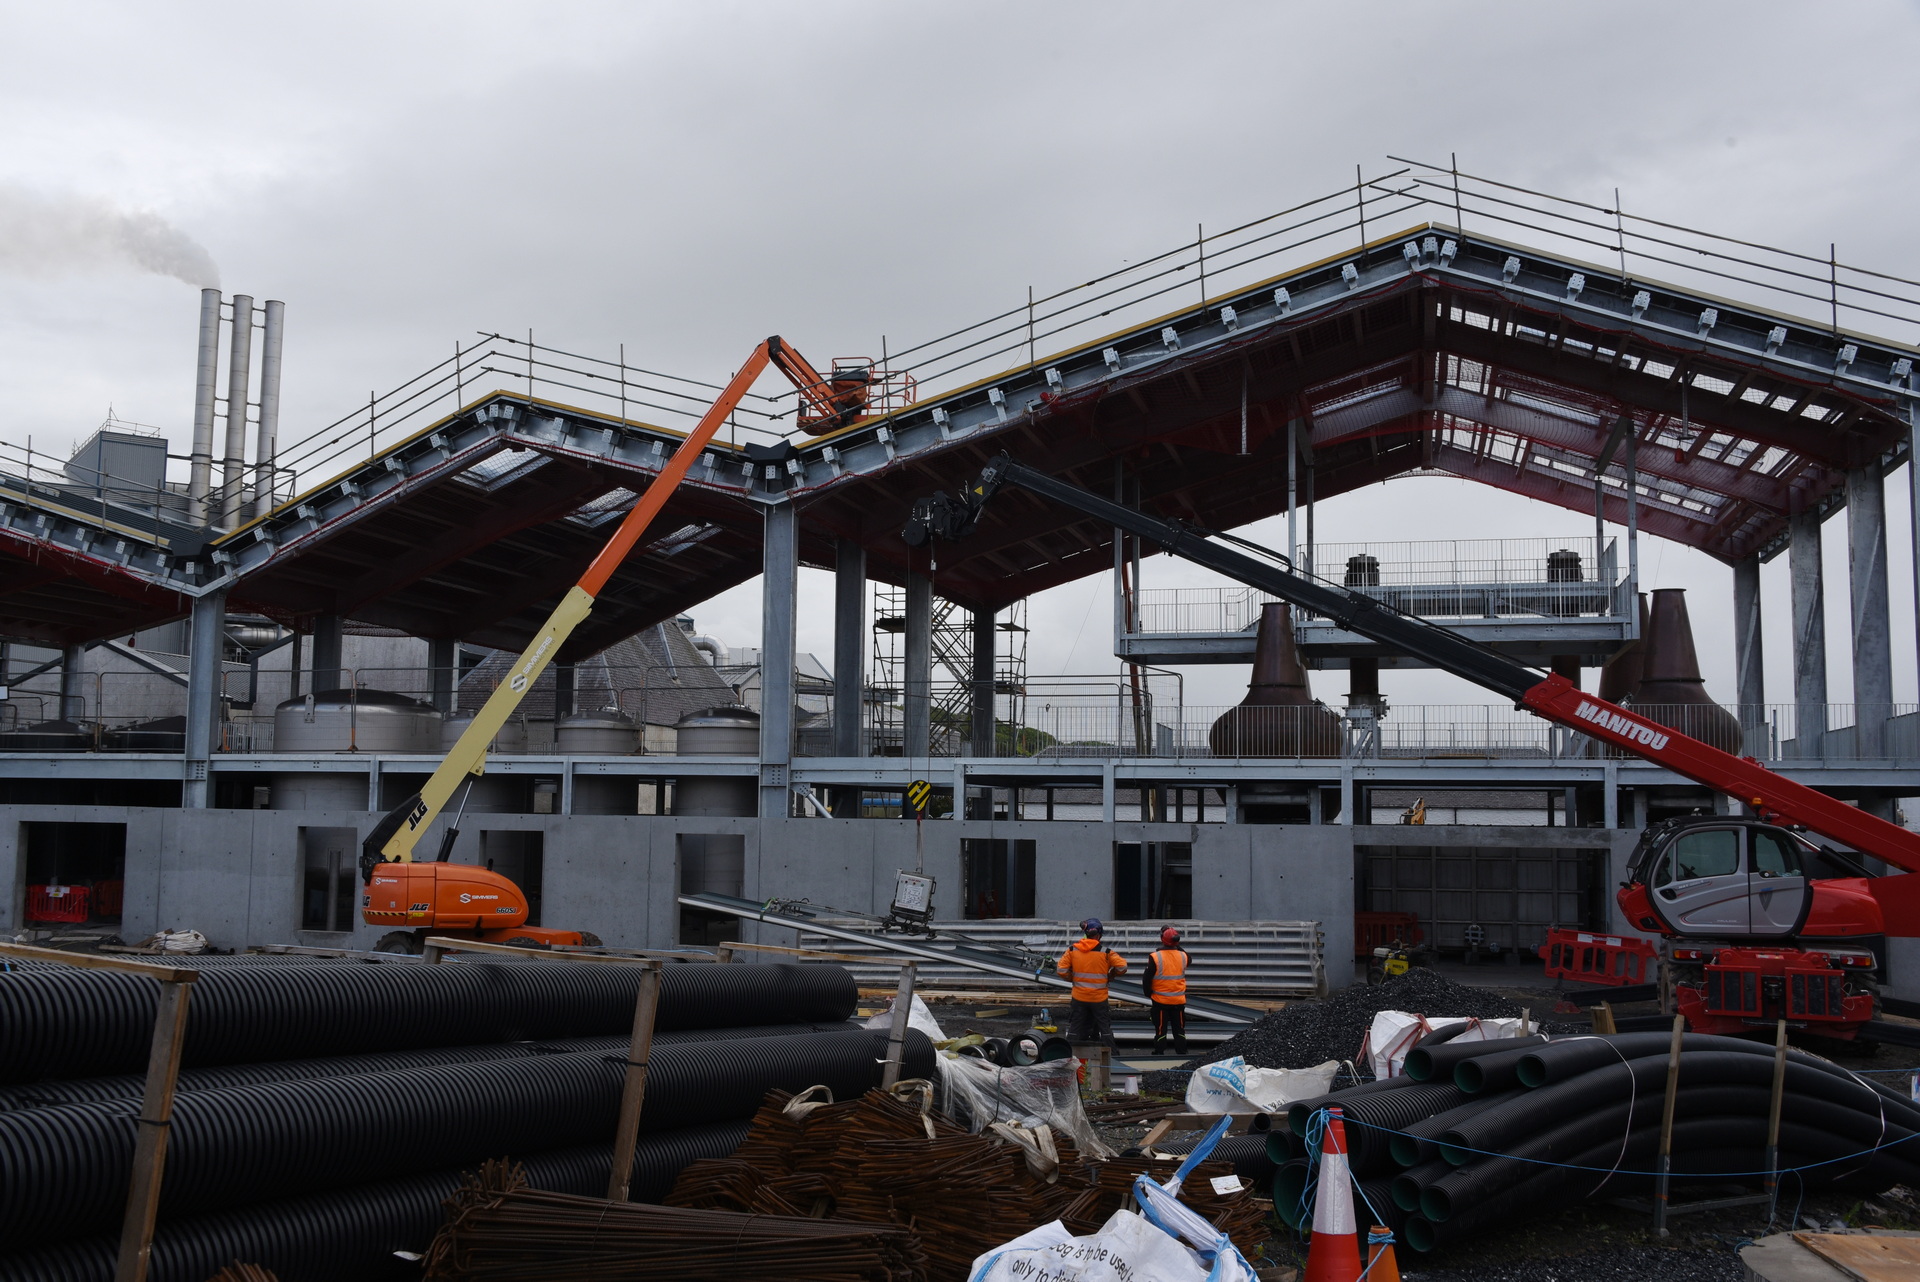
In Port Ellen zijn we nog even langs de Port Ellen distillery gereden, die ergens dit jaar ook weer heropend zou moeten worden. Maar toen we er langs reden was het duidelijk dat ze nog vol in de bouw fase zitten. Het frame stond, de tanks en de stills stonden er ook al in, maar voor de rest miste er nog veel. Wel leuk om zo te zien!
Vanaf de boot hadden we nog een mooi uitzicht op Port Ellen en de Port Ellen distillery, waardoor we ook hier het witte warehouse met de naam Port Ellen in zwarte letters hebben kunnen fotograferen
11 juni: Oban distiller (Scottish Mainland)
Vandaag de shop van de Oban distillery binnengelopen. Helaas konden we hier geen tasting doen.
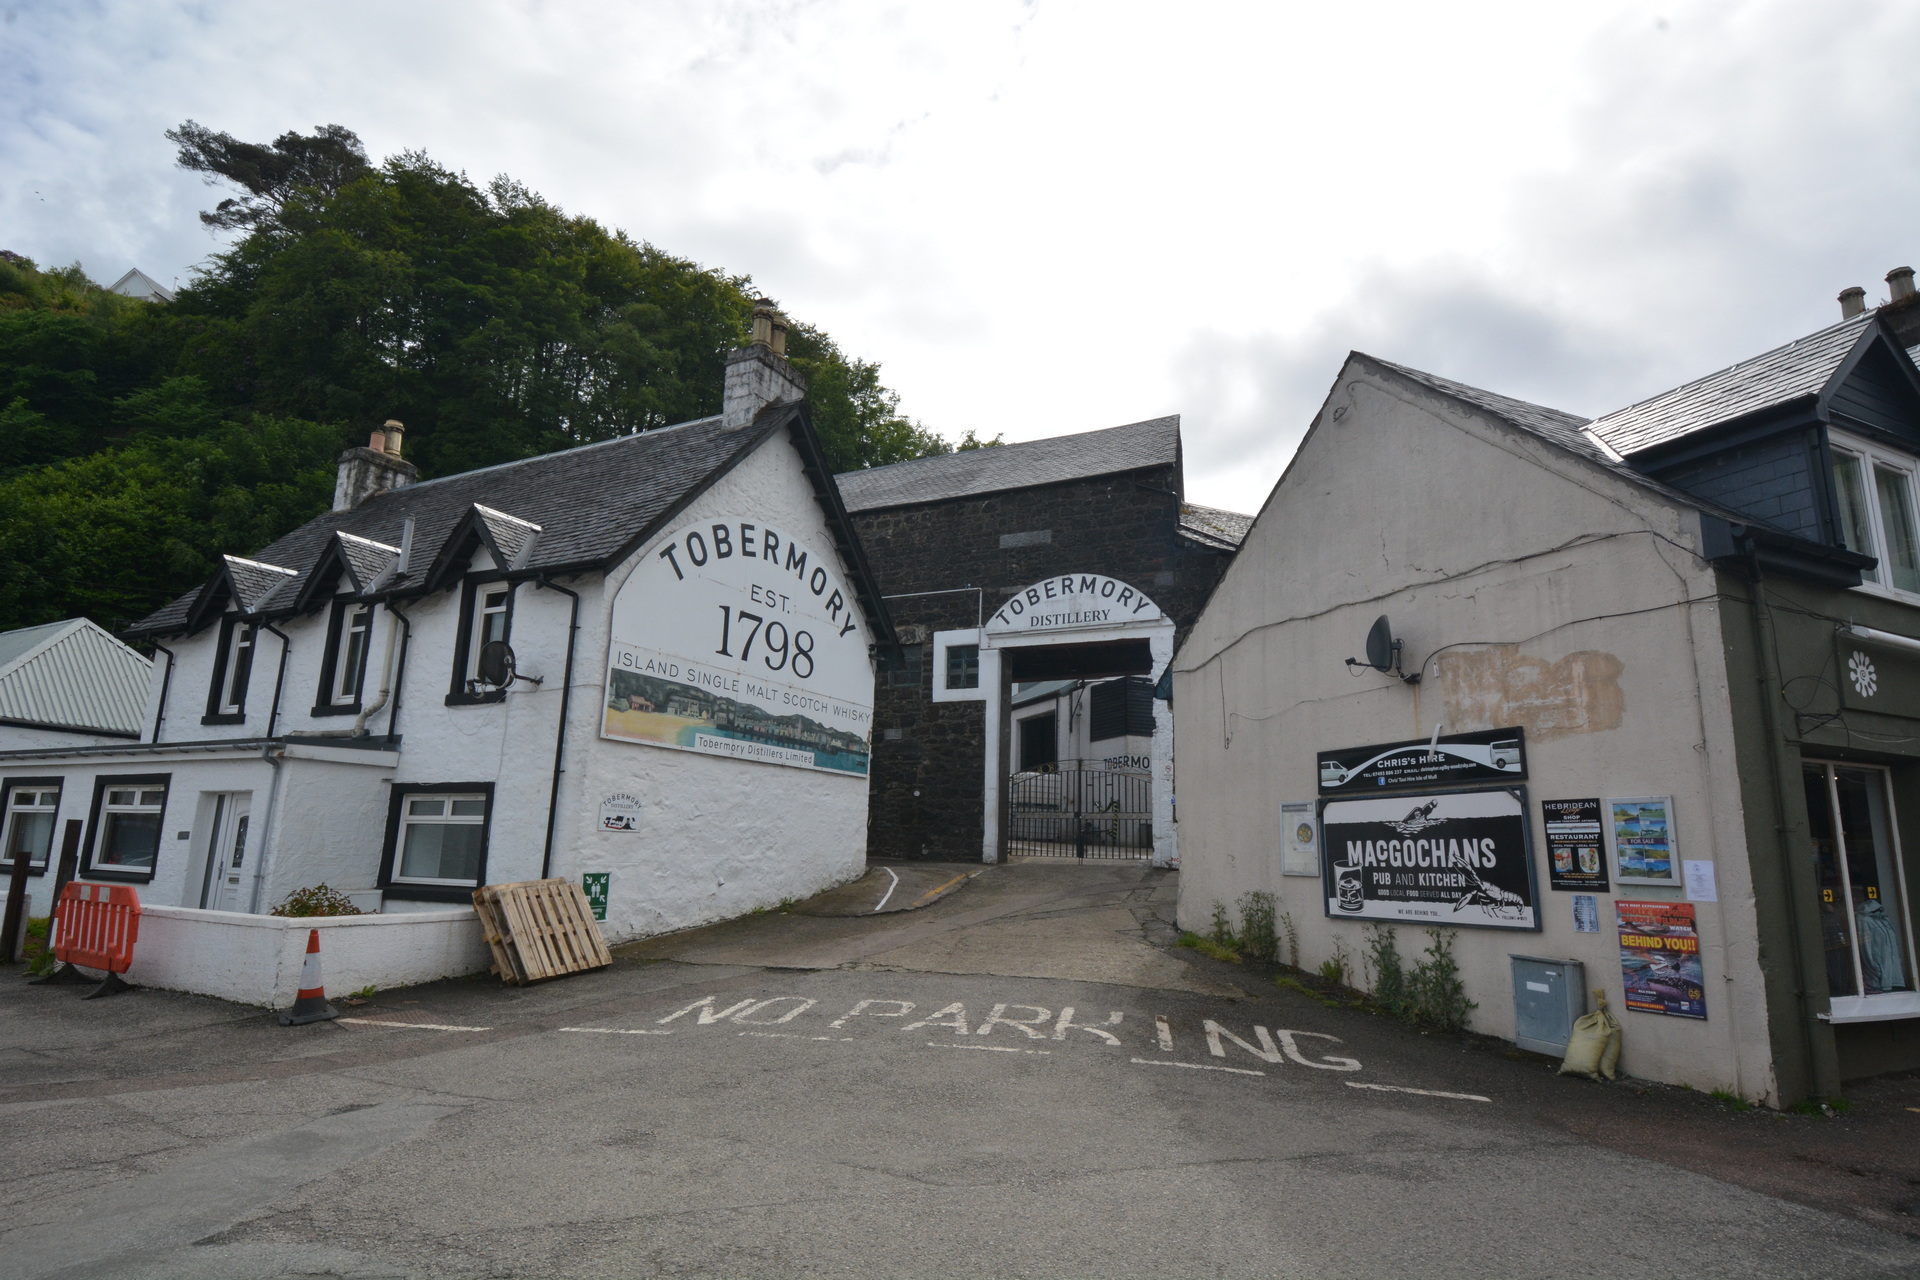
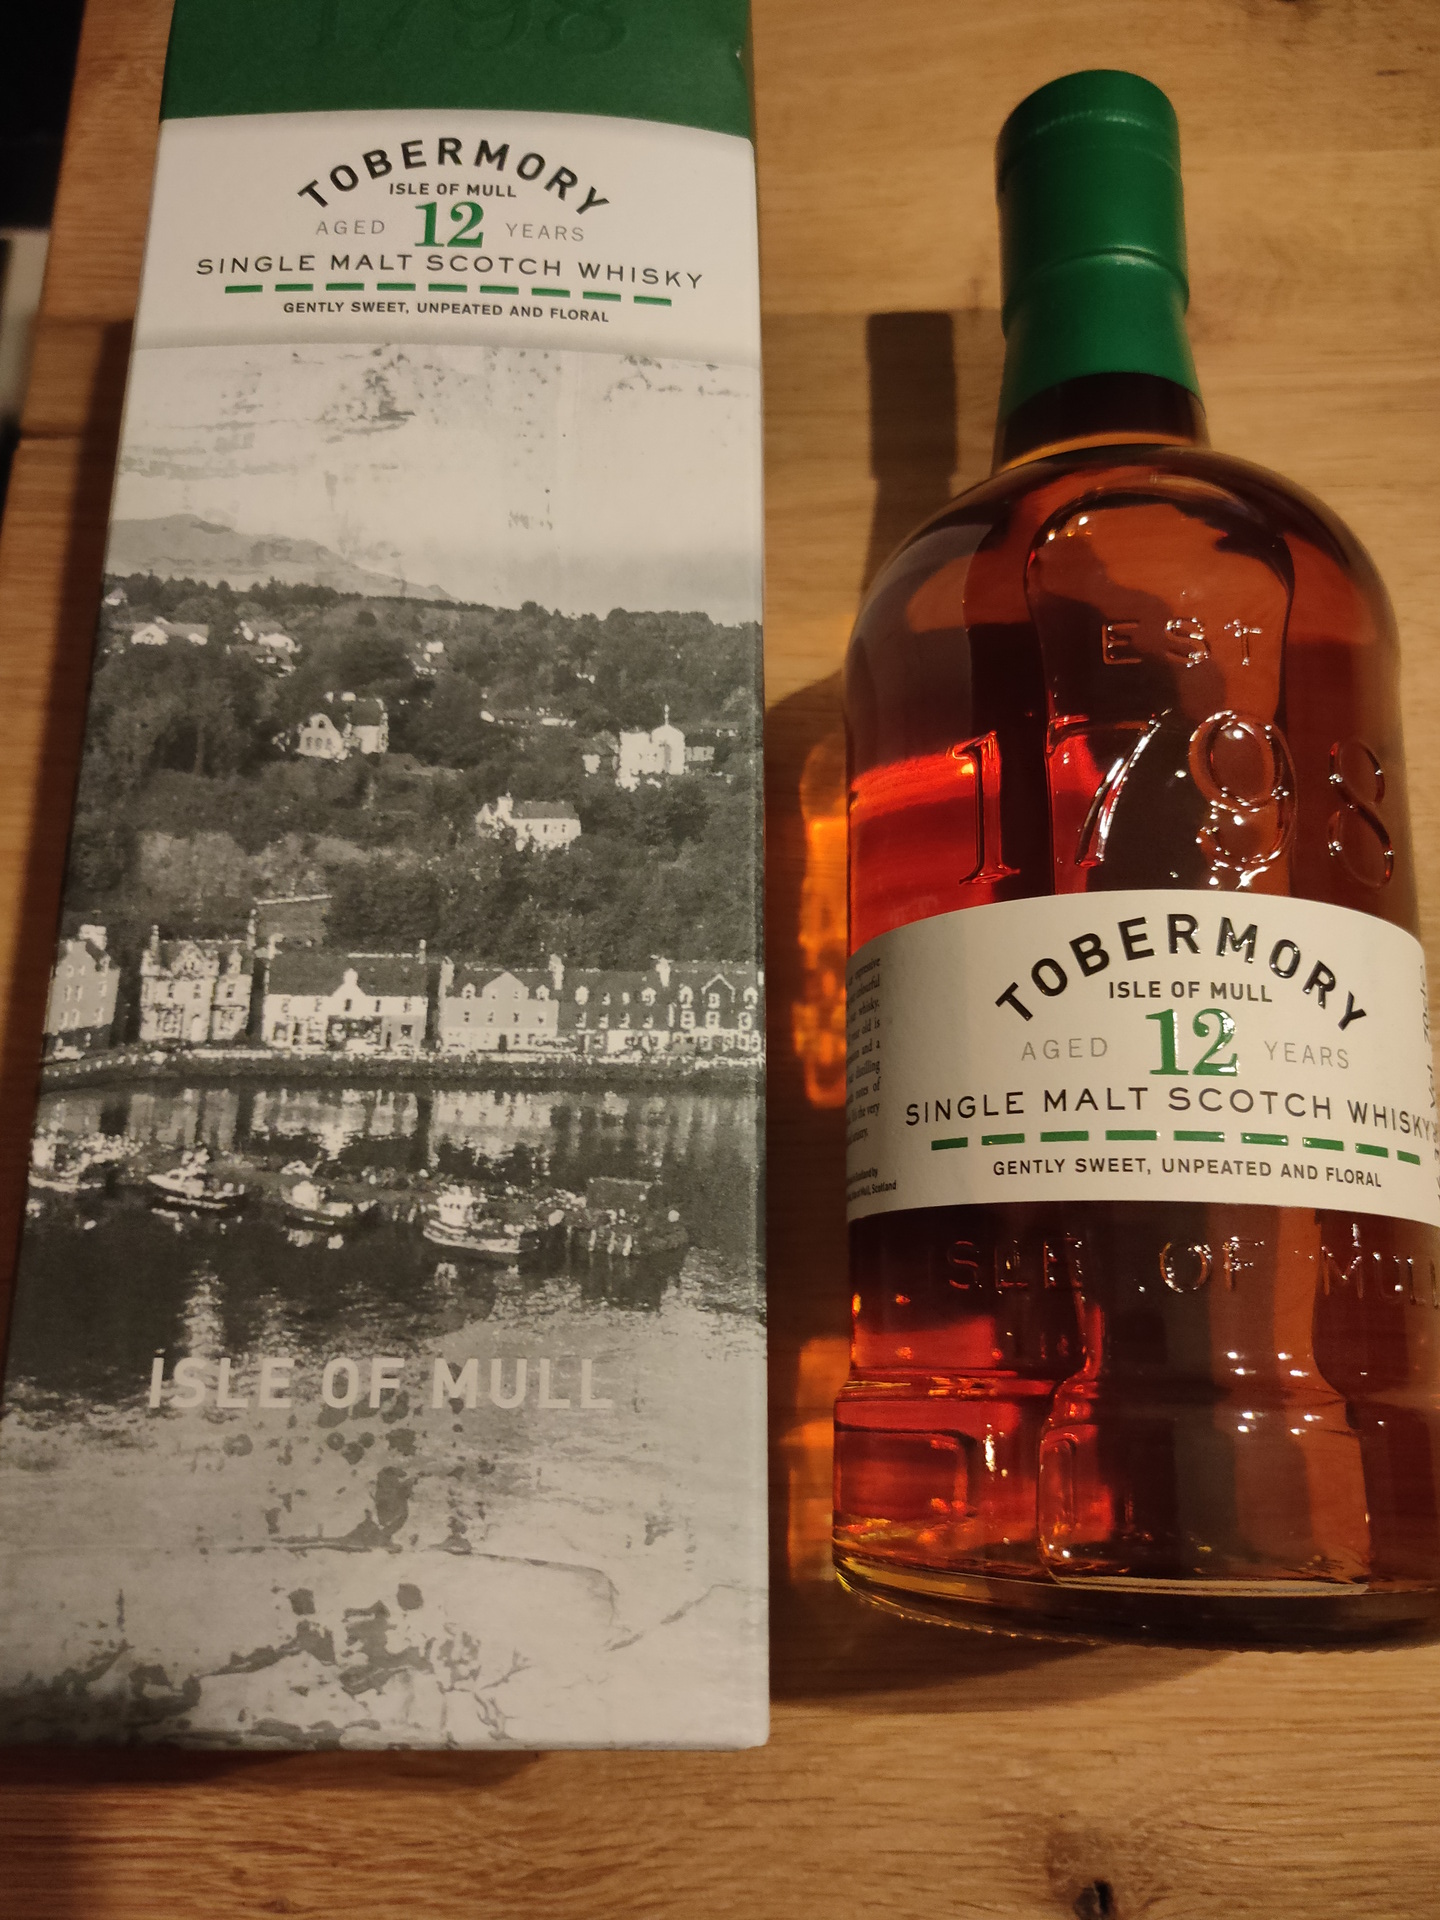
12 juni: Tobemory distiller (Isle of Mull)
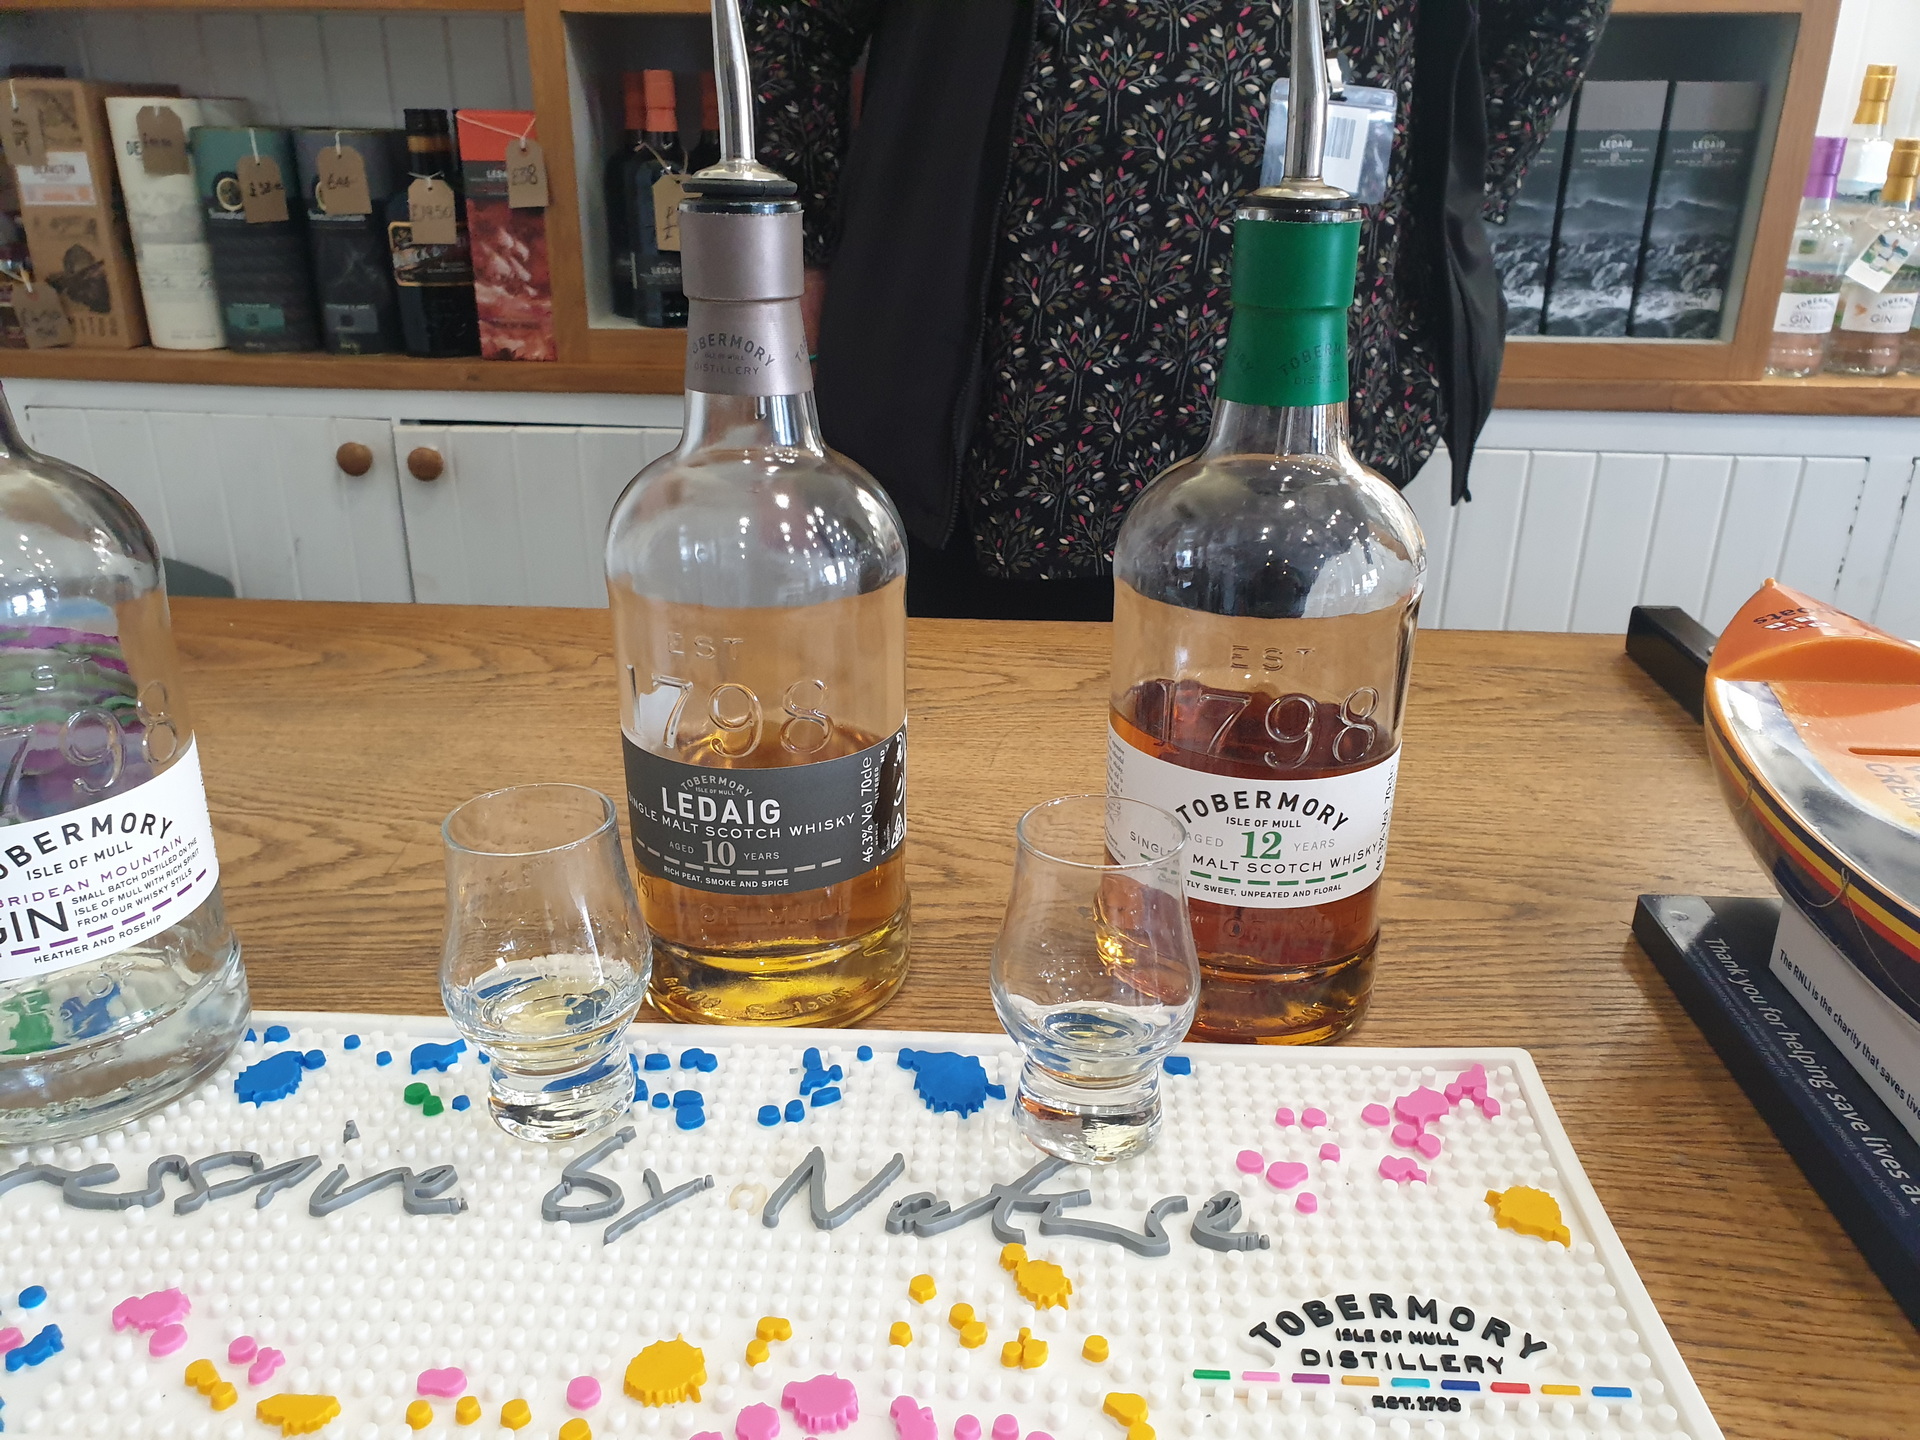
In Tobermory zijn we ook nog even naar de Tobermory distillery (Ledaig => is niet uit te spreken) te gaan. Hier konden we de 2 whisky’s proeven, de 12 jaar Tobermory (is unpeated) en de 10 jaar Ledaig (is wel peated). Deze laatste hebben we thuis staan. Henri besloot om een flesje van de andere te kopen, ter vergelijk ook straks thuis.
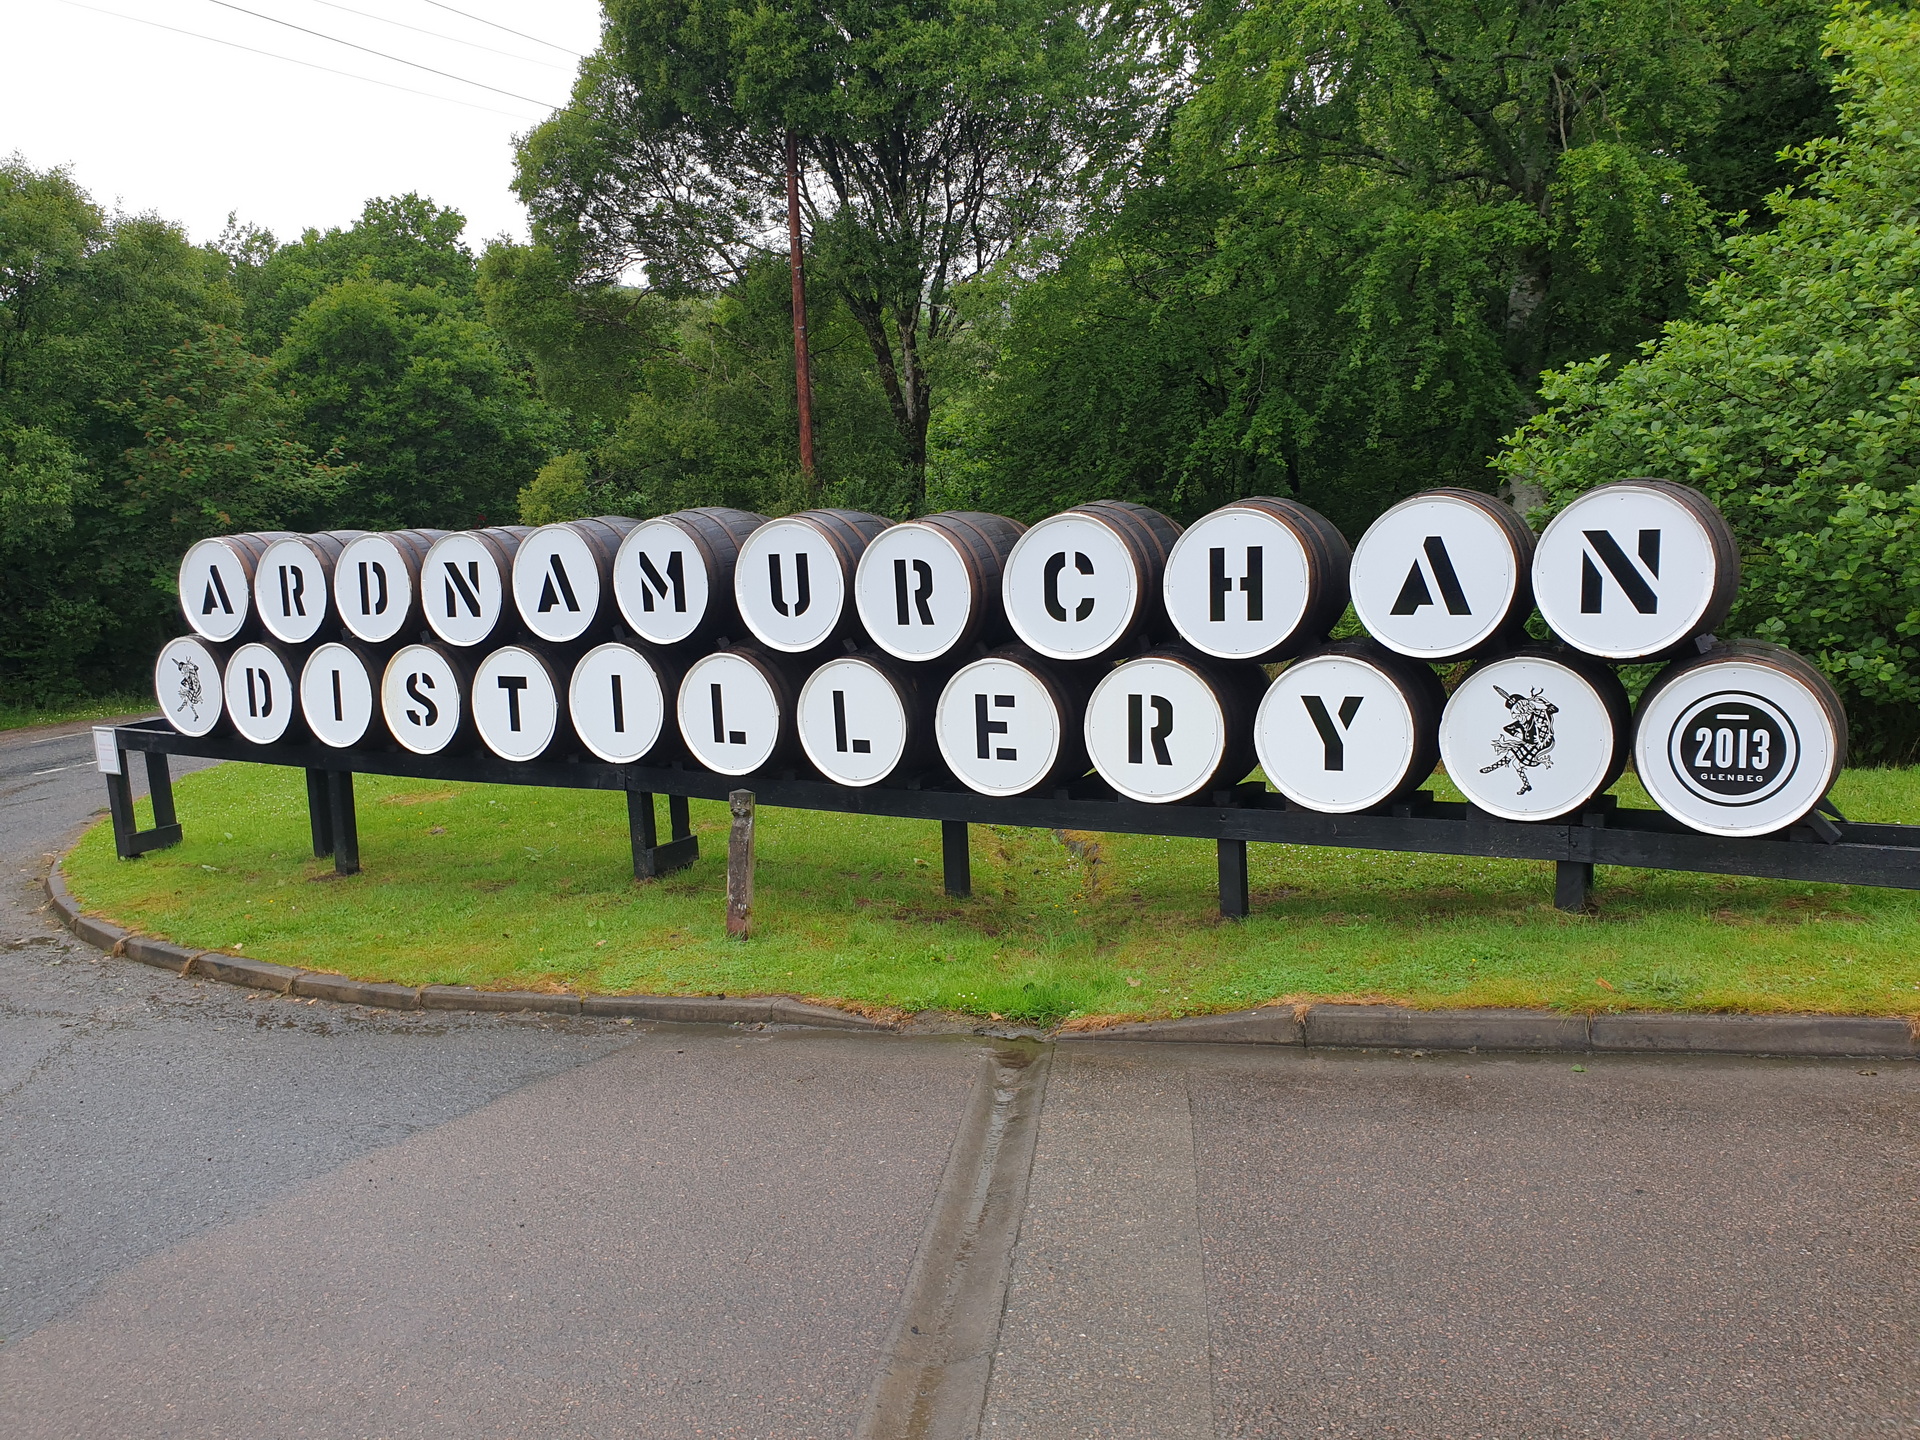
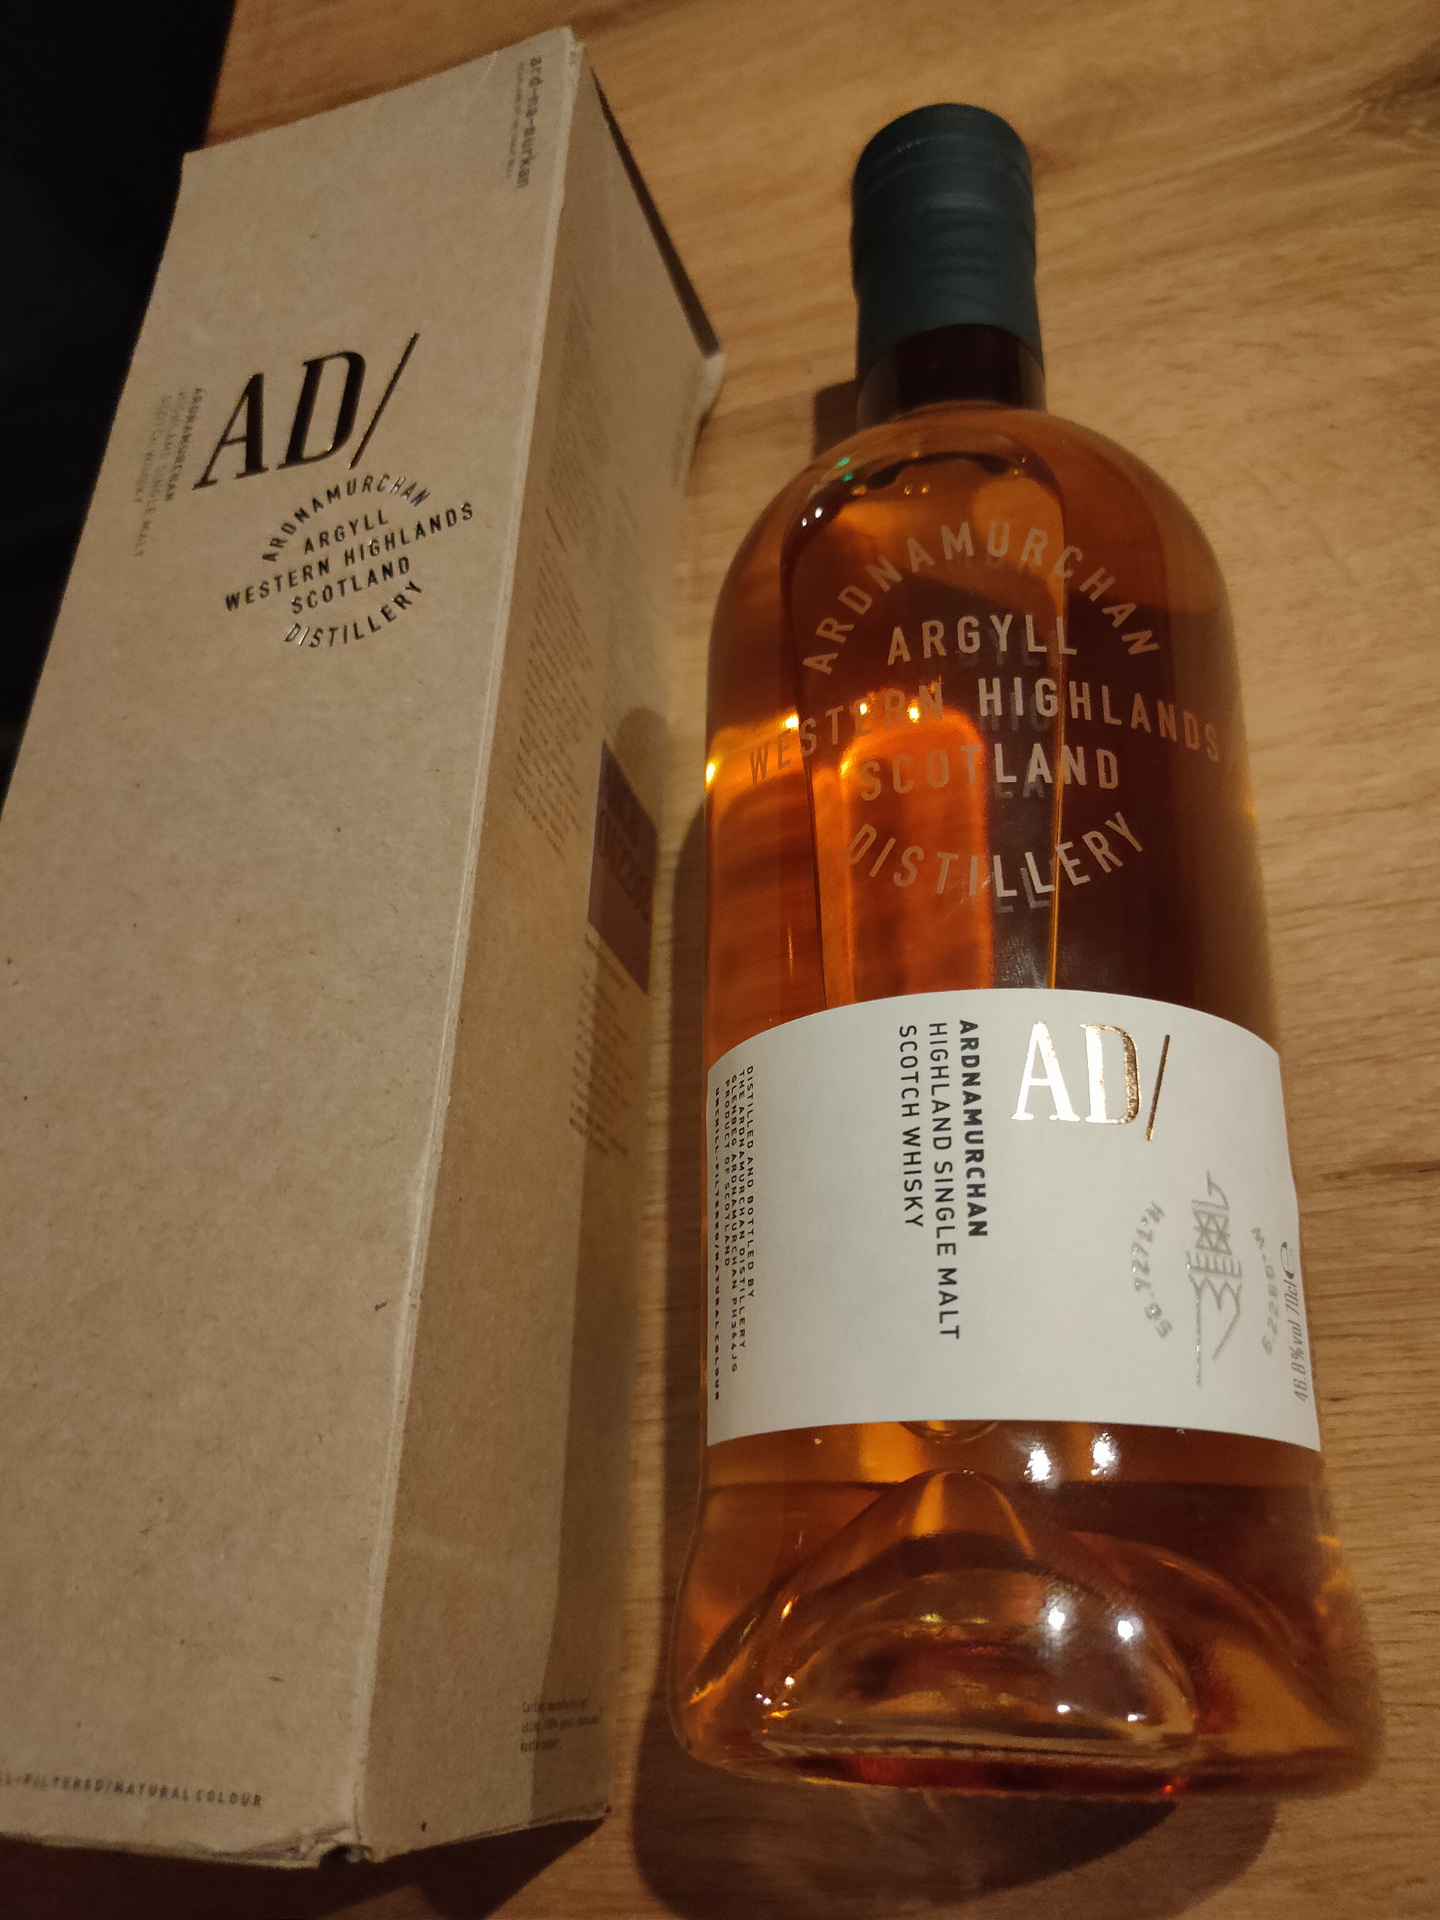
16 Juni – Ardnamurchan
Even in de shop gekeken, en een inieminie klein glaasje kunnen proeven, nog een flesje gekocht en wat foto’s maken.
20 Juni – North Uist Distillery (Benbecula), Isle of Harris distillery (Isle of Harris
We hebben nog een korte stop gemaakt bij de North Uist Distillery, welke om 10 uur open zou gaan. Deze destilleerderij is nog maar net begonnen dus heeft nog geen Whisky, maar zoals zovele startende destillerderijen, mogen ze wel gin maken. Hier hebben we een bezoekje gebracht aan het shopje waar ze hun downpour gin verkochten (welke we bij de AirBnB van Isabel & Robert hadden geproefd). We hebben een fles gekocht (al was het vanwege de mooie fles)
Hier komt t dan 🙂
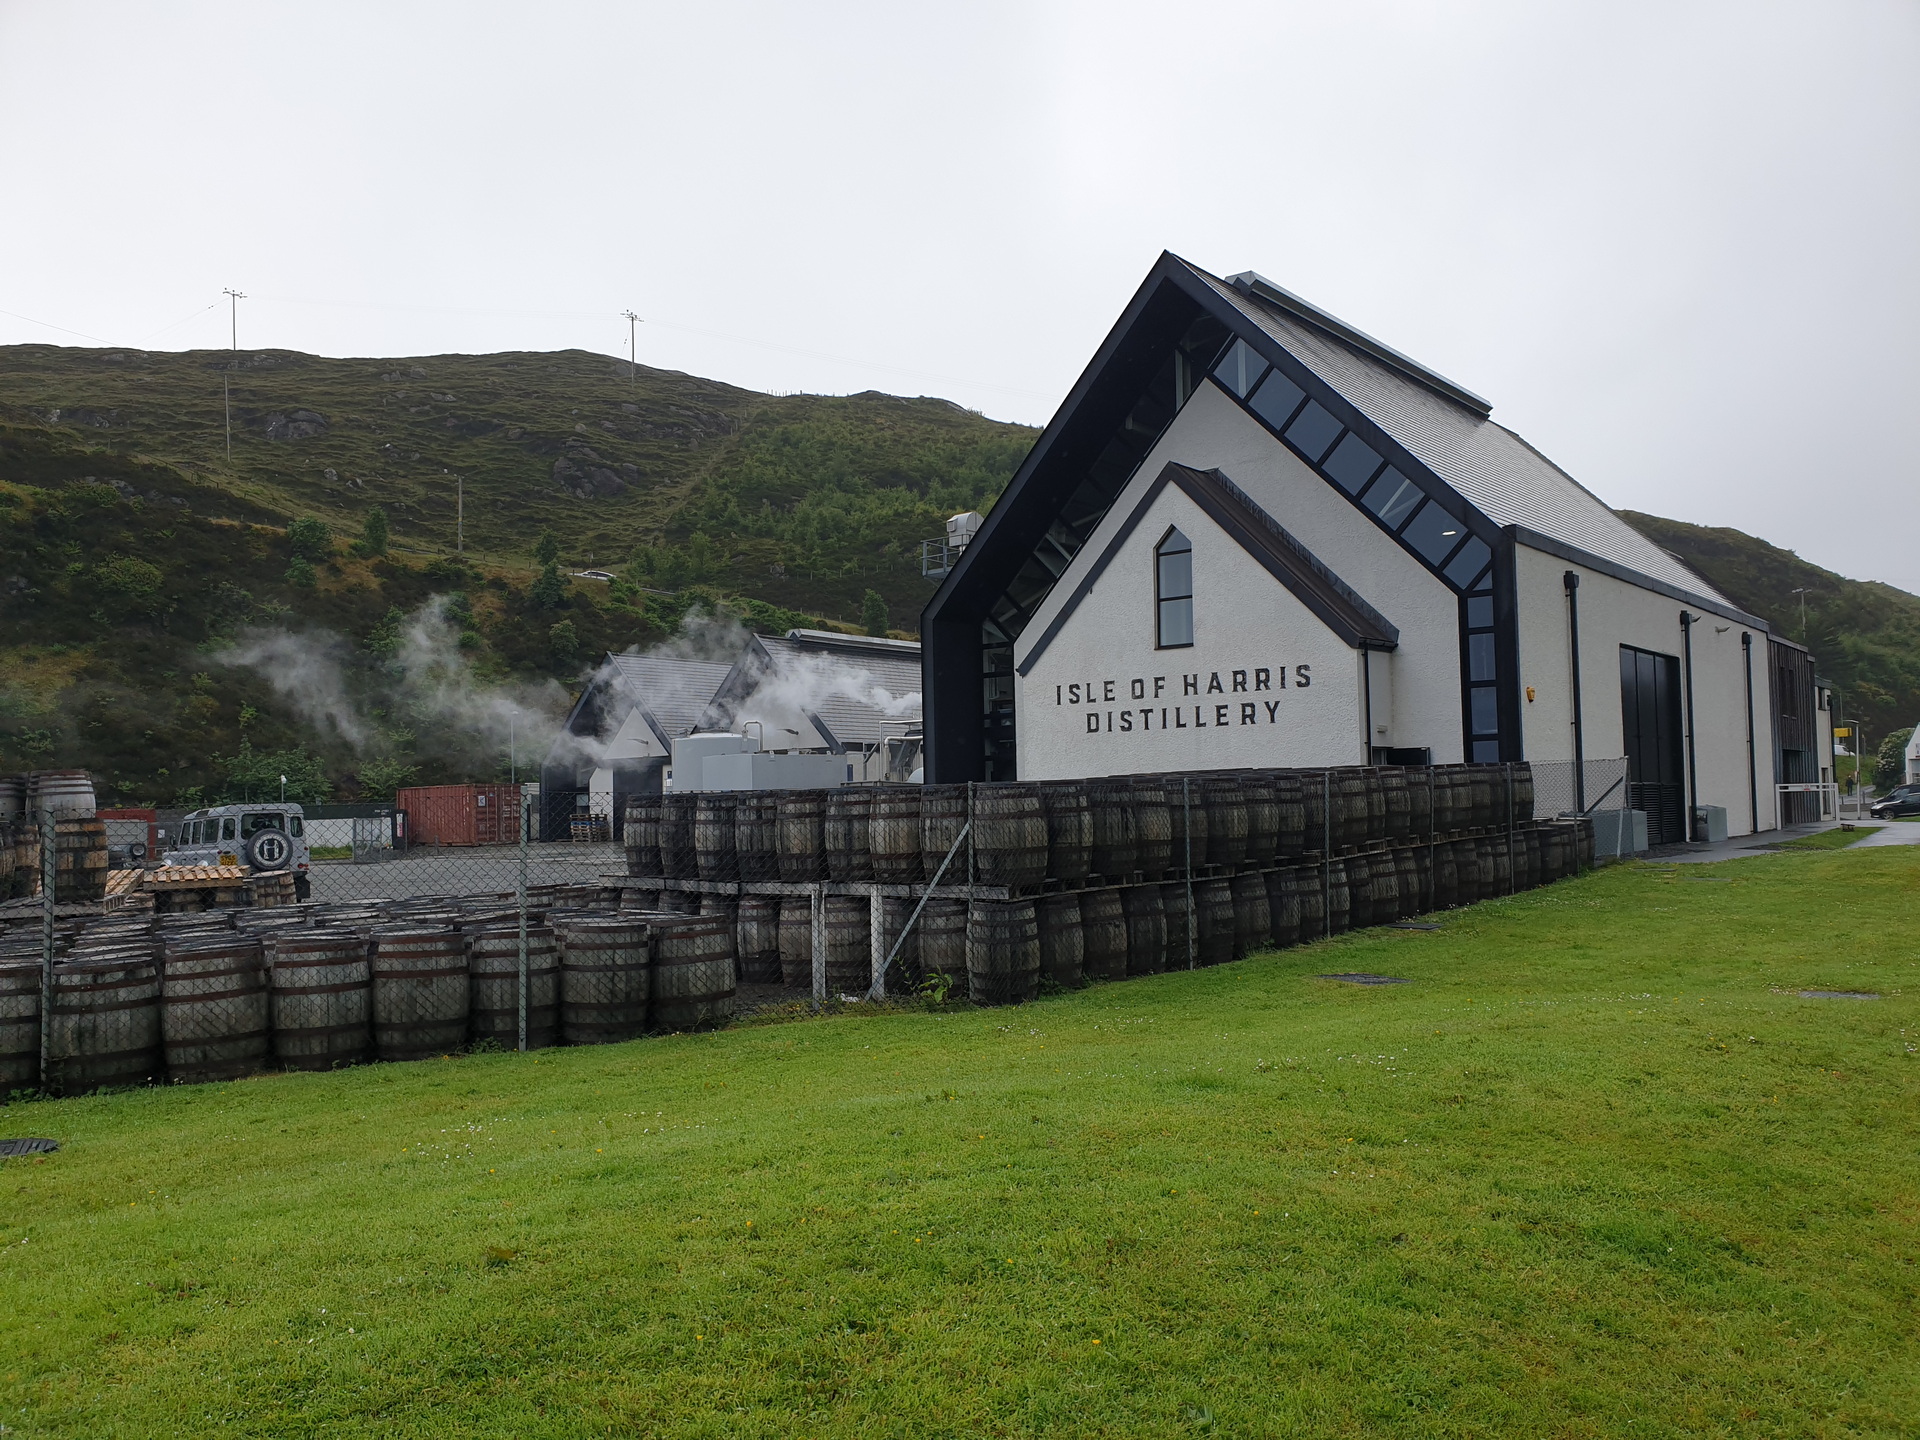
Hier hebben we een bezoekje gebracht aan de Isle of Harris distillery. Ook hier zijn ze nog te jong om al een whisky te hebben gebotteld. Maar ook hier zijn ze begonnen met een gin, deze bevat sugar kelp als speciaal extra ingrediënt.
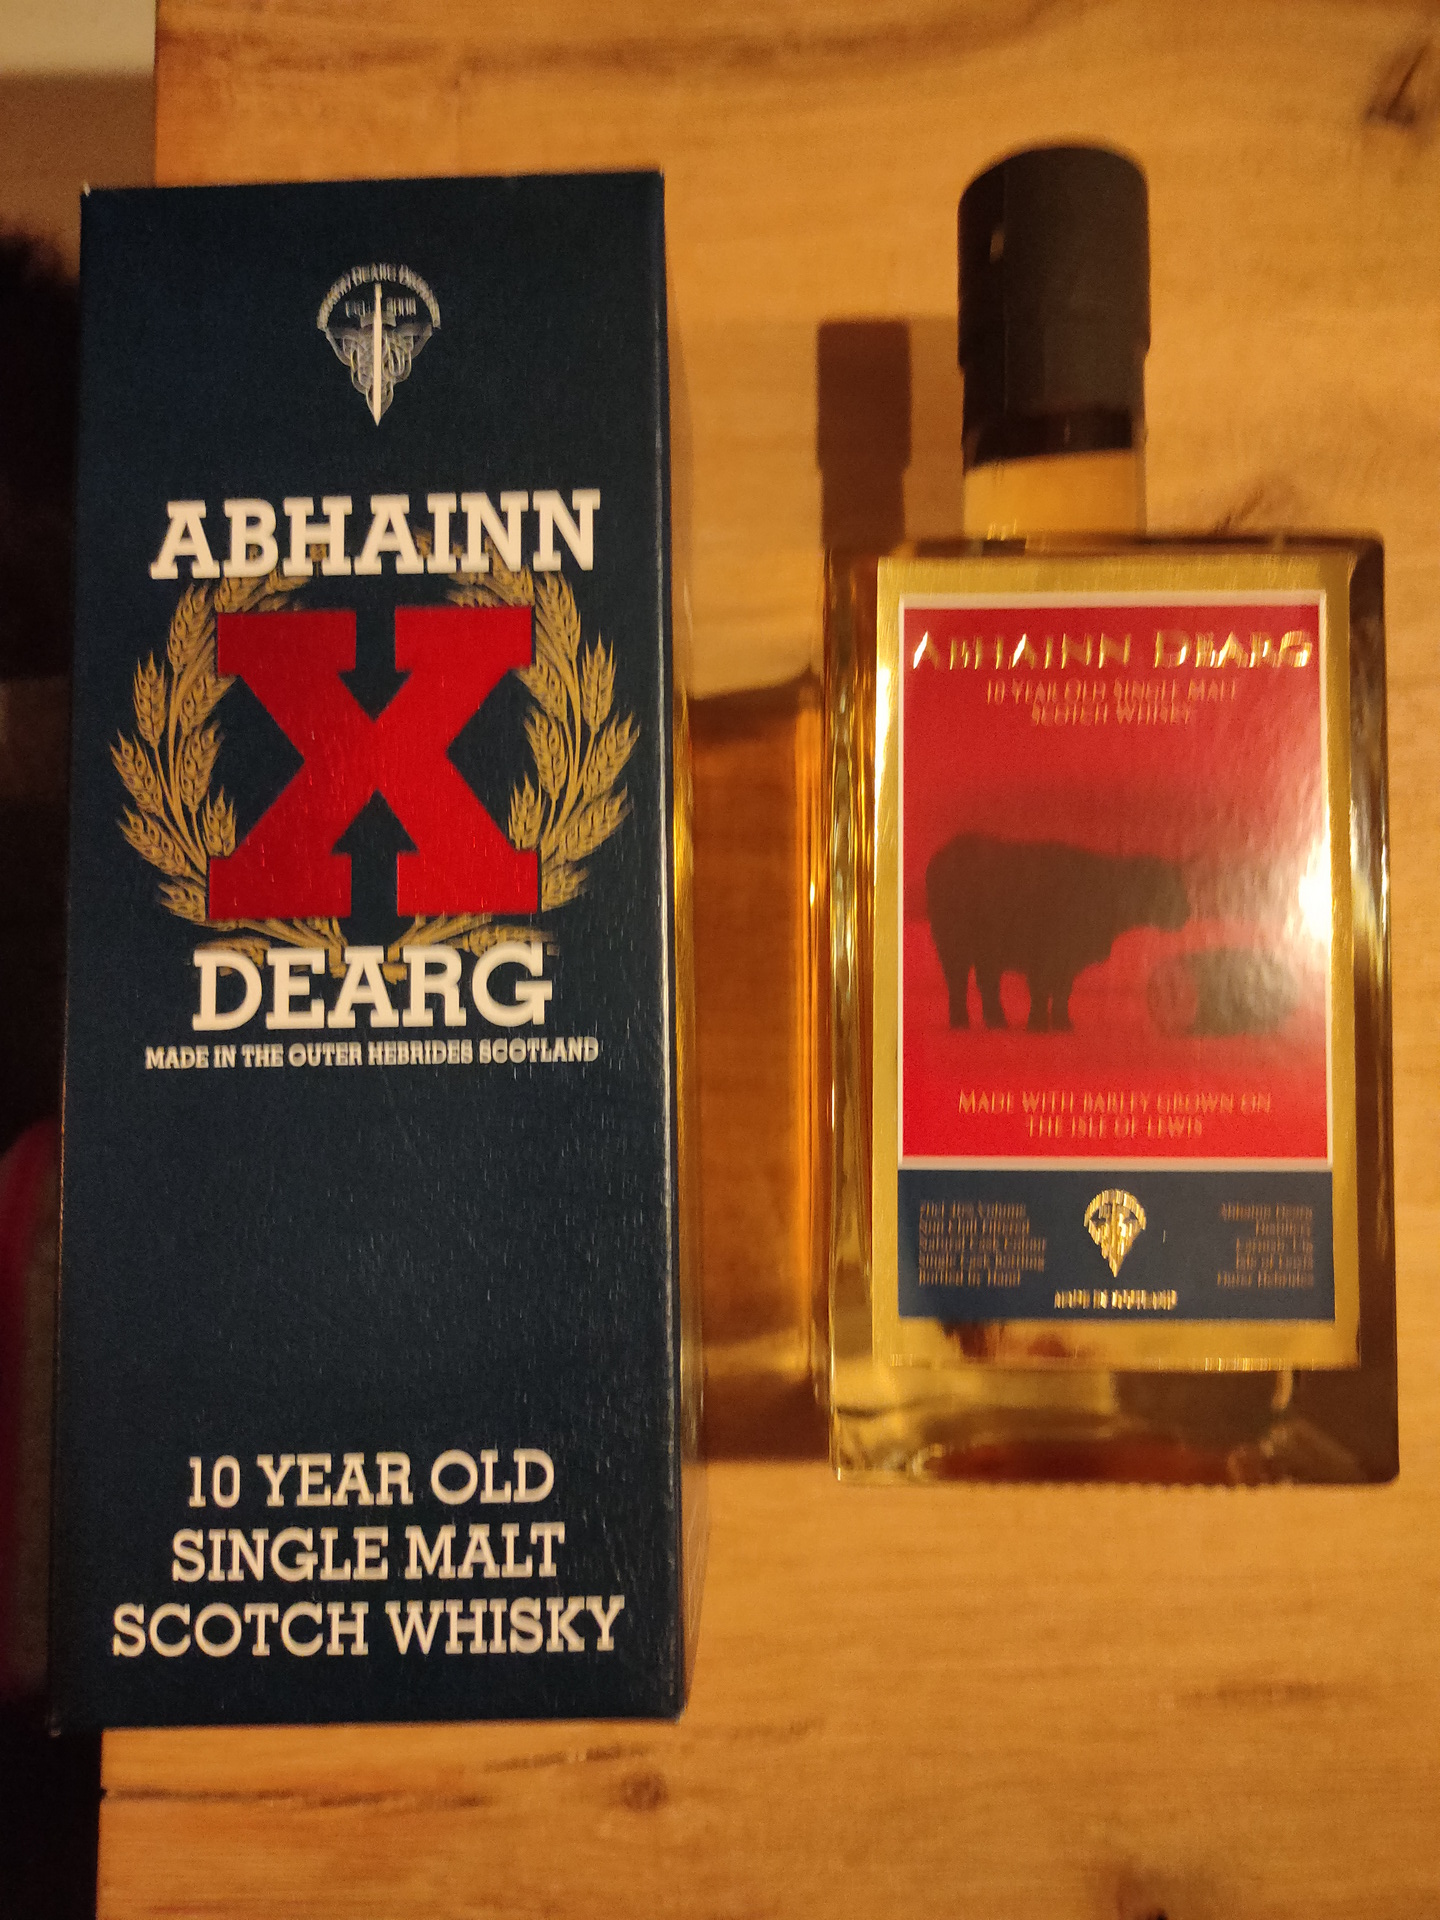
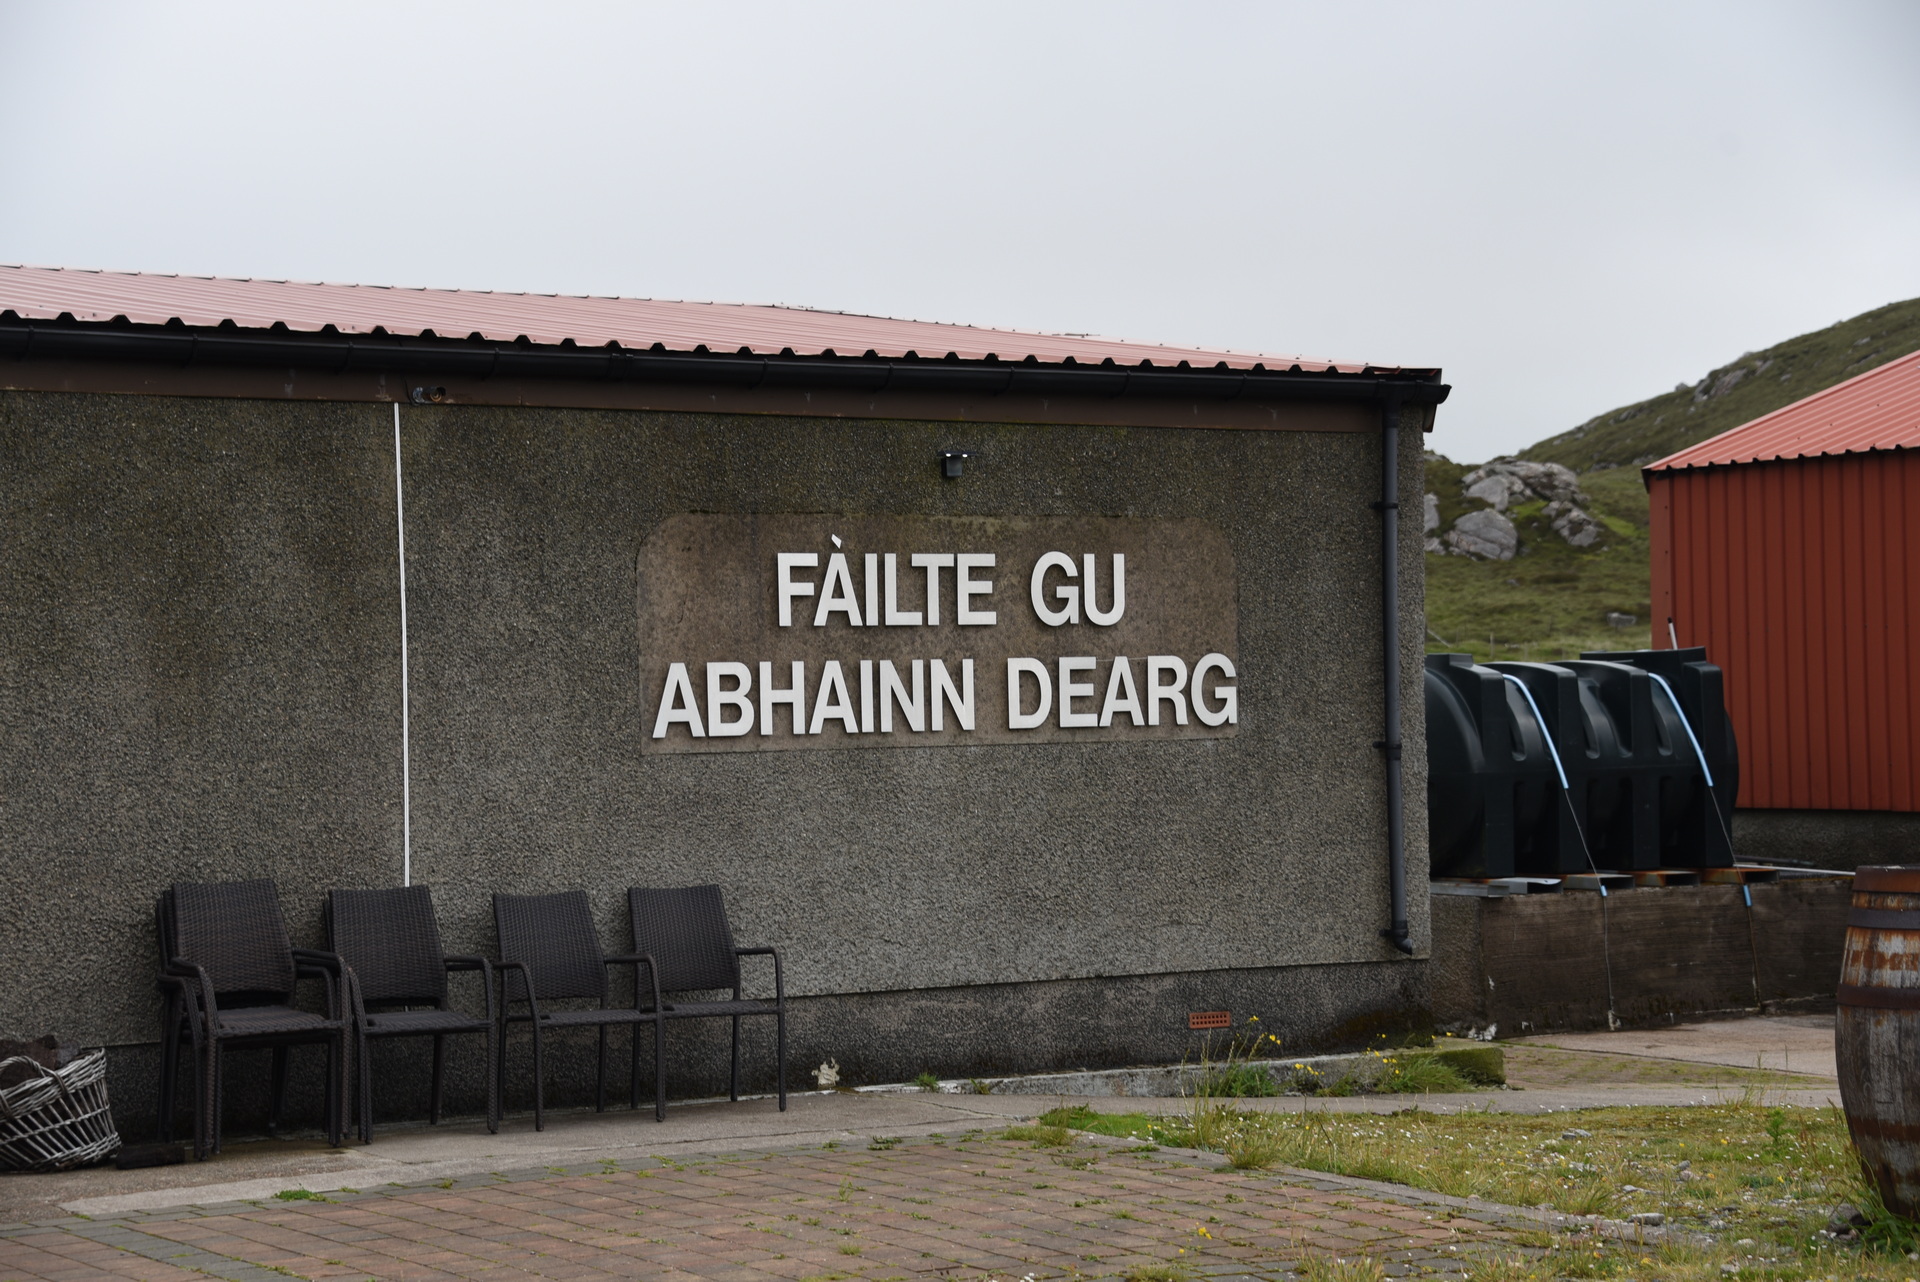
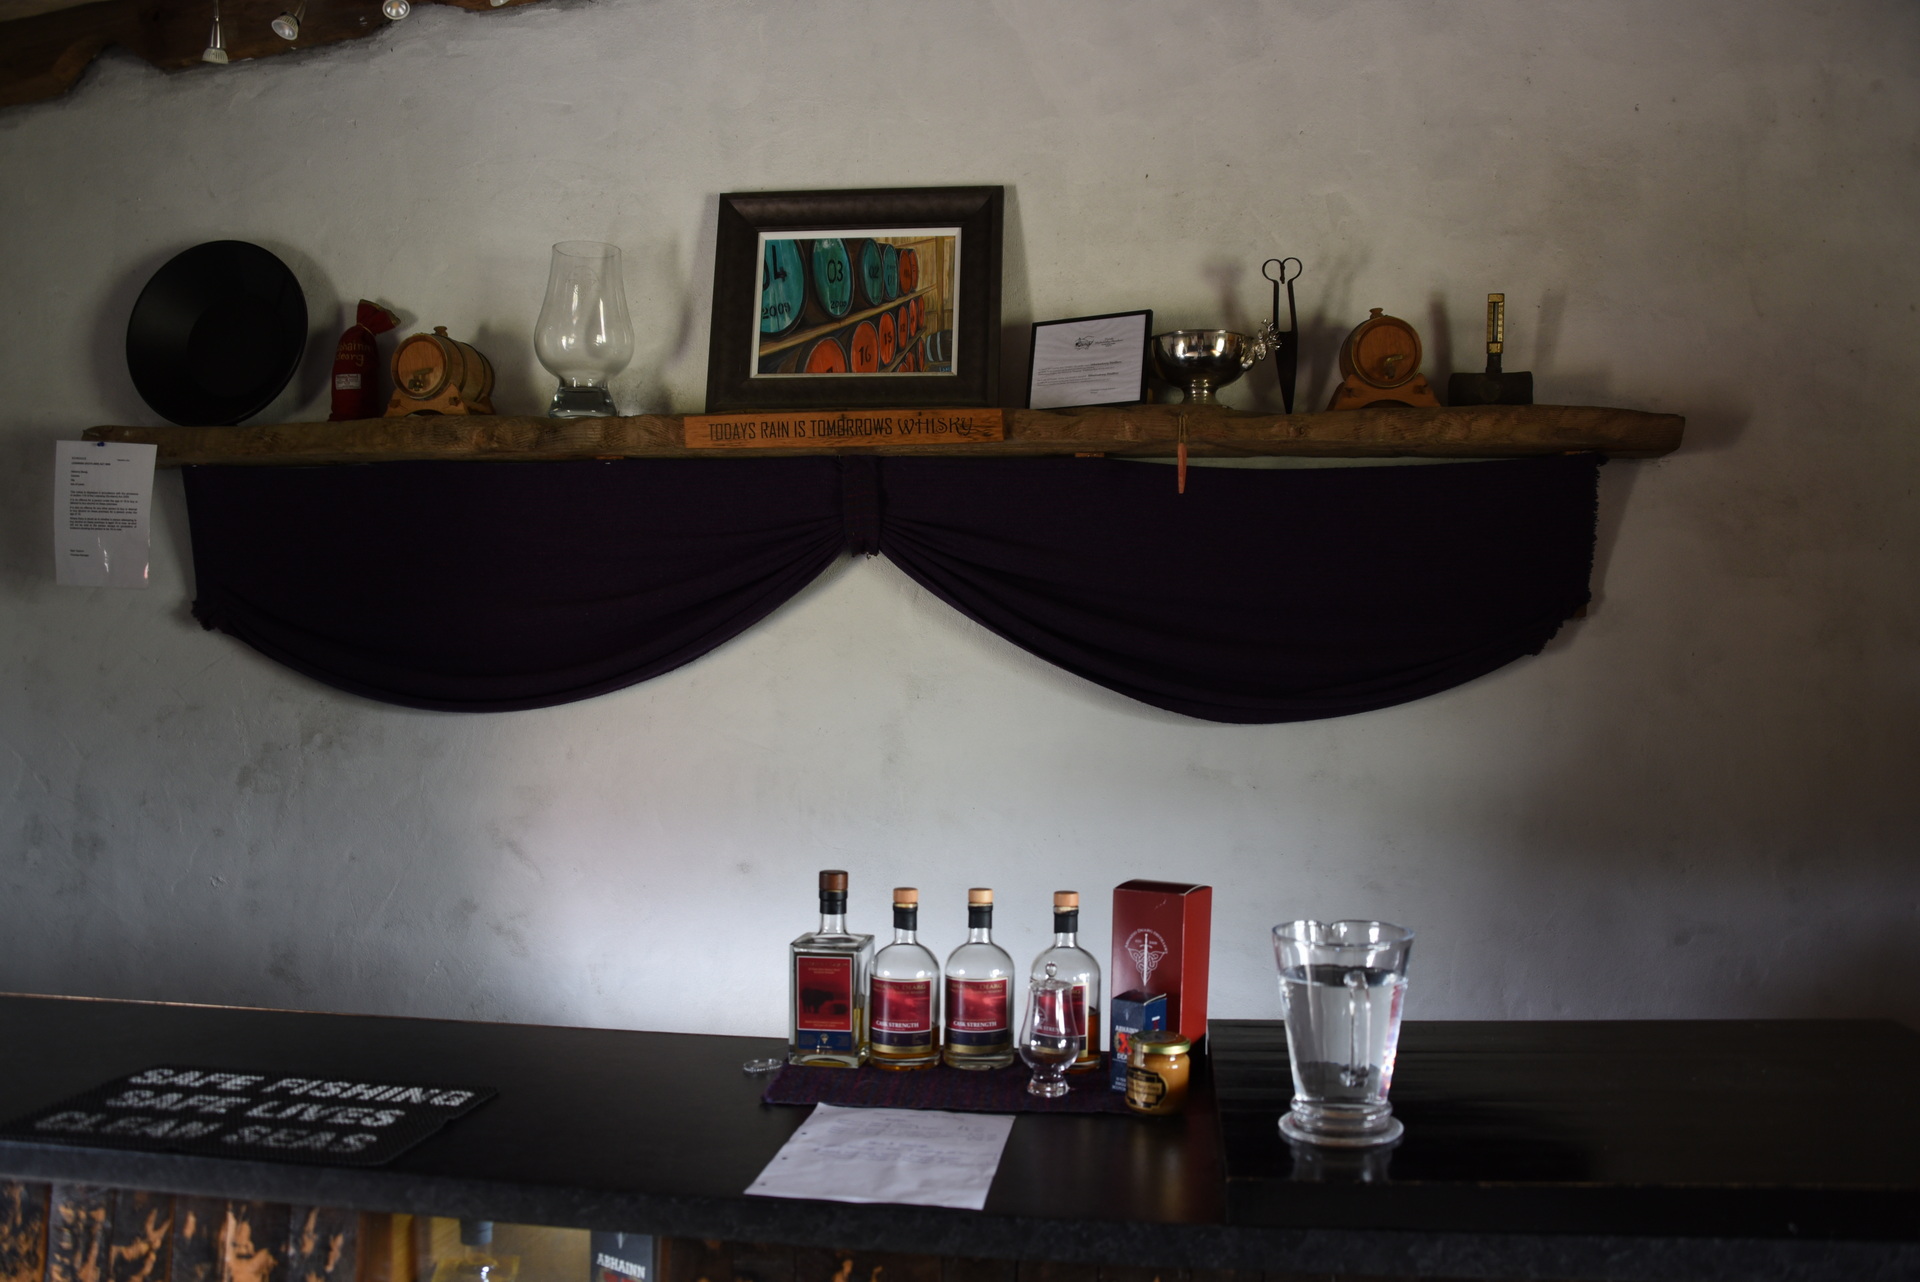
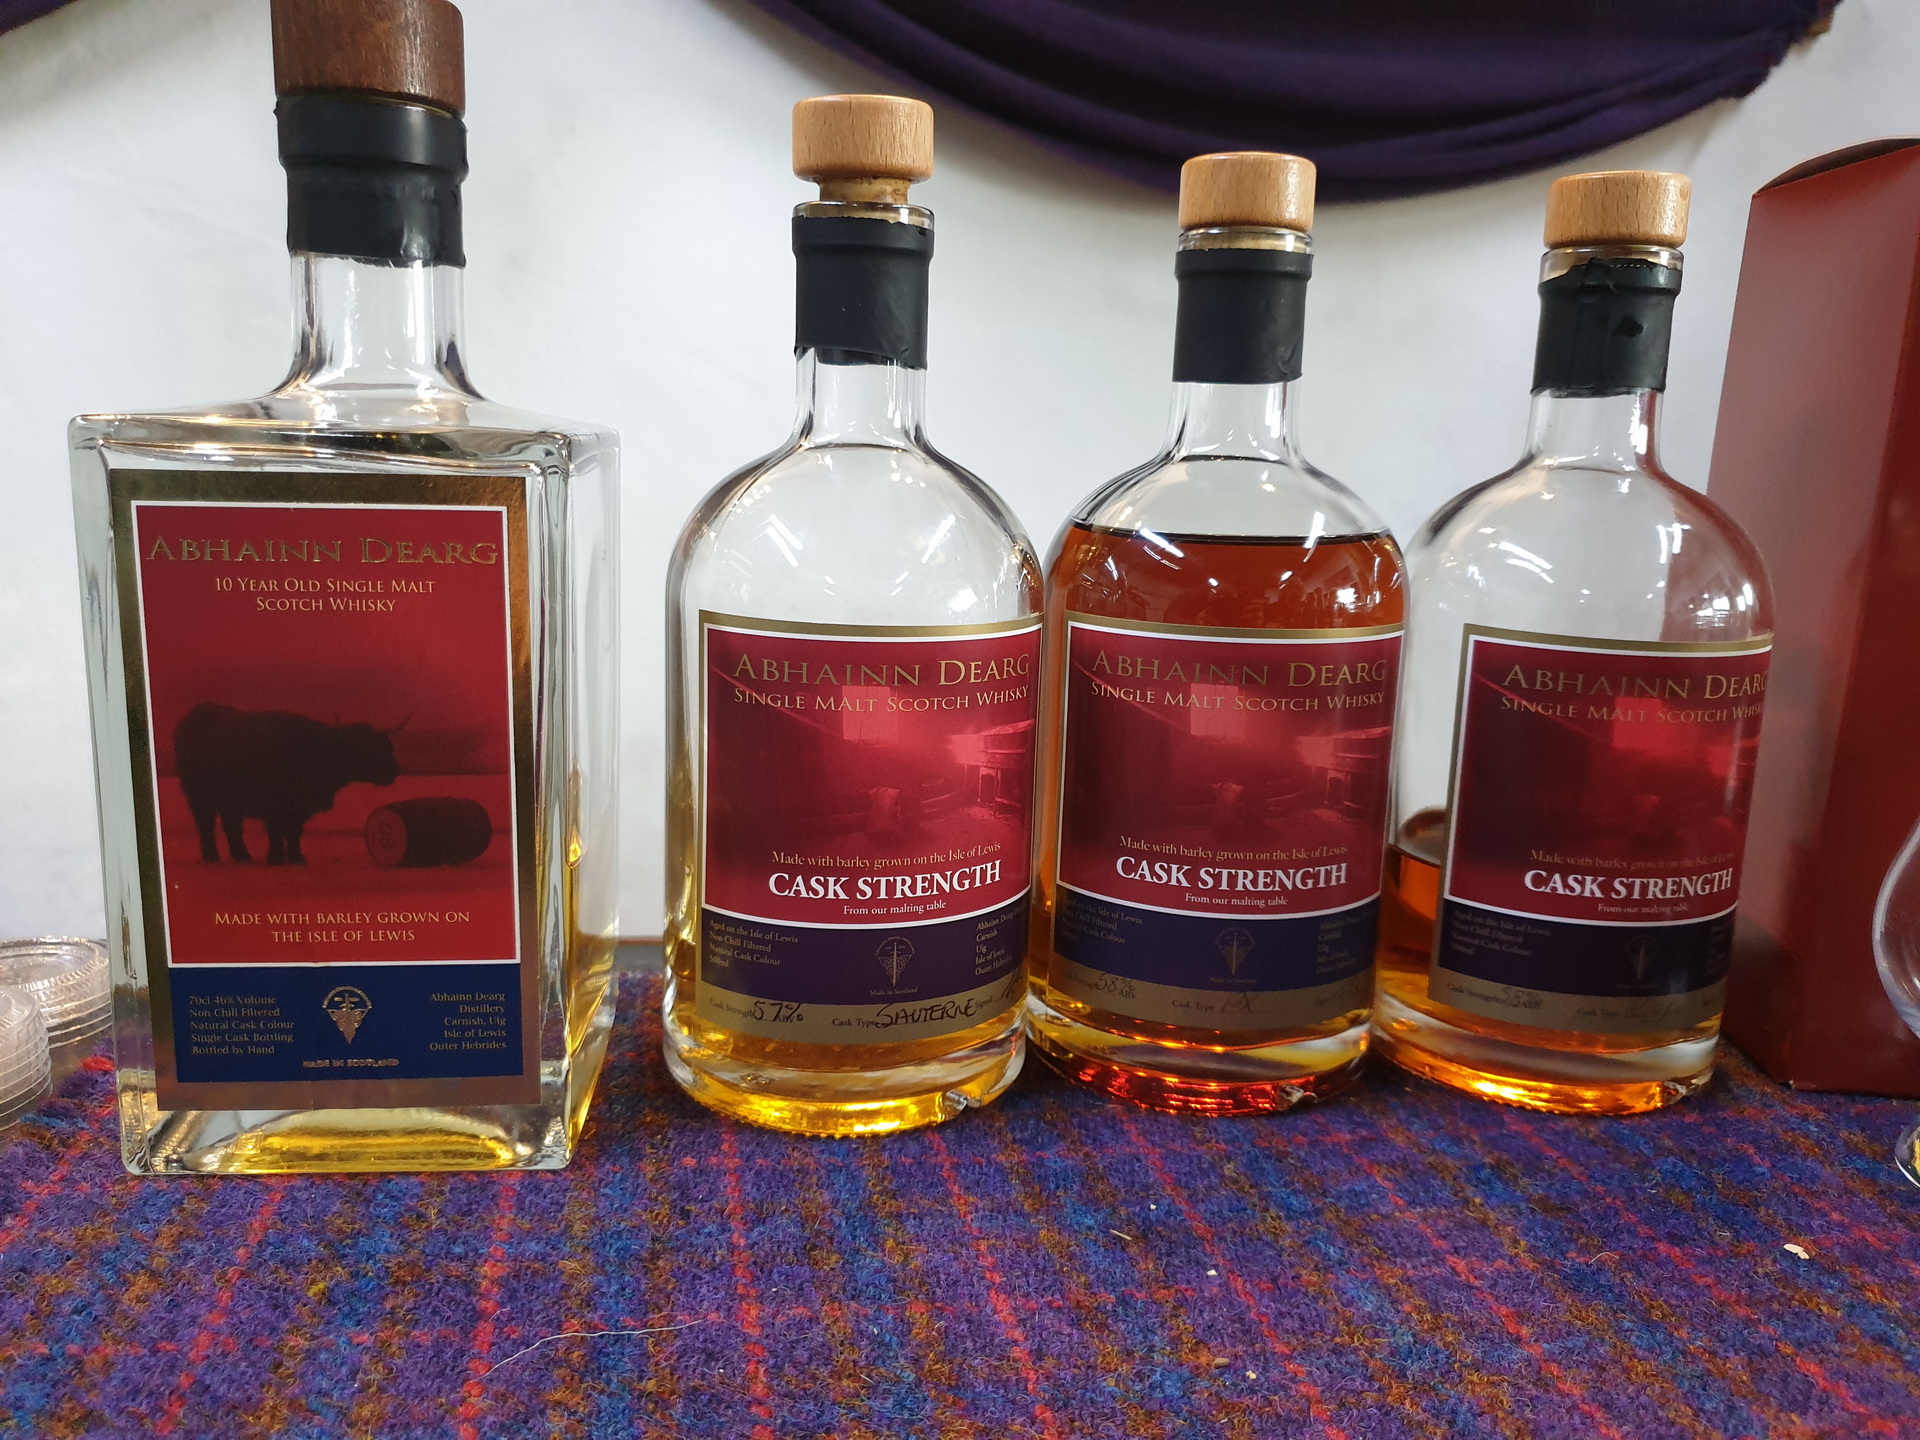
23 Juni – Abhainn Dearg Distillery (Isle of Lewis)
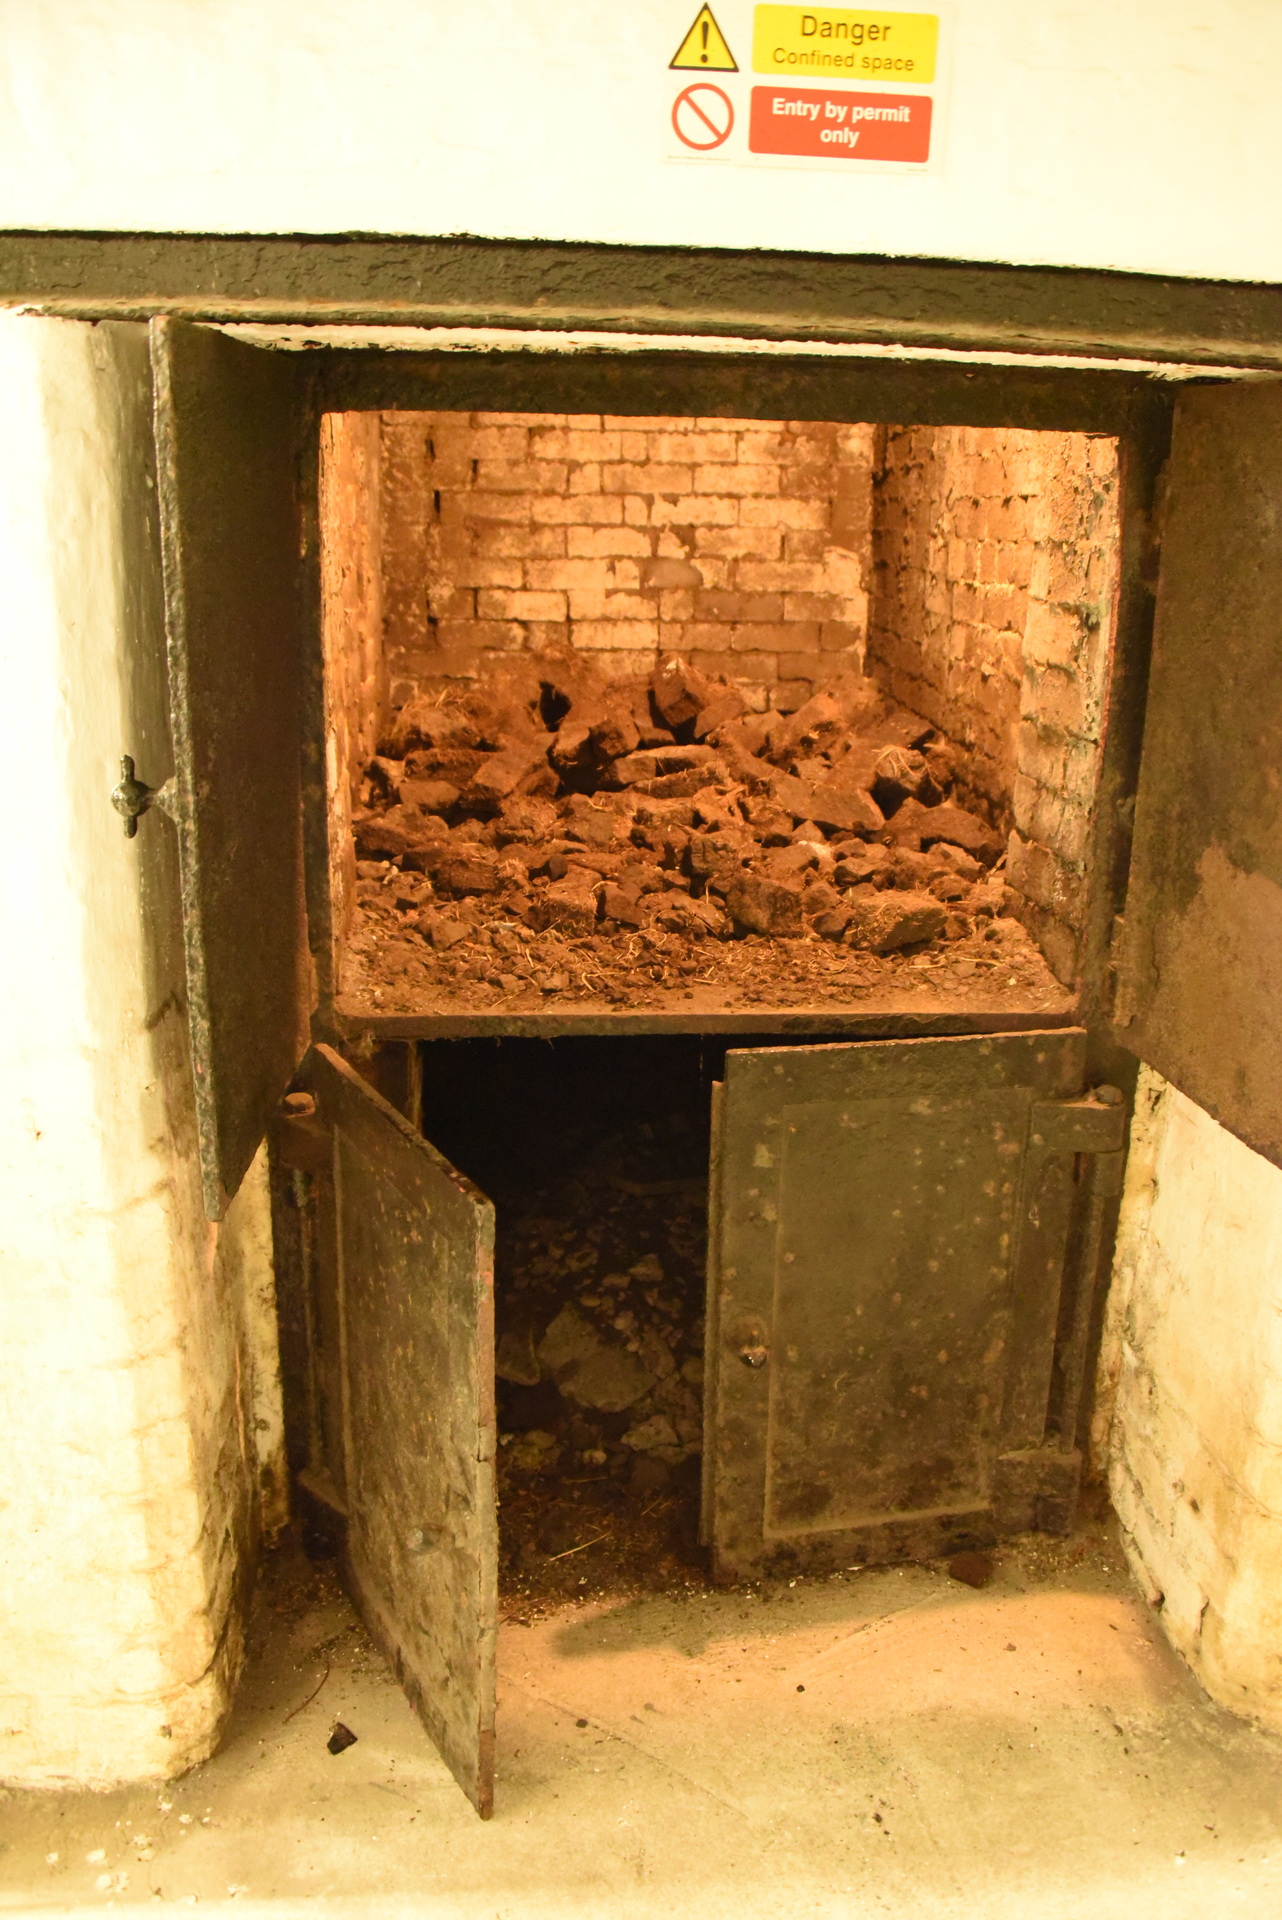
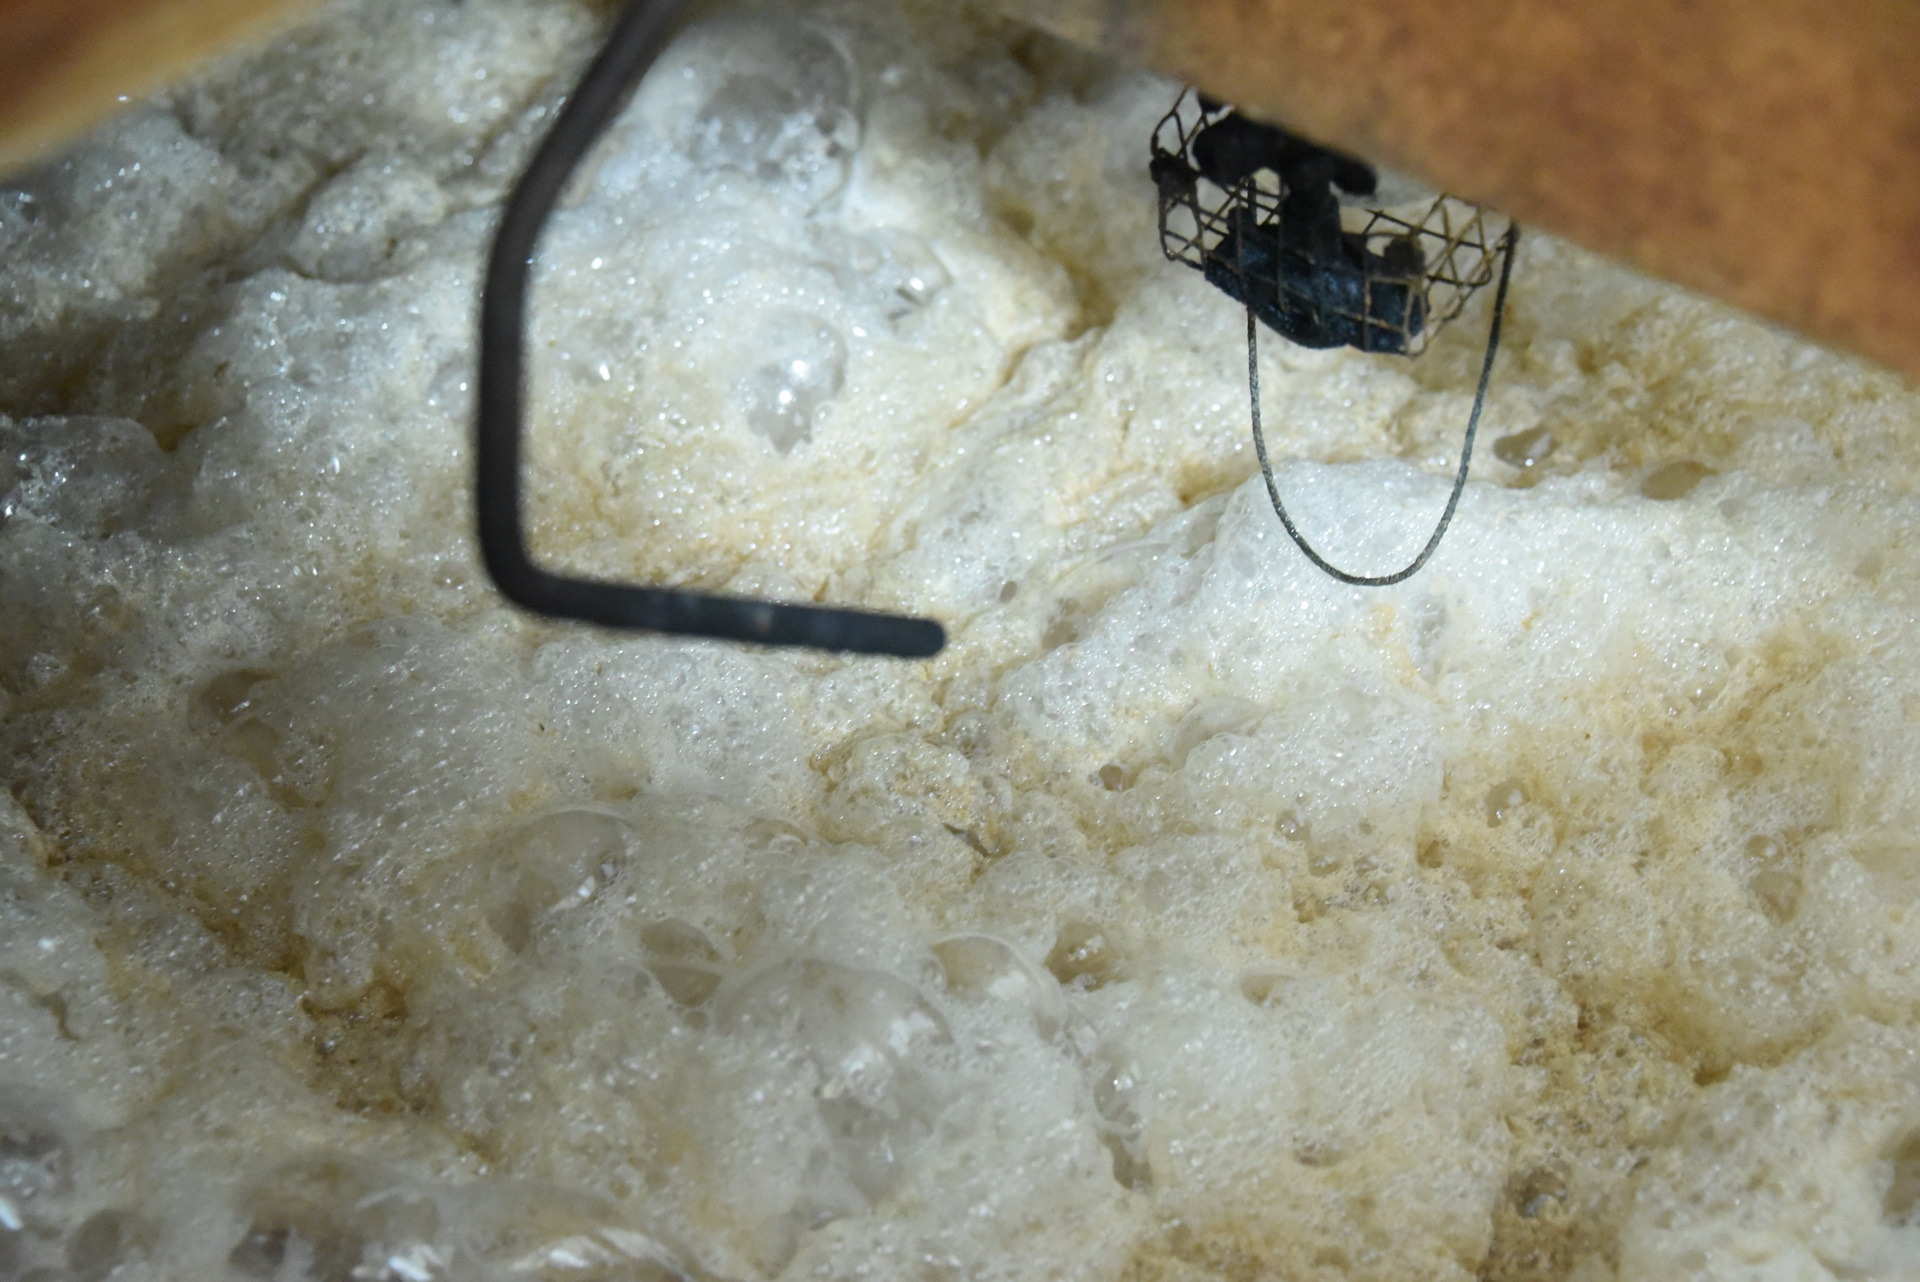
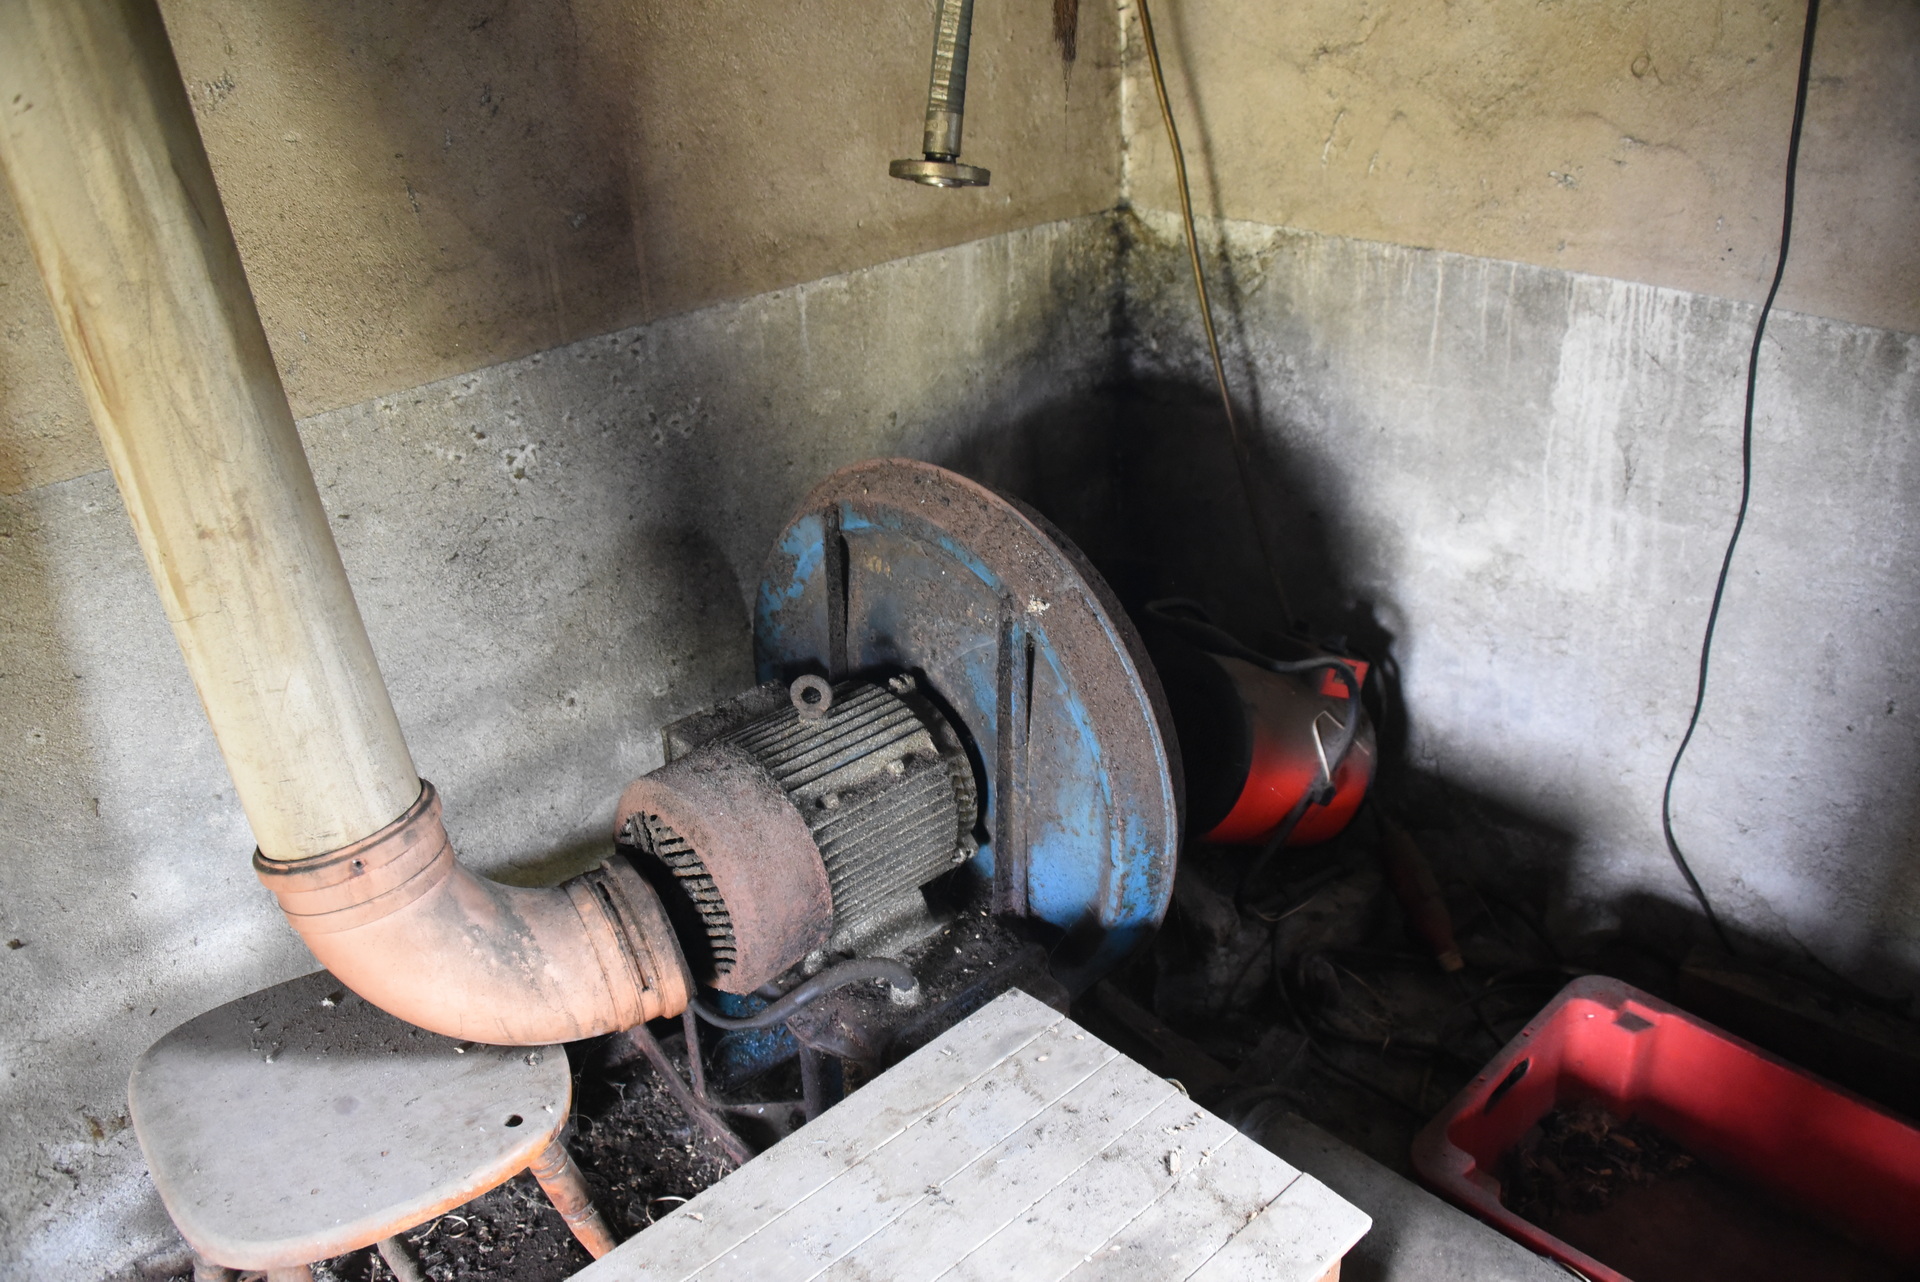
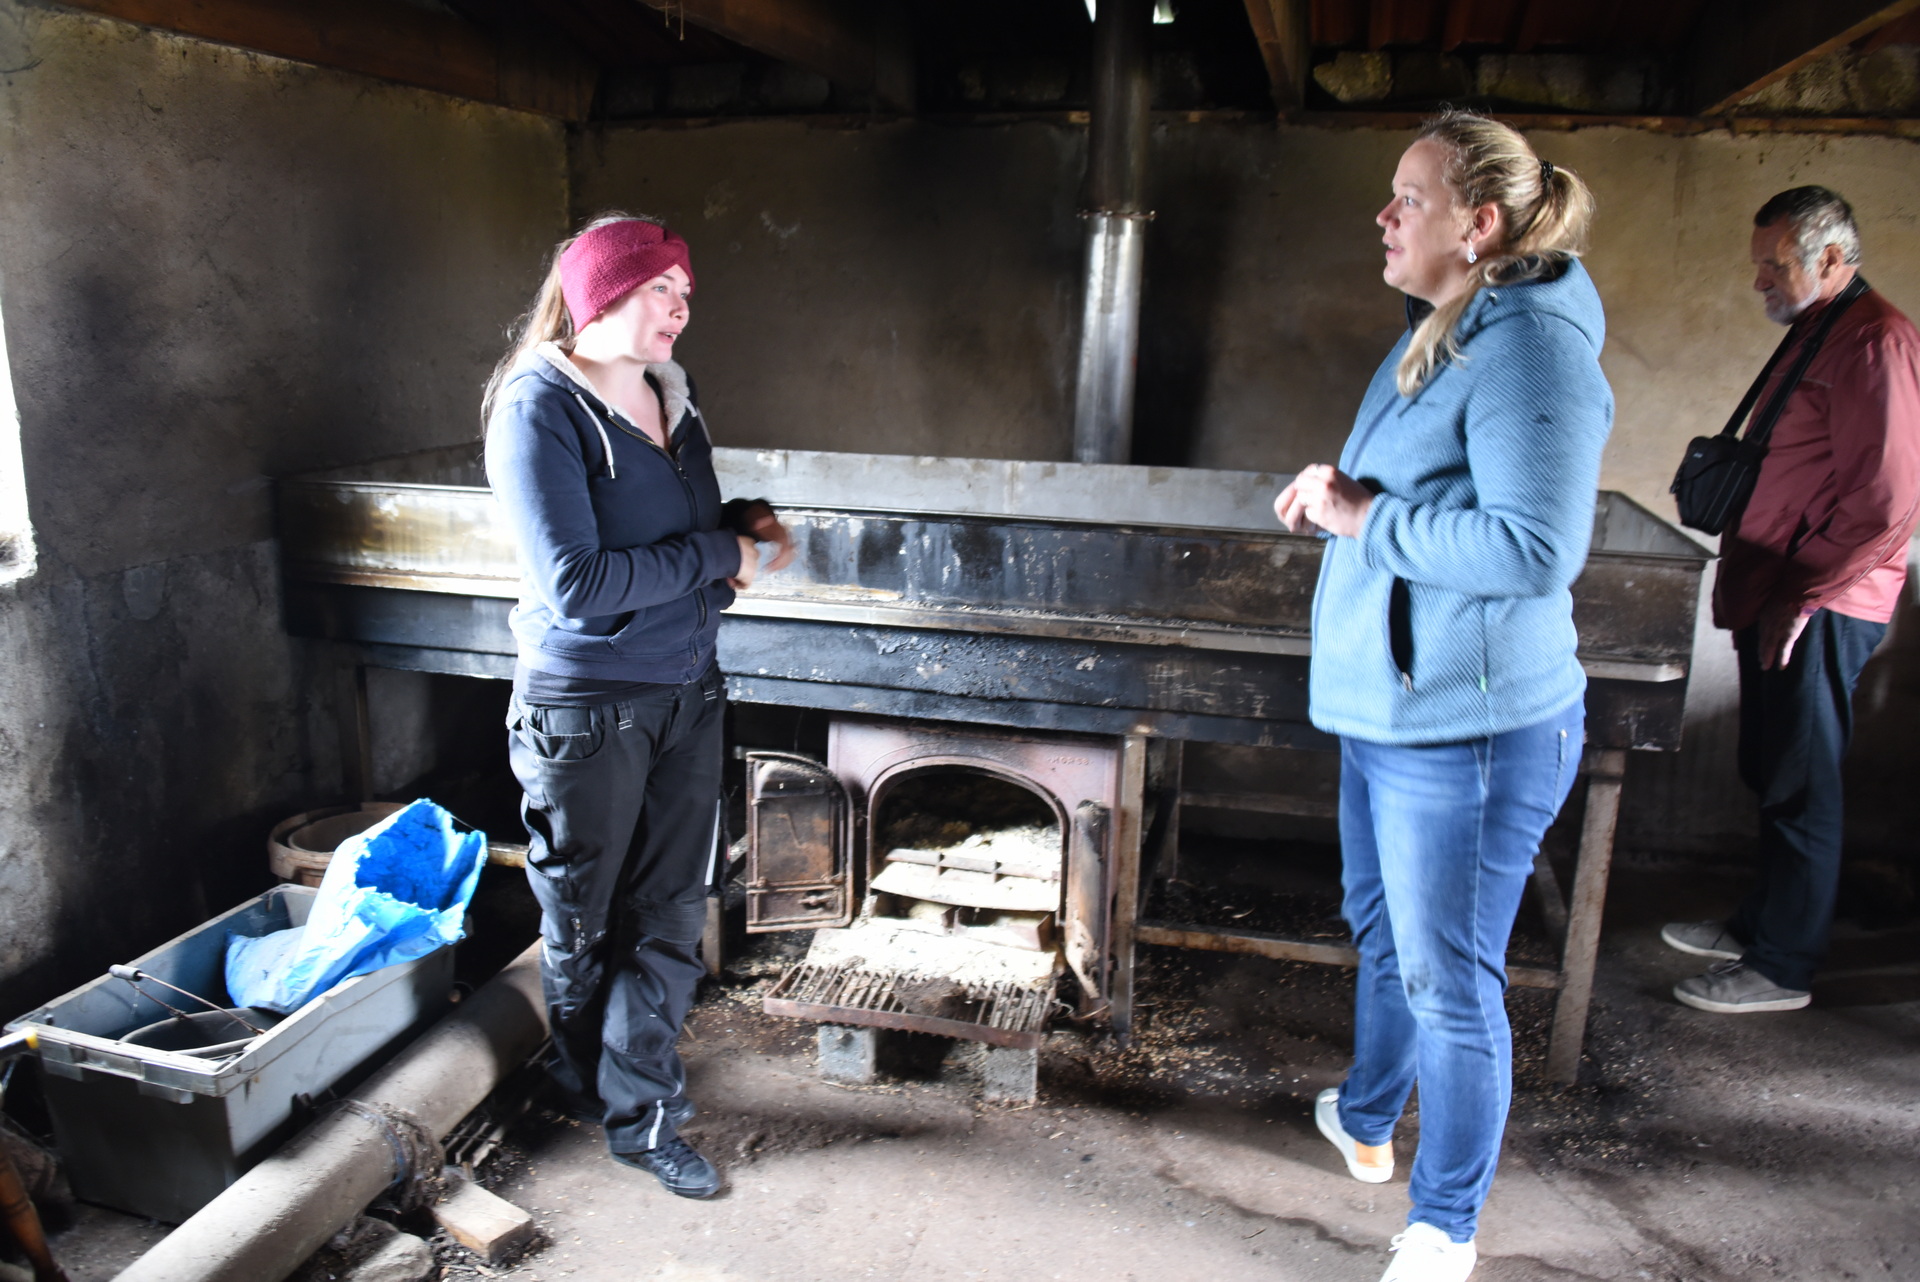
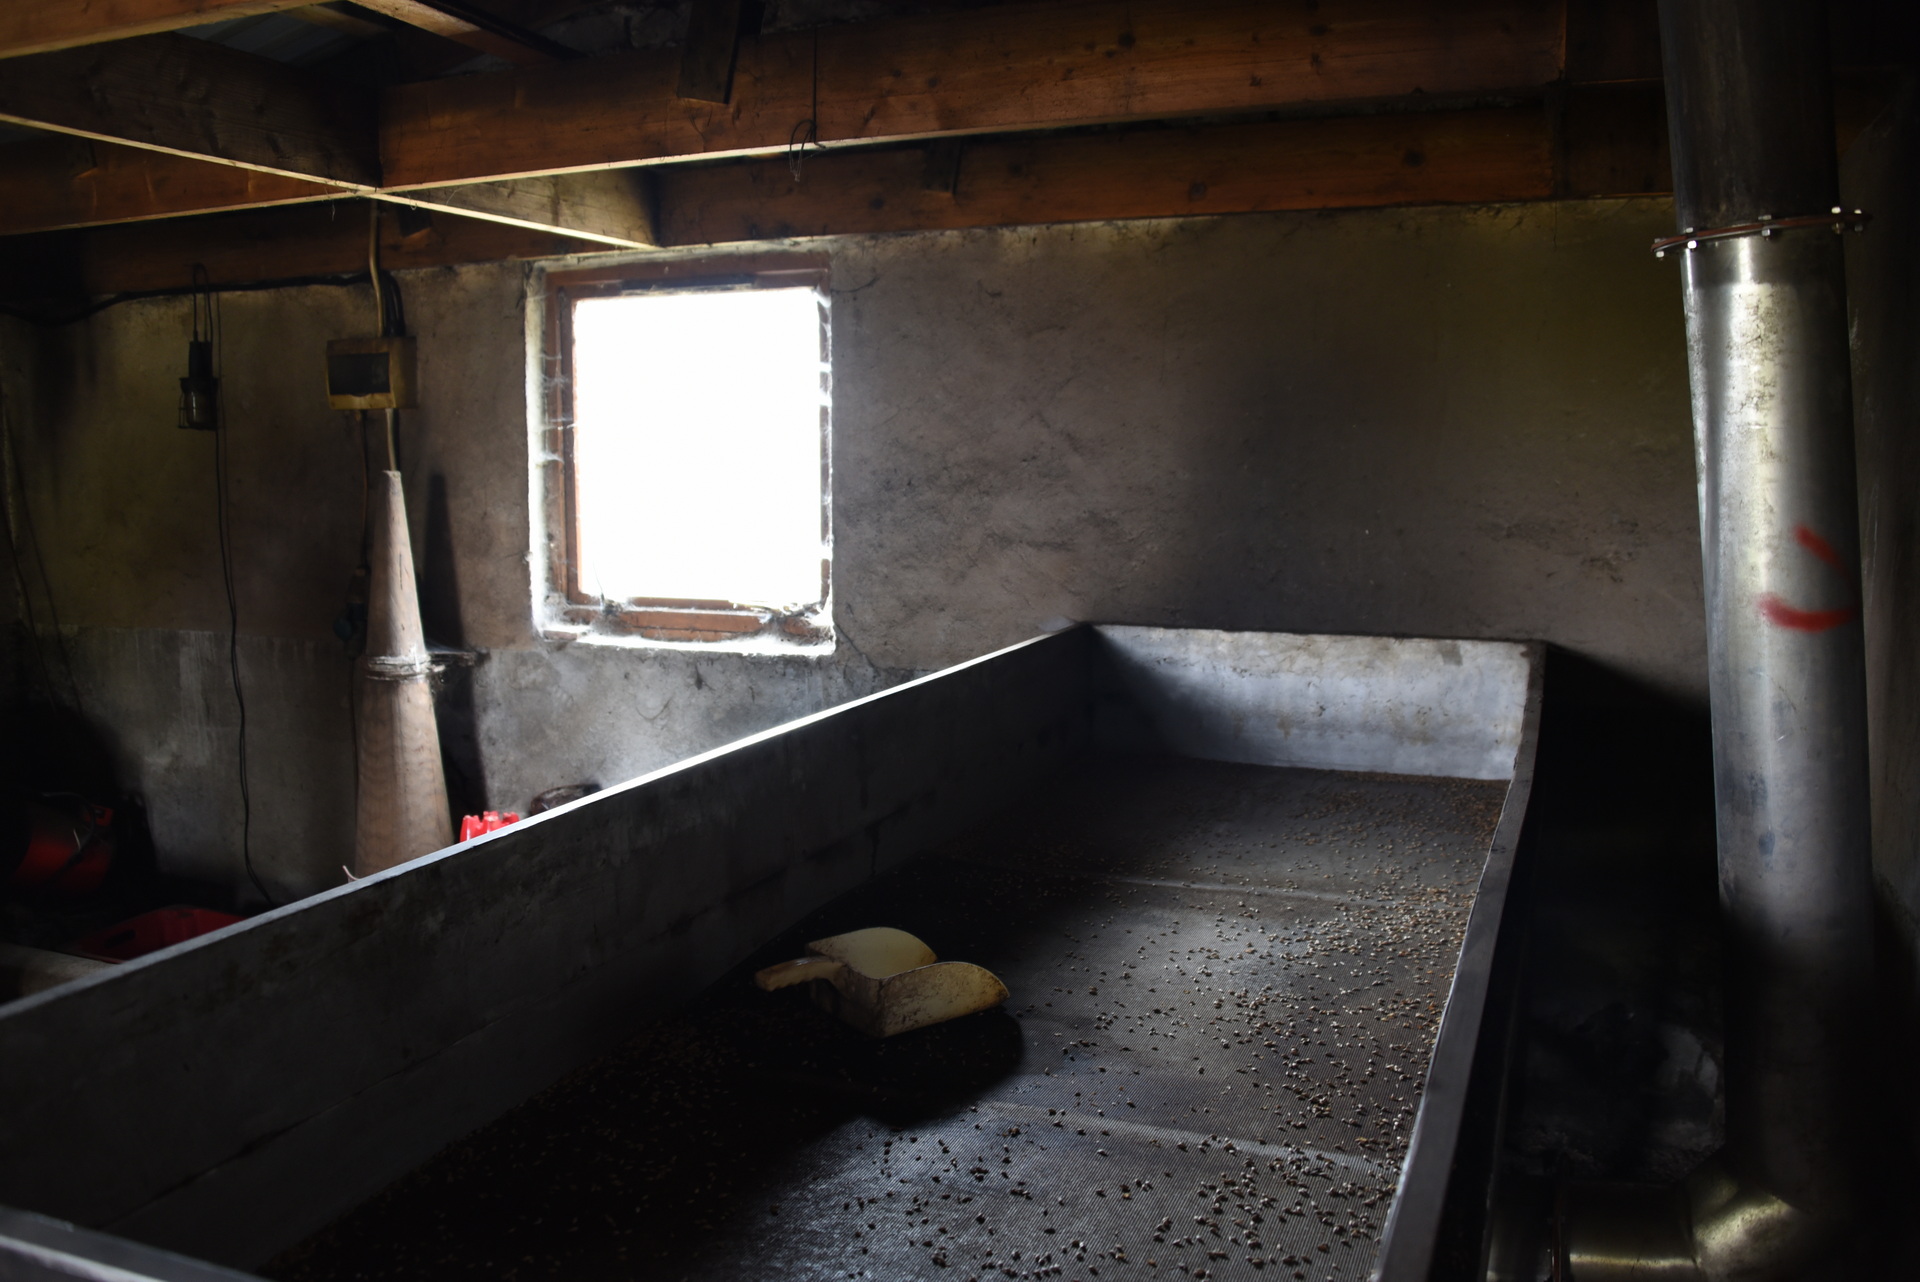
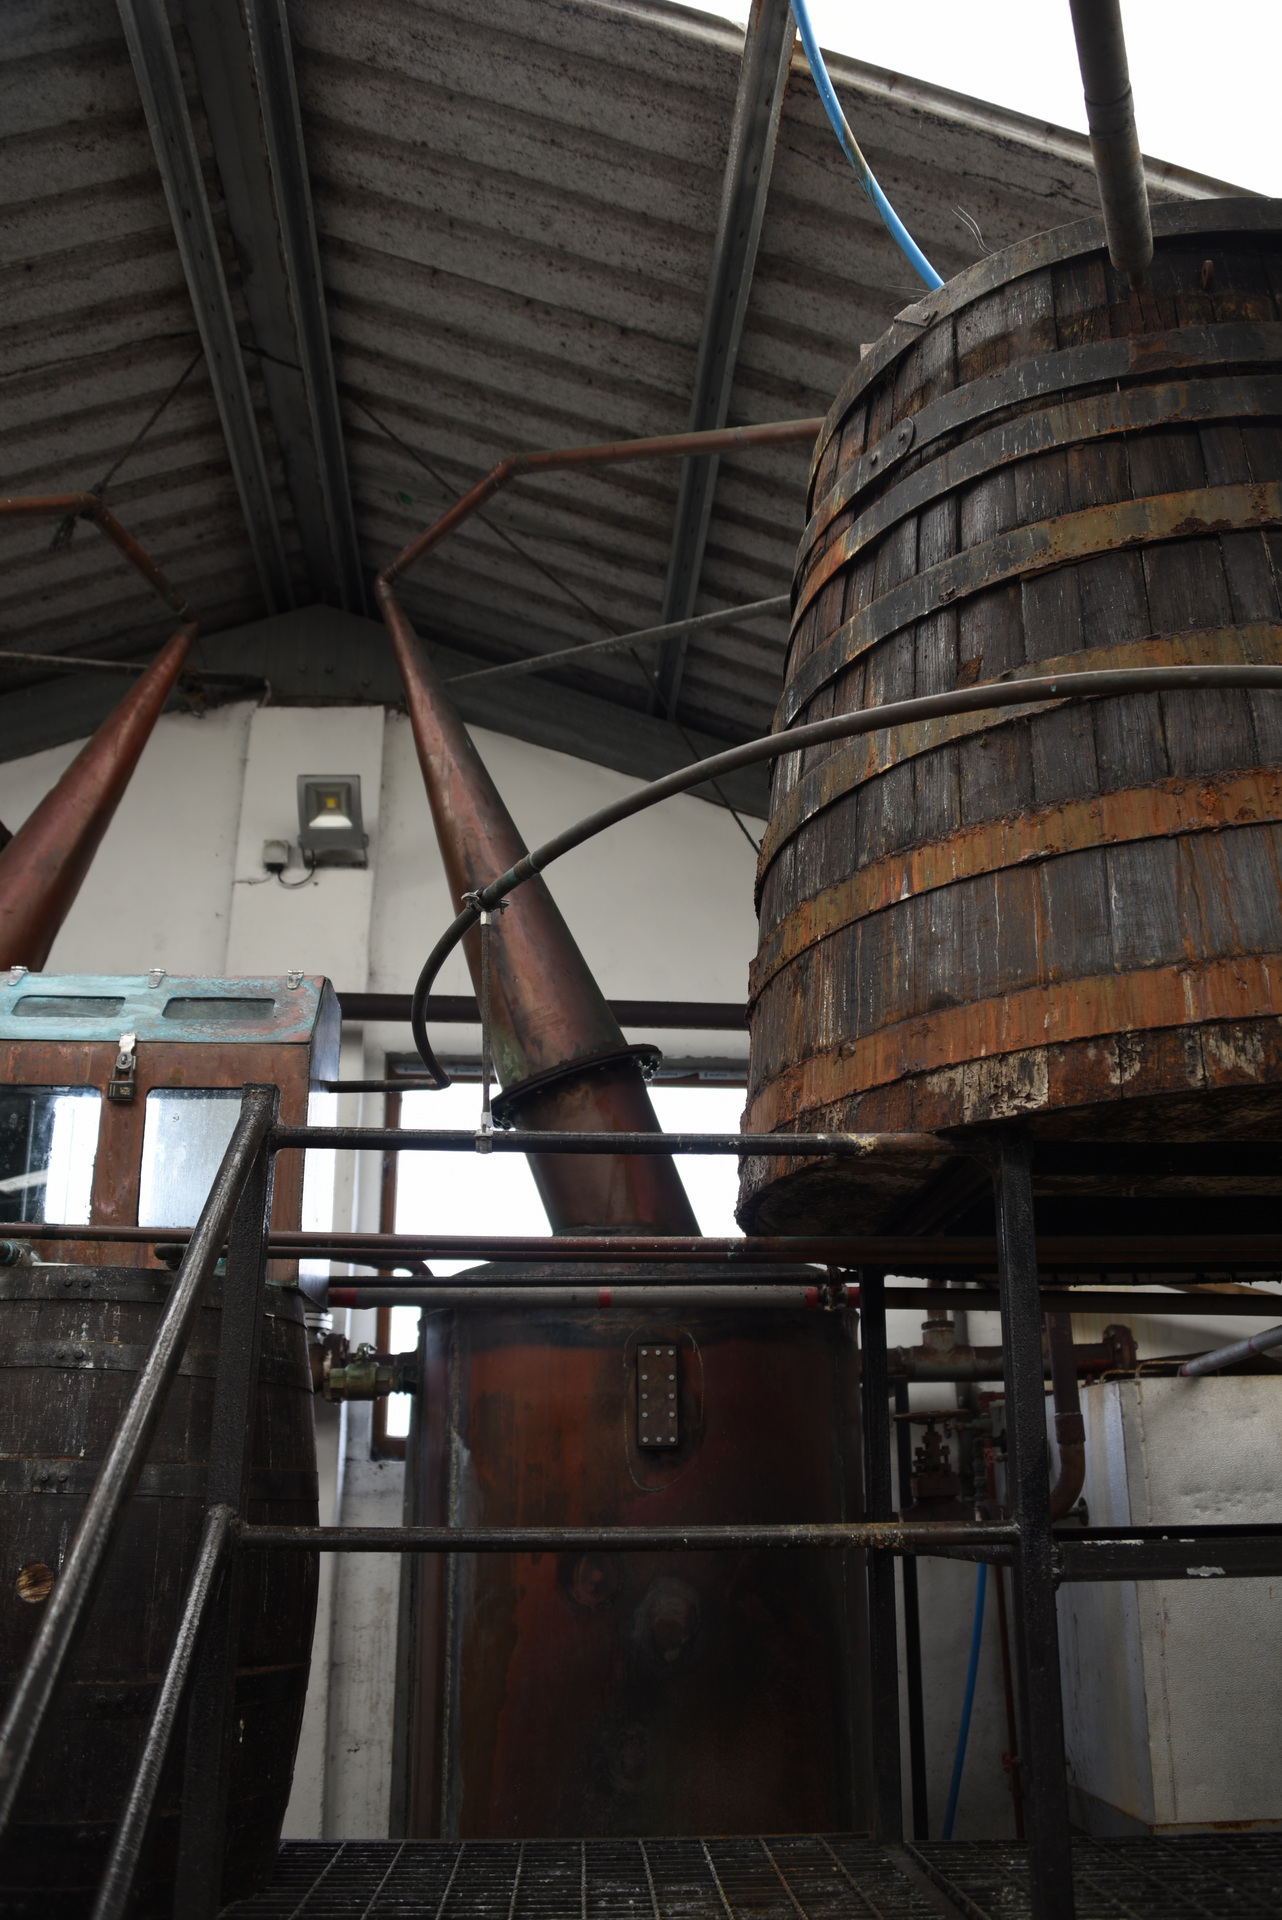
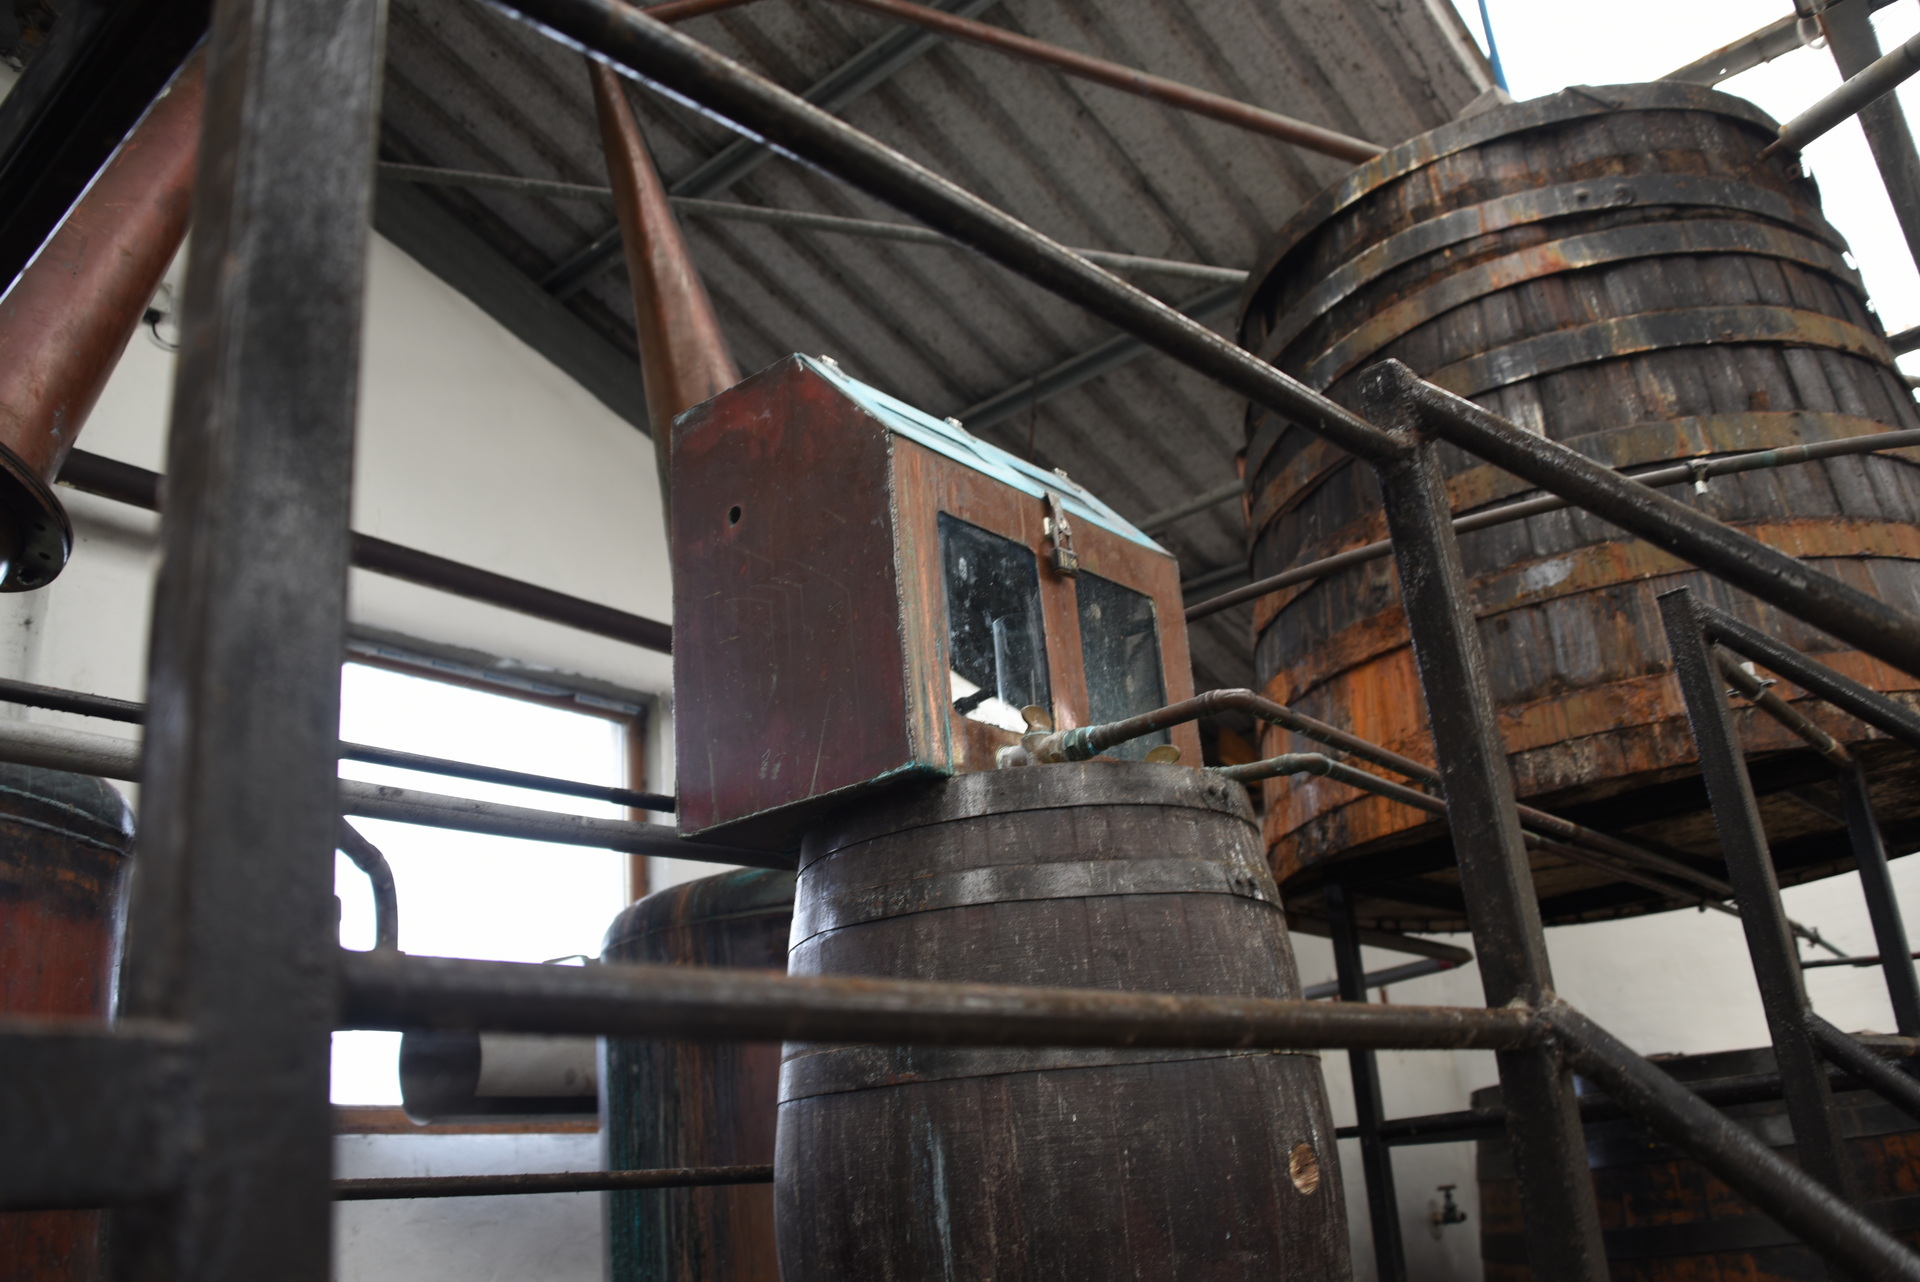
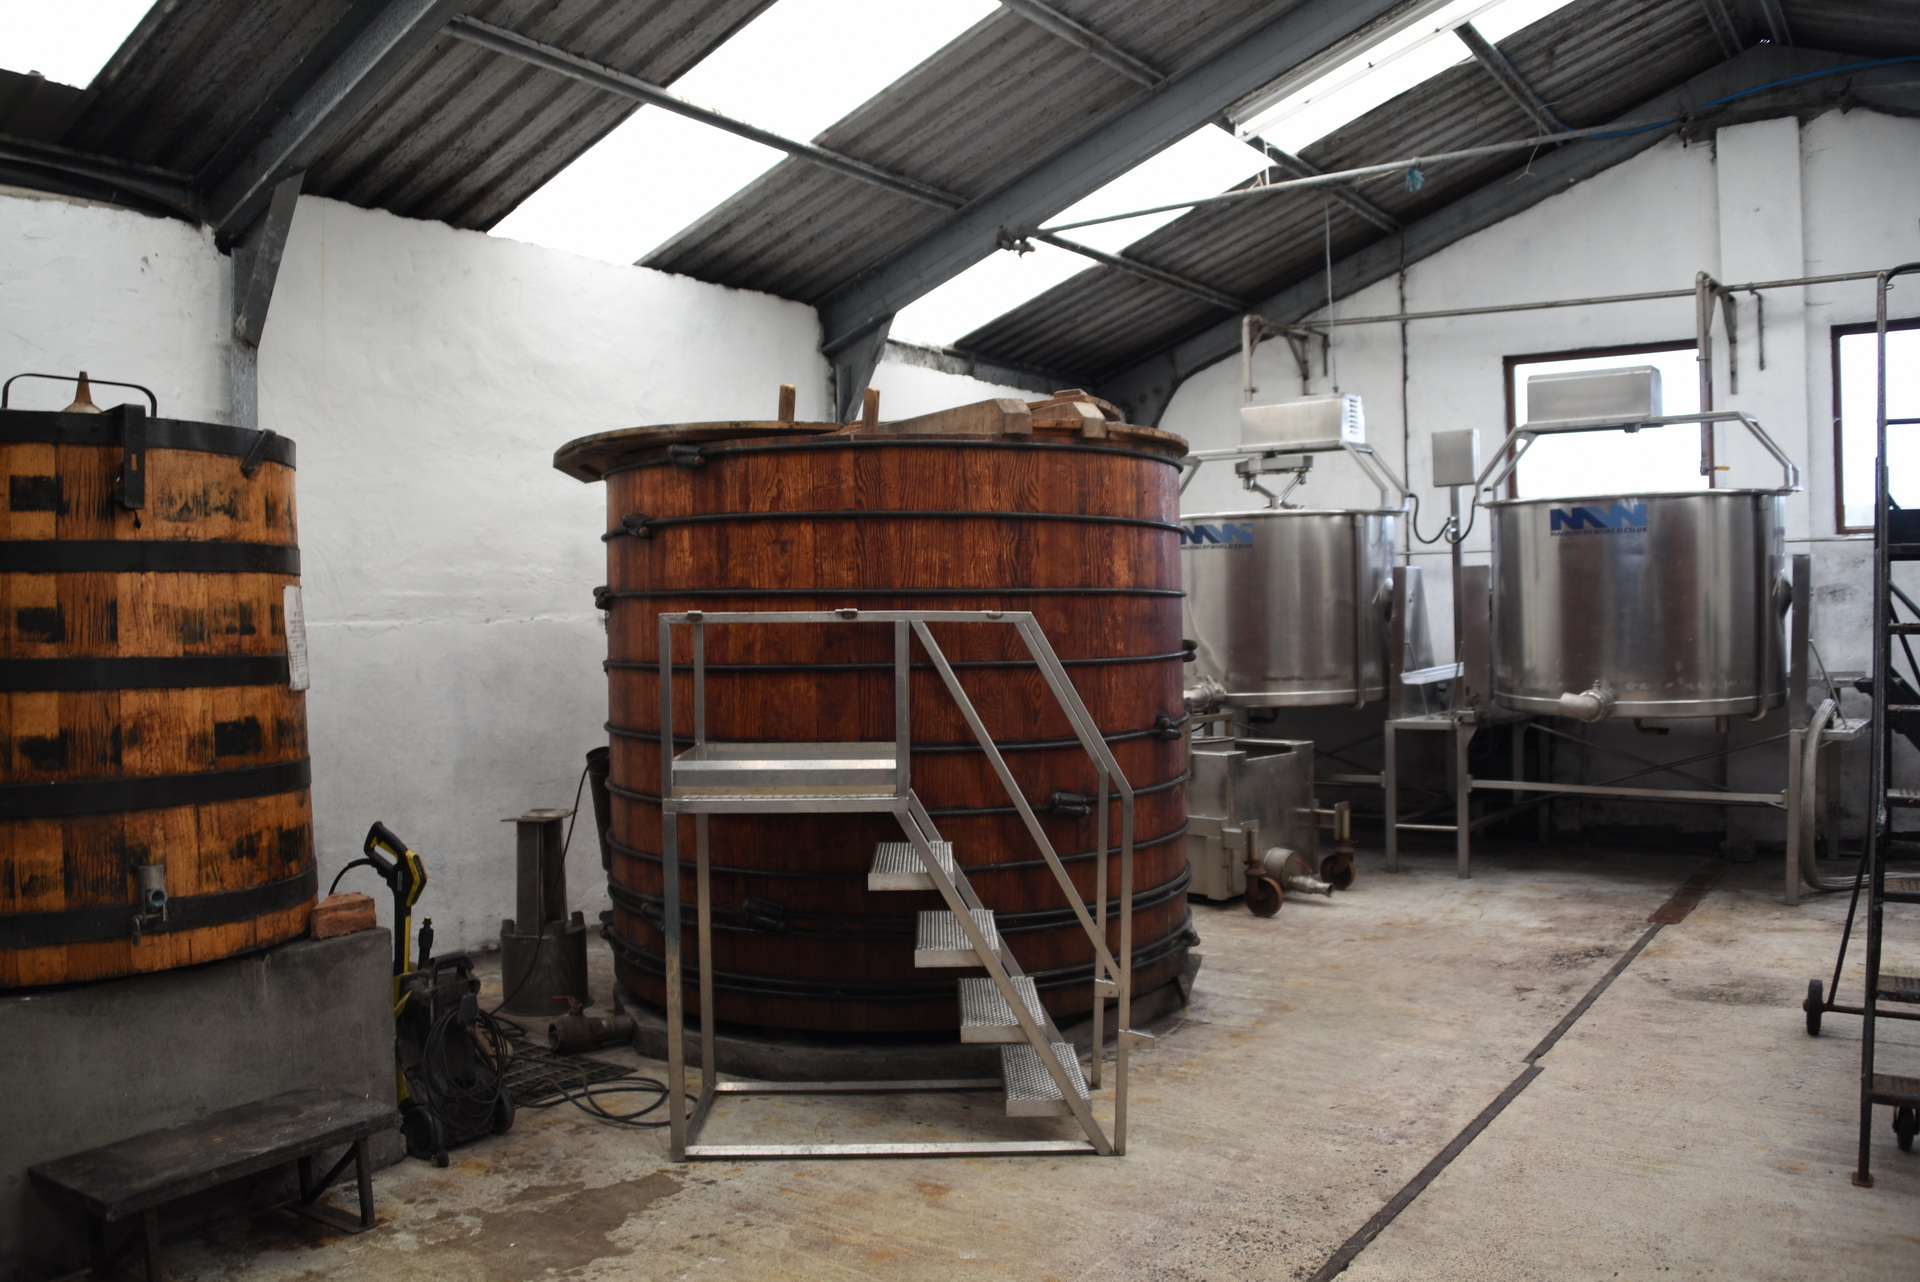
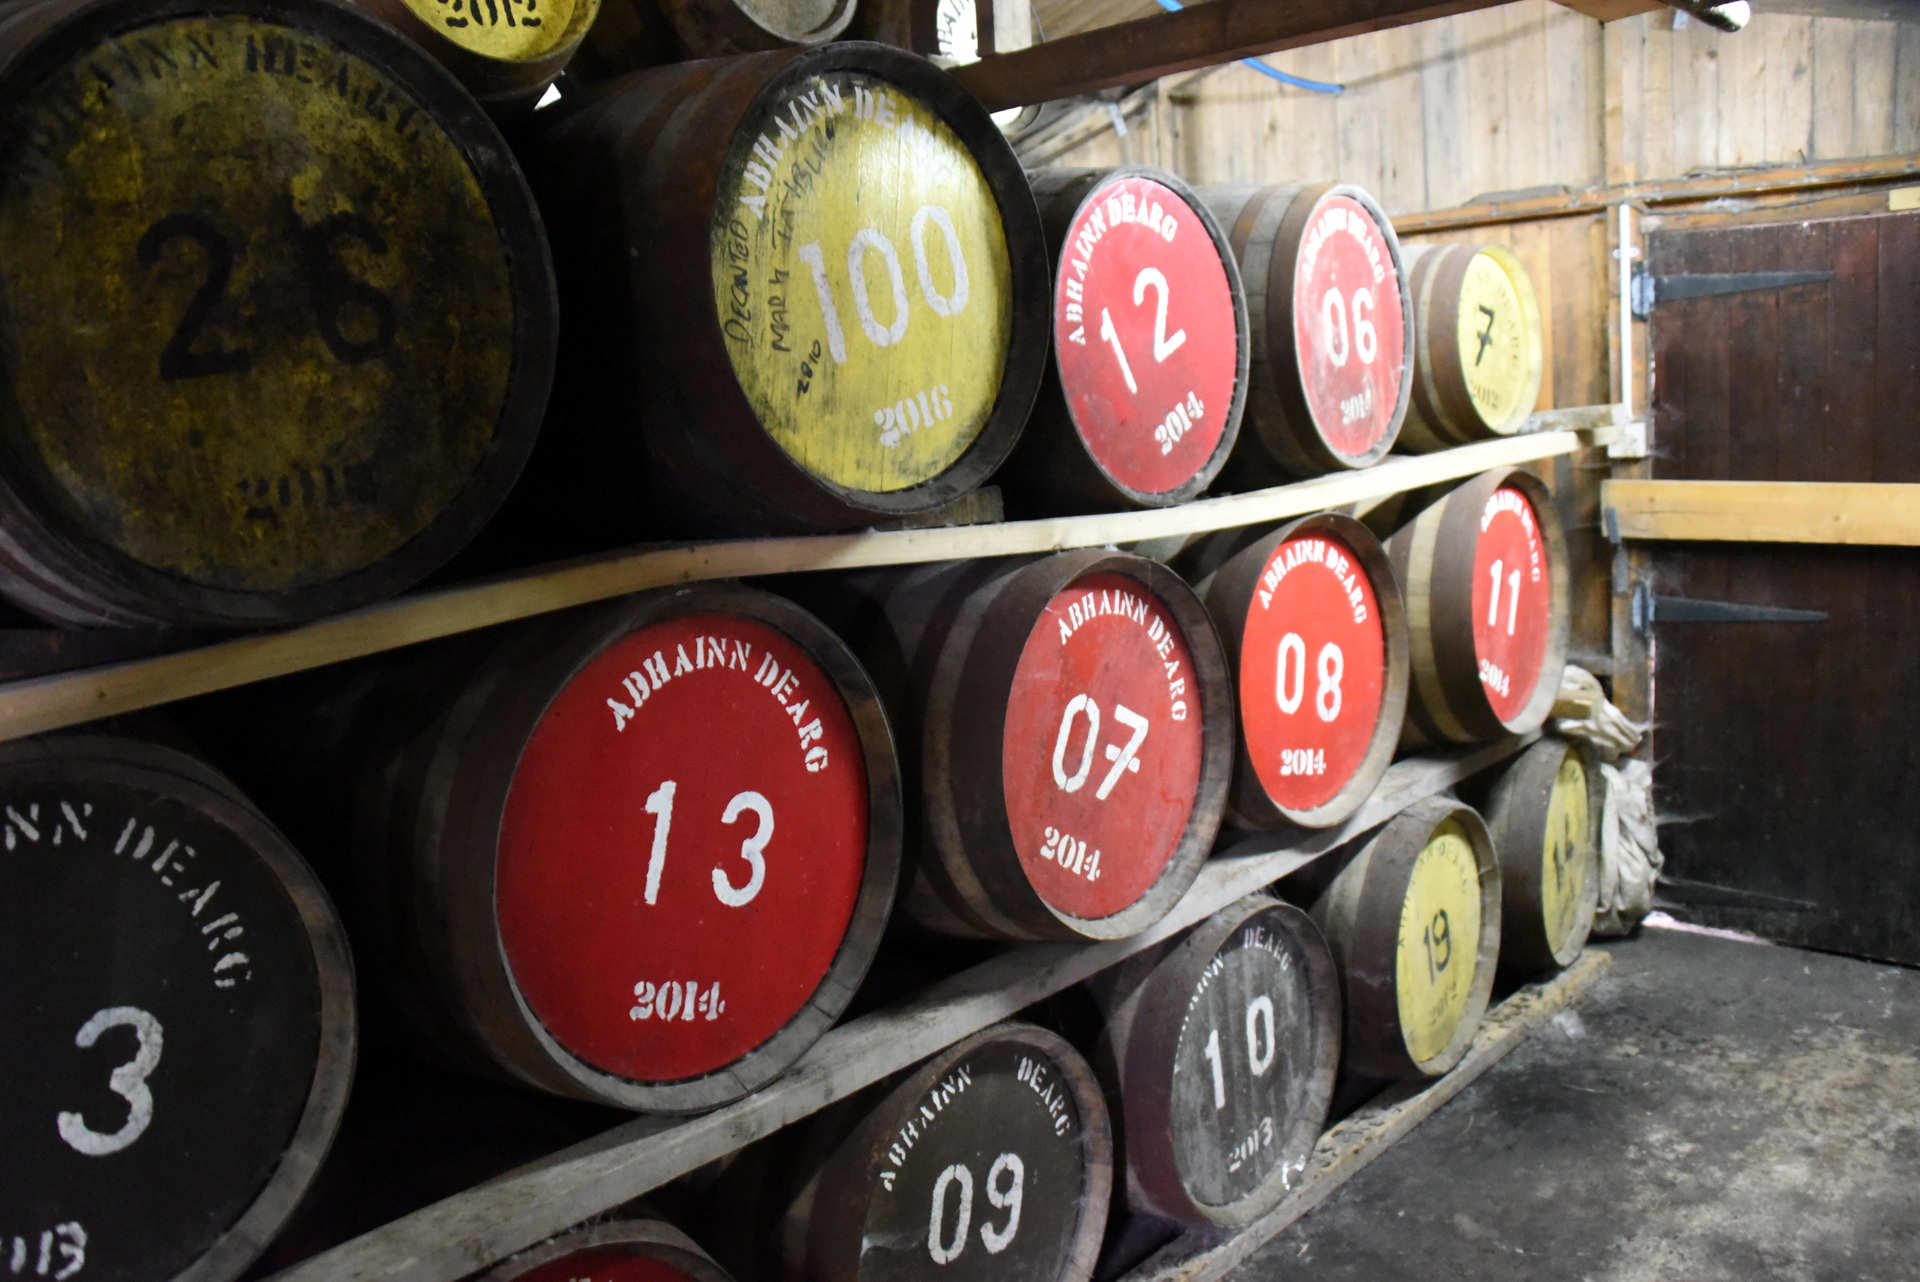
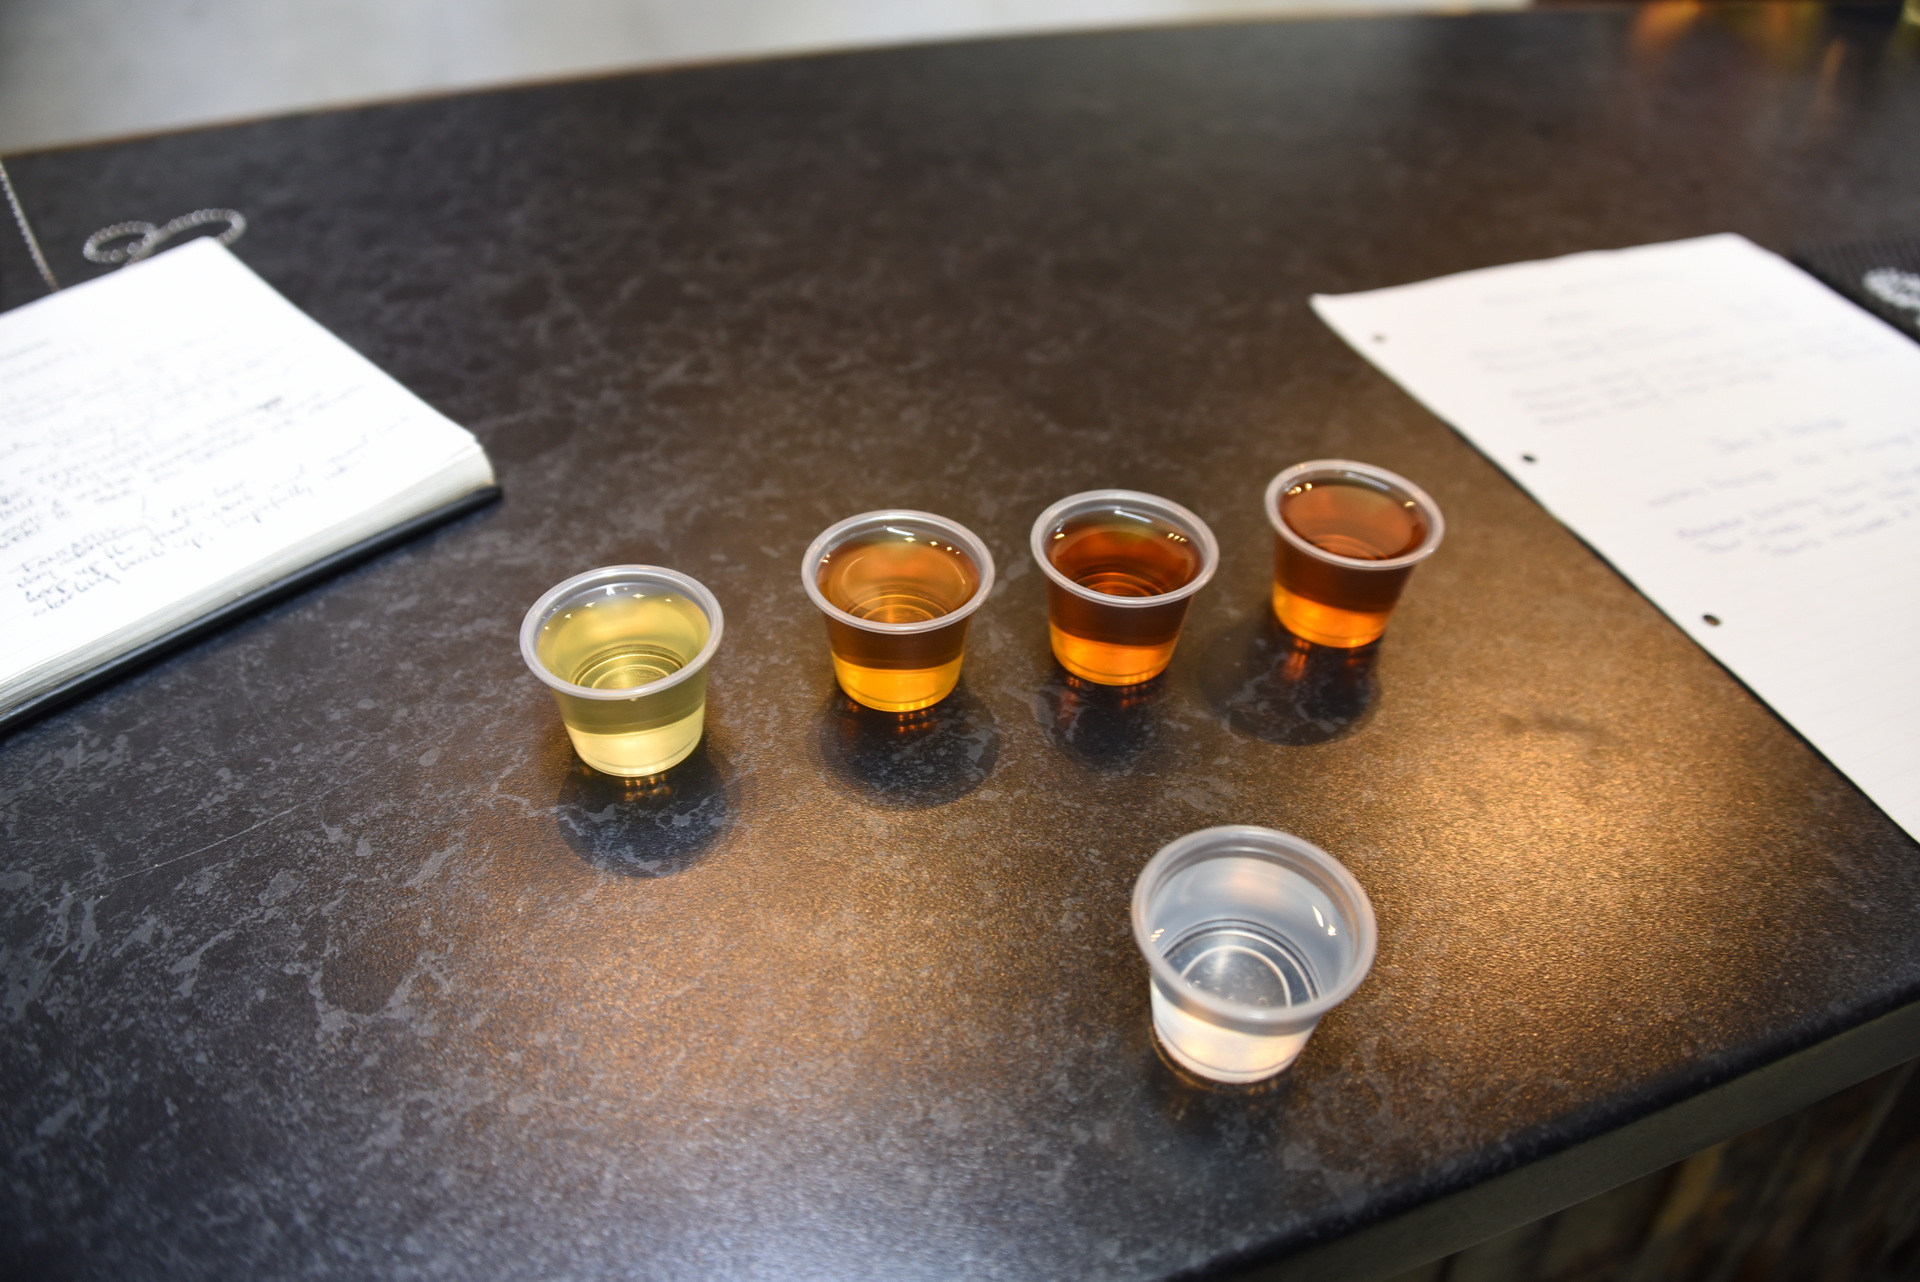
Het was een uurtje rijden naar de Abhainn Dearg distillery. Hier hadden we voor 11 uur een rondleiding geboekt; we kwamen netjes 10 voor 11 aan. Dit was een zeer kleinschalige craft distilleerderij op een soort boerderij. Terwijl we over het erf liepen werden we gewezen op het schuurtje waar we moesten zijn. De tour begon bij de mouterij, en toen naar de ruimte met de stills. Hier bleek het dat de distillery al geruime tijd (18 maanden) uit of business was doordat de wash stills lek waren en vervangen moesten worden, wat mede door corona erg veel vertraging opliep. Naar de toer, ging we terug naar de ruimte waar we gestart waren waar we elk 2 whiskies mochten proeven. Samen konden we ze alle 4 proeven: hun 10 jaar whisky of bourbon vatten gerijpt, en de 3 cask strengths op 3 verschillende vaten gerijpt (dessertwijn, sherry, en een roja rode wijn). Uiteindelijk hebben we nog een flesje van de 10 jaar meegenomen. En om 12 uur zijn we weer in de auto gesprongen. Dit was een leuke andere distiller, één waarbij mensen het niet zo nauw namen met hoe ze de whisky maken. Spinnenwebben, koper buisjes beetje aan elkaar gesoldeerd. Doffe stills die niet mooi rond waren, maar een cilinder met wat smalle buisjes. Whatever gets the job done.
24 Juni Edradour, Blair Atholl Distillery (Mainland)
Omdat we toch via Pitlochry naar het zuiden gingen, maar even lans de woonplaats van de helaas te vroeg overleden held van ons Gordon Duncan. Hier ligt het kleinste destillery van Scotland Edradour, maar deze is ‘temporarily closed’ Vanwege tijdgebrek van Blair Atholl alleen maar een foto gemaakt.
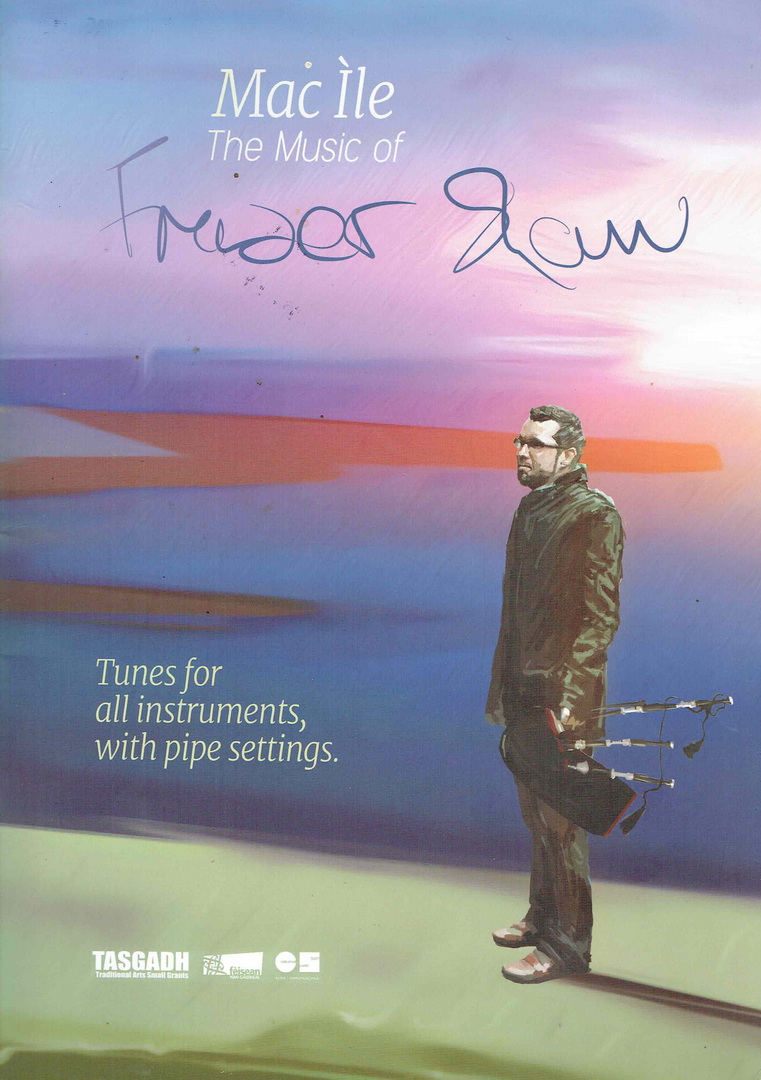
While visiting the Ardbeg dristiller on Isle of Islay, i notished a tunebook with CD in the whiskyshop. Tunes for multiple instruments and pipe settings .. interesting! Fraser Shaw, didn’t know who he was. The tunes in the book looked interesting. I bought both .. we will see.
While reading more about him, i learned he was a driving force on the islands when it comes to folk music. Sadly he died by a illness .. far to soon. While on holiday we drove by some places he was know to play. Tunes for whistle with guitar chords and pipe settings. Some tunes are in a complex time measure. I lost the CD but it is on spotify .. favourites: £50 Cashback and Air Chall
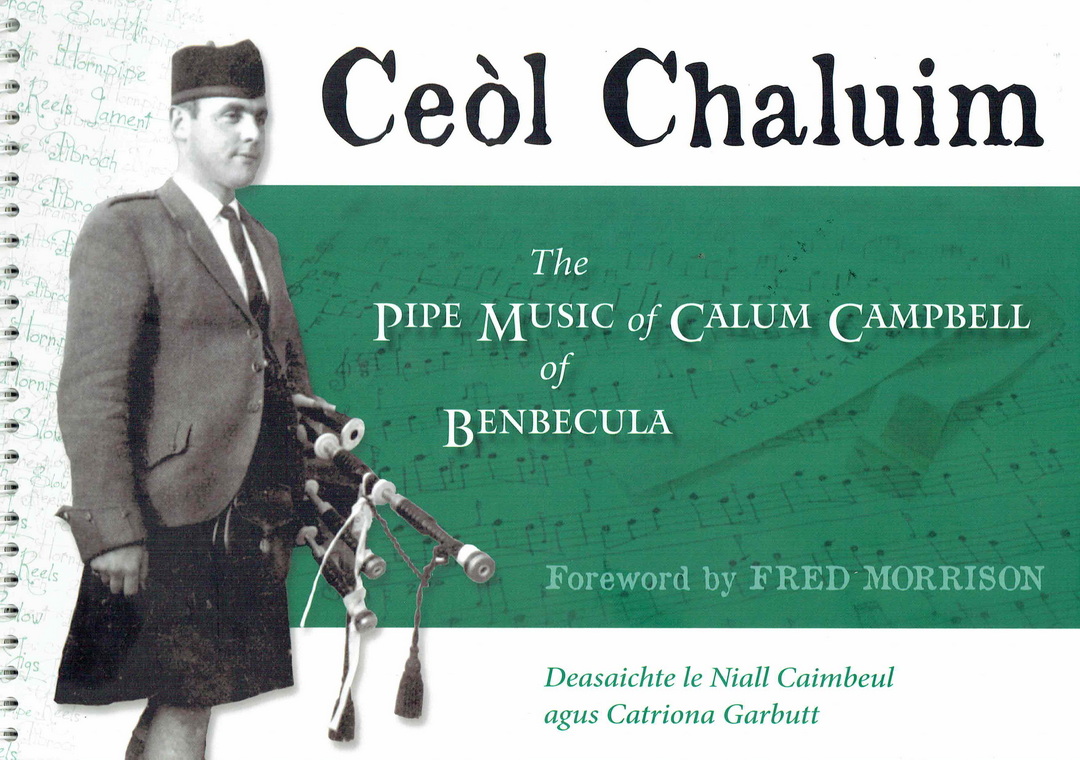
While visiting the Kildonan Museum in South Uist, i found a tunebook which was compiled of tunes from a piper named: Calum Campbell.
This oldskool piper wrote some amazing tunes. The book was made after he, his daughter and her two children lost their lives in a heavy storm in 2005. 2005 Was a bad year .. we lost John D Burgess, Martyn Bennett and Gordon Duncan the same year.
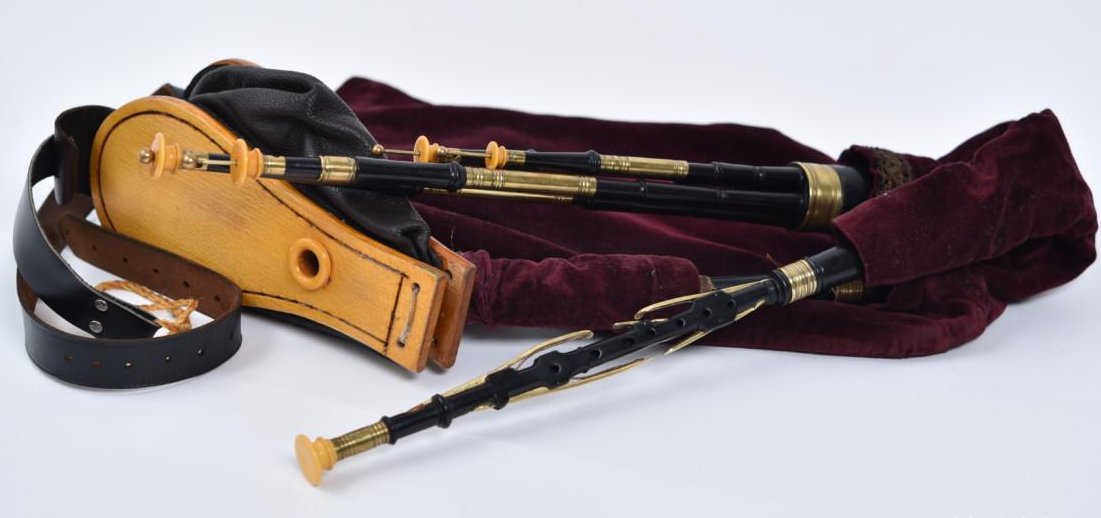
On our way home we visited the Morpeth Chantry Bagpipe Museum.
Most of the pipes here where Northumbrian bagpipes and some borderpipes ( even a shuttlepipe )
Our Northumbrian pipes
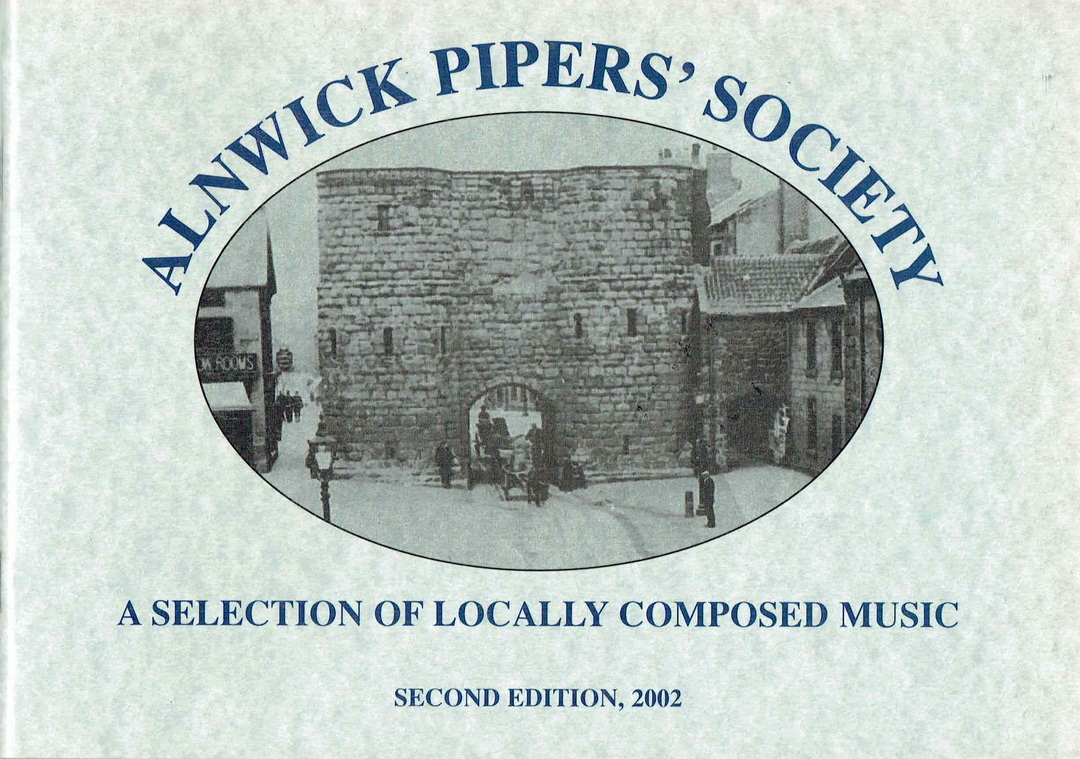
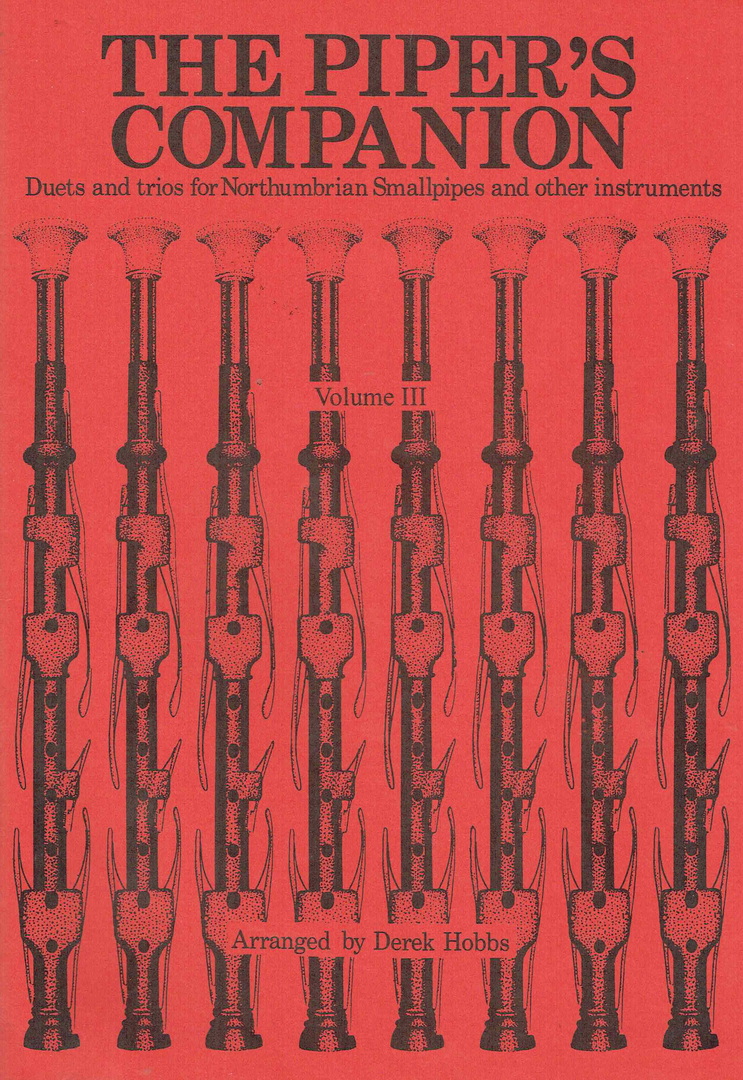
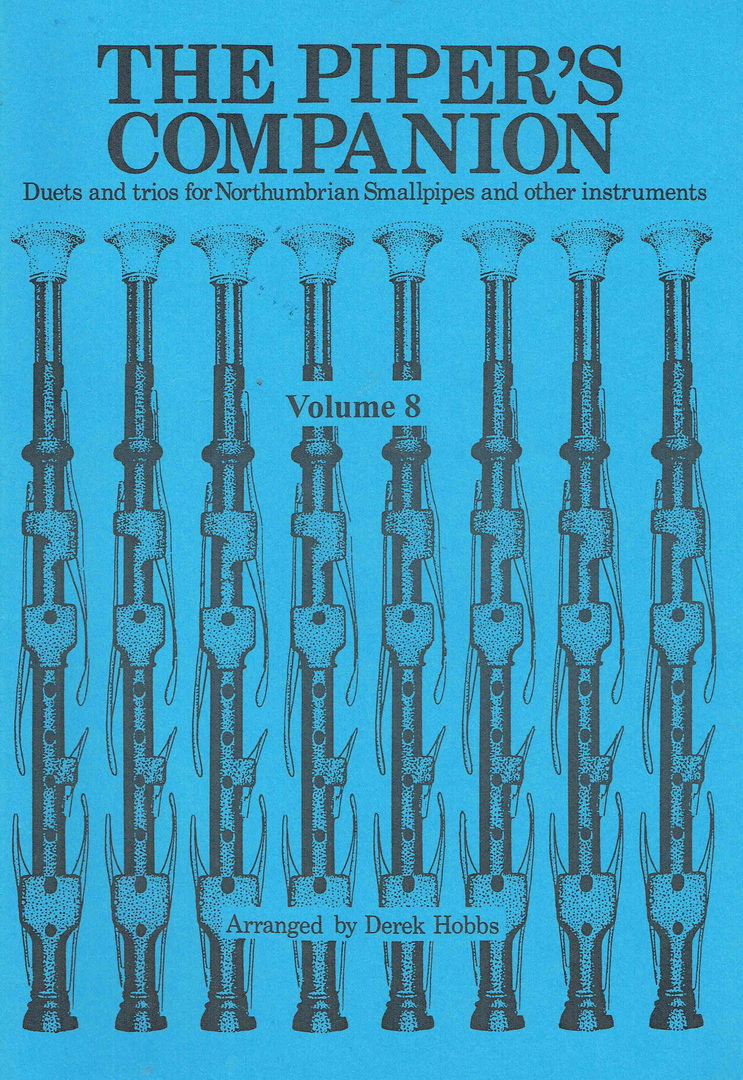
In the touristy shop i found these books, amoung others.
Last two are Duets/Trios also for different instruments .. nice!
One of my first encounters with English Humour was when my wonderful teacher Mrs Walraven rolled in the old VCR-on-cart when i was going to technical secondary school (MTS)
She showed us Monty Python, Faulty Towers and Black Adder. THIS is the humour i like, this is for me!
So from that point on i wanted to see English Humour.
There are standup comedians i like, Billy Connolly (seen him live), Eddie Izzard (seen him live), Michael McIntyre and Jimmy Carr (tickets!!!) to name a few. Life stories, wierd confronting idea’s and realisations of things , Real life observations and Dark humour. (in that order)
Billy Connolly 2016
But i wanted to tell about TV shows (i try to place them in order):
Monty Python One of the first things i saw, great stuff. Liked the movies also.
Black Adder Loved the way it was the character Rowan Atkinson played got smarter every ‘season’, and Tony Robinson (Baldrick) was getting dumber. The last ‘season’ WWI was when all things where exactly right. (Yearly rewatch)
Not the nine o’clock news This one i need to review
The Young Ones A series that broke boundaries like Monty Python. First time i notished the perfect duo, Rik Mayall and Ade Edmonson
Fawlty Towers To few episodes, but each a brilliant piece of work. Superb characters! (Yearly rewatch)
Red dwarf Great stuff, loved the characters. And the space setting
Mr Bean Great (silent) performance of Rowan Atkinson. Liked his One man show more i think.
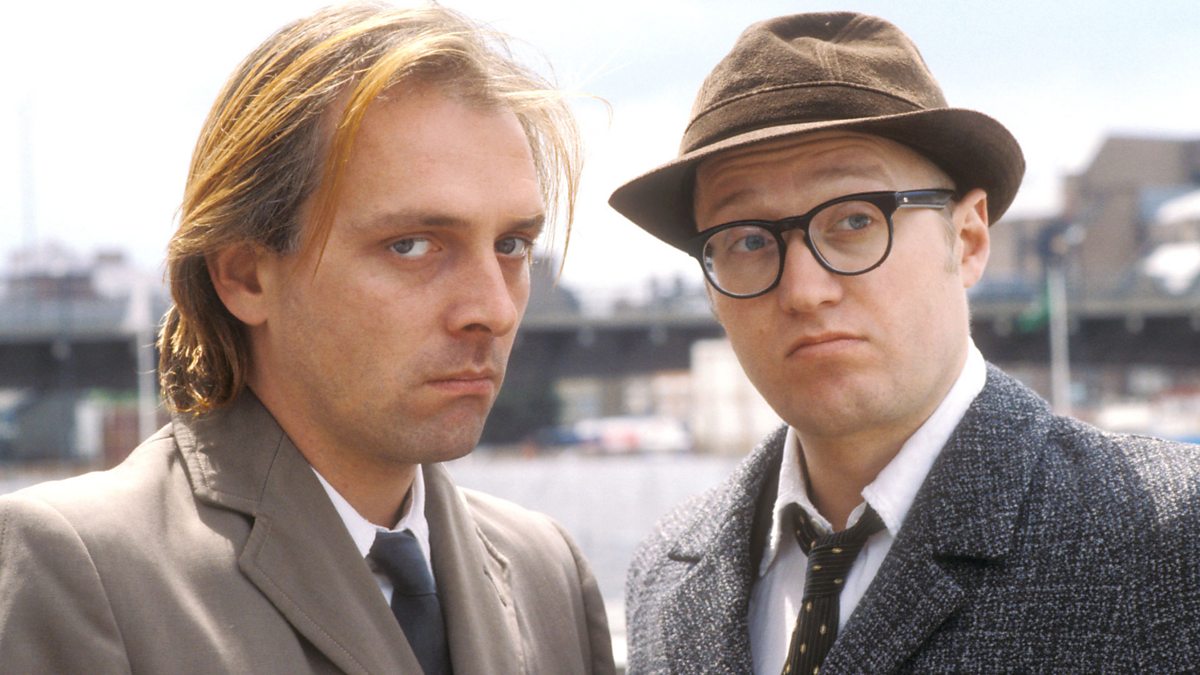
Bottom Then i learned about Bottom. It was the genius jokes and performances. The 5 liveshows where even more amazing. (Yearly rewatch) Also i have to mention the movie : Guest House Paradiso
So i went looking for more:
Filthy Rich & Catflap Secret Policeman’s Ball (not really a TV series)
Then i came across a oldie …
At last the 1948 show A predecessor of Monty Python with Marty Feldman
Do not adjust your set Also with guys who did Monty Python later on.
Today i was in Uist on holiday in Scotland, talking about these show. The B&B owner said “Do you know – Ripping Yarns???” So that’s the next to find and view!
Others i have to mention: Alas Smith and Jones The Bleak Old Shop of Stuff Allo allo
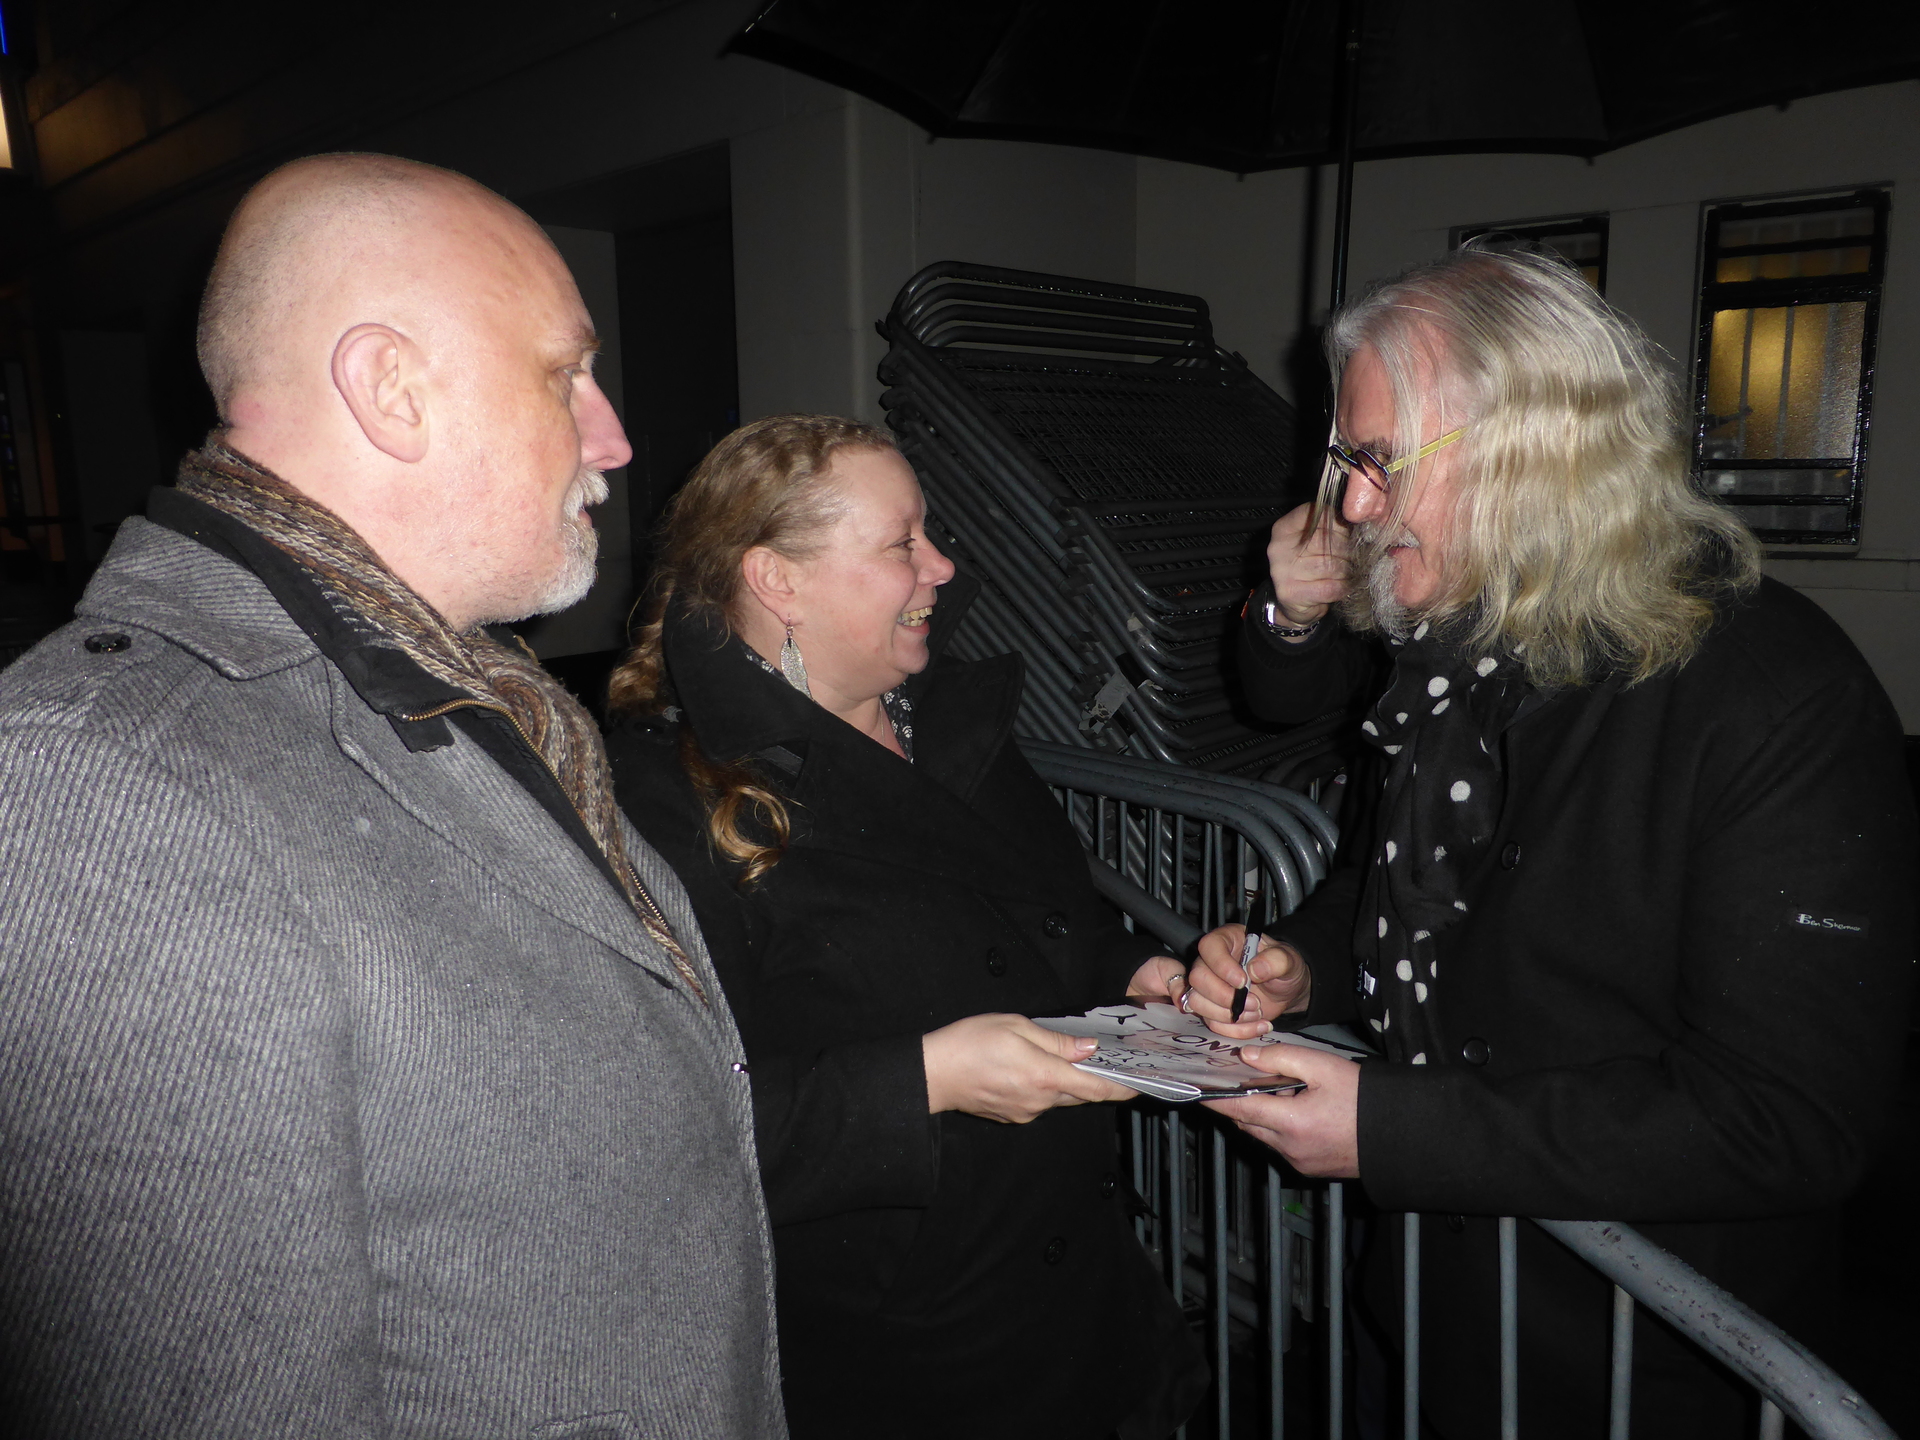
The location where the bench was from the intro of Bottom the TV series. Now a plaque is there, which reads: “Rik Mayall. 1958-2014. Punched his friend in the balls on a bench near this spot.”
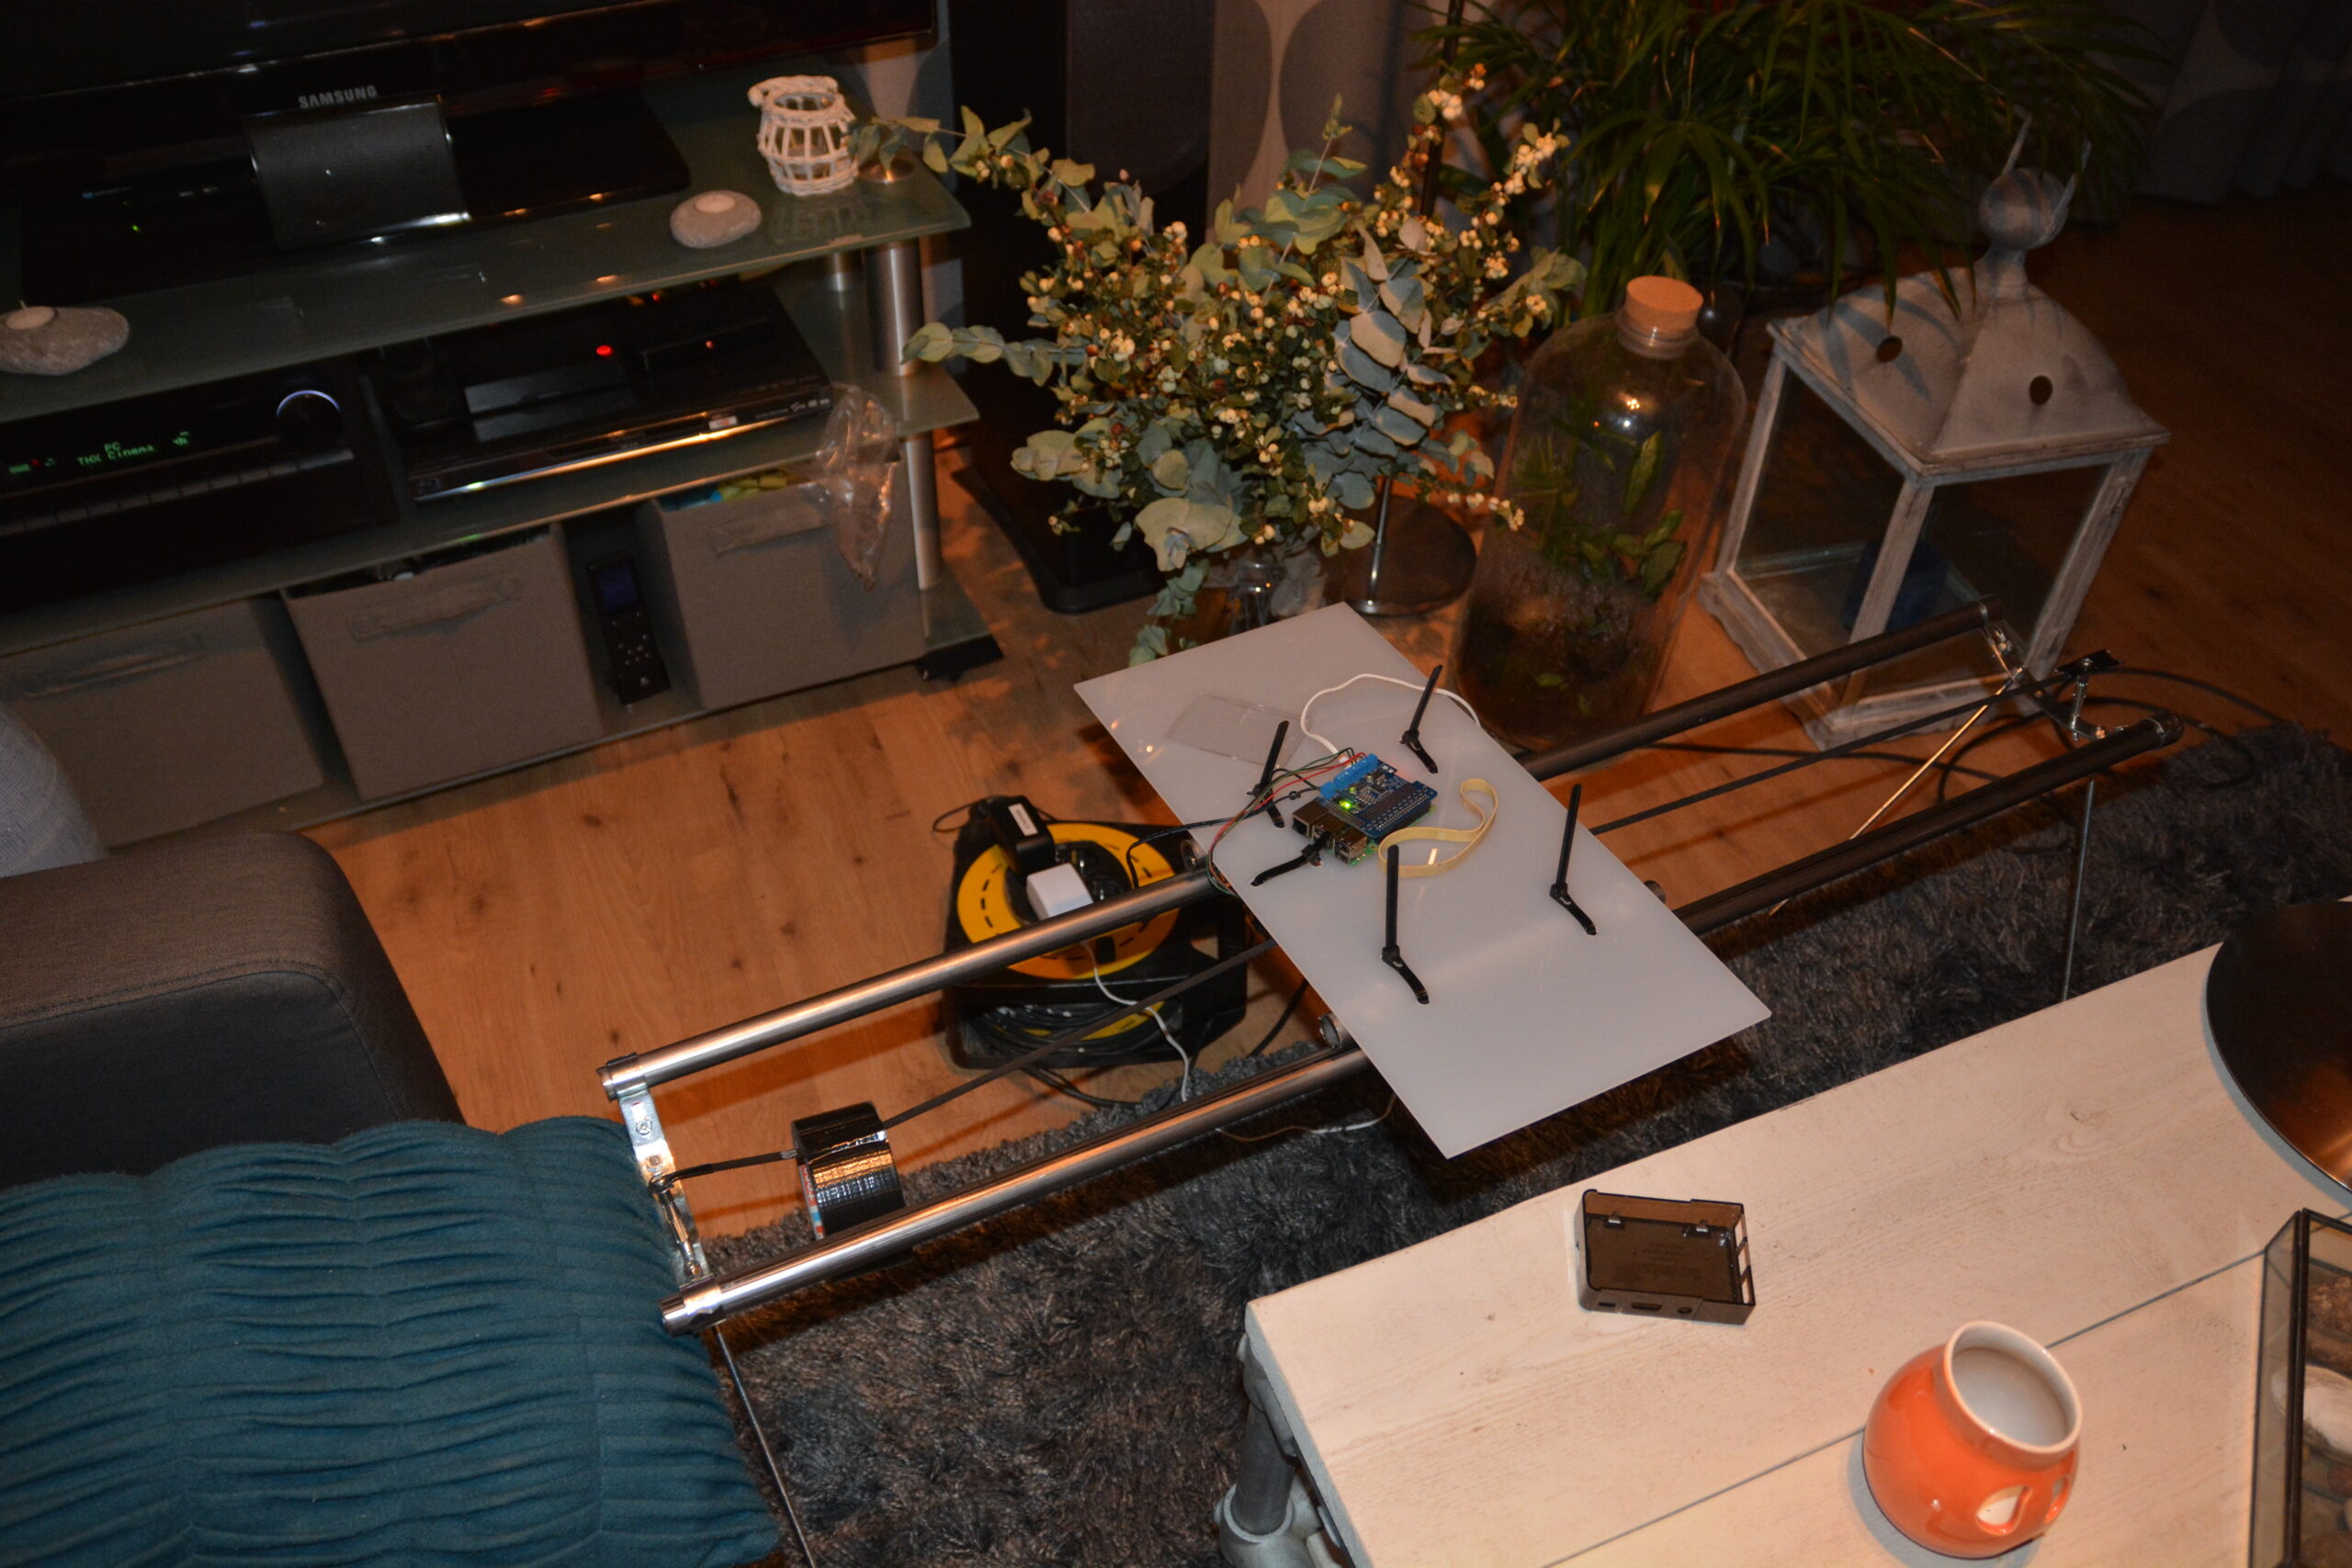
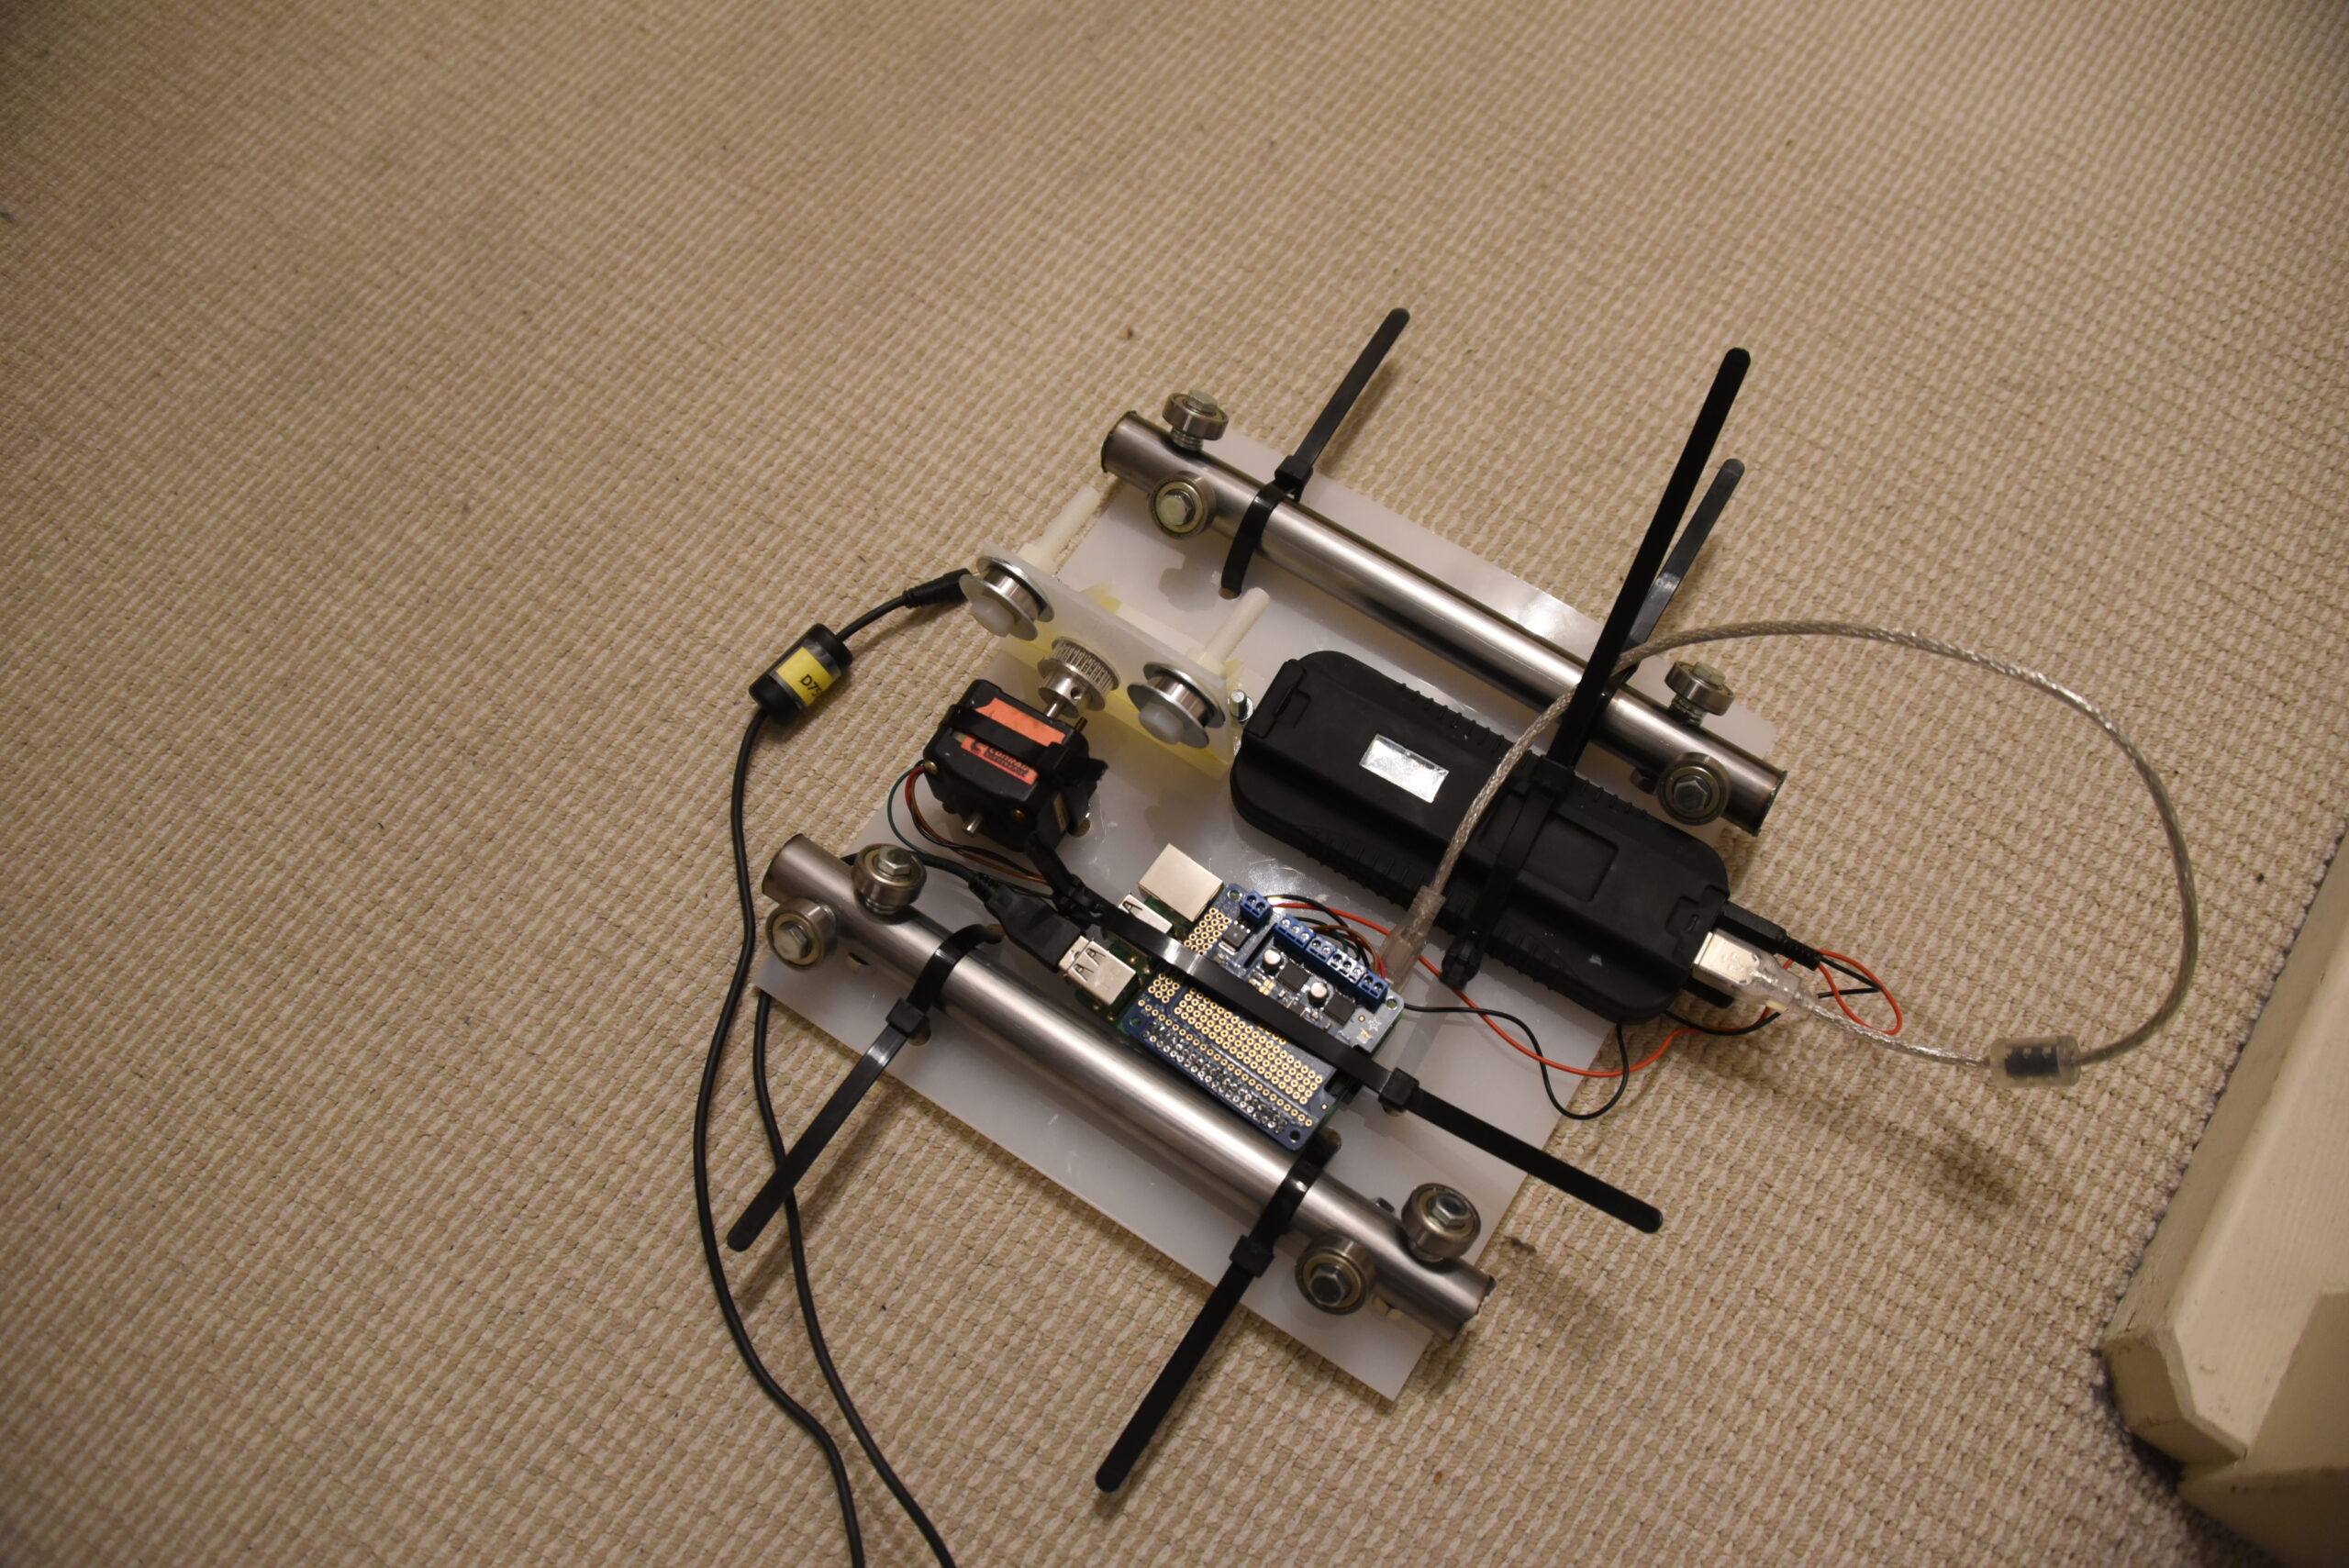
I got my DIY timelapse slider out of storage, and notished it wasn’t working any more. I’t was a quick and dirty build, using minimal components and could be build with minimal effort. We could not take a lot of stuff with us to New Zealand. Camera and powerbanks, those we always take with us. So i only needed:
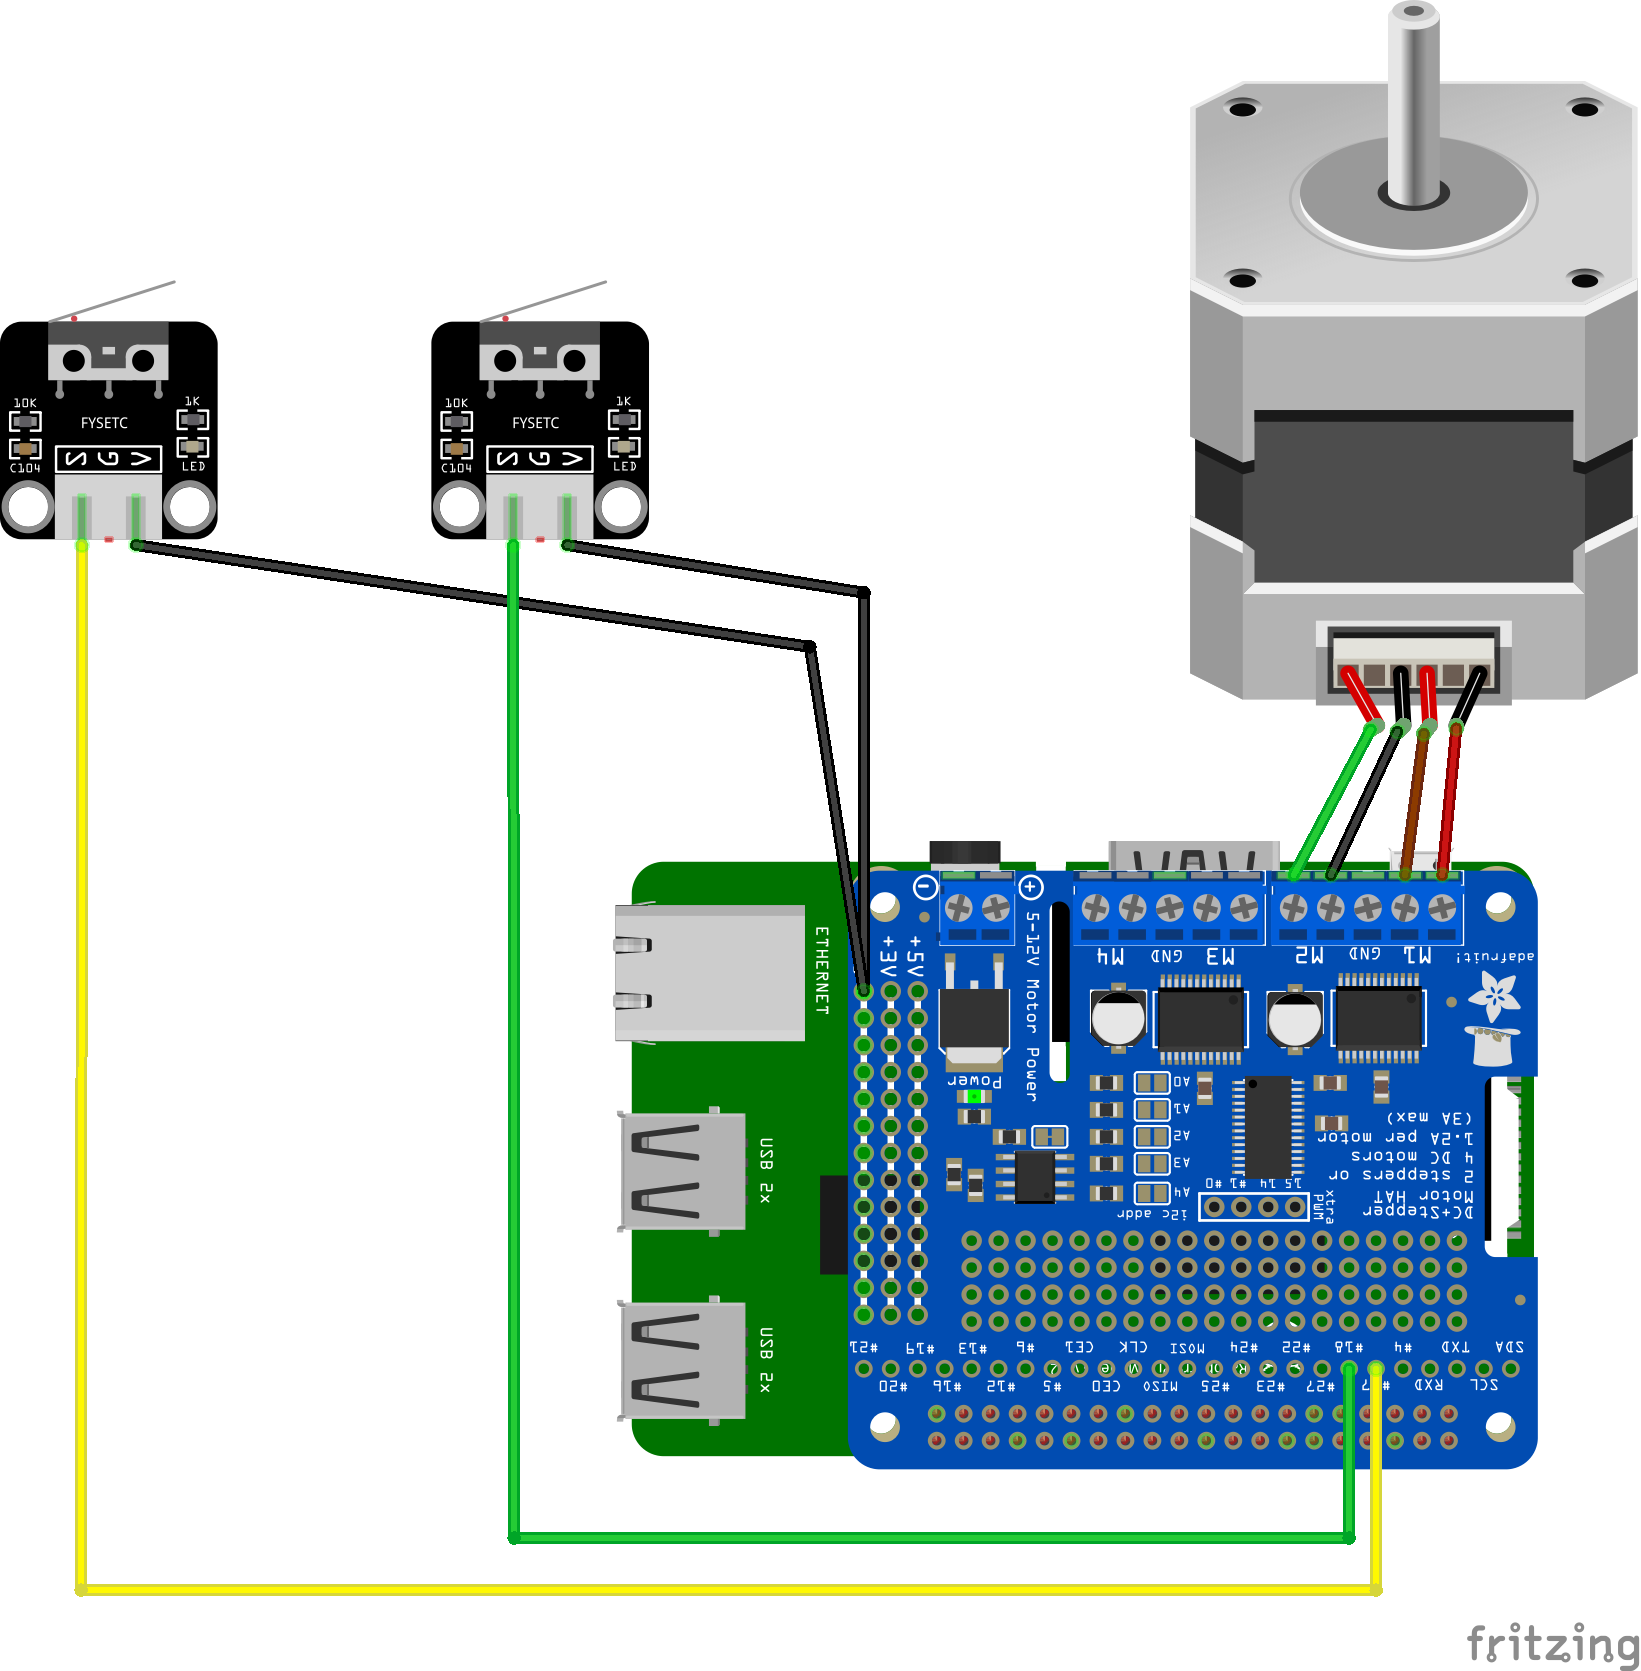
Raspberry Pi
Steppermotor and a plastic sheet where it was mounted on (using tiewraps you can undo)
Timingbeld
Two metal feet it was mounted on
It had to be build strong enough to hold a Nikon 750, and didn’t get out of balance when moving the camera on two metal tubes i bought in NZ.
The RPI would not start anymore, just a red power smd led. SO it didn’t boot. Taking the mini sdcard out of the raspberry trying to put it in my cardreader .. note the trying part. The damn thing broke into two parts, never seen anything like it. Damn, did i backup the latest version? No, i used my mobile and wifi in NZ to modify the scripts. Well .. “We can rebuild him, we have the technology”
How does it work?
Stepper motors move my camera over two metal rods, with ball bearing wheels. The raspberry controls my nikon using a usb cable. Mounted on the raspberry is a steppermotor hat (adafruit) which can control DC motors and stepper motors. ( In this project i used only one stepper ) The stepper motor carries the platform containing itself, a raspberry and my nikon over the “rails” Two switches on each side sends a signal to the program to stop. All timing are set via the Webgui.
Steps
At reboot, python script wil be started
Moving platform to the left, until switch detects the edge
Waiting for in structions
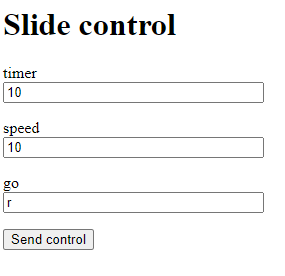
Entering for example timer 30, speed 10 and r
Platform wil move distance 10 to the right
Wait 30 seconds
Grab a picture
And loops until end of rod reached, then it wil move to left again.
Notes:
Gphoto works with other camera’s also
When placing the camera on the platform, focus once. Disable autofocus, also put your camera in manual mode, setting Apeture, ISO and shutterspeed same as your test photo. (bear in mind: when doing sundown shots maybe start with a little light over compensation)
Below old 2018 version
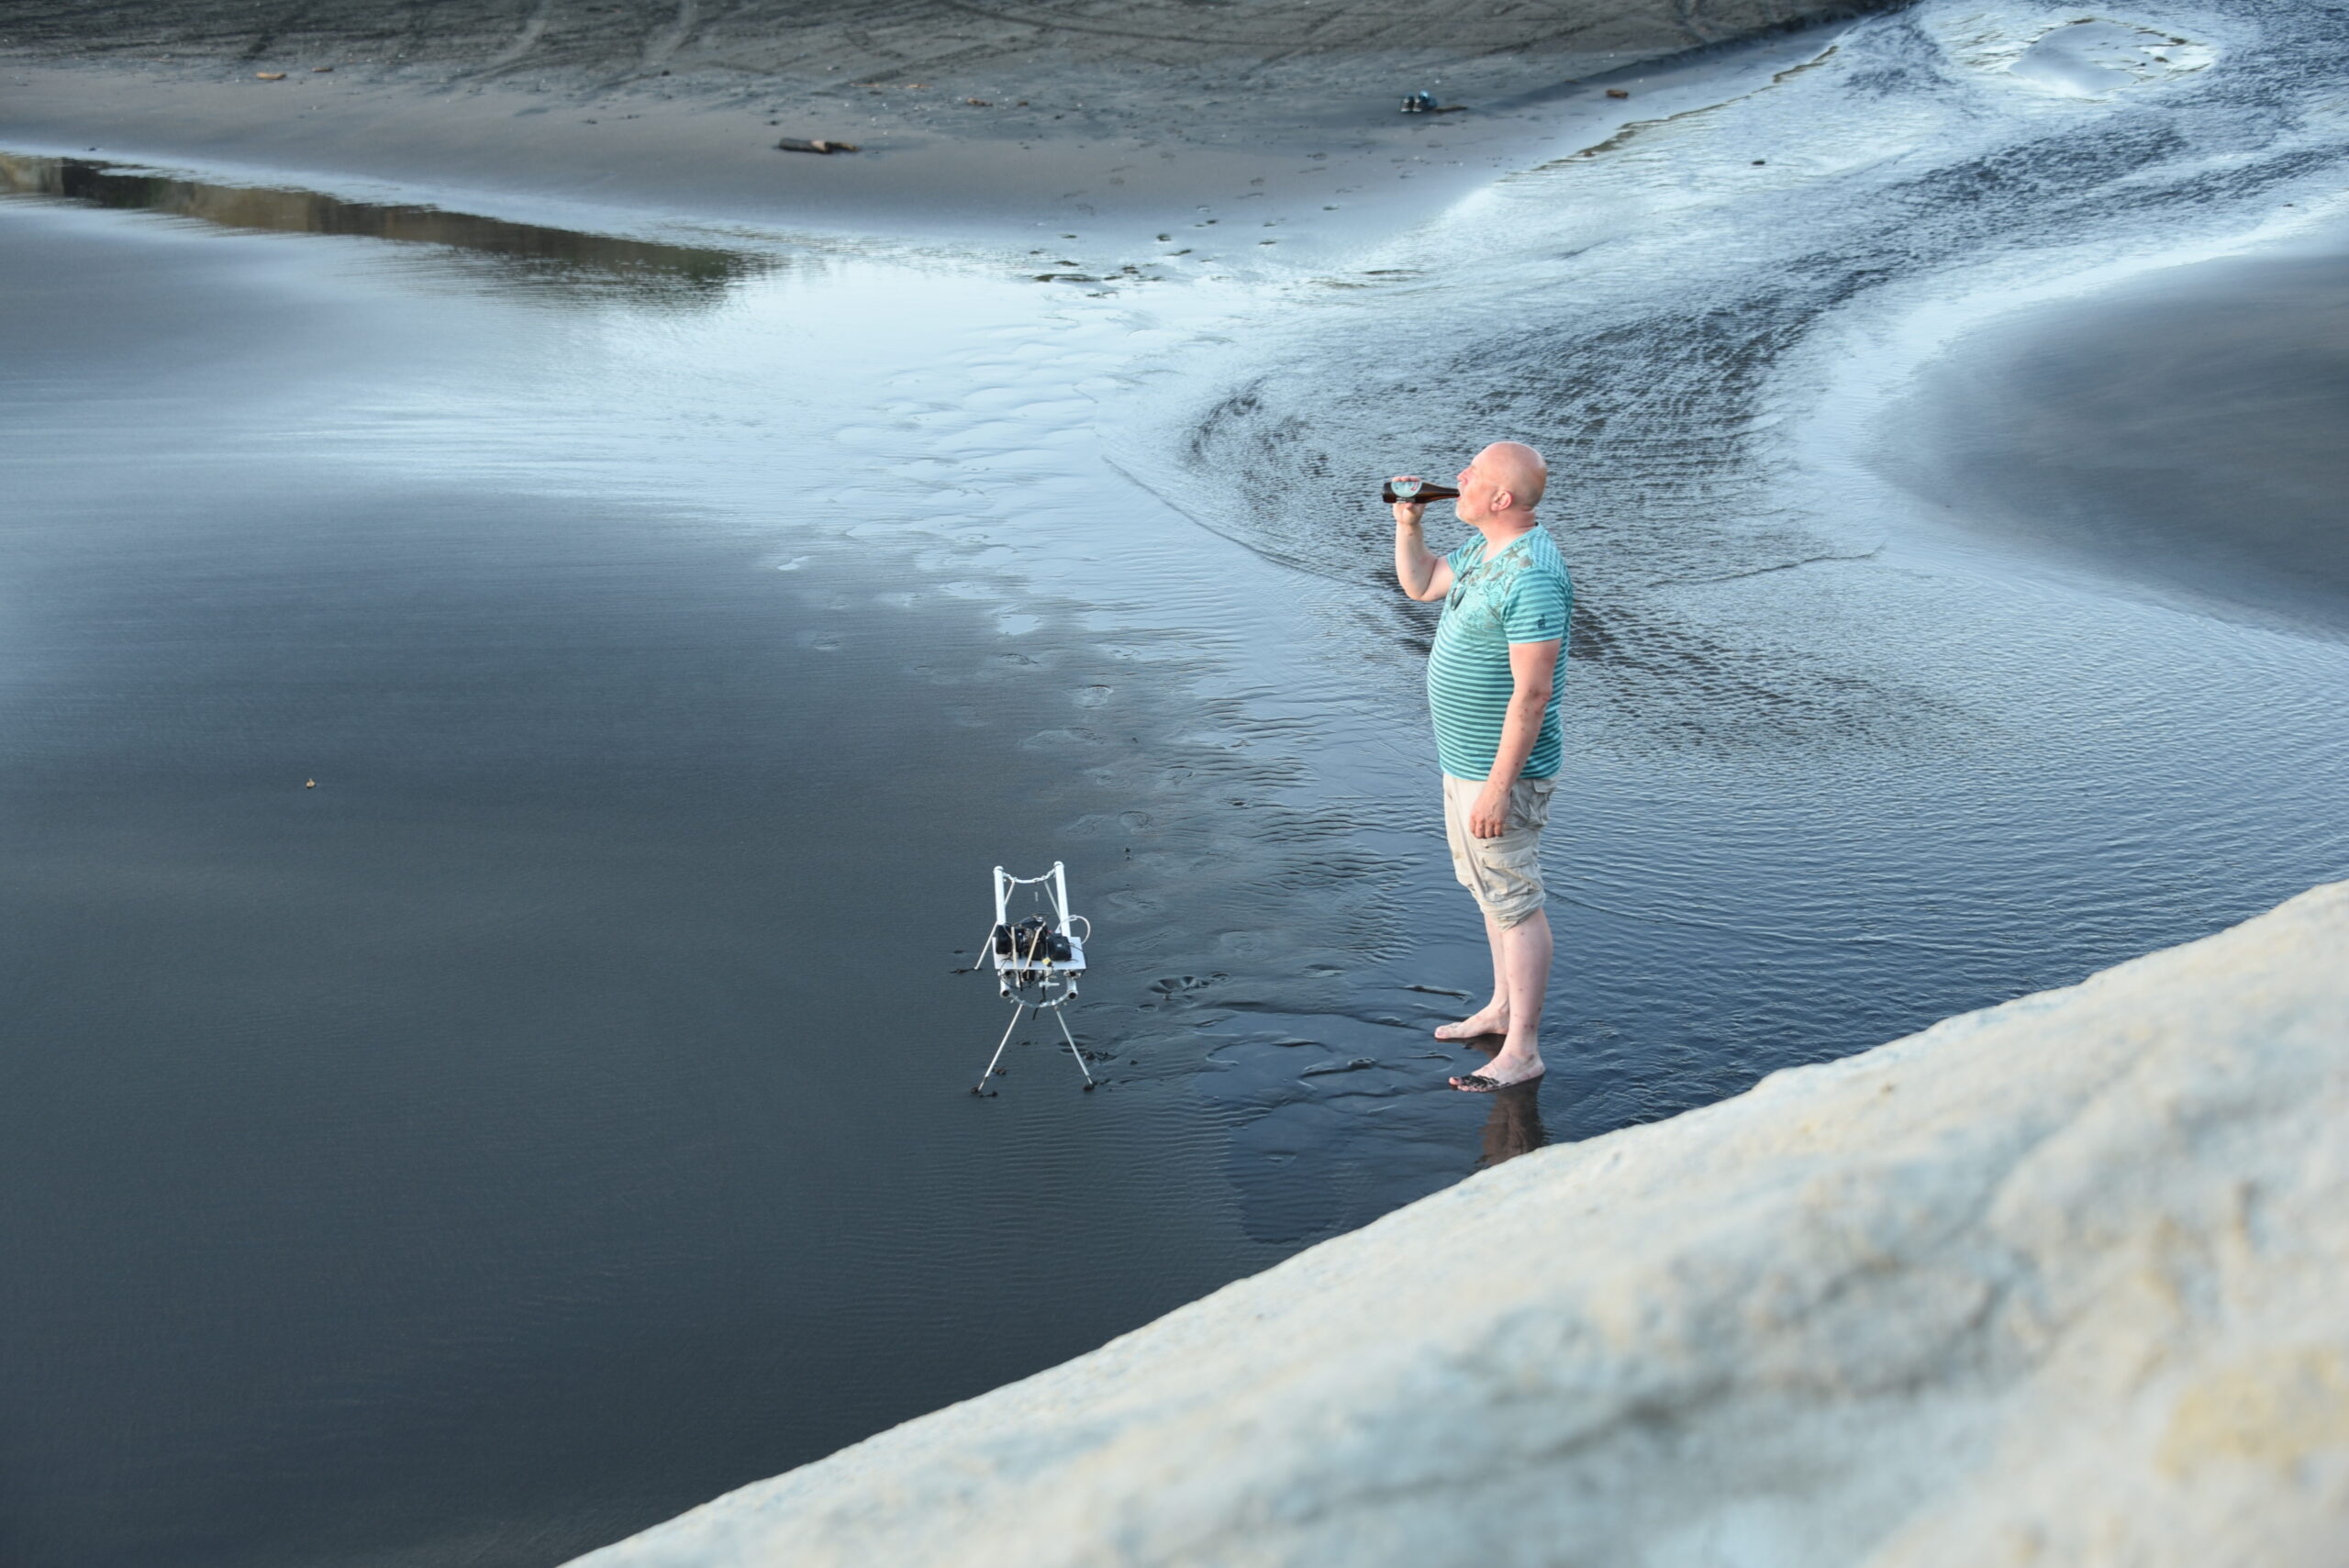
At home testingVersion i can take appartDrinking beer in NewZealand
New Sdcard. Format, put lite on this
# install gphoto2
apt-get install photo2
# connect nikon with usb, capture test with
gphoto2 --capture-image-and-download --interval 5
# Next steppers
apt-get install python3-pip
pip3 install adafruit-circuitpython-motorkit
# enable I2C
raspi-config -> enable i2c
reboot

# Test python script
import time
import board
from adafruit_motorkit import MotorKit

kit = MotorKit(i2c=board.I2C())

for i in range(100):
    kit.stepper1.onestep()
    time.sleep(0.01)

# Create a API
apt-get install python3-flask python3-flaskext.wtf
I’m using my phone in Hotspot mode, Timelapser will connect to my phone. Open a browser and enter : http://<ip of timelapser>:8080/form
timer in seconds to shoot pictures speed is the movement on the rail go = r(ight) or l(eft) go + timer 0, move until you reach the end (switch detect)
Todo: Need to change CSS to mobile responsive gui .. like my quizzer
import time
import subprocess
from flask import Flask, jsonify
from multiprocessing import Process, Value
from flask_wtf import FlaskForm
from wtforms import StringField, PasswordField, BooleanField, SubmitField, TextAreaField
from wtforms.validators import DataRequired
from flask import Flask, render_template, request
from flask import render_template
import board
from adafruit_motor import stepper
from adafruit_motorkit import MotorKit
import RPi.GPIO as GPIO
import os; myenv = os.environ.copy(); myenv["LANG"] = "C"


# NOTE:
# timer = seconds between shots
# speed = distance stepper travel

# Using gpio pins to detect max left/right with switches
# BCM Numbering
GPIO.setmode(GPIO.BCM)
# pullup to 17 & 18
GPIO.setup(17, GPIO.IN, pull_up_down=GPIO.PUD_UP)
GPIO.setup(18, GPIO.IN, pull_up_down=GPIO.PUD_UP)

# Stepper HAT is i2c
kit = MotorKit(i2c=board.I2C())

kit.stepper1.release()

global timer
global speed
timer=0
speed=0
go="nix"

app = Flask(__name__)
app.config['SECRET_KEY'] = 'you-will-never-guess'

class FormForm(FlaskForm):
    timer = StringField('timer', validators=[DataRequired()])
    speed = StringField('speed', validators=[DataRequired()])
    go = StringField('go', validators=[DataRequired()])
    submit = SubmitField('Send control')

# Make below in something like : nikon record .. slowly 10s to the right and recording stop?
# Or bounch left/right using gpio sensors
@app.route("/control/<time>/<speed>")
def action(number, message):

    time.sleep(1)

# Print form on: http://<IP>:8080/form = start page
@app.route("/form")
def form():
    form = FormForm()
    return render_template('web.html', title='Web slide control', form=form)


# process form
@app.route('/data', methods = ['POST', 'GET'])
def data():
    if request.method == 'GET':
        return "The URL /data is accessed directly. Try going to '/form' to submit form"
    if request.method == 'POST':

        timer = request.form['timer']
        speed = request.form['speed']
        go = request.form['go']
        timer = int(timer)
        speed = int(speed)
        if timer == 0:
            print("Turn off")
            p = Process(target=record_loop, args=(False,speed,timer,go))
            p.start()
            if str(go) == "l":
               while GPIO.input(17) == True:
                kit.stepper1.onestep(direction=stepper.FORWARD)
                time.sleep(0.01)
            if str(go) == "r":
               while GPIO.input(18) == True:
                kit.stepper1.onestep(direction=stepper.BACKWARD, style=stepper.DOUBLE)
                time.sleep(0.01)

        else:
            print("Turn on")
            p = Process(target=record_loop, args=(True,speed,timer,go))
            p.start()
# print form again
        form = FormForm()
        return render_template('web.html', title='Web slide control', form=form)


# main loop, controls stepper and camera
def record_loop(loop_on,myspeed,mytimer,mygo):
   while True:
      if loop_on == True:
# test if switch hit yet, else move
         print('timer' + str(mytimer))
         print('speed' + str(myspeed))
         time.sleep(2)
         if str(mygo) == "l":
             if GPIO.input(17):
                print("Pin 17 is HIGH")
                for i in range(myspeed):
                        kit.stepper1.onestep(direction=stepper.FORWARD, style=stepper.DOUBLE)
                        time.sleep(0.01)
                kit.stepper1.release()
             else:
                print("Pin 17 is LOW")
         if str(mygo) == "r":
             if GPIO.input(18):
                print("Pin 18 is HIGH")
                for i in range(myspeed):
                        kit.stepper1.onestep(direction=stepper.BACKWARD, style=stepper.DOUBLE)
                        time.sleep(0.01)
                kit.stepper1.release()
             else:
                print("Pin 18 is LOW")
         time.sleep(mytimer)
         subprocess.run(['/root/mycapture'])
         subprocess.Popen([
        "gphoto2",
        "--capture-image"],stdout=subprocess.PIPE)

# Main loop
if __name__ == "__main__":
   while GPIO.input(17) == True:
         kit.stepper1.onestep(direction=stepper.FORWARD, style=stepper.DOUBLE)
         time.sleep(0.01)
   kit.stepper1.release()
   p = Process(target=record_loop, args=(False,0,0,go))
   p.start()
   app.run(host='0.0.0.0', port=8080, debug=False)
   p.join()
Other files
cat templates/web.html
{% block content %}
    <h1>Slide control</h1>
	    <form action="/data" method = "POST">

        {{ form.hidden_tag() }}
        <p>
            {{ form.timer.label }}<br>
            {{ form.timer(size=32) }}
        </p>
        <p>
            {{ form.speed.label }}<br>
            {{ form.speed(size=32) }}
        </p>
        <p>
            {{ form.speed.go }}<br>
            {{ form.go(size=32) }}
        </p>
        <p>{{ form.submit() }}</p>
    </form>
{% endblock %}

gphoto running from cron/python is a b*tch, had to rewrite subprocess and running from screen

Start screen @reboot, just crontab -e