Tag Archives: mikrotik

DNS / DHCP

Today i’ve migrated my DNS/DHCP to a Mikrotik router.
See post

I’m planning to replace my main firewall/dhcp/dns/web/irc/mail/ids whatever more .. to virtual machines and a mikrotik router.

Having used bind and isc-dhcp-server for many years, i had to try some alternatives.

  • DNS in FreeIPA
  • Unbound with zone/dns
  • Phpipam with powerdns

And now DNS/DHCP in a Mikrotik router!

I still use Phpipam as cmdb.
So i’m planning to use ansible to synchronize phpipam and the mikrotik.

Nice .. no seach domain needed …
nslookup webserver, resolves webserver.dmz
If there are 2 hosts with the same hostname, you have to add a domain.

Mikrotik Vlan network with DMZ

UPDATE: 20230227 Static ip script

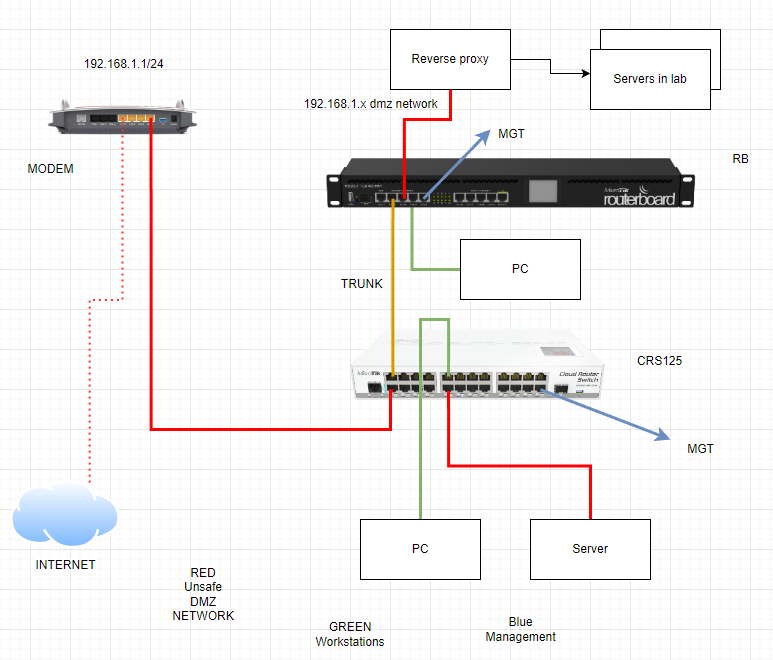
Example network with DMZ part, using VLANs and trunks.
Tested in my network, but not my current setup.

VLAN 3 – DMZ
VLAN 10 – Homenetwork
VLAN 128 – MGT

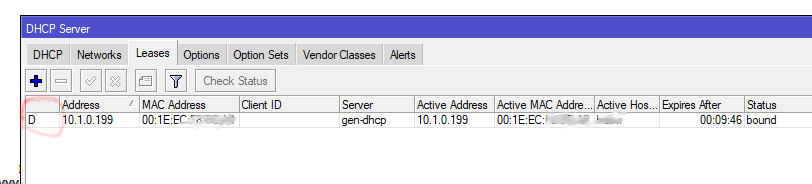
Modem : fritzbox, is dhcp server for 192.168.1.1 network
CRS: is dhcp server for wlan, home network, management, Also a firewall with NAT is configured here. ( No block examples below, only NAT )
RB: (Routerboard 2011) has no IPs except for a management IP (not in config below)
Server and Reverse proxy are in the 192.168.1.1 network.
(dhcp requests in a dmz vlan (3) get their IP from the modem DHCP pool.

Example ip’s server and PC

server: gets dhcp from modem, 192.168.1.10/24 gateway 192.168.1.1 DNS 192.168.1.1
PC: gets dhcp from CRS, 10.10.0.1/24 gateway 10.10.0.253 DNS 1.1.1.1

Config CRS

# feb/04/2023 14:55:22 by RouterOS 6.49.5
# software id = xxxx-xxxx
#
# model = CRS125-24G-1S
# serial number = xxxxxxxxxxxx
/interface bridge
add admin-mac=4C:5E:0C:xx:xx:xx auto-mac=no comment=defconf name=bridge
/interface ethernet
set [ find default-name=ether1 ] comment=WAN
set [ find default-name=ether2 ] comment=trunk
set [ find default-name=ether3 ] comment=trunk
set [ find default-name=ether9 ] comment=vlan3
set [ find default-name=ether10 ] comment=vlan10
set [ find default-name=ether24 ] comment="MGMT - untagged"
/interface vlan
add interface=bridge name=vlan3 vlan-id=3
add interface=bridge name=vlan10 vlan-id=10
add interface=bridge name=vlan128 vlan-id=128
/interface list
add name=WAN
add name=LAN
/interface wireless security-profiles
set [ find default=yes ] supplicant-identity=MikroTik
/ip pool
add name=vlan128-pool ranges=10.128.0.100-10.128.0.200
add name=vlan10-pool ranges=10.10.0.100-10.10.0.200
/ip dhcp-server
add address-pool=vlan128-pool disabled=no interface=vlan128 name=mgt-dhcp
add address-pool=vlan10-pool disabled=no interface=vlan10 name=gen-dhcp
/interface bridge port
add bridge=bridge comment=defconf ingress-filtering=yes interface=ether1
add bridge=bridge comment=defconf frame-types=admit-only-vlan-tagged ingress-filtering=yes interface=ether2
add bridge=bridge comment=defconf ingress-filtering=yes interface=ether3
add bridge=bridge comment=defconf interface=ether4
add bridge=bridge comment=defconf interface=ether5
add bridge=bridge comment=defconf interface=ether6
add bridge=bridge comment=defconf interface=ether7
add bridge=bridge comment=defconf interface=ether8
add bridge=bridge comment=defconf interface=ether9
add bridge=bridge comment=defconf interface=ether10
add bridge=bridge comment=defconf interface=ether11
add bridge=bridge comment=defconf interface=ether12
add bridge=bridge comment=defconf interface=ether13
add bridge=bridge comment=defconf interface=ether14
add bridge=bridge comment=defconf interface=ether15
add bridge=bridge comment=defconf interface=ether16
add bridge=bridge comment=defconf interface=ether17
add bridge=bridge comment=defconf interface=ether18
add bridge=bridge comment=defconf interface=ether19
add bridge=bridge comment=defconf interface=ether20
add bridge=bridge comment=defconf interface=ether21
add bridge=bridge comment=defconf interface=ether22
add bridge=bridge comment=defconf interface=ether23
add bridge=bridge comment=defconf interface=ether24
add bridge=bridge comment=defconf interface=sfp1
/interface ethernet switch egress-vlan-tag
add tagged-ports=ether2,ether3,switch1-cpu vlan-id=128
add tagged-ports=ether2,ether3,switch1-cpu vlan-id=10
add tagged-ports=ether2,ether3,switch1-cpu vlan-id=3
/interface ethernet switch ingress-vlan-translation
add customer-vid=0 new-customer-vid=128 ports=ether2,ether3,ether24
add customer-vid=0 new-customer-vid=3 ports=ether1,ether2,ether3,ether9
add customer-vid=0 new-customer-vid=10 ports=ether10,ether2,ether3
/interface ethernet switch vlan
add ports=ether2,ether3,ether24,switch1-cpu vlan-id=128
add ports=ether2,ether3,ether10,switch1-cpu vlan-id=10
add ports=ether1,ether2,ether3,ether9,switch1-cpu vlan-id=3
/interface list member
add interface=ether1 list=WAN
add interface=bridge list=LAN
/ip address
add address=192.168.1.253/24 comment=defconf interface=vlan3 network=192.168.1.0
add address=10.128.0.253/24 interface=vlan128 network=10.128.0.0
add address=10.10.0.253/24 interface=vlan10 network=10.10.0.0
/ip dhcp-server network
add address=10.1.0.0/24 dns-server=1.1.1.1 gateway=10.1.0.253
add address=10.128.0.0/24 dns-server=1.1.1.1 gateway=10.128.0.253
add address=192.168.88.0/24 gateway=192.168.88.1 netmask=24
/ip dns
set servers=1.1.1.1
/ip firewall nat
add action=masquerade chain=srcnat src-address=10.10.0.0/24
add action=masquerade chain=srcnat src-address=10.128.0.0/24 src-address-list=""
/ip route
add distance=1 gateway=192.168.1.1
/ip service
set telnet disabled=yes
set ftp disabled=yes
/lcd
set time-interval=hour
/system clock
set time-zone-name=Europe/Amsterdam
/system identity
set name=crs125
/system ntp client
set enabled=yes primary-ntp=194.109.6.67 secondary-ntp=194.109.9.100

RB2011 config

# software id = xxxx-xxxx
#
# model = 2011iL
# serial number = xxxxxxxxxxxx
/interface bridge
add name=bridge1
/interface ethernet switch port
set 1 vlan-header=add-if-missing vlan-mode=secure
set 2 default-vlan-id=3 vlan-header=always-strip vlan-mode=secure
set 3 default-vlan-id=10 vlan-header=always-strip vlan-mode=secure
set 4 default-vlan-id=128 vlan-header=always-strip vlan-mode=secure
/interface wireless security-profiles
set [ find default=yes ] supplicant-identity=MikroTik
/interface bridge port
add bridge=bridge1 interface=ether2
add bridge=bridge1 interface=ether3
add bridge=bridge1 interface=ether4
add bridge=bridge1 interface=ether5
/ip neighbor discovery-settings
set discover-interface-list=!dynamic
/interface ethernet switch vlan
add independent-learning=yes ports=ether2,ether3 switch=switch1 vlan-id=3
add independent-learning=yes ports=ether2,ether4 switch=switch1 vlan-id=10
add independent-learning=yes ports=ether2,ether5 switch=switch1 vlan-id=128

Additional info

Create a static dhcp entry :  IP->DHCP Server->Leases->Make Static
OR
add address=10.1.0.2 mac-address=00:1E:EC:xx:xx:xx server=gen-dhcp comment=”laptop”

Connected device gets ip from pool
Change into static
Waiting until lease expires
D – Dynamic flag is gone, now also comments are enabled

Converting above from a dhcpd.conf file

cat dhcpd.conf | egrep "host|fixed-address|hardware" | grep -v \# | grep -A1 -B1 fixed-address |  sed -e 'N;N;s/\n/ /g' | awk '{ print $5" "$8" "$2 }' | tr -d ';' | cut -f-4 -d. | awk '{ print "add address="$1" mac-address="$2" server=gen-dhcp comment=\""$3"\"" }'

will give you:
add address=10.1.0.41 mac-address=2C:F4:32:xx:xx:xx server=gen-dhcp comment="tasmotawifiusb"
add address=10.1.0.42 mac-address=b8:27:eb:xx:xx:xx server=gen-dhcp comment="ledserver"
add address=10.1.0.46 mac-address=CC:50:E3:xx:xx:xx server=gen-dhcp comment="kliko"
etc

Static DNS

/ip dns static
add address=10.1.0.1 name=brewpi.example.com

from the dhcpd.conf static entries
cat dhcpd.conf | egrep "host|fixed-address|hardware" | grep -v \# | grep -A1 -B1 fixed-address |  sed -e 'N;N;s/\n/ /g' | awk '{ print $5" "$8" "$2 }' | tr -d ';' | awk '{ print "add address="$1" name="$3 }'

from bind service
cat zonefile | grep "10.1" | awk '{ print "add address="$3" name="$1".example.com" }'

FreeIPA

ipa dnsrecord-find exampel.lab | grep -B1 "A rec" | grep -v "\-\-" | sed 'N;s/\n//' | awk '{ print "add address="$6" name="$3".example.lab" }'


Faster DNS
Add 2 firewall rules
forward chain, udp 53 action fasttrack
forward chain, tcp 53 action fasttrack

DrawIO

I used to draw my network using inkscape, or graphviz. But the last years i’ve been using DrawIO. A friend is drawing his. So i posted some tips.

When using inkscape, i liked the way that i could view more or less details using layers. But editing was hard.

Getting DrawIO:

There is a online version: https://app.diagrams.net/
You can download a AppImage
And .. install it in your nextcloud, which is the way i’m using it.
(Login as admin, click Apps and search for draw.io)

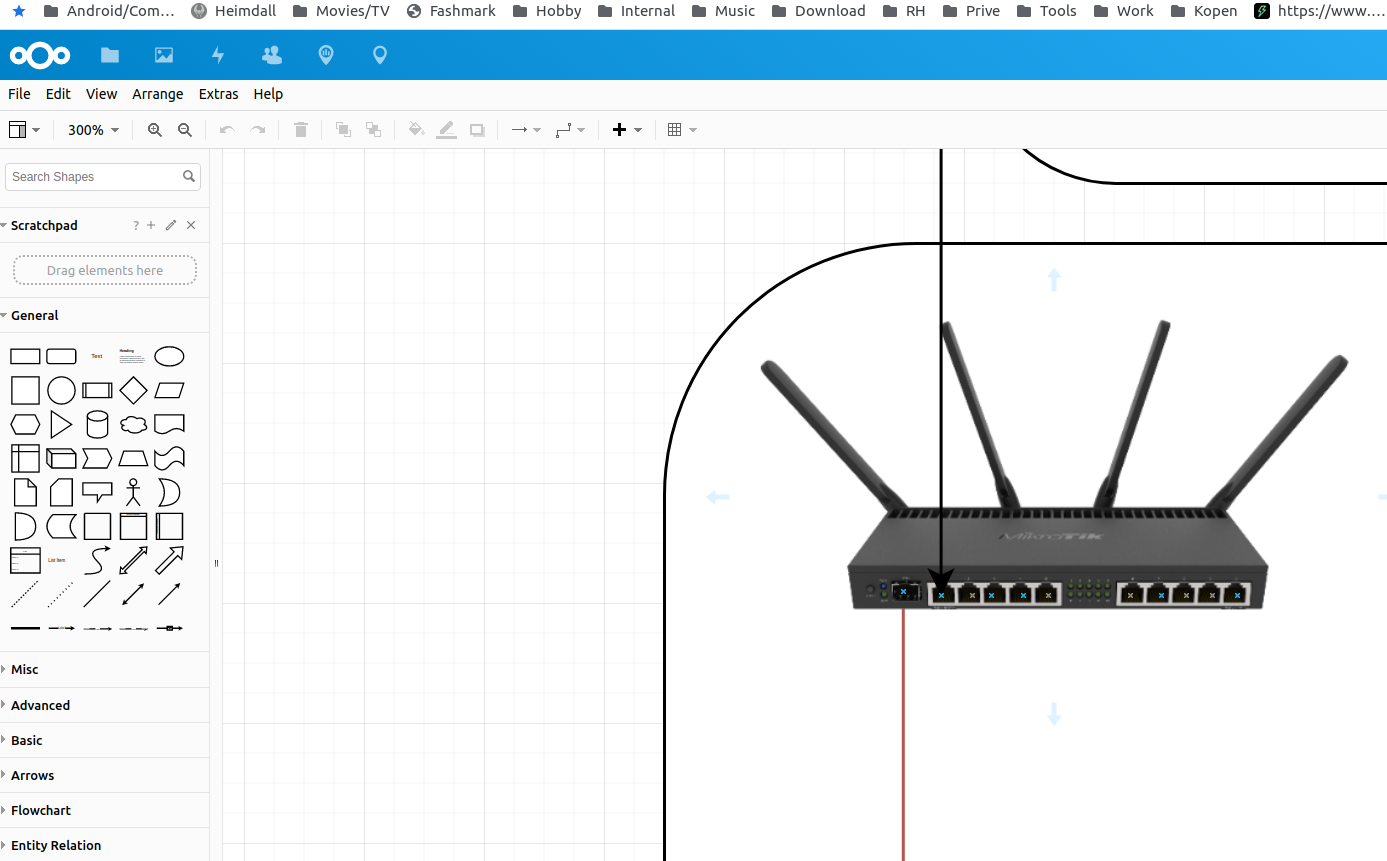
Some tips on using images ..
Below is a example of a Mikrotik switch with connector points.

Use a search engine to look for images, the ones with front facing connectors are easier to use.
I always look for images which have a transparent background.
Using google you can use below ‘trick’
google > images > tools > color > transparent
Just copy-paste into your DrawIO document, it is better to have a large picture which you can resize as the other way around.

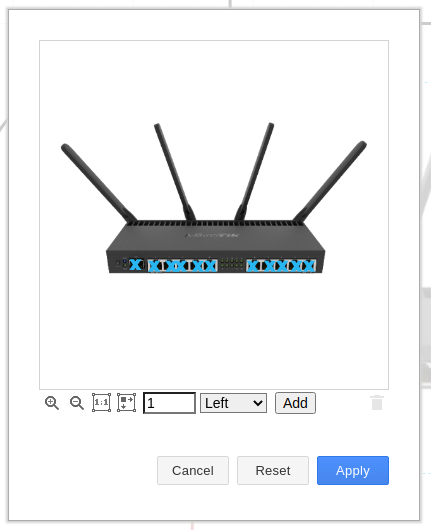
Adding connection points:

Left click the image in DrawIO, right mouse and Edit connection points

Now you can place/remove edit connection points.

Due to security reasons i won’t be posting my complete network image ..

Another tip:

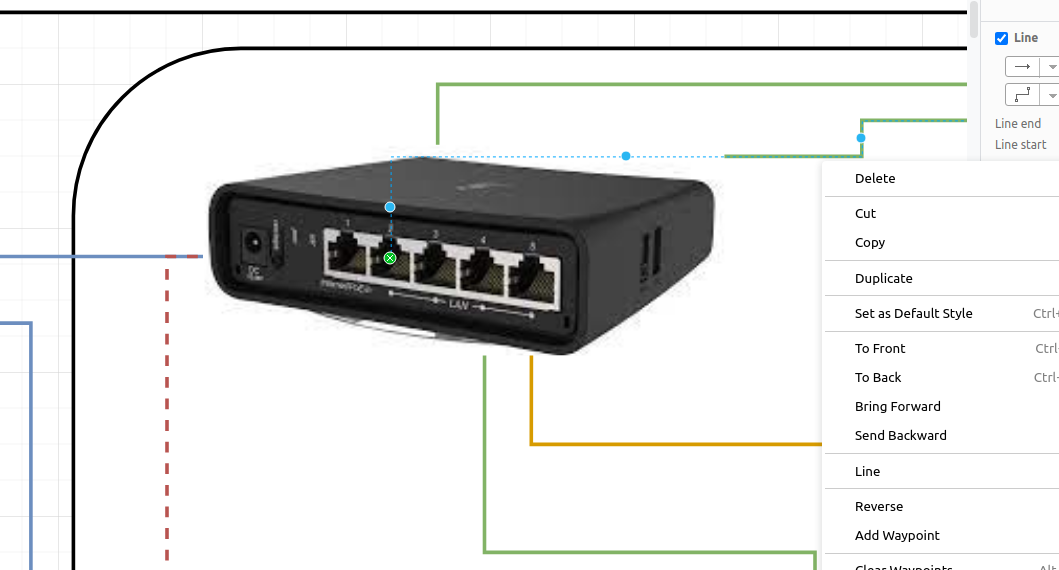
Network sheet a friend is working on

Device is not straight, so its harder to get the connections right. Besides that, the lines are below the device. Click line and select bring to front.

GNS3 Testing with Mikrotik

All my Mikrotiks are running production, so i need a virtual environment

sudo add-apt-repository ppa:gns3/ppa
sudo apt update                                
sudo apt install gns3-gui gns3-server

git clone https://github.com/GNS3/ubridge.git
cd ubridge
sudo apt-get install libpcap-dev
make 
sudo make install

reboot

nohup gns3server &
gns3

edit > preferences 
qemu 
qemu vms
New and select chr-6.48.6.img

New project > select vm

NOTES

ping not working? use even number interfaces (8)

garbled output? .. Answer (Y/N) with N when starting telnet. Or turn off and on again. 

How many vlan’s are enough?

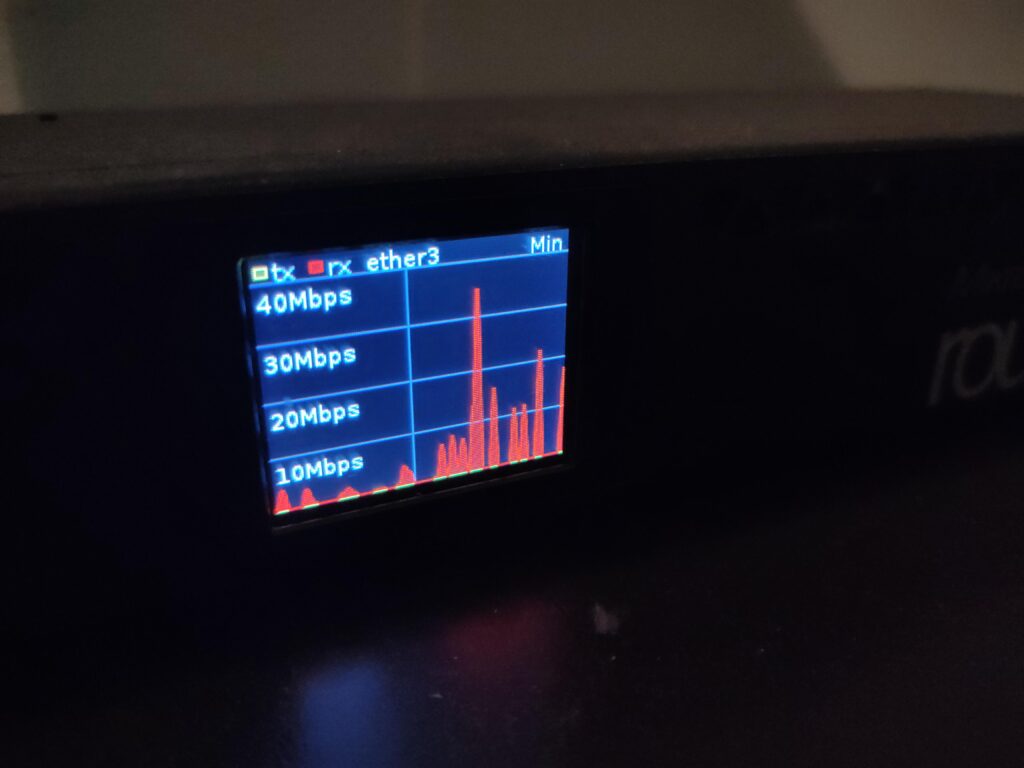
Many years ago i started segmenting my network using vlans.

In 2022 i started to reconfigure my lab and using a lot more Mikrotik switches.
So how many … is to many, because i always overdo stuff.

Well .. is 9 to many for home environments?

  • default vlan – did’t bother to configure
  • old DMZ .. to be migrated
  • DMZ – my servers live here
  • Wifi personal workstations – Mobiles and laptops .. macaddress limited
  • IOT – only arduino’s, raspberries and other hardware live here
  • Personal workstations – UTP connected workstations with less networking limitations
  • LAB – My lab environment, Ovirt virtualisation for fun and manage access to servers in dmz
  • Storage – my SFP enabled all-flash storage
  • Management – really tight restricted access to management interfaces (switches/routers/storage/ILO)

Hard to manage? All those vlan’s? .. Sure, but i learn a lot!
(Not really .. when you got the basics down, more of the same.
Hardest part? .. not cutting-off connections/switchports you are using!)

Mikrotik Mqtt

Today Vincent mentioned a link about mqtt and mikrotiks, i knew about addons, but not mqtt .. lets try this.

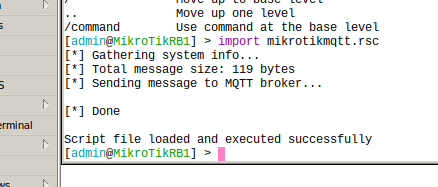
When you want to use MQTT with Mikrotik you have to install the iot package from extra_packages.

  • Download correct package zip from ( https://mikrotik.com/download )
    • Download extra packages zip for your system
  • Extract and use file upload
  • Reboot your mikrotik

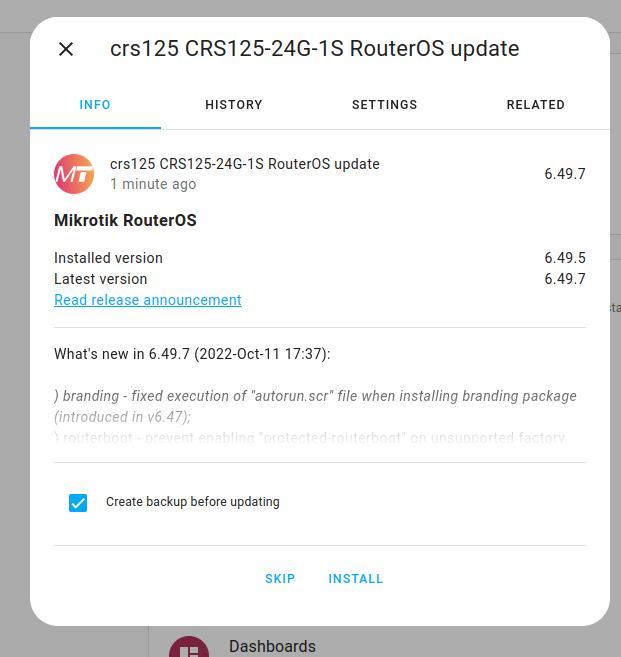
(i had to upgrade my firmware first, iot package was not build for my version)

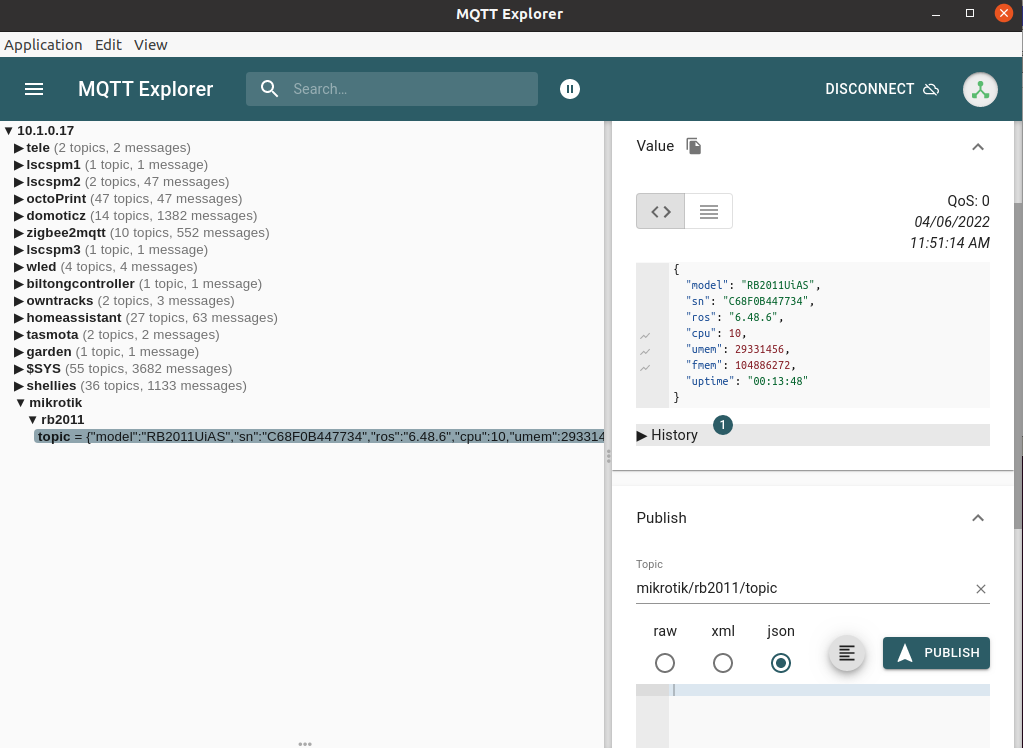
Create a entry in IoT > Mqtt to your broker.

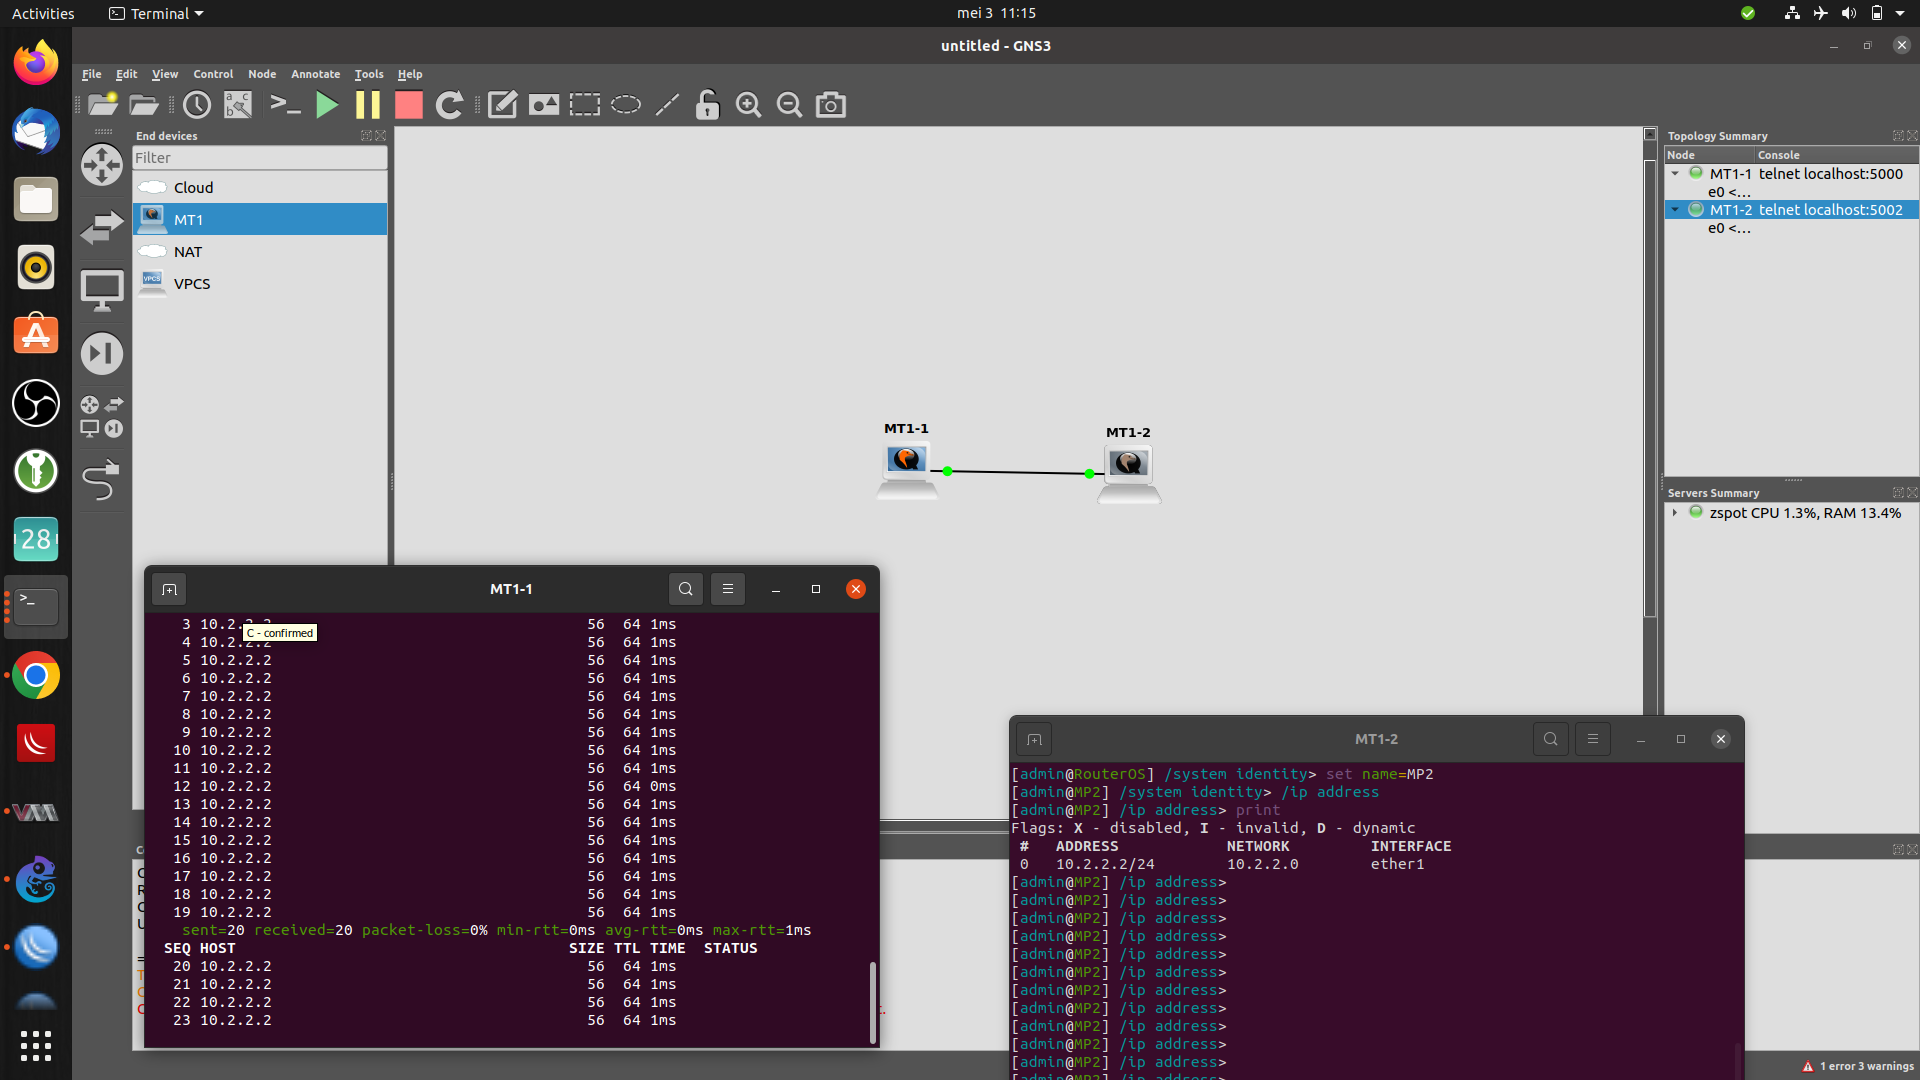
save below in a script ending with a .rsc extention, and upload in file manager

# Required packages: iot

################ Configuration #################
# Name of an existing MQTT broker that should be used for publishing, the one you just created
:local broker "10.1.0.17"

# MQTT topic where the message should be published
# i've got mine in a tree called mikrotik/switchtype/
:local topic "mikrotik/rb2011/topic"

############### System ###############
# You can create your own variables below
:put ("[*] Gathering system info...")
:local cpuLoad [/system resource get cpu-load]
:local freeMemory [/system resource get free-memory]
:local usedMemory ([/system resource get total-memory] - $freeMemory)
:local rosVersion [/system package get value-name=version \
    [/system package find where name ~ "^routeros"]]
:local model [/system routerboard get value-name=model]
:local serialNumber [/system routerboard get value-name=serial-number]
:local upTime [/system resource get uptime]

################## MQTT ###################
# create a message
:local message \
    "{\"model\":\"$model\",\
                \"sn\":\"$serialNumber\",\
                \"ros\":\"$rosVersion\",\
                \"cpu\":$cpuLoad,\
                \"umem\":$usedMemory,\
                \"fmem\":$freeMemory,\
                \"uptime\":\"$upTime\"}"

:log info "$message";
:put ("[*] Total message size: $[:len $message] bytes")
:put ("[*] Sending message to MQTT broker...")
/iot mqtt publish broker=$broker topic=$topic message=$message
:put ("[*] Done")

Import script using

import mikrotikmqtt.rsc

Todo’s:

Import is just @ import time, need to “cron” this?

Mikrotik

Switches and access-points

Today i got my RB4011 ! Wooot!

Total tally

  • MikroTik CRS305-1G-4S+IN – Lab
  • MikroTik RB2011UiAS-RM – Office
  • MikroTik hAP AC2 – Studio
  • MikroTik CRS109-8G-1S-2HnD-IN – Attic
  • MikroTik RB4011iGS+5HacQ2HnD-IN – Livingroom
  • NEW (2022-04-02) crs125-24g-1s-in (2022-04-02)

To replace .. 4 SLM2008 and a TPLink switch 🙂

How much fun is this! .. A display on a switch!

I’ll be posting something about connecting an arduino to the serial console using a tcp server later.

Mikrotiks are all you can eat .. And there is a lot of functionality. One of the main features (besides being switches and routers)

  • Openvpn server
  • DIY display connect
  • Proxy
  • Today Vincent mentioned Mqtt plugin (2022-apr-6)
  • https://help.mikrotik.com/docs/display/ROS/Packet+Sniffer sounds interesting also

Installing extra packages

  • Download correct package zip from ( https://mikrotik.com/download )
  • Extract and use file upload
  • Reboot your mikrotik

Mikrotik Guest Network

I’ve got several AccessPoints in my network.
Using a roaming setup, clients can connect to strongest AP.

For our Folkband i’ve setup same.
With the exception of those clients only being able to connect to the Internet, and not the rest of my Network

  • Virtual Access Point
  • Own subnet
  • dhcp server only for this access point
  • NAT and Firewall rules for access limitation
/interface bridge 
add name=bridgeguest
/interface wireless security-profiles 
add authentication-types=wpa2-psk eap-methods="" management-protection=allowed mode=dynamic-keys name=guest supplicant-identity=MikroTikHAP wpa2-pre-shared-key=guestkey
/interface wireless
add disabled=no mac-address=MACADDRESS master-interface=wlan1 name=guest security-profile=guest ssid=guest station-roaming=enabled wds-default-bridge=bridge wps-mode=disabled
/ip pool
add name=guest ranges=10.5.0.2-10.5.0.250
/ip dhcp-server
add address-pool=guest disabled=no interface=bridgeguest name=dhcpserverguest
/interface bridge port
add bridge=bridgenb interface=guest
/ip address
add address=10.1.0.5/24 comment=defconf interface=ether2 network=10.1.0.0
add address=10.5.0.1/24 interface=bridgeguest network=10.5.0.0
/ip dhcp-client
/ip dhcp-server network
add address=10.5.0.0/24 dns-server=1.1.1.1 gateway=10.5.0.1
/ip dns static
add address=10.1.0.5 name=router.lan type=A
/ip firewall filter
add action=drop chain=input dst-address=10.1.0.5 dst-port=22,80,443,8291,21,23 protocol=tcp src-address=10.5.0.1-10.5.0.254
add action=drop chain=input dst-address=MYNETWORKSHERE/16 src-address=10.5.0.2-10.5.0.250
add action=drop chain=forward dst-address=MYNETWORKSHERE/16 src-address=10.5.0.2-10.5.0.250
/ip firewall nat
add action=masquerade chain=srcnat comment="defconf: masquerade" ipsec-policy=out,none out-interface-list=WAN
add action=accept chain=srcnat src-address=10.5.0.0/24