Add filament and print model (after calibration process)
All fine and dandy, problems? Check YouTube for solutions.
What do you know about 3D printing?
People are forgetting about the knowledge to get at this point ..]…
How does it work, what is needed?
My first 3D printer. Lets compare:
Get printer in parts
Assemble
Calibrate
Manual bed calibration (*) 5 point calibration step by step, needs user input
Test print
Fail several times
Try different sticky methods (hairspray, double sided tape, gluestick)
Bed warping? Add tape to underside
Feed filament by cutting at 45 degree angle and manual feeding.
Load and unload using buttons and feeding until previous color flushed
Learn about Gcodes
color changing? split part and pause manually, switch manually.
out of filament, problem with printing? start the whole print again
no out of filament detector, no temperature failsave
Filament error? Start again or split gcode by hand and superglue parts
Clean plate, clean head
Manual change temperature of head and bed when problems arise
Using multiple software tools to design and slice
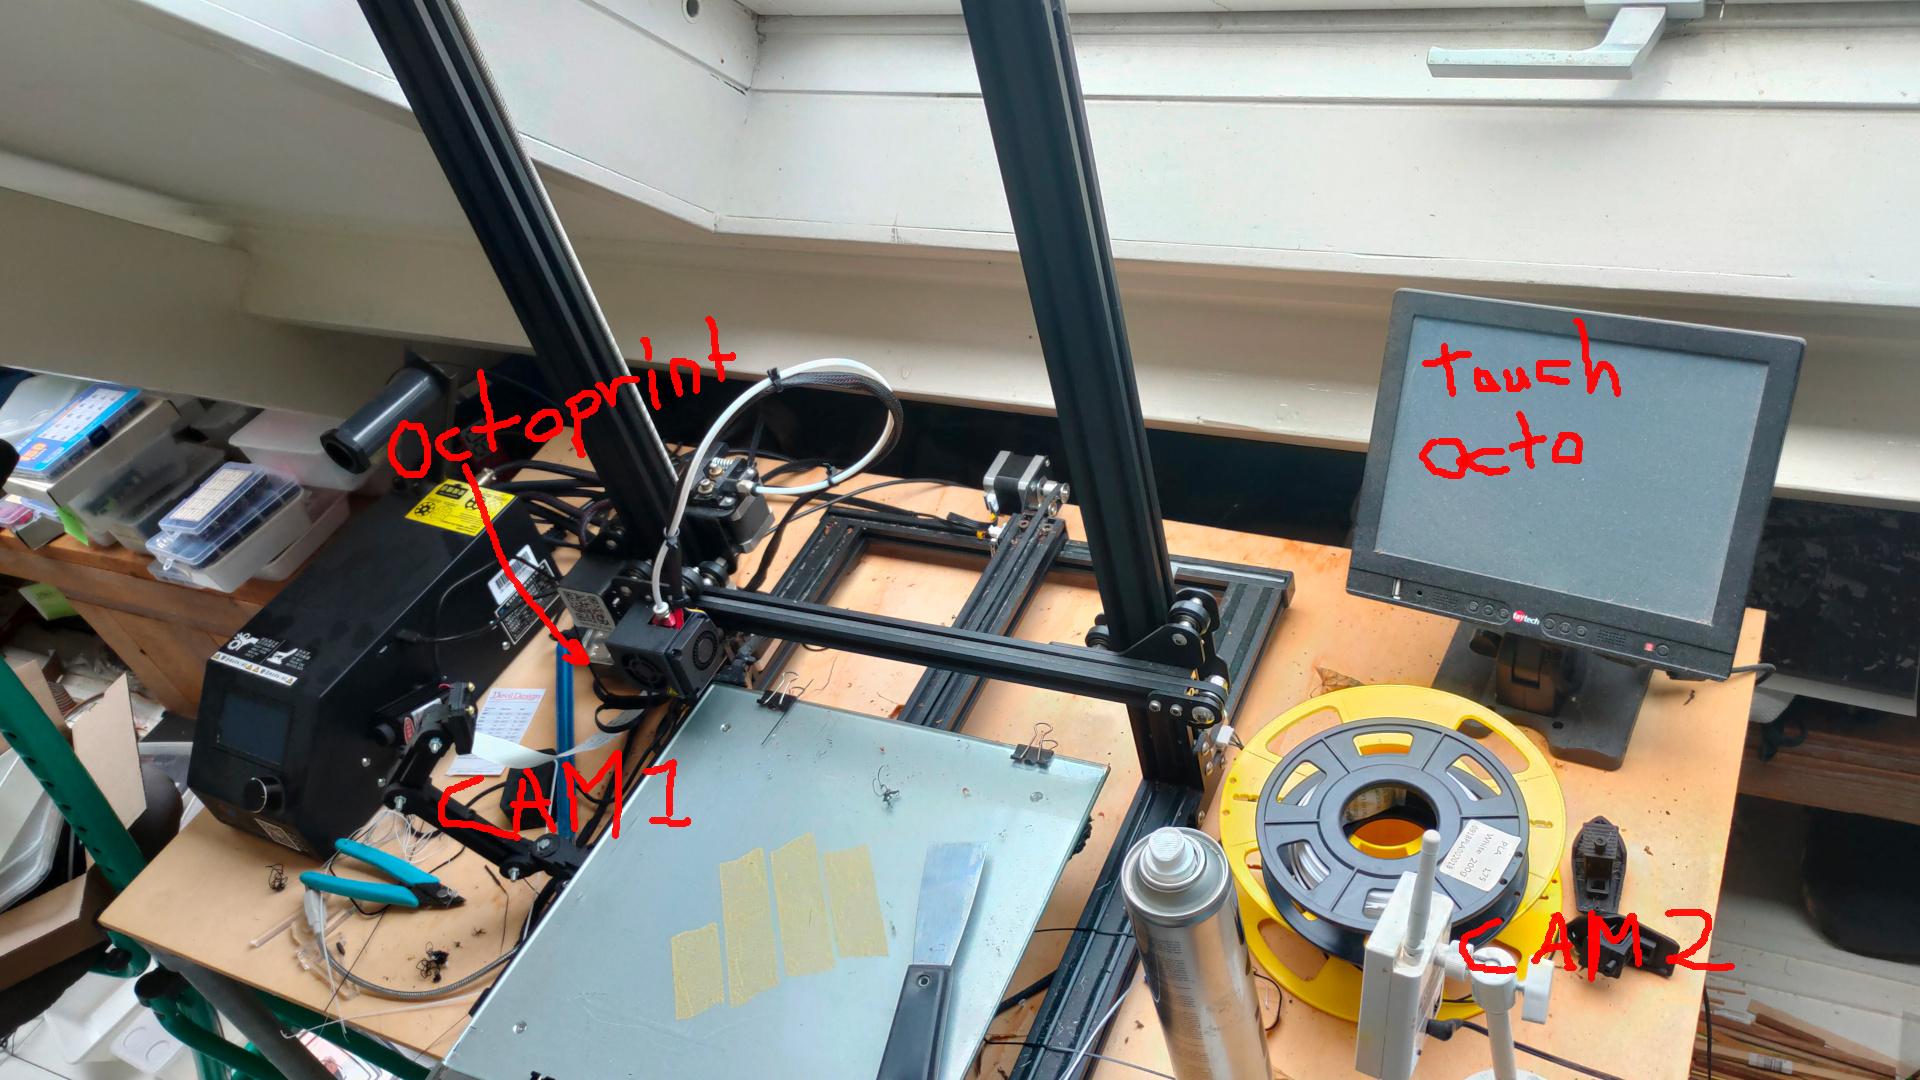
Put your gcode on a sdcard to print, or later via octoprint
Every next print start at calibrate in above list.
What did you learn? How your machine works and reacts. Fix extruding problems, temperature, filament wetness, starting layers. Difference between PLA, PETG, ABS in great detail. Learn to wait Troubleshooting in general
Never forget where we came from! 40 years old, but getting available to the masses after 2000.
Having my own business means having a more professional electronics lab is a must. So I’m moving from the attic to our outside workshop. That also means I have to make our Music Studio smaller.
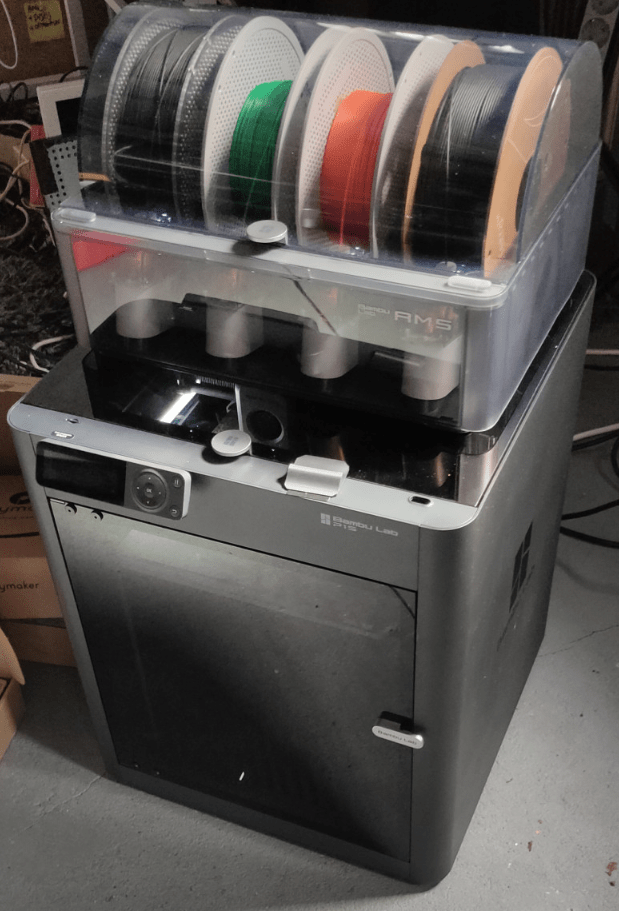
So moving, printing a lot on my new 3D printer and designing EuroCards.
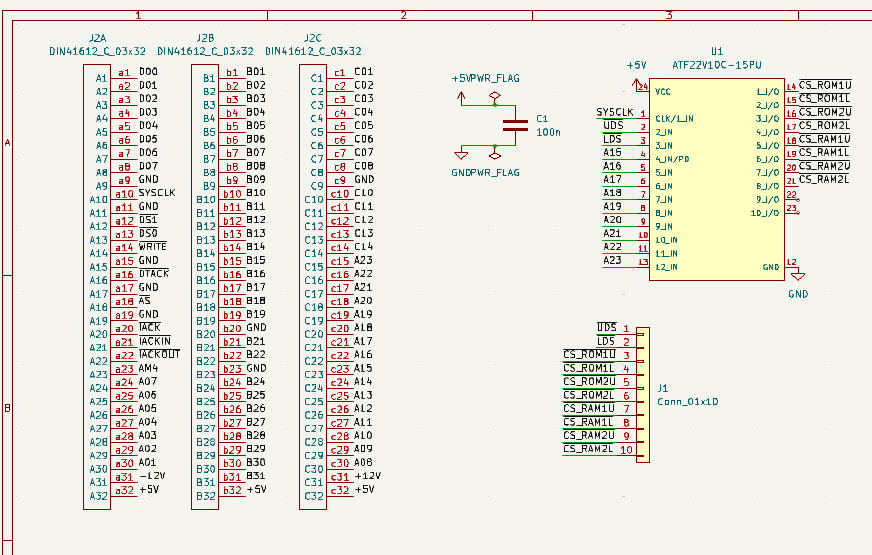
Part of the Address decoding eurocard with din41612.
Above card will hold two address decodes parts, selectable using jumpers. ( Old skool TTL using 74xx and a new solution using ATF22V10.
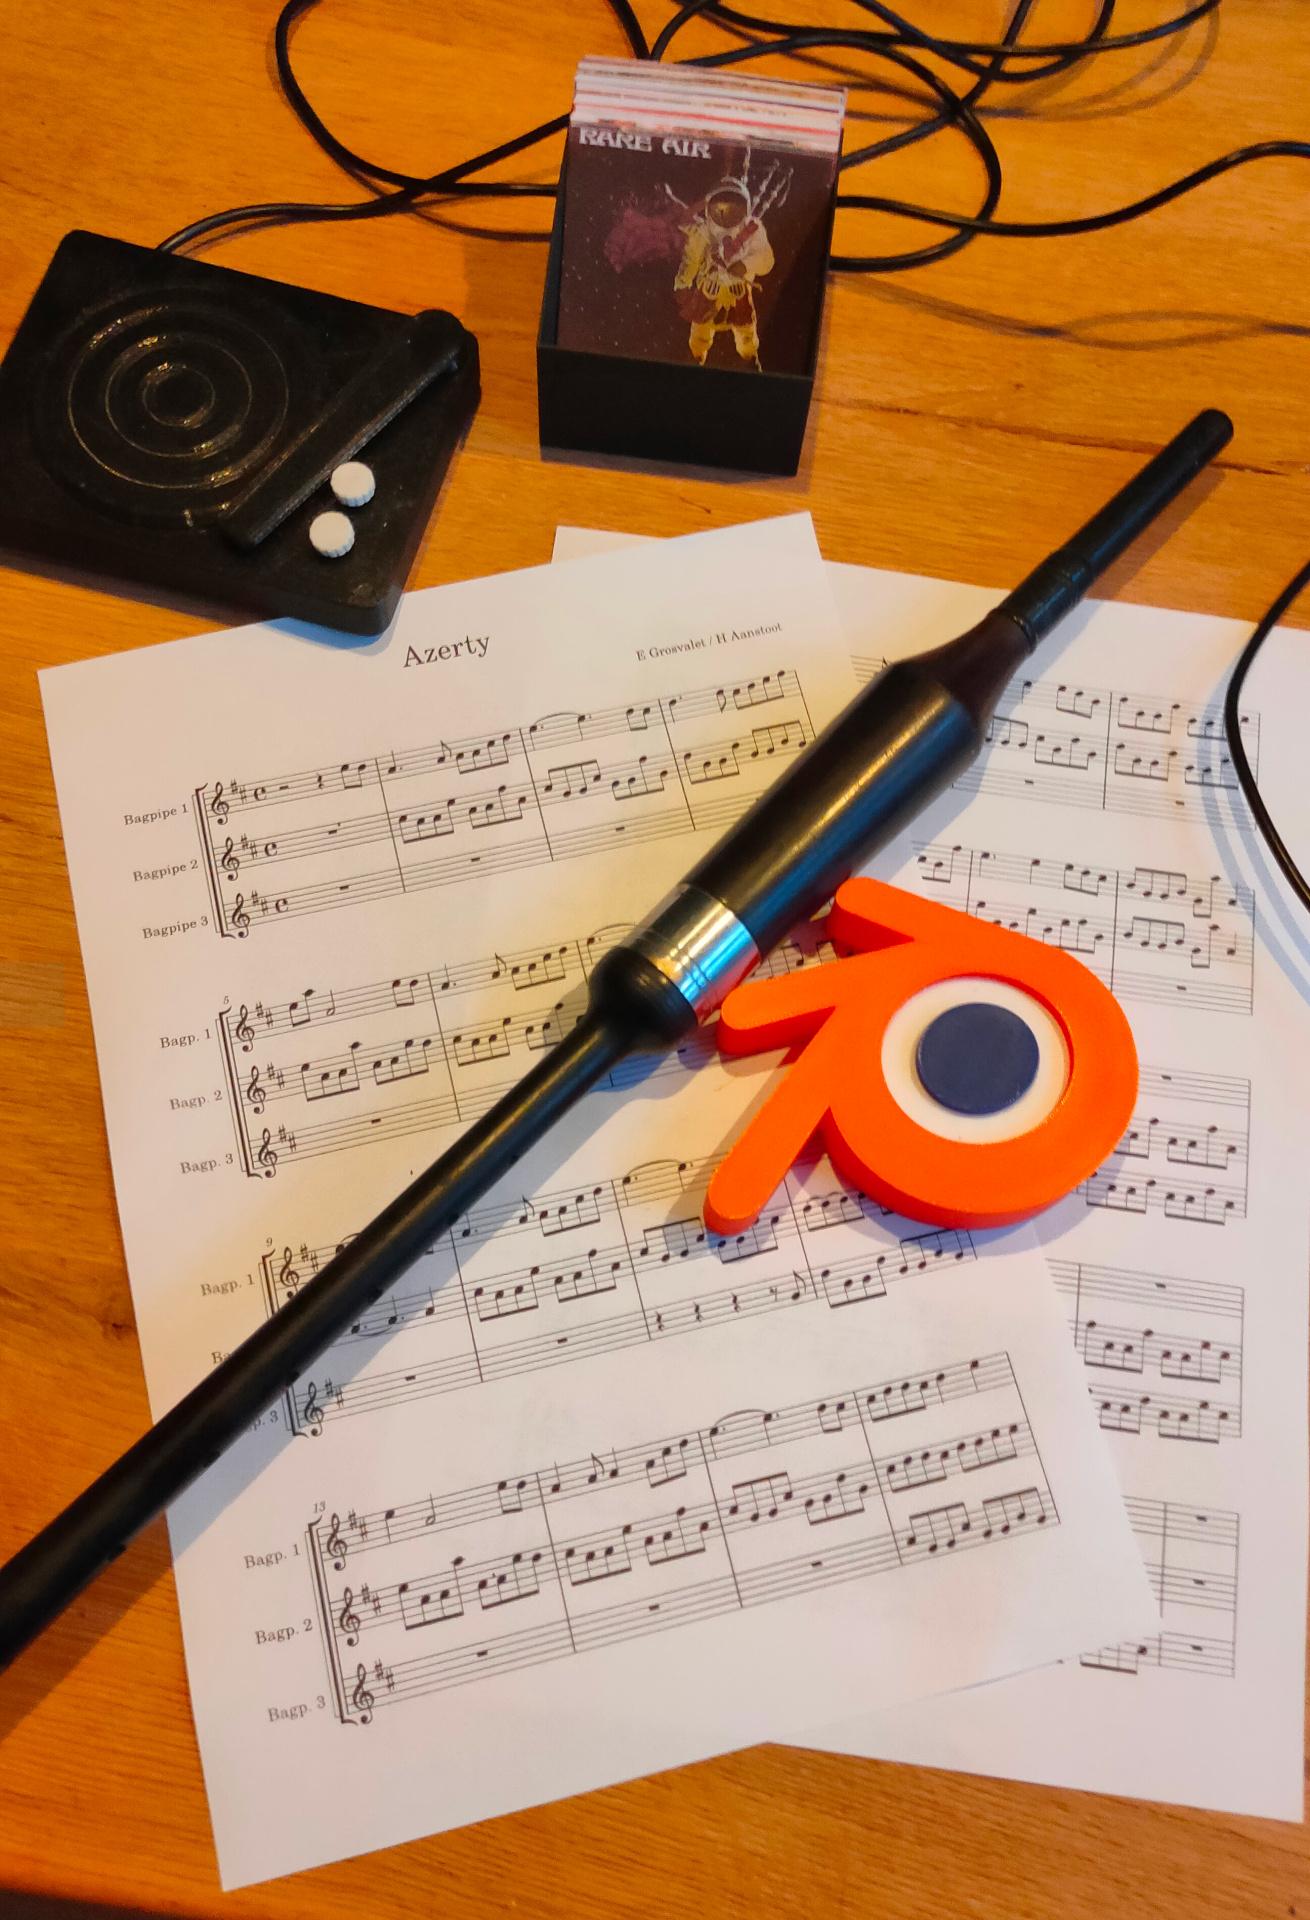
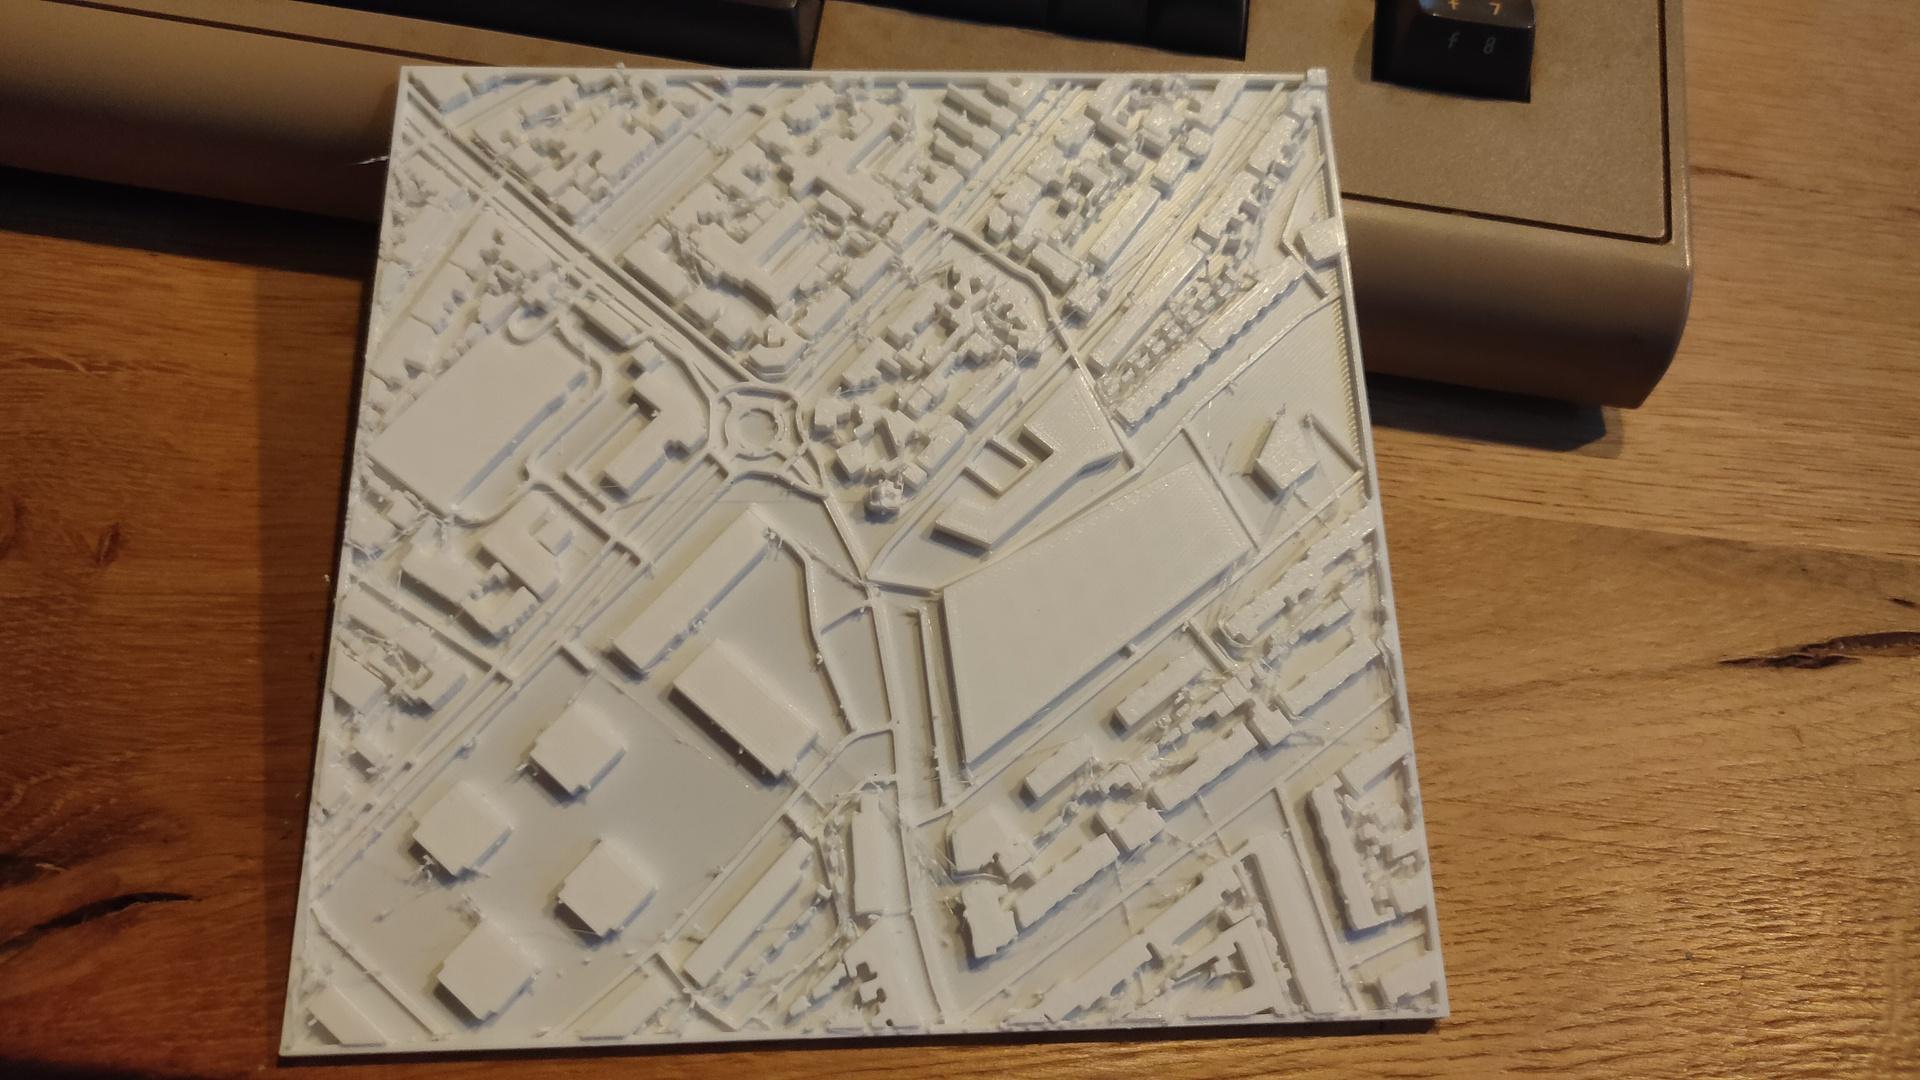
We like Low Poly models, so I printed one using marble PLA.
In the back my 100yr old highhat from my Grandfather (moleskin)
I’ve cleaned my old 3D printer, and I am planning to convert this printer to a 2D plotter and a CNC machine.
I’ve already printed a pen holder and a dremel holder. (The filament head will be removed)
I’m working on a Gcode writer to plot drawings using a pen, or using a Gyro-cut knife to cut paper. And the biggest project using this old 3D printer, a CNC machine!
Test Code:
import time
import serial

arduino = serial.Serial('/dev/ttyUSB0', 115200, timeout=.1)

# Motor stuff
arduino.write(str.encode("M84 X Y Z S12000\r\n"))
arduino.write(str.encode("M92 X160 Y160 Z800\r\n"))
# Extrude fix
arduino.write(str.encode("G92 E0\r\n"))
# Go home
arduino.write(str.encode("G28\r\n"))
# Move to x,y,z
arduino.write(str.encode("G1 Z90 X50 Y50\r\n"))
# Wait
arduino.write(str.encode("M400\r\n"))
Sin wave fun:
import time
import serial
import math
from time import sleep

arduino = serial.Serial('/dev/ttyUSB0', 115200, timeout=.1)

arduino.write(str.encode("M84 X Y Z S12000\r\n"))
arduino.write(str.encode("M92 X160 Y160 Z800\r\n"))
arduino.write(str.encode("G92 E0\r\n"))
arduino.write(str.encode("G28\r\n"))
arduino.write(str.encode("M220 S100\r\n"))
arduino.write(str.encode("G1 Z10 X60 Y60\r\n"))
arduino.write(str.encode("M400\r\n"))
sleep(10)
count = 0
while True:
	newx=(math.sin(math.radians(count))*50)+60
	newy=(math.cos(math.radians(count))*50)+60
	newz=(math.cos(math.radians(count))*10)+20
	count = count + 1
	mystring="G1 Z" + str(newz) + " X" + str(newx) + " Y" + str(newy) + "\r\n"
	print(mystring)
	arduino.write(str.encode(mystring))
	arduino.write(str.encode("M400\r\n"))
        # Not waiting for answer yet
	print(newx)
	sleep(0.1)
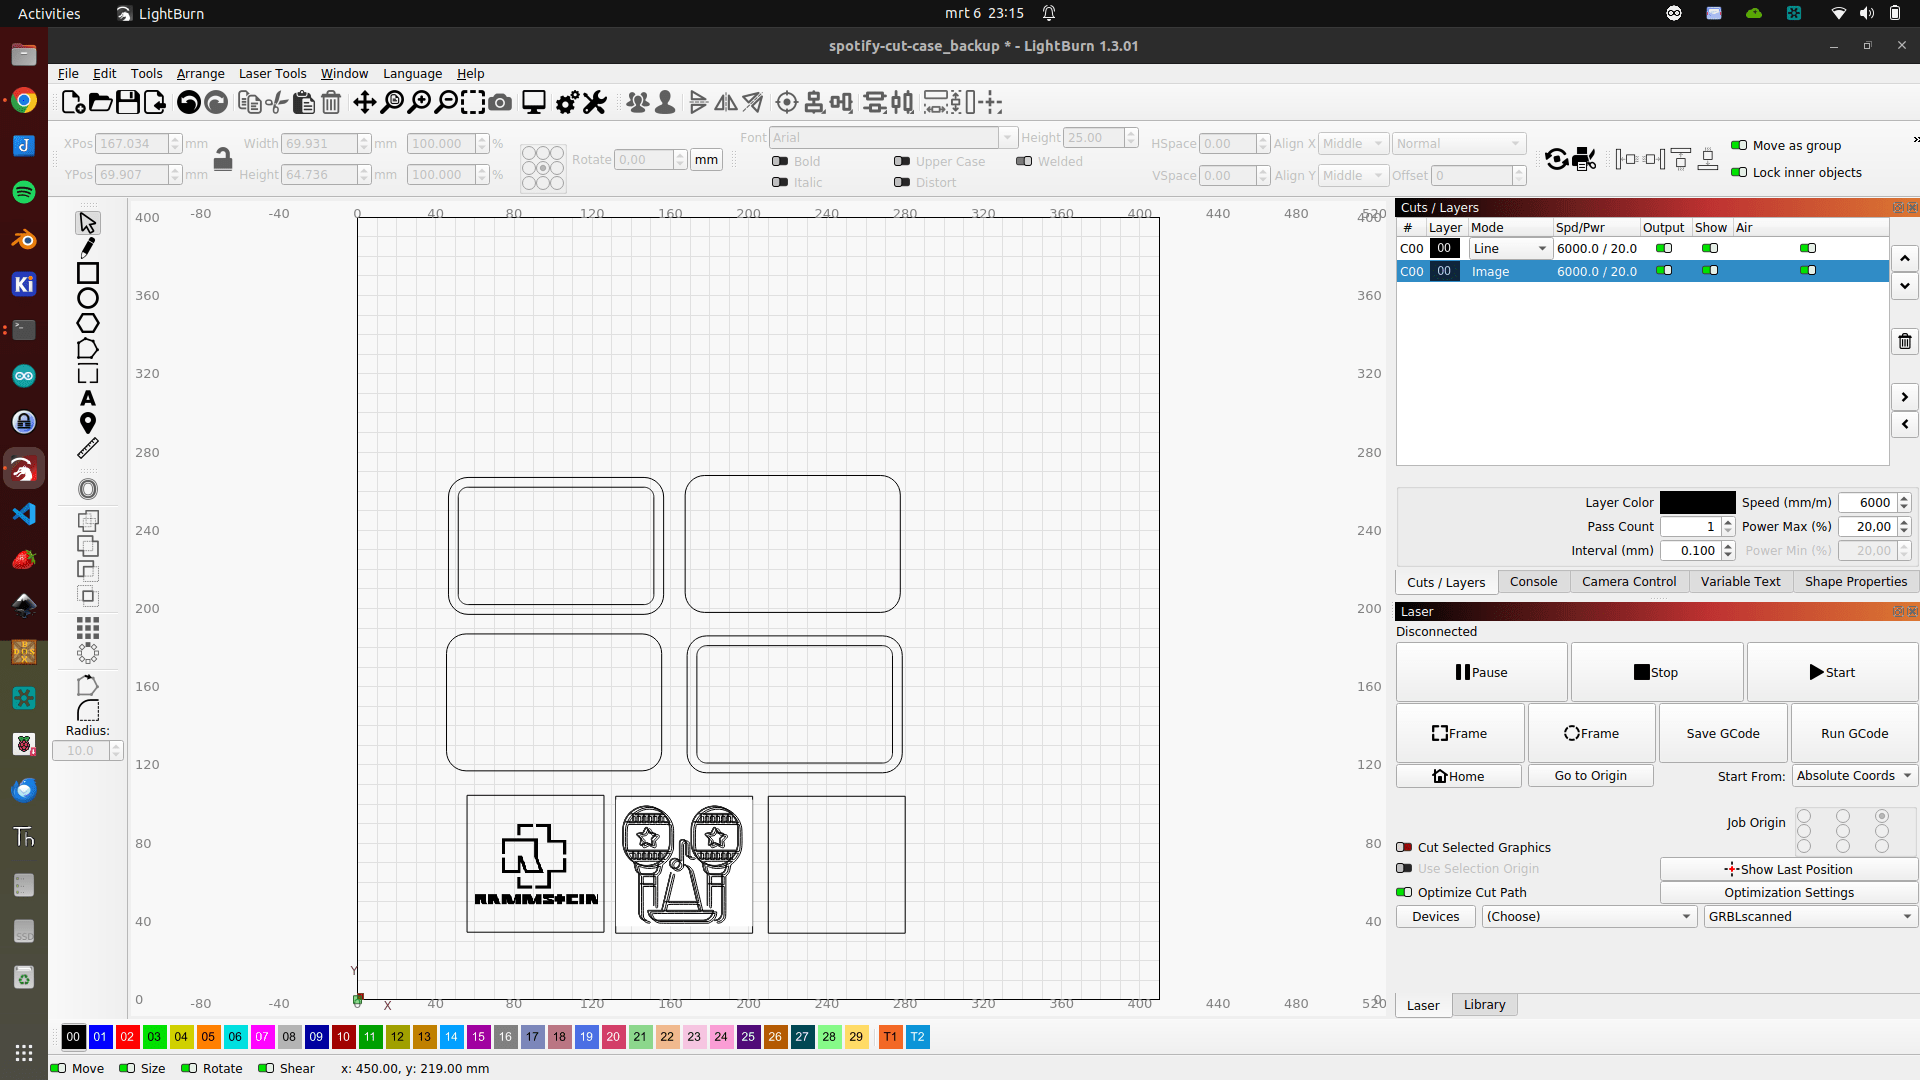
I was making a re-arrangement of a bagpipe tune. Designing a blender 3D printed light box. Cooking a Mexican BBQ dinner. Visiting a textile place with old and new weaving looms. (Which gave me some great ideas). And working on my 68000 computer.
A great weekend.
No embellishments yet, and no lights in de blender logo.
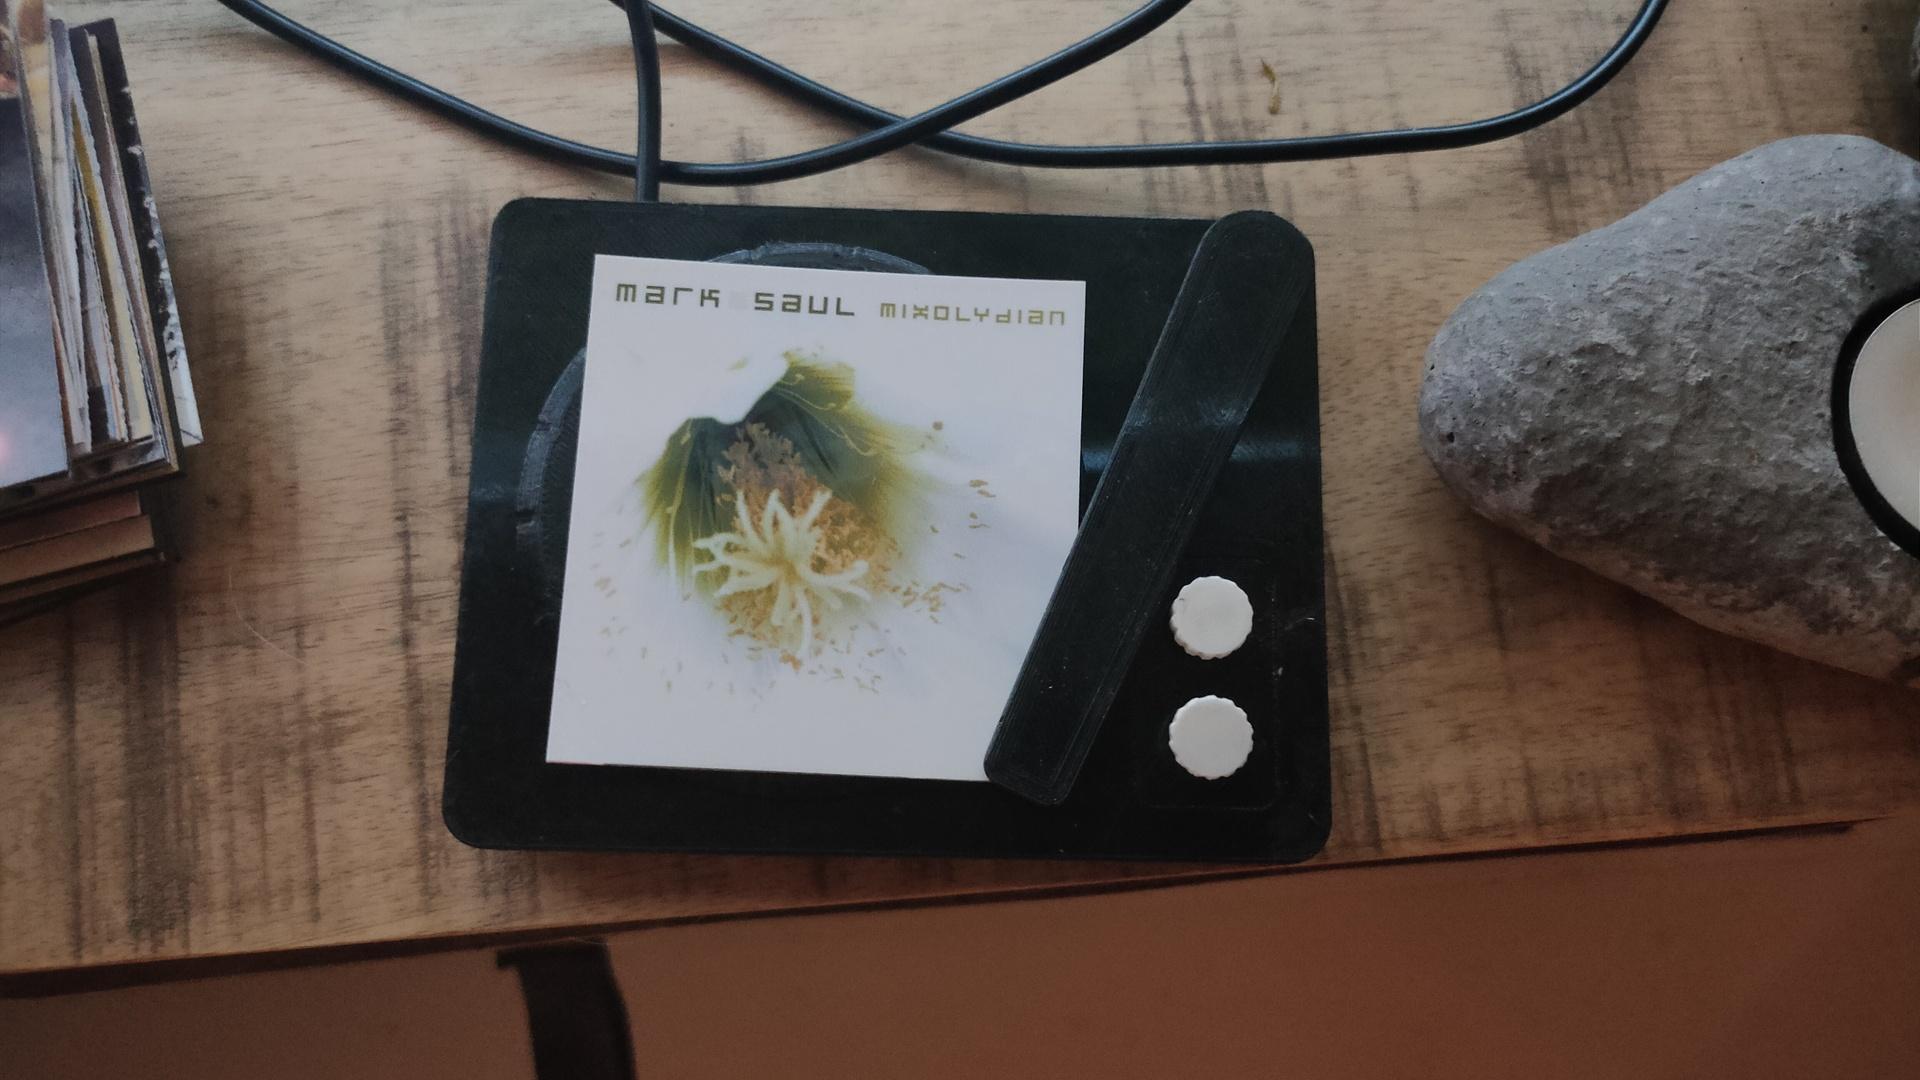
My little record player project is also in the picture, I need to re-print the parts using my new printer!
Recordplayer model by kriswillcode, but heavily remixed
Record player is going to be re-printed at a higher quality.
Put a printed image on the player, and it plays the album
Move the arm, and the next track will be played
Press upper white button, and the music will pause/resume
Press lower button … ??? Don’t know yet
Updated python client (see previous posts)
import paho.mqtt.client as mqtt
import urllib.request
from time import sleep

def on_connect(client, userdata, flags, rc):  # The callback for when the client connects to the broker
        print("Connected with result code {0}".format(str(rc)))
        client.subscribe("spotify/rfid/idlms")
        client.subscribe("spotify/rfid/but1")
        client.subscribe("spotify/rfid/but2")
        client.subscribe("spotify/rfid/arm")

def on_message(client, userdata, msg):  # The callback for when a PUBLISH message is received from the server.
        print("Message received-> " + msg.topic + " " + str(msg.payload))  # Print a received msg
        if msg.topic == "spotify/rfid/idlms":
            urllib.request.urlopen("http://LMS-SERVER-IP:9000/anyurl?p0=playlistcontrol&p1=album_id:" + msg.payload.decode() + "&p2=cmd:load&player=00:04:20:16:d9:04")
        if msg.topic == "spotify/rfid/but1":
            urllib.request.urlopen("http://LMS-SERVER-IP:9000/anyurl?p0=pause&player=00:04:20:16:d9:04")
            sleep(1)
        if msg.topic == "spotify/rfid/but2":
            urllib.request.urlopen("http://LMS-SERVER-IP:9000/anyurl?p0=pause&pt=1&player=00:04:20:16:d9:04")
            sleep(1)
        if msg.topic == "spotify/rfid/arm":
            urllib.request.urlopen("http://LMS-SERVER-IP:9000/status.html?p0=button&p1=jump_fwd&player=00:04:20:16:d9:04")
            sleep(1)

client = mqtt.Client("lmsclient")  # Create instance of client with client ID “digi_mqtt_test”
client.on_connect = on_connect  # Define callback function for successful connection
client.on_message = on_message  # Define callback function for receipt of a message
client.connect('MQTTSERVER', 1883)
client.loop_forever()  # Start daemon
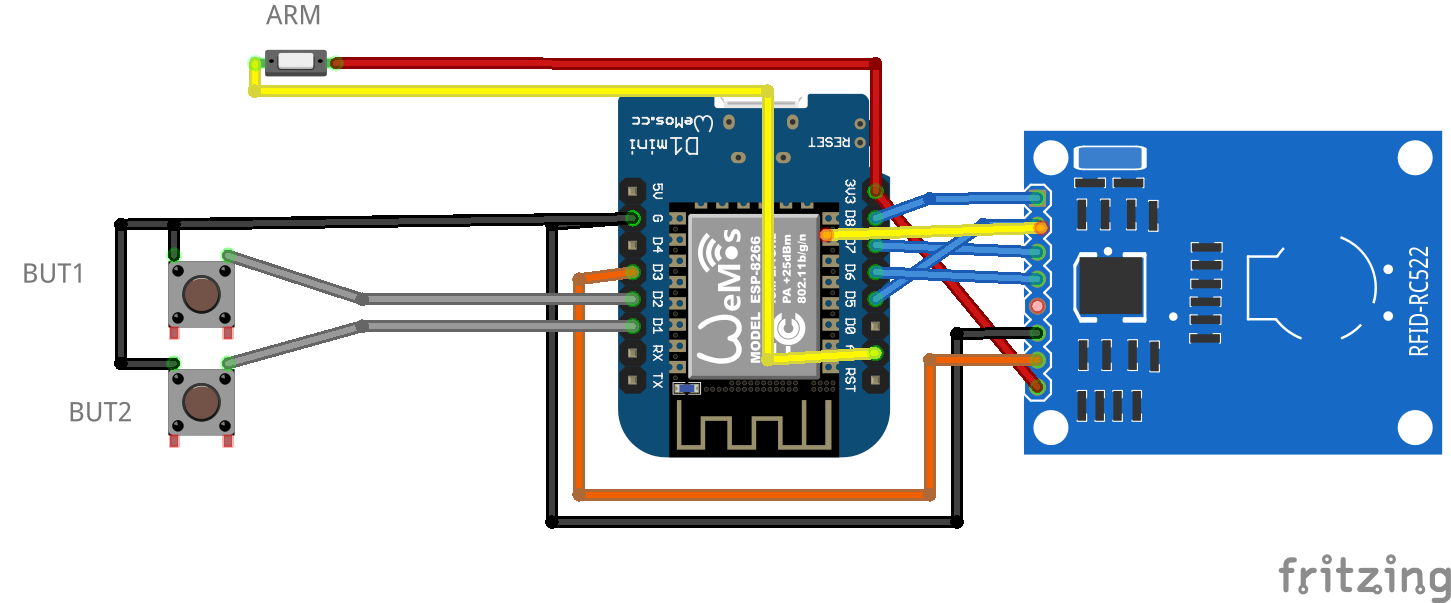
Wemos INO file
#include <Arduino.h>
#include <SPI.h>
#include <MFRC522.h>
#include <ESP8266WiFi.h>
#include <WiFiClient.h>
#include <PubSubClient.h>
#define SS_PIN 15
#define RST_PIN 0

const int buttonPin1 = D1;
const int buttonPin2 = D2;

int buttonState1 = 0;
int buttonState2 = 0;

MFRC522 mfrc522(SS_PIN, RST_PIN);
  MFRC522::StatusCode status; //variable to get card status

  byte buffer[18];  //data transfer buffer (16+2 bytes data+CRC)
  byte size = sizeof(buffer);

  uint8_t pageAddr = 0x06;  //In this example we will write/read 16 bytes (page 6,7,8 and 9).
                            //Ultraligth mem = 16 pages. 4 bytes per page.
                            //Pages 0 to 4 are for special functions.

unsigned long cardId = 0;
WiFiClient net;
PubSubClient client(net);
const char* mqtt_server = "MQTTBROKER";
const char* ssid = "MYSSID";
const char* password = "MYWIFIPASWORD";
String topicStr = "";
byte buffer2[8];

boolean Rflag=false;
int r_len;
char payload[5];
byte value[5];
void setup() {
  Serial.begin(9600);
    pinMode(buttonPin1, INPUT_PULLUP);
    pinMode(buttonPin2, INPUT_PULLUP  );

  SPI.begin();
  mfrc522.PCD_Init();
  WiFi.mode(WIFI_AP_STA);
  WiFi.begin(ssid, password);
  client.setServer(mqtt_server, 1883);
     delay(100);
    client.setCallback(callback);
      delay(100);
    client.subscribe("spotify/rfid/in/#");
}
void reconnect() {
  while (WiFi.waitForConnectResult() != WL_CONNECTED) {
  }
  while (!client.connected()) {
    String clientId = "rfid-";
    clientId += String(random(0xffff), HEX);
    if (!client.connect(clientId.c_str(), "rfidclient", "...")) {
      delay(5000);
    }
  }
  client.subscribe("spotify/rfid/in/#");
}
void callback(char* topic, byte* payload, unsigned int length) {
  Serial.print(F("Called"));
   Rflag=true; //will use in main loop
   r_len=length; //will use in main loop
   int j=0;
     for (j;j<length;j++) {
       buffer2[j]=payload[j];
       //Serial.print((char)payload[j]);
       }
if (r_len < 3) {
  Rflag=false;
  Serial.print(F("Set false"));
}
buffer2[j]='\0'; //terminate string
}

void loop() {
    if (!client.connected()) {
    reconnect();
  }

buttonState1 = digitalRead(buttonPin1);
  //Serial.print(buttonState1);
  if (buttonState1 == 0 ) {
    client.publish("spotify/rfid/but1", "0");
  }
buttonState2 = digitalRead(buttonPin2);
  //Serial.println(buttonState2);
  if (buttonState2 == 0 ) {
    client.publish("spotify/rfid/but2", "0");
  }

int reading = analogRead(0);
  //Serial.println(reading);
  if (reading > 500 ) {
    client.publish("spotify/rfid/arm", "0");
  }

  client.loop();
  if (!mfrc522.PICC_IsNewCardPresent()) {
    return;
  }
  if (!mfrc522.PICC_ReadCardSerial()) {
    return;
  }
if (Rflag) {
        for (int i=0; i < 4; i++) {
    //data is writen in blocks of 4 bytes (4 bytes per page)
    status = (MFRC522::StatusCode) mfrc522.MIFARE_Ultralight_Write(pageAddr+i, &buffer2[i*4], 4);
    if (status != MFRC522::STATUS_OK) {
      return;
    }

  }
  Rflag=false;
}

  cardId = getCardId();
  char buffer3[10];
  sprintf(buffer3, "%lu", cardId);
  client.publish("spotify/rfid/id", buffer3);

  status = (MFRC522::StatusCode) mfrc522.MIFARE_Read(pageAddr, buffer, &size);
  if (status != MFRC522::STATUS_OK) {
    Serial.println(F("MIFARE_Read() failed: (R)"));
    Serial.println(mfrc522.GetStatusCodeName(status));
    return;
  }

  Serial.println(F("Read data: "));
  for (byte i = 0; i < 5; i++) {
    Serial.write(buffer[i]);
       buffer2[i]=buffer[i];
    }

  client.publish("spotify/rfid/idlms", buffer,5);
  delay(1000);
  mfrc522.PICC_HaltA();
}

unsigned long getCardId() {
  byte readCard[4];
  for (int i = 0; i < 4; i++) {
    readCard[i] = mfrc522.uid.uidByte[i];
  }
  return (unsigned long)readCard[0] << 24
    | (unsigned long)readCard[1] << 16
    | (unsigned long)readCard[2] << 8
    | (unsigned long)readCard[3];
}
I used MCE to control some Windows VMs and programs running in it in the past. (Below link and a web interface engine which on the backend converted BWW/BMW (bagpipe music files) to PDF automated comes to mind)
Controlling a Windows VM using MQTT, very nice! (Use HA mqtt or mosquitto_pub in bash)
Question: anyone got a better solution to control programs within a VM? Let me know.
Next:
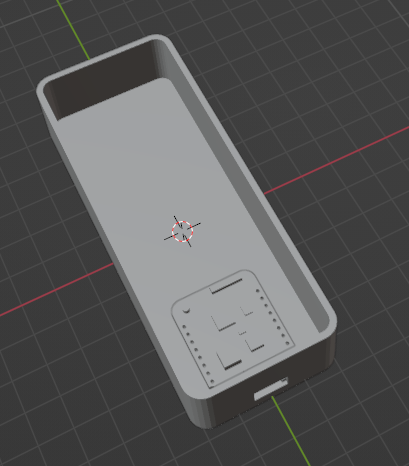
I’m creating a new case for my Wemos, LCD16x2, button, Led, Buzzer project (see other post)
I’m redesigning my previous case in blender.
But I really miss something like a generator function for different cases, like the one I made using Openscad. Question: Anyone know a tool/add-on to generate cases? I used a model of a wemos to get the usb connector/screw holes in place.
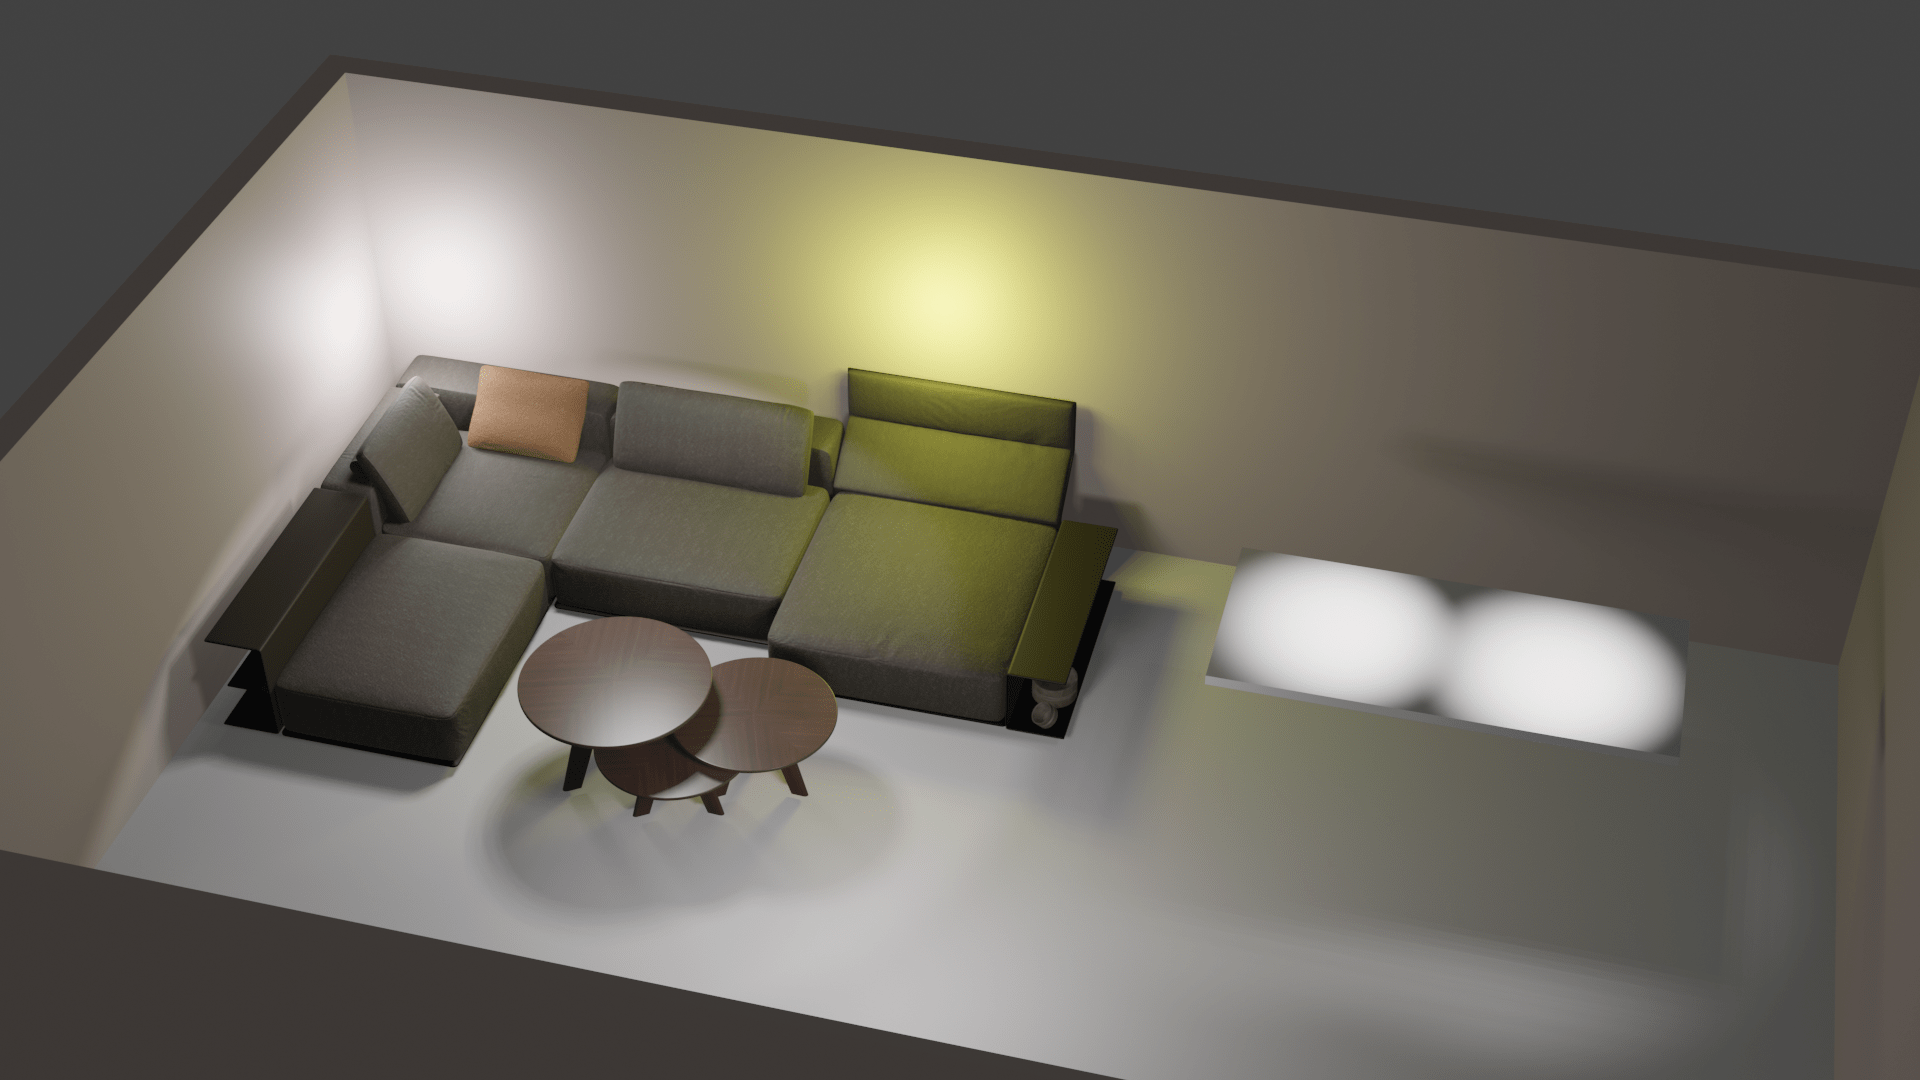
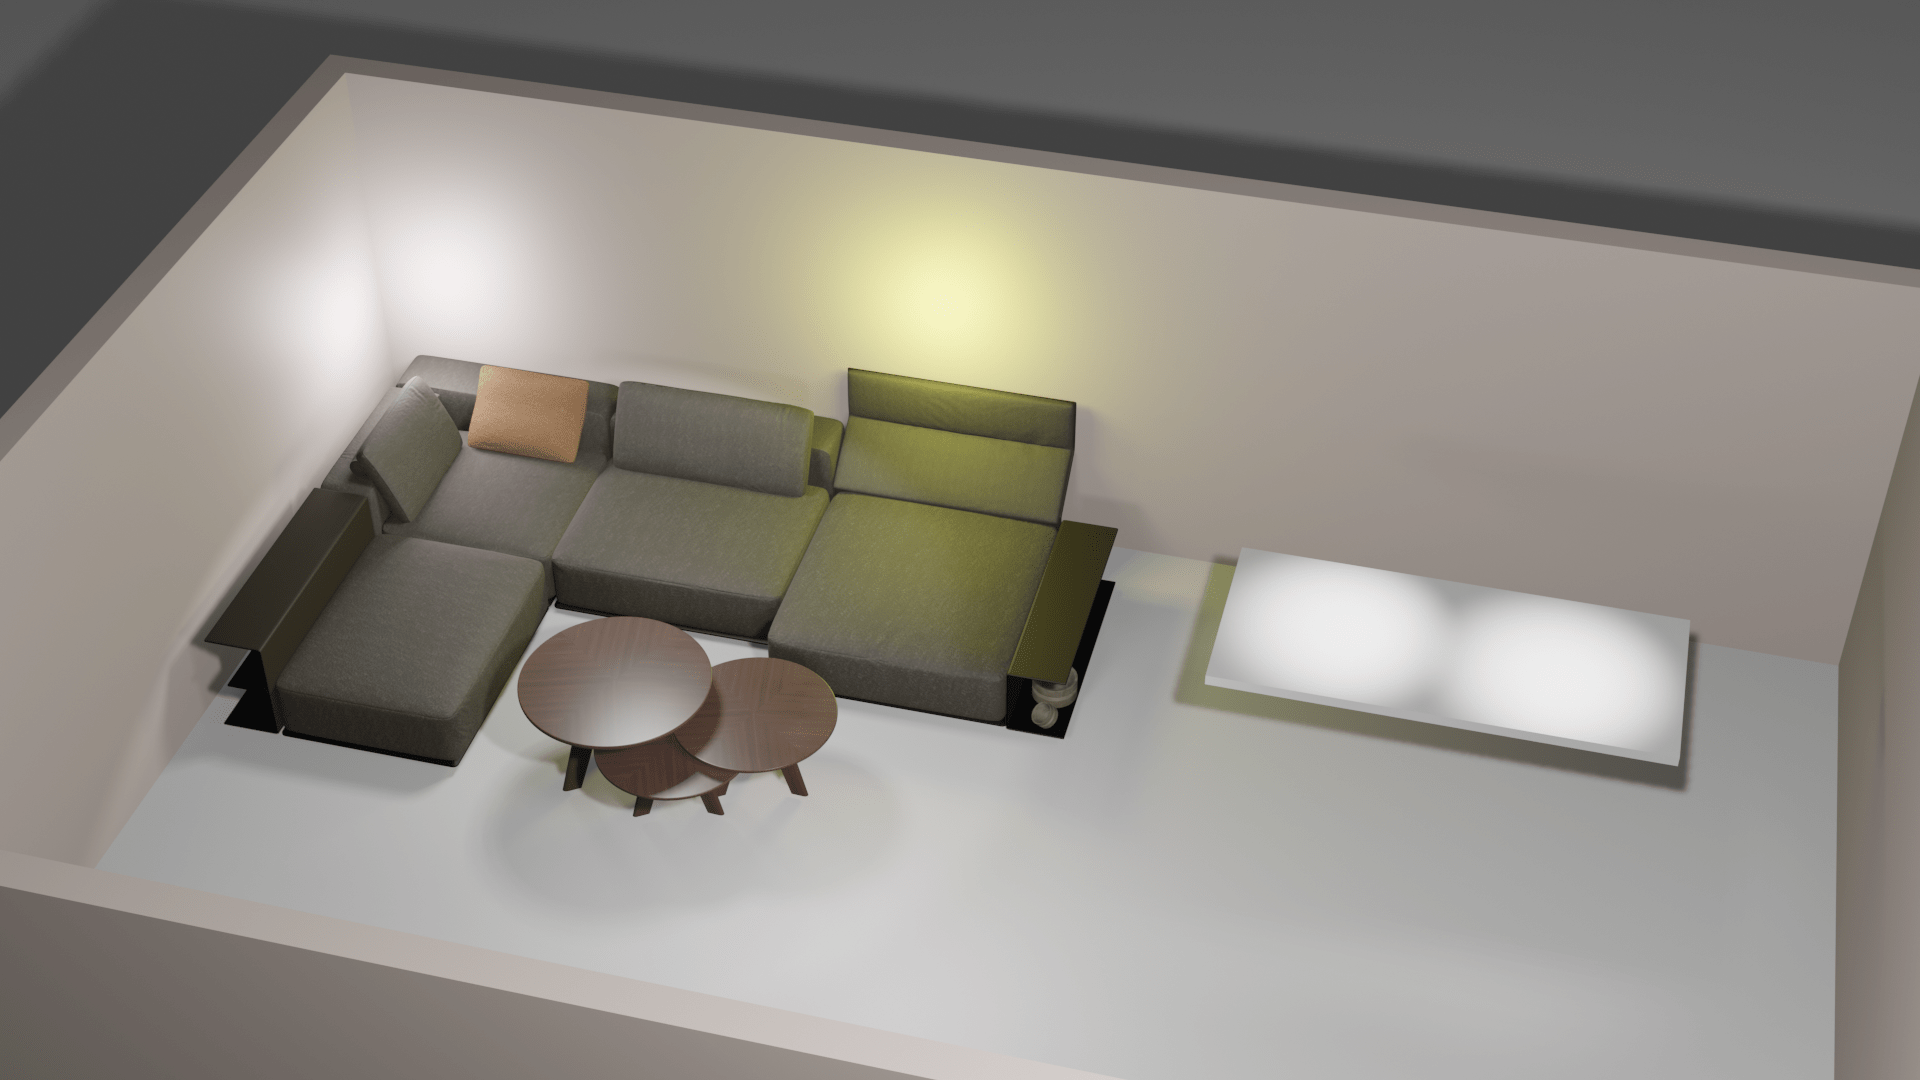
In the past, I’ve controlled some blender lights using python and MQTT. But now I’m trying to control it using DMX.
Example of lighting in our living using mock-up couch and tables.
I found a cool add-on called Blender-DMX. (B.t.w. wled can also use DMX)
Looks cool but, can I make a floorplan with this?
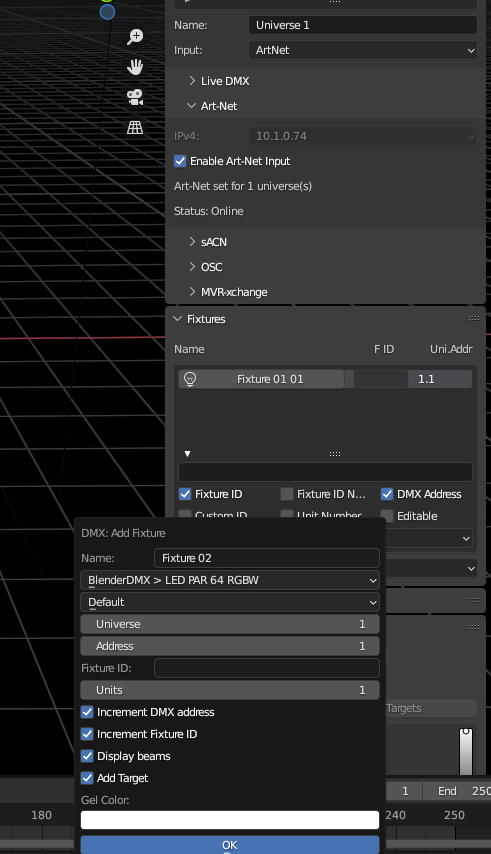
Blender add-on configuration
In Home Assistant I used a HACS add-on called : Art-net LED Lighting for DMX
Configuration can be done in configuration.yaml
light:
- platform: artnet_led
  host: BLENDERHOSTIP                   # IP of Art-Net Node
  max_fps: 25
  refresh_every: 0                      # Resend values if no fades are running every x seconds, 0 disables automatic refresh
  node_type: artnet-direct              # Which protocol to use
  universes:                            # Support for multiple universes
    1:                                  # .Nr of Universe (see configuration of your Art-Net Node)
      send_partial_universe: True       # Only send the universe which contains data
      devices:
        - channel: 1                    # first channel of dmx dimmer
          name: dmx_dimmer_rgbw         # name
          type: rgbw                    # type
          transition: 1                 # default duration of fades in sec.
          channel_size: 8bit            # width of the channel sent to DMX device, default "8bit", "16bit", "24bit" and "32bit"
          channel_setup: Wrgb           # This is the magic to get colors correct
It works, but I’m not happy, anyone got a better solution?
And I have to check out GDTF profiles for fixtures.
At a later stage I’m going to 3d print a white floorplan about 1cm high, with LEDs and buttons. A floorplan you can hang on your wall.
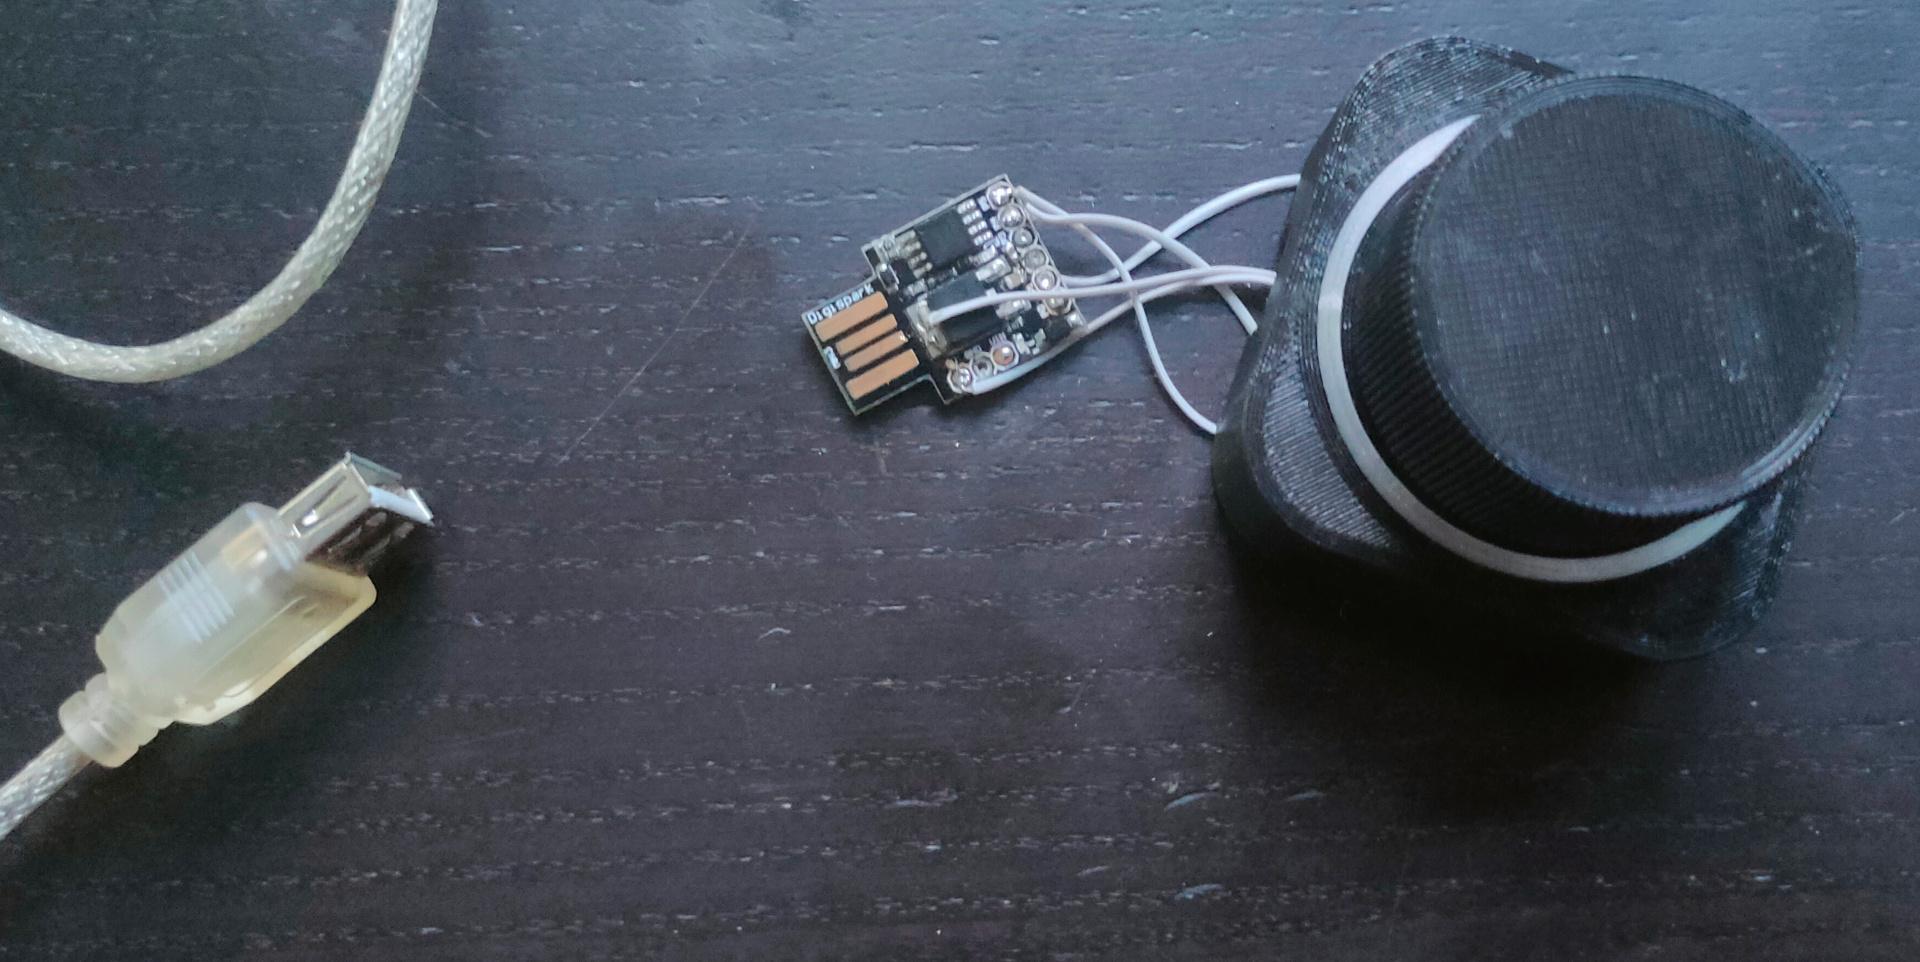
The old way of flashing using Arduino IDE (for digispark)
Install Boards using : preferences, add board URL http://digistump.com/package_digistump_index.json
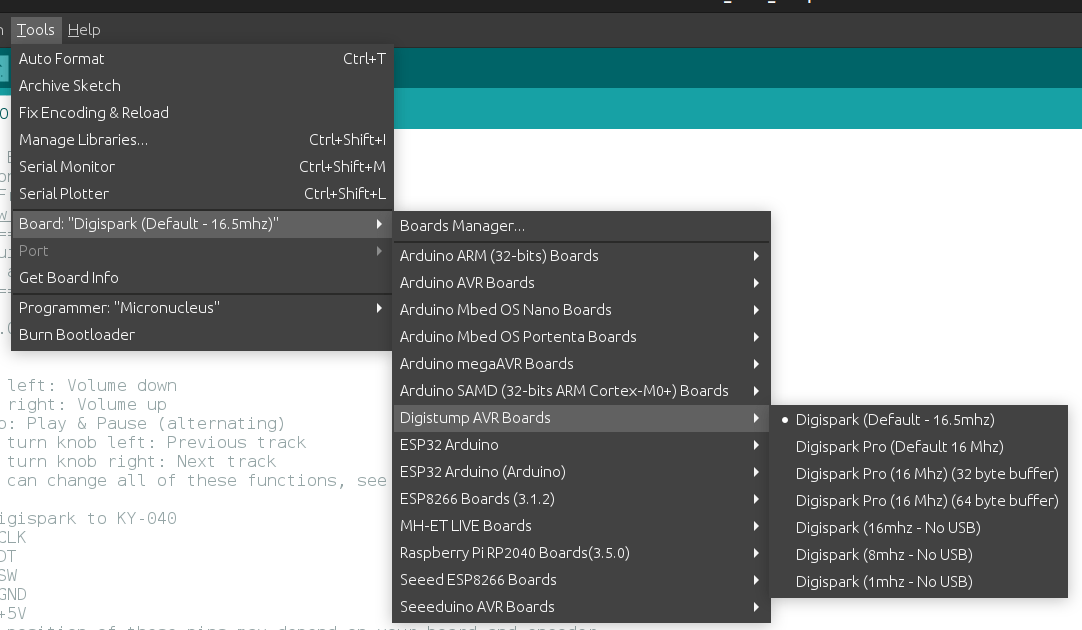
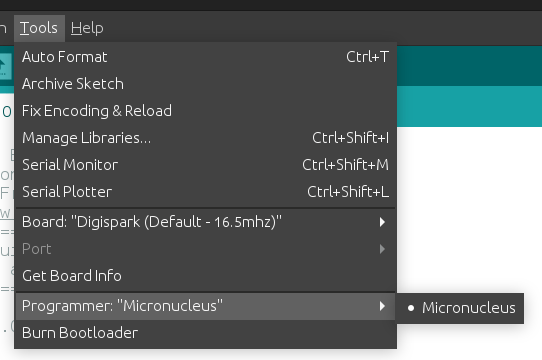
Change Board and programmer, YOU won’t have to select a USB device!
Note: There being no regular USB device, you need to add some udev rules. cat /etc/udev/rules.d/digispark.rules SUBSYSTEM==”usb”, ATTR{idVendor}==”16d0″, ATTR{idProduct}==”0753″, MODE=”0660″, GROUP=”dialout”
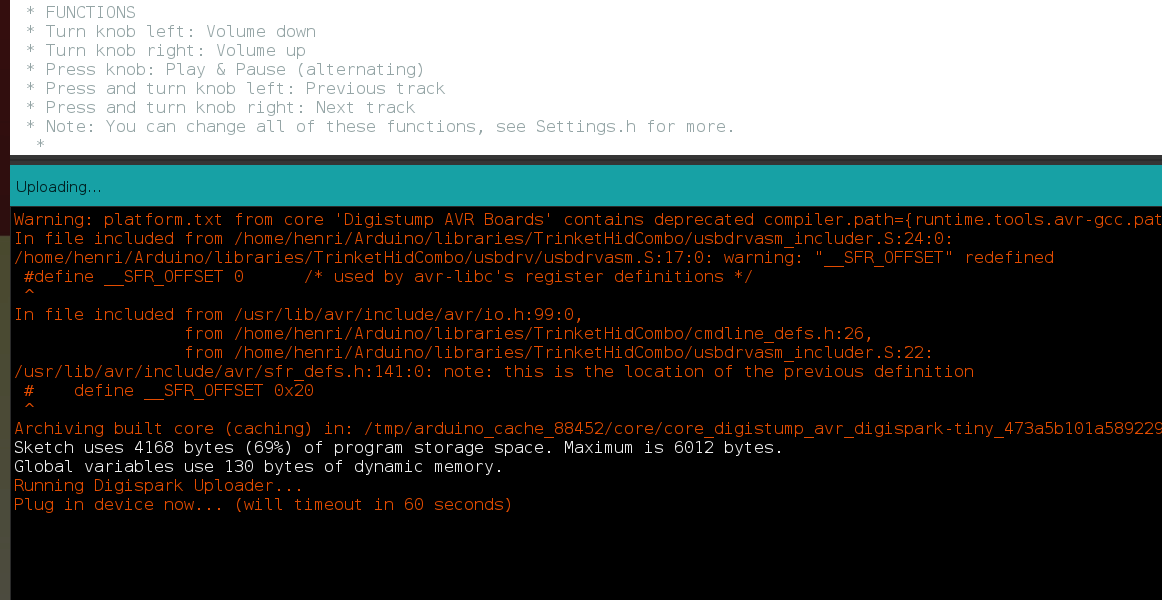
When compiling and uploading the program, you get a message to plug in the device. See below screenshot.
Now the 2024 change. Reason to change:
Want to have USB-C
Python to get a more flexible setup
I want to use more pins, so I can add LEDs and more buttons.
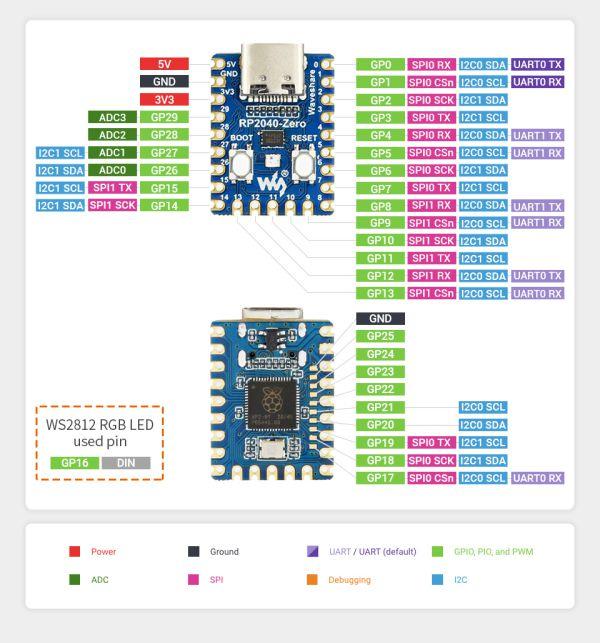
I wanted to play with my Waveshare RP2040 Zero.
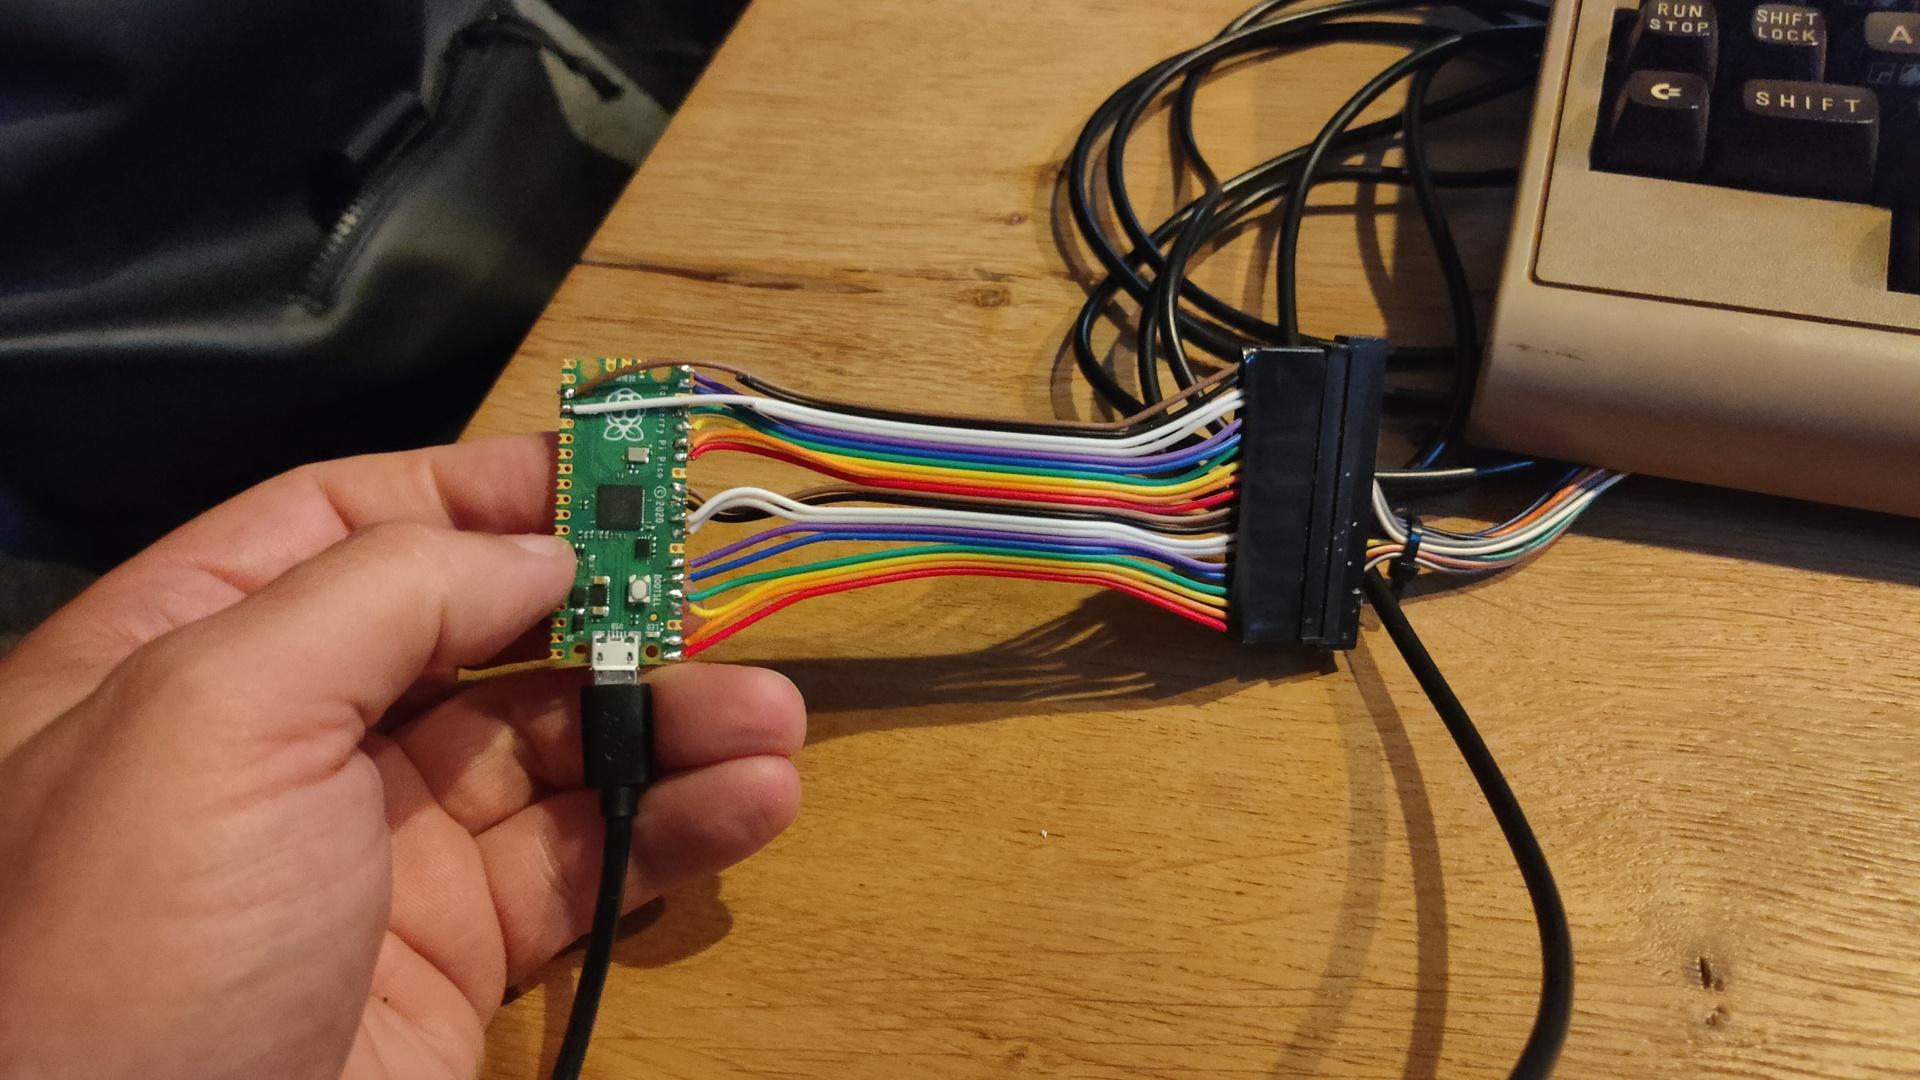
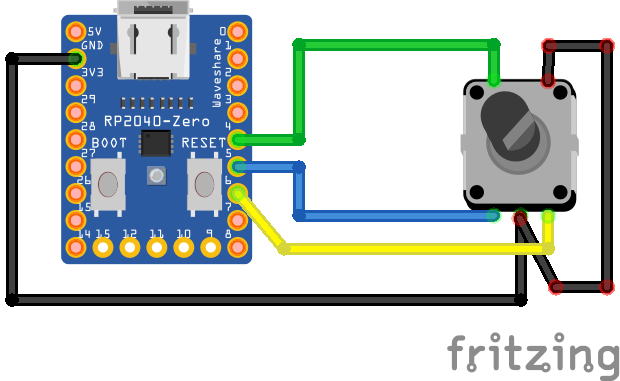
This is the first setup, with same functionality as before.
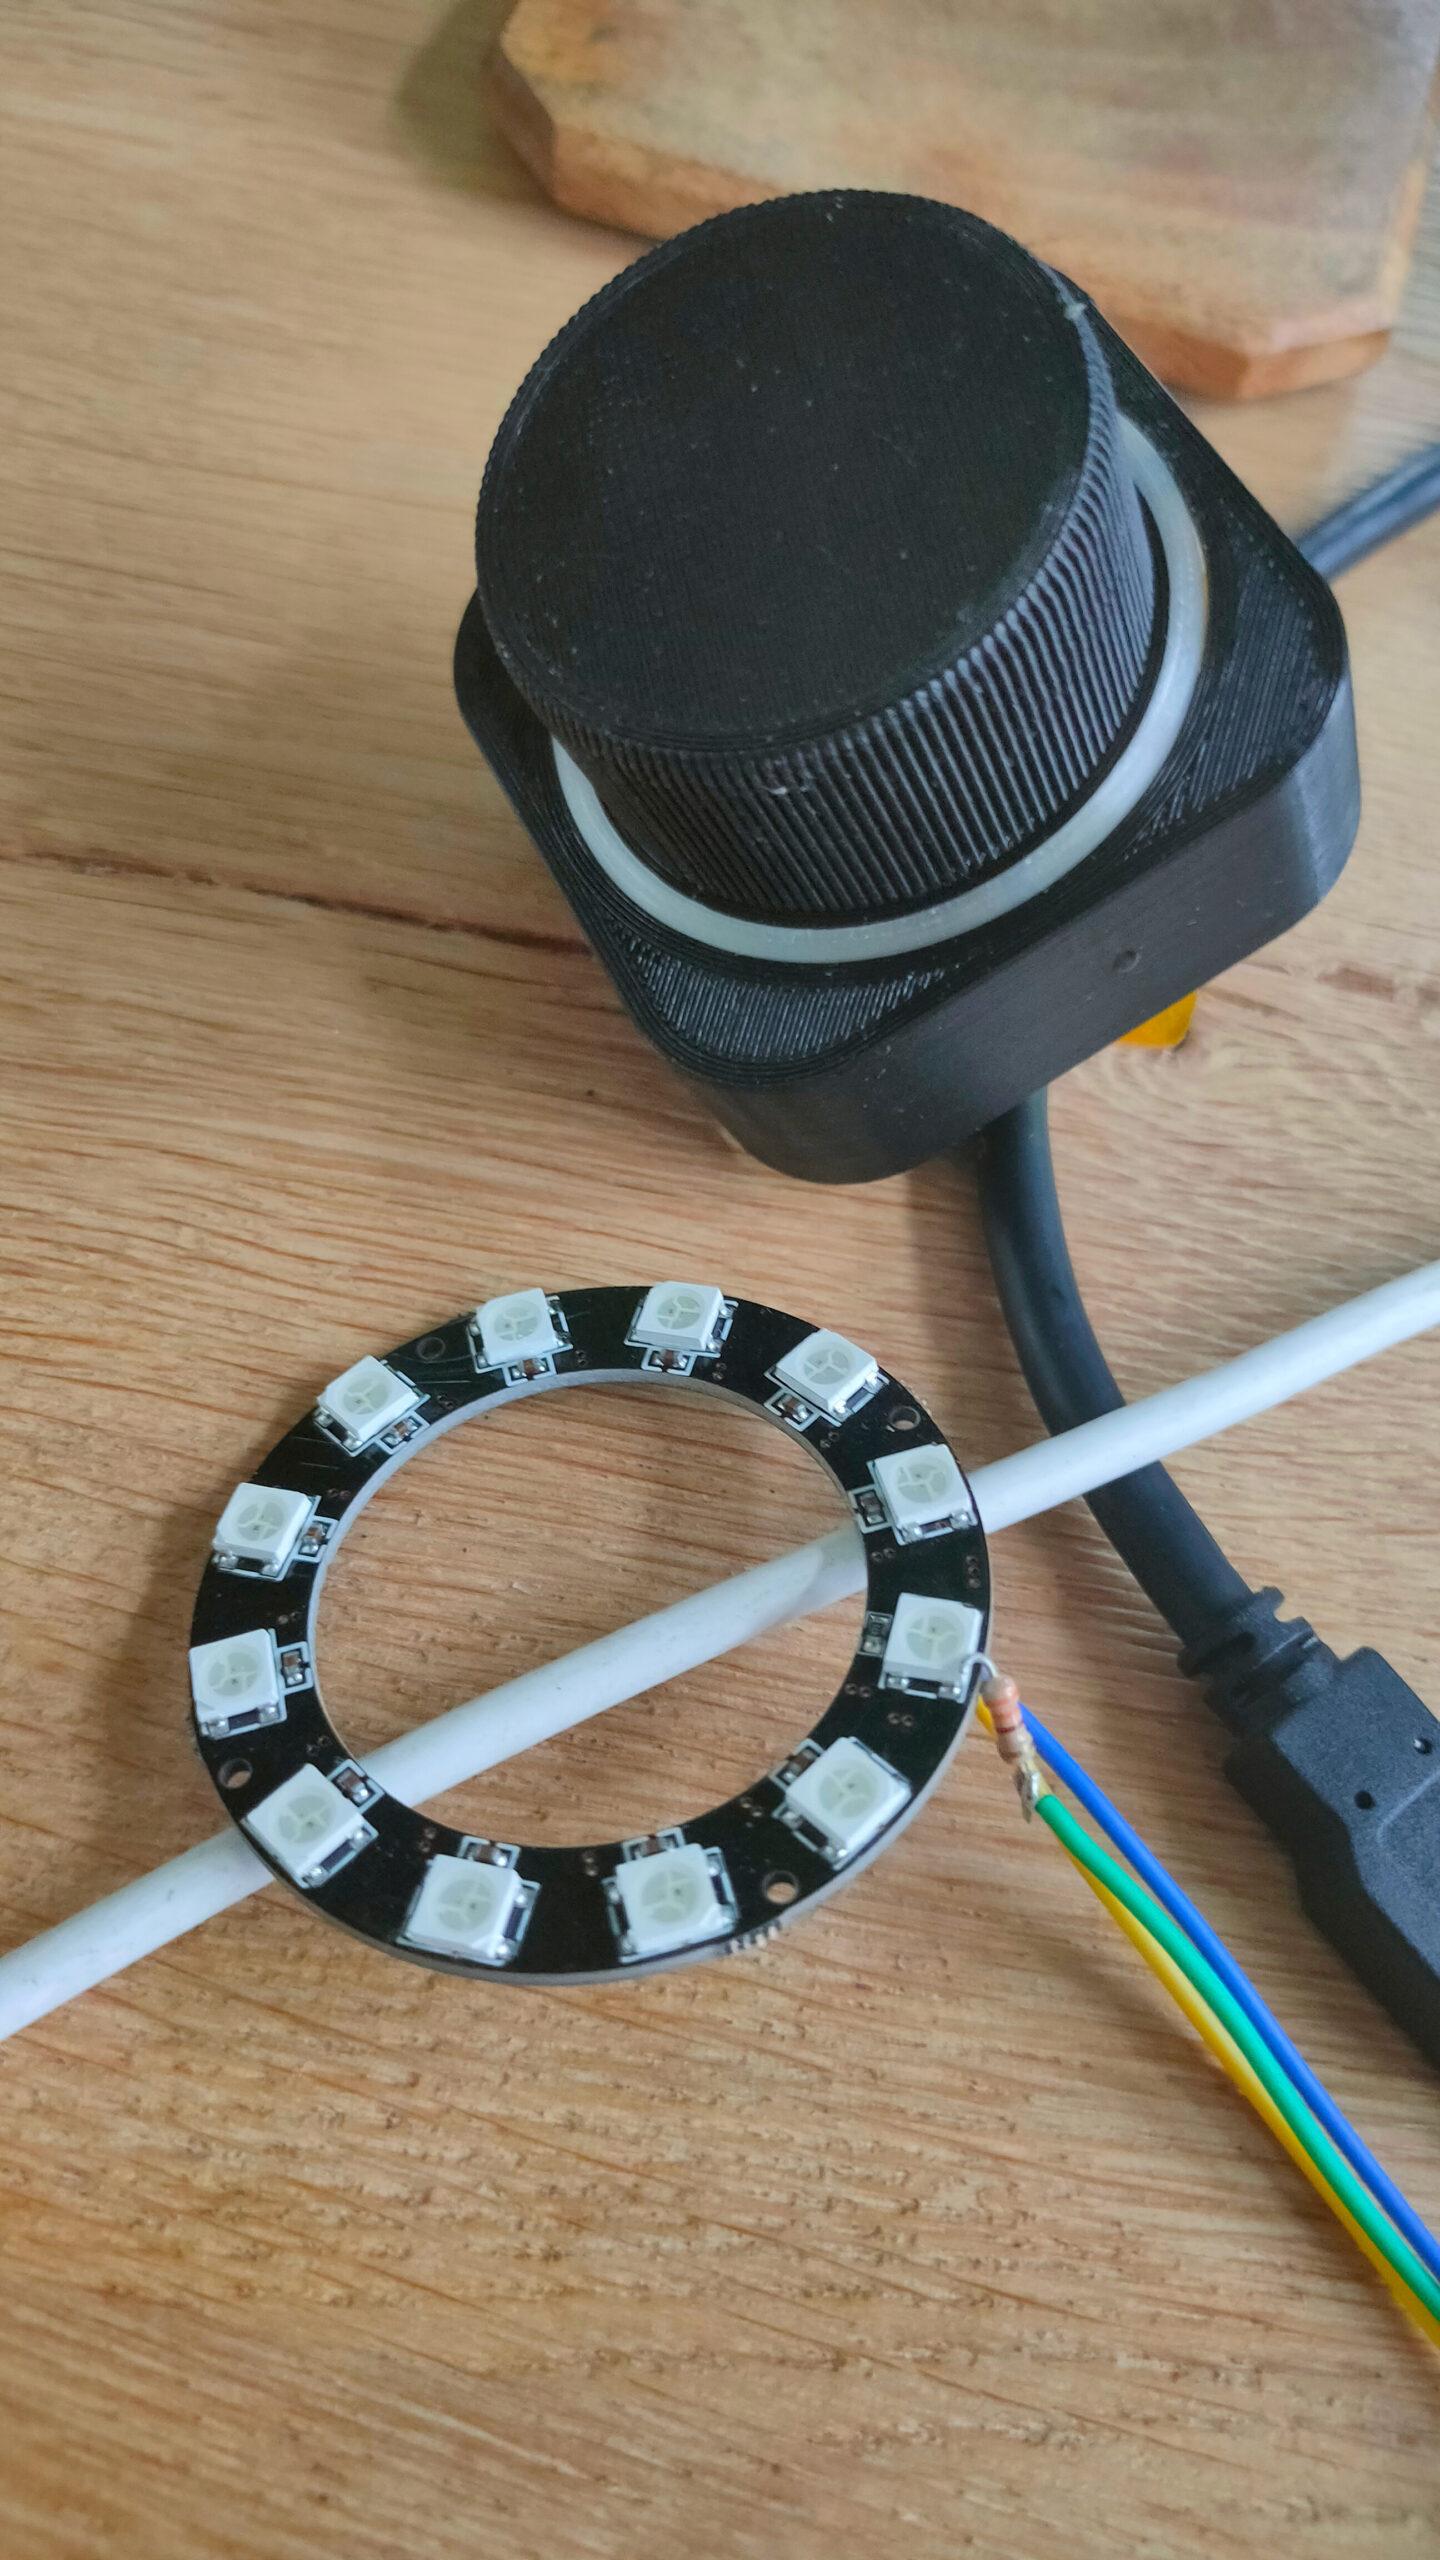
Now I can add more stuff!
Putting the code on the RP2040-zero
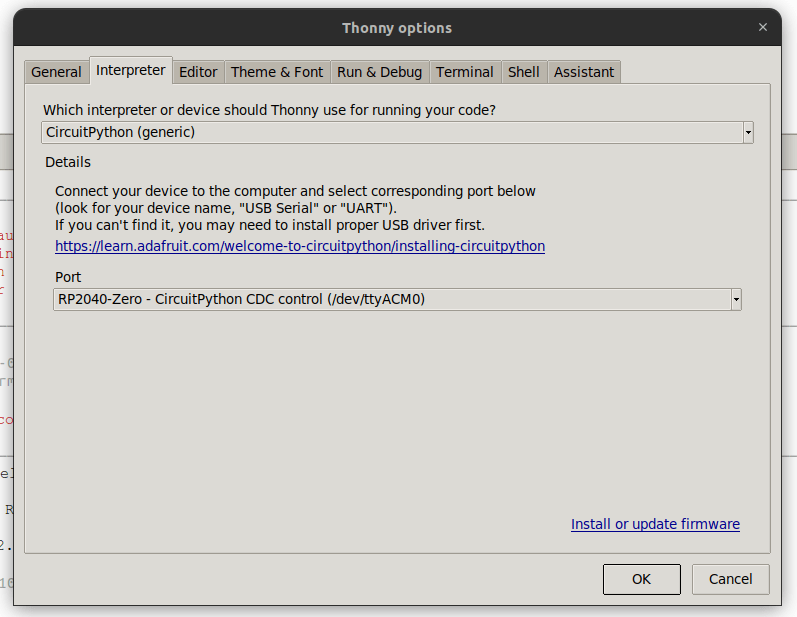
Press boot button and insert into your pc. Download uf2 file from here and save in RP2 drive. https://circuitpython.org/board/waveshare_rp2040_zero/ Open Thonny, and configure interpreter to:
Download the zip file from https://github.com/adafruit/Adafruit_CircuitPython_HID And copy only the subdirectory adafruit_hid to the drive in subdir lib
Open the file code.py from the device, and remove example hello world code. Paste in the following code.
import rotaryio
import board
import time

import board
import digitalio
import usb_hid
from adafruit_hid.keyboard import Keyboard
from adafruit_hid.keyboard_layout_us import KeyboardLayoutUS
from adafruit_hid.keycode import Keycode
from adafruit_hid.consumer_control import ConsumerControl
from adafruit_hid.consumer_control_code import ConsumerControlCode

but = digitalio.DigitalInOut(board.GP4)
but.direction = digitalio.Direction.INPUT
but.pull = digitalio.Pull.UP

cc = ConsumerControl( usb_hid.devices )

encoder = rotaryio.IncrementalEncoder(board.GP5, board.GP6)
last_position = 0
while True:
    position = encoder.position
    if int(last_position) < int(position):
        #print(position)
        command = ConsumerControlCode.VOLUME_DECREMENT
        cc.send(command)
    #last_position = position
    if int(last_position) > int(position):
        #print(position)
        command = ConsumerControlCode.VOLUME_INCREMENT
        cc.send(command)
    last_position = position
    if not but.value:
        command = ConsumerControlCode.MUTE
        cc.send(command)
        time.sleep(0.5)
Above code is the bare minimum, I’ll add more functionality soon. (LEDs and more buttons) Next and Previous Track and mode change. From Audio to Navigation for example.
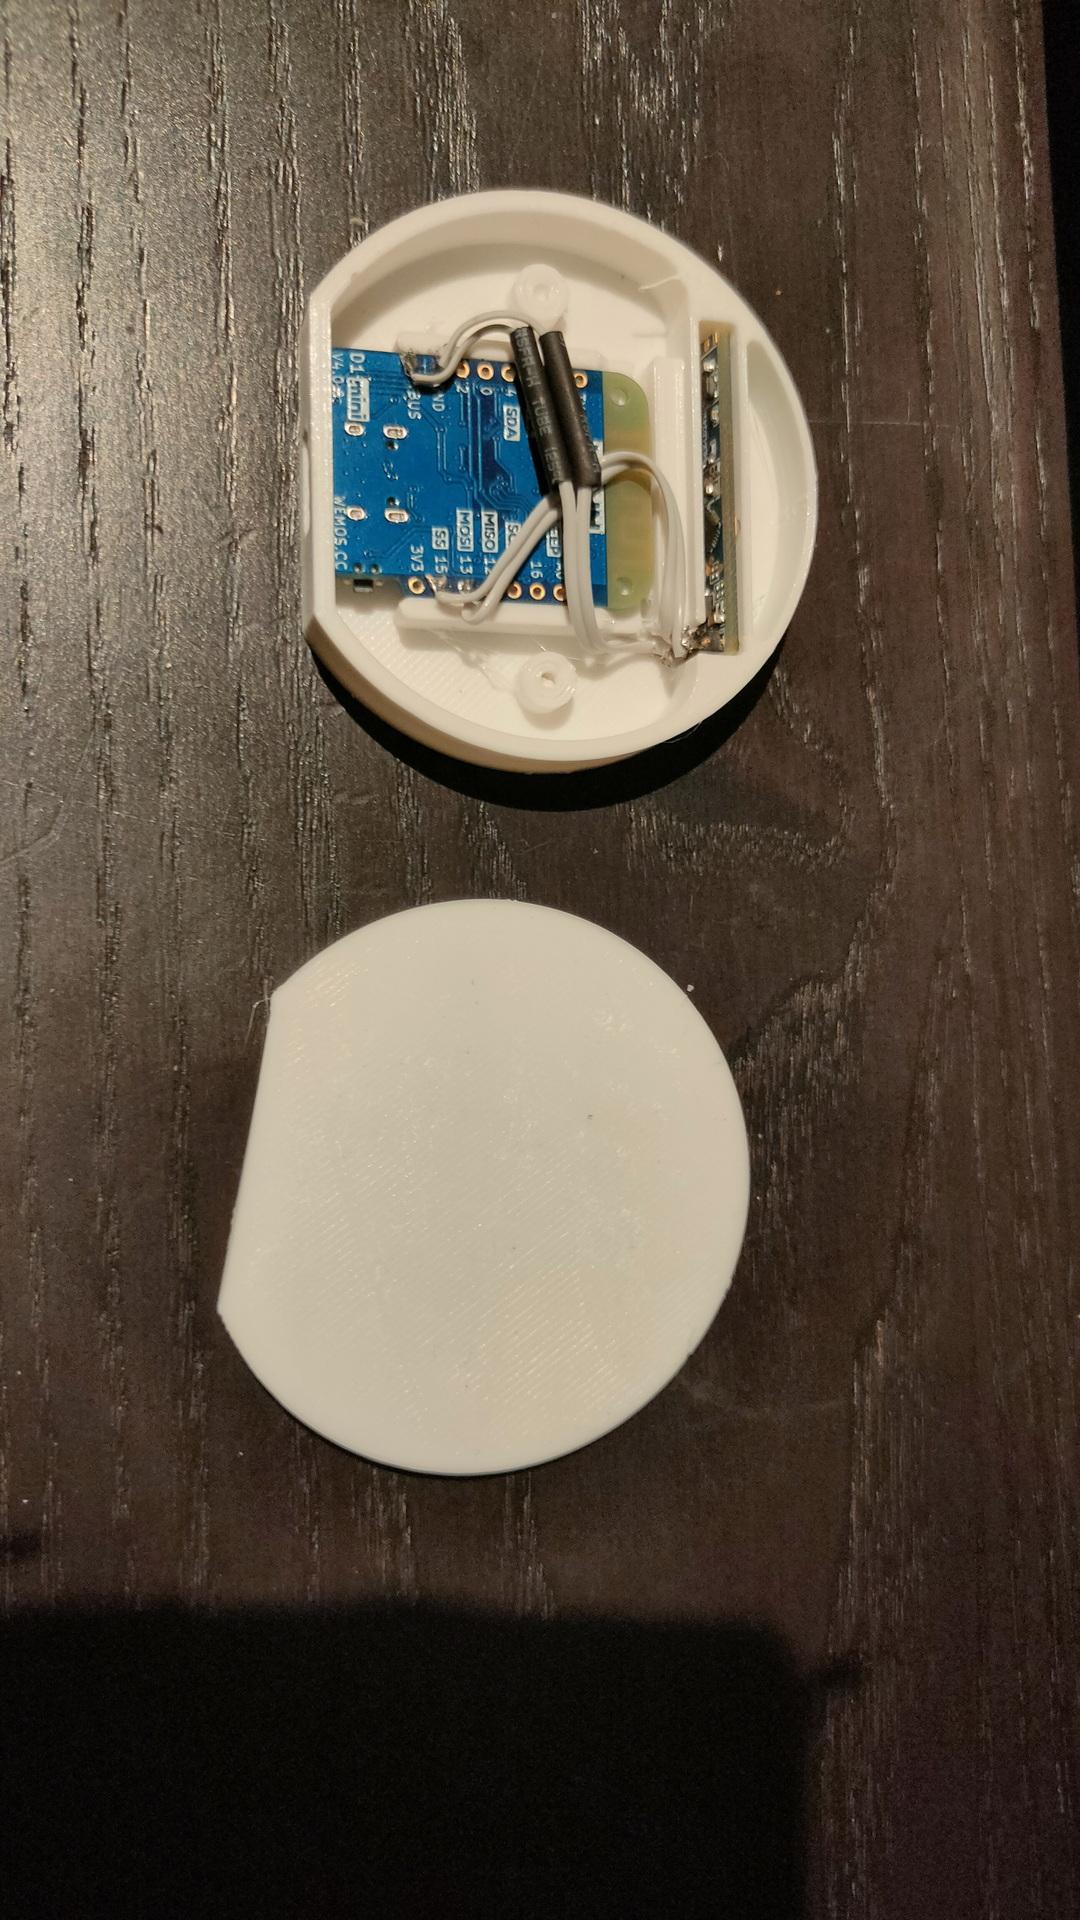
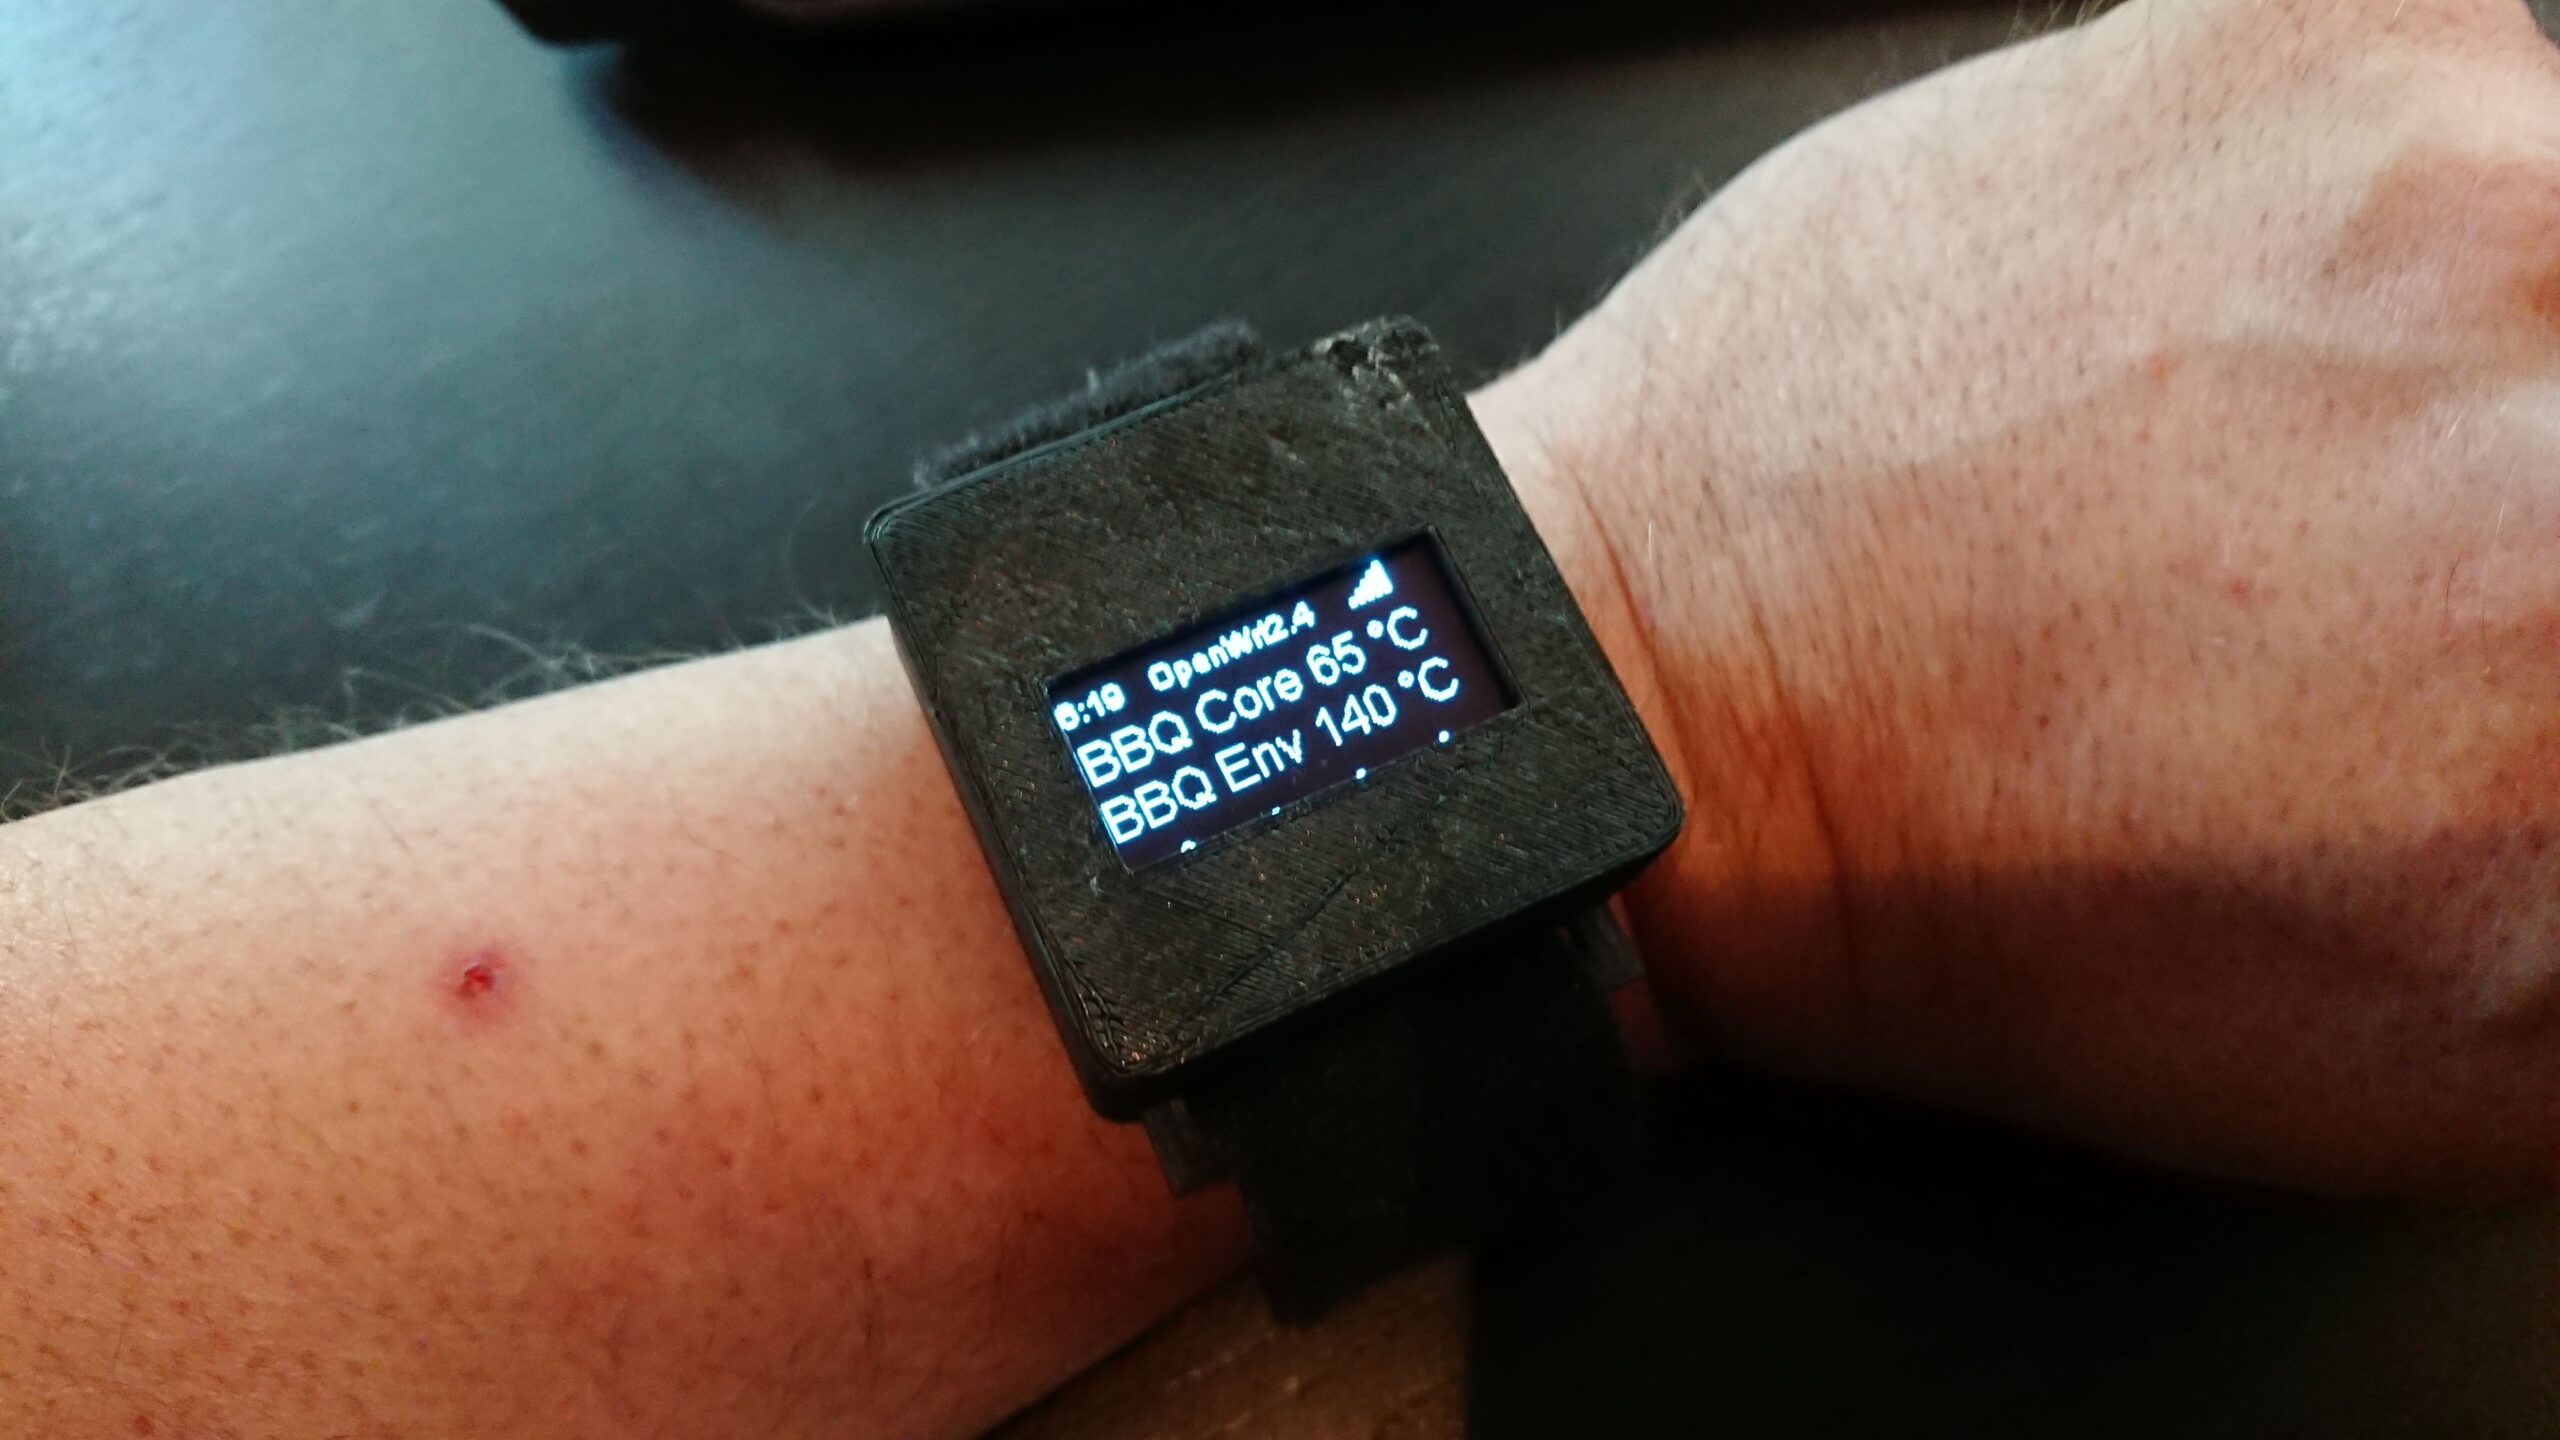
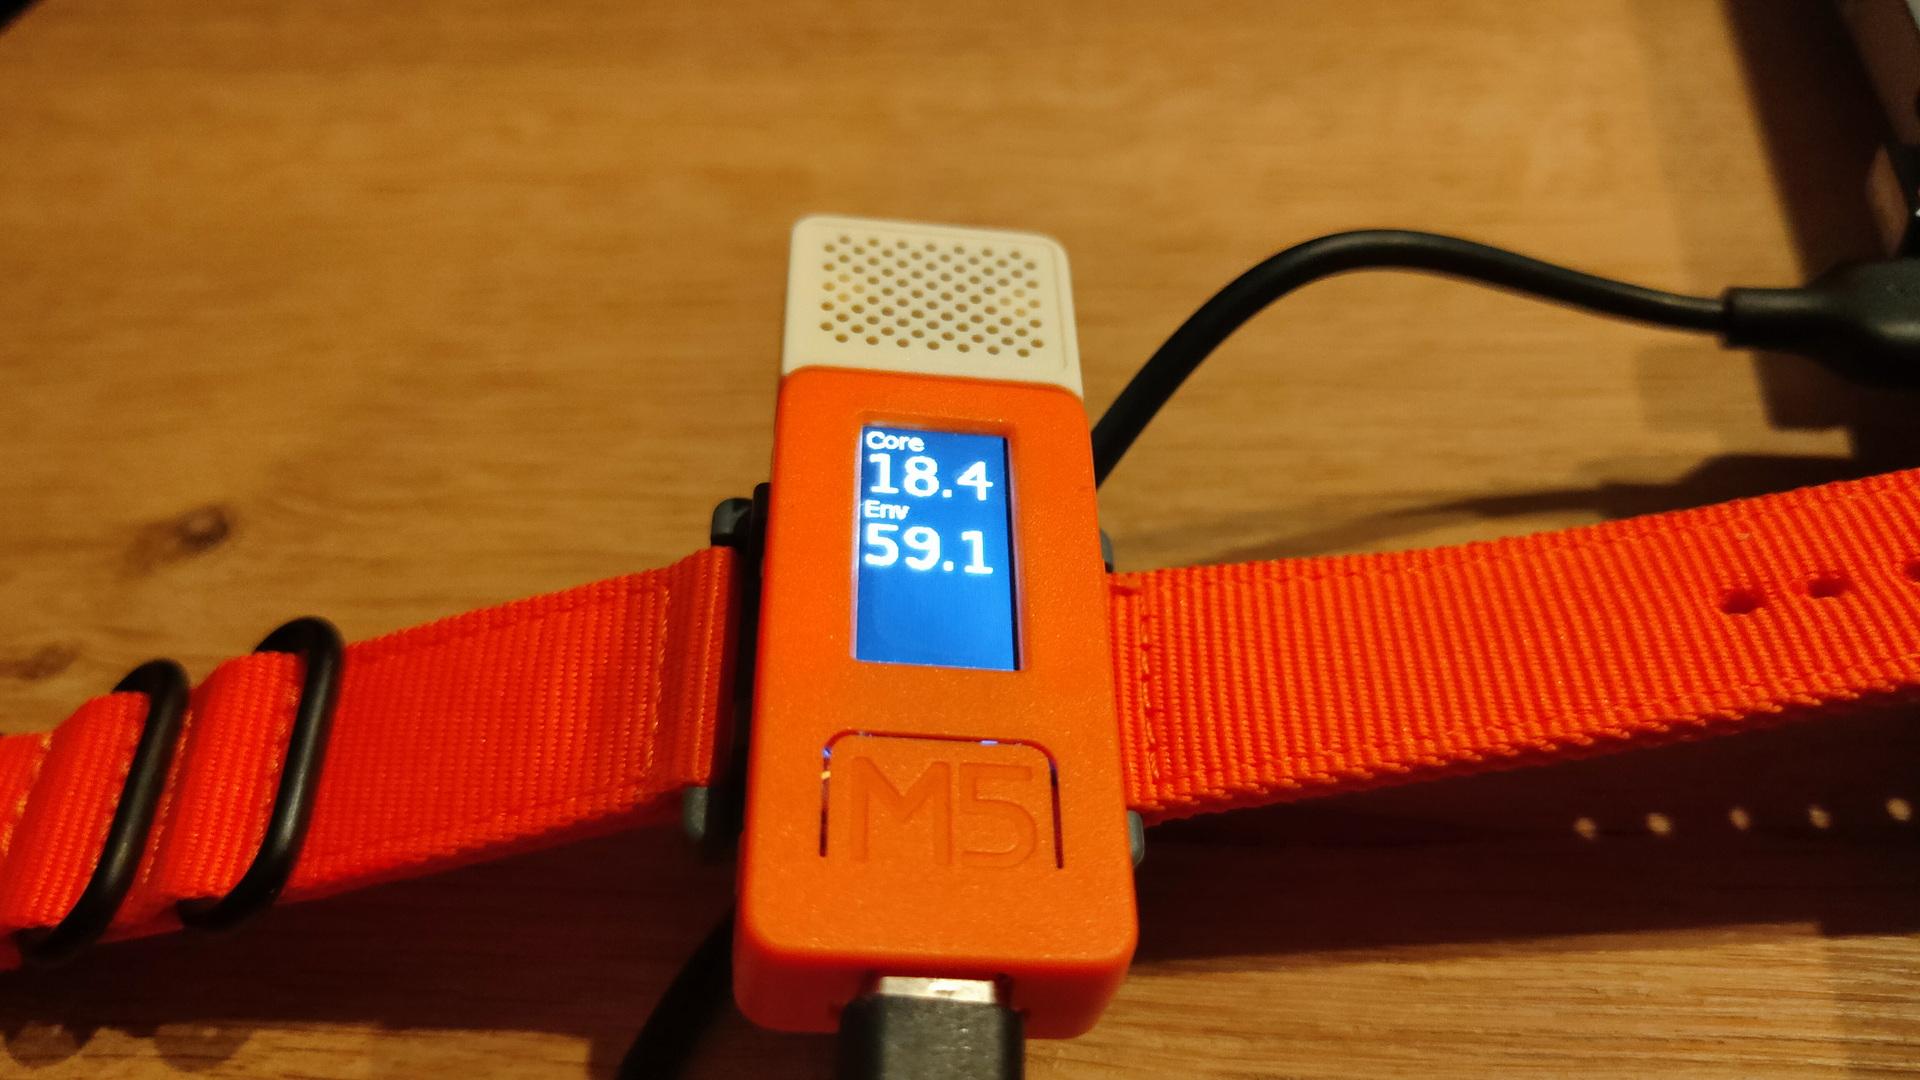
Not posted in the past, new version using ESPHOME and a m5stickc
Previous version using a ESP12
A “watch” with core and environment temperature of my smoker with a alarm, and button for timers.
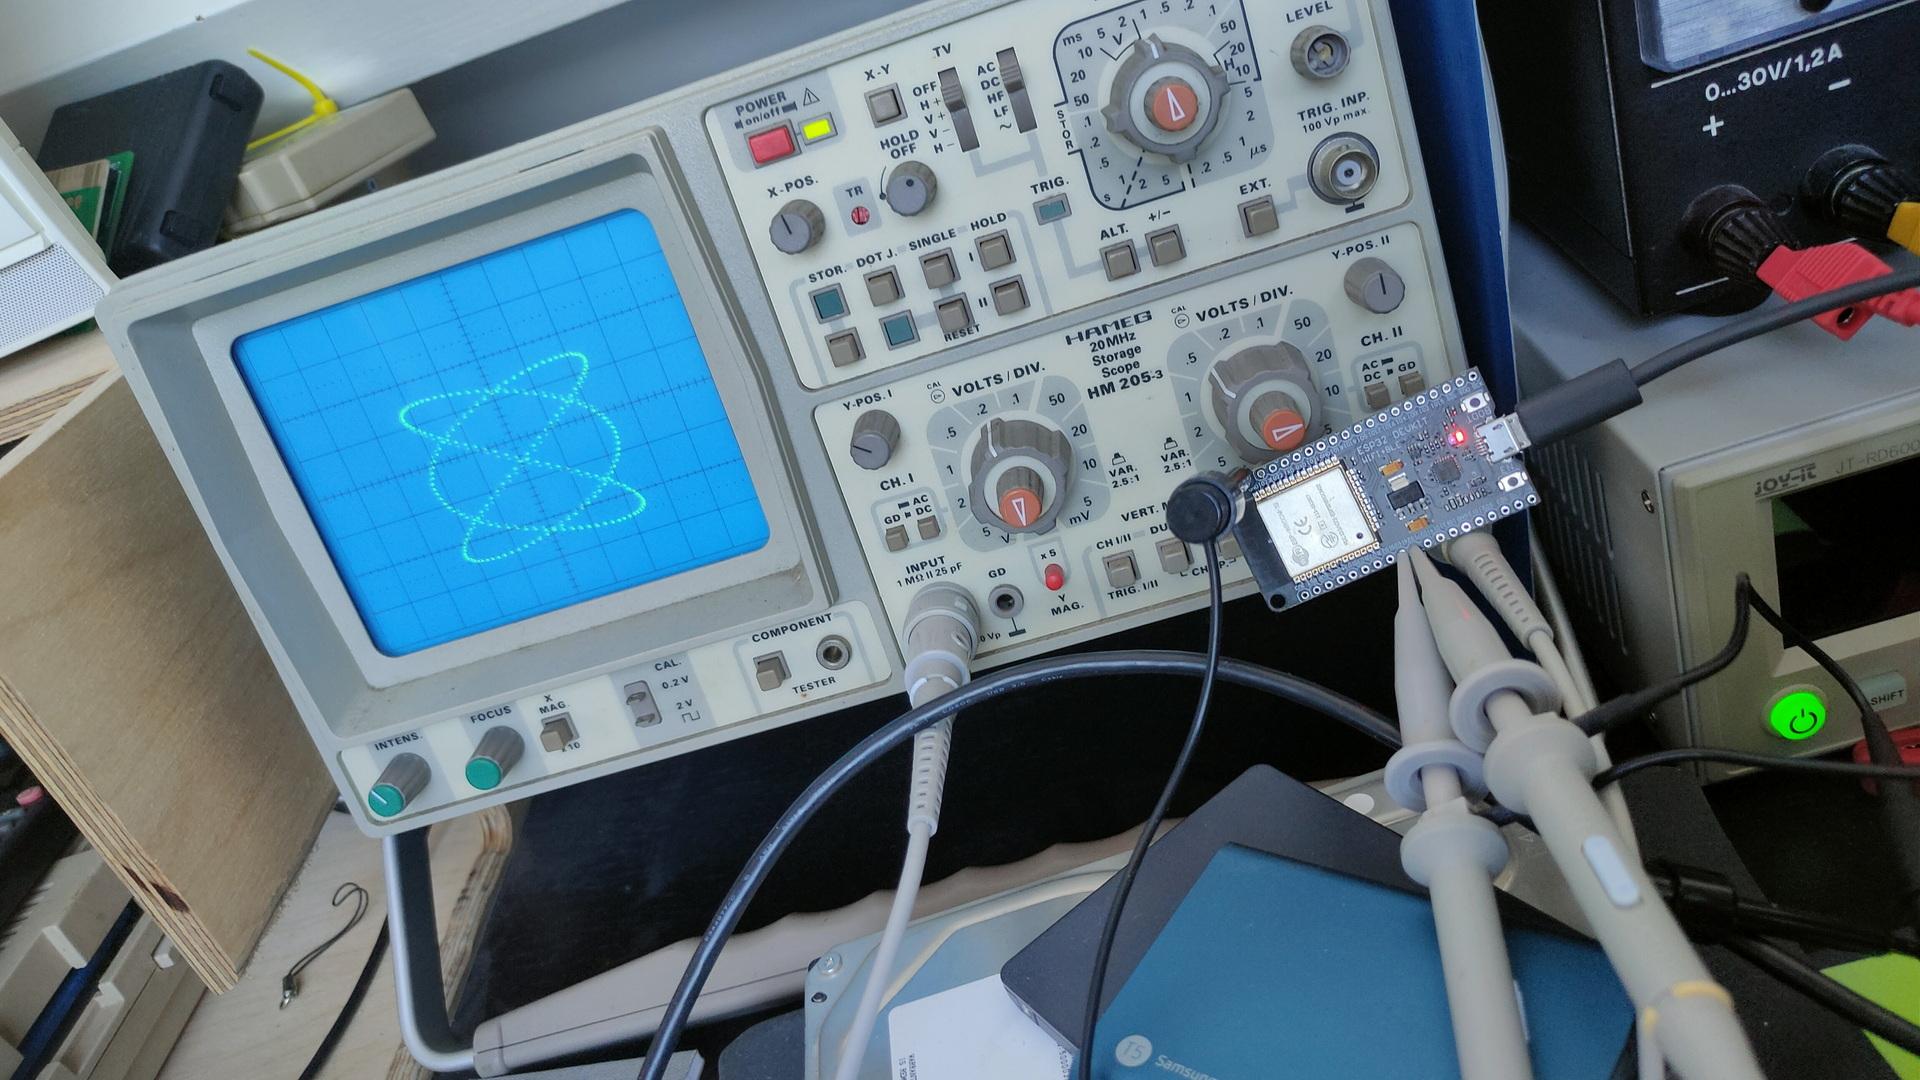
ESP32 dac’s drawing on oscilloscope ( no additional components)
ESP32 in front of scope, two clips for x and y
For above i used sin/cos functions 2:3, which creates Lissajous figures. See: https://www.henriaanstoot.nl/1992/01/01/oscilloscope-graphics-using-a-amiga-bonus-vectrex/
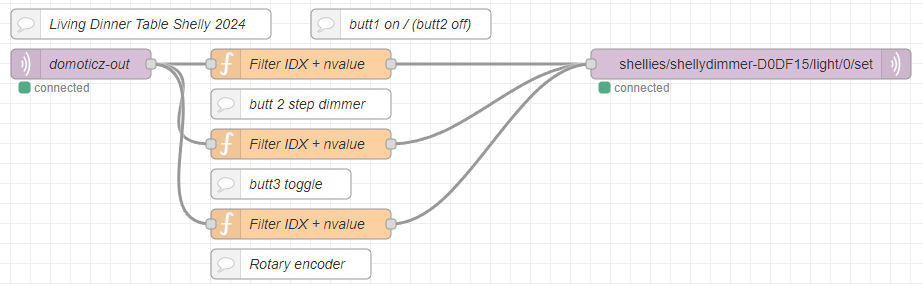
3 battery operated buttons (no wires needed) to control my shelly dimmer at the dinner table.
left button on, middle steps per 20% and 3rd button off. (This cheapass button only sends ON commands)