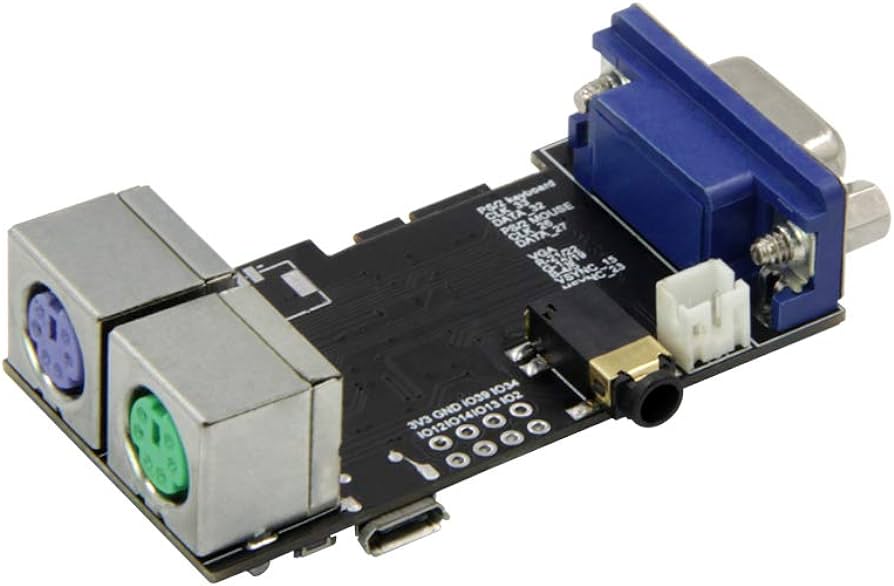
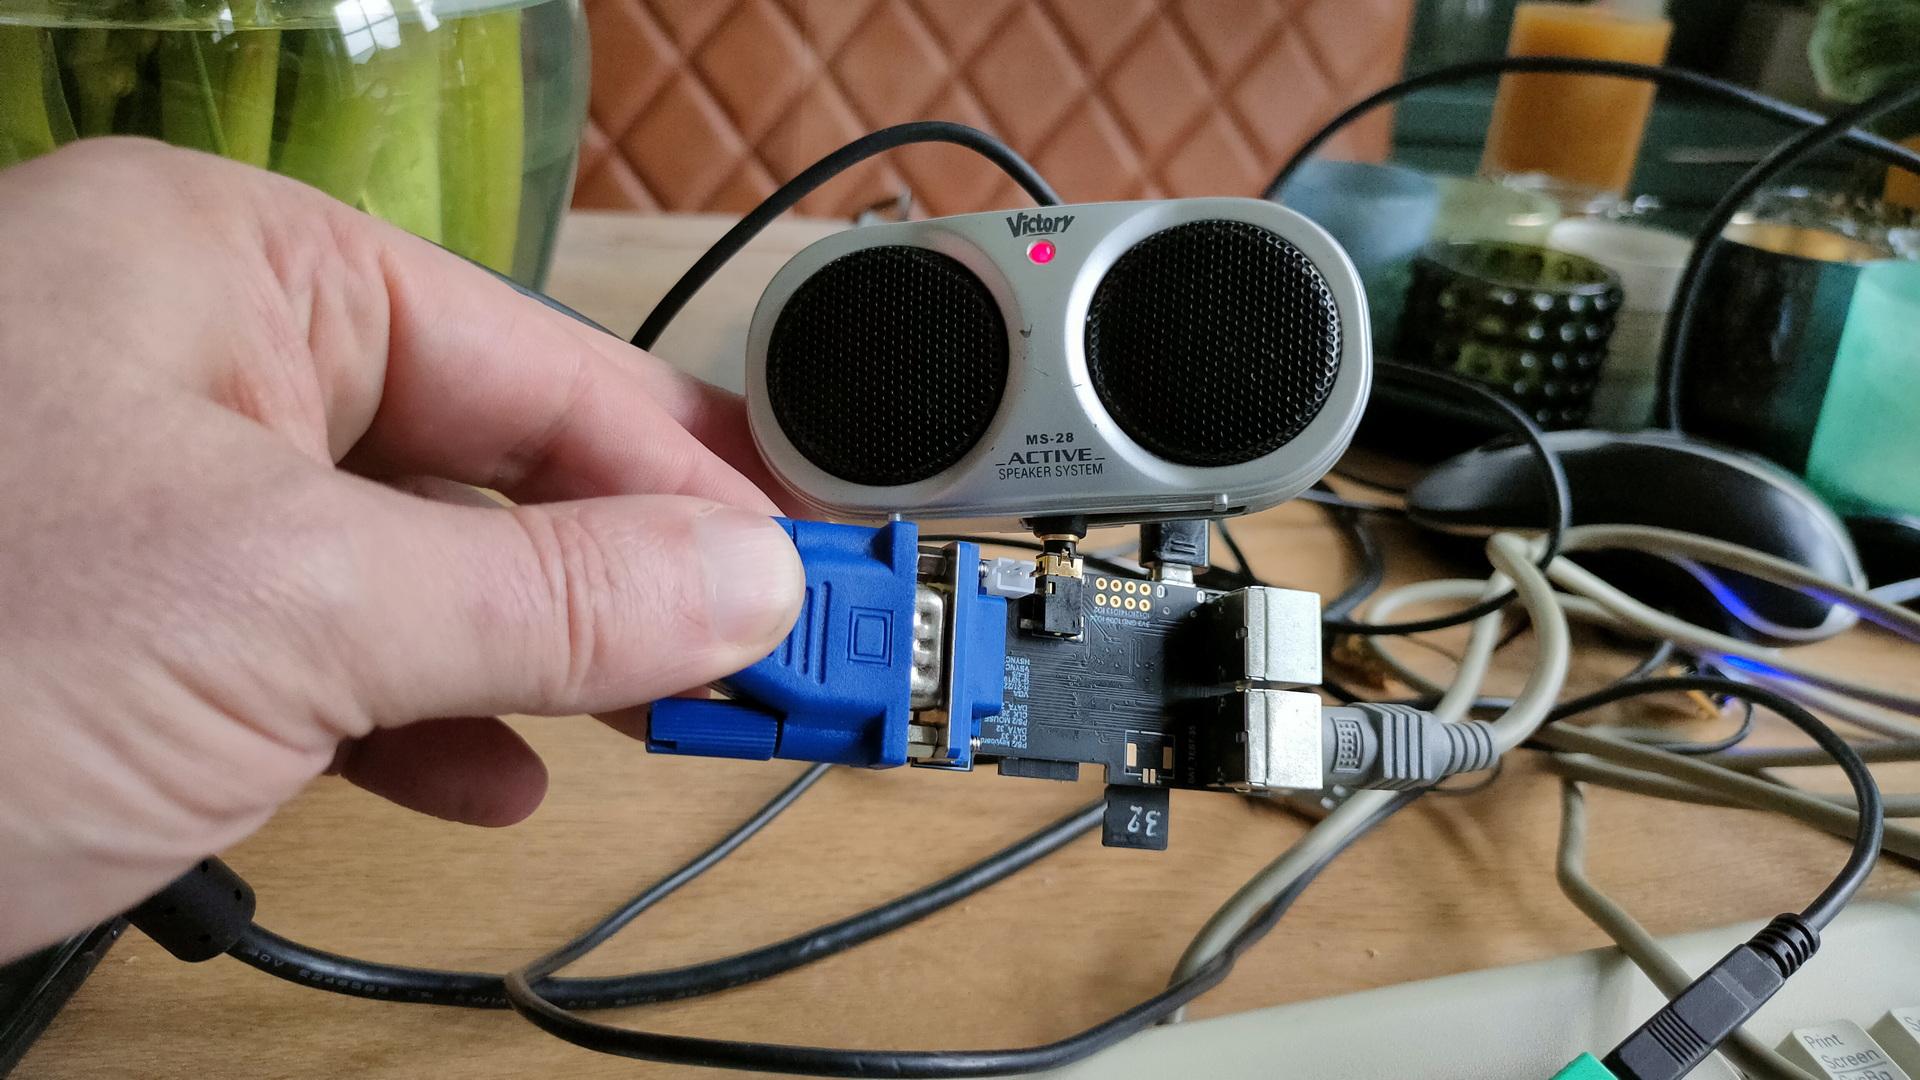
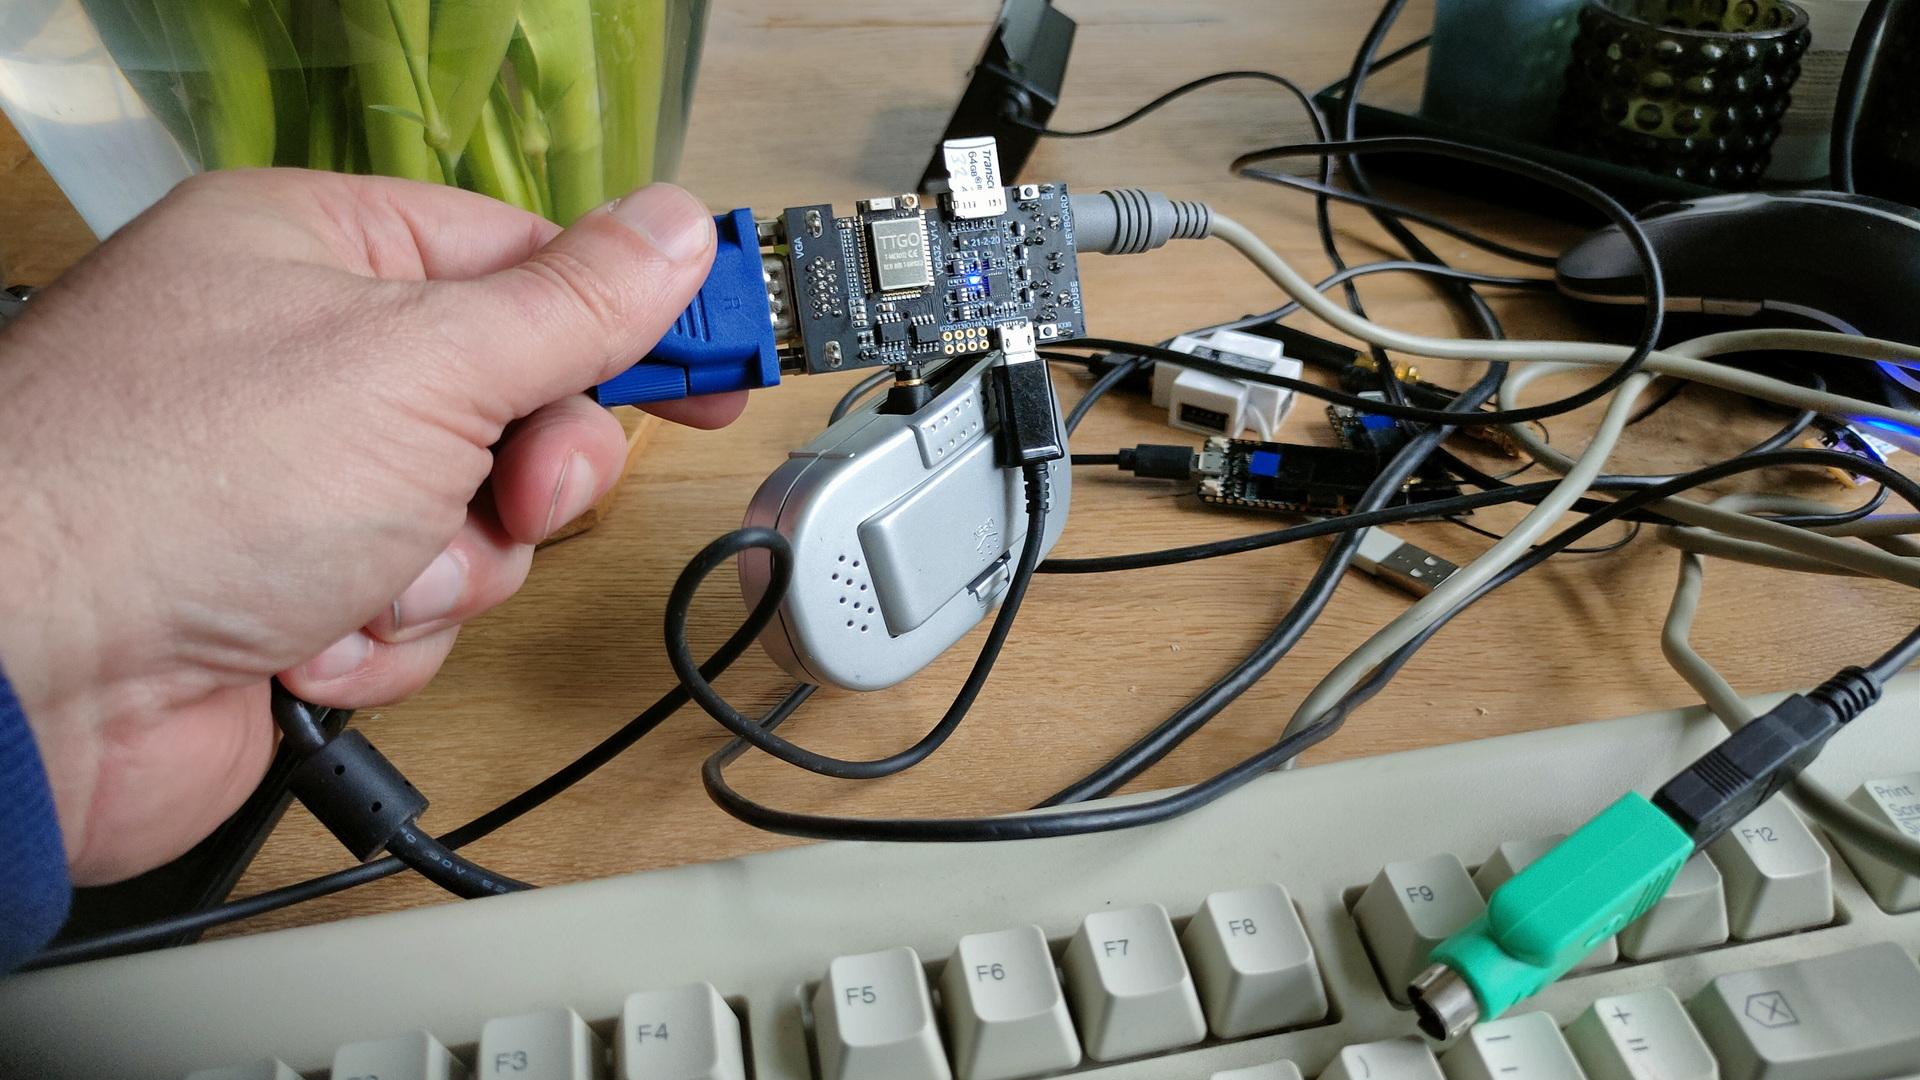
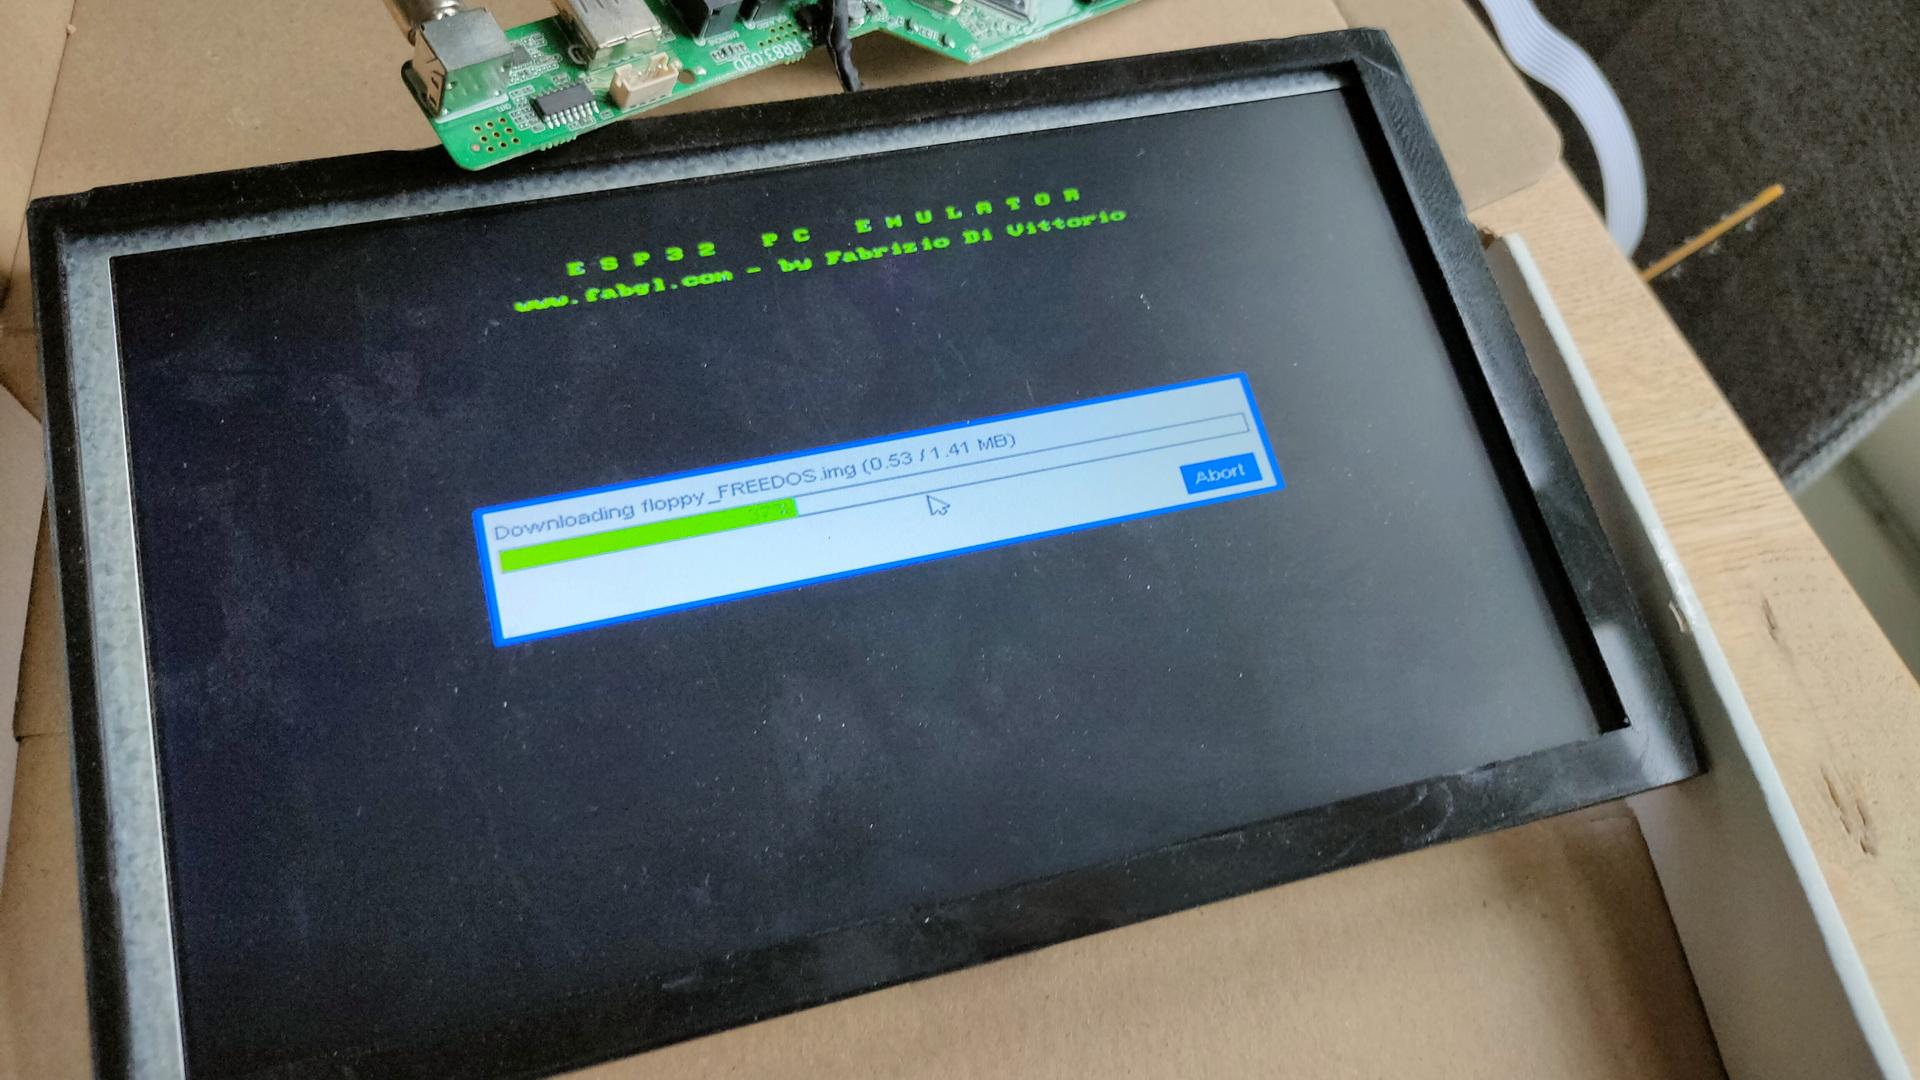
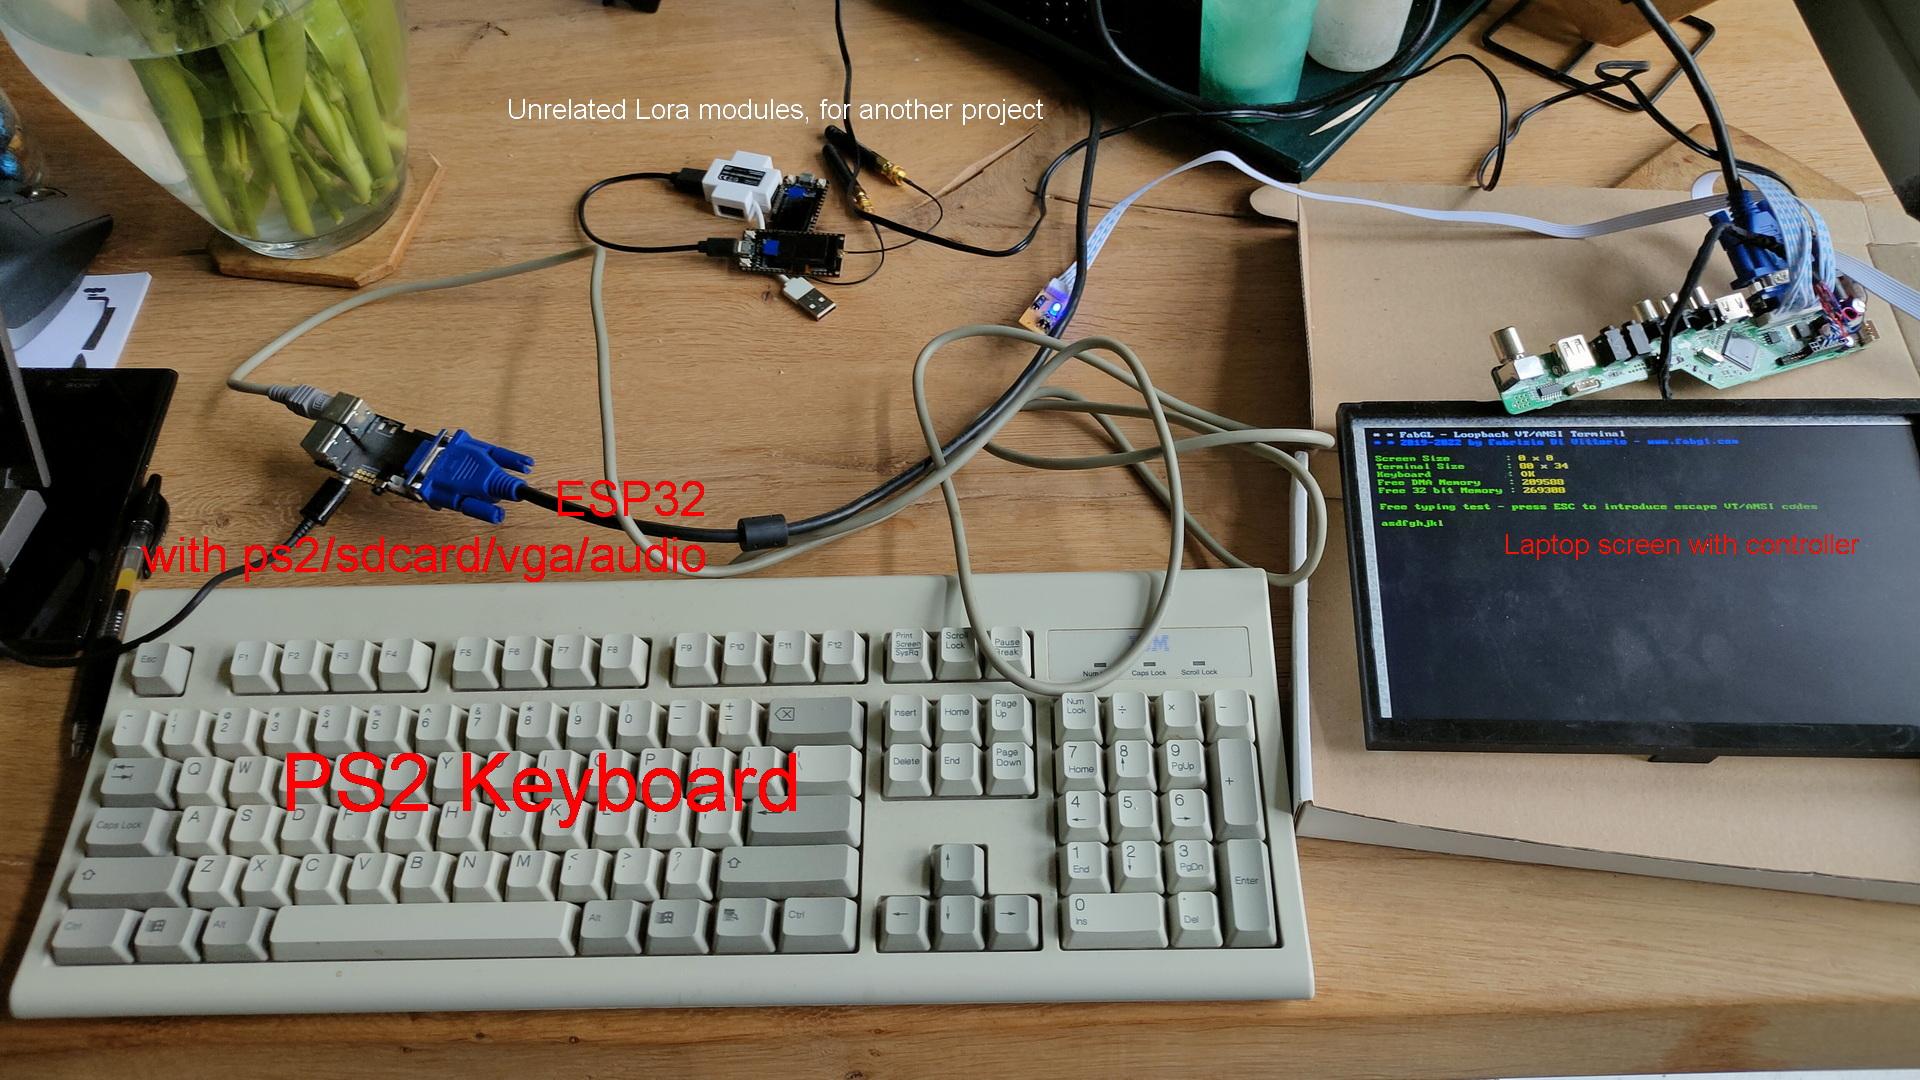
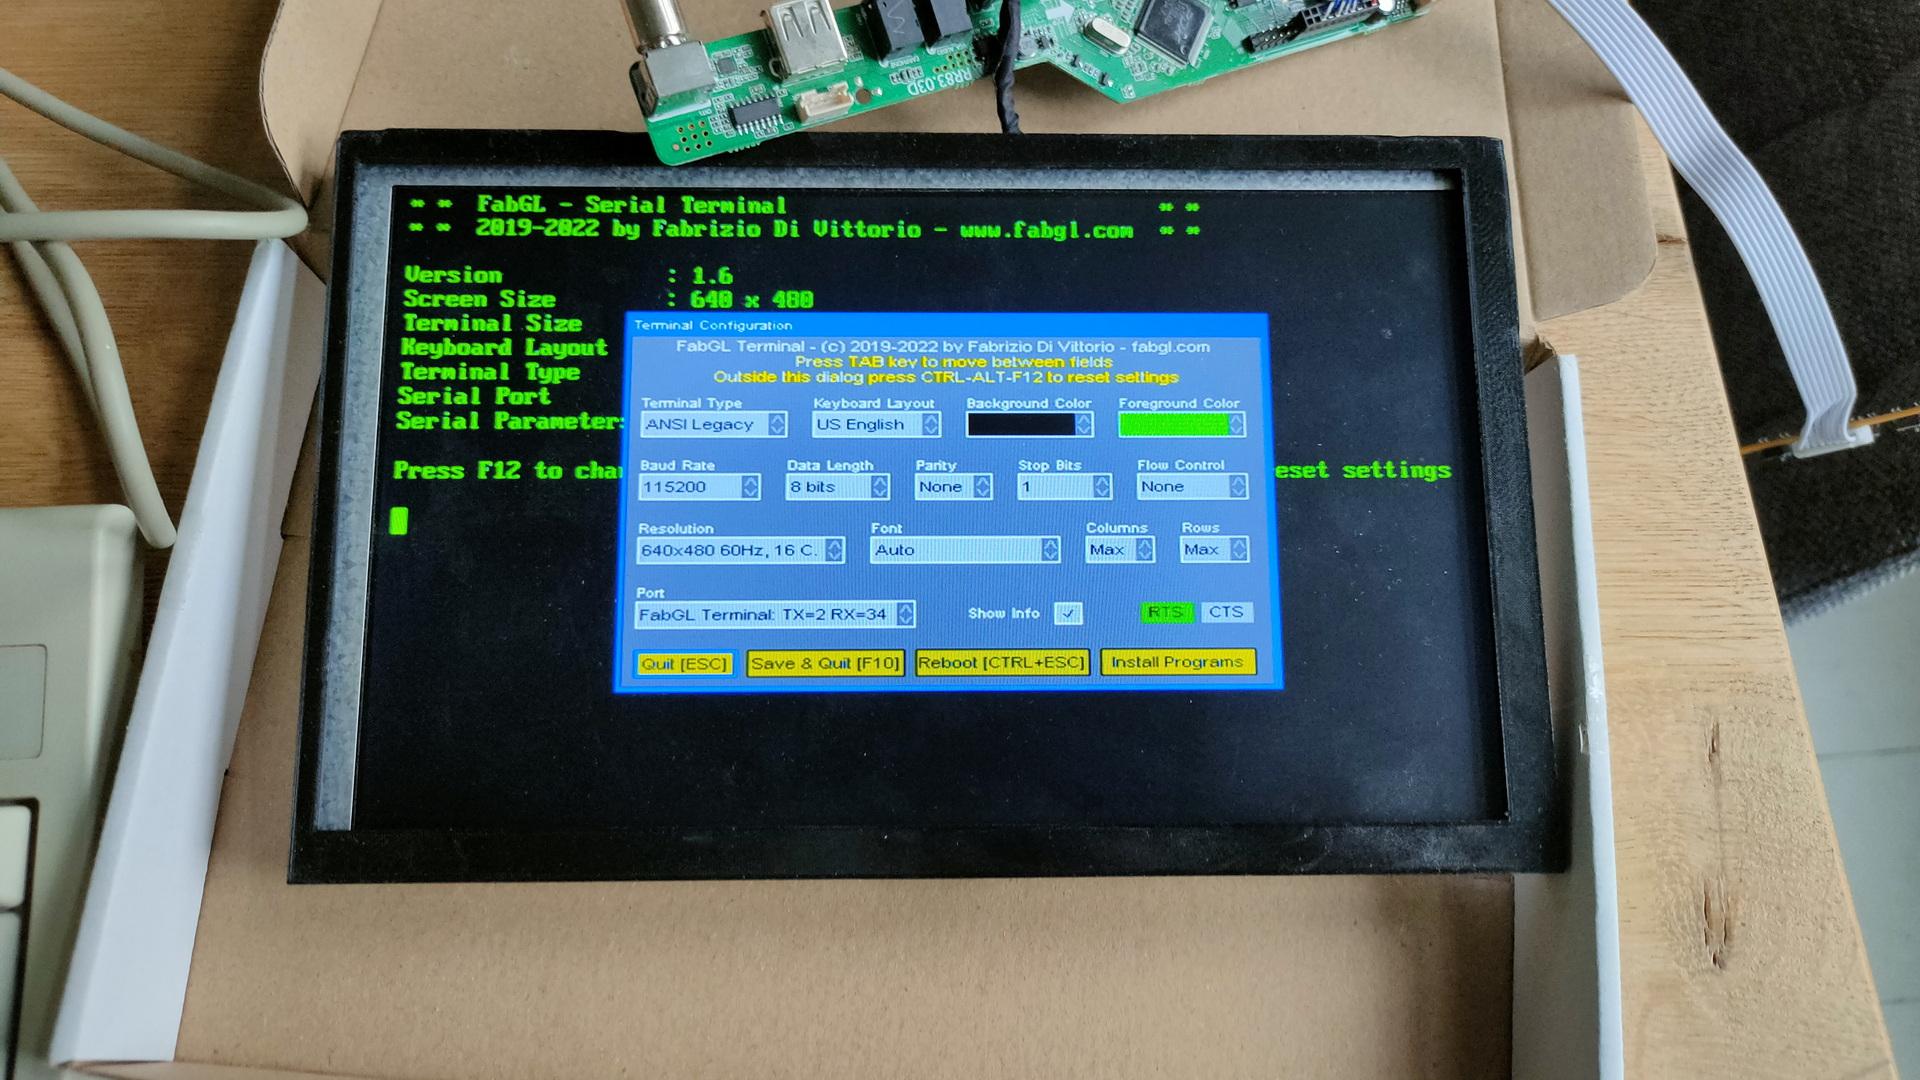
Using the Libraries from Fabrizio Di Vittorio, named FabGL, you can transform this device into a dumb terminal, game device, VIC-20, a 8086 pc and more. There are even some projects to turn this into a C64.
Some generic testing using sound and DOS
But the main thing I want to do: A simple terminal. (I probably revisit the other options again at a later stage)
Soldered some pinheaders on the device for serialSome terminal testing.
My Wozmon bios has bare minimum support for serial communication, so i have to do some bitbanging. (6502 is using a 6551 ACIA)
Step one, change your main DNS resolver to that one from your provider or 1.1.1.1 (cloudflare)
Goto https://www.hawking.org.uk/ in your browser
Check youtube, facebook and more.
Set you DNS to 8.8.8.8 (google)
Do the same (even in a incognito browser).
I haven’t seen a Hawking recommendation on YT for ages, I just checked a website with information on another machine. And my YT stream showed …. Stephen Hawking!
Below is a solution when you want to stream IP camera’s in Kodi/Libreelec .
You can push these commands using Nodered, Bash script or whatever.
First make some camera scripts in your profile directory.
Examples:
# Kodi on Linux/Raspberry
# Place a file cam1.m3u in .kodi/userdata/profiles/(kodiprofile)/playlists/video/
rtsp://admin:secretpass@192.168.1.123:88/videoMain

#and another one in cam2.m3u (another example mjpeg example)
http://192.168.1.124:8000/stream.mjpg

#For windows it is in
C:\Users\(Username)\AppData\Roaming\Kodi\userdata\profiles\(kodiprofile)\playlists\video
Enable http access in Kodi and run the playlist using curl
curl -i -X POST -H "Content-Type: application/json" -d '{"jsonrpc":"2.0","method":"Player.Open","params":{"options":{"shuffled":false,"repeat":"off"},"item":{"file":"special://profile/playlists/video/cam2.m3u"}},"id":"1"}' http://KODISERVERIP:8080/jsonrpc
A bash loop script
while true; do
curl -i -X POST -H "Content-Type: application/json" -d '{"jsonrpc":"2.0","method":"Player.Open","params":{"options":{"shuffled":false,"repeat":"off"},"item":{"file":"special://profile/playlists/video/cam1.m3u"}},"id":"1"}' http://KODISERVERIP:8080/jsonrpc
sleep 10
curl -i -X POST -H "Content-Type: application/json" -d '{"jsonrpc":"2.0","method":"Player.Open","params":{"options":{"shuffled":false,"repeat":"off"},"item":{"file":"special://profile/playlists/video/cam2.m3u"}},"id":"1"}' http://KODISERVERIP:8080/jsonrpc
sleep 5
done
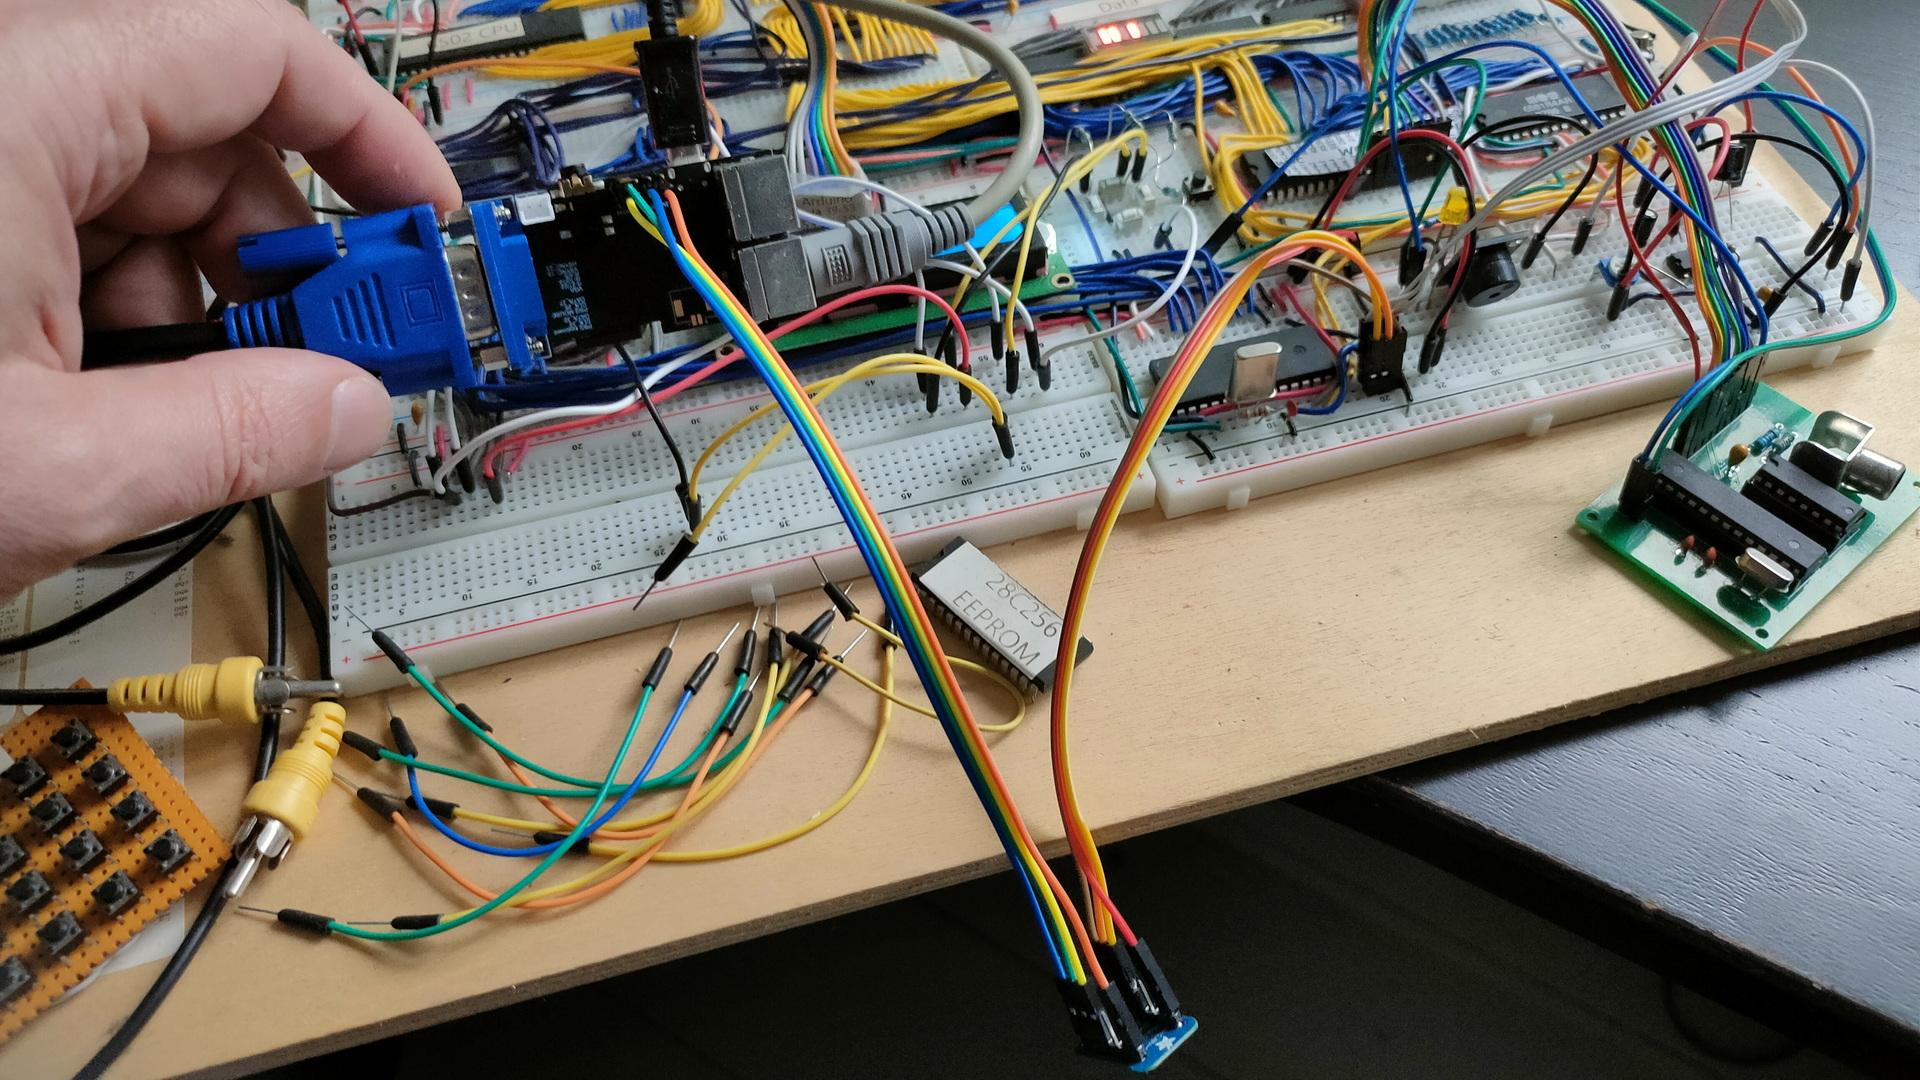
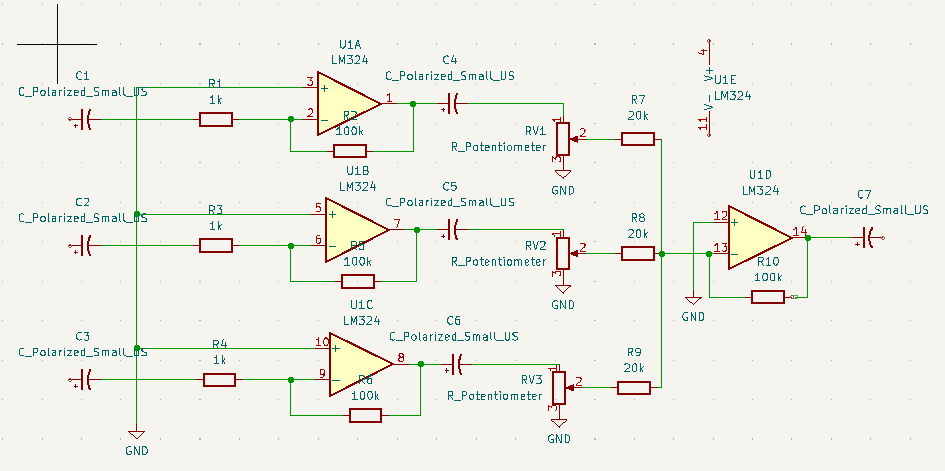
At the back the 8 pin single channel lm368 amplifier. At the front the 3 channel setup. I still have to tweak the resistors, and potmeters. Then I can make a permanent PCB, and figure out the connections to the 6502.
At the moment, the Arduino Nano is playing some real sound samples by using the registers of the sound chip. The music is being played by sending the register dumps directly to the chip.
Much like i’ve been using SID register dumps to play songs in another project.
This is version 0.1 .. do not use. If its wrong, or can do better please mail me. Oh it needs a 1k resistor from the 20K’s to ground I think.
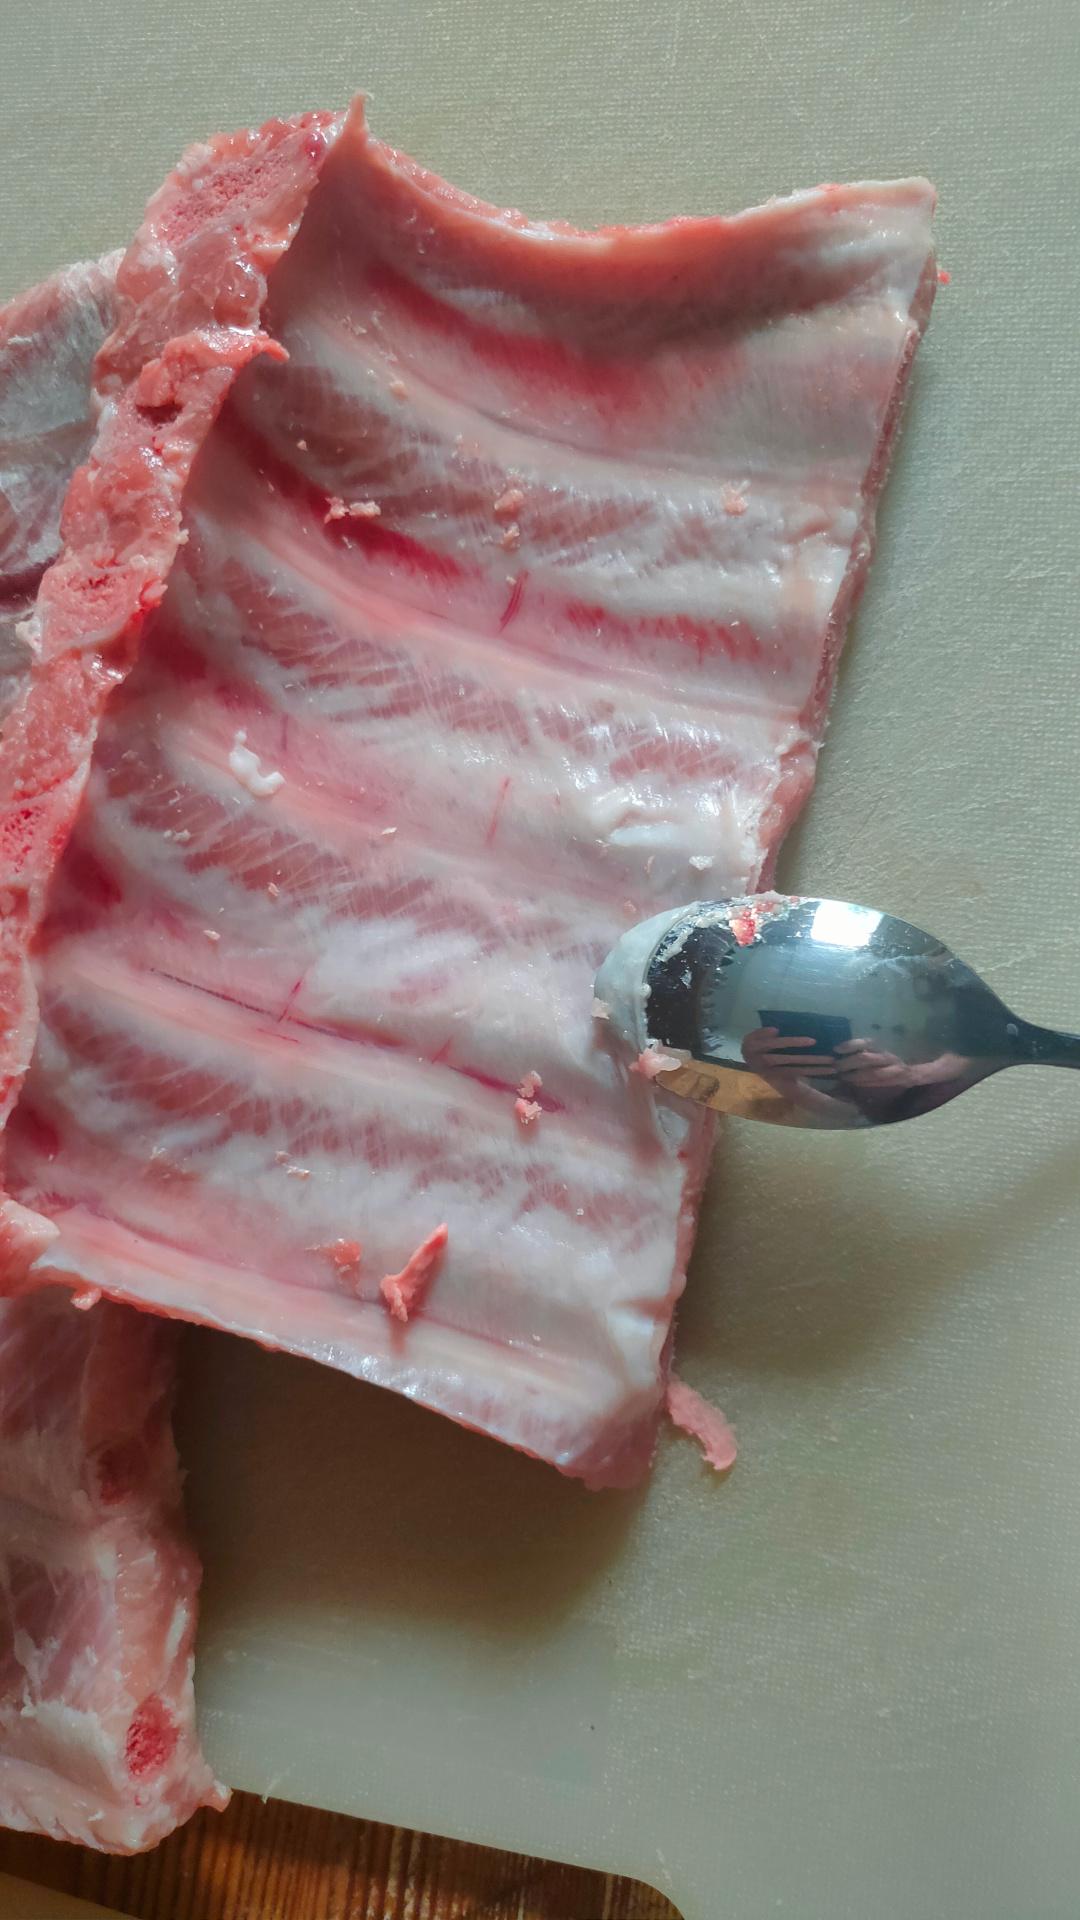
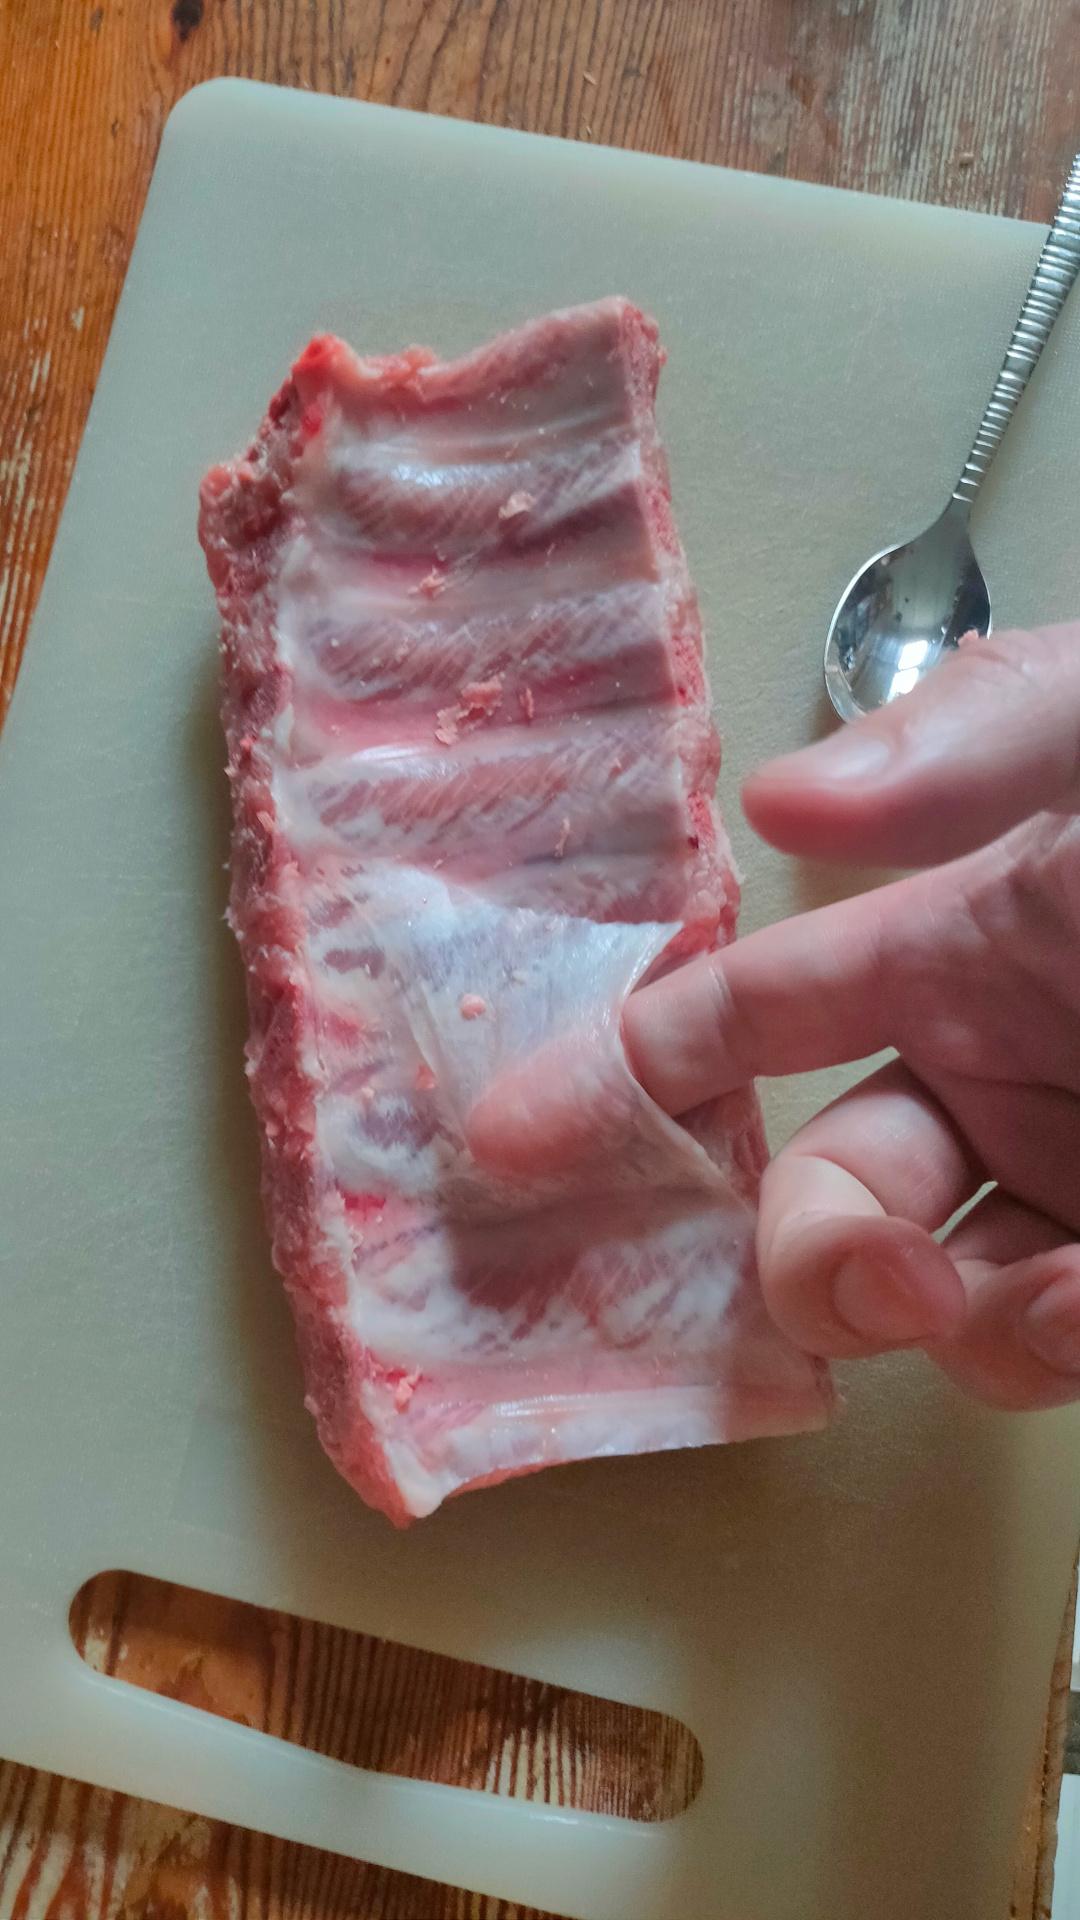
Use a little spoon NOT a knifeGet your fingers underneath the membranePreparing the ribs, getting the membrane off.
This time I used a rub with the following ingredients: Seasalt, garlic, brown sugar, mustard seeds, paprica, cilantroseeds, black pepper, red pepper, oregano, thyme and cumin.
Doing a simple 3-2-1 smoke session, so .. what to do in dose 6 hours?
Lets make something using a Sense hat and Python. Same HAT I used for my xmas ornament thingy in our tree.
Generate a large maze (80×80 for now)
Paint the maze using colors on the SenseHat
Read joystick movement and scroll the maze accordingly, keeping the player in the middle
Now I have to paint my ribs with BBQ sauce, and leave it in the smoker for yet another hour. (Nice glazing)
Next steps for the maze:
Use a better way to generate (reverse backtracking as I made for my other maze thing)
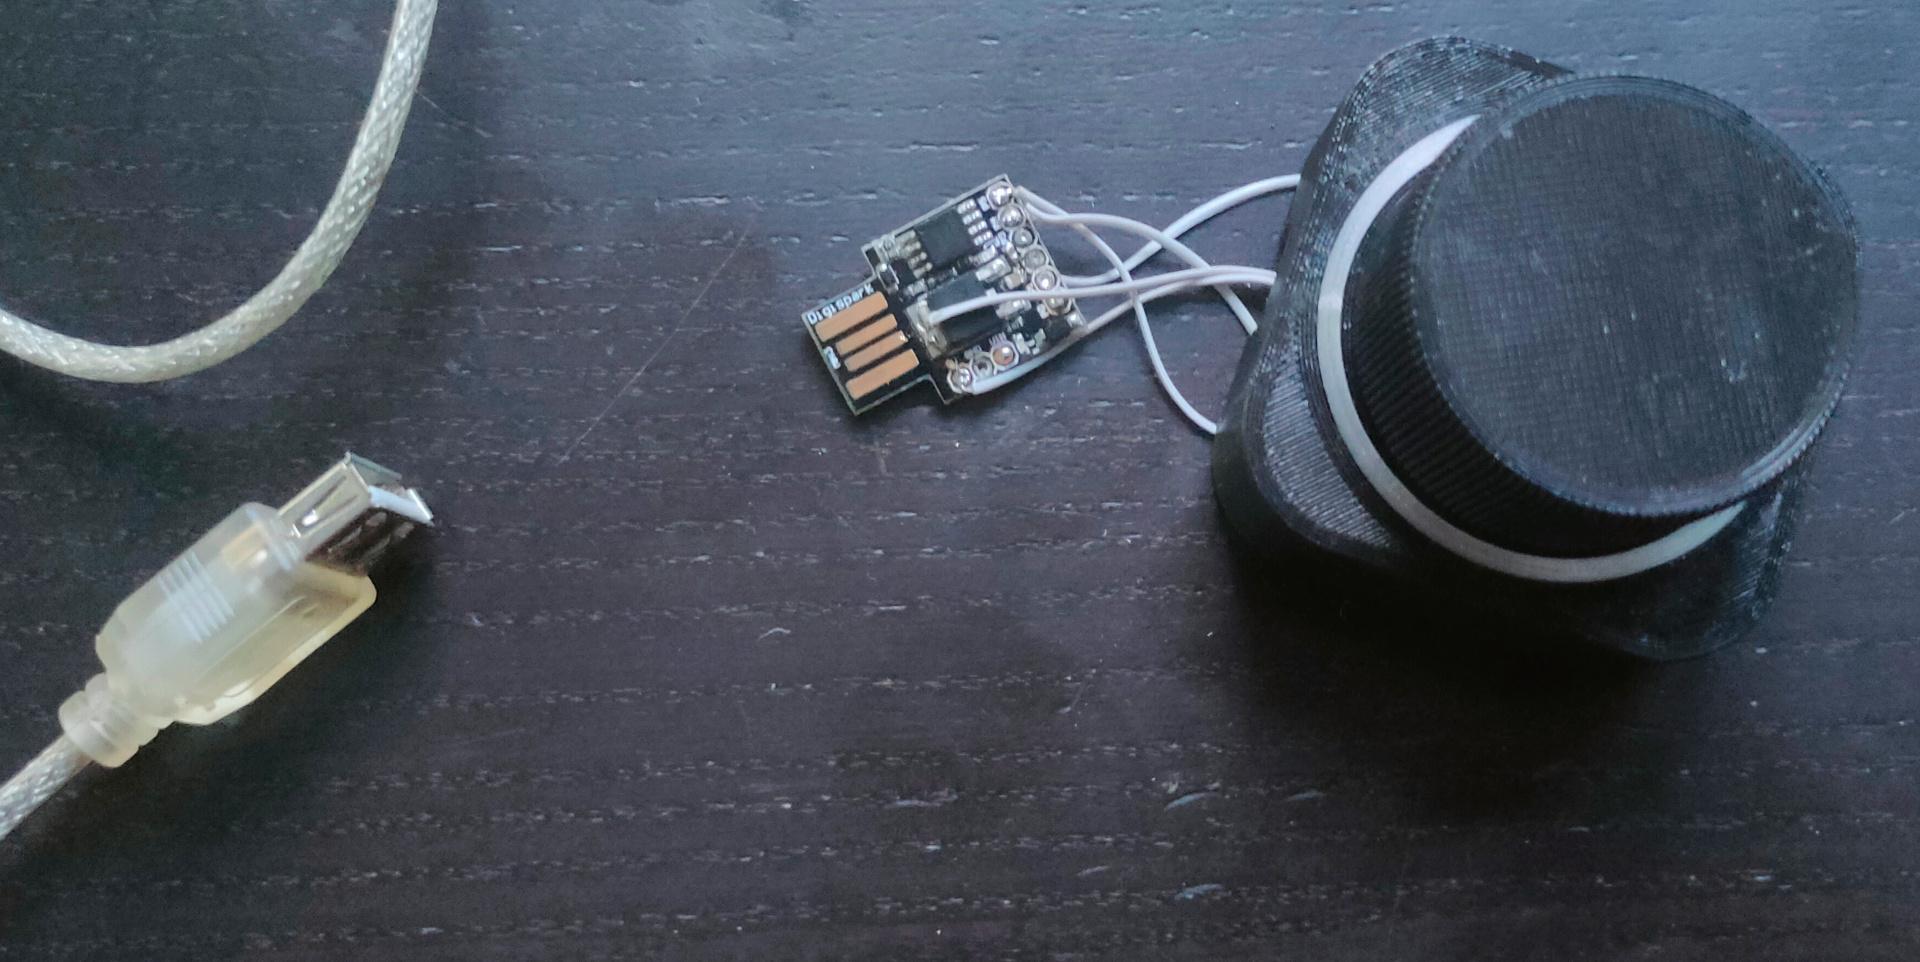
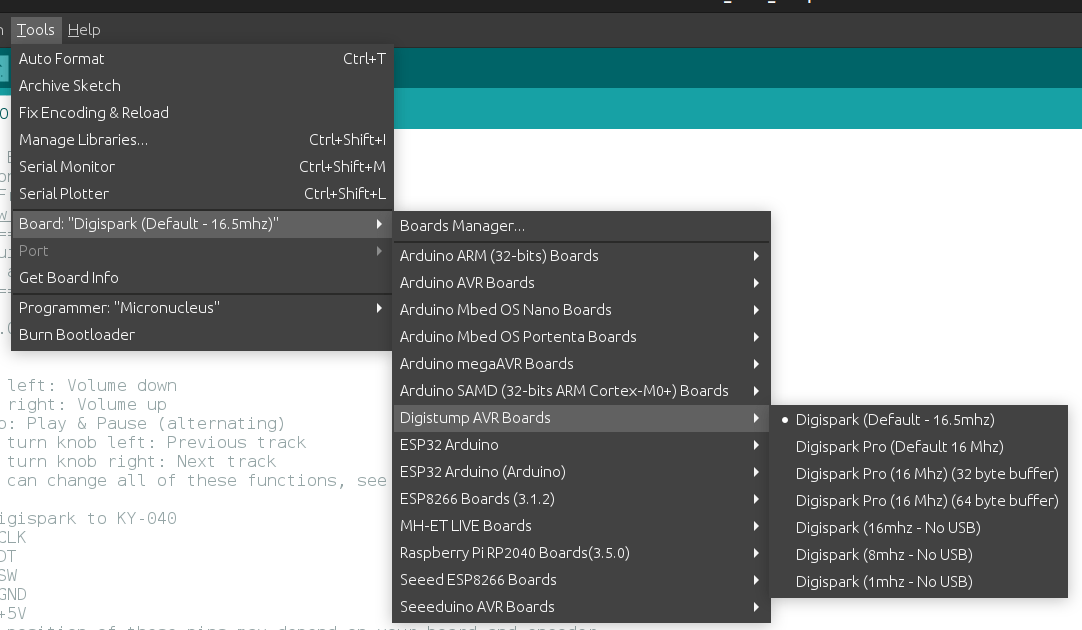
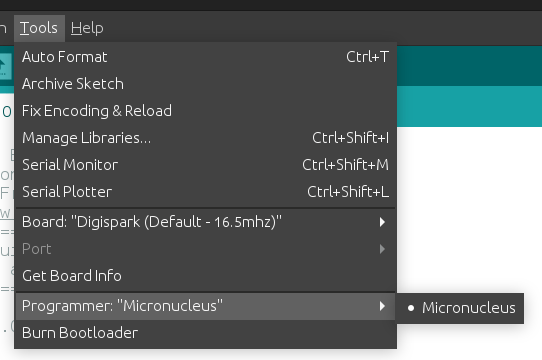
The old way of flashing using Arduino IDE (for digispark)
Install Boards using : preferences, add board URL http://digistump.com/package_digistump_index.json
Change Board and programmer, YOU won’t have to select a USB device!
Note: There being no regular USB device, you need to add some udev rules. cat /etc/udev/rules.d/digispark.rules SUBSYSTEM==”usb”, ATTR{idVendor}==”16d0″, ATTR{idProduct}==”0753″, MODE=”0660″, GROUP=”dialout”
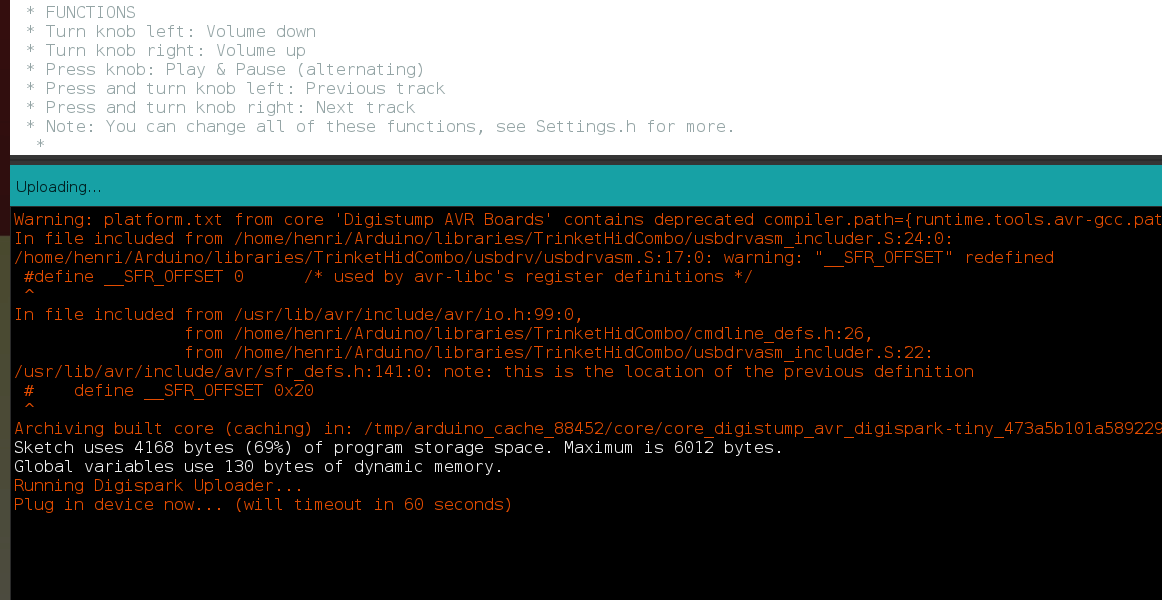
When compiling and uploading the program, you get a message to plug in the device. See below screenshot.
Now the 2024 change. Reason to change:
Want to have USB-C
Python to get a more flexible setup
I want to use more pins, so I can add LEDs and more buttons.
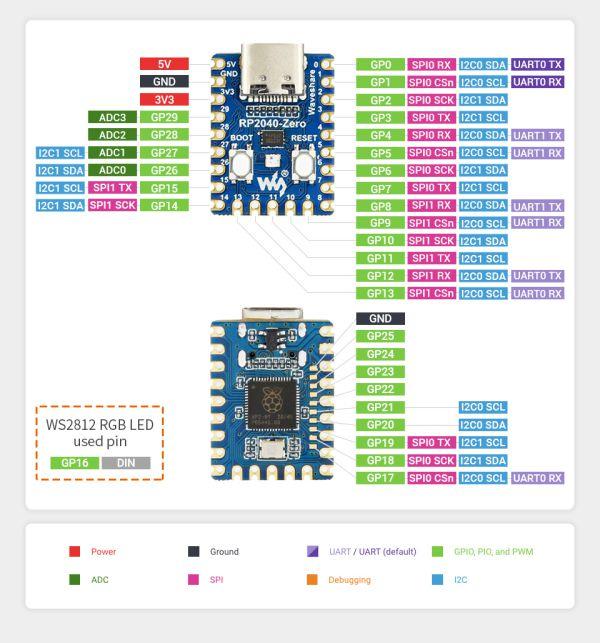
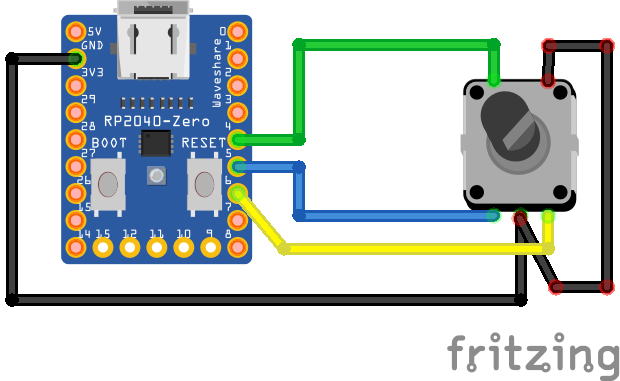
I wanted to play with my Waveshare RP2040 Zero.
This is the first setup, with same functionality as before.
Now I can add more stuff!
Putting the code on the RP2040-zero
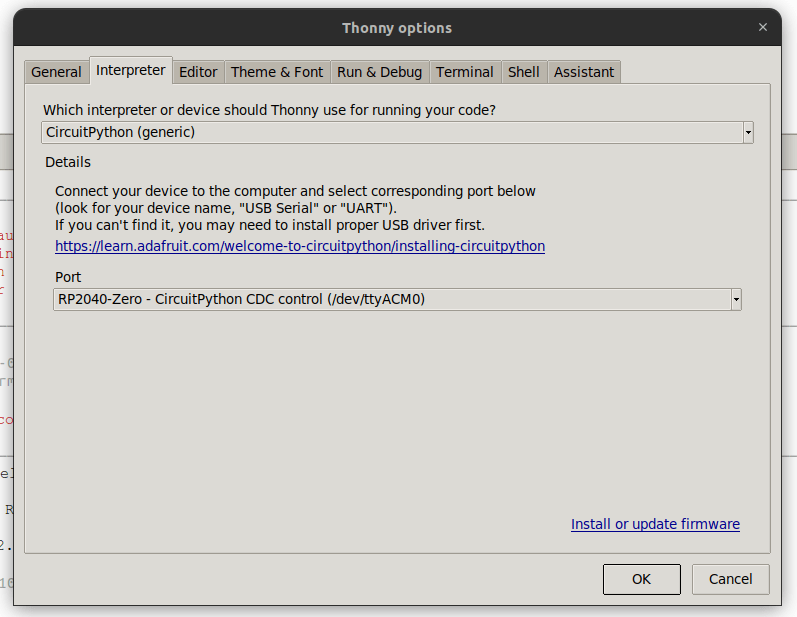
Press boot button and insert into your pc. Download uf2 file from here and save in RP2 drive. https://circuitpython.org/board/waveshare_rp2040_zero/ Open Thonny, and configure interpreter to:
Download the zip file from https://github.com/adafruit/Adafruit_CircuitPython_HID And copy only the subdirectory adafruit_hid to the drive in subdir lib
Open the file code.py from the device, and remove example hello world code. Paste in the following code.
import rotaryio
import board
import time

import board
import digitalio
import usb_hid
from adafruit_hid.keyboard import Keyboard
from adafruit_hid.keyboard_layout_us import KeyboardLayoutUS
from adafruit_hid.keycode import Keycode
from adafruit_hid.consumer_control import ConsumerControl
from adafruit_hid.consumer_control_code import ConsumerControlCode

but = digitalio.DigitalInOut(board.GP4)
but.direction = digitalio.Direction.INPUT
but.pull = digitalio.Pull.UP

cc = ConsumerControl( usb_hid.devices )

encoder = rotaryio.IncrementalEncoder(board.GP5, board.GP6)
last_position = 0
while True:
    position = encoder.position
    if int(last_position) < int(position):
        #print(position)
        command = ConsumerControlCode.VOLUME_DECREMENT
        cc.send(command)
    #last_position = position
    if int(last_position) > int(position):
        #print(position)
        command = ConsumerControlCode.VOLUME_INCREMENT
        cc.send(command)
    last_position = position
    if not but.value:
        command = ConsumerControlCode.MUTE
        cc.send(command)
        time.sleep(0.5)
Above code is the bare minimum, I’ll add more functionality soon. (LEDs and more buttons) Next and Previous Track and mode change. From Audio to Navigation for example.
Some quotes I like to refer to: https://www.henriaanstoot.nl/aboutme/
One of my websites was slow after the whole neighbourhood was without power for a few hours. My lab using dual power, and a UPS went down for a few hours.
After that incident, one of my websites was slow, and it got worse with time. But I never took the time to really look into this problem. Until it was too much .. 8 seconds to TTFB
I’ve checked in the last month:
Hypervisors
Memory
CPU load
Docker instances
Reverse proxy
Bind DNS server
Iscsi storage
10Gbps fibre connections
Database server
iotop latency
So, I was planning to rebuild my WordPress setup. Meanwhile, let’s check some sites for information.
Then I came across WPCast on YouTube. ( How To Fix A Slow WordPress Site – WordPress Speed Optimization Tutorial ) Let’s watch this, while rebuilding my website. All suggestions were in vain.
Until Query Monitor was mentioned.
I soon discovered that the resolving within my docker container was messed up!
2 http api call’s taking a long time.
Rebuild the docker container with my DNS nameserver and a second as fail back.
Fixed.
What did I learn, check all components! Start close to the problem source.
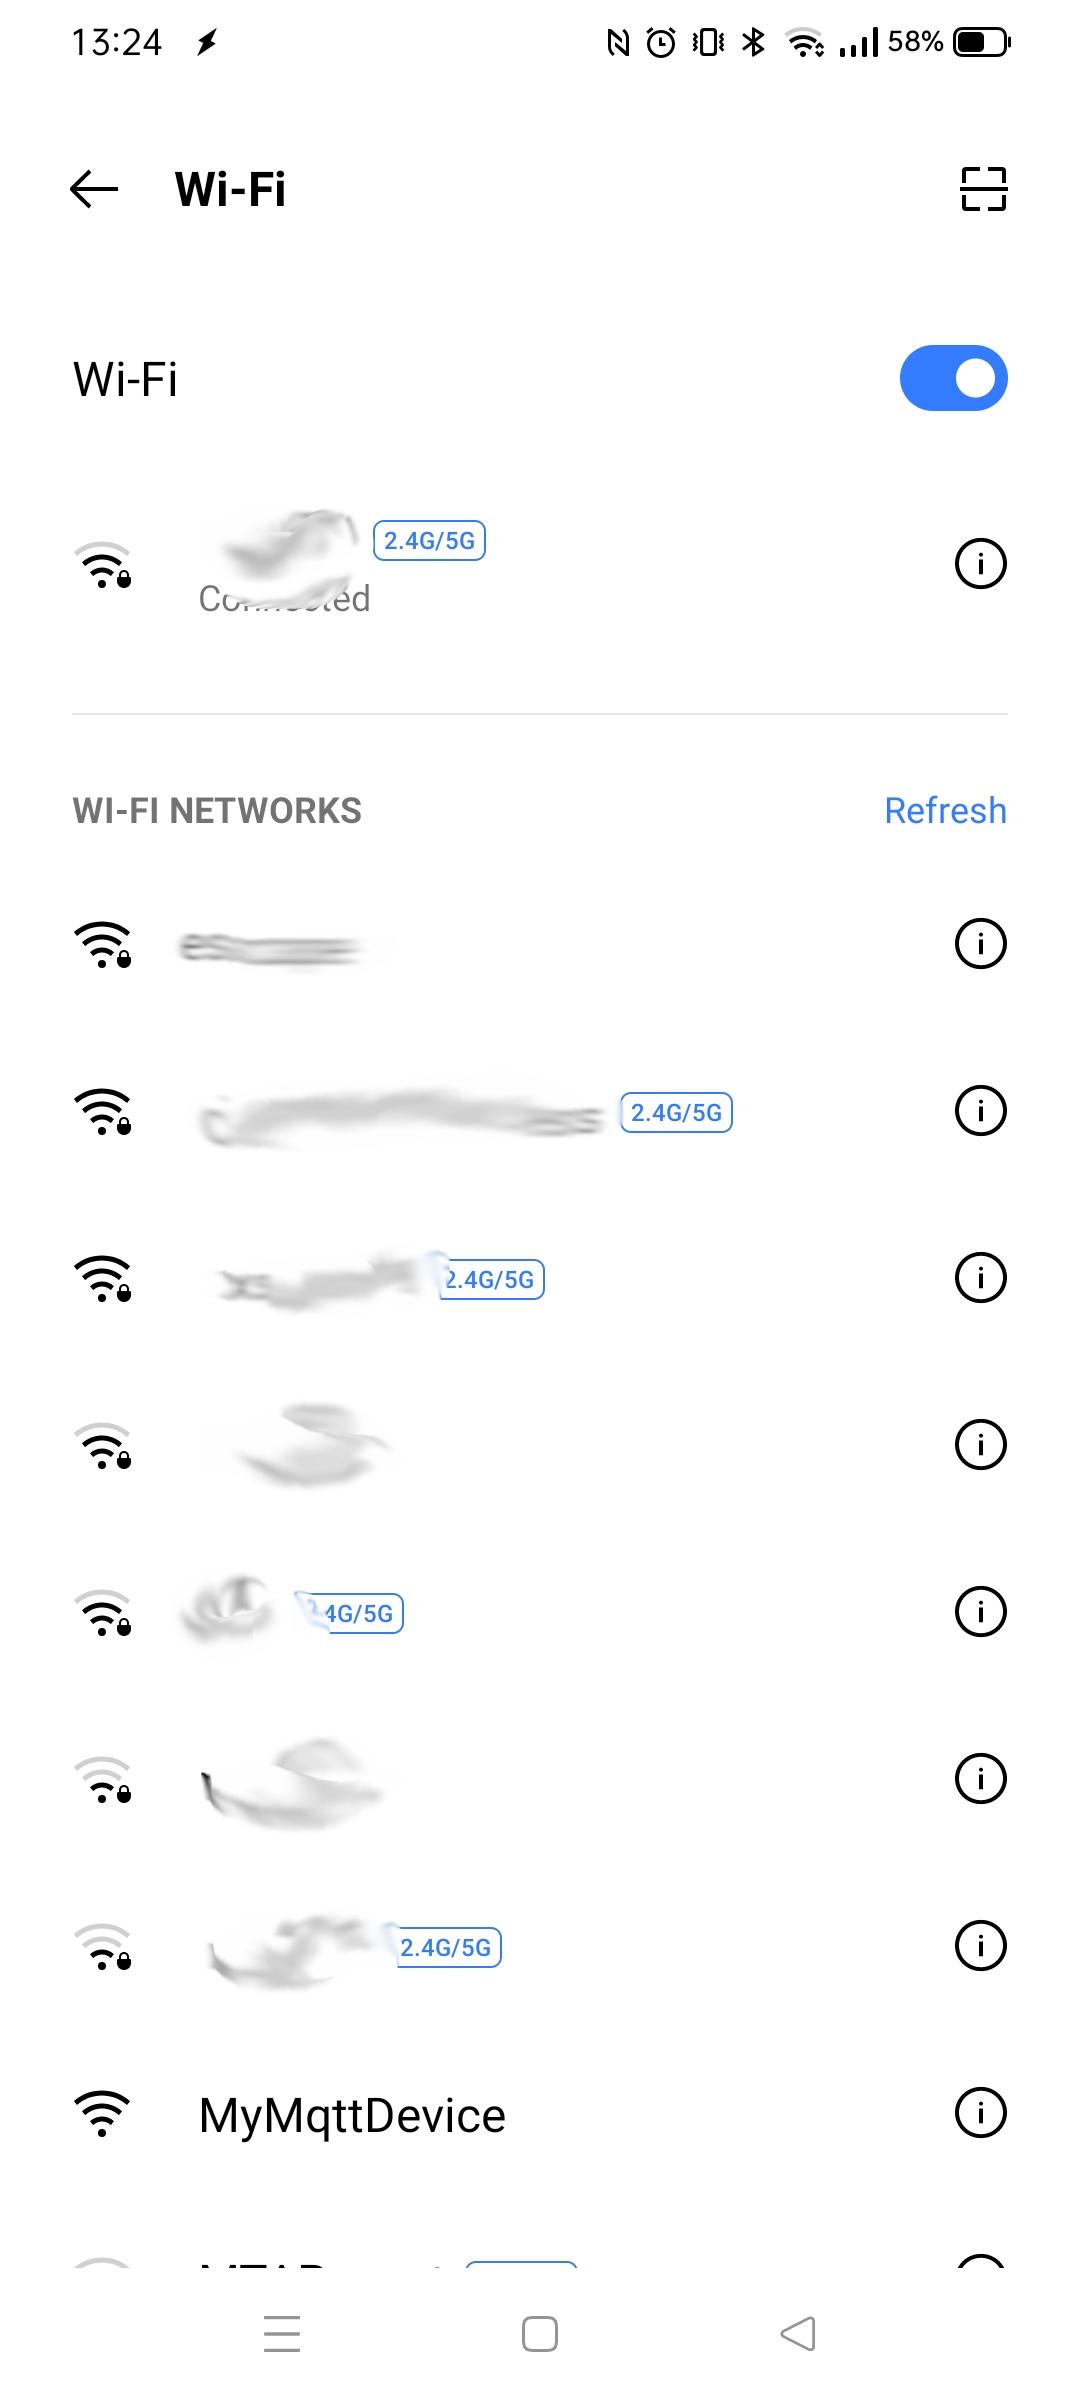
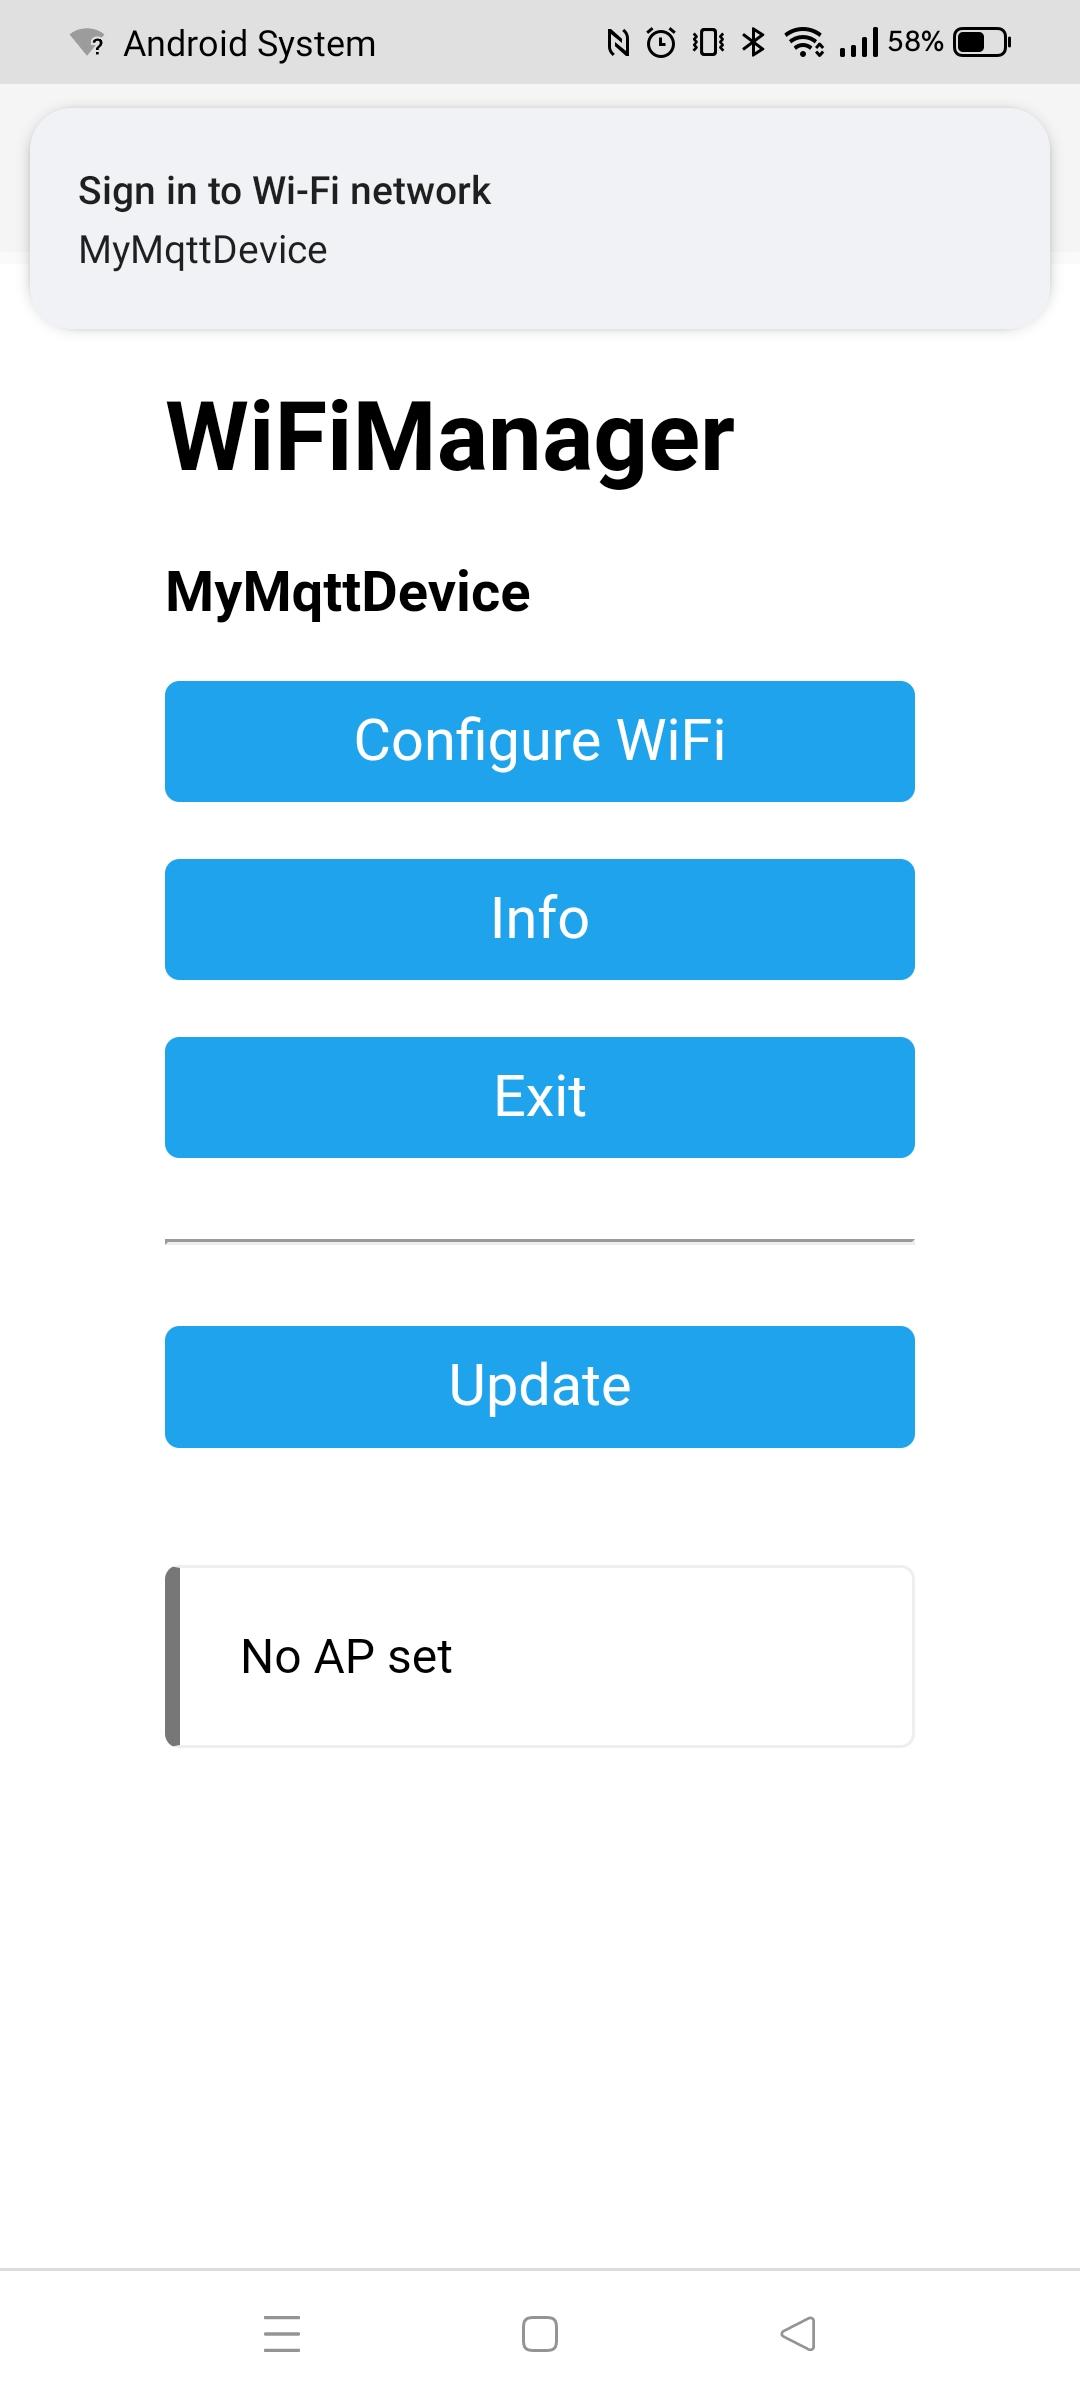
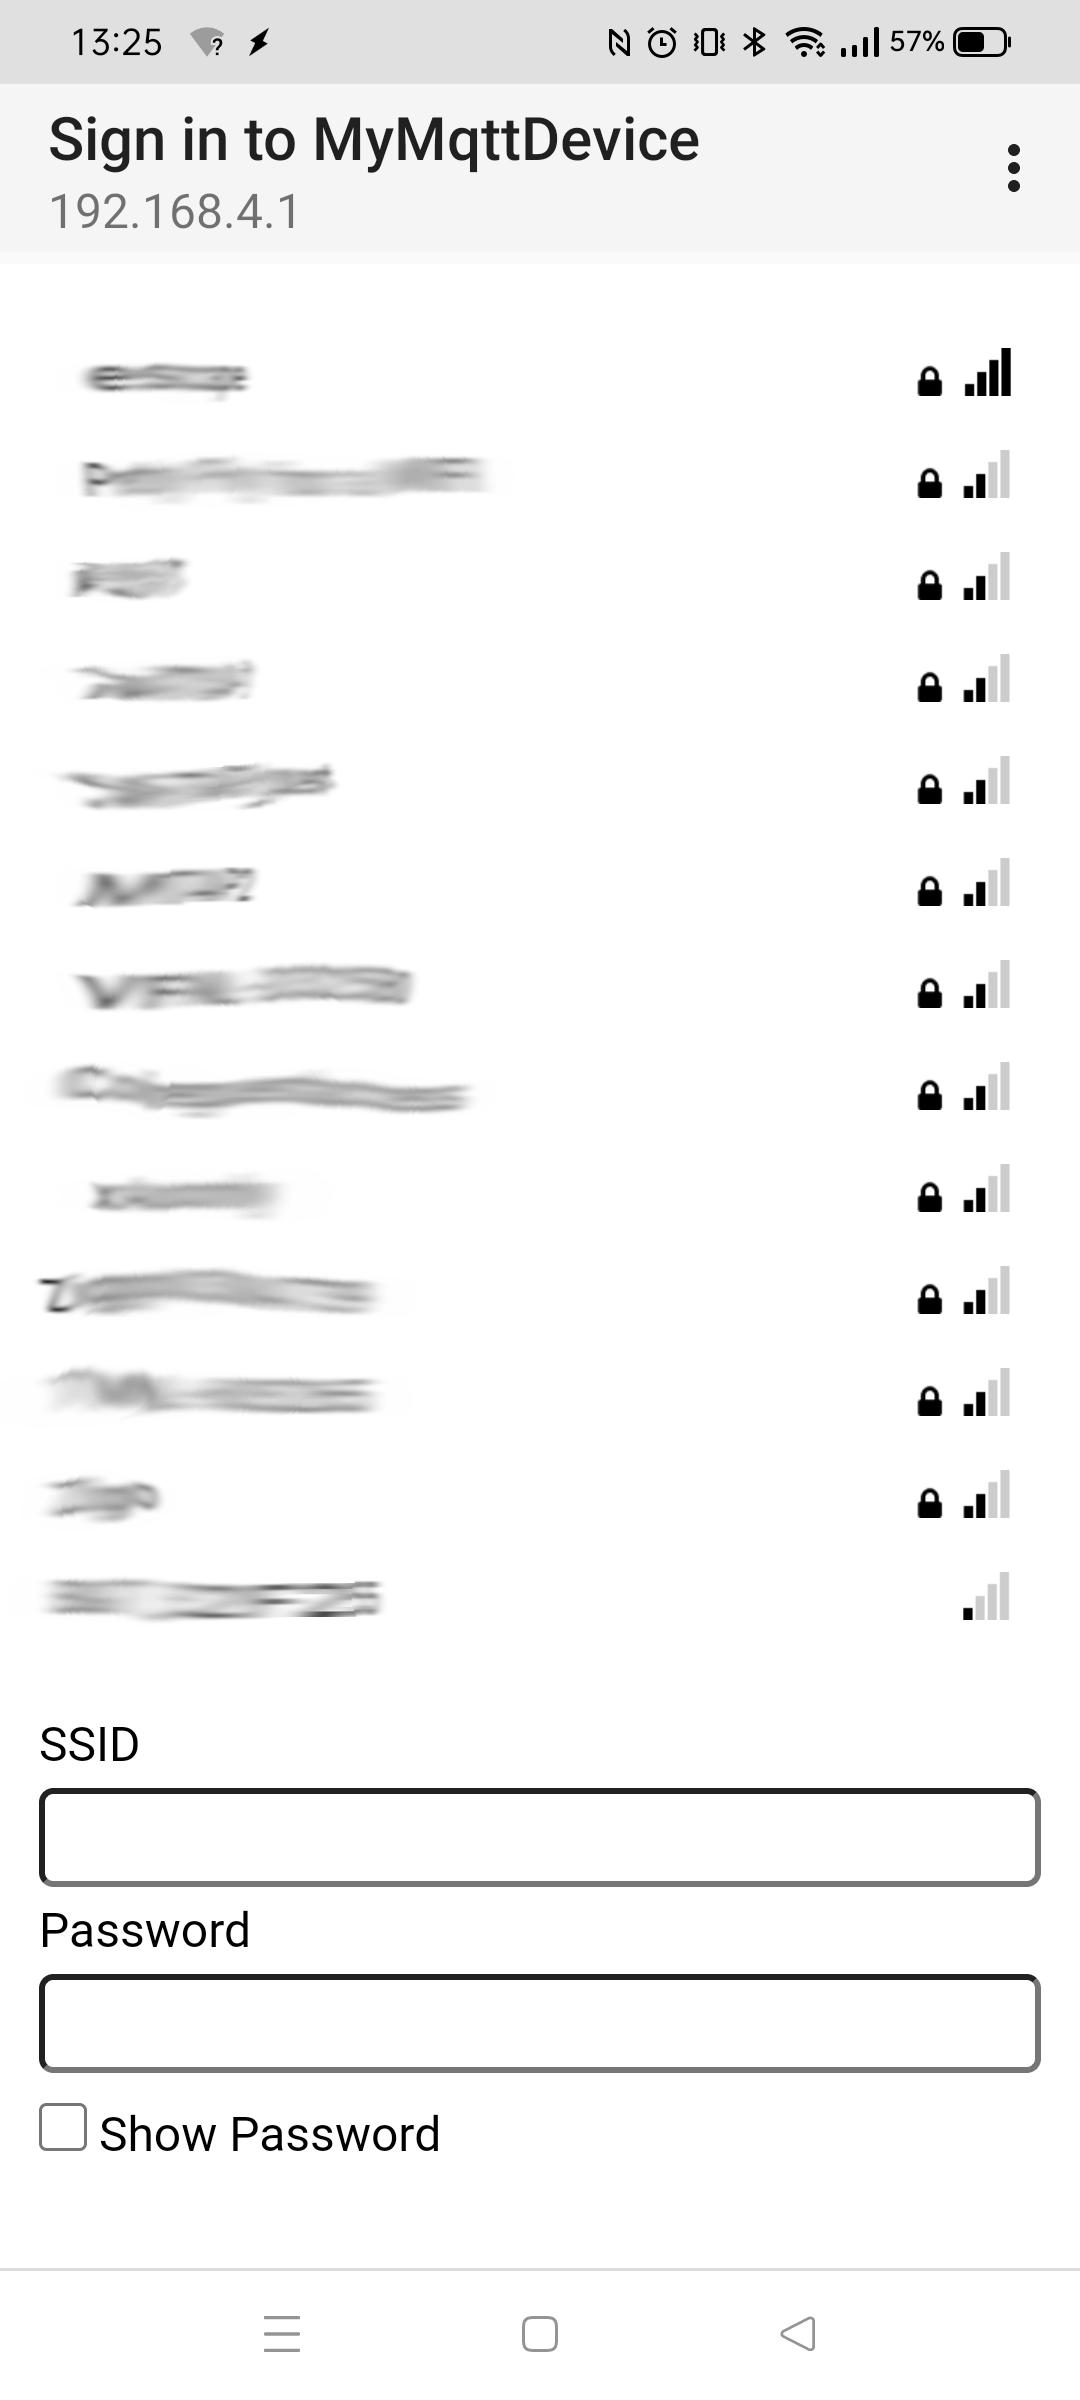
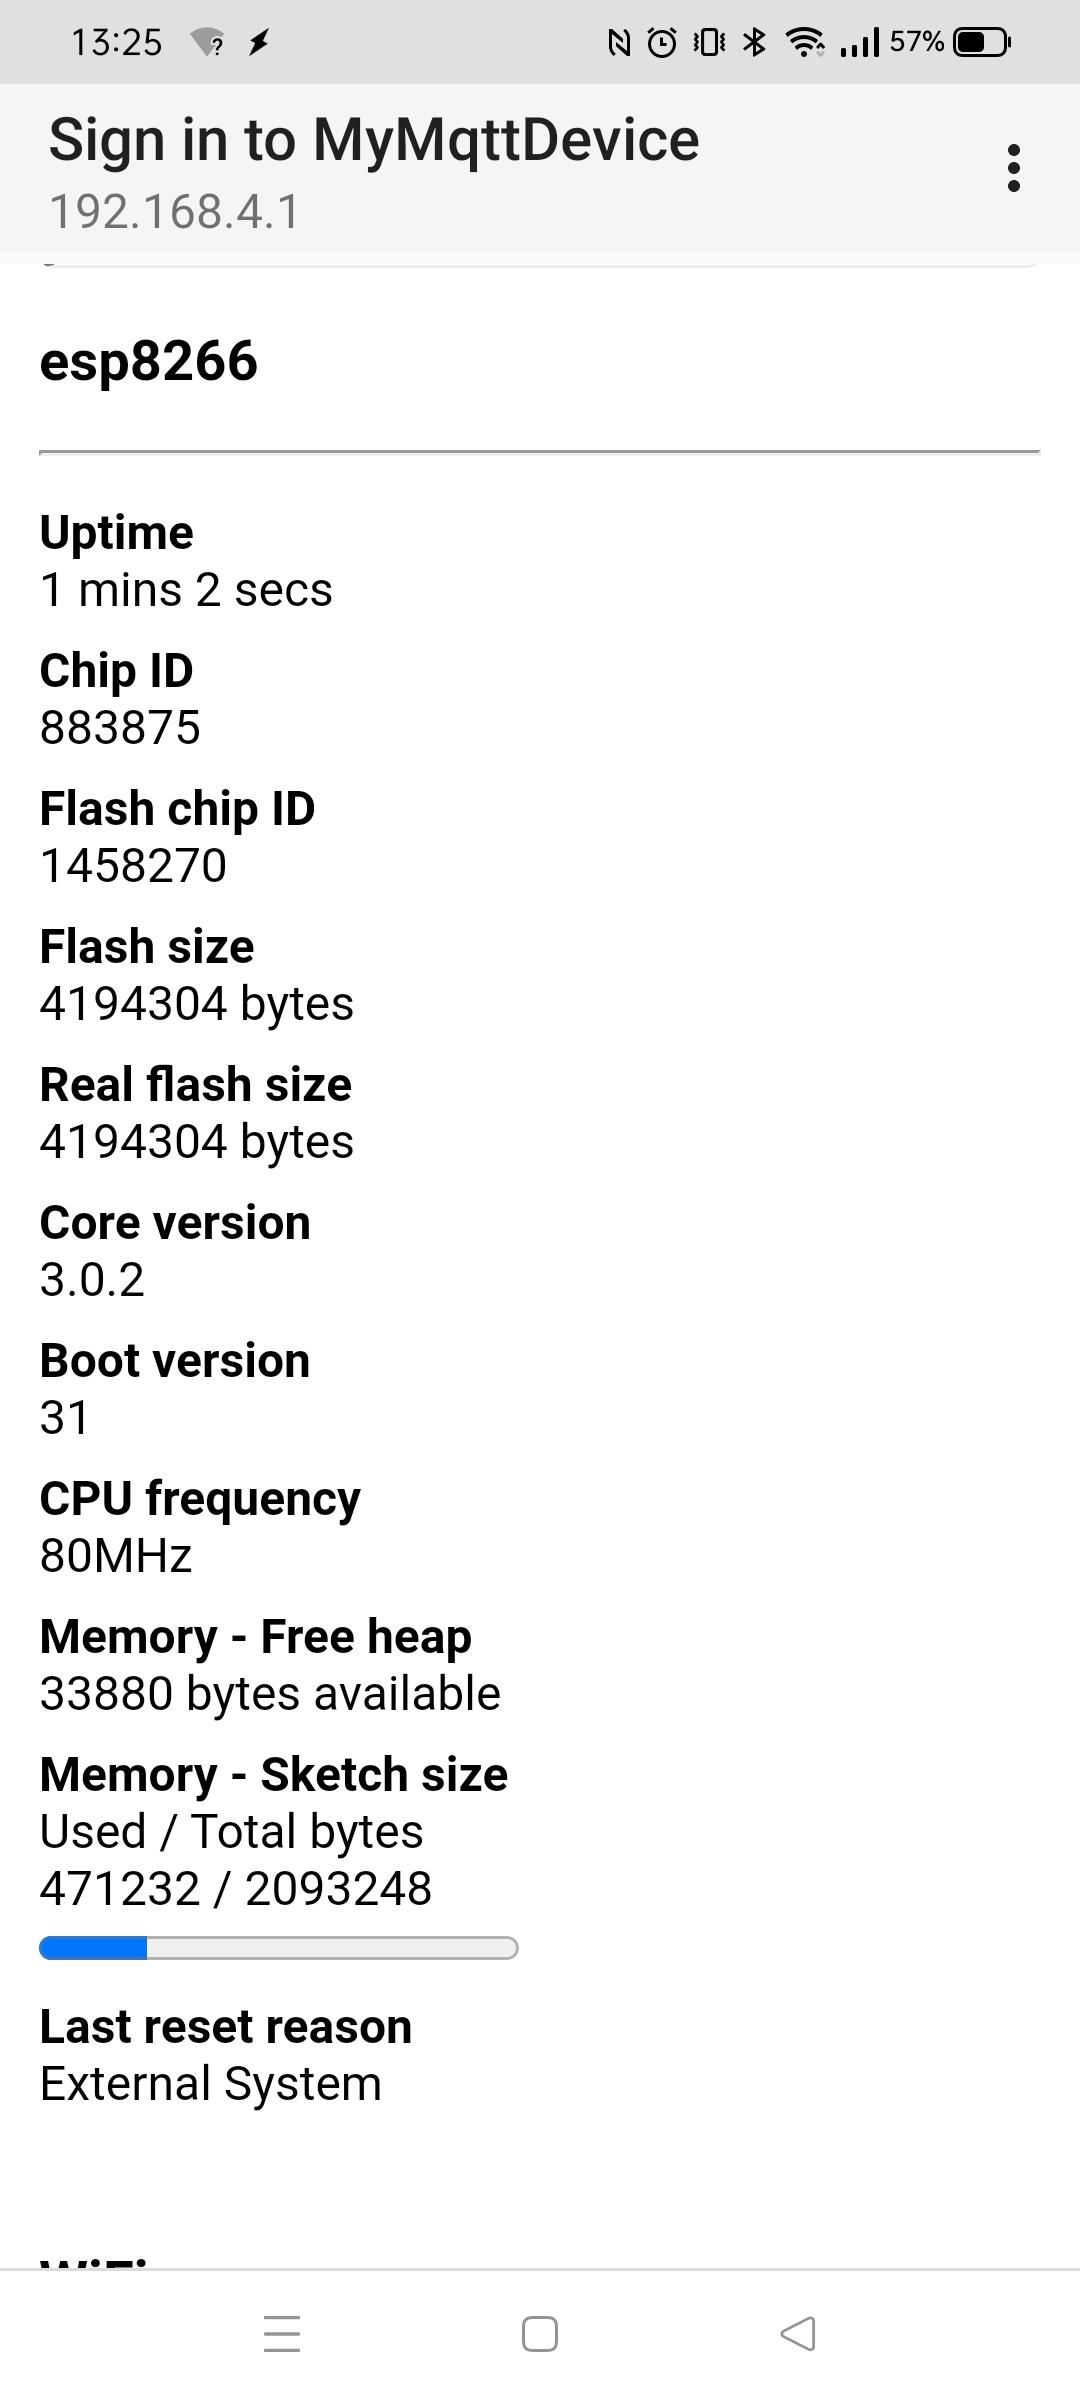
UPDATE: AccessPoint on Arduino implemented with captive portal for Wifi Configuration
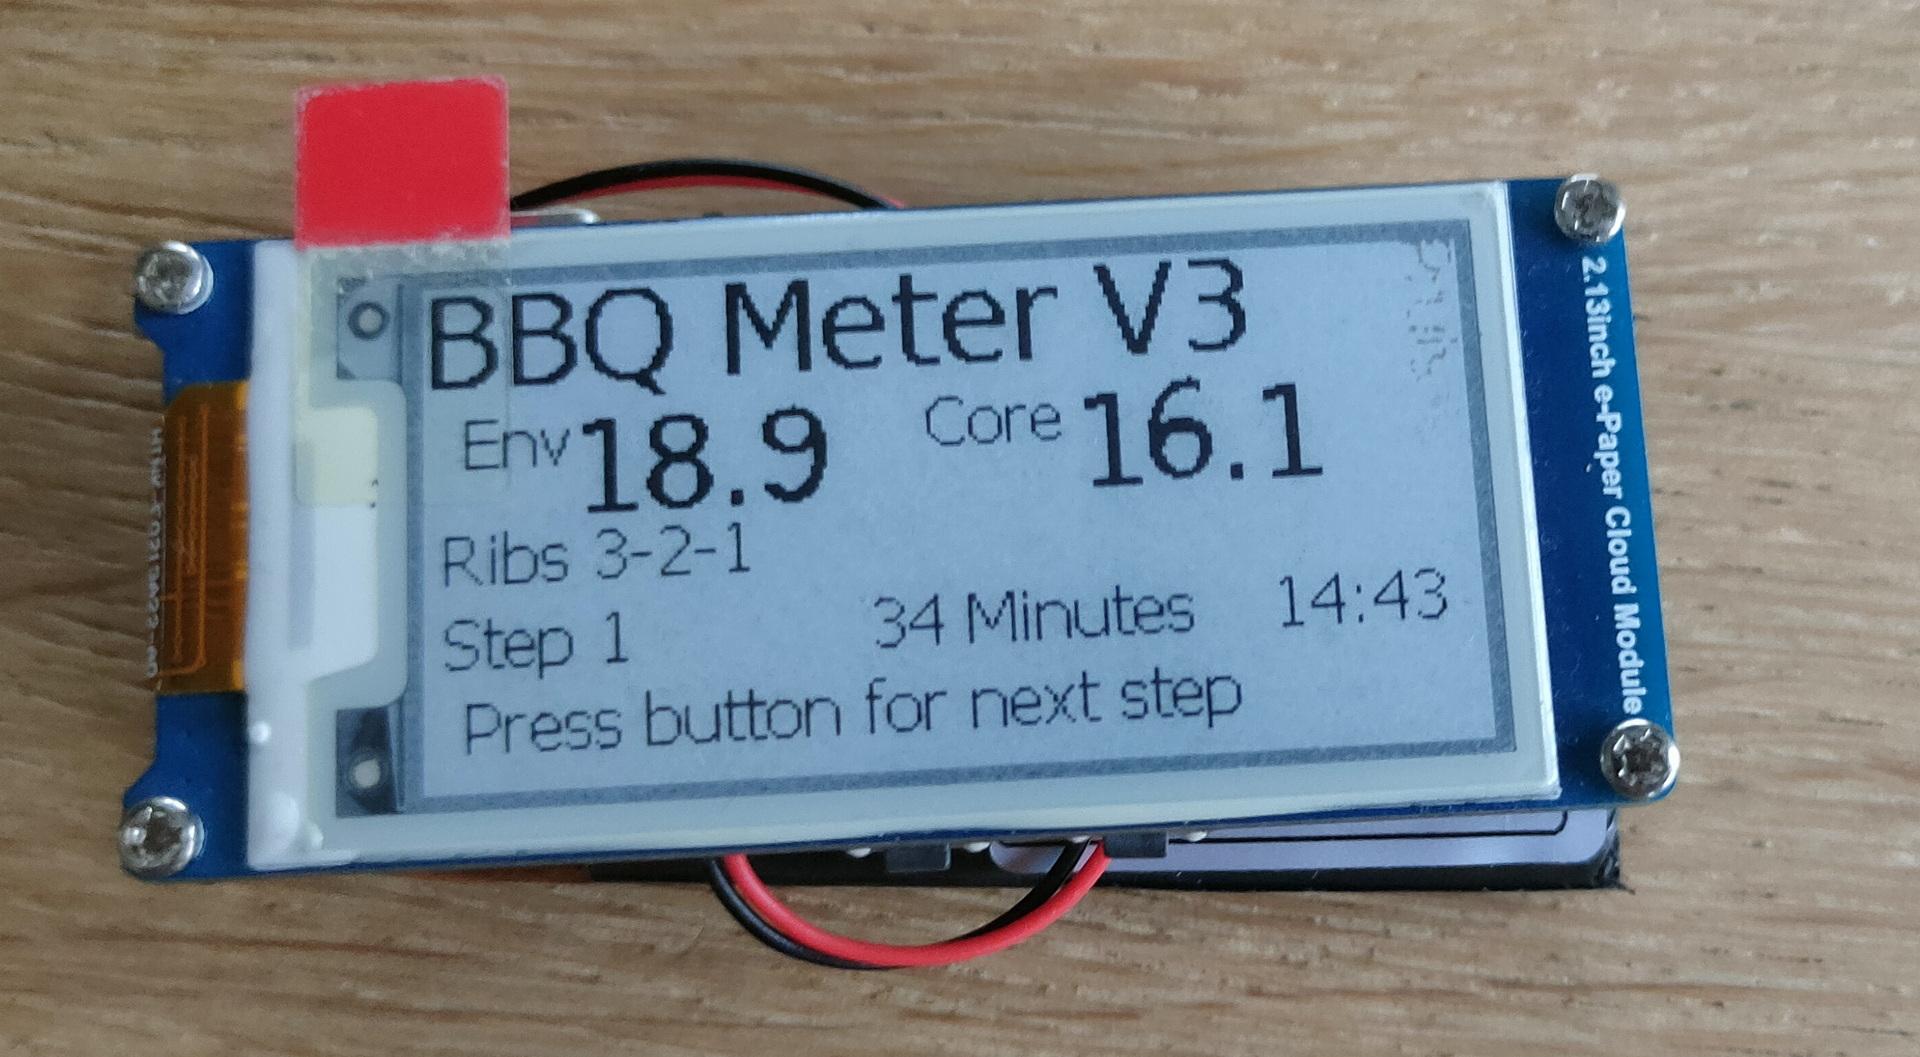
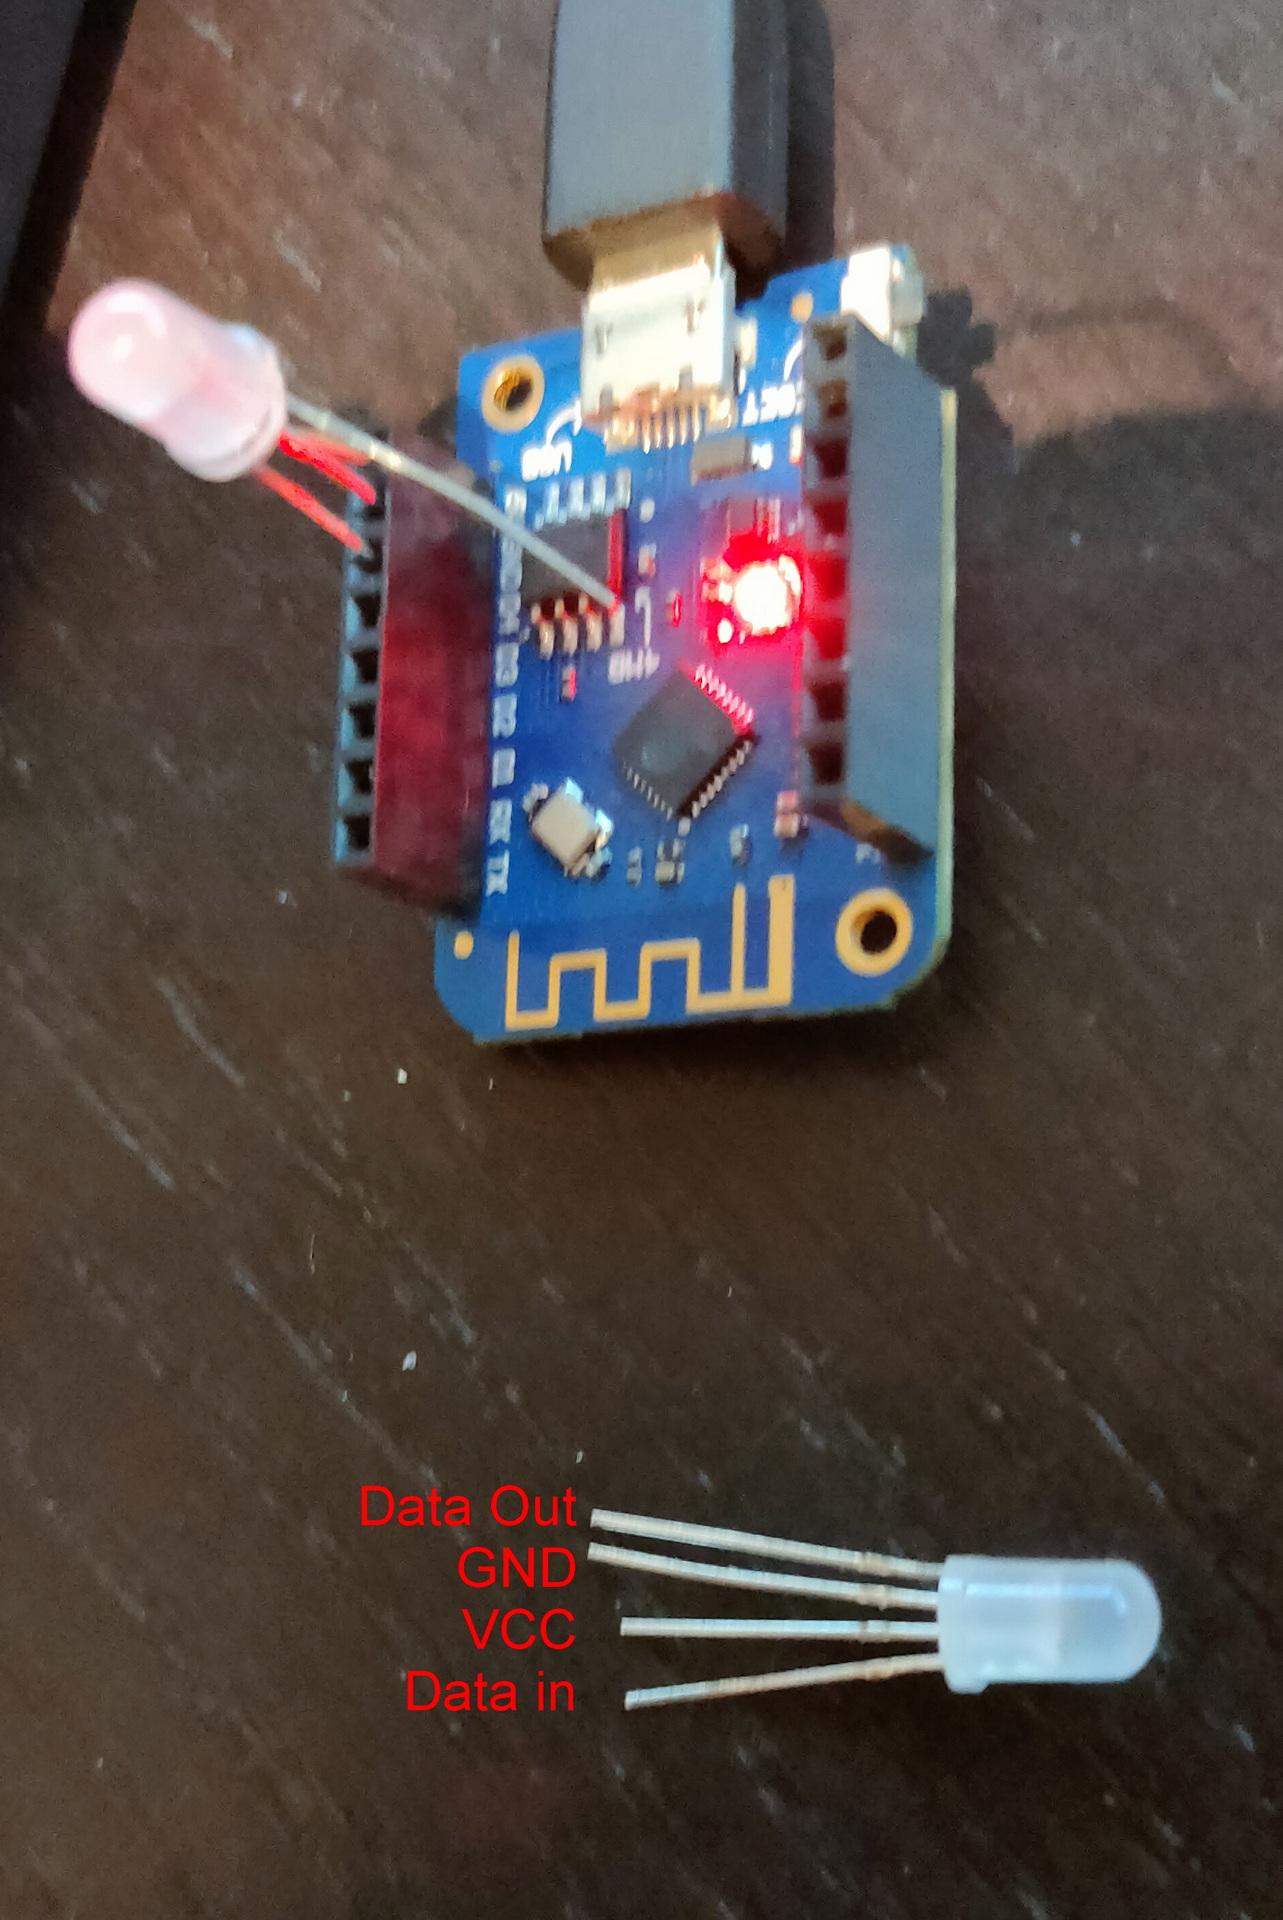
Got my Waveshare Epaper Cloud running on ESPHome
This is a Epaper display with a 2000mAh Lipo and a passive buzzer. Running parts of my Smoker monitor.
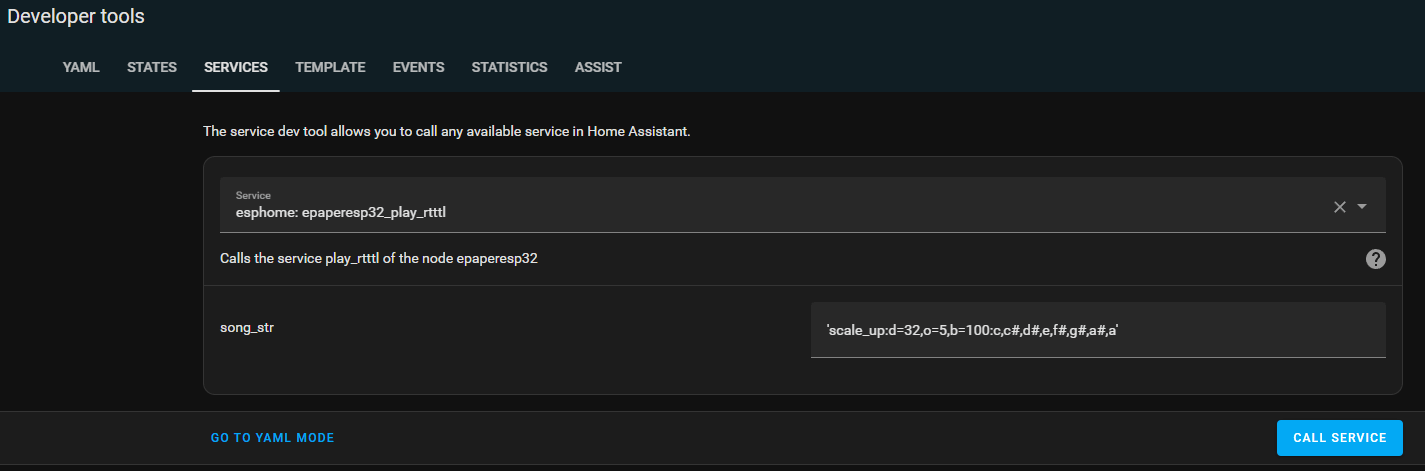
Below a little movie clip with RTTTL sound notification. (Send from Home Assistant) B.t.w. RTTTL are those ringtones we used to have. (Ring Tone Text Transfer Language)
Sending from HA
Parts of the ESPHOME Yaml NOTE: For the time, you need the time integration to get hours:minutes as a sensor!
This is part of a test where my friends and me can have notifications LEDs over the internet.
Using certificate parts from: Controlling the led will be done using Mattermost webhooks, or slashcommand with custom scripting. (Mattermost is my own hosted chat server)
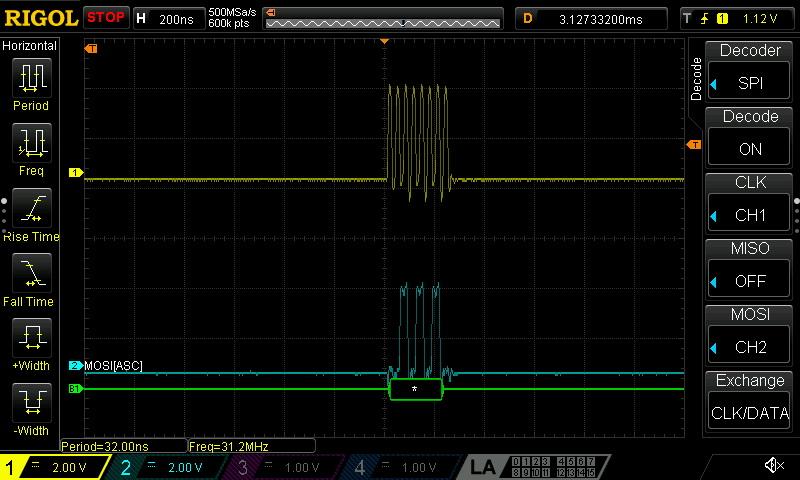
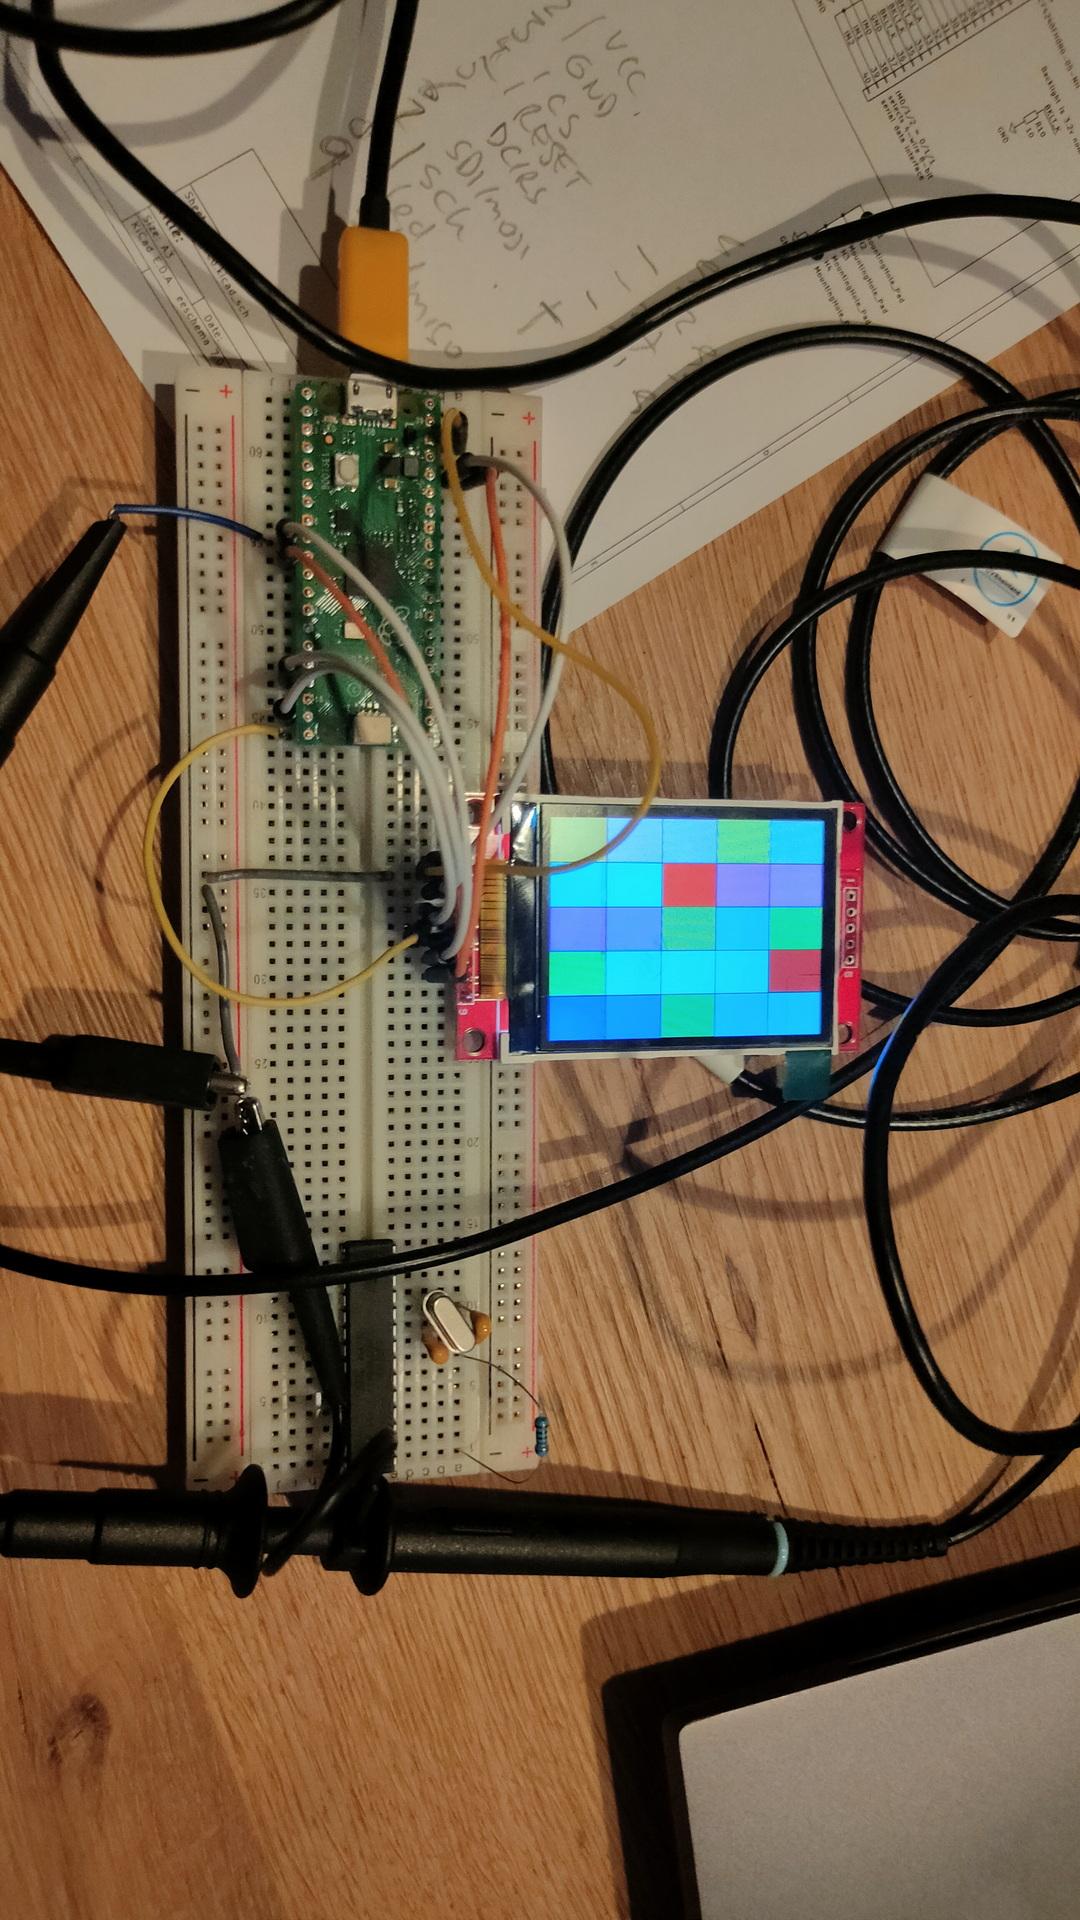
I was working on a MCUME proof of concept, with my own compiled version. But my combination of a Pico and an ILI9341 display didn’t work.
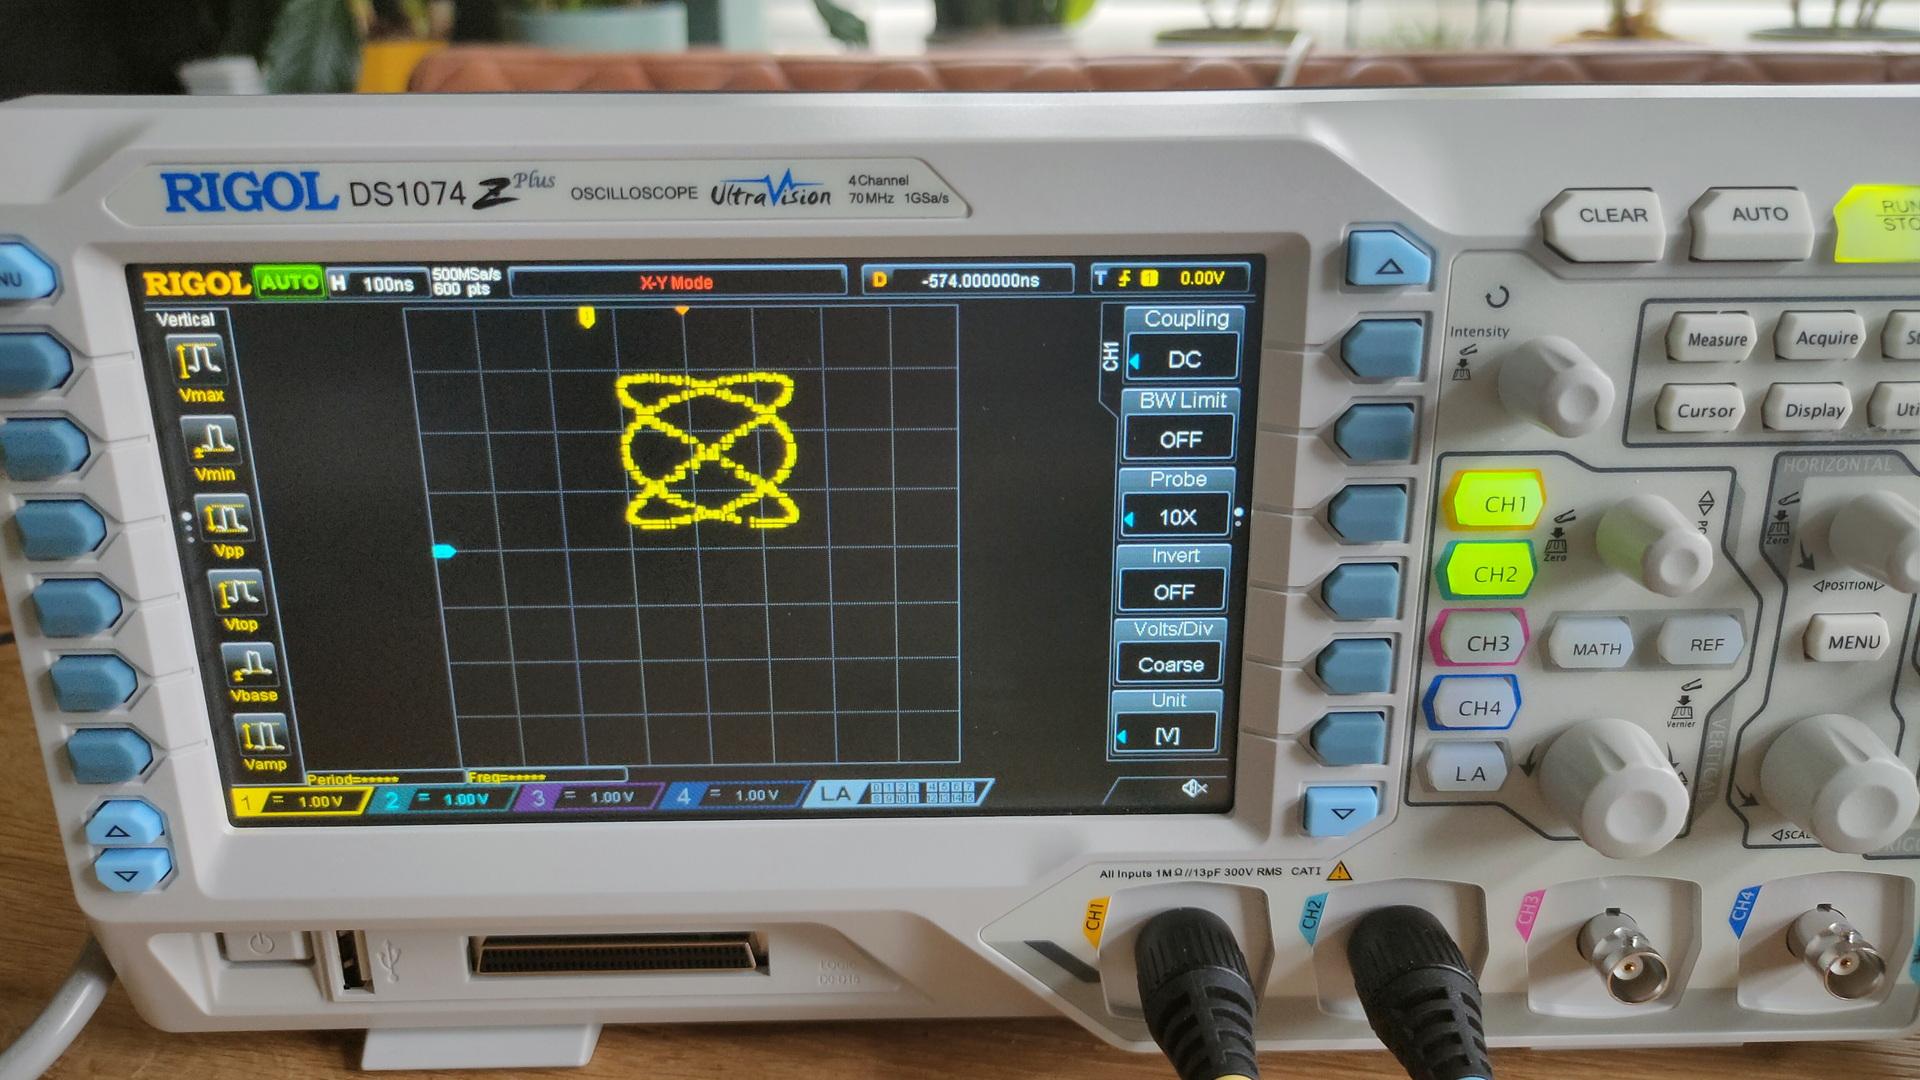
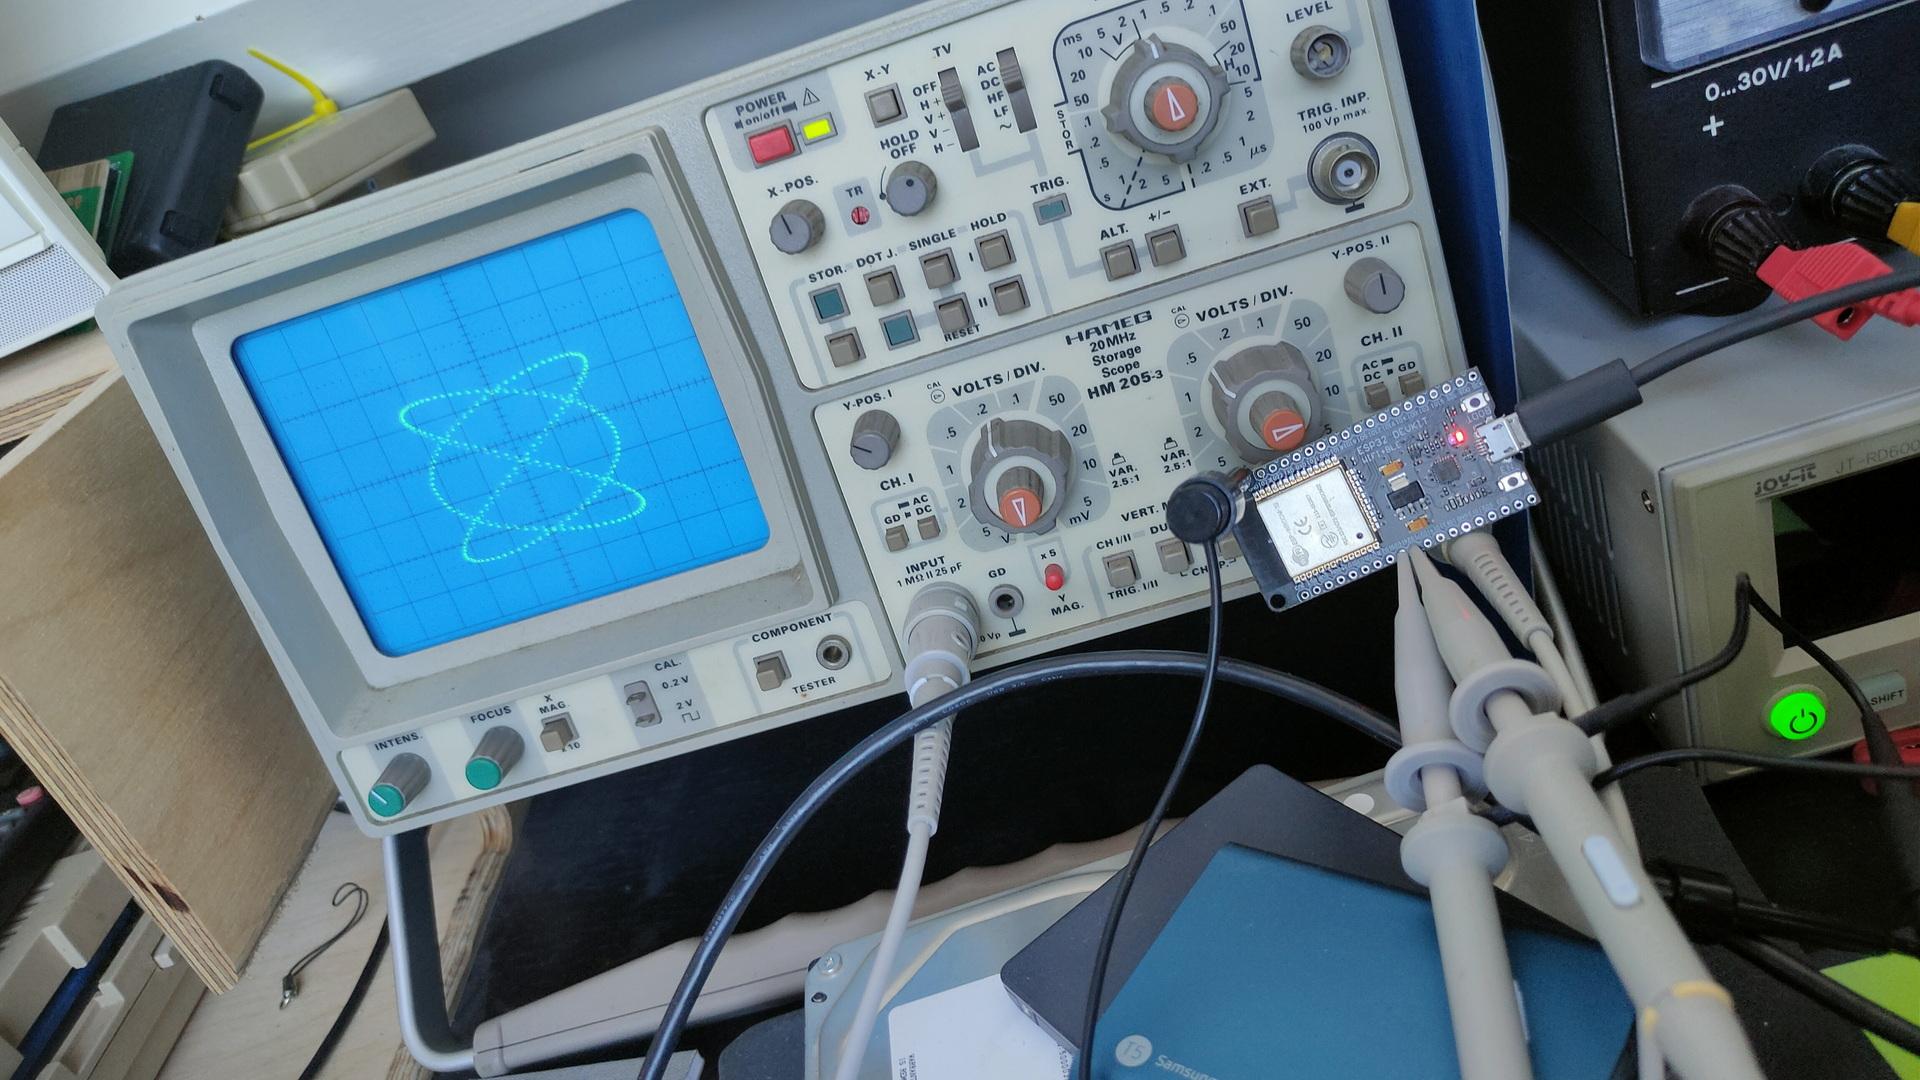
Luckily, a package arrived. My new scope!
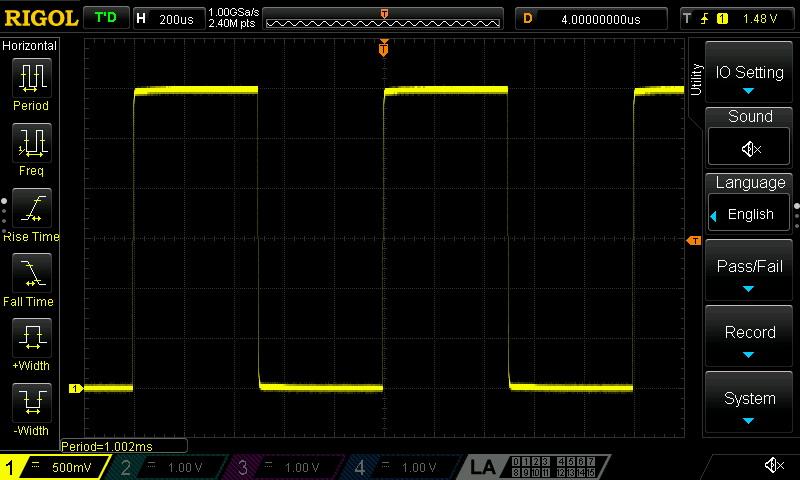
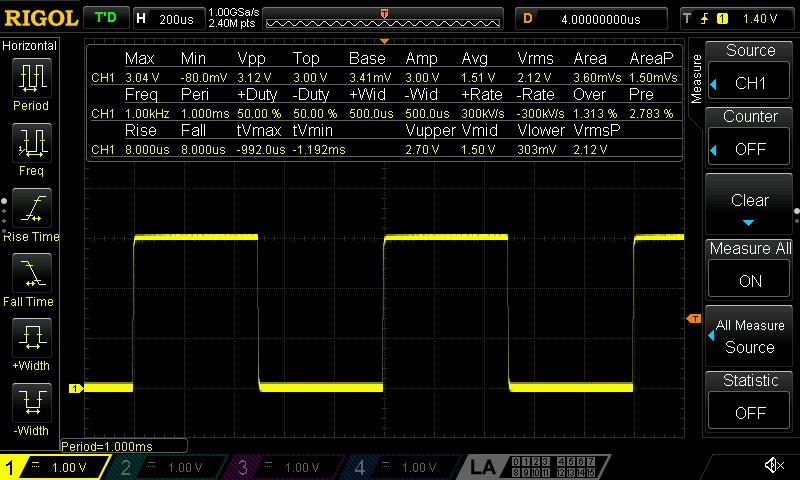
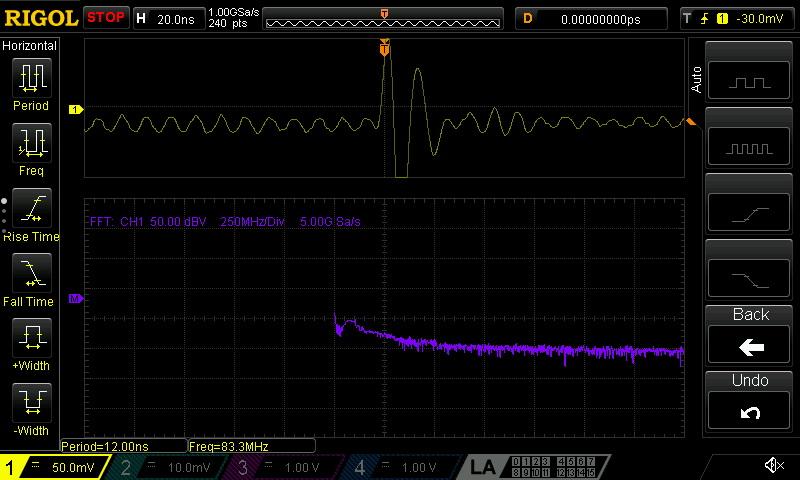
A Rigol DS1074Z+ oscilloscope! The replacement of my CRT version.
My new RigolThe old Crt versionNew and old, both with the ESP dual sine demo i’ve posted about.
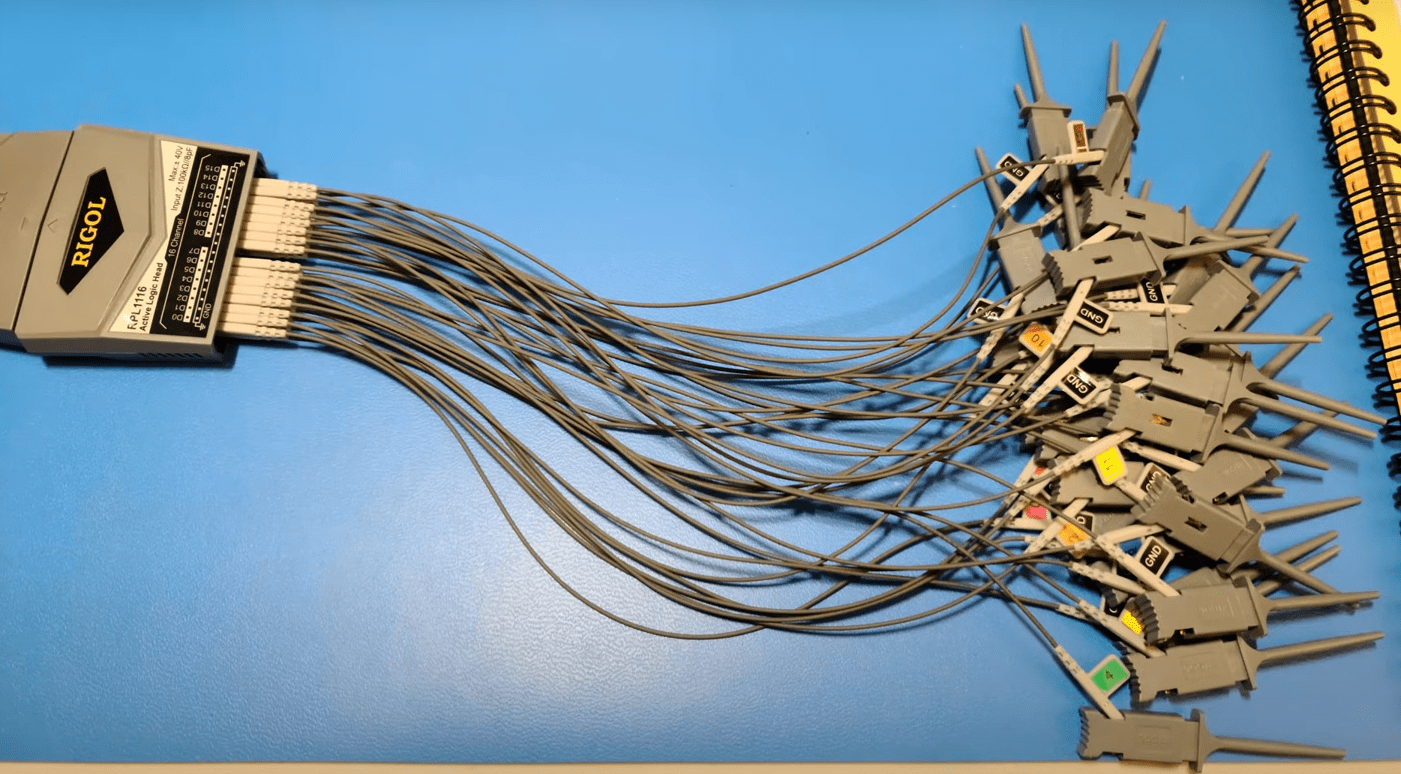
This new oscilloscope has 4 channels AND there is a add-on for a 16channel logic analyser.
For my next birthday?!? 🙂
The Rigol can be connected to a wired network. So that’s one of the first things I did. (It came with all software options enabled, so no need to ‘fix’ those)