Avond van de filmmuziek

After 3 times being cancelled due to Covid, it finally happened.

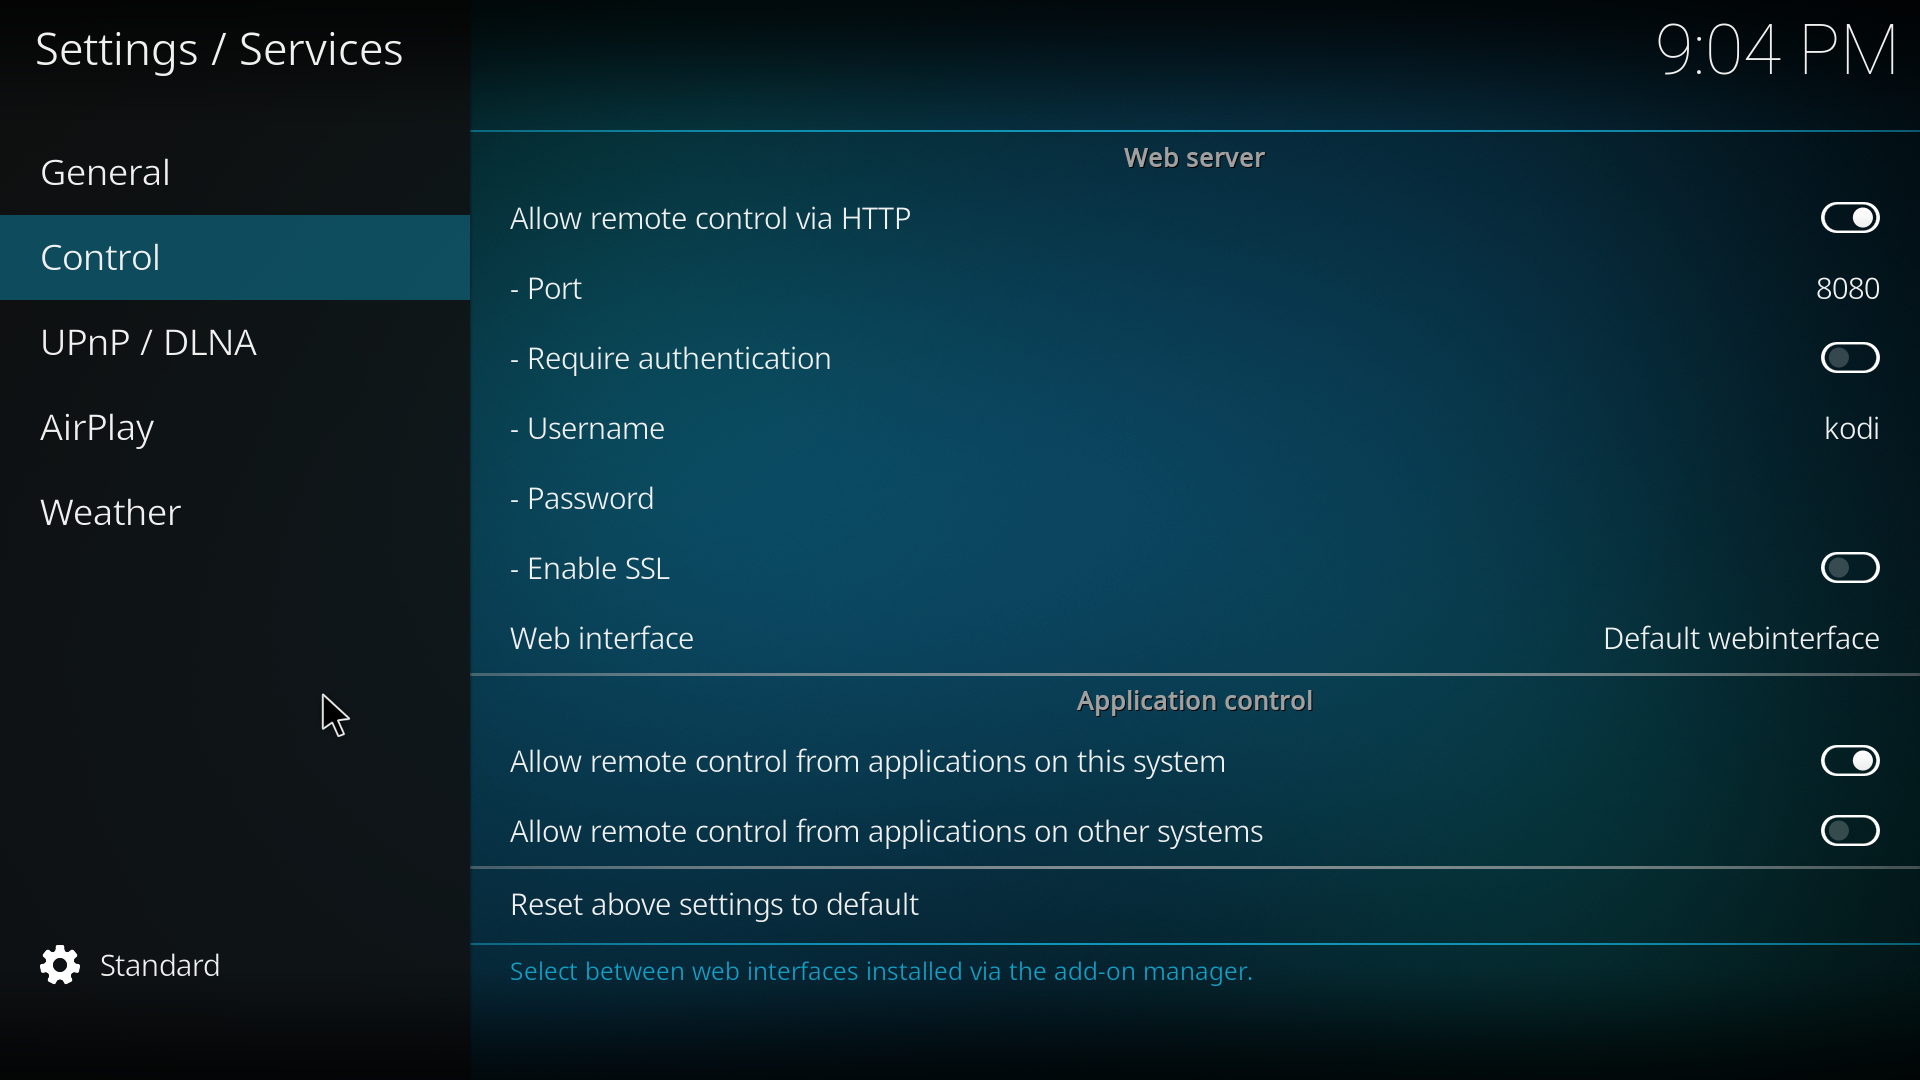
We got to get to the “Evening of the film music”

We held on to our tickets, as apparently 90% of the people!

We love film music, but it is a treat when there is a live orchestra.
(And special effects .. like a stuntman hanging from the roof, fire (not like Rammstein haha), and big displays)

If you get the chance .. go!
Wicked good musicians and singers.
Tania Kross was amazing!

Previous concerts we went to: Jeff Wayne’s War of the Worlds. The star wars suite, and an evening with Hans ZImmer.

  • Richard Strauss – “Also Sprach Zarathustra”
  • The Cinematic Orchestra – “Arrival of the Birds” from Theory of Everything
  • John Williams – “Hedwig’s Theme” from Harry Potter and the Sorcerer’s Stone
  • Ennio Morricone – The Good, the Bad and the Ugly
    • Main title
    • The Ecstasy of Gold
  • Ennio Morricone – Once Upon a Time in the West 
    • Man with a Harmonica
    • Once Upon a Time in the West
  • Hans Zimmer – “Maestro” from The Holiday
  • Thomas Newman – “The Night Window” from 1917
  • Ludovico Einaudi – “Oltremare” from Nomadland
  • Ludovico Einaudi – “Fly” from Intouchables
  • John Williams – “Duel of the Fates” from Star Wars:The Phantom Menace
  • John Williams –  “Main Title” from Star Wars: A New Hope

Intermission

  • Lalo Schifrin and Lorne Balfe – “Fallout” from Mission: Impossible – Fallout
  • Alexandre Desplat – “The Shape of Water” from The Shape of Water
  • Alan Silvestri – “Portals” from Avengers: Endgame
  • Hans Zimmer, Elton John and Lebo M – The Lion King
    • Circle of Life
    • King of the Pride Rock
  • Don Davis and Juno Reactor – “Navras” from The Matrix Revolutions
  • Jerry Goldsmith – Theme from Basic Instinct
  • 60 Years of James Bond
    • James Bond Theme
    • “No Time To Die” from No Time To Die
    • “Skyfall” from Skyfall
    • “A View to a Kill” from A View to a Kill
    • “Goldfinger” from Goldfinger
    • “Live and Let Die” from Live and Let Die
  • John Williams – “The Raiders March” from Raiders of the Lost Ark (encore)

Domoticz + NodeRed + HomeAssistant MQTT

UPDATE 20240122 : below

I’ve got my RFXCOM connected to my Domoticz, and not connected to my HA.

RFXCOM 433 Mhz

To have the changes of my IOT devices being known to HomeAssistant I wanted to use mqtt.

Domoticz writes the mqtt topic (payload) like this
(topic: domoticz/out)

{
	"Battery" : 100,
	"LastUpdate" : "2022-11-17 18:21:59",
	"RSSI" : 6,
	"description" : "",
	"dtype" : "Temp + Humidity",
	"hwid" : "4",
	"id" : "230E",
	"idx" : 8461,
	"name" : "Living Temp/Hum",
	"nvalue" : 0,
	"stype" : "Cresta, TFA TS34C",
	"svalue1" : "20.0",
	"svalue2" : "60",
	"svalue3" : "1",
	"unit" : 1
}

So you can’t see which device it is by the topic name, the idx is in the json (8461)

To get this device ( a temperature sensor) into HA using mqtt i rewrote the mqtt topic using NodeRed

Temperature Humidity Sensor

NodeRed flow

[
    {
        "id": "836cc419ddb2ca2b",
        "type": "mqtt in",
        "z": "cfb00976f06591d6",
        "name": "",
        "topic": "domoticz/out/#",
        "qos": "2",
        "datatype": "auto-detect",
        "broker": "8c74c5f6.9a7a48",
        "nl": false,
        "rap": true,
        "rh": 0,
        "inputs": 0,
        "x": 200,
        "y": 140,
        "wires": [
            [
                "dbe628e18027a287"
            ]
        ]
    },
    {
        "id": "a6cb517fd1cc9987",
        "type": "mqtt out",
        "z": "cfb00976f06591d6",
        "name": "",
        "topic": "",
        "qos": "",
        "retain": "",
        "respTopic": "",
        "contentType": "",
        "userProps": "",
        "correl": "",
        "expiry": "",
        "broker": "8c74c5f6.9a7a48",
        "x": 870,
        "y": 140,
        "wires": []
    },
    {
        "id": "dbe628e18027a287",
        "type": "function",
        "z": "cfb00976f06591d6",
        "name": "MQTT REWRITE",
        "func": "var varidx = msg.payload.idx;\nmsg.topic = \"home/\"+varidx+\"/payload\";\nreturn msg;\n",
        "outputs": 1,
        "noerr": 0,
        "initialize": "",
        "finalize": "",
        "libs": [],
        "x": 570,
        "y": 140,
        "wires": [
            [
                "a6cb517fd1cc9987"
            ]
        ]
    },
    {
        "id": "8c74c5f6.9a7a48",
        "type": "mqtt-broker",
        "name": "MQTTSERVERIP",
        "broker": "MQTTSERVERIP",
        "port": "1883",
        "clientid": "",
        "usetls": false,
        "compatmode": true,
        "keepalive": "15",
        "cleansession": true,
        "birthTopic": "",
        "birthQos": "0",
        "birthPayload": "",
        "closeTopic": "",
        "closePayload": "",
        "willTopic": "",
        "willQos": "0",
        "willPayload": ""
    }
]

The function node code ( rewrites the mqtt topic)

var varidx = msg.payload.idx;
msg.topic = "home/"+varidx+"/payload";
return msg;

Now we have a idx separated payload “home/IDX/payload”
(The other entries svalue/nvalue are from testing.

Adding the MQTT entries to HomeAssistant configuration.conf

mqtt:
 sensor:
  - name: "LivingTemperature"
    state_topic: "home/8461/payload"
    unit_of_measurement: "°C"
    value_template: "{{ value_json.svalue1 }}"
  - name: "LivingHumidity"
    state_topic: "home/8461/payload"
    unit_of_measurement: "%"
    value_template: "{{ value_json.svalue2 }}"

Now i can add the card to the dashboard.

This should now be a generic mqtt translator

A quick update:

Adding a motion sensor:

Home Assistant
  - name: "LivingMotion"
    state_topic: "home/45/payload"
    value_template: "{{ value_json.nvalue }}"

Add sensors to be reset to the switch node

[
    {
        "id": "836cc419ddb2ca2b",
        "type": "mqtt in",
        "z": "cfb00976f06591d6",
        "name": "",
        "topic": "domoticz/out/#",
        "qos": "2",
        "datatype": "auto-detect",
        "broker": "8c74c5f6.9a7a48",
        "nl": false,
        "rap": true,
        "rh": 0,
        "inputs": 0,
        "x": 200,
        "y": 140,
        "wires": [
            [
                "dbe628e18027a287",
                "768bb6e4b6731436"
            ]
        ]
    },
    {
        "id": "a6cb517fd1cc9987",
        "type": "mqtt out",
        "z": "cfb00976f06591d6",
        "name": "",
        "topic": "",
        "qos": "",
        "retain": "",
        "respTopic": "",
        "contentType": "",
        "userProps": "",
        "correl": "",
        "expiry": "",
        "broker": "8c74c5f6.9a7a48",
        "x": 870,
        "y": 140,
        "wires": []
    },
    {
        "id": "dbe628e18027a287",
        "type": "function",
        "z": "cfb00976f06591d6",
        "name": "MQTT REWRITE",
        "func": "var varidx = msg.payload.idx;\nmsg.topic = \"home/\"+varidx+\"/payload\";\nreturn msg;\n",
        "outputs": 1,
        "noerr": 0,
        "initialize": "",
        "finalize": "",
        "libs": [],
        "x": 570,
        "y": 140,
        "wires": [
            [
                "a6cb517fd1cc9987"
            ]
        ]
    },
    {
        "id": "768bb6e4b6731436",
        "type": "switch",
        "z": "cfb00976f06591d6",
        "name": "",
        "property": "payload.idx",
        "propertyType": "msg",
        "rules": [
            {
                "t": "eq",
                "v": "45",
                "vt": "str"
            }
        ],
        "checkall": "true",
        "repair": false,
        "outputs": 1,
        "x": 330,
        "y": 260,
        "wires": [
            [
                "e46fed76a596a719"
            ]
        ]
    },
    {
        "id": "e46fed76a596a719",
        "type": "delay",
        "z": "cfb00976f06591d6",
        "name": "",
        "pauseType": "delay",
        "timeout": "5",
        "timeoutUnits": "seconds",
        "rate": "1",
        "nbRateUnits": "1",
        "rateUnits": "second",
        "randomFirst": "1",
        "randomLast": "5",
        "randomUnits": "seconds",
        "drop": false,
        "allowrate": false,
        "outputs": 1,
        "x": 500,
        "y": 260,
        "wires": [
            [
                "3f7eeffc8d066de3"
            ]
        ]
    },
    {
        "id": "3f7eeffc8d066de3",
        "type": "function",
        "z": "cfb00976f06591d6",
        "name": "nvalue 0",
        "func": "msg.payload.nvalue = 0;\nreturn msg;",
        "outputs": 1,
        "noerr": 0,
        "initialize": "",
        "finalize": "",
        "libs": [],
        "x": 700,
        "y": 260,
        "wires": [
            [
                "dbe628e18027a287"
            ]
        ]
    },
    {
        "id": "8c74c5f6.9a7a48",
        "type": "mqtt-broker",
        "name": "MQTTIP",
        "broker": "MQTTIP",
        "port": "1883",
        "clientid": "",
        "usetls": false,
        "compatmode": true,
        "keepalive": "15",
        "cleansession": true,
        "birthTopic": "",
        "birthQos": "0",
        "birthPayload": "",
        "closeTopic": "",
        "closePayload": "",
        "willTopic": "",
        "willQos": "0",
        "willPayload": ""
    }
]

UPDATE 20240122

I’m using domoticz as a 433->mqtt bridge, and some virtual devices i can toggle with curl (bash scripts)

I needed to make a custom 433 door sensor in Home Assistant with toggles to OFF after a few seconds. (There is NO off signal in this cheap sensor i’m using)

I’m changing the payload complete, to have a payload which matches the device class for door: (state with on/off)
It was nvalue = 0/1

(Whenever the IDX changes, I only have to update this Nodered part)
HA won’t notice the change.

var nvalue = msg.payload.nvalue;
msg.payload = {};
if(nvalue == 1)
{
msg.payload.state = "ON";
return msg;
} 

AND after 5 seconds

msg.payload = {};
msg.payload.state = "OFF";
return msg;

Node-RED Deploy
Export nodes
Export
[
    {
        "id": "d8a1af40d14307a9",
        "type": "mqtt in",
        "z": "a8ec6104.cb08c",
        "name": "",
        "topic": "home/35/payload",
        "qos": "2",
        "datatype": "auto-detect",
        "broker": "8c74c5f6.9a7a48",
        "nl": false,
        "rap": true,
        "rh": 0,
        "inputs": 0,
        "x": 220,
        "y": 720,
        "wires": [
            [
                "ac3f66d770bb8f56"
            ]
        ]
    },
    {
        "id": "31cb1ca9e4060710",
        "type": "delay",
        "z": "a8ec6104.cb08c",
        "name": "",
        "pauseType": "delay",
        "timeout": "5",
        "timeoutUnits": "seconds",
        "rate": "1",
        "nbRateUnits": "1",
        "rateUnits": "second",
        "randomFirst": "1",
        "randomLast": "5",
        "randomUnits": "seconds",
        "drop": false,
        "allowrate": false,
        "outputs": 1,
        "x": 660,
        "y": 760,
        "wires": [
            [
                "dbf50e2146f5e631"
            ]
        ]
    },
    {
        "id": "96d60ca0976c555c",
        "type": "mqtt out",
        "z": "a8ec6104.cb08c",
        "name": "",
        "topic": "home/frontdoor/payload",
        "qos": "",
        "retain": "",
        "respTopic": "",
        "contentType": "",
        "userProps": "",
        "correl": "",
        "expiry": "",
        "broker": "8c74c5f6.9a7a48",
        "x": 1010,
        "y": 720,
        "wires": []
    },
    {
        "id": "ac3f66d770bb8f56",
        "type": "function",
        "z": "a8ec6104.cb08c",
        "name": "If open",
        "func": "var nvalue = msg.payload.nvalue;\nmsg.payload = {};\nif(nvalue == 1)\n{\nmsg.payload.state = \"ON\";\nreturn msg;\n} \n",
        "outputs": 1,
        "noerr": 0,
        "initialize": "",
        "finalize": "",
        "libs": [],
        "x": 490,
        "y": 720,
        "wires": [
            [
                "31cb1ca9e4060710",
                "96d60ca0976c555c"
            ]
        ]
    },
    {
        "id": "dbf50e2146f5e631",
        "type": "function",
        "z": "a8ec6104.cb08c",
        "name": "Send Close",
        "func": "msg.payload = {};\nmsg.payload.state = \"OFF\";\nreturn msg;",
        "outputs": 1,
        "noerr": 0,
        "initialize": "",
        "finalize": "",
        "libs": [],
        "x": 810,
        "y": 760,
        "wires": [
            [
                "96d60ca0976c555c"
            ]
        ]
    },
    {
        "id": "8c74c5f6.9a7a48",
        "type": "mqtt-broker",
        "name": "MQTTSERVER",
        "broker": "MQTTSERVER",
        "port": "1883",
        "clientid": "",
        "usetls": false,
        "compatmode": true,
        "keepalive": "15",
        "cleansession": true,
        "birthTopic": "",
        "birthQos": "0",
        "birthPayload": "",
        "closeTopic": "",
        "closePayload": "",
        "willTopic": "",
        "willQos": "0",
        "willPayload": ""
    }
]

HA Part : Instead of the generic setup above (Old post part)

mqtt:
 binary_sensor:
  - name: "FrontDoor"
    state_topic: "home/frontdoor/payload"
    value_template: "{{ value_json.state }}"
    device_class: door

Assembly in Dosbox, and draw a line

Below my setup in Dosbox.
(As used 30 years ago)

First install dosbox (Linux/Windows)

download the package with used files and compilers from here:
https://media.henriaanstoot.nl/assembly.tgz

extract with tar xzvf /tmp/assembly.tgz to a directory

start dosbox and mount the directory as C

mount c /path/assembly

Run “a line”, this a batchfile which starts the editor (qedit)
When closing the file (esc – q menu)
It will compile the assembly and write out a executable

This is the batchfile

@echo off
q %1.asm
cls
masm %1.asm;
link %1.obj;
exe2bin %1.exe %1.com
echo READY!

line assembly code

    NAME lijnentrekroutine

.286

Code SEGMENT
    ASSUME CS:Code,DS:Code
org 100h
Start:
    mov ax,13h            ;set video mode
    int 10h

    mov bx,100
    mov cx,100
hiero:
    mov dx,0a000h
    mov es,dx
    mov ax,320
    mul cx
    add ax,bx
    mov di,ax
    mov al,2
    stosb
    inc bx
    inc bx
    inc cx
    cmp bx,150
    jnz hiero


    mov ah,8
    int 21h
    mov ax,3
    int 10h

    MOV AX,4C00h
    INT 21h

code ends
end start

Hercules to VGA

While playing with MuseScore….
(Typesetting some scores for Pipes and Flute)

This came in: WOOOT

Trident 8900C (1024 x768 max 512Kb)

This is a Trident VGA card. While having a 16bit ISA connector, it can work in a 8bits ISA slot.

A while ago i bought a Laser XT/3, that’s the one my parents had.
This is where i did a lot of assembly programming on.
It’s a 8086 cpu, 640K and has a Hercules/CGA graphics card.

I found loads of assembly files and i want to see if i can get it running again.
While some code was written for hercules, ( That’s the monochrome image you see in the example above ) and a few for EGA (4 colors).

Most of it was written for VGA. Probably on a later machine like a 80386?

But i know there are vga cards for 8 bit msdos computers, and i found one. ( This one is even autodetect, so no jumpers to figure out)

So i’ve put this card in the machine, turned it on, and it works!
I’ve got only 2 examples living on the harddisk of the machine, both black and white … 🙂
I have to search for interesting code in hundreds of files.

Some friends of mine, picture was taken from an amiga genlock digitizer
The intro pages of a “amiga emulator” WHERE is the rest??? (end is a cga starfield demo)

Hercules Card

There is not much info available about this card:

  • Max resolution (Hercules) : 720×348
  • 15 pin analog monitor port (CN1)
  • BIOS enabled JP1 Pins 1 & 2 closed
  • BIOS disabled JP1 Pins 2 & 3 closed
  • CGA selected SW1 On
  • MDA (Hercules) selected SW1 Off

Floppy drive boot

My friend EDK and I made some demo’s like

And a boot demo, which was able to start from a bootsector, went into a graphic mode and ran a demo with sound. Edk wrote a sector loader for this.
I have some 5.25 inch floppy disks, labelled boot demo. So i wanted to try this today …
I needed to change the boot order, so i went online to search for jumper settings.

I see a led when it tries to boot, but my disks are probably formatted 720Kb instead of 360Kb, which this drive is.

So …. TODO!

Find a 720Kb floppy drive (5.25 inch), and sort through my code!
There is a 8bit soundblaster compatible soundcard that i bidding on online, hopefully i’ll get it

Assembly and modes

I wasn’t sure how to sort the assembly code into Hercules and VGA compatible, but i used this table (There are also extended modes for higher resolutions)

mode 0x00text 40×25 gray
mode 0x01text 40×25 16 colors
mode 0x02text 80×25
mode 0x03text 80×25 16 color
mode 0x04graphics mode (CGA) 320×200
mode 0x05graphics mode (CGA) 320×200
mode 0x06graphics mode (CGA) 640×200 (B/W)
mode 0x07text 80×25 Hercules
mode 0x0Fgraphics mode 640×350? gray
mode 0x10graphics mode 640×350?
mode 0x11graphics vga 2 colors
mode 0x12graphics vga 16 colors
mode 0x13graphics 320×200 256 colors
# Set VGA mode
    mov ax,13h
    int 10h         ;screen 320x200 256 colours

# Exit VGA mode
    mov ax,3
    int 10h         ;screen  80x25 text
    mov ax,4c00h
    int 21h         ;back to DOS

WIP – Designing a 7seg memory address “spy”

UNTESTED, haven’t got all components yet!

Sometimes when i’m writing code i want to know what’s happening. For example when i’m working on the display, there is maybe no output.
With the above example i can write to address $01F0 (example address), and it will display on the 7 Segment displays.

Upperleft PLD is my address decoder, which has been running for a while now.

Secondary PLD adds the rest of the Addressbus lines, and gives me the opportunity to select in a range of 16 addresses, using jumpers/

The two smaller PLD’s latch the databus data when addressed.
AND decodes a nibble to 7-Segment output for 0-9A-F.
(There are apparently no chips available which do A-F)

I’m going to add the PLD code when everything works. Let me know if you like the idea.

Should be only a few Euro’s

Radar module RCWL-0516 with MQTT

RCWL-0516 module (radar)

Last year i was playing with this radar module also, but today i made a version with MQTT and a linux client.
(There is a project on the internet which uses a HC-SR04, and a arduino connected to the Laptop. This setup is more sensitive and no need for a usb thinghy.)

HC-SR04 module (ultrasound)

Last years version, using a micro transformer and a ESP-12

When using MQTT i can integrate this in HomeAssistant, Domoticz, NodeRed and more.
But i’ve written a python script which runs on my Laptop.
For example i can: Kill vlc, change to my work desktop, stop sound output and lock the screen. (everything you can script)

I wanted to have a “mobile” version of the sensor so i can place it anywhere. (Frontdoor, gardengate, candydrawer 🙂 )

These modules are very cheap, but do their job well!

I’ve used a Wroom ESP32 and a BattBorg together with the module, that’s it.

Simplified schematic (without the battborg)

I’m using PIN34 as an analog input.

Radar module pins:

  • CDS not used
  • VIN 5V power
  • OUT 0-3.3V signal (analog)
  • GND
  • 3v3 not used

Arduino sketch

#include <WiFi.h>
#include <PubSubClient.h>
#include <Wire.h>

const char* ssid = "MYSSID";
const char* password = "MYPASS";
const char* mqtt_server = "IP-MQTT-SERVER";
const char* mqtt_username = "";
const char* mqtt_password = "";
const char* clientID = "radar";

const int tiltPin = 34;
int tiltState = 0;    
int previousState = 0;   

WiFiClient espClient;

PubSubClient client(espClient);

String translateEncryptionType(wifi_auth_mode_t encryptionType) {
 
  switch (encryptionType) {
    case (WIFI_AUTH_OPEN):
      return "Open";
    case (WIFI_AUTH_WEP):
      return "WEP";
    case (WIFI_AUTH_WPA_PSK):
      return "WPA_PSK";
    case (WIFI_AUTH_WPA2_PSK):
      return "WPA2_PSK";
    case (WIFI_AUTH_WPA_WPA2_PSK):
      return "WPA_WPA2_PSK";
    case (WIFI_AUTH_WPA2_ENTERPRISE):
      return "WPA2_ENTERPRISE";
  }
}
 
void scanNetworks() {
   int numberOfNetworks = WiFi.scanNetworks();
   Serial.print("Number of networks found: ");
  Serial.println(numberOfNetworks);
   for (int i = 0; i < numberOfNetworks; i++) {
 
    Serial.print("Network name: ");
    Serial.println(WiFi.SSID(i));
 
    Serial.print("Signal strength: ");
    Serial.println(WiFi.RSSI(i));
 
    Serial.print("MAC address: ");
    Serial.println(WiFi.BSSIDstr(i));
 
    Serial.print("Encryption type: ");
    String encryptionTypeDescription = translateEncryptionType(WiFi.encryptionType(i));
    Serial.println(encryptionTypeDescription);
    Serial.println("-----------------------");
 
  }
}
 
void connectToNetwork() {
  WiFi.begin(ssid, password);
   while (WiFi.status() != WL_CONNECTED) {
    delay(1000);
    Serial.println("Establishing connection to WiFi..");
  }
   Serial.println("Connected to network");
 }

void reconnect() {
  while (!client.connected()) {
    if (client.connect(clientID, mqtt_username, mqtt_password)) {
    } else {
      delay(2000);
    }
  }
}
void setup()
{
  {
    Serial.begin(115200);
    scanNetworks();
    connectToNetwork();
    Serial.println(WiFi.macAddress());
    Serial.println(WiFi.localIP());
    client.setServer(mqtt_server, 1883);
    pinMode(tiltPin, INPUT);
  }
}
void loop() {
  tiltState = analogRead(tiltPin);
    if (tiltState < 3048) {
      client.publish("radar/state", "0"); //
    } else {
      client.publish("radar/state", "1"); //
    }
     delay(100);
   {
    if (!client.connected()) {
      reconnect();
    }
    client.loop();
  }
}

Lockscreen!

Below shows the speed of detection, and sending though the network

Python script which does a lock-screen using XDOTOOL

from paho.mqtt import client as mqtt_client
import subprocess
import time

broker = 'MQTT-SERVER'
port = 1883
topic = "radar/state"
client_id = "radarclient"

def connect_mqtt() -> mqtt_client:
    def on_connect(client, userdata, flags, rc):
        if rc == 0:
            print("Connected to MQTT Broker!")
        else:
            print("Failed to connect, return code %d\n", rc)

    client = mqtt_client.Client(client_id)
    client.on_connect = on_connect
    client.connect(broker, port)
    return client

def subscribe(client: mqtt_client):
    def on_message(client, userdata, msg):
        state = msg.payload.decode()
        print (state)
        if state == "1":
            subprocess.Popen(["xdotool","key","Super_L+l"])
            time.sleep(30)


    client.subscribe(topic)
    client.on_message = on_message

def run():
    client = connect_mqtt()
    subscribe(client)
    client.loop_forever()

if __name__ == '__main__':
    run()

change
subprocess.Popen([“xdotool”,”key”,”Super_L+l”])
into
subprocess.Popen([“switchdesktop”])
to run a script named switchdesktop

#!/bin/bash
# This is the switchdesktop script, it goes to the next screen using winows-page-down combo
xdotool key "Super_L+Page_Down"

Todo:

3D print a case
Make a version which becomes a Access Point.
Then make another arduino setup which controls my Nikon.
So it can act like a wildcam (offline)

Something like below, using a optocoupler ( i still got some leftovers from my doorbell to gpio-pin project.)

Workshop Cyanotype

The cyanotype (from Ancient Greek kuáneos, “dark blue” and túpos, “mark, impression, type”) is a slow-reacting, photographic printing technique. It produces a cyan-blue print used for art as monochrome imagery applicable on a range of supports, and for reprography in the form of blueprints. For any purpose, the process usually uses two chemicals: ferric ammonium citrate or ferric ammonium oxalate, and potassium ferricyanide, and only water to develop and fix. Announced in 1842, it is still in use.

This technique was also used as a method of copying drawings.
For example buildings and schematics. While making copies of drawings with the exact dimensions of the original, making the result untemperable was another big plus. ( You could not move/redraw walls for example on the copy)

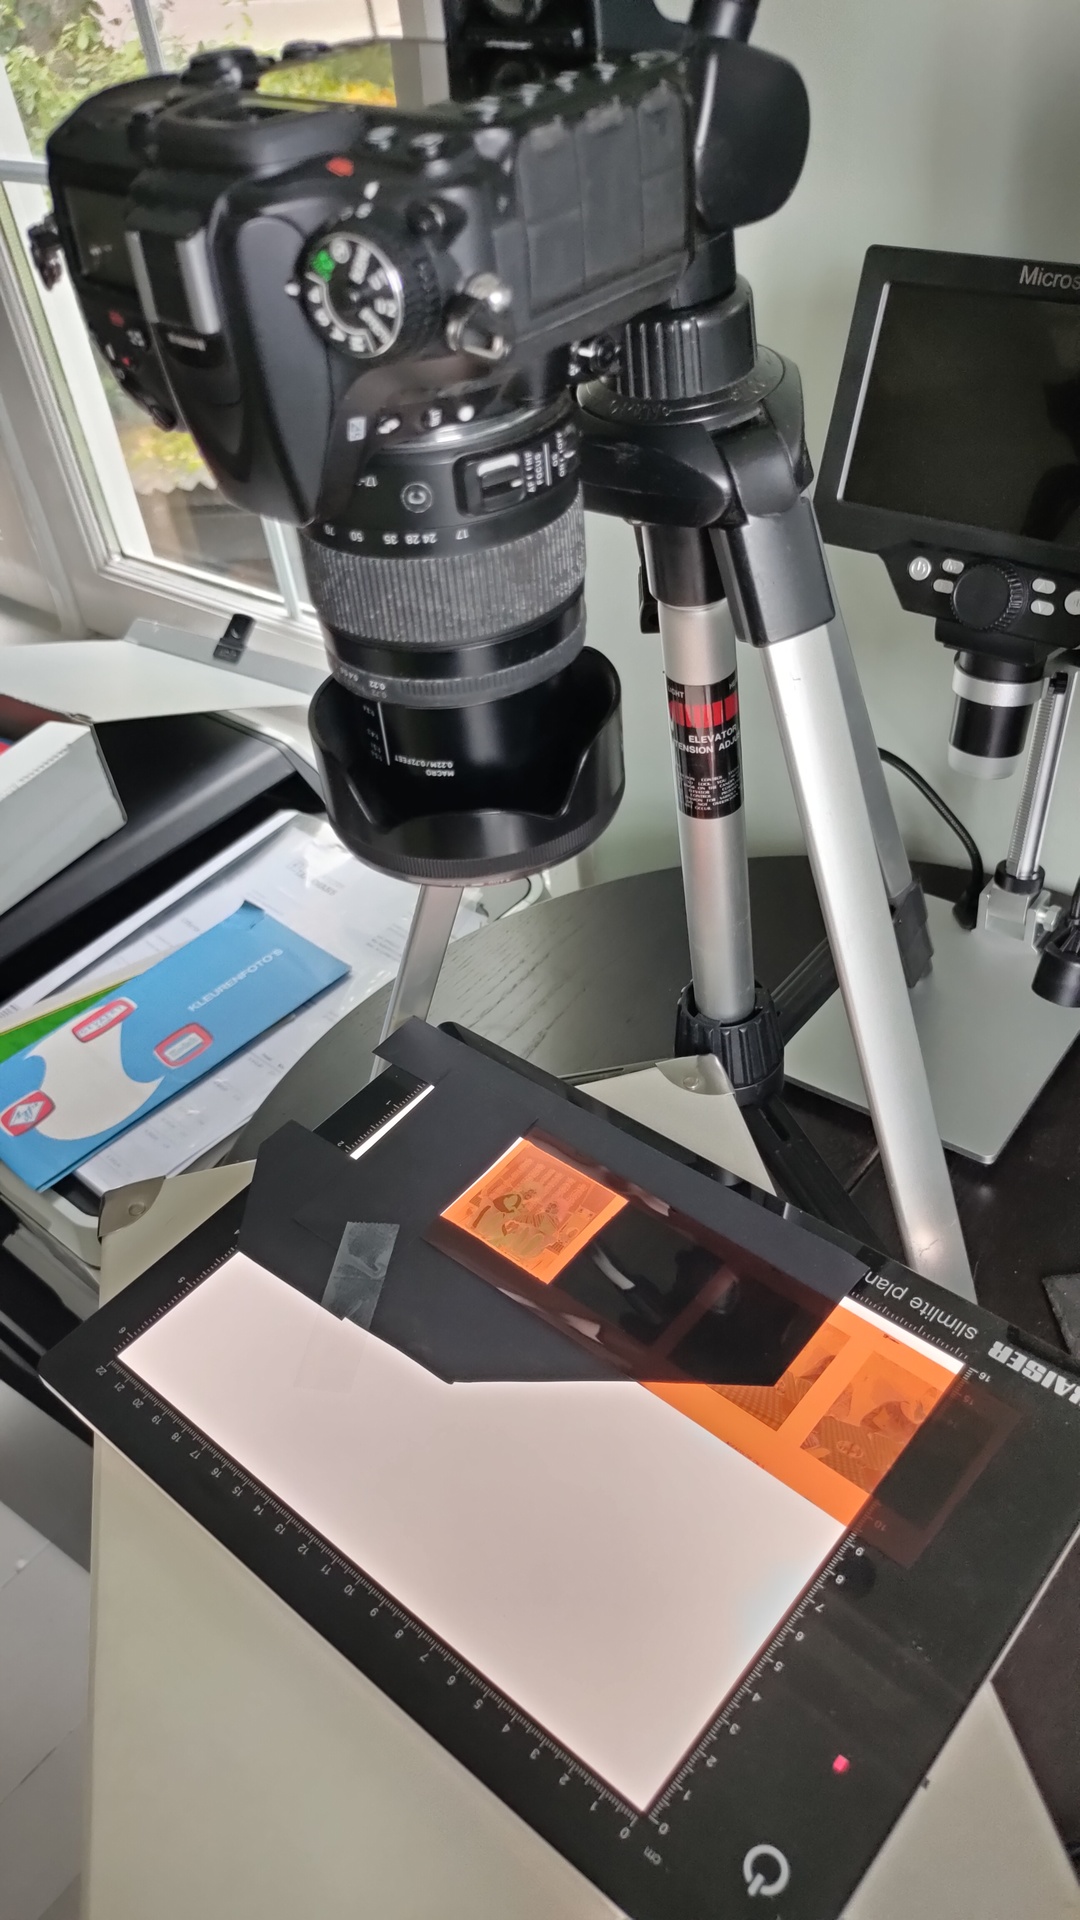
I’ve printed a photo on transparant sheets to experiment with.
(Next time, i’ll take a larger size, and fix the contrast.

The most interesting ones i’ve made today:

Composite video PCB working

UPDATE 20221108

Soldered the components on the print
No more sync issues! (see post https://www.henriaanstoot.nl/2022/10/19/composite-video-with-atmega328p/ )

There are some duplicate characters, the input device below does not have a proper debounce method.

My temporary input device (note hex 21 is a “!” character)

No need to fix the debounce, the dipswitches are temporary. This will be controlled by the VIA 6522 chip.

UPDATE 20221108 (Connected to second VIA)

PORTB = $5000
PORTA = $5001
DDRB = $5002
DDRA = $5003
clock = $e0

E  = %10000000
RW = %01000000
RS = %00000000

  .org $0200

reset:
  ldx #$ff
  txs

  lda #%11111111 ; Set all pins on port B to output
  sta DDRB
  lda #%10000000 ; Set top pin on port A to output
  sta DDRA
  lda #$00  ; reset bit
  sta PORTA
  sta clock

  ldx #0
print:
  lda message,x
  beq printborder
  jsr print_char
  inx
  jmp print

loop:
  jmp loop

message:
        .db 0x01,0x04,0x0C,0x0E,0x10,0x0F,0x08
        .db 0x05,0x0a,0x0a
        .db 0x05,0x0b,0x0b
        .asc "Composite Video 6502 - 20221108"
        .db 0x0E,0x11,0x0F,0x0C
        .asciiz " With 2 pixels "

waitloop:
  pha
  tya
  pha
  ldy #$ff
back:
  dey
  bne back
  pla
  tay
  pla
  rts

print_char:
  sta PORTB
  jsr waitloop
  jsr waitloop
  lda clock
  eor #%10000000
  sta clock
  sta PORTA
  jsr waitloop
  lda clock
  eor #%10000000
  sta PORTA
  jsr waitloop
  rts

Control codes as from : http://searle.x10host.com/MonitorKeyboard/index.html

Video display control codes:
Hex (Decimal) and meaning
01 (01) - Cursor home (Standard ASCII)
02 (02) - Define cursor character (2nd byte is the curs character, or 00 to turn off) <--New for 3.0
03 (03) - Cursor blinking
04 (04) - Cursor solid
05 (05) - Set graphics pixel (next two bytes = x,y) <--New for 3.0
06 (06) - Reset graphics pixel (next two bytes = x,y) <--New for 3.0
08 (08) - Backspace (Standard ASCII)
09 (09) - Tab (Standard ASCII)
0A (11) - Linefeed (Standard ASCII)
0C (12) - Clear screen (Standard ASCII)
0D (13) - Carriage return (Standard ASCII)
0E (14) - Set column 0 to 79 (2nd byte is the column number) or 0 to 39 for a 40 char line
0F (16) - Set row 0 to 24 (2nd byte is the row number)
10 (16) - Delete start of line
11 (17) - Delete to end of line
12 (18) - Delete to start of screen
13 (19) - Delete to end of screen
14 (20) - Scroll up
15 (21) - Scroll down
16 (22) - Scroll left
17 (23) - Scroll right
18 (24) - Set font attribute for the current line (see elsewhere on this page for details) <--New for 3.0
1A (26) - Treat next byte as a character (to allow PC DOS char codes 1 to 31 to be displayed on screen)
1B (27) - ESC - reserved for ANSI sequences
1C (28) - Cursor right
1D (29) - Cursor Left
1E (30) - Cursor up
1F (31) - Cursor down
20 (32) to 7E (126) - Standard ASCII codes
7F (127) - Delete
80 (128) to FF (255) - PC (DOS) extended characters

Home Assistant/NodeRed update

Upgraded the 2nd (Main) nodered machine to 3.0
Now the node-red-contrib-home-assistant-websocket nodes work again.

Also updated HA, and added some iframes using below.
The HA update broke my mqtt lighting due to changes in the code.

Below also in the example some iframe entries.
( When adding grafana, you need to change grafana.ini

allow_embedding = true

mqtt:
 broker: mqttbrokerserver <--- still errors on this part, 
 discovery: true   <--- but where to configure?
 light:                             <--- Moved this under mqtt
  - name: "KitchenOutside"          <--- added a dash
    payload_on: "99"
    payload_off: "0"
    unique_id: "KitchenOutside"
    brightness_scale: "99"
    brightness_state_topic: ha433/kitchenoutside/brightcontrol
    brightness_command_topic: ha433/kitchenoutside/brightcontrol
    state_topic: ha433/kitchenoutside/brightcontrol
    command_topic: ha433/kitchenoutside/control
    optimistic: false
    on_command_type: brightness

panel_iframe:                     <--- iframes added
  nodered:
    title: "NodeRed"
    url: "http://noderedserver:1880/"
    icon: si:nodered
    require_admin: true
  domoticz:
    title: "Domoticz"
    url: "http://domoticzserver:8080/"
    icon: si:homeadvisor
    require_admin: true
    
influxdb:
    host: influxserver
    port: 8086
    database: homeassistant
    max_retries: 3
    default_measurement: state <--- changed this
    

HomeAssistant add long-lived access token:

  • Click you profile icon bottom right
  • Scroll all the way down and press create token

Node-red

Add a HA node to a flow, double click and add a server with the little pencil

Base URL is important, you can’t just add http://internalip:port
Use a the URL configured in HA (config/network)

Hidden remotes

While having a lot automated, and controllable via apps, we sometimes need the remotes (TV/Chromecast/Mediacenter/etc)

They are always … gone, lost.

So i made a little wooden thingamajig, which is hidden behind our couch.
Maybe an idea also useful for you?

The gap between, the couch and the wall is there because of airflow and the skirting boards.

When looking from a normal perspective, you can’t see them.
(I still have to paint them in the same color as our wall)

In the wooden compartments is some bubble wrap plastic.
It has long “feet” so i can position it anywhere.

On the sides are power outlets for laptops, and usb charging cables.

"If something is worth doing, it's worth overdoing."