Working for clients, so fragmented personal stuff.
New workplace setup so even more space!
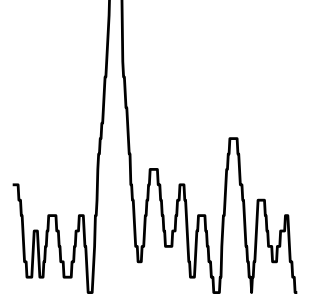
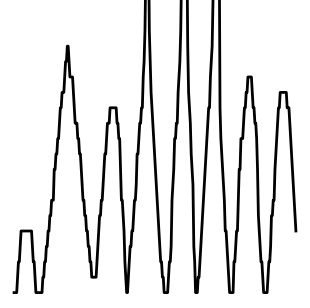
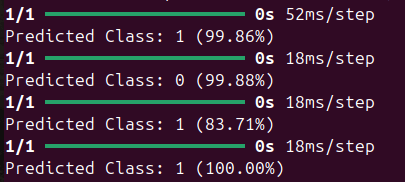
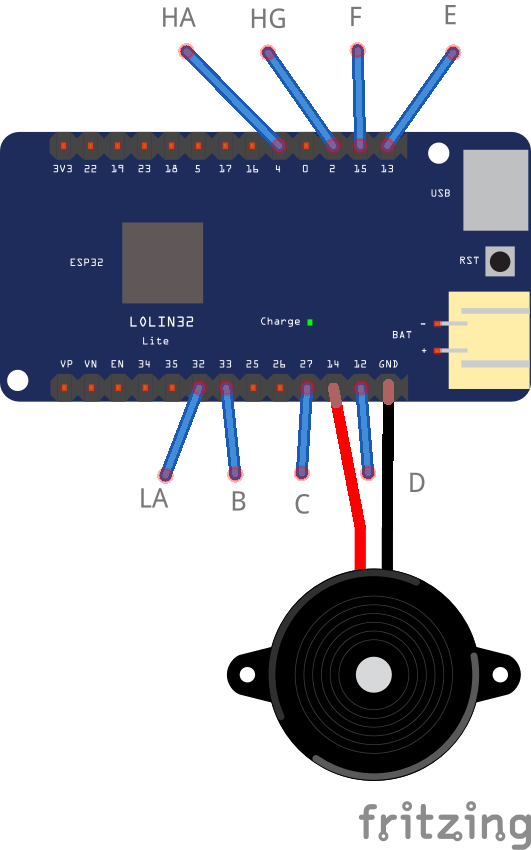
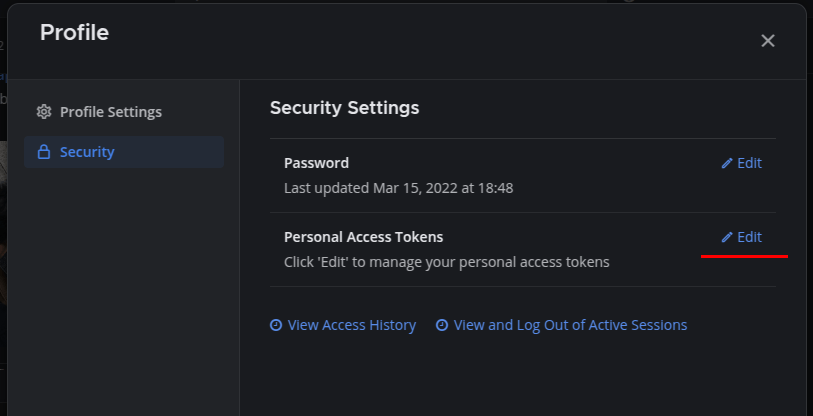
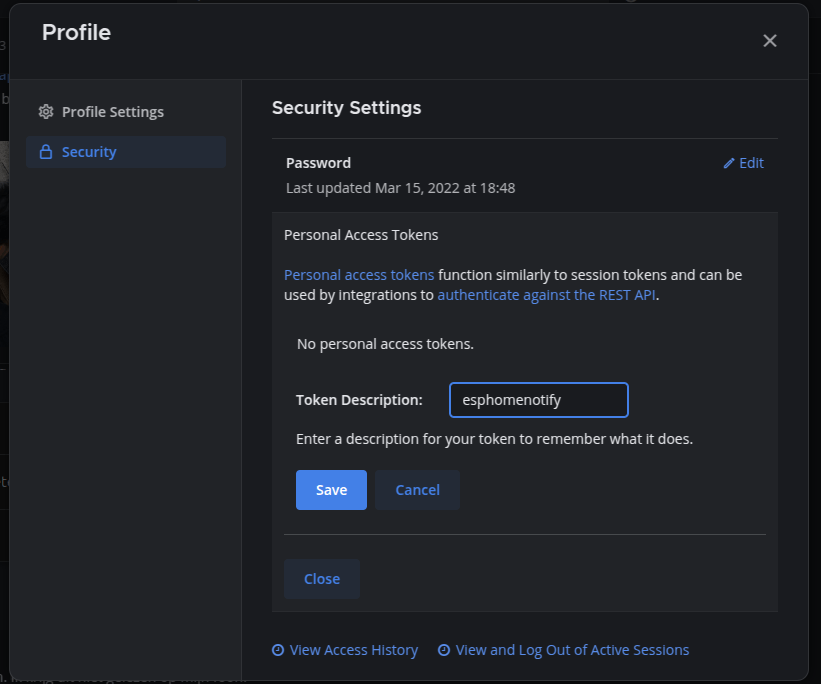
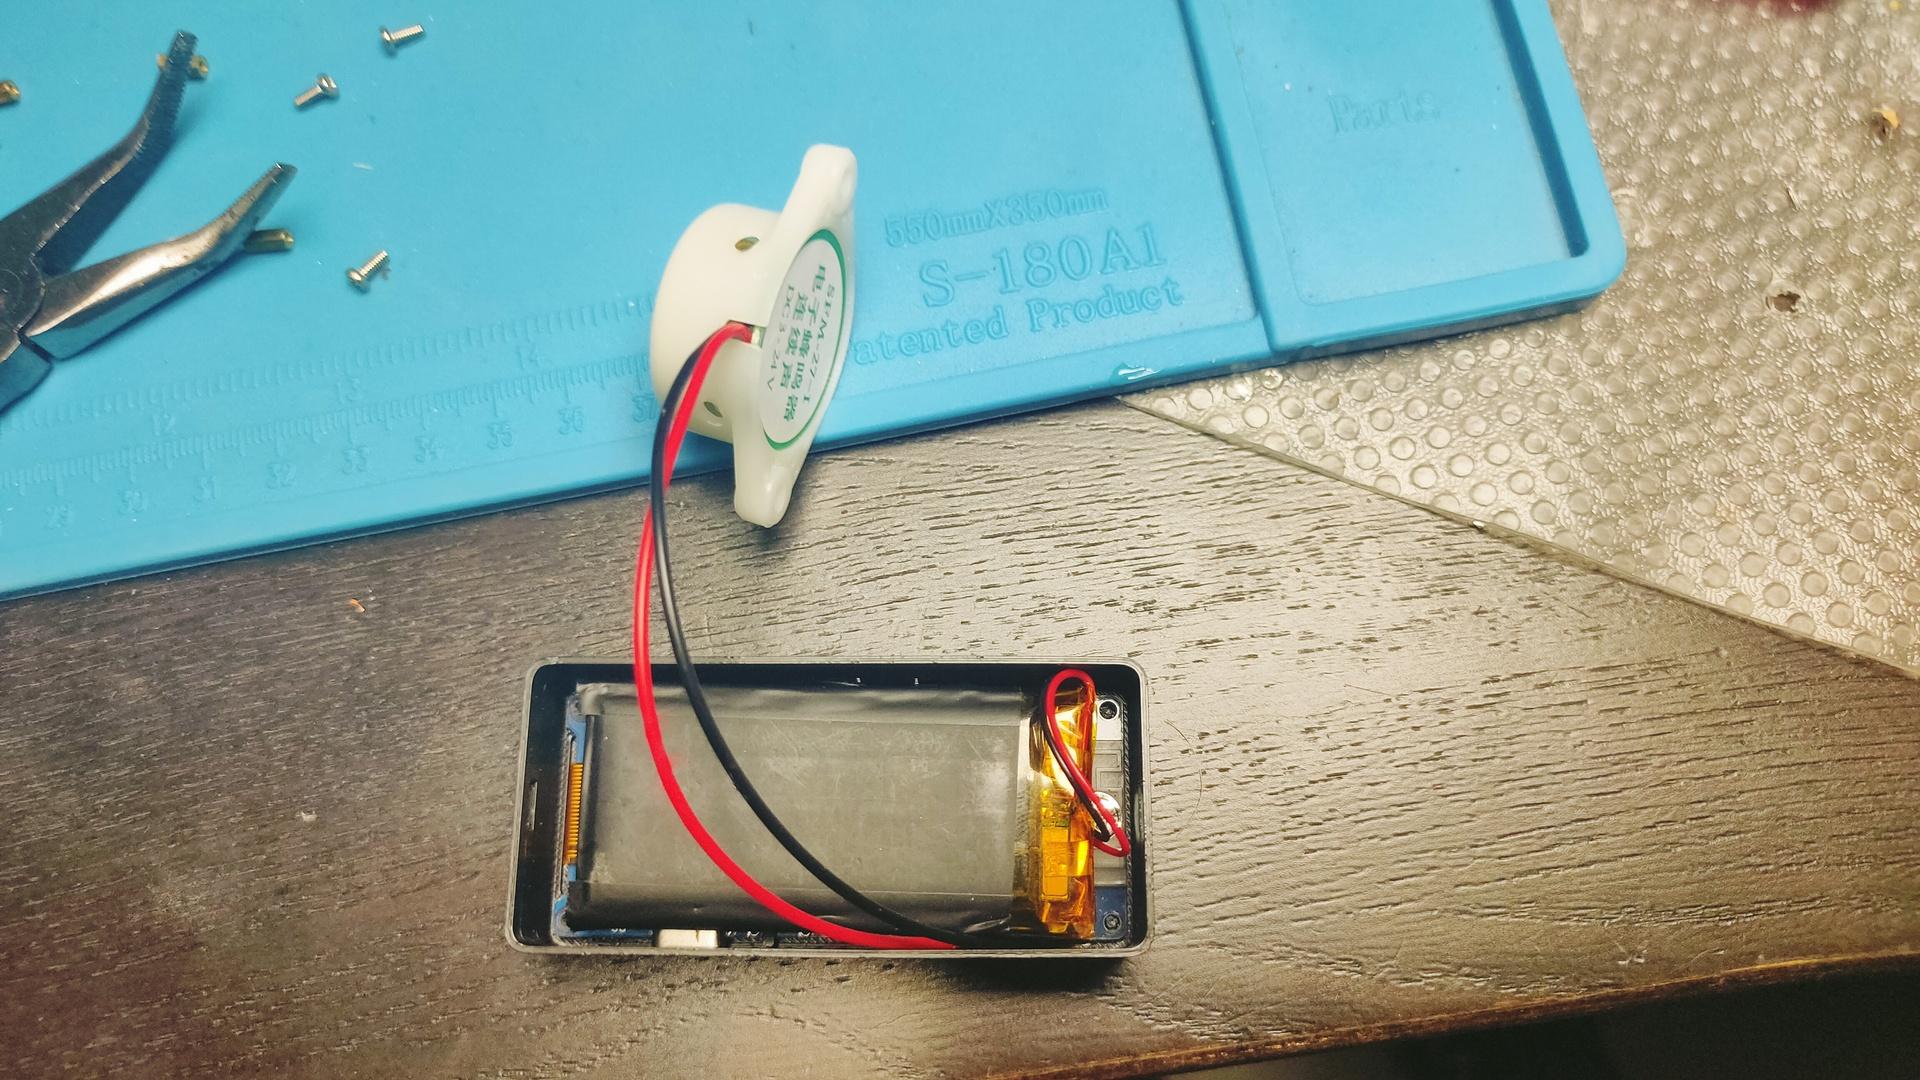
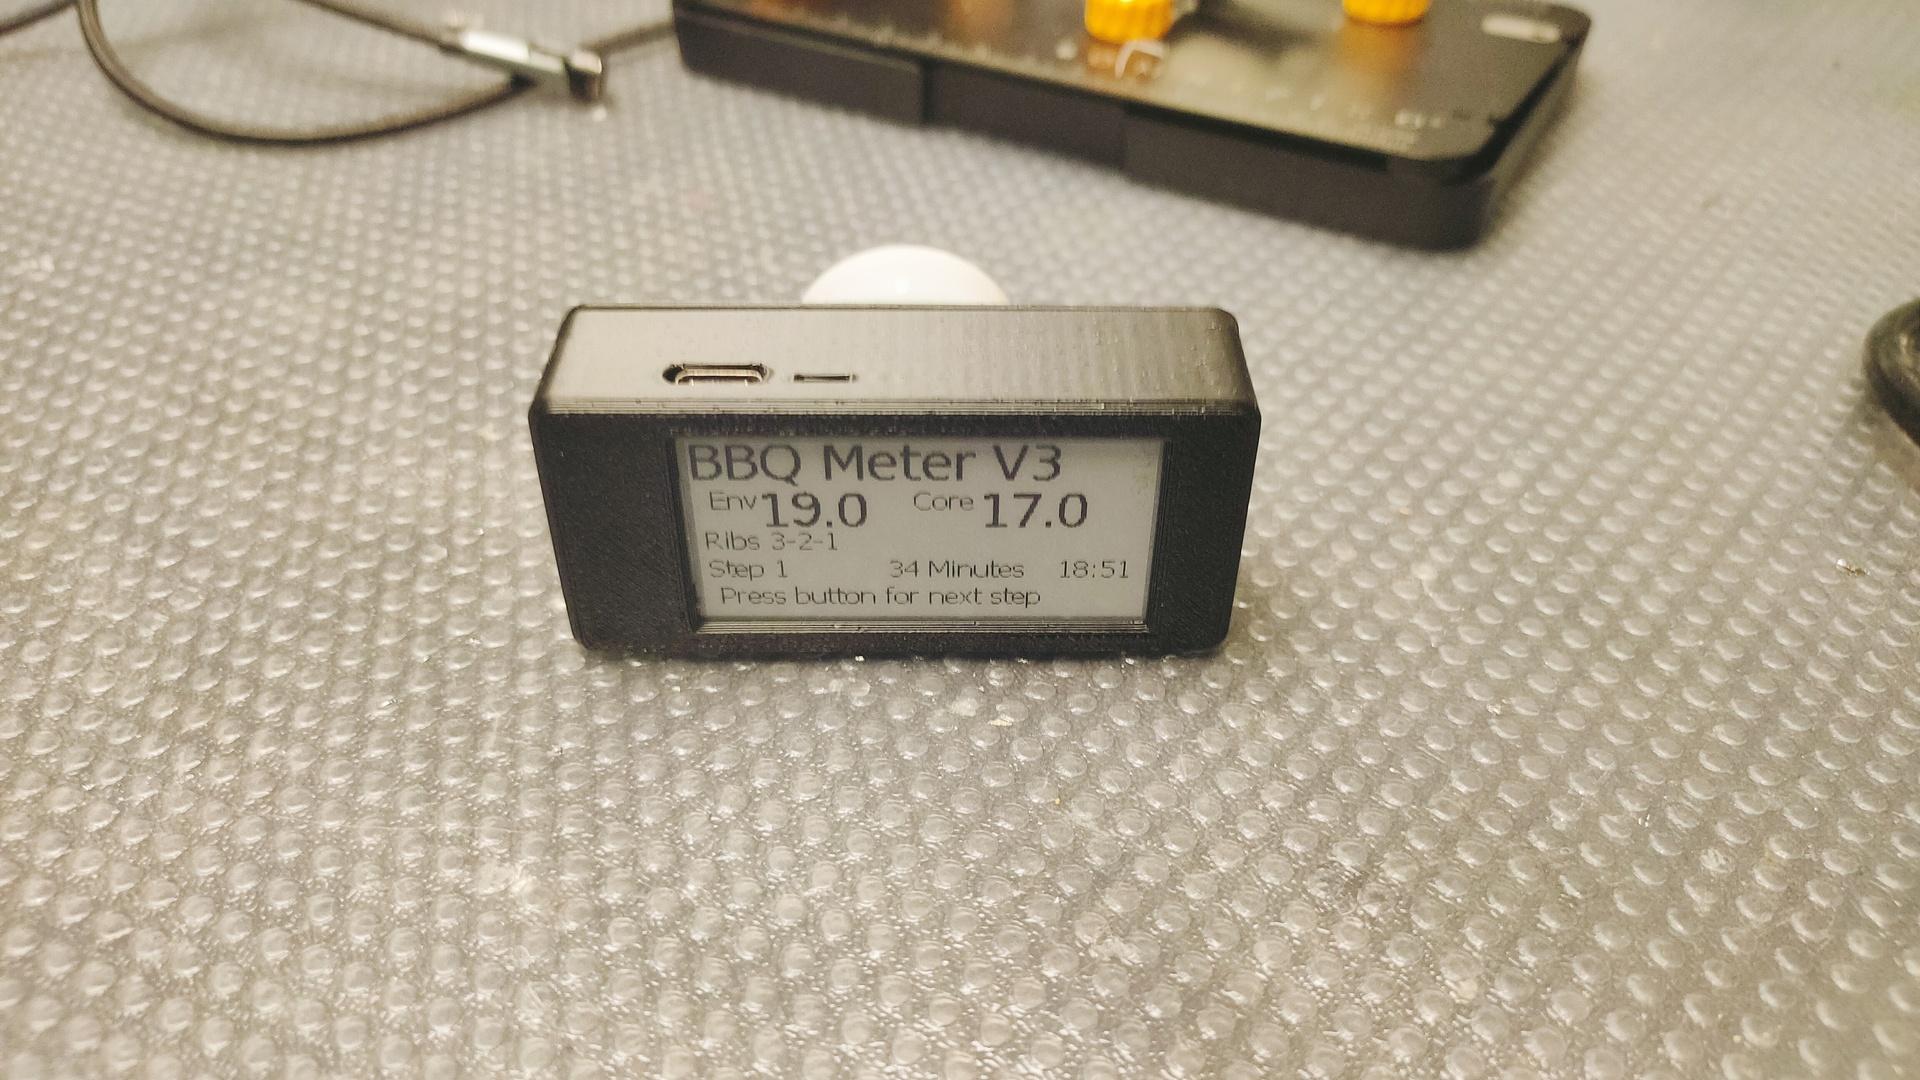
My BBQ monitor V3
As posted before, but now an esphome version, with big-ass buzzer
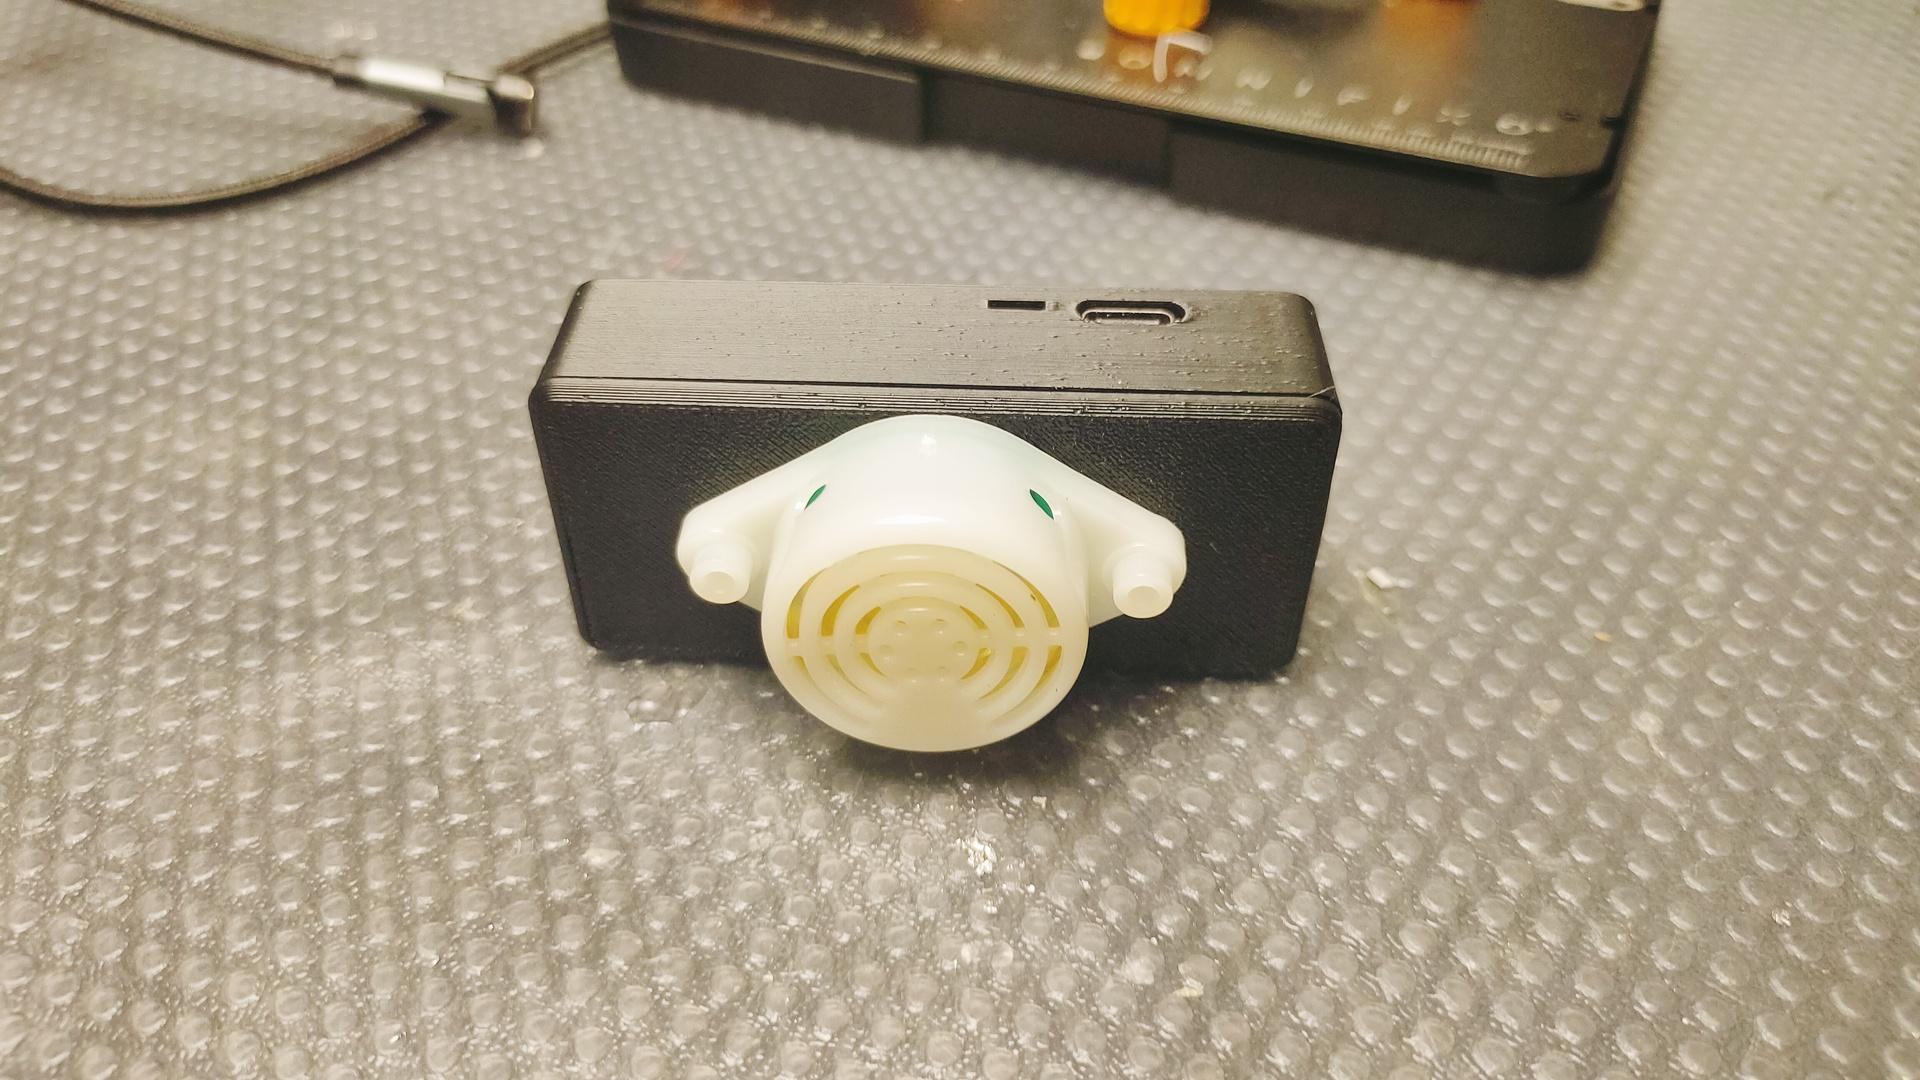
Code available soon, when made generic.
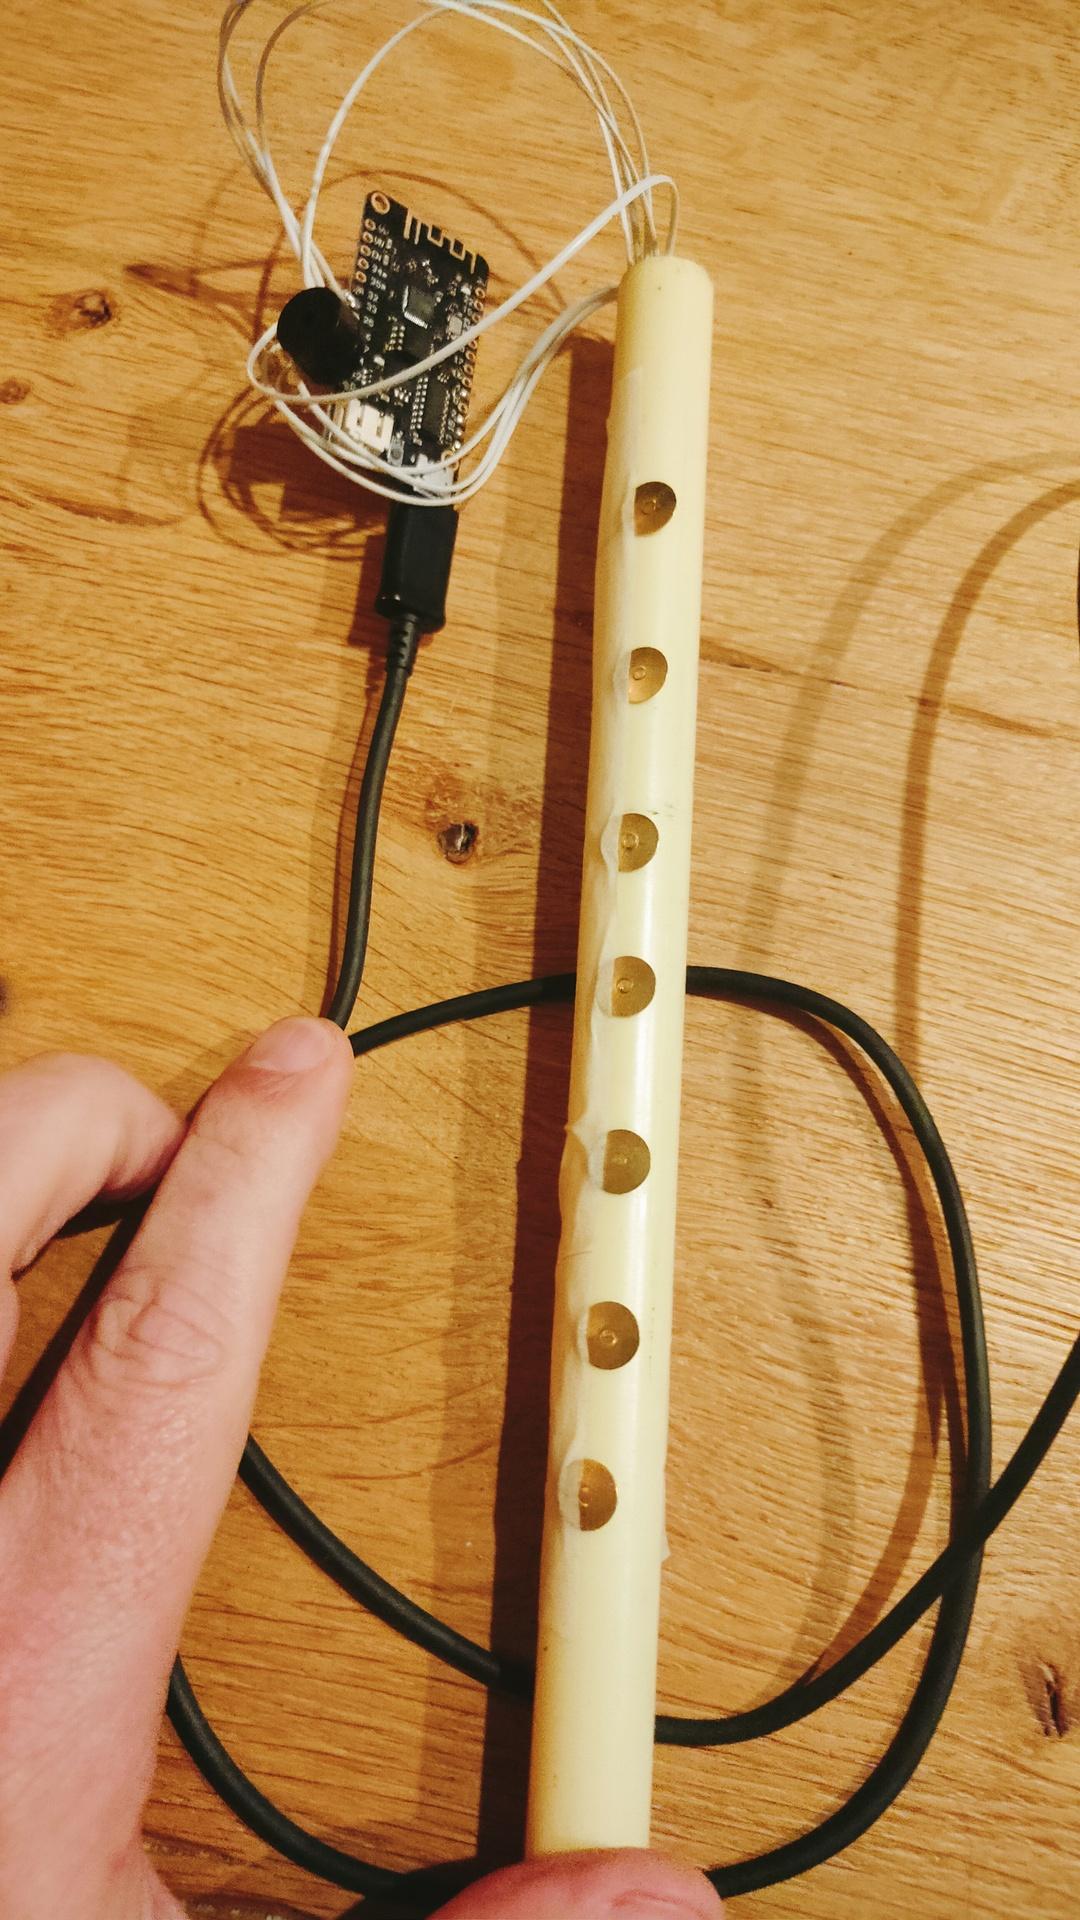
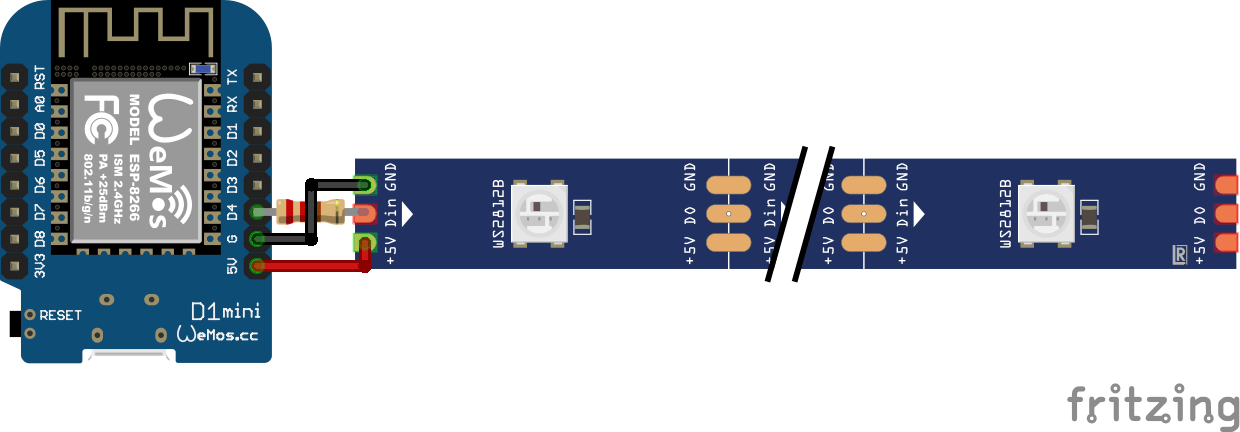
4Button controller using ESPHOME
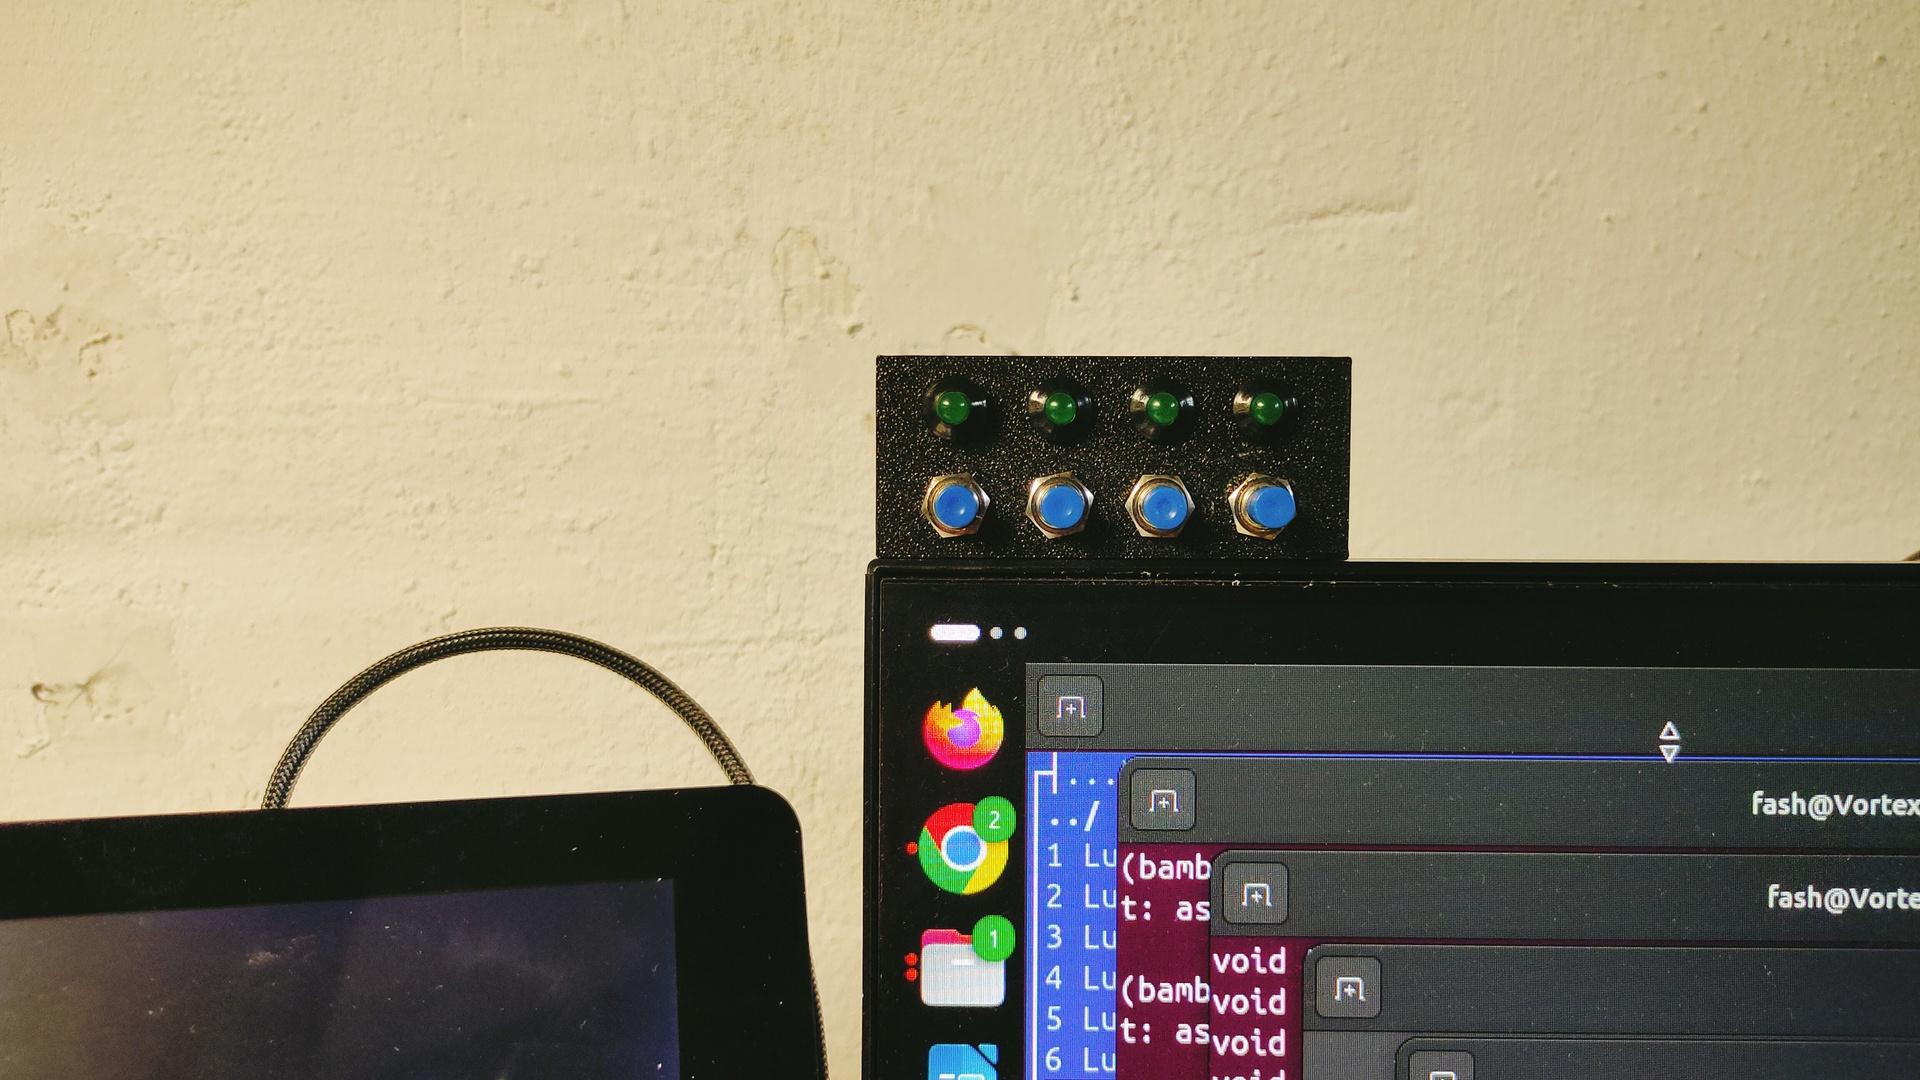
STL FILE https://media.henriaanstoot.nl/4buttons.stl
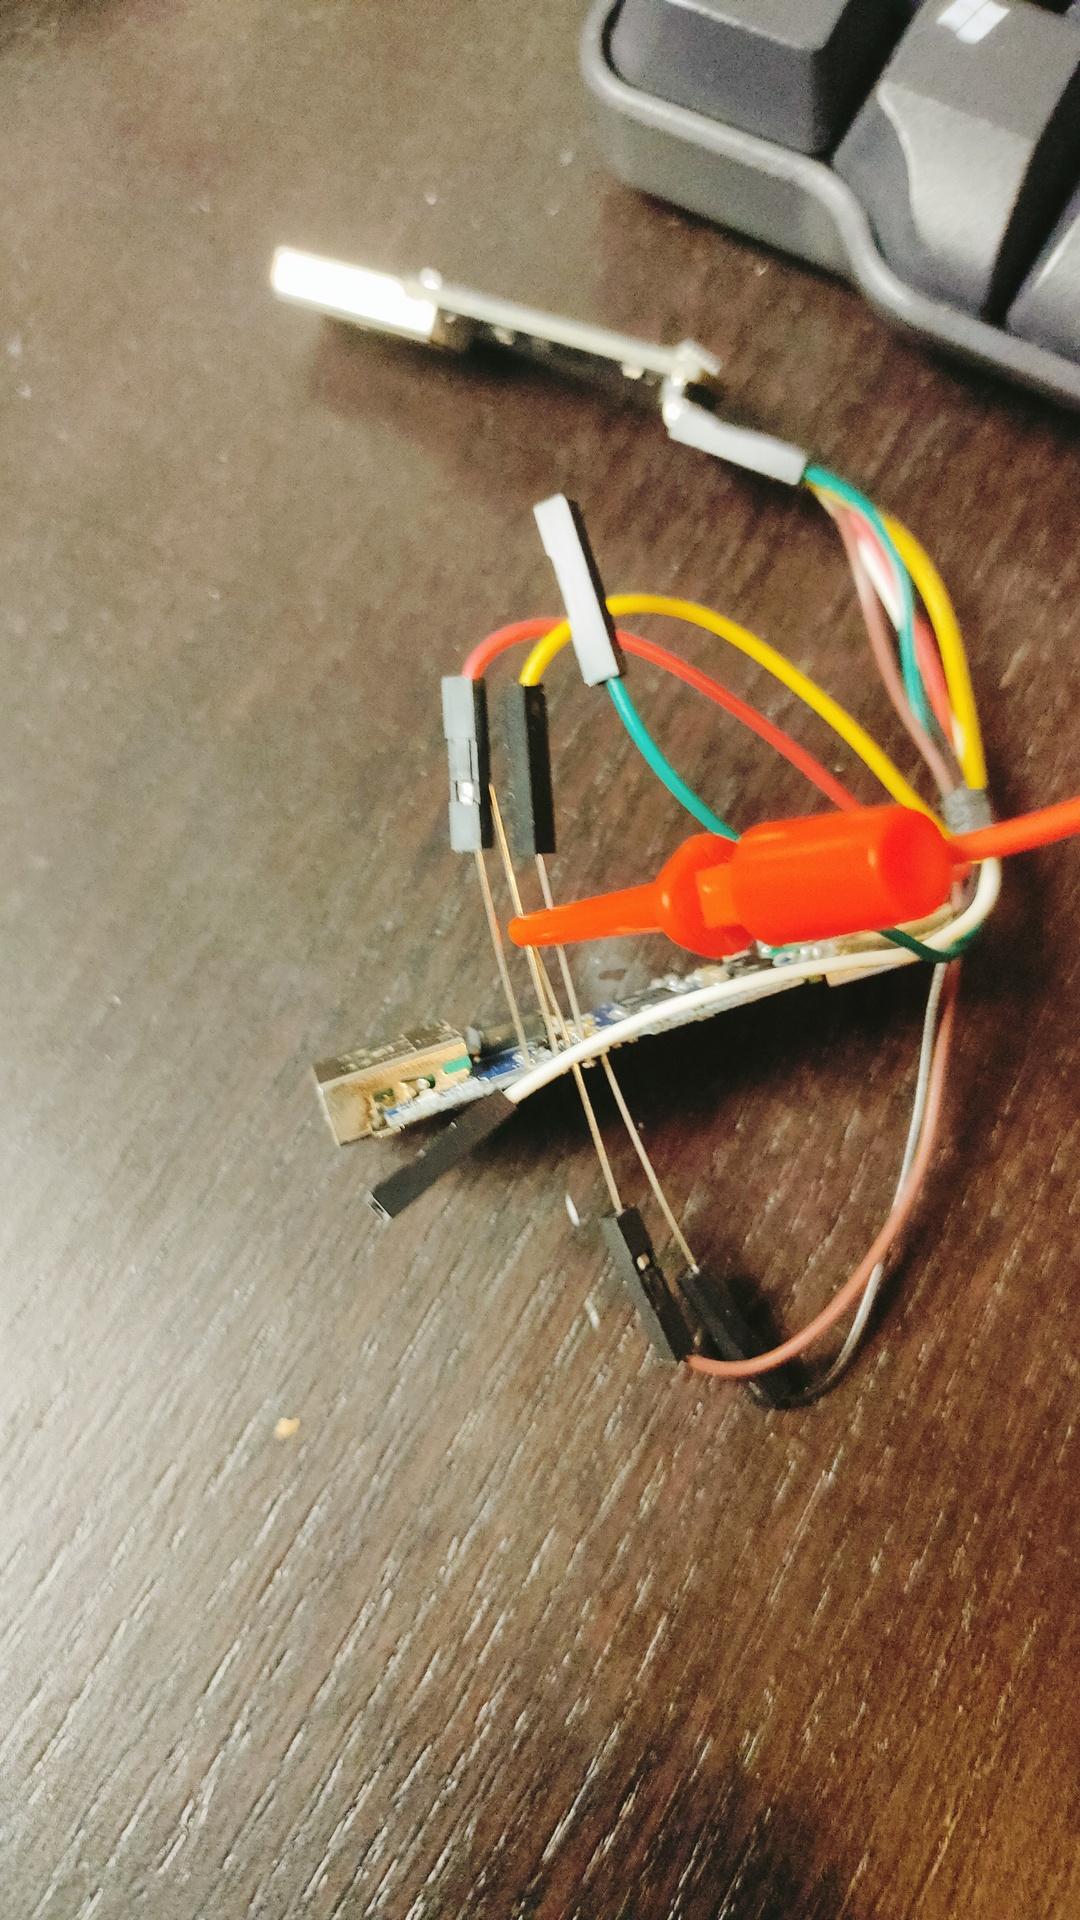
Flash trick for XYUSB
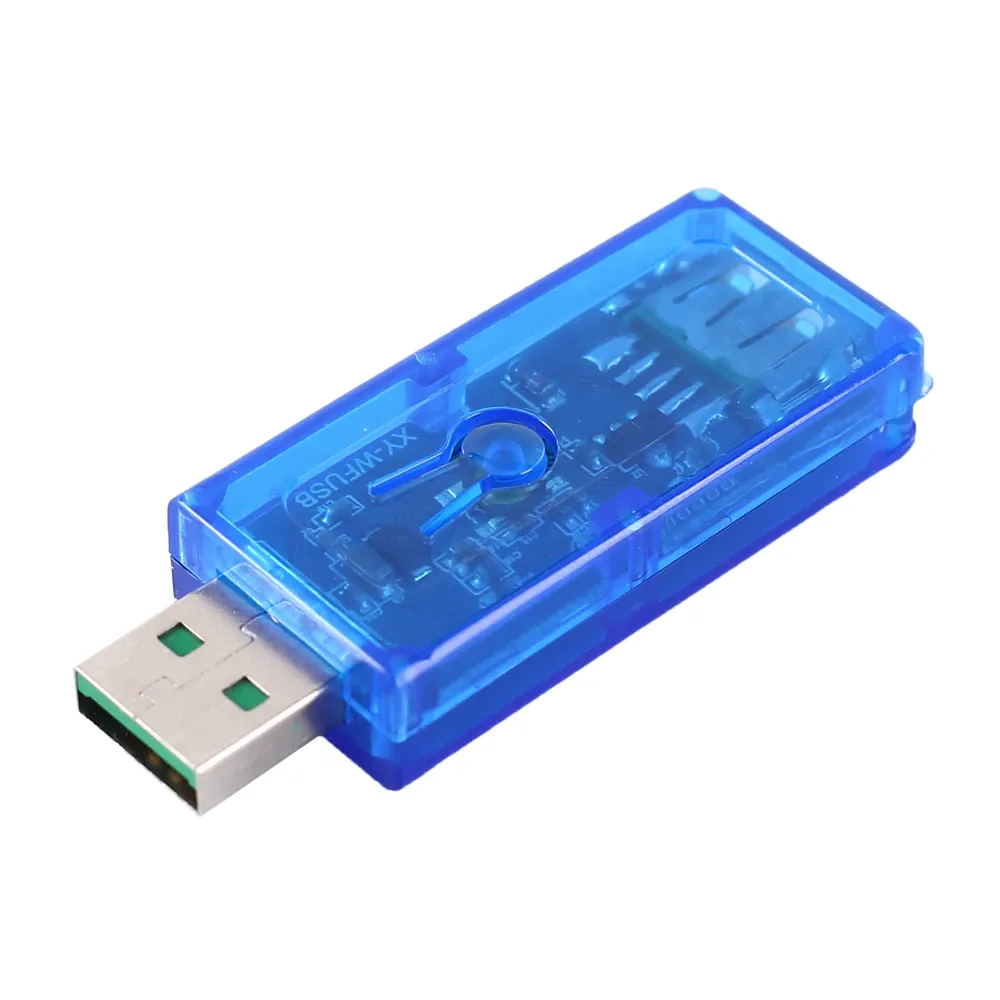
Flashing this to ESPHOME, use sowing pins!
CODE
substitutions:
  name: usb-relay
  friendly_name: "USB Relay"
  default_state: "RESTORE_DEFAULT_OFF"


esphome:
  name: xyusb1
  friendly_name: xyusb1

esp8266:
  board: esp01_1m

# Enable logging
logger:

# Enable Home Assistant API
api:
  encryption:
    key: "ndm8xxxxxxxxxxxxxxxxxjlvrggJv3a1BkY="

ota:
  - platform: esphome
    password: "12cc9xxxxxxxxxxxxxxxxfb6a01e672"

wifi:
  ssid: !secret wifi_ssid
  password: !secret wifi_password

  # Enable fallback hotspot (captive portal) in case wifi connection fails
  ap:
    ssid: "Xyusb1 Fallback Hotspot"
    password: "xxxxxxxxxxx"

captive_portal:

time:
  - platform: homeassistant

# Blue LED
status_led:
  pin:
    number: GPIO16

# Relay
switch:
  - platform: gpio
    id: switch_relay
    pin: GPIO5

  # Green LED
  - platform: gpio
    pin: GPIO14
    id: green_led
    inverted: true # start on

  # Switch template to link relay and green LED states
  # LED is on when relay is off
  - platform: template
    id: relay
    name: "${friendly_name}"
    lambda: |-
      if (id(switch_relay).state) {
        return true;
      } else {
        return false;
      }
    turn_on_action:
        - switch.turn_on:
            id: green_led
        - switch.turn_on:
            id: switch_relay
    turn_off_action:
        - switch.turn_off:
            id: green_led
        - switch.turn_off:
            id: switch_relay

# Button
binary_sensor:
  - platform: gpio
    id: hardware_button
    pin:
      number: GPIO04
      mode: INPUT_PULLUP
      inverted: True
    on_press:
      - switch.toggle: relay

# WiFi Signal Sensor
sensor:
  - platform: wifi_signal
    name: "WiFi Status"
    update_interval: 60s

# Restart button
button:
  - platform: restart
    name: "Restart"
Reflashed my USB Volume button and added a LED-Ring.
Example is green and blue.
Funny text on box
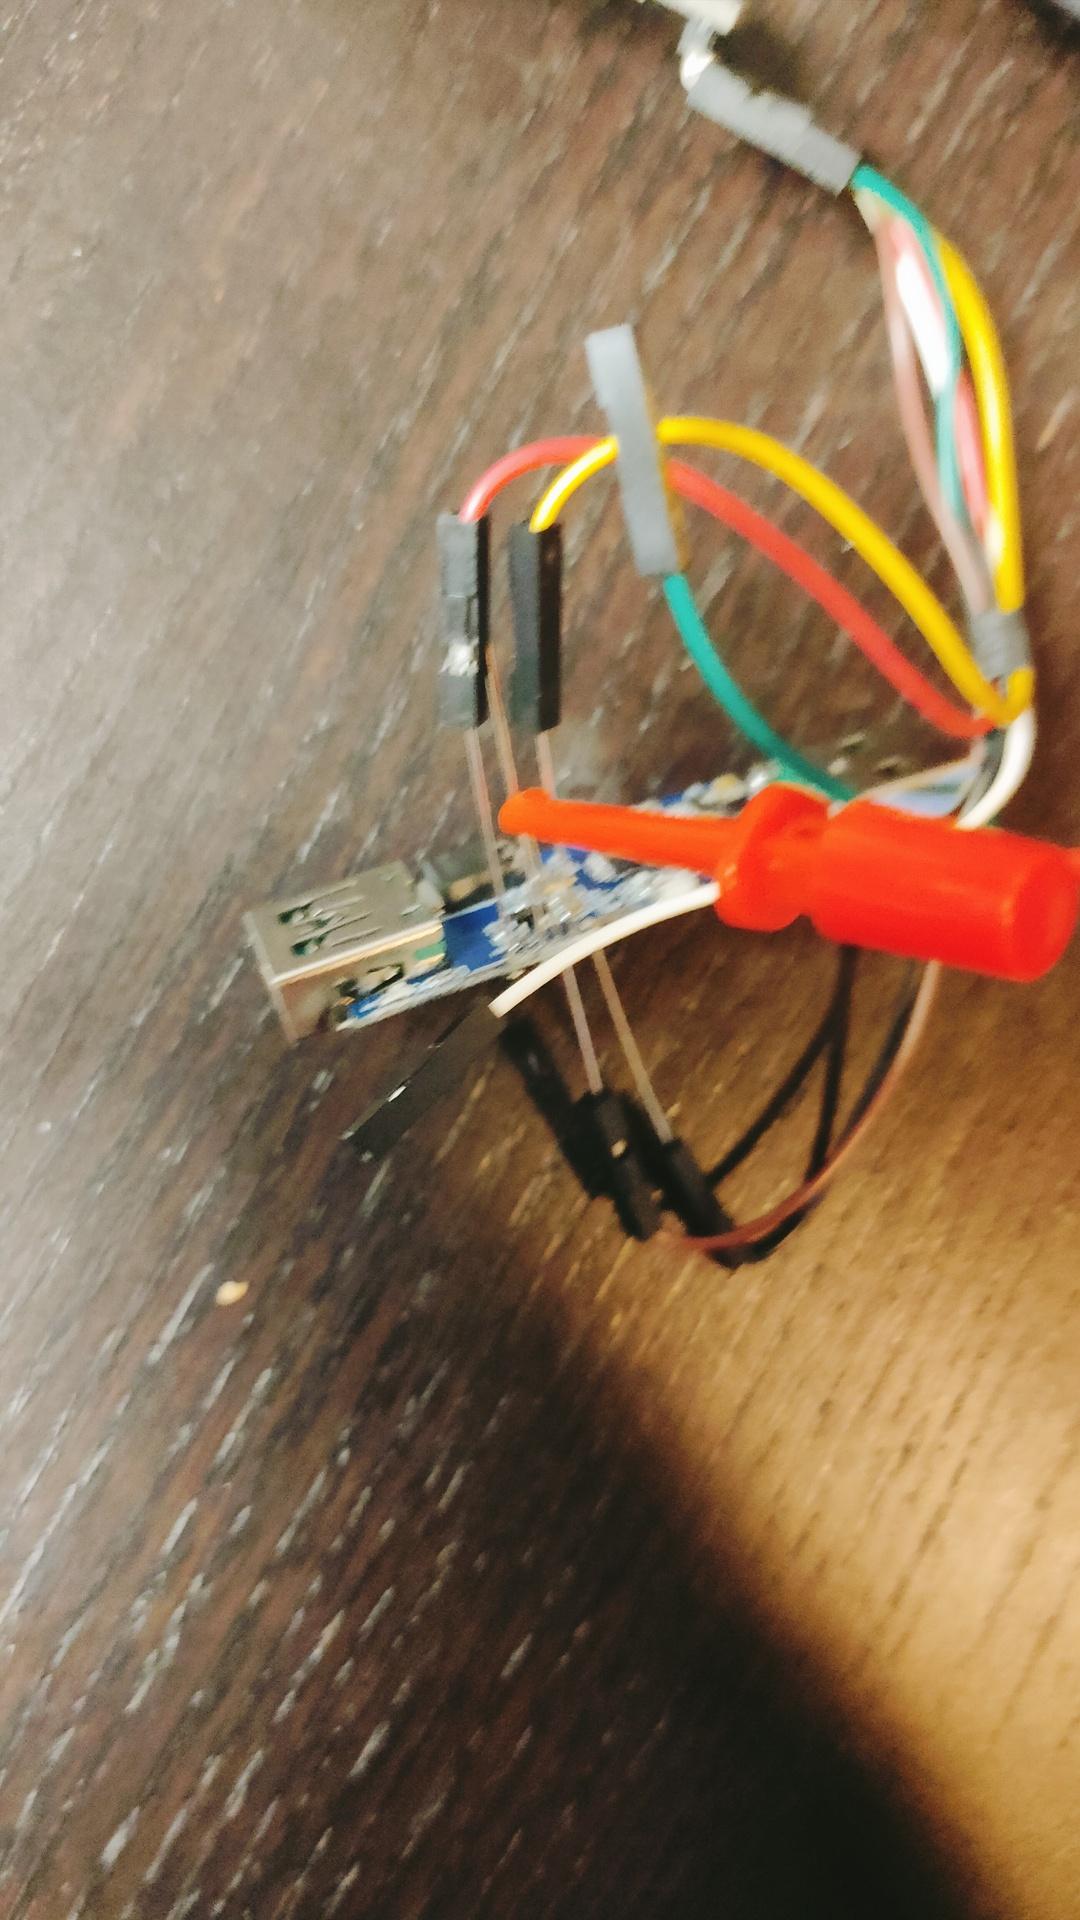
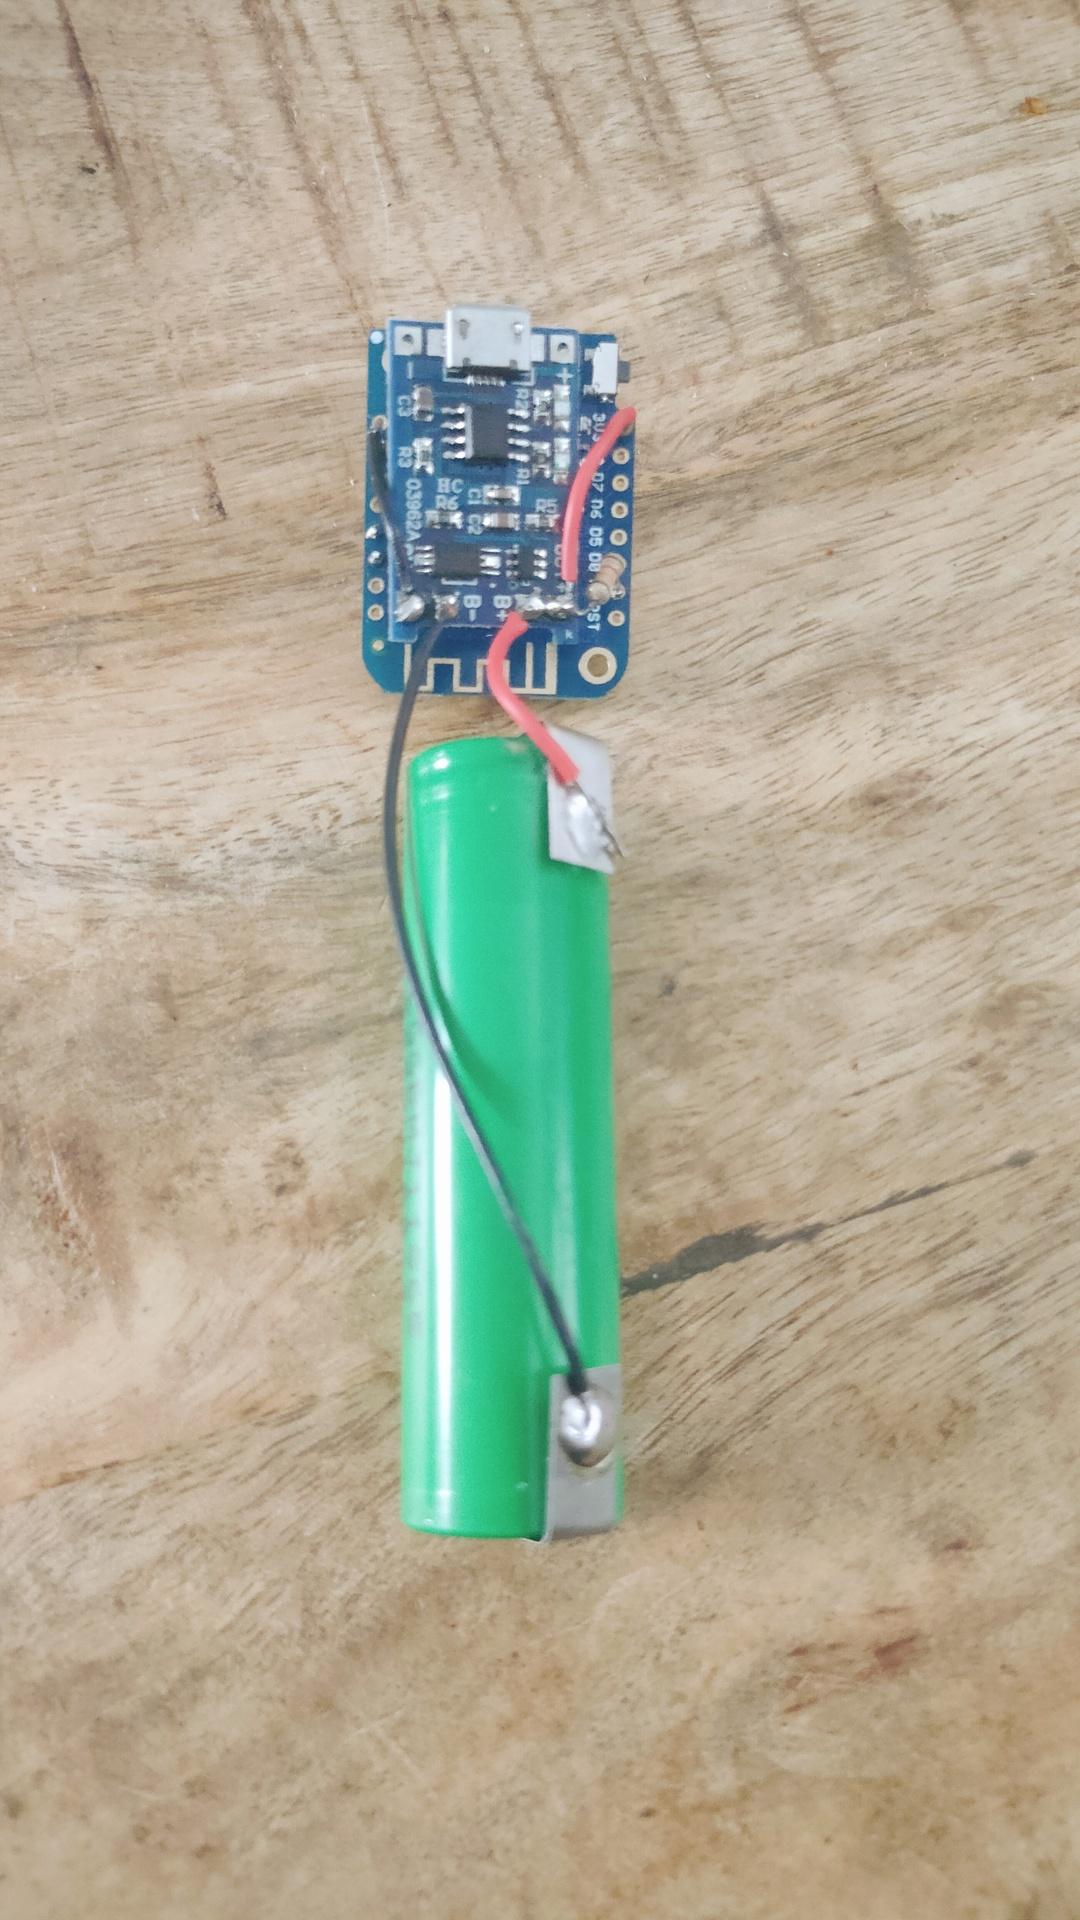
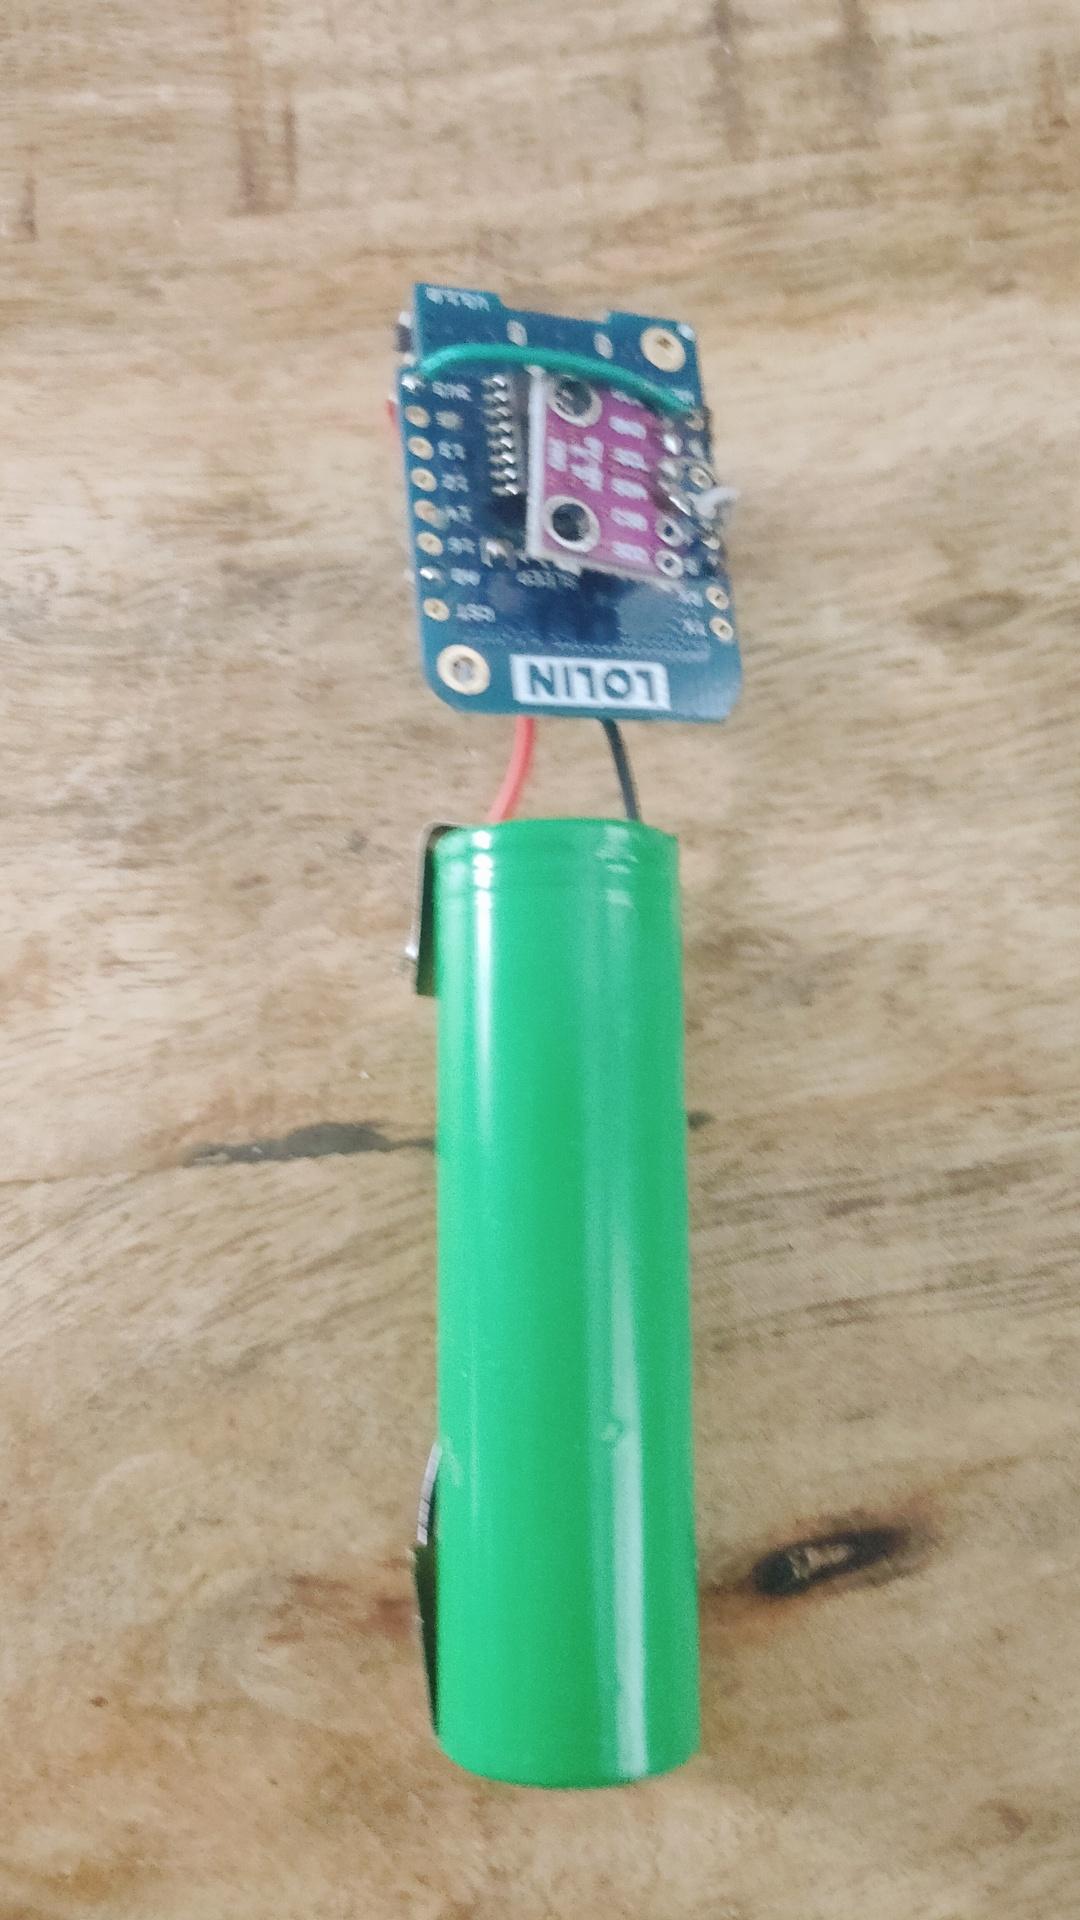
Wireless Temperature/Humidity sensor for ESPHome.
Wemos D1 mini with deep sleep, voltage monitoring using A0 line.
BME280 Temperature/Humidity sensor.
And a 18650 battery with TP4065 battery manager.
Now 3D print a little case.
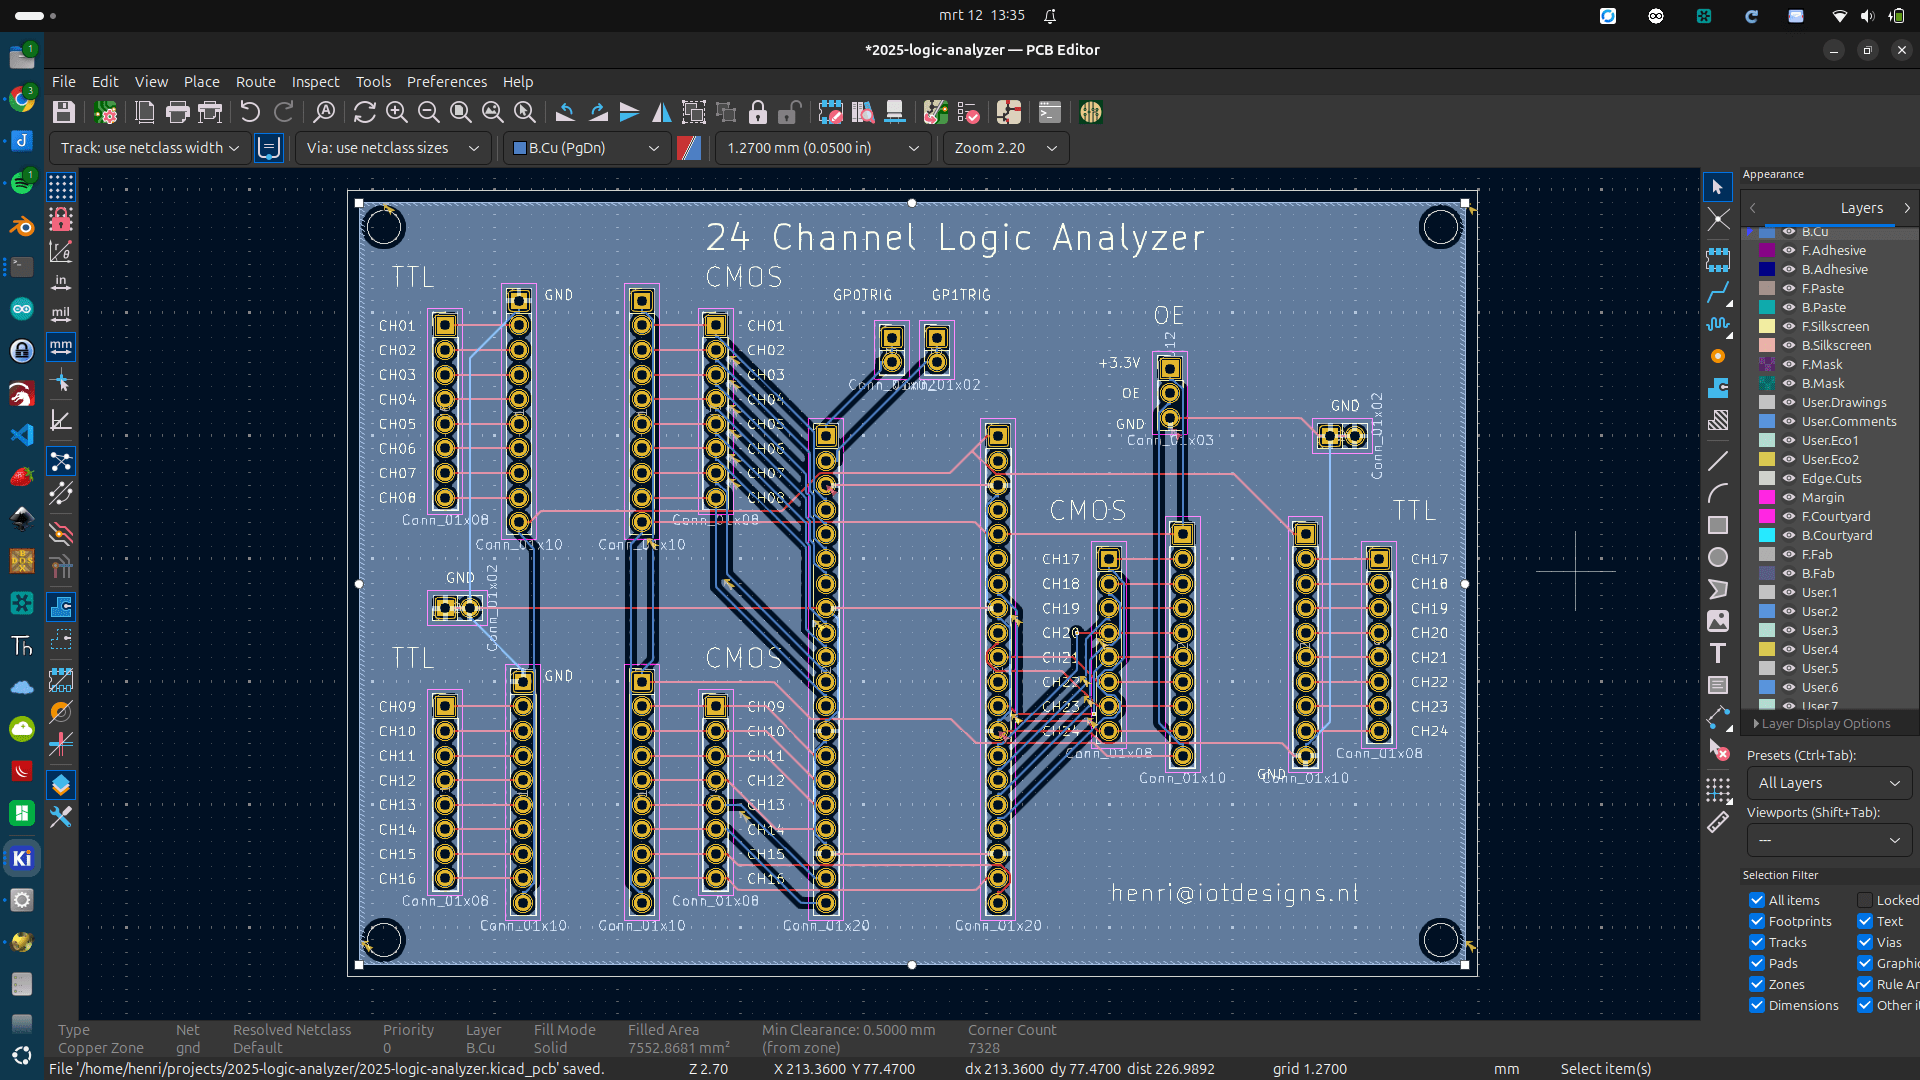
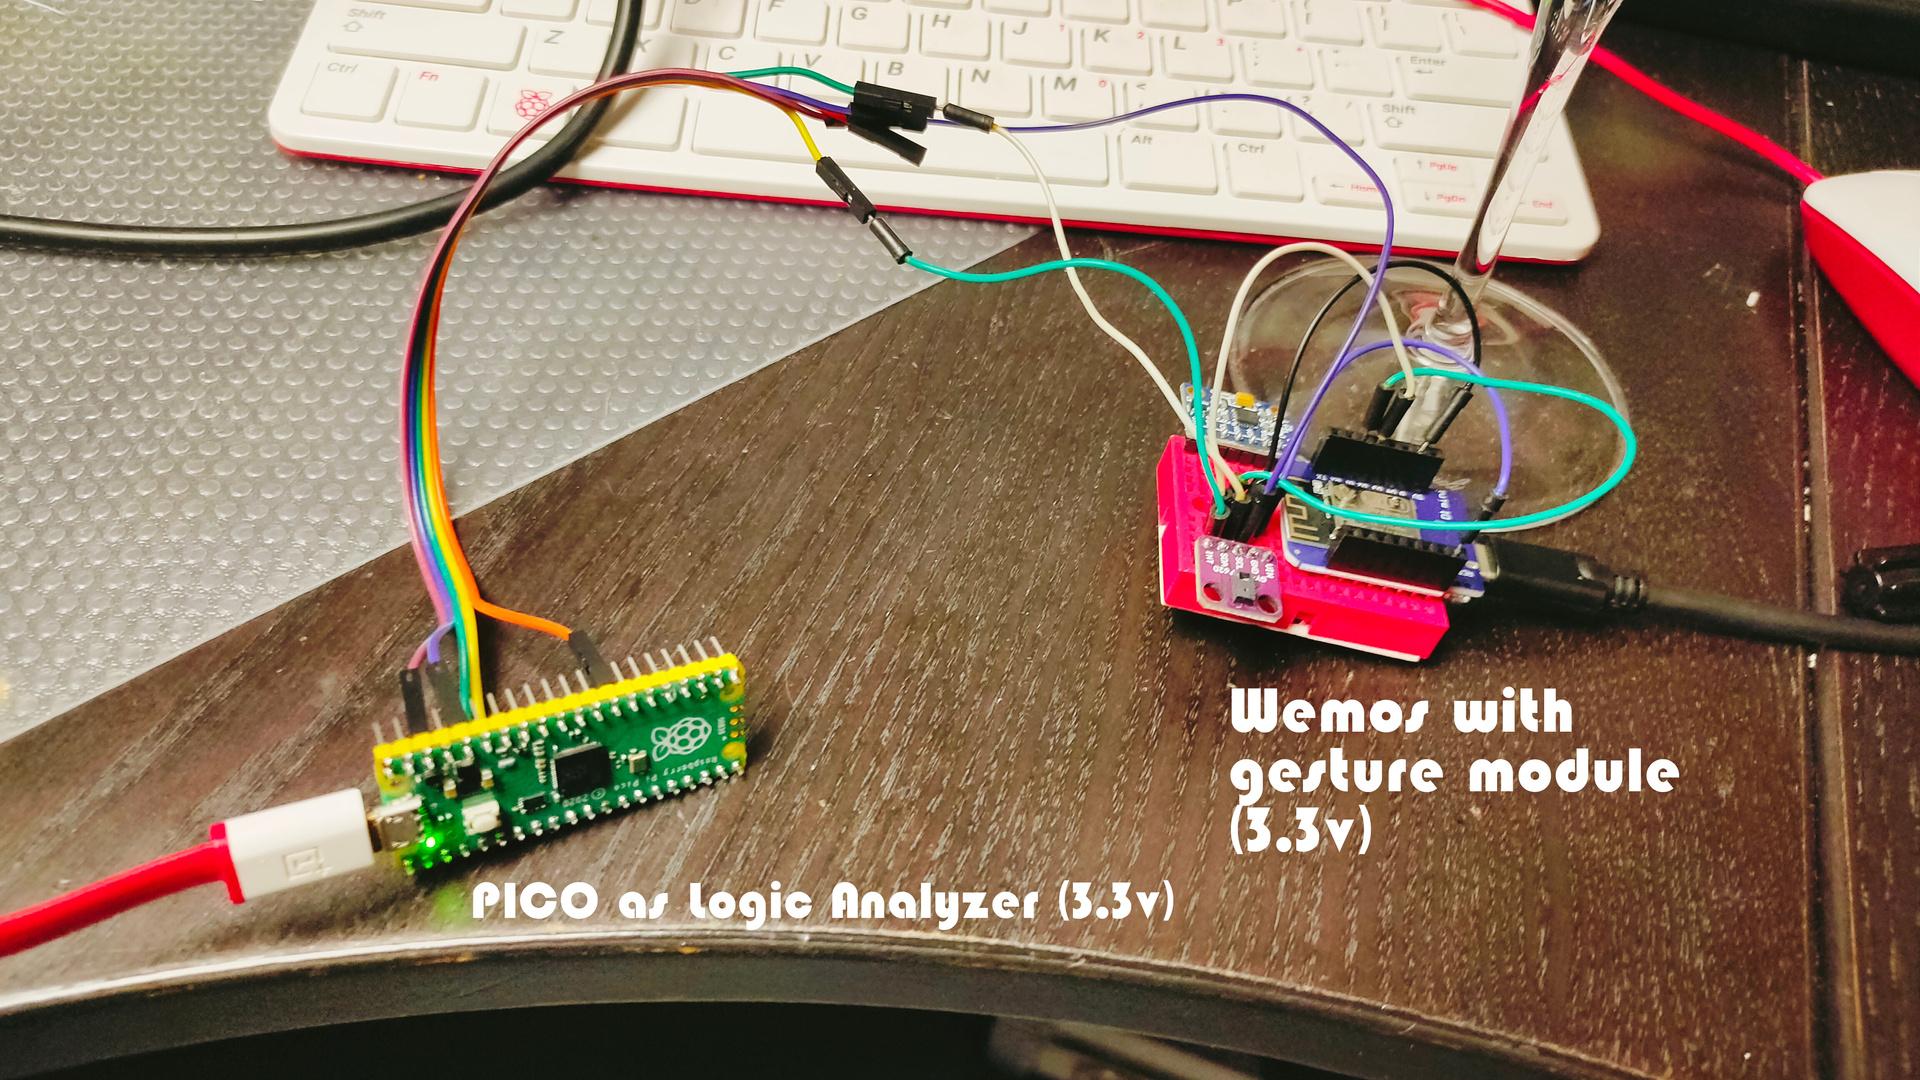
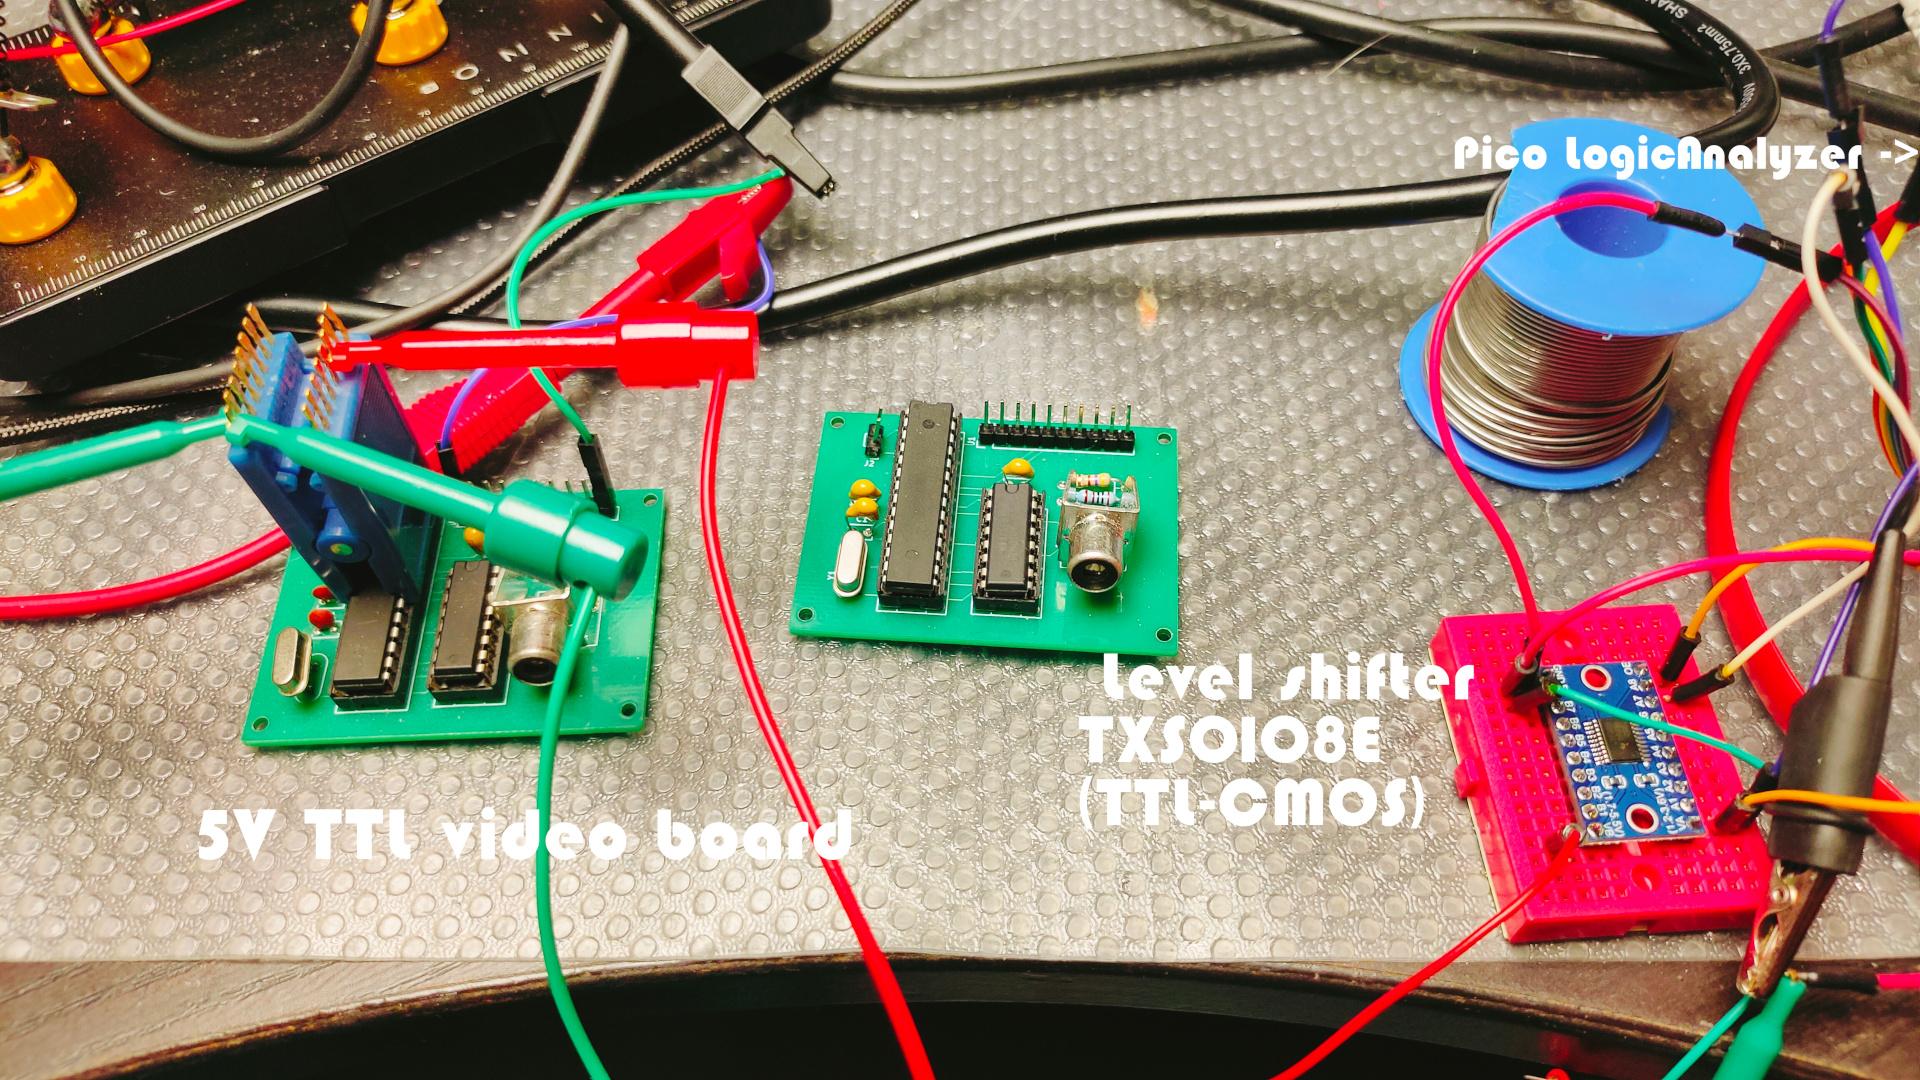
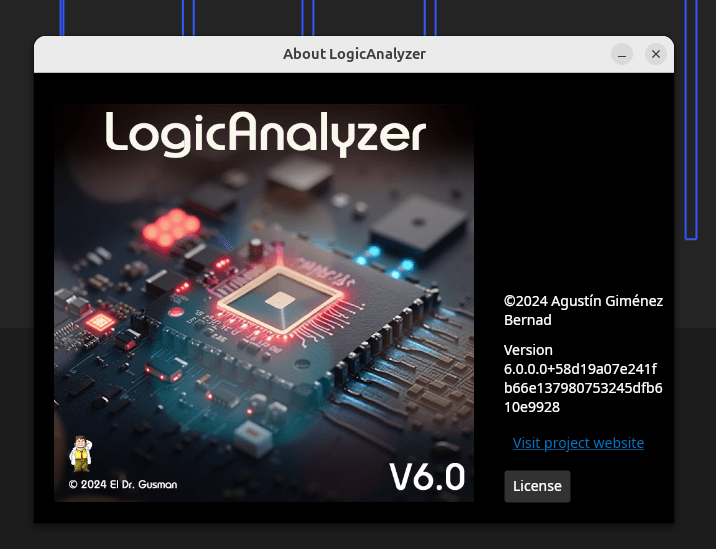
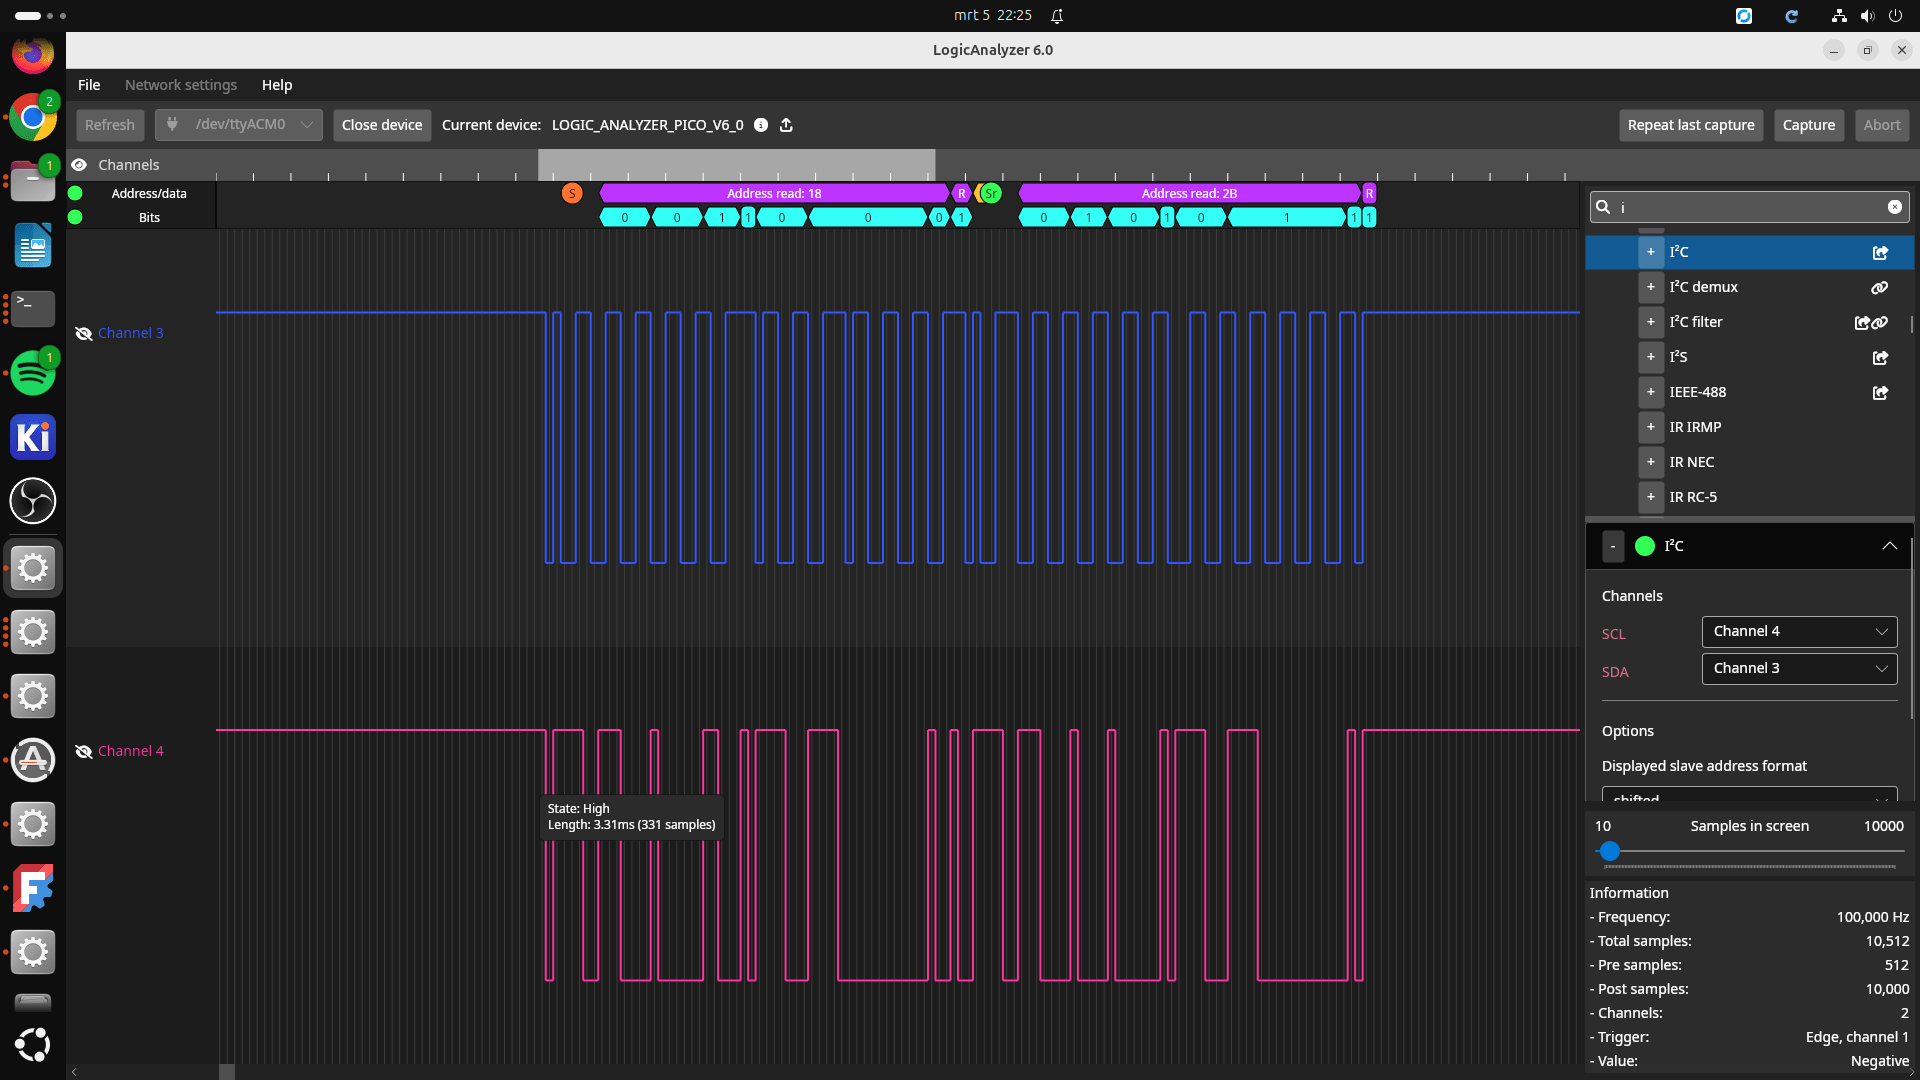
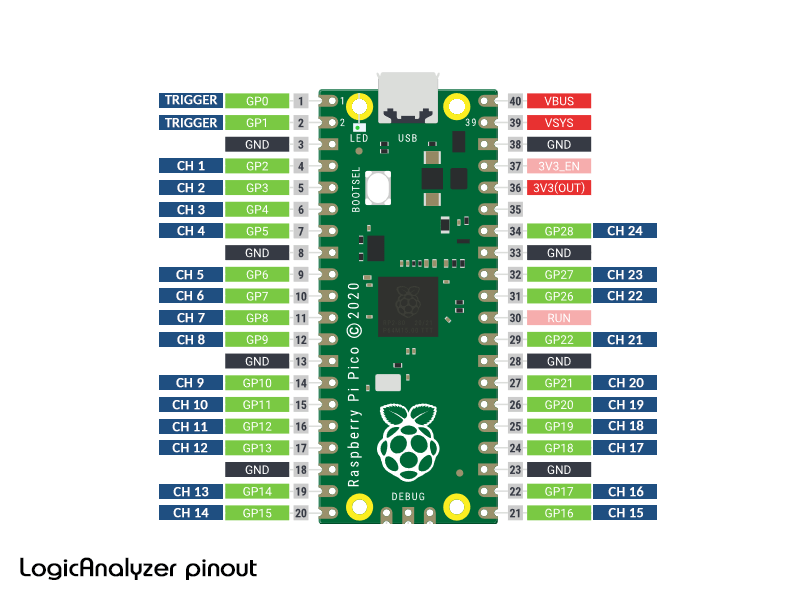
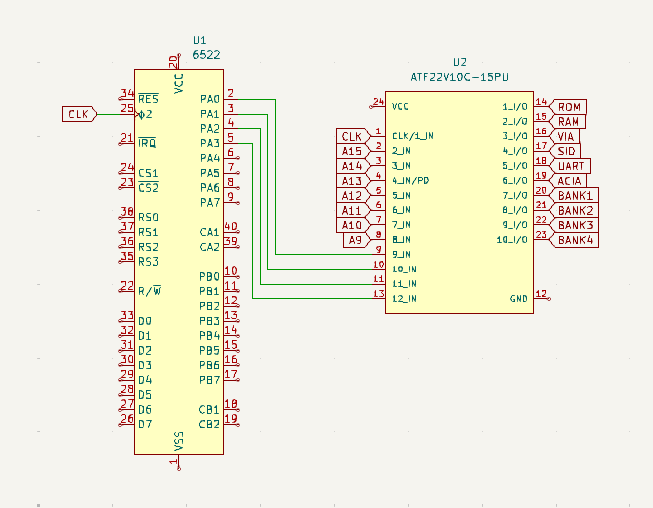
Made a PCB for a 24 Channel Logic analyzer
See post: