Some AI generated art I made – electronic components being sucked into a black hole.
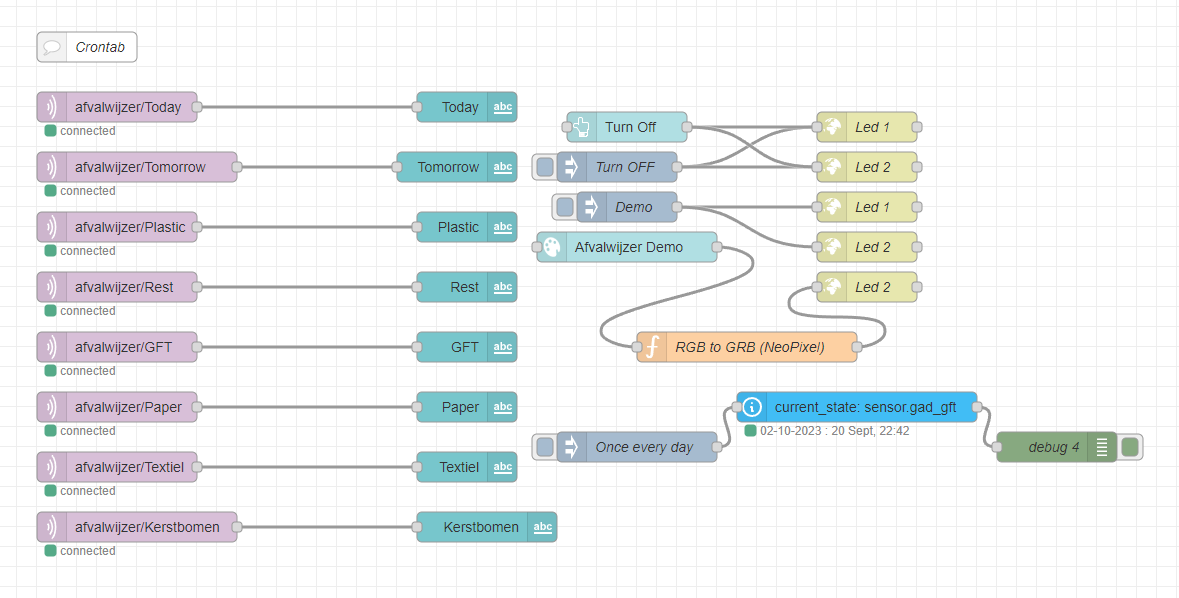
This is NOT a post about the pi-hole project. Of which I apparantly never posted my setup.
I needed an extra PI for a project, and I always try to keep one spare. But they are always gone, in use, missing .. whatever.
So I can´t work on this project right now, so lets rant about disappearing stuff
Like they are being sucked up in another dimension .. gone. WHERE ARE THEY?!?
How to keep track of them?
Any suggestions?
I used to have a sheet, but I often forget to keep track. Do I use a MAC address scan on my switches? First 3 parts of the Mac address are vendor specific.
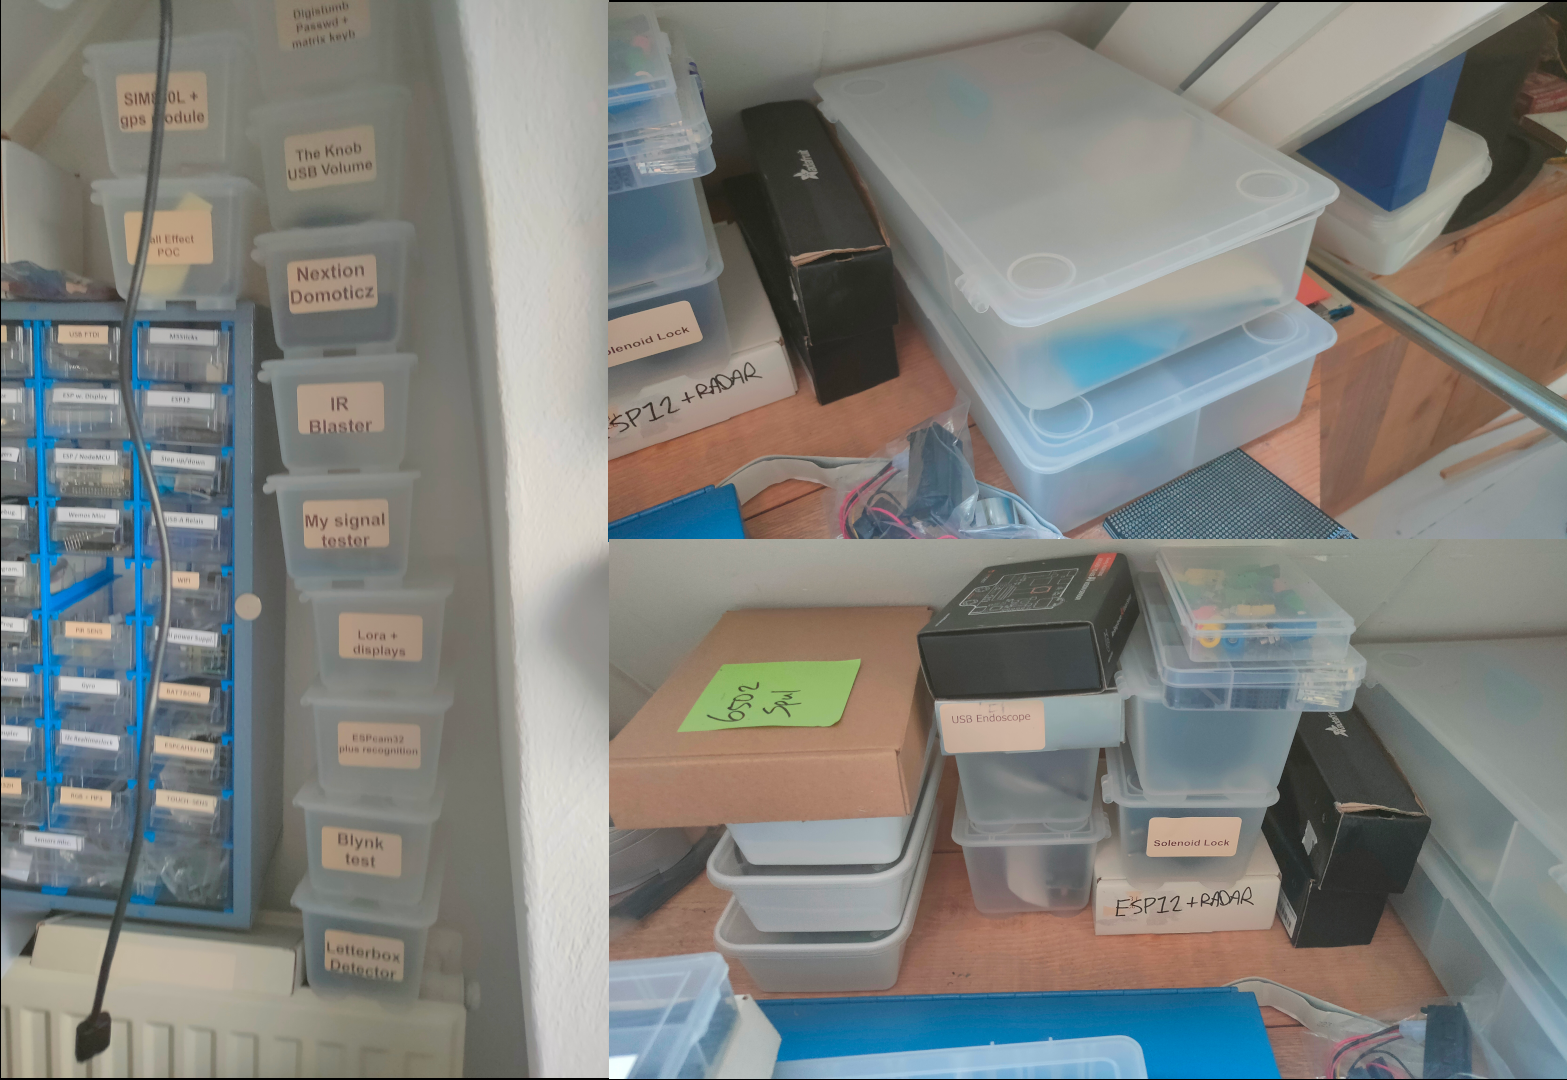
So far i’ve found : Octopi, Beerbrew computer, Retro Arcade, Picore, Nodered, Domoticz 433toMqtt, Ledserver, Lasercutter-etch-a-sketch, mobile LMS music server, Pressure Lab AP, Escape Game AP (3 of them), one unused Raspberry zero (without Wifi), One at my old work, one broke, Kodi+Netflix,Ansible project, found another one .. Jumanji/Dashticz/NoderedDashboard demo (with screen) WHERE THE F are the rest of them? (Sdcards with temporary projects on them 29, I need to combine project on those cards. I’ve got a 64Gb card holding a Rpi OS and only a 1K python script!)
And Arduino’s are even worse … they are all over the place. Those are probably 100+ (ESP32, 8266, Nano’s, Mega, M5Stack and alikes)
I know i have many temporary projects, but I keep most things organized in my projects containers.
One of the rows with Ikea containers, a few for bigger projects and now i’m using the plastic boxes you get when you order chinese or thai.
It’s a long time i’ve made a PLC ladder, but lets see how and what this integration brings me.
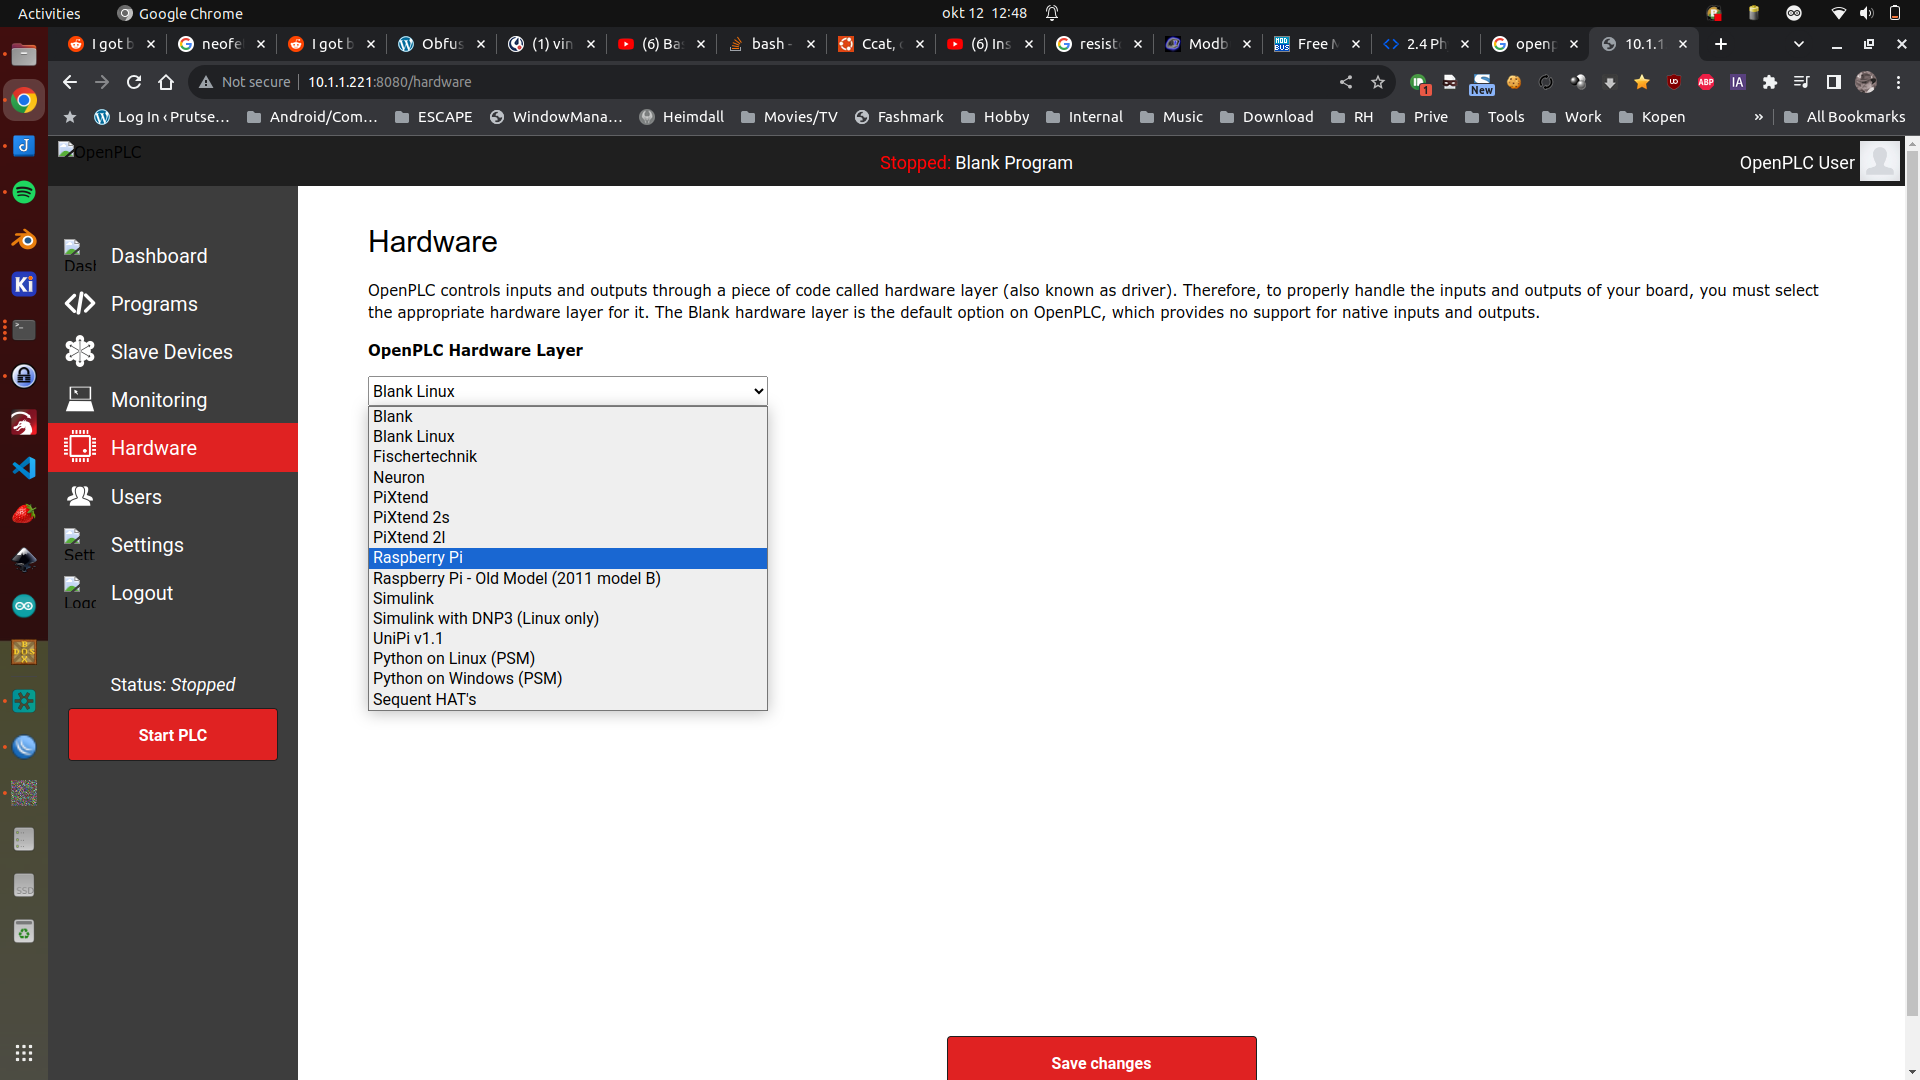
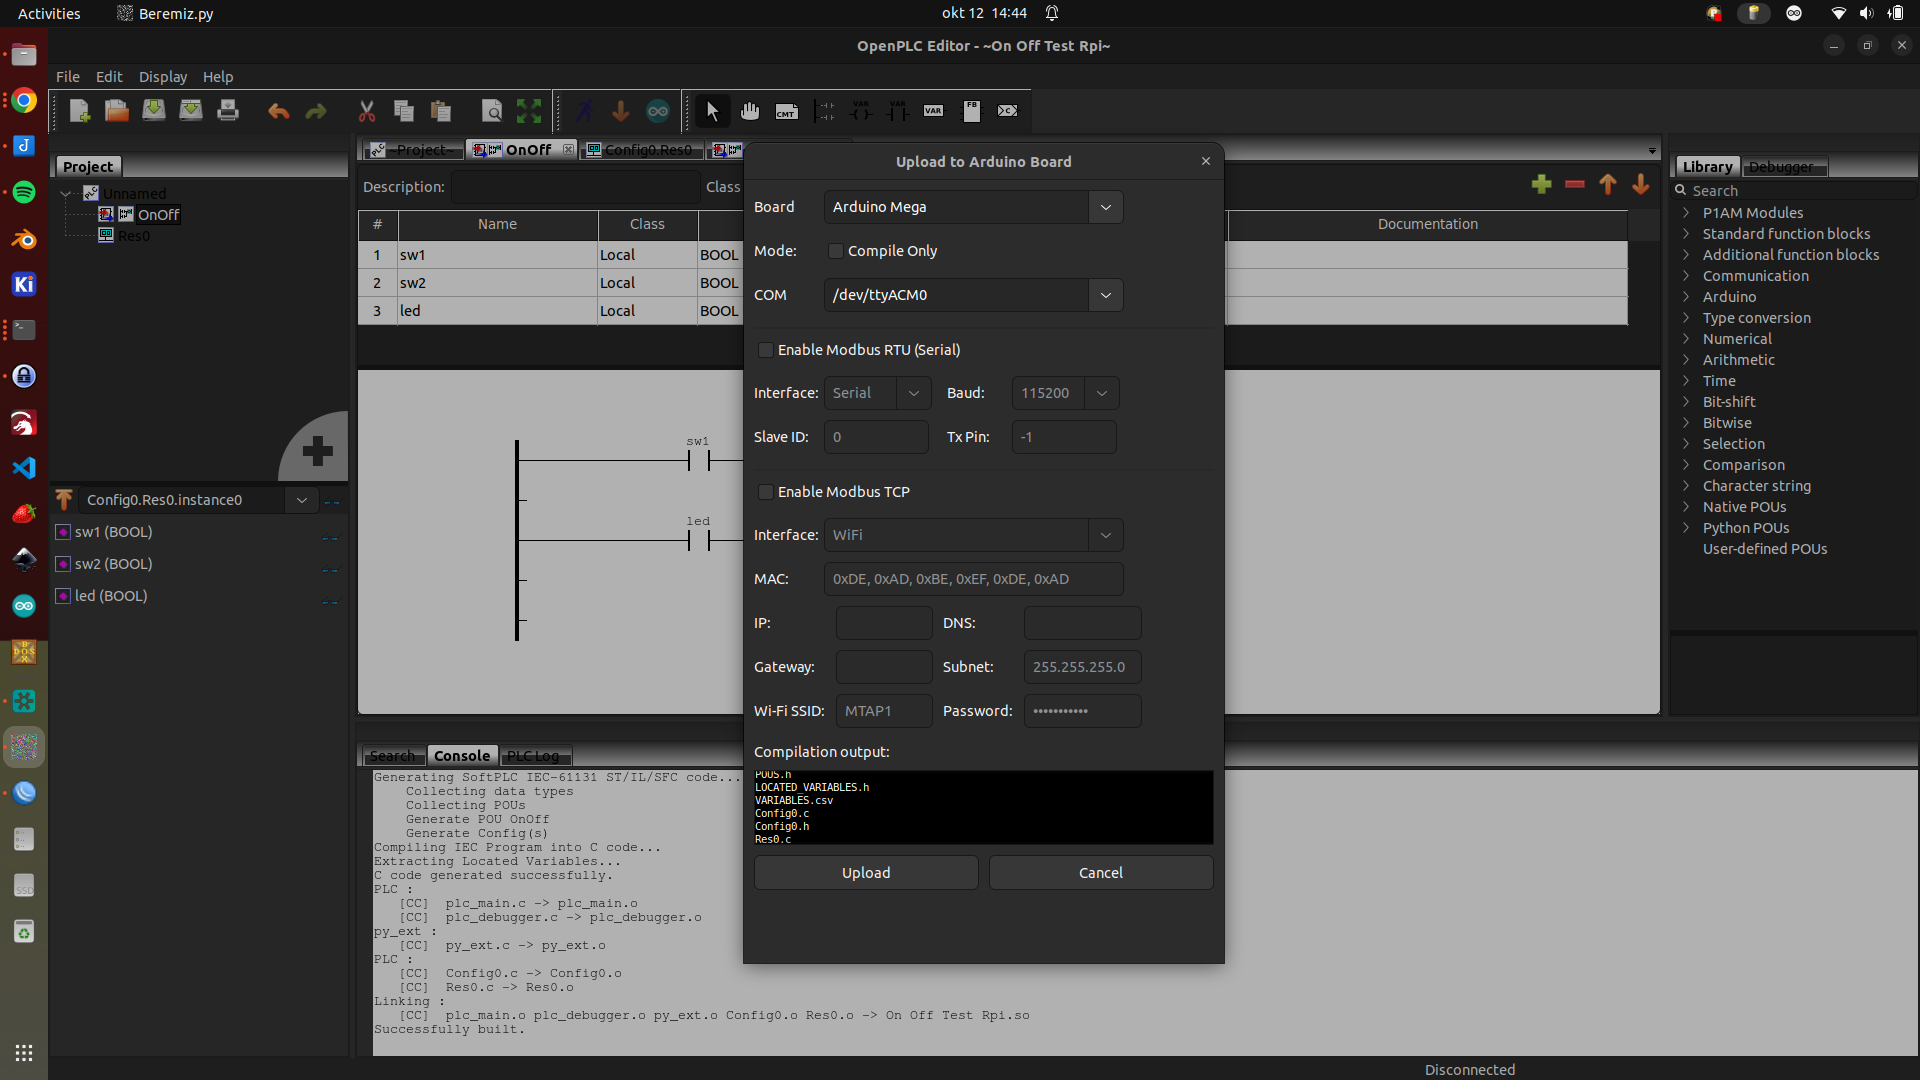
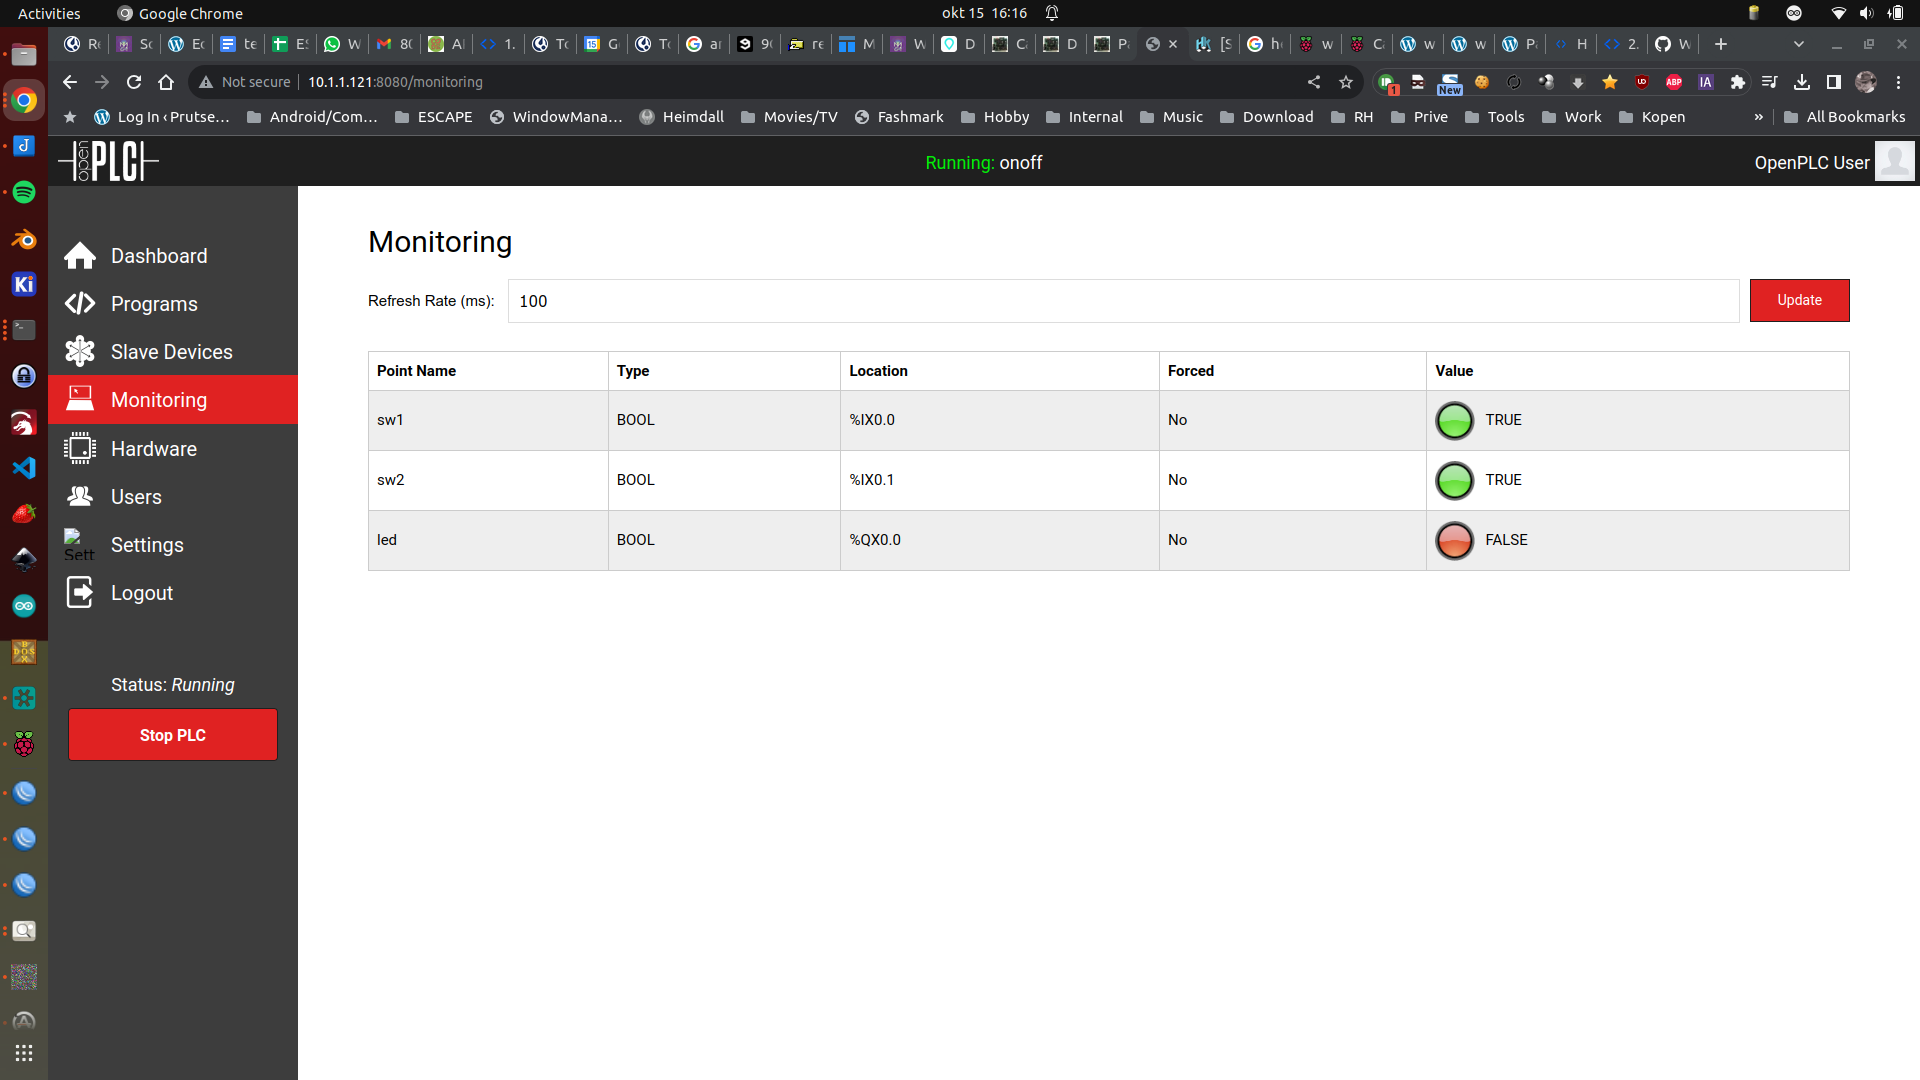
OpenPLC interface on a Raspberry, I could not start a program on RPI 5! But it compiled correctly. See below rpi3
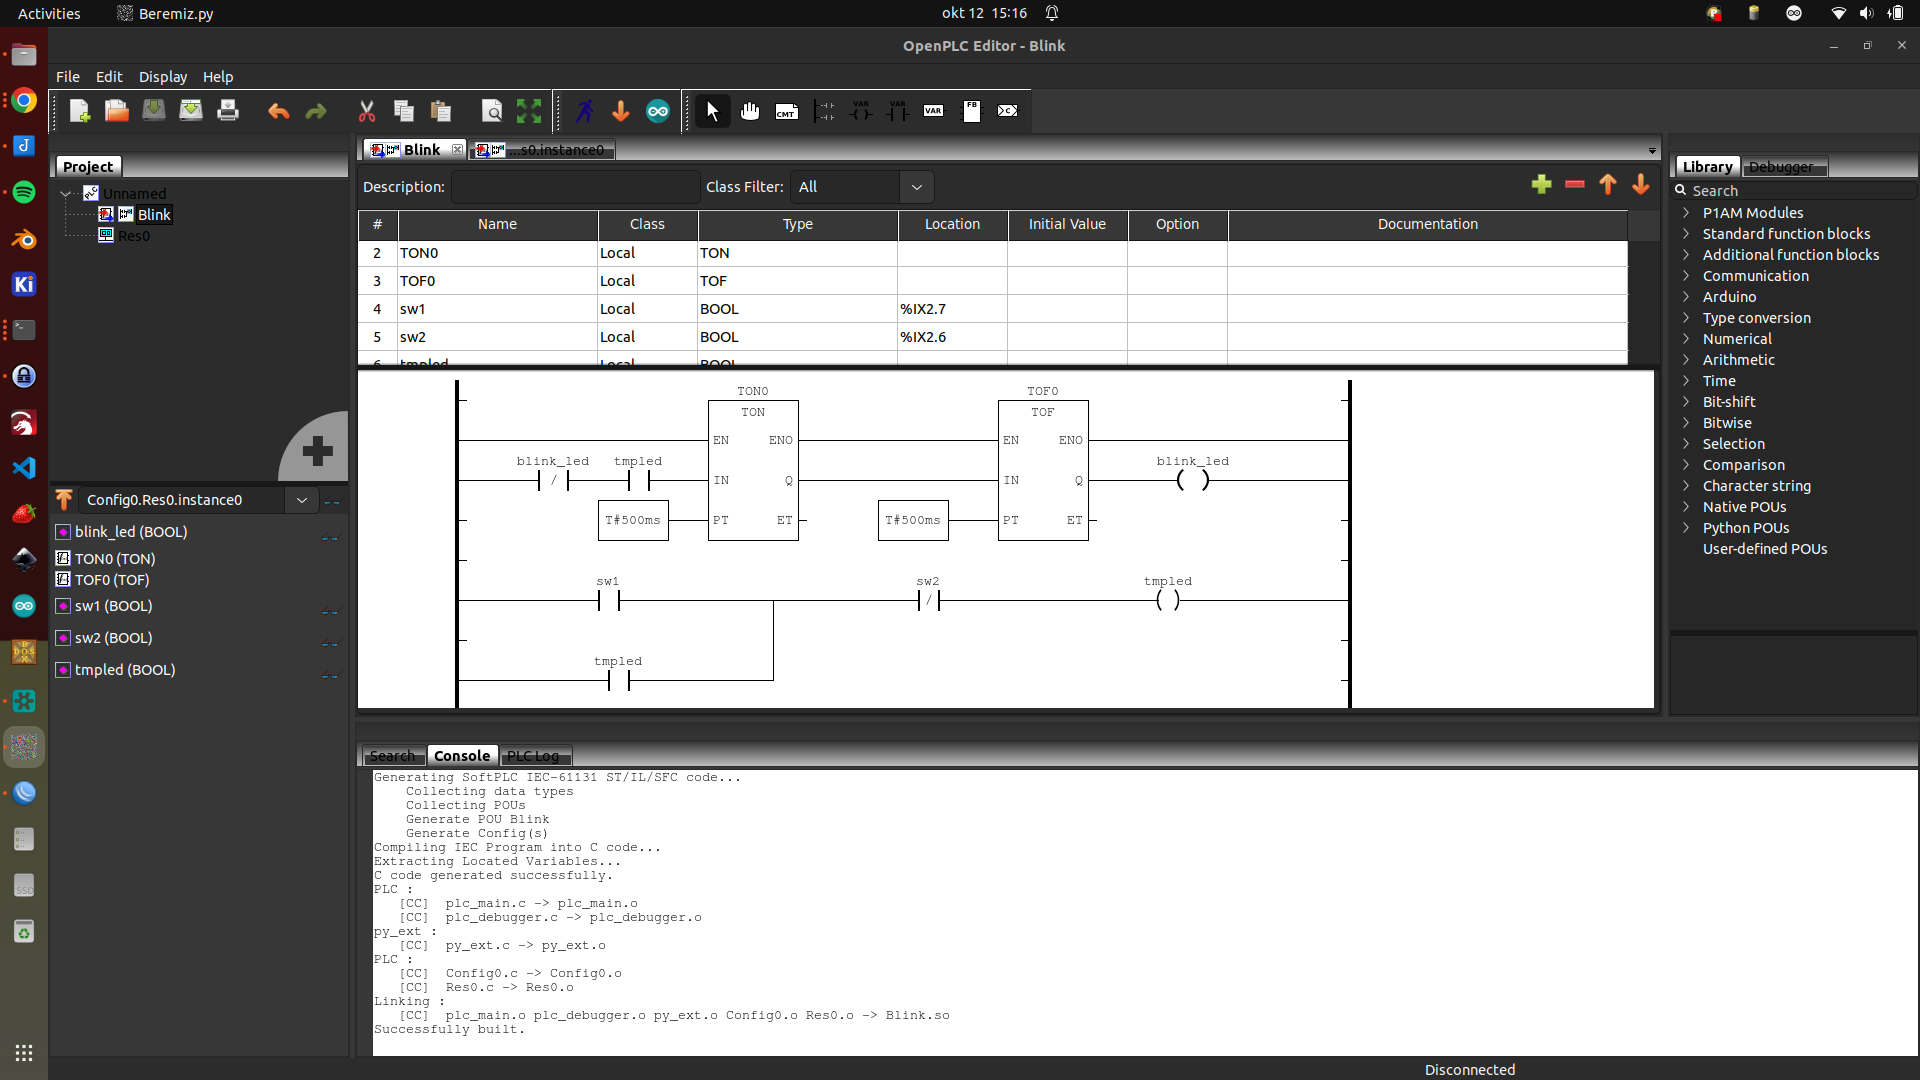
OpenPLC editor with timer ladders for Arduino
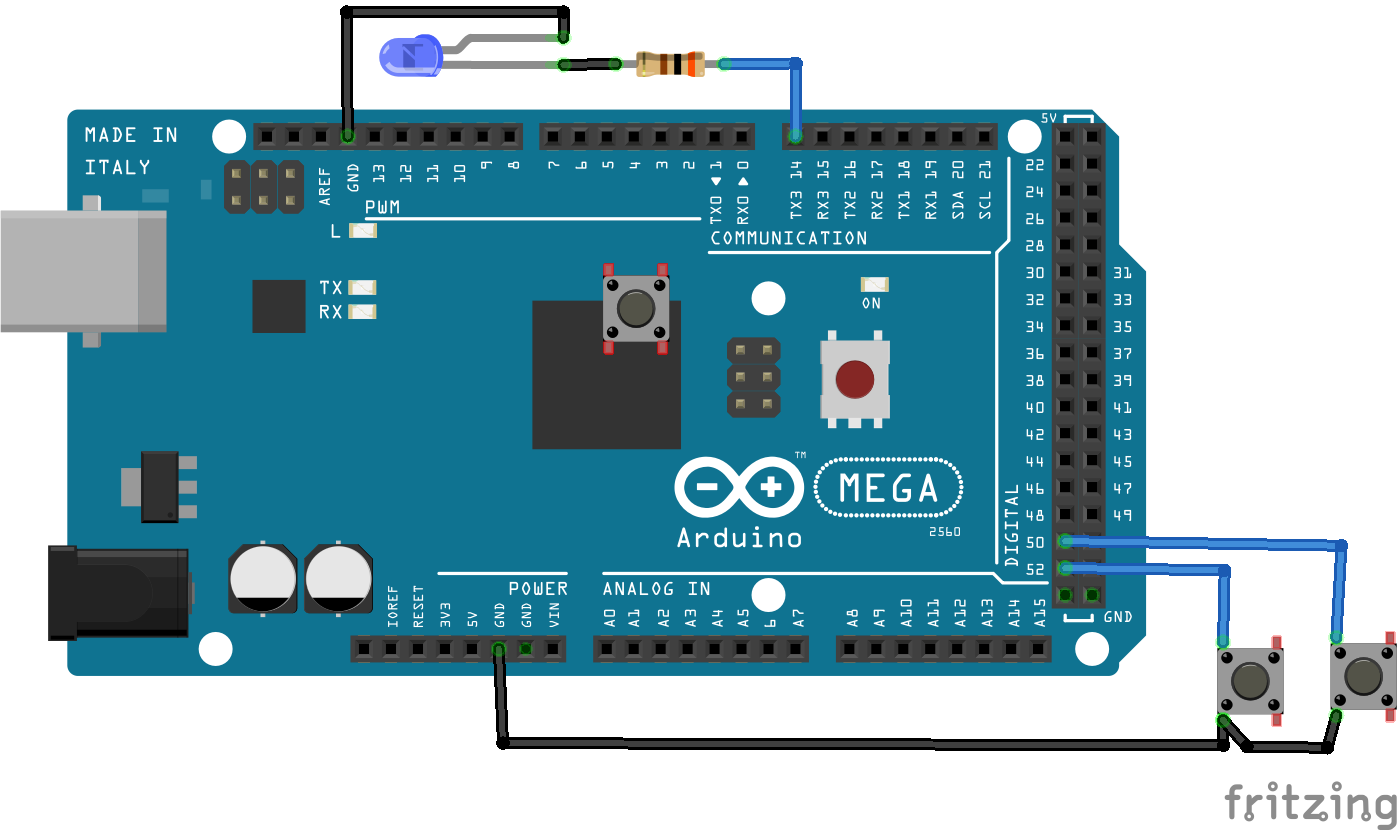
Schematic with a led and two buttons (and one floating in the middel, which i forgot to remove)
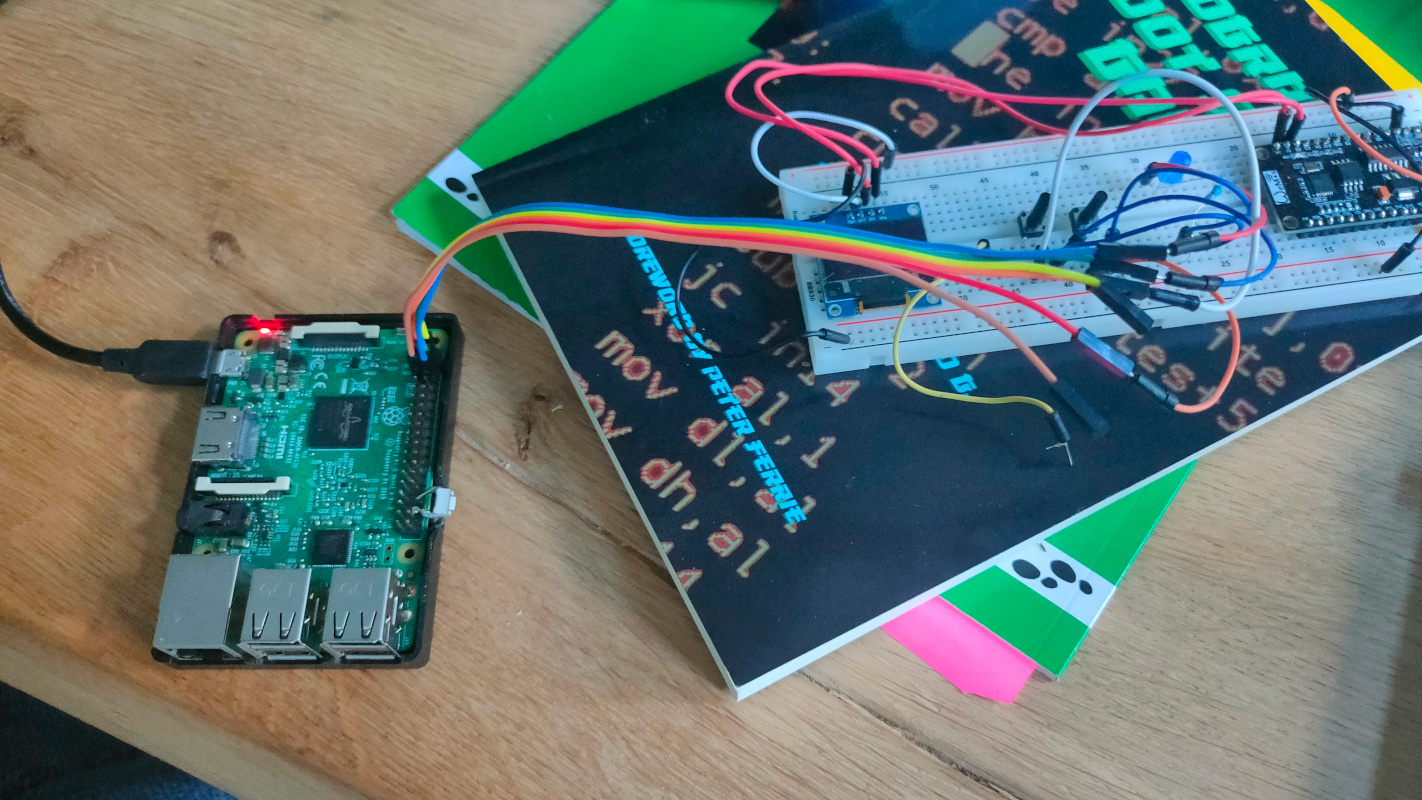
Working example ( wemos and display are from another project those are not connected )
UPDATE 20231015 – Raspberry 3 with OpenPLC
GND to leds and buttons GPIO2 (pin 3) to a button GPIO3 (pin 5) to another button GPIO14 (pin 8) to the led
Now OpenPLC works correct (RPI3)
https://github.com/thiagoralves/OpenPLC_v3.git
cd OpenPLC_v3
./install.sh rpi

## Warning .. takes a really long time

Wiringpi is deprecated
But can be installed using the last git repo

git clone https://github.com/WiringPi/WiringPi.git
cd WiringPi
./build
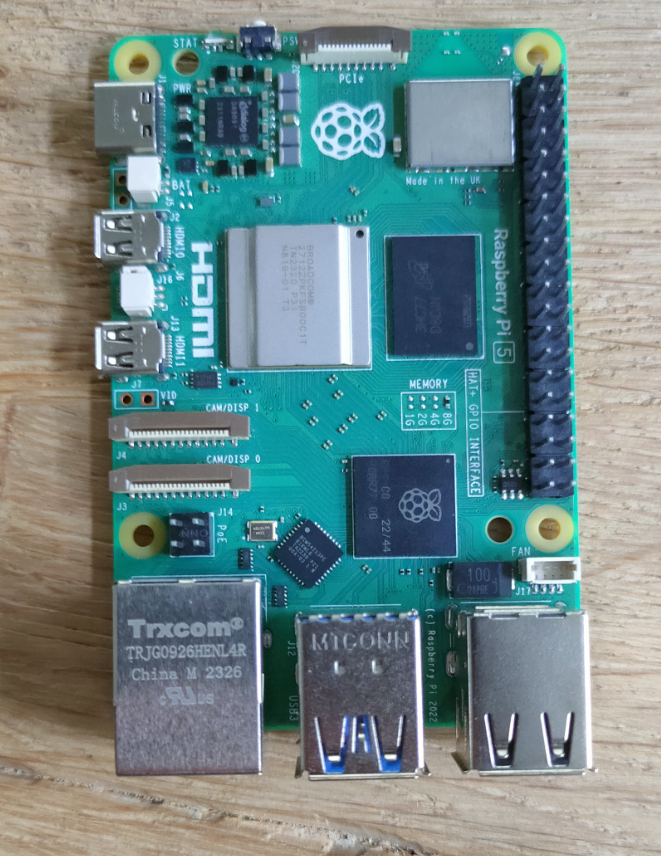
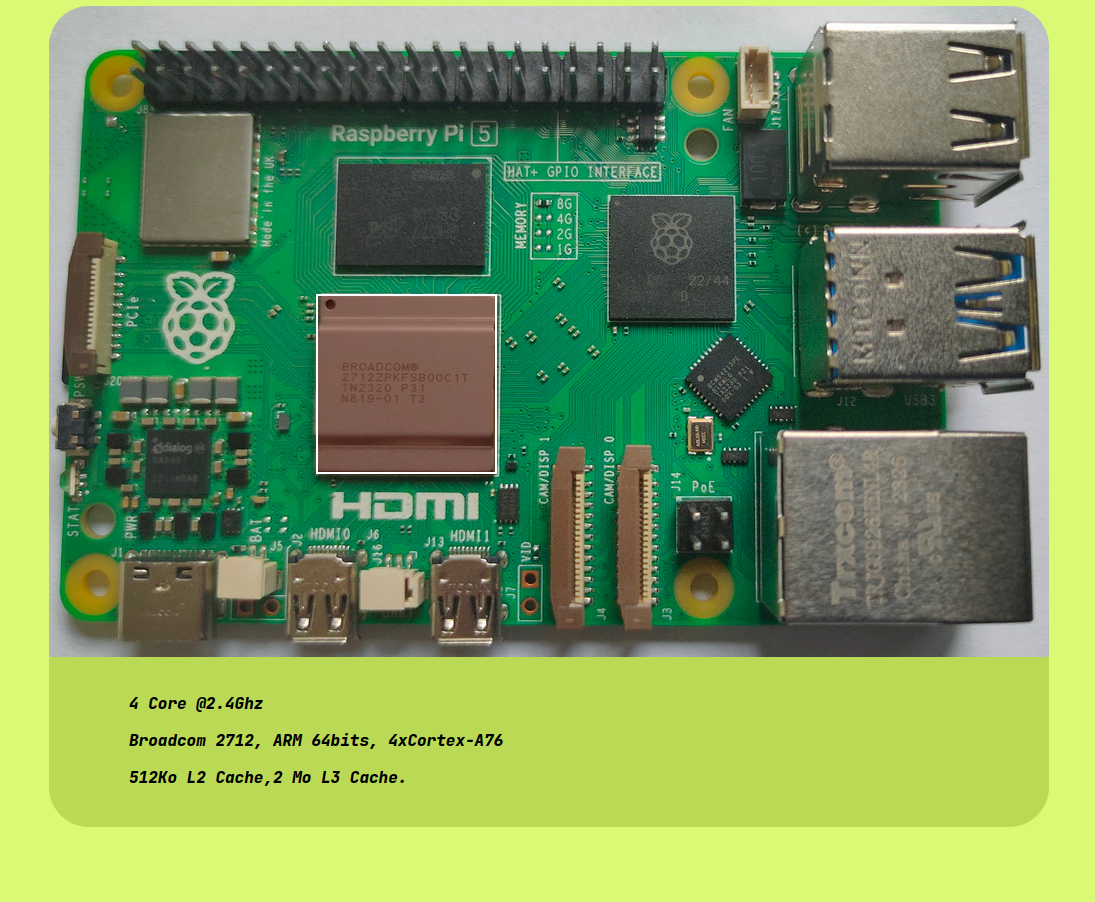
So many things to try .. and probably buy. I’m lucky to have this already, official it’s not even out yet.
Specification
Processor : Broadcom BCM2712 2.4GHz quad-core 64-bit Arm Cortex-A76 CPU, B with cryptography extensions, 512KB per-core L2 caches, and a 2MB shared L3 cache
Features:
VideoCore VII GPU, supporting OpenGL ES 3.1, Vulkan 1.2
Dual 4Kp60 HDMI® display output with HDR support
4Kp60 HEVC decoder
LPDDR4X-4267 SDRAM (4GB and 8GB SKUs available at launch)
Dual-band 802.11ac Wi-Fi
Bluetooth 5.0 / Bluetooth Low Energy (BLE)
microSD card slot, with support for high-speed SDR104 mode
2 × USB 3.0 ports, supporting simultaneous 5Gbps operation
2 × USB 2.0 ports
Gigabit Ethernet, with PoE+ support (requires separate PoE+ HAT)
2 × 4-lane MIPI camera/display transceivers
PCIe 2.0 x1 interface for fast peripherals (requires separate M.2 HAT or other adapter)
5V/5A DC power via USB-C, with Power Delivery support
Raspberry Pi standard 40-pin header
Real-time clock (RTC), powered from external battery
Power button
Some things come to mind to test:
Kubernetes
Dual Camera OpenCV – depthmap and more
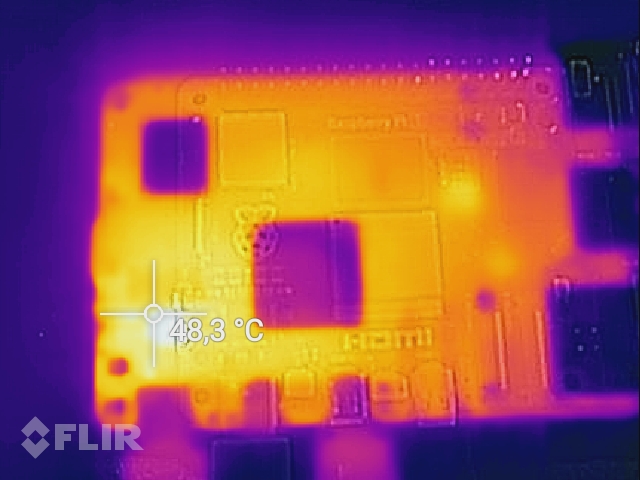
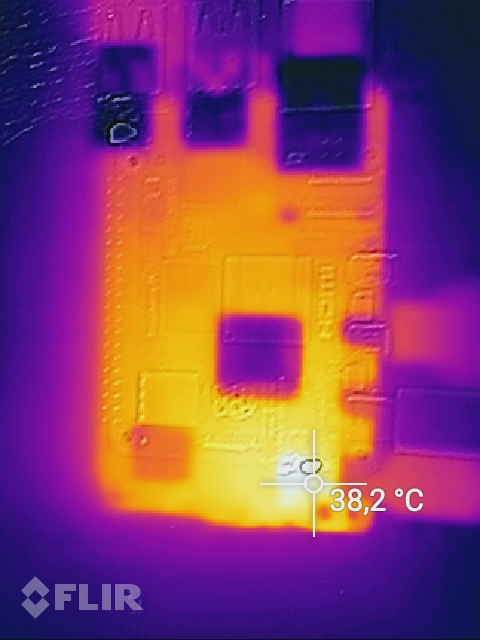
The offset between the normal camera and the Flir, is due to being to close to the object.After 5 minutes Wifi/Bluetooth bottom left heats up (didn’t use in this test)
You really want to use a case with an active blower to cool the rpi.
A dentro (Combination of demo and intro.) from 1995
It using only background colors behind existing text to display the dentro text. There is (somewhere) a version with animations.
New work:
Booting from floppy, showing a flash screen in mode 13h. Starting a trackloader, which loads a raw adlib file and plays it. All sectors written to floppy using my new sector writer. WOOT .. music at boot time!
Sector writer
use16
org 0100h
; 0 0 1
; bootblock with flashcode
	mov cl,1  ; start
	mov al,1  ; # sectors
	mov dh,0  ; head
	mov bx,bootblock
	call wrtsector

; flash image
	mov cl,8
	mov al,4
	mov dh,0
	mov bx,gfx
	call wrtsector

; Music loader
	mov cl,7  ; start
	mov al,1  ; # sectors
	mov dh,0  ; head
	mov bx,nextpart
	call wrtsector

; Music raw
	mov cl,13  ; start
	mov al,4  ; # sectors
	mov dh,0  ; head
	mov bx,musicraw
	call wrtsector

	jmp do_exit

printerror:
	push cs		; make ds same as cs
	pop ds
	MOV DX,TxtErr1	; error
	MOV AH,09h
	INT 21h
	mov ax,4c00h
	int 21h
do_exit:
	mov ax,4c00h
	int 21h
wrtsector:
;       On entry:      AH         03h
;                      AL         Number of sectors to write
;                      CH         Cylinder number (10-bit value; upper 2 bits
;                                 in CL)
;                      CL         Starting sector number
;                      DH         Head number
;                      DL         Drive number
;                      ES:BX      Address of memory buffer
;
;       Returns:       AH         Status of operation (See Service 01h)
;                      AL         Number of sectors written
;                      CF         Set if error, else cleared

	cld
	mov ah, 3h    ; int13h function 2
	mov ch, 0     ; from cylinder number 0
	mov dl,0
	push cs
	pop es
	int 13h
	jc printerror
ret

TxtErr1:	 DB "Error!",7,10,13,"$"

bootblock:
	file 'flash_b.bin'
gfx:
	file 'flashgfx.raw'
nextpart:
	file 'nextpart.bin'
musicraw:
	file 'LVLINTRO.RAW'
I wanted to know how a floppy differs from a floppy. So i wrote below code to fill each sector on a floppy disk or image with information at the start of each sector. (Head, Cylinder and Sector)
empty.bin was made using dd if=/dev/zero of=empty.bin count=1 bs=512
use16
org 0100h

	mov ch,0  ; cyl
	mov cl,1  ; sector
	mov dh,0  ; head
nextsector:
	mov bx,empty
	mov [empty],dh
	mov [empty+1],ch
	mov [empty+2],cl
	push cx
	push ax
	push dx
	call printer
	call wrtsector
	pop dx
	pop ax
	pop ax
	inc cl
	cmp cl,19
	jnz nextsector
	mov cl,1
	inc ch
	cmp ch,79
	jnz nextsector
; other side
	mov dh,1
	mov ch,0
	mov cl,1

nextsector1:
	mov bx,empty
	mov [empty],dh
	mov [empty+1],ch
	mov [empty+2],cl
	push cx
	push ax
	push dx
	call wrtsector
	pop dx
	pop ax
	pop ax
	inc cl
	cmp cl,19
	jnz nextsector1
	mov cl,1
	inc ch
	cmp ch,79
	jnz nextsector1


	jmp do_exit

printerror:
	push cs		; make ds same as cs
	pop ds
	MOV AX,3	; default text mode 3
	INT 10h
	MOV DX,TxtErr1	; error
	MOV AH,09h
	INT 21h
	mov ax,4c00h
	int 21h


do_exit:
	mov ax,3
	int 10h
	mov ax,4c00h
	int 21h

printer:
	push cx
	push dx
	mov dl,dh
	mov ah, 02h
	add dl, 30h
	int 21h
	mov dl,ch
	add dl, 30h
	int 21h
	mov dl,cl
	add dl, 30h
	int 21h
	mov dx,13
  mov ah,2
  int 21h
  mov dx,10
  mov ah,2
  int 21h
	pop dx
	pop cx
	ret

wrtsector:
;       On entry:      AH         03h
;                      AL         Number of sectors to write
;                      CH         Cylinder number (10-bit value; upper 2 bits
;                                 in CL)
;                      CL         Starting sector number
;                      DH         Head number
;                      DL         Drive number
;                      ES:BX      Address of memory buffer
;
;       Returns:       AH         Status of operation (See Service 01h)
;                      AL         Number of sectors written
;                      CF         Set if error, else cleared
;

	cld
	mov ah, 3h    ; int13h function 2
	mov al,1
	mov dl,0
	push cs
	pop es
	int 13h
	jc printerror
ret

TxtErr1:	 DB "Error!",7,10,13,"$"

empty:
	file 'empty.bin'
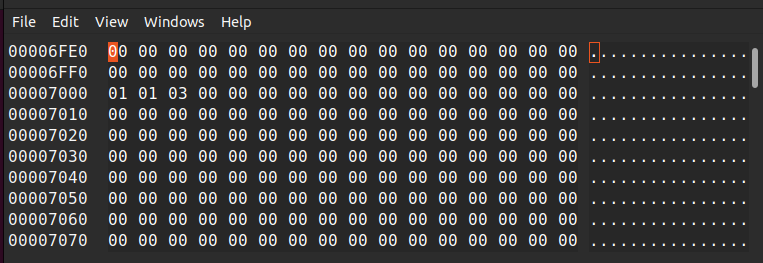
Viewing the floppy image with ghex
Offset 7000 = Head 1, Cylinder 1 and sector 3
When doing times 512 – ($-$$) db 0 to fill binaries to 512 bytes, you could cat the sectors to a disk/file with this knowledge.
Working on a library of functions (sector loaders, color palette, vert/hor retrace functions)
Laying out a memory map for the demo
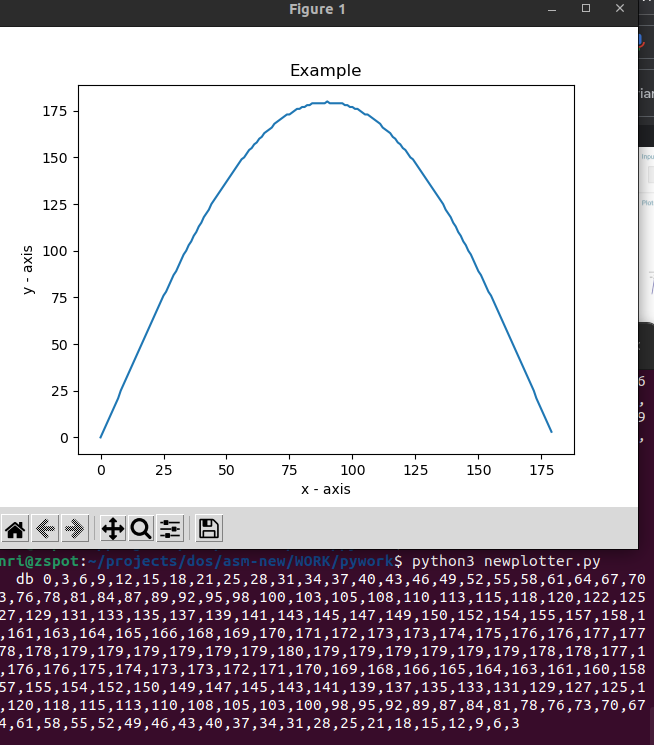
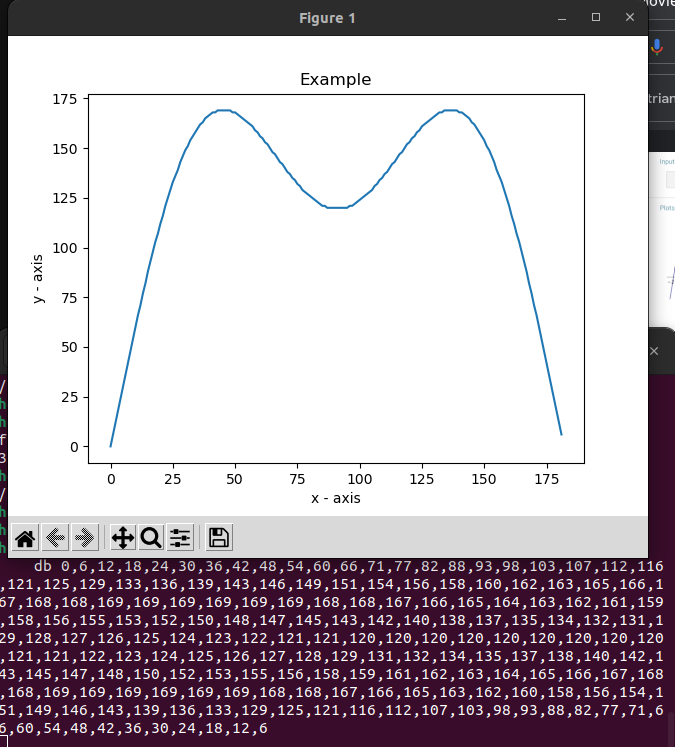
Below the output of the sin/cos generator ( see used in video below ) (It also shows a visual plot of the function)
Two examples included in the python script to generate DB enties, which can be assembled in your source code (just include or copy paste)
Source code python script
# importing the required module
import matplotlib.pyplot as plt
import numpy as np
import math

# Change these
numberofdatapoints = 360
maxamp = 180
howmuchfromwave = 0.5
numberofharmonies = 1
# Number of harmonies are sin/cos additions in the calculation line below

# not here
step = 360/numberofdatapoints*howmuchfromwave
offset = maxamp
maxamp = maxamp / numberofharmonies
offset = 0


x = [ ]

for xv in range(numberofdatapoints):
    xvstep=xv * step
# Calculation line
#    datapoint=np.sin(math.radians(xvstep))
# Double harmony example
    datapoint=np.sin(math.radians(xvstep)) + (np.sin(math.radians(xvstep*3))/2)

    datapoint=datapoint * maxamp
    datapoint=datapoint + offset
    x.append(int(datapoint))

print("    db ", end="")
print(*x, sep = ",")

# plotting the points
plt.plot(x)

# naming the x axis
plt.xlabel('x - axis')
# naming the y axis
plt.ylabel('y - axis')

# giving a title to my graph
plt.title('Example')

# function to show the plot
plt.show()
Minimalistic very fast boot loader flash screen effect
Graffiti bouncher test (probably ends up bounching a 320×400 image) This one uses the generated sintab (Using the python script above)
Test code for a text scroller
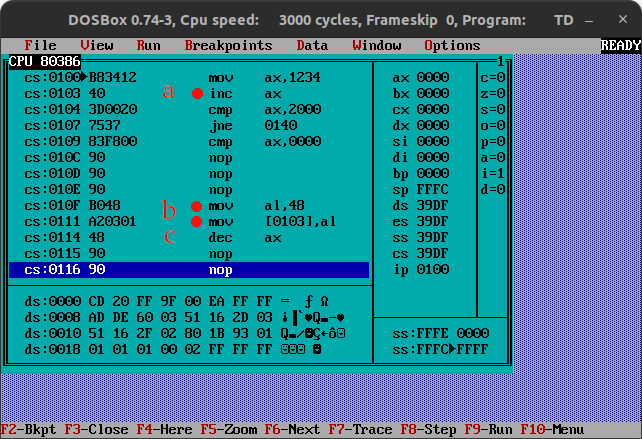
Code optimalisation/tricks
clear a (double) register? xor ax,ax is faster than mov ax,0h
Want to make ds pointer same as cs? Instead of mov ax,cs mov ds,ax use push cs pop ds
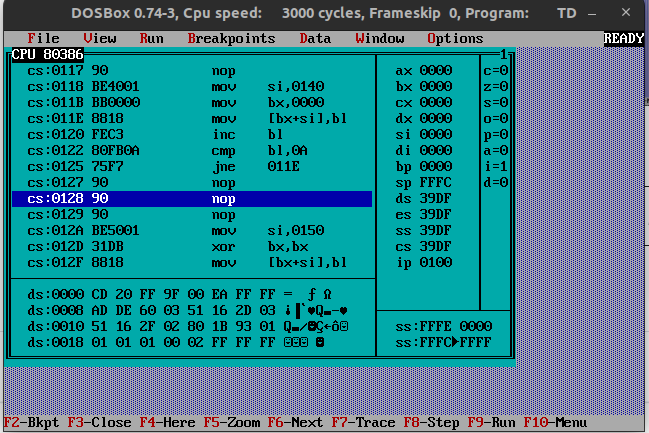
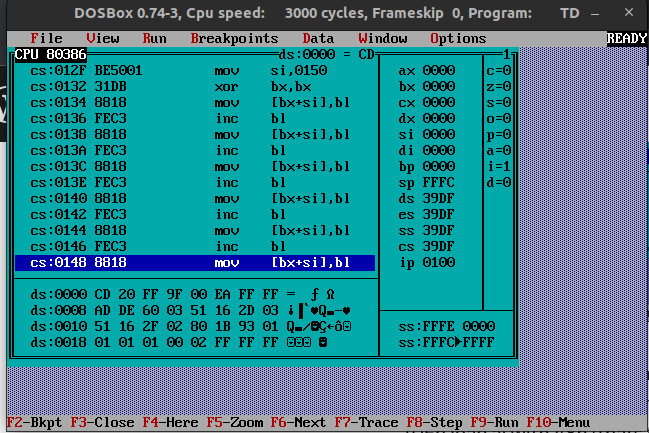
self modifying code mostly we just move data around, but you also can change the runtime code (instructions)
a – increment ax on line 103h
b – another part of the code/maybe in a interrupt 10Fh load al with 48h (thats the opcode for decrement (see c) 111h place the opcode in address 103h, which had 40h .. Now we changed the code to decrement next time
Speedcode/unrolled code
Populair on the C64 where resources are even more limited, you could use speedcode. Most of the speedcode you generate, due to its repeating lines. When looking at clock cycles you can save some extra cycles, by using a little more memory but saving on “expensive” loops.
Simple example
Left a funtion with a loop, right is the same but all instuctions sequencial
Left 15 bytes but 284 cycles
Right 39 bytes but only 102 cycles!
4
4
; below part 9 times
9
3
4
16 or 4
= 284 cycles

Speedcode
4
2 ; xor is faster
9
3 ; even 2 when you can use BX pair!
9
3
9
3
9
3
9
3
9
3
9
3
9
3
9
= 111 cycles (or 102 BX pair)
Moving memory blocks (No DMA)
;DS:(E)SI to address ES:(E)DI
    push cs          ; example to set es to code segment
    pop es
    mov si,1000      ; offset pointer source
    xor di,di        ; destination offset
    mov cx,320*100   ; number of transfers (See below words)
    mov ax,0a000h    ; Destination
    mov es,ax        ; destination segment
    cld              ; Clear direction flag set SI and DI to auto-increment
    rep movsw        ; repeat mov words! until number of transfers is 0
;
Short binary > bcd > dec (ascii) convert for numbers (0-99)
mov ax,01ch ; = 28
mov bx,0ah ; = 10
div bl ; divide BL by AX
       ; AX = 0802 ; Remainder/Divider
xchg ah,al ; change around (dont use if you want to keep little endian)
add ax,3030h ; offset to ascii 30=0 31=1
             ; ax ends up with 3238 .. 28
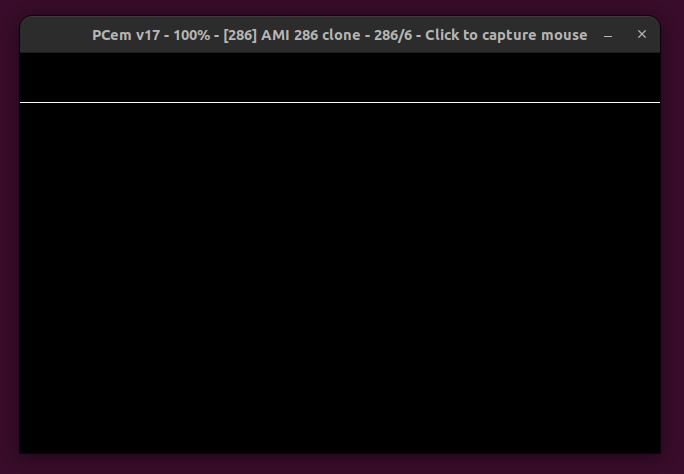
(NOTE, Dosbox can’t cope with the register speed, use real HW or PCem)
Effect using a edited photo I made from fireworks ..
Generating a RAW image and Palette, a in a new way
This bash script to convert BMP to Raw and a compiled colorpalette. (Note: this converts to 8 bit depth, the assembly code in the final assemby program converts to 6 for VGA mode 13h
So this time, i won´t have to use the standard VGA palette as mentioned in previous posts. (Gimp colors > indexed (255 colors) ; save as BMP, exclude colorspace information)
I’m using identify to extract the colorpalette, which i’m converting to DB entries for the fasm compiler
3C8h (R/W):  DAC Address Write Mode
 bit 0-7  The color data register (0..255) to be written to 3C9h.
 Note: After writing the 3 bytes at 3C9h this register will increment, pointing to the next data register.

3C9h (R/W):  DAC Data Register
 bit 0-8?  Color value
 Note:  Each read or write of this register will cycle through first the
        registers for Red, Blue and Green, then increment the appropriate
        address register, thus the entire palette can be loaded by writing 0 to
        the DAC Address Write Mode register 3C8h and then writing all 768 bytes
        of the palette to this register.

3DAh
Input Status #1 Register (Read at 3BAh (mono) or 3DAh (color))
7	6	5	4	3	2	1	0
                            VRetrace			DD

VRetrace -- Vertical Retrace
"When set to 1, this bit indicates that the display is in a vertical retrace interval.This bit can be programmed, through the Vertical Retrace End register, to generate an interrupt at the start of the vertical retrace."
DD -- Display Disabled
"When set to 1, this bit indicates a horizontal or vertical retrace interval. This bit is the real-time status of the inverted 'display enable' signal. Programs have used this status bit to restrict screen updates to the inactive display intervals in order to reduce screen flicker. The video subsystem is designed to eliminate this software requirement; screen updates may be made at any time without screen degradation."
Code (fasm)
use16
org 0x100

INPUT_STATUS = 0x03DA

start:

; set mode 320x200 256 colors palette
	mov ah,0x0
	mov al,13h
	int 10h

; press key to exit
waitforkeyloop:
	call effect 	; Calling the effect
	MOV AH,1
	INT 16h
	JZ waitforkeyloop
	XOR AH,AH
	INT 16h
Exit:
	MOV AX,3	; default text mode 3
	INT 10h
	MOV AX,4C00h	; exit to dos (terminate process)
	INT 21h

effect:
	cli		; stop interrupts
	call waitvretrace	; wait for vertical retrace
	mov al, 0    ; set color index 0 to black (needs to be converted to a function
	mov dx, 3c8h
	out dx, al
	inc dx       ; now 3c9h
	mov al, 0h
	out dx, al   ; set R = 0
	mov al, 0h
	out dx, al   ; set G = 0
	mov al, 0h
	out dx, al   ; set B = 0

	mov al,30h

; al = scanline, call wait for scanline
	call waithretrace
	mov al, 0    ; set color index 0 to white
	mov dx, 3c8h
	out dx, al
	inc dx
	mov al, 255
	out dx, al
	mov al, 255
	out dx, al
	mov al, 255
	out dx, al

; wait 1 scanlines (height of bar)
	mov al,1h
	call waithretrace

; draw black again
	mov al, 0    ; set color index 0's rgb value
	mov dx, 3c8h
	out dx, al
	inc dx       ; now 3c9h
	mov al, 0
	out dx, al
	out dx, al
	out dx, al

	sti	; start interrupts again
	ret

; this waits for vertical retrace
waitvretrace:
	mov dx,INPUT_STATUS
waitv1:
	in al,dx
	test al,8
	jnz waitv1
waitv2:
	in al,dx
	test al,8
	jz waitv2
	ret

; routine that waits for horizontal retrace
; al sets number of retraces
waithretrace:
	mov cl,al
	mov dx,INPUT_STATUS
waith1:
	in al,dx
	test al,1
	jnz waith1
waith2:
	in al,dx
	test al,1
	jz waith2
	dec cl
	cmp cl,0
	jnz waith1
	ret
My bash file to copy com file to floppy image to use in PCem.
PCem right button disk change drive A:
fasm one-line.asm
# disk.img is een msdos boot floppy image
sudo mount -o loop disk.img mountpoint
sudo cp *com mountpoint/
sudo cp *bmp mountpoint/
sudo umount mountpoint
"If something is worth doing, it's worth overdoing."