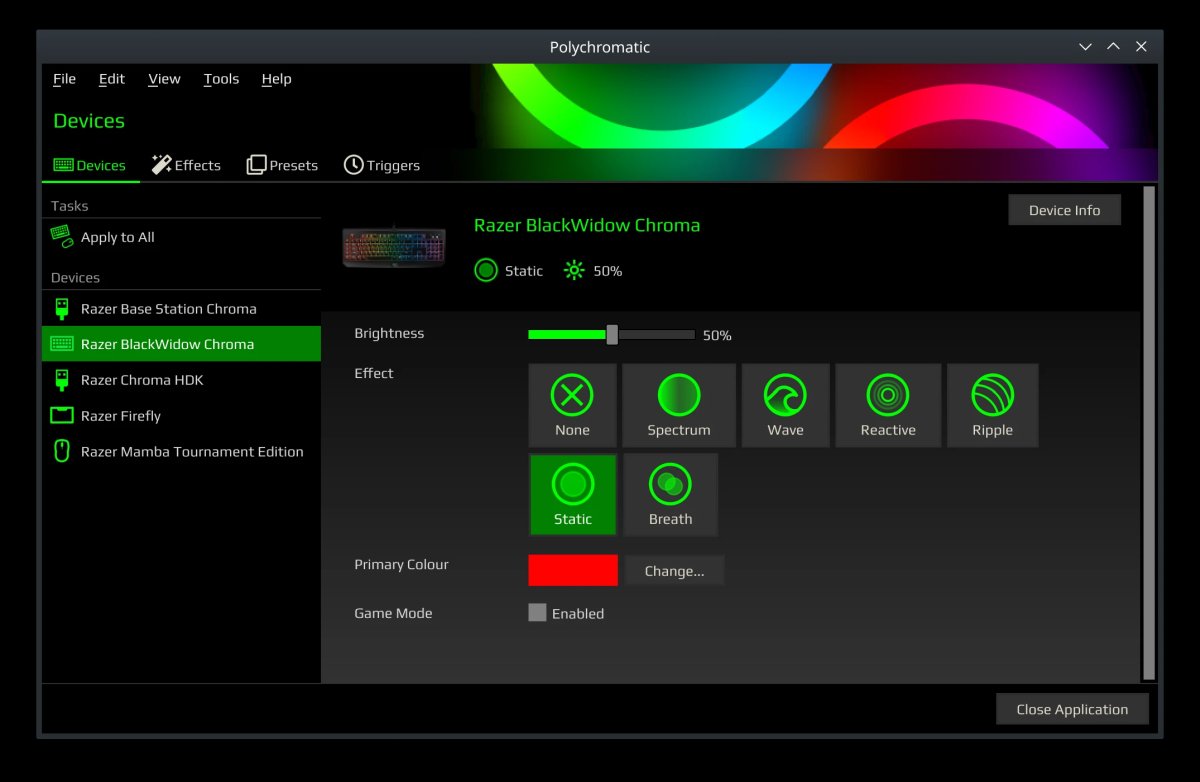
A fancy keyboard….. At last a clickety keyboard. A Razer Blackwidow V3 mechanical keyboard. I’m not a gamer, but i like the clickety sounds. RGB leds are always nice to play with.
One of the nice things about razer is the Linux support!
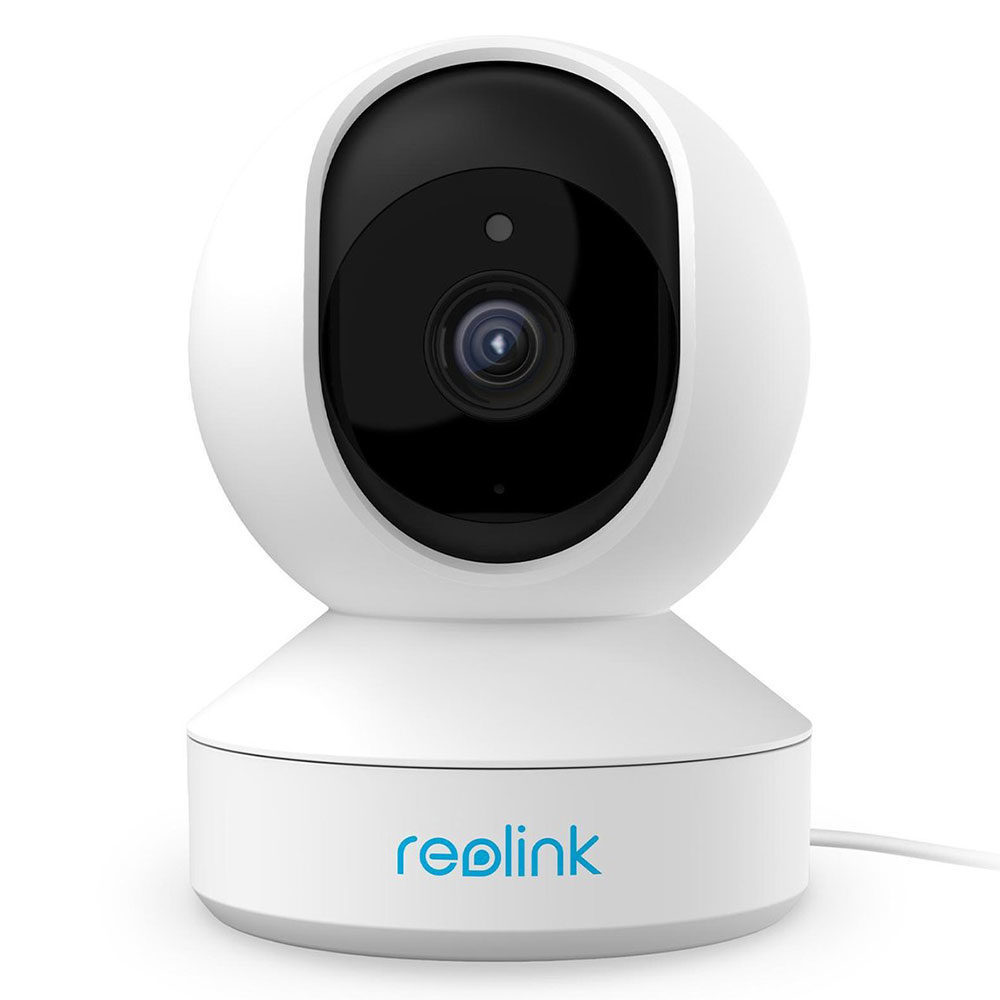
I made a little script to make a 360 spherical panorama photo, using a remote controlled IP cam,
Looking at the API CGI, i only needed to control the movement of the camera and getting a snapshot.
Point camera down
Point camera maximal left
Take picture
Point a little to the right
Take picture, loop until max right
Point a little more up and go max left
Doing same loop as above, until pointing maximal up
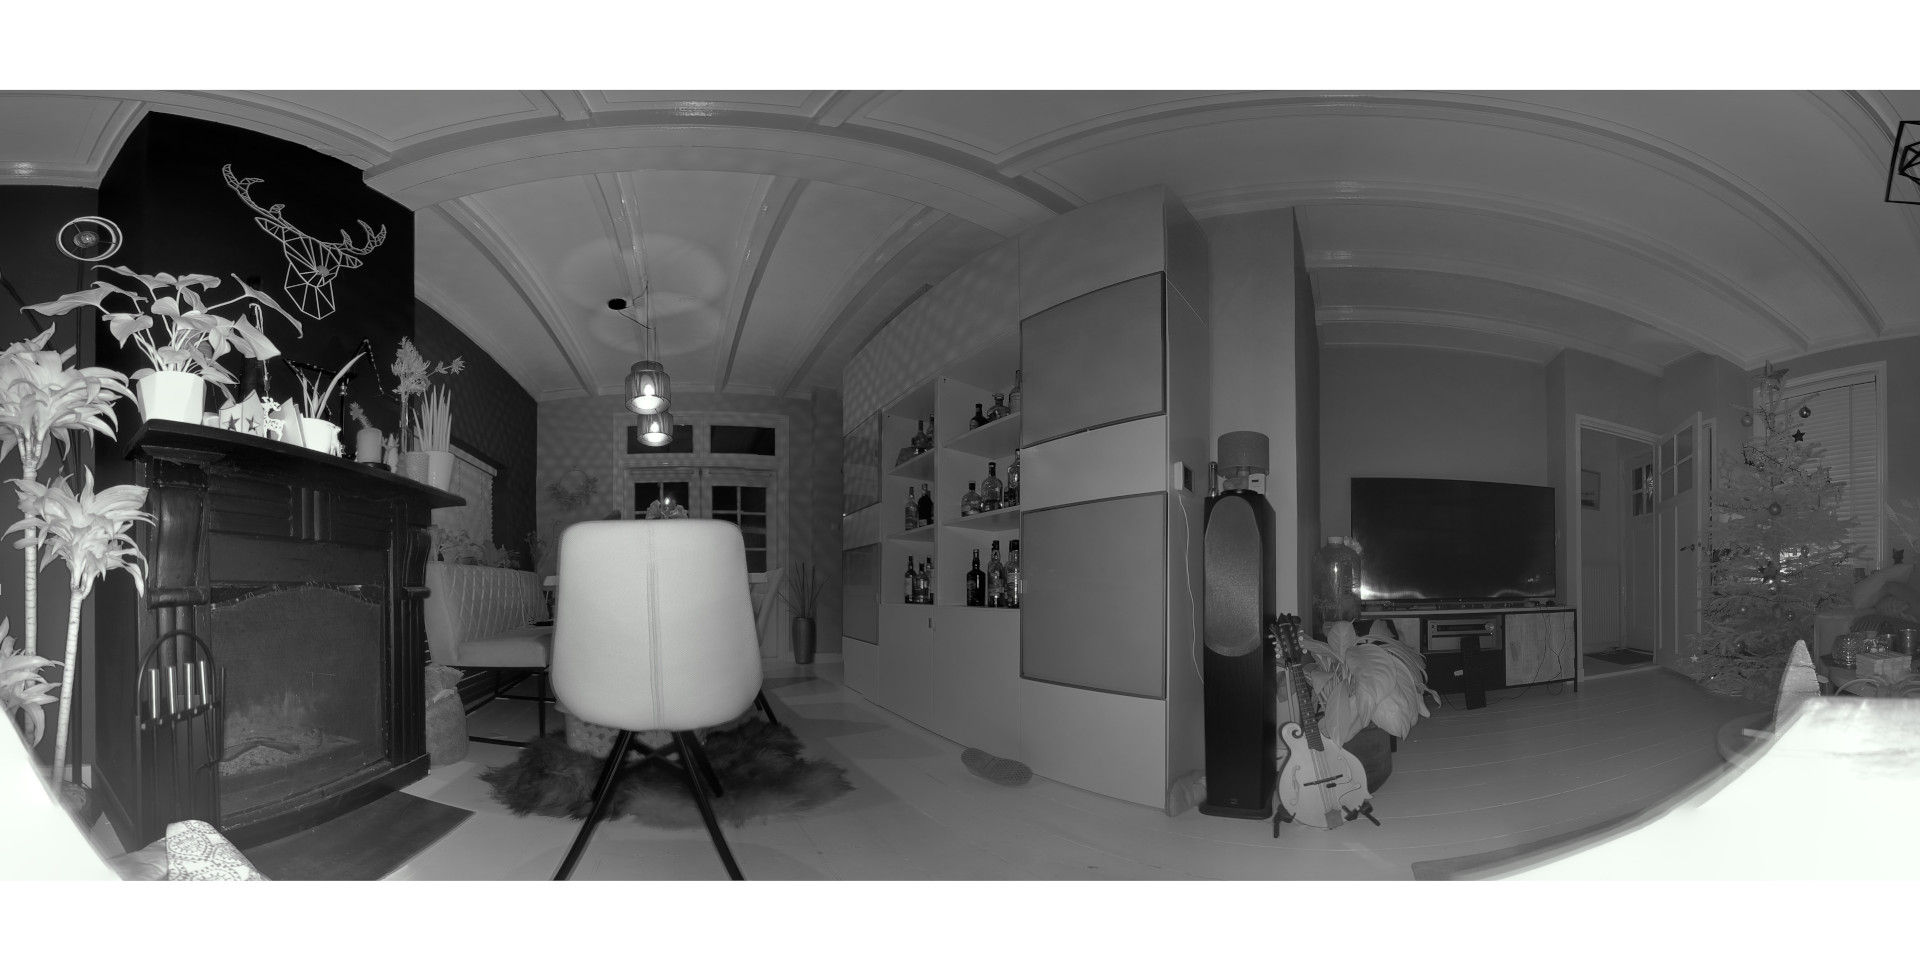
Made a little animation in blender
After getting all those pictures, i only needed to stitch them using Hugin. When viewing the image with VR Glasses, i could look around my room, without image distortion, like below flattend example.
The ipcam generates a token, which you have to use in your curl commands.
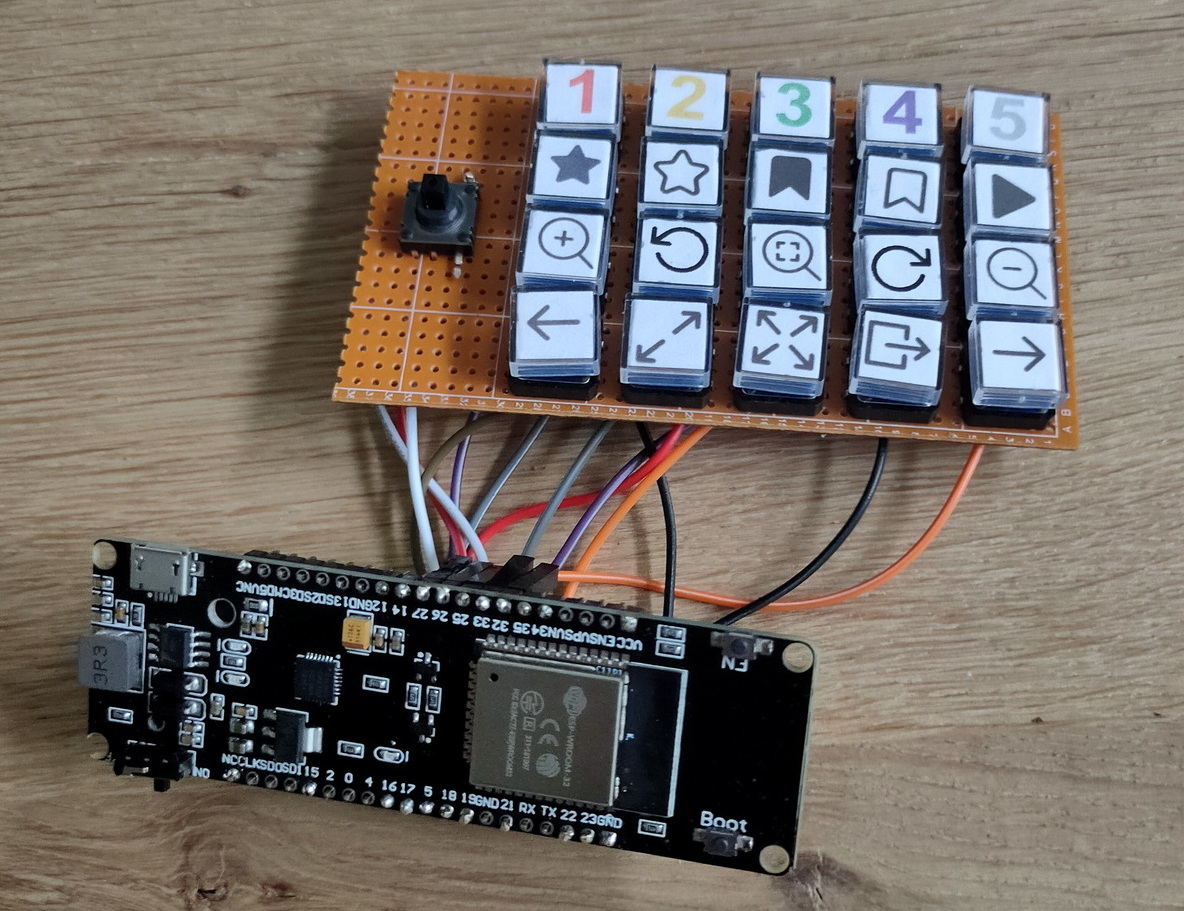
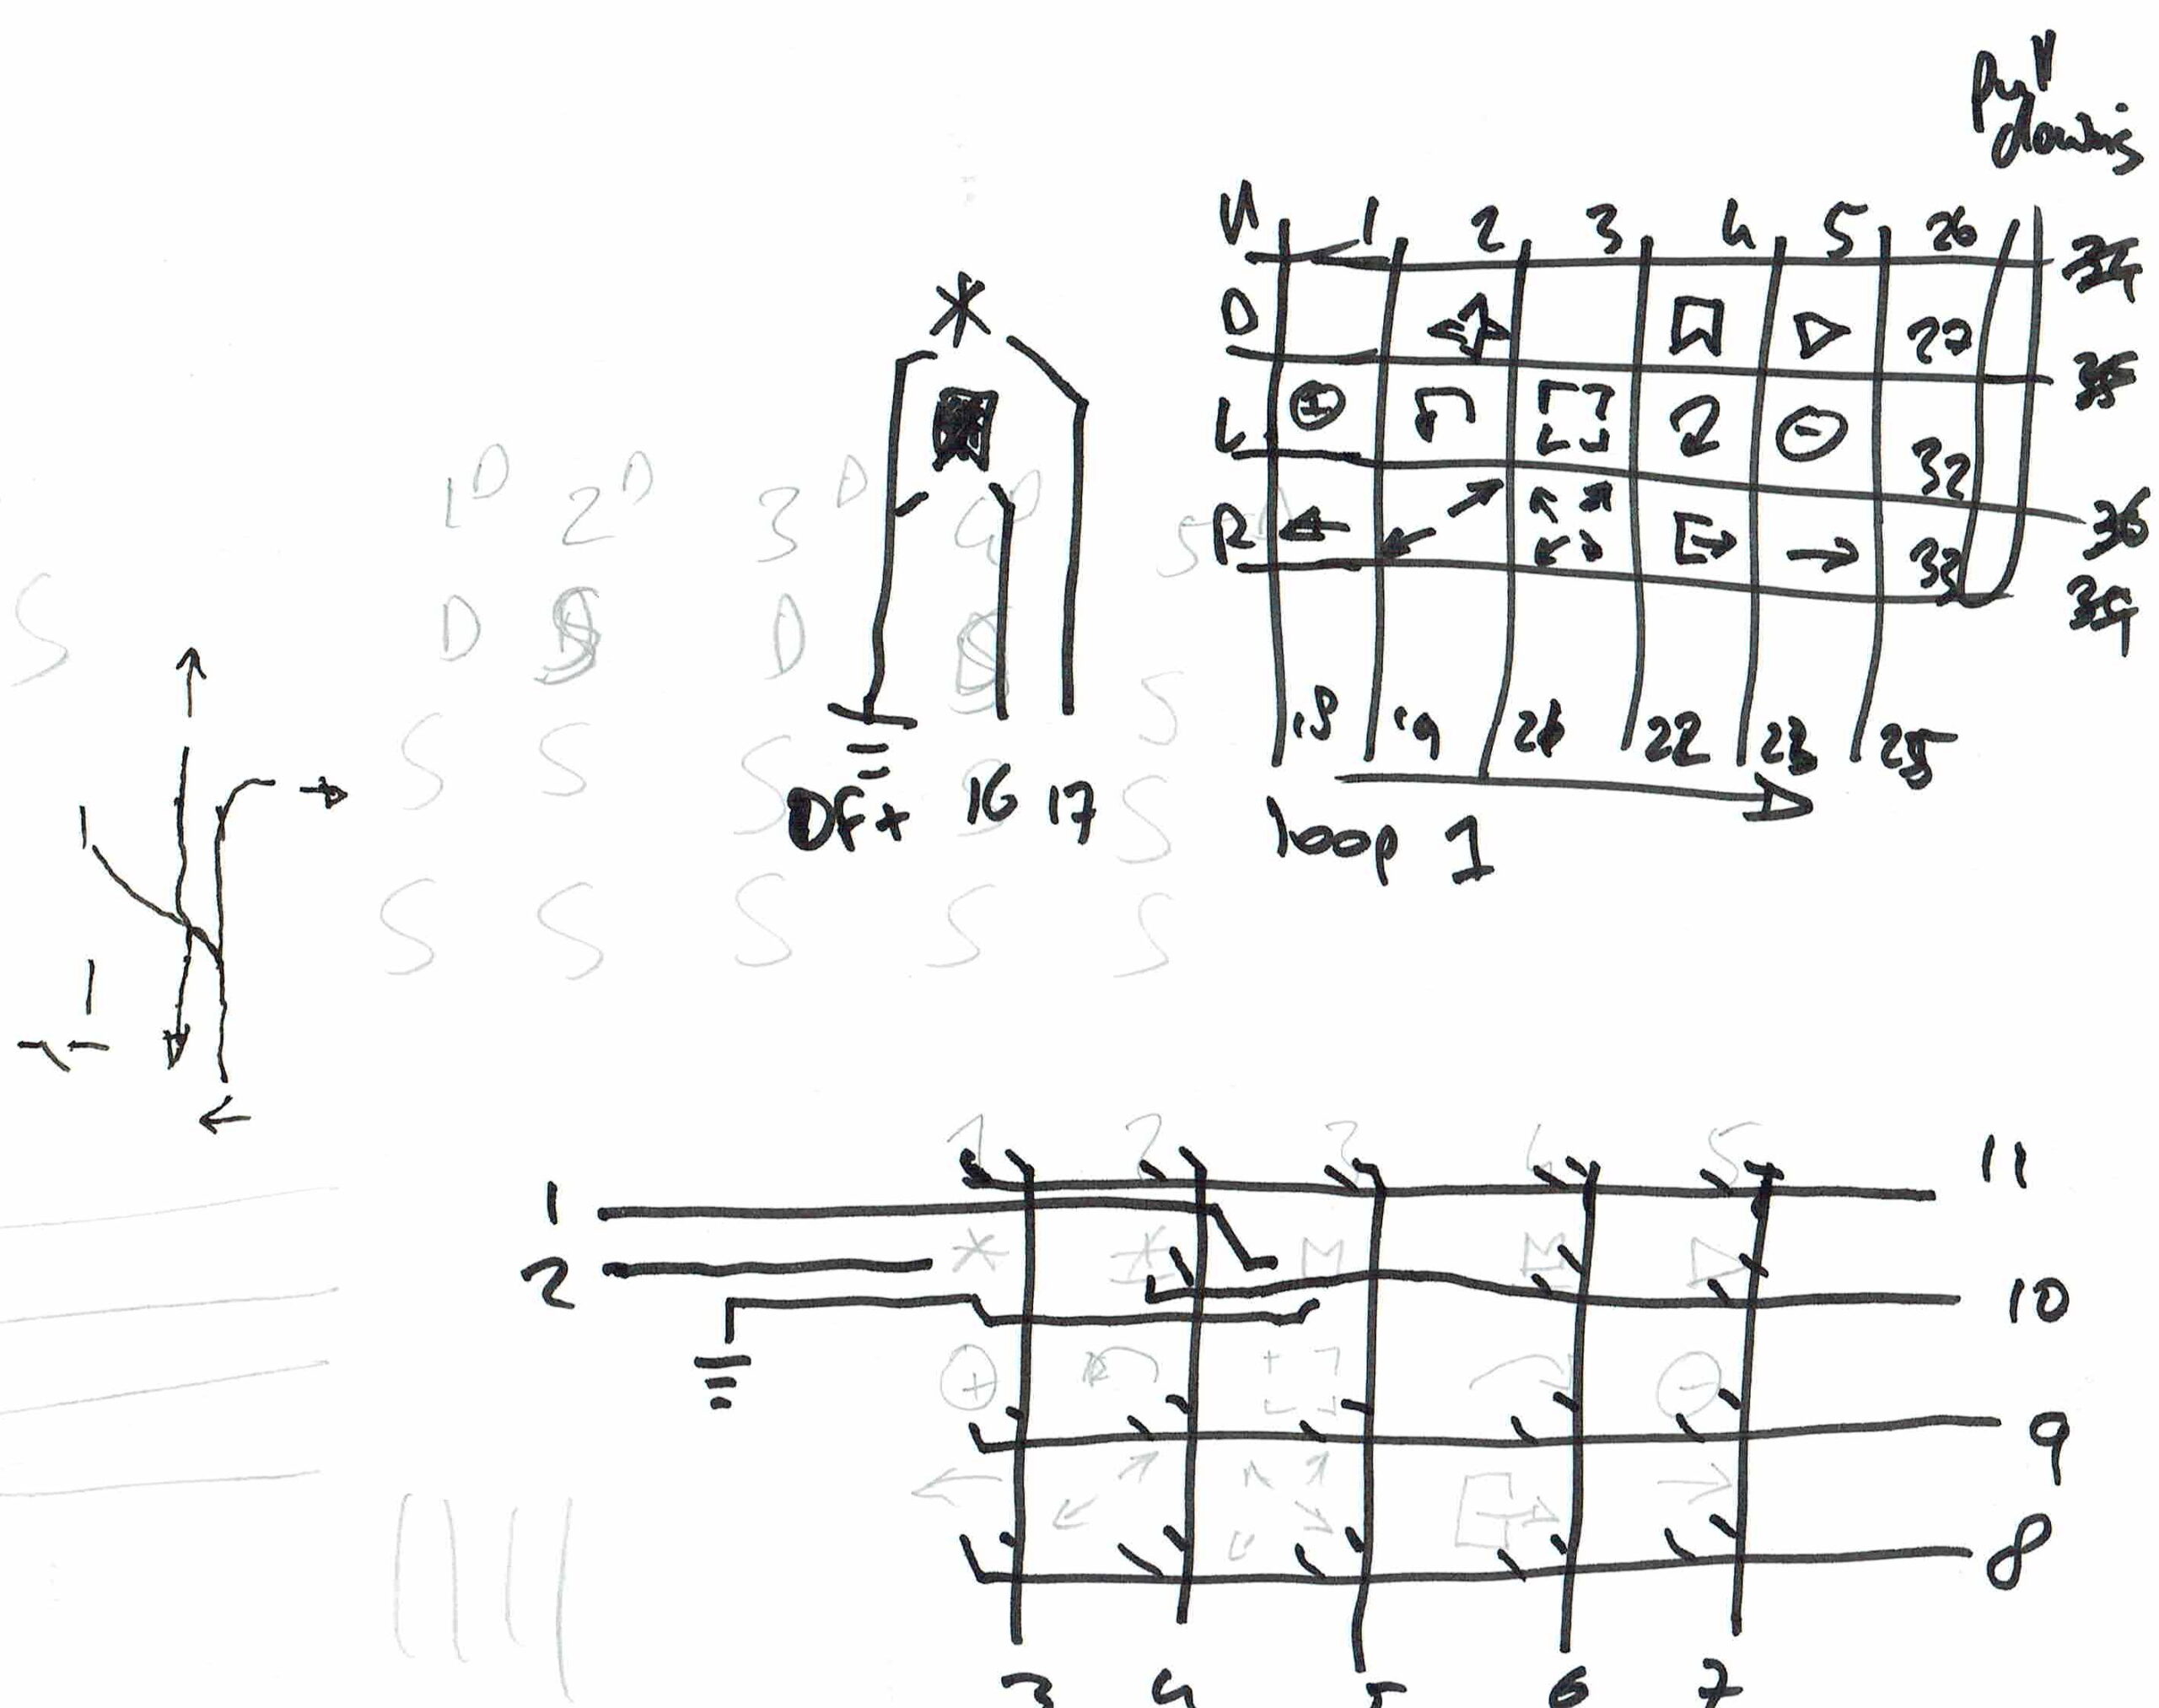
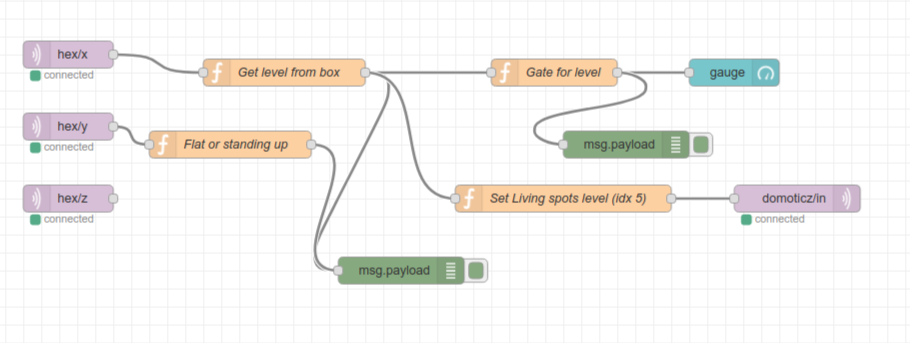
Put the box flat on the table to switch off. When you put it on one side, it will controll your lights brightness. 20,40,60,80 and 100%, just by rotating and putting it down on its sides.
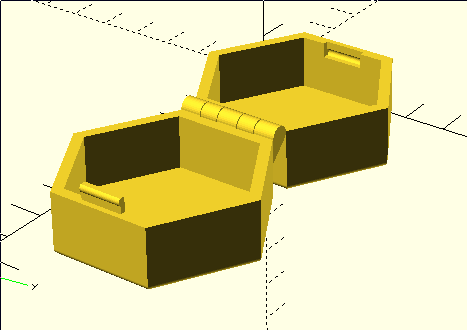
3D printed case
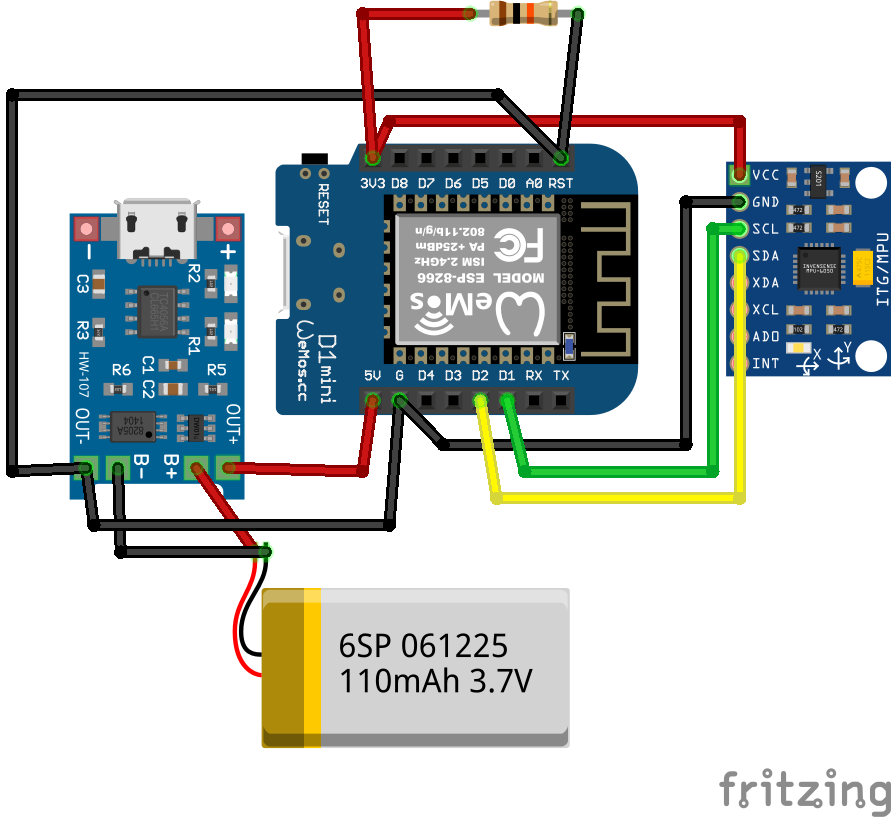
Schematics (without the wireless charging part)
Wireless part
Node-Red Controll part (source below)
Nice to have’s : Arduino-sleep mode, wakeup with a movement sensor.
Arduino Code
#include <Wire.h>
//#include <SPI.h>
#include <PubSubClient.h>
//#include <string.h>
//#include <stdio.h>
#include <ESP8266WiFi.h>

// Wifi settings
const char* ssid = "MTAP1";
const char* password = "xxxxxxxxxx";
const char* mqtt_server = "10.1.0.17";

// I2C address of the MPU-6050 - 0x68 or 0x69 if AD0 is pulled HIGH
const int MPU = 0x68;
int16_t AcX, AcY, AcZ, GyX, GyY, GyZ;
float gForceX, gForceY, gForceZ, rotX, rotY, rotZ;

// Wifi MAC address
byte mac[]= {  0xDE, 0xED, 0xBA, 0xFE, 0xFE, 0xED };

WiFiClient espClient;
IPAddress ip;
PubSubClient mqttClient(espClient);

// IP address of your MQTT server
const char* server = "10.1.0.17";
//const char* outTopic = "test/";
//const char* server = "iot.eclipse.org";

void dataReceiver(){
  Wire.beginTransmission(MPU);
  Wire.write(0x3B);  // starting with register 0x3B (ACCEL_XOUT_H)
  Wire.endTransmission(false);
  Wire.requestFrom(MPU,14,true);  // request a total of 14 registers
  AcX = Wire.read()<<8|Wire.read();  // 0x3B (ACCEL_XOUT_H) & 0x3C (ACCEL_XOUT_L)
  AcY = Wire.read()<<8|Wire.read();  // 0x3D (ACCEL_YOUT_H) & 0x3E (ACCEL_YOUT_L)
  AcZ = Wire.read()<<8|Wire.read();  // 0x3F (ACCEL_ZOUT_H) & 0x40 (ACCEL_ZOUT_L)
  GyX = Wire.read()<<8|Wire.read();  // 0x43 (GYRO_XOUT_H) & 0x44 (GYRO_XOUT_L)
  GyY = Wire.read()<<8|Wire.read();  // 0x45 (GYRO_YOUT_H) & 0x46 (GYRO_YOUT_L)
  GyZ = Wire.read()<<8|Wire.read();  // 0x47 (GYRO_ZOUT_H) & 0x48 (GYRO_ZOUT_L)
  processData();
}

void processData(){
  gForceX = AcX / 16384.0;
  gForceY = AcY / 16384.0;
  gForceZ = AcZ / 16384.0;

  rotX = GyX / 131.0;
  rotY = GyY / 131.0;
  rotZ = GyZ / 131.0;
}

void debugFunction(int16_t AcX, int16_t AcY, int16_t AcZ, int16_t GyX, int16_t GyY, int16_t GyZ){
  // Print the MPU values to the serial monitor
  Serial.print("Accelerometer: ");
  Serial.print("X="); Serial.print(gForceX);
  Serial.print("|Y="); Serial.print(gForceY);
  Serial.print("|Z="); Serial.println(gForceZ);
  Serial.print("Gyroscope:");
  Serial.print("X="); Serial.print(rotX);
  Serial.print("|Y="); Serial.print(rotY);
  Serial.print("|Z="); Serial.println(rotZ);
}

void reconnect() {
  // Loop until we're reconnected
  while (!mqttClient.connected()) {
    Serial.print("Attempting MQTT connection...");
    // Attempt to connect
    if (mqttClient.connect("arduinoClient")){
      Serial.println("connected");
    }
    else {
      Serial.print("failed, rc=");
      Serial.print(mqttClient.state());
      Serial.println(" try again in 5 seconds");
//      Wait 5 seconds before retrying
      delay(1000);
    }
  }
}

void setup(){
  Serial.begin(9600);

    setup_wifi();

  Wire.begin(0,2);
  Wire.beginTransmission(MPU);
  Wire.write(0x6B);  // PWR_MGMT_1 register
  Wire.write(0);     // set to zero (wakes up the MPU-6050)
  Wire.endTransmission(true);

  mqttClient.setServer(server, 1883);

//  Ethernet.begin(mac);
//  ip = Ethernet.localIP();

  Serial.println(ip);
  Serial.println(server);
  //delay(1500);
}

char* init(float val){

  char buff[100];

  for (int i = 0; i < 100; i++) {
      dtostrf(val, 4, 2, buff);  //4 is mininum width, 6 is precision
  }
   return buff;

}

void setup_wifi() {

  delay(10);
  // We start by connecting to a WiFi network
  Serial.println();
  Serial.print("Connecting to ");
  Serial.println(ssid);

  WiFi.begin(ssid, password);

  while (WiFi.status() != WL_CONNECTED) {
    delay(500);
    Serial.print(".");
  }

  Serial.println("");
  Serial.println("WiFi connected");
  Serial.println("IP address: ");
  Serial.println(WiFi.localIP());
}

void dataAcc(){

  char mpu6050X[100]= "";
  strcat(mpu6050X,init(gForceX));

  char mpu6050Y[100]= "";
  strcat(mpu6050Y,init(gForceY));

  char mpu6050Z[100]= "";
  strcat(mpu6050Z,init(gForceZ));

  // accelerometer - "topic, mpu6050"
  mqttClient.publish("AcX/", mpu6050X);
  mqttClient.publish("AcY/", mpu6050Y);
  mqttClient.publish("AcZ/", mpu6050Z);
//  mqttClient.publish(outTopic, "text to send via mqtt");
}


void dataGy(){

  char mpu6050X[100]= "";
  strcat(mpu6050X,init(rotX));

  char mpu6050Y[100]= "";
  strcat(mpu6050Y,init(rotY));

  char mpu6050Z[100]= "";
  strcat(mpu6050Z,init(rotZ));

  // gyroscope - "topic, mpu6050"
  mqttClient.publish("GyX/", mpu6050X);
  mqttClient.publish("GyY/", mpu6050Y);
  mqttClient.publish("GyZ/", mpu6050Z);
//  mqttClient.publish(outTopic, "text to send via mqtt");
}

void loop(){
  dataReceiver();
  debugFunction(AcX,AcY,AcZ,GyX,GyY,GyZ);

  if (!mqttClient.connected()) {
    reconnect();
  }

  mqttClient.loop();

  dataAcc();
  dataGy();

  delay(2000);
}
Why “rubber ducking’’? While an undergraduate at Imperial College in London, Dave did a lot of work with a research assistant named Greg Pugh, one of the best developers Dave has known. For several months Greg carried around a small yellow rubber duck, which he’d place on his terminal while coding. ( From “The Pragmatic programmer” page 95)
Why rubber ducking?
A very simple but particularly useful technique for finding the cause of a problem is simply to explain it to someone else or even a object. Explain out loud (or in your mind to the duck) what each line of code is doing. Often while doing so, you will see the problem.
Why Pair Programming?
It is no secret, i like working on a problem alone. Let me do my ‘thing’. But i like the idea of Pair Programming, why?
Differences in thinking, gives alternative solutions
4 eyes principle, typo’s will be seen
When working with a novice:
Teaches the new guy
Give the other space to ask stupid questions, maybe they are NOT!
The knowledge of the new code is now known to > 1 person!