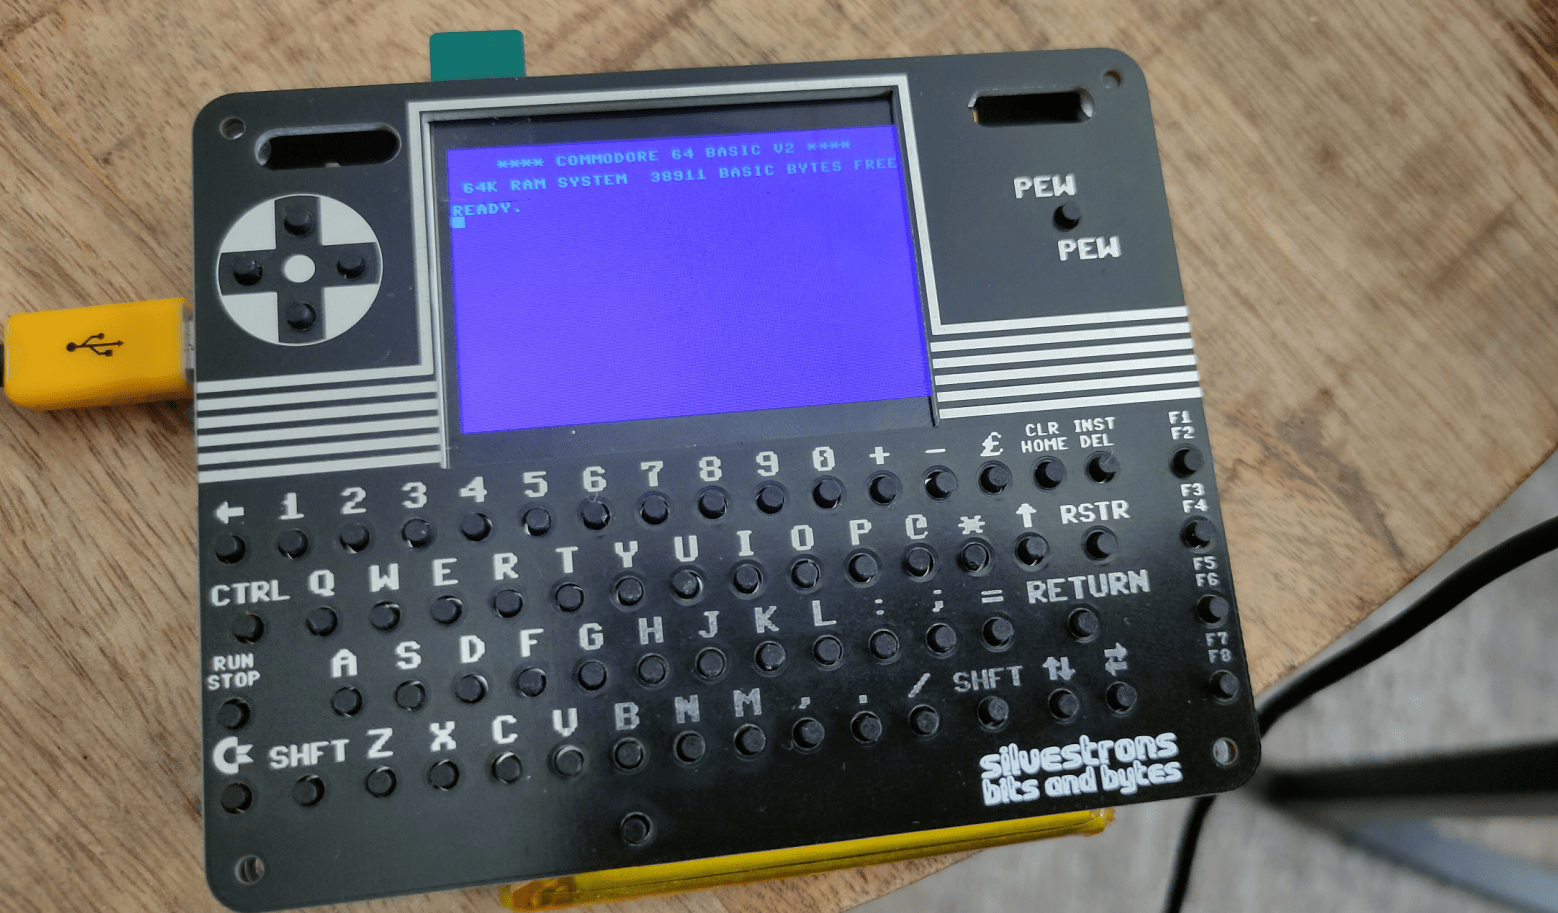
Tag Archives: programming

68000 SBC, C64 Git and SID Player

Working on 68000 Single Board Computer.

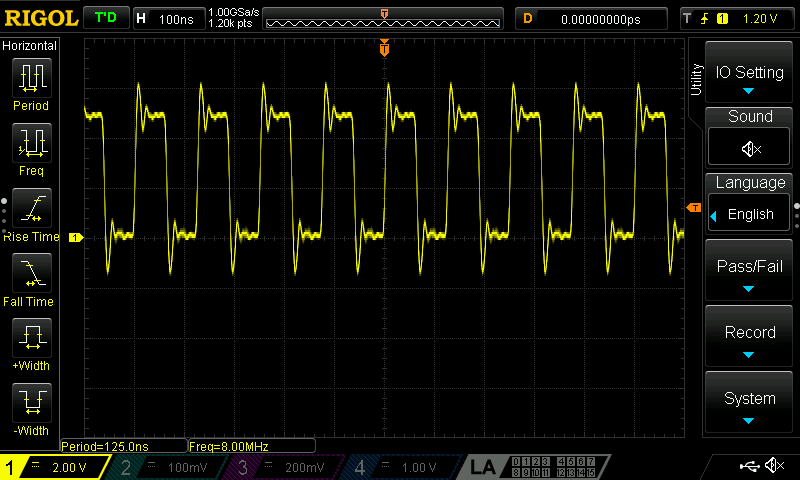
Made a clock circuit and busy designing a power-on-reset schematic. I’ve made one before, but this circuit needs RESET and HALT being pulled low.

8mhz 5V

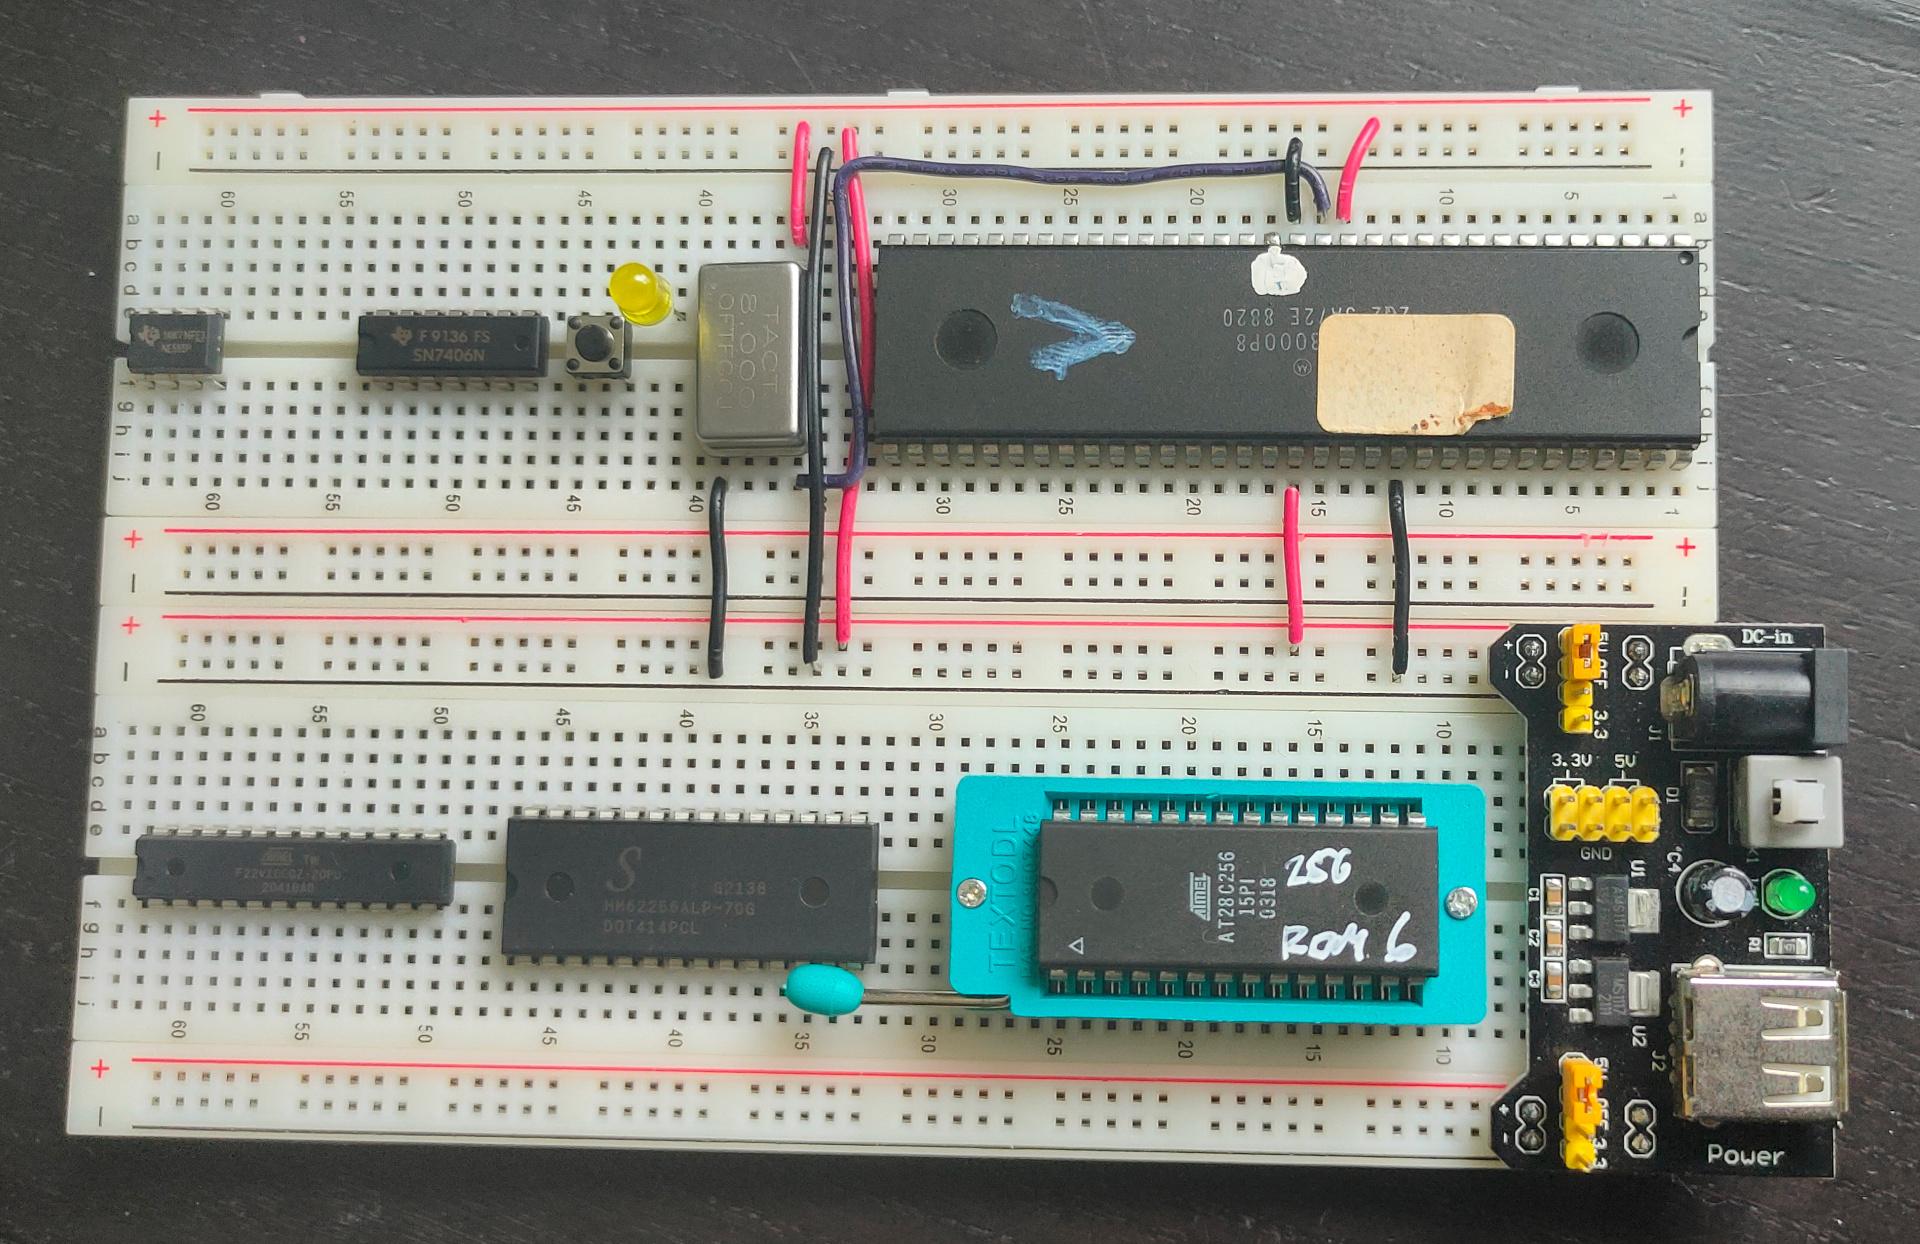
The 68000 being 24 bit address and 16 bit data needs 2x 8-bit roms and 2x 8 bit ram, but i didn’t have the components yet in this picture.

Address decoder using ATF22V10C is also halfway.
Schematics online soon.

Started a protected Git repo for C64 demo and proof of concepts for our old ICECREW group.

Installed Gitea, behind a reverse proxy.
Part of reverse proxy

ProxyRequests Off
ProxyPreserveHost On
SSLProxyVerify none
SSLProxyCheckPeerCN off
SSLProxyCheckPeerName off

<Location />
ProxyPass   http://10.x.y.z:3000/
ProxyPassReverse  http://10.x.y.z:3000/
Require ip 213.10.144.27
Require ip a.b.c.d
Require ip e.f.g.h
</Location>

Gitea config with token login over https

Generate token
Login https://icecrew.henriaanstoot.nl/

Select your profile (upper right)

And select Settings > Applications

Select a name for your token. And press generate

Top screen shows a token, copy this!

Create new project
Press explore (upper left)

Select organisation and icecrew

Press New Repository, give a name and create

(press https when not defaulted, there is NO ssh to this server)

The example is wrong! (Use below changing TOKENHERE and PROJECTNAME

touch README.md
git init -b master
git add README.md
git commit -m "first commit"
git remote add origin https://TOKENHERE@icecrew.henriaanstoot.nl/icecrew/PROJECTNAME.git
git push -u origin master

Clone a project
Goto a project

press HTTPS when not defaulted to this.

git clone https://icecrew.henriaanstoot.nl/icecrew/borderflag.git 

edit .git/config and add your token to the url ! to push

My Sidplayer as an option to select own collection.
And I’ve made a top list

# Best composers (no order)
Ouwehand_Reyn
Tel_Jeroen
Huelsbeck_Chris
Rowlands_Steve
Hubbard_Rob
Daglish_Ben
Follin_Tim
Gray_Matt
Tjelta_Geir
Mibri (from get in the Van)

# Best tunes (no order)
R-Type.sid
Arkanoid.sid
Bottom.sid
Turbo_Outrun.sid
A_Tune_for_Unity.sid
Ohne_Dich_Rammstein.sid

# Start of own collection (not in above collection)
Abyssus_Ignis_[8580].sid
Catastrophe_[8580].sid
Dumb_Terminal_[8580].sid
Get_in_the_Van_[8580].sid
Getting_in_the_Van_[8580].sid
Supercharger_[8580].sid
Tuna_Guitar_[8580].sid

Investigating syncing effect to Sid music.

I got a great tip from Youth who made the Freakandel demo presented at X2024.

> Setup the loop to play the music

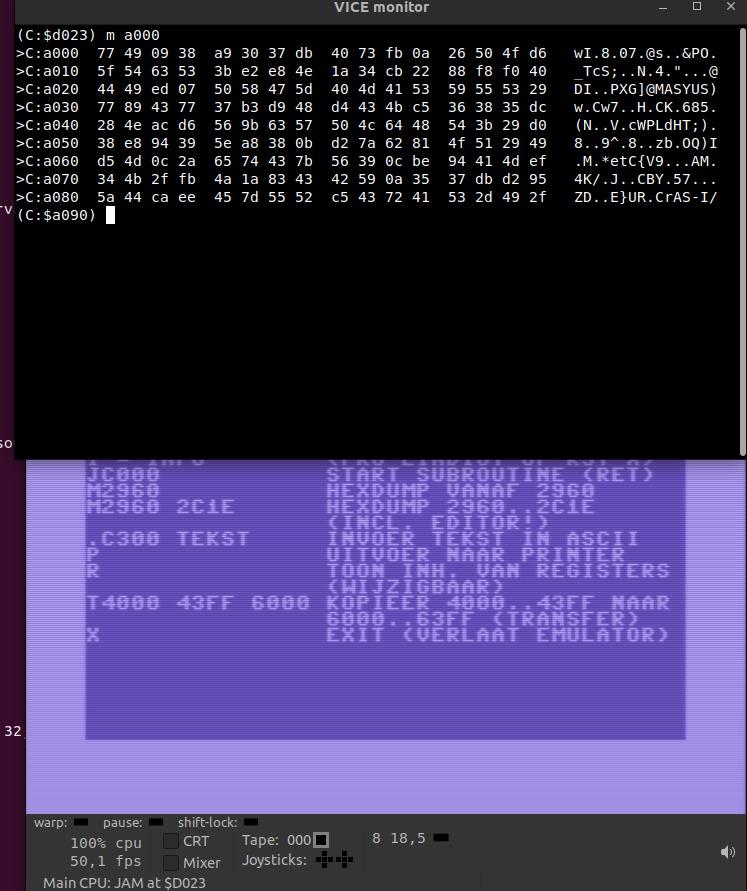
> Copy part of the memory to the screen ($0400) in the same loop to look for memory locations that are used as variables for the music. > Looking at

> Memory where the music is stored

> Zeropage ($00-$ff)

> See if there's some useful changes that coincide with for example drums

> For my own tunes, I use a music routine where I can put event markers in the music itself and react to those from the code. That's >how I synced https://www.micheldebree.nl/posts/big_angry_sprite/

> You could also try reading the SID registers for voice 3 (waveform and ADSR), those are the only ones that are not write-only. > Obviously you can then only react to those changes in voice 3.

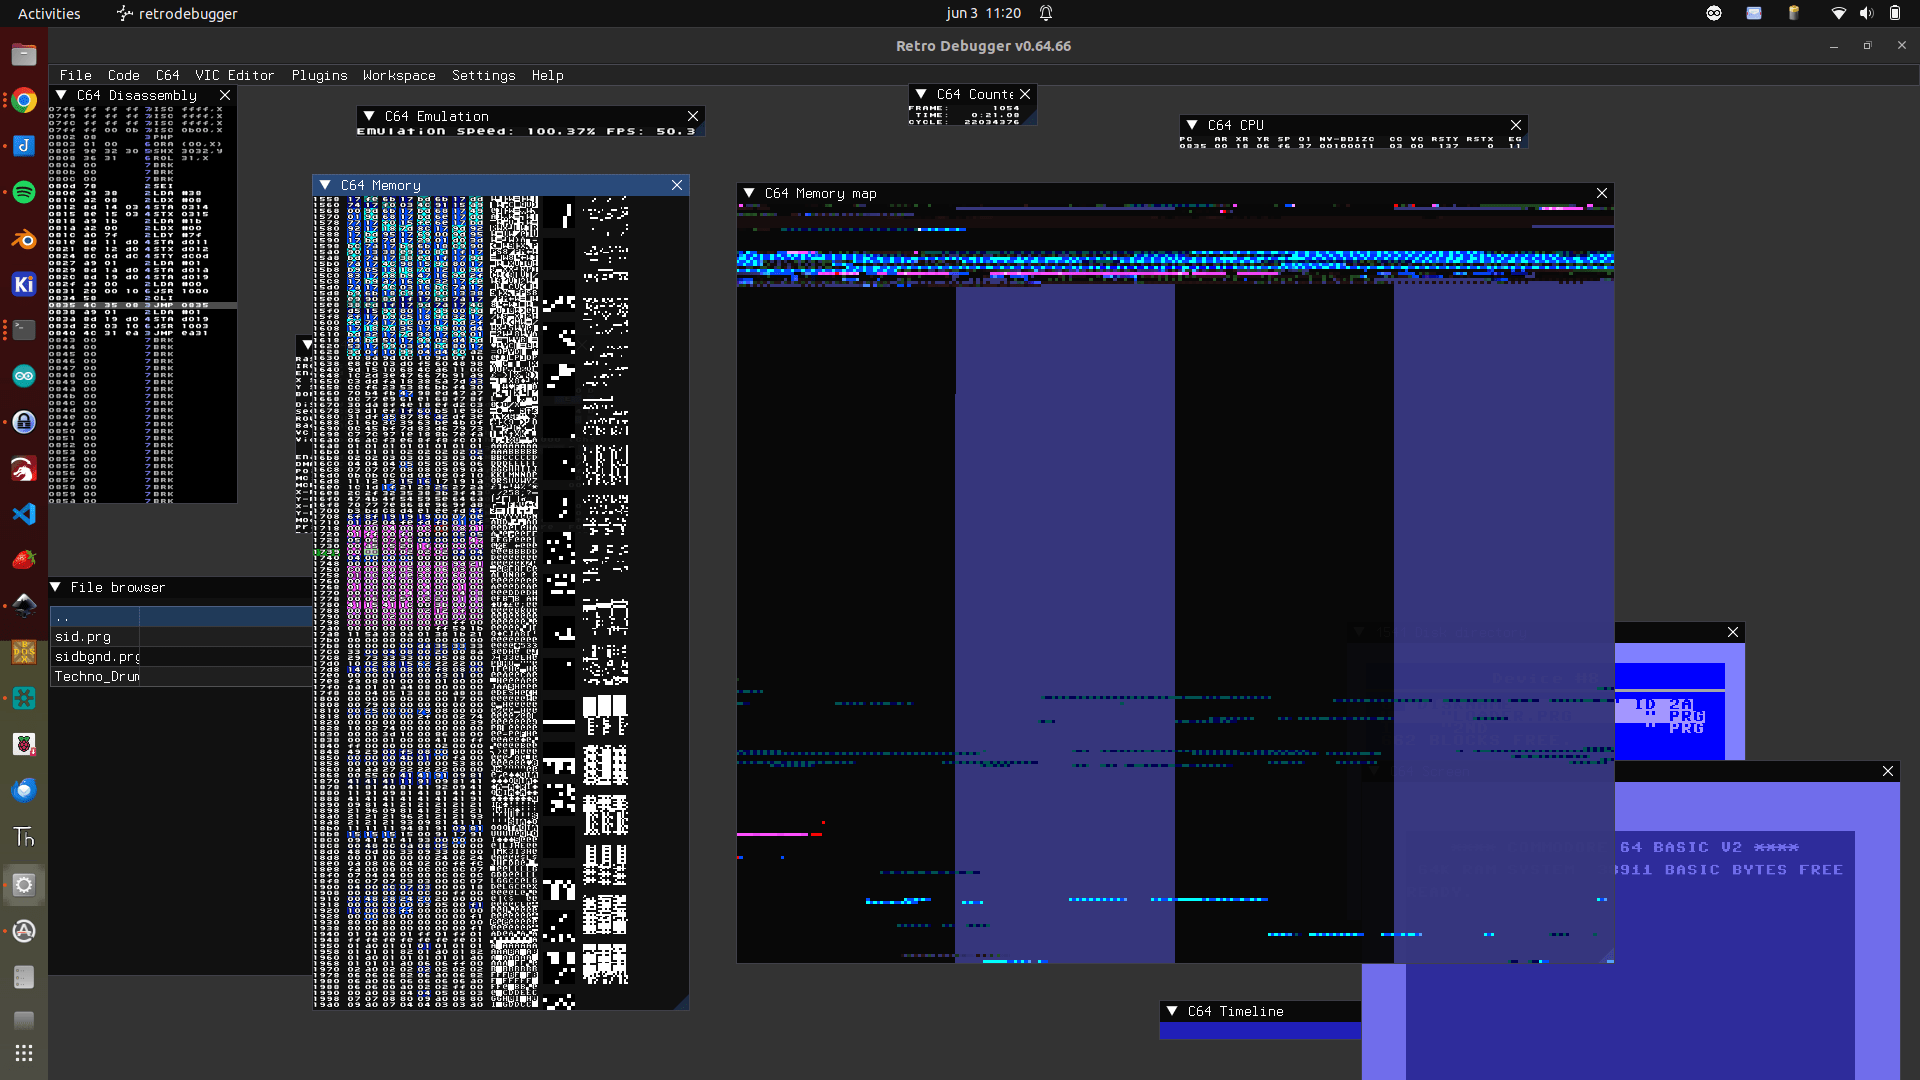
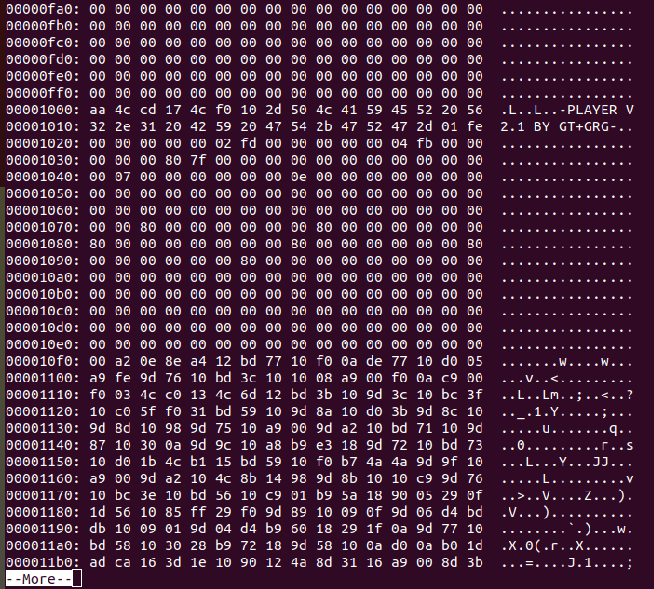
I used retrodebugger to see which bytes are changing.
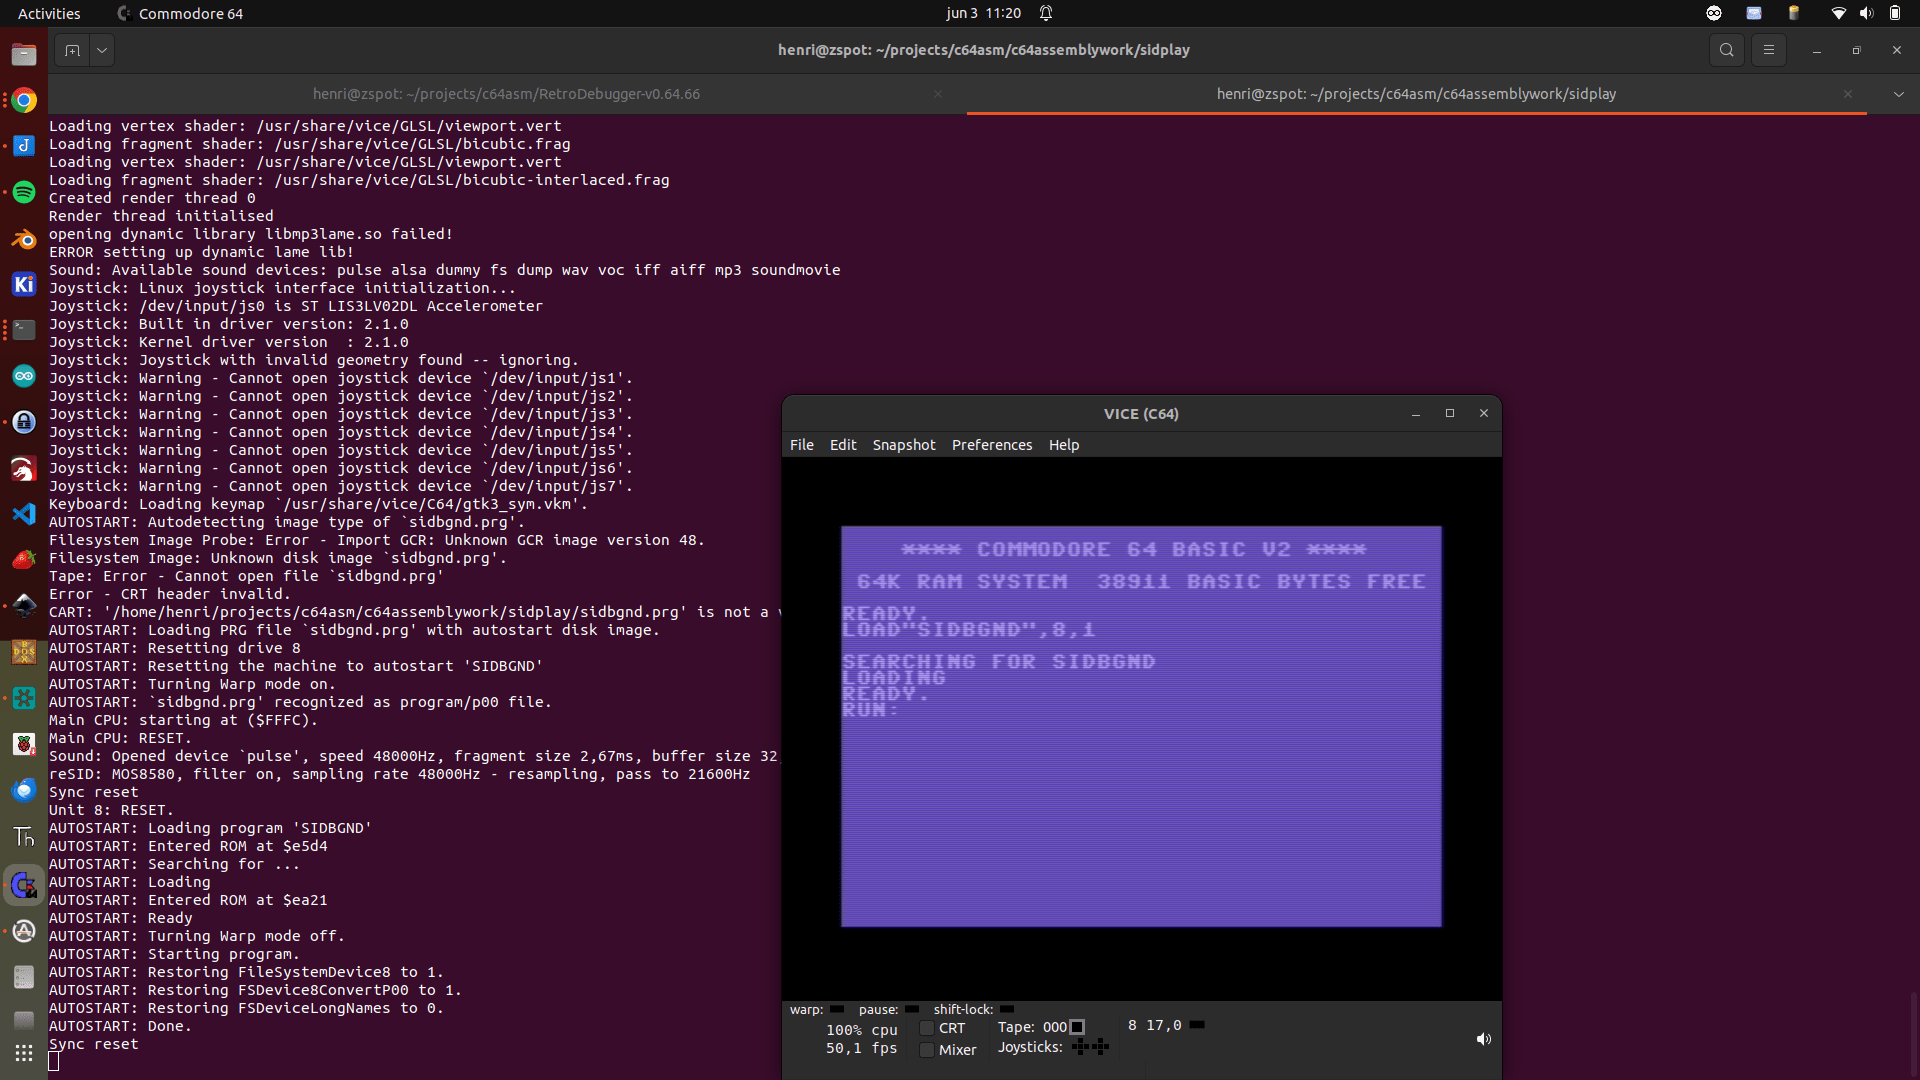
Then I wrote a program which changes the background colour to this value.
I also made a program to use a joystick to see which address have the most interesting effect.
(use up)

     1                                       !to "sidbgnd.prg",cbm
     2                          
     3                                  * = $0801
     4                          			
     5                          sysline:	
     6  0801 0b0801009e323036...        !byte $0b,$08,$01,$00,$9e,$32,$30,$36,$31,$00,$00,$00 ;= SYS 2061
     7                          
     8                                  * = $080d 
     9                          
    10  080d 78                 	sei
    11  080e a960               	lda #<irq
    12  0810 a208               	ldx #>irq
    13  0812 8d1403             	sta $314
    14  0815 8e1503             	stx $315
    15  0818 a91b               	lda #$1b
    16  081a a200               	ldx #$00
    17  081c a07f               	ldy #$7f 
    18  081e 8d11d0             	sta $d011
    19  0821 8e12d0             	stx $d012
    20  0824 8c0ddc             	sty $dc0d
    21  0827 a901               	lda #$01
    22  0829 8d1ad0             	sta $d01a
    23  082c 8d19d0             	sta $d019 
    24  082f a900               	lda #$00
    25  0831 200010             	jsr $1000 
    26  0834 58                 	cli
    27  0835 a920               	lda #$20
    28  0837 8d6b08             	sta vector
    29  083a a917               	lda #$17
    30  083c 8d6c08             	sta vector+1
    31  083f a000               	ldy #$00
    32  0841 b93017             hold 	lda $1730,y
    33  0844 8d20d0             	sta $D020
    34  0847 ad00dc             	lda $dc00
    35  084a 2901               	and #$1
    36  084c c901               	cmp #$1
    37  084e f0f1               	beq hold
    38  0850 ad00dc             	lda $dc00
    39  0853 2901               	and #$1
    40  0855 c900               	cmp #$0
    41  0857 f0e8               	beq hold
    42  0859 c8                 	iny
    43  085a 8c6d08             	sty vector+2
    44  085d 4c4108             	jmp hold 
    45                          irq
    46  0860 a901               	lda #$01
    47  0862 8d19d0             	sta $d019 
    48  0865 200310             	jsr $1003 
    49  0868 4c31ea             	jmp $ea31
    50                          
    51                          vector
    52  086b 0000               	!byte $00,$00
    53                                      
    54                          	* = $1000
    55  1000 4c37104c85104c2f...	!binary "Techno_Drums.sid" ,, $7c+2

Raster line with open borders to draw a flag

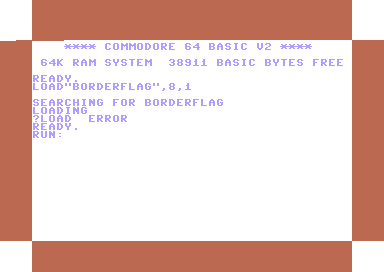
A fun experiment using opening the C64 border and changing colors on certain rasterlines.

Screenshot (only a little artefact on the lefthand side)

Code (acme)

acme borderflag.asm
x64 +drive8truedrive borderflag.prg

!cpu 650rasterline
!to "borderflag.prg",cbm


* = $0801
    !byte $0d,$08,$dc,$07,$9e,$20,$34
    !byte $39,$31,$35,$32,$00,$00,$00

* = $c000
        sei                     ; turn off interrupts

        ldx #1                  ; enable raster interrupts
        stx $d01a

        lda #<irq       	; set raster interrupt vector
        ldx #>irq
        sta $0314
        stx $0315

        ldy #$f0                ; set first interrupt rasterline
        sty $d012
        lda $d011               ; reset rasterline hi bit
        and #%01111111
        sta $d011

        asl $d019               ; ack VIC interrupts
        cli

loop_until_doomsday
        jmp loop_until_doomsday

irq
	asl $d019       	; ack irq

	lda #$01		; set screenframe and background
	sta $d020
	lda #$02
	sta $d021

	lda #$38        	; wait for line $38
	cmp $d012       	
	bne *-3

	lda #$02		; set screenframe and background
	sta $d020
	lda #$01
	sta $d021

	lda #$f9        	; wait for line $f9C
	cmp $d012       	; just below border in 25 row mode
	bne *-3

	lda $d011       	; switch to 24 row mode ($d011 bit 3 = 0)
	and #$f7        	; %11110111
	sta $d011

	lda #$fd        	; wait for line $fd
	cmp $d012       	; just below border in 25 row mode
	bne *-3

	lda $d011       	; switch back to 25 row mode ($d011 bit 3 = 1)
	ora #$08        	; %00001000
	sta $d011

	jmp $ea31		; exit irq

No more protected sheets

I needed to get some data from protected sheets.

But I got this on 100+ files:

F that:

Made a script to remove sheet protection and ran this in a loop over all files.
Bye bye protection.

 ./script.sh /mnt/fileserver/sensordata001.xlsx
Parsing /mnt/fileserver/sensordata001.xlsx
Archive:  this.zip
  inflating: tmp/[Content_Types].xml
  inflating: tmp/_rels/.rels
  inflating: tmp/xl/_rels/workbook.xml.rels
  inflating: tmp/xl/workbook.xml
  inflating: tmp/xl/worksheets/sheet4.xml
  inflating: tmp/xl/worksheets/sheet2.xml
  inflating: tmp/xl/worksheets/sheet3.xml
  inflating: tmp/xl/worksheets/sheet1.xml
  inflating: tmp/xl/styles.xml
  inflating: tmp/xl/theme/theme1.xml
  inflating: tmp/xl/sharedStrings.xml
  inflating: tmp/docProps/core.xml
  inflating: tmp/docProps/app.xml
  adding: [Content_Types].xml (deflated 78%)
  adding: docProps/ (stored 0%)
  adding: docProps/core.xml (deflated 49%)
  adding: docProps/app.xml (deflated 54%)
  adding: _rels/ (stored 0%)
  adding: _rels/.rels (deflated 60%)
  adding: xl/ (stored 0%)
  adding: xl/worksheets/ (stored 0%)
  adding: xl/worksheets/sheet2.xml (deflated 92%)
  adding: xl/worksheets/sheet1.xml (deflated 46%)
  adding: xl/worksheets/sheet4.xml (deflated 92%)
  adding: xl/worksheets/sheet3.xml (deflated 92%)
  adding: xl/_rels/ (stored 0%)
  adding: xl/_rels/workbook.xml.rels (deflated 77%)
  adding: xl/workbook.xml (deflated 56%)
  adding: xl/theme/ (stored 0%)
  adding: xl/theme/theme1.xml (deflated 78%)
  adding: xl/styles.xml (deflated 57%)
  adding: xl/sharedStrings.xml (deflated 23%)

Bash script:
It leaves the original intact, but makes a unprotected copy named the same with unprot_ in front of it.

#!/bin/bash
if [ -n "$1" ]; then
  echo "Parsing $1"
else
  echo "usage : scriptname /path/to/sheet.xlsx"
  exit 0
fi
name=$(basename $1)
dir=$(dirname $1)
rm -f this.zip
rm -rf tmp
mkdir tmp
cp "$1" this.zip
unzip this.zip -d tmp
find tmp/xl/worksheets/ -iname *xml -exec sed -i -e "s/<sheetProtection.*\/>//g" {} \;
cd tmp
rm -f "$dir/unprot_${name}"
zip -r "$dir/unprot_${name}" *
cd ..

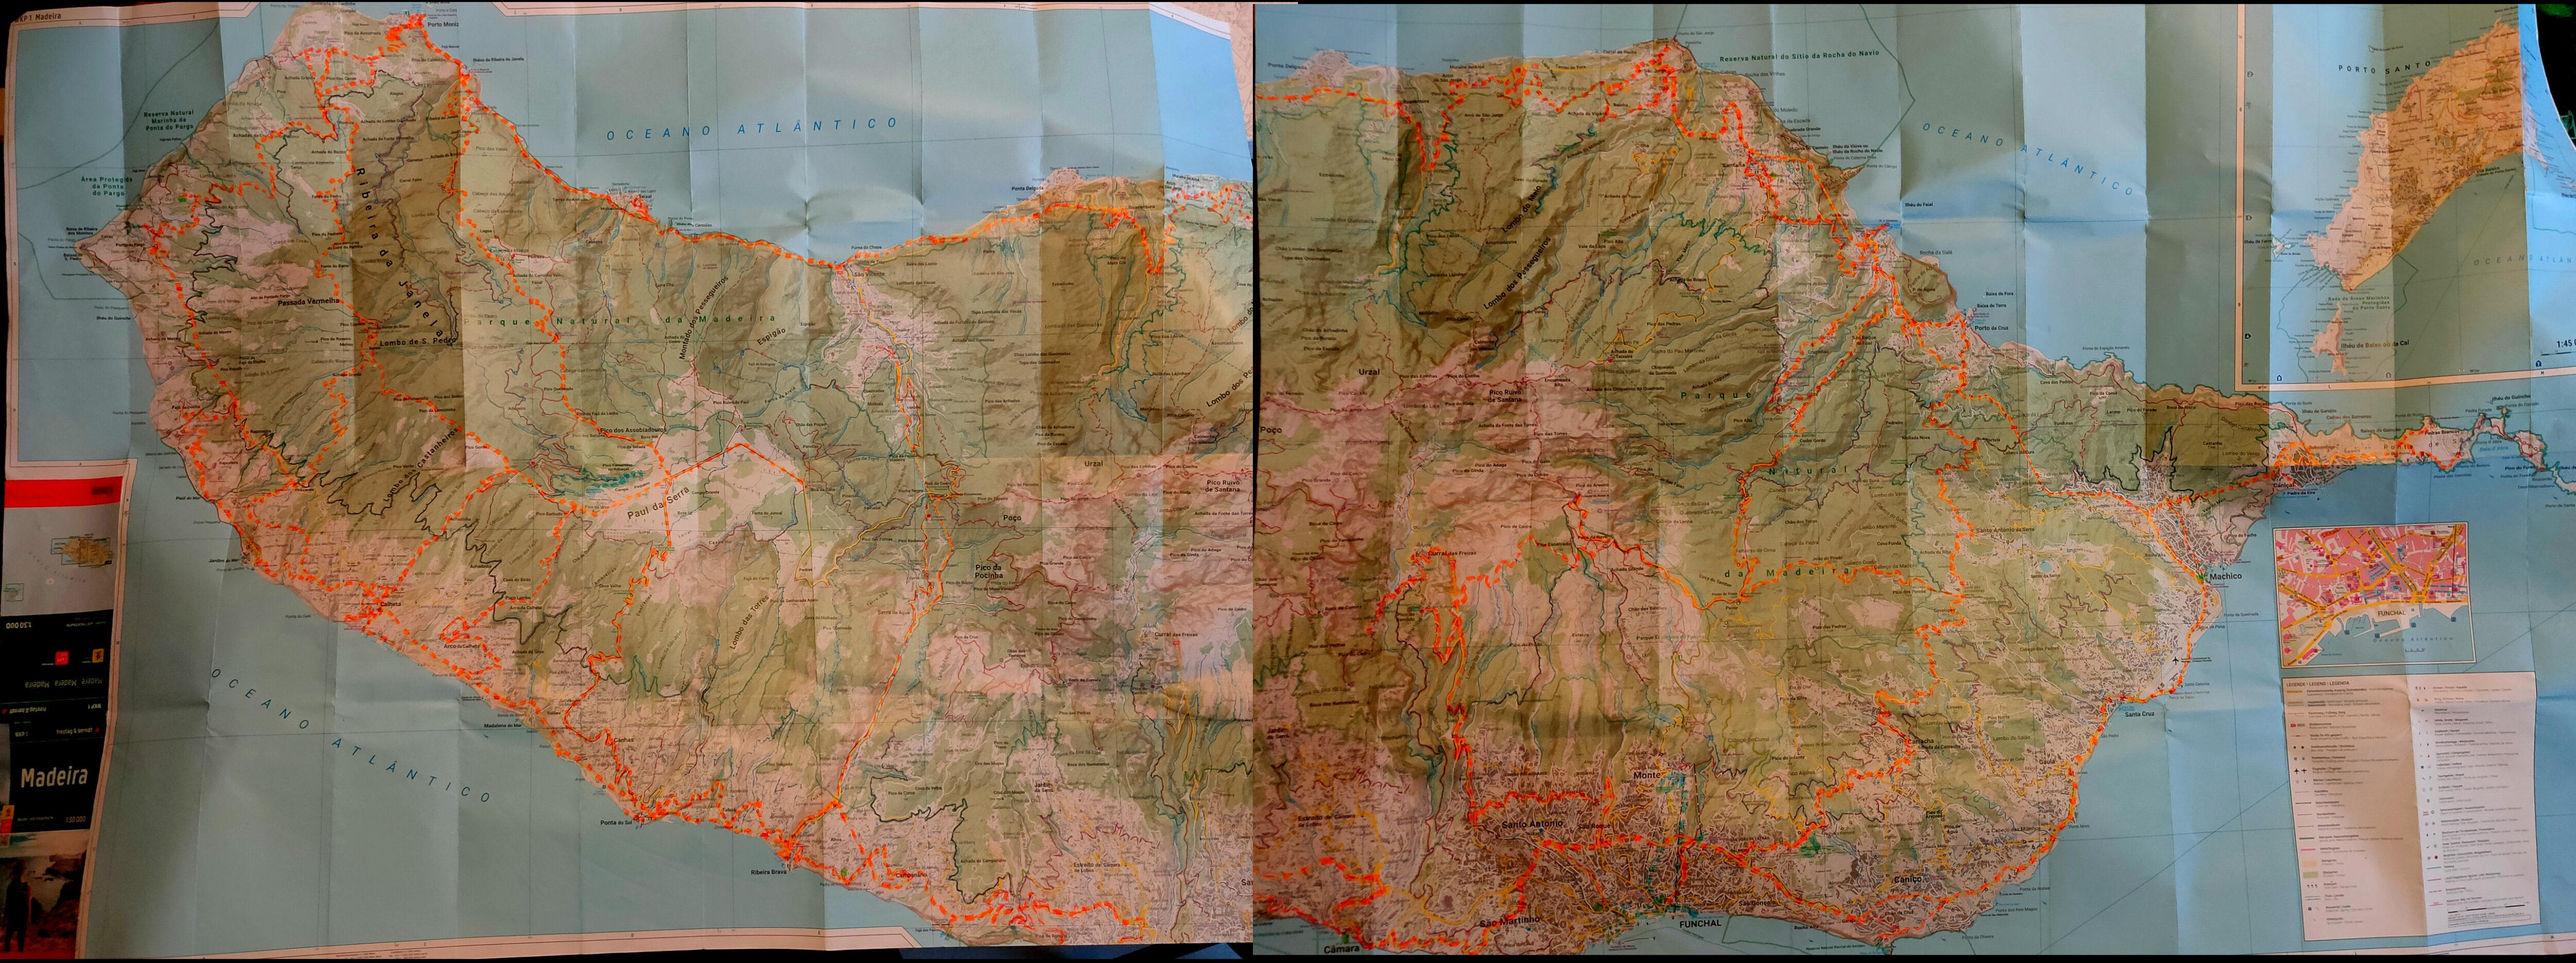
Notes for next projects I made using our short holiday in Madeira.

I think we’ve seen Maderia .. 🙂

I bought a little notebook while being there.
I wrote about 12 pages of ideas, schematics and projects to start.

  1. Rewrite Wozmon to use my composite pcb (Atmega328)
    access though via
  2. Building a 68000 pcb with a minimal machine code monitor.
    Using a atf22v10 as address decoder.
    (Same as my 6502 , I love those devices)
    Maybe I’ll add a micro sdcard reader
  3. Add a lcd matrix display to my 8088/8086
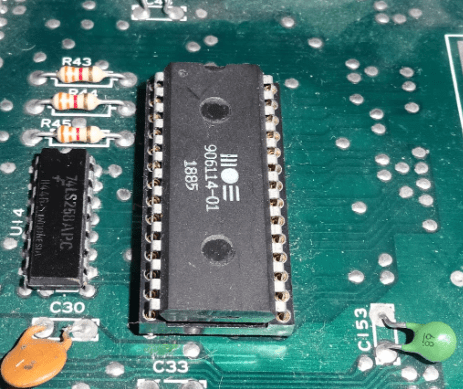
  4. Creating a PLA alternative for C64 using ath22v10 (again)
  5. Make backplanes for my 6502, so I can plug cards with different POC cards.
    Clockcard, Latched bus leds, multiple VIA’s, IRQ controller, SID + Buzzer (Maybe also AY-3-8910, see other posts), LCD, composite, serial, Matrix and serial_usb) keyboard)
  6. IRQ controller because I have some devices without opendrain, so I can’t tie all IRQ’s together
  7. Amiga Chip Mem mod for rev 5 (using a ‘new’ 8372A)
  8. 8085 Cartridge new approach
  9. C64Pico fix and add backplane + breadboard version for POCs
  10. … more
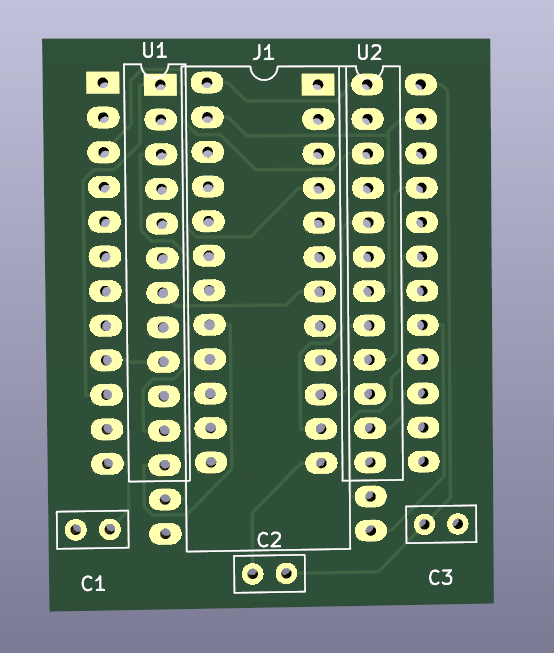
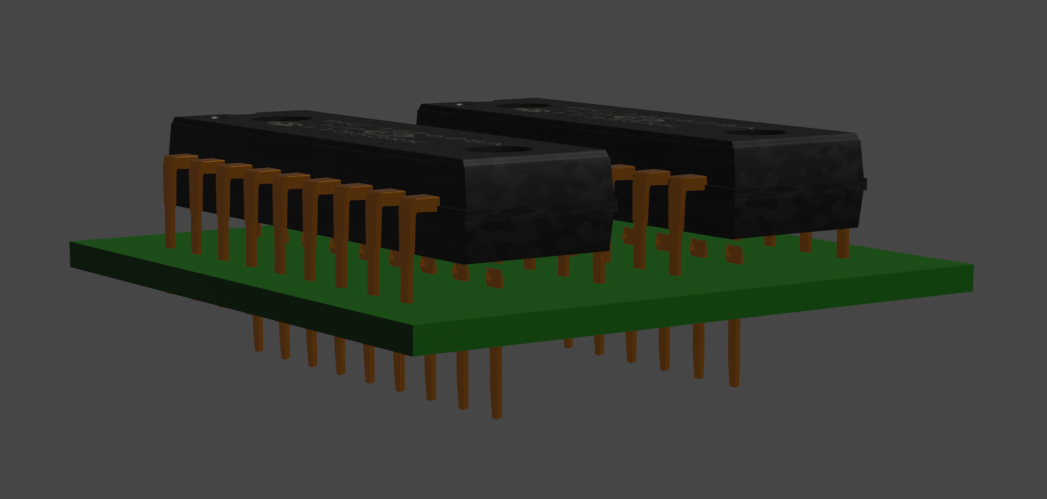
First version PLA with atf22v10
PCB mockup (two ATF22v10 on top and a wide pin setup for placement in C64
Wide PLA

8085 Cartridge revisited

Working on 8085 cartridge

Problem with cartridge: prg is 17k, exomized 10k.
So you need 2 banks of 8k.
This disables basic rom, needed for the program.
The program needs to be relocated to 0x800 anyway.
So my exomizer options will take care of that.
But the basic is not being enabled again.

exomizer sfx sys -o data.exo -Di_ram_enter=\$37 -Di_ram_during=\$34 -f'LDA #$37 STA $01' 8085.prg 
xa frame.asm -o frame.bin
x64 -cart16 frame.bin 

Result … JAM

68000 Build environment

For my new SBC I’ll need a machine code build environment.

This is what I’ve setup now.

My main workstation is Linux based. While this setup is Linux based, vasm should work on other operating systems also.

Getting and compiling vasm for 68k

wget http://sun.hasenbraten.de/vasm/release/vasm.tar.gz
tar xzvf vasm.tar.gz
cd vasm
# Building
make CPU=m68k SYNTAX=oldstyle
# Using
./vasmm68k_oldstyle -m68000 -Fbin -dotdir -no-opt source.asm
# this generates a.out

# Dumping the file (byte separated and with a offset of 0x8000)
xxd -g 1 -o 0x8000 a.out | head
00008000: 30 3c aa aa 4e f9 00 00 80 04 00 00 00 00 00 00  0<..N...........
00008010: 00 00 00 00 00 00 00 00 00 00 00 00 00 00 00 00  ................
00008020: 00 00 00 00 00 00 00 00 00 00 00 00 00 00 00 00  ................
00008030: 00 00 00 00 00 00 00 00 00 00 00 00 00 00 00 00  ................
00008040: 00 00 00 00 00 00 00 00 00 00 00 00 00 00 00 00  ................
00008050: 00 00 00 00 00 00 00 00 00 00 00 00 00 00 00 00  ................
00008060: 00 00 00 00 00 00 00 00 00 00 00 00 00 00 00 00  ................
00008070: 00 00 00 00 00 00 00 00 00 00 00 00 00 00 00 00  ................
00008080: 00 00 00 00 00 00 00 00 00 00 00 00 00 00 00 00  ................
00008090: 00 00 00 00 00 00 00 00 00 00 00 00 00 00 00 00  ................

# But my 68k needs an ODD EVEN eeprom 
# so I used another tool - romsplit
git clone https://github.com/ullman/romsplit
cd romsplit
make all
# Using romsplit
./romsplit -s a.out odd.rom even.rom
# Split into 4? Split the splits using above
# Output
xxd -g 1 -o 0x8000 odd | head -1 ; xxd -g 1 -o 0x8000 even | head -1
00008000: 30 aa 4e 00 80 00 00 00 00 00 00 00 00 00 00 00  0.N.............
00008000: 3c aa f9 00 04 00 00 00 00 00 00 00 00 00 00 00  <...............
# Burn these with minipro

Disassemble

m68k-linux-gnu-objdump --disassemble-all --target=binary --architecture=m68k a.out

68030 example for friend

# Compile vasm with
make CPU=m68k SYNTAX=mot
------------
vasmm68k_mot  -Fbin  ./edk.asm
-------------
.68030

	ORG $0

*****
* exception table (256 x 4 bytes)
*****
	dc.l $400	; Program Counter na reset (startadres)
	dc.l $20000	; stackpointer (ram locatie)
	dc.l 0,0,0,0,0,0,0,0,0,0,0,0,0,0

	dc.l 0,0,0,0,0,0,0,0,0,0,0,0,0,0,0,0
	dc.l 0,0,0,0,0,0,0,0,0,0,0,0,0,0,0,0
	dc.l 0,0,0,0,0,0,0,0,0,0,0,0,0,0,0,0
	dc.l 0,0,0,0,0,0,0,0,0,0,0,0,0,0,0,0
	dc.l 0,0,0,0,0,0,0,0,0,0,0,0,0,0,0,0
	dc.l 0,0,0,0,0,0,0,0,0,0,0,0,0,0,0,0
	dc.l 0,0,0,0,0,0,0,0,0,0,0,0,0,0,0,0
	dc.l 0,0,0,0,0,0,0,0,0,0,0,0,0,0,0,0
	dc.l 0,0,0,0,0,0,0,0,0,0,0,0,0,0,0,0
	dc.l 0,0,0,0,0,0,0,0,0,0,0,0,0,0,0,0
	dc.l 0,0,0,0,0,0,0,0,0,0,0,0,0,0,0,0
	dc.l 0,0,0,0,0,0,0,0,0,0,0,0,0,0,0,0
	dc.l 0,0,0,0,0,0,0,0,0,0,0,0,0,0,0,0
	dc.l 0,0,0,0,0,0,0,0,0,0,0,0,0,0,0,0
	dc.l 0,0,0,0,0,0,0,0,0,0,0,0,0,0,0,0

	org $400	; hier starten
	move.l #$0,d0
loop1:
	add.l #$1,d0
	cmp.l #$10000,d0
	bne loop1

	move.l #$0,d0
loop2:
	add.l #$1,d0
	cmp.l #$10000,d0
	bne loop2

	nop
	nop
	nop
-----
vasm 1.9f (c) in 2002-2023 Volker Barthelmann
vasm M68k/CPU32/ColdFire cpu backend 2.6c (c) 2002-2023 Frank Wille
vasm motorola syntax module 3.18 (c) 2002-2023 Frank Wille
vasm binary output module 2.3a (c) 2002-2023 Volker Barthelmann and Frank Wille

org0001:0(acrwx1):	           0 bytes
org0002:0(acrwx1):	        1024 bytes
org0003:400(acrwx2):	          30 bytes
-----
-rw-rw-r--  1 henri    henri       1054 aug 27 11:45  a.out

C64 code re-learning stuff

Re-learning the little I knew (I never had a c64 as a kid).
Back to basics, welll machine code I mean.

Programming a little demo using acme.
Split screen bitmap and text mode plus sid music

Running a little demo in retrodebugger (missing the sid music in the recording)

Some useful commands

; Dump prg with offset 0x800 per byte and skip 00 00 lines
xxd -o 0x800 -g1 icecrew.prg | uniq -f10

; Write symbol list
acme -l icecrew.sym icecrew.asm

; png to kla (koala picture)
retropixels icecrew.png -o icecrew.kla

; relocate a sid address
sidreloc -r org.sid new.sid

Below code has some flaws:

Many empty gaps, creating a large file.
Exomizer could fix this, but better memory management should be the better solution.
The Koala file has many 0 bytes, the logo is small but the file is created for a full screen image.

Part of the program see $1000 of start of SID music


!cpu 6502
!to "icecrew1.prg",cbm

; Standard basic sys runner
basic_address   = $0801

; sid addresses
; address moved using 
; sidreloc -r Lameness_Since_1991.sid lame.sid
; addresses found using
;sidplay2 -v lame.sid 
;+------------------------------------------------------+
;|   SIDPLAY - Music Player and C64 SID Chip Emulator   |
;|          Sidplay V2.0.9, Libsidplay V2.1.1           |
;+------------------------------------------------------+
;| Title        : Lameness Since 1991                   |
;| Author       : Peter Siekmann (Devilock)             |
;| Released     : 2017 Oxyron                           |
;+------------------------------------------------------+
;| File format  : PlaySID one-file format (PSID)        |
;| Filename(s)  : lame.sid                              |
;| Condition    : No errors                             |
;| Playlist     : 1/1 (tune 1/1[1])                     |
;| Song Speed   : 50 Hz VBI (PAL)                       |
;| Song Length  : UNKNOWN                               |
;+------------------------------------------------------+
;| Addresses    : DRIVER = $1C00-$1CFF, INIT = $0FFF    |
;|              : LOAD   = $0FFF-$1B25, PLAY = $1003    |
;| SID Details  : Filter = Yes, Model = 8580            |
;| Environment  : Real C64                              |
;+------------------------------------------------------+
;
sid_address     = $0fff
sid_play        = $1003
sid_init        = $0fff
; Character 
char_address    = $3800
screen_mem      = $4400
; Koala address
bitmap_address  = $6000
bitmap_data     = $7f40
bitmap_color    = $8328
bitmap_bgcolor  = $8710
program_address = $c000
color_mem       = $d800

reg_d011	= $D011
; VIC register
;Bit 7 (weight 128) is the most significant bit of the VIC's nine-bit raster register (see address 53266).
;Bit 6 controls extended color mode
;Bit 5 selects either the text screen ("0") or high resolution graphics ("1").
;Bit 4 controls whether the screen area is visible or not.
;Bit 3 selects 25 (when set to "1") or 24 (when set to "0") visible character lines on the text screen.
;Bit 0–2 is used for vertical pixel-by-pixel scrolling of the text or high resolution graphics.

; Rom routine to clear screen ( slow ! )
; Better to do this yourself
clear_screen     = $e544

* = sid_address
    !bin "lame.sid",,$7c+2

; standard charset
* = char_address
    !bin "charset.chr"

; drawn with gimp converted using retropixel
; retropixels icecrew.png -o icecrew.kla
* = bitmap_address
    !bin "icecrew.kla",,$02

; sys 49152
* = basic_address
    !byte $0d,$08,$dc,$07,$9e,$20,$34,$39,$31,$35,$32,$00,$00,$00

* = program_address
    sei
    ; init
    lda #$00
    tax
    tay
    jsr sid_init
    jsr clear_screen
    jsr load_bitmap
    jsr init_text
    ldy #$7f
    sty $dc0d
    sty $dd0d
    lda $dc0d
    lda $dd0d
    lda #$01
    sta $d01a
    lda reg_d011
    and #$7f
    sta reg_d011
; move interrupt vector to bitmap
    lda #<interruptbitmap
    ldx #>interruptbitmap
    sta $314    ; Low Address part IRQ vector
    stx $315    ; High Address part IQR vector
    ldy #$1b
    sty reg_d011
    lda #$7f
    sta $dc0d
    lda #$01
    sta $d01a
; trigger interrupt at rasterline 0
    lda #$00
    sta $d012
    cli
    jmp *

interruptbitmap
    inc $d019
; trigger interrupt at rasterline 128
    lda #$80
    sta $d012
    lda #<interrupttxt
    ldx #>interrupttxt
    sta $314
    stx $315
    jsr bitmap_mode
    jmp $ea81

interrupttxt
; ack IRQ
    inc $d019
; IRQ at line 0
    lda #$00
    sta $d012
    lda #<interruptbitmap
    ldx #>interruptbitmap
    sta $314
    stx $315
    jsr text_mode
    jsr sid_play
    jmp $ea81

bitmap_mode
; bitmap graphics multicolor
    lda #$3b
    sta reg_d011
    lda #$18
    sta $d016
; switch to video bank 2 ($4000-$7FFF)
    lda $dd00
    and #$fc
    ora #$02
    sta $dd00
    lda #$18
    sta $d018
    rts

text_mode
; set text mode hires
    lda #$1b
    sta reg_d011
    lda #$08
    sta $d016
; switch to video bank 1 ($0000-$3FFF)
    lda $dd00
    and #$fc
    ora #$03
    sta $dd00
; set charset location
; 7 * 2048 = $3800, set in bits 1-3 of $d018
    lda $d018
    ora #$0e
    sta $d018
    rts

load_bitmap
    lda bitmap_bgcolor
    sta $d020
    sta $d021
    ldx #$00
copy_bmp
; screen memory
    lda bitmap_data,x
    sta screen_mem,x
    lda bitmap_data+256,x
    sta screen_mem+256,x
    lda bitmap_data+512,x
    sta screen_mem+512,x
    lda bitmap_data+768,x
    sta screen_mem+768,x
; color memory
    lda bitmap_color,x
    sta color_mem,x
    lda bitmap_color+256,x
    sta color_mem+256,x
    lda bitmap_color+512,x
    sta color_mem+512,x
    lda bitmap_color+768,x
    sta color_mem+768,x
    inx
    bne copy_bmp
    rts

init_text
    ldx #$00
copy_txt
    lda text1,x
    sta $0400+520,x
    lda text2,x
    sta $0400+640,x
    lda text3,x
    sta $0400+640+120,x
    lda #$06
    sta color_mem+520,x
    lda #$0e
    sta color_mem+640,x
    lda #$0e
    sta color_mem+640+120,x
    inx
    cpx #$28
    bne copy_txt
    rts


text1
    !scr  "     back to oldskool demos in 2024     "
text2
    !scr  "   greetings to bigred & tyrone & edk   "
text3
    !scr  "     a lot to relearn - keep coding!    "

C64 Multipart Loader

Today I tested part loading for a demo.

I wanted this to be a multipart loader, instead of a trackloader.
A trackloader can load sector parts which I would like more.
But the C64Pico can’t do disk images. (Mcume)

C64Pico based on MCUME see building of this in other posts.

2nd reason: While I’ve written a track loader for 8086, I never did it for C64. As a kid I didn’t have a C64, so all knowledge I have is from later years.
I’ve written only a few C64 machinecode programs.

See below explanation of what happens
  • Showing makefile
  • Showing first part assembly (without text Hello 2nd part)
  • Showing second part (no sysheader) needs to be loaded at $2000
  • Compile using Acme
  • make disk image
  • and run using autostart x64 (Vice emulator)

You see the first text from the 1st assemby code, then it will load the second at $2000 and does a jmp to this address.
Second text will but displayed.

While i’ve been using KickAss in the past and some other 6502 compilers, I manly use acme.

Makefile I created to compile, create a C64 diskimage and run the program is as below. (No exomizer tools in this Makefile)

all: acme disk run

acme:
	acme testloader.asm
	acme 2ndpart.asm

disk:
	c1541 -format diskname,id d64 my_diskimage.d64 -attach my_diskimage.d64 -write loader.prg loader.prg -write 2nd 2nd

run:
	x64 my_diskimage.d64 

New POC / WIP Rfid Read/Write

yes, again. Another change.

UPDATE: Working example at bottom!

Micros*ft Surface Running Linux!

I don’t want IDs and Paths in a Home Assistant automation.
The RFIDs can store more than enough data to store the paths to albums.

I Also tested with ESPHOME in HA, but you can’t write tags.

ESPHOME Config for my RFID device (NOT USED ANYMORE)

esphome:
  name: rfidtag
  friendly_name: rfidtag

esp8266:
  board: d1_mini

mqtt:
  broker: IPMQTTBROKER

# Enable logging
logger:

# Enable Home Assistant API
api:
  encryption:
    key: "xxxxxxxxxxxxxxxxxx="

ota:
  password: "xxxxxxxxxxxxxxxxxxxxx"

wifi:
  ssid: !secret wifi_ssid
  password: !secret wifi_password

  # Enable fallback hotspot (captive portal) in case wifi connection fails
  ap:
    ssid: "Rfidtag Fallback Hotspot"
    password: "xxxxxxxxxxxxxx"

captive_portal:
    
spi:
  clk_pin: D5
  miso_pin: D6
  mosi_pin: D7
rc522_spi:
  cs_pin: D8
  update_interval: 1s
  on_tag:
    then:
      - mqtt.publish:
          topic: rc522/tag
          payload: !lambda 'return x;'
  on_tag_removed:
    then:
      - mqtt.publish:
          topic: rc522/tag_removed
          payload: !lambda 'return x;'

The next iteration of my Rfid controller will have a write function for the RFID tags.

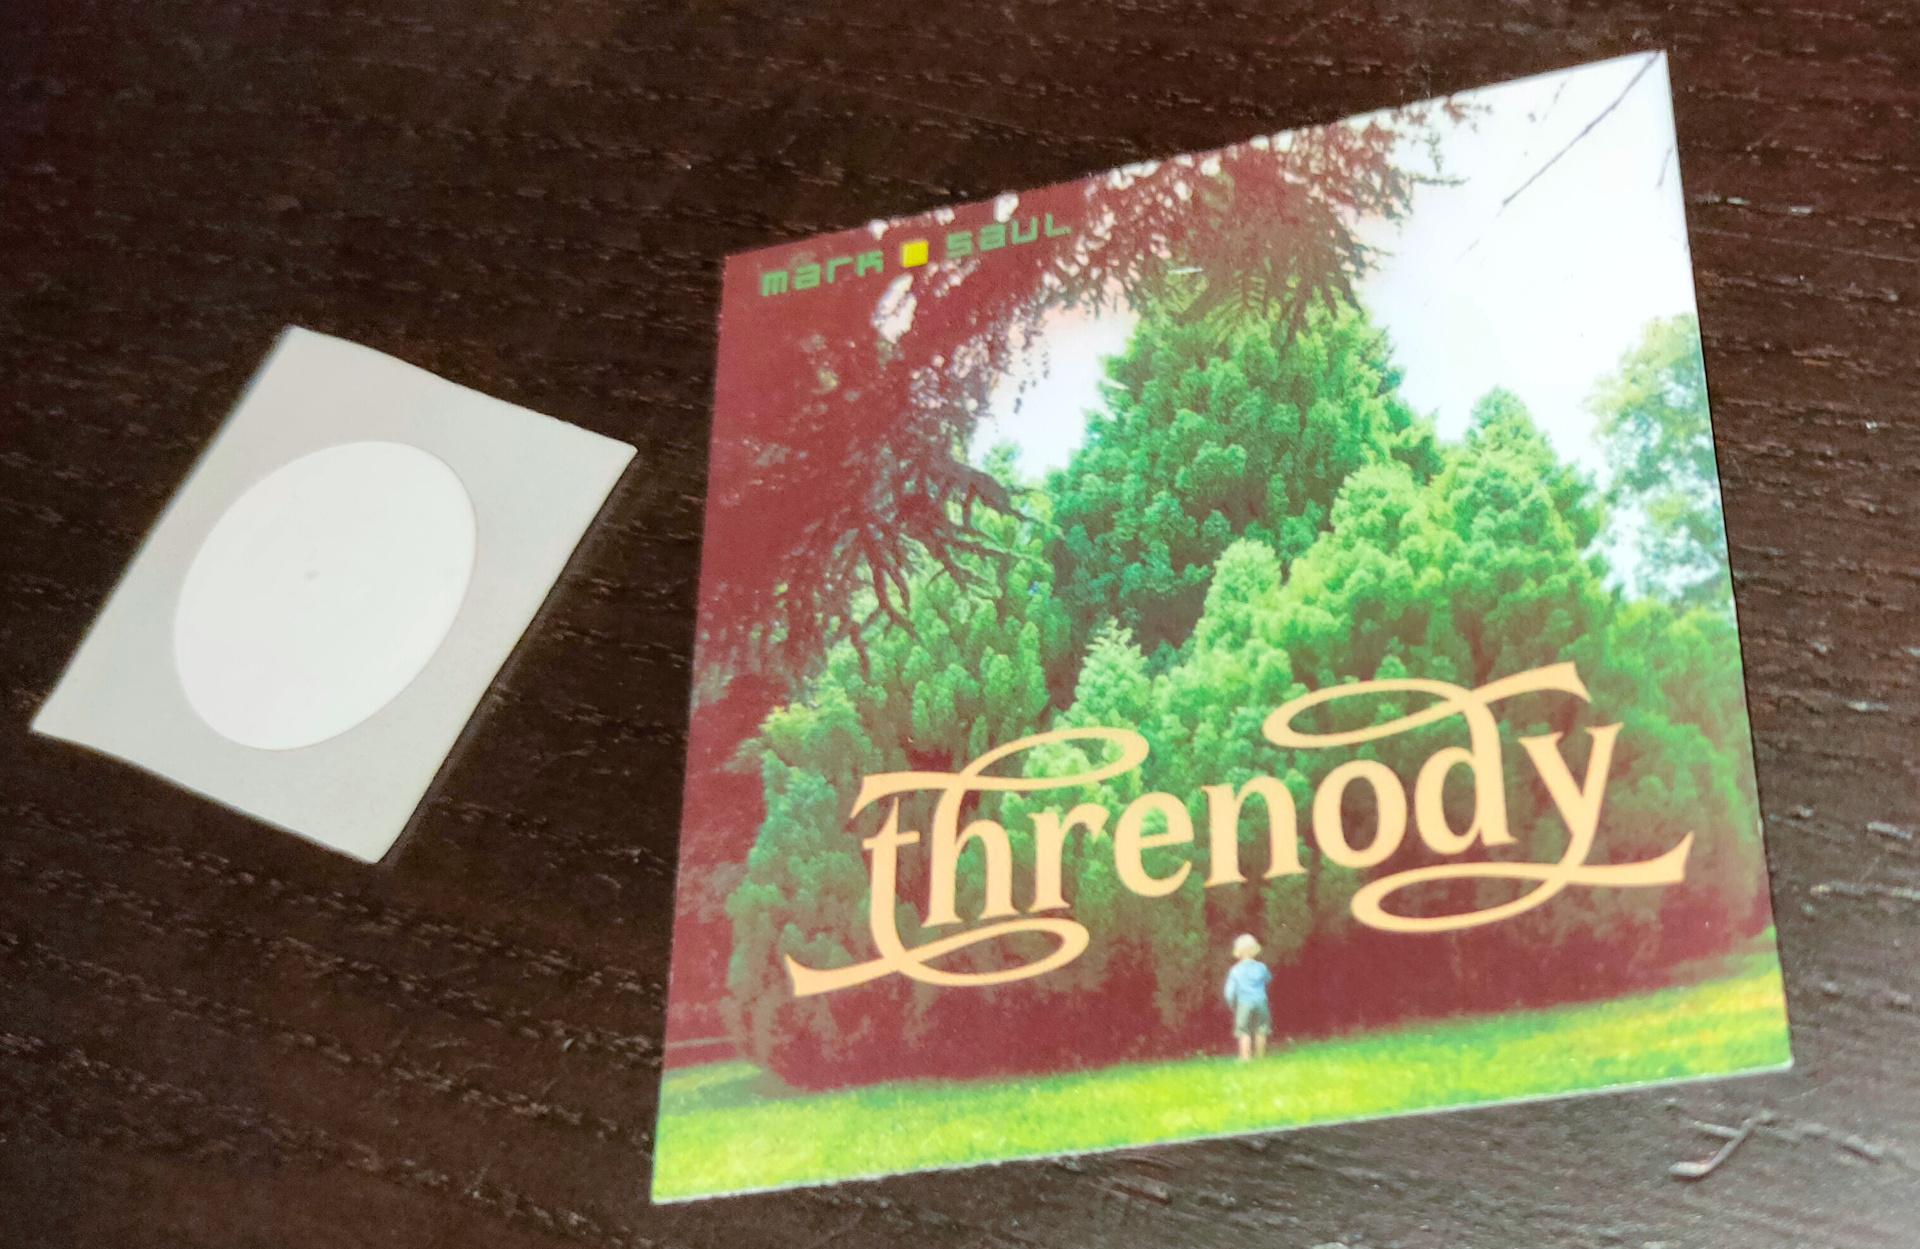
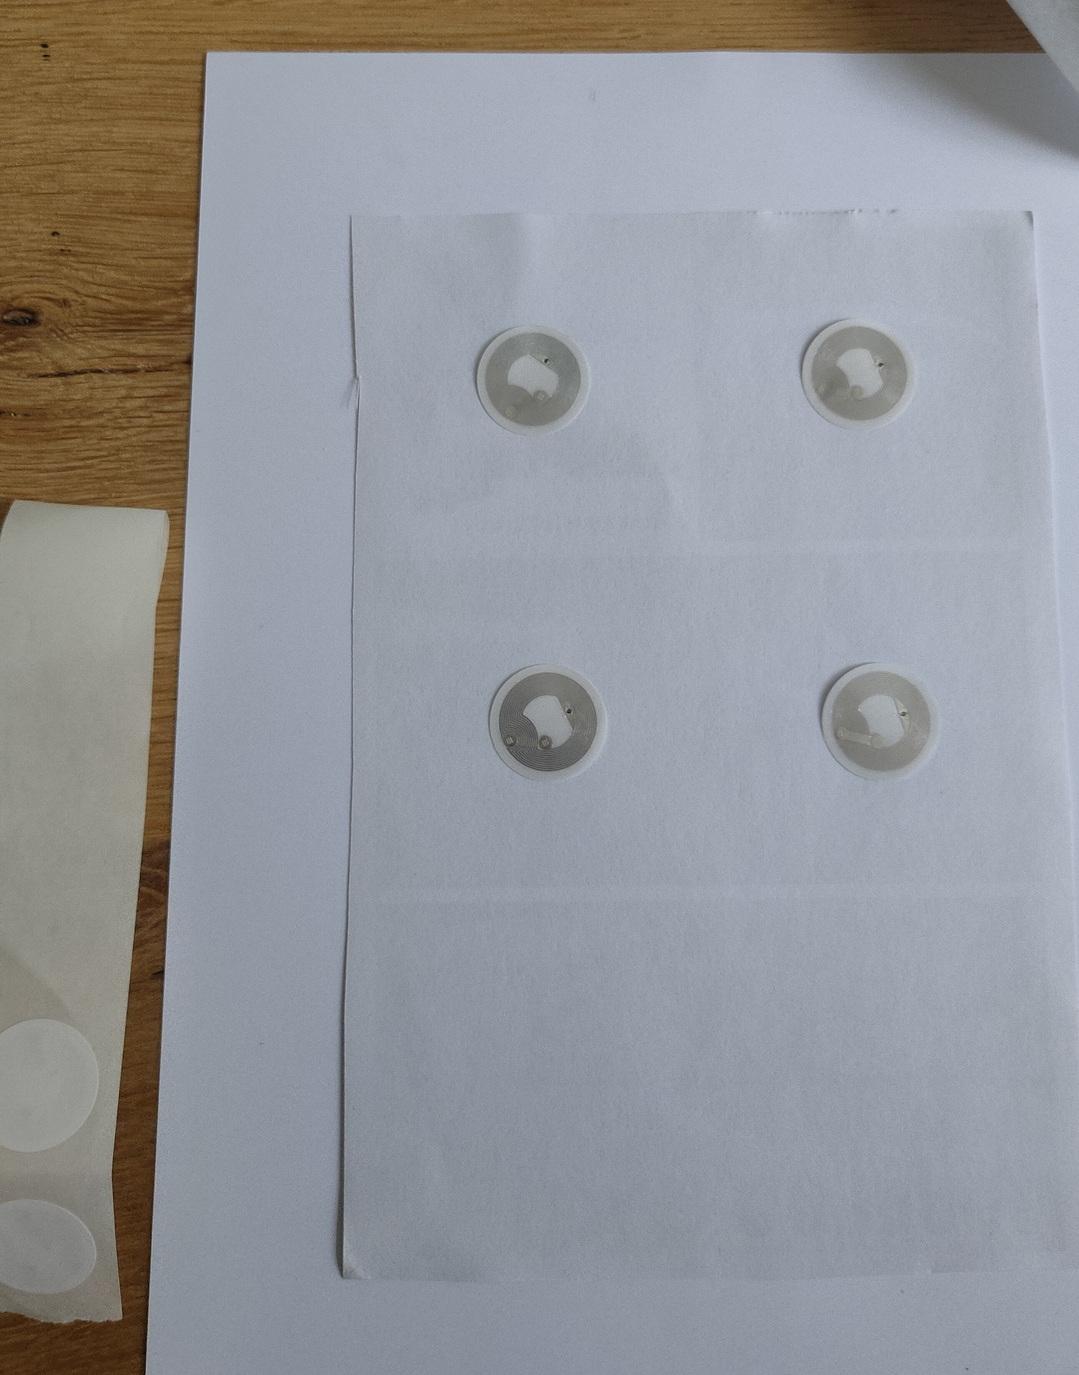
  1. Stick a tag on a cover art piece of cardboard. (see below)
  2. Read path from data sector.
    • Send path to player automation
  3. Send path to program using MQTT or website if needed.

Not sure yet, also want to implement a wifi manager on the wemos.

Changes on above idea:

  • Paths are too long, I could not work out how to create a working program using this.
  • I stopped using paths, instead I’m using the Logitech media server album IDs.
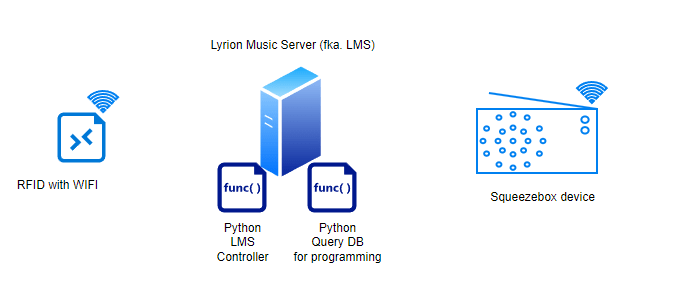
  • Using two python scripts, I can use one for programming the card, and another script to control LMS.

How does it work

RFid device is connected to the network.

Start query.py on your LMS server.
Search for an album name, it will present an ID and Album name in a list.
Enter the ID you want to program, or 0 to exit.
(This will also reset the programming mode)

Place an empty or previously programmed tag on the device.
It will write the album ID on the tag.

Then it will start the album.
Changing the tags will also just change the album playing.

(NOTE: My genre spotify player still works using this method, using the same device)

A second python script will read the Mqtt topic and control the Squeezebox player.

Python Code DB Query

import sqlite3
#paho-mqtt
import paho.mqtt.publish as publish

host = "IPMQTTBROKER"
port = 1883
topic = "spotify/rfid/in/write"
auth = {'username': 'xxxx','password': 'xxxxx'}
client_id = "spotithing"

def readSqliteTable(albumname):
    try:
        sqliteConnection = sqlite3.connect('/var/lib/squeezeboxserver/cache/library.db')
        cursor = sqliteConnection.cursor()
        albumname = "%" + albumname + "%"
        cursor.execute("select * from albums where title Like ?",
               (albumname,))
        records = cursor.fetchall()
        for row in records:
            print("Id: ", row[0],row[1])
        cursor.close()

    except sqlite3.Error as error:
        print("Failed to read data from sqlite table", error)
    finally:
        if sqliteConnection:
            sqliteConnection.close()

album = input("Album name ? ")
readSqliteTable(album)

number = input("Enter ID or 0 to quit : ")
publish.single(topic, "00000" , qos=1, hostname=host, port=port,
        auth=auth, client_id=client_id)
if number == 0:
        exit()
publish.single(topic, number, qos=1, hostname=host, port=port,
        auth=auth, client_id=client_id)
print("Program your tag")
print("Reset/disable writing using exit with 0!")

Python Code Controller (this one needs to be running at all times)

import paho.mqtt.client as mqtt
import urllib.request

def on_connect(client, userdata, flags, rc):  
        print("Connected with result code {0}".format(str(rc)))
        client.subscribe("spotify/rfid/idlms")

def on_message(client, userdata, msg):
        print("Message received-> " + msg.topic + " " + str(msg.payload))  # Print a received msg
        urllib.request.urlopen("http://IPADDRESLMS:9000/anyurl?p0=playlistcontrol&p1=album_id:" + msg.payload.decode() + "&p2=cmd:load&player=b8:27:eb:11:16:ab")
#NOTE also change b8:27:eb:11:16:ab into you players MACAddress!

client = mqtt.Client("digi_mqtt_test")  
client.on_connect = on_connect  
client.on_message = on_message  
client.connect('IPMQTTBROKER', 1883)
client.loop_forever()  

Arduino Code (see schematic in other post)

#include <Arduino.h>
#include <SPI.h>
#include <MFRC522.h>
#include <ESP8266WiFi.h>
#include <WiFiClient.h>
#include <PubSubClient.h>
#define SS_PIN 15
#define RST_PIN 0
MFRC522 mfrc522(SS_PIN, RST_PIN);
  MFRC522::StatusCode status; //variable to get card status
  byte buffer[18];  //data transfer buffer (16+2 bytes data+CRC)
  byte size = sizeof(buffer);
  uint8_t pageAddr = 0x06;  //In this example we will write/read 16 bytes (page 6,7,8 and 9).
                            //Ultraligth mem = 16 pages. 4 bytes per page.  
                            //Pages 0 to 4 are for special functions.           
unsigned long cardId = 0;
WiFiClient net;
PubSubClient client(net);
const char* mqtt_server = "IPMQTTBROKER";
const char* ssid = "MYSSID";
const char* password = "MYSSIDPASS";
String topicStr = "";
byte buffer2[8];

boolean Rflag=false;
int r_len;
char payload[5];
byte value[5];
void setup() {
  Serial.begin(9600);
  SPI.begin();
  mfrc522.PCD_Init();
  WiFi.mode(WIFI_AP_STA);
  WiFi.begin(ssid, password);
  client.setServer(mqtt_server, 1883);
     delay(100);
    client.setCallback(callback);
      delay(100);
    client.subscribe("spotify/rfid/in/#");
}
void reconnect() {
  while (WiFi.waitForConnectResult() != WL_CONNECTED) {
  }
  while (!client.connected()) {
    String clientId = "rfid-";
    clientId += String(random(0xffff), HEX);
    if (!client.connect(clientId.c_str(), "rfidclient", "...")) {
      Serial.print("failed, rc=");
      Serial.print(client.state());
      delay(5000);
    }
  }
  client.subscribe("spotify/rfid/in/#");
}
void callback(char* topic, byte* payload, unsigned int length) {
 
  Serial.print(F("Called"));
   Rflag=true; //will use in main loop
   r_len=length; //will use in main loop
   Serial.print("length message received in callback= ");
   Serial.println(length);
   int j=0;
     for (j;j<length;j++) {
       buffer2[j]=payload[j];
       }
if (r_len < 3) {
  Rflag=false;
  Serial.print(F("Set false"));
}
buffer2[j]='\0'; //terminate string
}

void loop() {
    if (!client.connected()) {
    reconnect();
  }
  client.loop();
  if (!mfrc522.PICC_IsNewCardPresent()) {
    return;
  }
  if (!mfrc522.PICC_ReadCardSerial()) {
    return;
  }
if (Rflag) {
        for (int i=0; i < 4; i++) {
    //data is writen in blocks of 4 bytes (4 bytes per page)
    status = (MFRC522::StatusCode) mfrc522.MIFARE_Ultralight_Write(pageAddr+i, &buffer2[i*4], 4);
    if (status != MFRC522::STATUS_OK) {
      Serial.print(F("MIFARE_Read() failed: (W) "));
      Serial.println(mfrc522.GetStatusCodeName(status));
      return;
    }
  }
  Serial.println(F("MIFARE_Ultralight_Write() OK "));
  Serial.println();
  Rflag=false;
}
  cardId = getCardId();
  char buffer3[10];
  sprintf(buffer3, "%lu", cardId);
  client.publish("spotify/rfid/id", buffer3);
  // Read data ***************************************************
  Serial.println(F("Reading data ... "));
  //data in 4 block is readed at once.
  status = (MFRC522::StatusCode) mfrc522.MIFARE_Read(pageAddr, buffer, &size);
  if (status != MFRC522::STATUS_OK) {
    Serial.println(F("MIFARE_Read() failed: (R)"));
    Serial.println(mfrc522.GetStatusCodeName(status));
    return;
  }

  Serial.println(F("Read data: "));
  //Dump a byte array to Serial
  for (byte i = 0; i < 5; i++) {
    Serial.write(buffer[i]);
       buffer2[i]=buffer[i];
    }
  client.publish("spotify/rfid/idlms", buffer,5);
  delay(1000);
  mfrc522.PICC_HaltA();
}

unsigned long getCardId() {
  byte readCard[4];
  for (int i = 0; i < 4; i++) {
    readCard[i] = mfrc522.uid.uidByte[i];
  }
  return (unsigned long)readCard[0] << 24
    | (unsigned long)readCard[1] << 16
    | (unsigned long)readCard[2] << 8
    | (unsigned long)readCard[3];
}

I tried to recreate an optical illusion

My friend Tyrone posted something he recorded from TV.
It was an illusion, using rotated images.

The effect is that it seems that the card is rotating at different speeds, when pressing the s (show/unshow) key, you see the card rotating at the same speed as before.

So I wanted to try to recreate this using python.
The effect is there, but a little less.
What can I improve?

Mine:

Around the 30 seconds mark I disable the background, you’ll see the card rotating as before.

Original:

Better version, larger and using s key to toggle water off, to see the card rotating

import pygame
import math

# 20240409 added s to toggle 

pygame.init()
screen = pygame.display.set_mode((1600, 900))
clock = pygame.time.Clock()

def blitRotate(surf, image, pos, originPos, angle):

    image_rect = image.get_rect(topleft = (pos[0] - originPos[0], pos[1]-originPos[1]))
    offset_center_to_pivot = pygame.math.Vector2(pos) - image_rect.center
    rotated_offset = offset_center_to_pivot.rotate(-angle)
    rotated_image_center = (pos[0] - rotated_offset.x, pos[1] - rotated_offset.y)
    rotated_image = pygame.transform.rotate(image, angle)
    rotated_image_rect = rotated_image.get_rect(center = rotated_image_center)
    surf.blit(rotated_image, rotated_image_rect)

try:
    image = pygame.image.load('cards.png').convert_alpha()
    image2 = pygame.image.load('clear+sea+water-2048x2048.png').convert_alpha()
except:
    text = pygame.font.SysFont('Times New Roman', 50).render('imagemissing', False, (255, 255, 0))
    image = pygame.Surface((text.get_width()+1, text.get_height()+1))
    image2 = image
    image.blit(text, (1, 1))

w, h = image.get_size()
angle = 0
angle2 = 0
done = False
while not done:
    clock.tick(60)
    for event in pygame.event.get():
        if event.type == pygame.QUIT:
            done = True

    pos = (screen.get_width()/2, screen.get_height()/2)
    
    screen.fill(0)
    keys = pygame.key.get_pressed()
    if (not keys[pygame.K_s]):
        blitRotate(screen, image2, pos, (900, 900), angle2)
    blitRotate(screen, image, pos, (w/2, h/2), angle)
    angle += 1
    angle2 += math.sin(math.radians(angle))
    pygame.display.flip()
    
pygame.quit()
exit()