The workshop at MCH2022 gave me the idea to make my next PCB not at home, but professionally.
I’m planning to make my 6502 on modular PCB’s when i’ve got the base part working. ( I probably will only make THT (Though Hole Technology) boards instead of smd ) So i’ll probably end up making a few boards, namely:
Power on reset
Clock module
Interconnect with arduino
CPU, memory and ROM
Display
6522 Via
SID chip
Hex keyboard
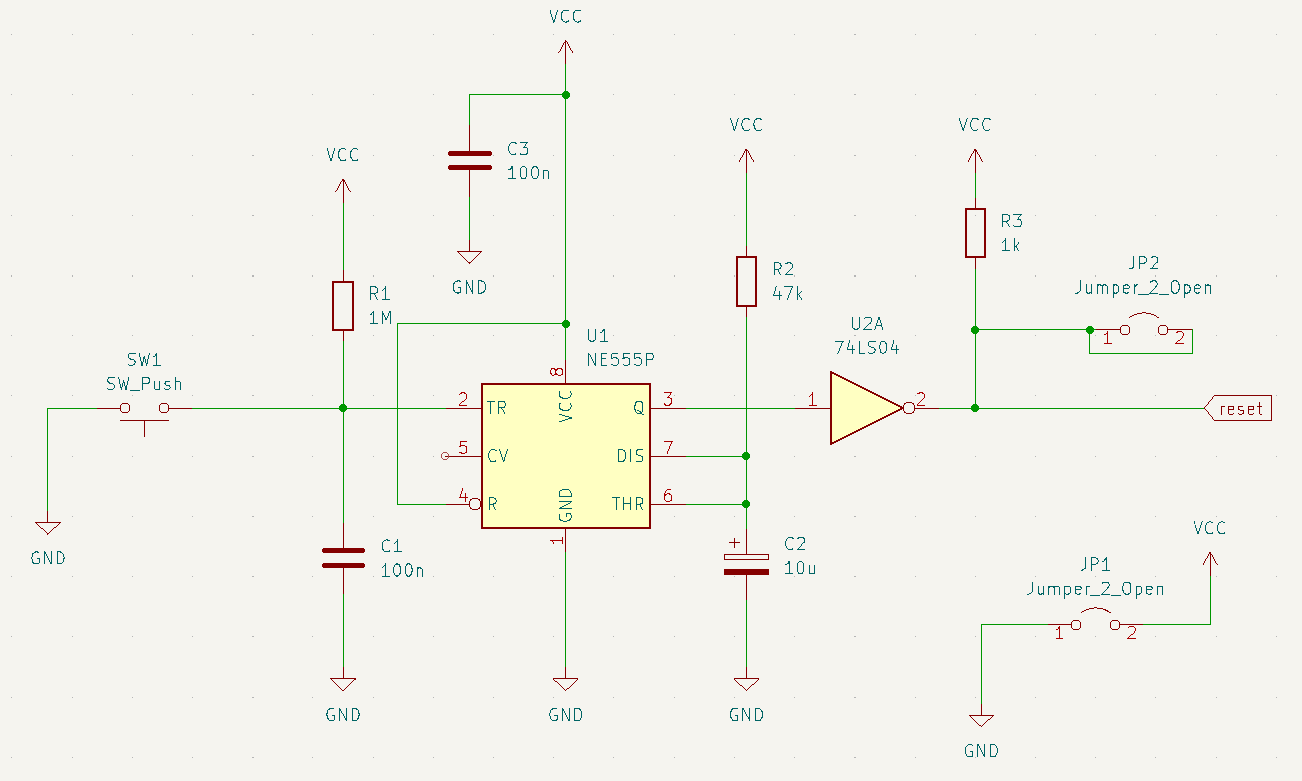
This power-on reset is based on the original C64 part to reset the CPU when you power the machine on. With my 6502 i have to manually push reset to start booting. (The CPU starts in a unknown state when you power it up, it needs a reset)
MCH2022 is a nonprofit outdoor hacker camp taking place in Zeewolde, the Netherlands, July 22 to 26 2022. The event is organized for and by volunteers from the worldwide hacker community.
Knowledge sharing, technological advancement, experimentation, connecting with your hacker peers and hacking are some of the core values of this event.
MCH2022 is the successor of a string of similar events happening every four years since 1989. These are GHP, HEU, HIP, HAL, WTH, HAR, OHM and SHA.
I’ve bin to several of these big events. Besides these big events are many different smaller events (wannull, ne2000 etc).
First one i’ve been was HIP97. I went with Bigred at that time. I had to get the tickets at that time, he didn’t had a handle at that time. It was Monique who came up with his new nick.
After HIP97 there was HAL2001 WTH2005 and OHM2013 which i was present. HAL2001 the whole ICEcrew was present, WTH a part of them, OHM a few and i was with a few PRUTS friends.
Now i was with my girlfriend, AND with Bigred again! Loads of fun and memories. Had not seen Bigred since a inbetween hacker party at my place. So ’97 and now ’22 .. jeez 25 years!
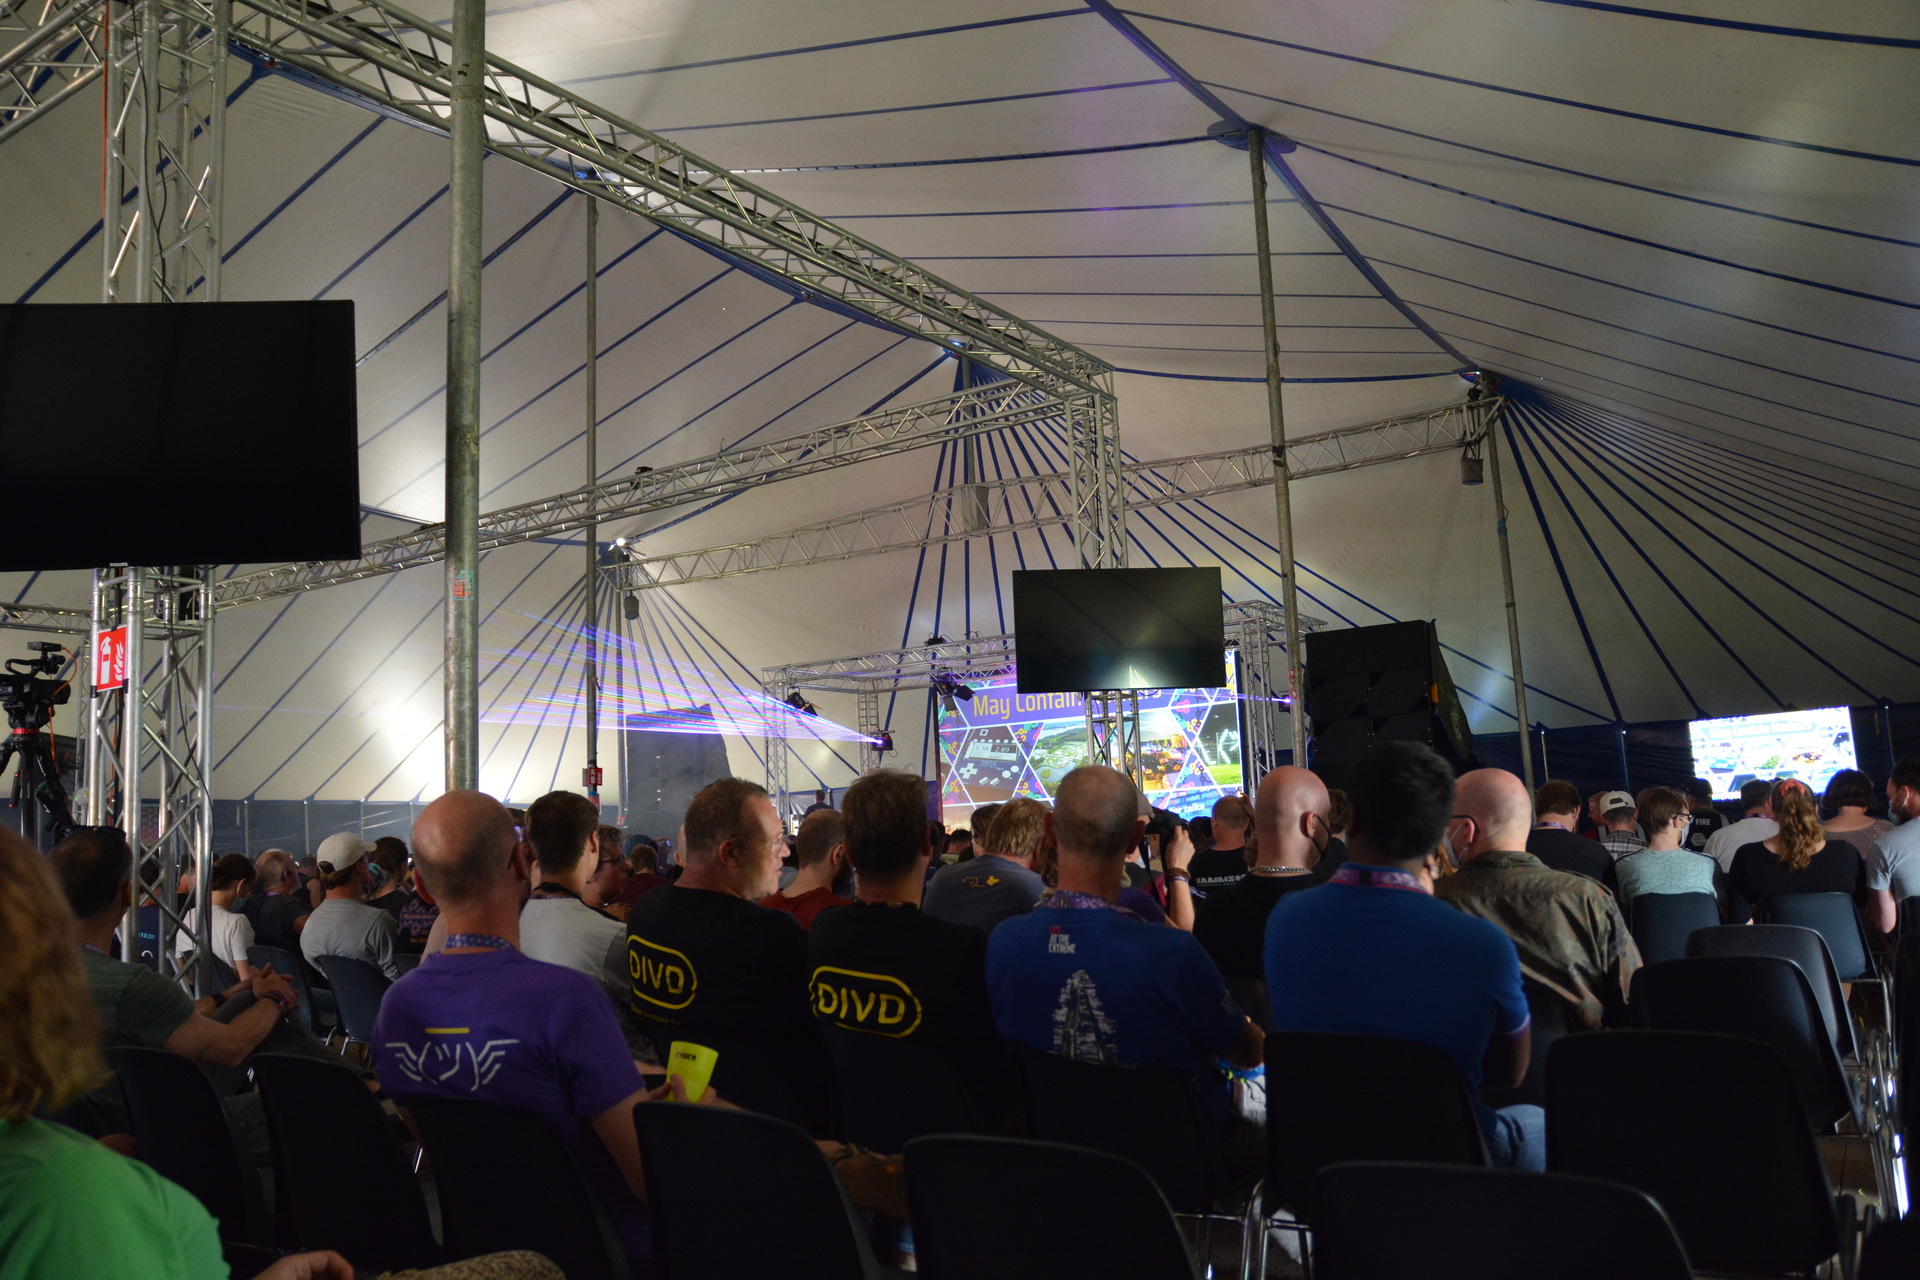
So MCH, it was great again. Loads of stuff to do and to see. Weather was … okay. Two days where really hot, one day some light rain but a load of wind. Our neighbours tent collapsed, beer tents where reenforced. First campsite with a supermarket! Music stage was awesome, lasers and fire!
I went to a lot of talks, even my girlfriend found some she was interested in.
OpeningAt nightLast time my tapeTinkeringtar cz ourstuff.tgz
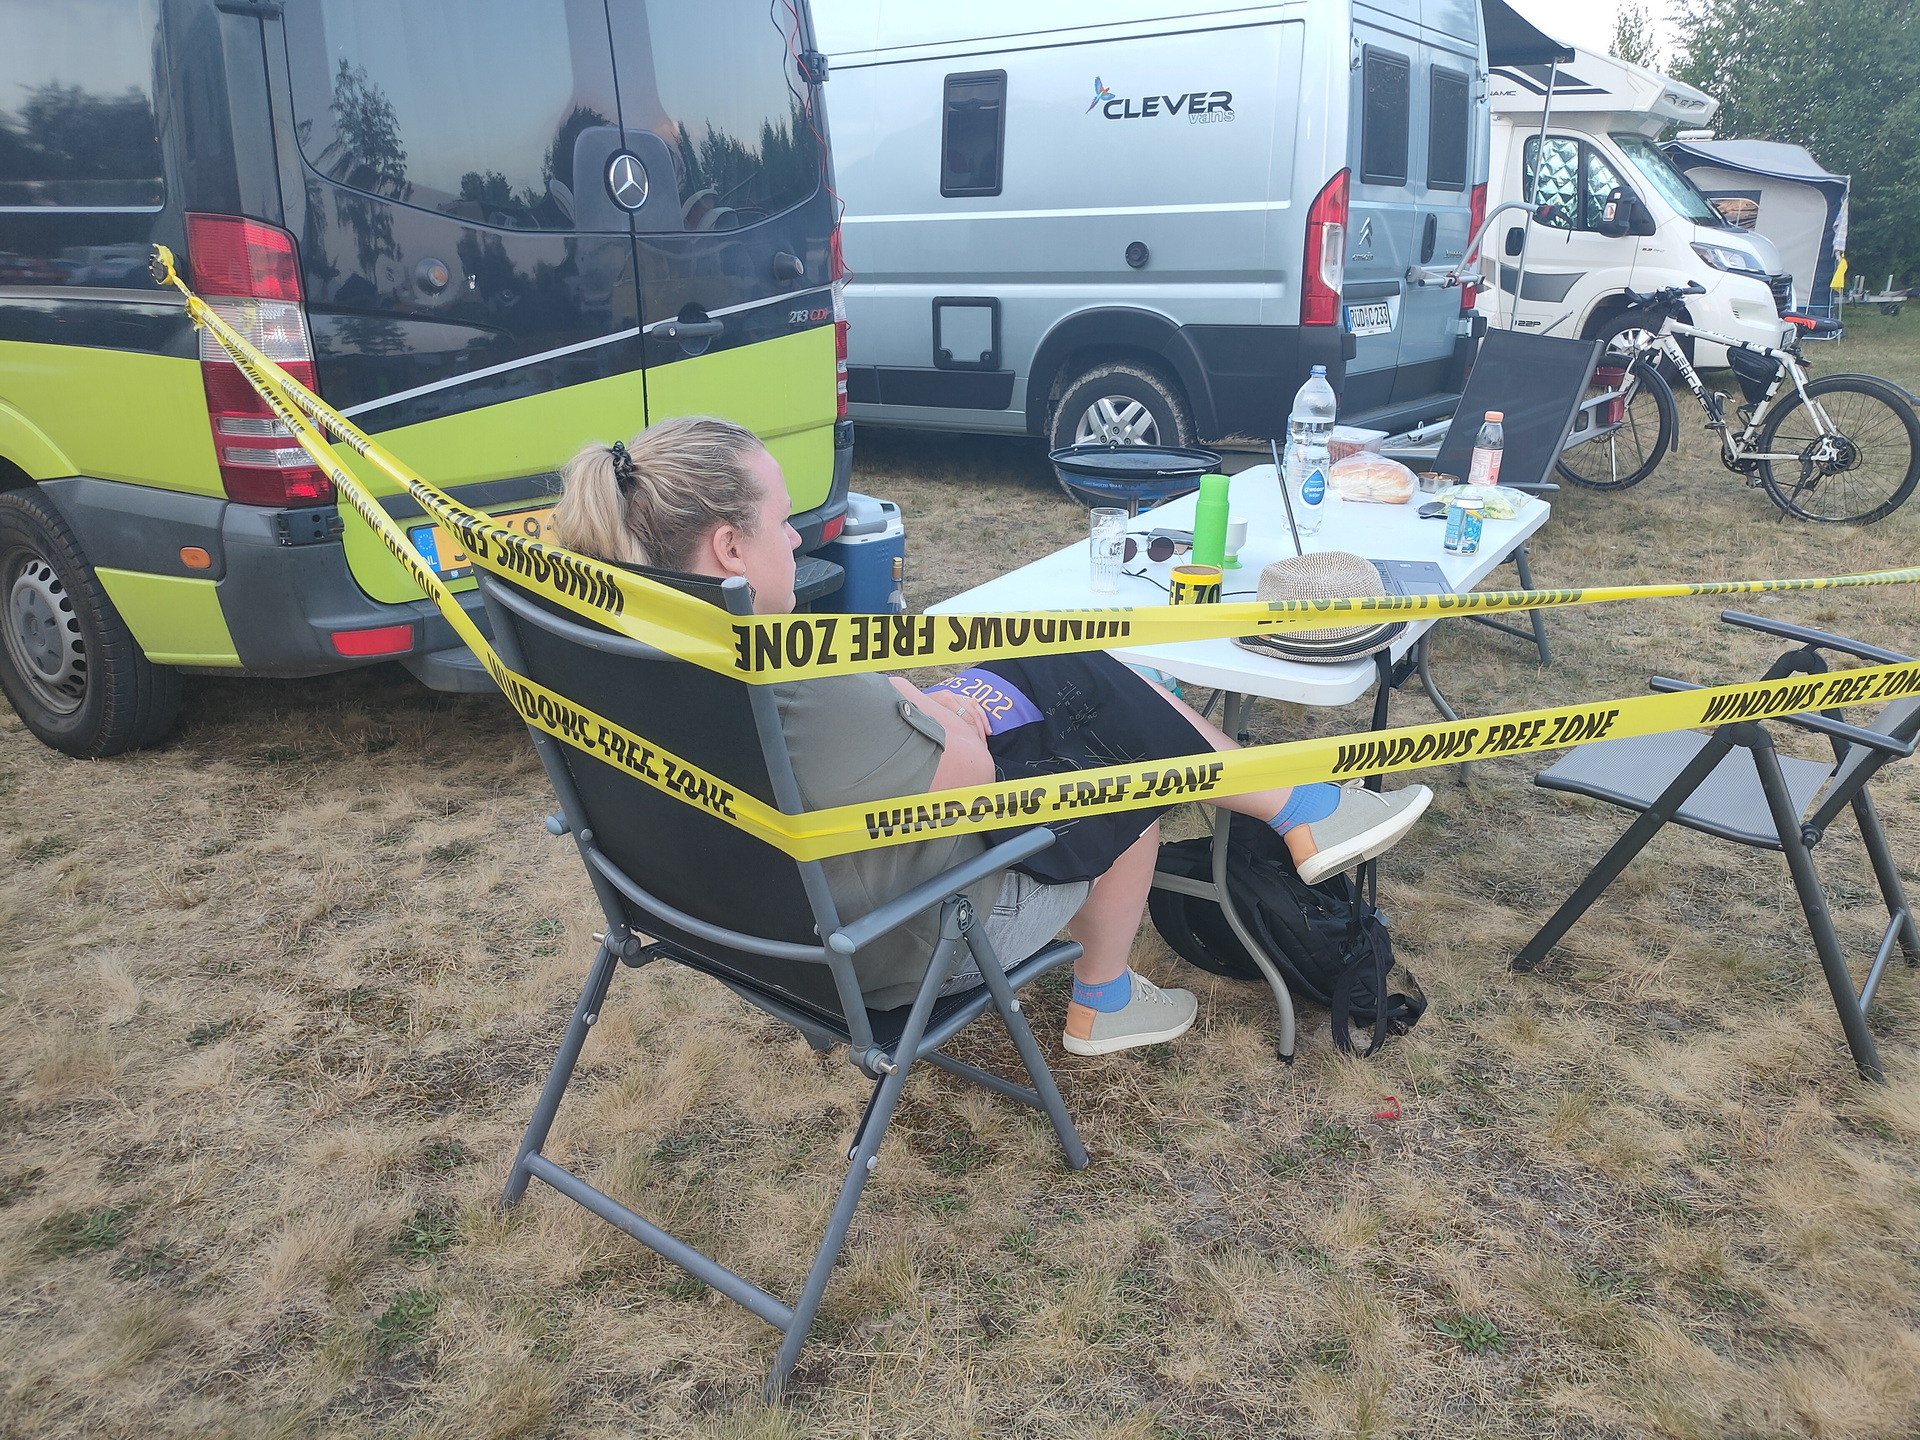
This was the last time i’ve brought my “Windows free zone tape” This big roll of tape was used on many occasions. I got this roll somewhere < 2000, I did a search but couldn’t find anything mentioning it on the web. Maybe some archive.org entry?
Starting a Home Computer Museum (which i almost did in the past)
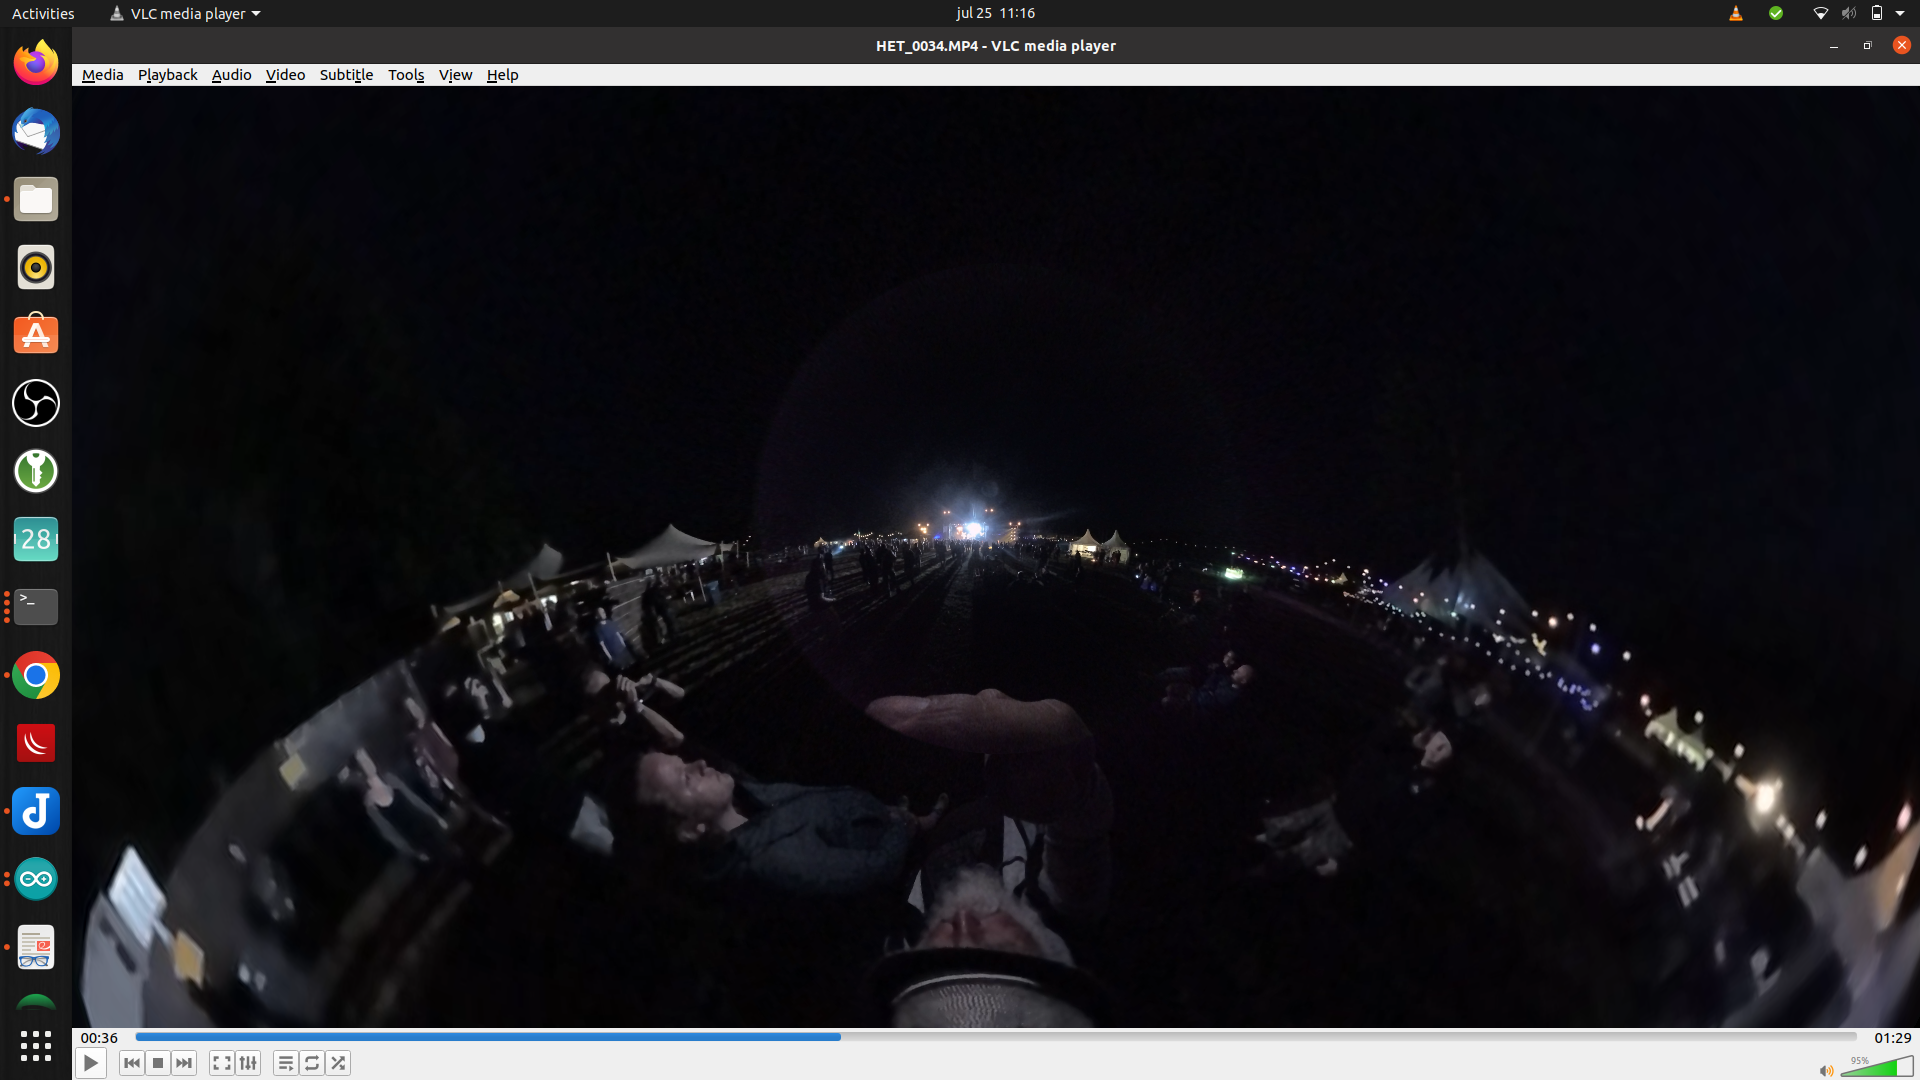
streaming 360 video (going to try this with my Vuze XR Camera)
Non-Euclidean Doom: what happens to a game when pi is not 3.14159… (Really enjoyed this one)
Hacking the genome: how does it work, and should we?
And more
Besides the talks i’ve done some workshops:
Micropython on the badge (see my other post)
Kicad – PCB designing
Meanwhile we where looking at all the villages and hackerspaces. Loads of interesting people to meet. Like our neighbour two tents futher, he was also a home-brewer, and he brought a minifridge with beer taps connected to it.
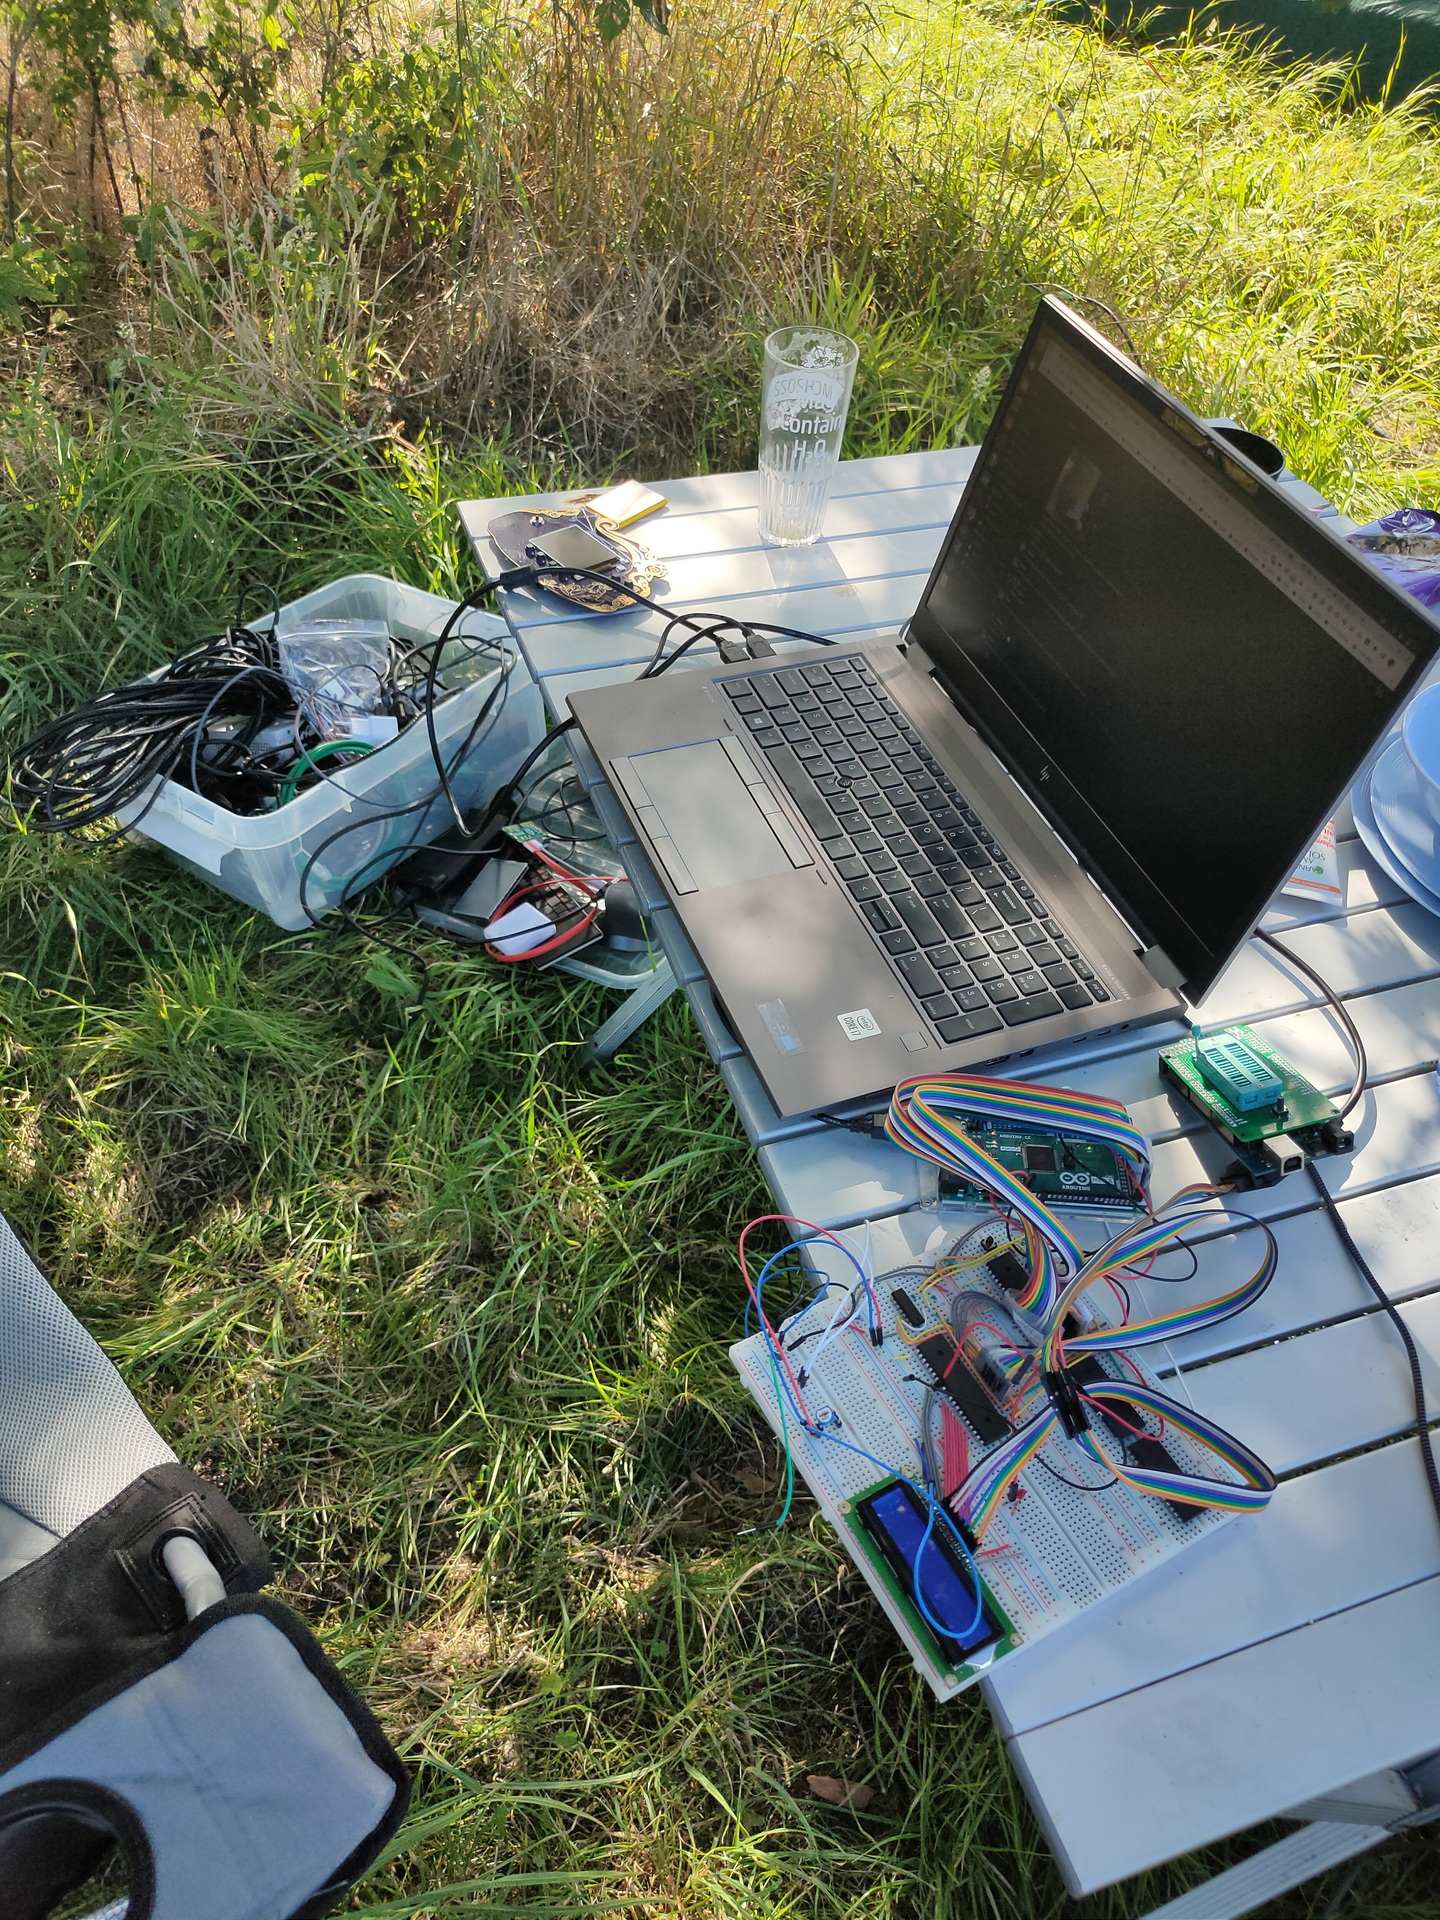
When back at our tent or Bigreds Campervan, we talked about differences now and then. New technology, what we’ve been upto in the last years and tinkering, loads of tinkering.
I’ve brough a big plastic container with .. ehh “things to do ….”
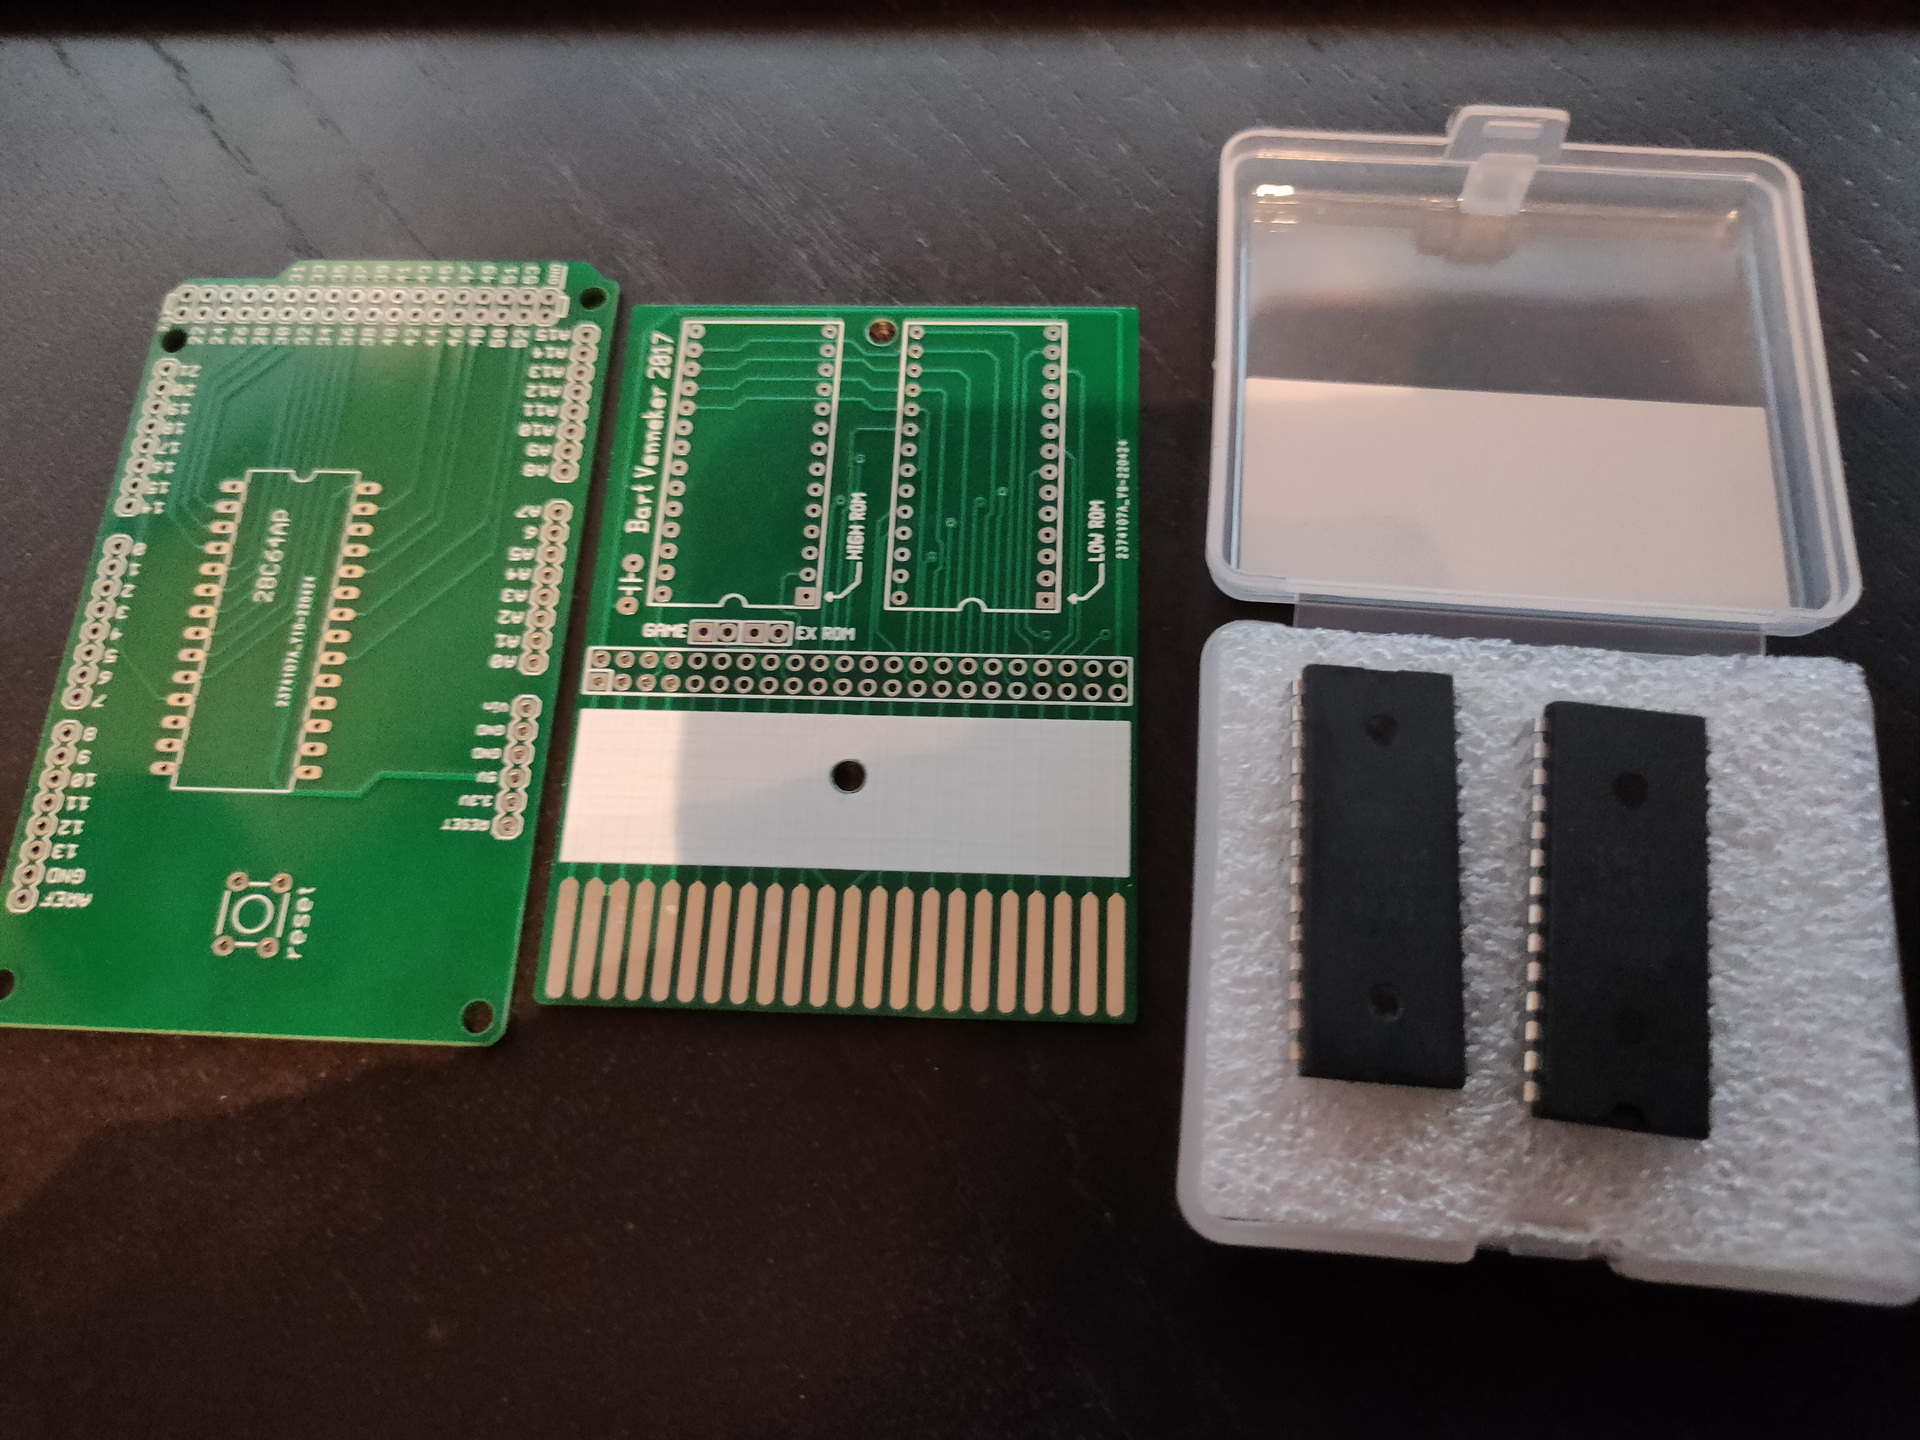
My 6502, bigred helped me debugging the 16*2 display. (Luckily his campervan was packed with electronics!) We cannibalized one of his projects for a display, and re-flashed his eeprom programming arduino to test my display. ( The arduino i had to reflash later to program a rom he had given me for my 6502. ) Other toys he gave me: Print for the programmer, and a C64 Cartridge print for Exrom and Game.
Mini C64 with a little screen and raspberry zero.
5050 ledstrip (didn’t had time to reprogram this for our mood-light)
Handheld gamehat: Bigred found some old games he played when he was young
Mikrotik router, because i wanted to make a dmz for my girlfriends laptop. (MS)
Playing around with my Vuze XR camera
Huskycam, which i’m planning to use on a racetrack
DVB-T DAB FM Stick, got some hints and tips from Bigred. (Note to myself … fix the antenna!)
My Arduino touch bagpipe player with i2c
The wifi deauther, which has a display which i wanted to use to make a programmable clock for my 6502. Using a rotary encoder and the display to control the speed in Hz.
I spend many hours playing with the Badge and Kicad
Wrote some 6502 assembly, arduino sketches, php, bash and micropython.
While playing around with the badge i got some things working easily. Spinning logo and blinky leds. Next goal to achieve was, to get the gyroscope to control the angle of spinning. Most of the code worked, but the gyro values stayed zero! (After many hours …. you have to start/enable the chip/measurements on the bno055 first! .. duh! )
I didn’t had my dev directory from my main battlestation synced in my nextcloud, so changing things for the 6502 was a b*tch. Used vasm and acme to generate a bin file to use to fill the rom. Didn’t like the eeprom programmer program, because i could not easily check the rom contents. Have to look into that later on.
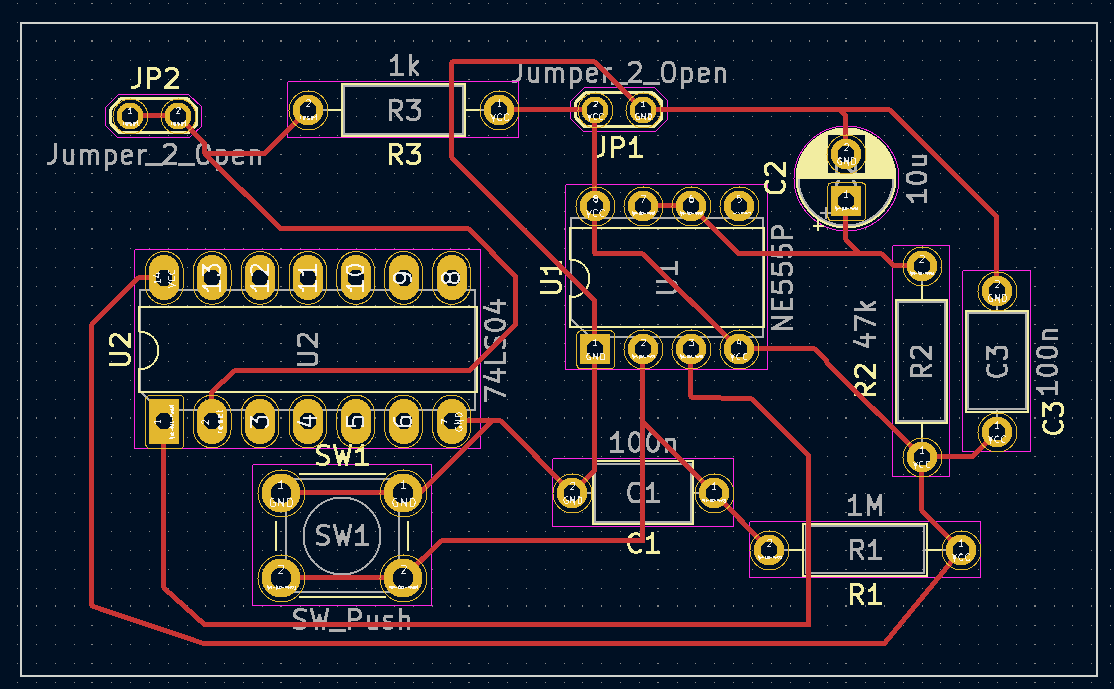
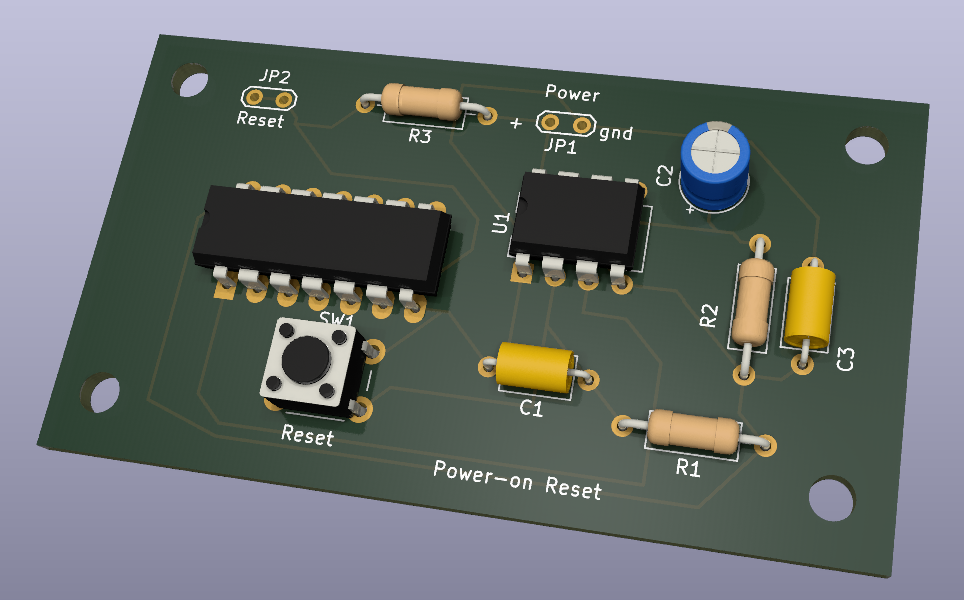
While learning to use Kicad, which i only had been using to draw schematics (besides fritzing) , i learned to create a pcb. Which gave me the idea to make a print for the power-on-reset for the 6502. Which is going to be the first PCB by ordering, instead of the old skool messing around with DIY print making. (see next post)
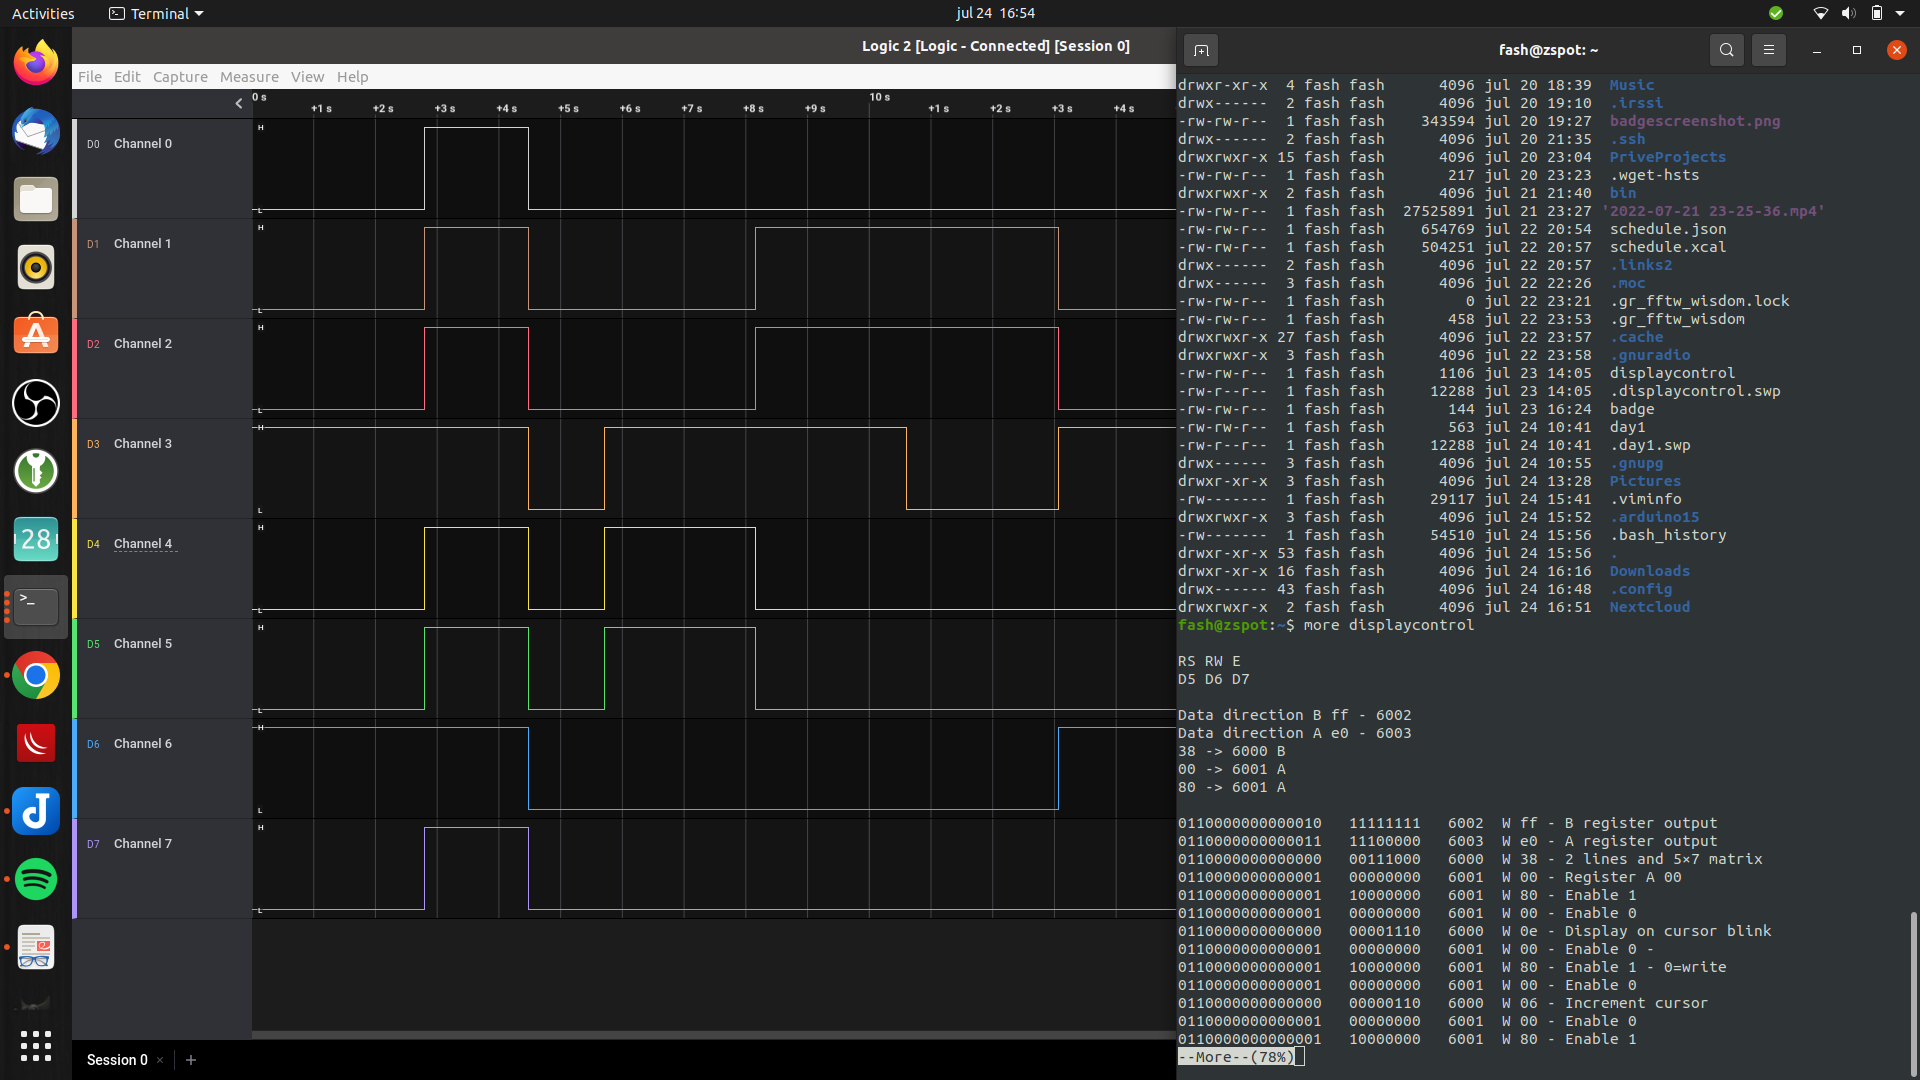
….. Oh, why my display was not working? I even connected my 8bit logic analyzer to the pins of the display.
Everything was correct. But i didn’t use a variable resistor for the contrast. Just a simple resistor i could find. Luckily … bigreds stash. All those hours debugging, all for one resistor! (I have to mention, we had a suspicion halfway. But it was too hot and we where too lazy to go to Bigred’s campervan, to get a potentiometer. )
65c22 connected, new data, and address-bus ribboncables!
First led on Register B blinking!
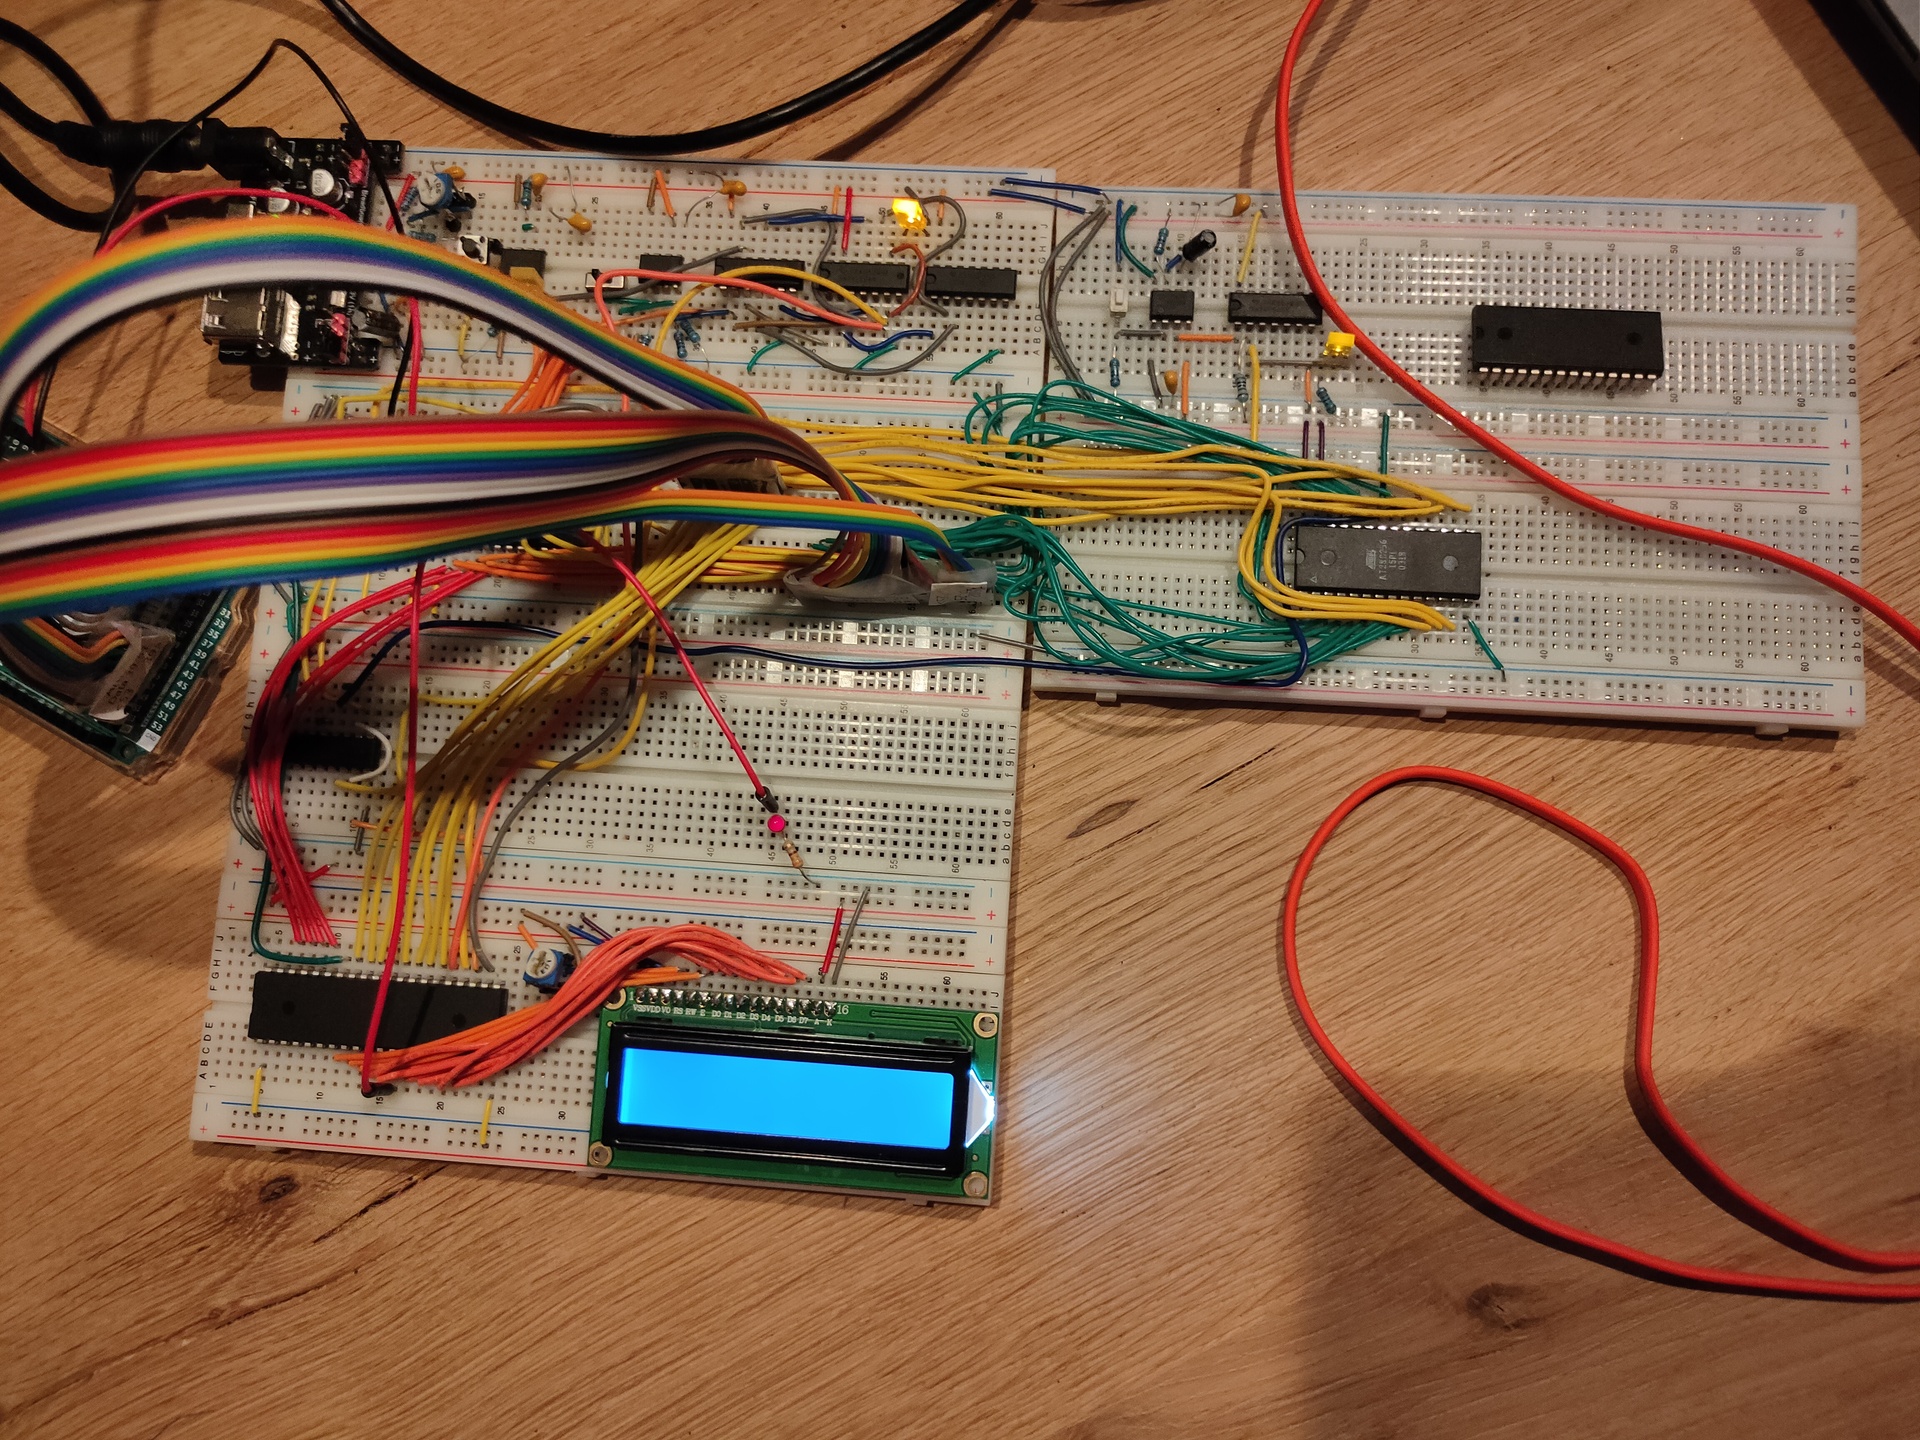
Notes: Temporary display wil be 2×16 Chars. Ram in place, but not connected (is emulated by the Arduino Mega at the moment) Rom is somewhere halfway the atlantic ocean .. still waiting on that one. Ben Eatons clock module is disconnected, i’m using the Arduino as programmable clock right now. (There wil be a little display and a rotary encoder to set clock speed.)
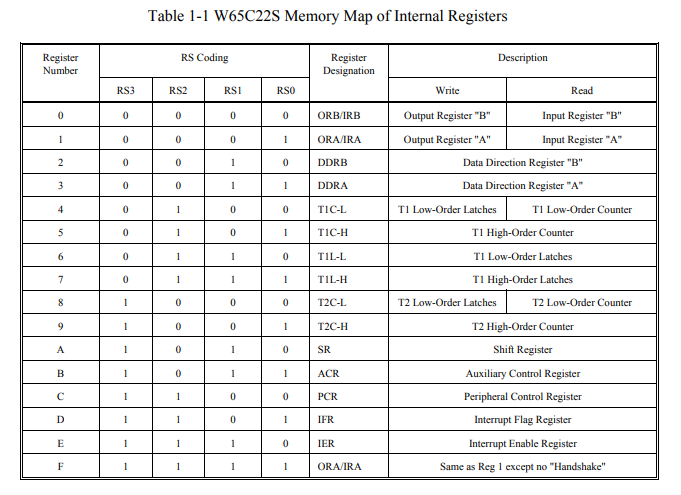
lda #$ff ; all bits
sta $6002 ; set direction (out) for B register
lda #$80 ; set 1 bit
sta $6000 ; set register B
lda #$00 ; reset bit
sta $6000 ; set register B
jmp $8005 ; jmp to bit set part
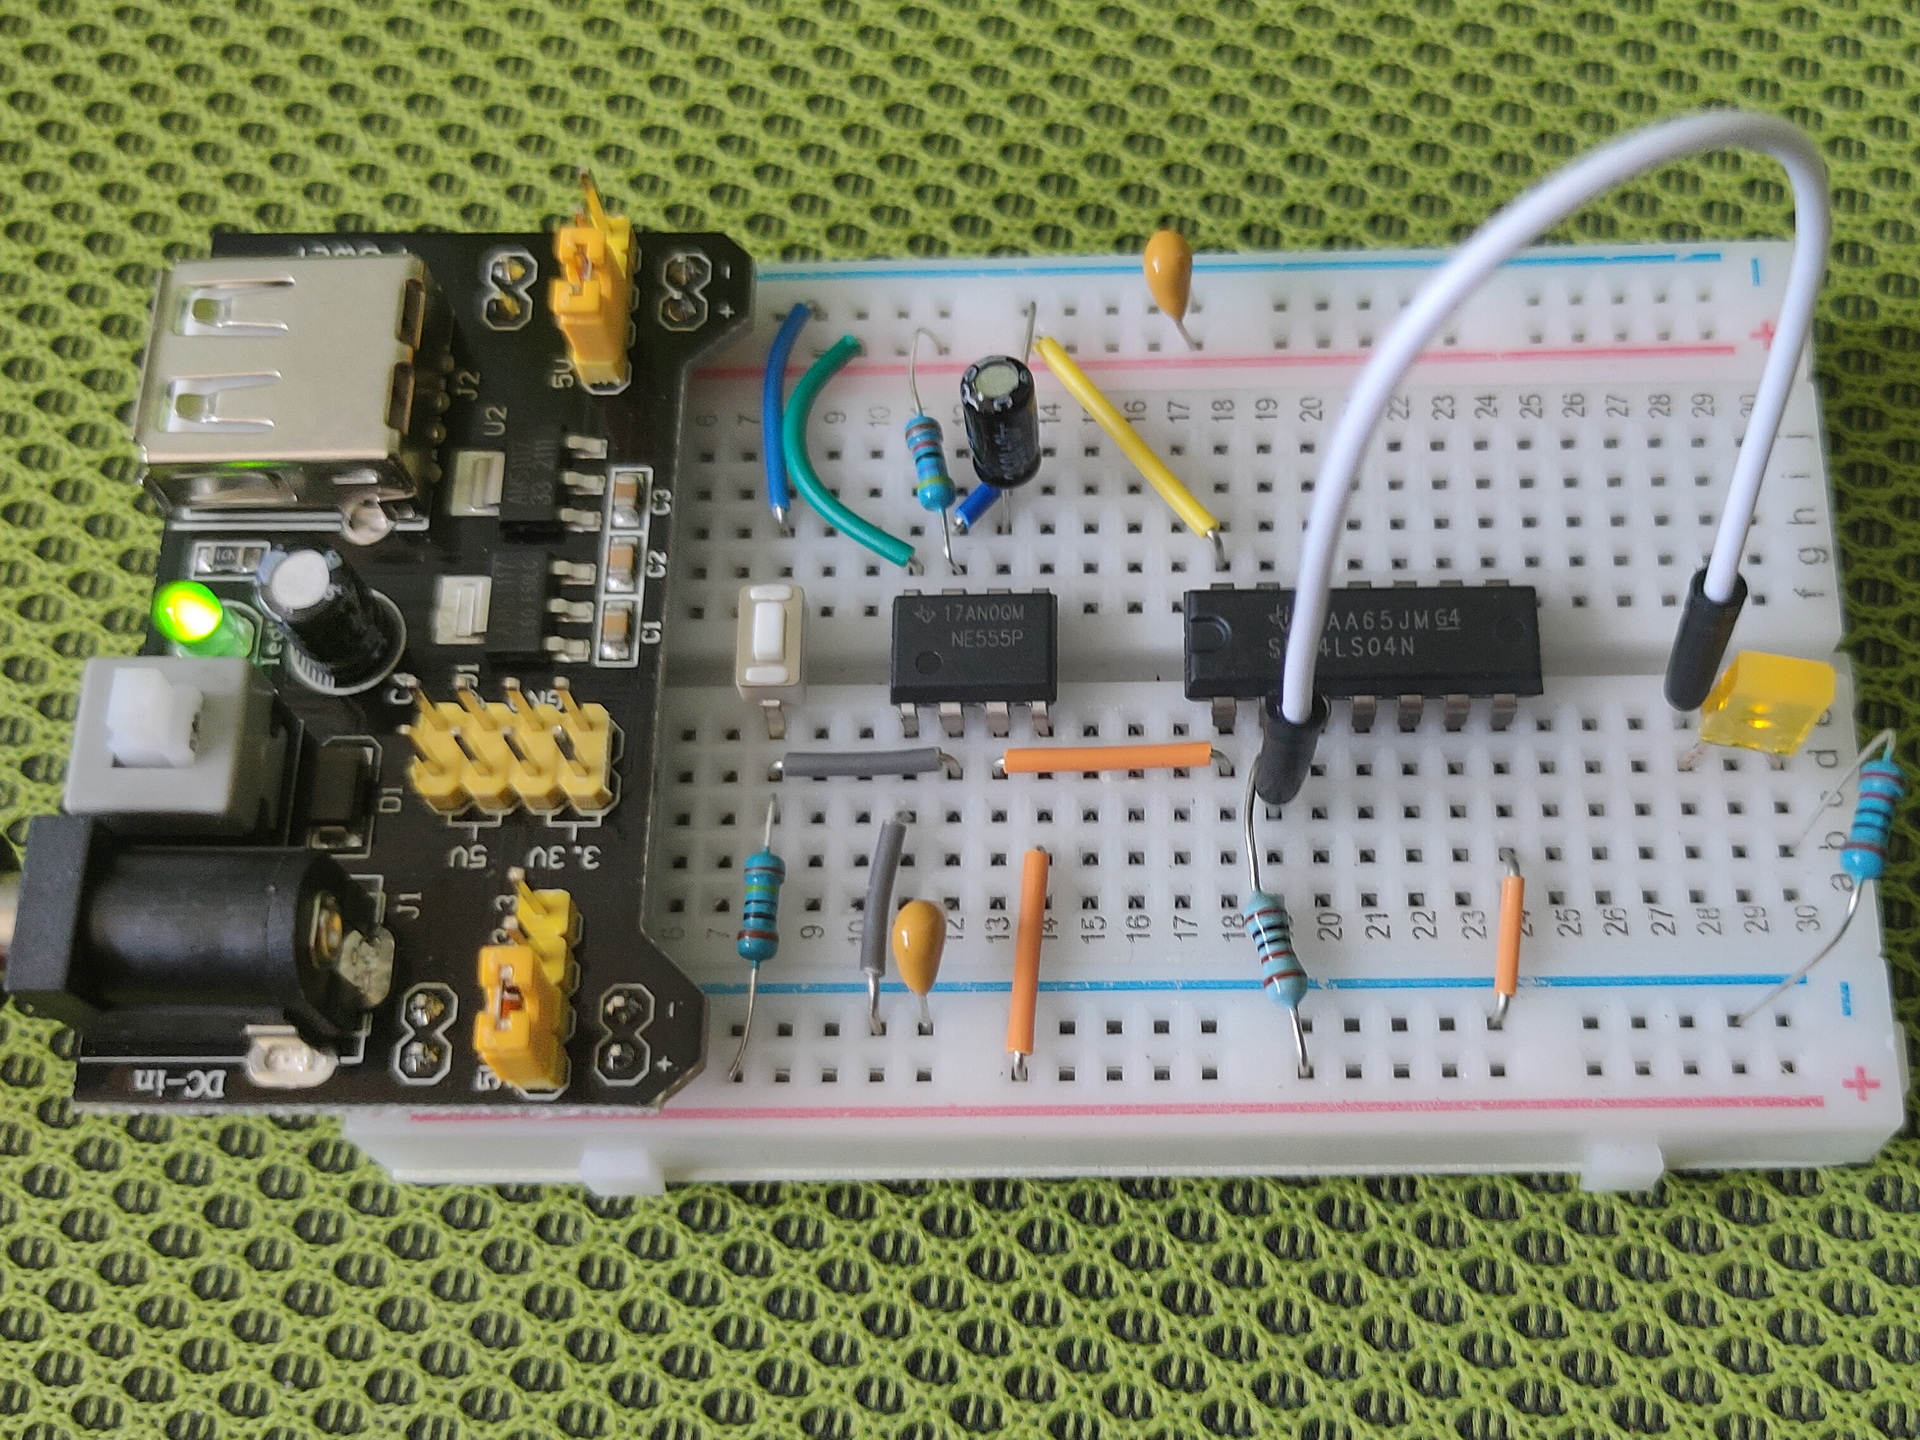
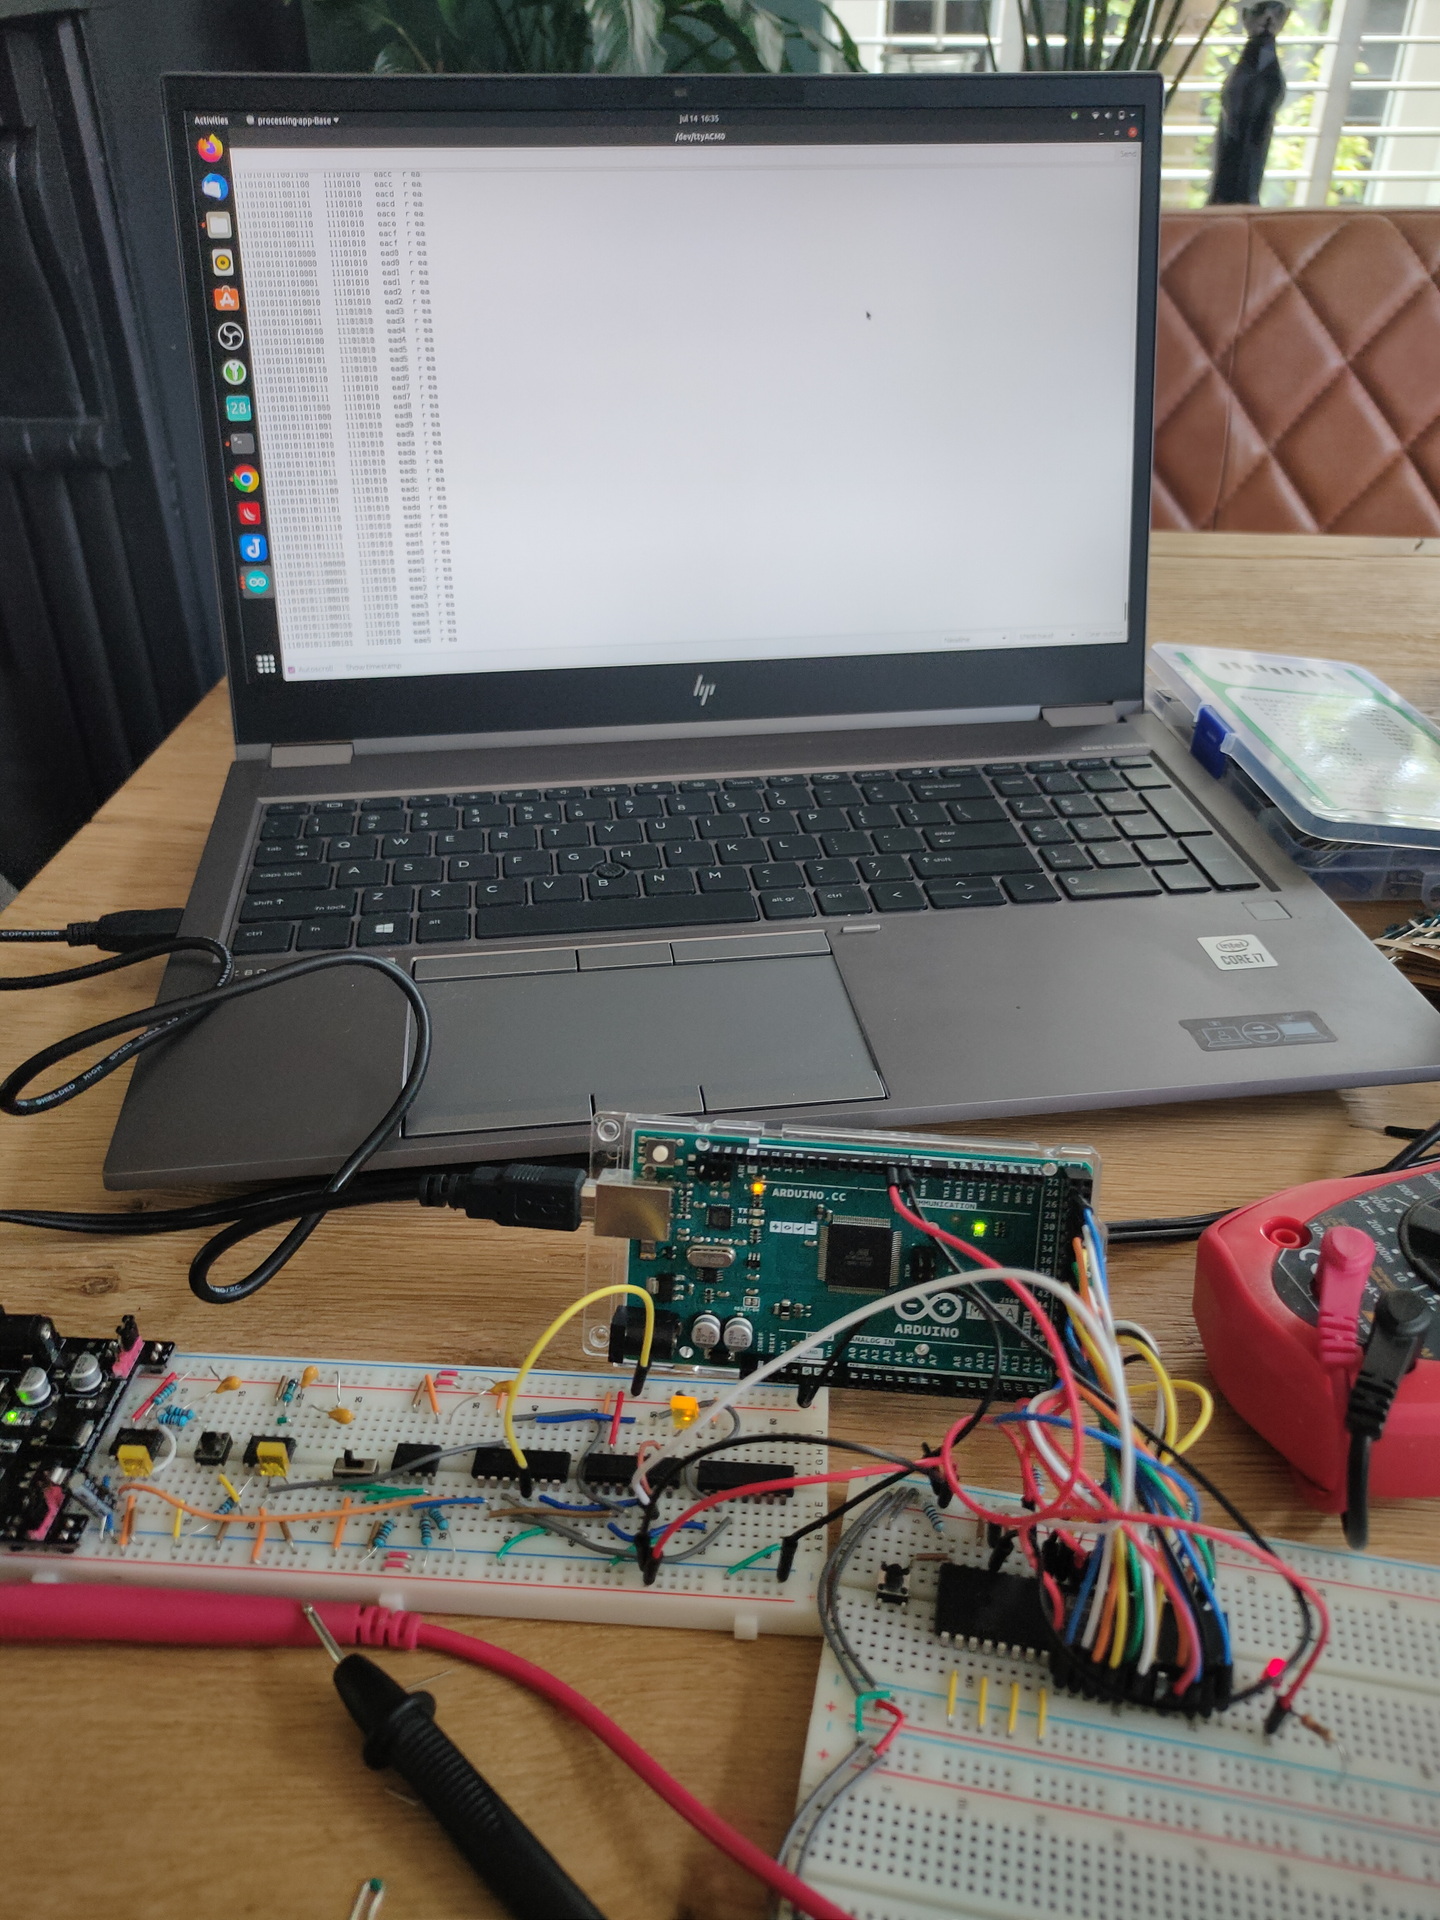
Due to eeproms being scarce, i’m going to use a arduino as Rom emulator. Below is a test setup i’m going to build.
Made the drawing in Kicad.
KiCad is a free software suite for electronic design automation. It facilitates the design and simulation of electronic hardware. It features an integrated environment for schematic capture, PCB layout, manufacturing file viewing, SPICE simulation, and engineering calculation.
Memory assignment:
$8000-FFFF - Rom
$4000-7FFF - Ram ?
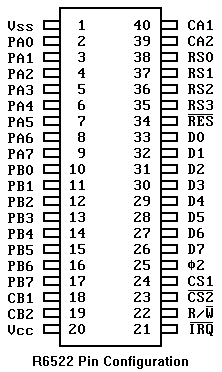
$2000-3FFF - Multiple times the 6522 *
$0000-???? - Ram probably
* This is due to the fact i am only using Address lines: 0,1,2,3,13,14,15
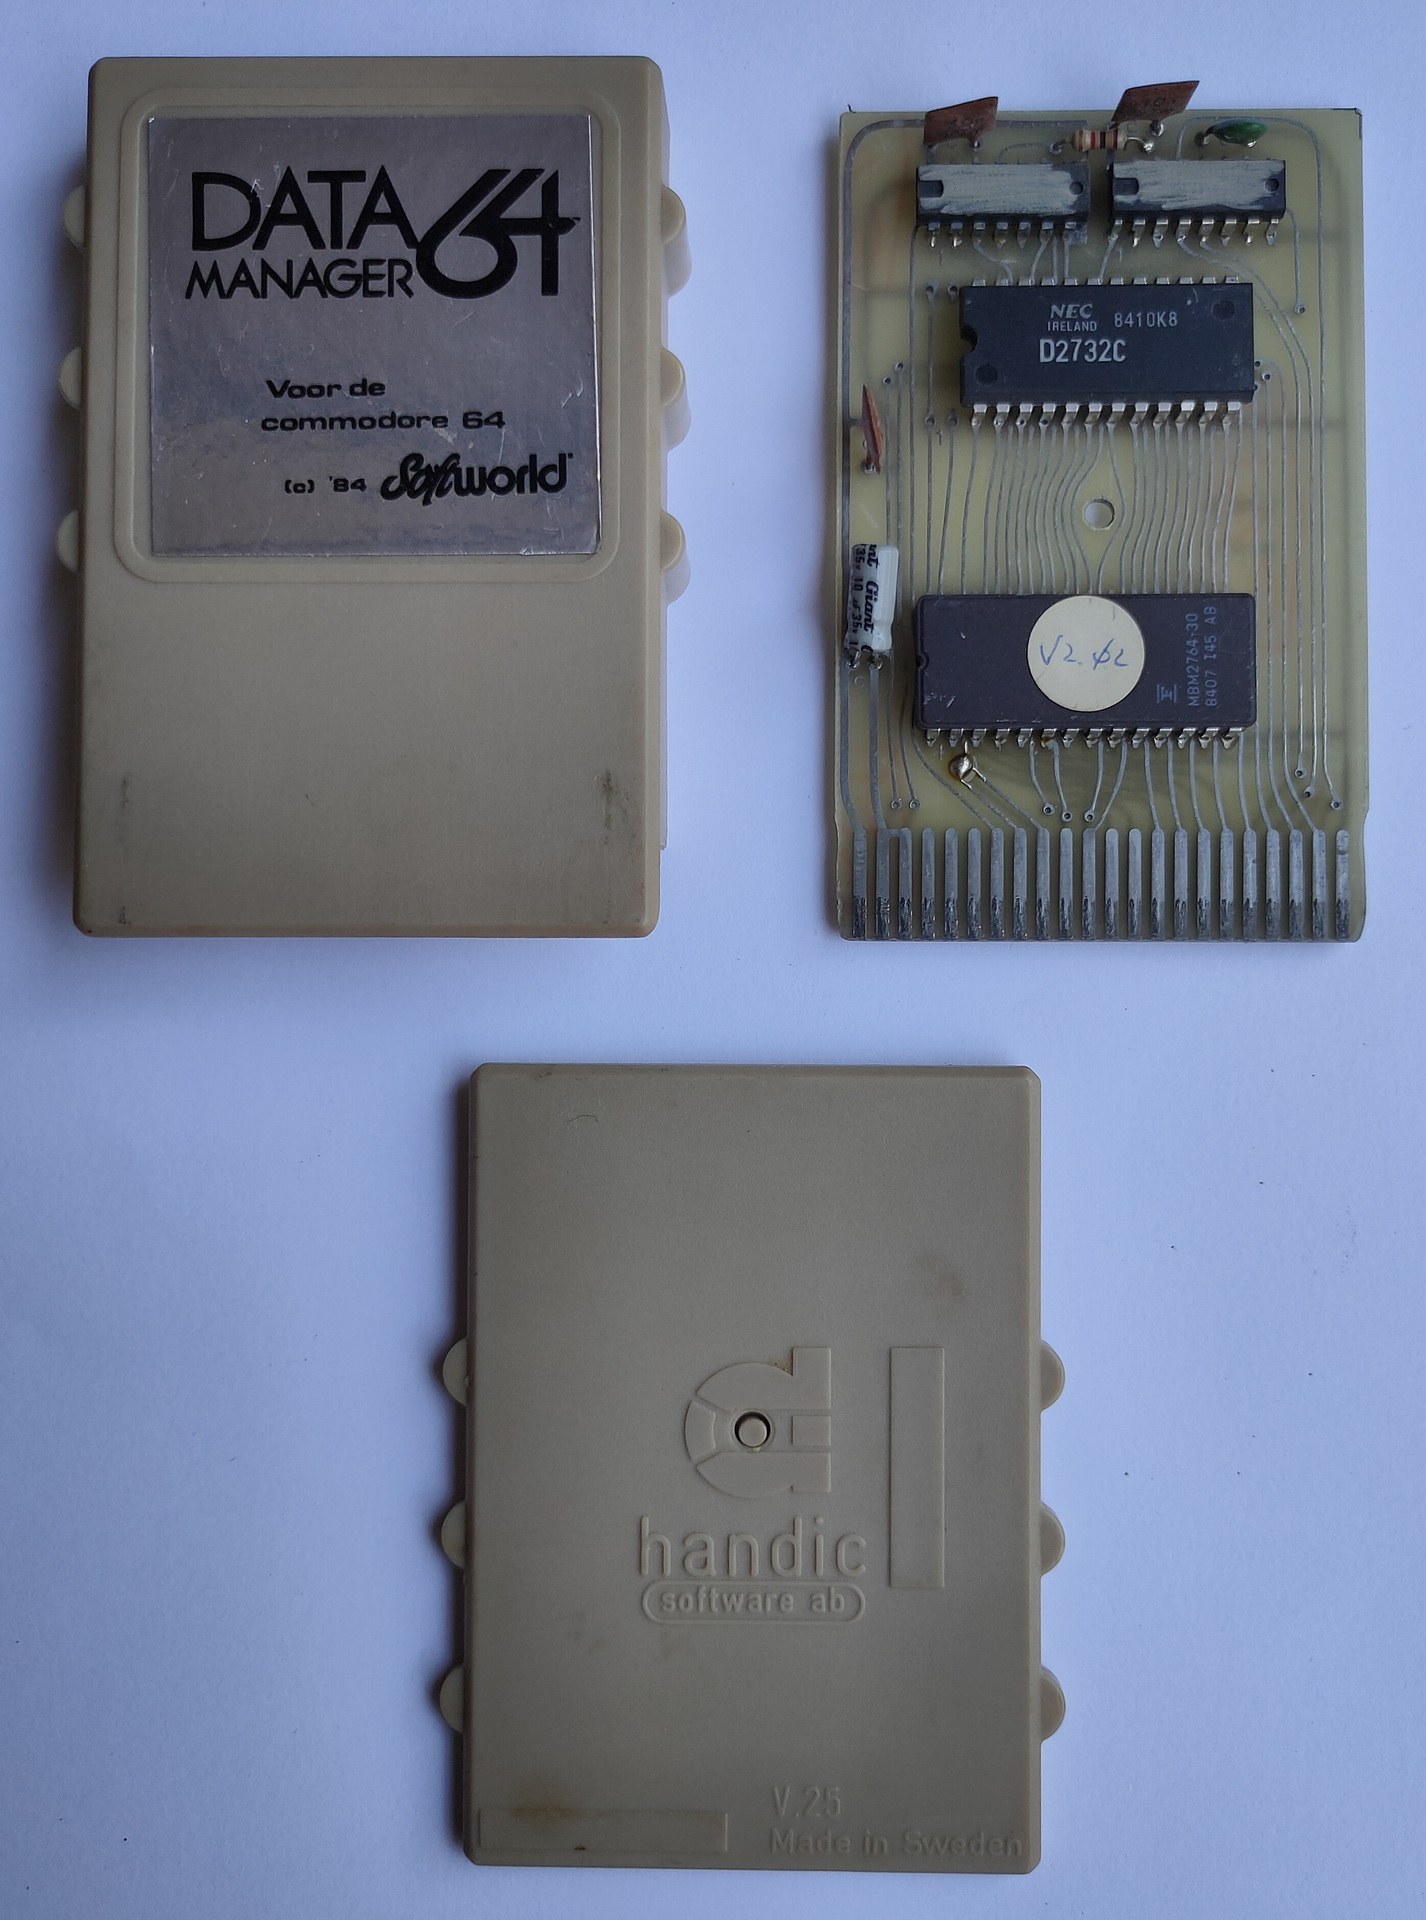
As posted before, i found a cartridge in my collection a while ago. I don’t know where i’ve got this one from.
While searching on the internet for more information, i really couldn’t find anything about it. Not even on collectors sites.
Where did it come from, what does it do?
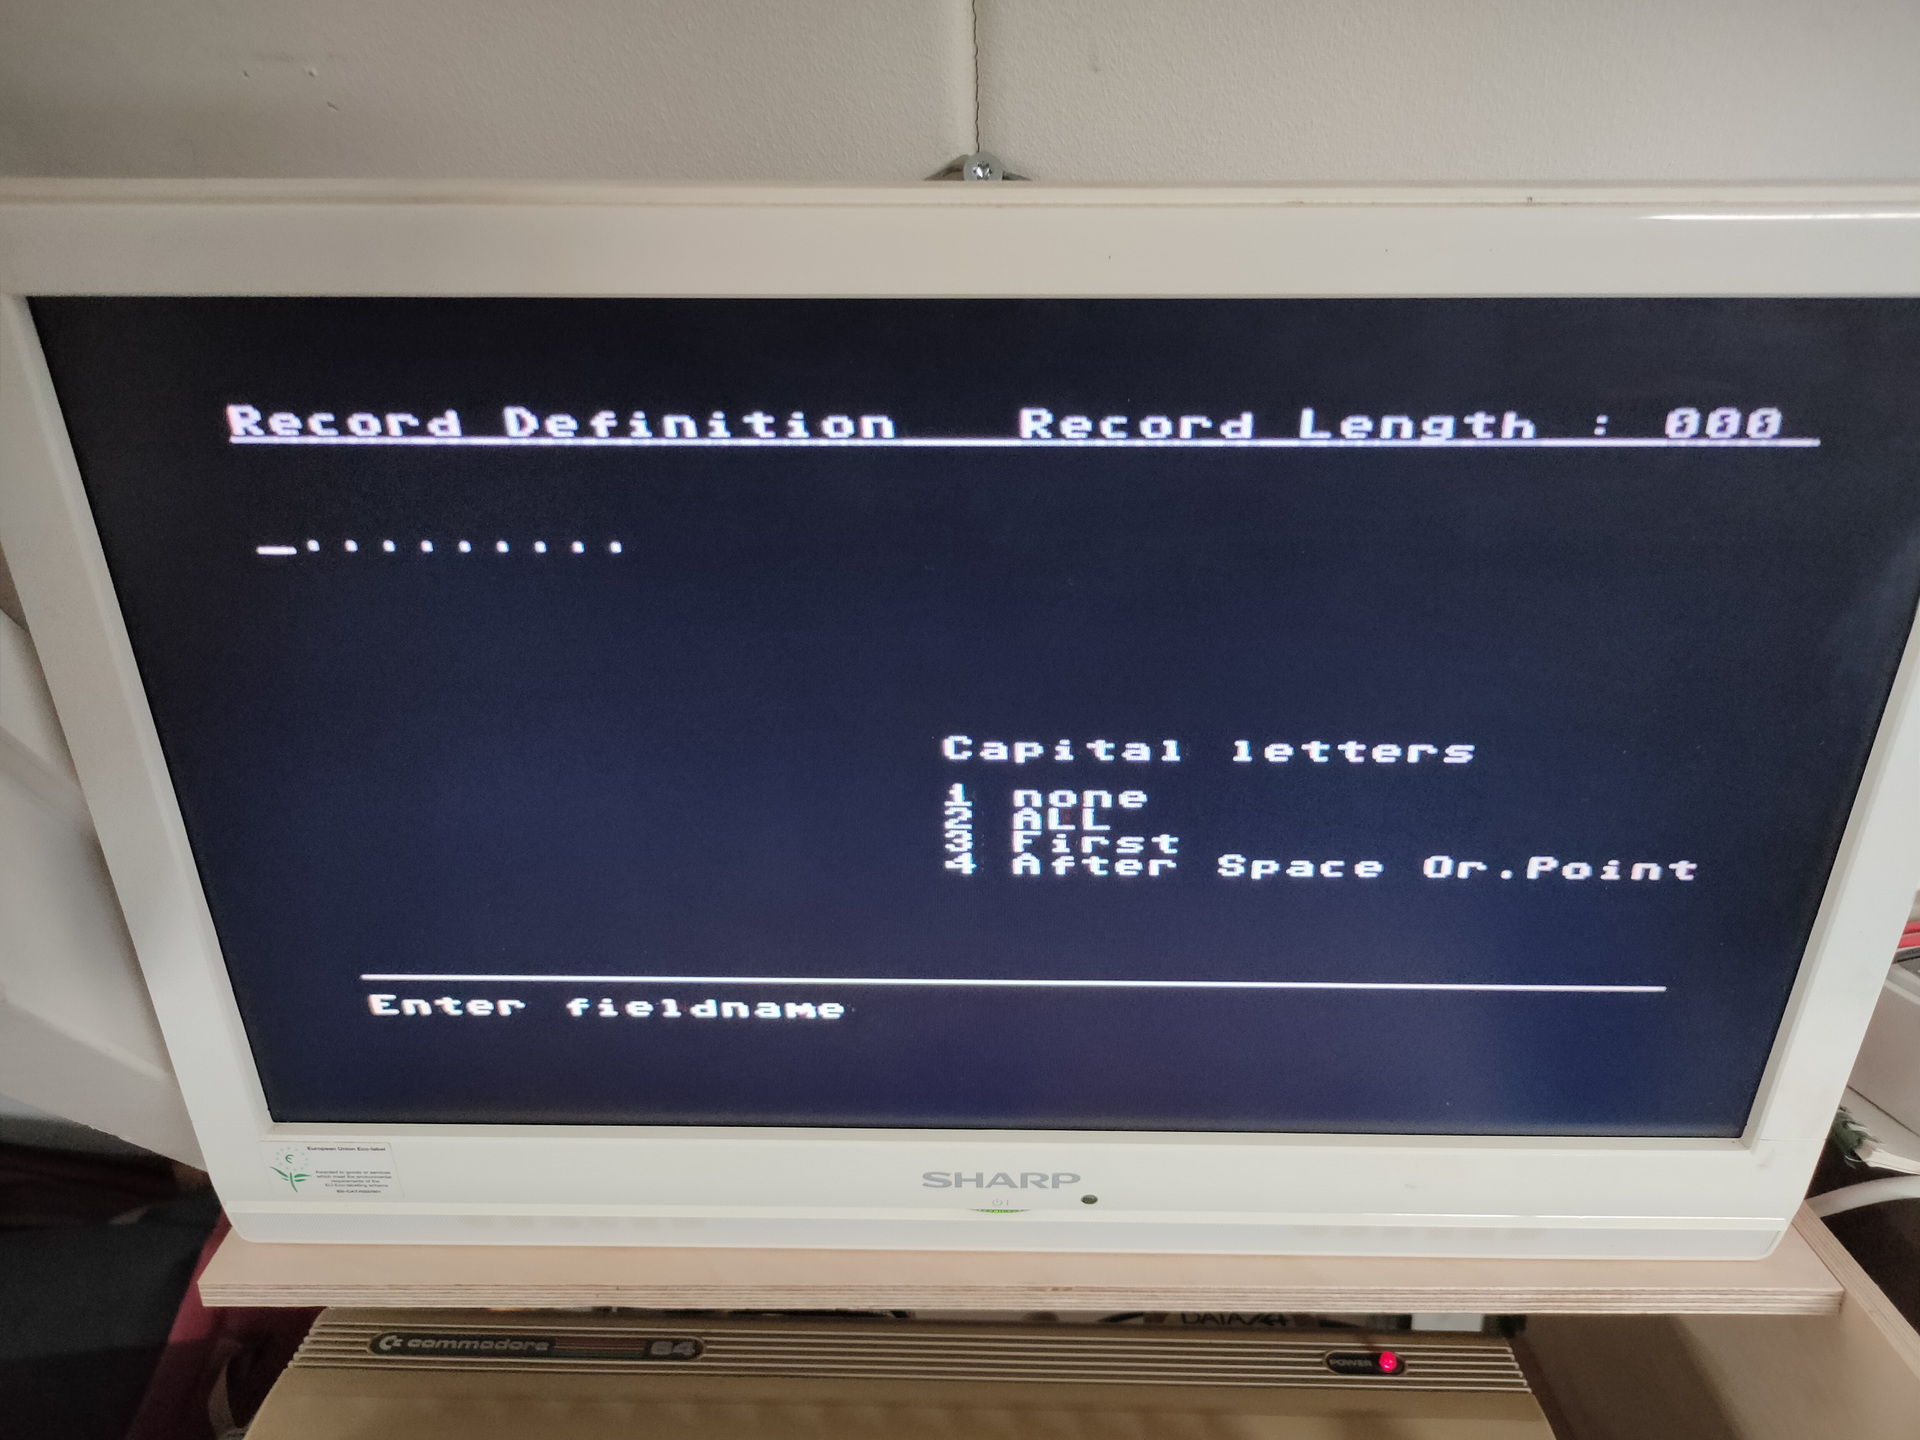
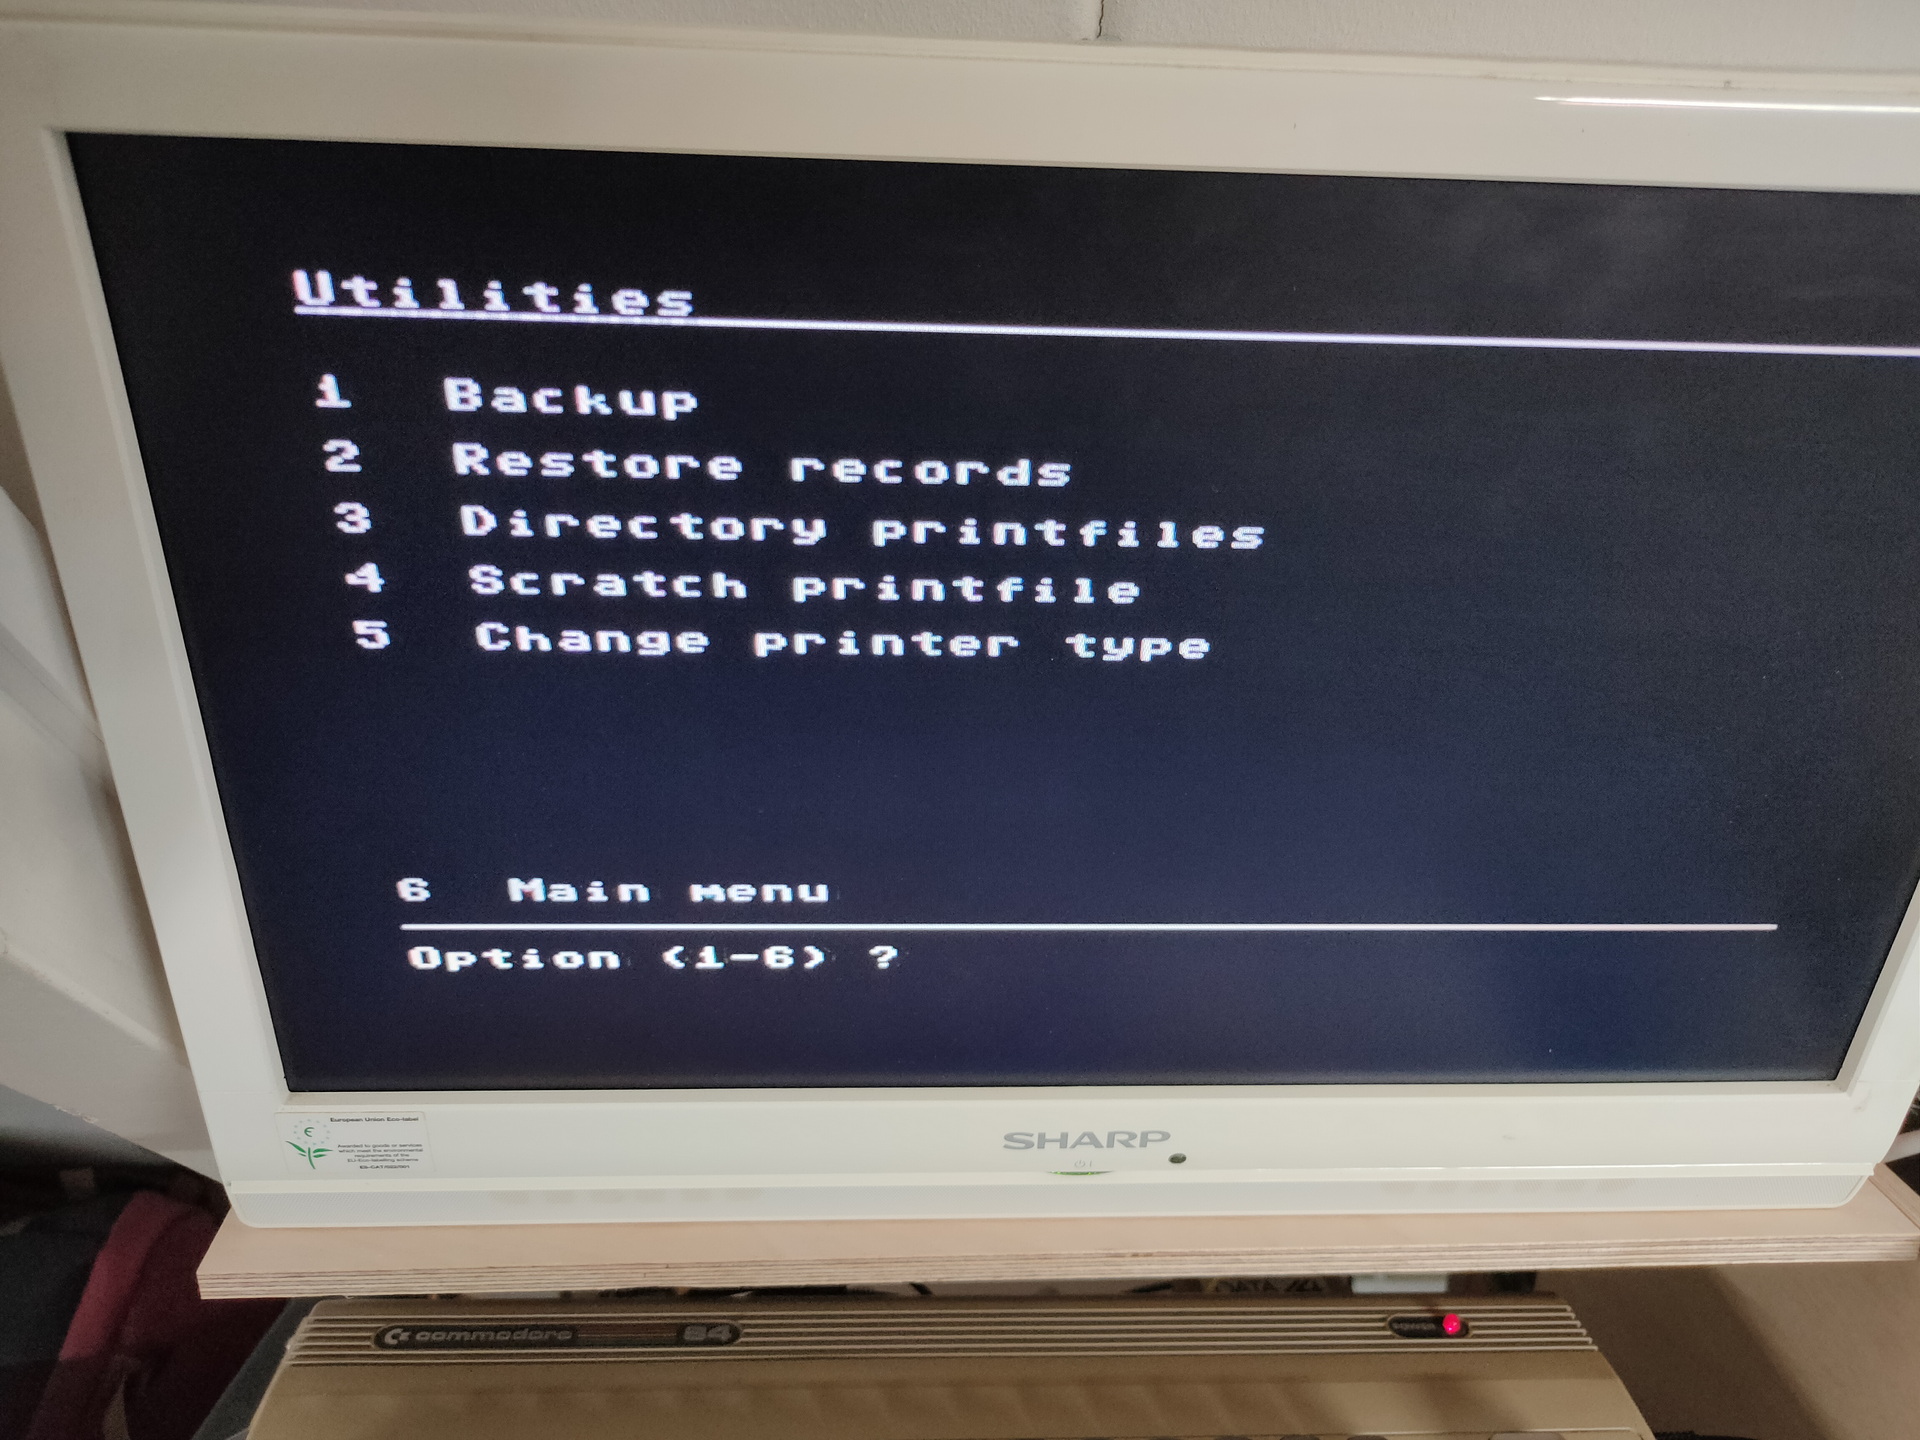
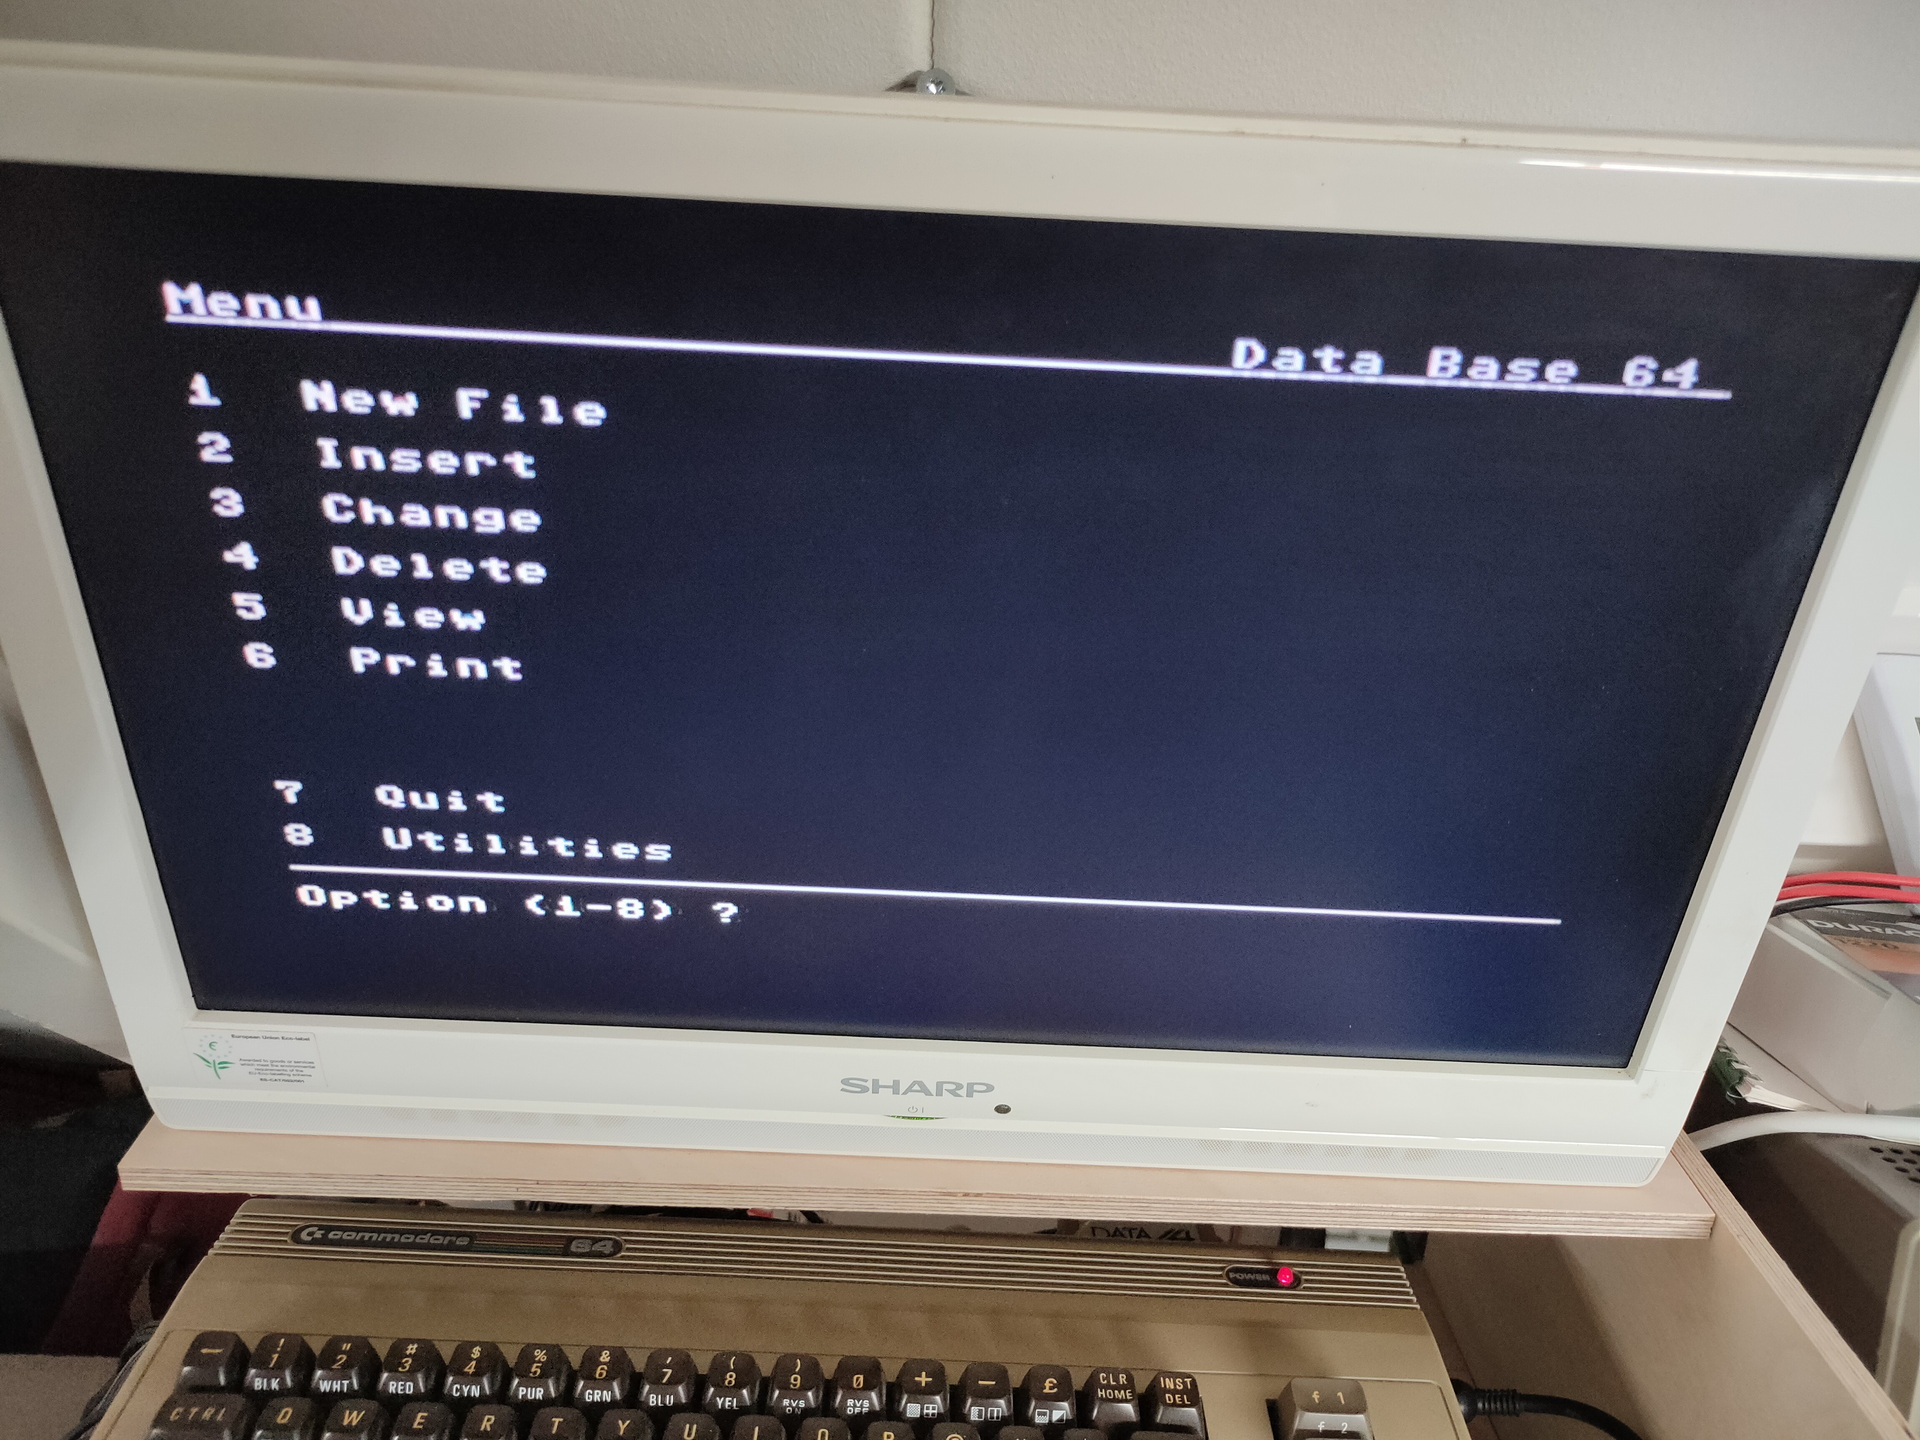
It says: Data Manager 64 (1984) , Softworld and Handic.
I can find many cartridges by Handic. I’ve checked all database/filers i could find. Non looked like this.
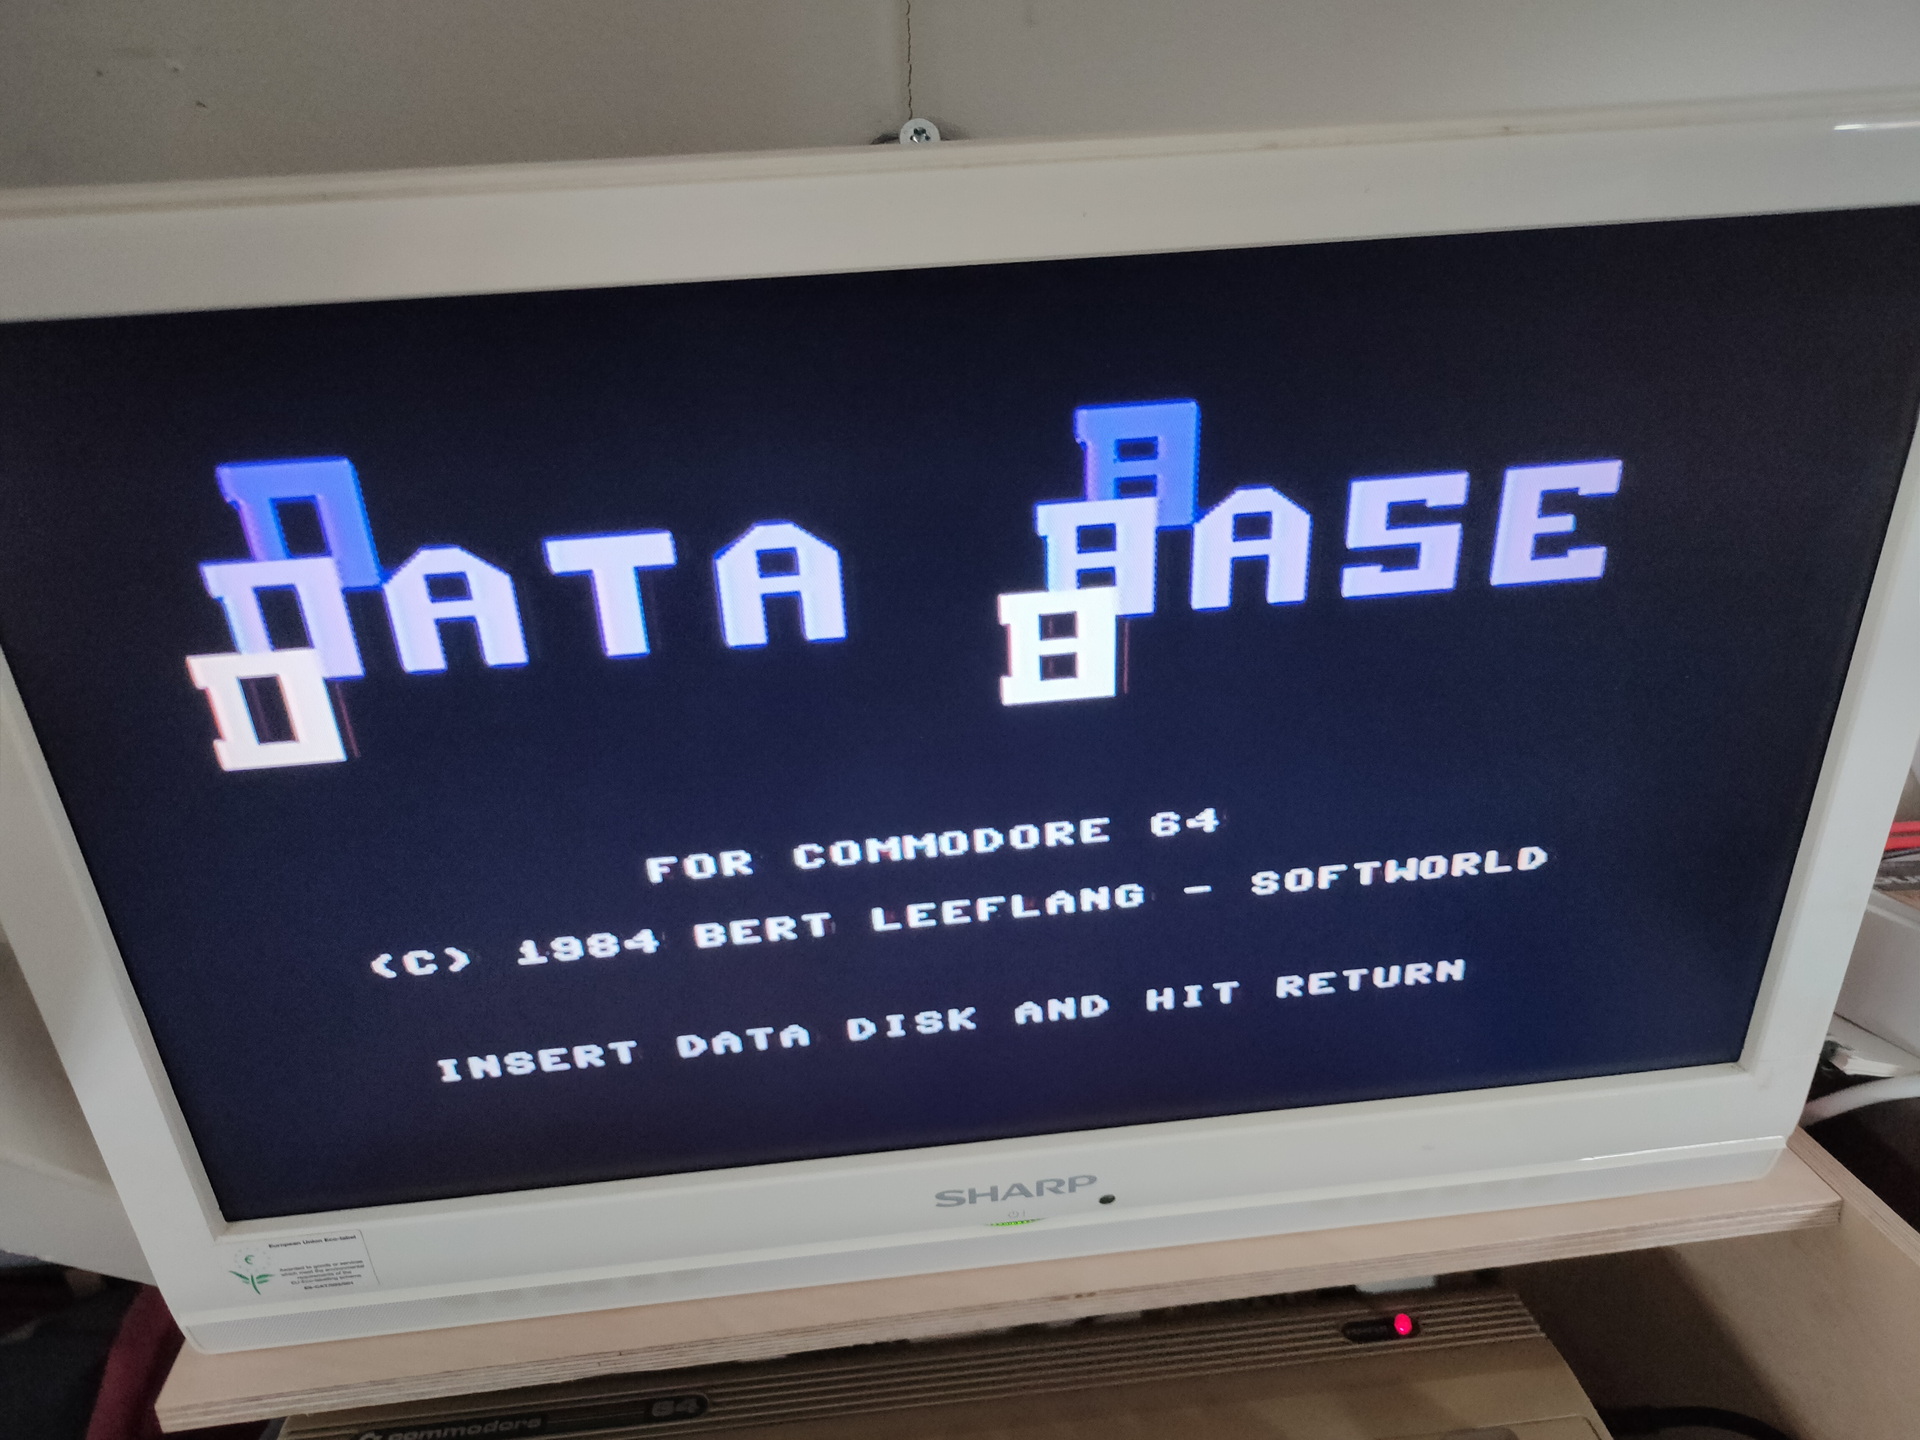
Some screenshots
Next to try .. Dumping the cartridge to file. Probably by changing the way the C64 starts a autostart cartridge. So i have to modify the cartridge port, and put a cross connection on the lines EXROM and GAME, this will change the memory addresses ($8000/$A000) where a cartridge is placed. Then the commodore will start normally, and i can dump the cartrige memory locations to a file.
So pins 8 and 9 have to be switched around. The C64 autostarts a cartridge when it find certain data on $8000
Meanwhile i try to contact some collectors of cartridges.
Next week i’ll be going to May Contain Hackers 2022, what to bring? My old friend Bigred will be there, many others couldn’t make it …
What to bring and do:
Laptops
Arduino touch project?
My new 6502 breadboard computer?
The DVB-T / DAB / FM stick
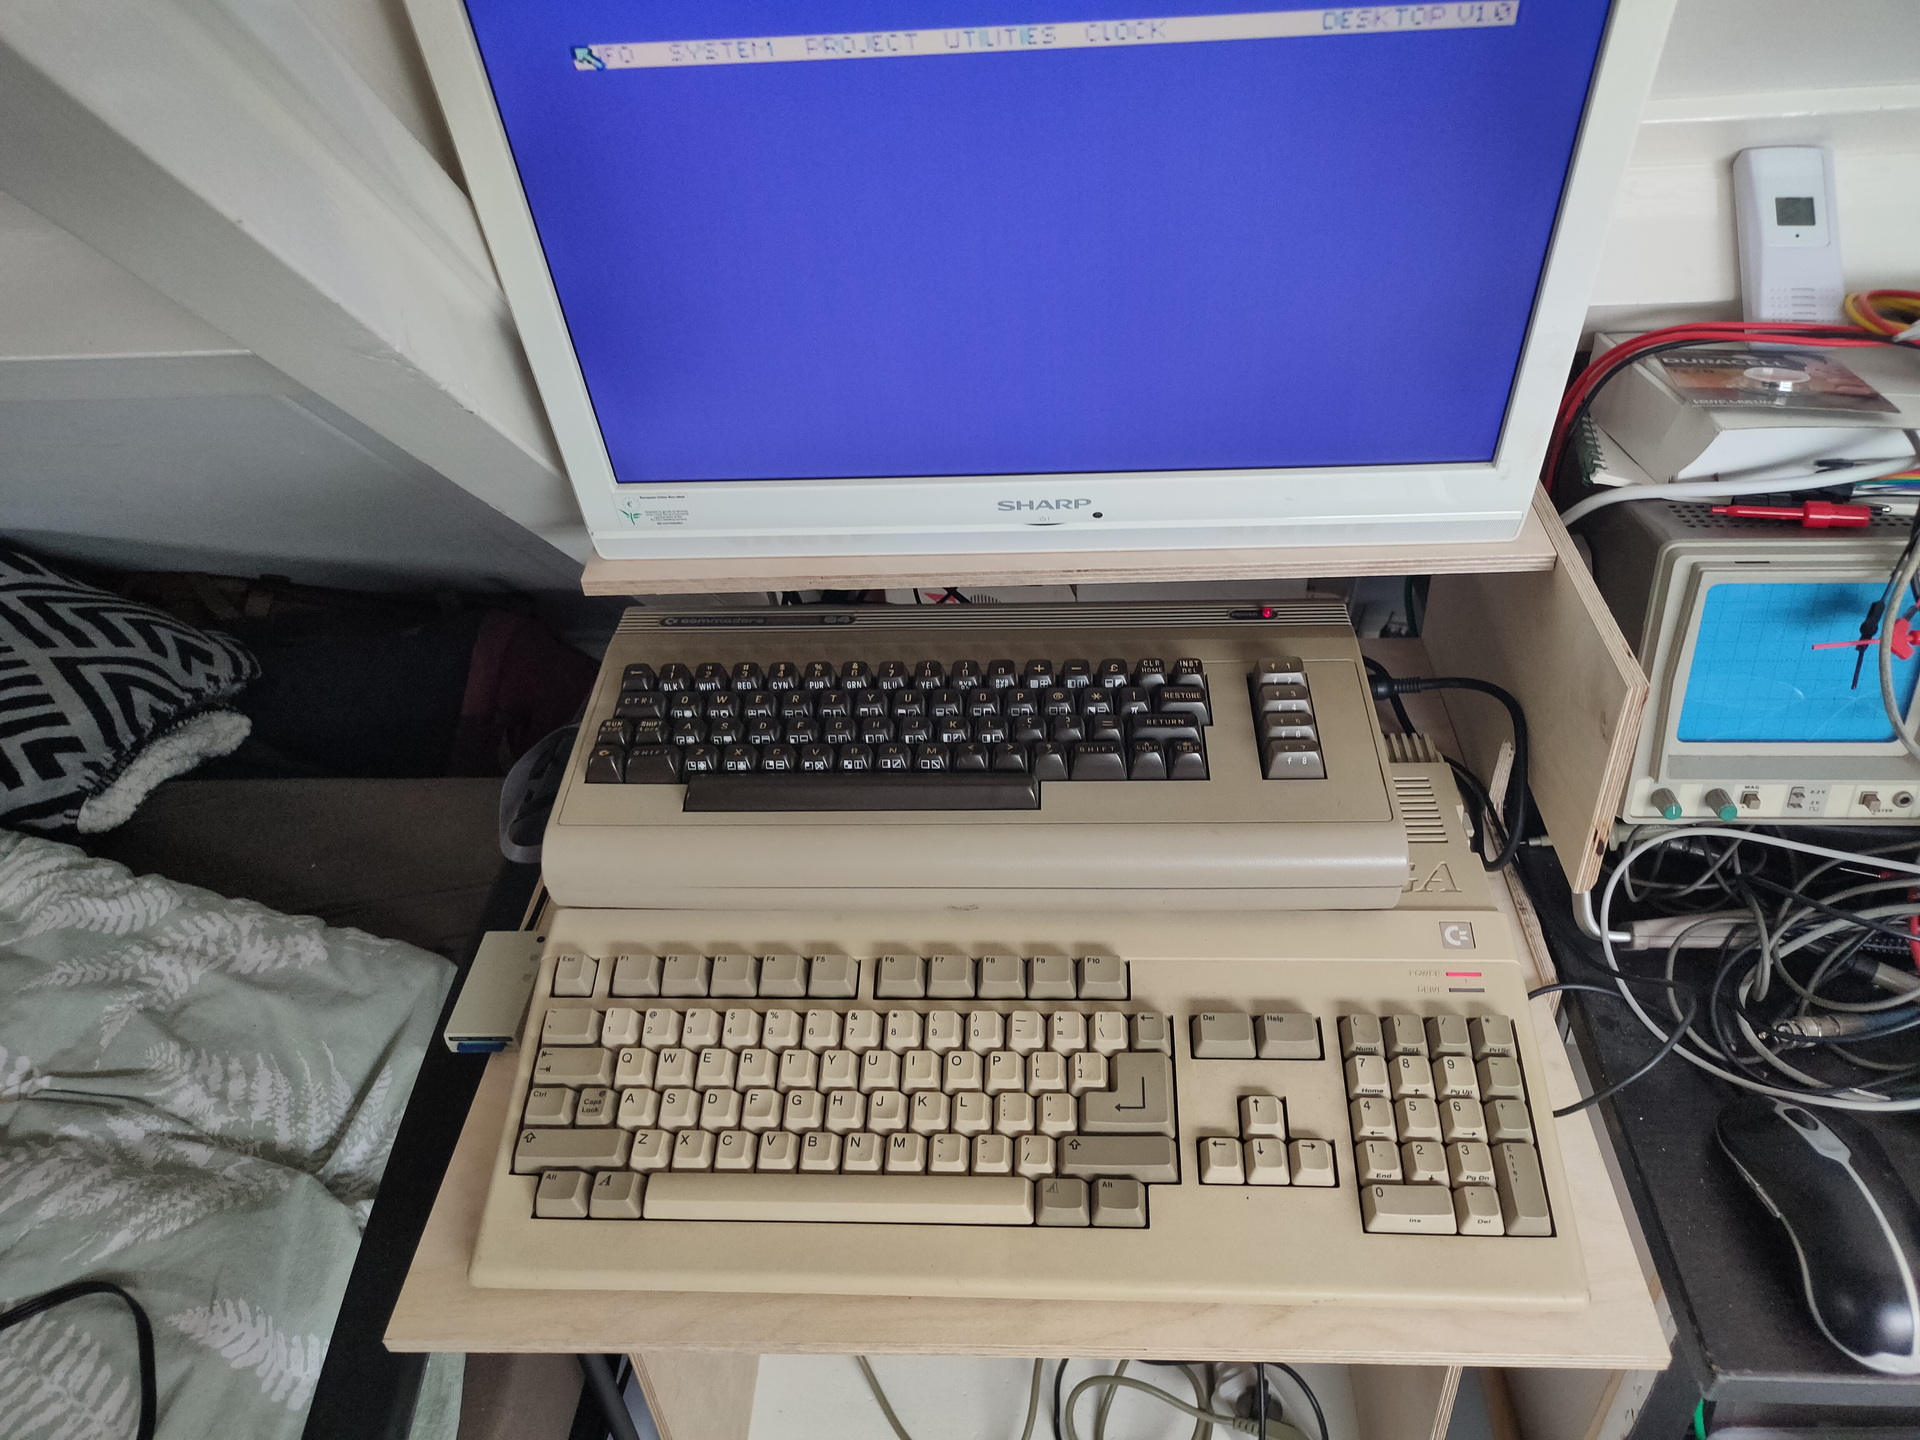
Besides the emulators on my laptop, maybe i’ll bring this little thing (Or a real C64?)
Booting in 4 seconds! Running Vice in 50 or 60 Hz Low latency video! Can emulate cartrides, floppy’s When you connect joysticks or a real C64 keyboard to the GPIO pins it will use that. SID sound using ReSid CRT emulation (look for BMC64 or combian)
I’ve used a basic program on C64 in the past and a Cartridge machinecode monitor in the past. I’ve really forgotten how, what i’ve used and what i’ve done with it. Not nearly as much as my friends at that time. I started with a Vic-20 and played around with machinecode on a 6502. I didn’t have a C64 for many years.
How much funit this!
I’ve recently started to build a 6502 computer again, and programming on 65xx again (Generic 6502 and C64). (2022)
Below is my setup on linux, to write assembly code, compiling and running the code in a emulator.
I have installed the Acme compiler and Vice as a emulator. Both can compile/run machinecode for multiple computer emulations. So maybe i can run my old Vic-20 machine code or the few C64 programs i’ve written.
I’ve only made the bash script, the included asm files i copied from someone on the internet. ( Credit lookup )
makeprg bash file:
#!/bin/bash
set -x
f=""
if [ "$2" == "f" ] ; then f="-fullscreen" ; fi
if [ ! -f $1.asm ] ; then
cp template.asm $1.asm
fi
vi $1.asm
acme --cpu 6510 --format cbm --outfile $1.prg $1.asm
if [ ! $? -eq 0 ] ; then exit 1 ; fi
c1541 -format foo,id d64 $1.d64 -write $1.prg
if [ ! $? -eq 0 ] ; then exit 1 ; fi
x64 $f $1.prg
template.asm
!source "basic-boot.asm"

+start_at $0900

; Set background and border to black
ldx #$00
stx bgcol
stx bocol

; Flicker border and background
.loop
  inc bgcol
  inc bocol
  jmp .loop
basic-boot.asm
; A BASIC booter, encodes `10 SYS <address>`.
; Macroified from http://www.pouet.net/topic.php?which=6541

!source "constants.asm"

!macro start_at .address {
  * = basic
  !byte $0c,$08,$00,$00,$9e
  !if .address >= 10000 { !byte 48 + ((.address / 10000) % 10) }
  !if .address >=  1000 { !byte 48 + ((.address /  1000) % 10) }
  !if .address >=   100 { !byte 48 + ((.address /   100) % 10) }
  !if .address >=    10 { !byte 48 + ((.address /    10) % 10) }
  !byte $30 + (.address % 10), $00, $00, $00
  * = .address
}

; A cooler example is to write
;
;   10 SYS <address>: REM <backspaces>Your comment
;
; When the user types LIST, he will just see
;
;   10 Your comment
;
; but still be able to run it.
; For this, see http://codebase64.org/doku.php?id=base:acme-macro-tu
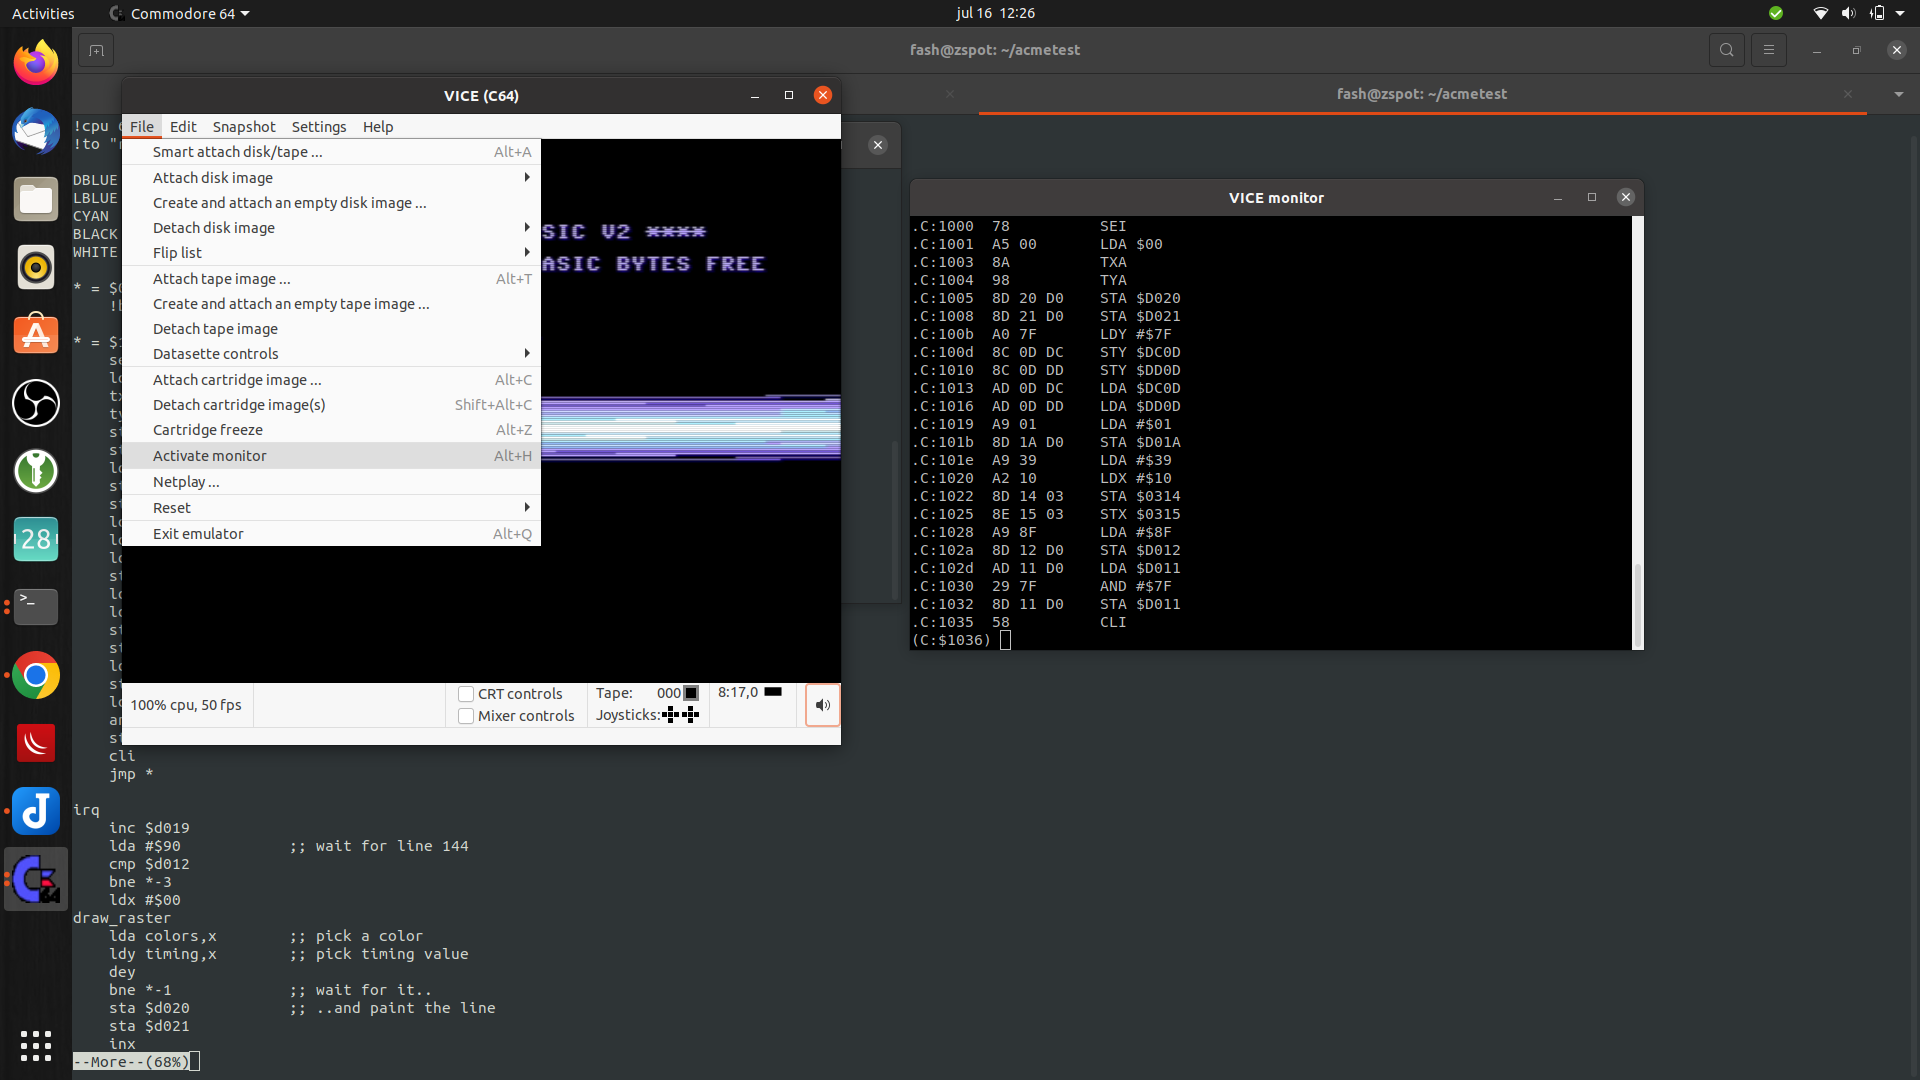
When running above bash script. it will open the file if it exists, else it will take a template file. After opening it with vi, and editing it, it starts a the compiler and creates a C64 d64 disk. This is going to be autorun/started with the VIce emulator. Appending -f to the bash script will start it in fullscreen mode. ./makeprg myawesomedemo.asm -f
Below it is running without the fullscreen option. but is shows how to start the interactive monitor in vice.
Update: 20220721 .. VIA chip installed Update: 20220801 .. changed layout, addressing and added rom, see below post.
Such a influencial little processor … Apple, Vic-20, C64 (with modifications), PET, BBC Micro, Oric, Atari and Nintendo.
Another (big brother) influencial CPU is the 68000. (Amiga/Atari ST/ Macintosh/Sinclair)
I’ve made a 680x computer in the past, and i want to make another one.
This one will be based on a 6502, because i used to program on this cpu when i got my Vic-20.
Goals of this project:
6502 Cpu
Memory and Rom
Rom must contain a good machinecode monitor
Adjustable clock
Now using Ben Eatons clock diagram, but i will move this to a programmable arduino, with a display which shows the clock rate
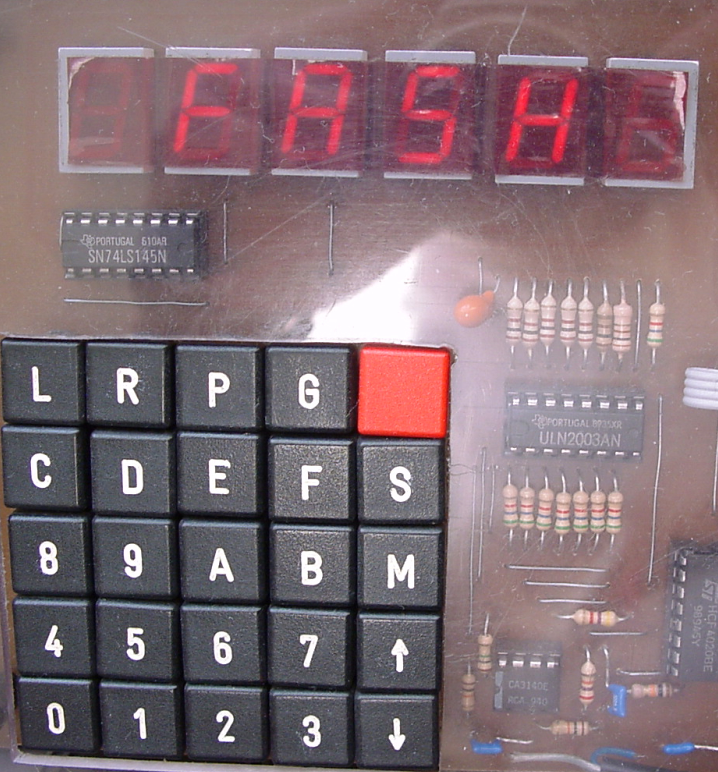
Hex keyboard ro program the machine, just like picture below
Display which was a resolution of at least 640×480
It will be a slow screen, character printing and a gfx mode?
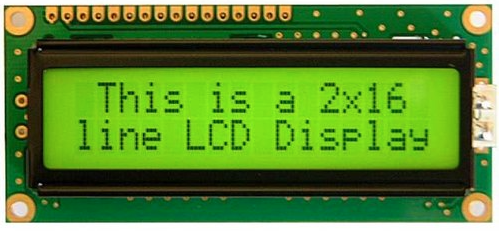
First probably a SPLC780 HD44780, so i can enter/edit machine code.
Hopefully using a SID chip
Hardware monitoring of the address and data lines like movie below
Programming via serial/usb, by halting the 6502 cpu and pushing data into memory or fake-eprom with a arduino
Save/restore by modifying memory
Small
Example of Hex keyboard
Update 20220721
Via chip is on the board. For now i’m using a old display, like this one
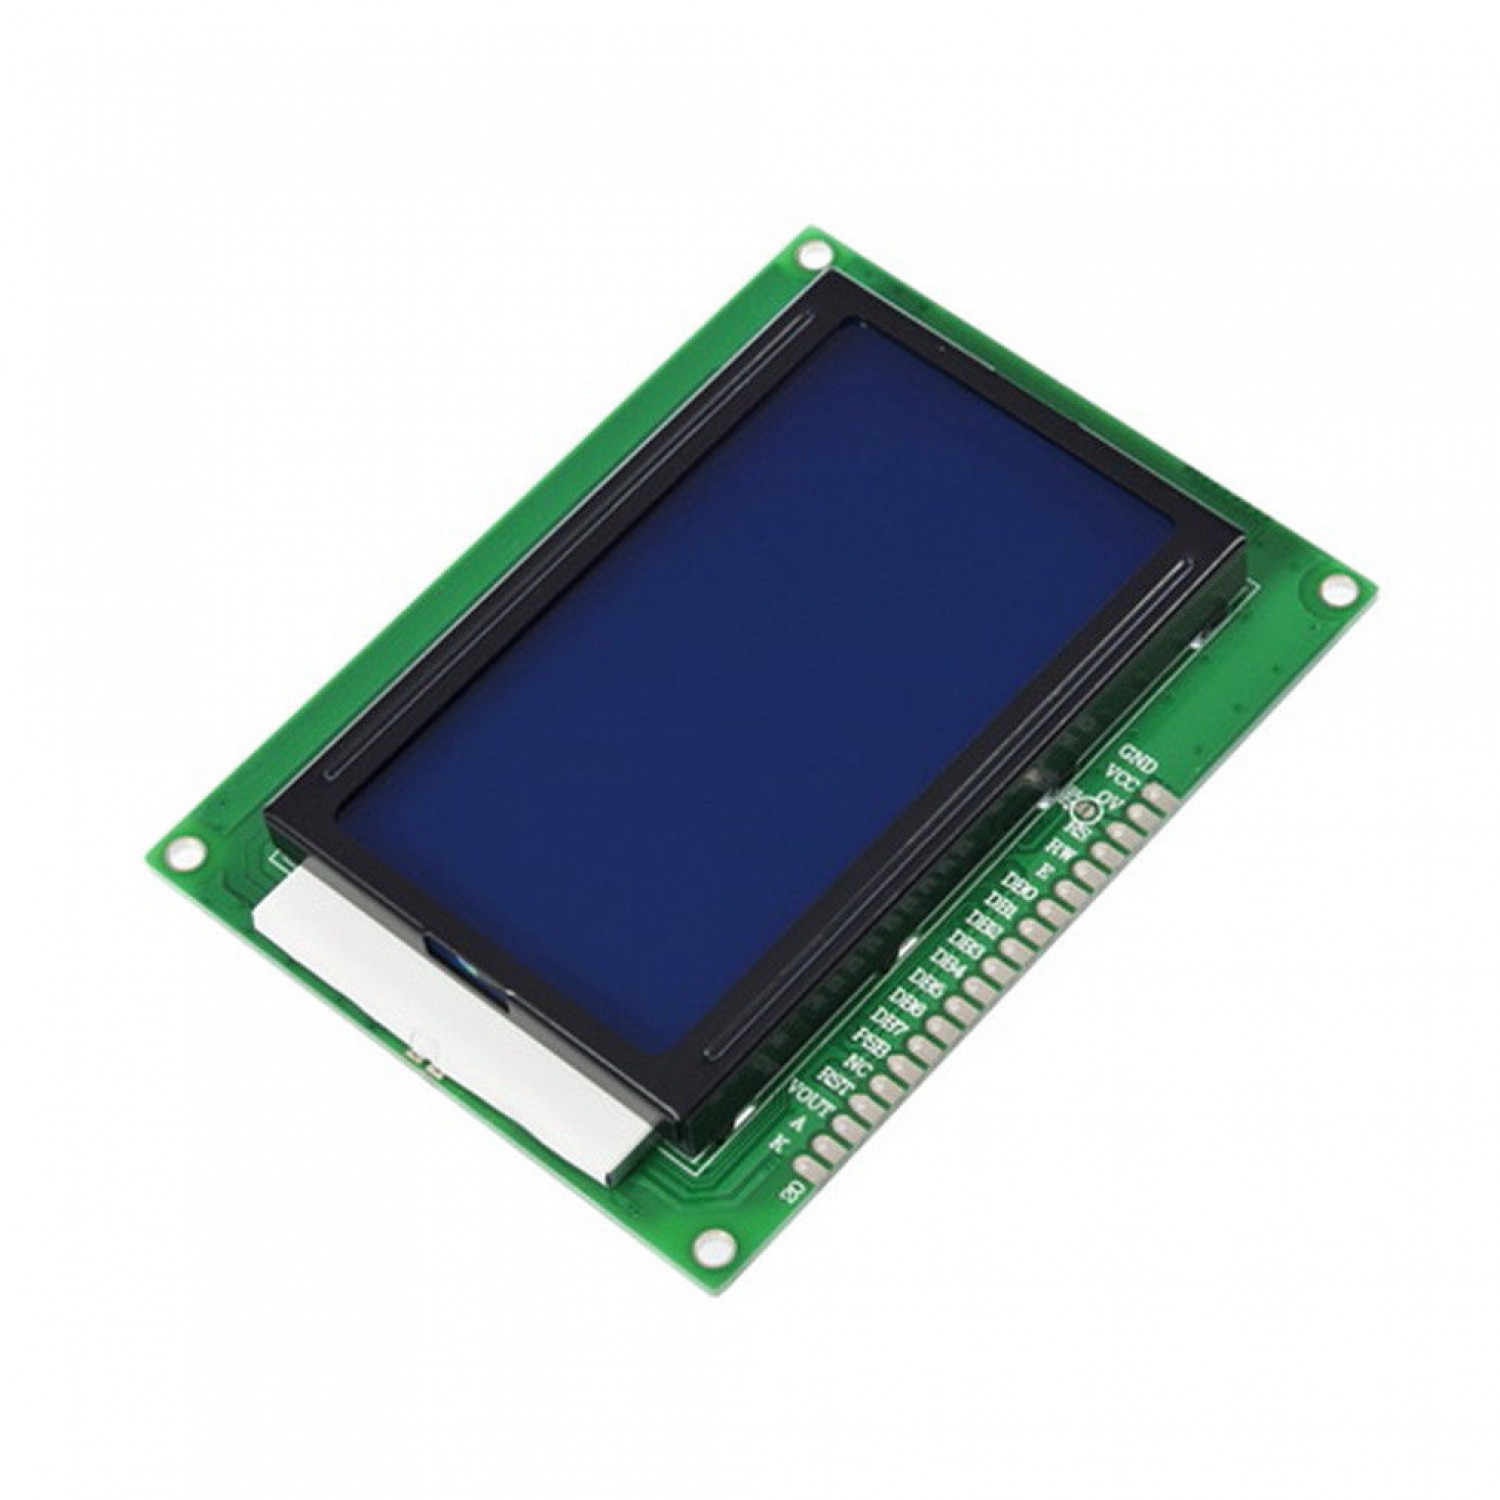
I was planning to use this one
The graphic capable 12864 display (128 x 64 pixels)
I will reuse the schematics i’ve used for the 680x computer. (Posted above)
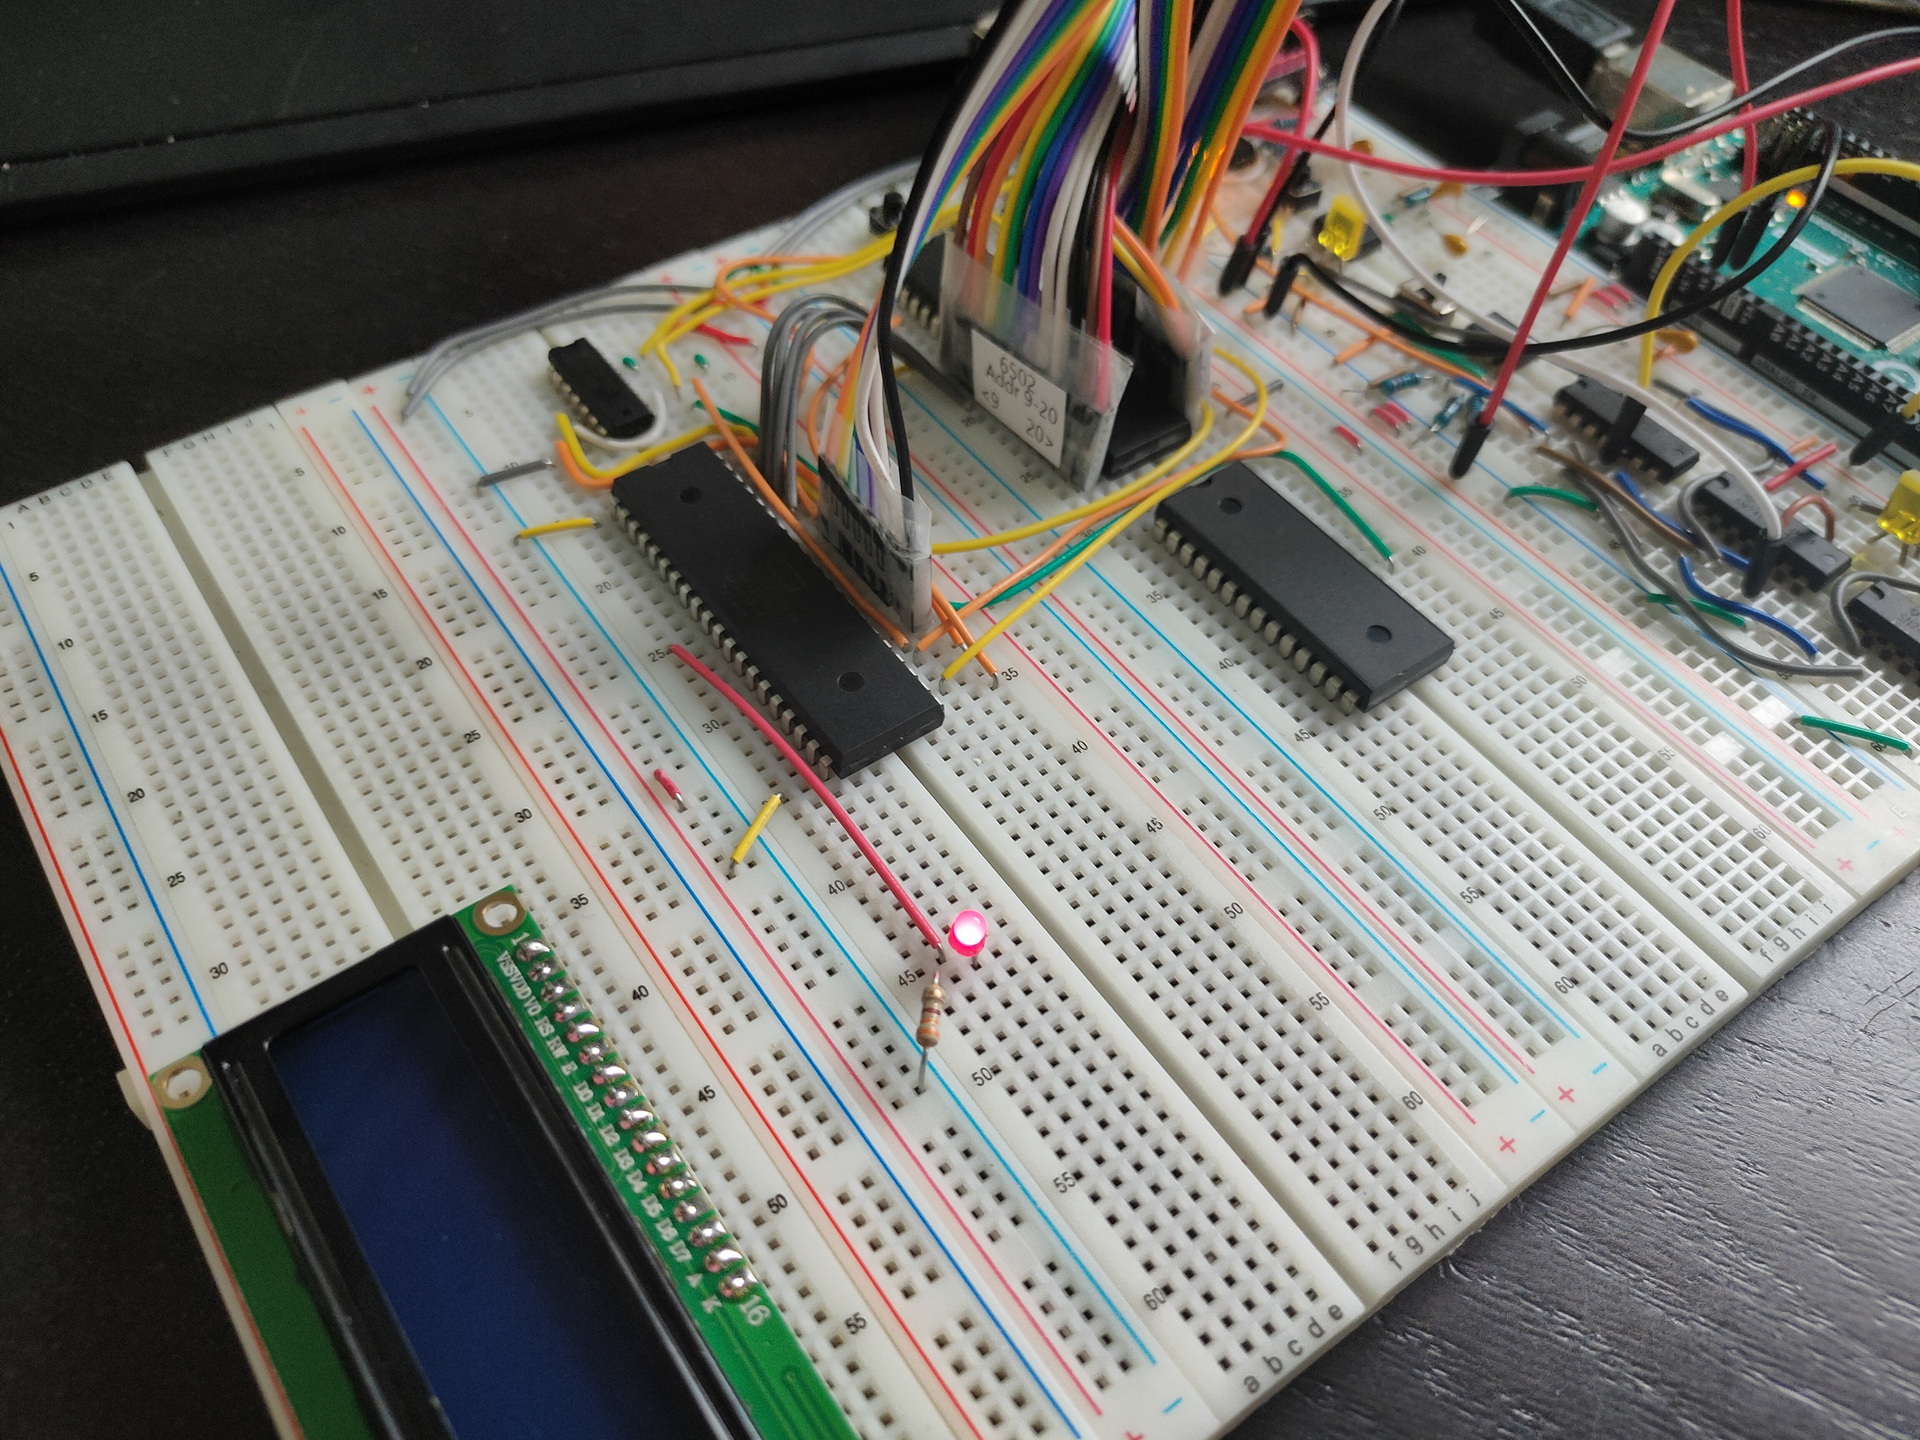
Update: 20220801
Added ROM, and changed layout. Every breadboard has a function now.
Upper left, Ben’s Clock module (this is going to be changed to a arduino with display which shows frequency) Upper right, power-on reset (Reused part of C64 schematic) Second row left, the 6502 On the right the ROM, RAM i also going to install here. 3rd Row, Address decoding, this is going to be a dynamic setup using dip switches and a eeprom for decoding (i know, this kind of decoding is slow, but i don’t need speed), on the right probably the hex keyboard with its own 6522. 4rd row left, a temporary display 16X2 connected via a 6522. Here i want to have a graphical display. 4rd row right (not started this part yet) a sound device. SID or a Yamaha sound chip i still have.