We had a delayed Burns night, seems a bit of a habit of our band. But with Covid, who knows, maybe we are celebrating Burns Night 2020.
I wanted to make Haggis “bitterballen” (Fried balls) but Irmgard has no frying pan. So I made some Haggis sausage rolls.
The others made also a lot of Scottish/Irish themed food. (Too much again) But i don’t have the recipes.
We played some old tunes, and some new. Talking eating and drinking, time flies!
Irmgard and I played a duet on the Harp and some new tunes on the Concertina.
Wellll the recipes:
I wanted to make this one: https://cookingwithbry.com/haggis-bon-bons-recipe/
Instead I made this:
392g haggis, canned haggis ( Holiday 2022, stuffed a load of cans in our car )
3 Sausages (that is about 200 gr)
Bunch fresh parsley, finely chopped
320g ready rolled all-butter puff pastry
2 tbsp Dijon mustard
1 free-range egg, beaten
Mix haggis, sausagemeat and parsley.
I used square “bladerdeeg” for pastry, made a roll out of one square filled with the haggis. (Takes about of 13 sheets). Brushed on the beaten egg, and put on baking paper. 20 Minutes in a 180 degrees oven. Cut up each roll in 3-4 parts.
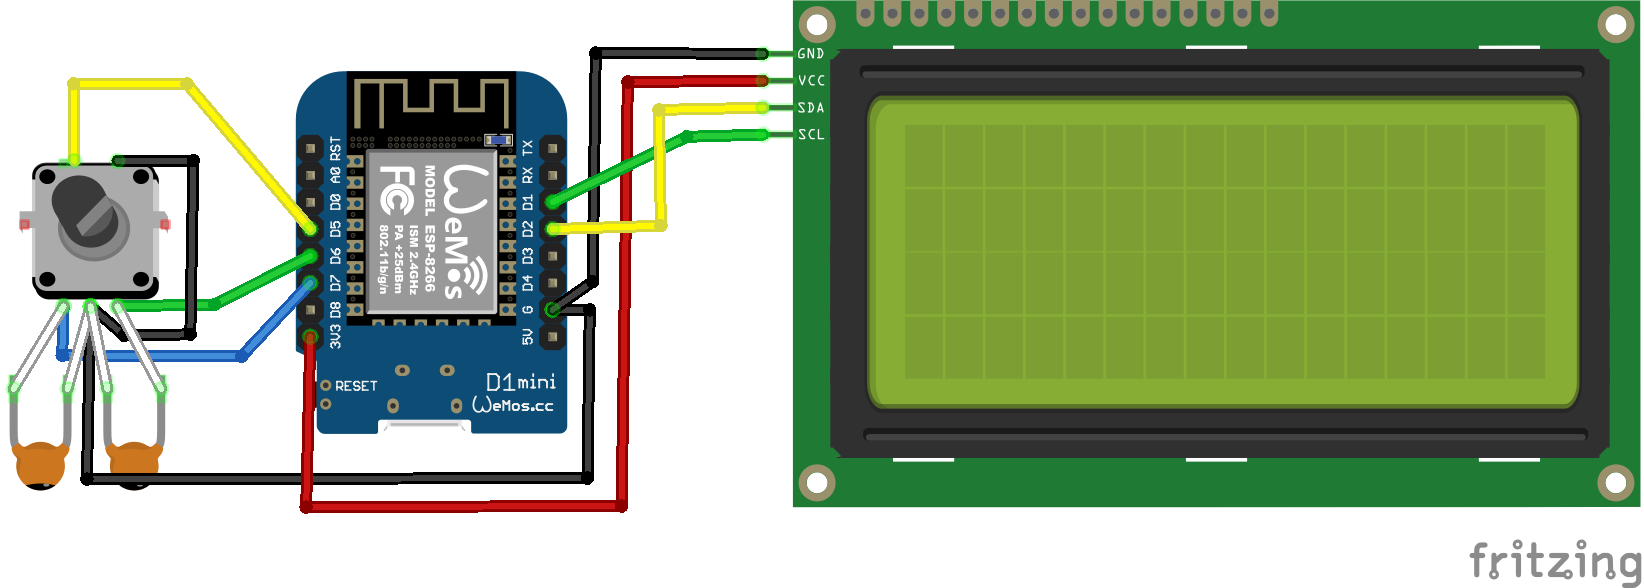
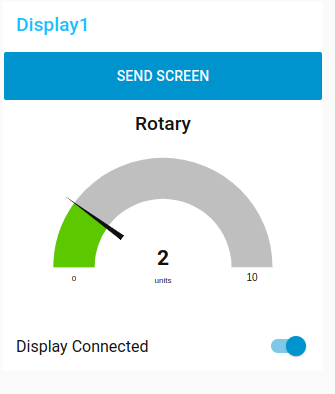
Rotary values are displayed, a push on the rotary sends the value to Mosquitto
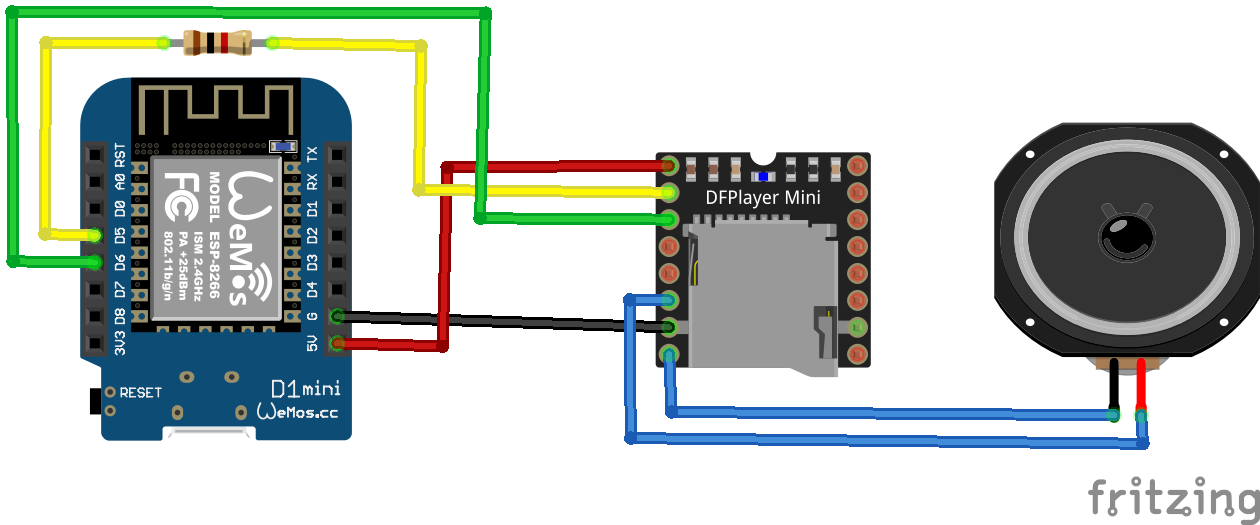
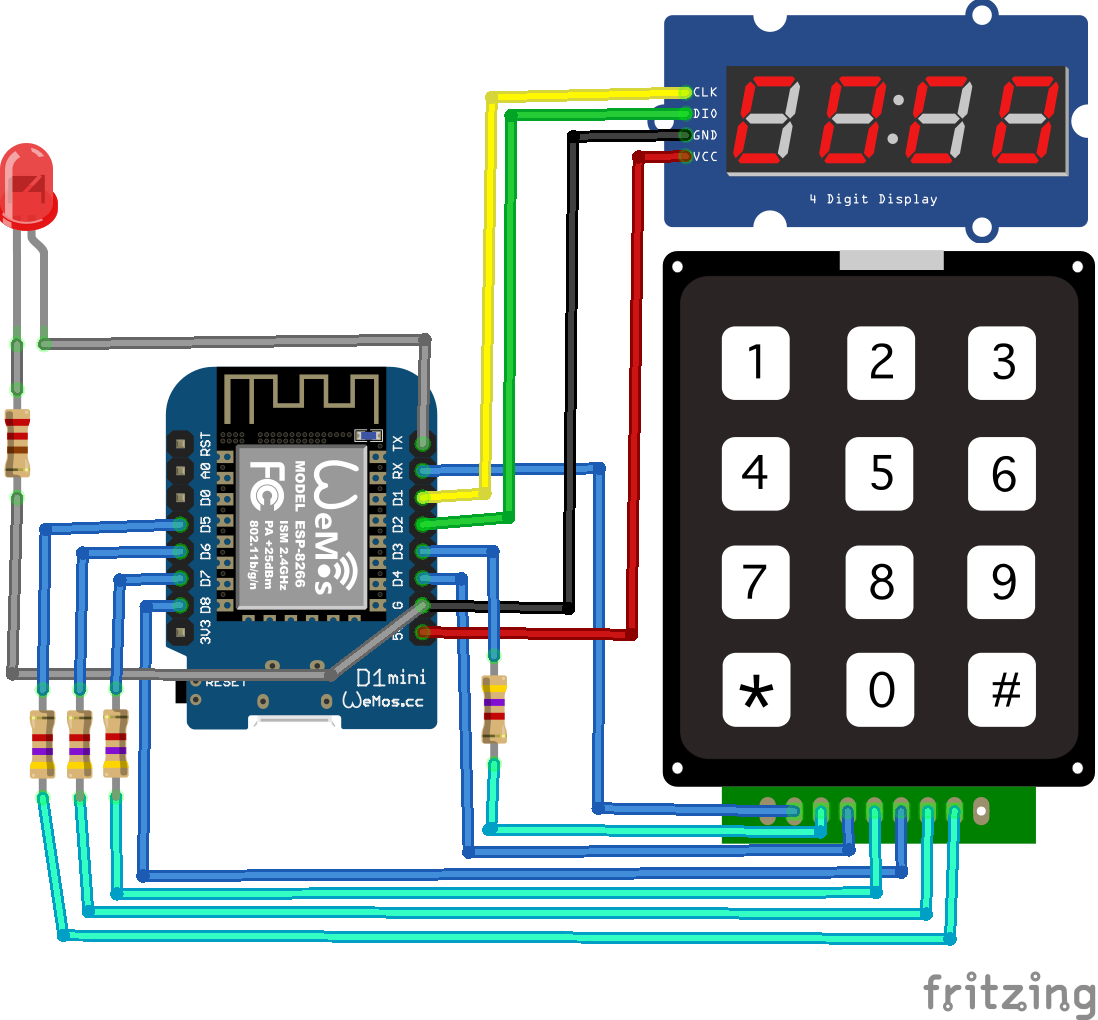
Schematic : capacitors are 100nF and display has an I2C backpack
Node-red flow example
Node red GUI
Code :
Notes: There is a problem with 4 line LCD using LiquidCrystal_I2C Lines 3 and 4 will be shifted 4 characters to the right. Workaround is: lcd.setCursor(-4, 2); // Go to column 0, row 3
#include <ESP8266WiFi.h>
#include <PubSubClient.h>
#include <WiFiClient.h>
#include "SoftwareSerial.h"
#include <Ethernet.h>
#include <Arduino.h>
#include <RotaryEncoder.h>
#define wifi_ssid "MYSSID"
#define wifi_password "MYSSIDPASS"
#define mqtt_server "MQTTSERVER"
#define mqtt_port 1883

WiFiClient espClient;
EthernetClient ethClient;

PubSubClient mqtt(espClient);

#include <Wire.h>                  // Include Wire library (required for I2C devices)
#include <LiquidCrystal_I2C.h>     // Include LiquidCrystal_I2C library

LiquidCrystal_I2C lcd(0x27, 16, 4);  // Configure LiquidCrystal_I2C library with 0x27 address, 16 columns and 4 rows
volatile bool flag = false;


#define PIN_IN1 D7
#define PIN_IN2 D6
#define push D5
int temp = 0;

RotaryEncoder *encoder = nullptr;

#if defined(ARDUINO_AVR_UNO) || defined(ARDUINO_AVR_NANO_EVERY)
// This interrupt routine will be called on any change of one of the input signals
void checkPosition()
{
  encoder->tick(); // just call tick() to check the state.
}

#elif defined(ESP8266)
/**
 * @brief The interrupt service routine will be called on any change of one of the input signals.
 */
IRAM_ATTR void checkPosition()
{
  encoder->tick(); // just call tick() to check the state.
}

#endif

void scrollText(int row, String message, int delayTime, int lcdColumns) {
  for (int i=0; i < lcdColumns; i++) {
    message = " " + message;
  }
  message = message + " ";
  for (int pos = 0; pos < message.length(); pos++) {
    lcd.setCursor(0, row);
    lcd.print(message.substring(pos, pos + lcdColumns));
    delay(delayTime);
  }
}

void setup_wifi() {
  delay(10);
  WiFi.mode(WIFI_STA);
  WiFi.begin(wifi_ssid, wifi_password);
  while (WiFi.status() != WL_CONNECTED) {
    delay(500);
  }
}

void setup() {
    setup_wifi();
  mqtt.setServer(mqtt_server, mqtt_port);
  mqtt.setCallback(callback);
  Serial.begin(115200);
  Serial.println("initializing...");

  WiFiClient espClient;
PubSubClient mqtt(espClient);

 mqtt.setClient(espClient);
  mqtt.setServer(mqtt_server, 1883);

mqtt.setCallback(callback);
   mqtt.subscribe("escape/display1/#");

  lcd.init();                        // Initialize I2C LCD module
  lcd.backlight();                   // Turn backlight ON

  lcd.setCursor(0, 0);               // Go to column 0, row 0
  lcd.print("Init");
  lcd.setCursor(0, 1);               // Go to column 0, row 1
  lcd.print("Display #1");

  encoder = new RotaryEncoder(PIN_IN1, PIN_IN2, RotaryEncoder::LatchMode::TWO03);

  // register interrupt routine
  attachInterrupt(digitalPinToInterrupt(PIN_IN1), checkPosition, CHANGE);
  attachInterrupt(digitalPinToInterrupt(PIN_IN2), checkPosition, CHANGE);

 pinMode(push, INPUT_PULLUP);
}

void reconnect() {
  // Loop until we're reconnected
  while (!mqtt.connected()) {
    // Create a random client ID
    String clientId = "ESP8266Client-";
    clientId += String(random(0xffff), HEX);
    // Attempt to connect
    if (mqtt.connect(clientId.c_str())) {
      // Once connected, publish an announcement...
      mqtt.publish("escape", "display1 connected");
      // ... and resubscribe
      mqtt.subscribe("escape/display1/#");
    } else {
      // Wait 5 seconds before retrying
      delay(5000);
    }
  }
}

void callback(char* topic, byte* payload, unsigned int length) {

payload[length]= '\0';
char * charPointer = (char *)payload;
String s="";
s =charPointer;
s = s + "               ";
    String topicStr = topic;

if (topicStr == "escape/display1/clear"){
   lcd.clear();
}
if (topicStr == "escape/display1/1in"){
  lcd.setCursor(0, 0);               // Go to column 0, row 1
  lcd.print(s.substring(0, 16));
}
if (topicStr == "escape/display1/2in"){
  lcd.setCursor(0, 1);               // Go to column 0, row 2
  lcd.print(s.substring(0, 16));
}
if (topicStr == "escape/display1/3in"){
  lcd.setCursor(-4, 2);               // Go to column 0, row 3
  lcd.print(s.substring(0, 16));
}
if (topicStr == "escape/display1/4in"){
  lcd.setCursor(-4, 3);               // Go to column 0, row 4
  lcd.print(s.substring(0, 16));
}
    }

void loop() {
   if (!mqtt.connected()) {
    reconnect();
  }
    mqtt.loop();

  static int pos = 0;

  encoder->tick(); // just call tick() to check the state.

  int newPos = encoder->getPosition() / 2;
    if (pos != newPos) {
    String nr="";
    Serial.print("pos:");
    Serial.print(newPos);
    Serial.print(" dir:");
    Serial.println((int)(encoder->getDirection()));
    pos = newPos;
 // hier nog iets mee doen
   // zonder setPos moet je eerst lang clockwise voordat weer gaat tellen
    // met setPos blijft 0
   // if (pos < 0){
    //  pos = 0;
   //     encoder->setPosition(0);
   // }

    nr = pos + "        ";
    lcd.setCursor(10, 3);               // Go to column 10, row 3
  lcd.print(pos);
  lcd.print("   ");
  }

  temp = digitalRead(push);
  if (temp == LOW) {

char msg_out[20];
sprintf(msg_out, "%d",pos);
        mqtt.publish("escape/display1/rotary", msg_out);
  }

}
I’ve been playing tin whistles/low whistle for a long time, but I love flutes.
My first try on a Concert metal flute was in a bus with the “Eendracht” to germany. There is a photo but i’ve trashed stuff a long time ago. A old girlfriend (Noelle) let me try it. Apparently I didn’t do it that badly.
Now 30 odd years later, I picked it up again. But now on the Irish Wooden flute.
We bought it 10+ years, and occasionally I pick it up and try to play some slow airs.
I love the sound of flutes. But I’m bad at lip embouchure. The Irish Flute makes it even harder, there is no Lip plate.
We have some books, and Coline attended to the Flute lessons in Ireland.
(Some are Uilleann/ Low Whistle tunes I already know) Having a large collection of tunes does not make it easy. But having trouble myself to get all the octaves correct, I limit myself to certain tunes.
I’ll post some progress / examples at a later date.
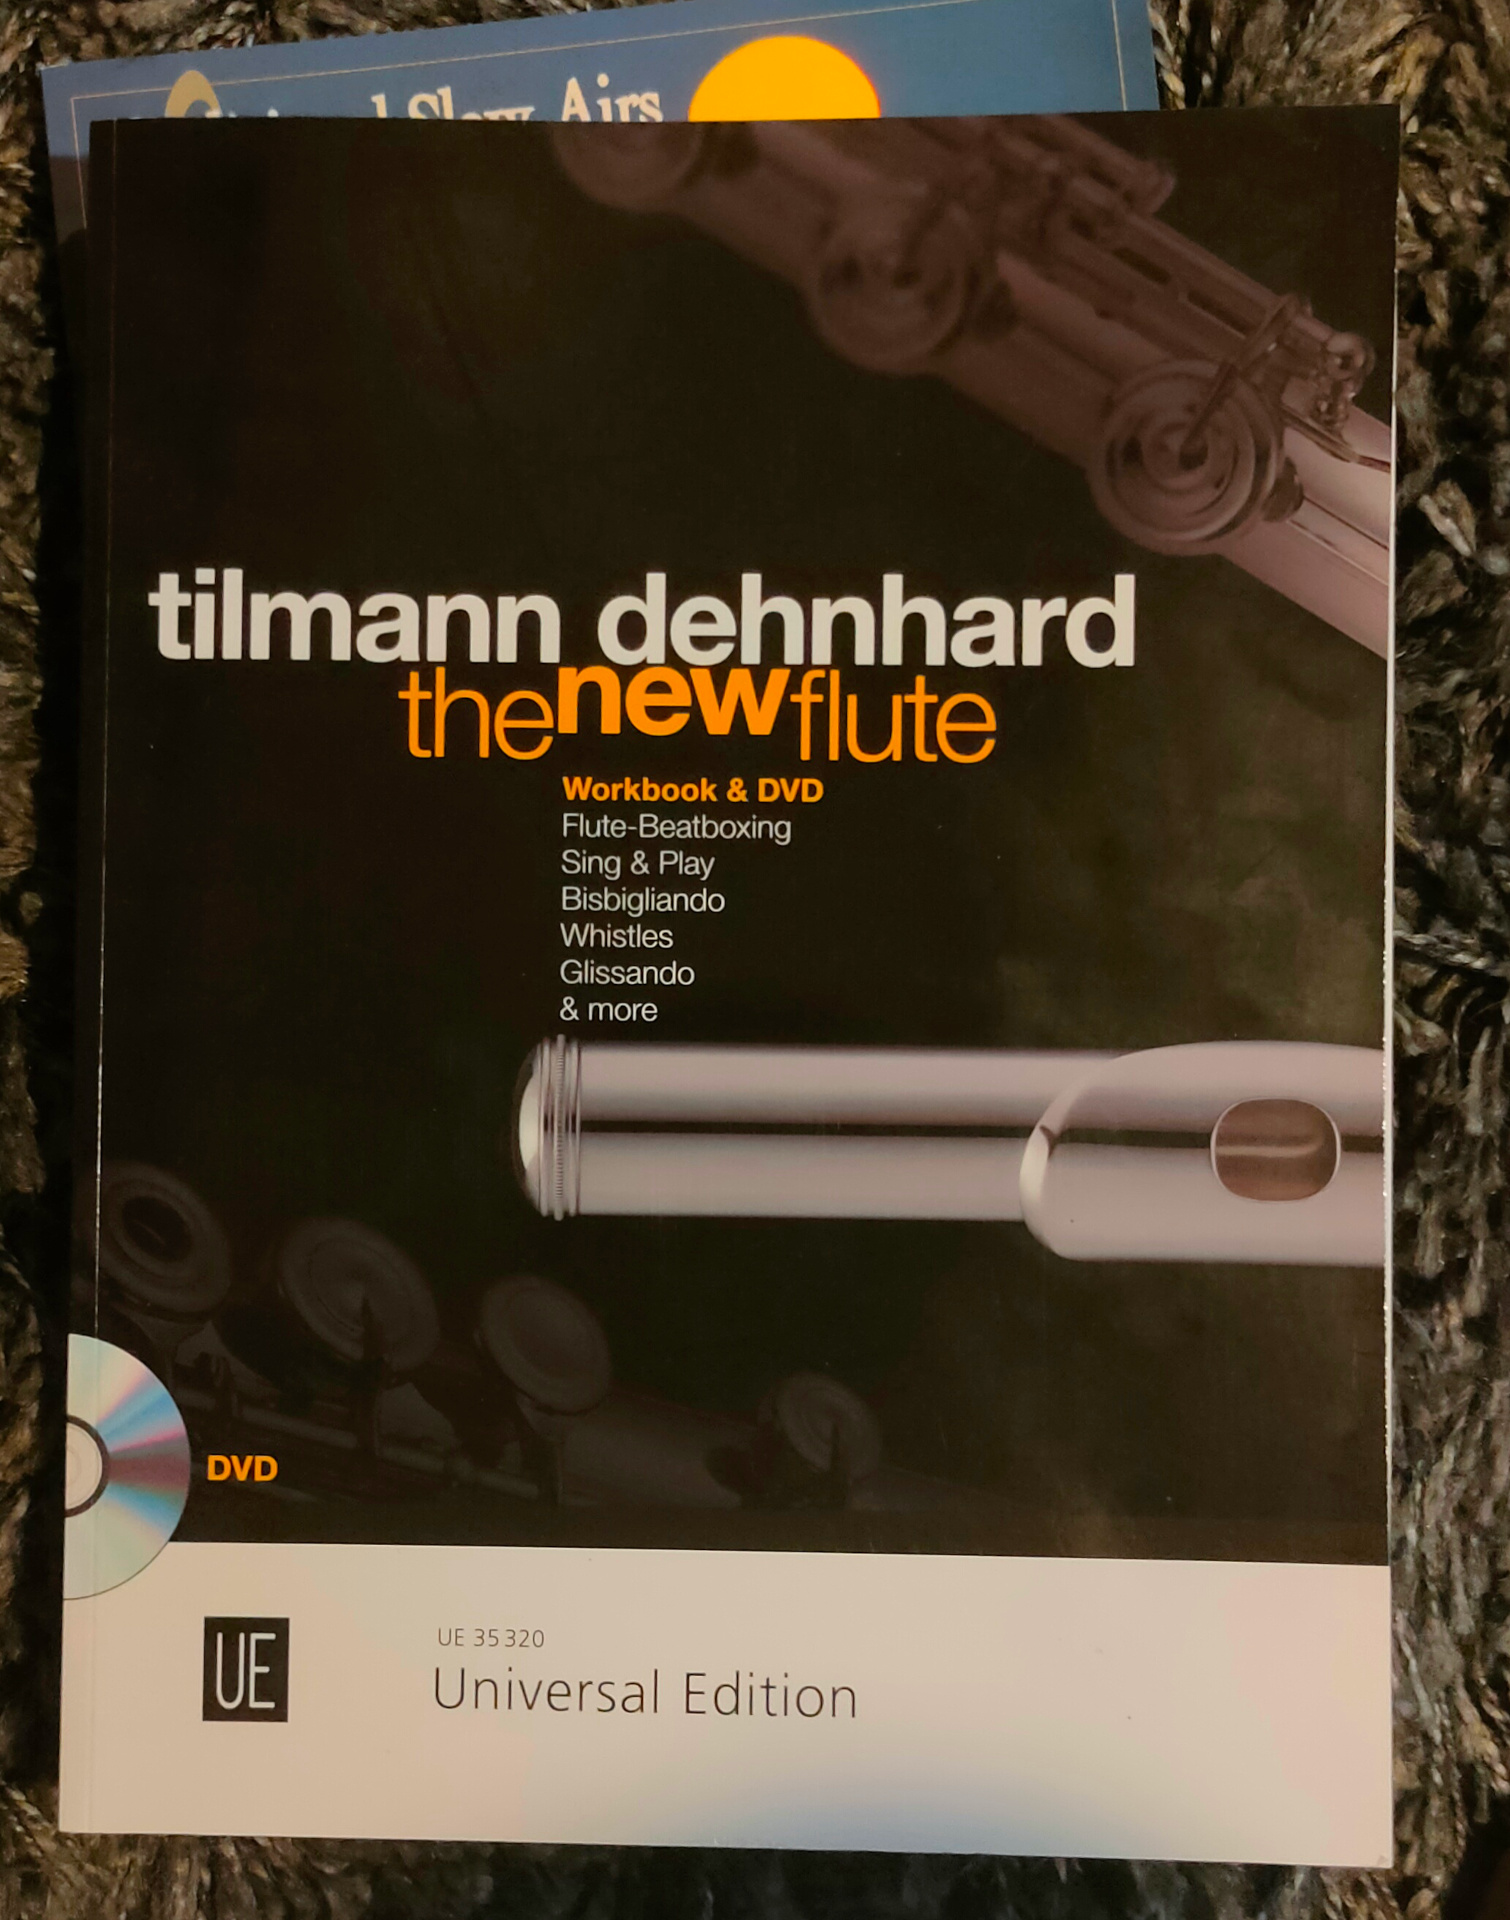
charset=InvalidCharsetId 8
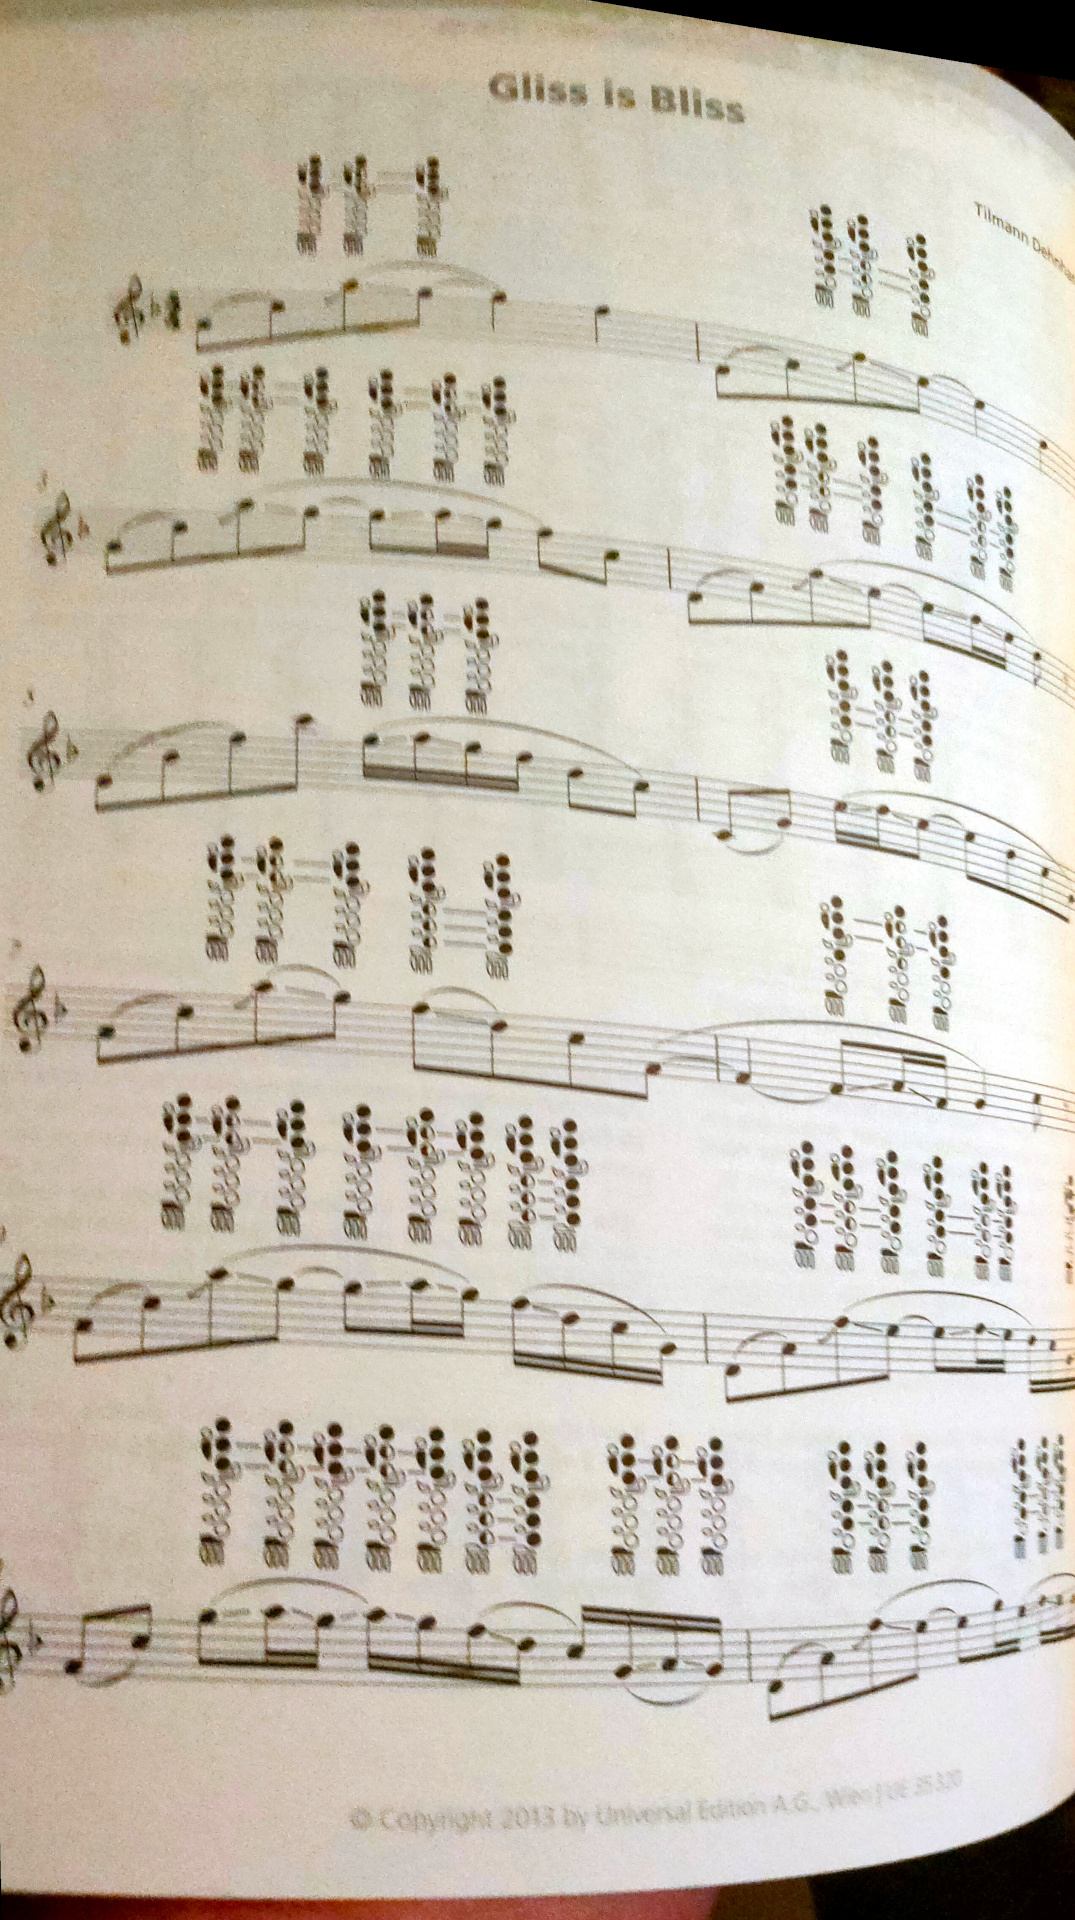
Very interesting book and DVD!
Yes, we even tried beatboxing with the flute. (see below)
Some nice flute playing below:
And the best players (according to my opinion)
Sir James Galway Matt Malloy Michael McGoldrick Jethro Tull Séamus Tansey Calum Stewart – I play one of his tunes on Uilleann Paddy Carty Robert Harvey Flook stuff
Egyptian flutes are amazing : Lookup Erik the Flutemaker for more exceptional flutes.
Pan flutes from Peru and some asian bamboo flutes are amazing also
I’ve made a overtone flute a while ago, these ones doesn´t have holes. I’ll post something about those soon.
The last example with overtone reminds me to post my findings about. (Mongolian) throatsinging, overtone flutes and Altai playing. (look it up .. amazing, We’ve been to a Hanggai concert) But i’m drifting away from flutes and the topic in general.
Above McGoldrick with some Fred Morrison tunes i also play.
I was needing ALL GPIO pins, even RX/TX ( see trick below) When doing so, you can’t use serialprint. Do NOT enable, your sketch won’t work!
Don’t use pullup on D8, you can’t upload to the wemos if you do that
Due to library conflicts in keypad.h, DON’T change the order in the source. You will end up with compile errors!
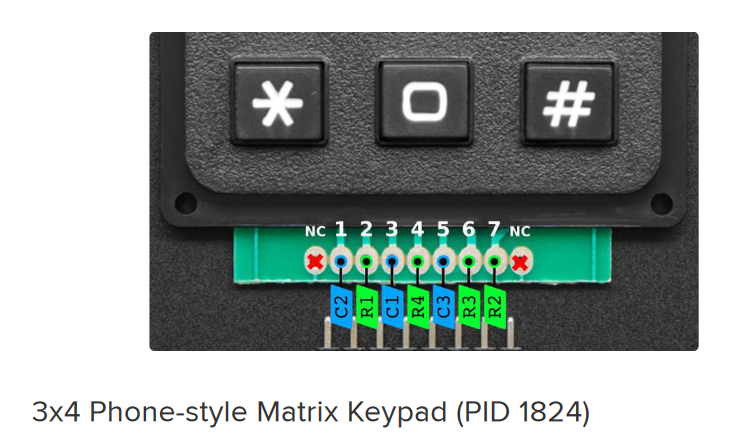
The keypad has a weird pinout, but there are similar keypads with alternative layouts. Measure this using a multimeter.
The pull-up resistors will help fighting ghost key presses!
I2C needs D1/D2
To use RX/TX as GPIO pins you need to do the following:
//Define pins
  int led = 1; //tx
  int col = 3; //rx

// Change to function mode 3
// see https://www.esp8266.com/wiki/doku.php?id=esp8266_gpio_pin_allocations
  pinMode(1, FUNCTION_3);
  pinMode(3, FUNCTION_3);

// Revert to normal mode
// pinMode(1, FUNCTION0);

// Define mode input/output
// i'm using led to control the led so thats an output
// I'm using col for the keypad column scanner, that's an input
  pinMode(led, OUTPUT);
  pinMode(col, INPUT);
Complete code
The (*) clears input The (#) sends the pin code using MQTT
Sending a 0 or 1 to escape/keypadin topic will toggle the led
A friend needed to scrape data from an authenticated website. This needs to be scripted and processed without human intervention.
Following steps are needed to get the correct curl commands (one time only)
Login page
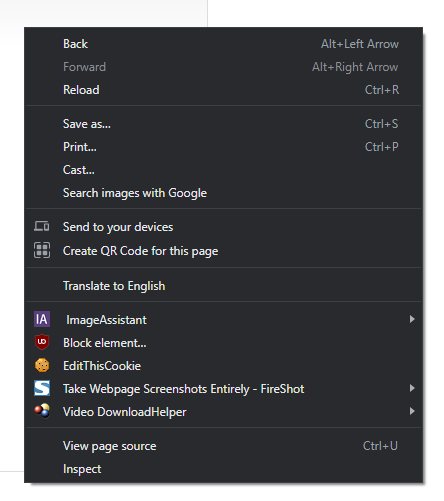
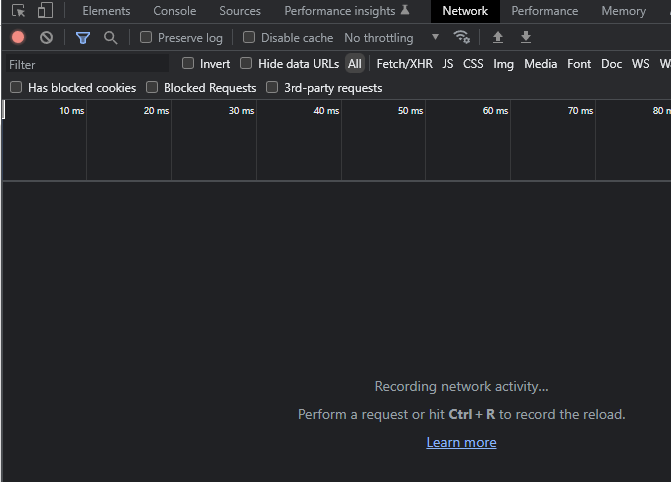
Press F12 or right-click inspect
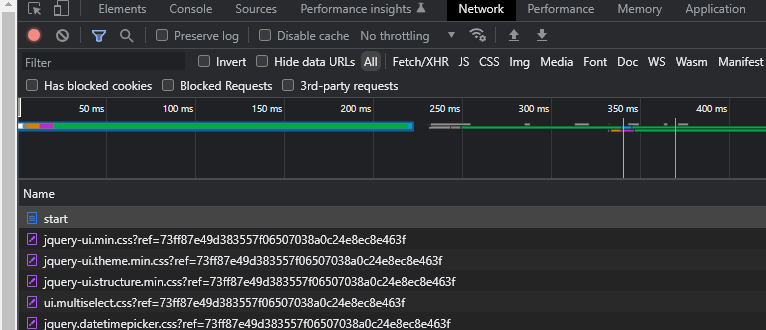
Click network and reload using ctrl-r
Select the start page and right click
copy as cURL (bash)
next steps
save curl command in a file
remove –compresssion and -H ‘Cookie: JSESSIONID=?????????????????????????????’
add just after curl
-k (no certificate check) and –cookie-jar tmpcookiefile
excecute this. It will give you a file with a session id and a true field. (This will change at every login) but is needed for subsequential requests
Next: use this sessioncookie to get the next authenticated request
So to scrape with login, you need two lines in your script. One to get the session cookie. (YOUR username/pass will be in here!!) And the second to get the needed page using the cookie