~/.dosbox/dosbox-*.conf
;-------- bottom part
[autoexec]
# Lines in this section will be run at startup.
# You can put your MOUNT lines here.

mount c: /home/myusername/projects/dos
c:
The files
A.BAT – Runs editor, masm,linker (start with a<space>progname
DEBUG.COM – msdos debugger
EXE2BIN.EXE – exe to com (if segments allow)
GFX.ASM – example template (see below)
LINK.EXE – masm linker
MASM.EXE – masm compiler
Q* – editor stuff
Q.EXE – editor
SR.EXE – sourcer
SYMDEB.EXE
TASM.EXE – turbo assembler
TD.EXE – turbo debugger
TLINK.EXE – turbo linker
Template
; everything in 64k CS, DS, and SS are the same
.model small
; start pointer
.stack 100h
.code
start:
	; set mode 13 (320x200 * 265 colors palette)
    mov ah,0
    mov al,13h
    int 10h

    ; set pixel in the middle color 2 (cyan)
    mov ah,0ch
    mov al,2
    mov cx,160
    mov dx,100
    int 10h

	; wait key input
    mov ah,0
    int 16h

	; set mode back to text
    mov ah,0
    mov al,3
    int 10h

	; exit to dos
    mov ax,4c00h
    int 21h
end start
Usage
start dosbox a gfx (edit gfx.asm example) esc, q, e gfx (run program)
Today I was working on my own brew ISA card (wirewrapping). Did some mini modeling stuff. Sorted some pipetunes. And played around with my 8086.
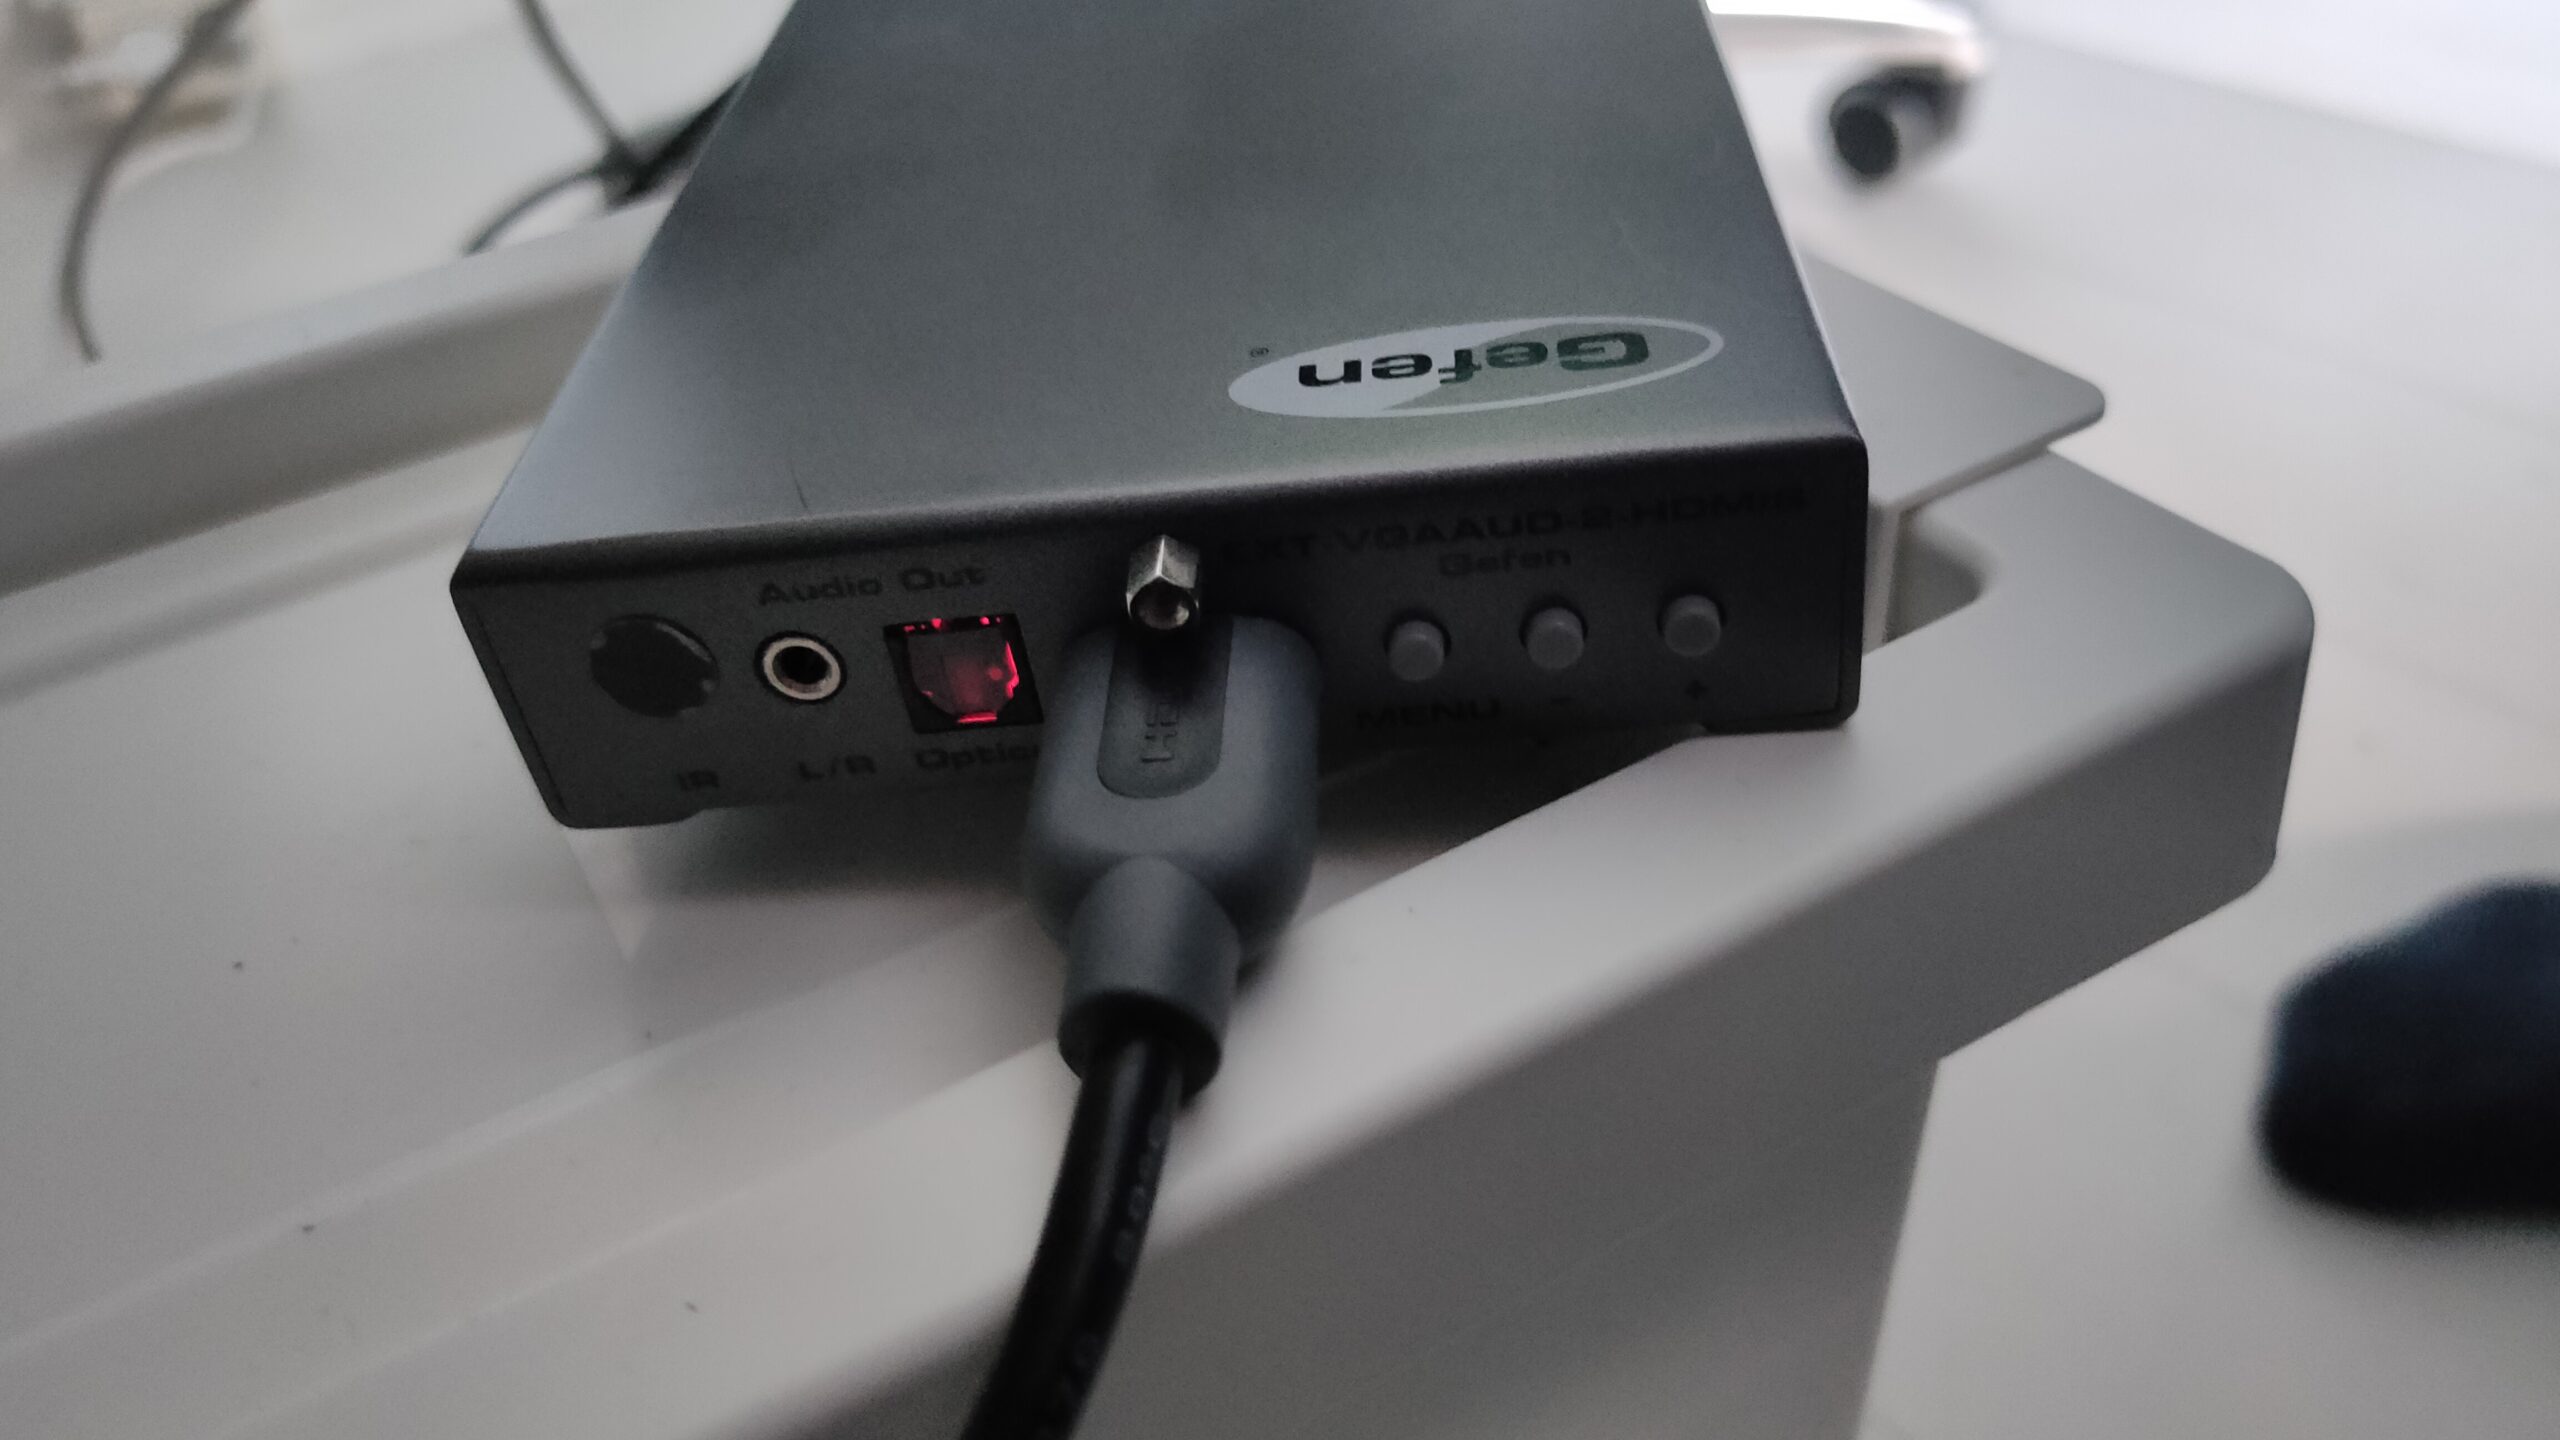
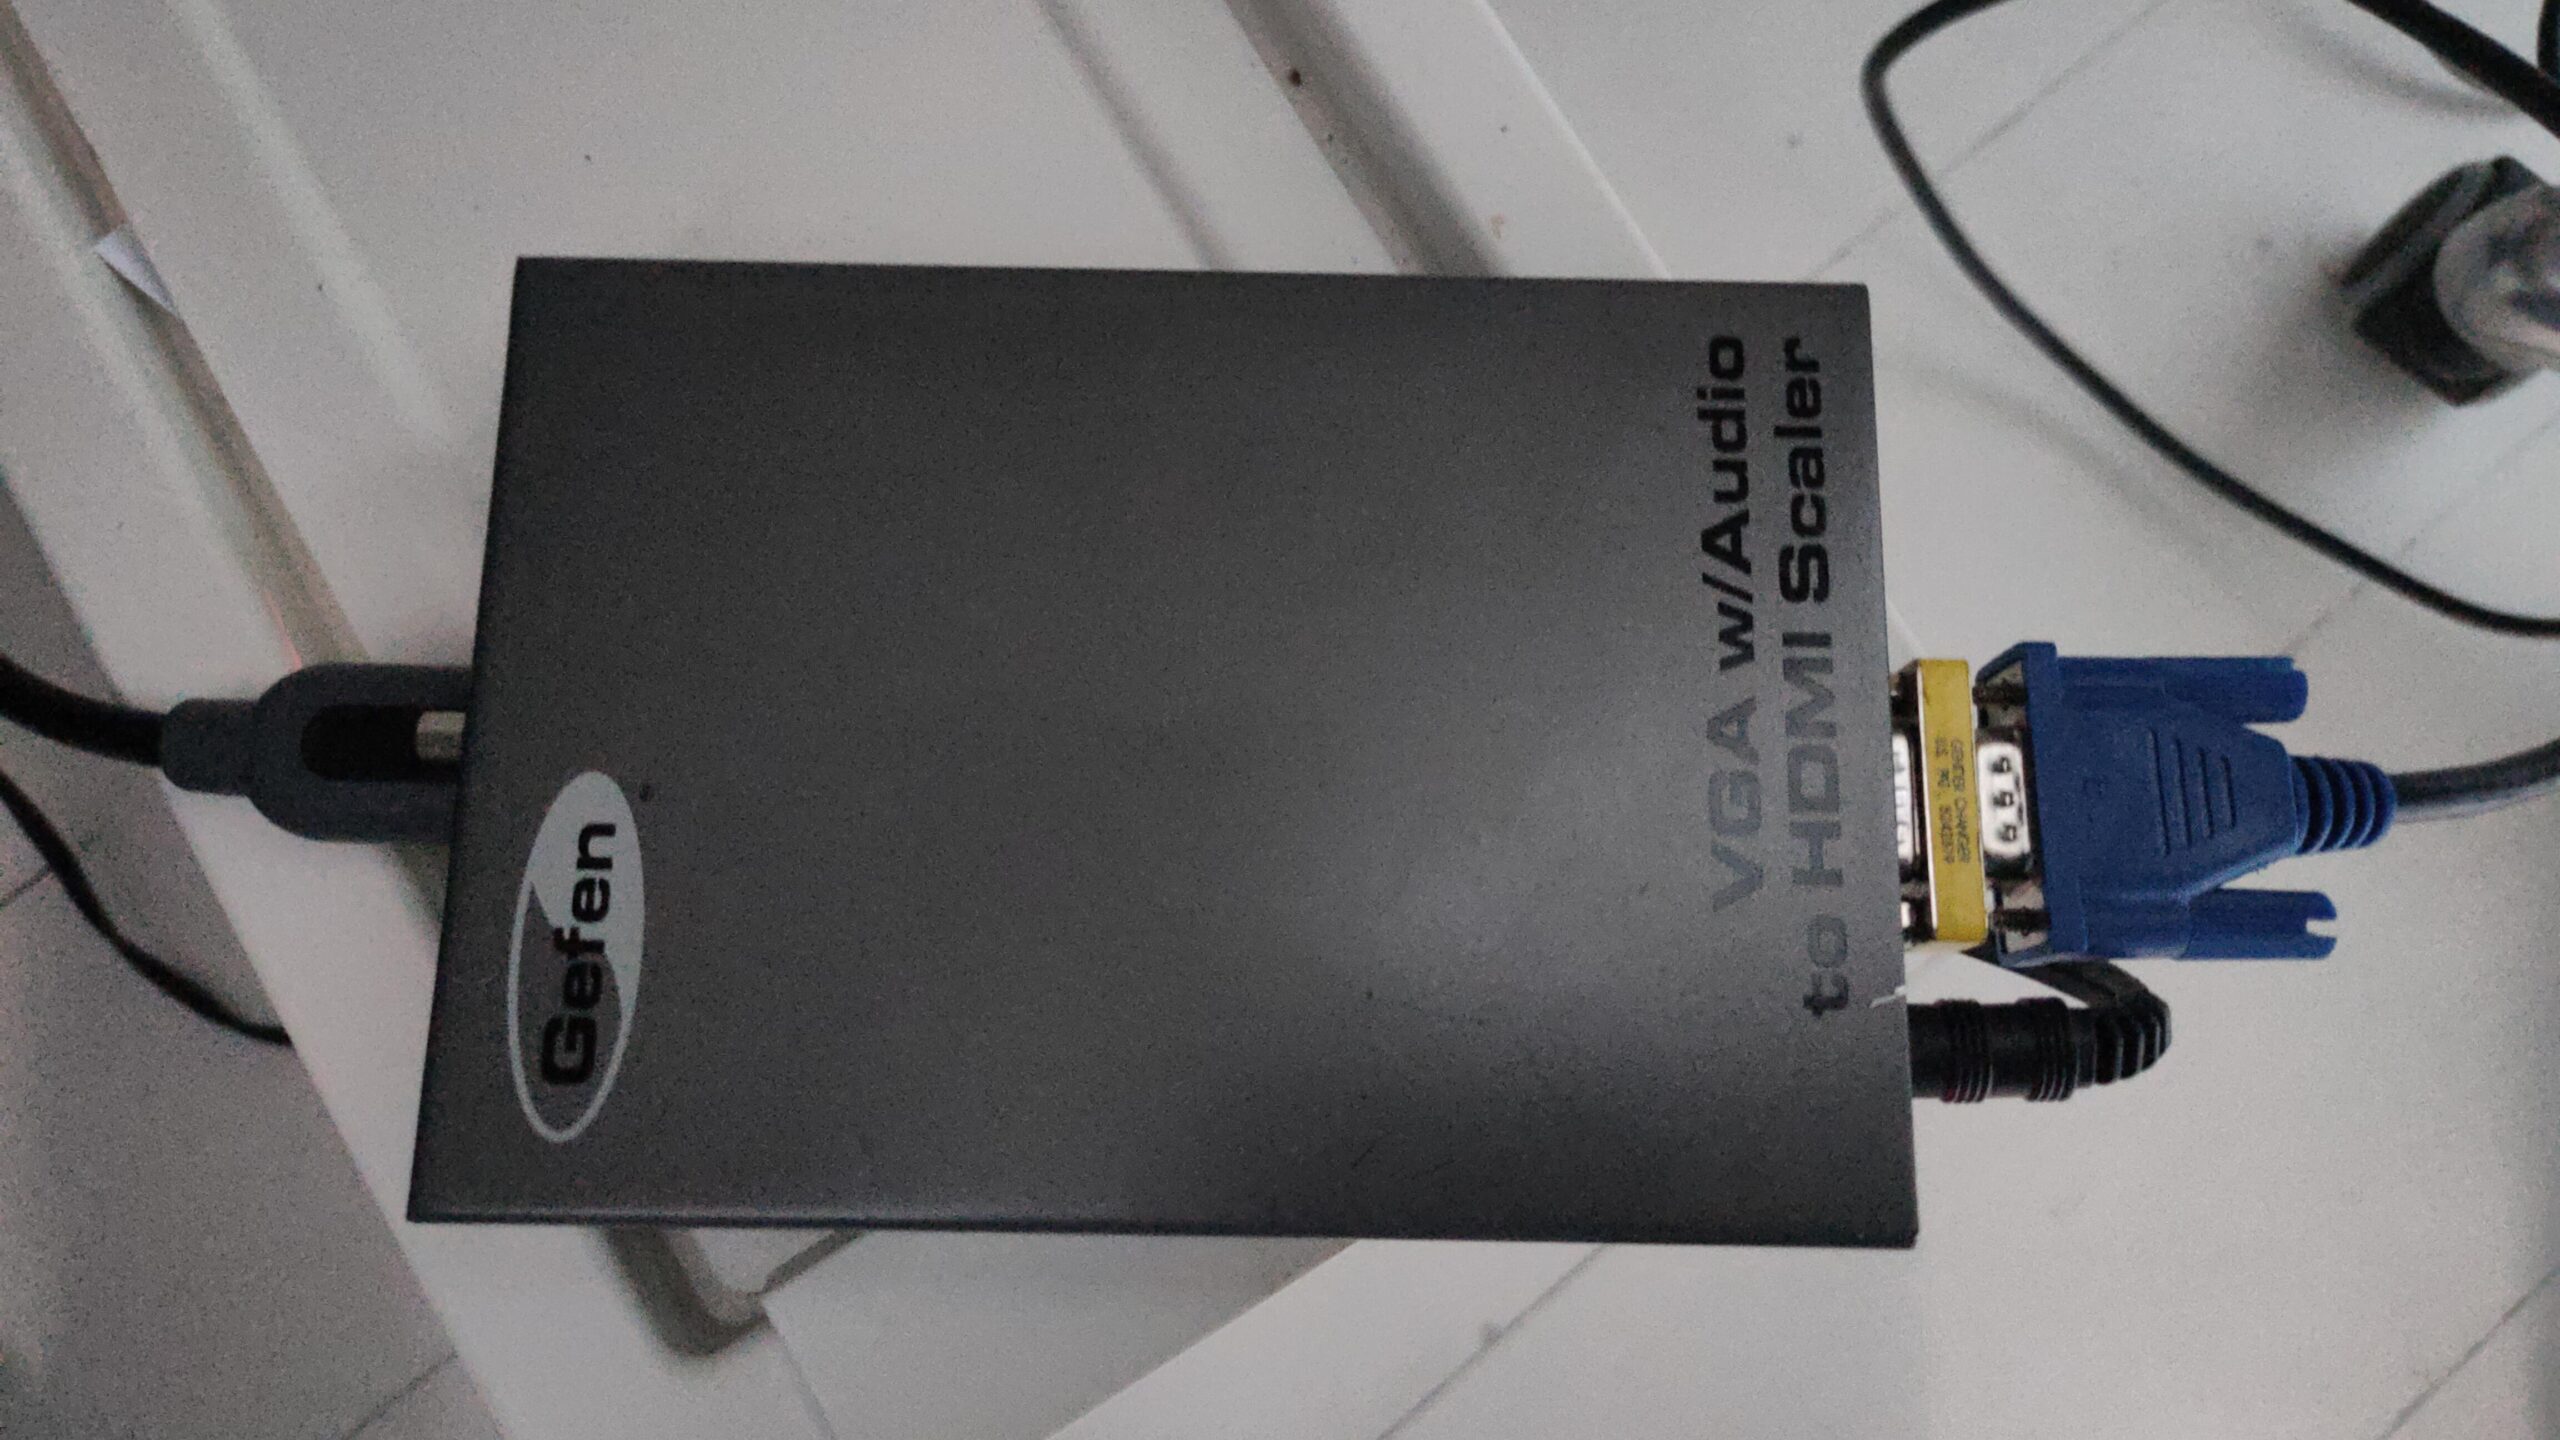
Got it on a desk now, and replaced the harddisk with the CF card. Also got an old SoundBlaster working, so i wanted to see what of my old code could still run. Apparanty most code was compiled for 386/486 🙁 So i recompiled some stuff. Below a horizontal scroller example.
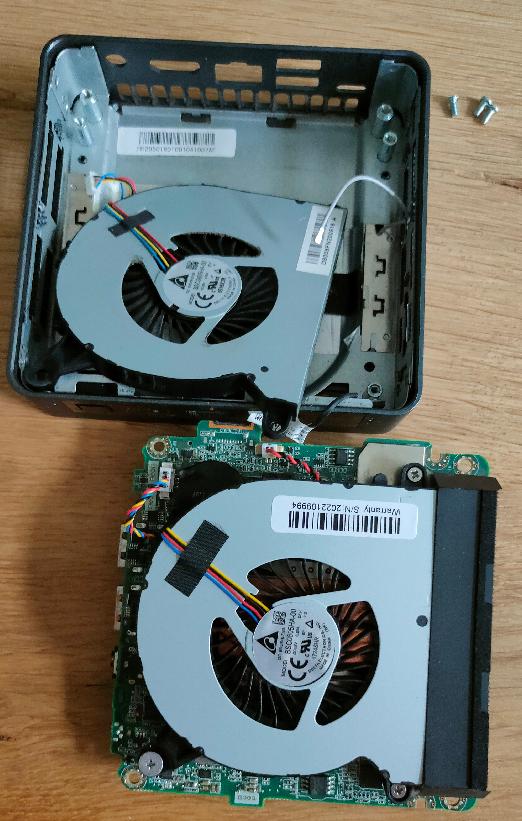
Meanwhile i got my new fans in for my NUC (Kodi player, it was making a hell of a noise due to bad ball bearings.
Adding a picture: Most used is loading a koala picture. Never done it like this before, luckily loads of retro lovers are posting code examples. There are a lot of tools now available on PC. (Windows and Linux)
Acme : compiler i’ve used for this example Retropixels : converting jpg into koala Exomizer : packing/compressing the C64 prg (16k to 5.4k) Sidreloc : relocator for SID files.
Exomizer command with effect: (NOTE on linux you have to use single qoutes!)
retropixels -r 64 --format prg bottom.jpg ; for a prg (not used)
retropixels bottom.jpg ; for a koala picture

exomizer sfx 0x080d bottom.prg -x 'lda $fb eor #$01 sta $fb beq skip dec $d020 inc $d020 skip:'
# 0x080d is the starting address
Code
!to "bottomsm.prg",cbm
; start prg
* = $0801
; header for sys auto start
!byte $0b, $08, $00, $00, $9e, $32, $30, $36, $31, $00, $00, $00

PICTURE = $2000
BITMAP = PICTURE
VIDEO = PICTURE+$1f40
COLOR = PICTURE+$2328
BACKGROUND = PICTURE+$2710

* = $080d

	sei
	lda #<irq
	ldx #>irq
	sta $314
	stx $315
	lda #$1b
	ldx #$00
	ldy #$7f
	sta $d011
	stx $d012
	sty $dc0d
	lda #$01
	sta $d01a
	sta $d019 ; ACK any raster IRQs
	lda #$00
	jsr $1000 ; Call music

	lda #$00
	sta $d020 ; Border Color
	lda BACKGROUND
	sta $d021 ; Screen Color

	; Transfer Video and Color
	ldx #$00
.LOOP
	; Transfers video data
	lda VIDEO,x
	sta $0400,x
	lda VIDEO+$100,x
	sta $0500,x
	lda VIDEO+$200,x
	sta $0600,x
	lda VIDEO+$2e8,x
	sta $06e8,x
	; Transfers color data
	lda COLOR,x
	sta $d800,x
	lda COLOR+$100,x
	sta $d900,x
	lda COLOR+$200,x
	sta $da00,x
	lda COLOR+$2e8,x
	sta $dae8,x
	inx
	bne .LOOP

	; Bitmap Mode On
	lda #$3b
	sta $d011

	; MultiColor On
	lda #$d8
	sta $d016
	; When bitmap adress is $2000 ; Screen at $0400 ; Value of $d018 is $18
	lda #$18
	sta $d018
	cli
	.MYLOOP
	jmp .MYLOOP

irq
	lda #$01
	sta $d019 ; ACK any raster IRQs
	jsr $1003 ;Play the music
	jmp $ea31

; Data parts with headers cut
	* = $1000
	!binary "bottom1000.sid" ,, $7c+2


	* = PICTURE
	!binary "bottom.kla",,2
Started with a example from https://codebase64.org/
But that didn´t work (see movie clip)
looking at the sid info:
Title Bottom
Author Richard Bayliss
Released 2011 The New Dimension
Load Address $8000
Init Address $8000
Play Address $8003
Number of tunes 1
Default tune 1
Speed $00000000
SID Model 8580
Clock PAL
File Format PSID
Format Version 2
BASIC false
PlaySID Specific false
I saw that I have to move the load/init/play address.
Luckily there is sidreloc !
wget https://hd0.linusakesson.net/files/sidreloc-1.0.tgz
tar xzvf sidreloc*
cd sidreloc
make
I found some parts of our (Edk and Me) bootloader demo.
It was compiled using masm or tasm. Encountering a problem converting the code into a raw bin, to put on a floppy I diverted to another setup to try to get things working.
Using old code (below) and a example from YT, I made the following setup.
Visual studio code, with the x64 assembly plugin. xxd as hexviewer. fasm as assembler (This makes things easier, because it is a native Linux x86 compiler. So no need for dosbox anymore.)
;-------- snip
Start:
    JMP     SHORT BootHere
    NOP
    DB      "FASH-EDK"
    DW      512
    DB      2
    DW      1
    DB      2
    DW      0070h
    DW      02d0h       ;max. aantal sectoren van volume A
    DB      0Fdh        ;media descriptor
    DW      0002h       ;aantal sectoren per FAT
    DW      0009h       ;aantal sectoren per spoor
    DW      2
    DW      0
BootHere:
    mov     bp,5
tryboot:
    push bp
    mov     bx,4000h
    mov     es,bx
    mov     bx,0
    mov     cx,2        ;vanaf sector 2
    mov     dx,0        ;drive A, kant 0
    mov     ah,02h
    MOV     AL,8
    int     13h         ;sector(en) lezen
    pop     bp
    jnc     bootok
    dec     bp
    jnz     tryboot
bootok:
    mov     bp,5
;---------- snap
New setup using fasm (bootloader) boot.asm
    org 0x7c00                  ;  still not sure about this, have not found this in our demo

    mov bx, 0x1000              ; load sector address
    mov es, bx
    mov bx, 0x0

; Sector read function
    mov dh, 0x0                 ; head 0
    mov dl, 0x0                 ; drive 0
    mov ch, 0x0                 ; cylinder 0
    mov cl, 0x02                ; start sector

readdisk:
    mov ah, 0x02                ; read sec
    mov al, 0x02                ; demo is > 512 so 2 sectors
    int 0x13                    ; call bios

    mov ax, 0x1000
    mov ds, ax
    mov es, ax
jmpcode:
    jmp 0x1000:0x0              ; far jmp demo

; Expand bin to 512 byte sector
    times 510-($-$$) db 0
    dw 0xaa55                   ; Sector header (ROM as this at the start)
Graphics demo i wrote a long time ago, converted into fasm loadpart.asm
	mov ah,0
        mov ax, 4f02h   ; Set VESA video mode
        mov bx, 10dh    ; Your video mode number
	int 10h
	mov al,0
drawall:
	mov dx,0
	mov cx,0

drawloop:
	mov ah,0ch
	mov bh,0
	push ax
	int 10h
	pop ax
	inc al
	inc cx
	cmp cx,319
	jc drawloop
	mov cx,0
	inc dx
	cmp dx,199
	jmp drawloop
jmp drawall

; complete sector with zeros
    times 512-($-$$) db 0
Booting the demo in milli seconds using qemu. Next to do: Write this to floppy and test on real hardware.
A reset starts the virtual machine and boots from a virtual floppy. The drawing of the pixels is slow, because I used a int 10h function for every pixel, instead of writing to screen memory directly.
Got a part working again in PCem. This is from our bootdemo. A scroller and sector loader in a bootsector. Needed some include files masm, link, exe2com creates a 12- sector sized floppy. And we’ve got a (little distorted but working) Scroller in boot sector with custom font!
font:   db 64 dup (0)       ;space
        db 0,0,2,2,0,0,0,0  ;!
        db 0,2,2,2,2,0,0,0
        db 0,2,2,2,2,0,0,0
        db 0,2,2,2,2,0,0,0
        db 0,0,2,2,0,0,0,0
        db 0,0,2,2,0,0,0,0
        db 0,0,0,0,0,0,0,0
        db 0,0,2,2,0,0,0,0
Ben posted a youtube about Wozmon running on his 6502.
In 1976, Steve Wozniac wrote what’s commonly known simply as Wozmon.
Wozmon is a machine-code monitor program written by Wozniak for the Apple 1. In Only 256 bytes ! Being pure 6502 code easily adaptable. A monitor program allows you to view/edit and run machine code using simple commands.
I’ve got a different setup as Ben’s computer. But changing the necessary, and it will run on my 6502.
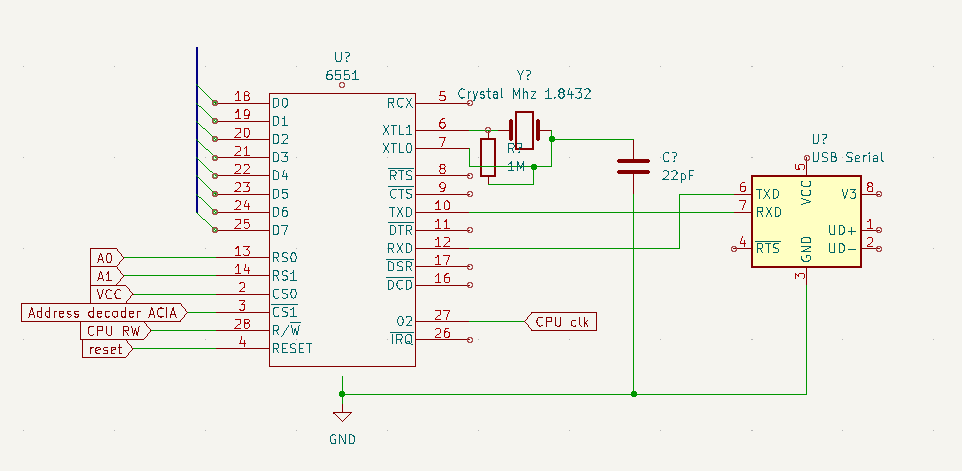
I’m not using rs232 voltage levels (-7 till -25 and +7 till +25 volts). I’m using a usb serial uart standard 5v leveling stick …
For address decoder see other post
Simplified schematic of my UART/ACIA
Compiling the Wosmon gave me an error, DEC is not a valid opcode for a bare 6502 .. but we have a 65c02. Solution: Add -c02 extra opcodes
error 1 in line 187 of "wozmon.s": illegal operand types
>                DEC                    ; Decrement A.

# fix .. add -c02
vasm6502_oldstyle -c02 -Fbin -dotdir wozmon.s
Below Apple I Manual with the sourcecode for Wozmon
When selling a large part of my computer collection I kept a few odd pieces.
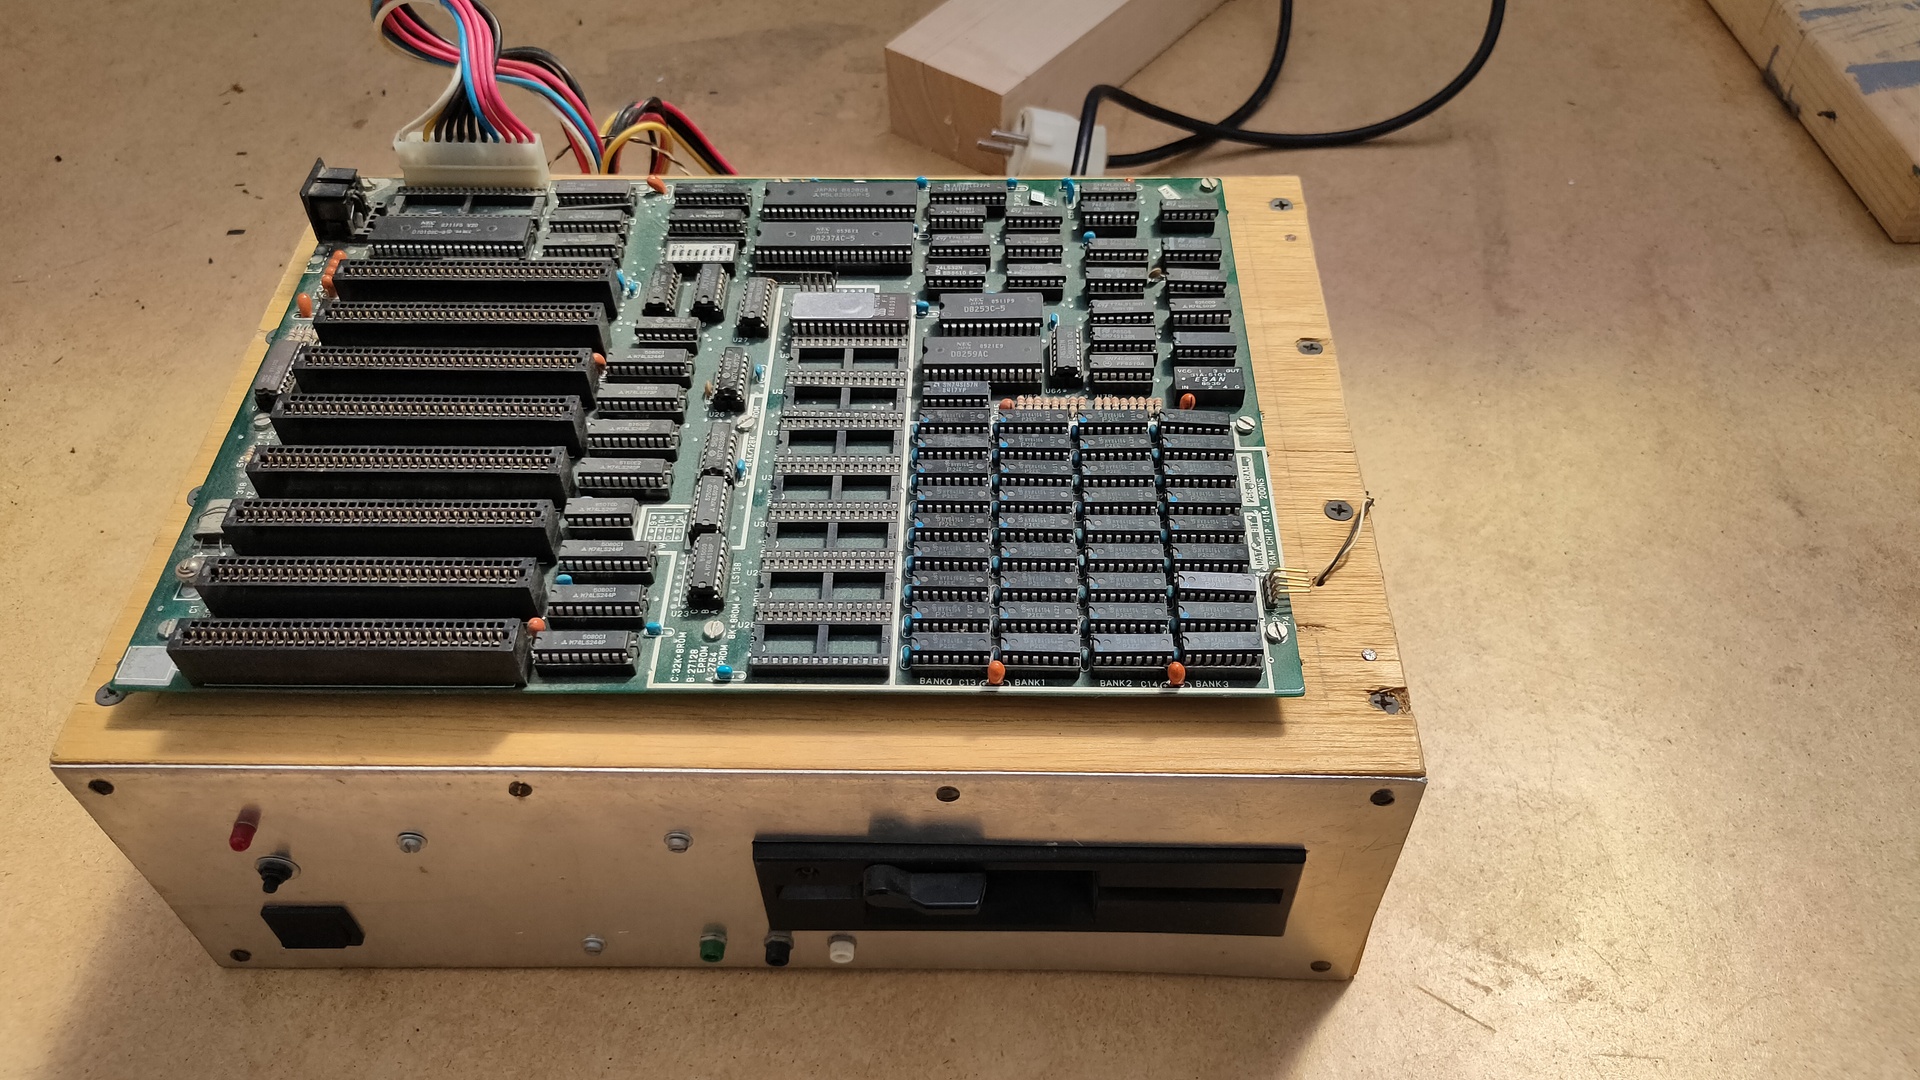
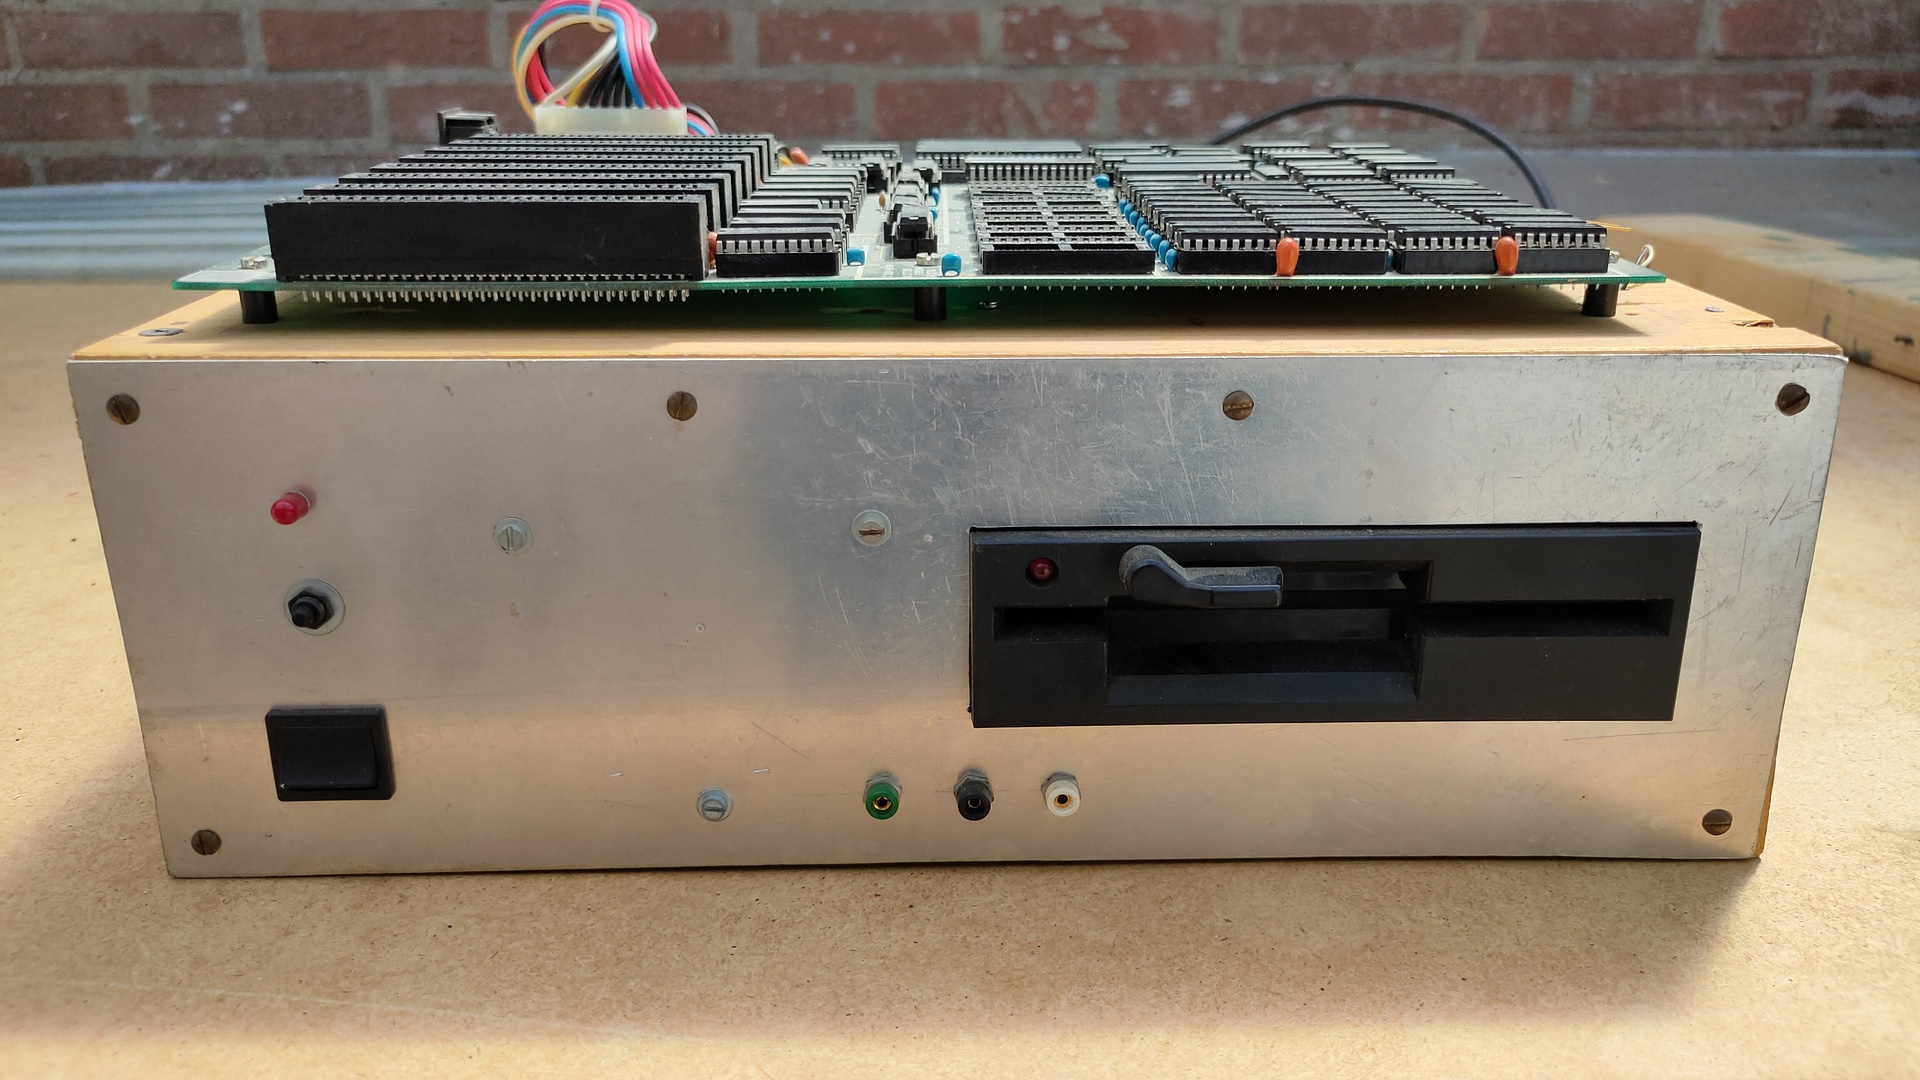
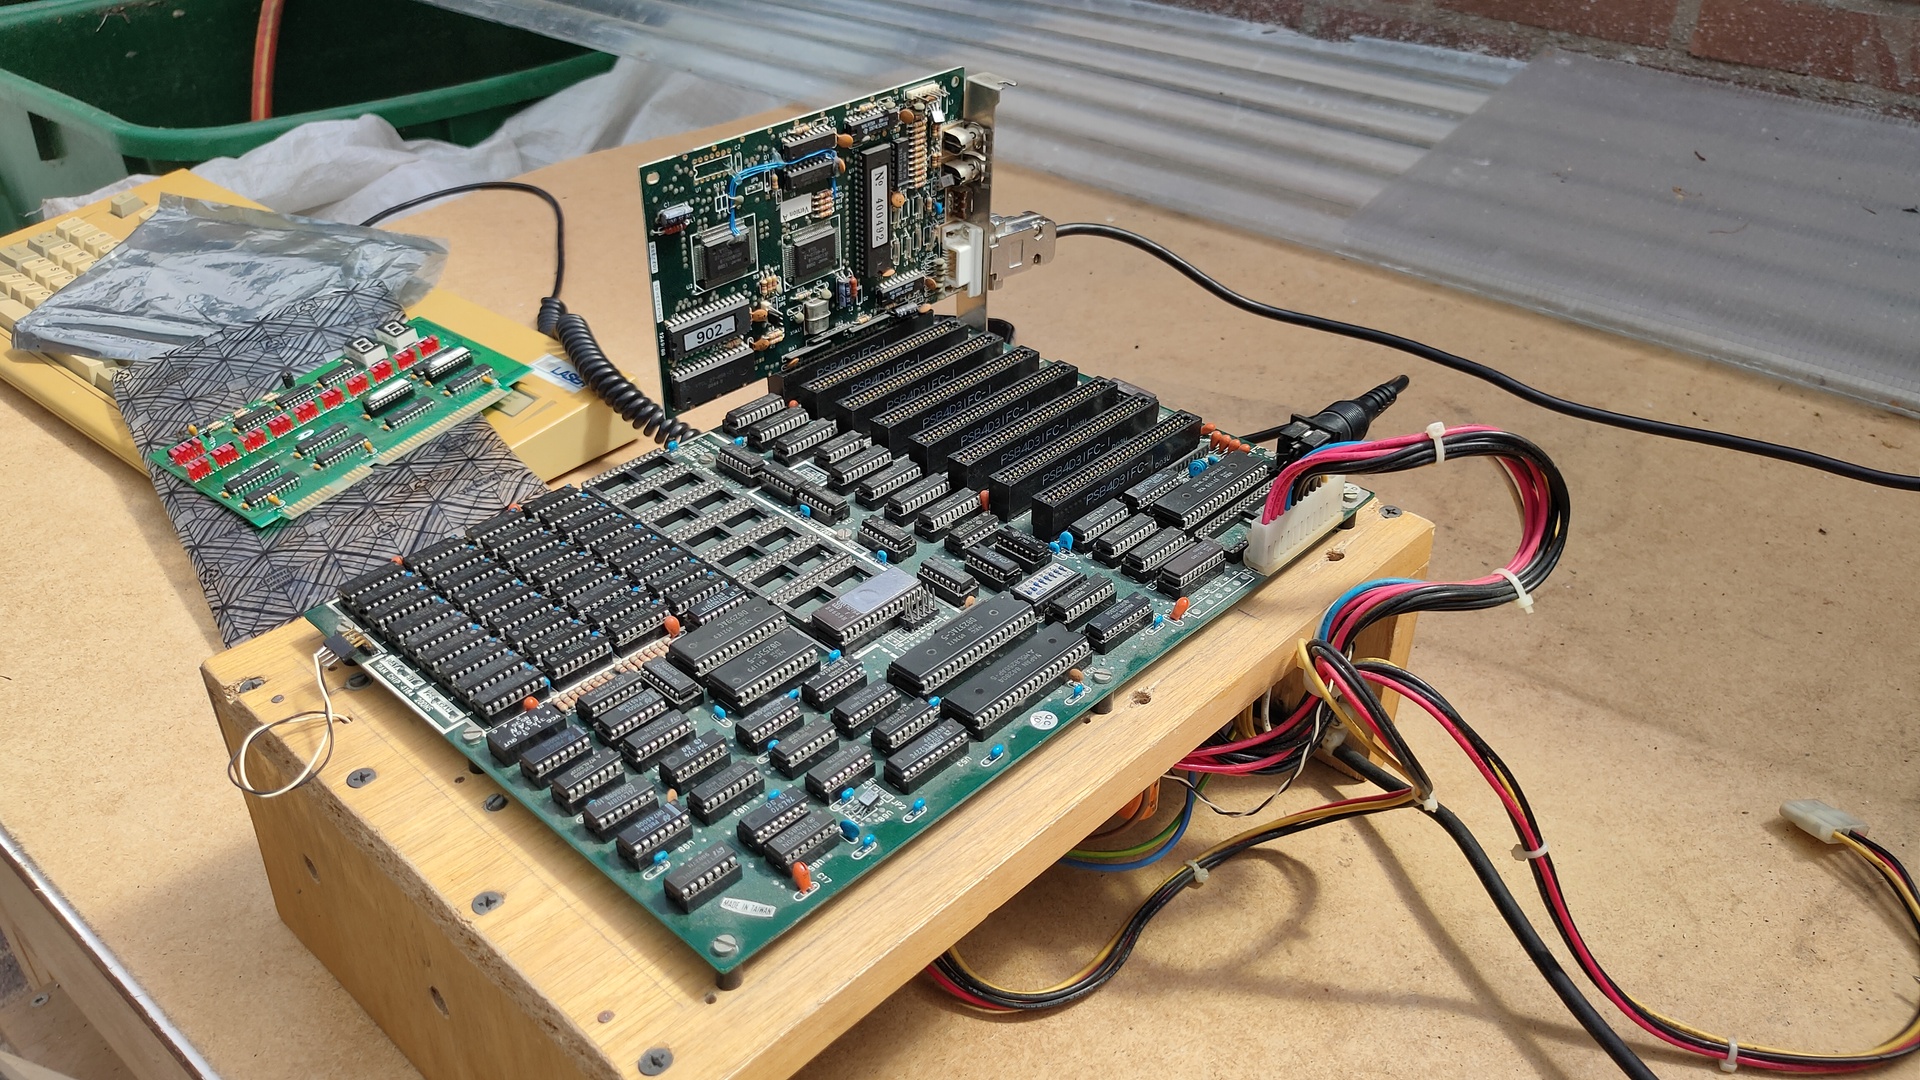
Amongst those was a 8088 DIY machine.
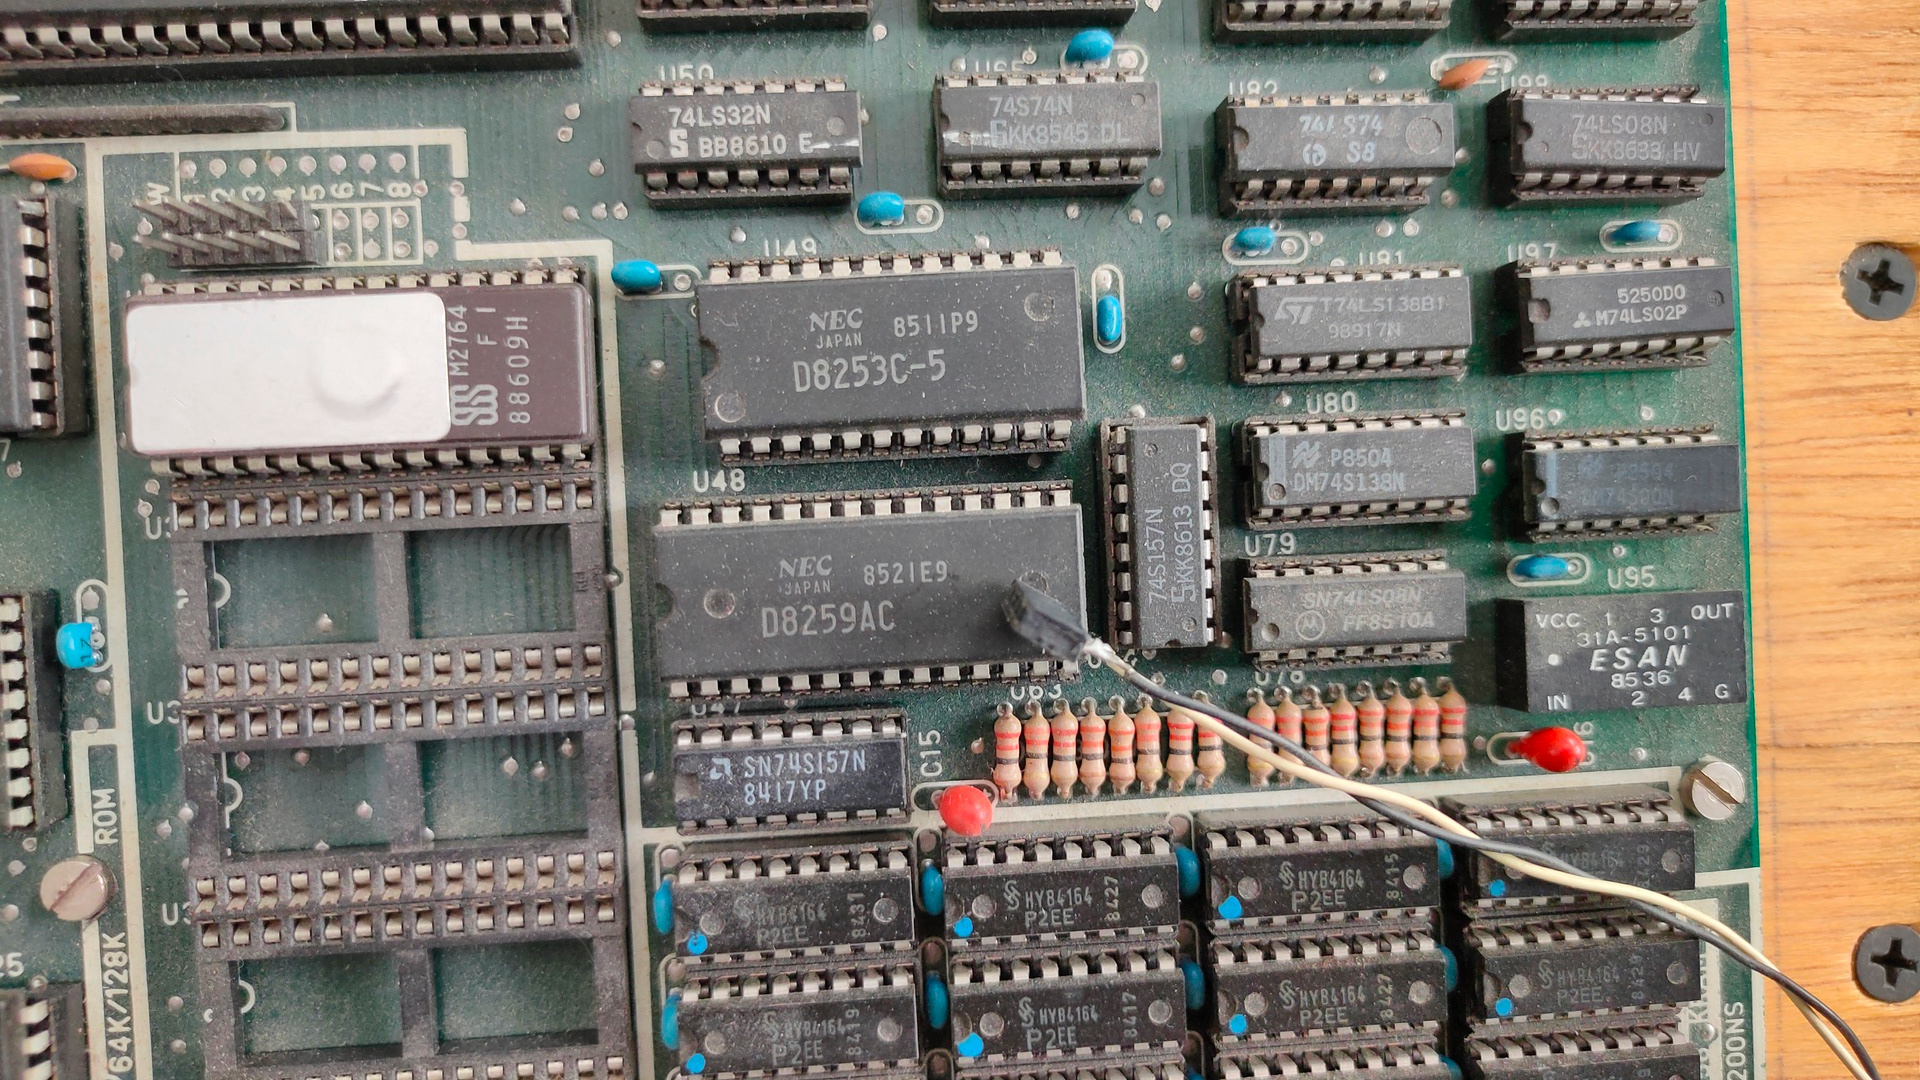
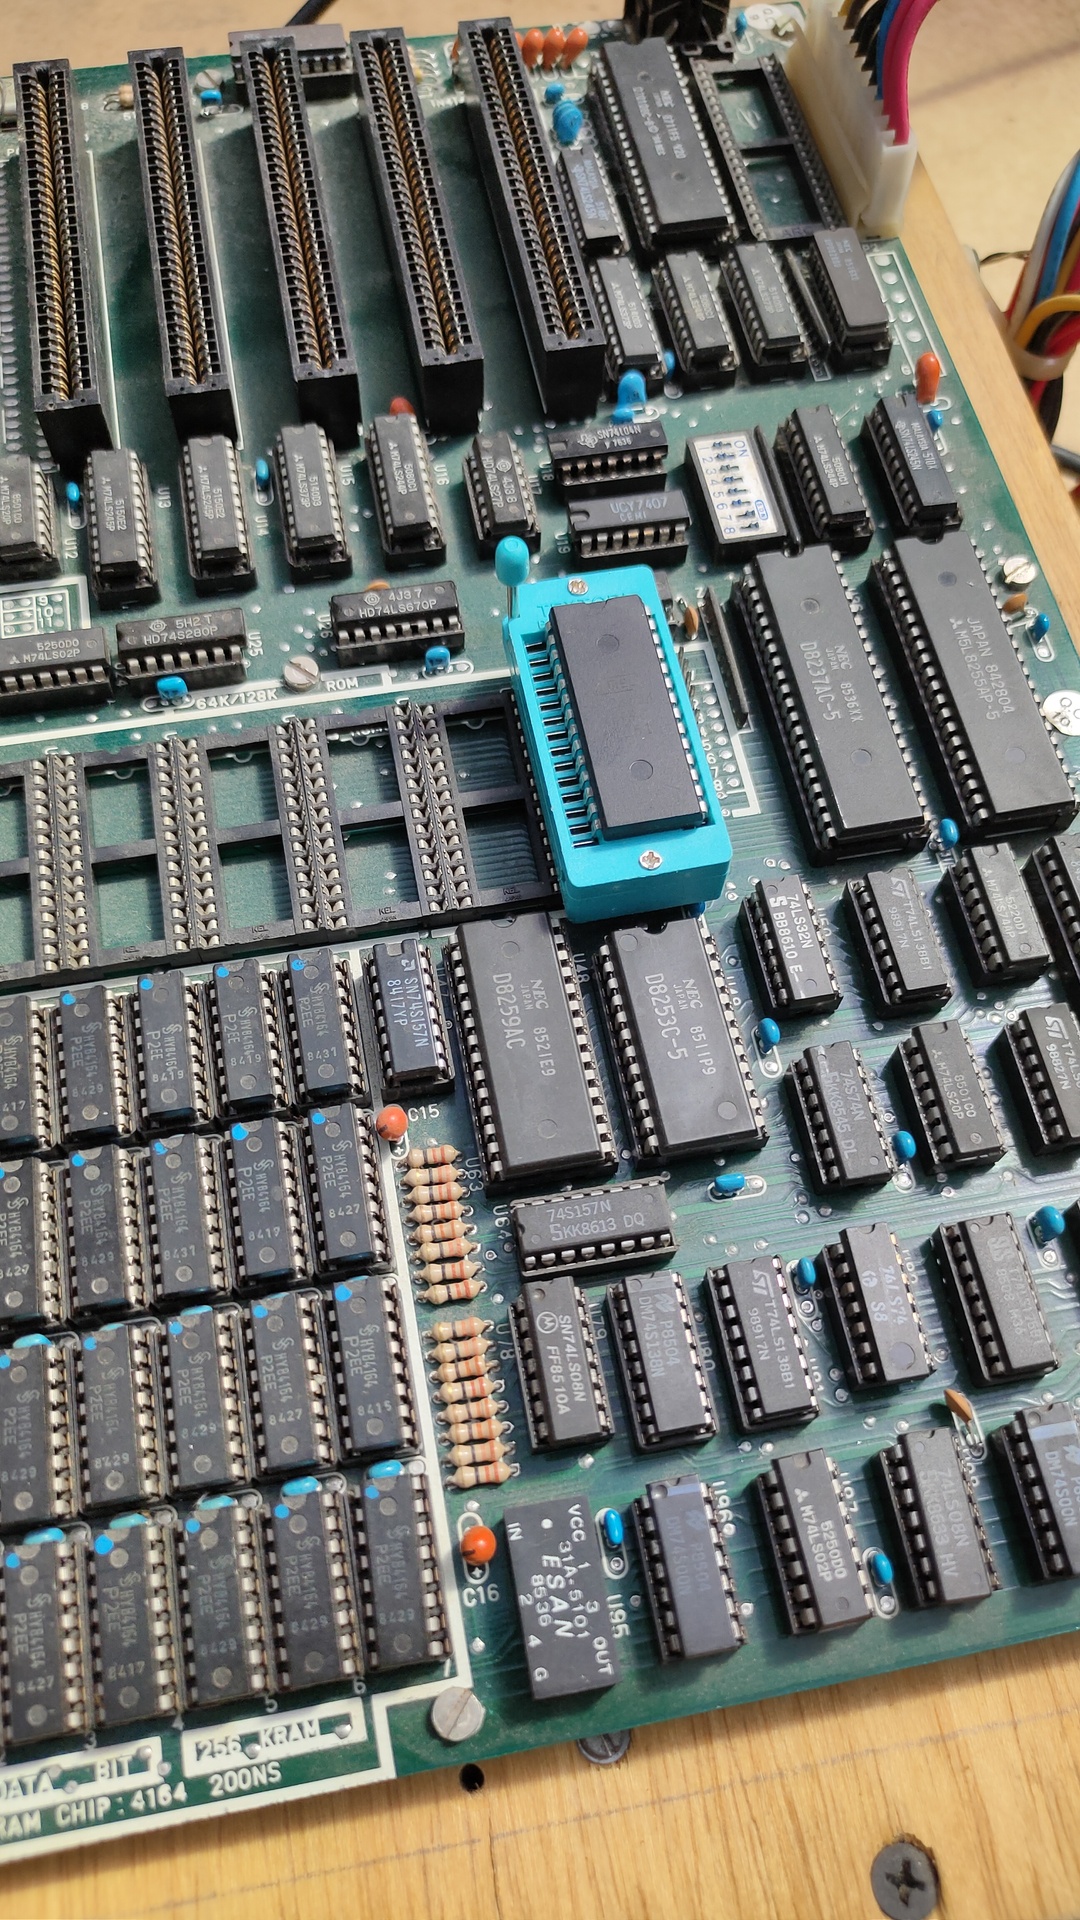
It is a 50PTX3 motherboard with a 8088 compatible CPU
Power light (Not LED) and connected to power adaptor, not motherboard
Reset button??? not connected
Power switch
Mid center, 5v gnd and 12v
5.25″ drive not connected
Bottom
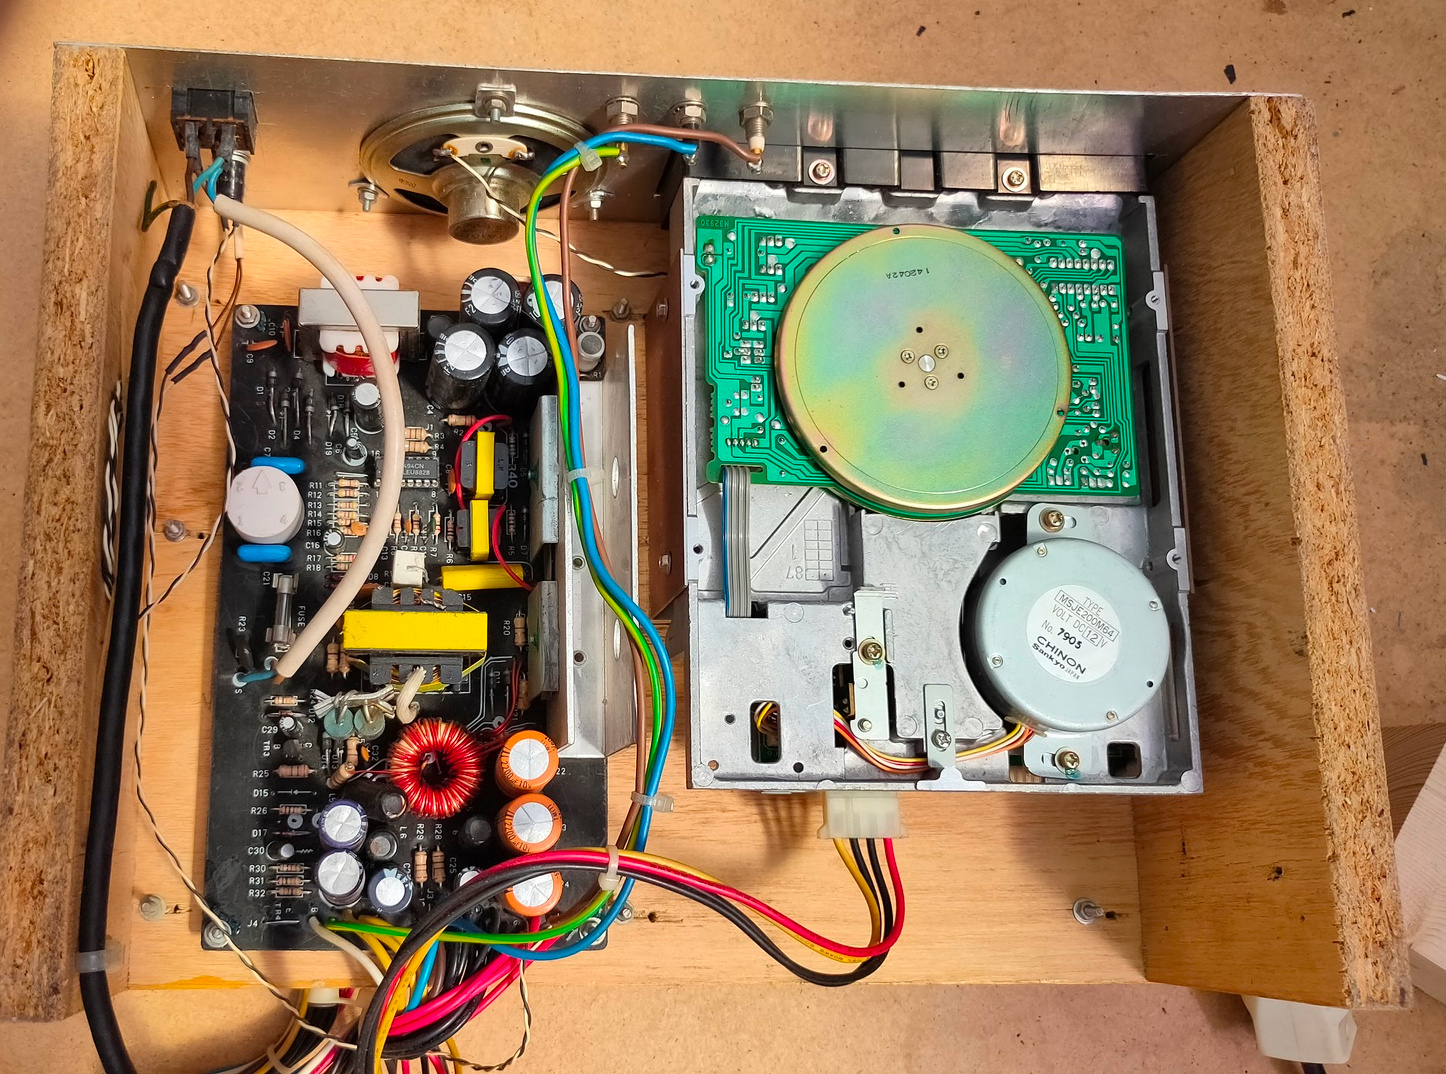
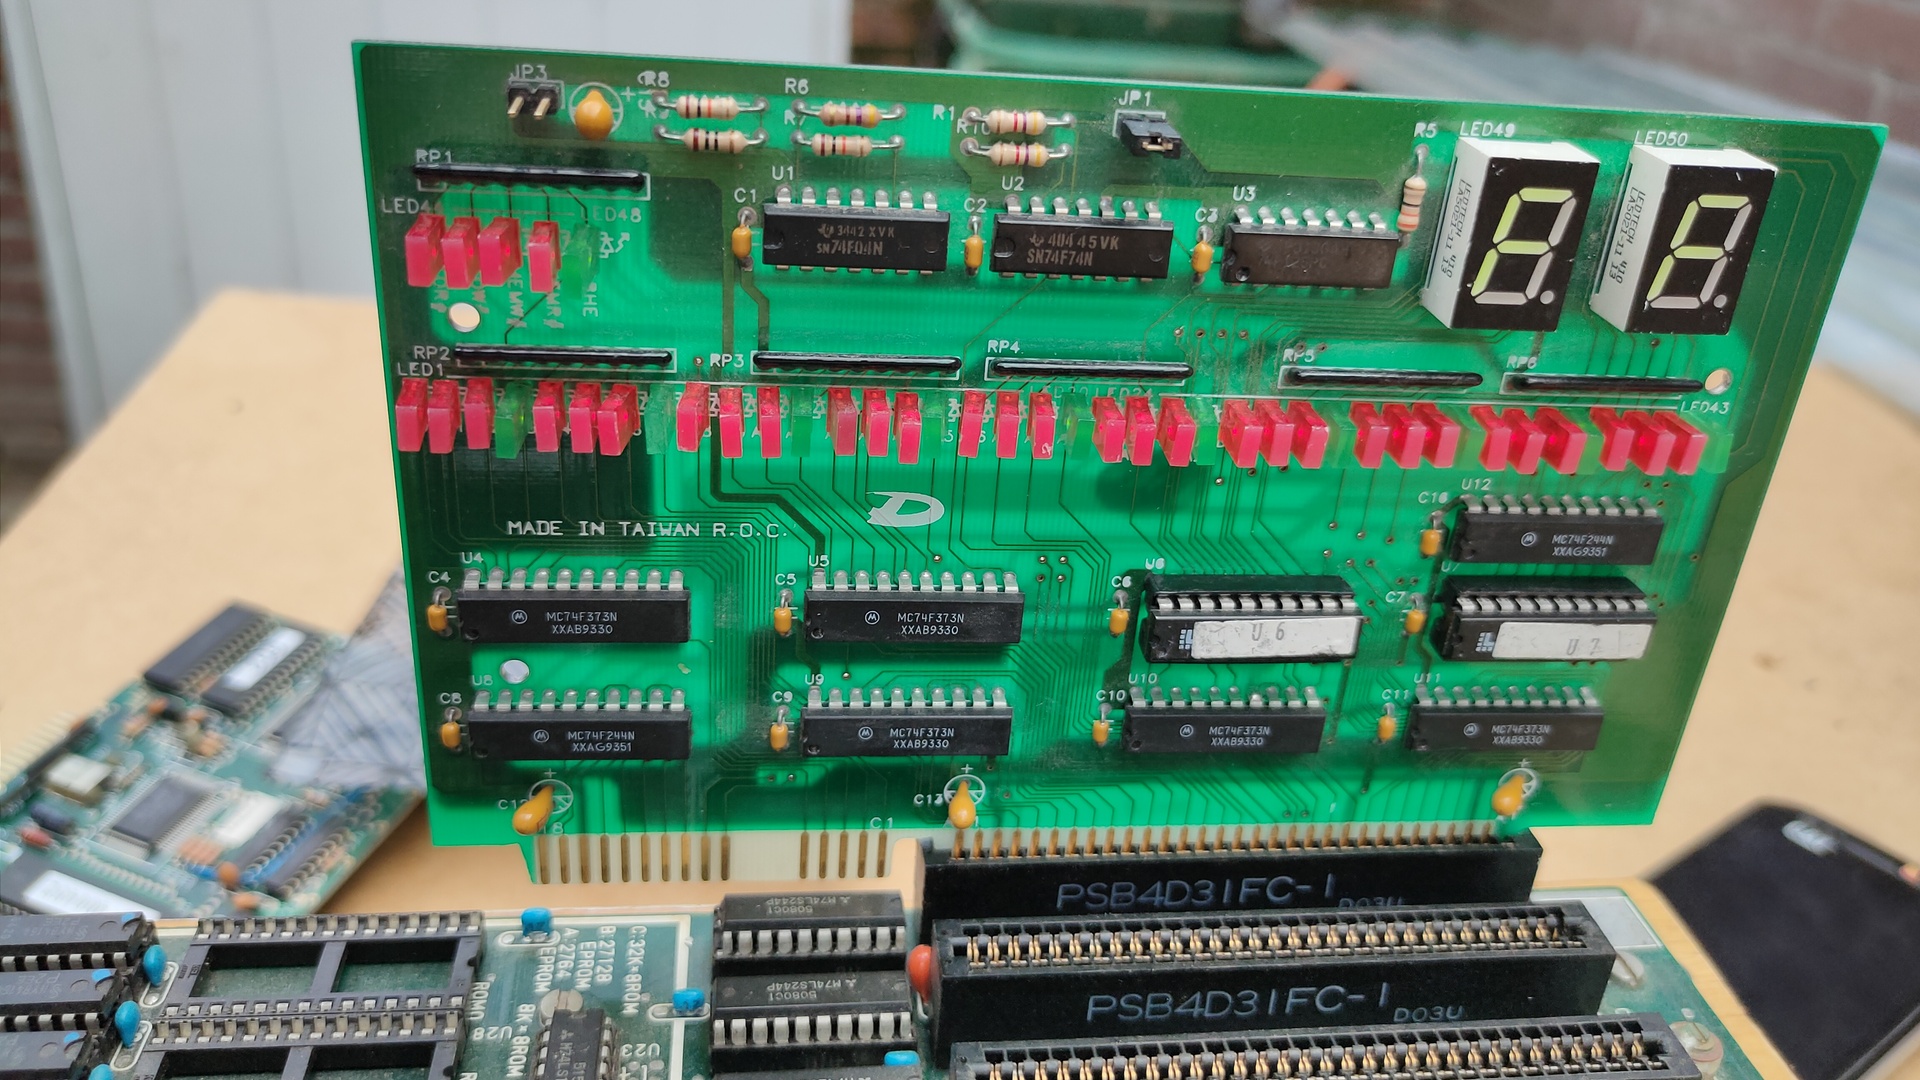
Tested the power adapter first, a nice 5V and 12V. Then I plugged the power in the Motherboard add plugged a test ISA card in the slot. After turning the machine on I saw the Address leds flashing
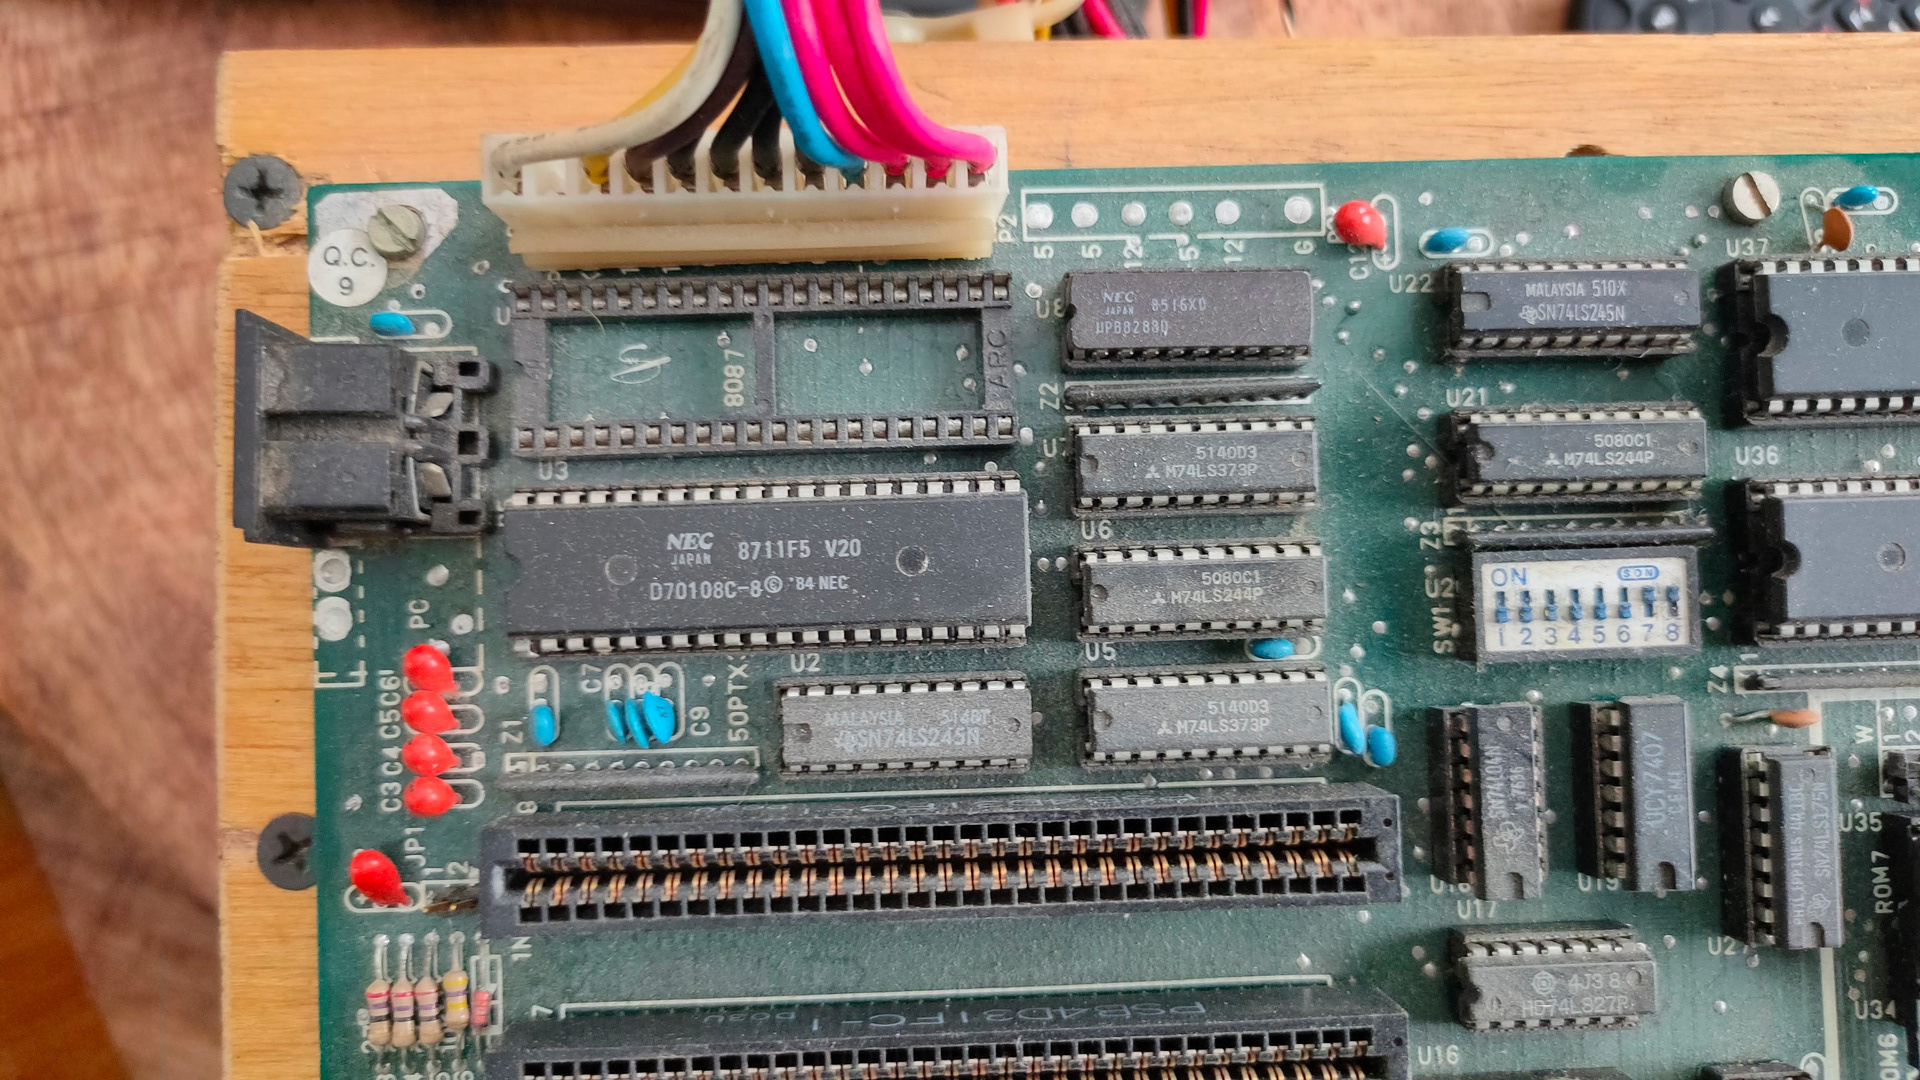
A NEC D70108C from 1984, which is 8088 pin compatible with Intel 8088 but faster, and has some extra functionality. The empty socket is for the 8087 Co-processor.
Nec V20 versus 8088
Everything pretty dirty
Rom 2764 (8Kb) and a disconnected speaker wire.
Adding an 8bit Isa hercules/CGA card.
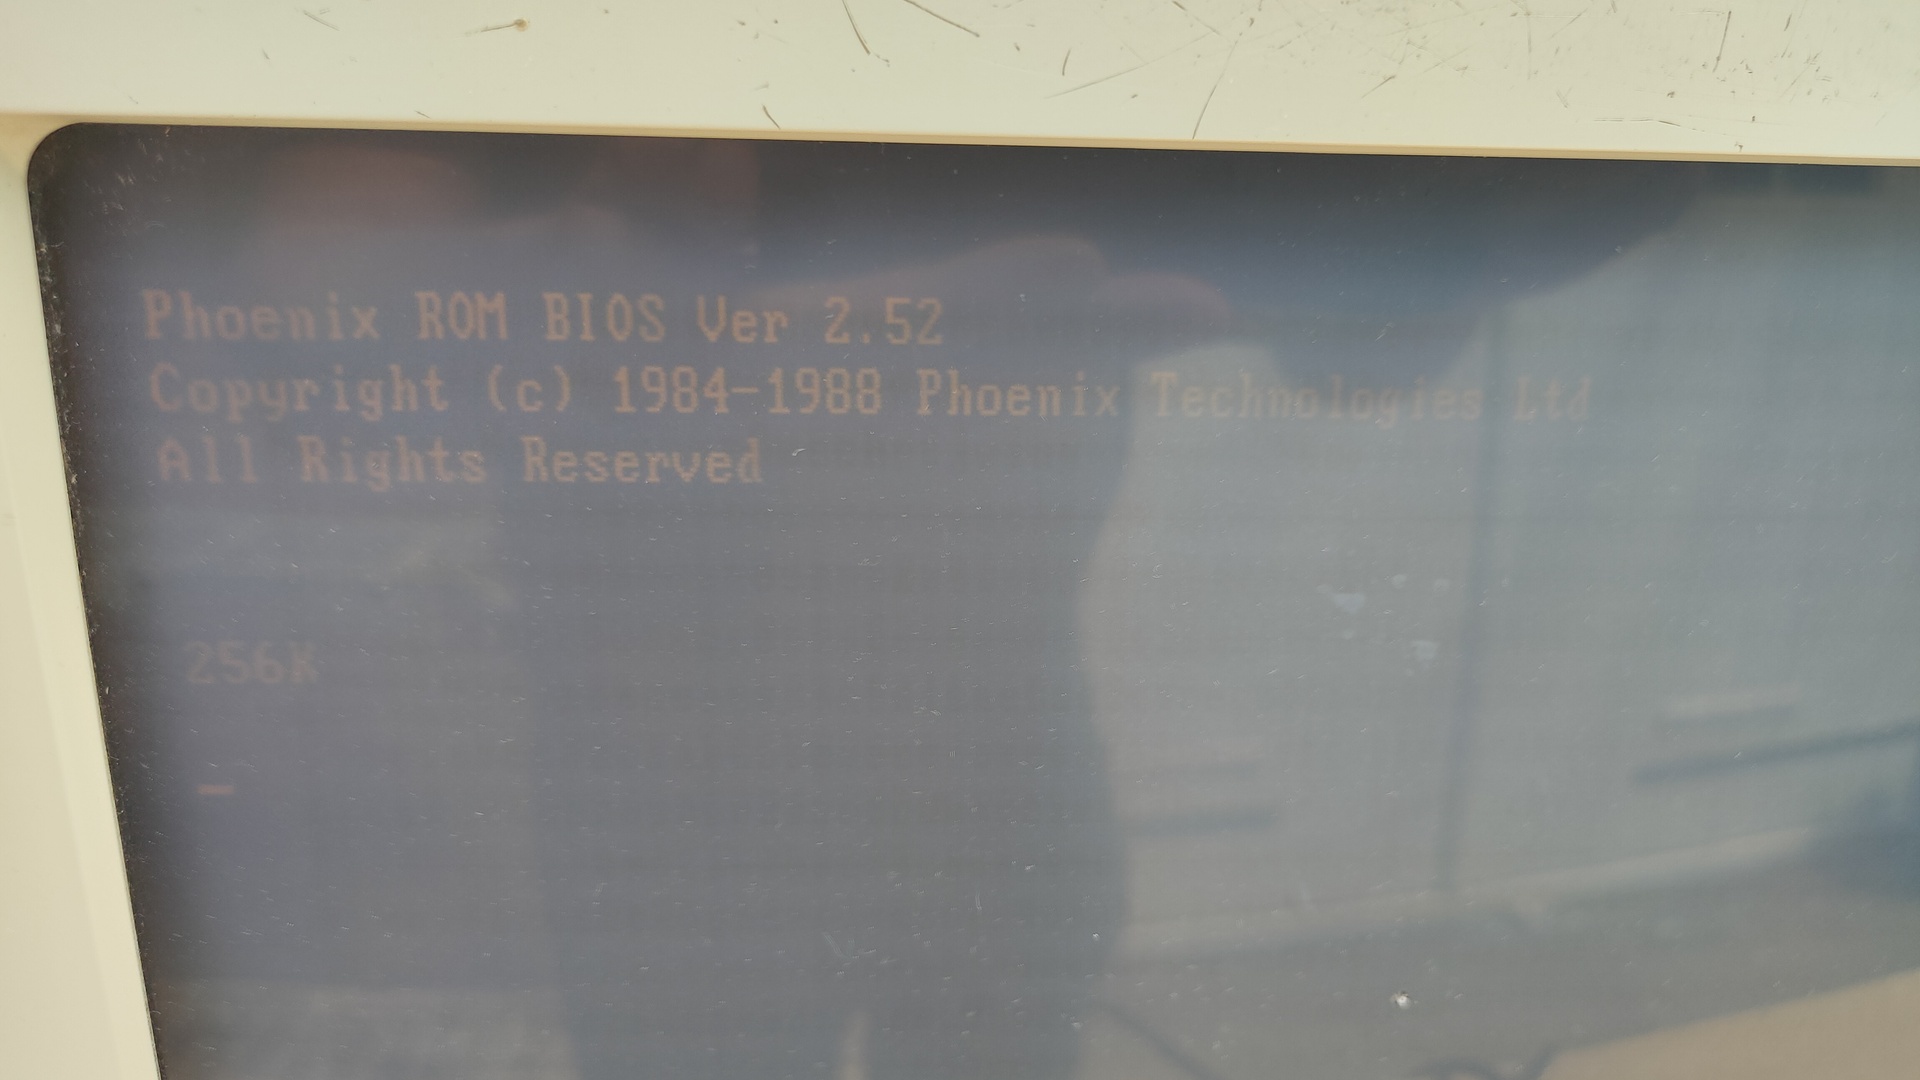
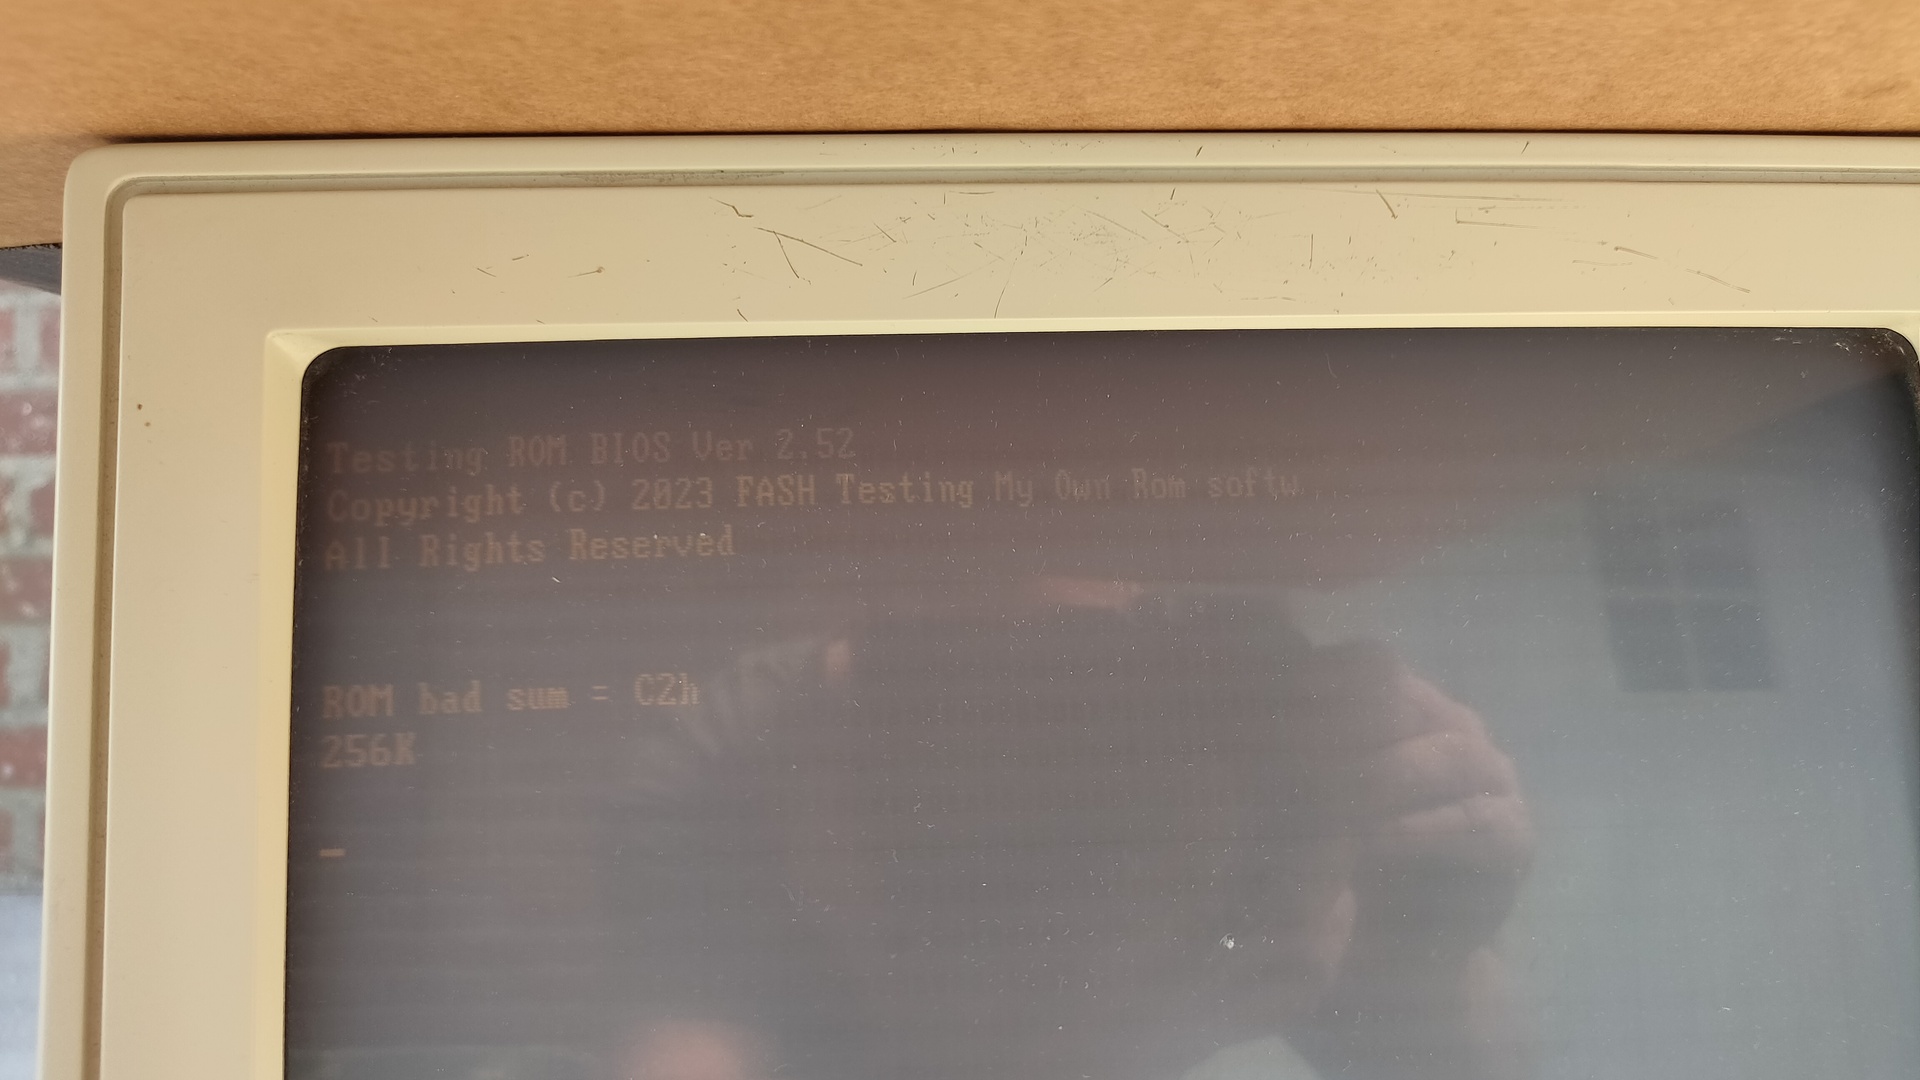
It starts! .. But there is no Floppy controller (yet)
I’ve dumped the Bios to a file and used a hexeditor to play around. So that’s why there is a bad checksum.
Installing a ZIF socket (Zero Insertion Force) to make things easier to modify.
Burned GlaBios on the Eprom and now I can continue to play around.
So why? Why this all ..
I want to play around with old 8088 assembly code again, but not as I did before using a Dos machine, but hardcoded into Eproms. I’ve got 8 banks for ROMs and the source code for GlaBios is available.
In the past Edk and me wrote a boot demo, so it was not utilizing Ms-Dos functions. Maybe i can get some graphical and sound stuff working straight from the Bios.
Some commands:
# Dump the bios to file
minipro -w original.rom -p AT2764A@DIP28
xxd and hexdump to view the dump
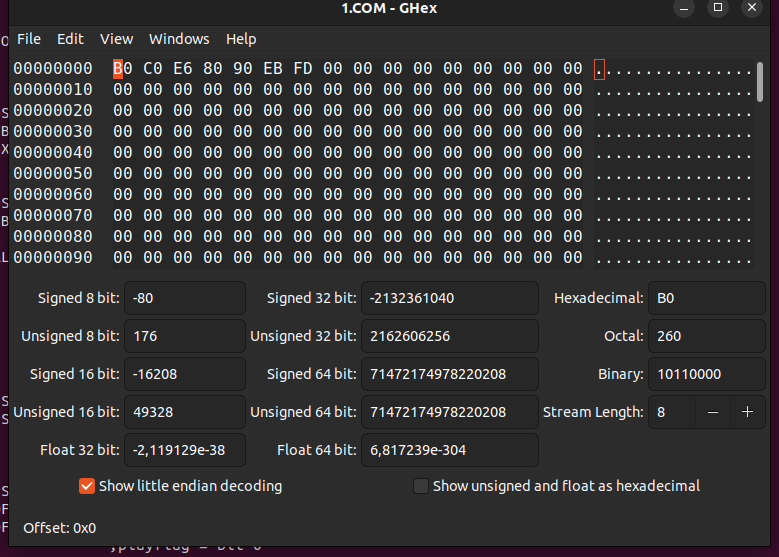
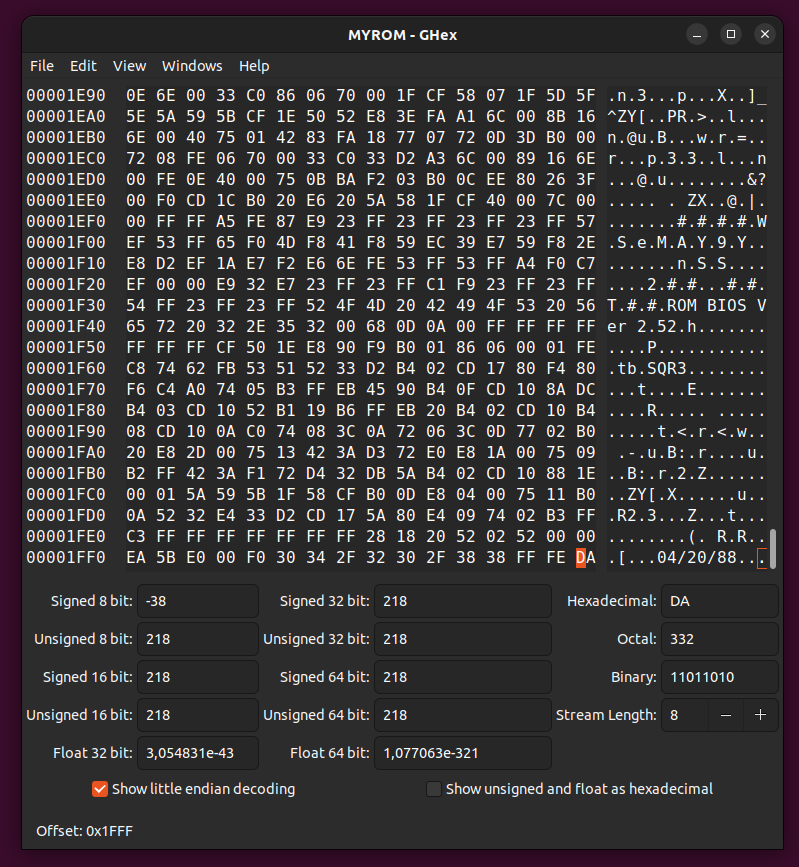
I've used ghex to alter the ROM
# Write a new bios to a 28C64 (same Eeprom i've used for the C64 Cartridges)
minipro -w /home/henri/Downloads/MYROM -p AT28C64
I was planning to disassemble the Phoenix Bios, but it’s quite hard to differentiate between code and data, there are no named pointers and you have to interpret every line of code.
So GlaBios it is ..
First code to look at:
This is after the whole post reset.
There is a reset pointer at ffff:fffe
Which points to the bootstrap routine, which ends in below machine code.
I'm going to plug my own code over here.

(See the funny remark about Monster as being displayed in one of above pictures)

;----------------------------------------------------------------------------;
; INT 18 - Unbootable IPL
;----------------------------------------------------------------------------;
; Display a disk boot failure message and wait for a key to cold reboot.
;
; This may be re-vectored to ROM BASIC, if present.
;
; Size: 18 bytes
;----------------------------------------------------------------------------;
INT_18 PROC
		ASSUME DS:_BDA_ABS
	PRINT_SZ  BOOT_FAIL			; print boot failure string
	XOR	AX, AX				; AH = 0 (wait for key)
	MOV	DS, AX				; DS = 0000
	MOV	WARM_FLAG_ABS, AX			; do a cold boot
	INT	16H					; wait for key press
	JMP	BOOT					; reboot
INT_18 ENDP

BOOT ENDP

;----------------------------------------------------------------------------;
;
; END OF BIOS POST/BOOTSTRAP
;
;----------------------------------------------------------------------------;

		ASSUME DS:_BDA
STRINGS PROC
;----------------------------------------------------------------------------;
; Banner Strings
;
BANNER_STRINGS PROC

					IF POST_GLADOS EQ 1
BOOT_BEGIN		DB	CR, LF
			DB	'Starting GLaDOS...'
NL2_Z			DB	LF				; two NL's, null term'd
					ENDIF
NL_Z			DB	CR, LF, 0			; one NL, null term'd
BOOT_FAIL		DB	'Disk Boot Fail.'
			DB	' You monster.'
NL2_ANY_KEY		DB	LF
NL_ANY_KEY		DB	CR, LF
ANY_KEY		DB	'Press the Any Key'
			DB	'...'
Assembly stuff
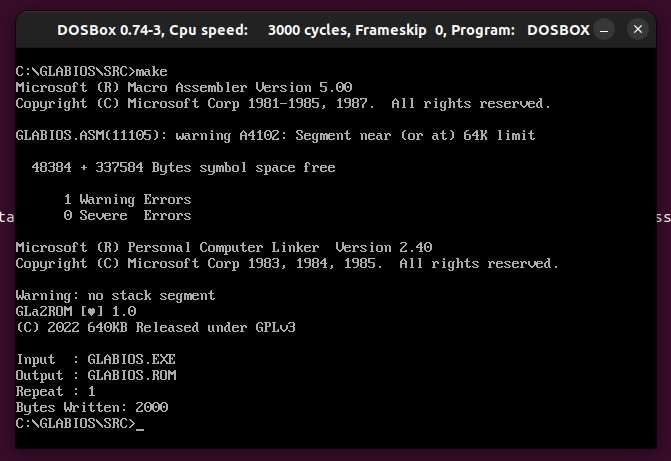
I’ve got Dosbox installed on my machine.
git clone https://github.com/640-KB/GLaBIOS.git I copied MASM.EXE and LINK.EXE in the GLaBios src directory.
edit make.bat
change MASM GLABIOS; into MASM /DVER_DATE=”05/24/23″ /DARCH_TYPE=”T” /DCPU_TYPE=”V” GLABIOS;
Using searle’s design, i can draw pixels using composite video out.
Converting b/w png to hex include files, for usage in vasm I did the following.
#Python script to convert black levels to pixels
from PIL import Image
i = Image.open("fash.png")

pixels = i.load() # this is not a list, nor is it list()'able
width, height = i.size

all_pixels = []
for x in range(width):
    for y in range(height):
        cpixel = pixels[x, y]
        if cpixel[1] == 255:
            s = '\t.db 0x05,' + hex(int(x)) + ',' + hex(int(y))
            print (s)
Running and output example
python3 image.py > out

head out
	.db 0x05,0x1,0x16
	.db 0x05,0x1,0x18
	.db 0x05,0x1,0x19
	.db 0x05,0x2,0x7
	.db 0x05,0x2,0x8
	.db 0x05,0x2,0xc
	.db 0x05,0x2,0xd
	.db 0x05,0x2,0x17
	.db 0x05,0x3,0x5
Control codes and vasm include
01 (01) - Cursor home (Standard ASCII)
04 (04) - Cursor solid
05 (05) - Set graphics pixel (next two bytes = x,y)
0C (12) - Clear screen (Standard ASCII)
0D (13) - Carriage return (Standard ASCII)
0E (14) - Set column 0 to 79 (2nd byte is the column number) or 0 to 39 for a 40 char line
0F (16) - Set row 0 to 24 (2nd byte is the row number)
1B (27) - ESC - reserved for ANSI sequences

vasm include part:

message:
	.db 0x01,0x0c   ; home and clear
	.db 0x1b,0x2d   ; disable ansi translation
	include "out"   ; include hex "png"
	.db 0x00        ; end with 0 (part of message print routine)