C53UiG+5HPaxD2HPaxD MikroTik hAP ax3 + with POE
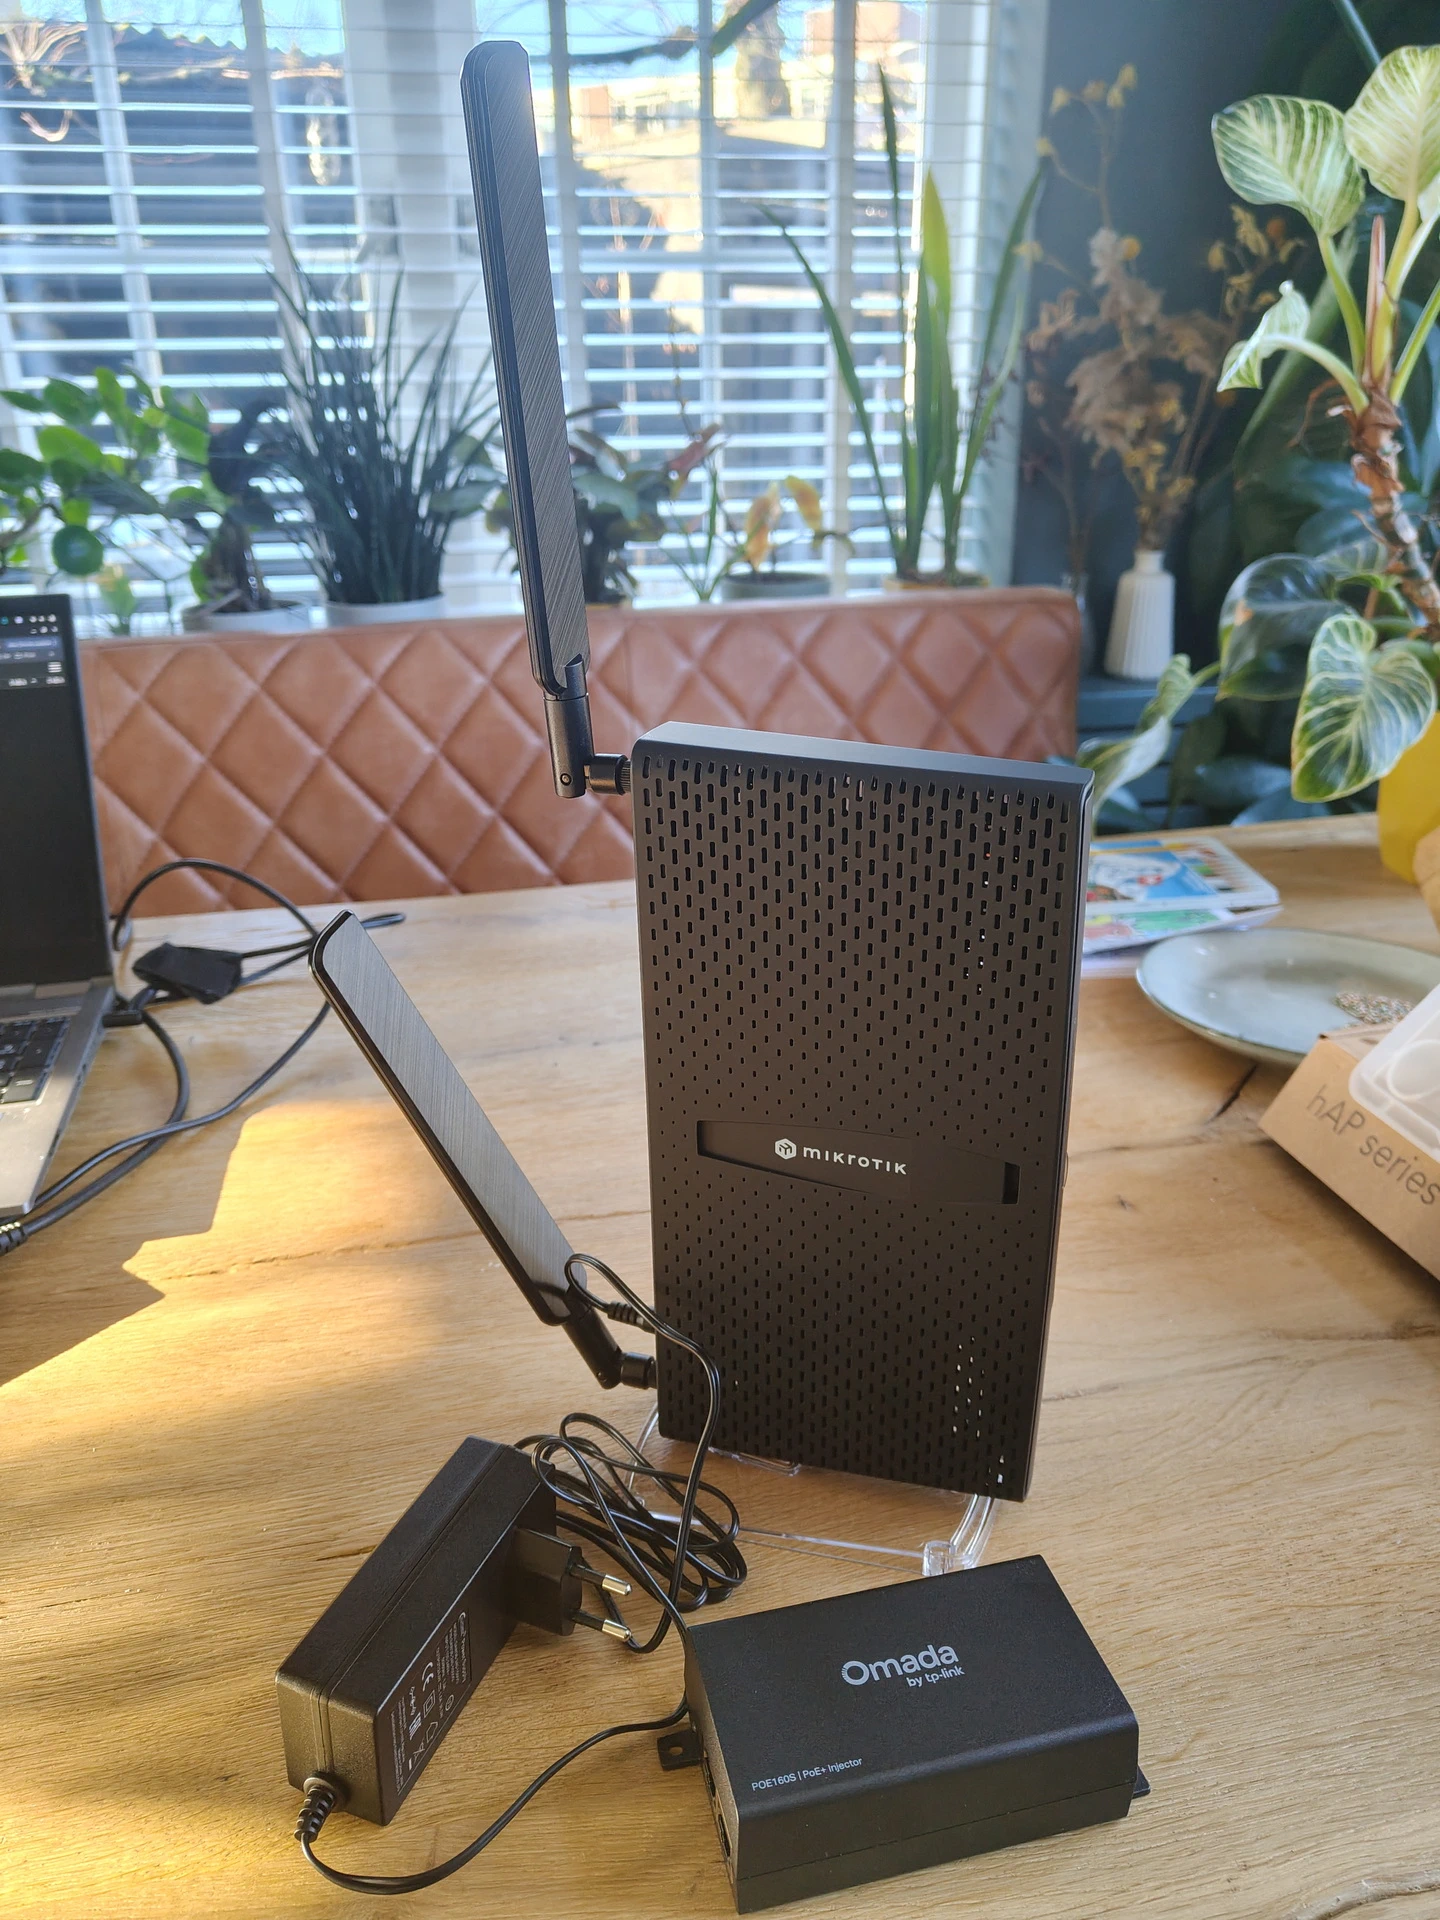
C53UiG+5HPaxD2HPaxD MikroTik hAP ax3 + with POE
Schedule below script after changing the first few lines
### Set local variables. Change the value between "" to reflect your environment. Do not delete quotation marks.
:local ftpserver "ftpserver"
:local username "ftpuser"
:local password "ftppass"
:local ftppath "mikrotik/hapac2"

:local hostname [/system identity get name]
:local localfilename "$hostname-Backup-Daily";
:global thisdate [/system clock get date]
:global thistime [/system clock get time]
:global date ([:pick $thisdate 0 10])
:local remotebackup ([/system identity get name]."-".$date.".backup")
:local remotersc ([/system identity get name]."-".$date.".rsc")

### Create backup file and export the config.
export compact file="$localfilename"
/system backup save name="$localfilename"
:log info "Backup Created Successfully"

### Upload config file to FTP server.
/tool fetch address=$ftpserver src-path="$localfilename.backup" \
user=$username mode=ftp password=$password \
dst-path=($ftppath."/".$remotebackup) upload=yes
:log info "Config Uploaded Successfully"

### Upload backup file to FTP server.
/tool fetch address=$ftpserver src-path="$localfilename.rsc" \
user=$username mode=ftp password=$password \
dst-path=($ftppath."/".$remotersc) upload=yes
:log info "Backup Uploaded Successfully"
Files are written on the FTP server like this:
MikroTikHAP1-2024-03-14.backup
MikroTikHAP1-2024-03-14.rsc
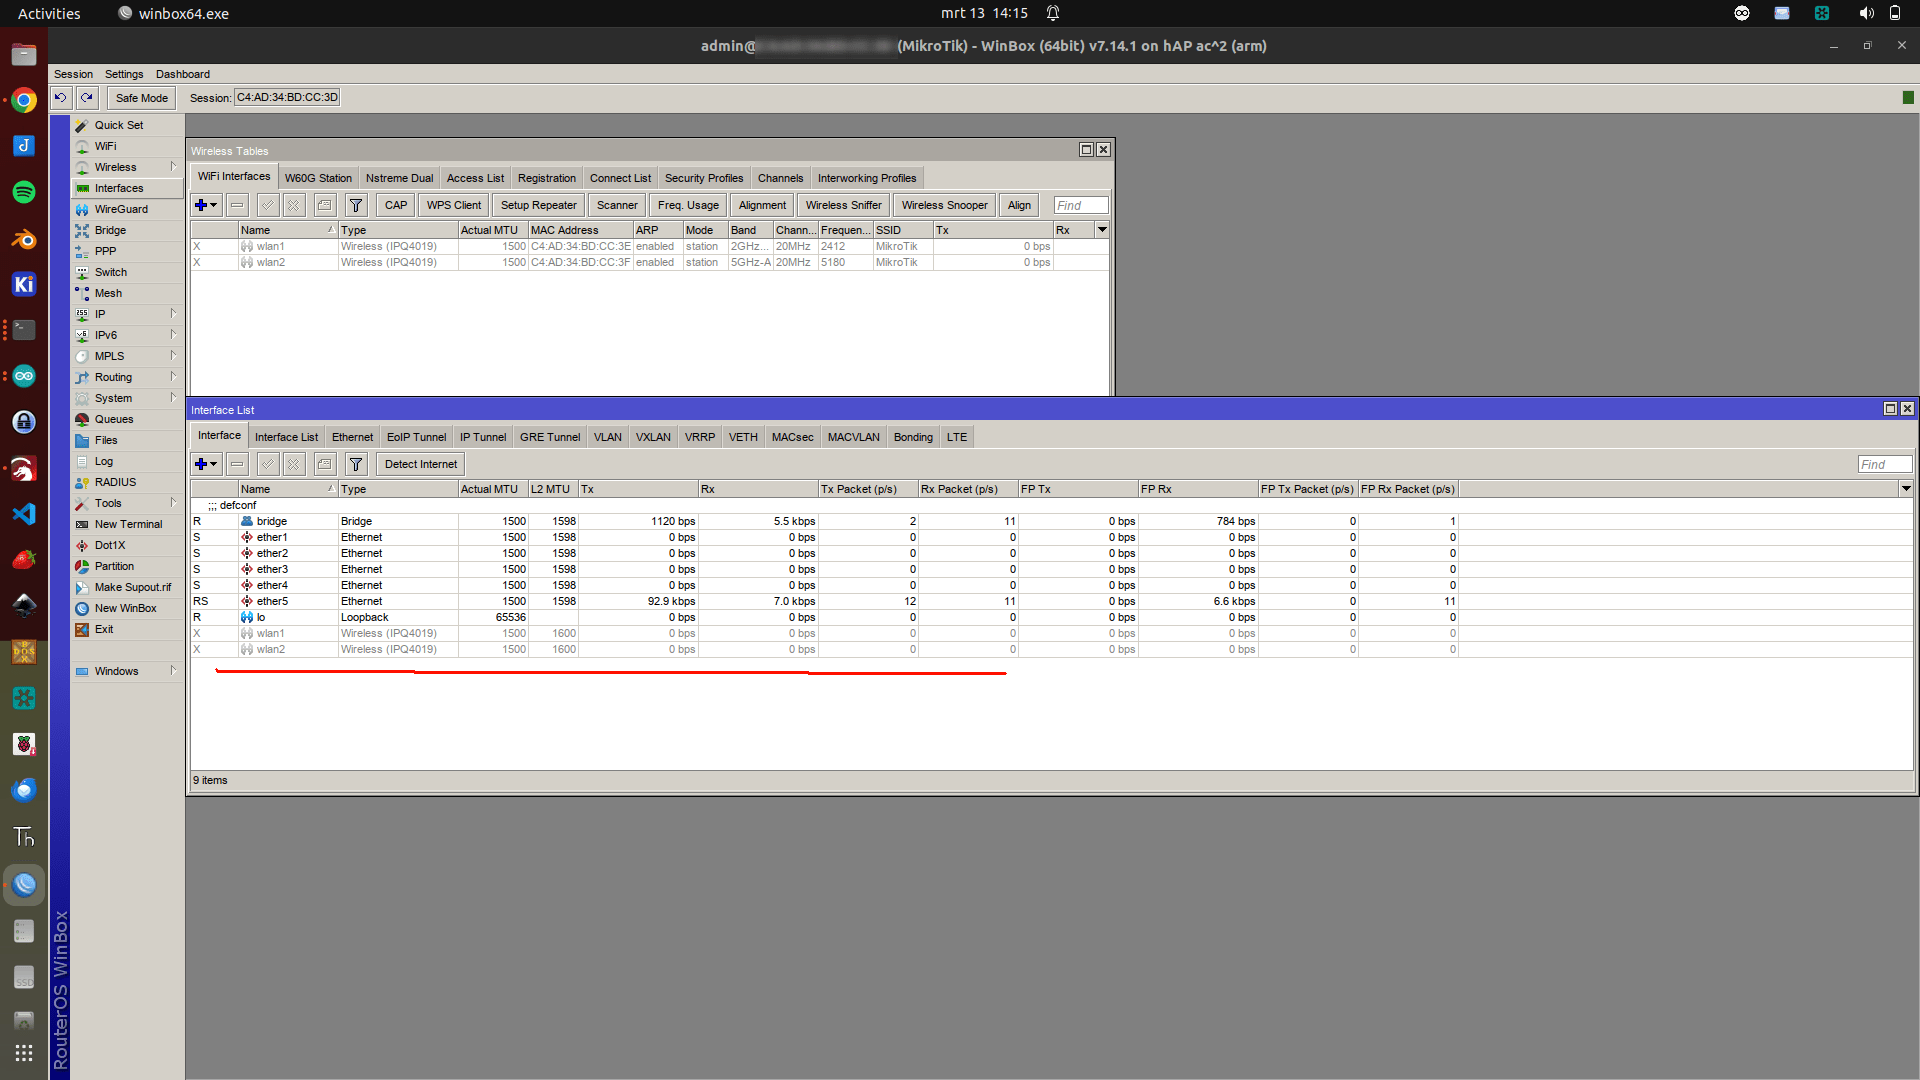
Mikrotik is in netboot mode only, not accessible using winbox/web or IP.
(This is one of my smaller AP’s)
Below the log from my DHCP server
Mar 12 23:30:43 shibari dhcpd[3559351]: BOOTREQUEST from c4:ad:34:aa:aa:39 via p1p1.10
Mar 12 23:30:43 shibari dhcpd[3559351]: BOOTREPLY on to c4:ad:34:aa:aa:39 via p1p1.10
Download netinstall (linux cli) from here:
Also the latest routeros, and in my case also wireless package for HAP2.
(There was a change in packaging, due to the limited size of the Hap2.)
Steps to take: Use a UTP cable to connect the hap to a pc or laptop.
config your ethernet to 192.168.88.2/24 and make sure you change the default gateway to 192.168.1.1 !
(Disable wifi)
Start below command
./netinstall -r -a 192.168.88.1 routeros-7.14.1-arm.npk
Disconnect/connect power and uploading should start.
Here is the text from my console
root@zspot:/home/henri/Downloads/mt# route add default gw 192.168.88.1
root@zspot:/home/henri/Downloads/mt# route -n
Kernel IP routing table
Destination     Gateway         Genmask         Flags Metric Ref    Use Iface
0.0.0.0         192.168.88.1    0.0.0.0         UG    0      0        0 enp0s31f6
192.168.88.0    0.0.0.0         255.255.255.0   U     0      0        0 enp0s31f6
192.168.122.0   0.0.0.0         255.255.255.0   U     0      0        0 virbr0
root@zspot:/home/henri/Downloads/mt# ip a s
1: lo: <LOOPBACK,UP,LOWER_UP> mtu 65536 qdisc noqueue state UNKNOWN group default qlen 1000
    link/loopback 00:00:00:00:00:00 brd 00:00:00:00:00:00
    inet 127.0.0.1/8 scope host lo
       valid_lft forever preferred_lft forever
    inet6 ::1/128 scope host
       valid_lft forever preferred_lft forever
2: enp0s31f6: <BROADCAST,MULTICAST,UP,LOWER_UP> mtu 1500 qdisc fq_codel state UP group default qlen 1000
    link/ether e0:70:ea:53:b3:6e brd ff:ff:ff:ff:ff:ff
    inet 192.168.88.2/24 brd 192.168.88.255 scope global enp0s31f6
       valid_lft forever preferred_lft forever
3: wlp0s20f3: <BROADCAST,MULTICAST> mtu 1500 qdisc noqueue state DOWN group default qlen 1000
    link/ether f4:4e:e3:91:27:24 brd ff:ff:ff:ff:ff:ff
4: virbr0: <NO-CARRIER,BROADCAST,MULTICAST,UP> mtu 1500 qdisc noqueue state DOWN group default qlen 1000
    link/ether 52:54:00:b1:16:1a brd ff:ff:ff:ff:ff:ff
    inet 192.168.122.1/24 brd 192.168.122.255 scope global virbr0
       valid_lft forever preferred_lft forever
root@zspot:/home/henri/Downloads/mt# ./netinstall -r -a 192.168.88.1 routeros-7.14.1-arm.npk
Will reset config
Using server IP: 192.168.88.2
Starting PXE server
Waiting for RouterBOARD...
PXE client: C4:AD:34:AA:AA:39
Sending image: arm
Discovered RouterBOARD...
Formatting...
Sending package routeros-7.14.1-arm.npk ...
Ready for reboot...
Sent reboot command

Quiet days, I working on some art.
But here are the last ‘prutsen’
My current Wifi setup
I’ve got a Wifi outside of my network for guest and emergency. ( 2 SSIDs)
Then a main Wifi router in my livingroom, one in my workshop/studio and one in the Attic (Electronics Lab)
So three main Wifi AccessPoints. These all have the same SSID’s but on different frequencies. That way i’ve got roaming in and outside my house.
Also some virtual accesspoints are configured.
I’ve got a main, folkband, IOT, guest-inside all on 2.4Ghz and 5Ghz.
I watched a lot of YT presentations about Mikrotik Wifi.
So I ended up with DFS safe channels 20Mhz for 2.4 and 20/40Mhz Ce for 5Ghz. (subchannels for each after some frequency scanning)
(2.4 does a failback to 20Mhz whenever there is even one client detected which connects only on this band. Such as some old IOT stuff)
2.4 in only 1,6 and 11 no overlap, each on another device.
300Mbps is sufficient for my wifi 🙂
I’ve got accesslists in place and i’m going to read into kicking a client when the signal strenght is below -50dB
80386 (DX) Computer
Besides my 8088 and 8086 machines I needed a machine which could run our old demo’s. So I bought a new toy.
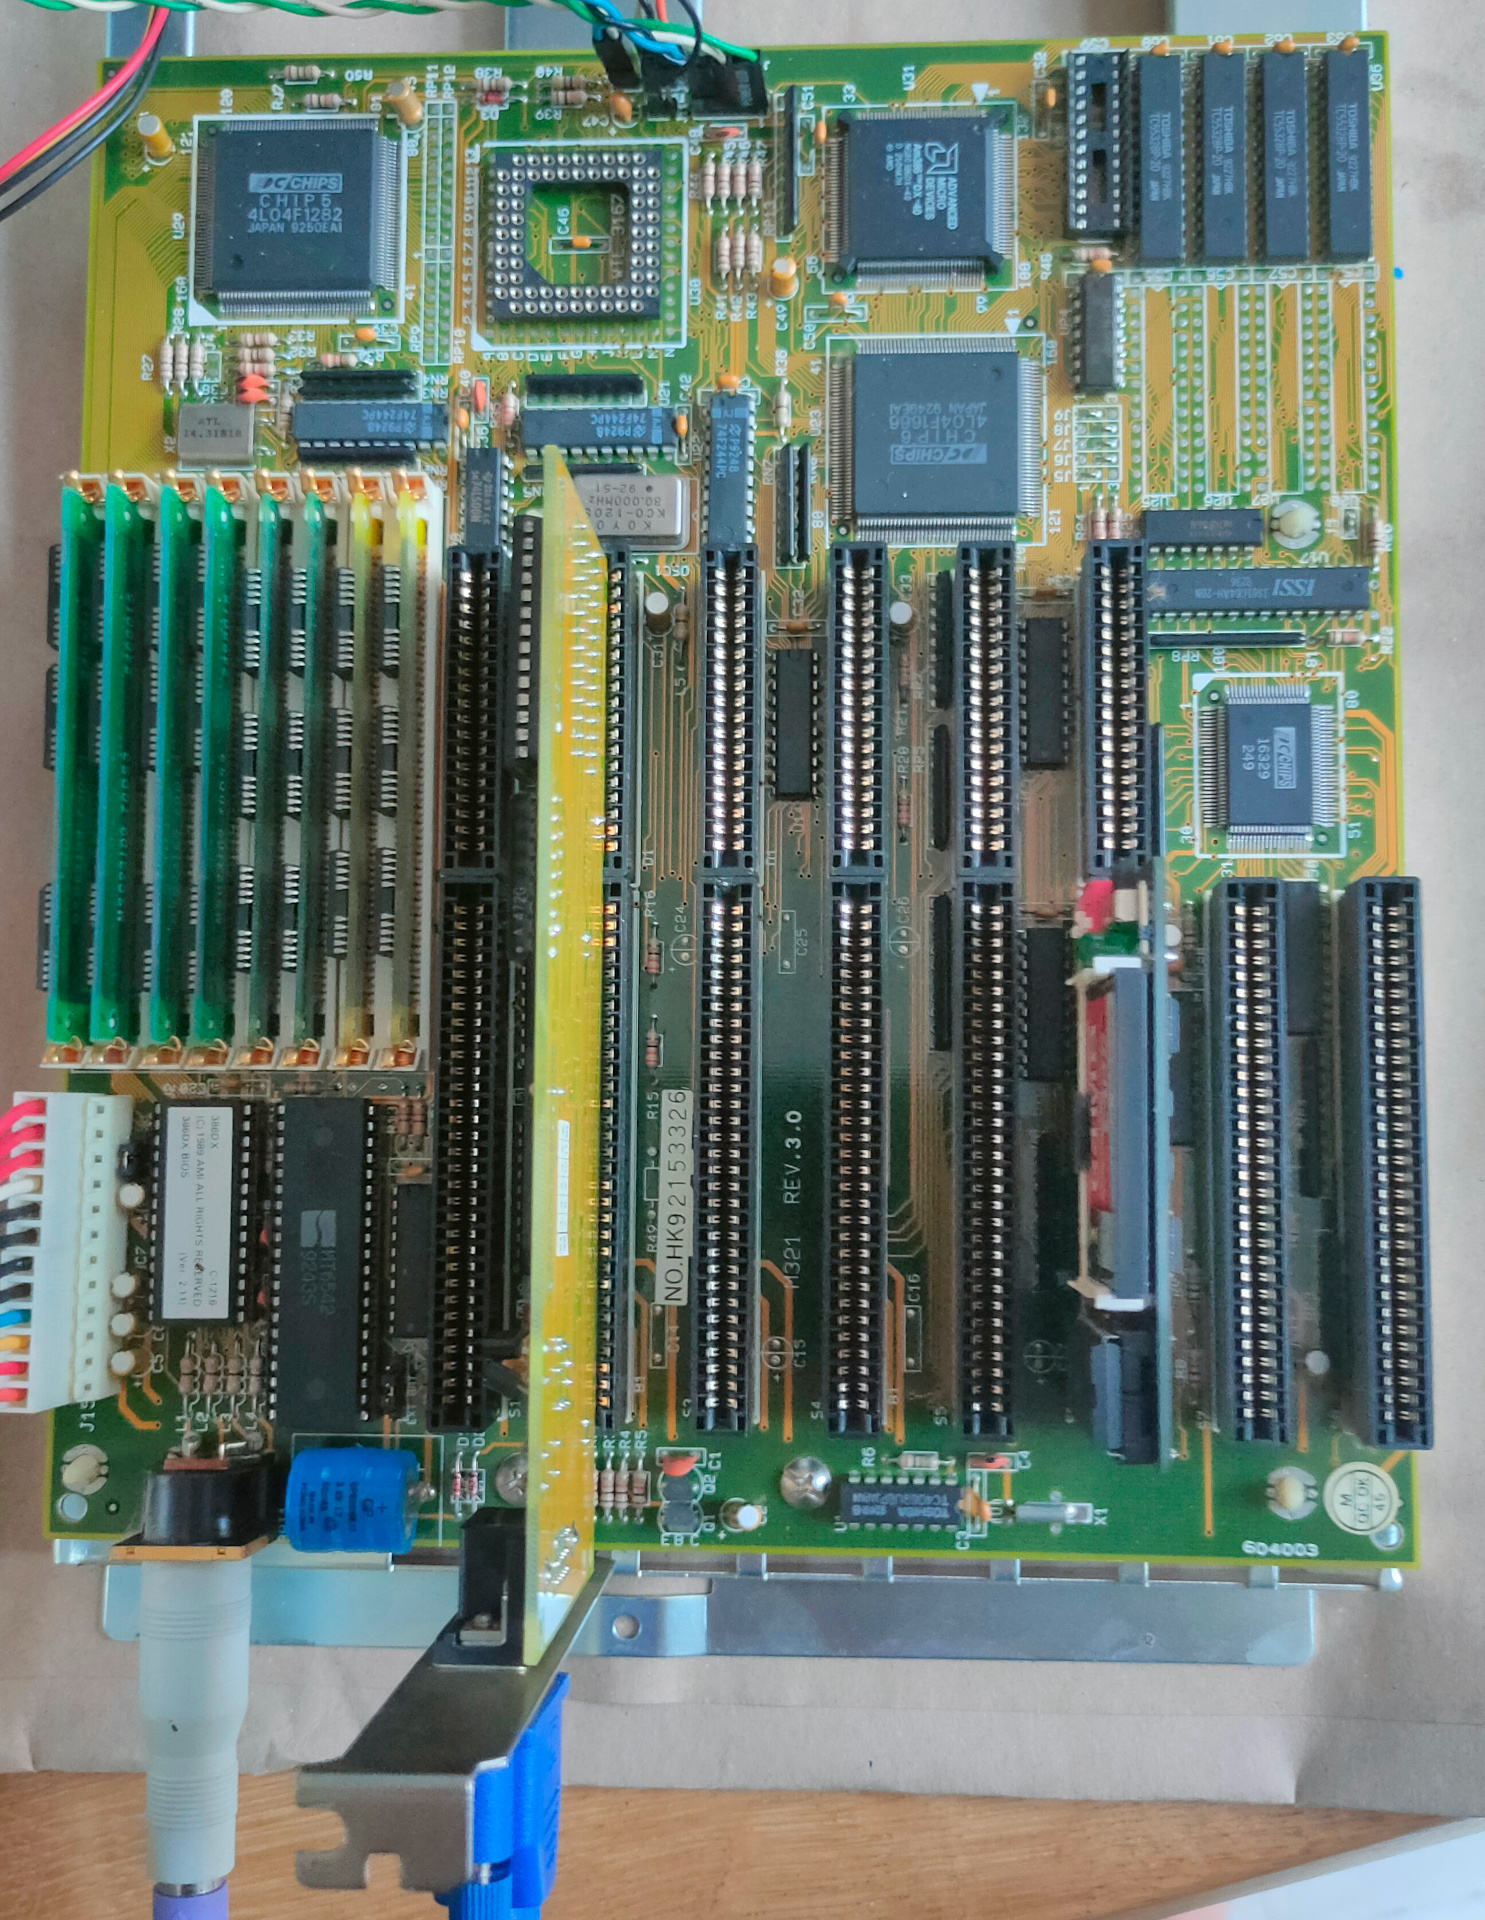
It has 8Mb Ram and runs at 40Mhz.
I’ve noticed that many of my VGA register manipulation code, can’t be run on a modern VGA monitor, I need to use a CRT for that .. Another thing to buy
Lilygo T-Display S3 Streaming
Not my code: https://github.com/Steve5451/esp32-stream-desktop
A very cool project!
Needed to fix arduino code, due to the TFT_eSPI library issues.
And I’ve got a S3 with another resolution, but that was an easy fix.
Then needed to reinstall nodejs with another version.
Had to modify the code because the tcp server would not start.
Weird errors logging, but in the end fixed … very cool
I probably end up designing a 3D printed case that looks like a monitor or tv.
Moving dhcp from isc-dhcp-server to Mikrotik.
And playing with theDude and speedtesting.
I got an old linux gateway which only runs a dhcp server.
Time to move this to a Mikrotik router.
The config on this isc-dhcp-server is huge!
So i was planning to migrate some one by one by hand.
Maybe writing a script to do this automatically later on.
I’ve got loads of static configured hosts, so I change these
Example host
#                # kodiserver
#                host kodi.example.com {
#                fixed-address 10.11.12.13;
#                hardware ethernet ae:ae:ae:ae:ae:ea;
#                }

host movekodito4011 {
   hardware ethernet ae:ae:ae:ae:ae:ea;
   deny booting;
}
Mikrotik config (static single entry config)
See other post about dhcp config
/ip dhcp-server lease
add address=10.11.12.13 mac-address=EA:EA:EA:EA:EA:EA:EA
The Dude
The dude is a cool tool which connects to your MT and generates all kinds of cool info.
I was trying to get the frequency spectral scan working.
But it generates a nice network map also.

Easy to install under linux
While moving a lot from my gateway to Mikrotik, I still have to come up with a plan to migrate my netboot.xyz PXE server to TFTP/ipxe using a migrated dhcpd server.
I probably end up using a separate dhcp instance which handles only the PXE requests.

See inline comments:
# Add vlan bridge
/interface bridge
add name=bridge_vlan5

# add security profile for wifi
/interface wireless security-profiles
set [ find default=yes ] supplicant-identity=MikroTik
add authentication-types=wpa2-psk eap-methods="" mode=dynamic-keys name=iot supplicant-identity=""

# add virtual wifi to 2.4G and 5G APs
/interface wireless
set [ find default-name=wlan2 ] band=2ghz-g/n country=netherlands disabled=no distance=indoors frequency=auto installation=indoor mode=ap-bridge security-profile=xxxxxxxxxxx ssid=MYSSID station-roaming=enabled wireless-protocol=802.11 wps-mode=\
    disabled
set [ find default-name=wlan1 ] band=5ghz-a/n/ac channel-width=20/40mhz-Ce country=netherlands disabled=no distance=indoors frequency=auto installation=indoor mode=ap-bridge name=wlan5 security-profile=xxxxxxxxxxxxx skip-dfs-channels=all ssid=\
    MYSSID station-roaming=enabled wireless-protocol=802.11 wps-mode=disabled
add disabled=no keepalive-frames=disabled mac-address=4A:8F:5A:48:A4:69 master-interface=wlan2 multicast-buffering=disabled name=wlan_iot2 security-profile=iot ssid=IOT vlan-id=5 vlan-mode=use-tag wds-cost-range=0 wds-default-cost=0 \
    wps-mode=disabled
add disabled=no keepalive-frames=disabled mac-address=4A:8F:5A:80:CE:1D master-interface=wlan5 multicast-buffering=disabled name=wlan_iot5 security-profile=iot ssid=IOT vlan-id=5 vlan-mode=use-tag wds-cost-range=0 wds-default-cost=0 \
    wps-mode=disabled

# Add vlans to virtual Wifi
/interface vlan
add interface=wlan_iot2 name=vlan5_iot-2 vlan-id=5
add interface=wlan_iot5 name=vlan5_iot-5 vlan-id=5

# add ip range for dhcp
/ip pool
add name=dhcp_pool5_iot ranges=10.5.0.2-10.5.0.200

# add dhcp server with above range
/ip dhcp-server
add address-pool=dhcp_pool5_iot interface=bridge_vlan5 name=dhcpiot

# add vlans and interfaces to vlan  bridge
/interface bridge port
add bridge=bridge interface=wlan_iot2
add bridge=bridge interface=wlan_iot5
add bridge=bridge_vlan5 interface=vlan5_iot-5
add bridge=bridge_vlan5 interface=vlan5_iot-2

# add vlan to existing bridge (Not really needed) is for inter vlan traffic
/interface bridge vlan
add bridge=bridge_vlan5 vlan-ids=5

# add interfaces to LAN list (firewall needs this)
/interface list member
add interface=vlan5_iot-2 list=LAN
add interface=bridge_vlan5 list=LAN
add interface=vlan5_iot-5 list=LAN

# Add gateway/dhcpserver ip address
/ip address
add address=10.5.0.254/24 comment="IOT (vlan5)" interface=bridge_vlan5 network=10.5.0.0

# dhcp server network
/ip dhcp-server network
add address=10.5.0.0/24 dns-server=1.1.1.1 gateway=10.5.0.254 netmask=24

# generic NAT rule
/ip firewall nat
add action=masquerade chain=srcnat comment="defconf: masquerade" ipsec-policy=out,none out-interface-list=WAN
When plugging an ethernet cable in port one, the alarm will sound.
And a mqtt message is being send
In the script is a little sound effect loop, maybe I’m going to write a ABC musicnotation / BagpipeMusicWriter to beep commands.
Script
:do {
	:local broker "NR"
        :local topic "crs109/ether1/alarm"
        :local int1 ether1;
	:foreach a in=[/interface find name=$int1] do={
		:local status [/interface get $a running];
		:if ($status=true) do={
                     :for t1 from=1 to=8 step=1 do={
                     :for t2 from=600 to=750 step=8 do={
                     :beep frequency=$t2 length=11ms;
                     :delay 11ms;
                     }
                     }
                /iot mqtt publish broker=$broker topic=$topic message="{\"ether1\":\"connected\"}"
                }
	}
}
Schedule
/system scheduler
add interval=5s name=schedule1 on-event=script1 policy=\
    ftp,reboot,read,write,policy,test,password,sniff,sensitive,romon \
    start-date=may/14/2023 start-time=23:25:36
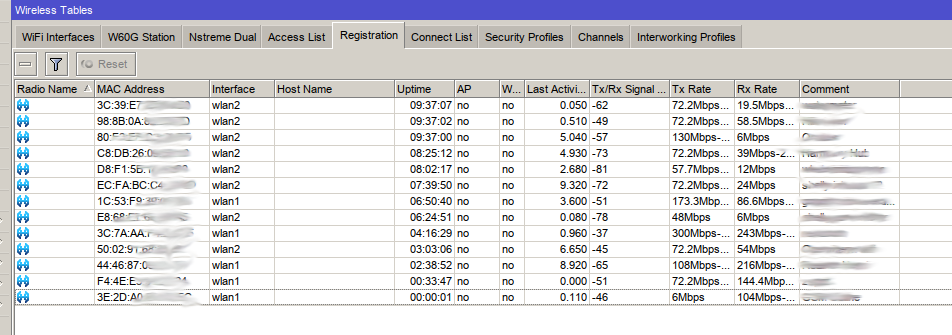
I’ve made a arpscanner in the past
https://www.henriaanstoot.nl/2019/10/15/arpscanner/
But i’m going to migrate the server this is running on.
So I played with ssh commands using ssh connections with a ssh-key, also using Ansible is possible.
ssh user@mikrotik /interface wireless registration-table print
But I didn’t like the continuous logins with automated logins.
So below solution is what i’ve implemented for now.
I’ve installed the IOT extra package from Mikrotik, now I can send MQTT messages from my Wifi enabled Mikrotiks to my Mosquitto broker.
(Download extra package zip, extract iot-7.x-arm.npk, upload this to your mikrotik files folder, and reboot)
The script I’m running on my Mikrotik, sends the active wifi connections with the comments. ( When a comment is set in the Access List, then it’s a know connection )
[admin@RB40111] /iot/mqtt> export
# may/15/2023 21:45:12 by RouterOS 7.9
# software id = xxxx-xxxx
#
# model = RB4011iGS+5HacQ2HnD
# serial number = xxxxxxxxxxxxxxxxx
/iot mqtt brokers
add address=10.1.x.y client-id=rb4011 name=NR
I made the following script on my MT named mqtt
:local broker "NR"

# MQTT topic where the message should be published
:local topic "rb4011/mac"

:foreach i in=[/interface wireless registration-table print proplist=mac-address as-value] do={
:local message "$i"

/iot mqtt publish broker=$broker topic=$topic message=$message
}
A schedule is needed to run this script every 15 minutes
[admin@RB40111] /system/scheduler> export
# may/15/2023 21:48:14 by RouterOS 7.9
# software id = xxxx-xxx
#
# model = RB4011iGS+5HacQ2HnD
# serial number = xxxxxxxxxxx
/system scheduler
add interval=15m name=mqtt on-event=mqtt policy=\
    ftp,reboot,read,write,policy,test,password,sniff,sensitive,romon \
    start-date=may/15/2023 start-time=13:30:54
Now all wifi connections will be send to topic rb4011/mac.
# Example
.id=*6a;comment=Mobile Henri wlan2;mac-address=44:46:87:xx:xx:xx
Using NodeRed I can make filters and notifications

Below function: get Mac and Comment from payload, if the comment is empty then it is a unknown connection … so send me a warning using Pushover.
// filter function
var output = msg.payload.split(";");

var comment = (output[1].split("="));
var mac = (output[2].split("="));

msg.payload={};
msg.payload = mac[1];
if (comment[1] == "") {
return msg;
}

// is xx:xx:xx:xx:xx:xx online? example
var output = msg.payload.split(";");

var comment = (output[1].split("="));
var mac = (output[2].split("="));

msg.payload={};
msg.payload = mac[1];
if (mac[1] == "xx:xx:xx:xx:xx:xx") {
return msg;
}
Now i’m getting a notification when an unknown wifi connection is made on my Access Point.
( I going to implement the Access List from MT at a later point. No access when not in the Access List)
My work document for my Mikrotiks
(Also for my friend Vincent, with a similar setup.)
I’m going to collect information on this page for below changes.
WIFI
Zerotier
IOT
Move all clients to own vlan
New or better VLAN setup
Info
YT : https://www.youtube.com/watch?v=Hqu8JlieSq4
Today i’ve upgraded one of my Mikrotiks to 7.8.
And installed the zerotier extra package!
I’m not going to explain what zerotier is .. read it here:
https://www.zerotier.com/
I already did some tests using my phone and a linux server.
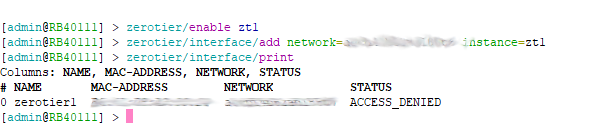
Add zerotier network
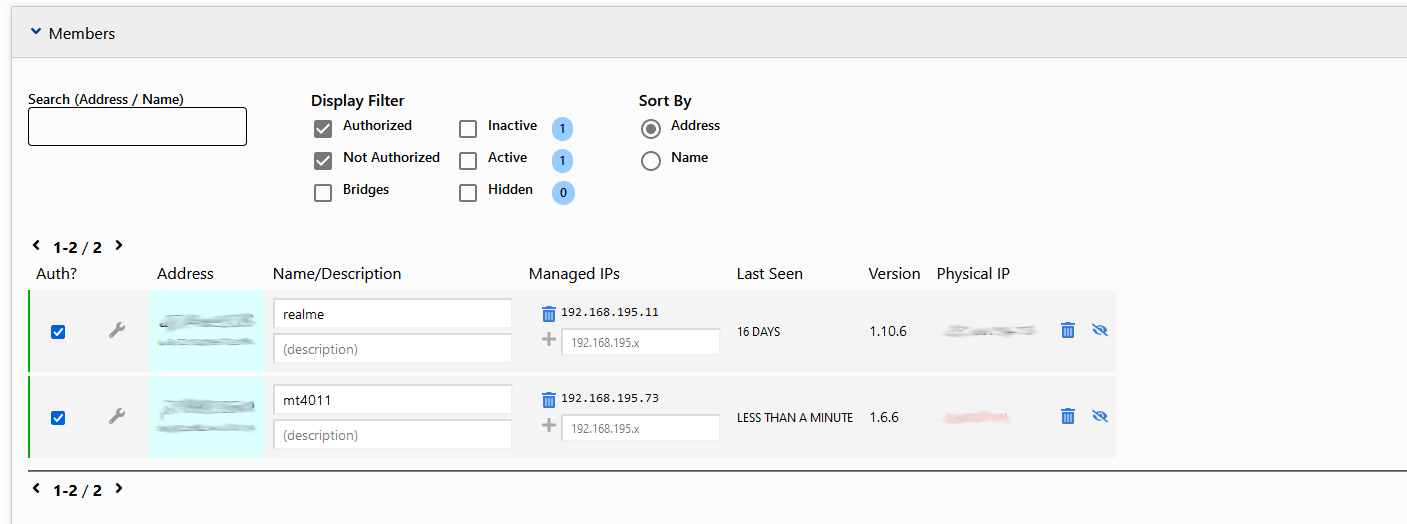
Allow connection in the Zerotier Gui
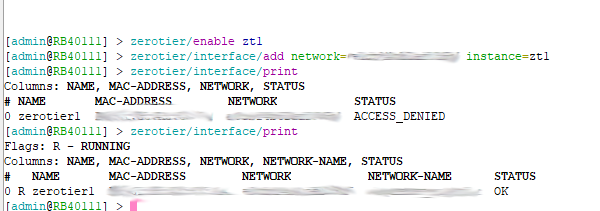
Mikrotik changes from ACCESS_DENIED to OK
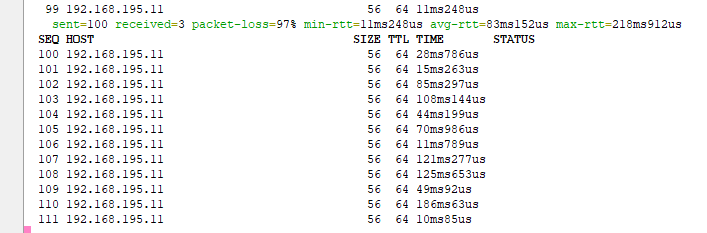
Ping test from MT to my Phone !
Maybe we could setup a adhoc zerotier network with some of my friends to do some remote assisting when needed!