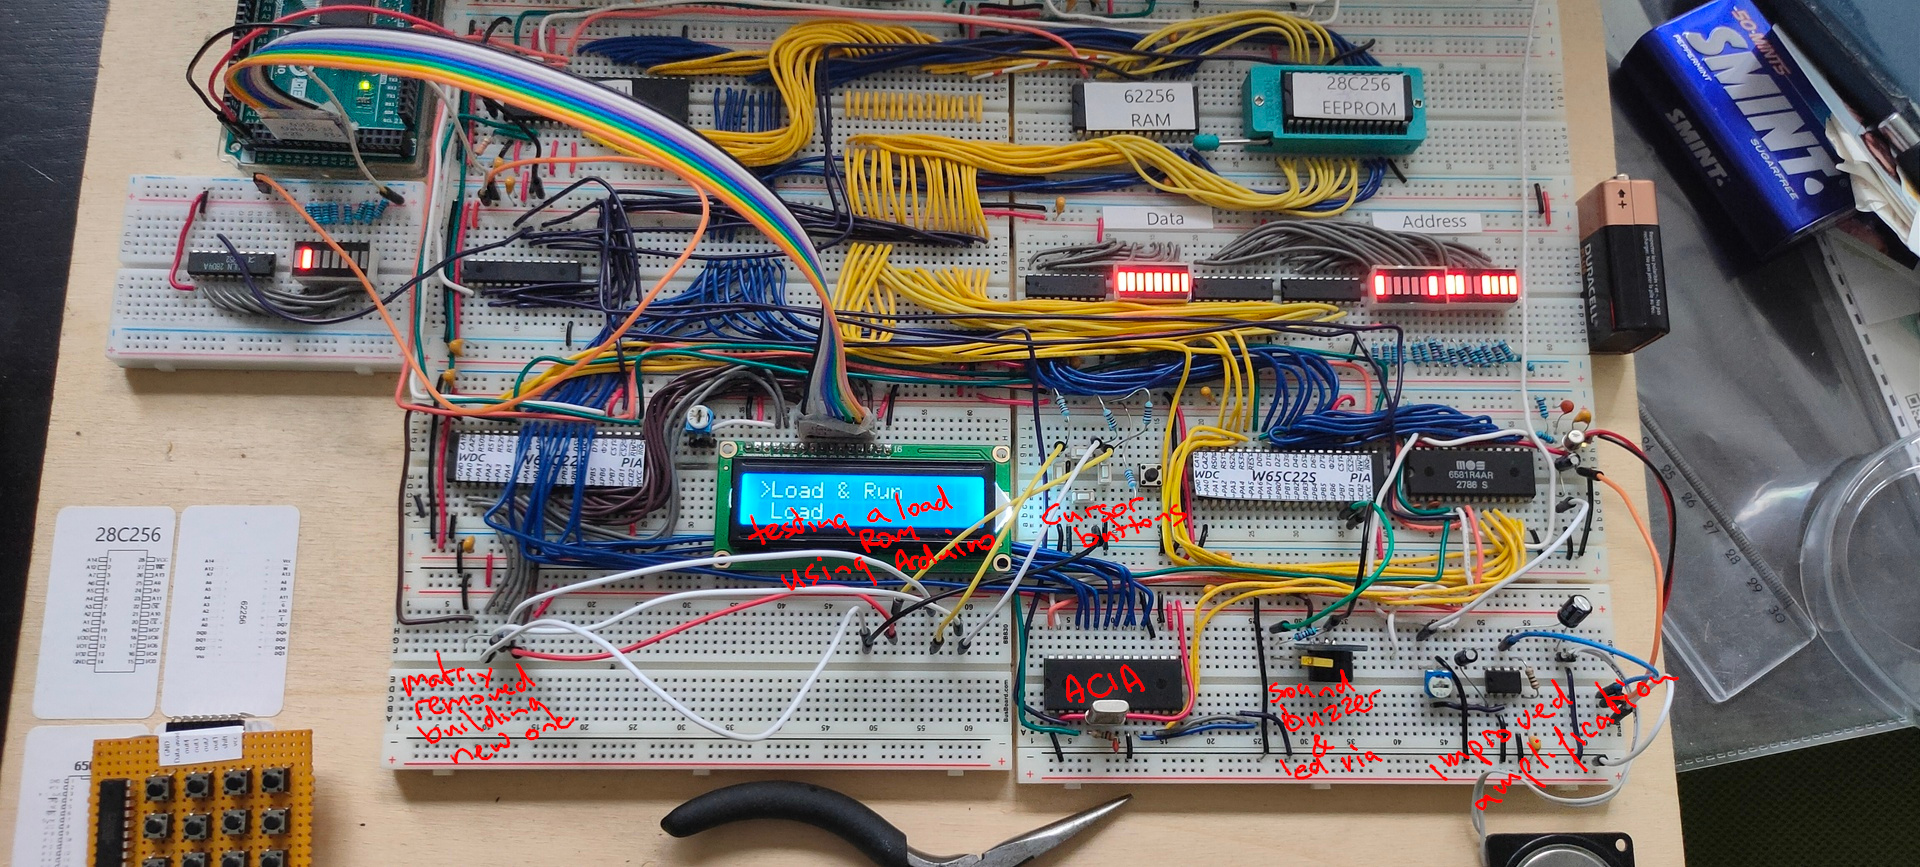
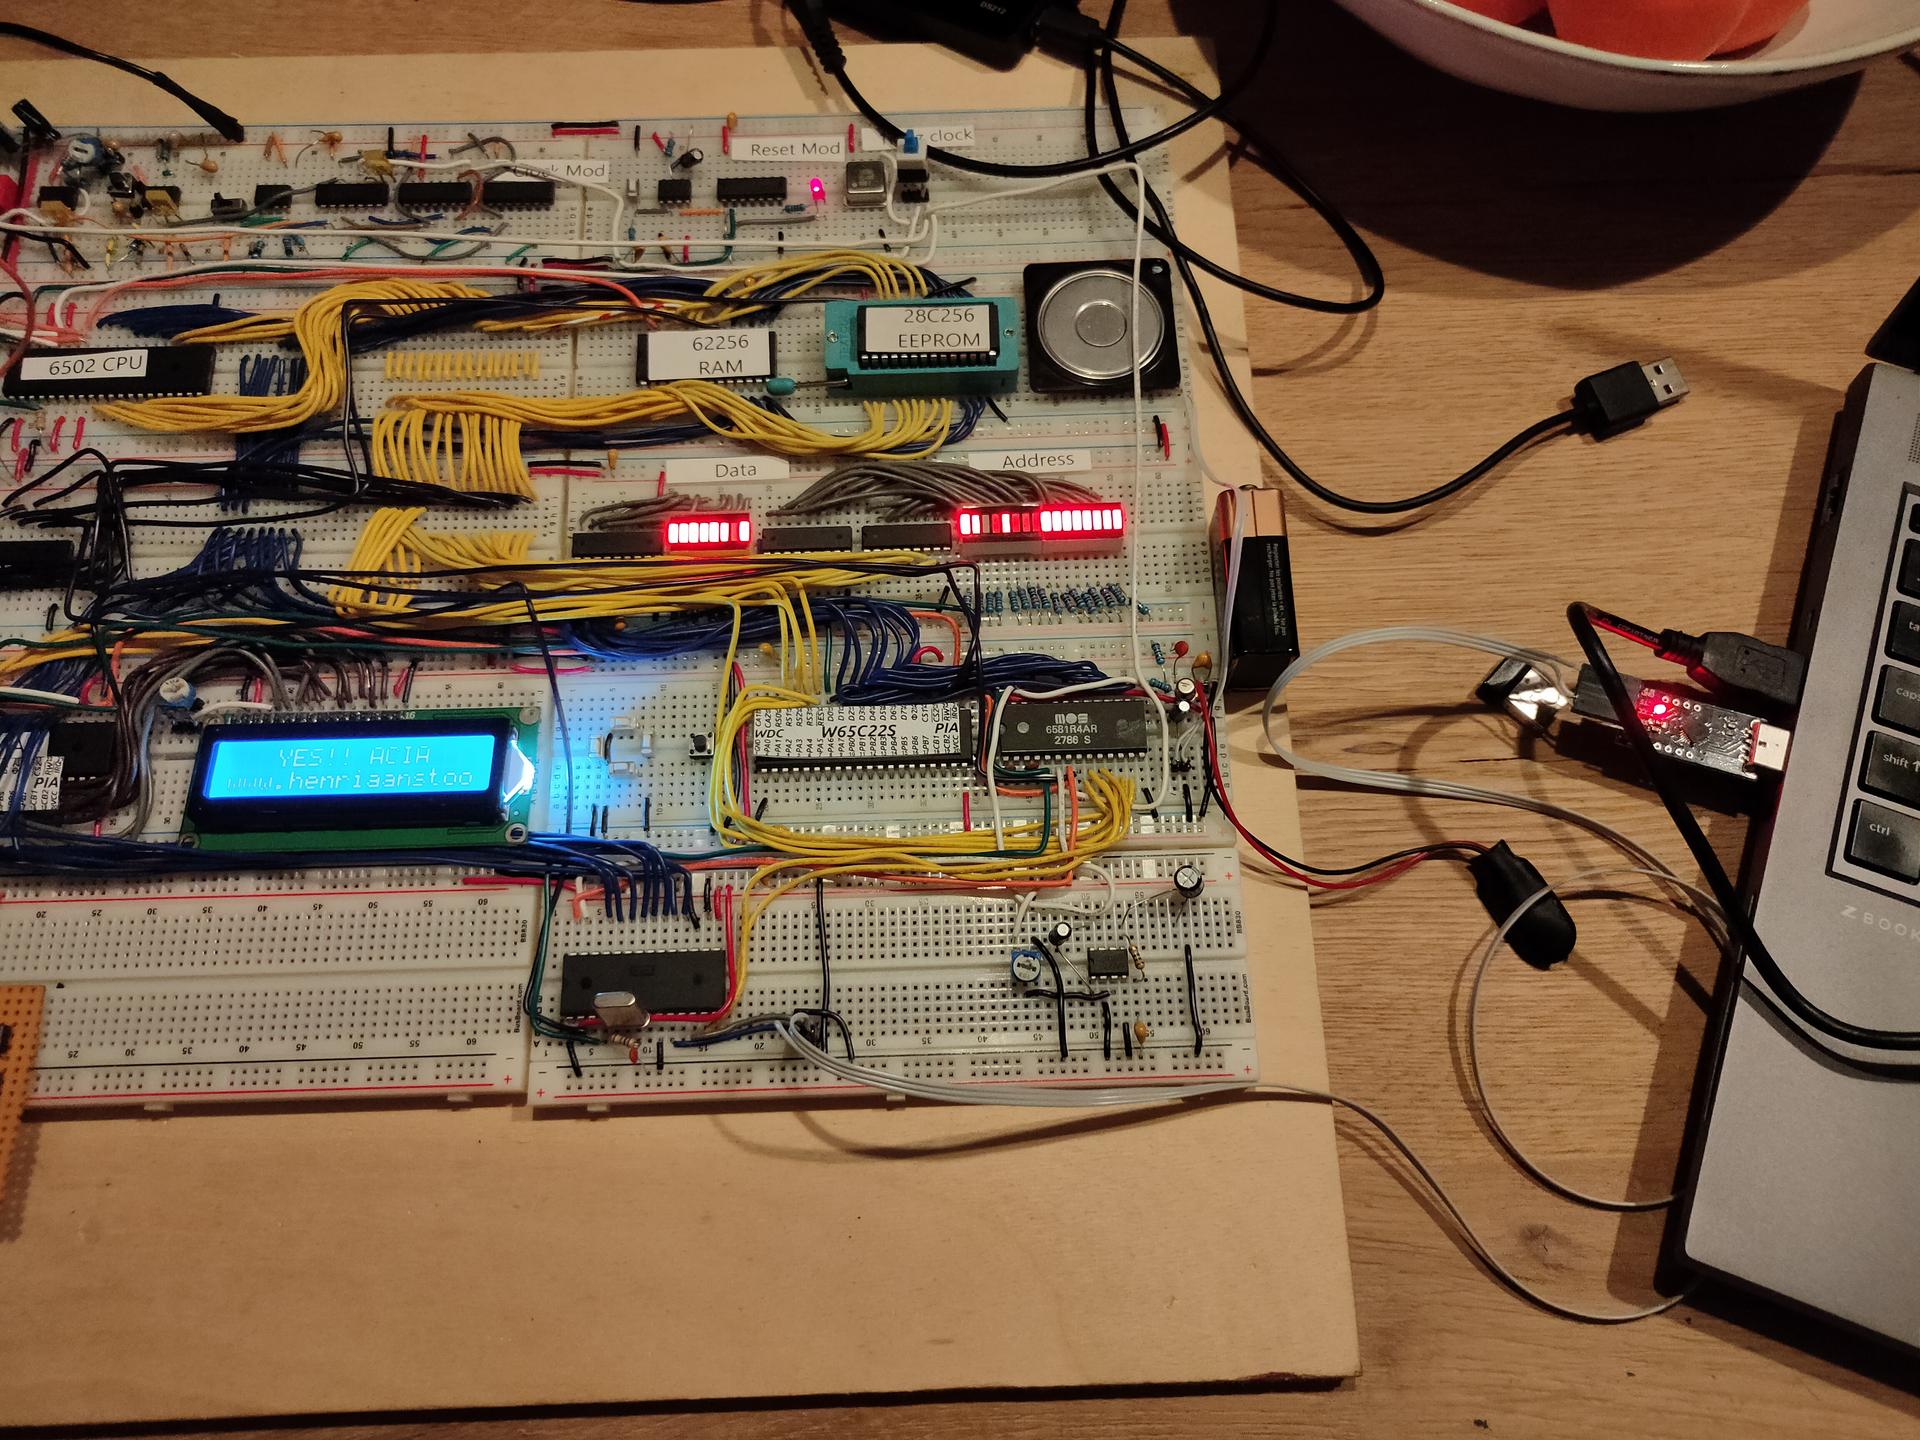
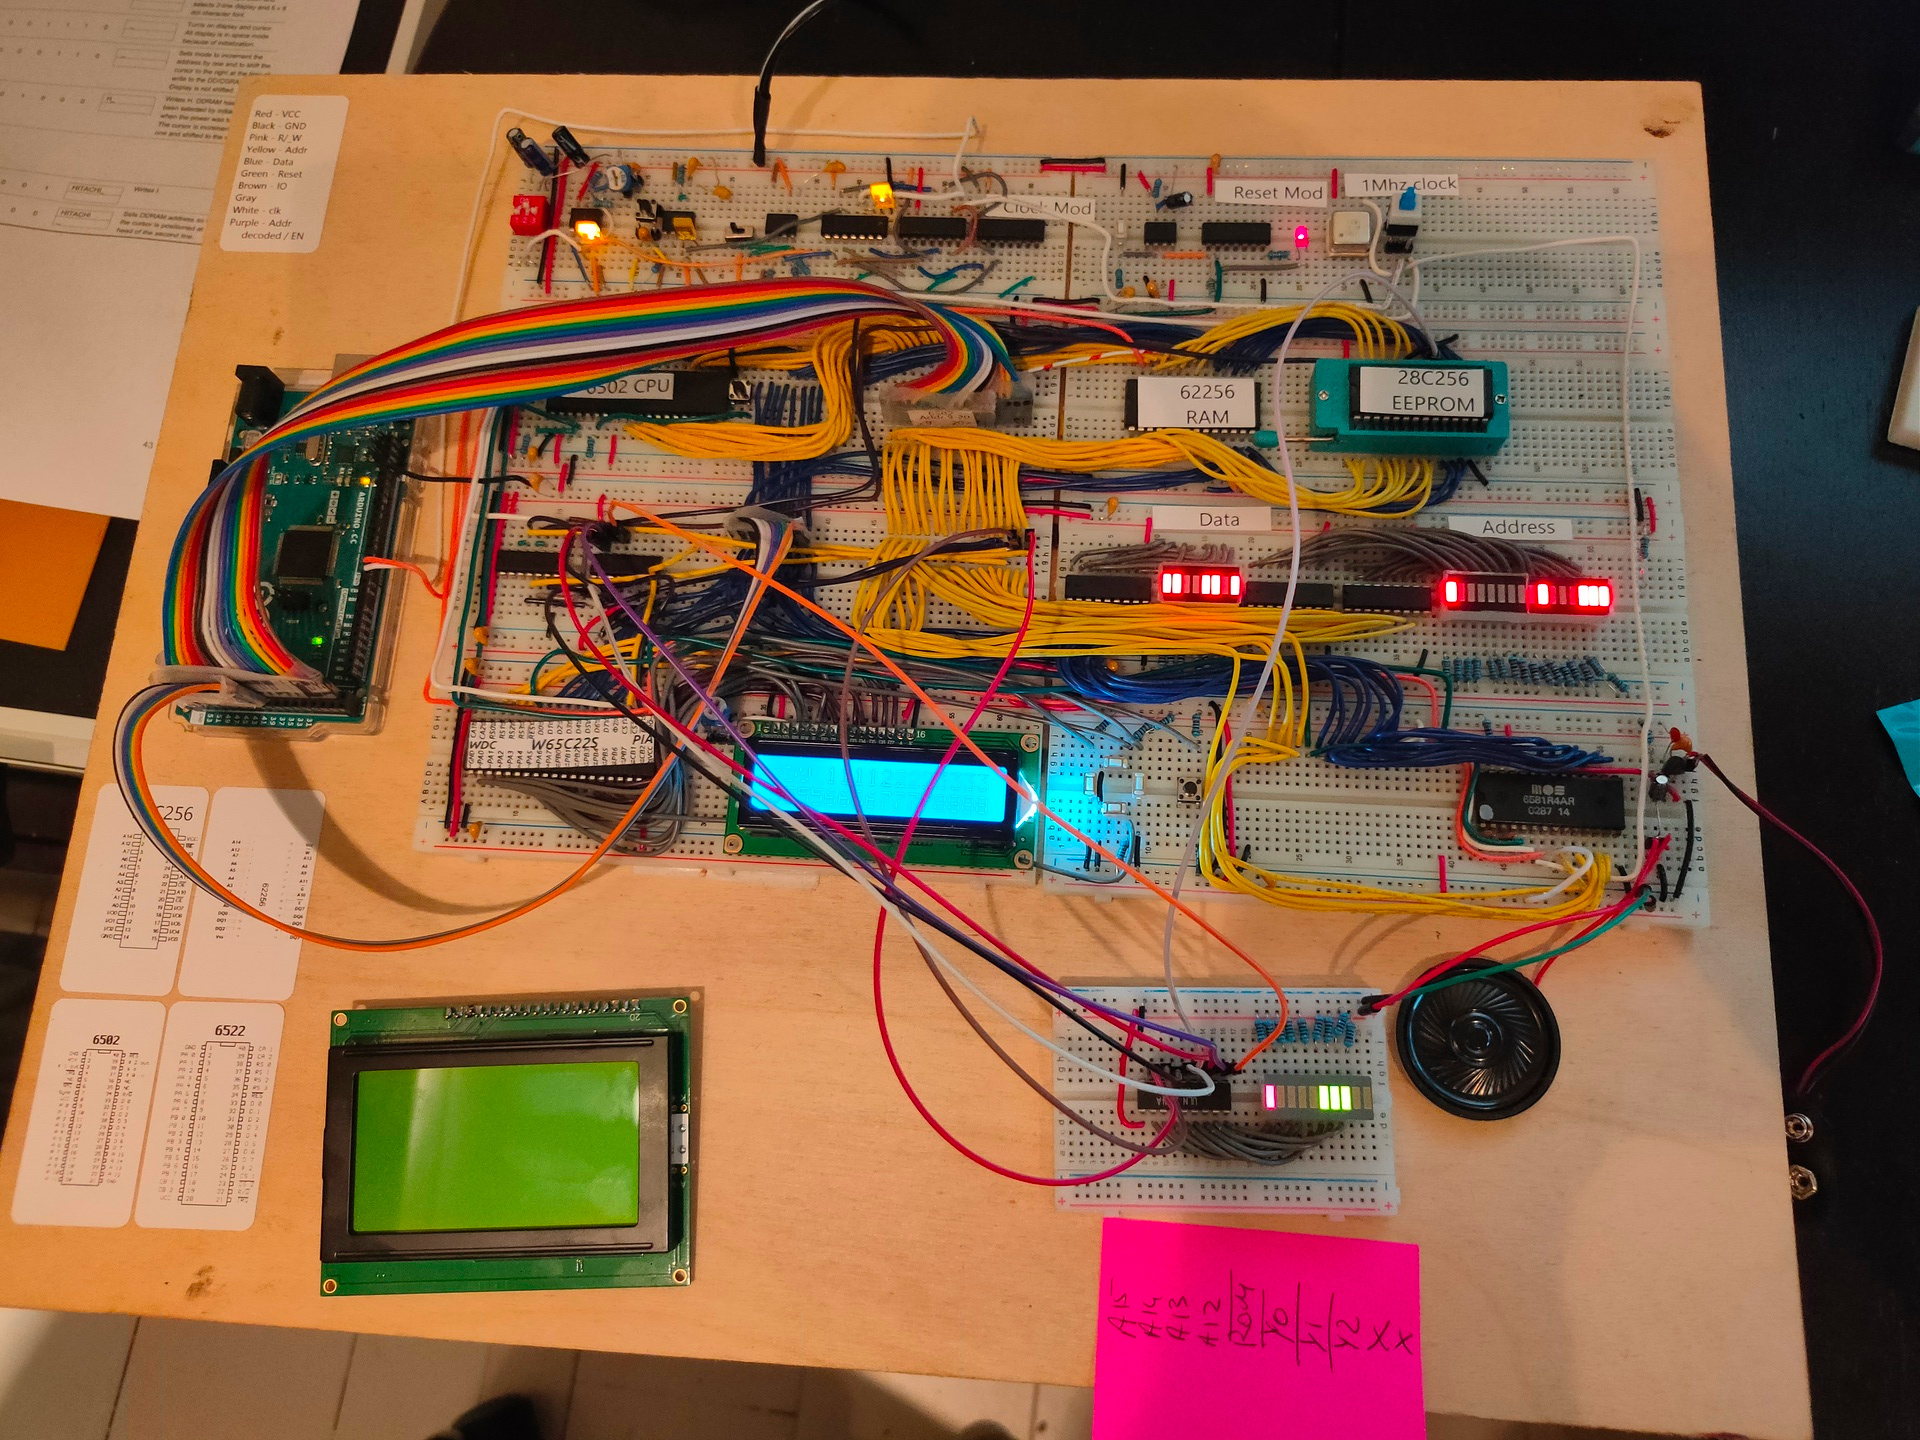
I’ve got a ROM in my 6502 which can load programs at $0200.
When running own programs i want to use IRQ’s, but my rom is also using IRQ routines.
So i was wondering if i could ‘hijack’ this IRQ for own program purposes.
So i’ve altered the rom to use a vector in userspace.
- CPU starts, getting vector from FFFC
- Goto $8000 main ROM program
- Setting a jmp routine on zero page $F0
- 4C C9 FF
- 4C C9 FF ; second time, first one will redirect
- Running my program on $0200
- Change first jmp C9 FF to my own IRQ part
- Changed jmp vectors
- 4C 6E 02 ; jmp $026E (myprg)
- 4C C9 FF ; jmp $FFC9 (rom)
- Run rest of program
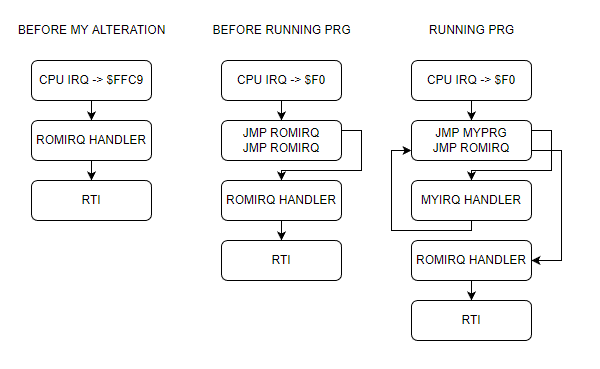
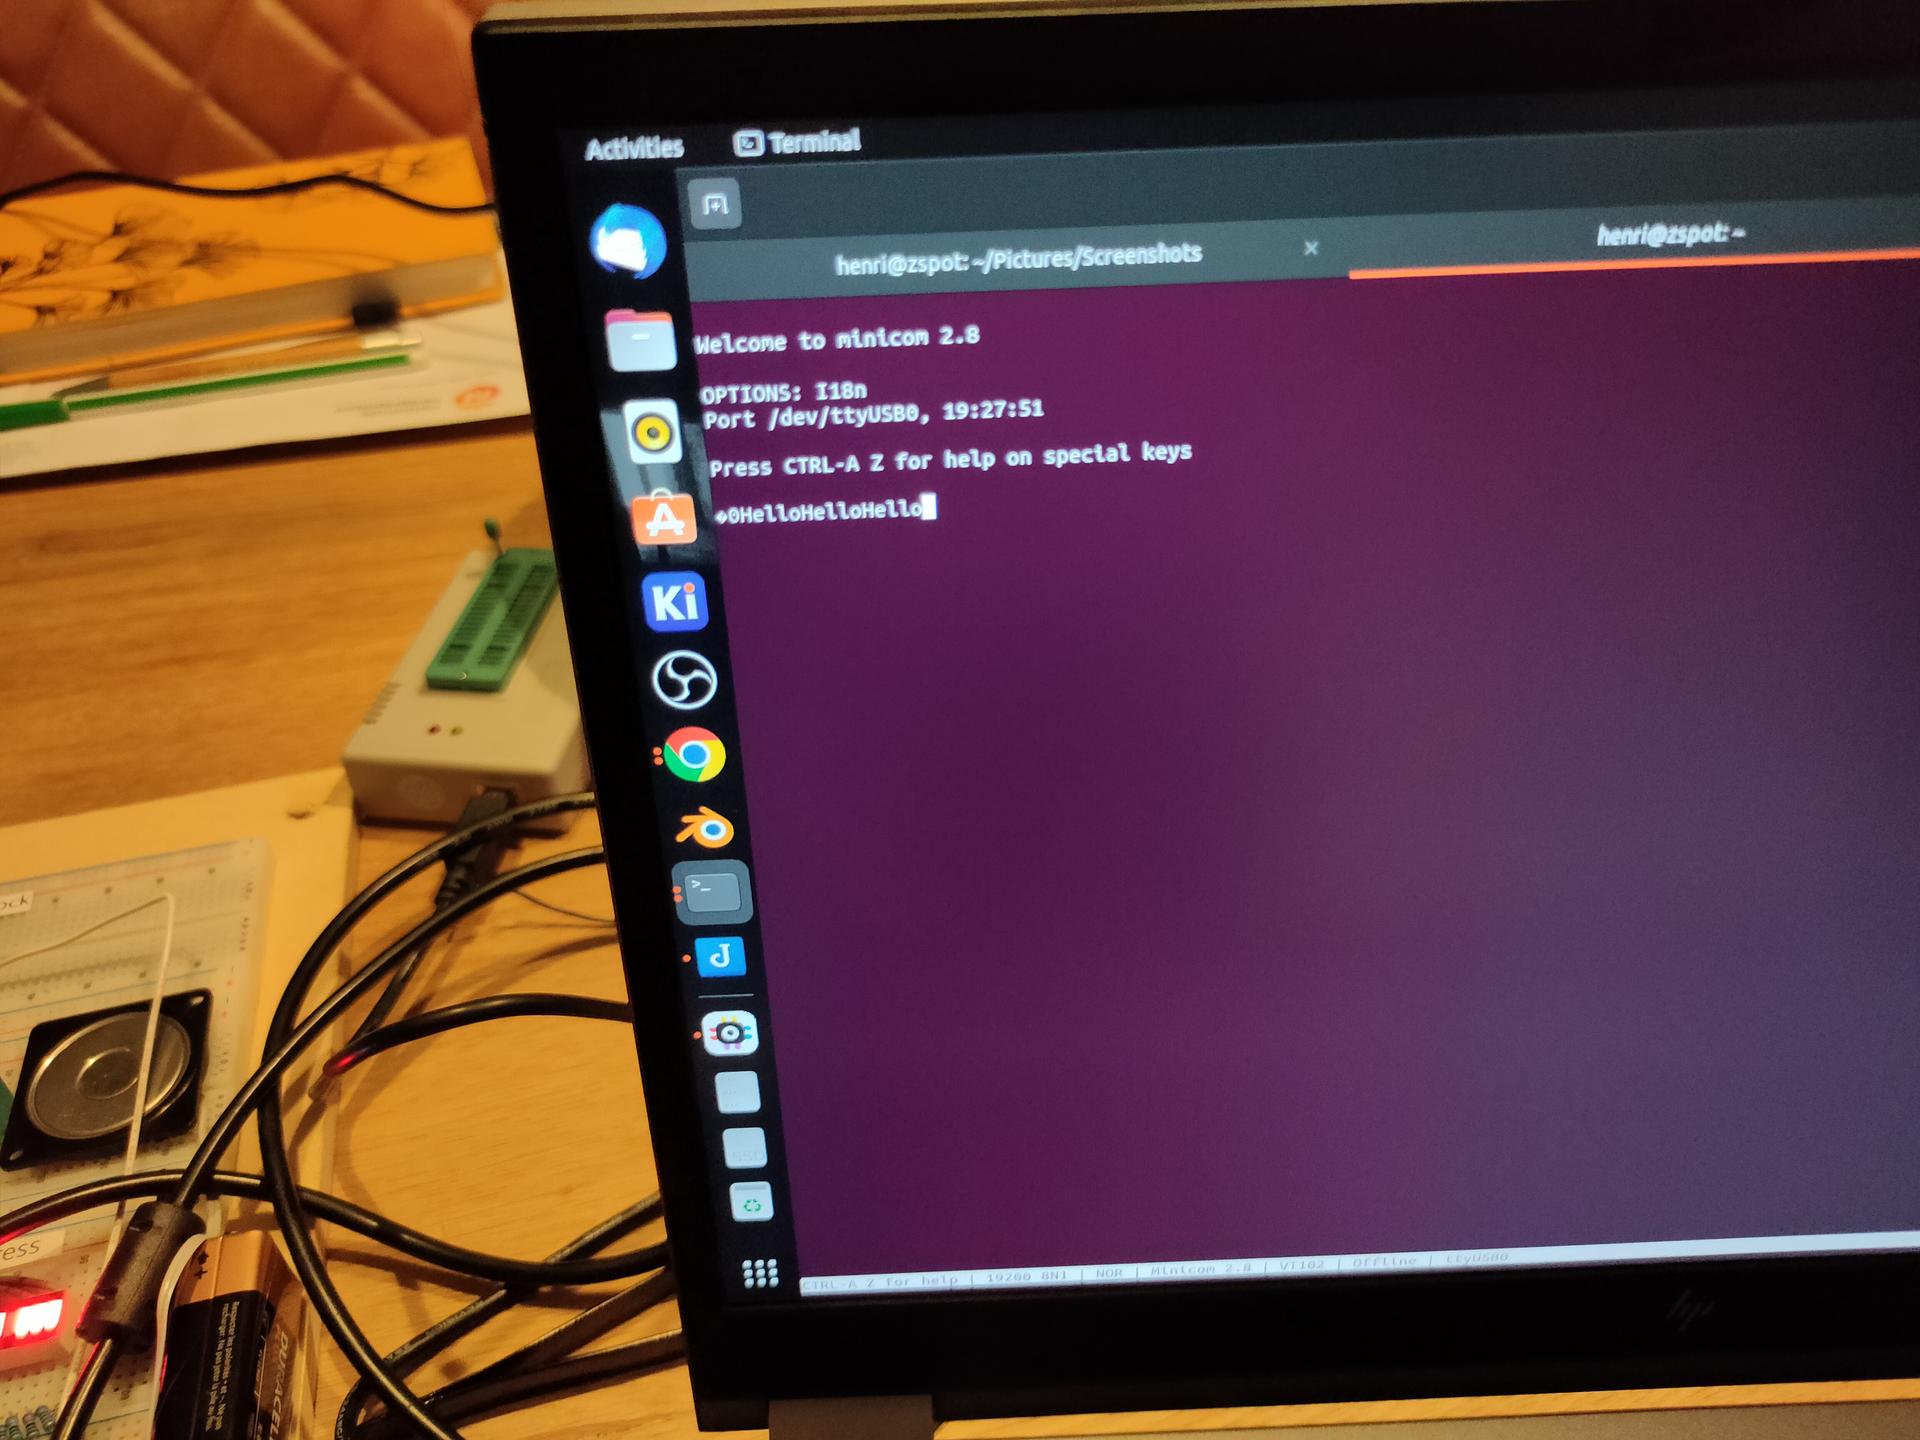
All seems fine and dandy … buzzer is sounding, but no blinky leds.
When flashing the rom with only my program, everything works ..
So whats going on? .. anyone?
00000000  78 a9 6e 85 f1 a9 02 85  f2 58 a9 ff 8d 03 50 8d  |x.n......X....P.| ; sei , lda #$6e, store $f1, lda #$02, store $f2 - so address $026e
00000010  02 50 a9 00 8d 01 50 8d  00 50 85 04 20 45 02 a9  |.P....P..P.. E..|
00000020  77 8d 04 50 a9 07 8d 05  50 20 2f 02 4c 29 02 38  |w..P....P /.L).8|
00000030  a5 00 e5 04 c9 19 90 0c  a9 40 4d 00 50 8d 00 50  |.........@M.P..P|
00000040  a5 00 85 04 60 a9 00 85  00 85 01 85 02 85 03 a9  |....`...........|
00000050  c0 8d 0b 50 a9 a0 8d 0e  50 a9 0e 8d 08 50 a9 27  |...P....P....P.'|
00000060  8d 09 50 a9 00 8d 04 50  8d 05 50 58 60 40 48 a9  |..P....P..PX`@H.| ; at $6e opcode 48 (pha)
00000070  0e 8d 08 50 a9 27 8d 09  50 e6 00 d0 0a e6 01 d0  |...P.'..P.......|
00000080  06 e6 02 d0 02 e6 03 68  4c f3 00                 |.......hL..|
ROM parts
MYIRQ = $F0 ; Own IRQ vector <=================== my additions/alterations
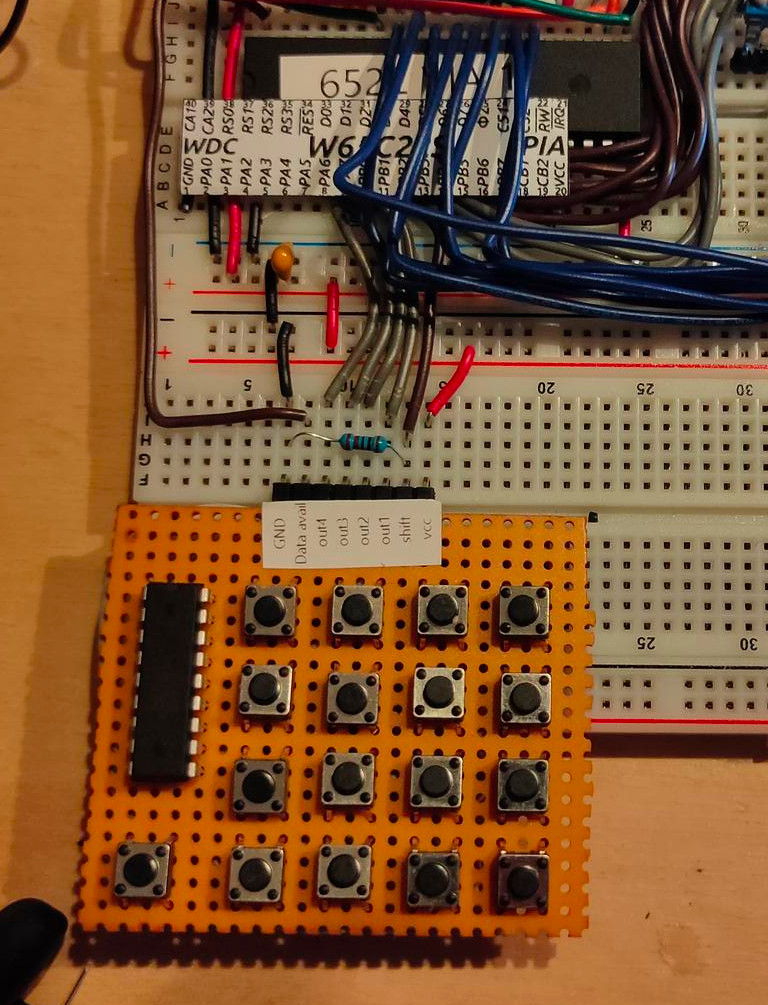
; Below definitions for VIA 1 my loadable program uses VIA 2
PORTB = $6000 ; VIA port B
PORTA = $6001 ; VIA port A
DDRB = $6002 ; Data Direction Register B
DDRA = $6003 ; Data Direction Register A
-------------8<------- snip
PROGRAM_LOCATION = $0200 ; memory location for user programs
.org $8000
main: ; boot routine, first thing loaded
ldx #$ff ; initialize the stackpointer with 0xff
txs
; ISR redirect code <=================== my additions/alterations
sei
lda #$4C
sta MYIRQ
sta MYIRQ + 3
lda #<ISR
sta MYIRQ + 1
sta MYIRQ + 4
lda #>ISR
sta MYIRQ + 2
sta MYIRQ + 5
cli
; End ISR redirect <=================== till here
; below this the standard rom routines
-------------8<------- snip
.org $FFC9 ; as close as possible to the ROM's end
ISR: <====================== Whole ISR not my code
CURRENT_RAM_ADDRESS = Z0 ; a RAM address handle for indirect writing
pha
tya
pha
lda ISR_FIRST_RUN ; check whether we are called for the first time
bne .write_data ; if not, just continue writing
lda #1 ; otherwise set the first time marker
sta ISR_FIRST_RUN ; and return from the interrupt
jmp .doneisr
.write_data:
lda #$01 ; progressing state of loading operation
sta LOADING_STATE ; so program_ram routine knows, data's still flowing
lda PORTB ; load serial data byte
ldy #0
sta (CURRENT_RAM_ADDRESS),Y ; store byte at current RAM location
; increase the 16bit RAM location
inc CURRENT_RAM_ADDRESS_L
bne .doneisr
inc CURRENT_RAM_ADDRESS_H
.doneisr
pla ; restore Y
tay
pla ; restore A
rti
.org $fffc
.word main ; Main ROM program
.word MYIRQ ; Redirect to OWN irq vector <=================== my additions/alterations
RAM Program
; Second VIA stuff
PORTB = $5000
PORTA = $5001
DDRB = $5002
DDRA = $5003
;------------------8<-------------

; Vector pointer on zero page
MYIRQ = $F0

ticks = $00 ; 4 Bytes
toggle_time = $04 ; 1 Byte

    .org $0200

start:
; IRQ REDIRECT
    sei               ; irq masked
    lda #<irq         ; get low byte IRQ routine address
    sta MYIRQ + 1     ; store at $F1

    lda #>irq         ; get high part of address
    sta MYIRQ + 2     ; store at $F2
    cli               ; irq enabled
; IRQ END REDIRECT

; init of program part
    lda #%11111111
    sta DDRA
    sta DDRB
        lda #$00
    sta PORTA
    sta PORTB
    sta toggle_time
    jsr init_timer
    lda #$77
    sta T1CL
    lda #$07
    sta T1CH

loop:                       ; loop
    jsr update_led          ; update led routine
    jmp loop

update_led:
    sec
    lda ticks
    sbc toggle_time
    cmp #25
    bcc exit_update_led
    ; Toggle led
    lda #%01000000
    eor PORTB
    sta PORTB
    lda ticks
    sta toggle_time
exit_update_led:
    rts

;-----------------------------8<------------- snip

irq:
    pha
    lda #$0e
    sta T2CL
    lda #$27
    sta T2CH
    inc ticks
    bne end_irq
    inc ticks + 1
    bne end_irq
    inc ticks + 2
    bne end_irq
    inc ticks + 3
end_irq:
    pla
    jmp MYIRQ + 3           ; jmp to vector which points to ROM routine ; should be $FFC9