!cpu 650rasterline
!to "borderflag.prg",cbm


* = $0801
    !byte $0d,$08,$dc,$07,$9e,$20,$34
    !byte $39,$31,$35,$32,$00,$00,$00

* = $c000
        sei                     ; turn off interrupts

        ldx #1                  ; enable raster interrupts
        stx $d01a

        lda #<irq       	; set raster interrupt vector
        ldx #>irq
        sta $0314
        stx $0315

        ldy #$f0                ; set first interrupt rasterline
        sty $d012
        lda $d011               ; reset rasterline hi bit
        and #%01111111
        sta $d011

        asl $d019               ; ack VIC interrupts
        cli

loop_until_doomsday
        jmp loop_until_doomsday

irq
	asl $d019       	; ack irq

	lda #$01		; set screenframe and background
	sta $d020
	lda #$02
	sta $d021

	lda #$38        	; wait for line $38
	cmp $d012
	bne *-3

	lda #$02		; set screenframe and background
	sta $d020
	lda #$01
	sta $d021

	lda #$f9        	; wait for line $f9C
	cmp $d012       	; just below border in 25 row mode
	bne *-3

	lda $d011       	; switch to 24 row mode ($d011 bit 3 = 0)
	and #$f7        	; %11110111
	sta $d011

	lda #$fd        	; wait for line $fd
	cmp $d012       	; just below border in 25 row mode
	bne *-3

	lda $d011       	; switch back to 25 row mode ($d011 bit 3 = 1)
	ora #$08        	; %00001000
	sta $d011

	jmp $ea31		; exit irq
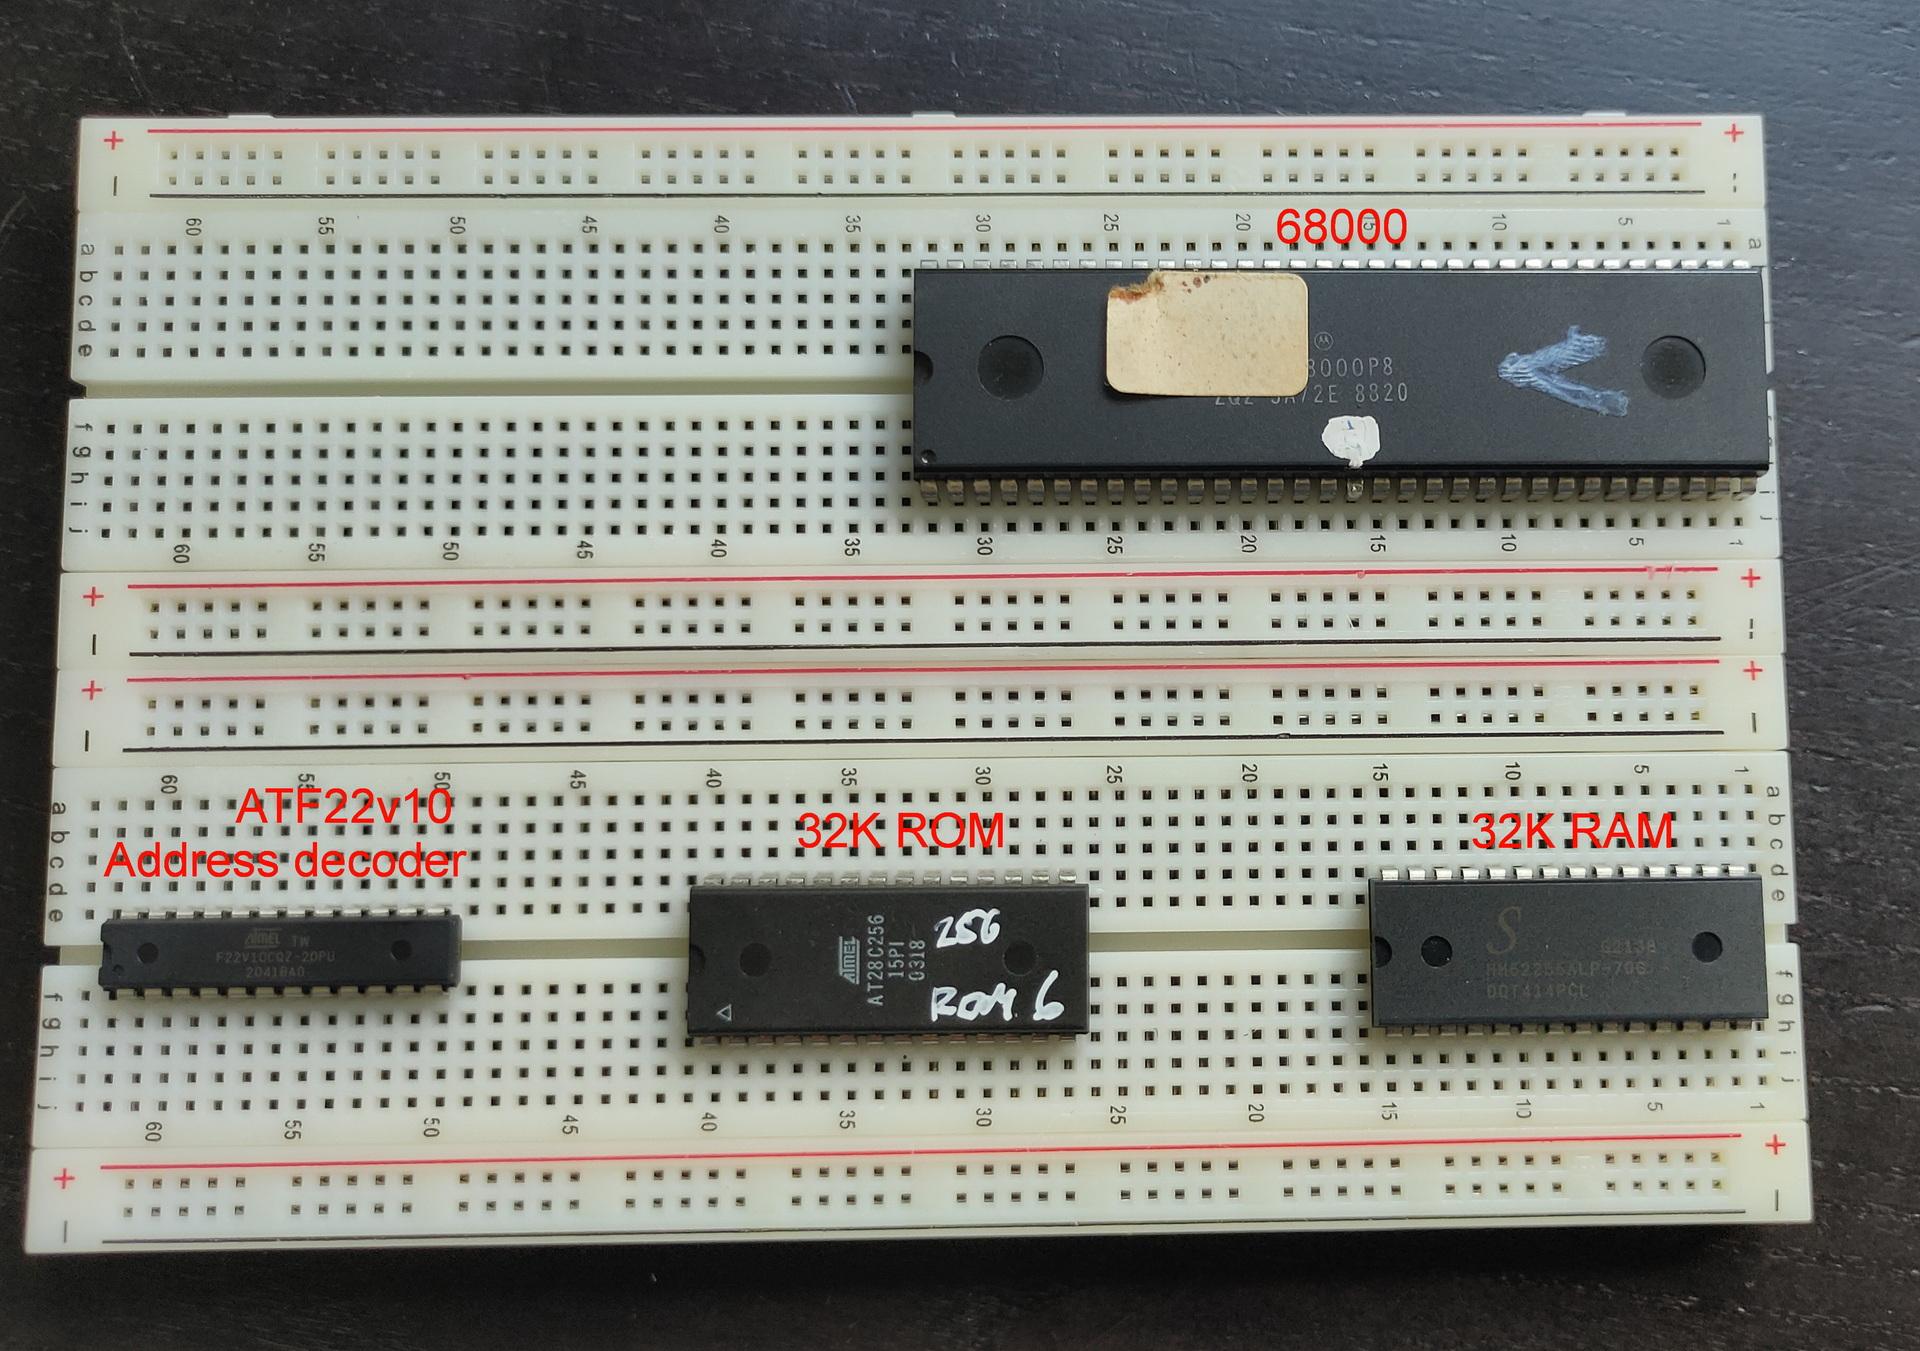
Started working on my breadboard version of a 68k computer. When it’s working, I’ll make a PCB version. Using almost only parts I still have. (No 8mhz crystal)
The 68000 being 24 bit address and 16 bit data needs 2x 8-bit roms and 2x 8 bit ram, but i didn’t have the components yet in this picture.
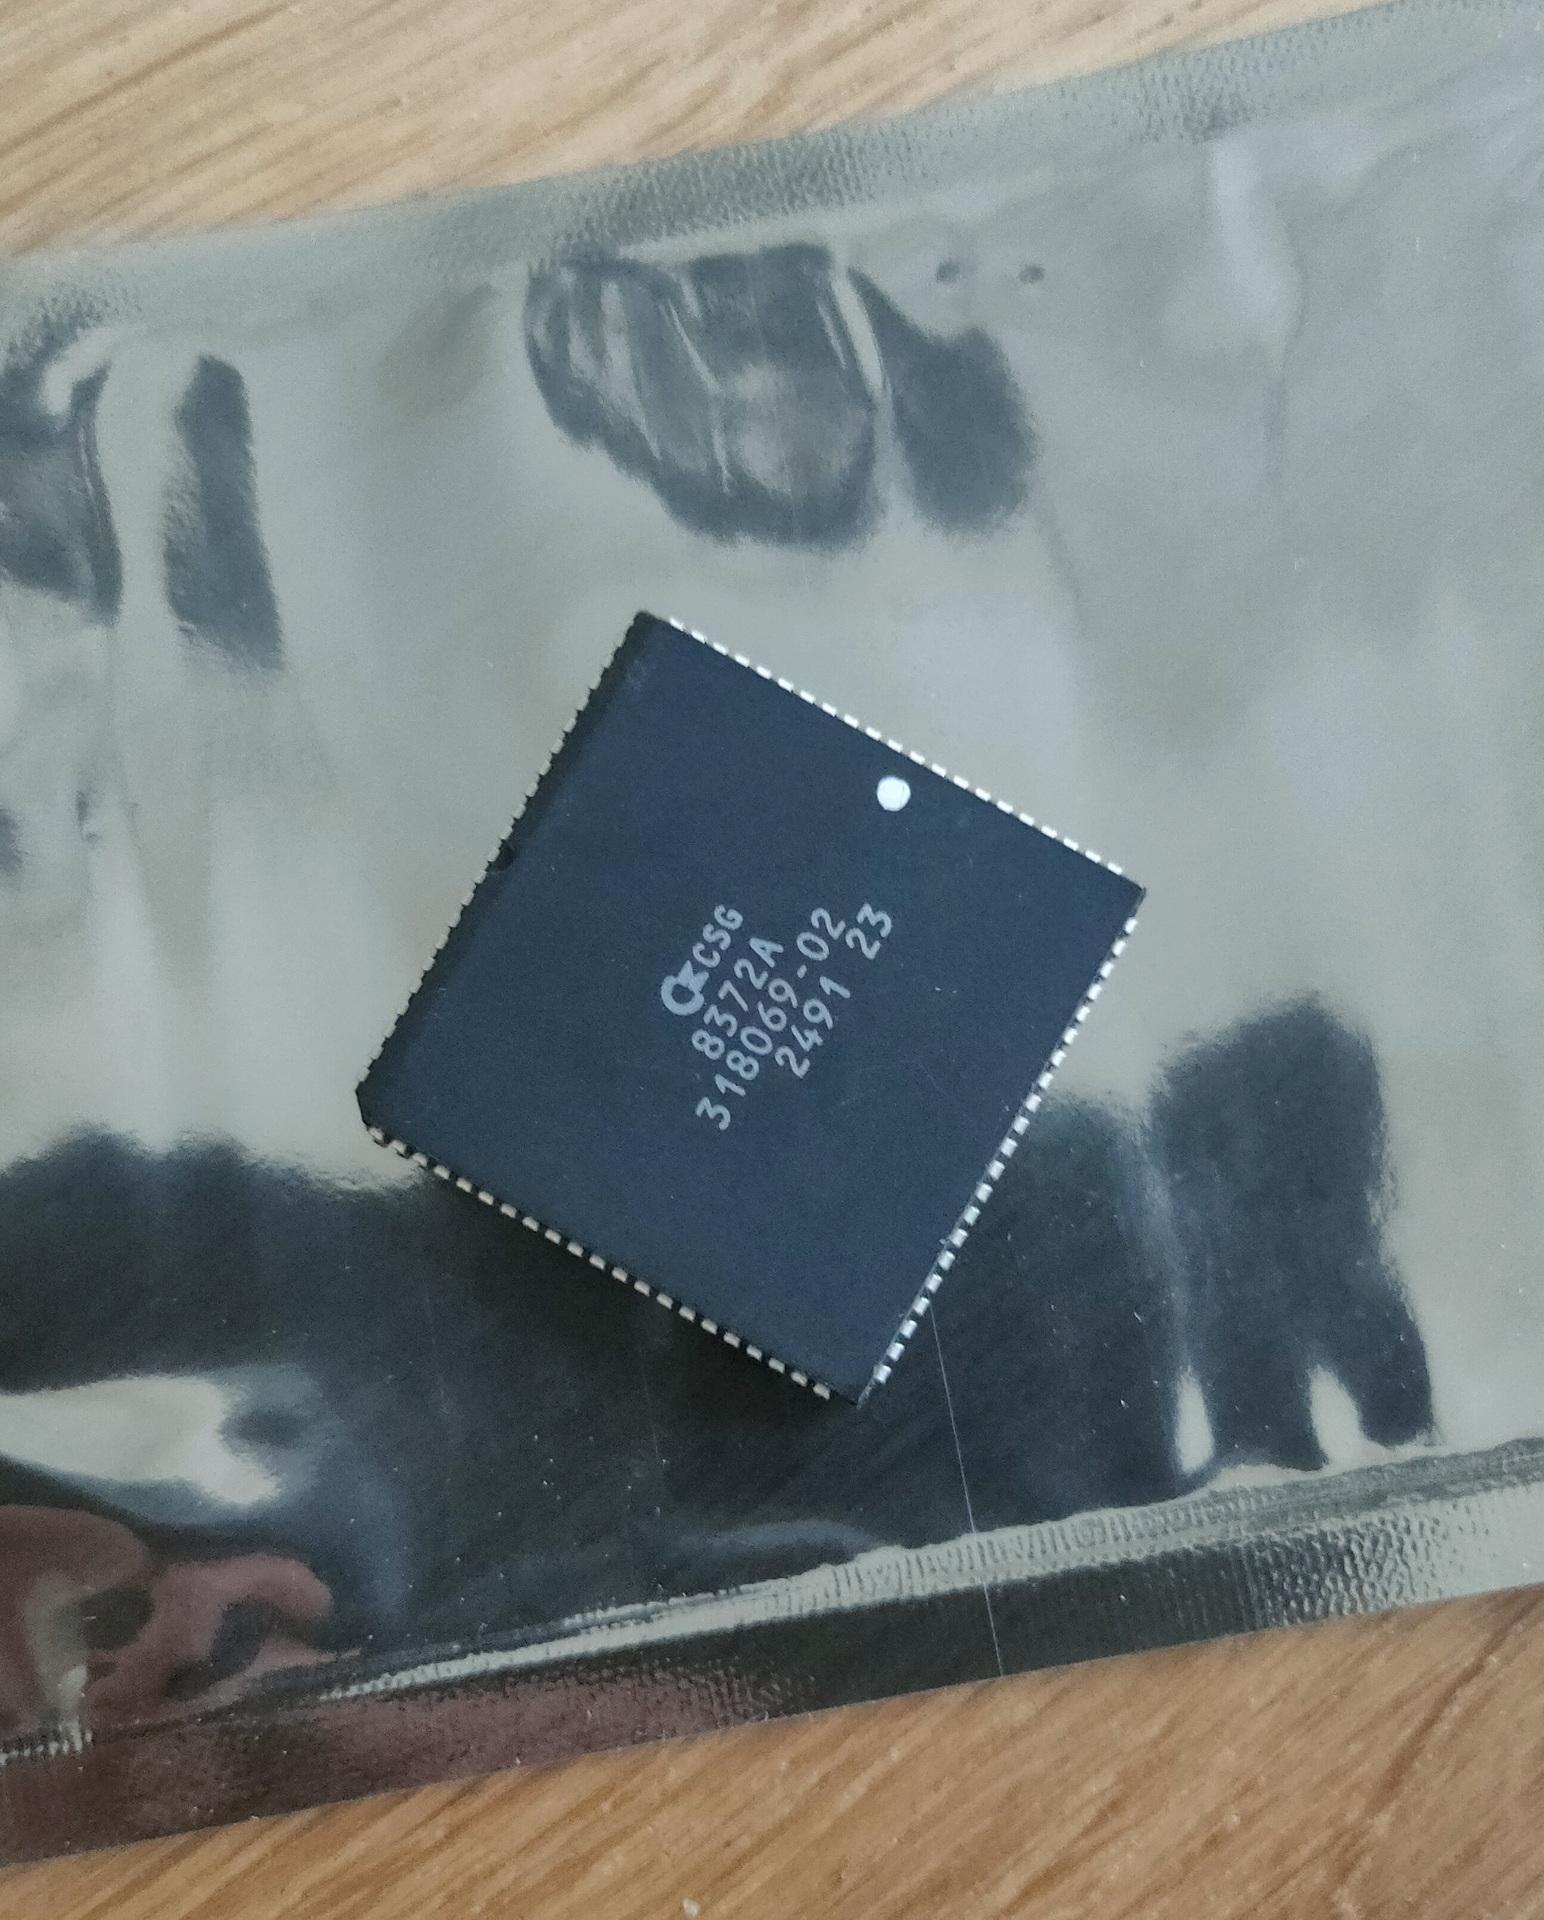
While tinkering with above, my Fatter Agnus chip came in.
To make a 1mb chipmem version of your rev 5 amiga (PAL)
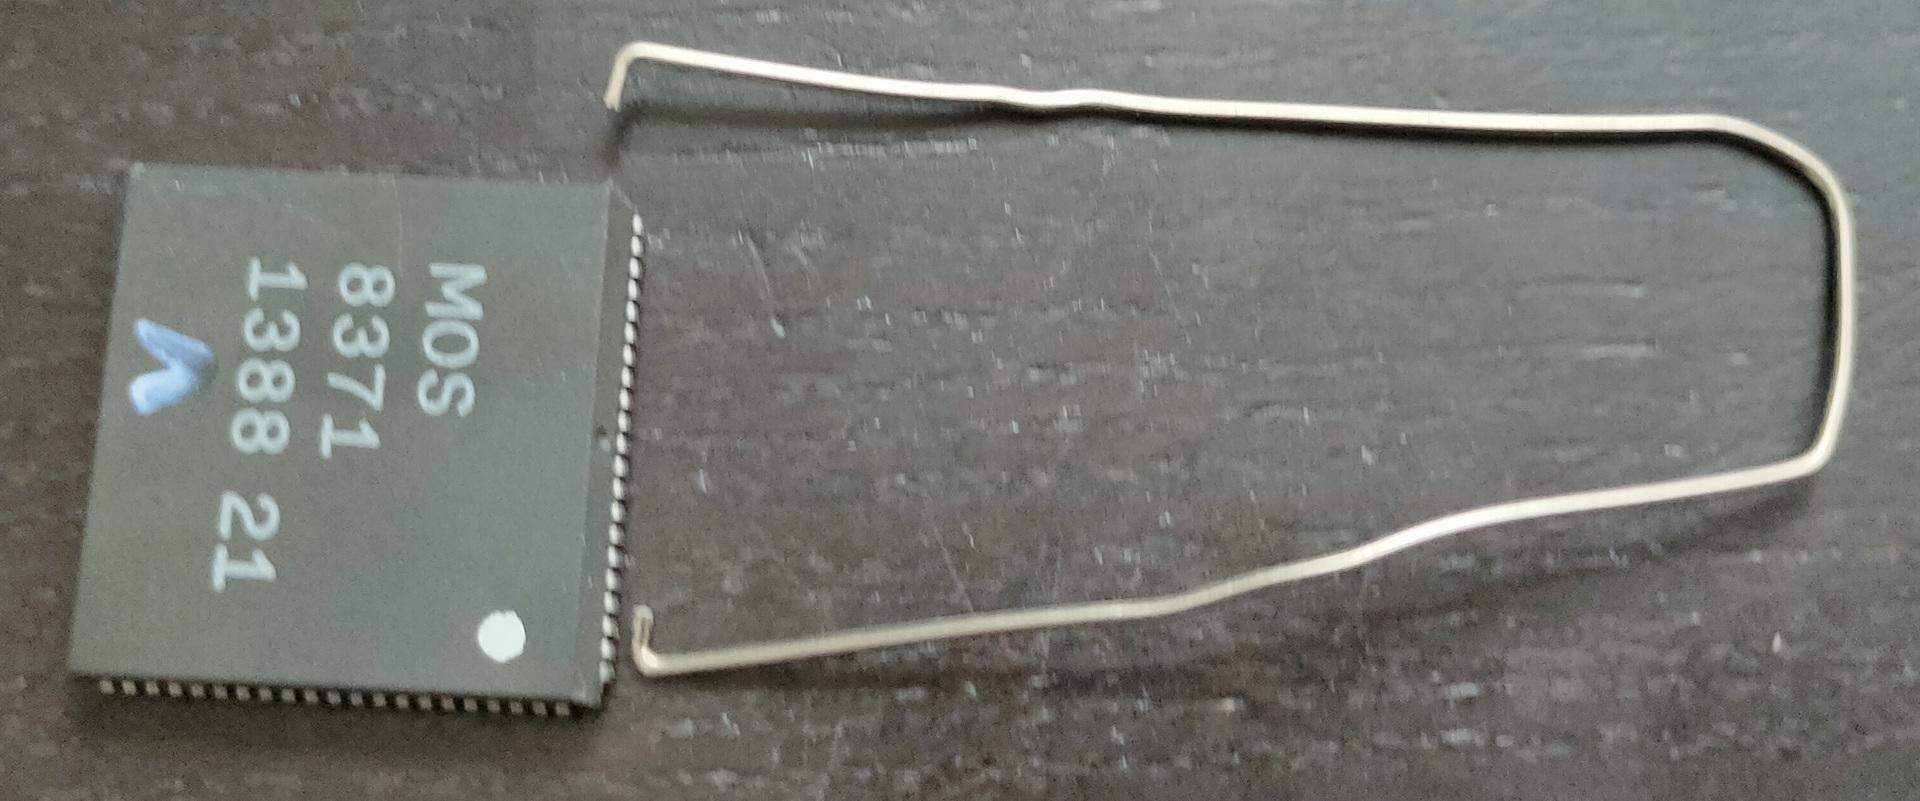
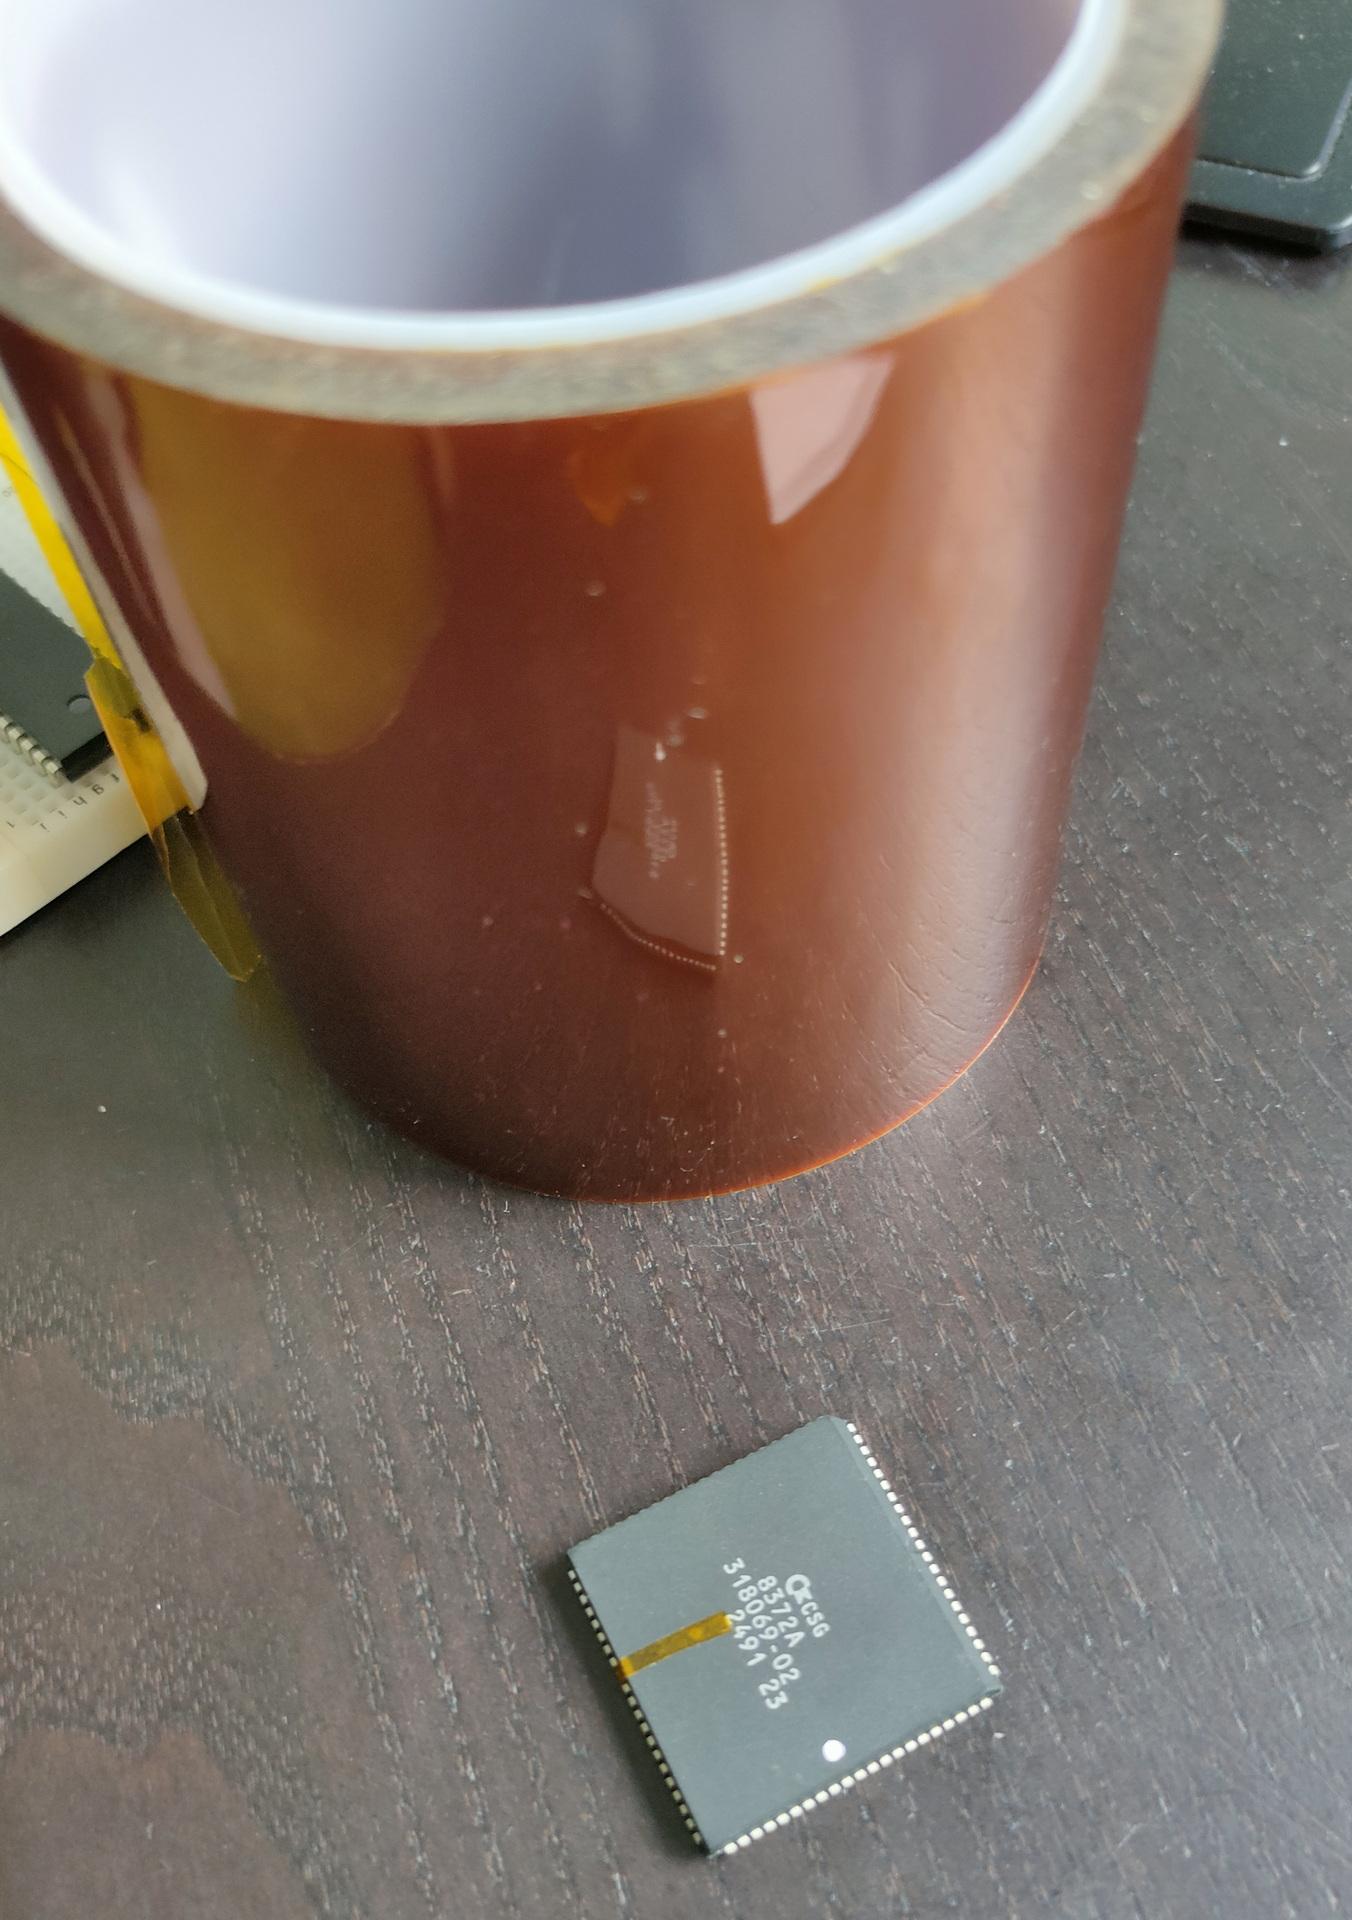
You need to have a newer version of the Agnus chip (I had 8371, and bought a 8372a) AND you need a 512kb trapdoor memory expansion.
An unmodded rev 5 will see 512kb Chip mem and 512 Fast mem.
Replacing the Agnus 8371 for 8372a: I lost my PLCC puller, so I modded a paperclip into a puller 🙂
MISSING IN ACTION
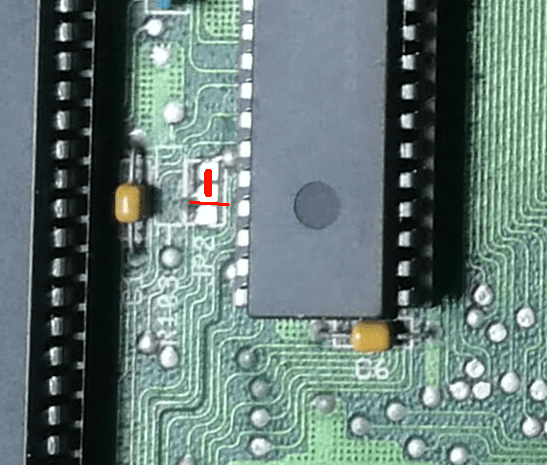
When placing the new chip, I had to tape pin 41 for PAL version. I used Polyimide Film tape.
Next I had to cut the jumper 2 connection and solder the other pads. (Bottom and middle disconnect and middle and top bridged)
Next was another cut on the PCB, this disables the trapdoor card detection.
I bought a little notebook while being there. I wrote about 12 pages of ideas, schematics and projects to start.
Rewrite Wozmon to use my composite pcb (Atmega328) access though via
Building a 68000 pcb with a minimal machine code monitor. Using a atf22v10 as address decoder. (Same as my 6502 , I love those devices) Maybe I’ll add a micro sdcard reader
Add a lcd matrix display to my 8088/8086
Creating a PLA alternative for C64 using ath22v10 (again)
Make backplanes for my 6502, so I can plug cards with different POC cards. Clockcard, Latched bus leds, multiple VIA’s, IRQ controller, SID + Buzzer (Maybe also AY-3-8910, see other posts), LCD, composite, serial, Matrix and serial_usb) keyboard)
IRQ controller because I have some devices without opendrain, so I can’t tie all IRQ’s together
Amiga Chip Mem mod for rev 5 (using a ‘new’ 8372A)
8085 Cartridge new approach
C64Pico fix and add backplane + breadboard version for POCs
… more
First version PLA with atf22v10
PCB mockup (two ATF22v10 on top and a wide pin setup for placement in C64
Wide PLA
8085 Cartridge revisited
Working on 8085 cartridge
Problem with cartridge: prg is 17k, exomized 10k. So you need 2 banks of 8k. This disables basic rom, needed for the program. The program needs to be relocated to 0x800 anyway. So my exomizer options will take care of that. But the basic is not being enabled again.
exomizer sfx sys -o data.exo -Di_ram_enter=\$37 -Di_ram_during=\$34 -f'LDA #$37 STA $01' 8085.prg
xa frame.asm -o frame.bin
x64 -cart16 frame.bin
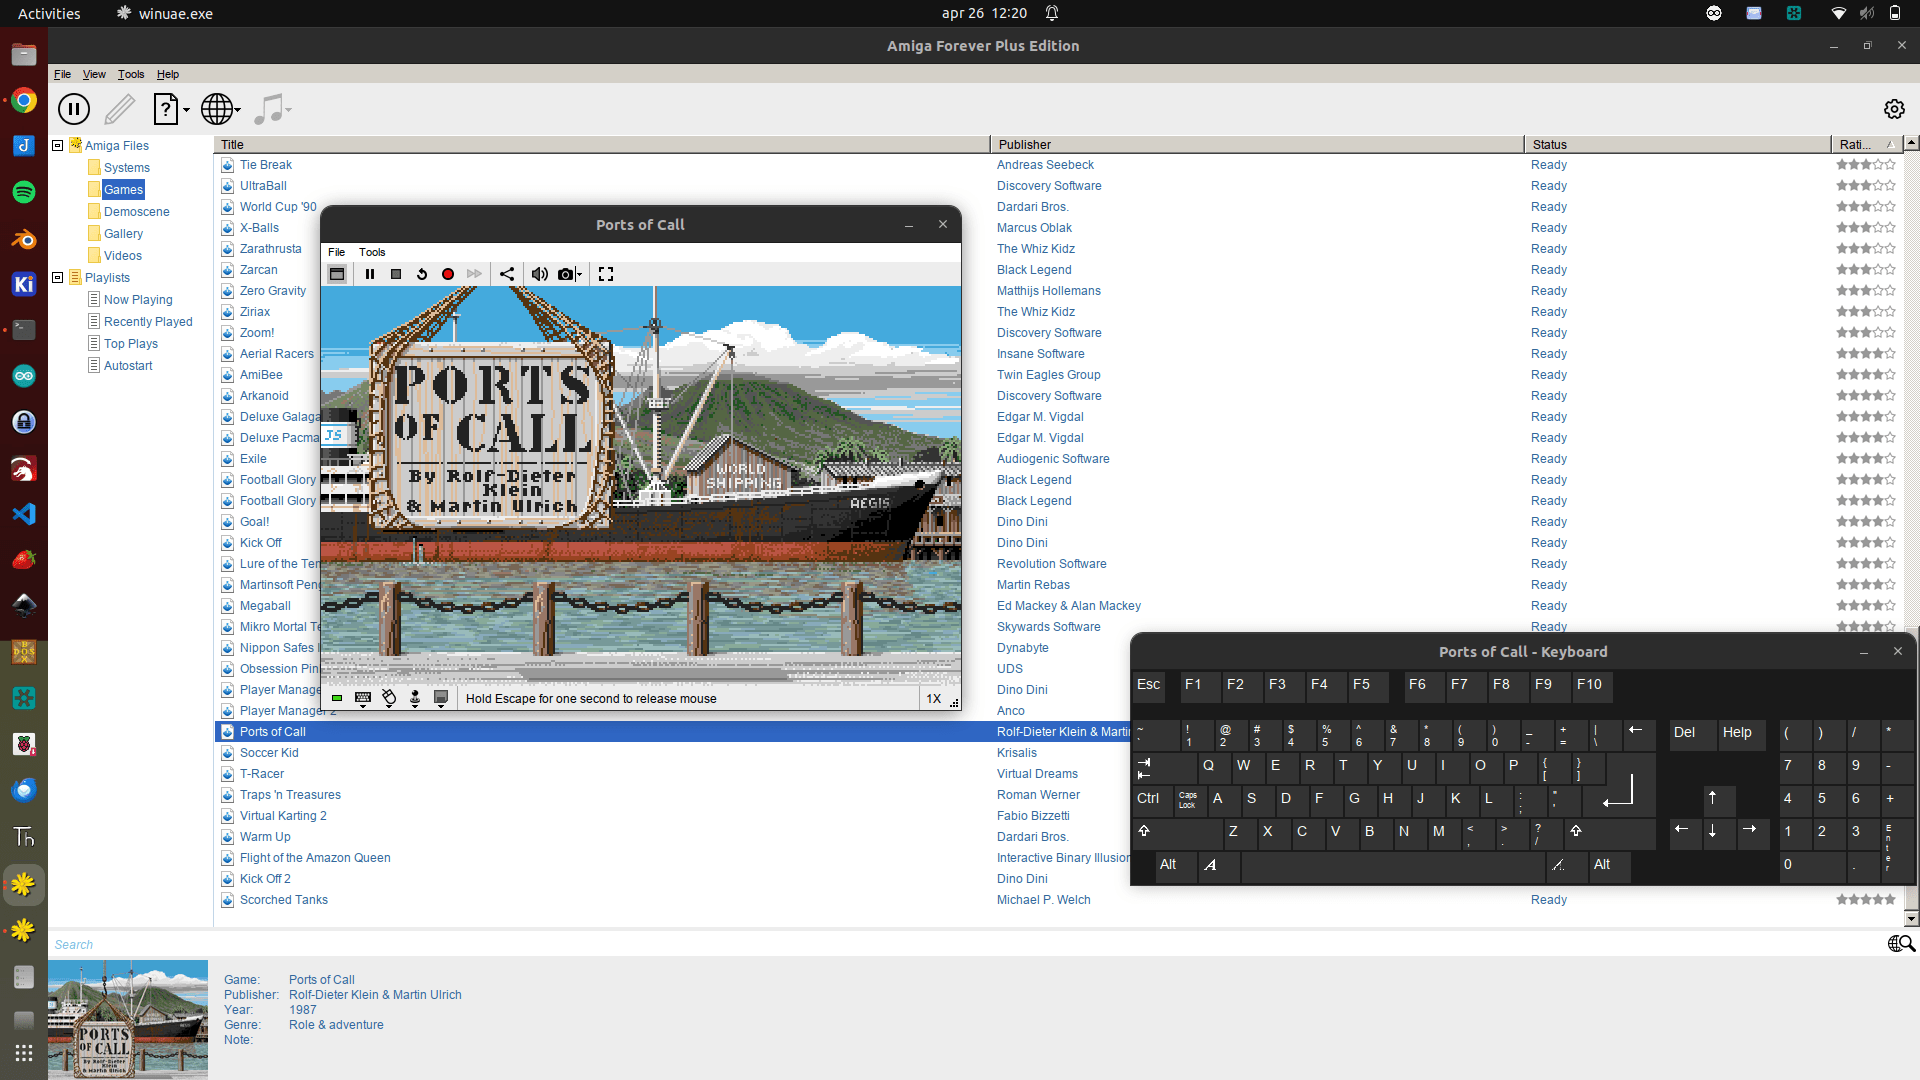
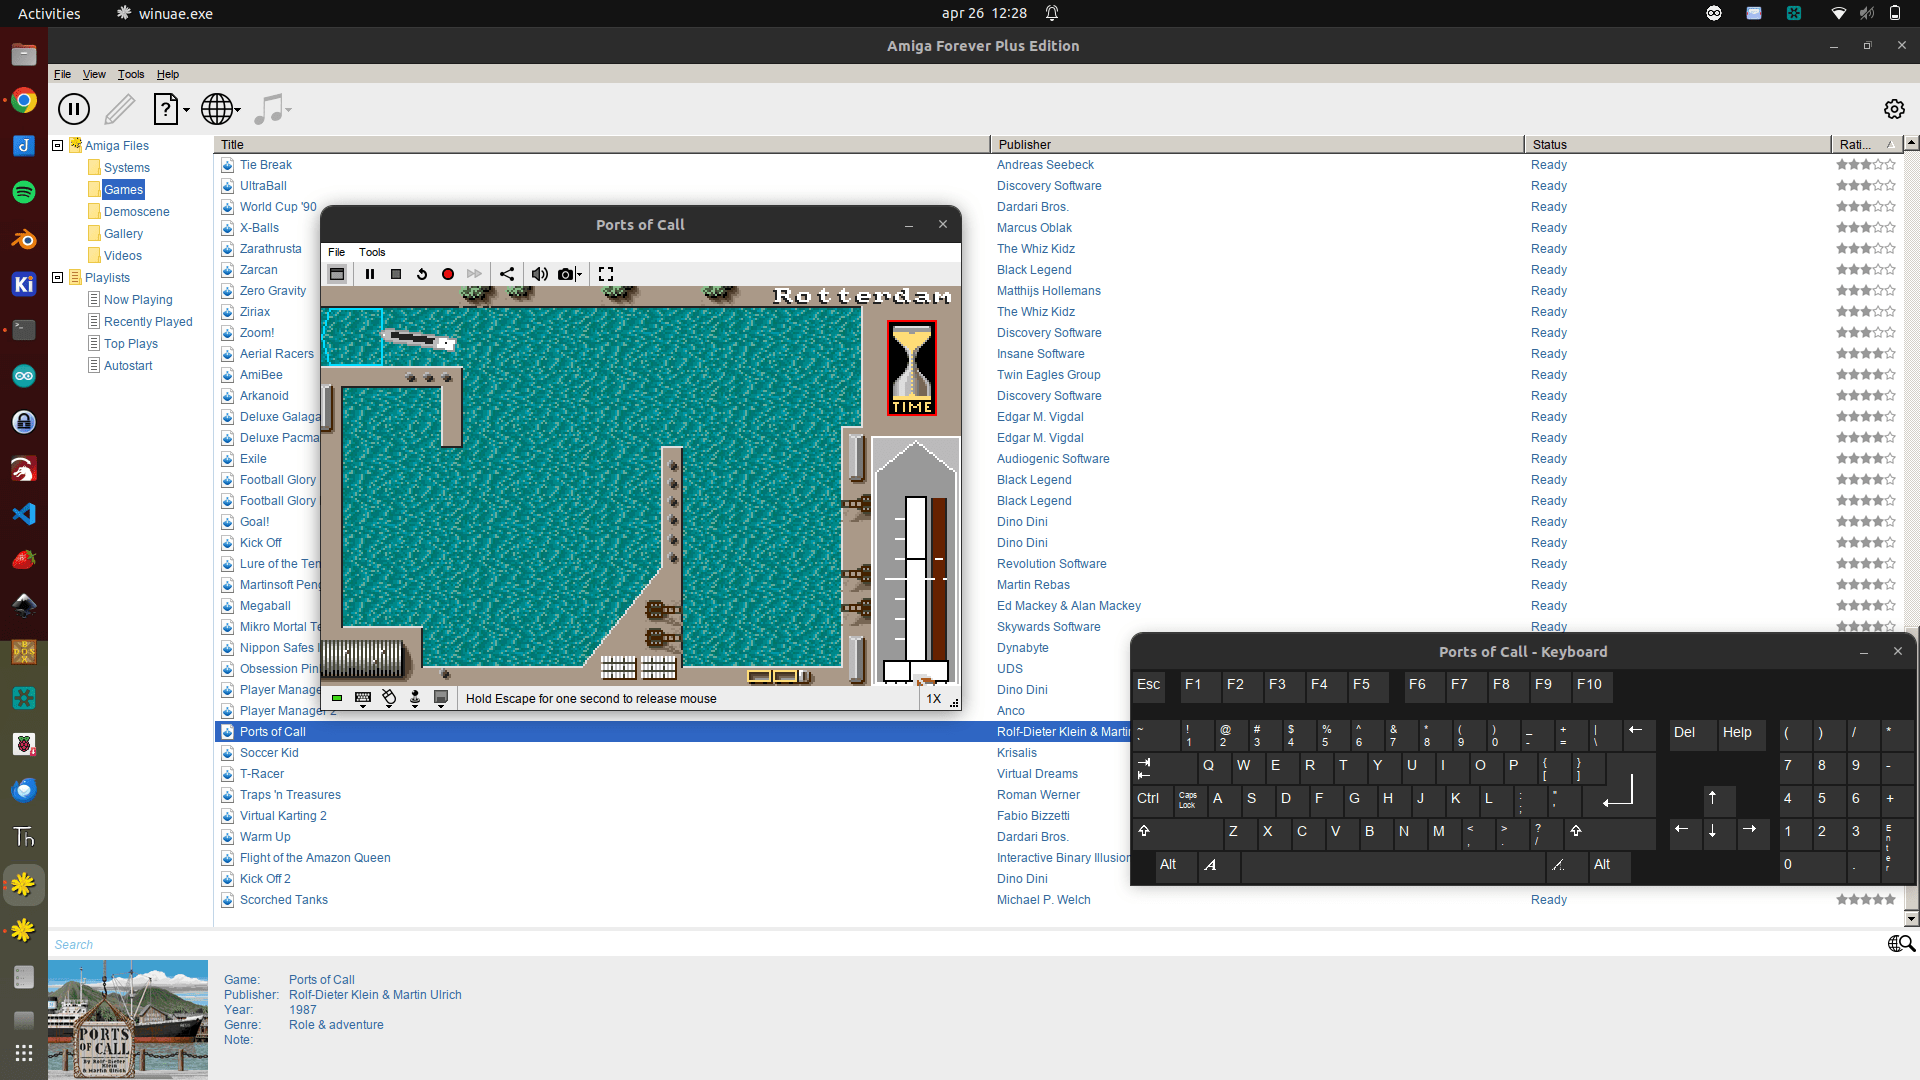
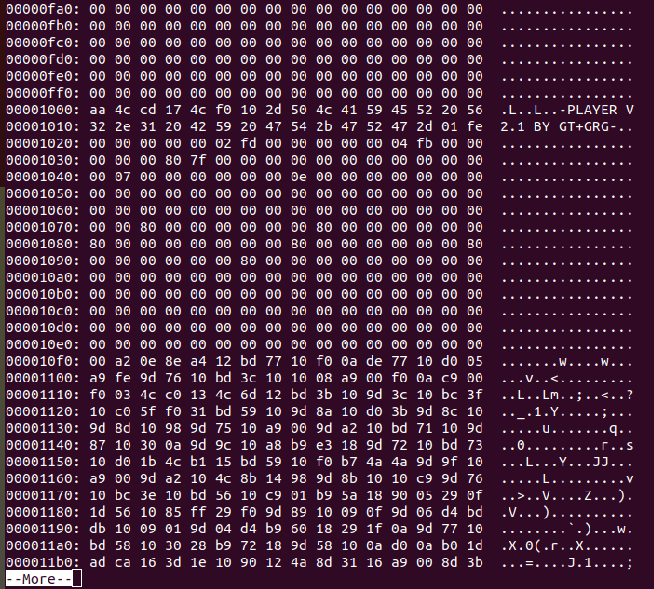
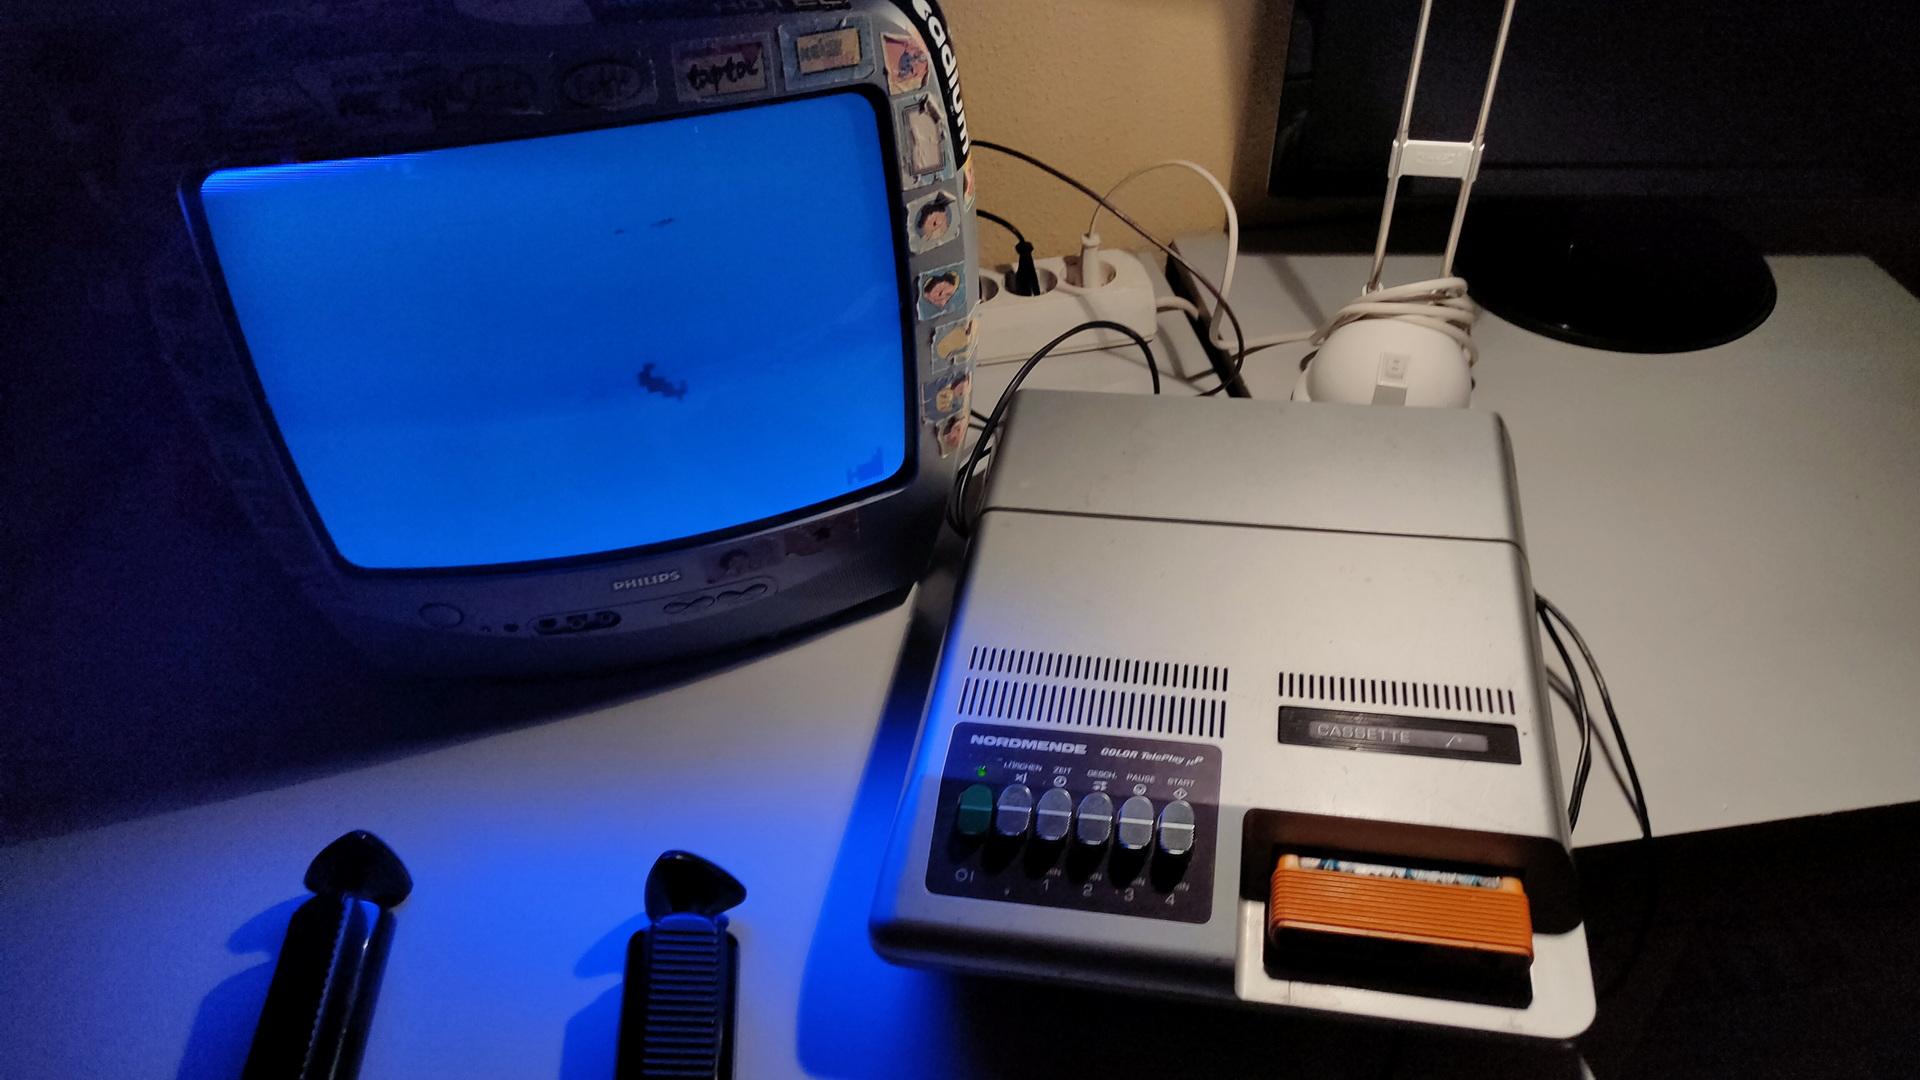
Ports of Call is a 1986 business simulation game developed by German duo Rolf-Dieter Klein and Martin Ulrich, and published by Aegis Interactive Entertainment. The game simulates the management of a global freight transport company, where the player charters freight, and, using the accumulated profit, can buy more and better ships. Minigames include manually piloting your ship into a specified berth in the harbour and picking up survivors from a life-raft.
I loved the manoeuvring part, especially the large ships with both front and back rudders.
Here are some screenshots from Amiga Forever emulator
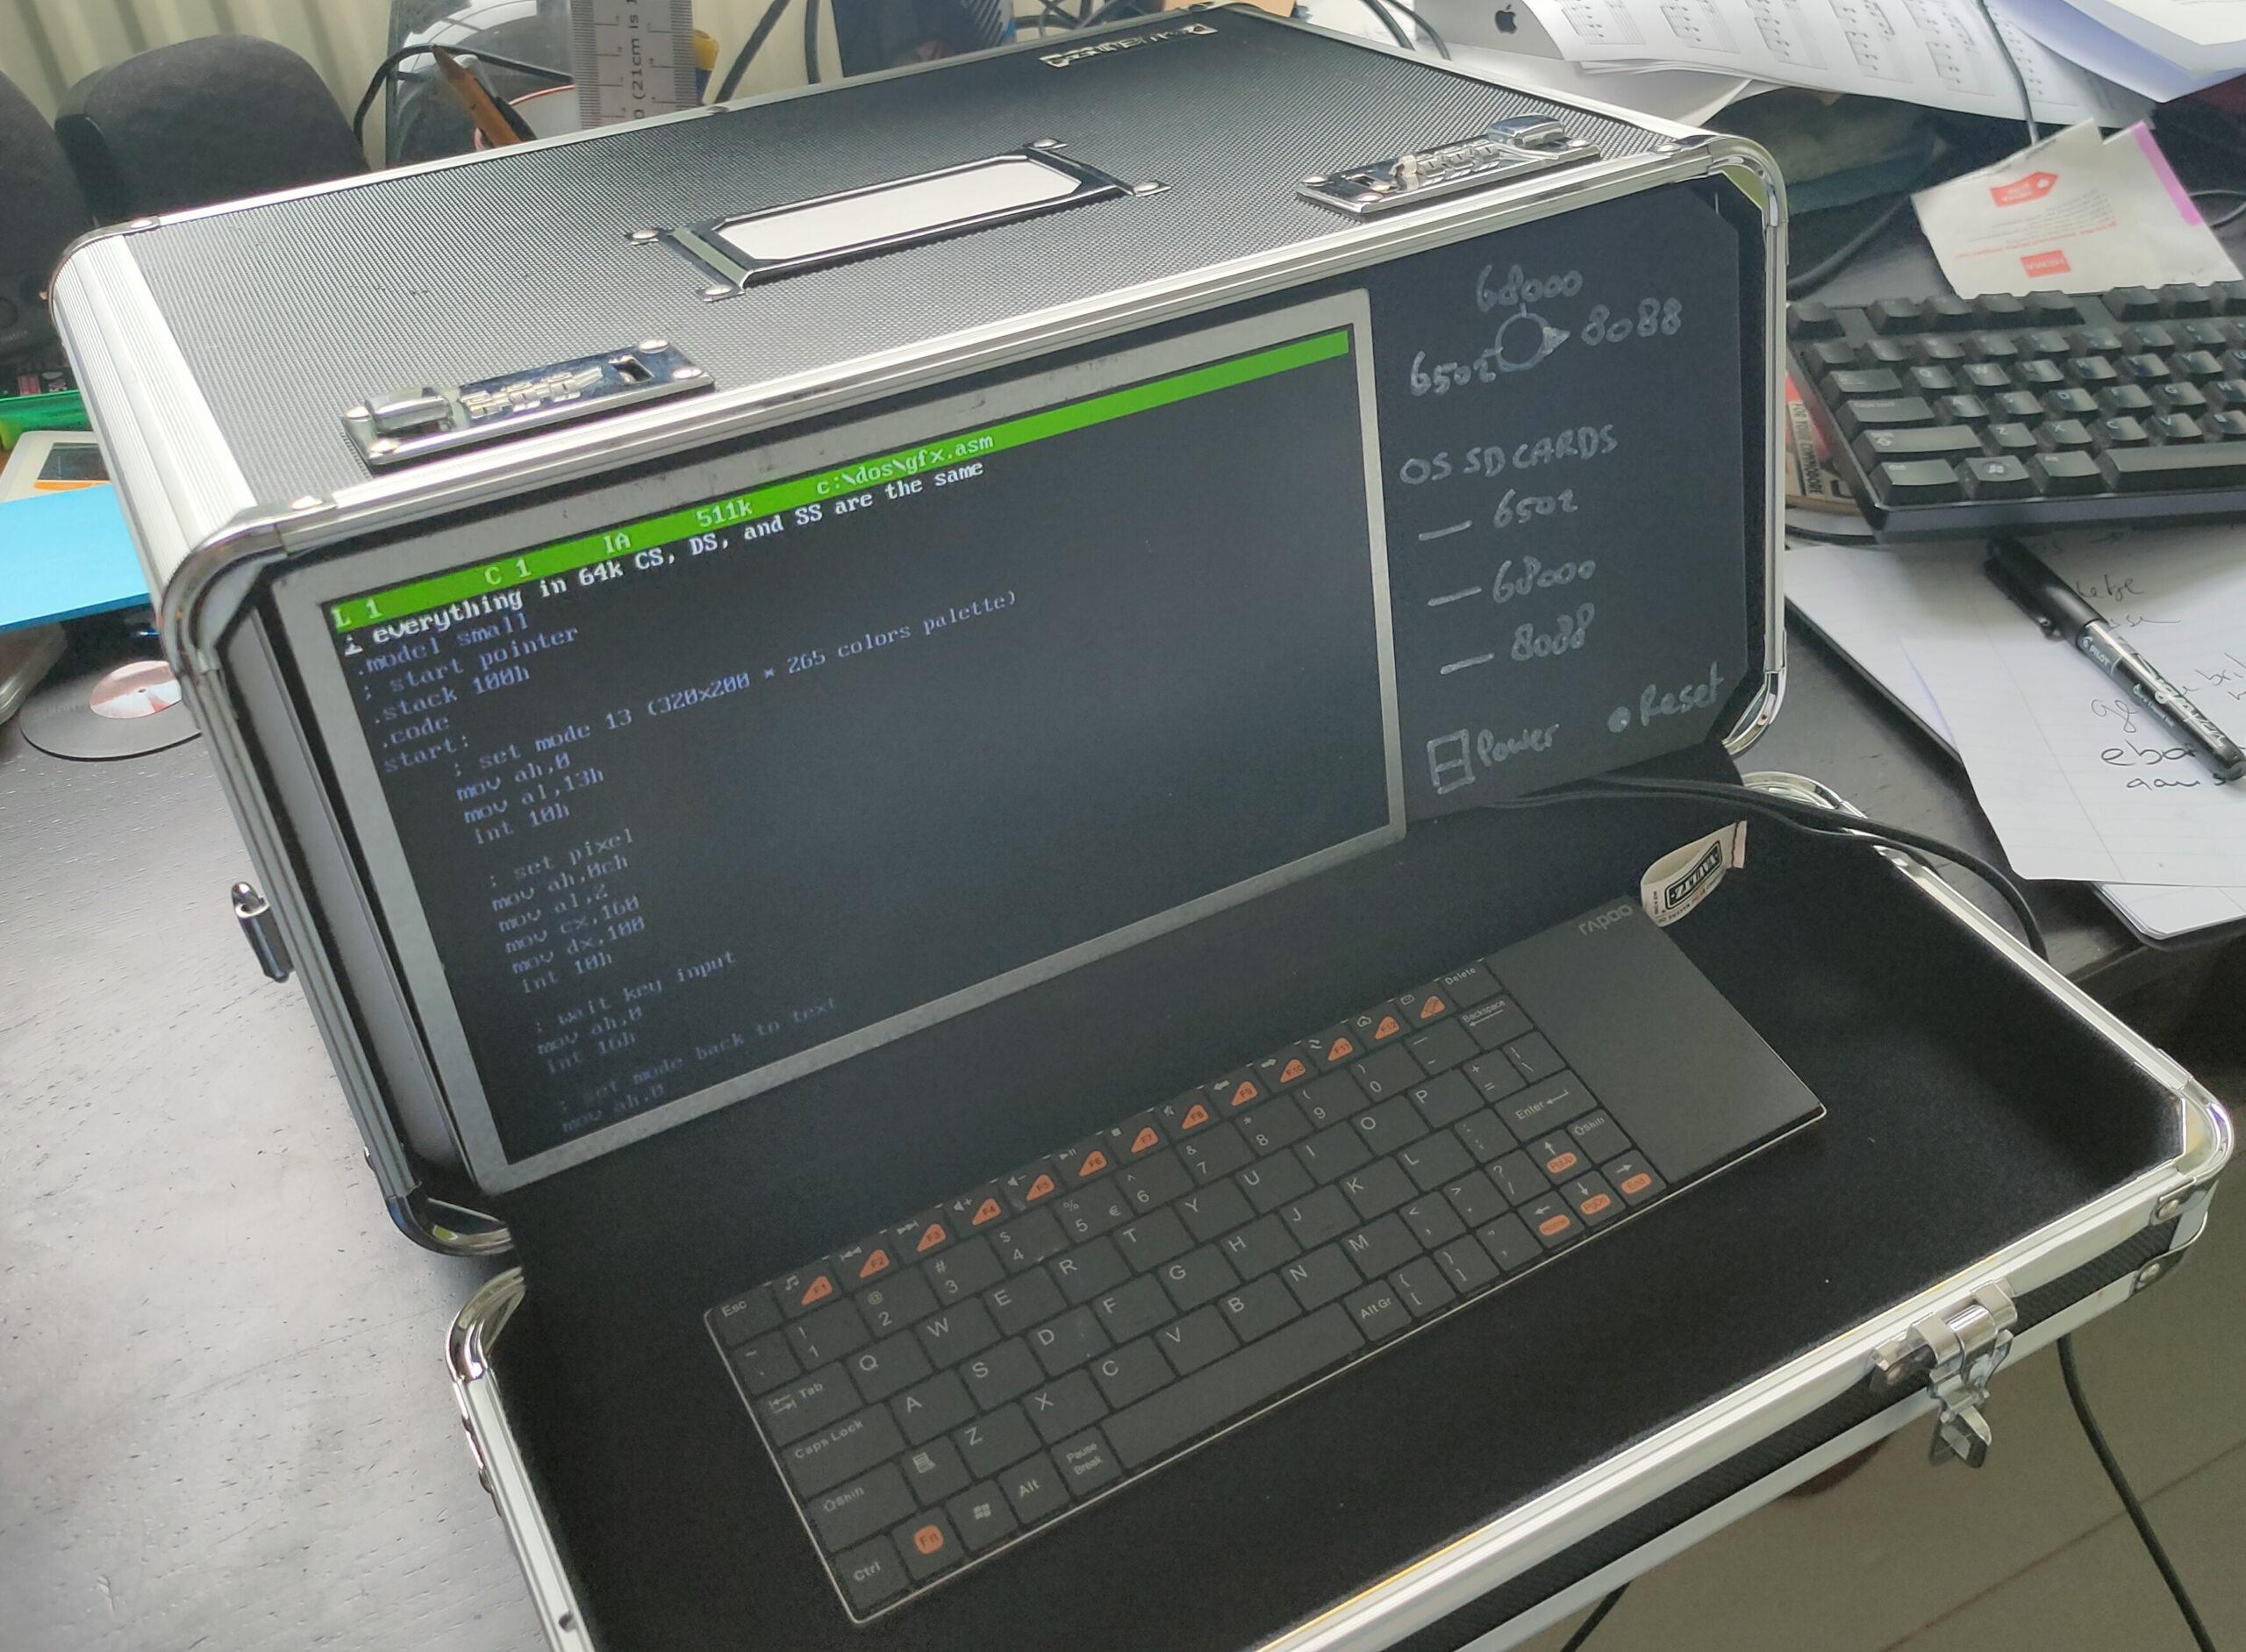
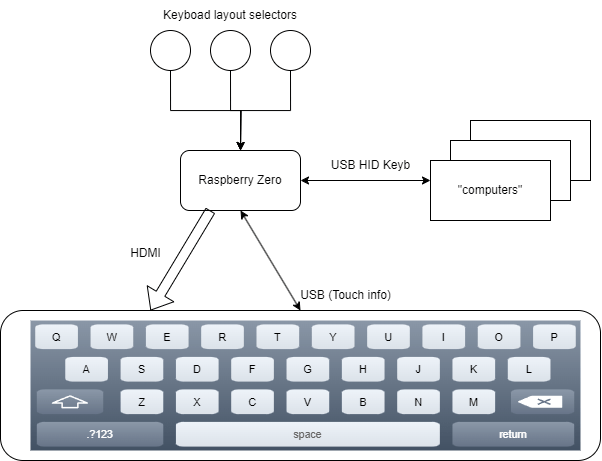
Test picture of a multiprocessor computer setup. Using buttons on the right, I want the possibility to change between systems and keyboard settings. Also, multiple software/OS slots for SDCards will be on the right.
Mockup using a laptop display (eeepc) a bought display controller and a pi2 with Faux86
The lid containing the keyboard has a handle!
After laser cutting a nice front, it could become a nice road warrior hacking station.
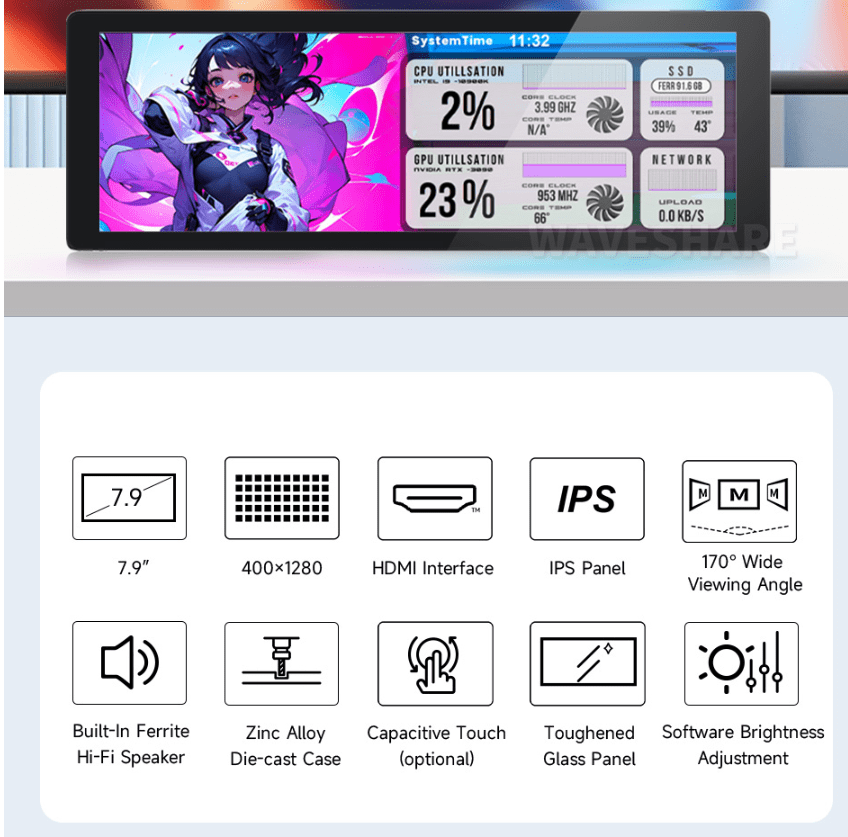
I’m going to replace the wireless keyboard, probably with a touch display and a programmable layout for keyboards. Something like below
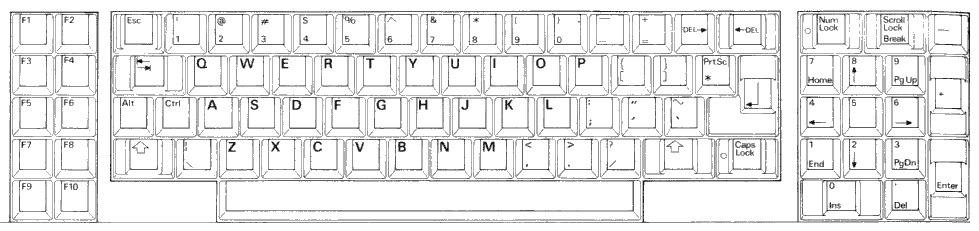
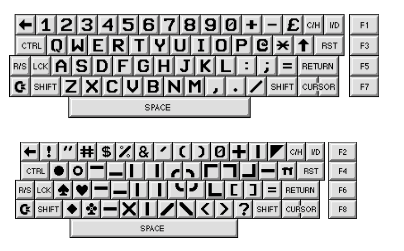
Some layouts:
8088650268000
I’ll probably buy this one from waveshare
Info about Faux86
8086/8088, V20, 80186 and limited 286 instruction set.
Configurable CPU speeds from 5Mhz up to 100Mhz.
Custom Hardware BIOS’s supported.
Supports bootable disk images in .img and .raw file format.
CGA / EGA / VGA Colour Video emulation, with most modes supported.
PC Speaker, Adlib, Soundblaster and Disney SoundSource.
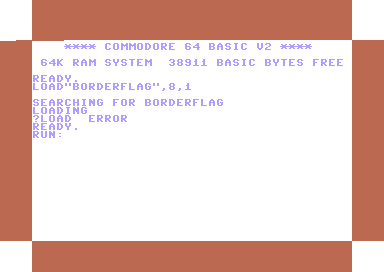
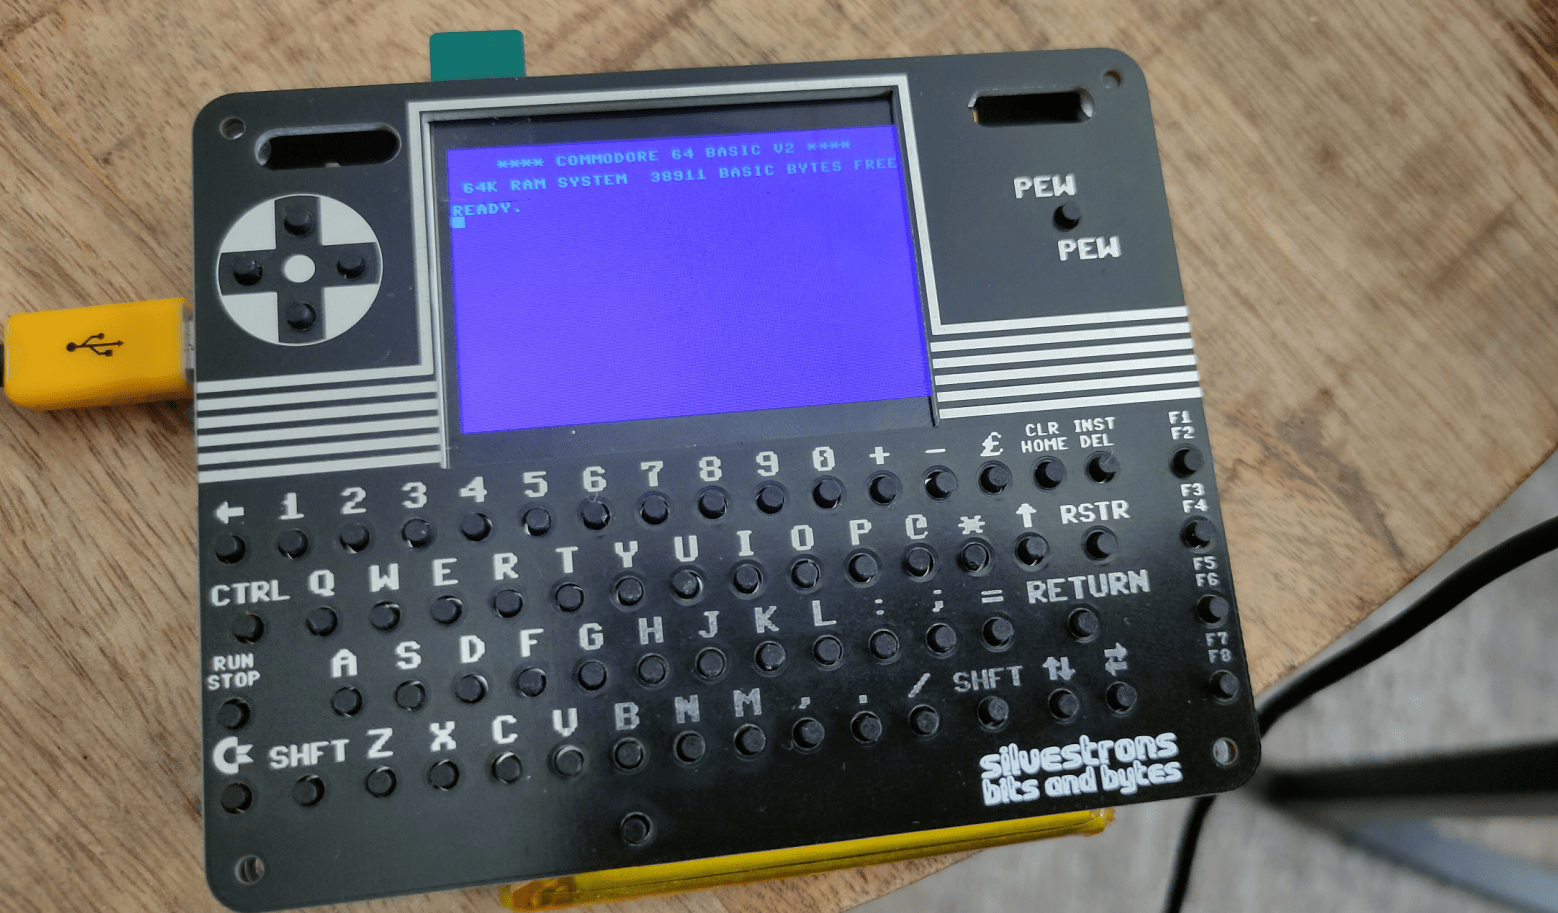
Re-learning the little I knew (I never had a c64 as a kid). Back to basics, welll machine code I mean.
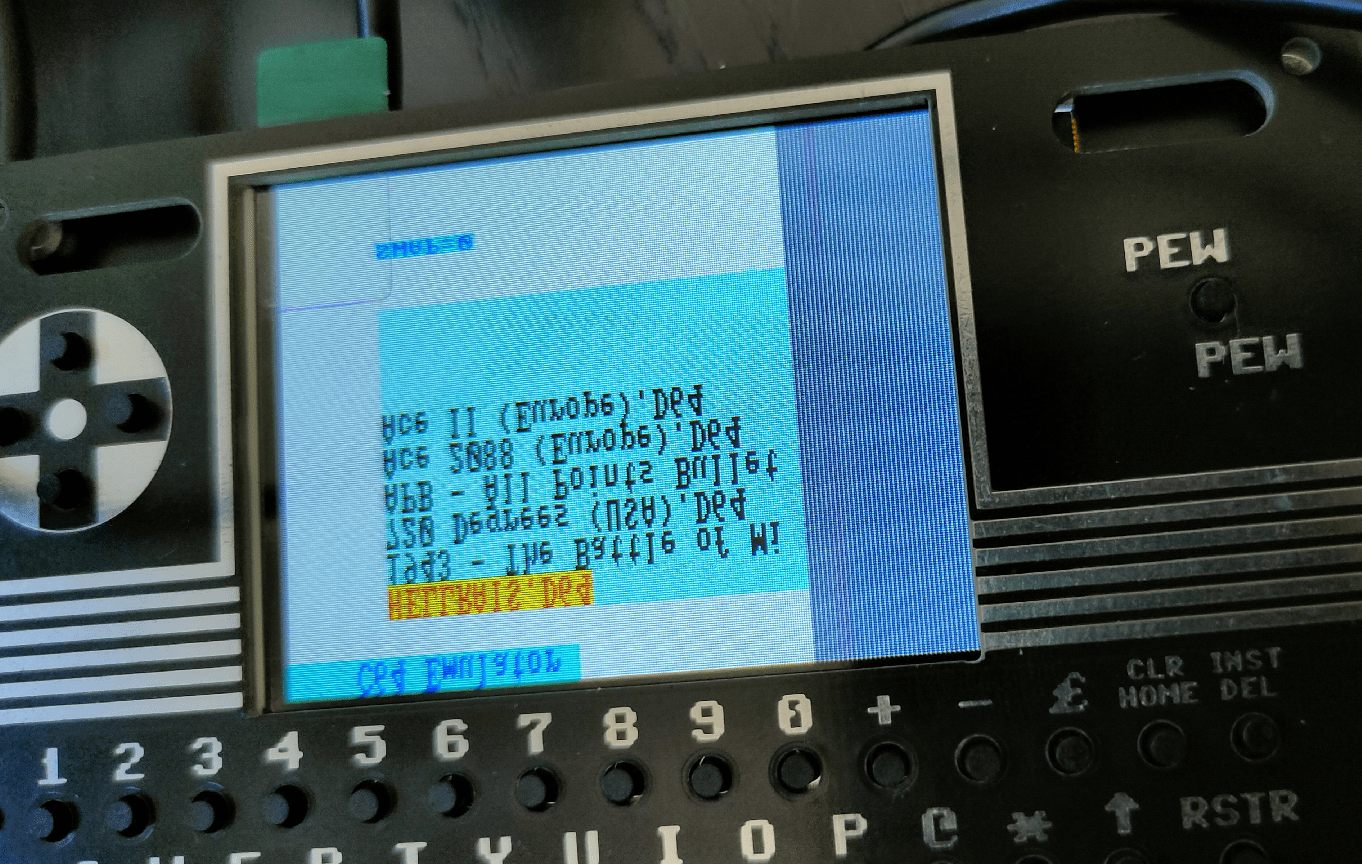
Programming a little demo using acme. Split screen bitmap and text mode plus sid music
Running a little demo in retrodebugger (missing the sid music in the recording)
Some useful commands
; Dump prg with offset 0x800 per byte and skip 00 00 lines xxd -o 0x800 -g1 icecrew.prg | uniq -f10
; Write symbol list acme -l icecrew.sym icecrew.asm
; png to kla (koala picture) retropixels icecrew.png -o icecrew.kla
; relocate a sid address sidreloc -r org.sid new.sid
Below code has some flaws:
Many empty gaps, creating a large file. Exomizer could fix this, but better memory management should be the better solution. The Koala file has many 0 bytes, the logo is small but the file is created for a full screen image.
Part of the program see $1000 of start of SID music
!cpu 6502
!to "icecrew1.prg",cbm

; Standard basic sys runner
basic_address   = $0801

; sid addresses
; address moved using
; sidreloc -r Lameness_Since_1991.sid lame.sid
; addresses found using
;sidplay2 -v lame.sid
;+------------------------------------------------------+
;|   SIDPLAY - Music Player and C64 SID Chip Emulator   |
;|          Sidplay V2.0.9, Libsidplay V2.1.1           |
;+------------------------------------------------------+
;| Title        : Lameness Since 1991                   |
;| Author       : Peter Siekmann (Devilock)             |
;| Released     : 2017 Oxyron                           |
;+------------------------------------------------------+
;| File format  : PlaySID one-file format (PSID)        |
;| Filename(s)  : lame.sid                              |
;| Condition    : No errors                             |
;| Playlist     : 1/1 (tune 1/1[1])                     |
;| Song Speed   : 50 Hz VBI (PAL)                       |
;| Song Length  : UNKNOWN                               |
;+------------------------------------------------------+
;| Addresses    : DRIVER = $1C00-$1CFF, INIT = $0FFF    |
;|              : LOAD   = $0FFF-$1B25, PLAY = $1003    |
;| SID Details  : Filter = Yes, Model = 8580            |
;| Environment  : Real C64                              |
;+------------------------------------------------------+
;
sid_address     = $0fff
sid_play        = $1003
sid_init        = $0fff
; Character
char_address    = $3800
screen_mem      = $4400
; Koala address
bitmap_address  = $6000
bitmap_data     = $7f40
bitmap_color    = $8328
bitmap_bgcolor  = $8710
program_address = $c000
color_mem       = $d800

reg_d011	= $D011
; VIC register
;Bit 7 (weight 128) is the most significant bit of the VIC's nine-bit raster register (see address 53266).
;Bit 6 controls extended color mode
;Bit 5 selects either the text screen ("0") or high resolution graphics ("1").
;Bit 4 controls whether the screen area is visible or not.
;Bit 3 selects 25 (when set to "1") or 24 (when set to "0") visible character lines on the text screen.
;Bit 0–2 is used for vertical pixel-by-pixel scrolling of the text or high resolution graphics.

; Rom routine to clear screen ( slow ! )
; Better to do this yourself
clear_screen     = $e544

* = sid_address
    !bin "lame.sid",,$7c+2

; standard charset
* = char_address
    !bin "charset.chr"

; drawn with gimp converted using retropixel
; retropixels icecrew.png -o icecrew.kla
* = bitmap_address
    !bin "icecrew.kla",,$02

; sys 49152
* = basic_address
    !byte $0d,$08,$dc,$07,$9e,$20,$34,$39,$31,$35,$32,$00,$00,$00

* = program_address
    sei
    ; init
    lda #$00
    tax
    tay
    jsr sid_init
    jsr clear_screen
    jsr load_bitmap
    jsr init_text
    ldy #$7f
    sty $dc0d
    sty $dd0d
    lda $dc0d
    lda $dd0d
    lda #$01
    sta $d01a
    lda reg_d011
    and #$7f
    sta reg_d011
; move interrupt vector to bitmap
    lda #<interruptbitmap
    ldx #>interruptbitmap
    sta $314    ; Low Address part IRQ vector
    stx $315    ; High Address part IQR vector
    ldy #$1b
    sty reg_d011
    lda #$7f
    sta $dc0d
    lda #$01
    sta $d01a
; trigger interrupt at rasterline 0
    lda #$00
    sta $d012
    cli
    jmp *

interruptbitmap
    inc $d019
; trigger interrupt at rasterline 128
    lda #$80
    sta $d012
    lda #<interrupttxt
    ldx #>interrupttxt
    sta $314
    stx $315
    jsr bitmap_mode
    jmp $ea81

interrupttxt
; ack IRQ
    inc $d019
; IRQ at line 0
    lda #$00
    sta $d012
    lda #<interruptbitmap
    ldx #>interruptbitmap
    sta $314
    stx $315
    jsr text_mode
    jsr sid_play
    jmp $ea81

bitmap_mode
; bitmap graphics multicolor
    lda #$3b
    sta reg_d011
    lda #$18
    sta $d016
; switch to video bank 2 ($4000-$7FFF)
    lda $dd00
    and #$fc
    ora #$02
    sta $dd00
    lda #$18
    sta $d018
    rts

text_mode
; set text mode hires
    lda #$1b
    sta reg_d011
    lda #$08
    sta $d016
; switch to video bank 1 ($0000-$3FFF)
    lda $dd00
    and #$fc
    ora #$03
    sta $dd00
; set charset location
; 7 * 2048 = $3800, set in bits 1-3 of $d018
    lda $d018
    ora #$0e
    sta $d018
    rts

load_bitmap
    lda bitmap_bgcolor
    sta $d020
    sta $d021
    ldx #$00
copy_bmp
; screen memory
    lda bitmap_data,x
    sta screen_mem,x
    lda bitmap_data+256,x
    sta screen_mem+256,x
    lda bitmap_data+512,x
    sta screen_mem+512,x
    lda bitmap_data+768,x
    sta screen_mem+768,x
; color memory
    lda bitmap_color,x
    sta color_mem,x
    lda bitmap_color+256,x
    sta color_mem+256,x
    lda bitmap_color+512,x
    sta color_mem+512,x
    lda bitmap_color+768,x
    sta color_mem+768,x
    inx
    bne copy_bmp
    rts

init_text
    ldx #$00
copy_txt
    lda text1,x
    sta $0400+520,x
    lda text2,x
    sta $0400+640,x
    lda text3,x
    sta $0400+640+120,x
    lda #$06
    sta color_mem+520,x
    lda #$0e
    sta color_mem+640,x
    lda #$0e
    sta color_mem+640+120,x
    inx
    cpx #$28
    bne copy_txt
    rts


text1
    !scr  "     back to oldskool demos in 2024     "
text2
    !scr  "   greetings to bigred & tyrone & edk   "
text3
    !scr  "     a lot to relearn - keep coding!    "
I wanted this to be a multipart loader, instead of a trackloader. A trackloader can load sector parts which I would like more. But the C64Pico can’t do disk images. (Mcume)
C64Pico based on MCUME see building of this in other posts.
2nd reason: While I’ve written a track loader for 8086, I never did it for C64. As a kid I didn’t have a C64, so all knowledge I have is from later years. I’ve written only a few C64 machinecode programs.
Showing first part assembly (without text Hello 2nd part)
Showing second part (no sysheader) needs to be loaded at $2000
Compile using Acme
make disk image
and run using autostart x64 (Vice emulator)
You see the first text from the 1st assemby code, then it will load the second at $2000 and does a jmp to this address. Second text will but displayed.
While i’ve been using KickAss in the past and some other 6502 compilers, I manly use acme.
Makefile I created to compile, create a C64 diskimage and run the program is as below. (No exomizer tools in this Makefile)
Today we worked on this project again. (Bigred and me)
There were some problems we needed to fix since last time:
It was quite hard to get the correct parts. Our display connector was only fitted with connection pins on the wrong side of the connector. (up/down) So I bought a connector with both positions populated. So we had to replace this hard to solder (40 pin) connector.
It was not clear what the orientation should be of the atmega328pb. We looked at the pinout, and followed the VCC/GND. But these are also available of the opposite side of the chip. (We missed that) Later, we saw a tiny line on the PCB, which showed the pin 1 placement. So we had to remove and replace the chip. When turning on the power, (with incorrect placement) probably fried R5 (10k resistor), on both our boards. Had to replace those also.
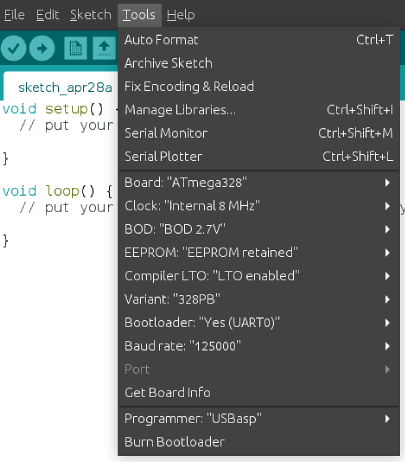
Programming the atmega328pb was not easy, see below fixes.
Compiling the pico firmware resulted in a black screen. Below the fixes I had to make to get the screen working.
Other things still to fix.
Bigreds screen.
atmega328p didn’t work for Bigred, so probably needs to replace with the pb version.
My battery controller is not charging. See bottom of page
Some of my buttons are working. The pewpew and some of the cursor keys (not as I expect, there are some up/down issues) And none of the other keys are working.
Some other things we noticed.
sdcard: remove partitions, format using mkfs.exfat Create a c64 directory on this filesystem where you can put the d64 files!
0402 SMD is far too small for me. There is enough room on the board to use 0805 for example. Even THT is possible, there are only a few components.
Some components are TOO close together, removing a component resulted in other small parts disconnecting also.
My friend Bigred said: If I can see it, I can solder it. But it is not easy. This probably keeps a lot of people from building it!
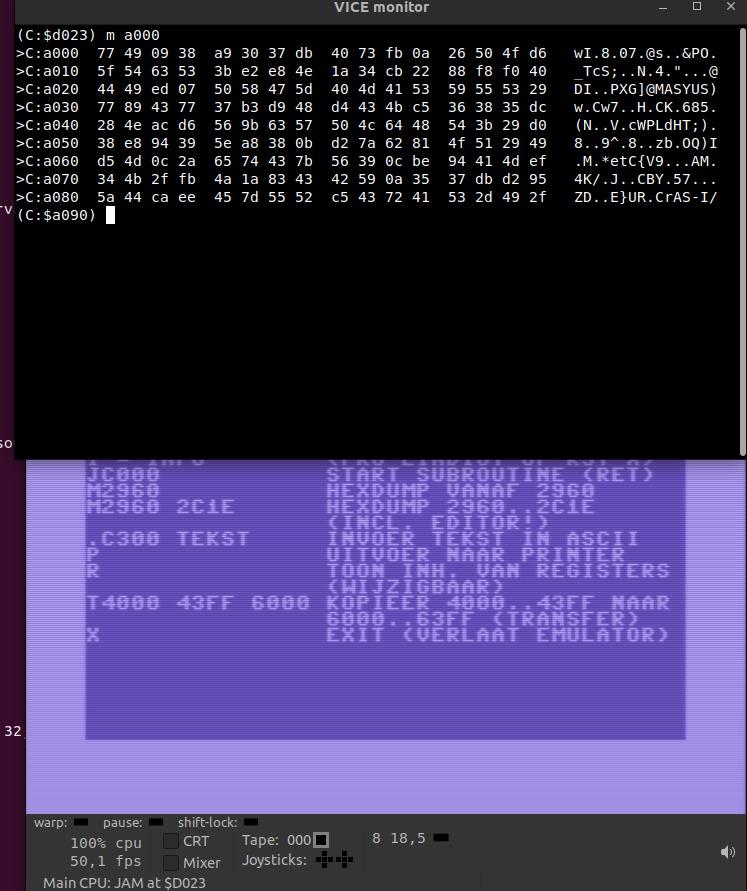
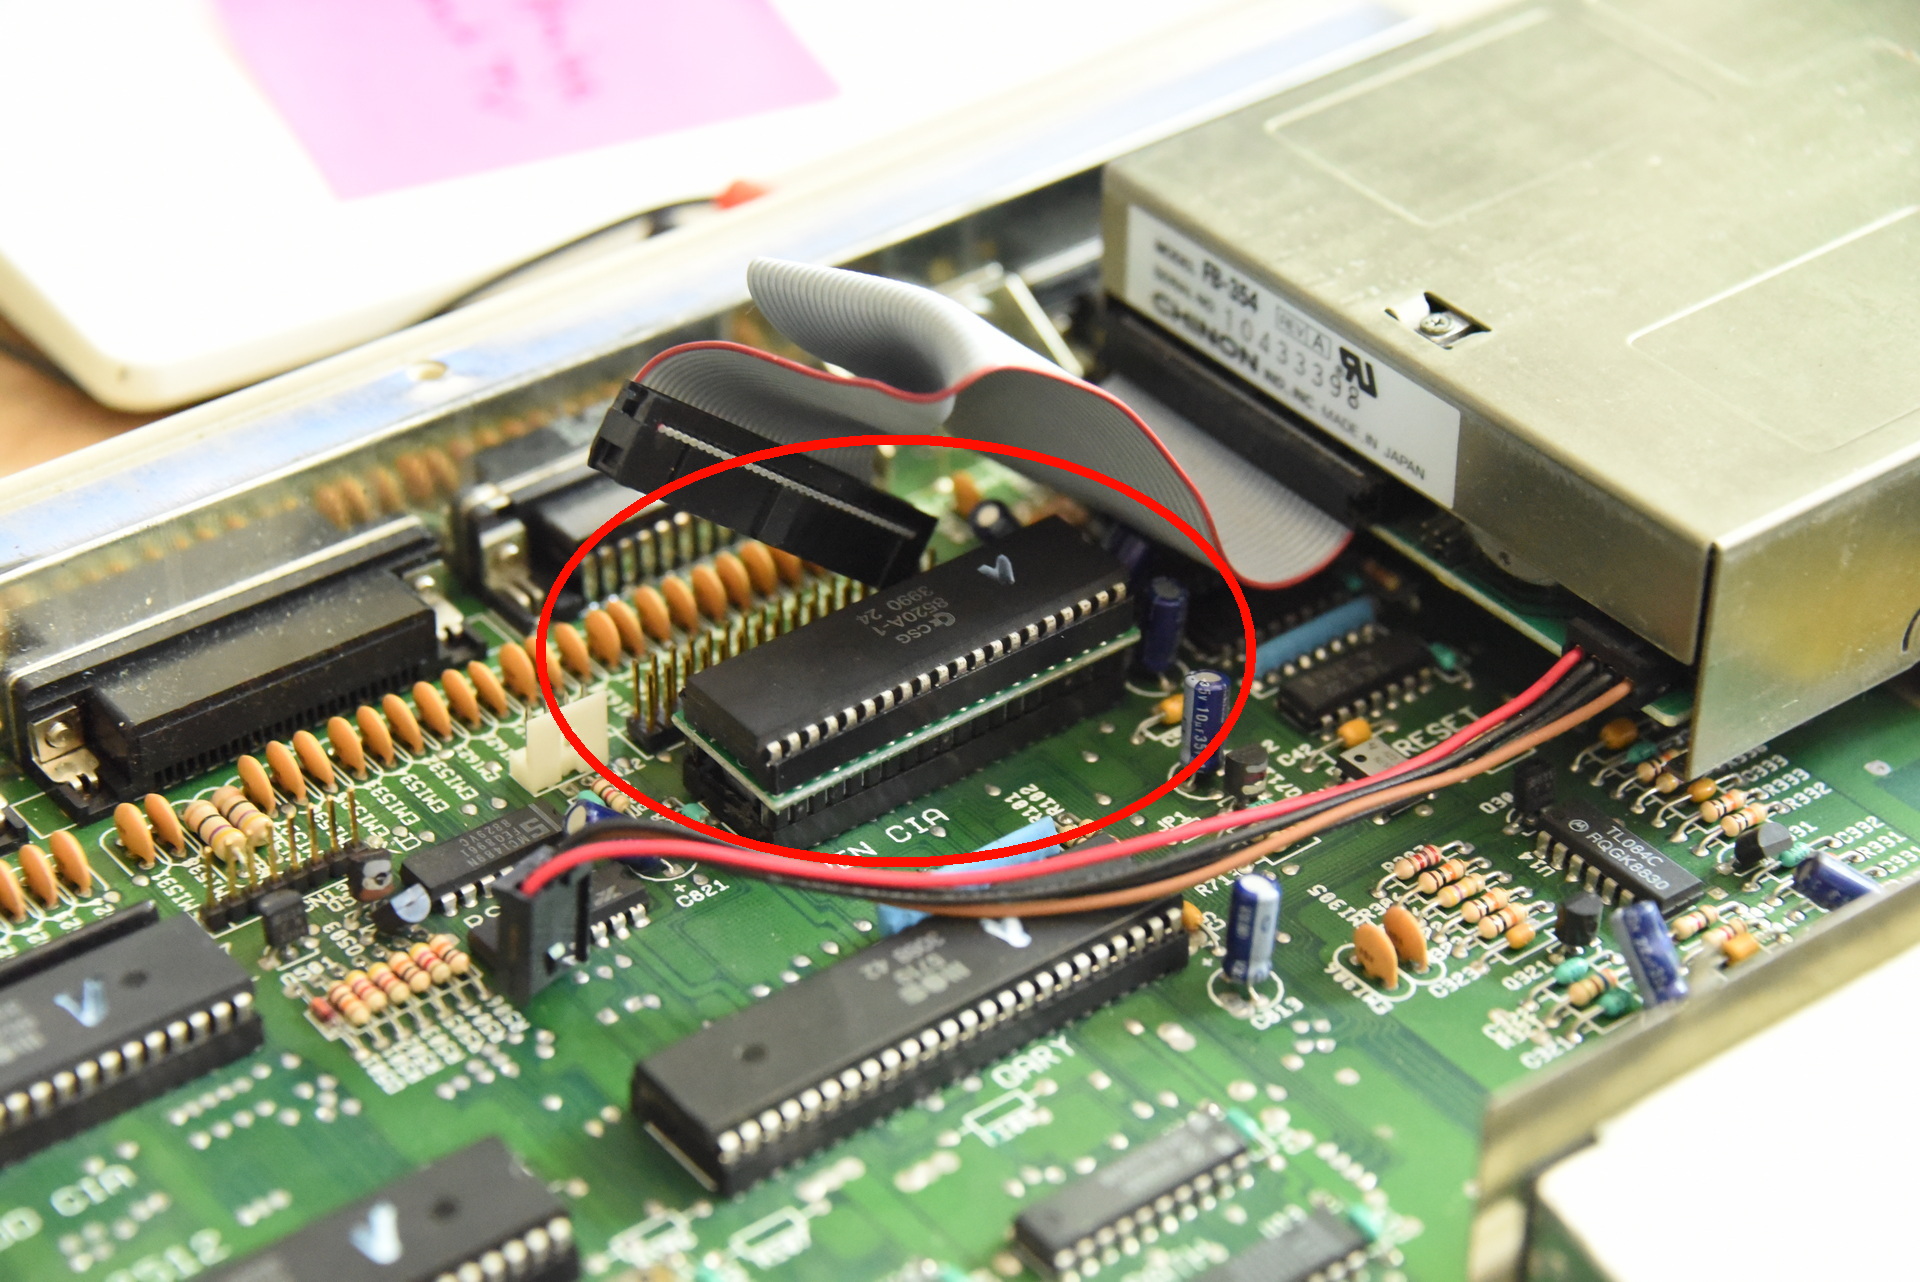
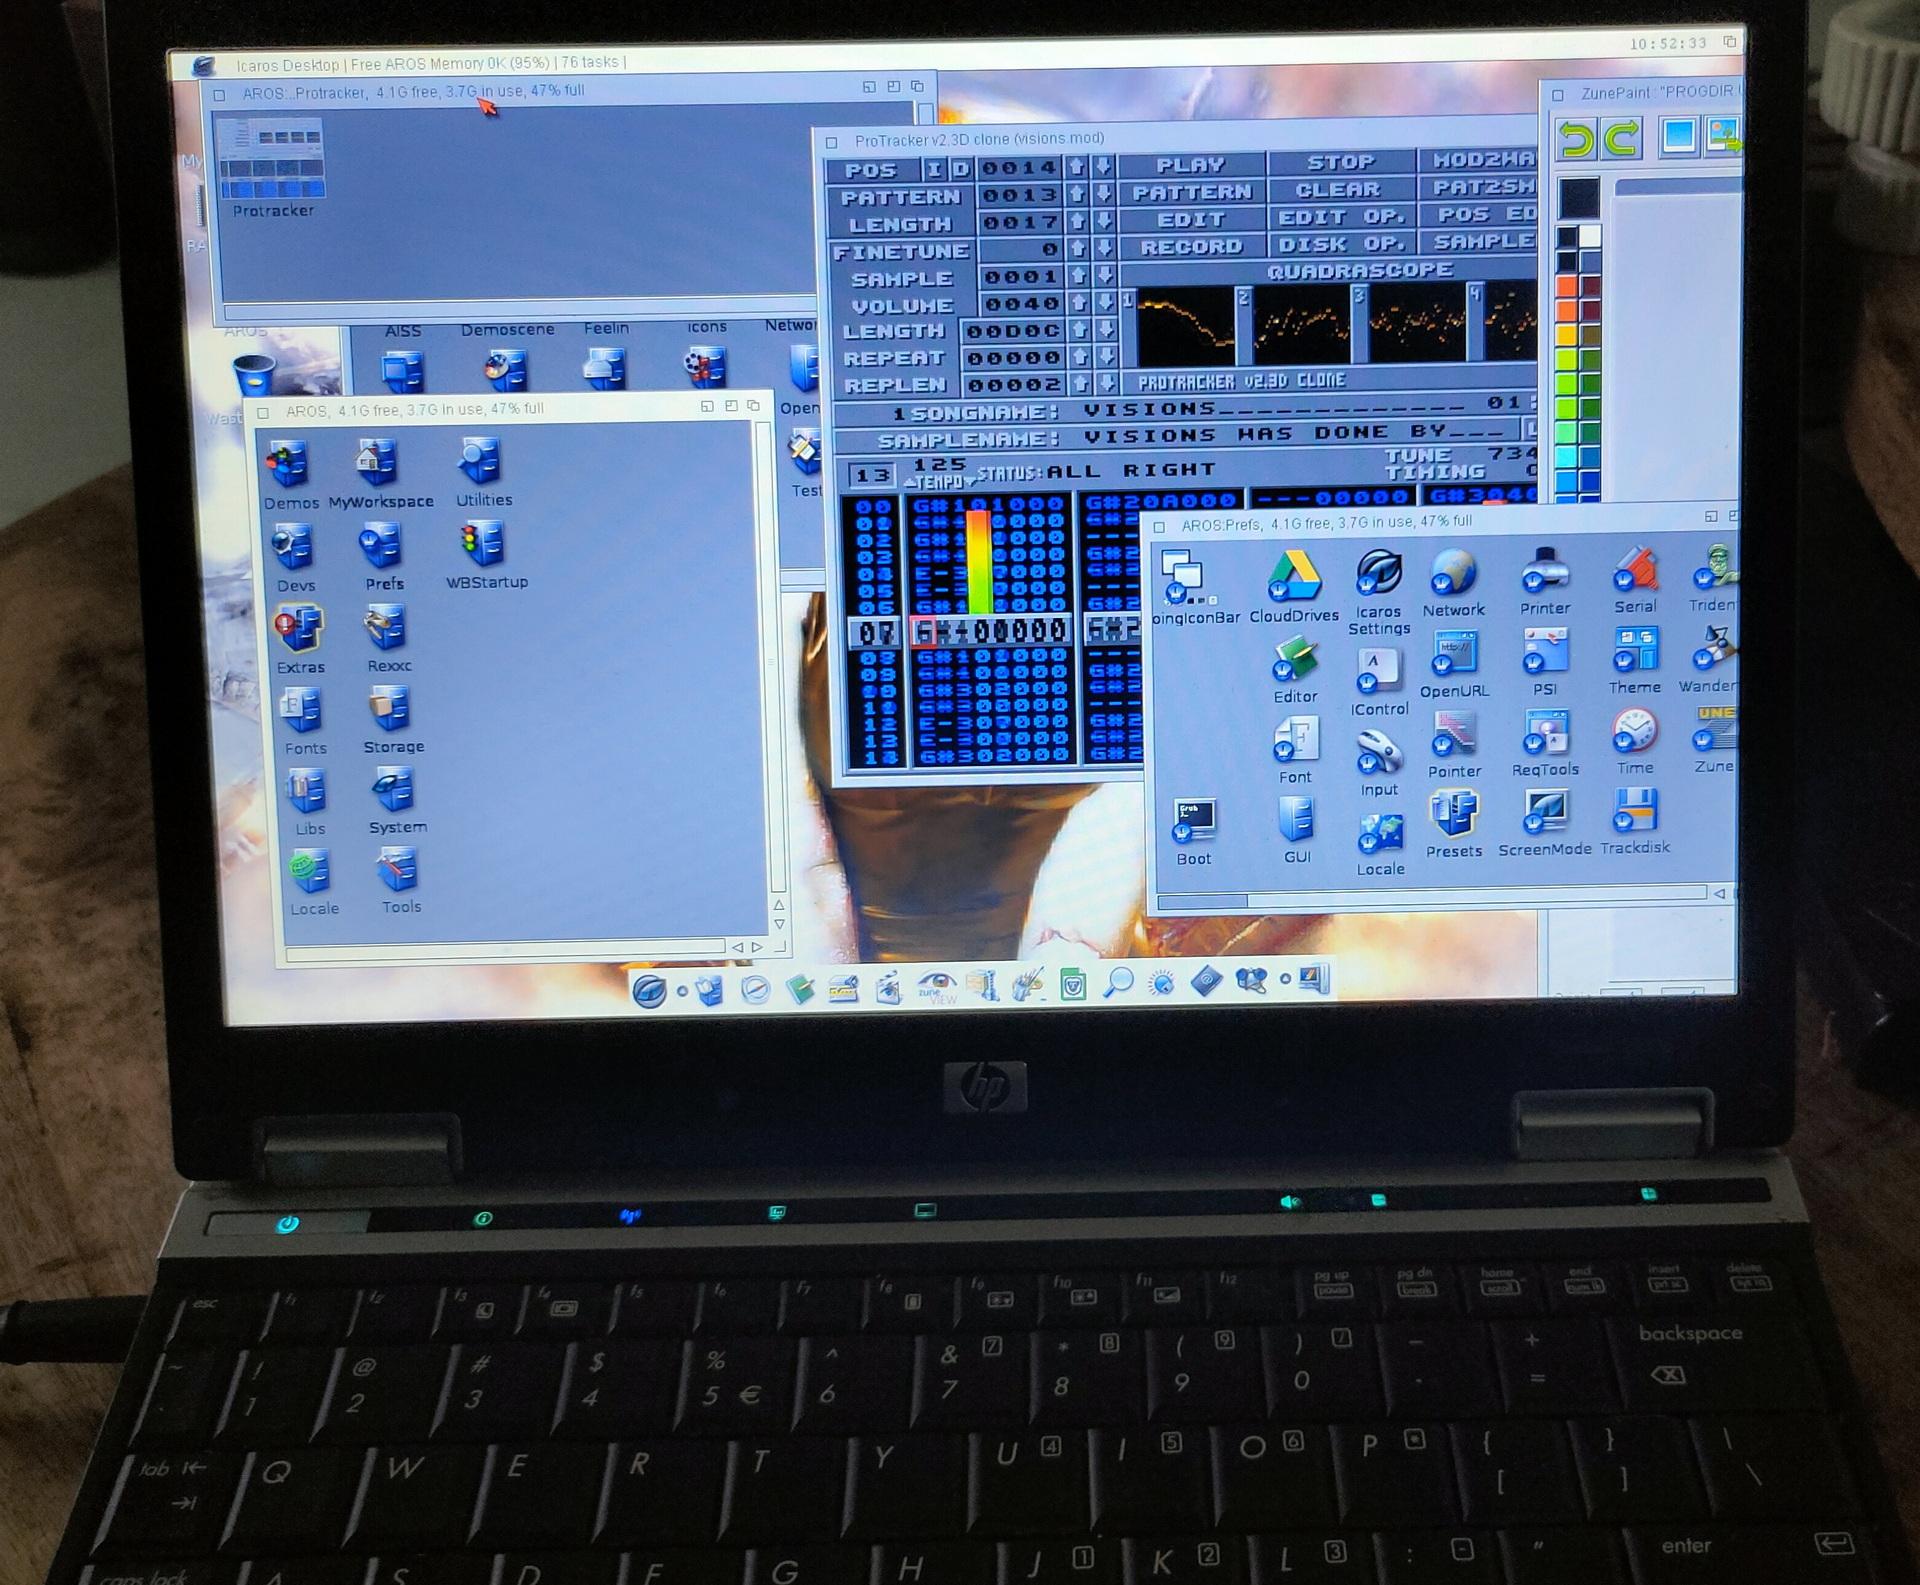
This week (while preparing for a mini retro party) I fixed some Amiga stuff.
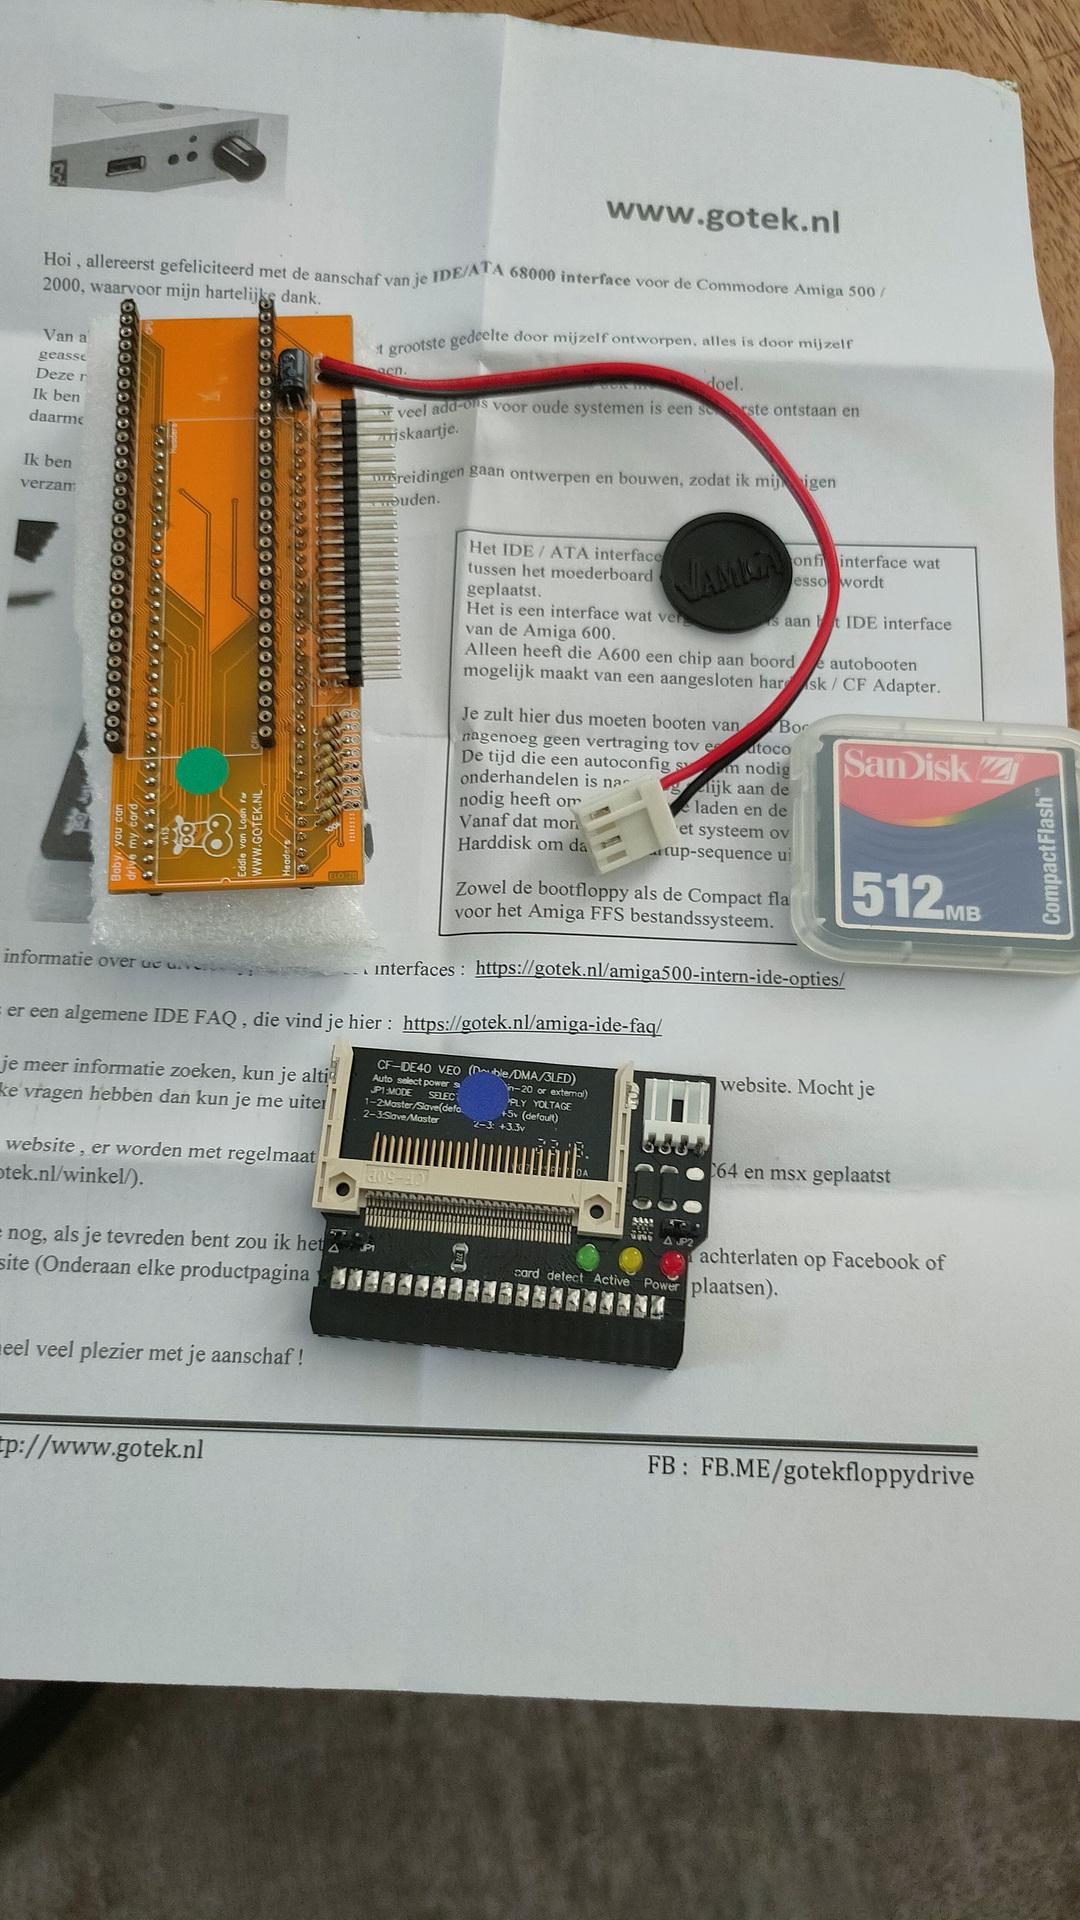
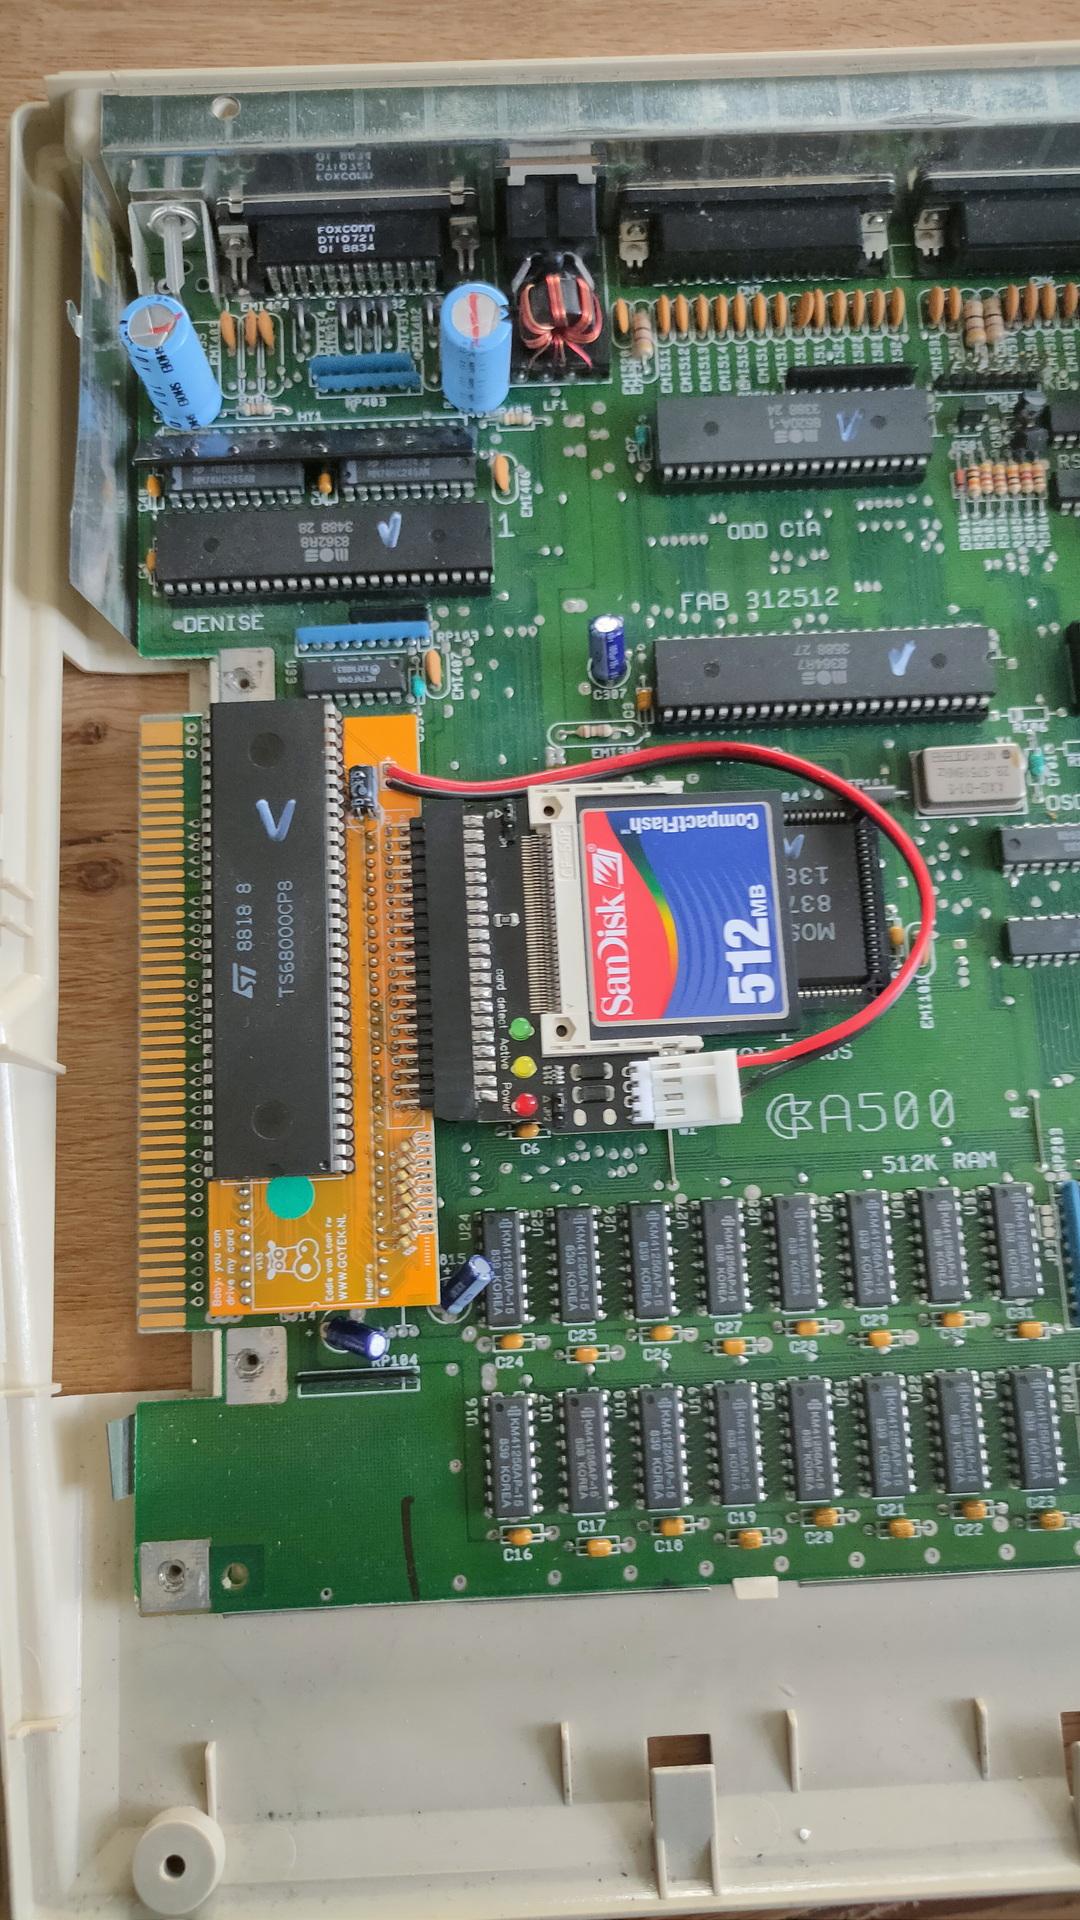
I’ve bought a new gadget.
You place this PCB between the CPU IC socket and the CPU (68000) itself.
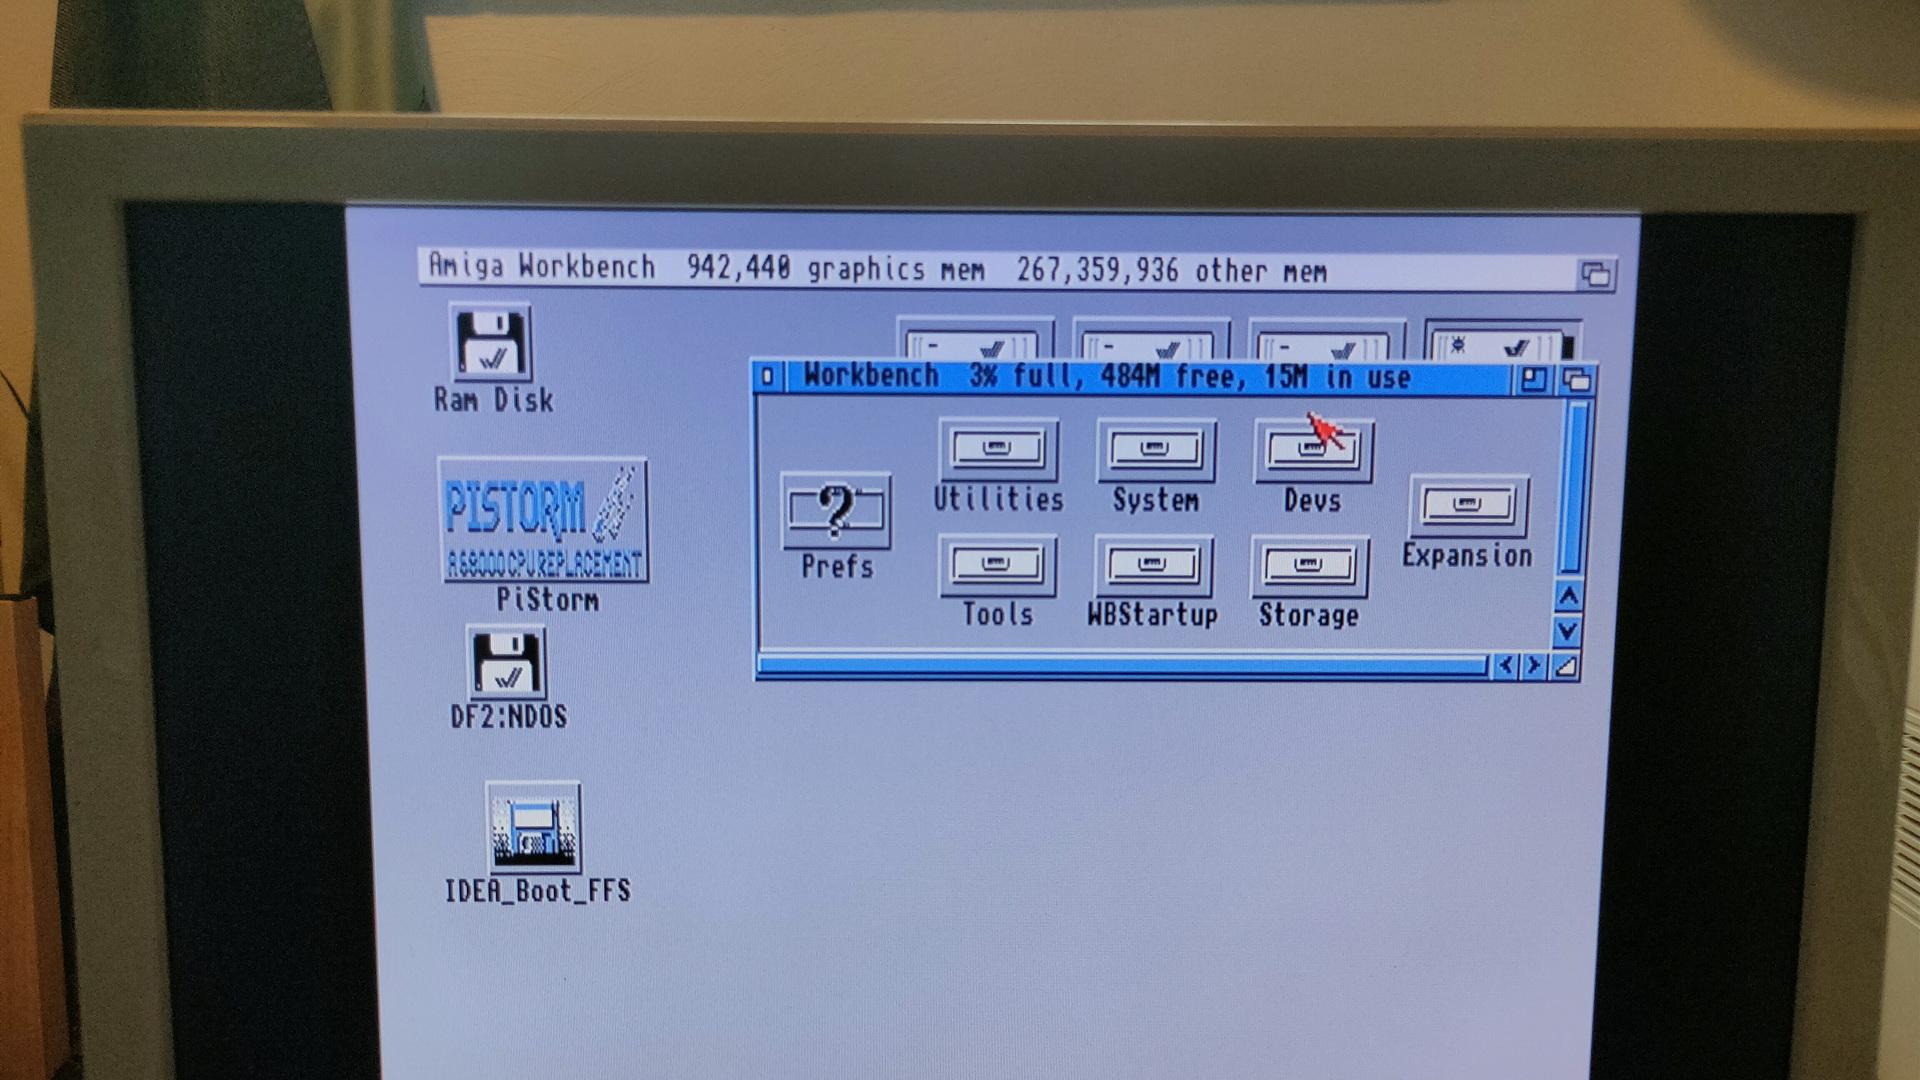
Now running a special floppy image, which loads a driver, I can use the 512MB sdcard as “harddisk”.
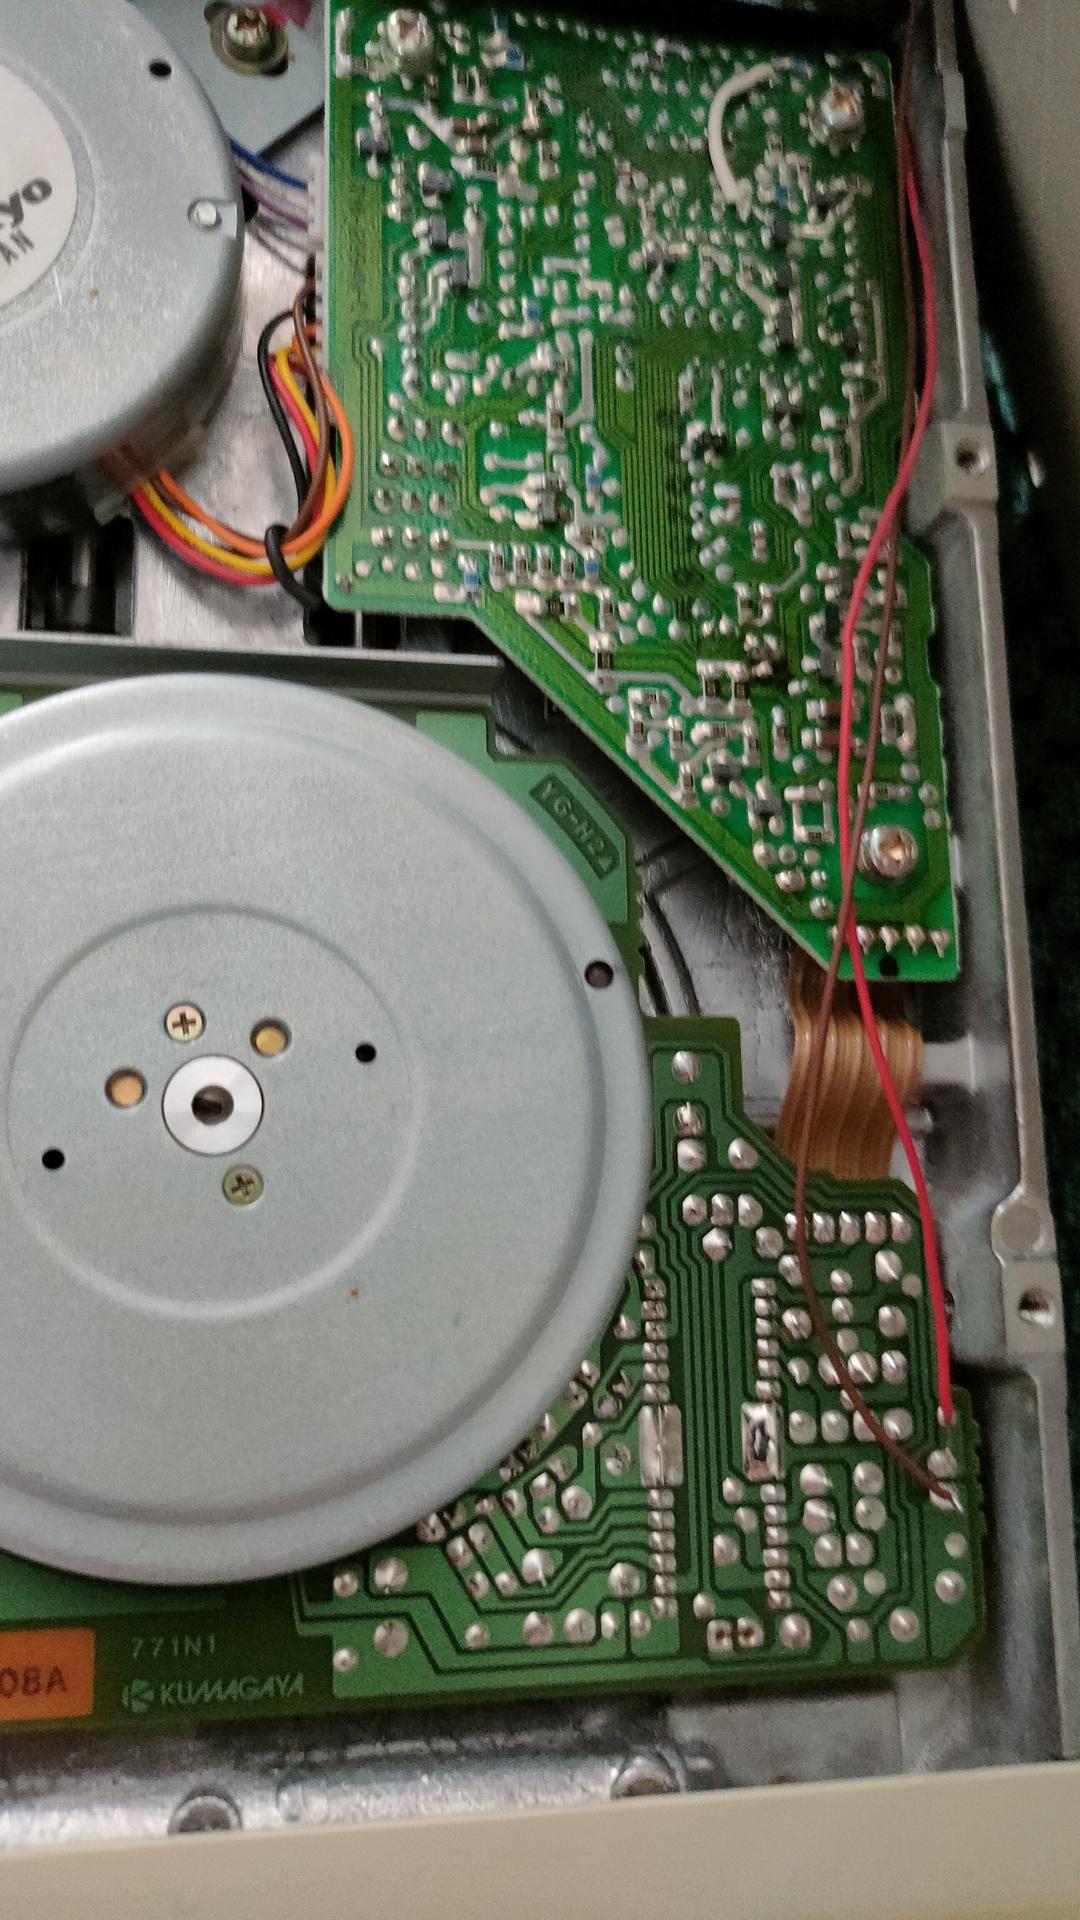
It at first ran into all kinds of hangups. Checking everything, I found CIAB (8520) the culprit. Timing errors I’ve never noticed before!
Switching this one with CIAA resolved the problem. (I don’t use a printer anyway, but I have to remember that anything using the parallel port can have problems now.)
Running some programs
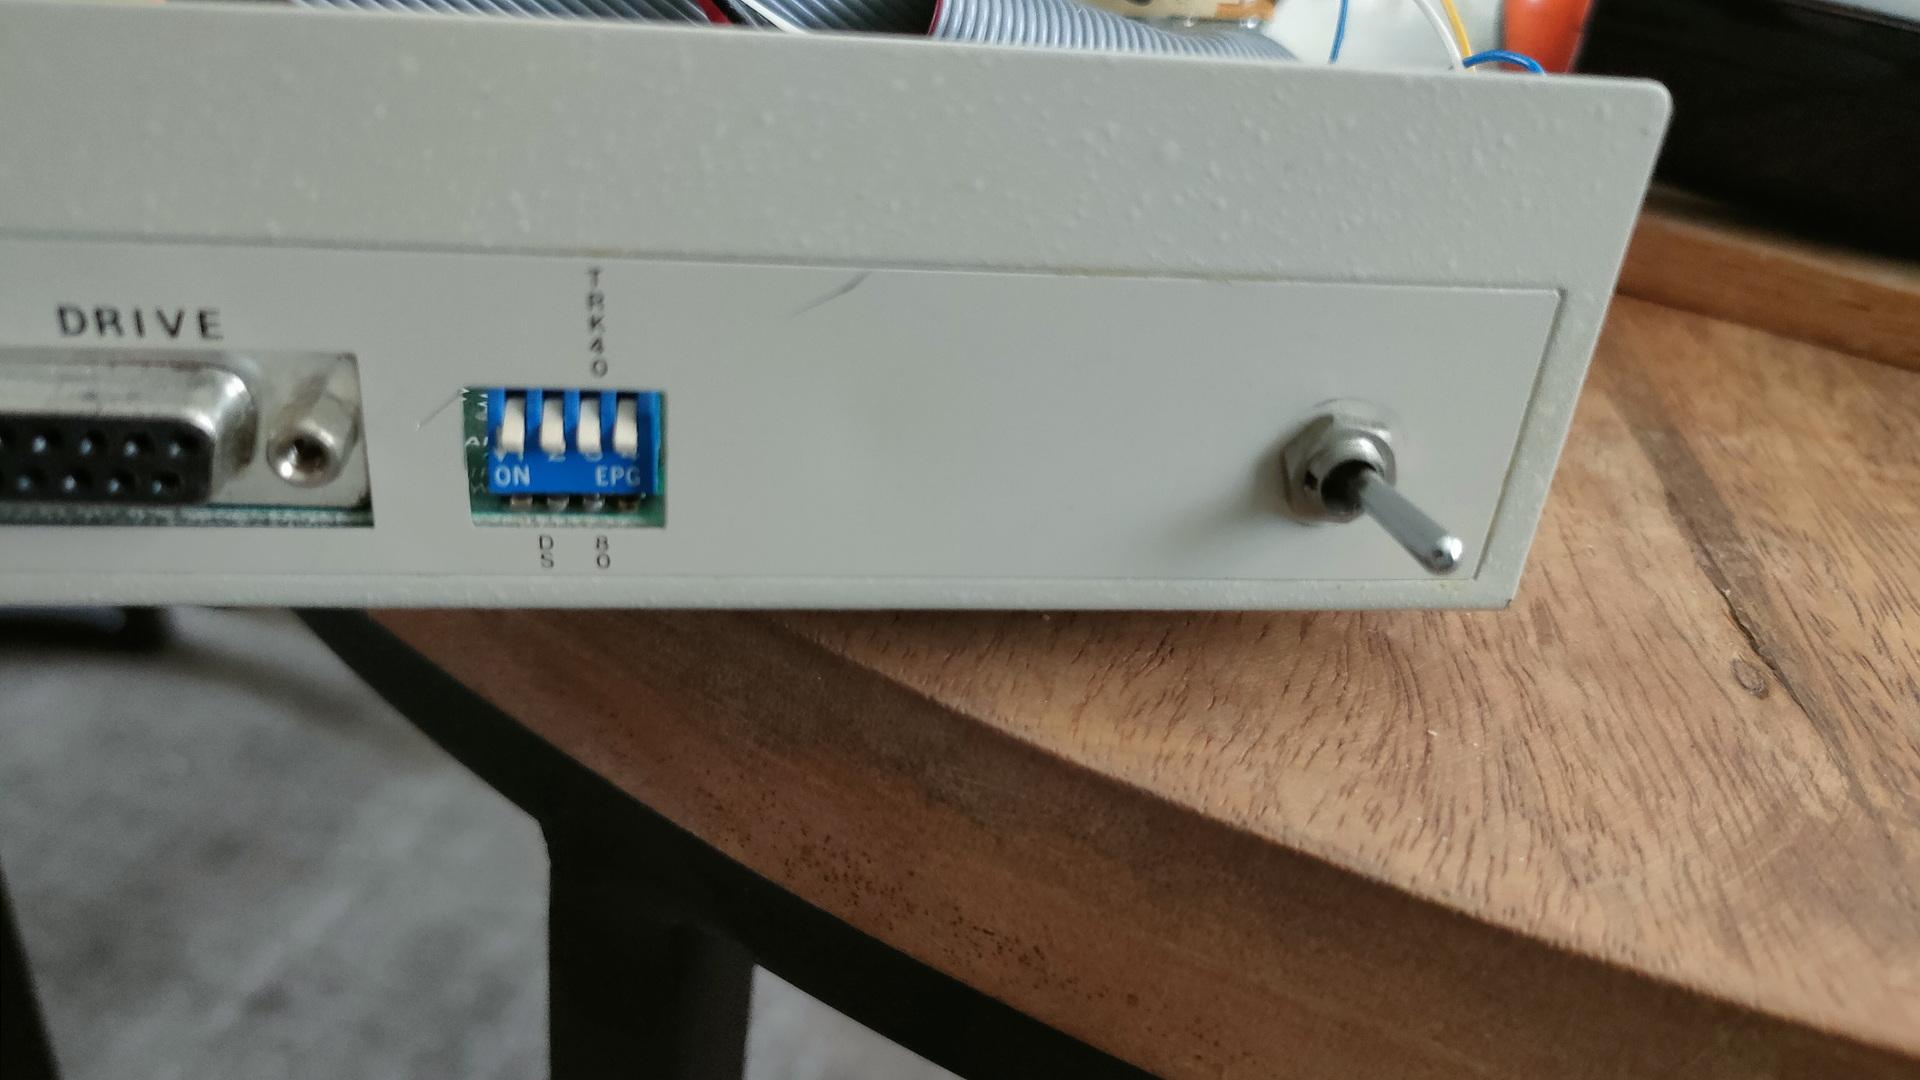
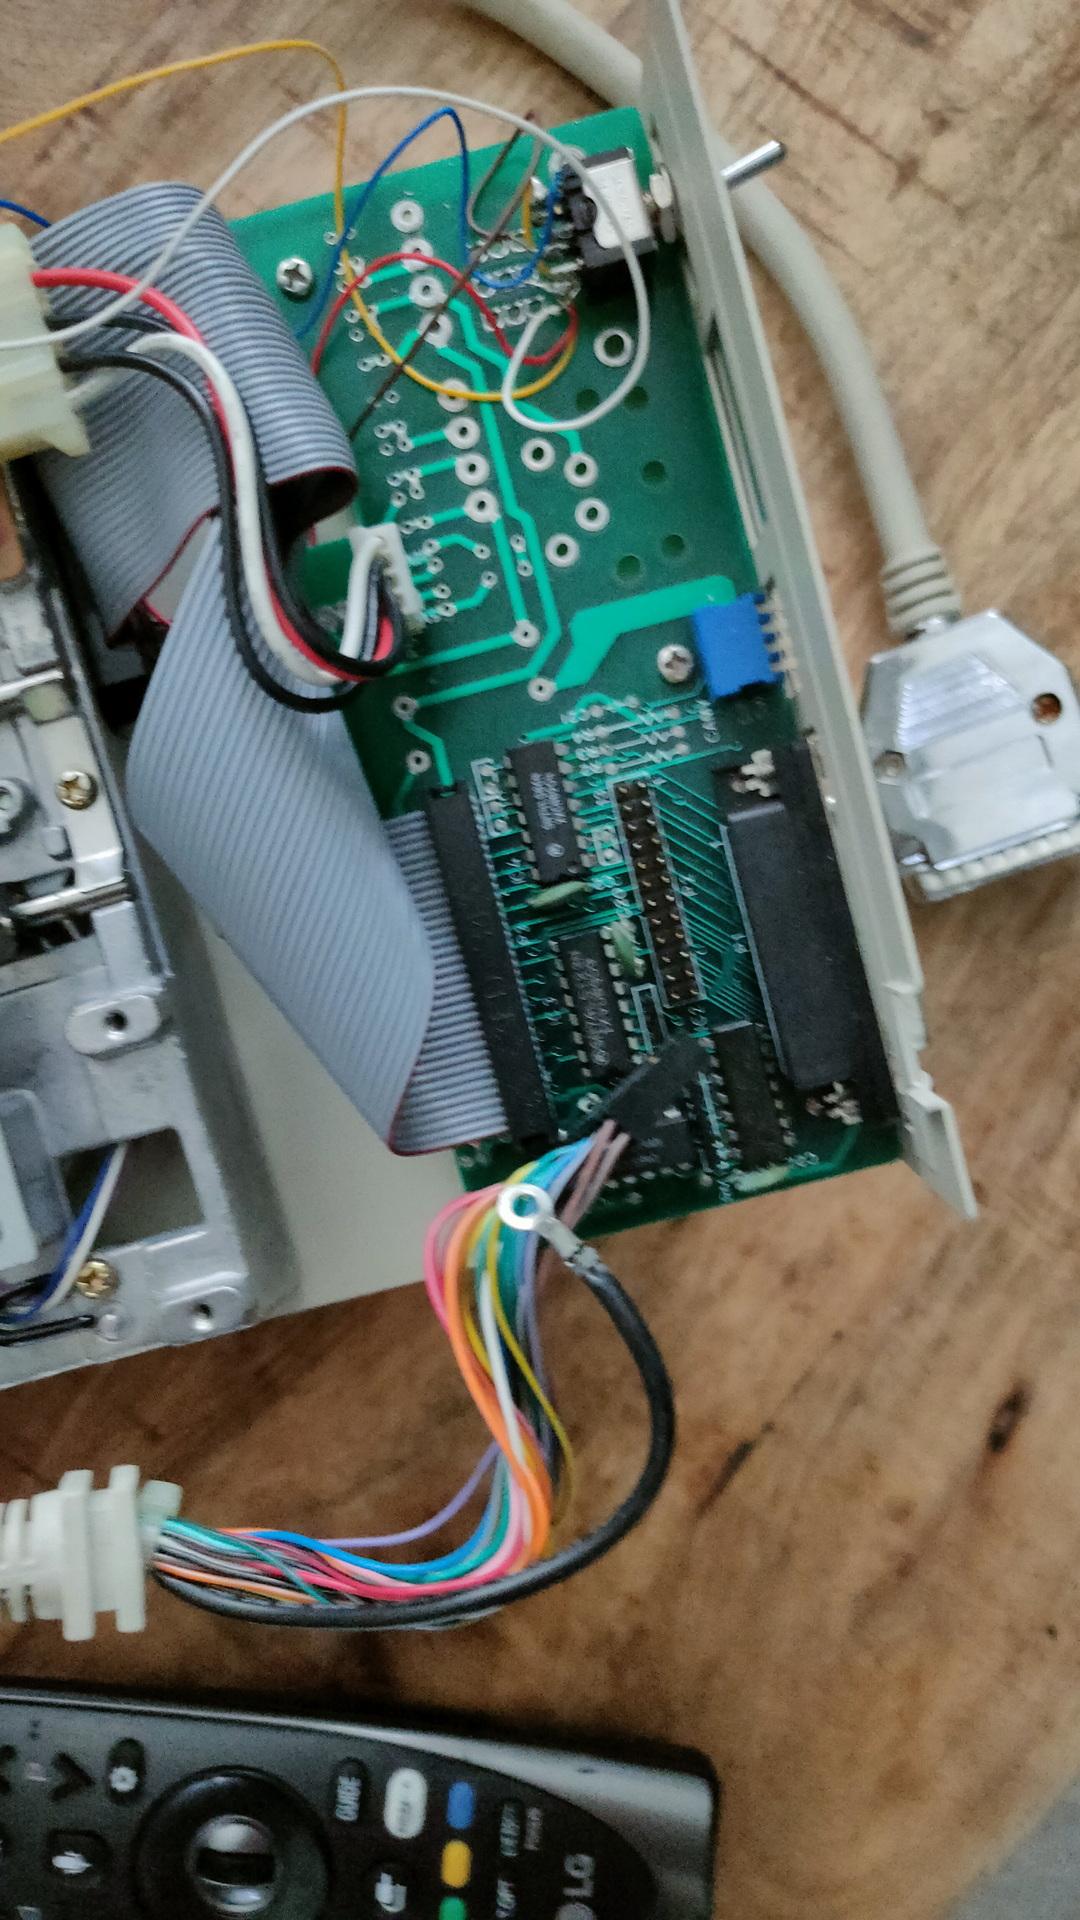
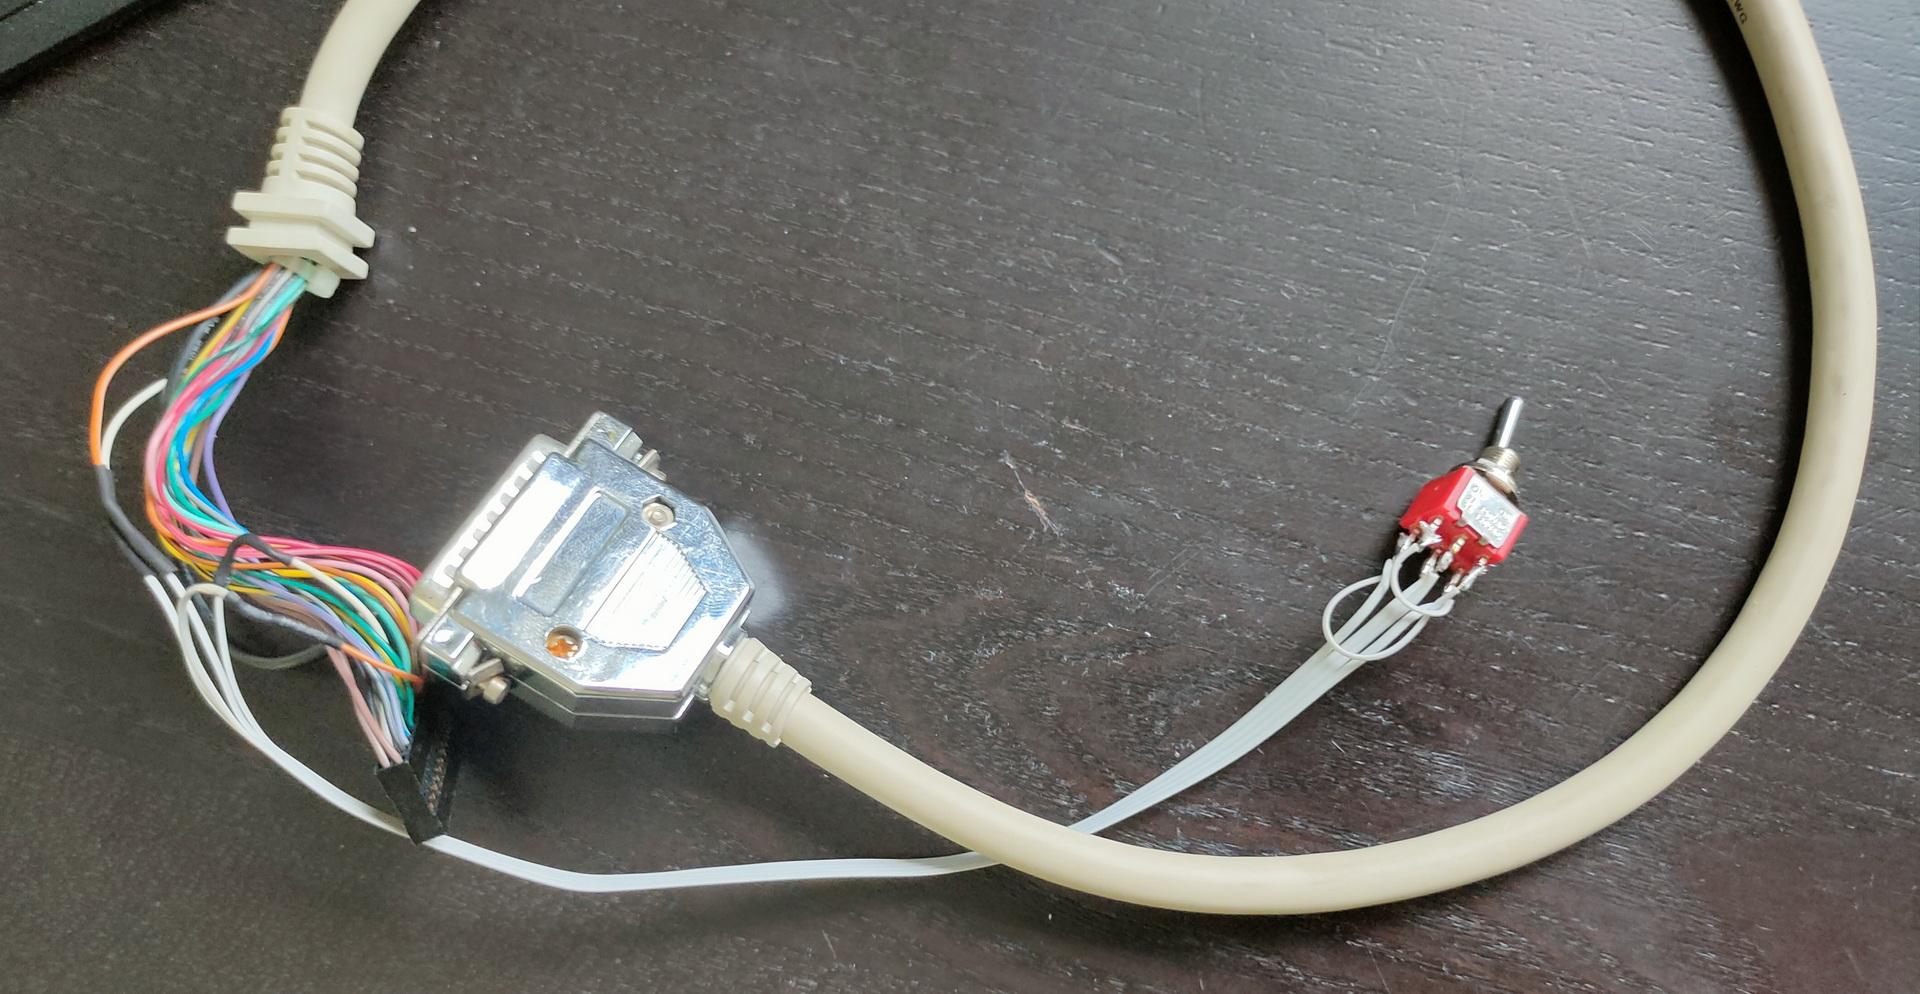
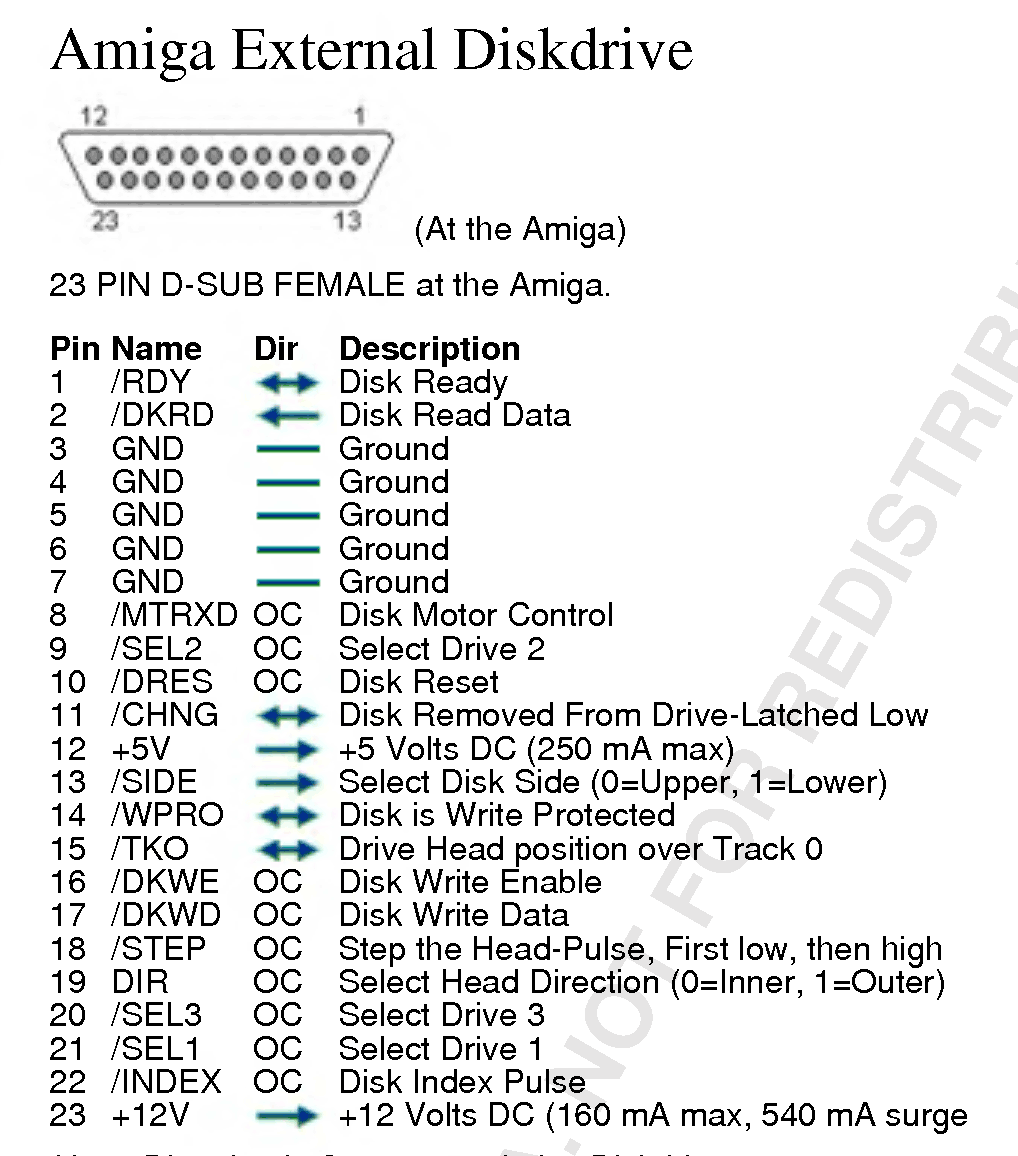
Meanwhile, I wanted to have a better control over the Amiga drives, so I’m planning to use a second switch to reassign drive numbers using a switch.
For switching Internal/External drive (df0/df1) I was using a Gotek boot switch. (Just press 3x ctrl-Amiga-Amiga)
But I have TWO external devices. The Gotek virtual disk device and a real 5.24″ drive.
So I’m going to use a ON-ON double switch to toggle the external devices.
oppo_32
The internal switch toggles internal and external. The secondary I’m going to build into the 5.25″ drive toggles df2 and the “df1”. That way the internal drive can be 0 (boot) or 1. The external drives can be 0,1 or 2.
Bottom connector is incorrect!Better view of cross switch part
NOTE: Switch pin 21 and 9 using the cross switch!
SO: Amiga with internal drive -> External 5.24″ which has a passthrough to the Gotek.
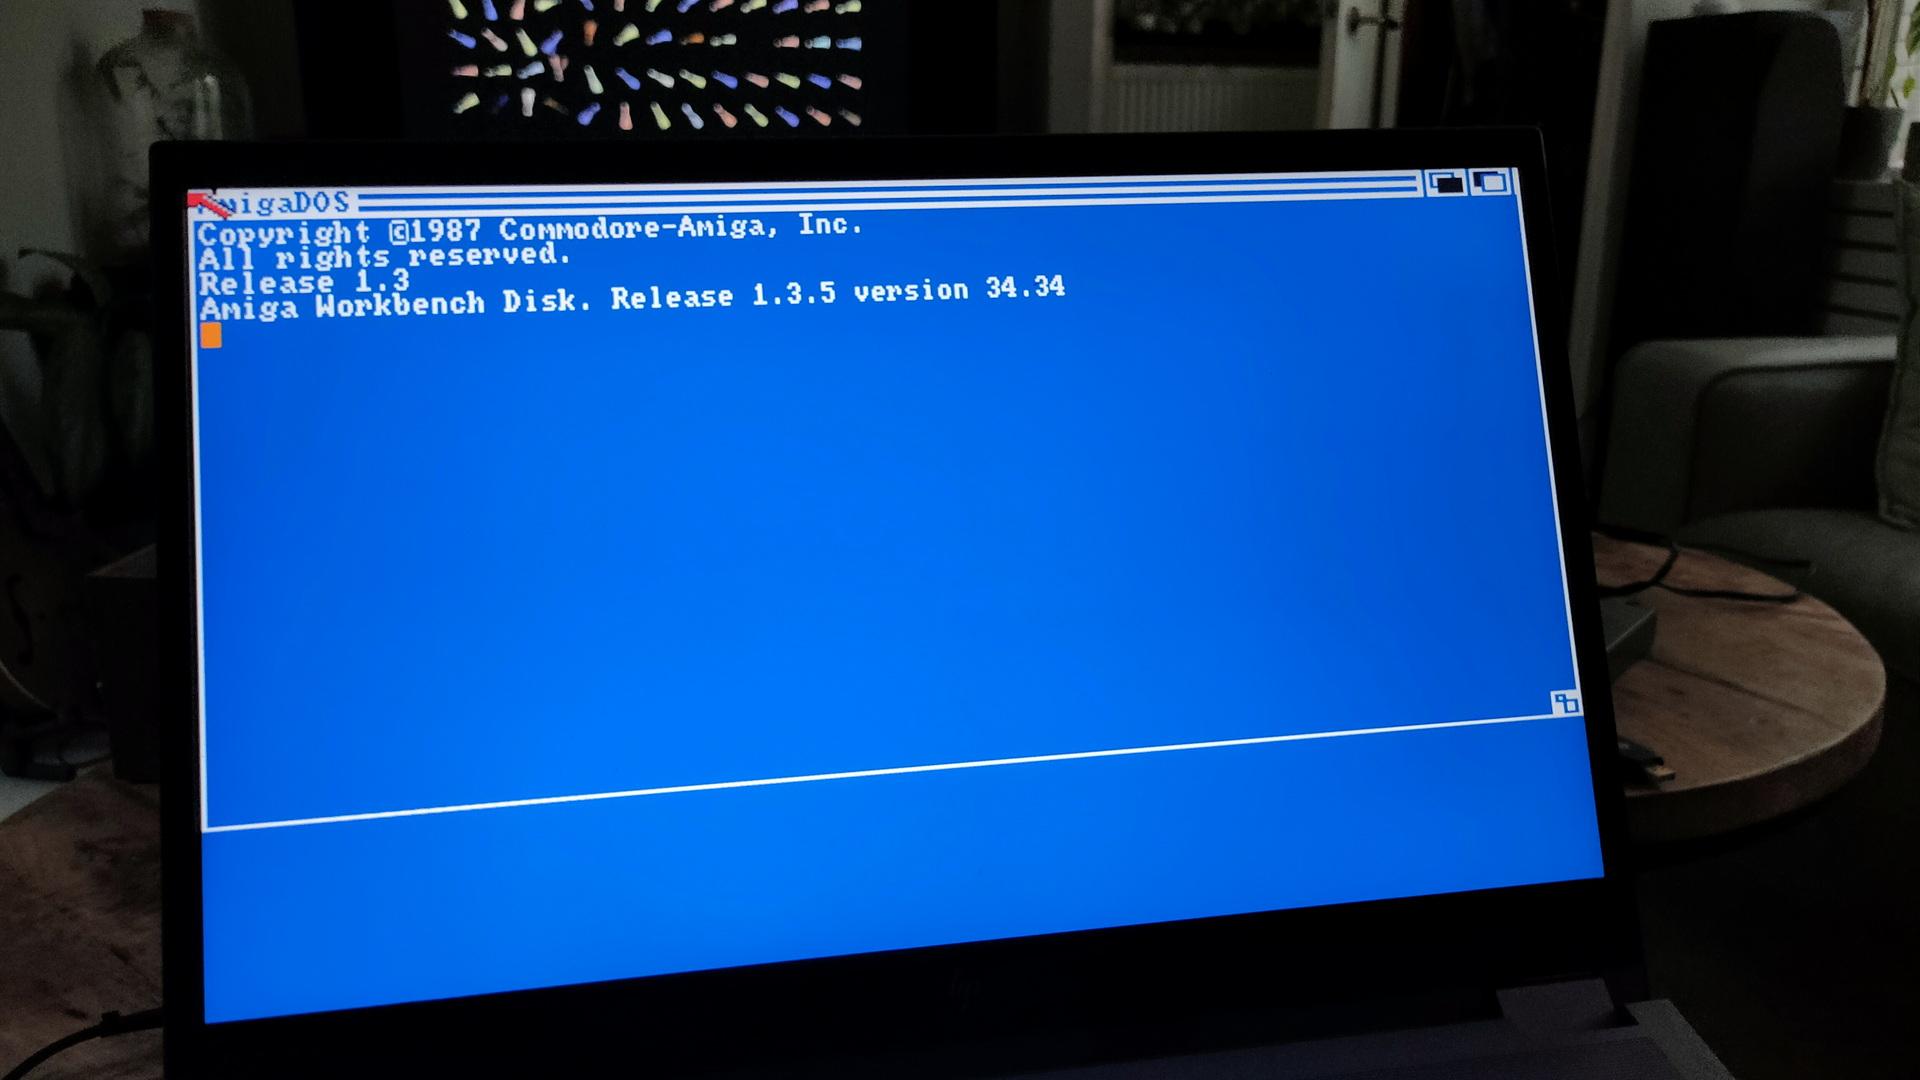
Another amiga thing fixed: I re-installed Aros (on an old Laptop this time)
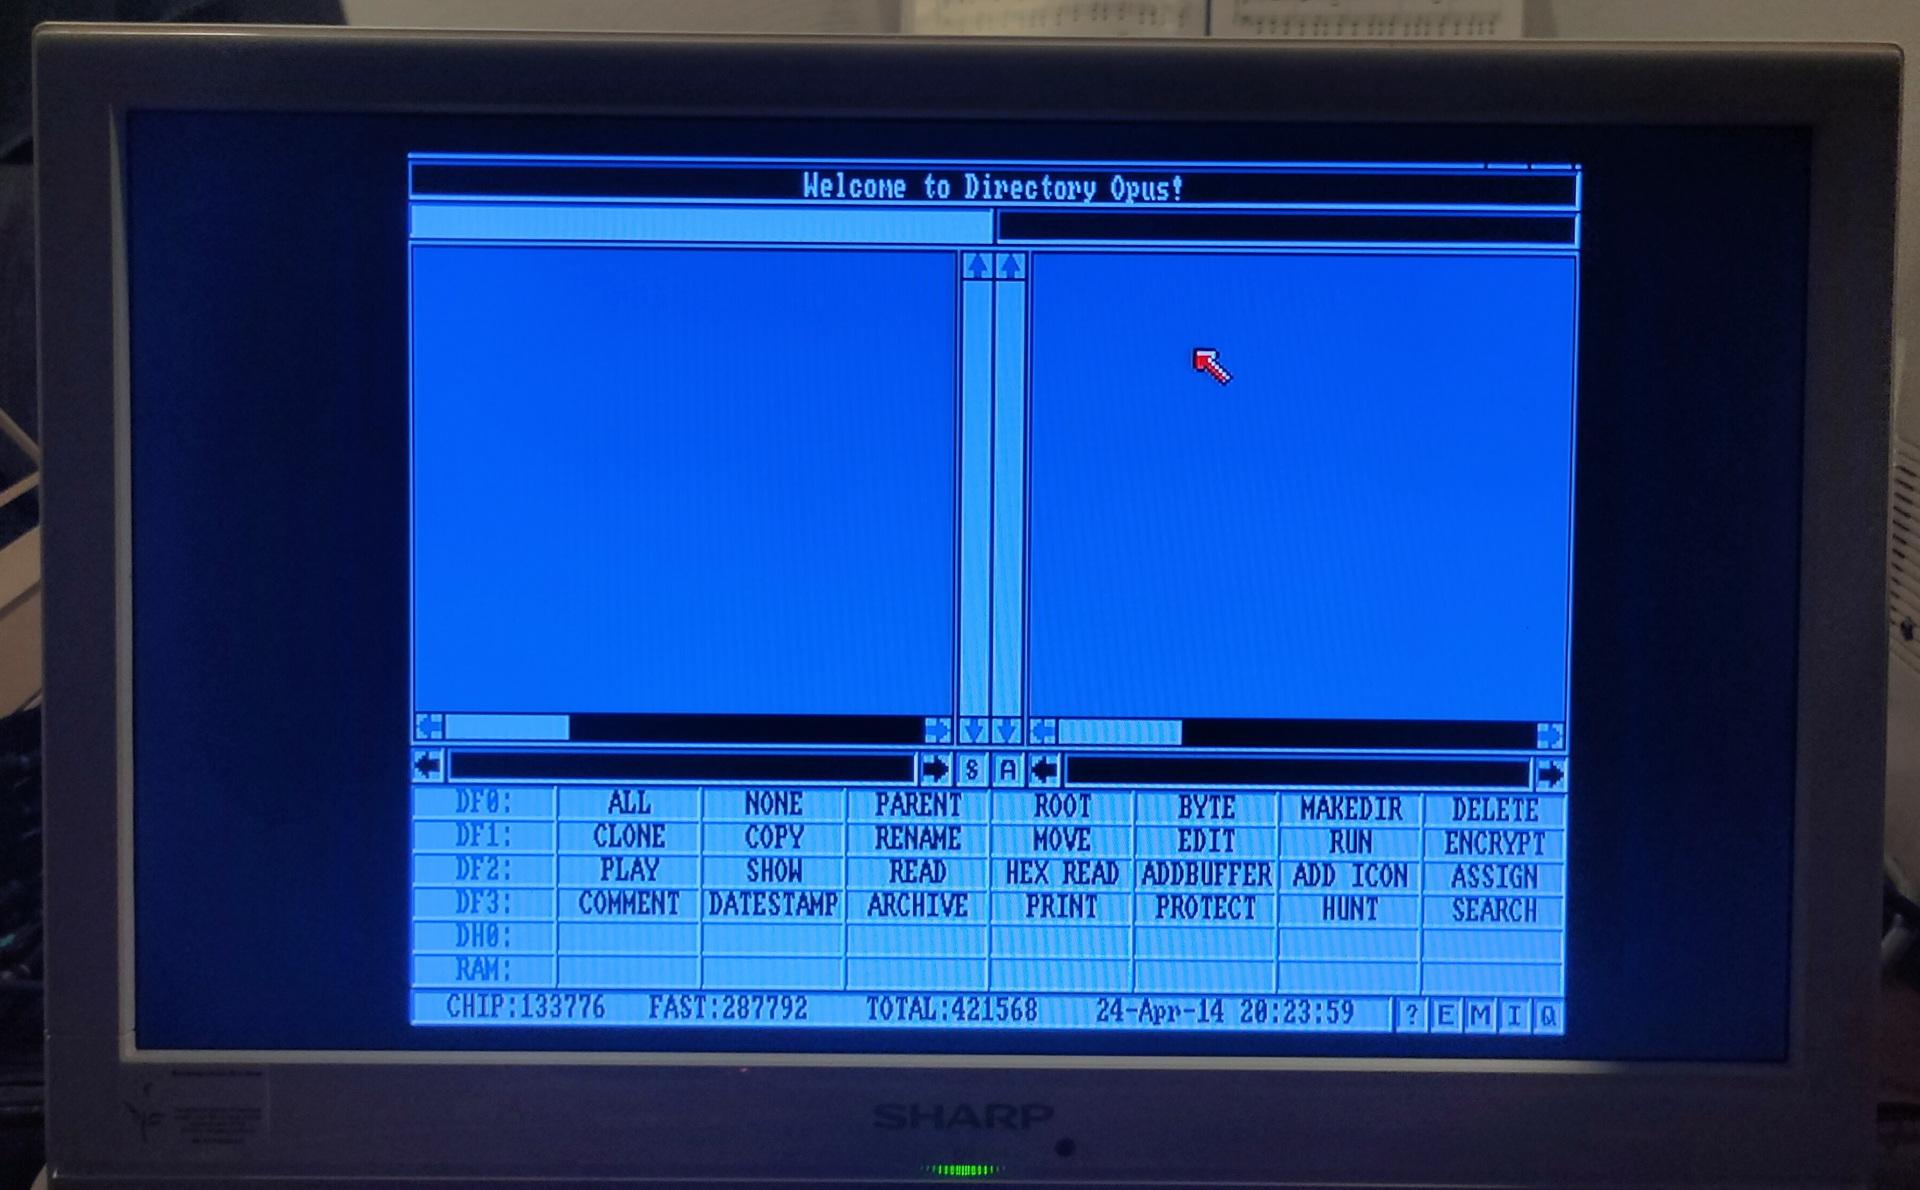
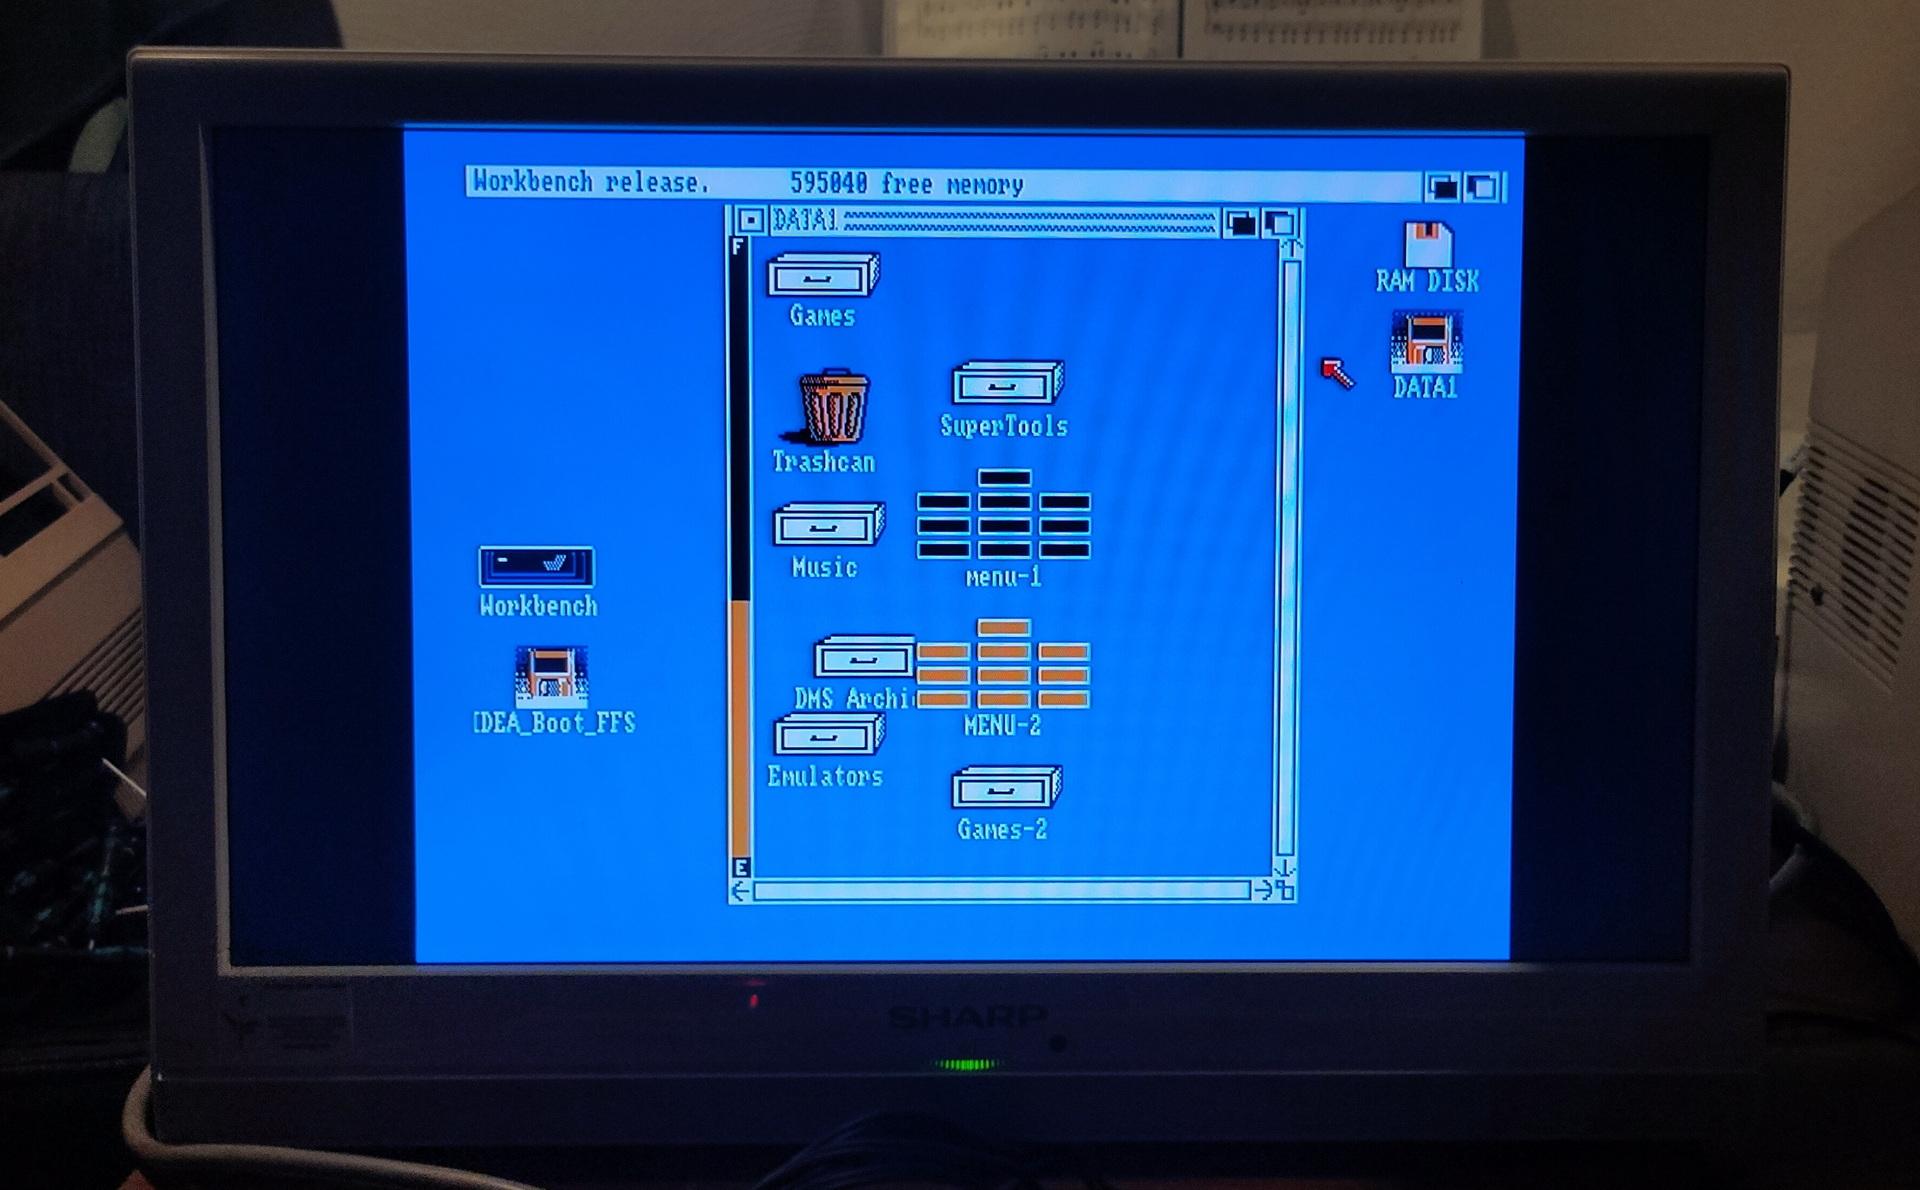
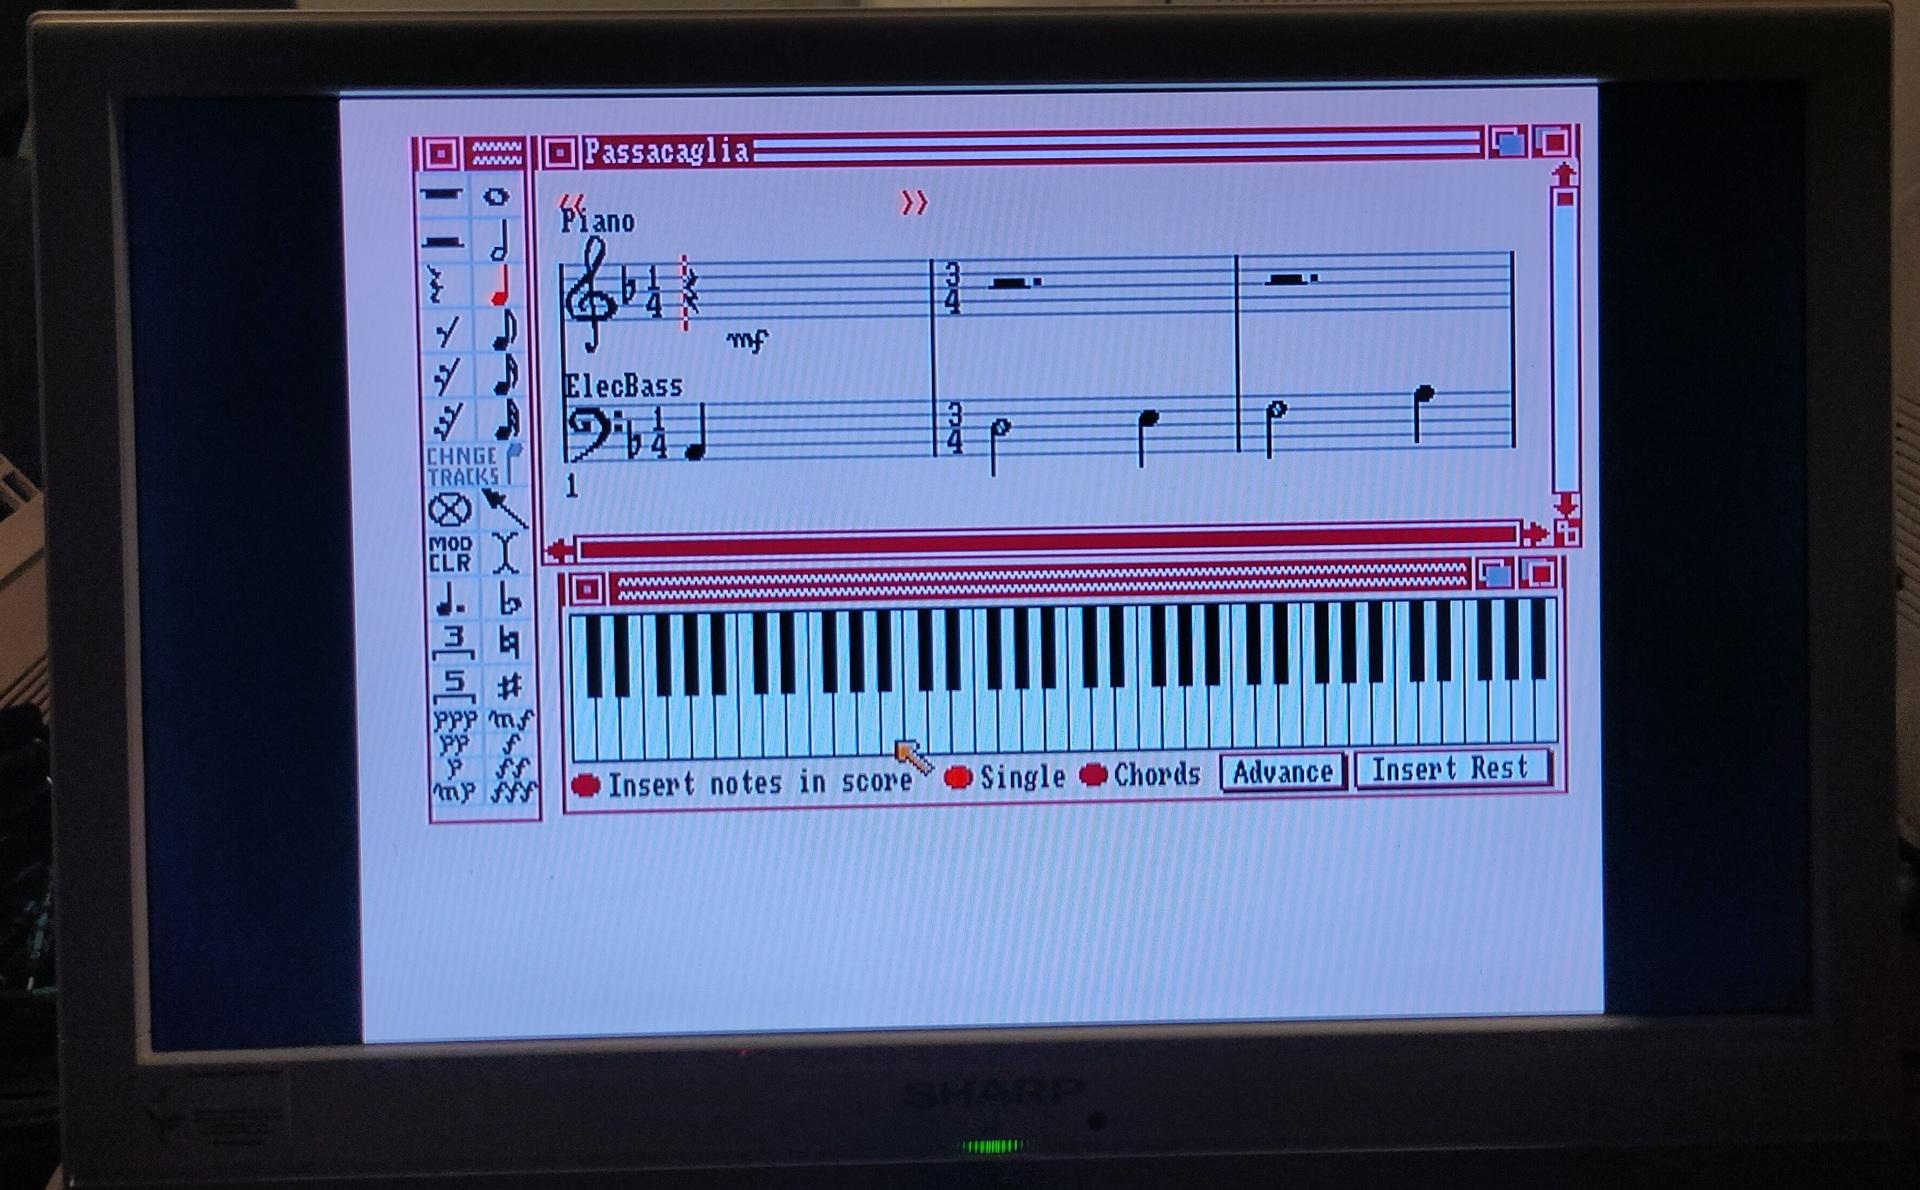
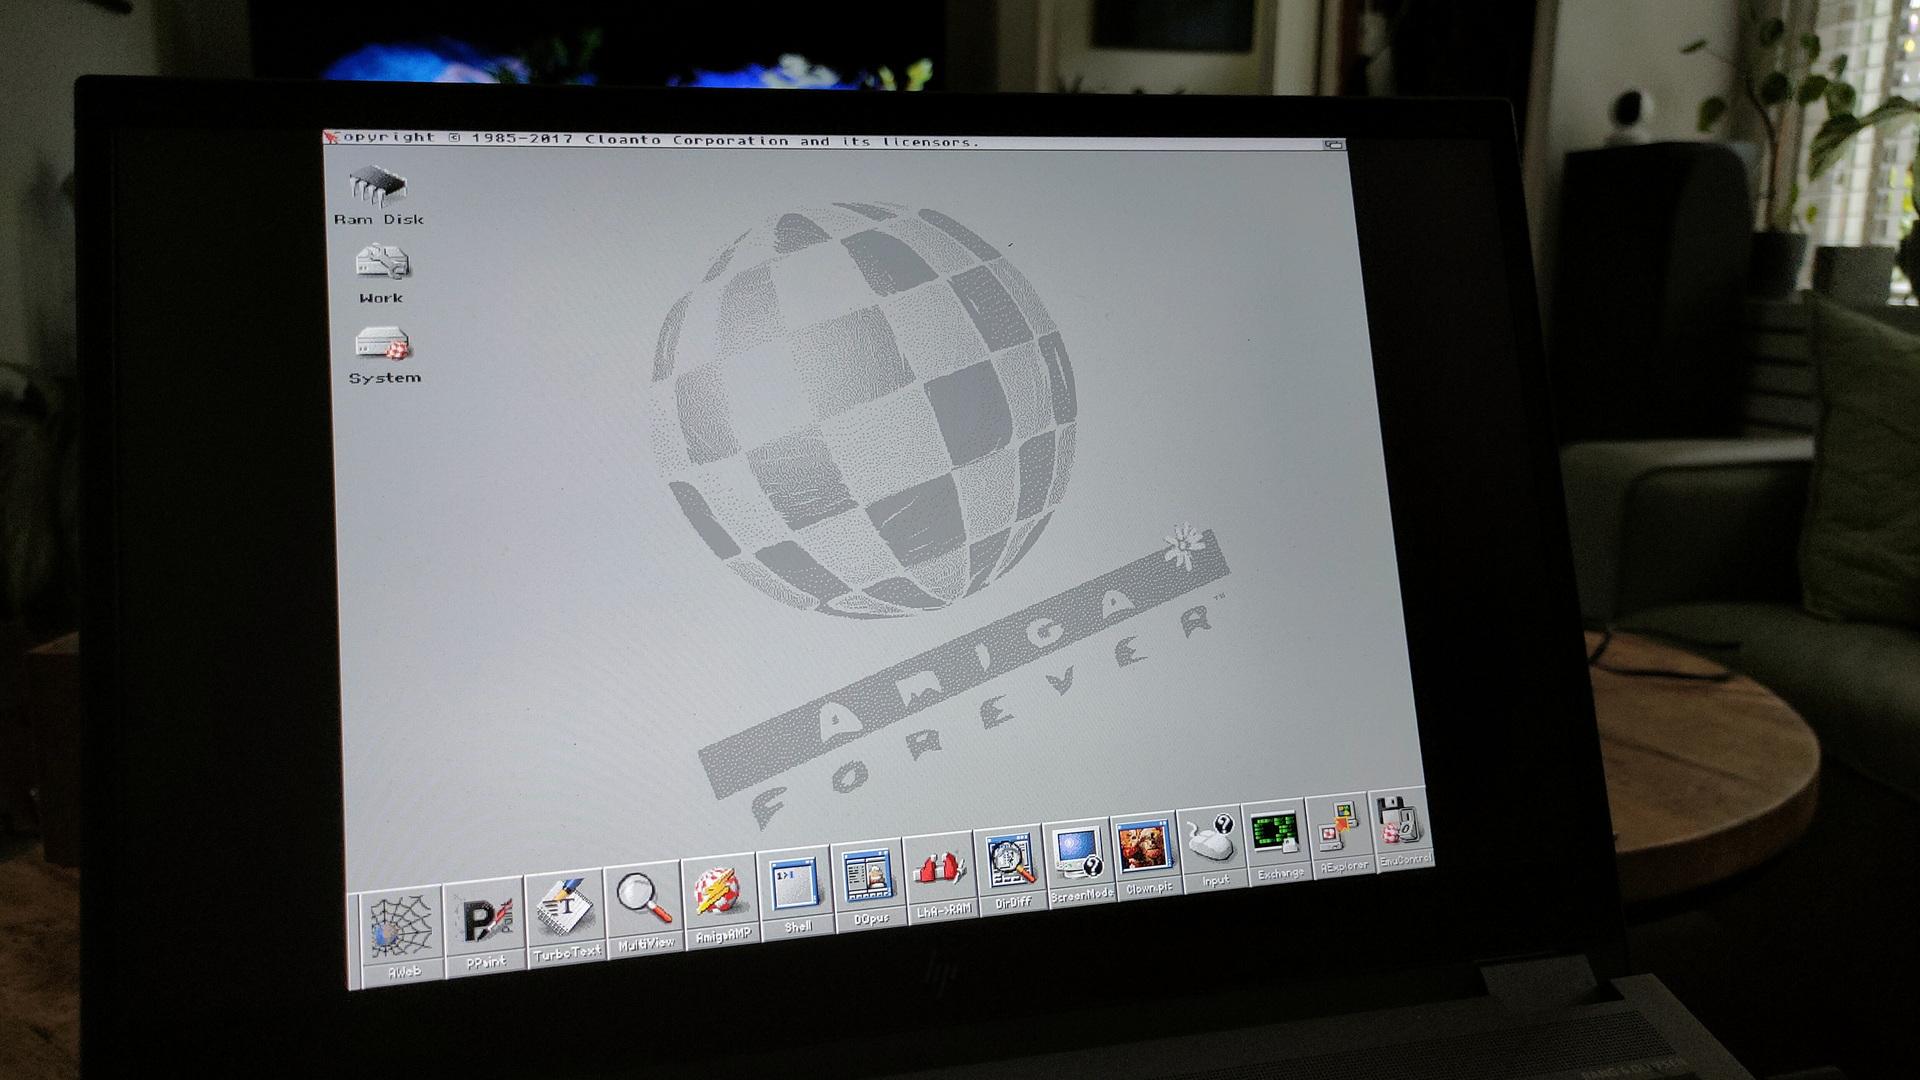
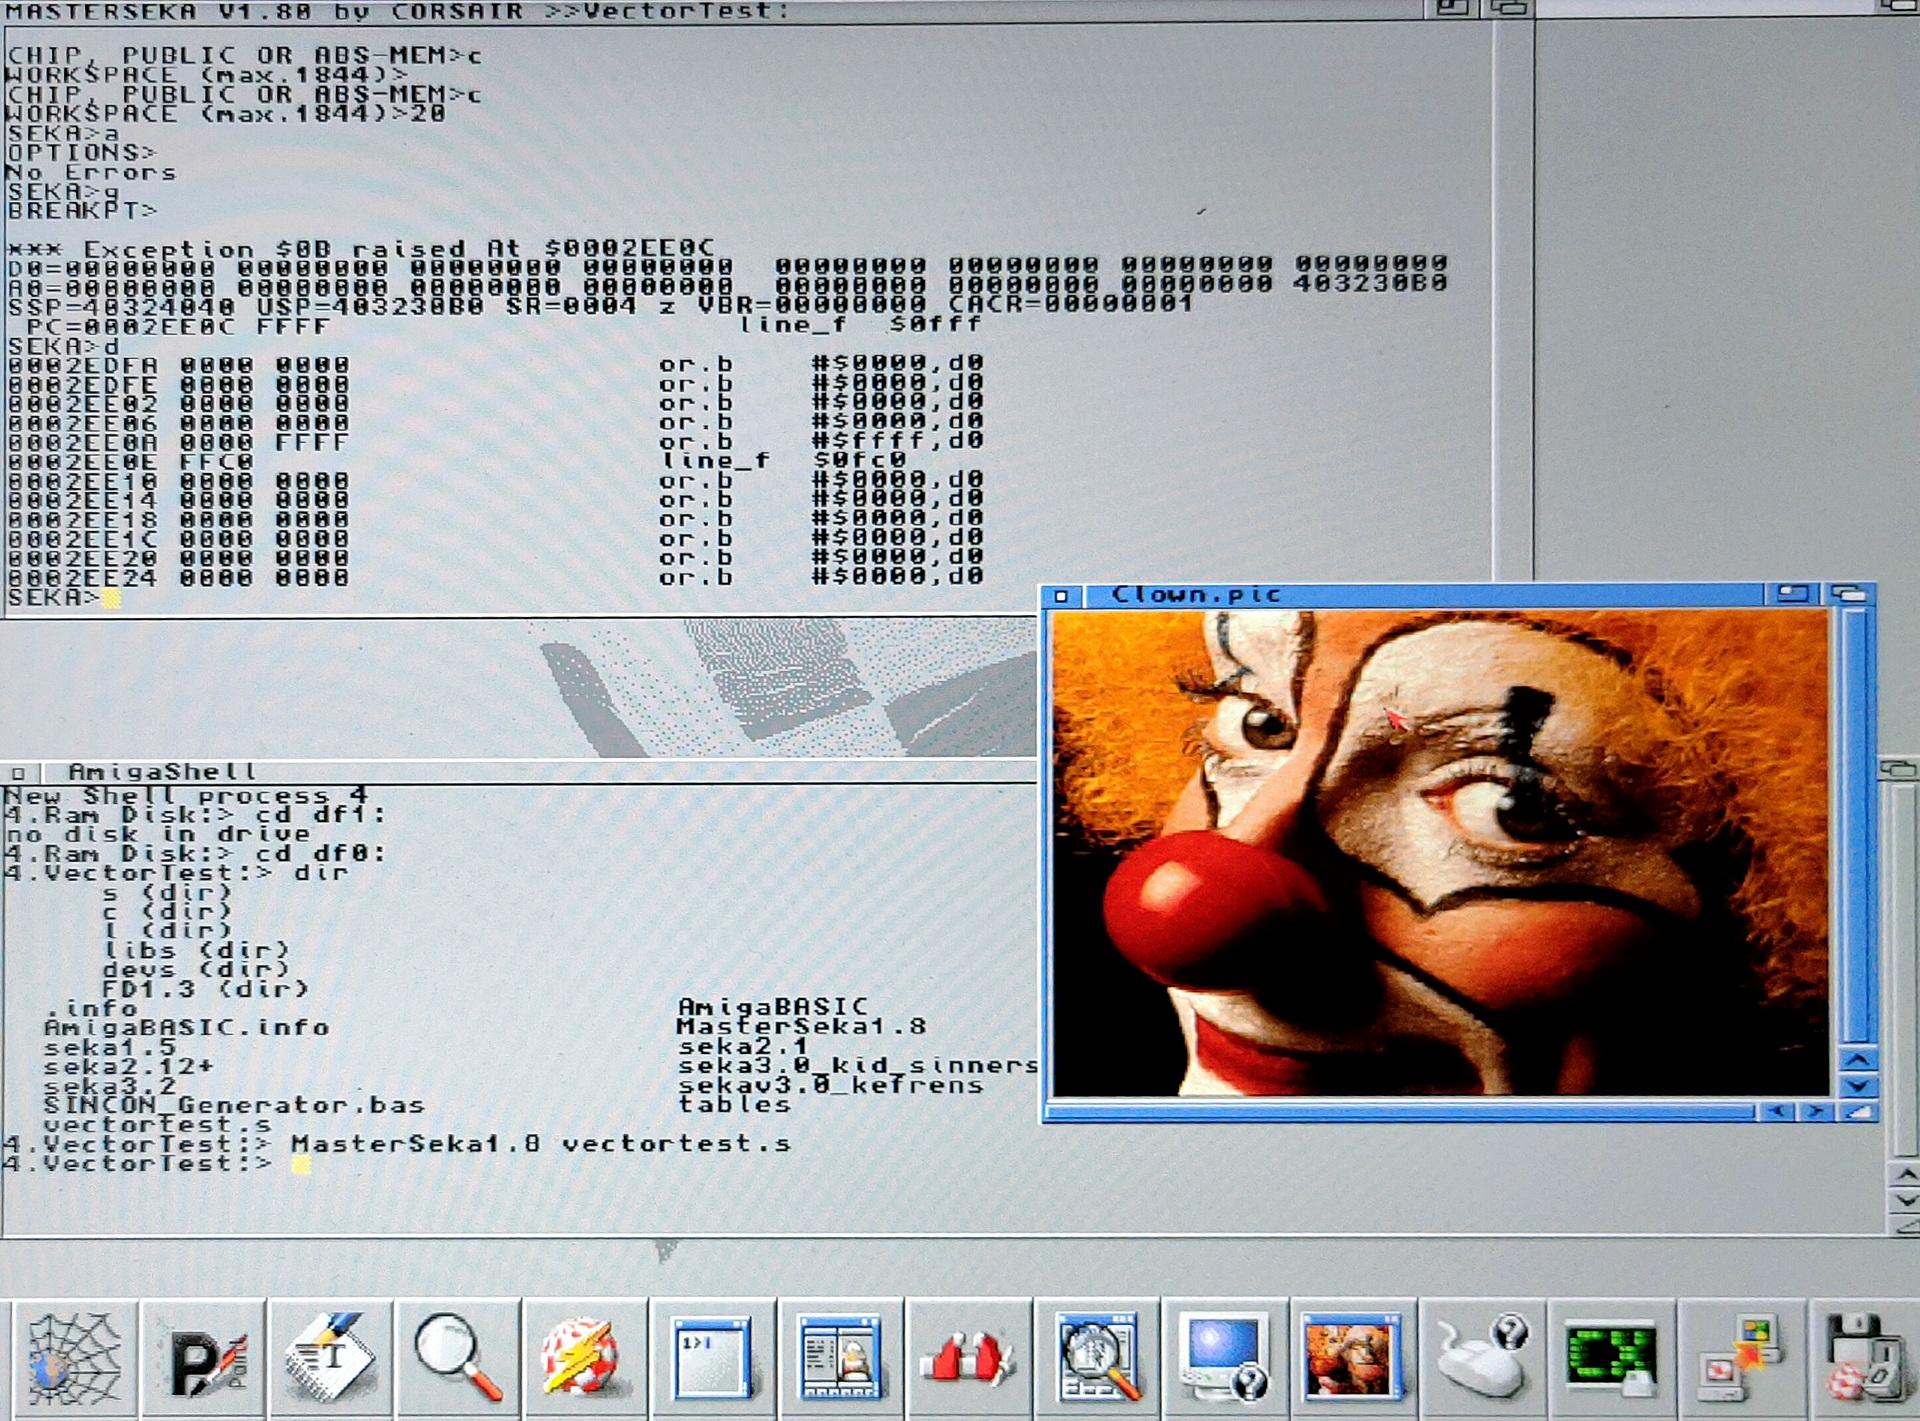
And third: I’ve bought the Amiga Forever cdrom.
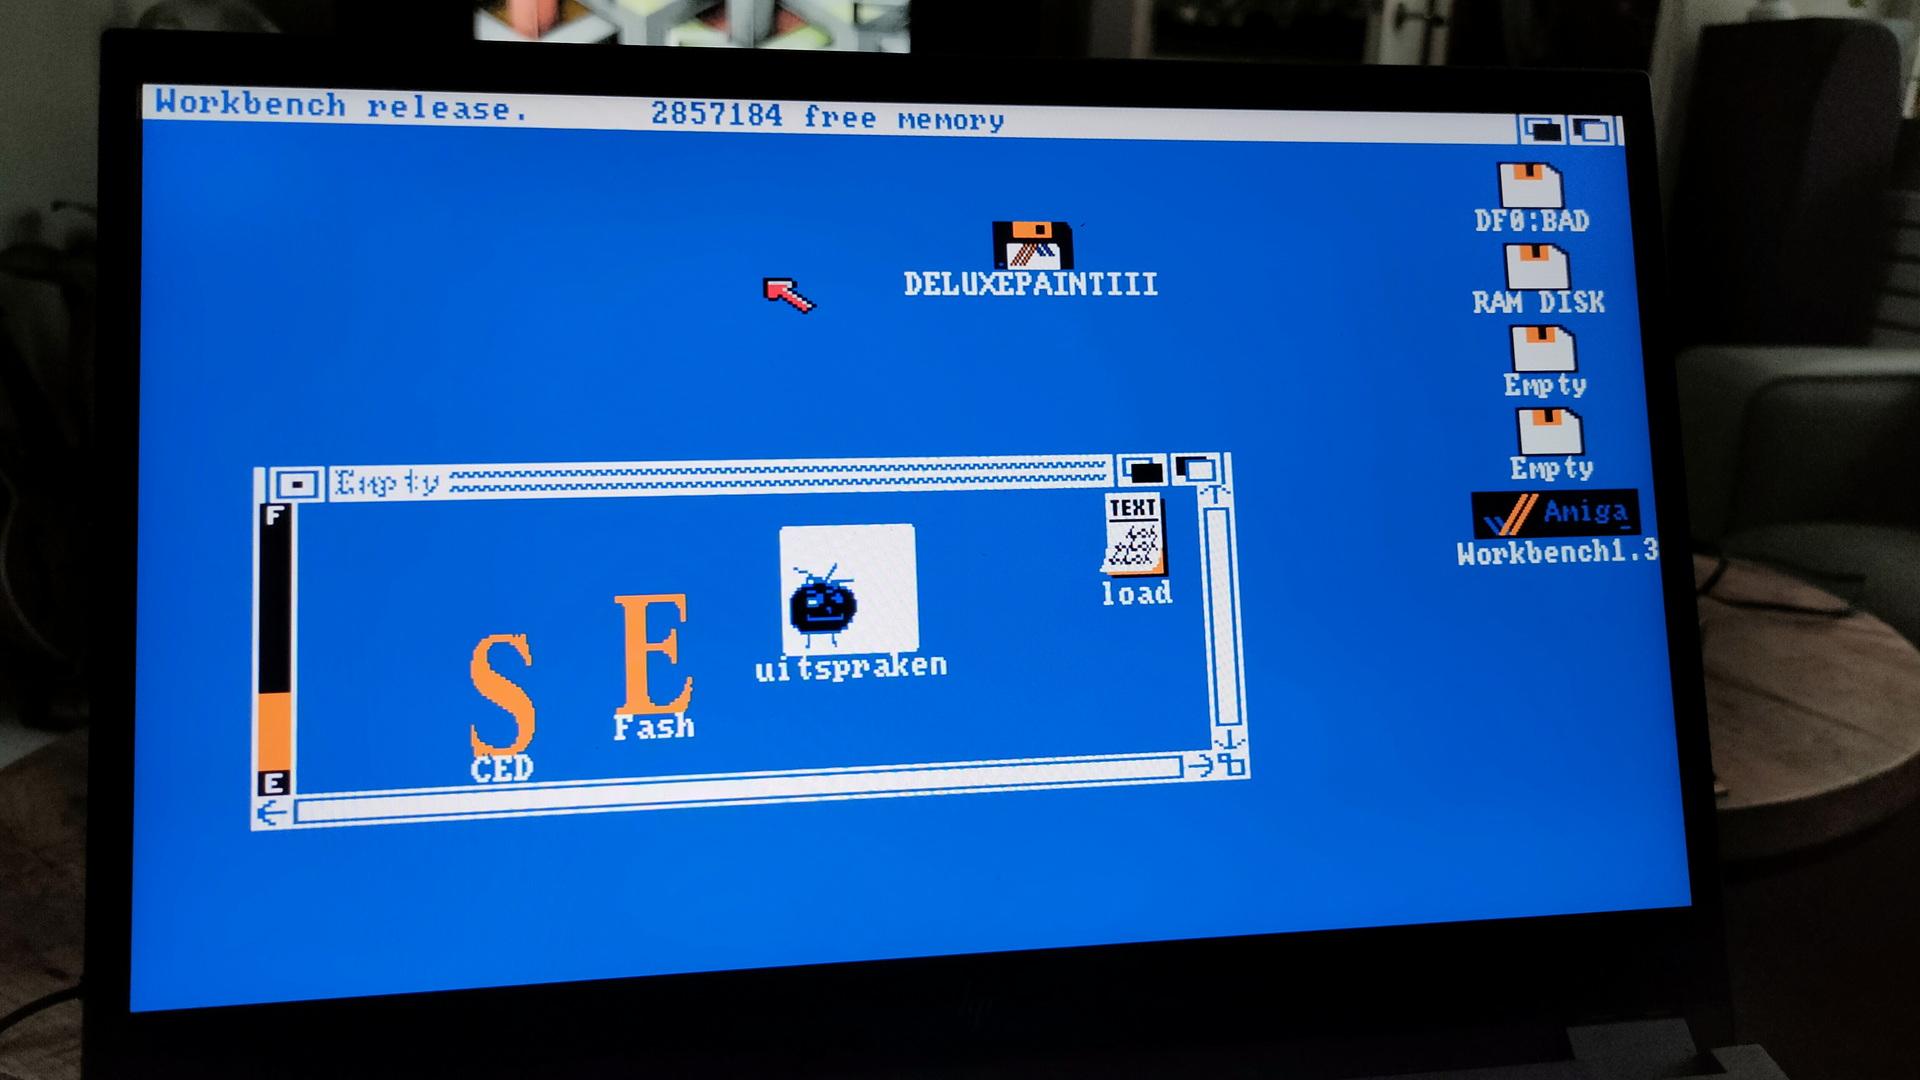
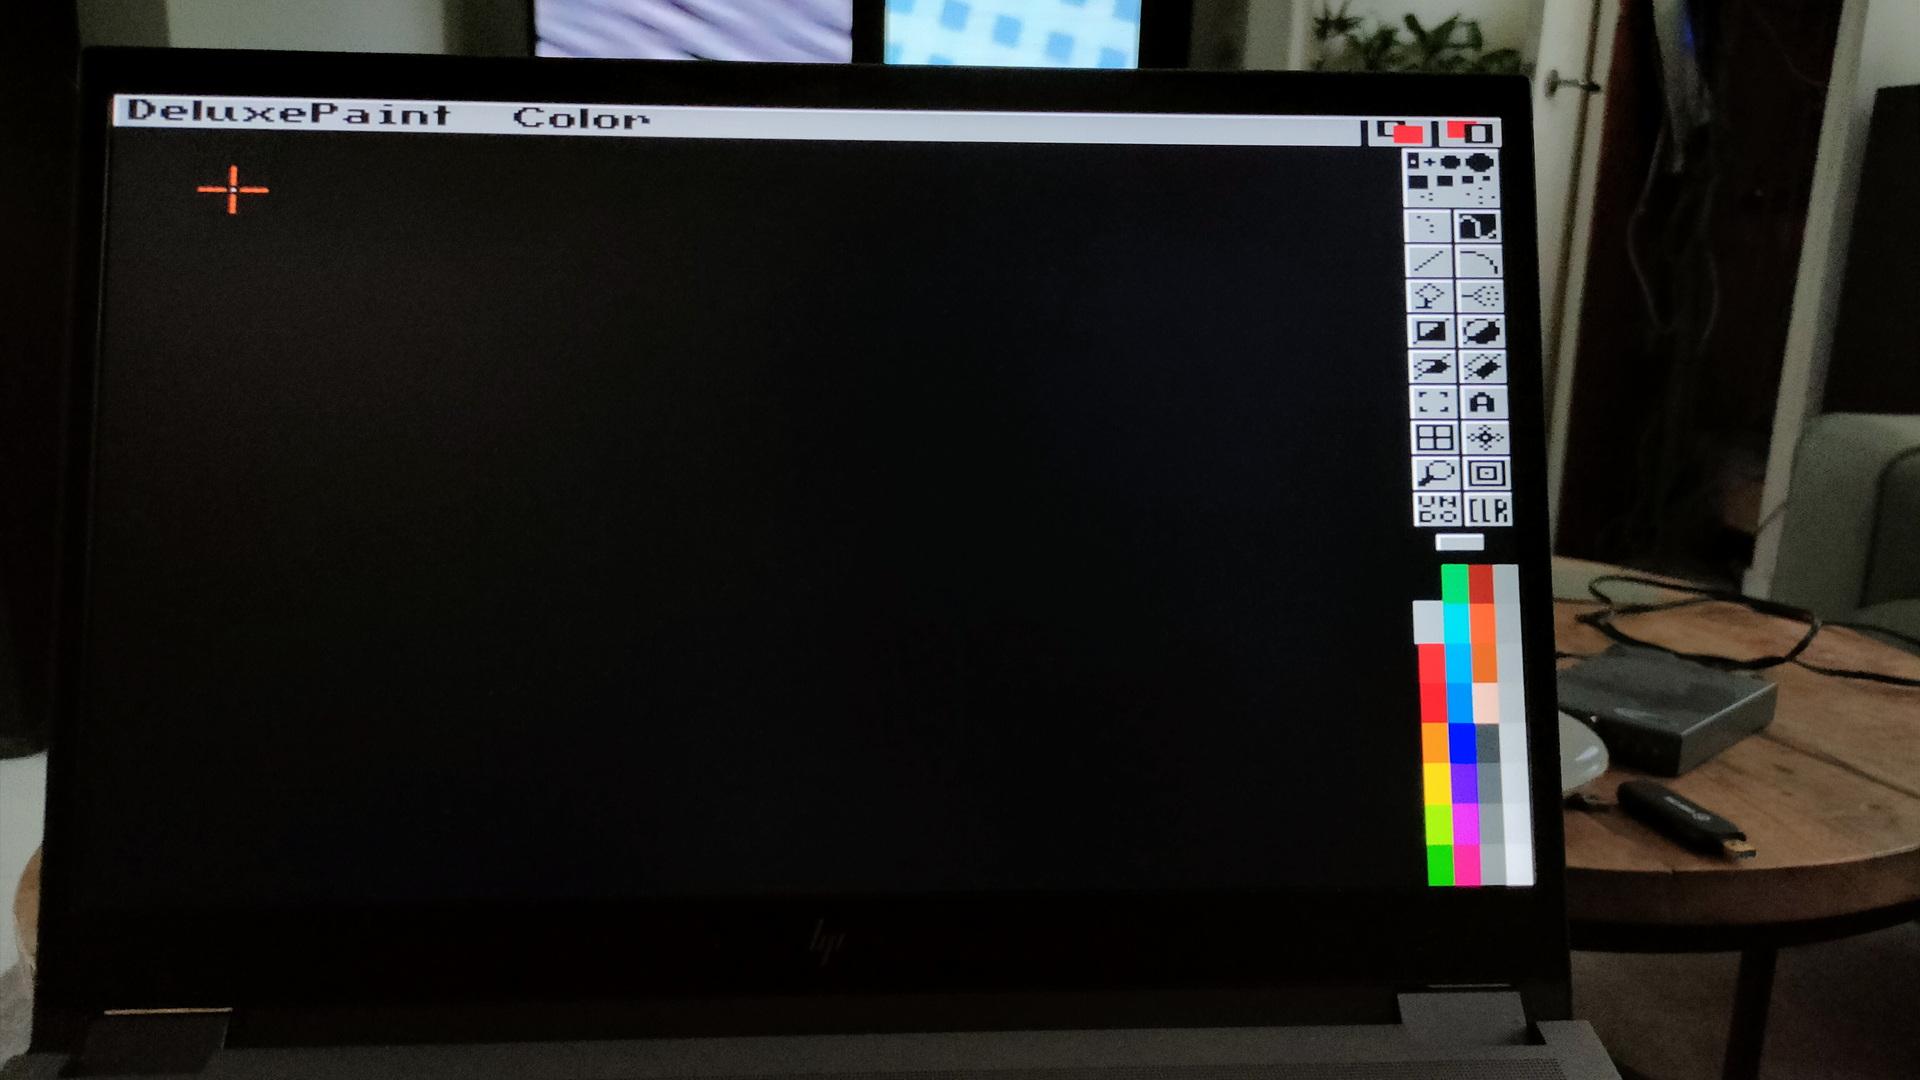
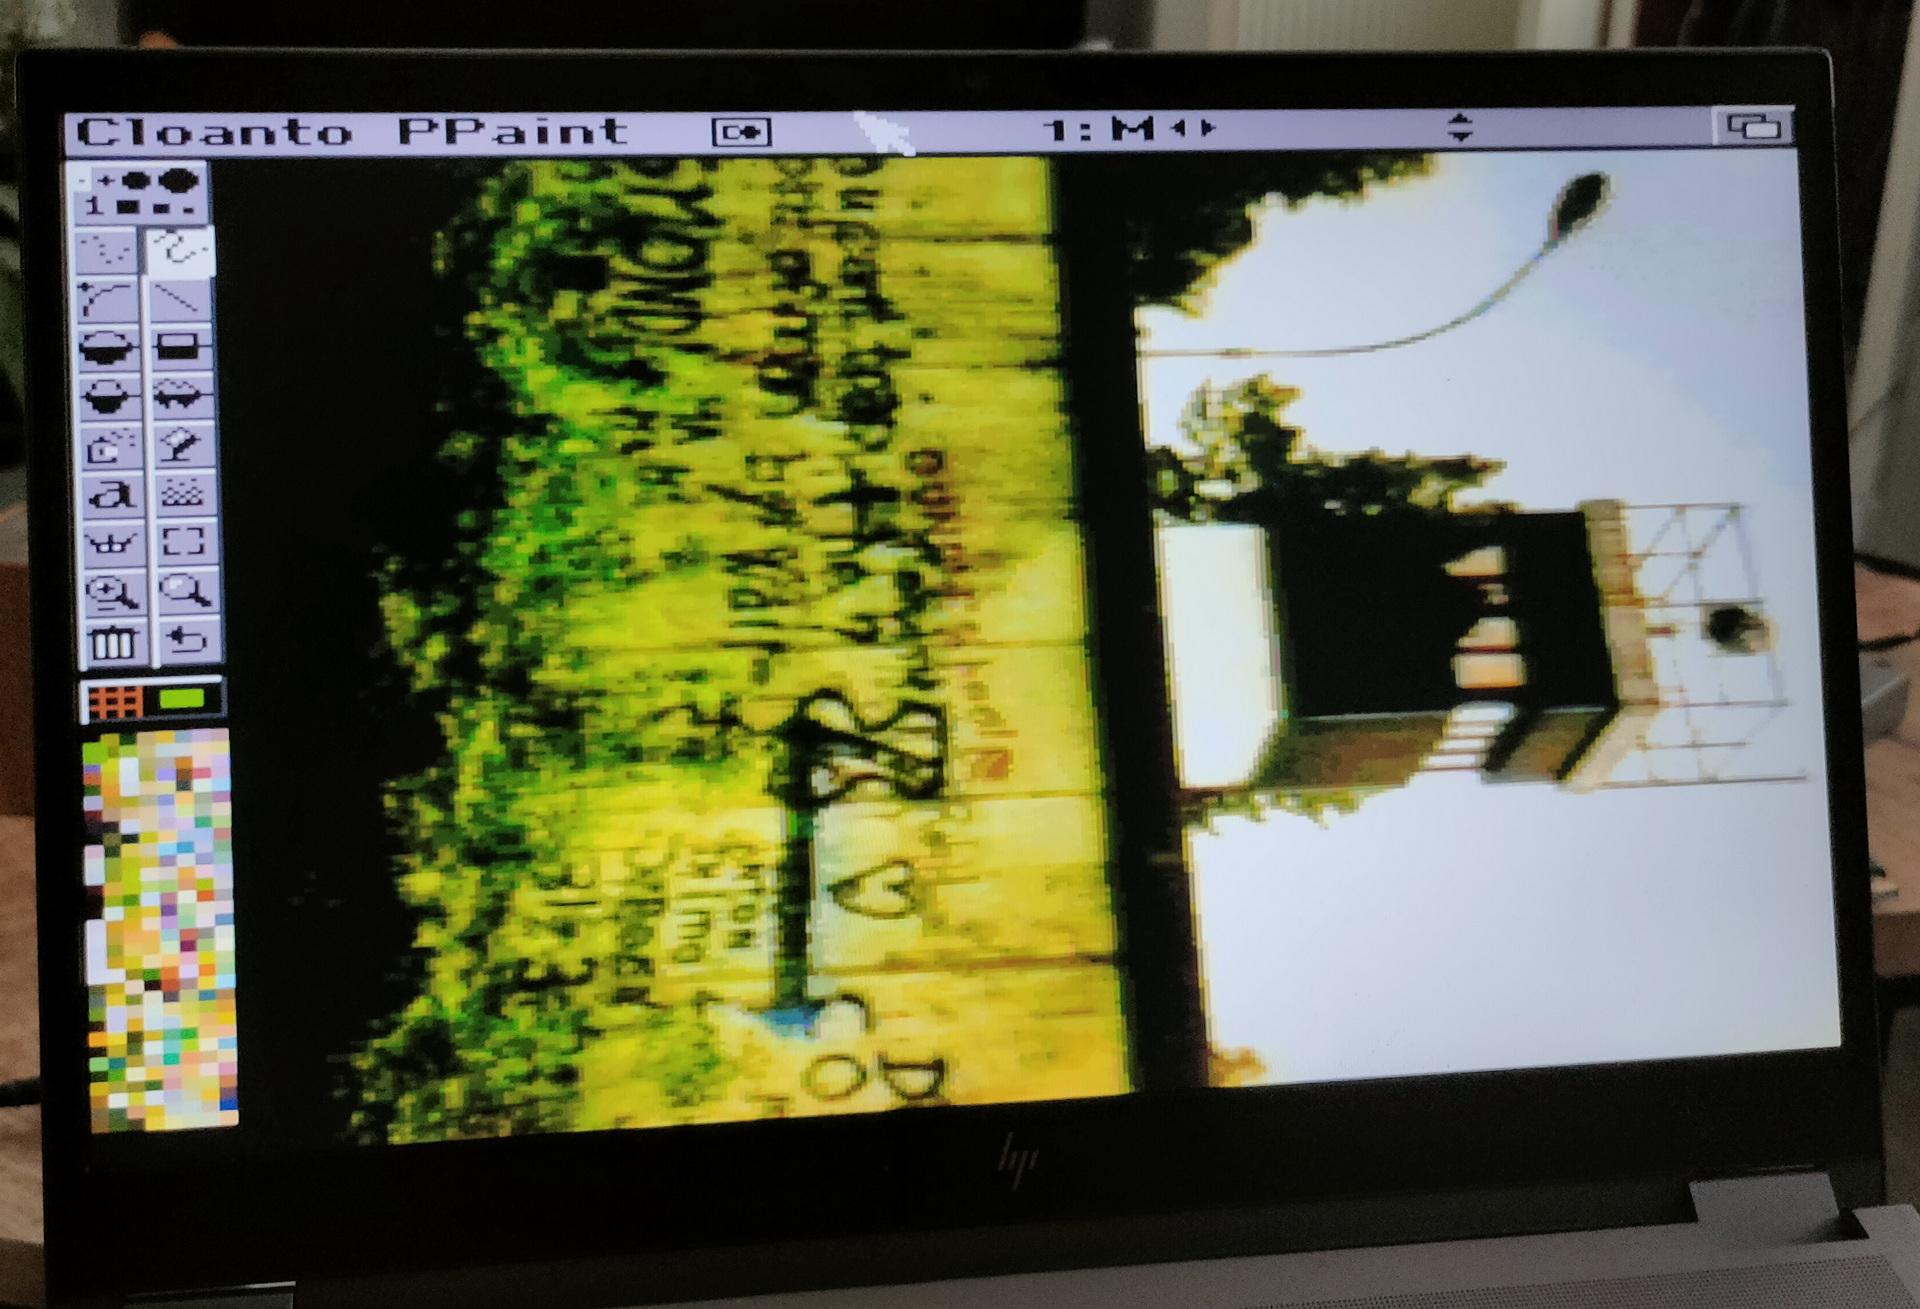
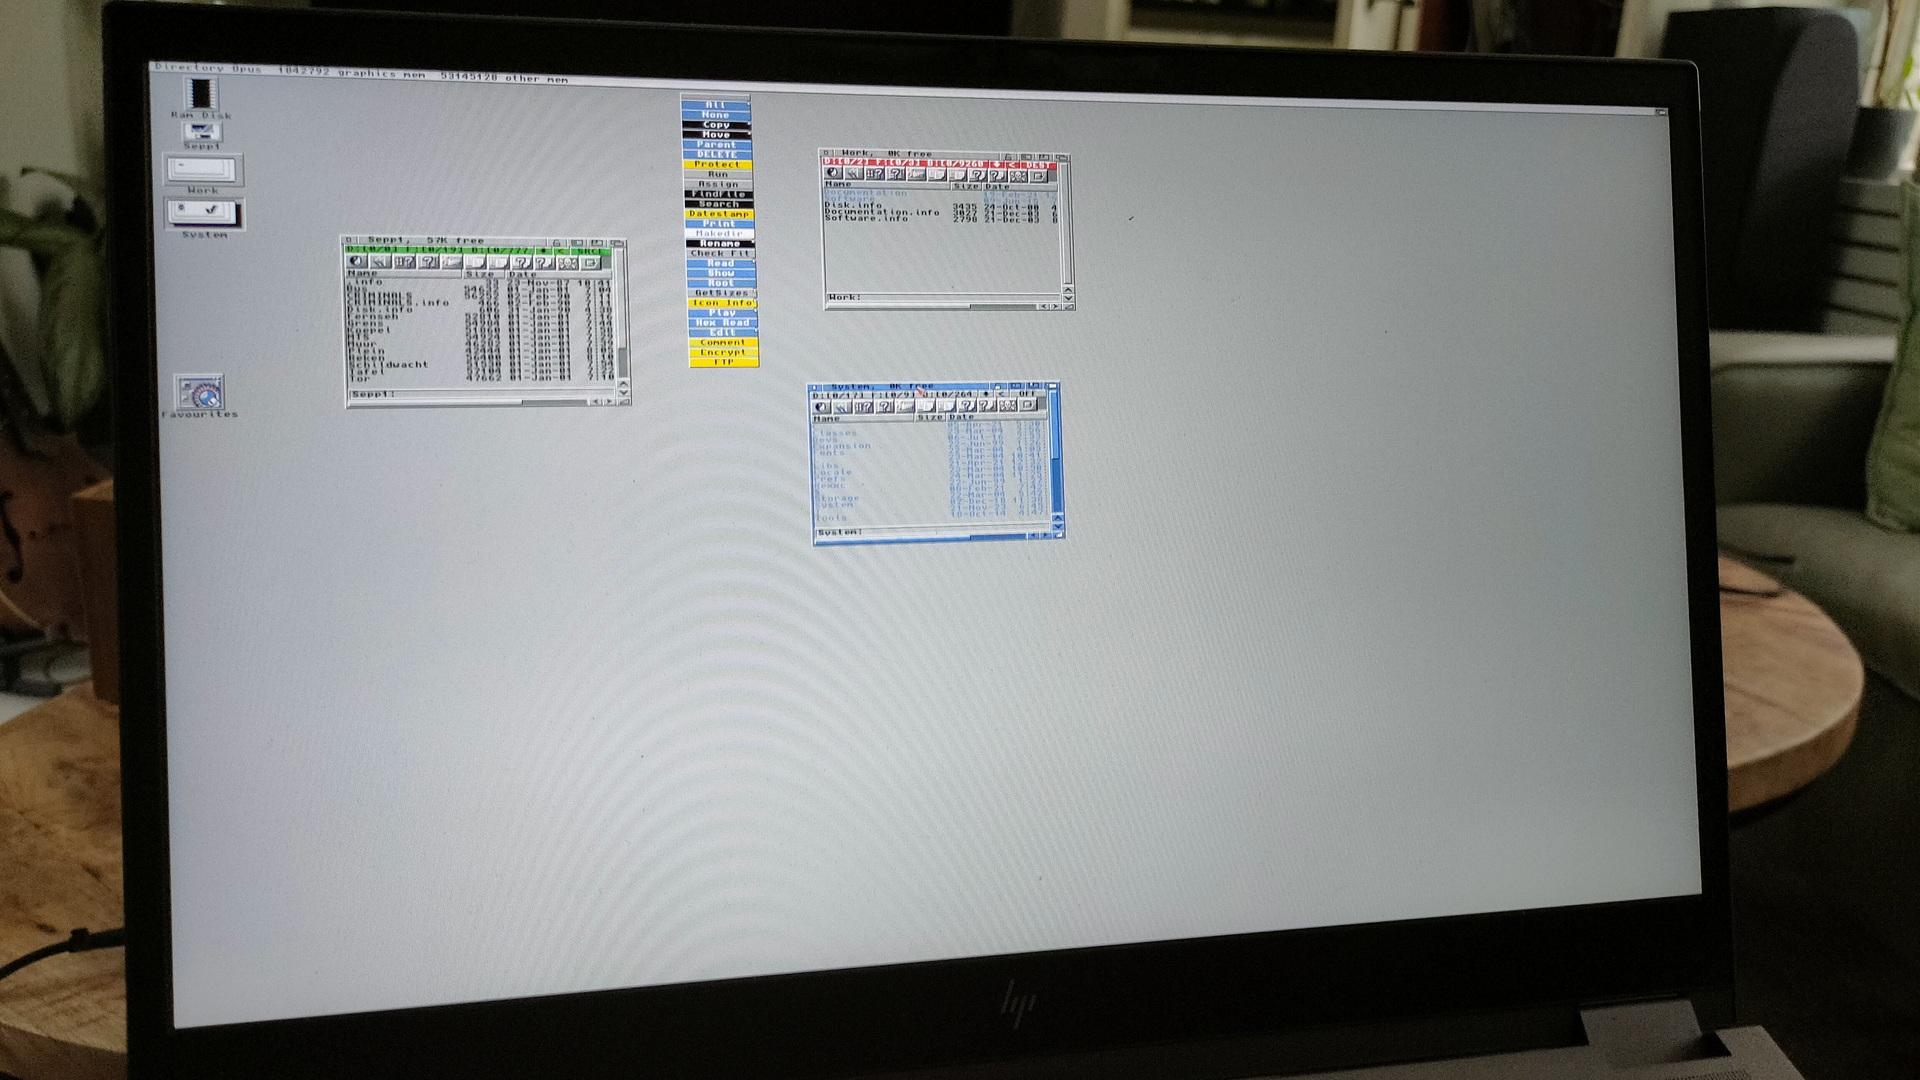
Booting kickstartDPaintWorkbench 3.xHQ PPaintEven in 1920×1080
When you get the ISO image from AmigaForever, and want to run it using Linux, do this to get it working
sudo apt install xkbfile1:i386
sudo apt install libxkbfile1:i386
mkdir -p /cdrom
sudo mount -t iso9660 ~/Downloads/AF.iso /cdrom
cd /cdrom/Private/Linux/e-uae/
./kxlight-start.sh

If you install Wine, you can use the windows gui in linux also.
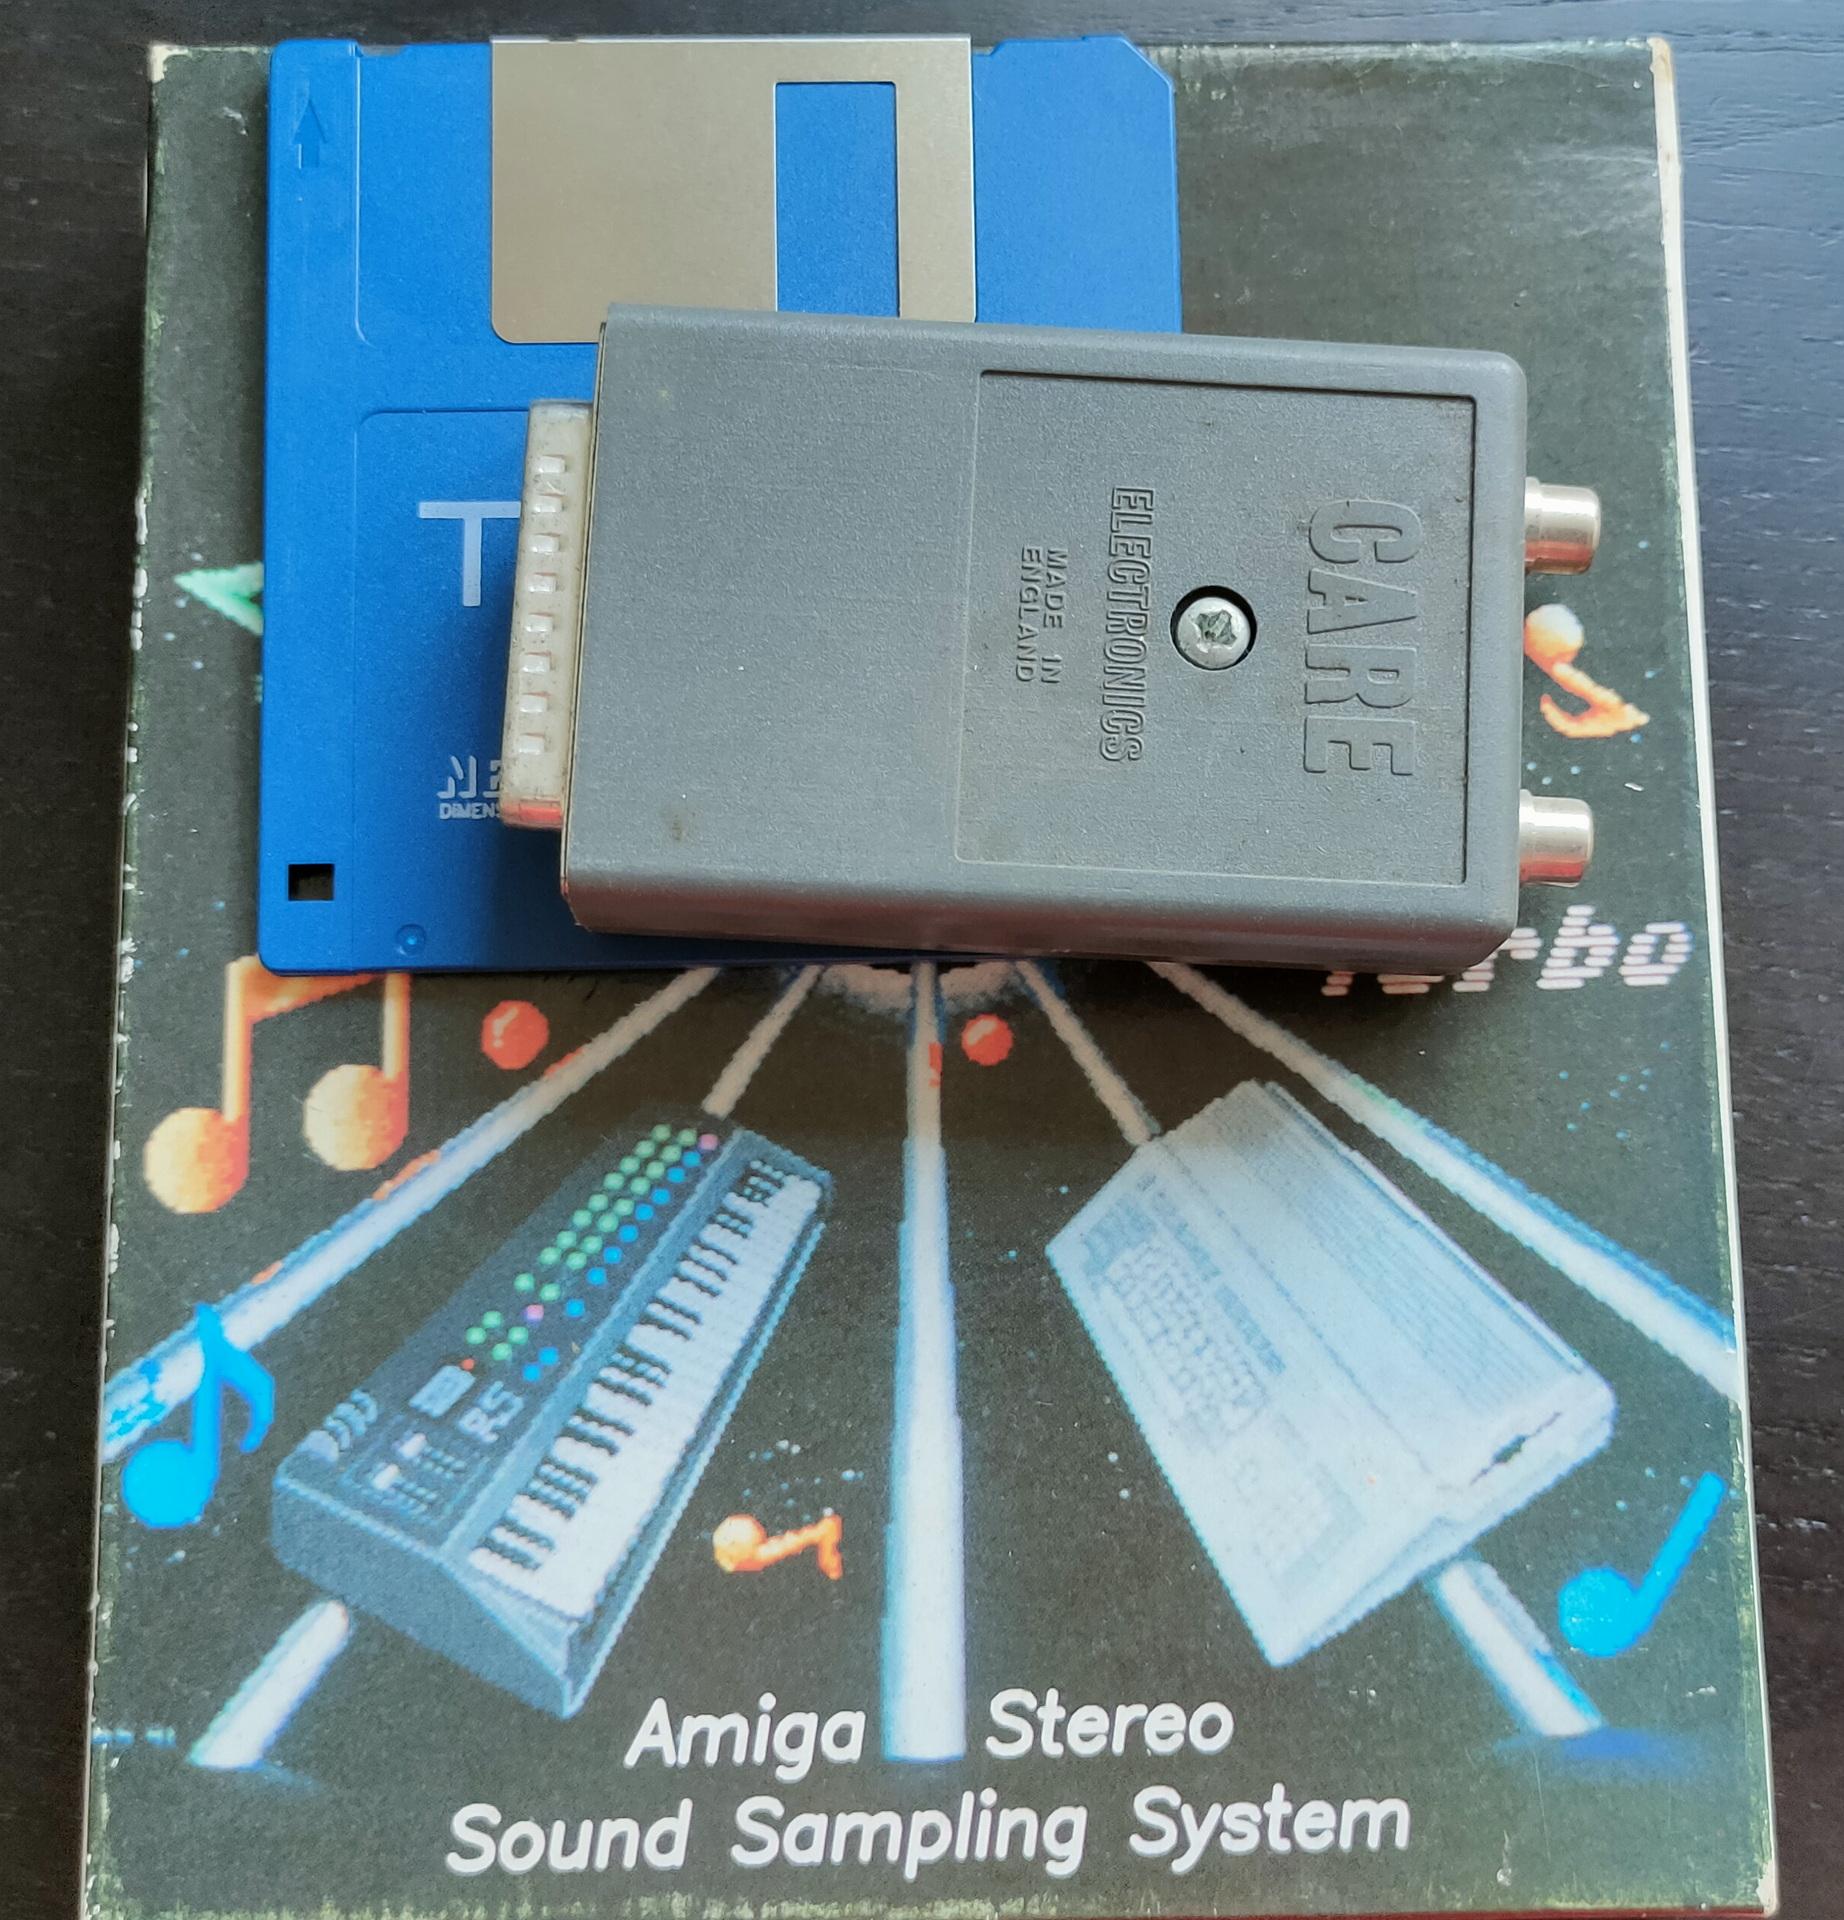
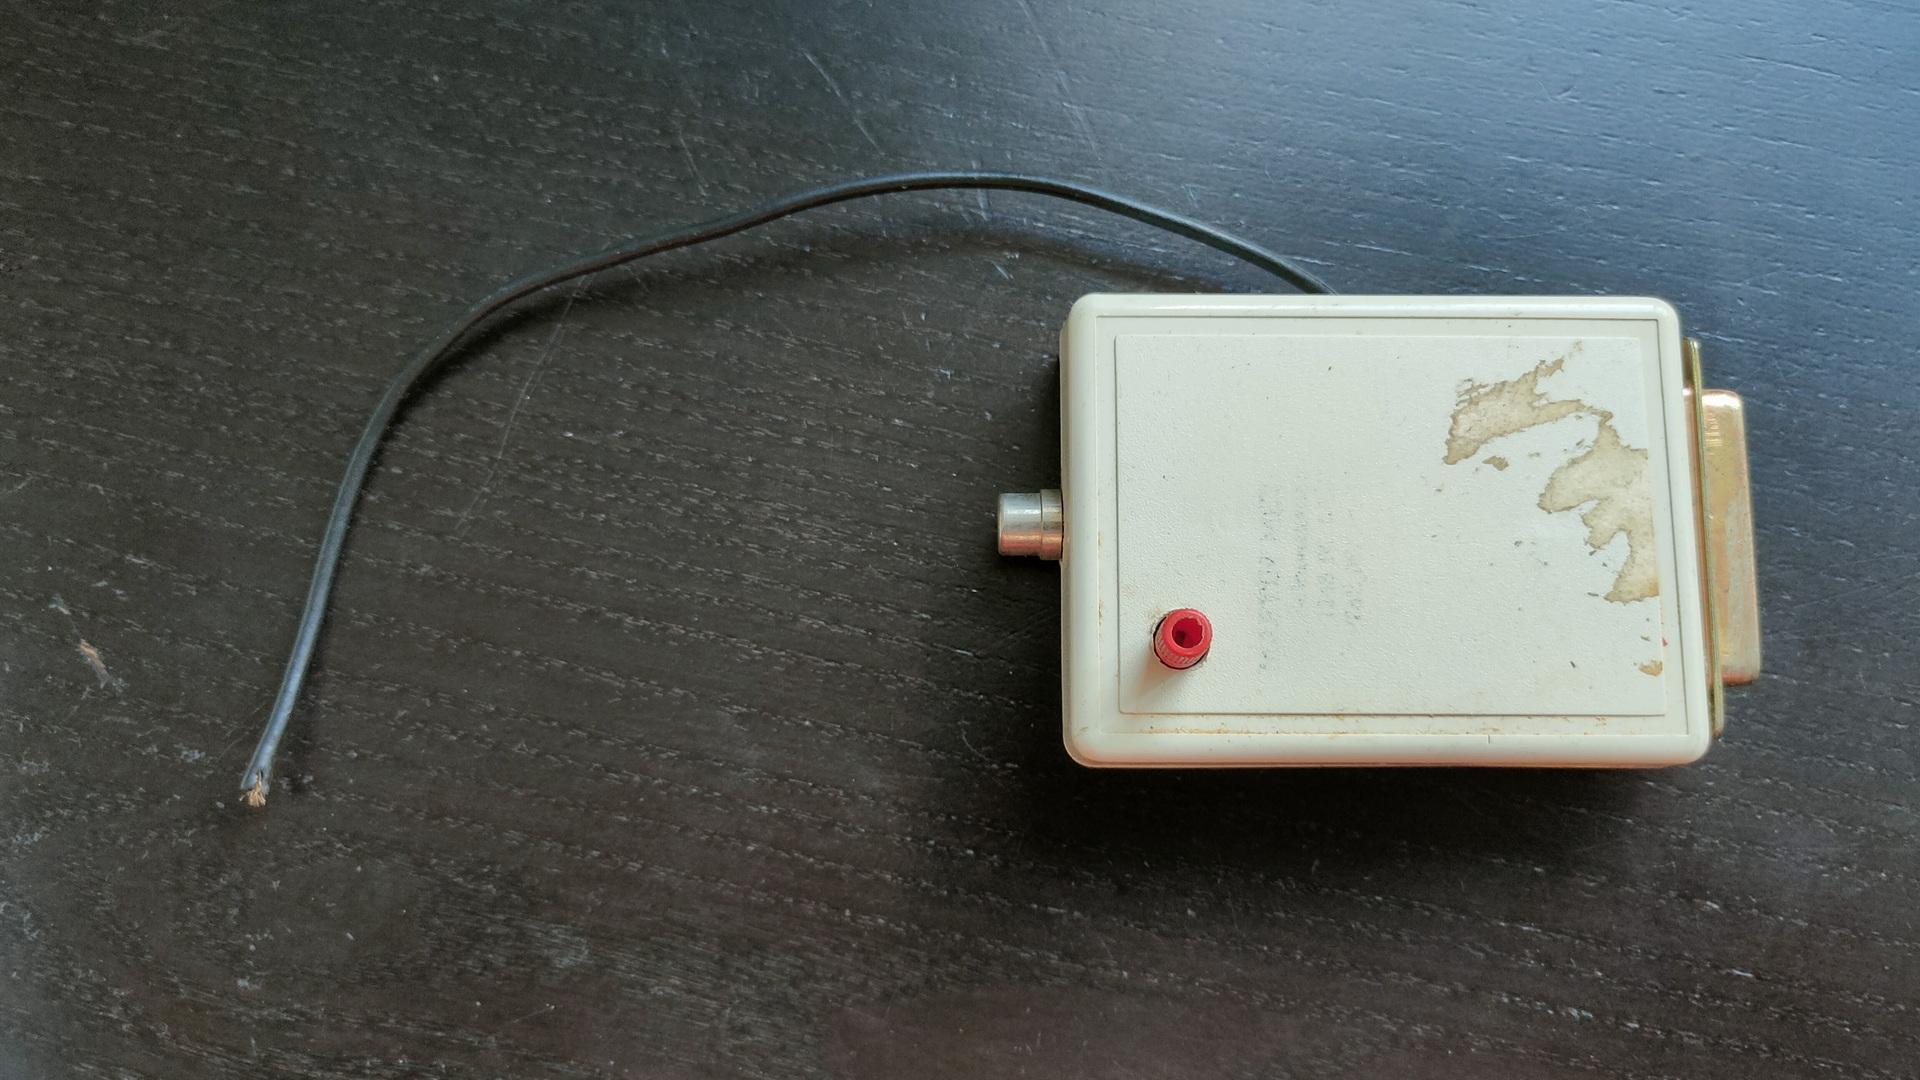
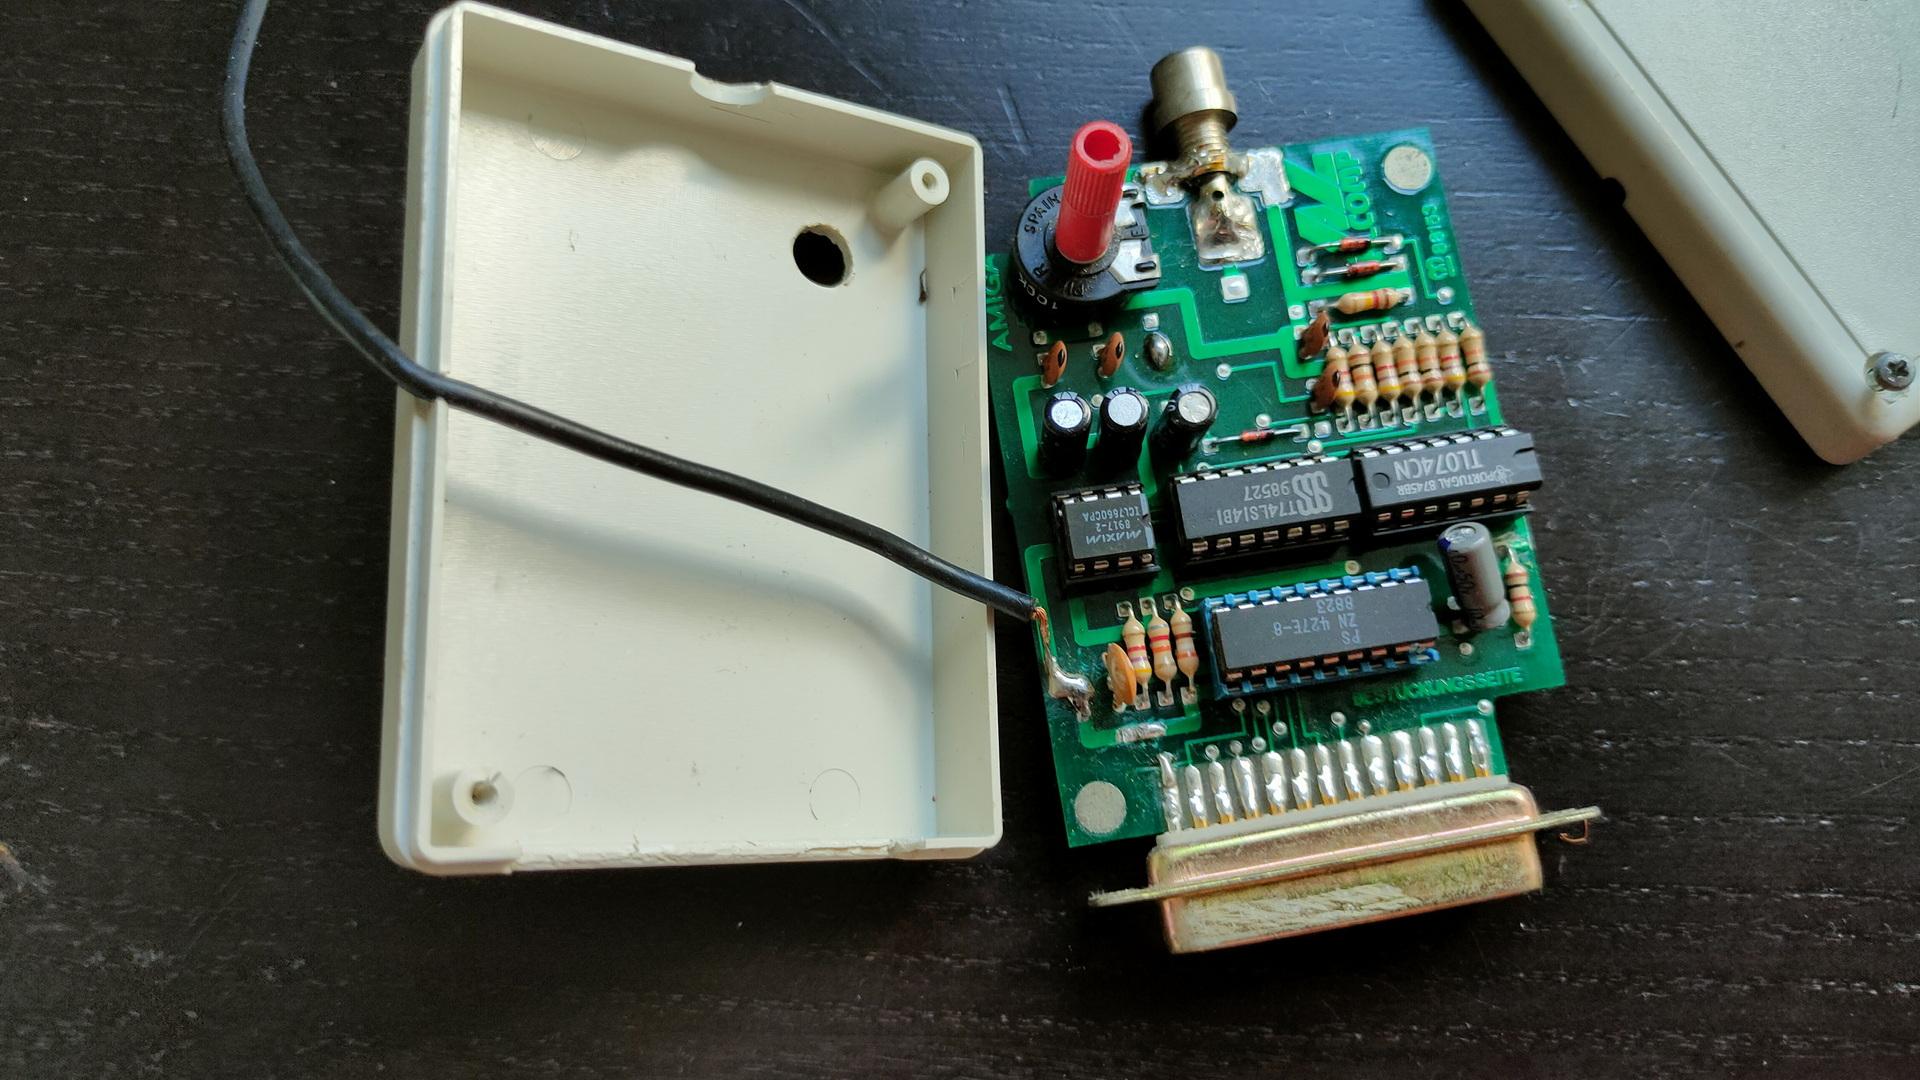
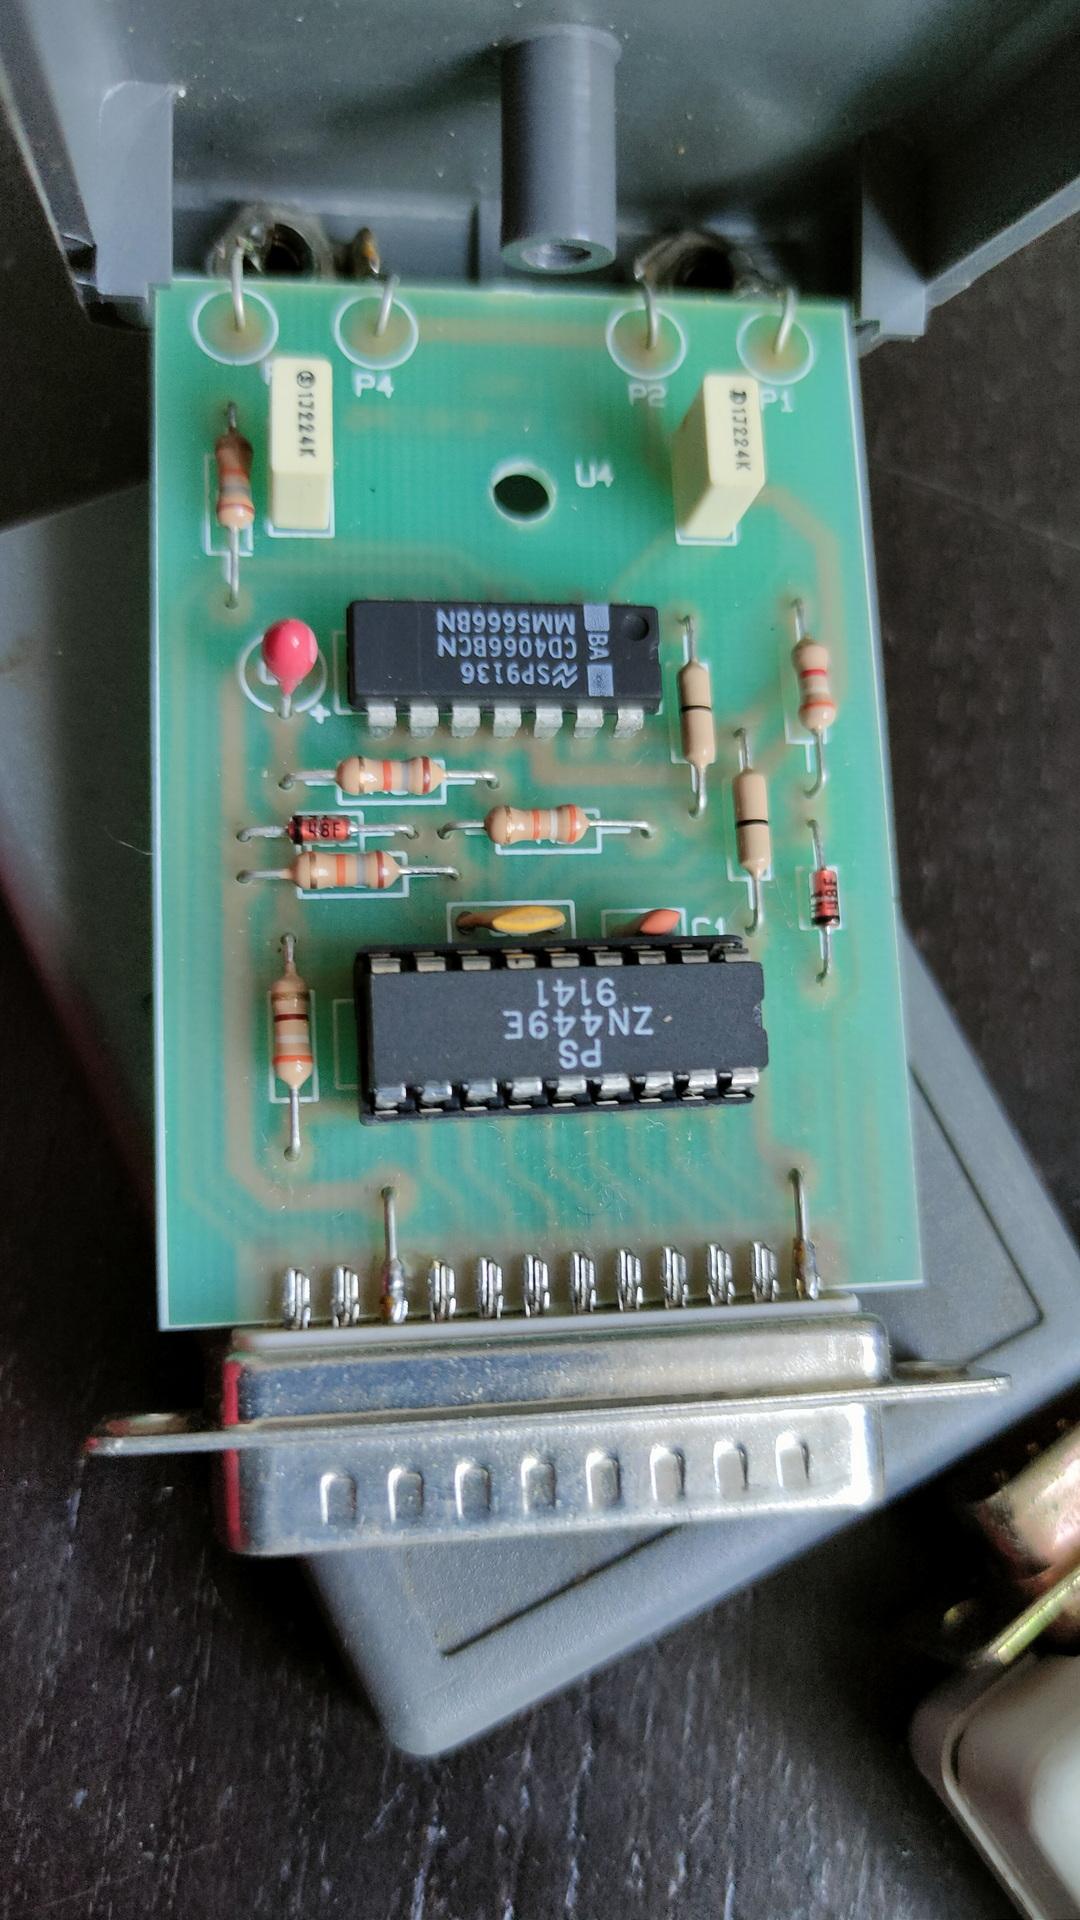
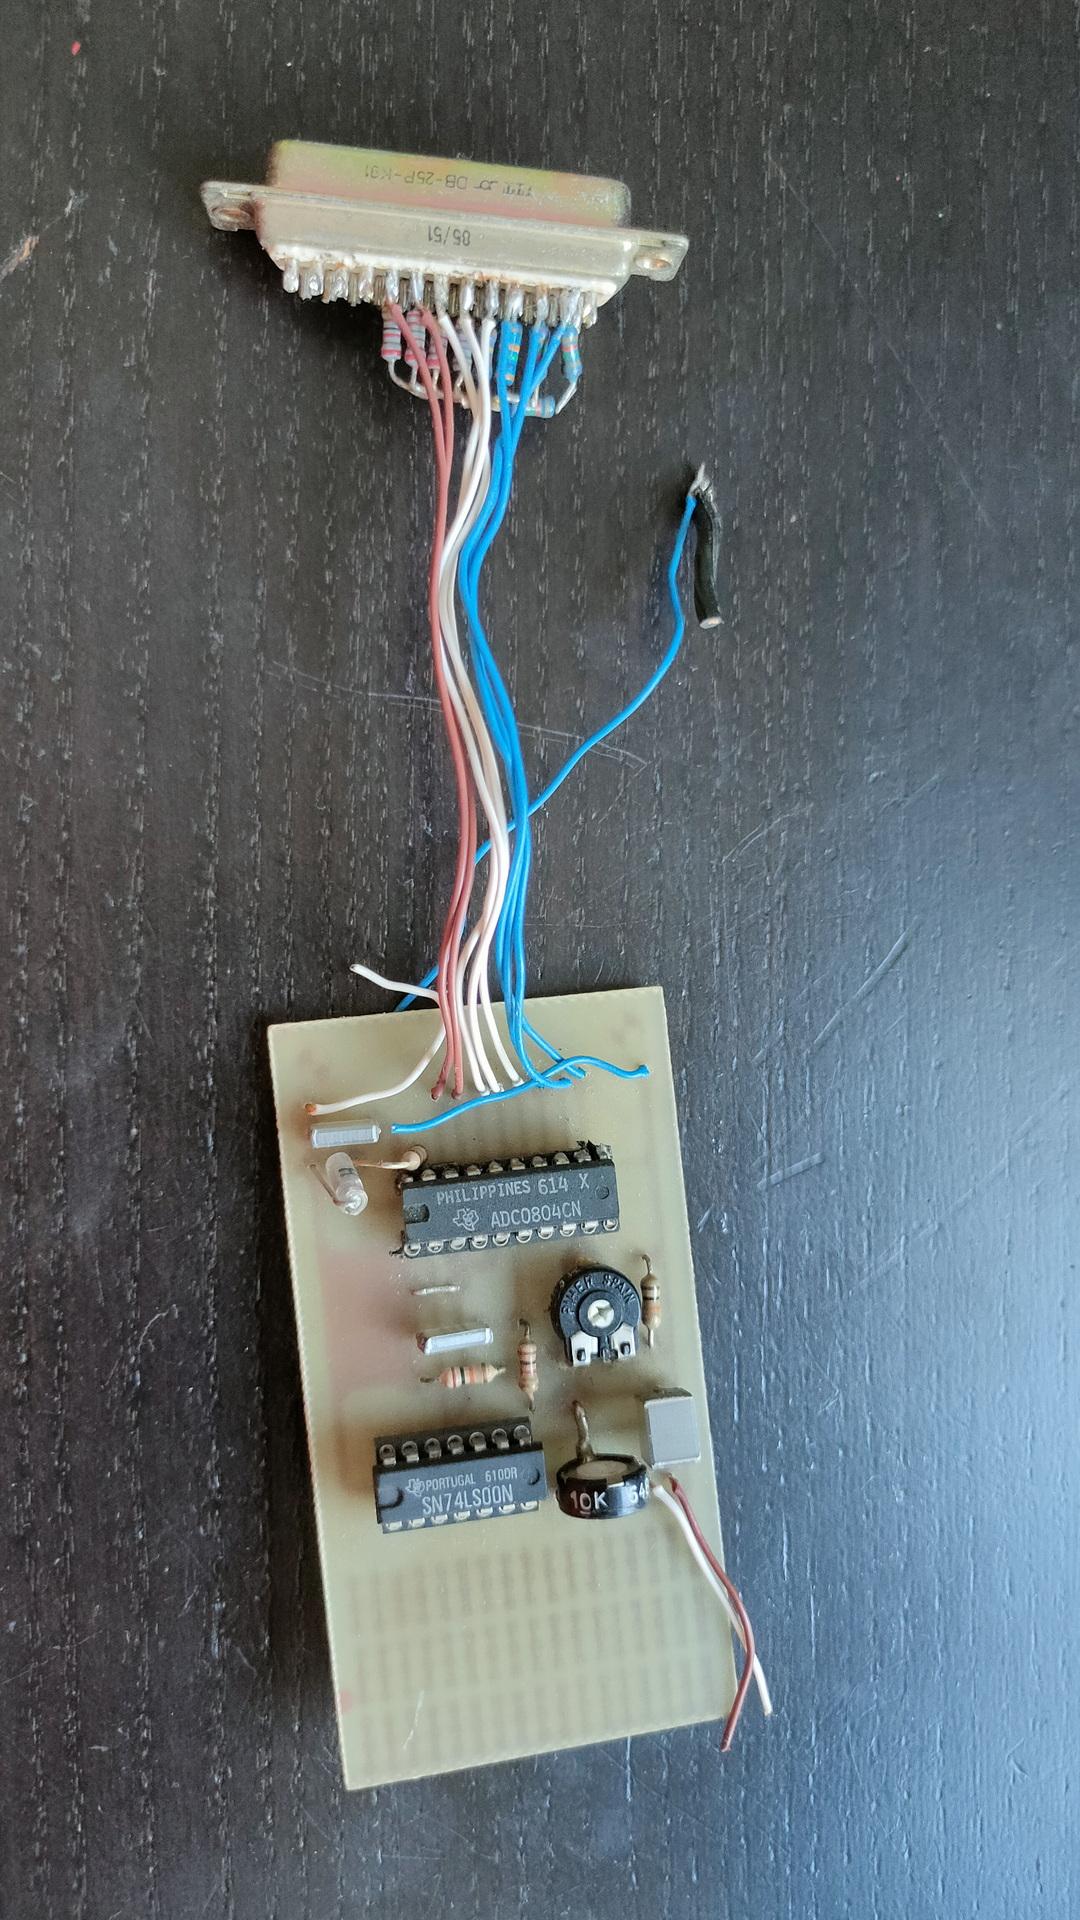
Amiga samplers
Missing a DB-9, I have to look into this.I’m not sure about this one. I made it myself. But it could be a PC version?
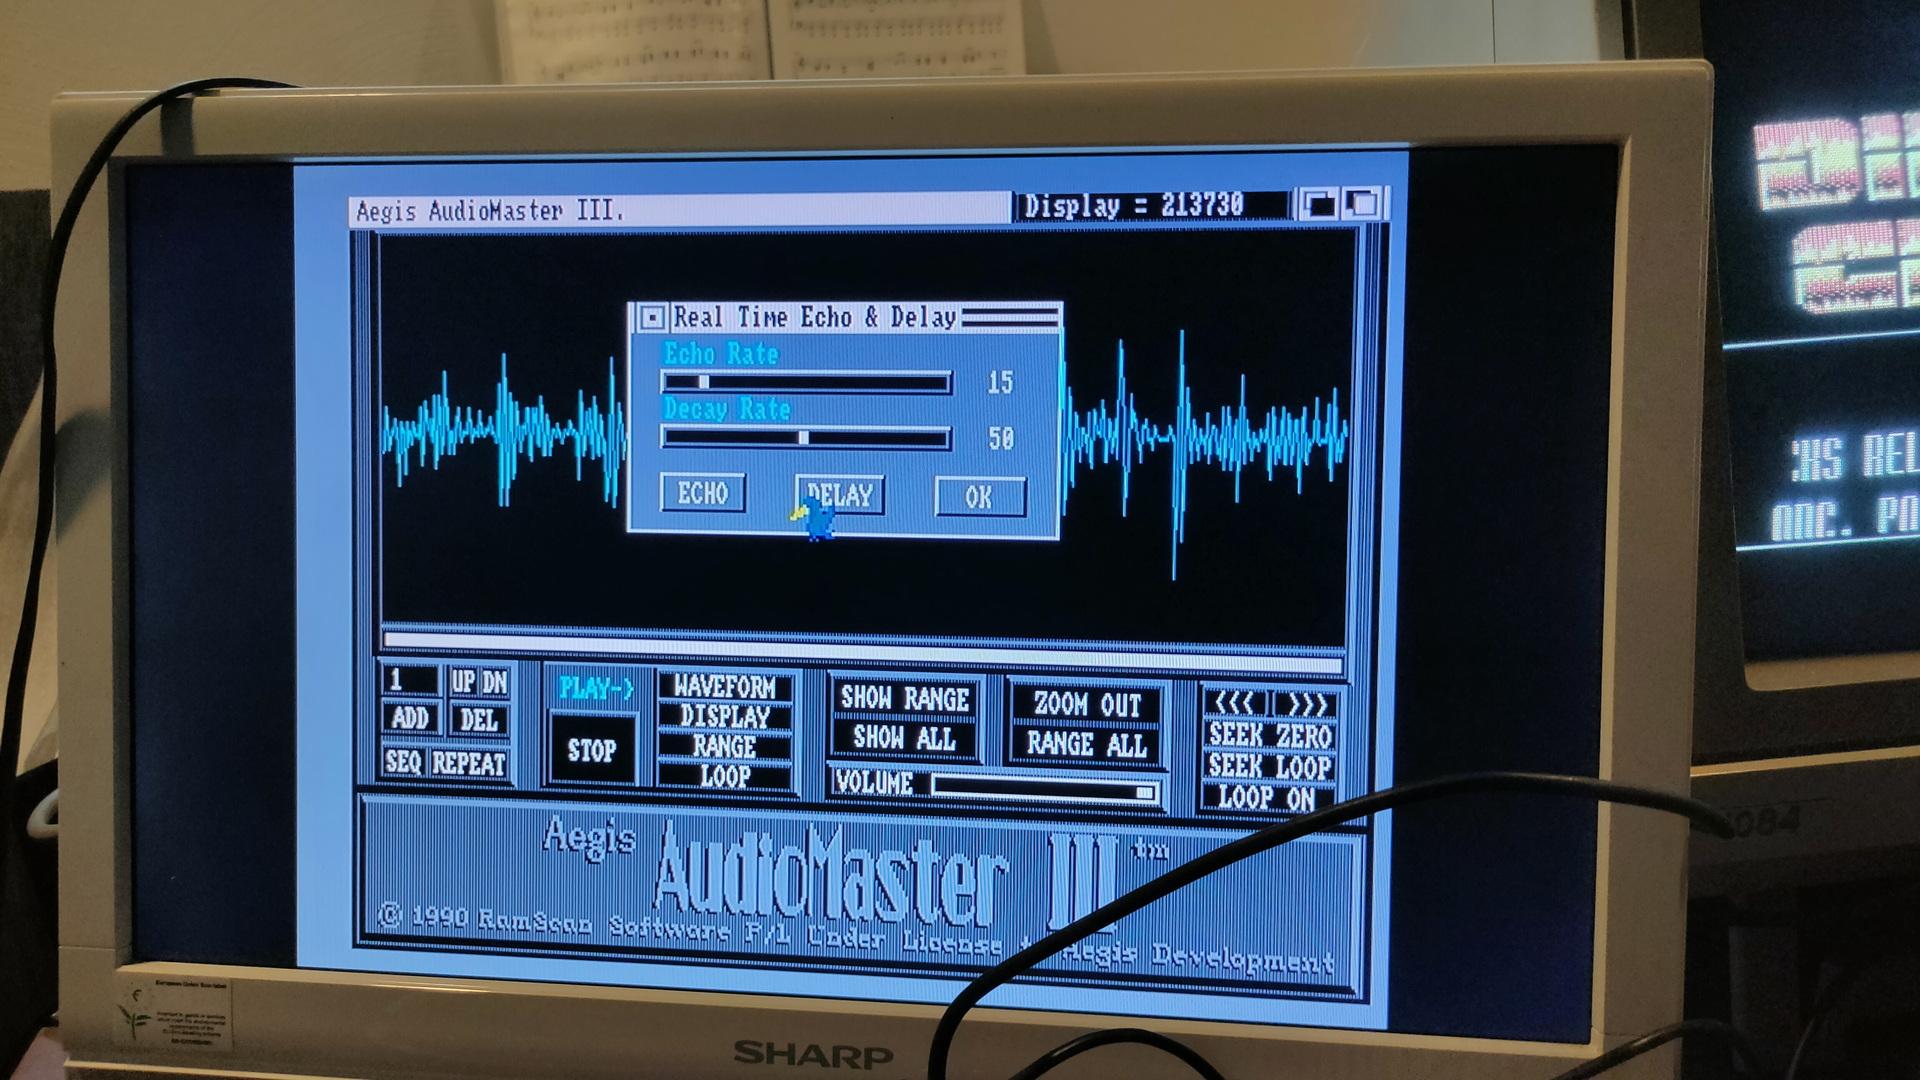
Testing the sampler (demo for Tyrone)
Sampling the sound of a C64 on an Amiga. Started (booted) the sampling program from second external drive using switch setup as above.